# 3rd Party Analytics
Source: https://superwall.com/docs/3rd-party-analytics
Superwall can easily be integrated with 3rd party analytics tools.
### Hooking up Superwall events to 3rd party tools
SuperwallKit automatically tracks some internal events. You can [view the list of events here](/tracking-analytics). We encourage you to also track them in your own analytics by implementing the [Superwall delegate](/using-superwall-delegate). Using the `handleSuperwallEvent(withInfo:)` function, you can forward events to your analytics service:
```Swift Swift
extension SuperwallService: SuperwallDelegate {
func handleSuperwallEvent(withInfo eventInfo: SuperwallEventInfo) {
print("analytics event called", eventInfo.event.description)
MyAnalyticsService.shared.track(
event: eventInfo.event.description,
params: eventInfo.params
)
}
}
```
```Swift Objective-C
- (void)handleSuperwallEventWithInfo:(SWKSuperwallEventInfo *)info {
NSLog(@"Analytics event called %@", info.event.description));
[[MyAnalyticsService shared] trackEvent:info.event.description params:info.params];
}
```
```kotlin Kotlin
override fun handleSuperwallEvent(eventInfo: SuperwallEventInfo) {
println("analytics event: ${eventInfo.event.rawName}")
MyAnalytics.shared.track(eventInfo.event.rawName, eventInfo.params)
}
```
```dart Flutter
@override
void handleSuperwallEvent(SuperwallEventInfo eventInfo) async {
print("handleSuperwallEvent: $eventInfo");
// Example usage...
switch (eventInfo.event.type) {
case EventType.appOpen:
print("appOpen event");
case EventType.deviceAttributes:
print("deviceAttributes event: ${eventInfo.event.deviceAttributes} ");
case EventType.paywallOpen:
final paywallInfo = eventInfo.event.paywallInfo;
print("paywallOpen event: ${paywallInfo} ");
if (paywallInfo != null) {
final identifier = await paywallInfo.identifier;
print("paywallInfo.identifier: ${identifier} ");
final productIds = await paywallInfo.productIds;
print("paywallInfo.productIds: ${productIds} ");
}
default:
break;
}
}
```
```typescript React Native
handleSuperwallEvent(eventInfo: SuperwallEventInfo) {
console.log(`handleSuperwallEvent: ${eventInfo}`);
switch (eventInfo.event.type) {
case EventType.appOpen:
console.log("appOpen event");
break;
case EventType.deviceAttributes:
console.log(`deviceAttributes event: ${eventInfo.event.deviceAttributes}`);
break;
case EventType.paywallOpen:
const paywallInfo = eventInfo.event.paywallInfo;
console.log(`paywallOpen event: ${paywallInfo}`);
if (paywallInfo !== null) {
paywallInfo.identifier().then((identifier: string) => {
console.log(`paywallInfo.identifier: ${identifier}`);
});
paywallInfo.productIds().then((productIds: string[]) => {
console.log(`paywallInfo.productIds: ${productIds}`);
});
}
break;
default:
break;
}
}
```
You might also want to set user attribute to allow for [Cohorting in 3rd Party
Tools](/cohorting-in-3rd-party-tools)
Alternatively, if you want typed versions of all these events with associated values, you can access them via `eventInfo.event`:
```swift Swift
func handleSuperwallEvent(withInfo eventInfo: SuperwallEventInfo) {
switch eventInfo.event {
case .firstSeen:
break
case .appOpen:
break
case .appLaunch:
break
case .identityAlias:
break
case .appInstall:
break
case .sessionStart:
break
case .deviceAttributes(let attributes):
break
case .subscriptionStatusDidChange:
break
case .appClose:
break
case .deepLink(let url):
break
case .triggerFire(let placementName, let result):
break
case .paywallOpen(let paywallInfo):
break
case .paywallClose(let paywallInfo):
break
case .paywallDecline(let paywallInfo):
break
case .transactionStart(let product, let paywallInfo):
break
case .transactionFail(let error, let paywallInfo):
break
case .transactionAbandon(let product, let paywallInfo):
break
case .transactionComplete(let transaction, let product, let type, let paywallInfo):
break
case .subscriptionStart(let product, let paywallInfo):
break
case .freeTrialStart(let product, let paywallInfo):
break
case .transactionRestore(let restoreType, let paywallInfo):
break
case .transactionTimeout(let paywallInfo):
break
case .userAttributes(let atts):
break
case .nonRecurringProductPurchase(let product, let paywallInfo):
break
case .paywallResponseLoadStart(let triggeredPlacementName):
break
case .paywallResponseLoadNotFound(let triggeredPlacementName):
break
case .paywallResponseLoadFail(let triggeredPlacementName):
break
case .paywallResponseLoadComplete(let triggeredPlacementName, let paywallInfo):
break
case .paywallWebviewLoadStart(let paywallInfo):
break
case .paywallWebviewLoadFail(let paywallInfo):
break
case .paywallWebviewLoadComplete(let paywallInfo):
break
case .paywallWebviewLoadTimeout(let paywallInfo):
break
case .paywallWebviewLoadFallback(let paywallInfo):
break
case .paywallProductsLoadStart(let triggeredPlacementName, let paywallInfo):
break
case .paywallProductsLoadFail(let triggeredPlacementName, let paywallInfo):
break
case .paywallProductsLoadComplete(let triggeredPlacementName):
break
case .paywallProductsLoadRetry(let triggeredPlacementName, let paywallInfo, let attempt):
break
case .surveyResponse(let survey, let selectedOption, let customResponse, let paywallInfo):
break
case .paywallPresentationRequest(let status, let reason):
break
case .touchesBegan:
break
case .surveyClose:
break
case .reset:
break
case .restoreStart:
break
case .restoreFail(let message):
break
case .restoreComplete:
break
case .configRefresh:
break
case .customPlacement(let name, let params, let paywallInfo):
break
case .configAttributes:
break
case .confirmAllAssignments:
break
case .configFail:
break
case .adServicesTokenRequestStart:
break
case .adServicesTokenRequestFail(let error):
break
case .adServicesTokenRequestComplete(let token):
break
case .shimmerViewStart:
break
case .shimmerViewComplete:
break
}
}
```
```kotlin Kotlin
override fun handleSuperwallEvent(eventInfo: SuperwallEventInfo) {
when(eventInfo.event) {
is SuperwallPlacement.AppClose -> TODO()
is SuperwallPlacement.AppInstall -> TODO()
is SuperwallPlacement.AppLaunch -> TODO()
is SuperwallPlacement.AppOpen -> TODO()
is SuperwallPlacement.DeepLink -> TODO()
is SuperwallPlacement.FirstSeen -> TODO()
is SuperwallPlacement.FreeTrialStart -> TODO()
is SuperwallPlacement.NonRecurringProductPurchase -> TODO()
is SuperwallPlacement.PaywallClose -> TODO()
is SuperwallPlacement.PaywallDecline -> TODO()
is SuperwallPlacement.PaywallOpen -> TODO()
is SuperwallPlacement.PaywallPresentationRequest -> TODO()
is SuperwallPlacement.PaywallProductsLoadComplete -> TODO()
is SuperwallPlacement.PaywallProductsLoadFail -> TODO()
is SuperwallPlacement.PaywallProductsLoadStart -> TODO()
is SuperwallPlacement.PaywallResponseLoadComplete -> TODO()
is SuperwallPlacement.PaywallResponseLoadFail -> TODO()
is SuperwallPlacement.PaywallResponseLoadNotFound -> TODO()
is SuperwallPlacement.PaywallResponseLoadStart -> TODO()
is SuperwallPlacement.PaywallWebviewLoadComplete -> TODO()
is SuperwallPlacement.PaywallWebviewLoadFail -> TODO()
is SuperwallPlacement.PaywallWebviewLoadStart -> TODO()
is SuperwallPlacement.PaywallWebviewLoadTimeout -> TODO()
is SuperwallPlacement.SessionStart -> TODO()
is SuperwallPlacement.SubscriptionStart -> TODO()
is SuperwallPlacement.SubscriptionStatusDidChange -> TODO()
is SuperwallPlacement.SurveyClose -> TODO()
is SuperwallPlacement.SurveyResponse -> TODO()
is SuperwallPlacement.TransactionAbandon -> TODO()
is SuperwallPlacement.TransactionComplete -> TODO()
is SuperwallPlacement.TransactionFail -> TODO()
is SuperwallPlacement.TransactionRestore -> TODO()
is SuperwallPlacement.TransactionStart -> TODO()
is SuperwallPlacement.TransactionTimeout -> TODO()
is SuperwallPlacement.TriggerFire -> TODO()
is SuperwallPlacement.UserAttributes -> TODO()
}
}
```
```dart Flutter
@override
void handleSuperwallEvent(SuperwallEventInfo eventInfo) async {
// Example usage...
switch (eventInfo.event.type) {
case PlacementType.appOpen:
print("appOpen event");
case PlacementType.deviceAttributes:
print("deviceAttributes event: ${eventInfo.event.deviceAttributes} ");
case PlacementType.paywallOpen:
final paywallInfo = eventInfo.event.paywallInfo;
print("paywallOpen event: ${paywallInfo} ");
if (paywallInfo != null) {
final identifier = await paywallInfo.identifier;
print("paywallInfo.identifier: ${identifier} ");
final productIds = await paywallInfo.productIds;
print("paywallInfo.productIds: ${productIds} ");
}
default:
break;
}
}
```
```typescript React Native
handleSuperwallEvent(eventInfo: SuperwallEventInfo) {
console.log(`handleSuperwallEvent: ${eventInfo}`);
switch (eventInfo.event.type) {
case EventType.appOpen:
console.log("appOpen event");
break;
case EventType.deviceAttributes:
console.log(`deviceAttributes event: ${eventInfo.event.deviceAttributes}`);
break;
case EventType.paywallOpen:
const paywallInfo = eventInfo.event.paywallInfo;
console.log(`paywallOpen event: ${paywallInfo}`);
if (paywallInfo !== null) {
paywallInfo.identifier().then((identifier: string) => {
console.log(`paywallInfo.identifier: ${identifier}`);
});
paywallInfo.productIds().then((productIds: string[]) => {
console.log(`paywallInfo.productIds: ${productIds}`);
});
}
break;
default:
break;
}
}
```
Wanting to use events to see which product was purchased on a paywall? Check out this
[doc](/viewing-purchased-products).
# Manually Handling Purchases and Subscription Status
Source: https://superwall.com/docs/advanced-configuration
If you need fine-grain control over the purchasing pipeline, use a purchase controller.
Using a `PurchaseController` is only recommended for advanced use cases. Superwall handles all
subscription-related logic and purchasing operations for you out of the box.
By default, Superwall handles basic subscription-related logic for you:
1. **Purchasing**: When the user initiates a checkout on a paywall.
2. **Restoring**: When the user restores previously purchased products.
3. **Subscription Status**: When the user's subscription status changes to active or expired (by checking the local receipt).
However, if you want more control, you can pass in a `PurchaseController` when configuring the SDK via `configure(apiKey:purchaseController:options:)` and manually set `Superwall.shared.subscriptionStatus` to take over this responsibility.
### Step 1: Creating a `PurchaseController`
A `PurchaseController` handles purchasing and restoring via protocol methods that you implement. You pass in your purchase controller when configuring the SDK:
```swift Swift
// MyPurchaseController.swift
import SuperwallKit
import StoreKit
final class MyPurchaseController: PurchaseController {
static let shared = MyPurchaseController()
// 1
func purchase(product: StoreProduct) async -> PurchaseResult {
// Use StoreKit or some other SDK to purchase...
// Send Superwall the result.
return .purchased // .cancelled, .pending, .failed(Error)
}
func restorePurchases() async -> RestorationResult {
// Use StoreKit or some other SDK to restore...
// Send Superwall the result.
return .restored // Or failed(error)
}
}
```
```swift Objective-C
@import SuperwallKit;
@import StoreKit;
// MyPurchaseController
@interface MyPurchaseController: NSObject
+ (instancetype)sharedInstance;
@end
@implementation MyPurchaseController
+ (instancetype)sharedInstance
{
static MyPurchaseController *sharedInstance = nil;
static dispatch_once_t onceToken;
dispatch_once(&onceToken, ^{
sharedInstance = [MyPurchaseController new];
});
return sharedInstance;
}
// 1
- (void)purchaseWithProduct:(SWKStoreProduct * _Nonnull)product completion:(void (^ _Nonnull)(enum SWKPurchaseResult, NSError * _Nullable))completion {
// TODO
// ----
// Purchase via StoreKit, RevenueCat, Qonversion or however
// you like and return a valid SWKPurchaseResult
completion(SWKPurchaseResultPurchased, nil);
}
// 2
- (void)restorePurchasesWithCompletion:(void (^ _Nonnull)(enum SWKRestorationResult, NSError * _Nullable))completion {
// TODO
// ----
// Restore purchases and return `SWKRestorationResultRestored` if successful.
// Return an `NSError` if not.
completion(SWKRestorationResultRestored, nil);
}
@end
```
```kotlin Kotlin
// MyPurchaseController.kt
class MyPurchaseController(val context: Context): PurchaseController {
// 1
override suspend fun purchase(
activity: Activity,
productDetails: ProductDetails,
basePlanId: String?,
offerId: String?
): PurchaseResult {
// TODO
// ----
// Purchase via GoogleBilling, RevenueCat, Qonversion or however
// you like and return a valid PurchaseResult
return PurchaseResult.Purchased()
}
// 2
override suspend fun restorePurchases(): RestorationResult {
// TODO
// ----
// Restore purchases and return true if successful.
return RestorationResult.Success()
}
}
```
```dart Flutter
// MyPurchaseController.dart
class MyPurchaseController extends PurchaseController {
// 1
@override
Future purchaseFromAppStore(String productId) async {
// TODO
// ----
// Purchase via StoreKit, RevenueCat, Qonversion or however
// you like and return a valid PurchaseResult
return PurchaseResult.purchased;
}
@override
Future purchaseFromGooglePlay(
String productId,
String? basePlanId,
String? offerId
) async {
// TODO
// ----
// Purchase via Google Billing, RevenueCat, Qonversion or however
// you like and return a valid PurchaseResult
return PurchaseResult.purchased;
}
// 2
@override
Future restorePurchases() async {
// TODO
// ----
// Restore purchases and return true if successful.
return RestorationResult.restored;
}
}
```
```typescript React Native
export class MyPurchaseController extends PurchaseController {
// 1
async purchaseFromAppStore(productId: string): Promise {
// TODO
// ----
// Purchase via StoreKit, RevenueCat, Qonversion or however
// you like and return a valid PurchaseResult
}
async purchaseFromGooglePlay(
productId: string,
basePlanId?: string,
offerId?: string
): Promise {
// TODO
// ----
// Purchase via Google Billing, RevenueCat, Qonversion or however
// you like and return a valid PurchaseResult
}
// 2
async restorePurchases(): Promise {
// TODO
// ----
// Restore purchases and return true if successful.
}
}
```
```swift
import StoreKit
import SuperwallKit
final class SWPurchaseController: PurchaseController {
// MARK: Sync Subscription Status
/// Makes sure that Superwall knows the customer's subscription status by
/// changing `Superwall.shared.subscriptionStatus`
func syncSubscriptionStatus() async {
var products: Set = []
for await verificationResult in Transaction.currentEntitlements {
switch verificationResult {
case .verified(let transaction):
products.insert(transaction.productID)
case .unverified:
break
}
}
let storeProducts = await Superwall.shared.products(for: products)
let entitlements = Set(storeProducts.flatMap { $0.entitlements })
await MainActor.run {
Superwall.shared.subscriptionStatus = .active(entitlements)
}
}
// MARK: Handle Purchases
/// Makes a purchase with Superwall and returns its result after syncing subscription status. This gets called when
/// someone tries to purchase a product on one of your paywalls.
func purchase(product: StoreProduct) async -> PurchaseResult {
let result = await Superwall.shared.purchase(product)
await syncSubscriptionStatus()
return result
}
// MARK: Handle Restores
/// Makes a restore with Superwall and returns its result after syncing subscription status.
/// This gets called when someone tries to restore purchases on one of your paywalls.
func restorePurchases() async -> RestorationResult {
let result = await Superwall.shared.restorePurchases()
await syncSubscriptionStatus()
return result
}
}
```
Here’s what each method is responsible for:
1. Purchasing a given product. In here, enter your code that you use to purchase a product. Then, return the result of the purchase as a `PurchaseResult`. For Flutter, this is separated into purchasing from the App Store and Google Play. This is an enum that contains the following cases, all of which must be handled:
1. `.cancelled`: The purchase was cancelled.
2. `.purchased`: The product was purchased.
3. `.pending`: The purchase is pending/deferred and requires action from the developer.
4. `.failed(Error)`: The purchase failed for a reason other than the user cancelling or the payment pending.
2. Restoring purchases. Here, you restore purchases and return a `RestorationResult` indicating whether the restoration was successful or not. If it was, return `.restore`, or `failed` along with the error reason.
### Step 2: Configuring the SDK With Your `PurchaseController`
Pass your purchase controller to the `configure(apiKey:purchaseController:options:)` method:
```swift UIKit
// AppDelegate.swift
import UIKit
import SuperwallKit
@main
class AppDelegate: UIResponder, UIApplicationDelegate {
func application(_ application: UIApplication, didFinishLaunchingWithOptions launchOptions: [UIApplication.LaunchOptionsKey: Any]?) -> Bool {
Superwall.configure(
apiKey: "MY_API_KEY",
purchaseController: MyPurchaseController.shared // <- Handle purchases on your own
)
return true
}
}
```
```swift SwiftUI
@main
struct MyApp: App {
init() {
Superwall.configure(
apiKey: "MY_API_KEY",
purchaseController: MyPurchaseController.shared // <- Handle purchases on your own
)
}
var body: some Scene {
WindowGroup {
ContentView()
}
}
}
```
```swift Objective-C
// AppDelegate.m
@import SuperwallKit;
@implementation AppDelegate
- (BOOL)application:(UIApplication *)application didFinishLaunchingWithOptions:(NSDictionary *)launchOptions {
// Override point for customization after application launch.
[Superwall configureWithApiKey:@"MY_API_KEY" purchaseController:[MyPurchaseController sharedInstance] options:nil completion:nil];
return YES;
}
```
```kotlin Kotlin
// MainApplication.kt
class MainApplication : android.app.Application(), SuperwallDelegate {
override fun onCreate() {
super.onCreate()
Superwall.configure(this, "MY_API_KEY", MyPurchaseController(this))
// OR using the DSL
configureSuperwall("MY_API_KEY") {
purchaseController = MyPurchaseController(this@MainApplication)
}
}
}
```
```dart Flutter
// main.dart
void initState() {
// Determine Superwall API Key for platform
String apiKey = Platform.isIOS ? "MY_IOS_API_KEY" : "MY_ANDROID_API_KEY";
// Create the purchase controller
MyPurchaseController purchaseController = MyPurchaseController();
Superwall.configure(apiKey, purchaseController);
}
```
```typescript React Native
export default function App() {
React.useEffect(() => {
const apiKey = Platform.OS === "ios" ? "MY_IOS_API_KEY" : "MY_ANDROID_API_KEY"
const purchaseController = new MyPurchaseController()
Superwall.configure({
apiKey: apiKey,
purchaseController: purchaseController,
})
}, [])
}
```
### Step 3: Keeping `subscriptionStatus` Up-To-Date
You **must** set `Superwall.shared.subscriptionStatus` every time the user's subscription status changes, otherwise the SDK won't know who to show a paywall to. This is an enum that has three possible cases:
1. **`.unknown`**: This is the default value. In this state, paywalls will not show and their presentation will be ***automatically delayed*** until `subscriptionStatus` changes to a different value.
2. **`.active(let entitlements)`**: Indicates that the user has an active entitlement. Paywalls will not show in this state unless you remotely set the paywall to ignore subscription status. A user can have one or more active entitlement.
3. **`.inactive`**: Indicates that the user doesn't have an active entitlement. Paywalls can show in this state.
Here's how you might do this:
```swift Swift
import SuperwallKit
func syncSubscriptionStatus() async {
var purchasedProductIds: Set = []
// get all purchased product ids
for await verificationResult in Transaction.currentEntitlements {
switch verificationResult {
case .verified(let transaction):
purchasedProductIds.insert(transaction.productID)
case .unverified:
break
}
}
// get store products for purchased product ids from Superwall
let storeProducts = await Superwall.shared.products(for: purchasedProductIds)
// get entitlements from purchased store products
let entitlements = Set(storeProducts.flatMap { $0.entitlements })
// set subscription status
await MainActor.run {
Superwall.shared.subscriptionStatus = .active(entitlements)
}
}
```
```swift Objective-C
@import SuperwallKit;
// when a subscription is purchased, restored, validated, expired, etc...
[myService setSubscriptionStatusDidChange:^{
if (user.hasActiveSubscription) {
[Superwall sharedInstance] setActiveSubscriptionStatusWith:[NSSet setWithArray:@[myEntitlements]]];
} else {
[[Superwall sharedInstance] setInactiveSubscriptionStatus];
}
}];
```
```kotlin Kotlin
// When a subscription is purchased, restored, validated, expired, etc...
myService.subscriptionStatusDidChange {
if (it.hasActiveSubscription) {
Superwall.instance.setSubscriptionStatus(SubscriptionStatus.Active(entitlements))
} else {
Superwall.instance.setSubscriptionStatus(SubscriptionStatus.Inactive(entitlements))
}
}
```
```dart Flutter
// When a subscription is purchased, restored, validated, expired, etc...
myService.addSubscriptionStatusListener((subscriptionInfo) {
var entitlements = subscriptionInfo.entitlements.active.keys
.map((id) => Entitlement(id: id))
.toSet();
var hasActiveSubscription = subscriptionInfo.isActive;
if (hasActiveSubscription) {
Superwall.shared.setSubscriptionStatus(SubscriptionStatusActive(entitlements: entitlements));
} else {
Superwall.shared.setSubscriptionStatus(SubscriptionStatusInactive());
}
});
```
```typescript React Native
// When a subscription is purchased, restored, validated, expired, etc...
myService.addSubscriptionStatusListener((subscriptionInfo: SubscriptionInfo) => {
const entitlements = Object.keys(subscriptionInfo.entitlements.active).map((id) => ({
id,
}))
if (entitlements.length === 0) {
Superwall.shared.setSubscriptionStatus(SubscriptionStatus.Inactive())
} else {
Superwall.shared.setSubscriptionStatus(
SubscriptionStatus.Active(entitlements.map((id) => new Entitlement(id)))
)
}
})
```
`subscriptionStatus` is cached between app launches
### Listening for subscription status changes
If you need a simple way to observe when a user's subscription status changes, on iOS you can use the `Publisher` for it. Here's an example:
```swift iOS
subscribedCancellable = Superwall.shared.$subscriptionStatus
.receive(on: DispatchQueue.main)
.sink { [weak self] status in
switch status {
case .unknown:
self?.subscriptionLabel.text = "Loading subscription status."
case .active(let entitlements):
self?.subscriptionLabel.text = "You currently have an active subscription: \(entitlements.map { $0.id }). Therefore, the paywall will not show unless feature gating is disabled."
case .inactive:
self?.subscriptionLabel.text = "You do not have an active subscription so the paywall will show when clicking the button."
}
}
```
```kotlin Kotlin
Superwall.instance.subscriptionStatus.collect { status: SubscriptionStatus ->
// React to changes
}
```
```dart Flutter
Superwall.shared.subscriptionStatus.listen((status) {
// React to changes
}
//Or use SuperwallBuilder widget which triggers the builder closure when subscription status changes
SuperwallBuilder(
builder: (context, status) => Center(
child: Text('Subscription Status: ${status}'),
)
)
```
```typescript React Native
Superwall.shared.subscriptionStatusEmitter.addListener("change", (status) => {
switch (status.status) {
case "ACTIVE":
break
default:
break
}
})
```
You can do similar tasks with the `SuperwallDelegate`, such as [viewing which product was purchased from a paywall](/3rd-party-analytics#using-events-to-see-purchased-products).
# Android
Source: https://superwall.com/docs/android
The long-awaited Superwall for Android is now available! Here's how to get started!
### Quickstart
Follow [this guide](/creating-applications) to create a new android app.
Follow [this guide](/installation-via-gradle) to install the SDK.
Follow [this guide](/configuring-the-sdk) to configure the SDK
You're all set! 🎉 Reach out to us on Intercom or by [email](mailto:team@superwall.com)
For any feedback, email [team@superwall.com](mailto:team@superwall.com)
***
#### Known Issues
* [Presentation Style](/paywall-editor-settings#presentation-style) (right now only full screen)
#### Next Up!
Once we're done fixing up any initial issues we'll move on to improving on the version we've delivered.
Including supporting Google Upgrade & Downgrade flow.
# App Store Privacy Labels
Source: https://superwall.com/docs/app-privacy-nutrition-labels
(iOS only) When submitting your app for review, you'll need to fill out an App Store Privacy label. When using the Superwall SDK, there are a few choices you may need to consider.
### App Store Privacy Labels
Privacy disclosures in regards to how data is processed or otherwise used are required when submitting an app for review on the App Store. When using the Superwall SDK, there are a few options you'll need to select to comply with this requirement.
**At a minimum, you'll need to select "Purchases":**

When you select "Purchases", you'll need to scroll down finish setup. When you do, there are two options you'll need to select:
1. Analytics
2. App Functionality

### Identifying Users
How you proceed with the next prompt depends on how you are identifying users. If you *are* identifying users via their email or any other means, disclose that here. Note that the Superwall SDK does not do this.
Finally, Superwall does not track purchase history of users for advertising purposes — so you can choose "No" here (unless you're using other SDKs which do this, or you're performing any purchase history tracking for advertising purposes on your own ):

In terms of the Superwall SDK, that's all you need to choose. But again, remember that your privacy label could look different depending on how you process data, how other SDKs are used and more.
### Collected Data
Here is a detailed list of anything that might be collected in the Superwall SDK:
| Property | Description |
| ----------------------------- | --------------------------------------------------------------- |
| `publicApiKey` | The API key for accessing the public API. |
| `platform` | The operating system of the device (e.g., iOS, Android). |
| `appUserId` | A unique identifier for the app user. |
| `aliases` | List of aliases associated with the app user. |
| `vendorId` | The vendor ID of the device. |
| `appVersion` | The version of the app. |
| `osVersion` | The operating system version running on the device. |
| `deviceModel` | The model of the device (e.g., iPhone or Android device model). |
| `deviceLocale` | The current locale set on the device. |
| `preferredLocale` | The preferred locale of the user. |
| `deviceLanguageCode` | The language code of the device's system language. |
| `preferredLanguageCode` | The preferred language code set by the user. |
| `regionCode` | The region code set on the device. |
| `preferredRegionCode` | The preferred region code of the user. |
| `deviceCurrencyCode` | The currency code for transactions on the device. |
| `deviceCurrencySymbol` | The currency symbol based on the device’s settings. |
| `interfaceType` | The type of user interface (e.g., vision, ipad, etc). |
| `timezoneOffset` | The device’s current timezone offset in minutes. |
| `radioType` | The network radio type (e.g., WiFi, Cellular). |
| `interfaceStyle` | The interface style (e.g., light or dark mode). |
| `isLowPowerModeEnabled` | Indicates whether low power mode is enabled. |
| `bundleId` | The bundle identifier of the app. |
| `appInstallDate` | The date the app was installed. |
| `isMac` | A boolean indicating if the device is a Mac. |
| `daysSinceInstall` | The number of days since the app was installed. |
| `minutesSinceInstall` | The number of minutes since the app was installed. |
| `daysSinceLastPaywallView` | The number of days since the last paywall view. |
| `minutesSinceLastPaywallView` | The number of minutes since the last paywall view. |
| `totalPaywallViews` | The total number of paywall views. |
| `utcDate` | The current UTC date. |
| `localDate` | The local date of the device. |
| `utcTime` | The current UTC time. |
| `localTime` | The local time on the device. |
| `utcDateTime` | The UTC date and time combined. |
| `localDateTime` | The local date and time combined. |
| `isSandbox` | Indicates if the app is running in a sandbox environment. |
| `subscriptionStatus` | The subscription status of the app user. |
| `isFirstAppOpen` | Boolean indicating if it is the user’s first app open. |
| `sdkVersion` | The current version of the SDK. |
| `sdkVersionPadded` | The padded version of the SDK (e.g. 001.002.003-beta.001). |
| `appBuildString` | The app’s build string identifier. |
| `appBuildStringNumber` | The numeric value of the app’s build number. |
| `interfaceStyleMode` | The current interface style mode (e.g., dark, light). |
| `ipRegion` | The region derived from the device's IP address. |
| `ipRegionCode` | The region code derived from the device's IP. |
| `ipCountry` | The country derived from the device's IP address. |
| `ipCity` | The city derived from the device's IP address. |
| `ipContinent` | The continent derived from the device's IP address. |
| `ipTimezone` | The timezone derived from the device's IP address. |
| `capabilities` | A string indicating any Superwall-SDK specific capabilities. |
| `capabilitiesConfig` | A JSON configuration of the above capabilities. |
| `platformWrapper` | The platform wrapper (e.g., React Native). |
| `platformWrapperVersion` | The version of the platform wrapper. |
# Campaigns
Source: https://superwall.com/docs/campaigns
Campaigns are logical groupings of paywalls to show when certain _events_ are registered and _conditions_ are met. They are an incredibly powerful tool for creating experiments and managing best-in-class monetization flows.
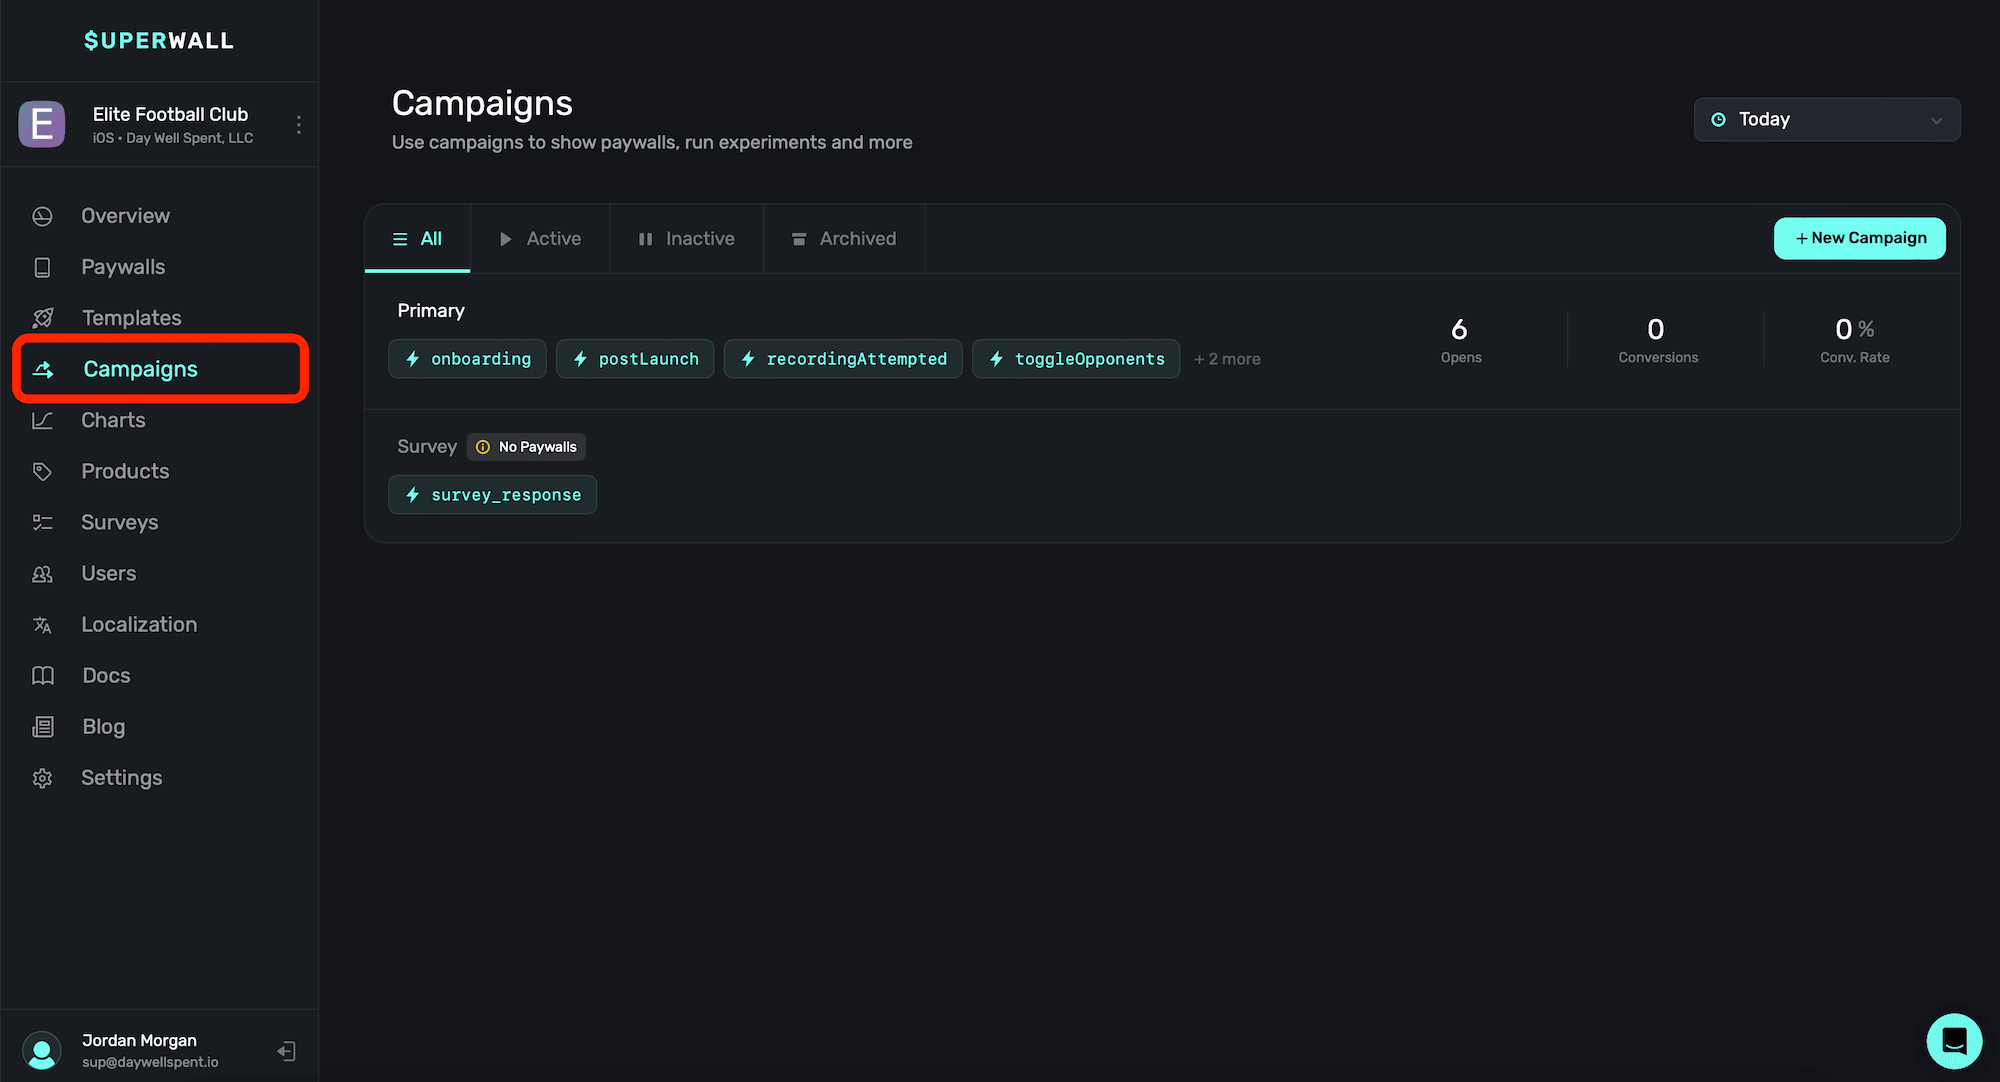
View **Campaigns** by clicking them over on the left-hand **sidebar**:
Campaigns consist of three main concepts:
1. [Placements](/feature-gating)
2. [Audiences](/campaigns-audience)
3. [Paywalls](/paywall-editor-overview)
Campaigns are the centerpiece of Superwall. You can use one, or several, campaigns that can run concurrently. To understand campaigns, think of them like this:
* In a campaign, you add **placements** — which are actions you want to result in a paywall, or might someday want to result in a paywall(i.e. `loggedCaffeine`, `addedEntry`, etc).
* Then, as users take actions in your app, those placements are **registered** in the Superwall SDK.
* When a placement is registered, it's then evaluated by Superwall. Superwall looks at your campaign **[filters](/campaigns-audience#configuring-an-audience)**, and may or may not show a matching **paywall**.
With this setup, you can be incredibly simple or make in-depth, complex filters which determine when (and what) paywall is shown. You can set the percentage of new users that see each paywall, or even configure no paywall (a.k.a. a holdout) to be shown for certain placements.
### Toggling campaigns by status
You can toggle between campaigns by their status using the tabs at the top (above the campaigns):
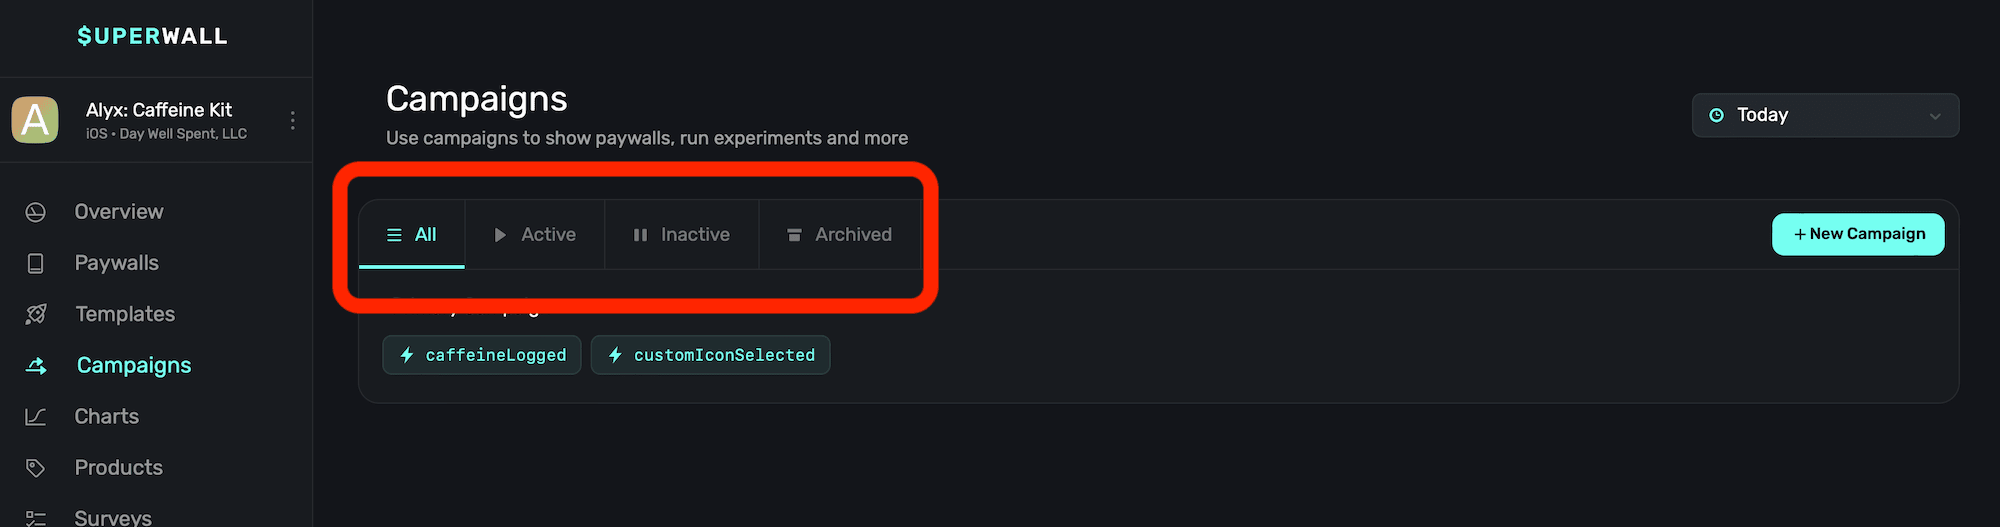
* **All:** The default view. This shows all of your campaigns, regardless of their status.
* **Active:** Campaigns being used in production and serving up paywalls.
* **Inactive:** Campaigns that are not serving paywalls in production, but can be quickly re-enabled.
* **Archived:** Campaigns that have been archived, and not attached to any campaign. These can be restored.
### Viewing campaign top-level metrics
Each campaign will also display its active placements and top-level metrics (if any are available). In this example, the campaign at the top has data, while the one below it doesn't:
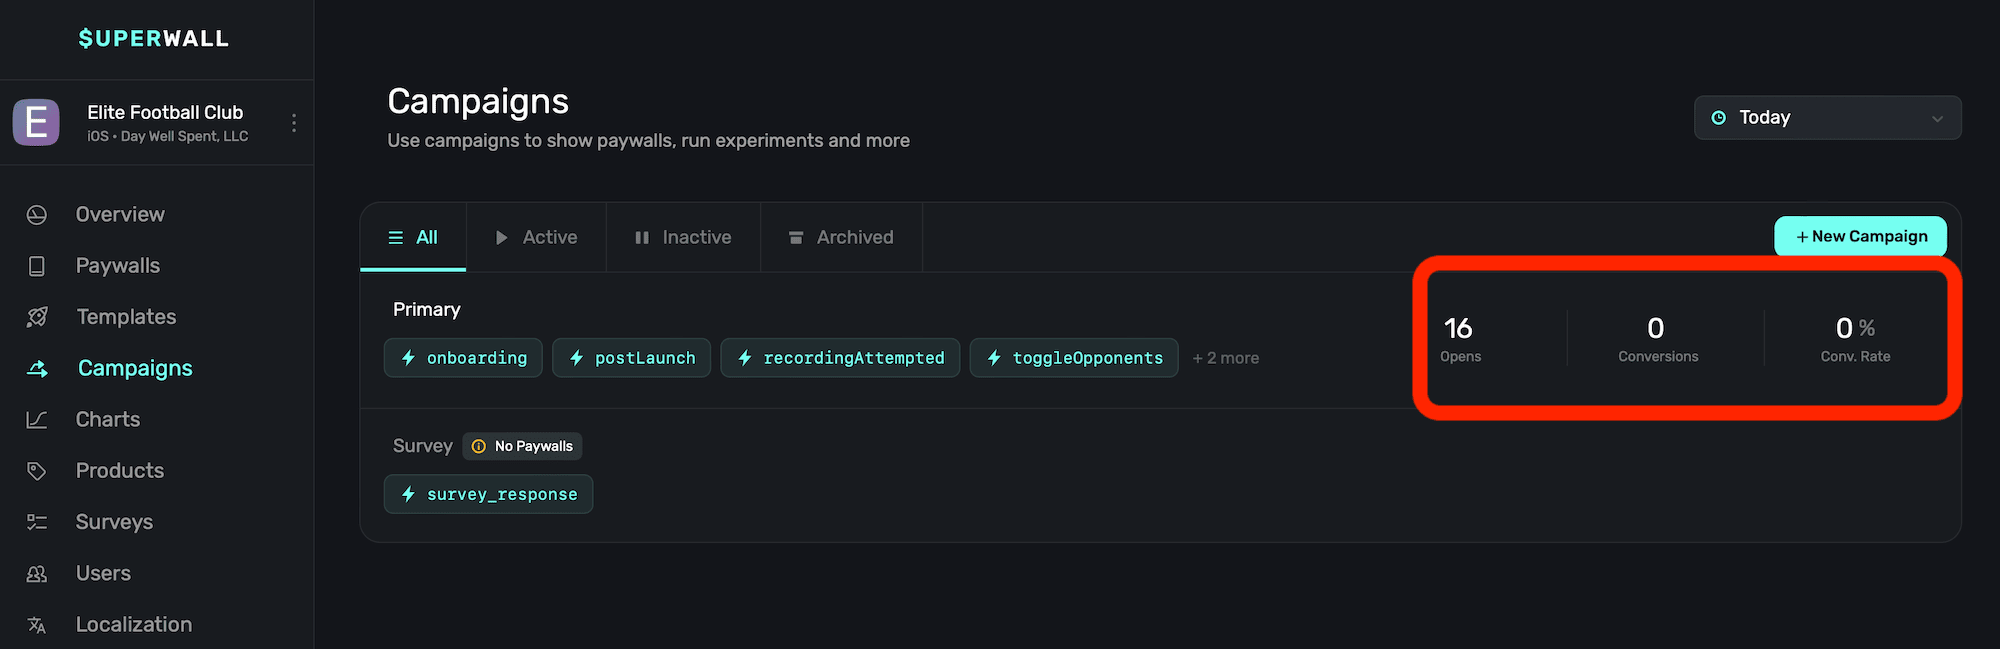
Metrics shown include:
* **Opens:** The amount of time any of the campaign's placements resulted in a paywall being presented.
* **Conversions:** The number of conversions produced from any paywall attached to the campaign.
* **Conversion Rate:** The conversion rate of the current campaign.
If the campaign isn't currently serving any paywalls because none have been attached to it, you'll
see a wanting indicating that in this view. In the image above, that's the case for the campaign
at the bottom, called "Survey".
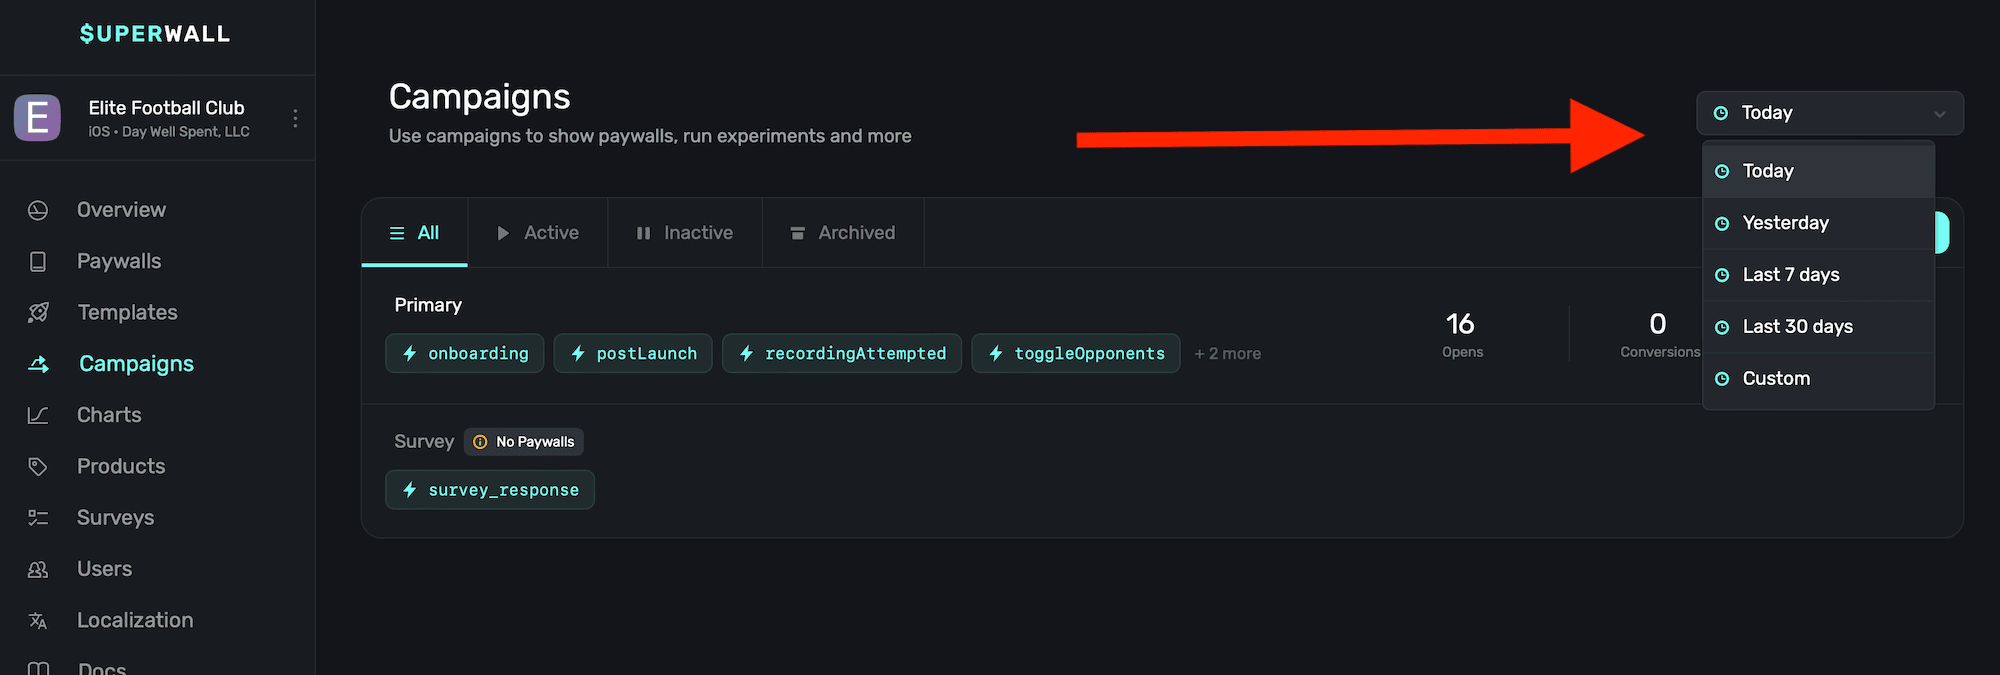
### Toggling campaigns by date
To toggle the date range that the metrics previously mentioned should display within, use the date toggle at the top-right side:
### Viewing campaign details
To view more about any campaign, to set up filters, edit placements, paywalls and more — simply **click** on any campaign listed in the table. Then, campaigns details will be presented. More on that in the next [page](/campaigns-structure).
# Audiences
Source: https://superwall.com/docs/campaigns-audience
Audiences allow you to set up simple or complex filtering rules to match certain users and show a paywall to them. For a user to see a paywall, they must be matched to an audience. An audience can show one or more paywalls based on a percentage you set (i.e. show paywall A to 70% of users, and paywall B to 30%).
**Another way to think of them is this: If you're wanting to create conditions, filters or certain rules or flows that must happen to show a paywall — then you create an audience for it.**
If creating filters to show a paywall under certain conditions doesn't apply to you, then you can simply leave the default audience on — it'll match everyone who hits a [placement](/campaigns-placements).
In the audience view, you can set up filtering rules, check results of experiments and recent transactions resulting from them. All of your current audiences will show in the left-hand side of the campaign details screen:

The audience section lets you [edit the order](#reordering-audiences) in which audiences are evaluated. **Superwall evaluates audiences top-to-bottom.** For example, consider you had three audiences for a caffeine tracking app:
* An audience for users who tried to set a custom app icon.
* An audience for users who've logged caffeine late at night.
* And, everyone else.
If a user logged caffeine in the morning, Superwall would first check if they matched the custom app icon audience, and then the audience for logging caffeine late at night. Since neither of those match (since they are logging caffeine in the morning, and not setting a custom icon), they'd land in the "everyone else" audience bucket.
### Adding a new audience
To create a new audience, **click** the **+** button in the audiences section, located at the left-hand side of the campaign details view:
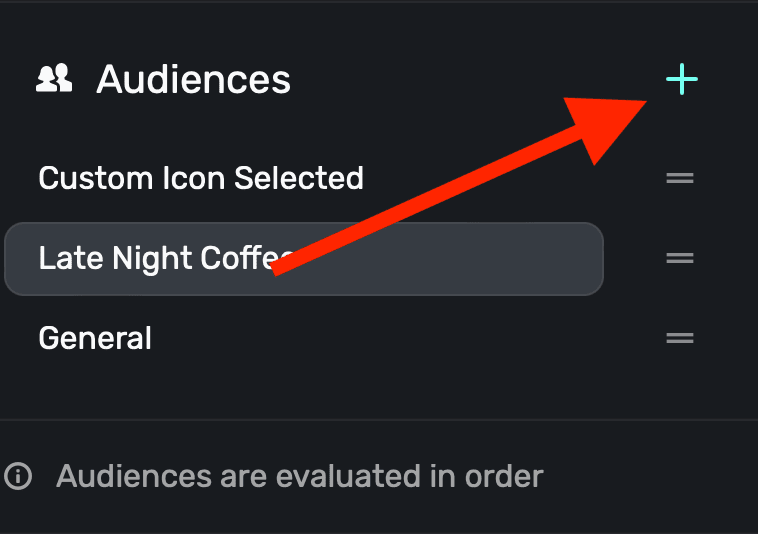
Superwall will create a new audience, and place it at the bottom of your current audiences by default.
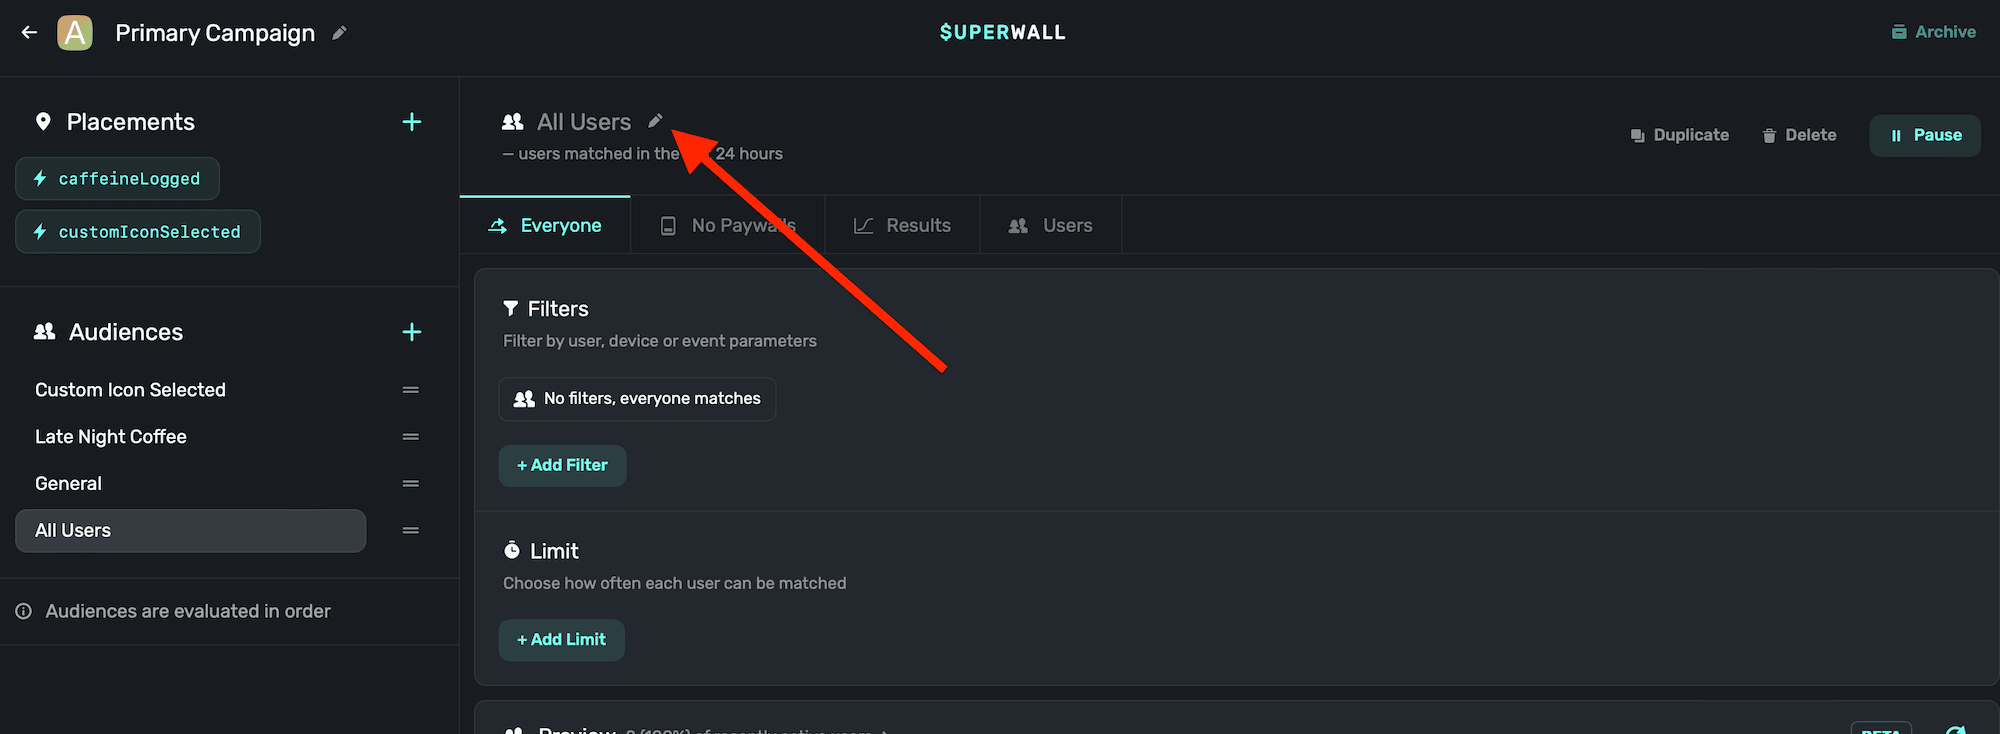
### Renaming Audiences
To rename an audience, **click** the **pencil icon**, located at the top of a selected audience:
### Configuring an audience
To use an audience to filter for a particular set of events, rules or any other condition — you use **filters**, specify if an **entitlement** should be evaluated, along with an optional **limit**.
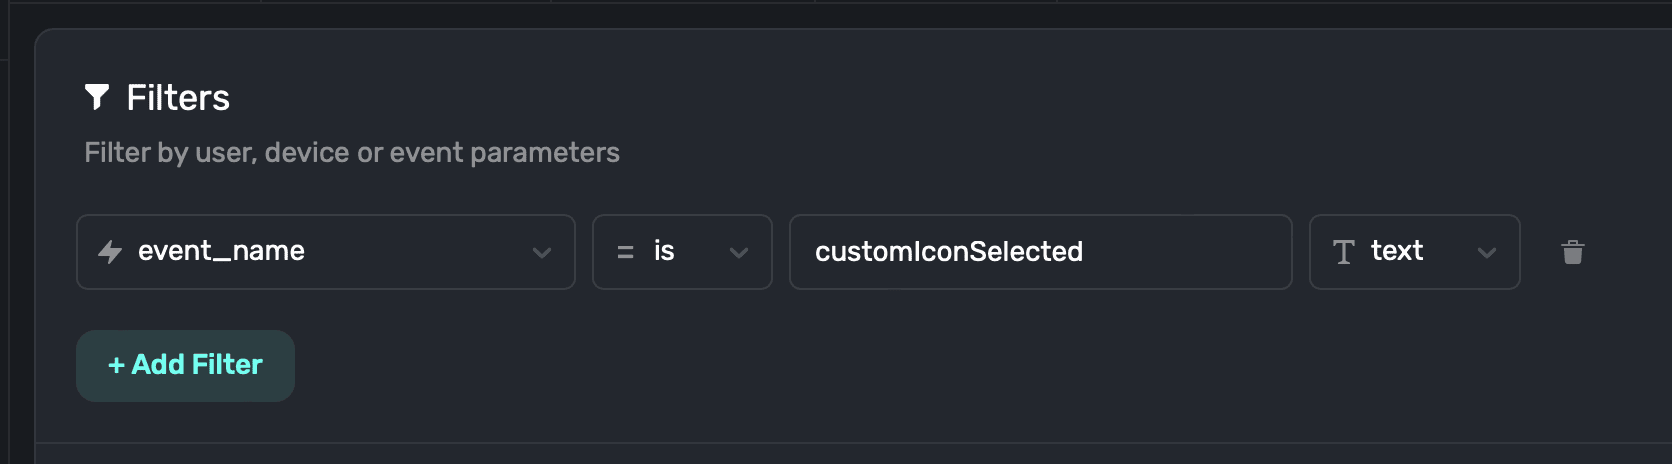
#### Creating filters
You can add filters (i.e. rules or conditions to match against) by **clicking** on an audience, and then clicking the **+ Add Filter** button:
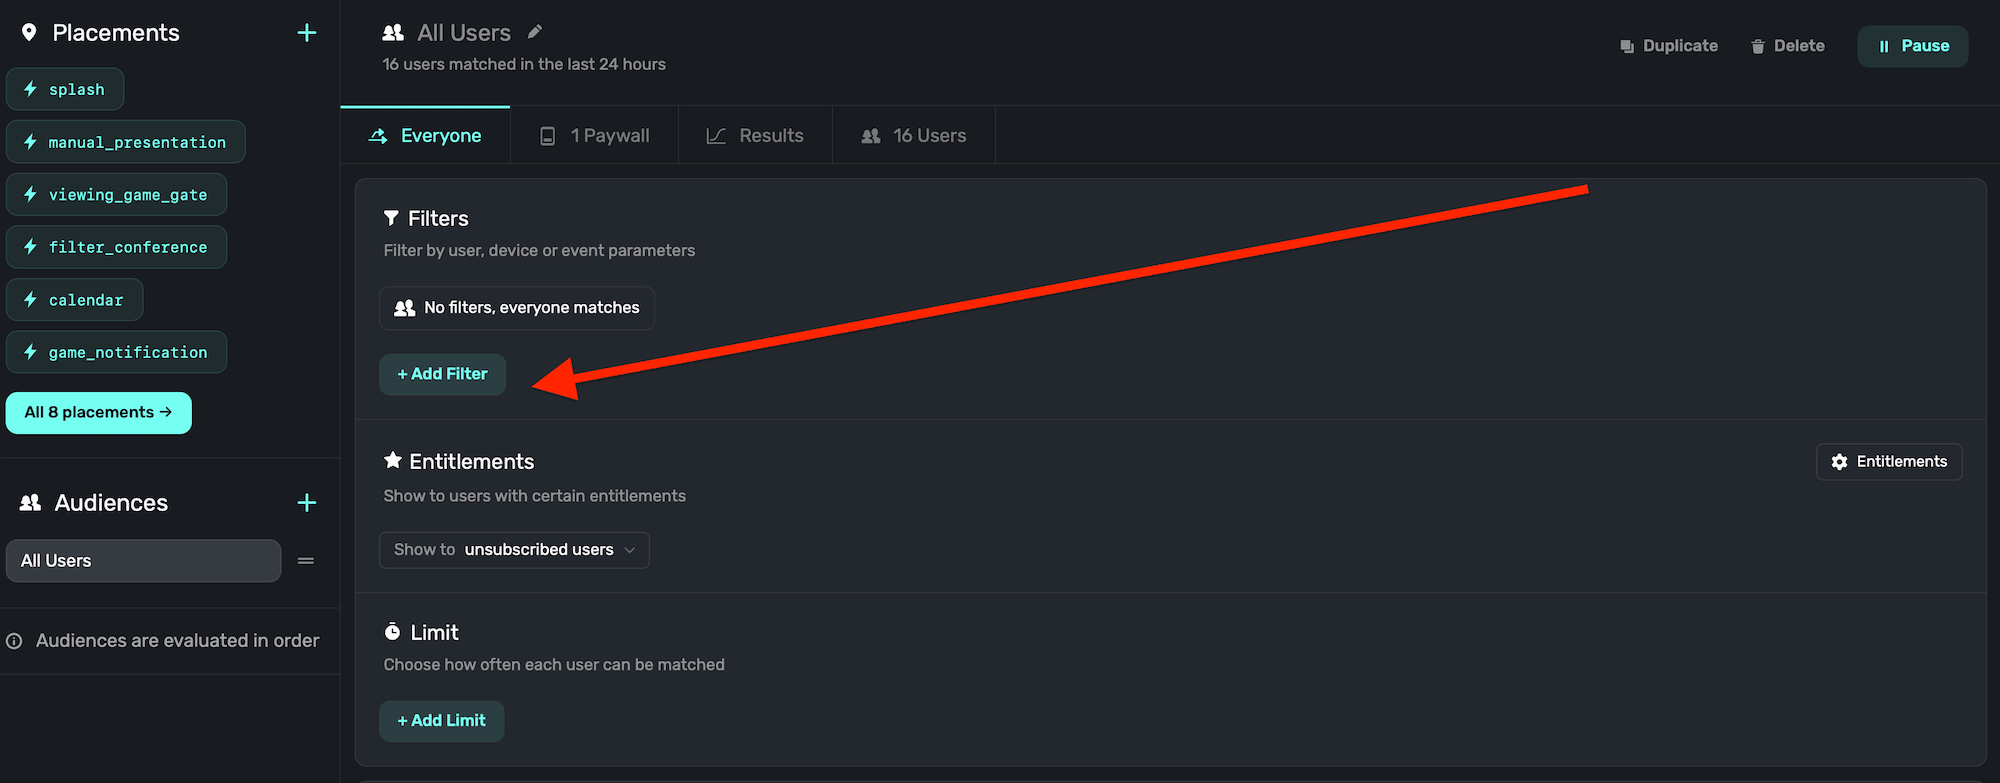
From there, select any of the events to create a filter with. For example, if you want to use a placement you've made to match against:
1. Click "+ Add Filter".
2. Type in "event\_name".
3. For the evaluation operator, choose "is".
4. And then, type in the placement's name.
For example, if we wanted to show a certain paywall for users who tried to set a custom icon, it might look like this:
When you have a condition setup, **click** the **Save** button towards the bottom to apply it:
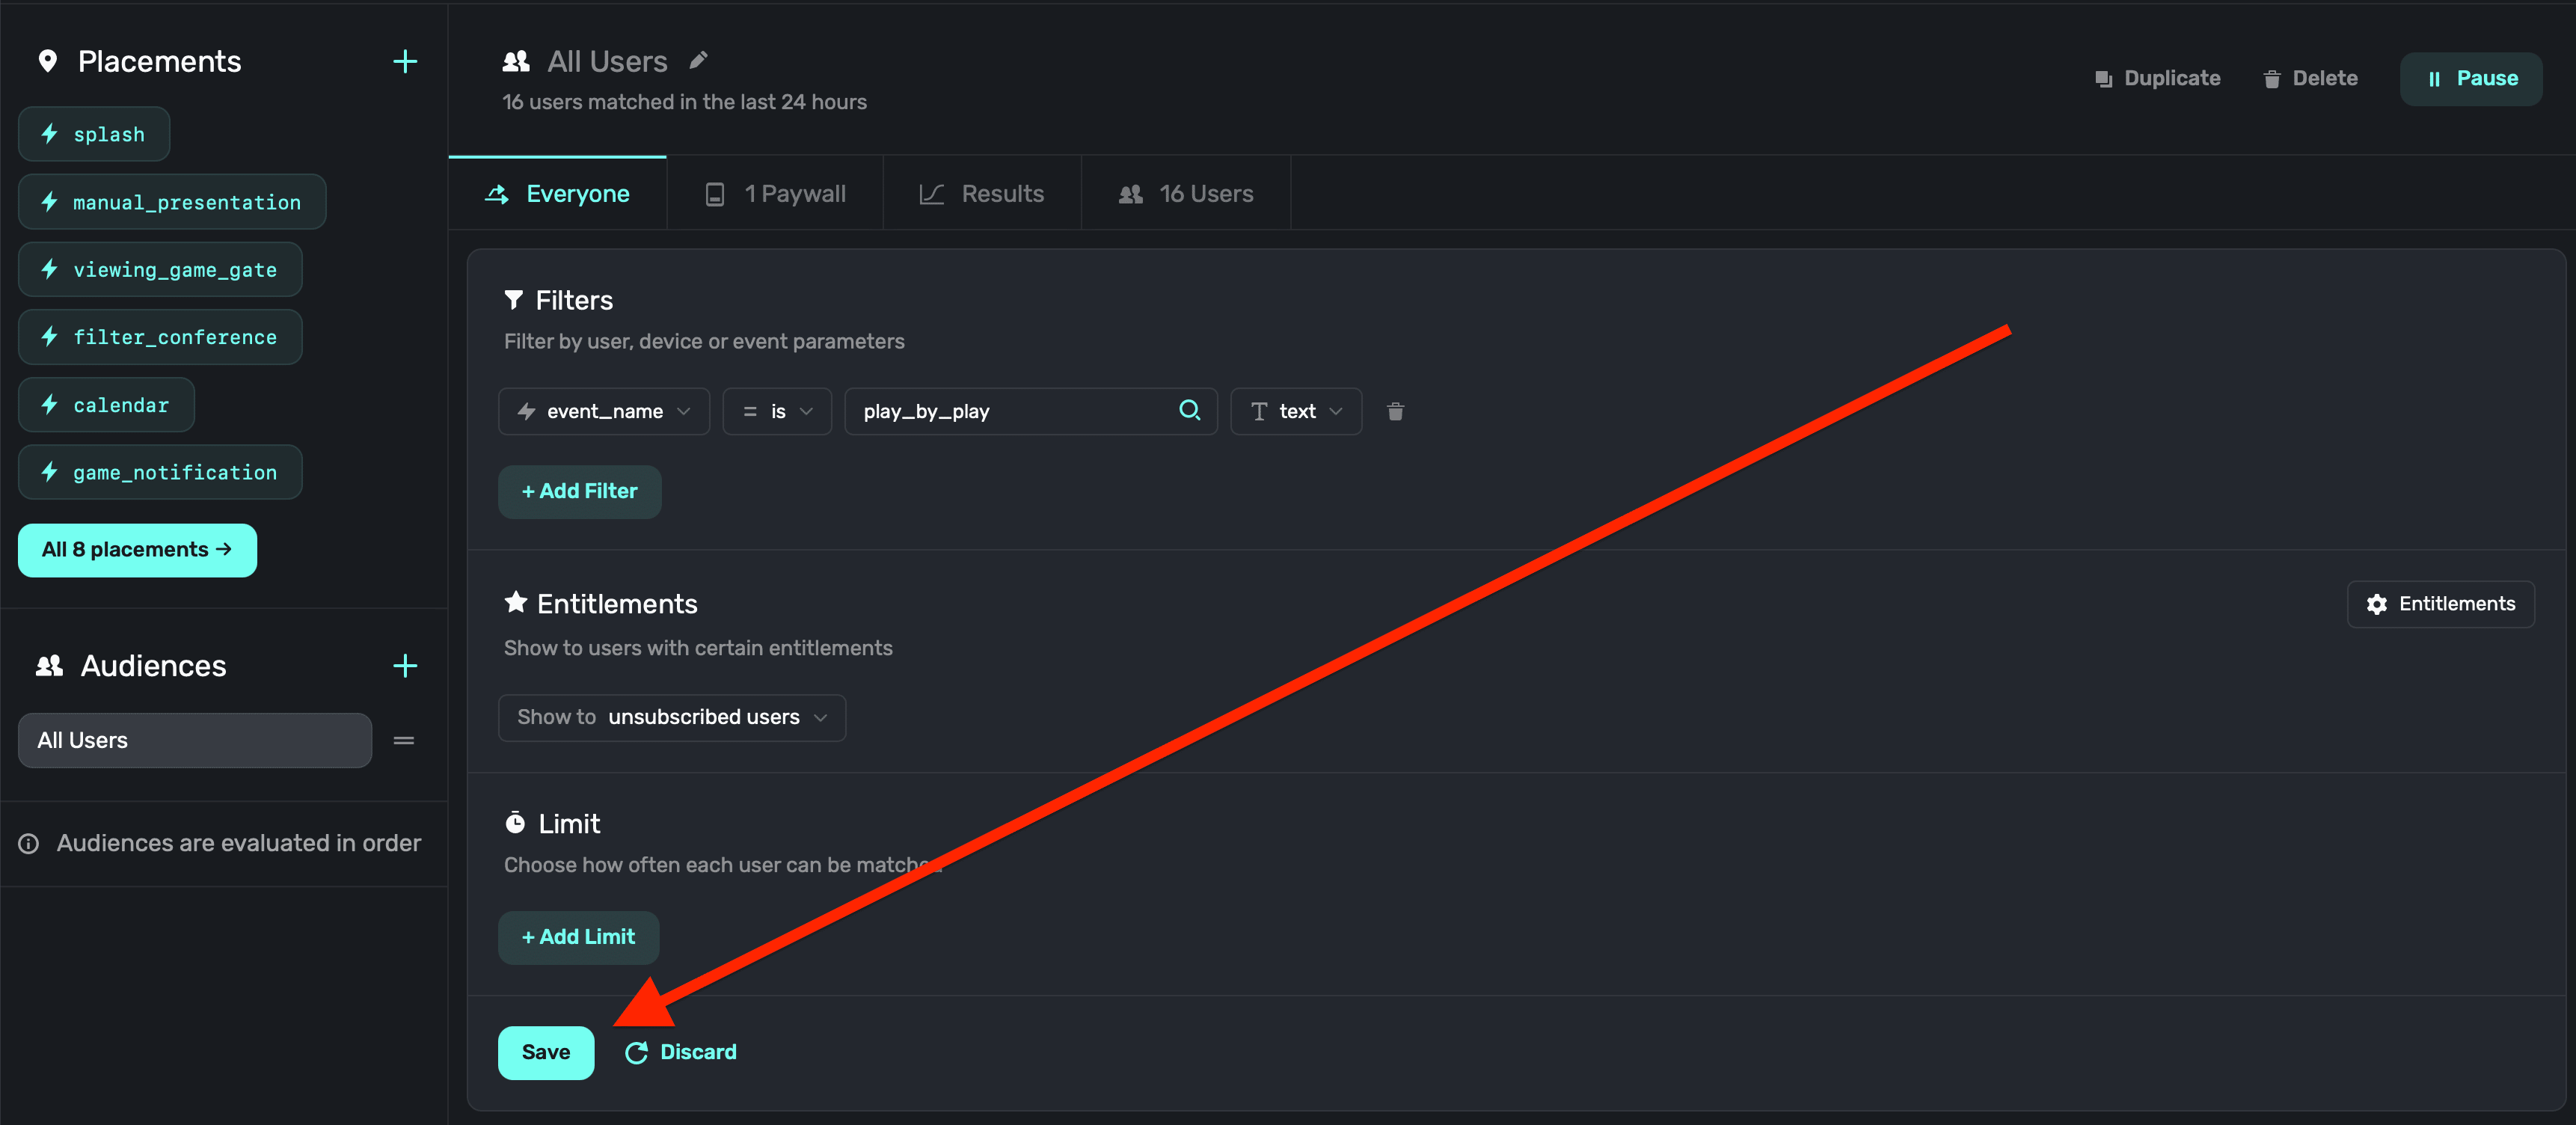
If you don't want to save any filter you're working on, **click** the **Discard** button by the save button.
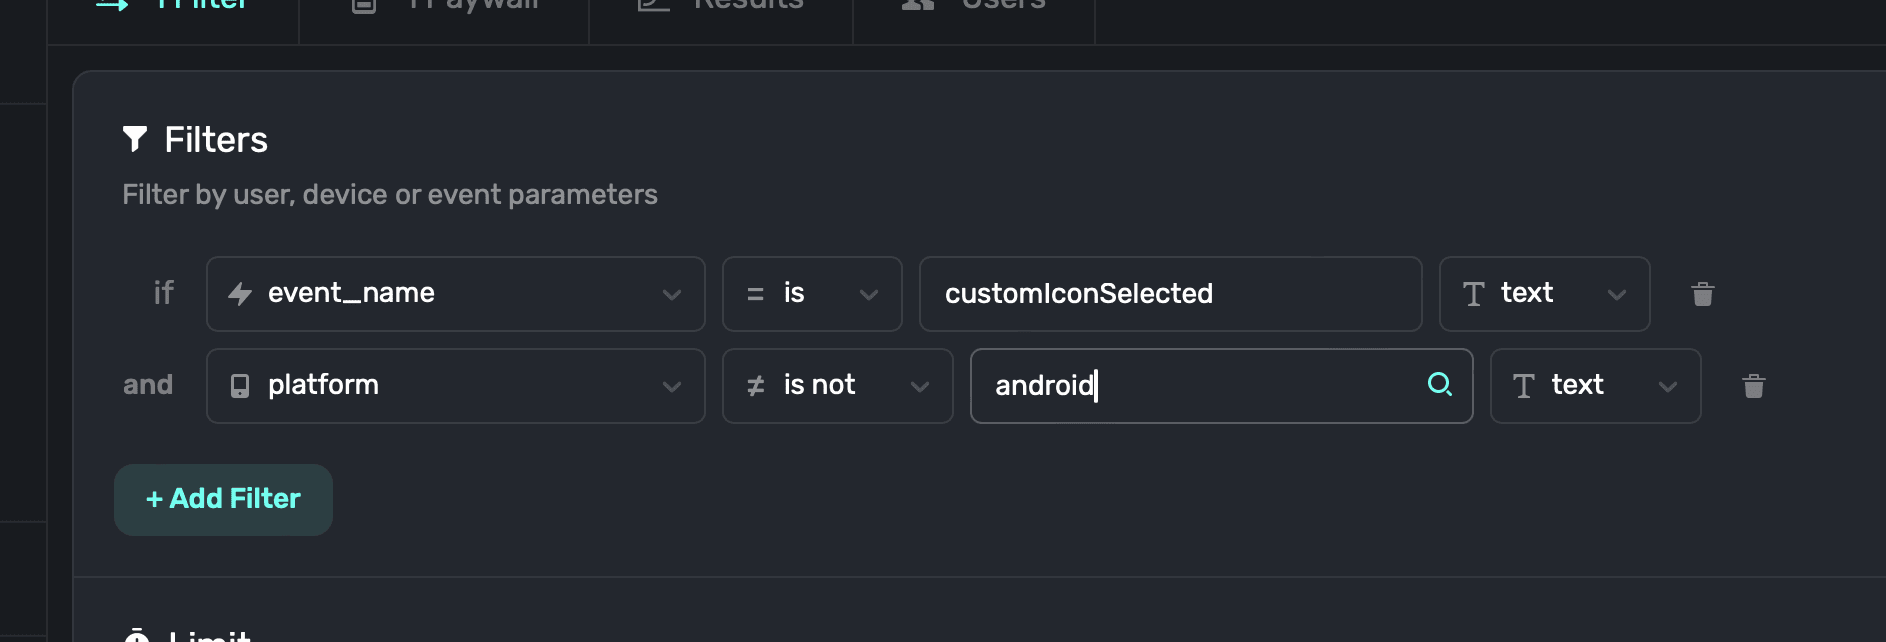
You can combine rules together, too. In the following example, if we only wanted the paywall to show on iOS, and not Android, you can simply click "+Add Filter" once more, and add the condition:
For a hands on tutorial of creating multiple filters to show different paywalls, check out this video:
Assignments Are "Sticky". Once a user is assigned a paywall or a holdout within an audience, they
will continue to see that assignment unless you reset them (by clicking the reset icon next to
Assigned) or remove the paywall from the rule via the X button. Remember: Changing a paywall's
percentage only affects **new users**. It doesn't affect assignments for users who already saw
that paywall.
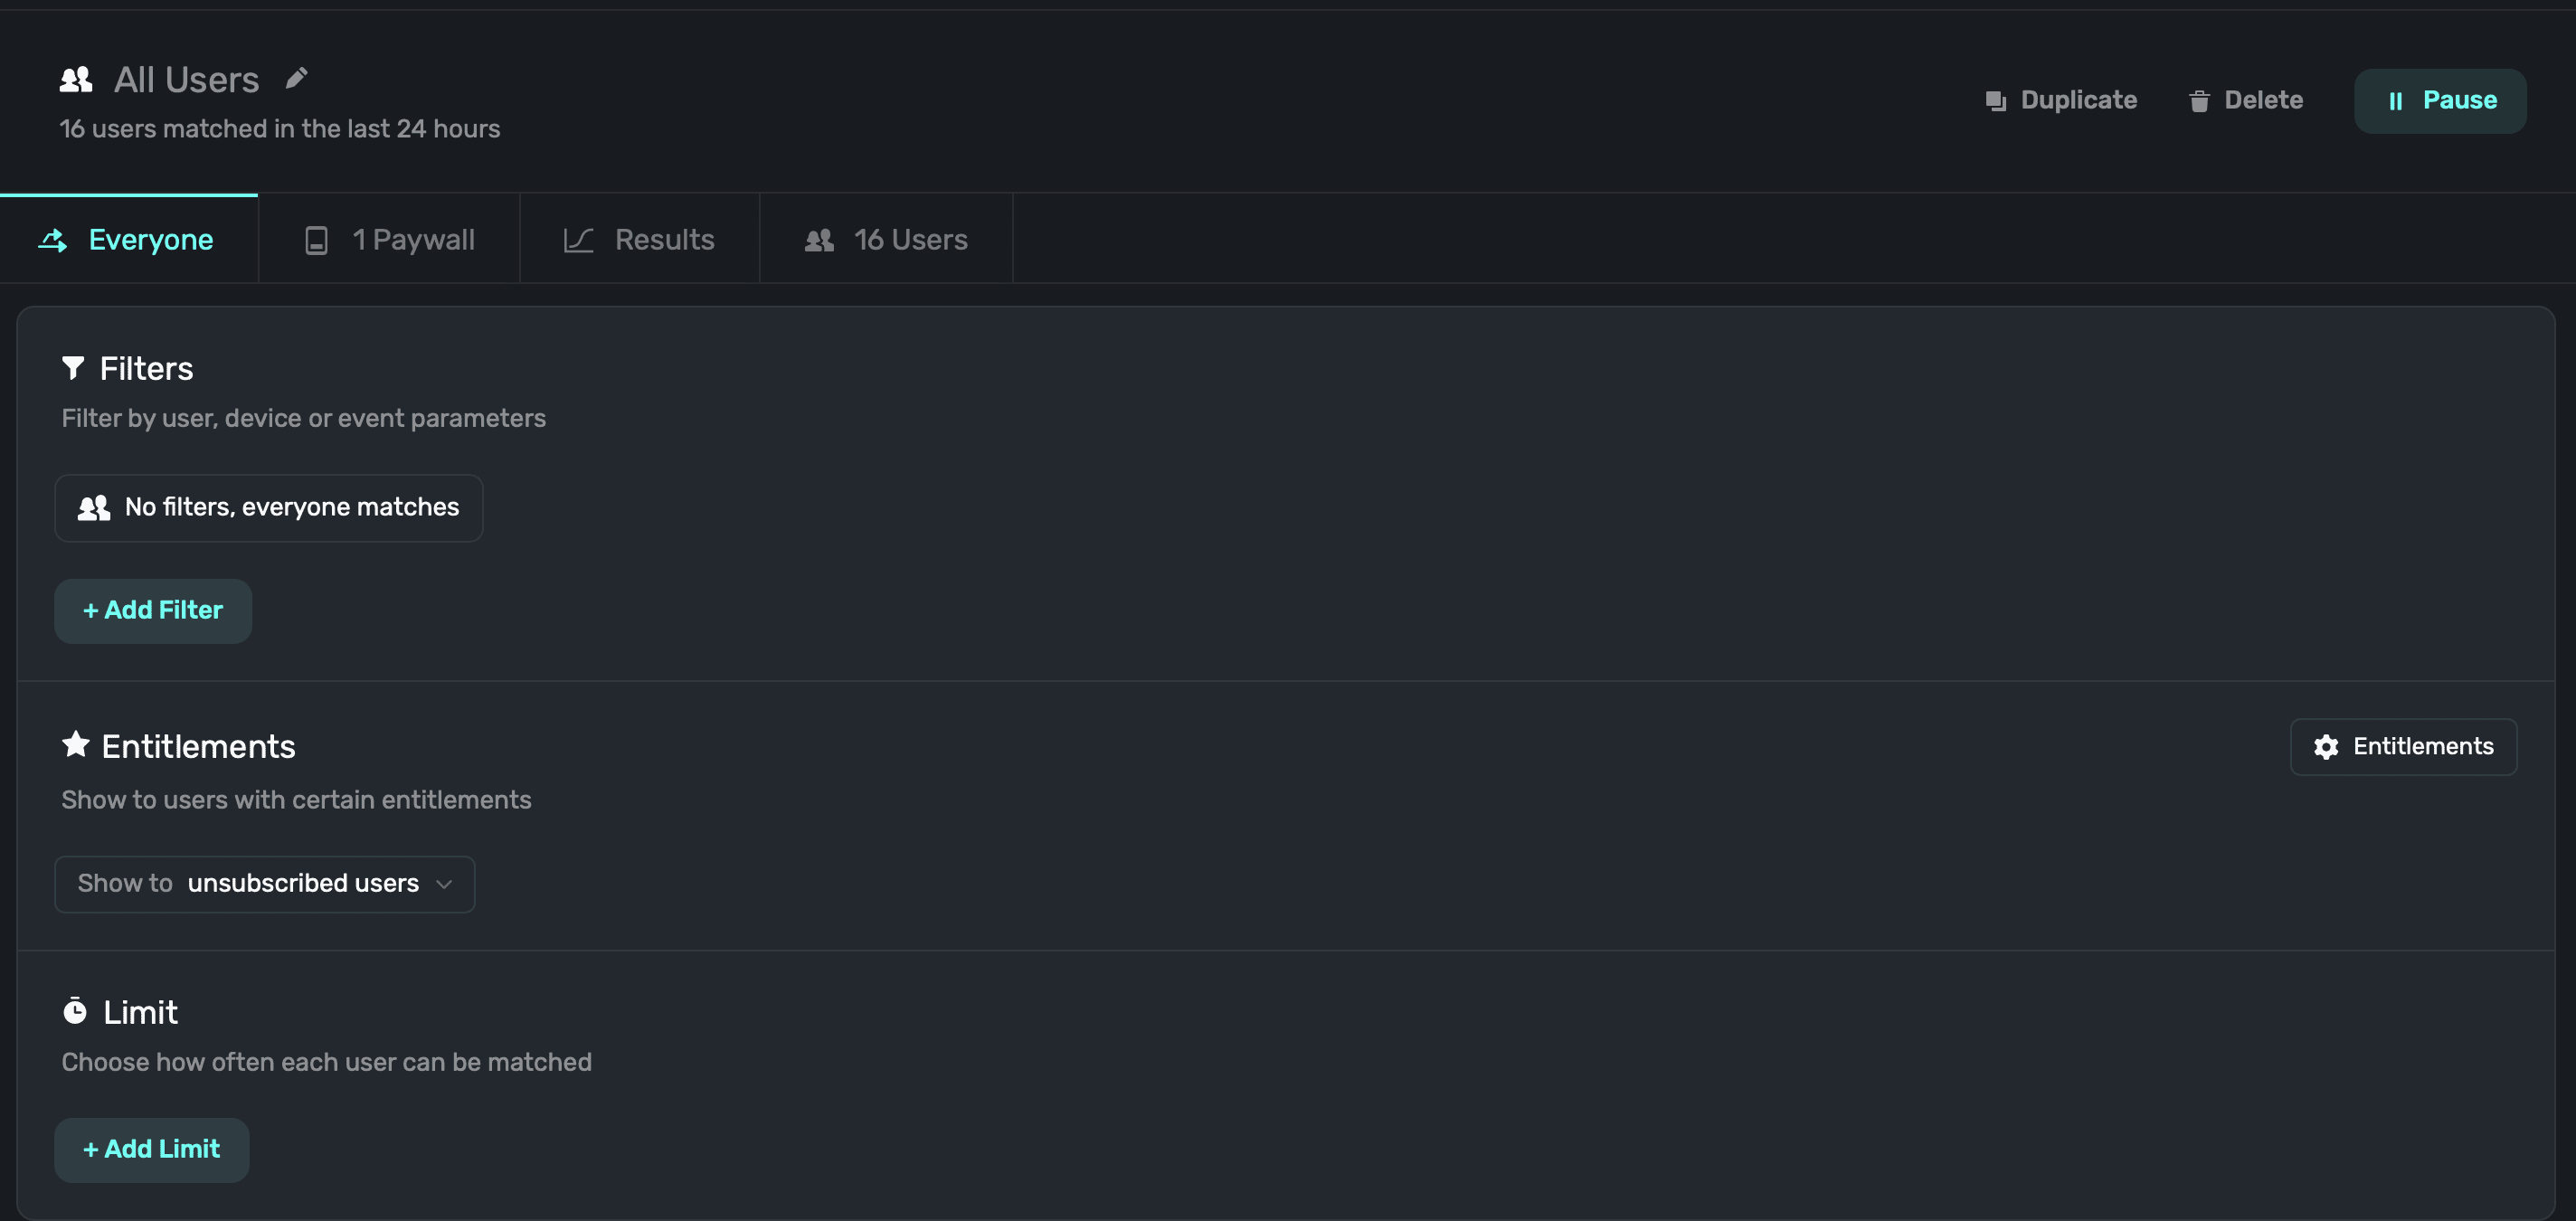
#### Matching to entitlements
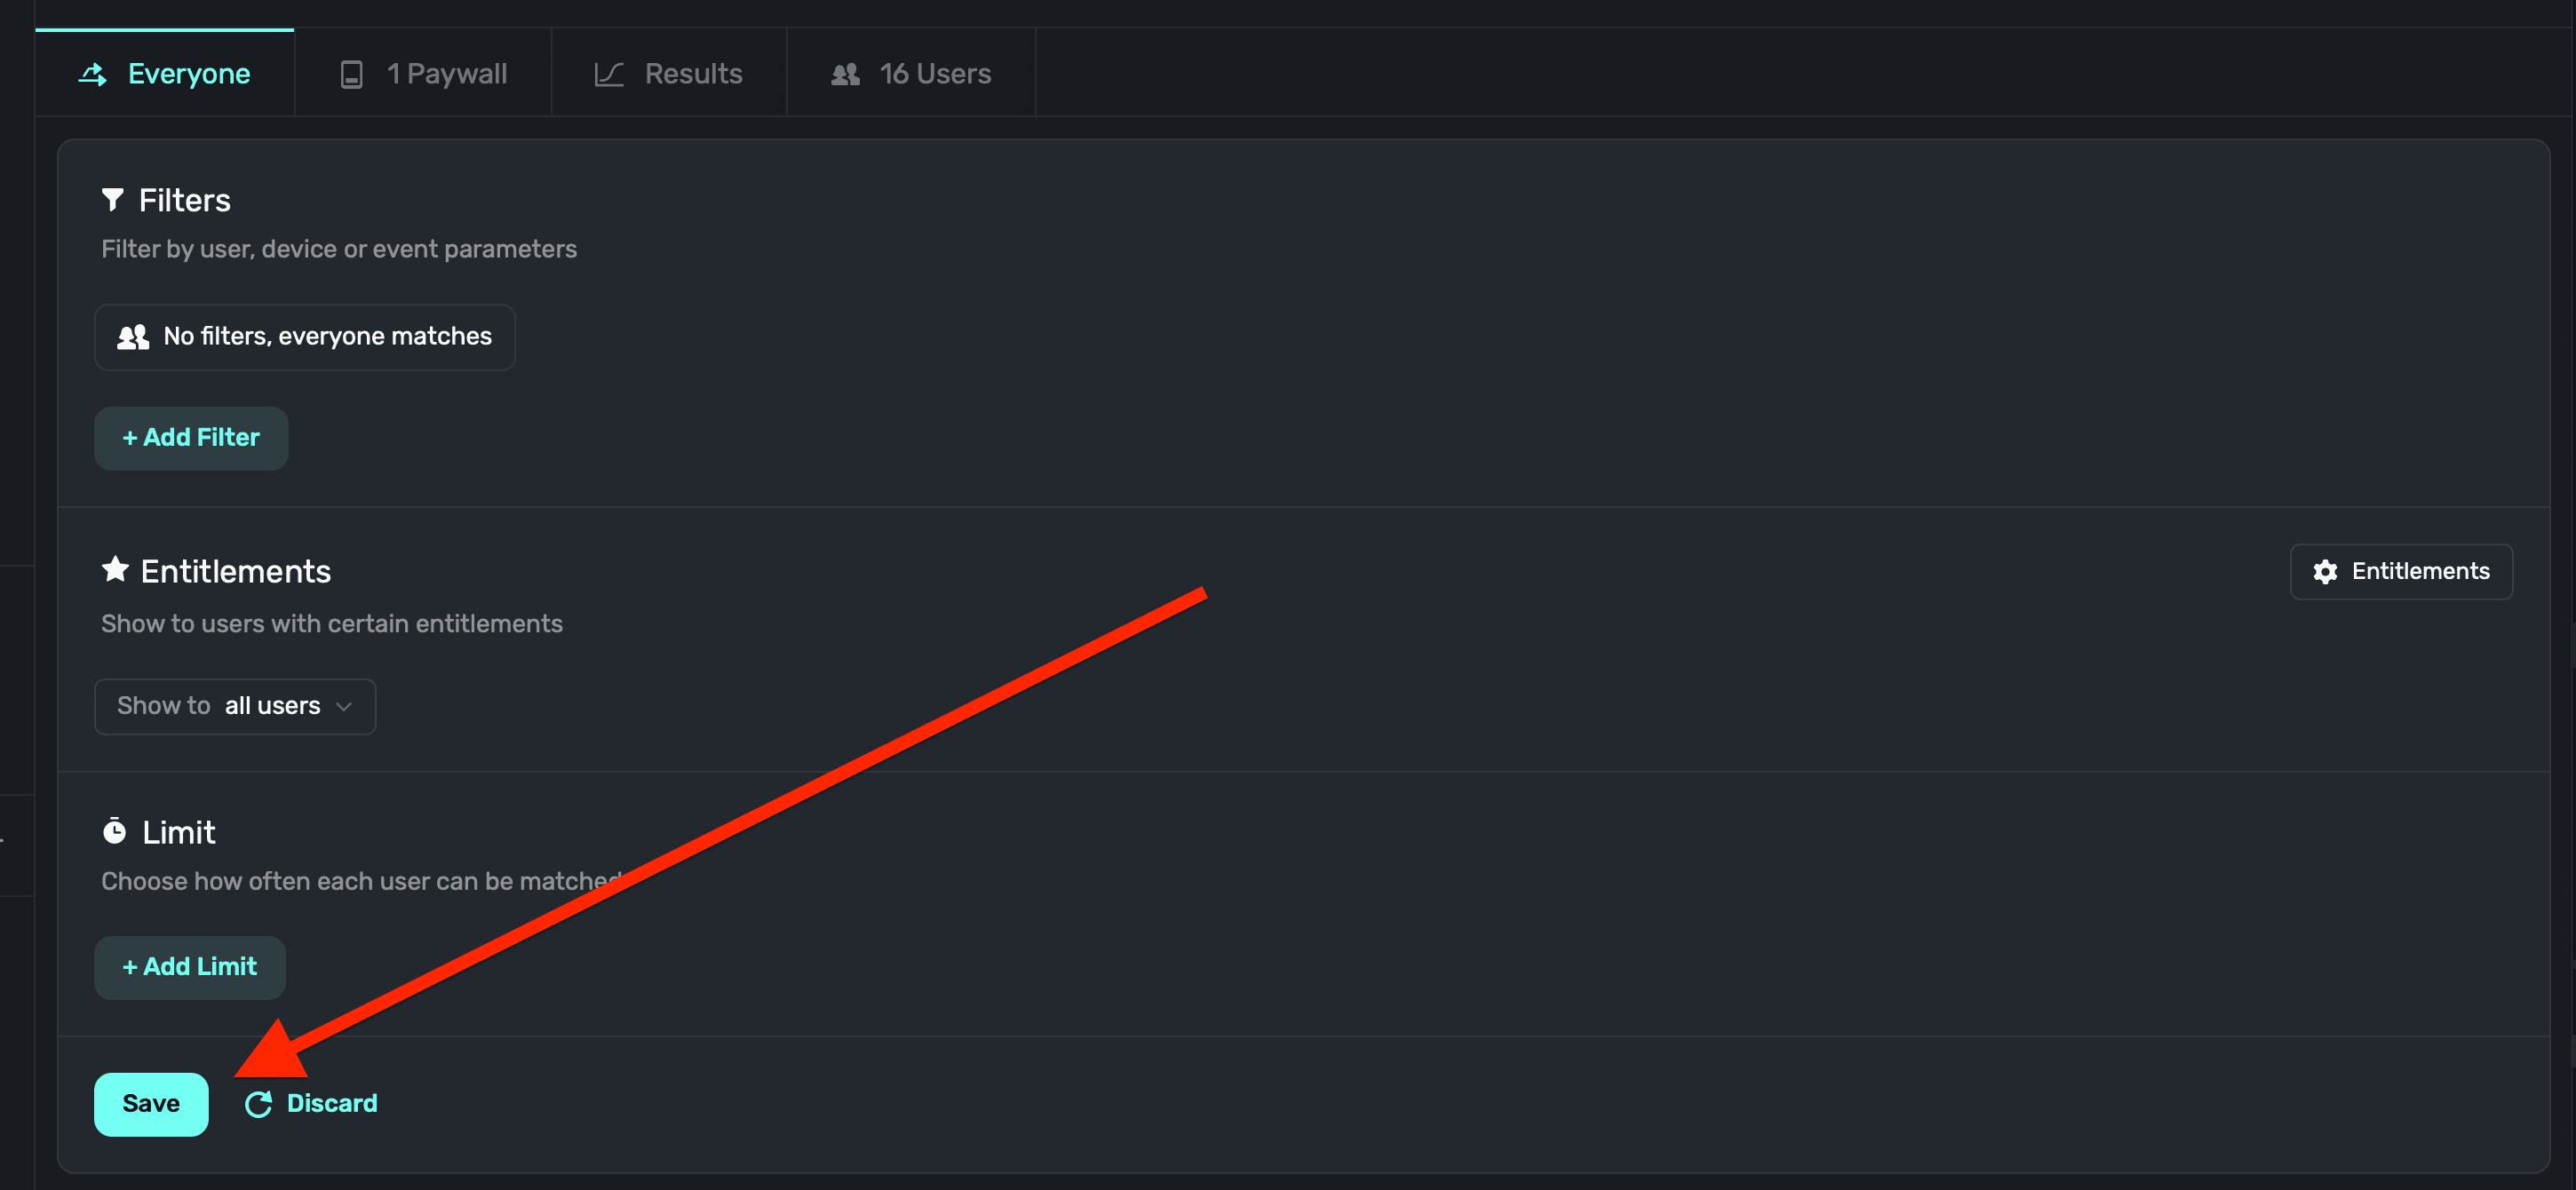
To match your campaign to specific entitlement, **click** the entitlements button and choose an option:

1. **Show to unsubscribed users (default):** Users without an active entitlement match.
2. **All users**: All users match.
3. **Specify entitlement**: Users with the specified entitlement(s) and state are matched. Here, you can combine multiple entitlement checks, too. For example, if `gold` is `active` but `platinum` is `inactive`:

Once you've set up entitlement checks for the campaign, **click** the **Save** button that appears at the bottom:
#### Setting a limit
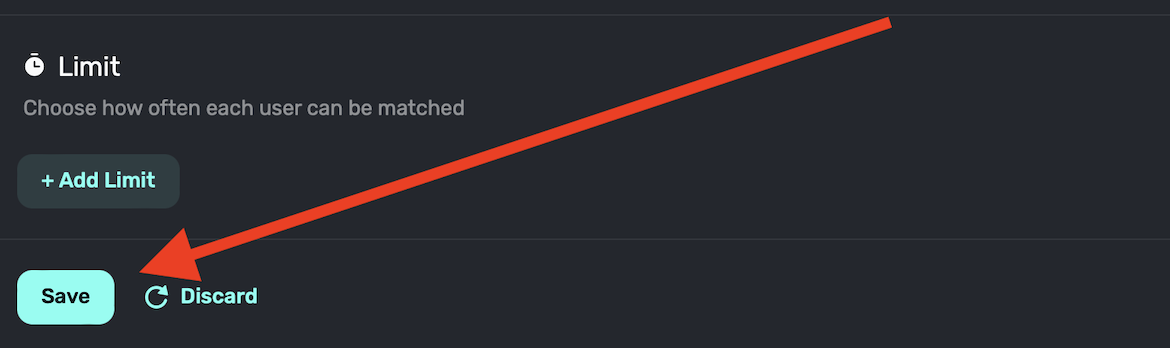
To set a limit for an audience, **click** the **+ Add Limit** button — located below the entitlements section:

This is useful if you want to limit how many times a user can match with the audience. You can choose how many times the limit should be placed, along with a time duration and time span. For example: 1 (times) every 60 (time duration) minutes (time span):

Once you've set up a limit, **click** the **Save** button at the bottom:
### Audience details
When you select an audience, you can toggle between four main sections:
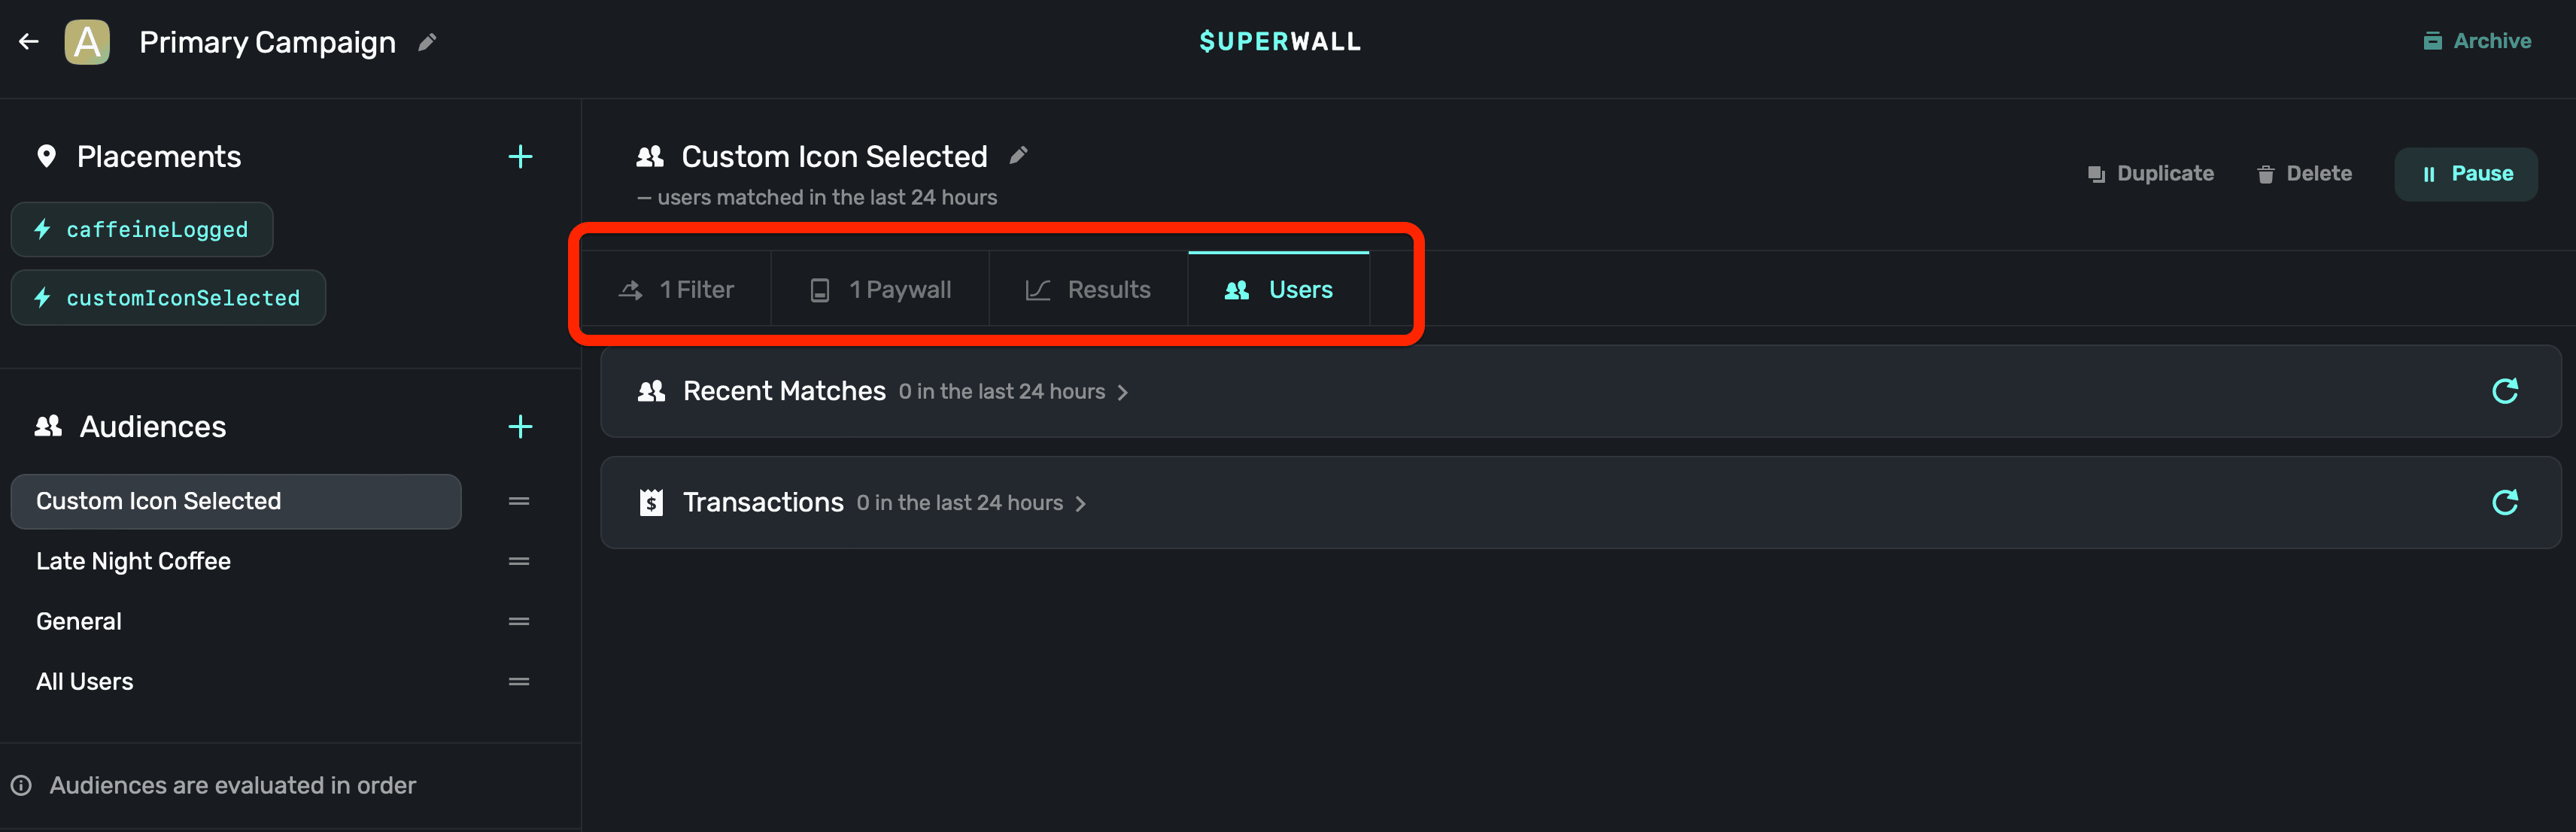
#### Filters
This is where you can configure filters and limits. If there isn't one set, this will say "Everyone", indicating the audience will match all users.
#### Paywalls
This section displays the paywalls which will present for the audience.
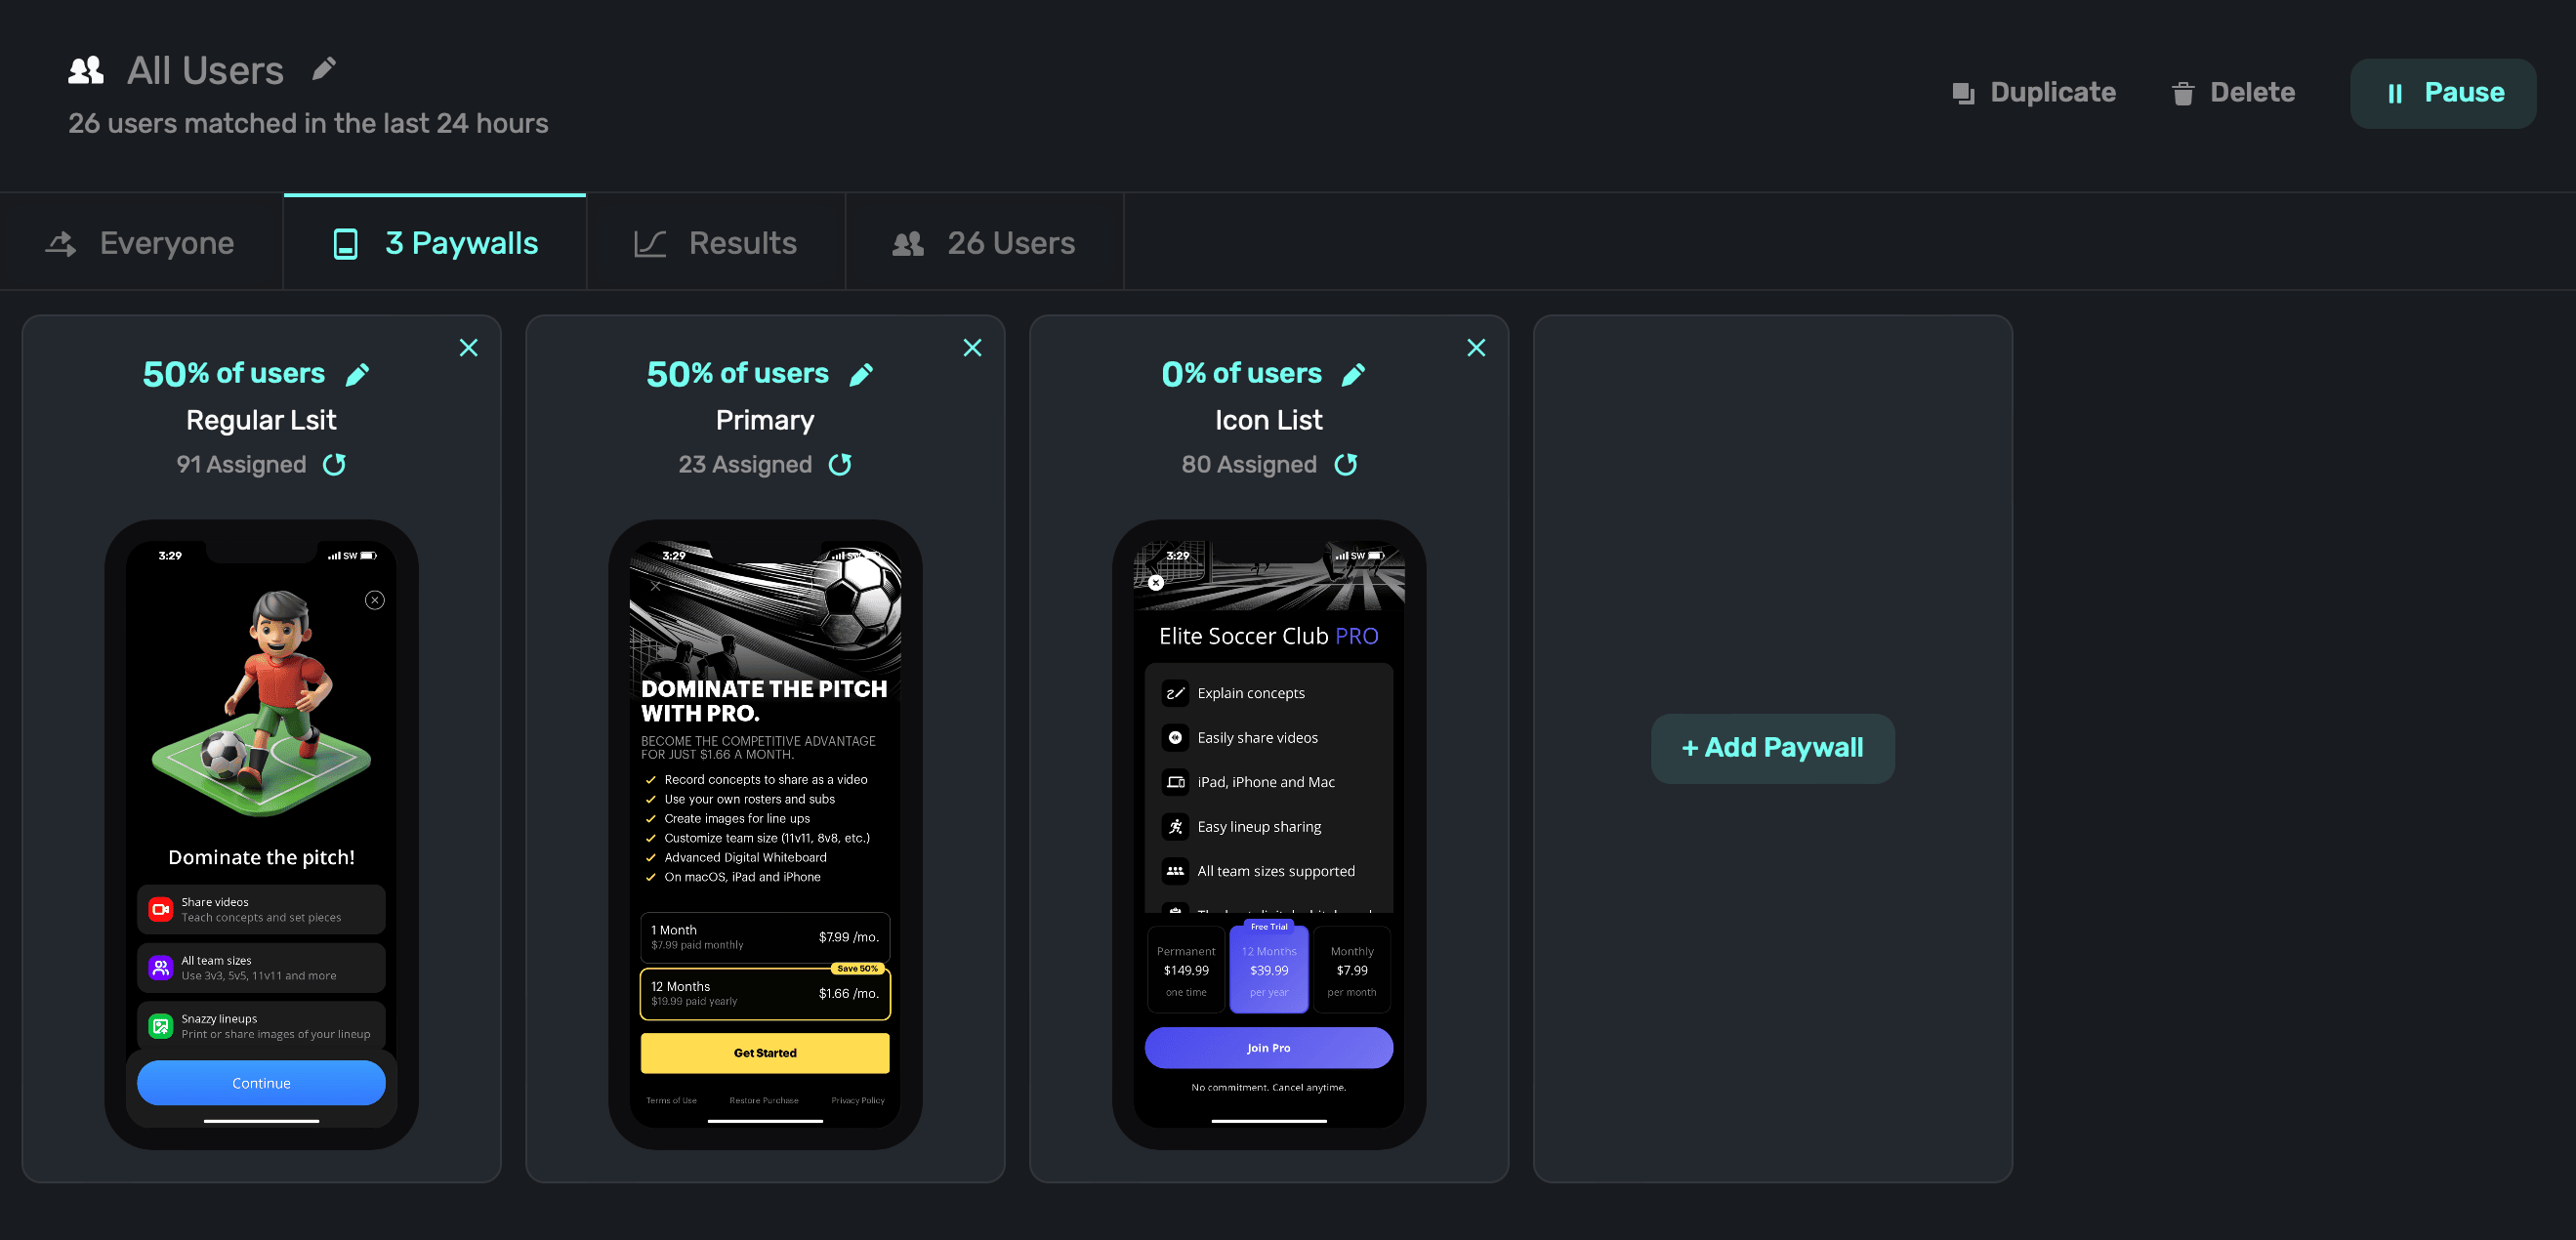
You can add new paywalls for the audience to use, or set a percentage to show across multiple paywalls when the audience is matched. To add a new paywall, click on **+ Add Paywall** to associate one to the current campaign.
#### Results
Here, you can see how paywalls are performing for the given audience.
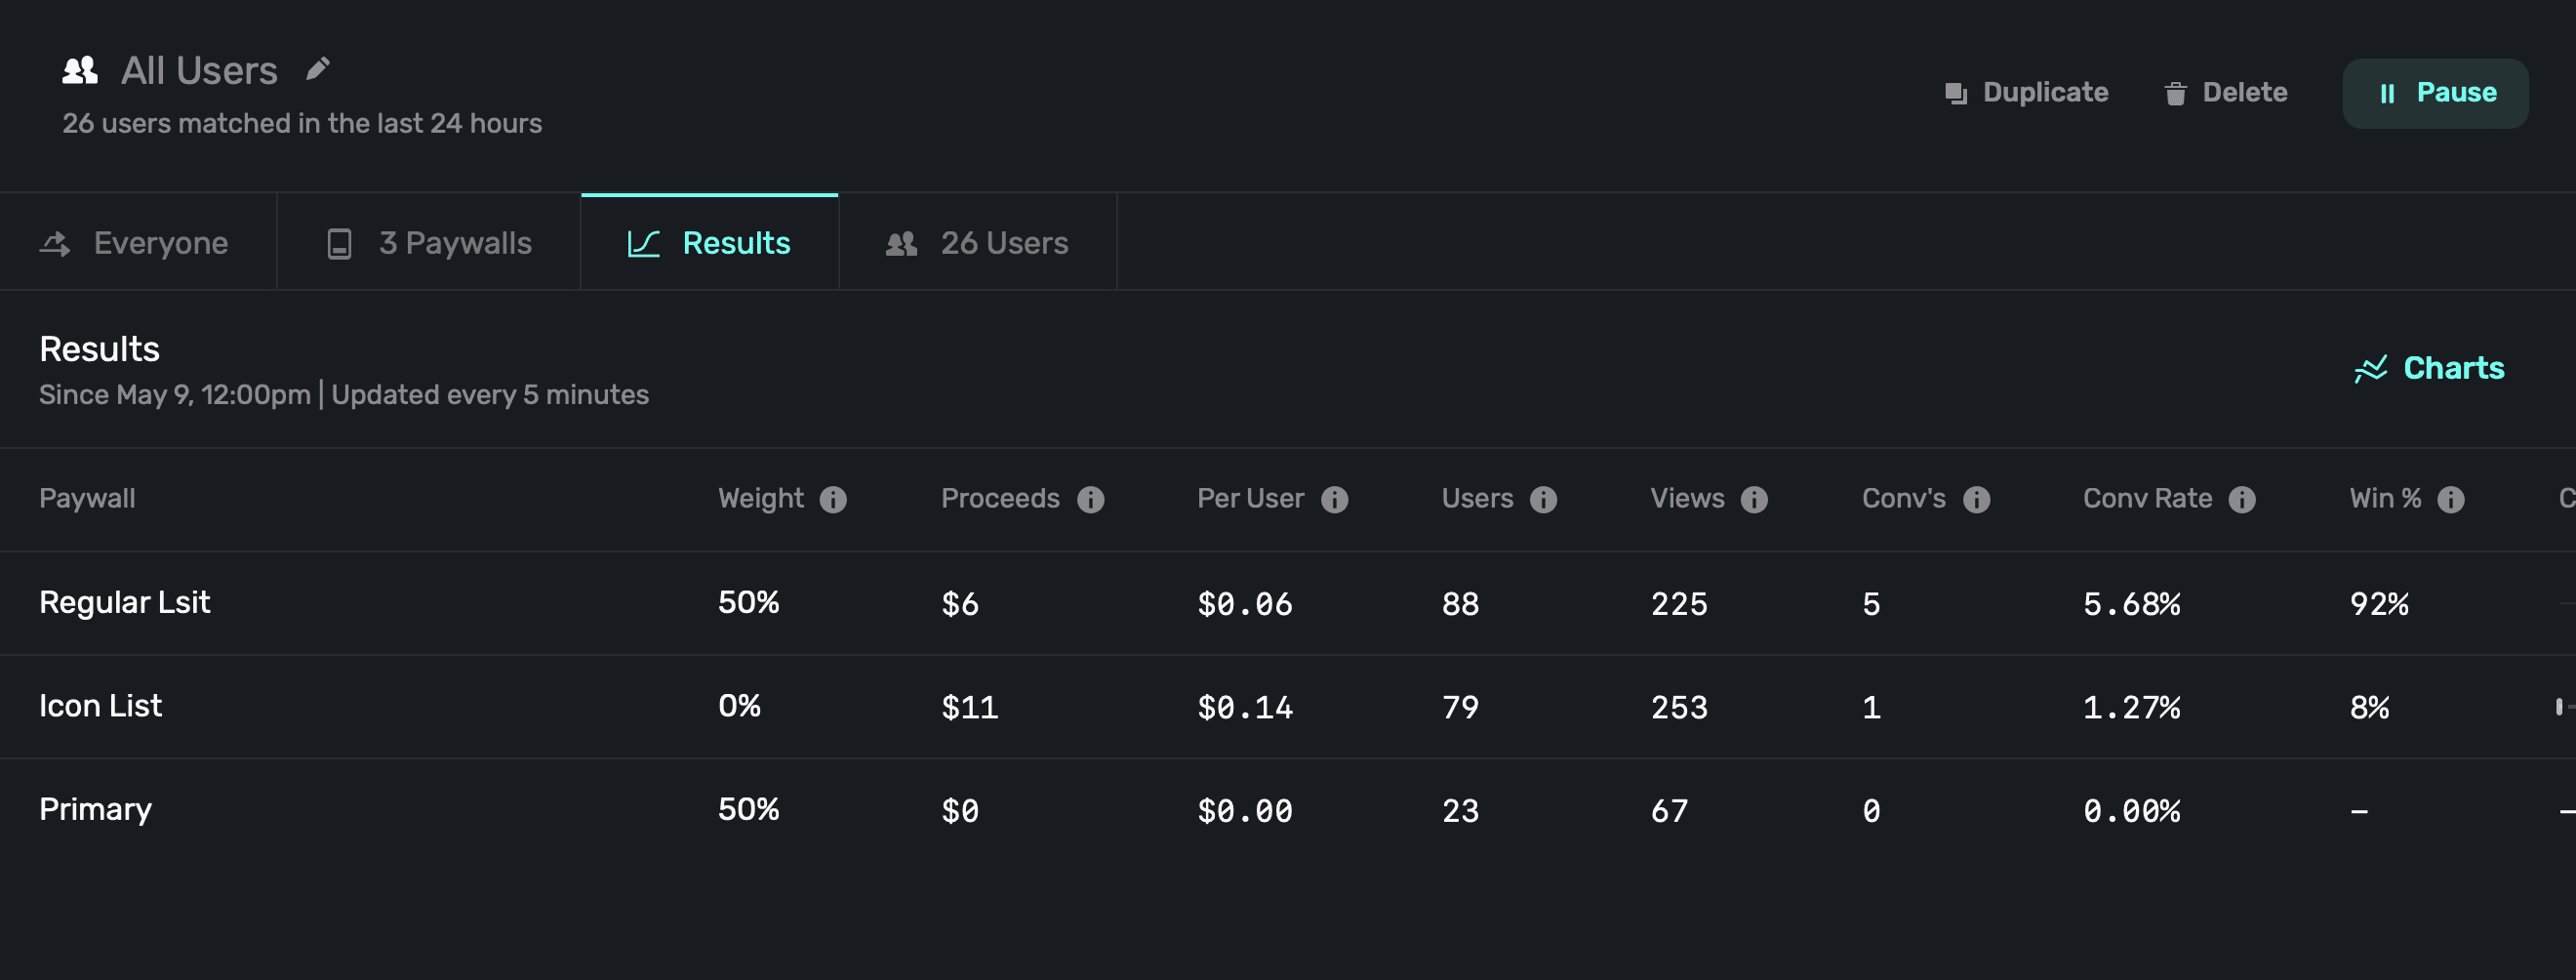
Superwall will show top-level metrics here, but if you want to see more details, **click** the **Charts** button at the top-right hand side of the metrics.
#### Users
Finally, the users section shows **recent matches** in the audience from filters set up for it, and **transactions** that have resulted from them.
When viewing either one, Superwall will show which placement resulted in the paywall being presented (recent matches), and which placement led to a conversion (transactions).
### Reordering audiences
To change the order that Superwall evaluates audiences, simply drag and drop them in the left-hand sidebar of any opened campaign:
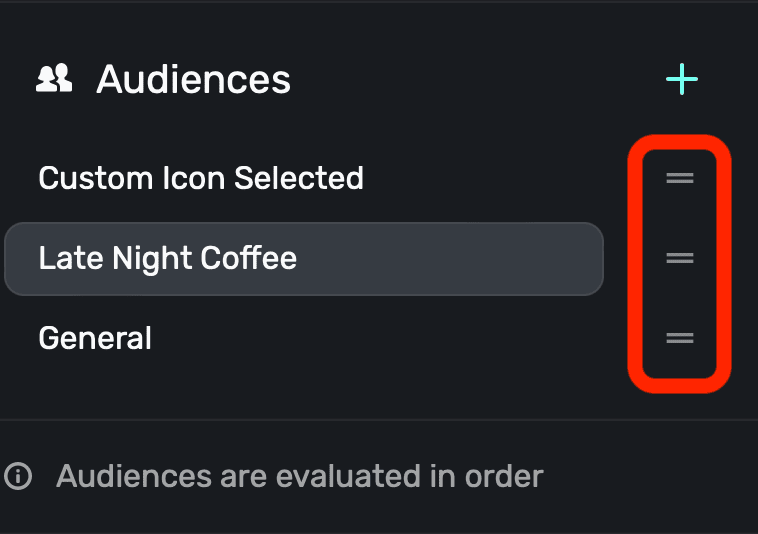
Remember, Superwall will check the audience at the top of the list here, and then go down one-by-one until it hits a match. These checks occur when a user hits a code path where you've registered a [placement](/campaigns-placements) or if an automatically tracked placement is triggered (i.e. something like `survey_response`).
### Changing audience status
You can **duplicate**, **delete**, **pause** or **archive** an audience using the buttons at the top of open audience:

Archived audiences can be restored at any point. Paused campaigns are not evaluated by Superwall.
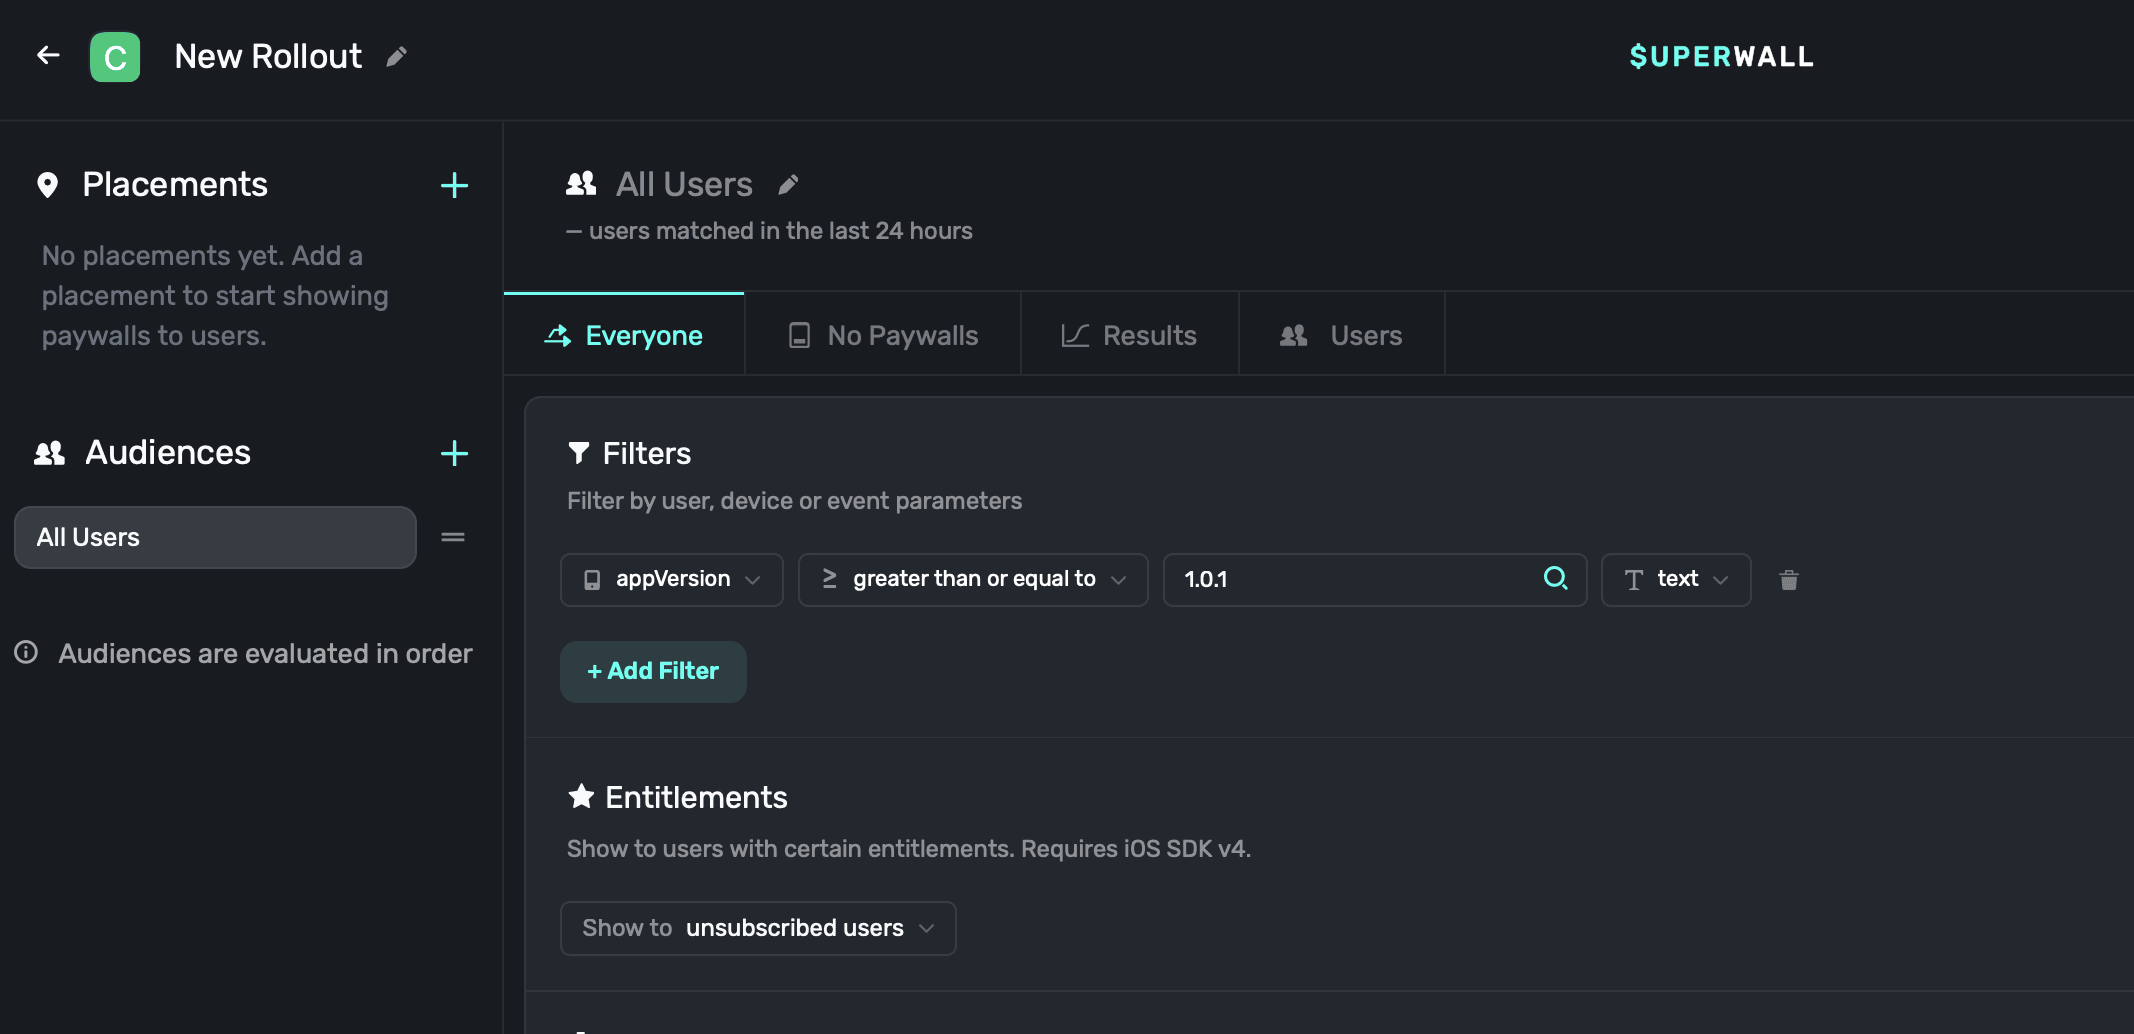
### Common filters
#### App versions
To filter by app version, add `appVersion` as a filter. This is helpful if you want to show a paywall to users on a specific version of your app. For example, to target users on version 1.0.1 or later, add a filter for `appVersion`, the operator to is greater than or equal to, and the value to 1.0.1:
Another useful app version filter is `appVersionPadded`. When filtering by app version, string comparisons can cause unexpected behavior for versions with triple digits. For example, `3.100.0` would incorrectly compare as less than `3.65.0` when using a standard `appVersion` filter.
To solve this, use the `appVersionPadded` in your filter. It automatically zero-pads each segment of the version (e.g., `3.65.0` becomes `003.065.000` and `3.100.0` becomes `003.100.000`), allowing greater than and less than comparisons to work as expected.
Use `appVersionPadded` instead of `appVersion` whenever you're doing a greater than or less than comparison across major or minor version updates that could exceed two digits.
Here's an example:
| Version | `appVersion` Comparison to 3.65.0 | `appVersionPadded` Comparison to 003.065.000 |
| ------- | --------------------------------- | -------------------------------------------- |
| 3.64.0 | Less than | Less than |
| 3.65.0 | Equal | Equal |
| 3.66.0 | Greater than | Greater than |
| 3.100.0 | **Less than** ❌ | **Greater than** ✅ |
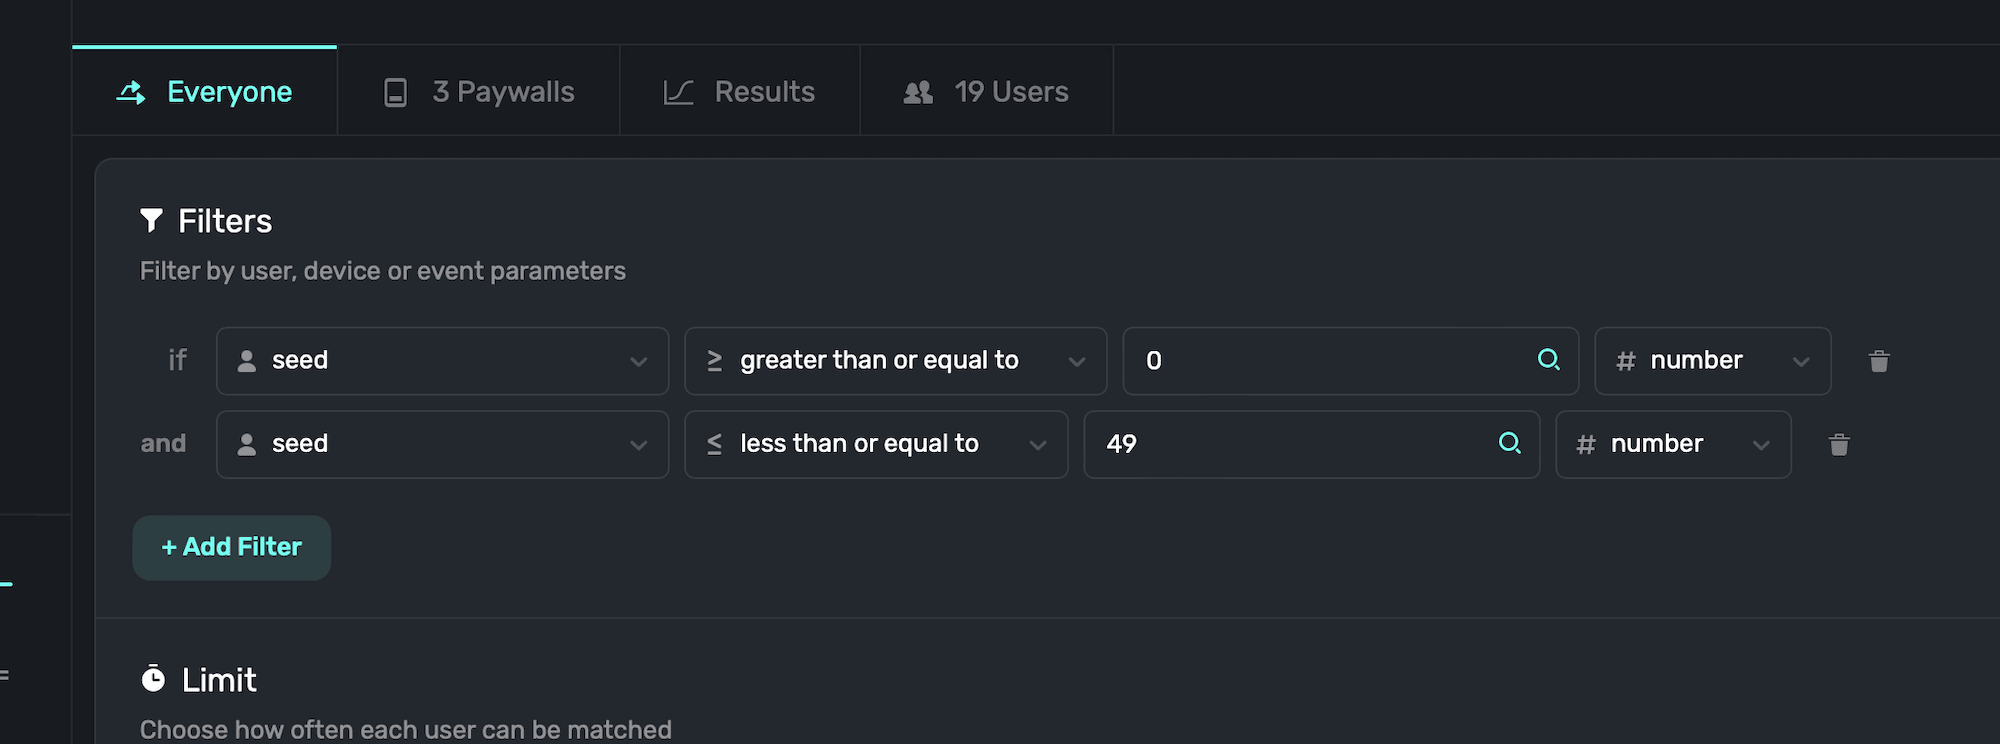
#### User seeds
One particularly useful property to filter by are *user seeds*, which are automatically assigned by Superwall to a user from 0-99. You can add them as a filter by entering `user.seed`. User seeds are primarily used to control entirely different user experiences across different campaigns.
For example, imagine testing whether showing a paywall early in onboarding or at the end of it works better for conversion:
**Campaign A: Placement early in onboarding**
For your audience filter, you could use user seeds 0-49.
Here's what that would look like when setting up the filter:
**Campaign B: Placement late in onboarding**
And here, you'd filter by user seeds 50-99.
Even though these are filters that were set up across two entirely different campaigns, you can still define certain user audiences without creating custom placements for each of them. Using user seeds, you can easily compare the campaign results, too.
# Paywalled Users
Source: https://superwall.com/docs/campaigns-paywalled-users
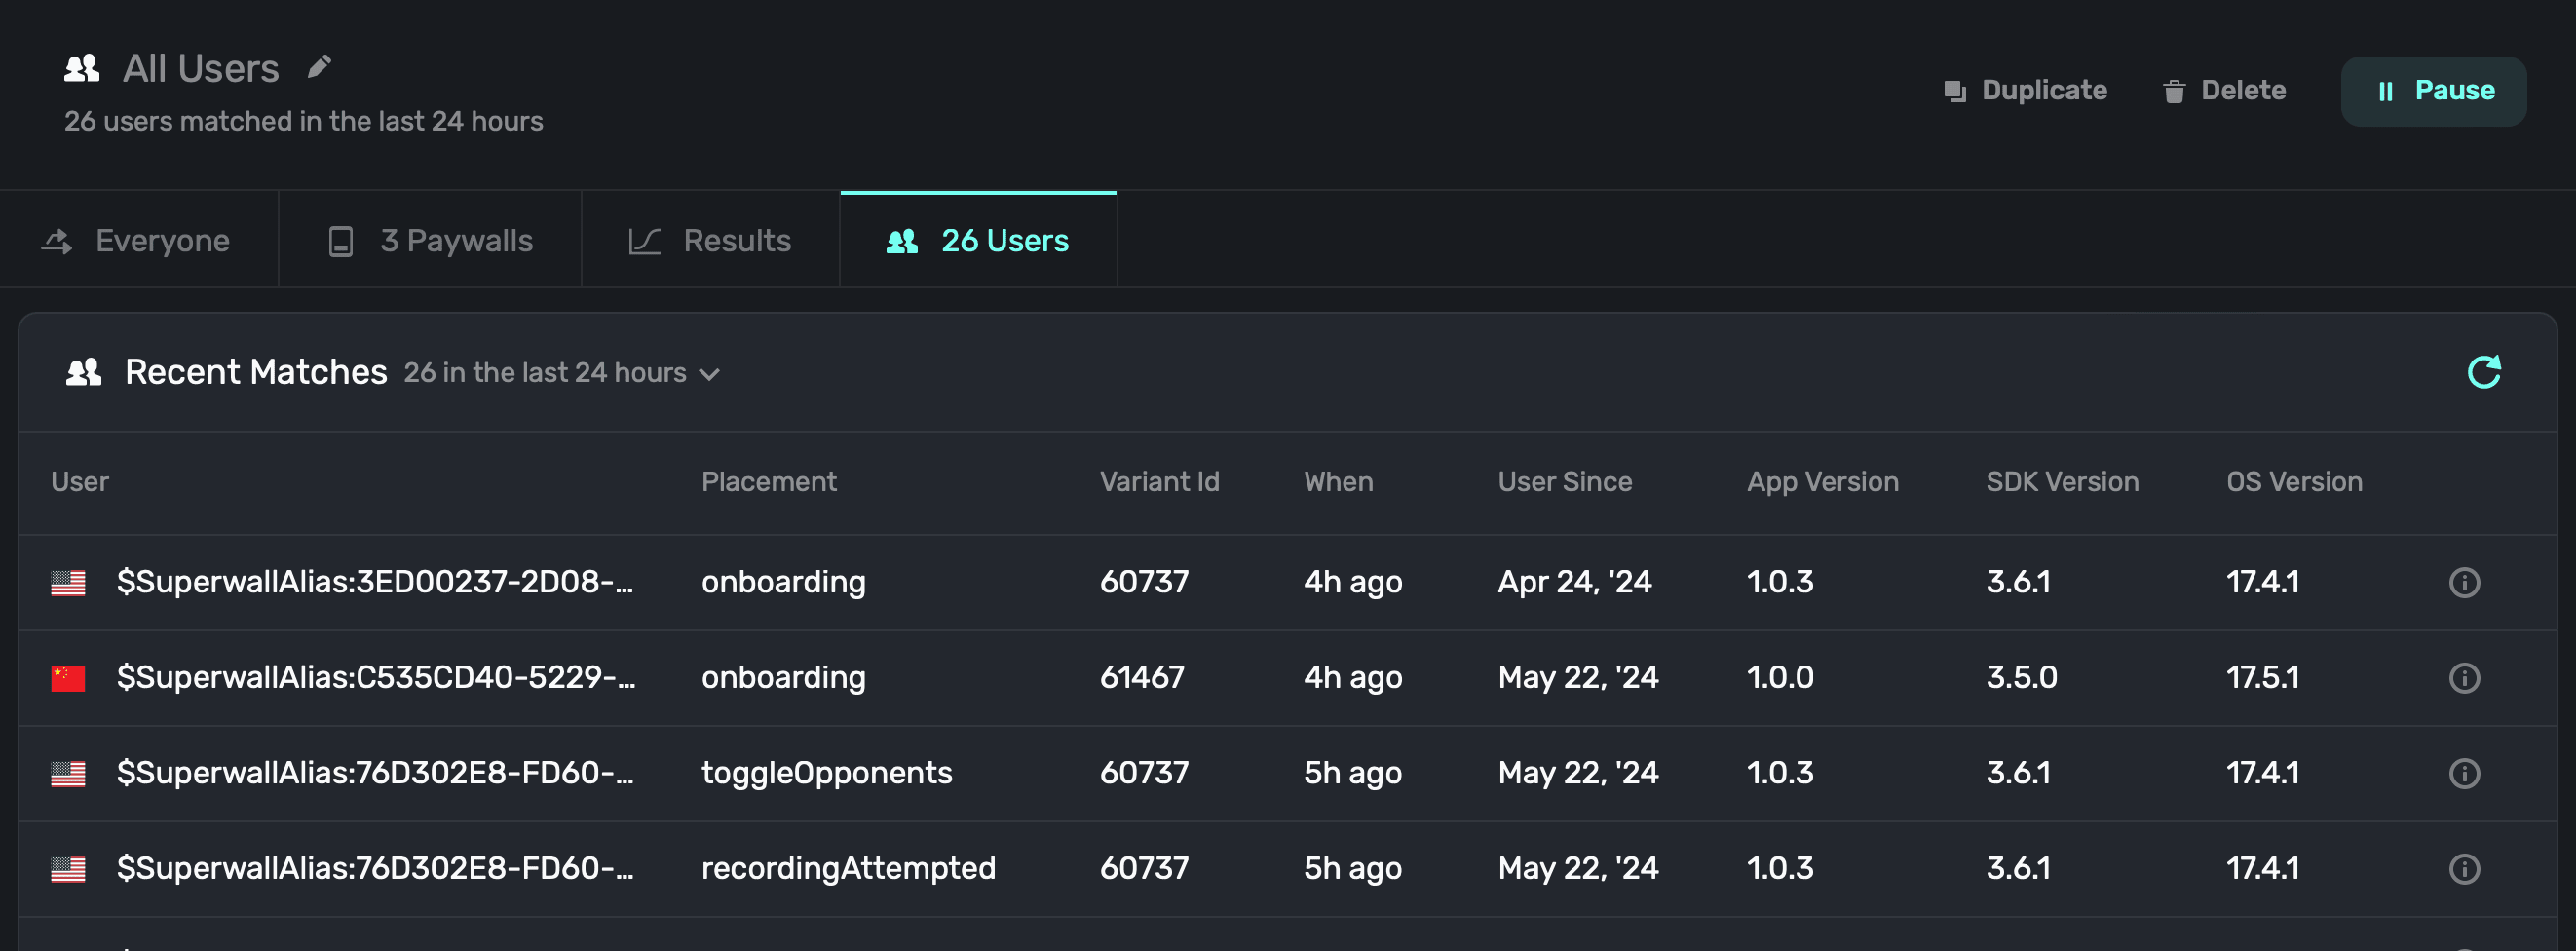
Paywalled users are users that have been presented a paywall from the selected audience. To see recent matches from your audience filter and its resulting transactions, **click** on the **Users** tab above the campaign details:
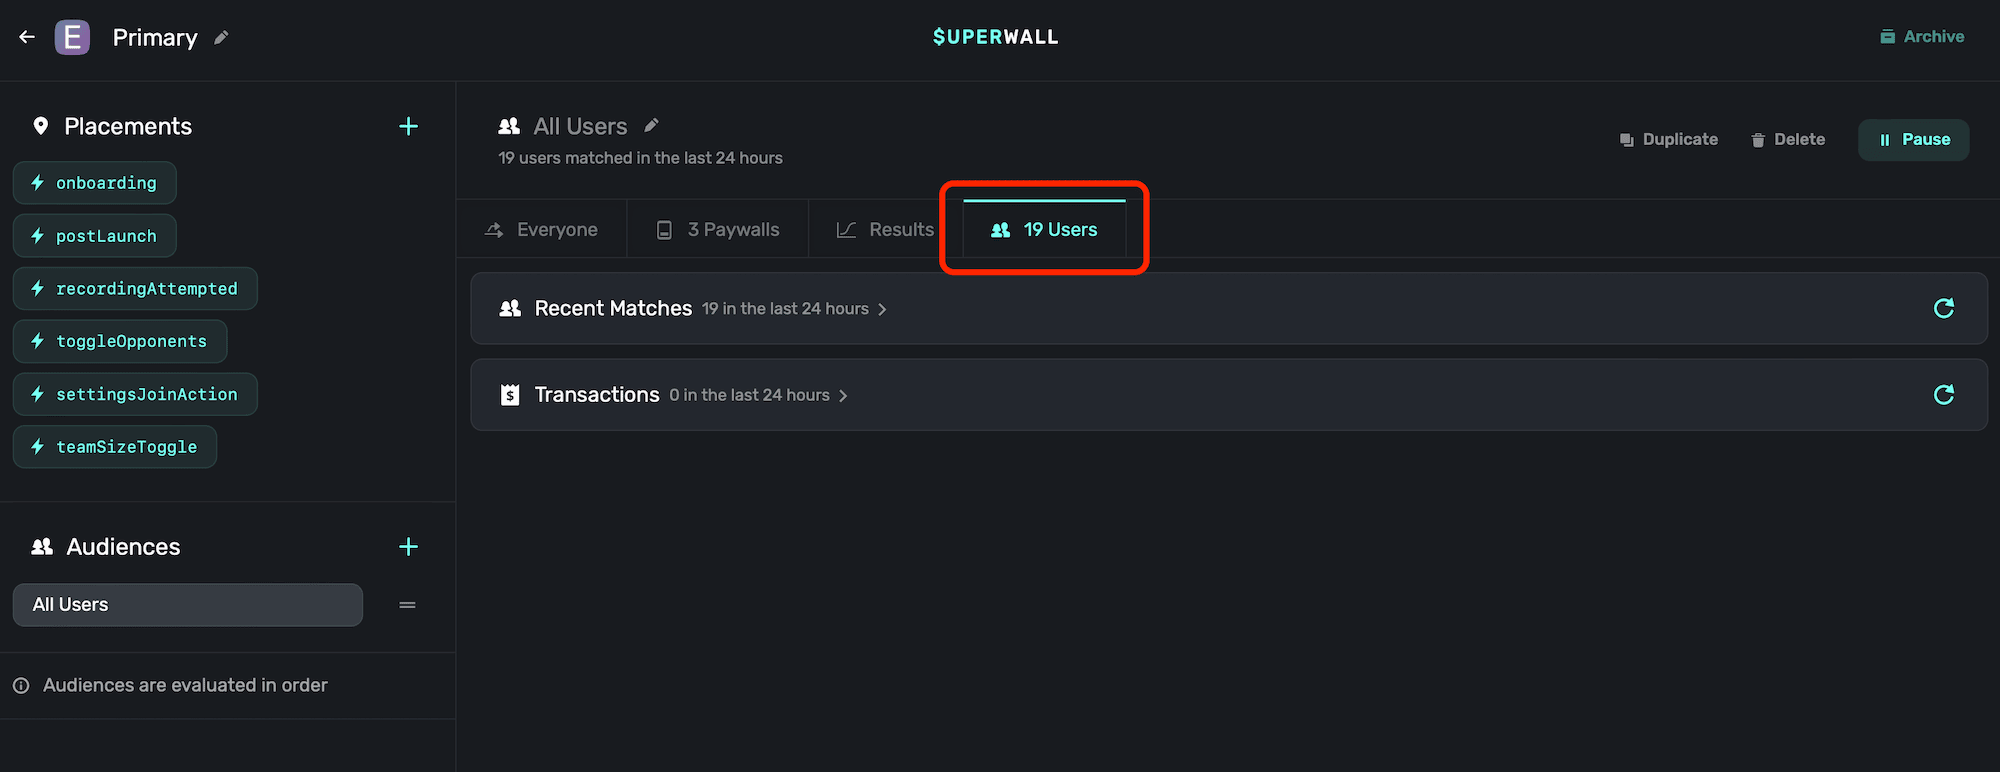
You'll find two main sections:
1. **Recent Matches:** Here, you'll see every user which matched your audience filter.
2. **Transactions:** Next, this displays any resulting transaction which occurred within the audience.
Note that both Recent Matches and Transactions show the [placement](/campaigns-placements) which
triggered the match or transaction. This is incredibly useful in helping you gauge which actions
are resulting in conversions.
### Recent matches
Recent Matches show you each user, their locale, and the placement which matched them to your selected audience (among other data) from the last 24 hours:

You can click on any user to see more details about them, including the history of the actions they took. You can also filter events by Superwall-managed events, your own app events and more:
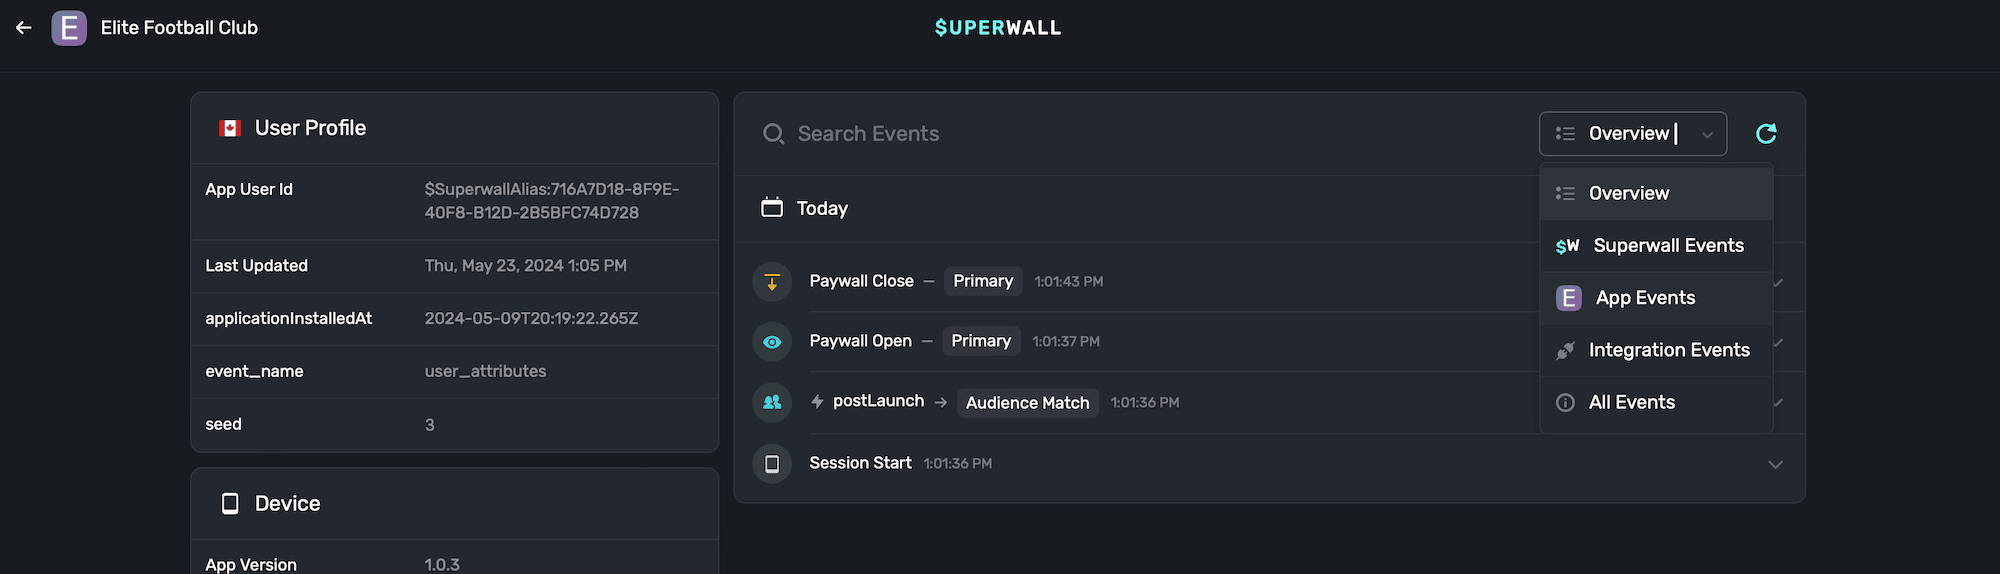
For more on viewing users, check out this [doc](/overview-users).
### Transactions
The transactions shows all transactions which came from the campaign in the last 24 hours:
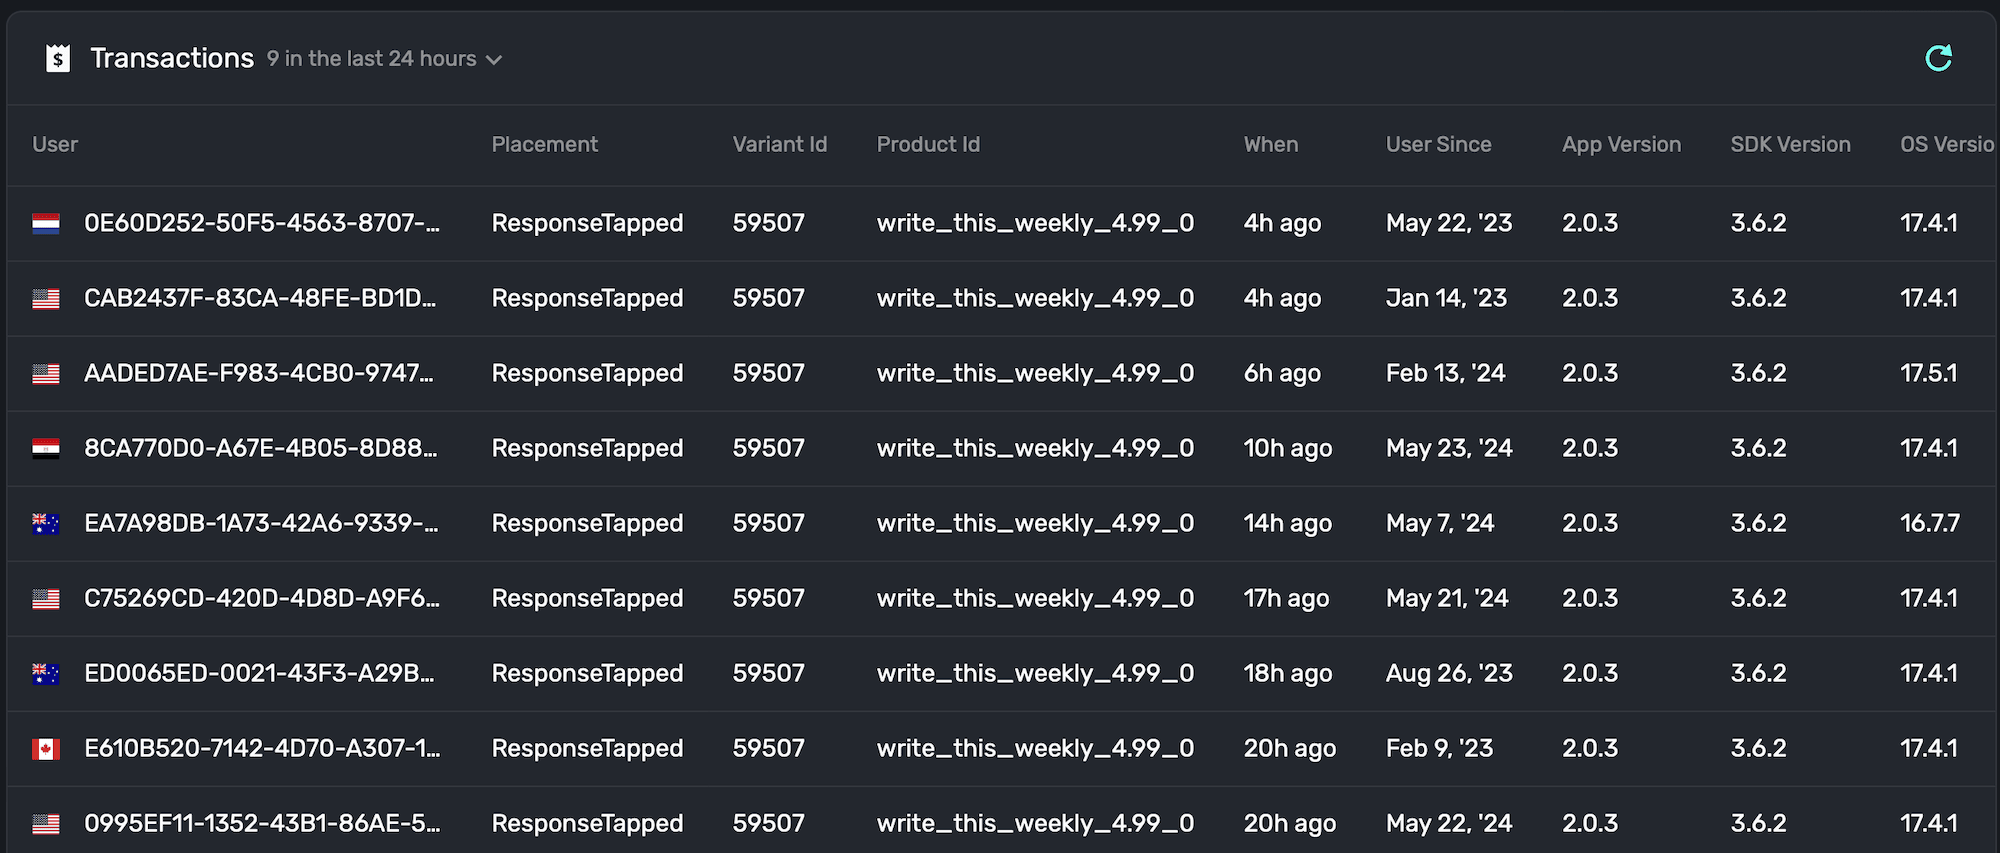
You can click on any user here, too, to see more details about them. Again, take note of the placements here — because they were directly linked to a conversion.
# Placements
Source: https://superwall.com/docs/campaigns-placements
Placements are the building blocks of a campaign. There are two types of placements:
1. **Standard placements:** These are placements you can use which Superwall already tracks and manages for you. Things like app installs, session start, failed transactions and more. We go into more detail about them [here](/campaigns-standard-placements).
2. **Placements you create:** These are app-specific placements you create. They usually correlate to some "pro" action in your app, like "chartsOpened" or "workoutStarted" in a weight lifting app.
At their core, you register placements that, in turn, present paywalls. They can be as simple as that, or you can combine them with [audiences](/campaigns-audience) to create specific filtering rules to control paywall presentations, create holdouts and more.
To see how they work with our SDK, check out the [docs](/feature-gating). For a quick example, here's what it looks like on iOS:
```swift
Superwall.shared.register(placement: "caffeineLogged") {
// Action to take if they are on a paid plan
}
```
**Don't be shy about adding placements.** If you think you *might* want to use a certain feature in your app with a placement — do it now. You can add the placement, and keep it paused. Then, if you ever want to feature-gate that particular flow, you can enable it. No app update required.
In short, add placements for everything you want to feature gate, and things you may *want* to in the future.
### The placements interface
Under the placements section, you can:
* **Add** new placements.
* **Pause** running placements.
* **Delete** existing placements.
#### Adding a placement
To add a placement, **click** the "+" button in the top-right side of the placements section:
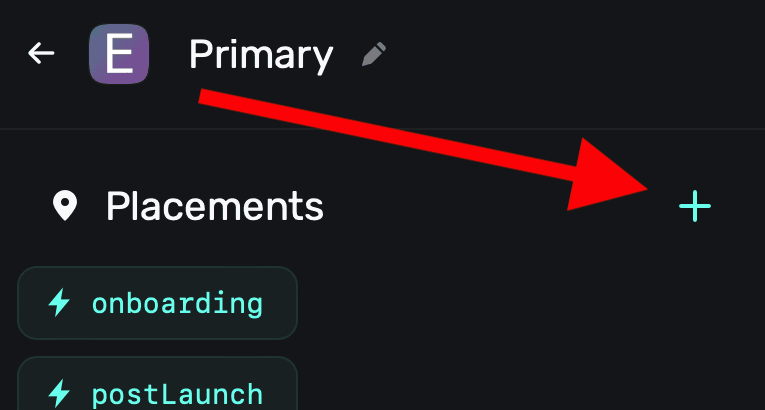
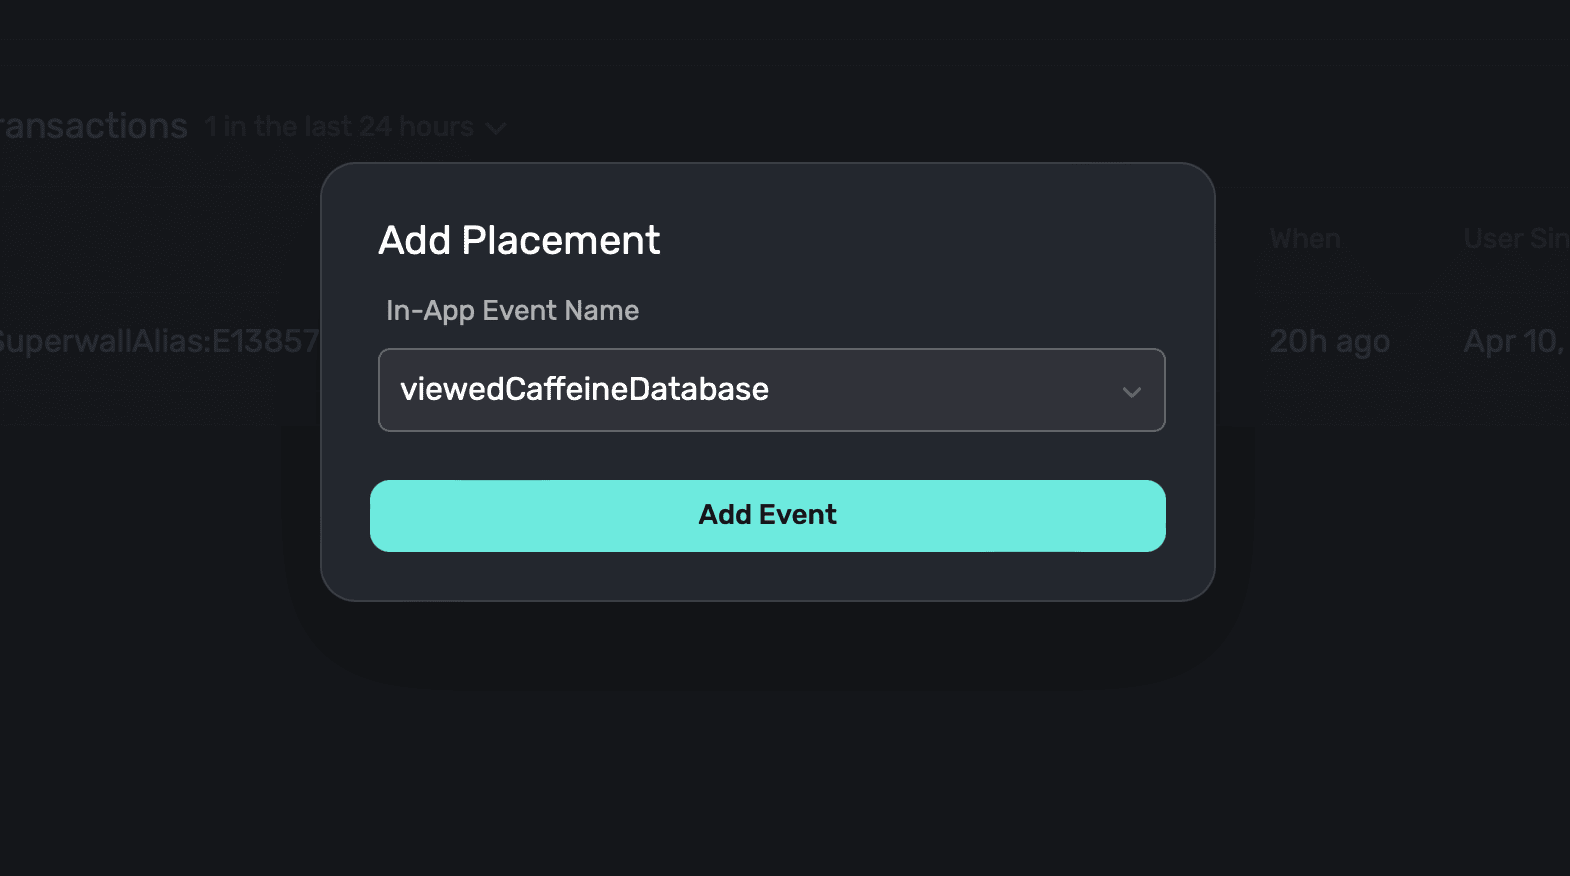
A modal will appear, and from there you can add a placement via two different means:
1. **Use an existing Superwall event:** Superwall automatically manages several events that can be used as placements. For example, the `survey_response` event could be used to show an entirely different paywall with a discounted offering if a user responded with a particular answer. See the [list](/campaigns-standard-placements) of the Superwall-managed events to learn more.
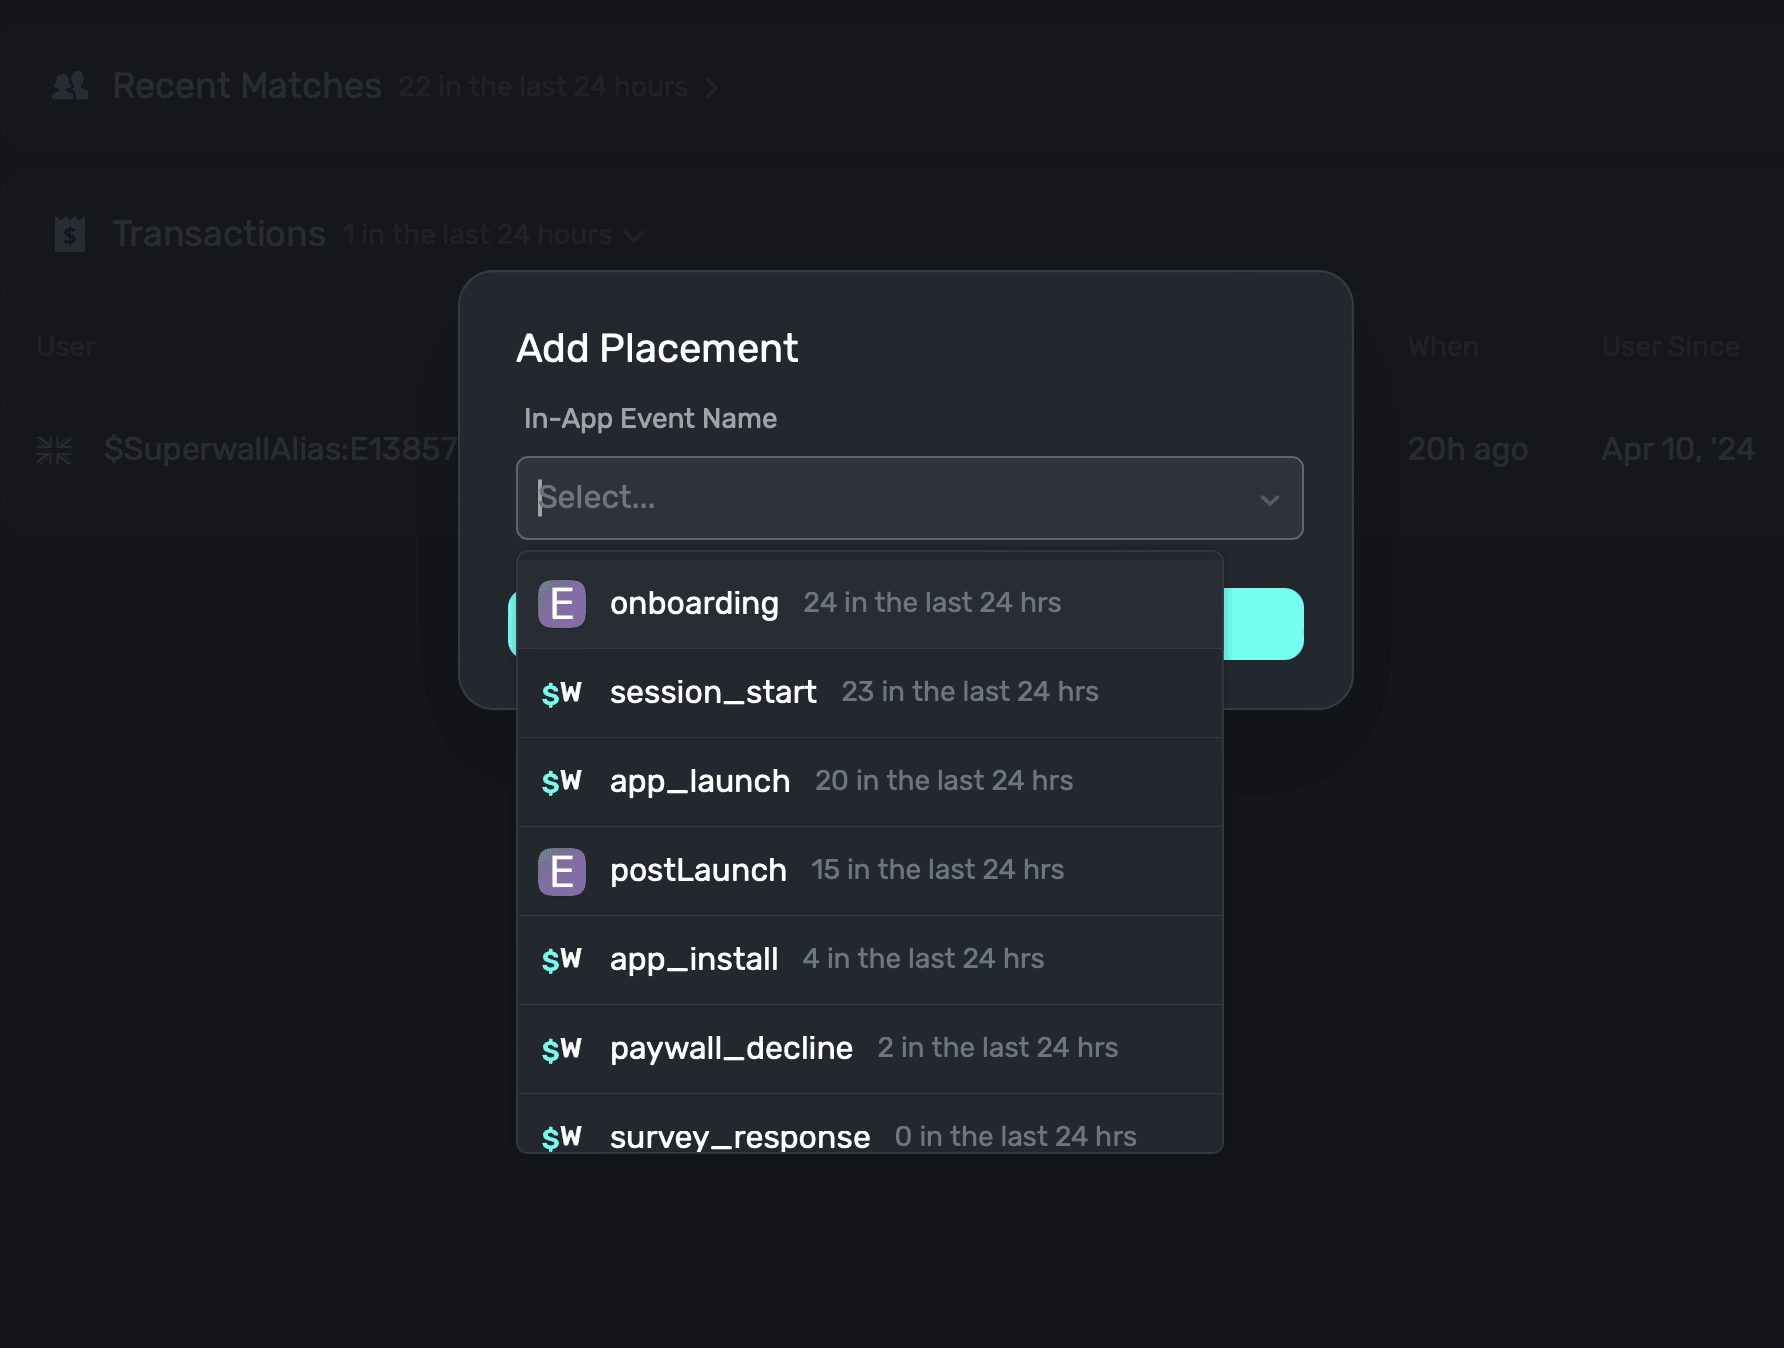
2. **Create your own, app-specific placement:** Here, you type in whatever event you want to use as a placement in your own app. In a caffeine tracking app, one of them might be when a user logs caffeine — something like `caffeineLogged`.
Either way, once you've selected one from our existing events or typed in your own, **click** on **Add Event** to associate the placement to your campaign:
You can also add placements "on the fly" by invoking `register(placement:"myNewPlacement")`. If
the placement you pass doesn't exist for a campaign, Superwall will automatically add it.
### Basic example of placement usage
Consider a caffeine tracking app. At a basic level, we want a paywall to show when a user tries to log caffeine, and they are not on a "pro" plan:
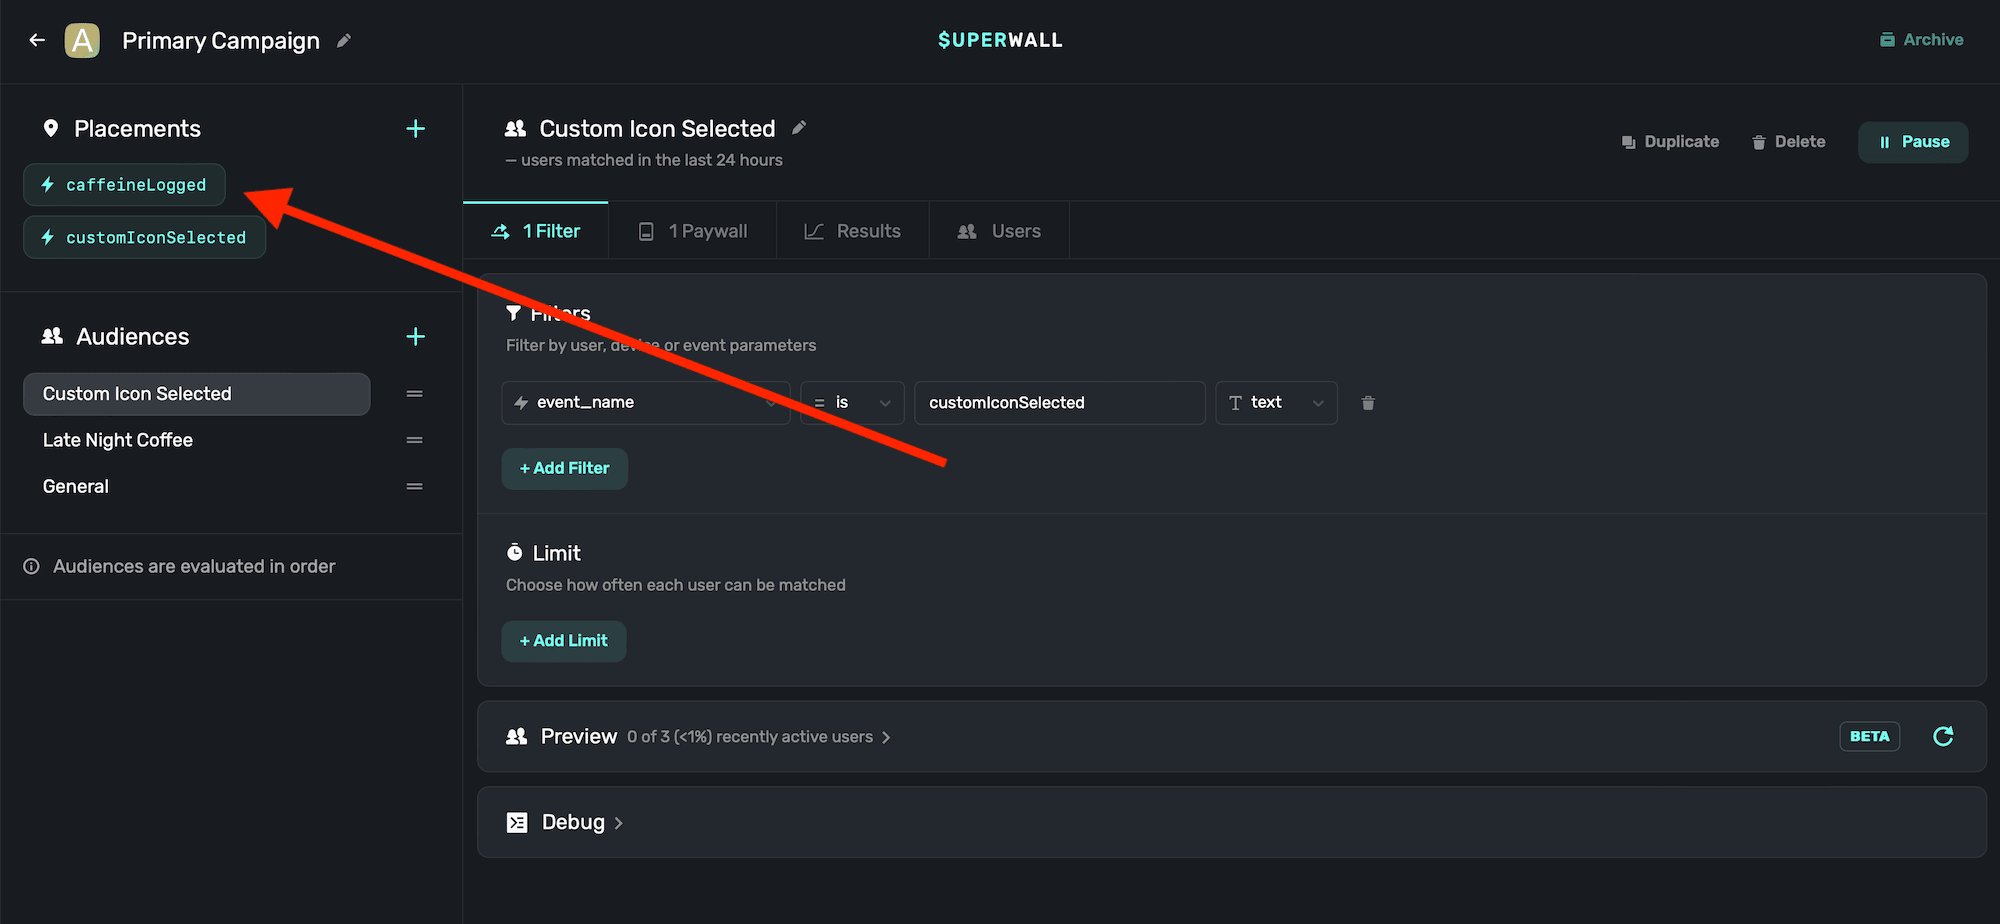
#### Step One: Make the placement
We'd make a placement called `caffeineLogged` inside a campaign:
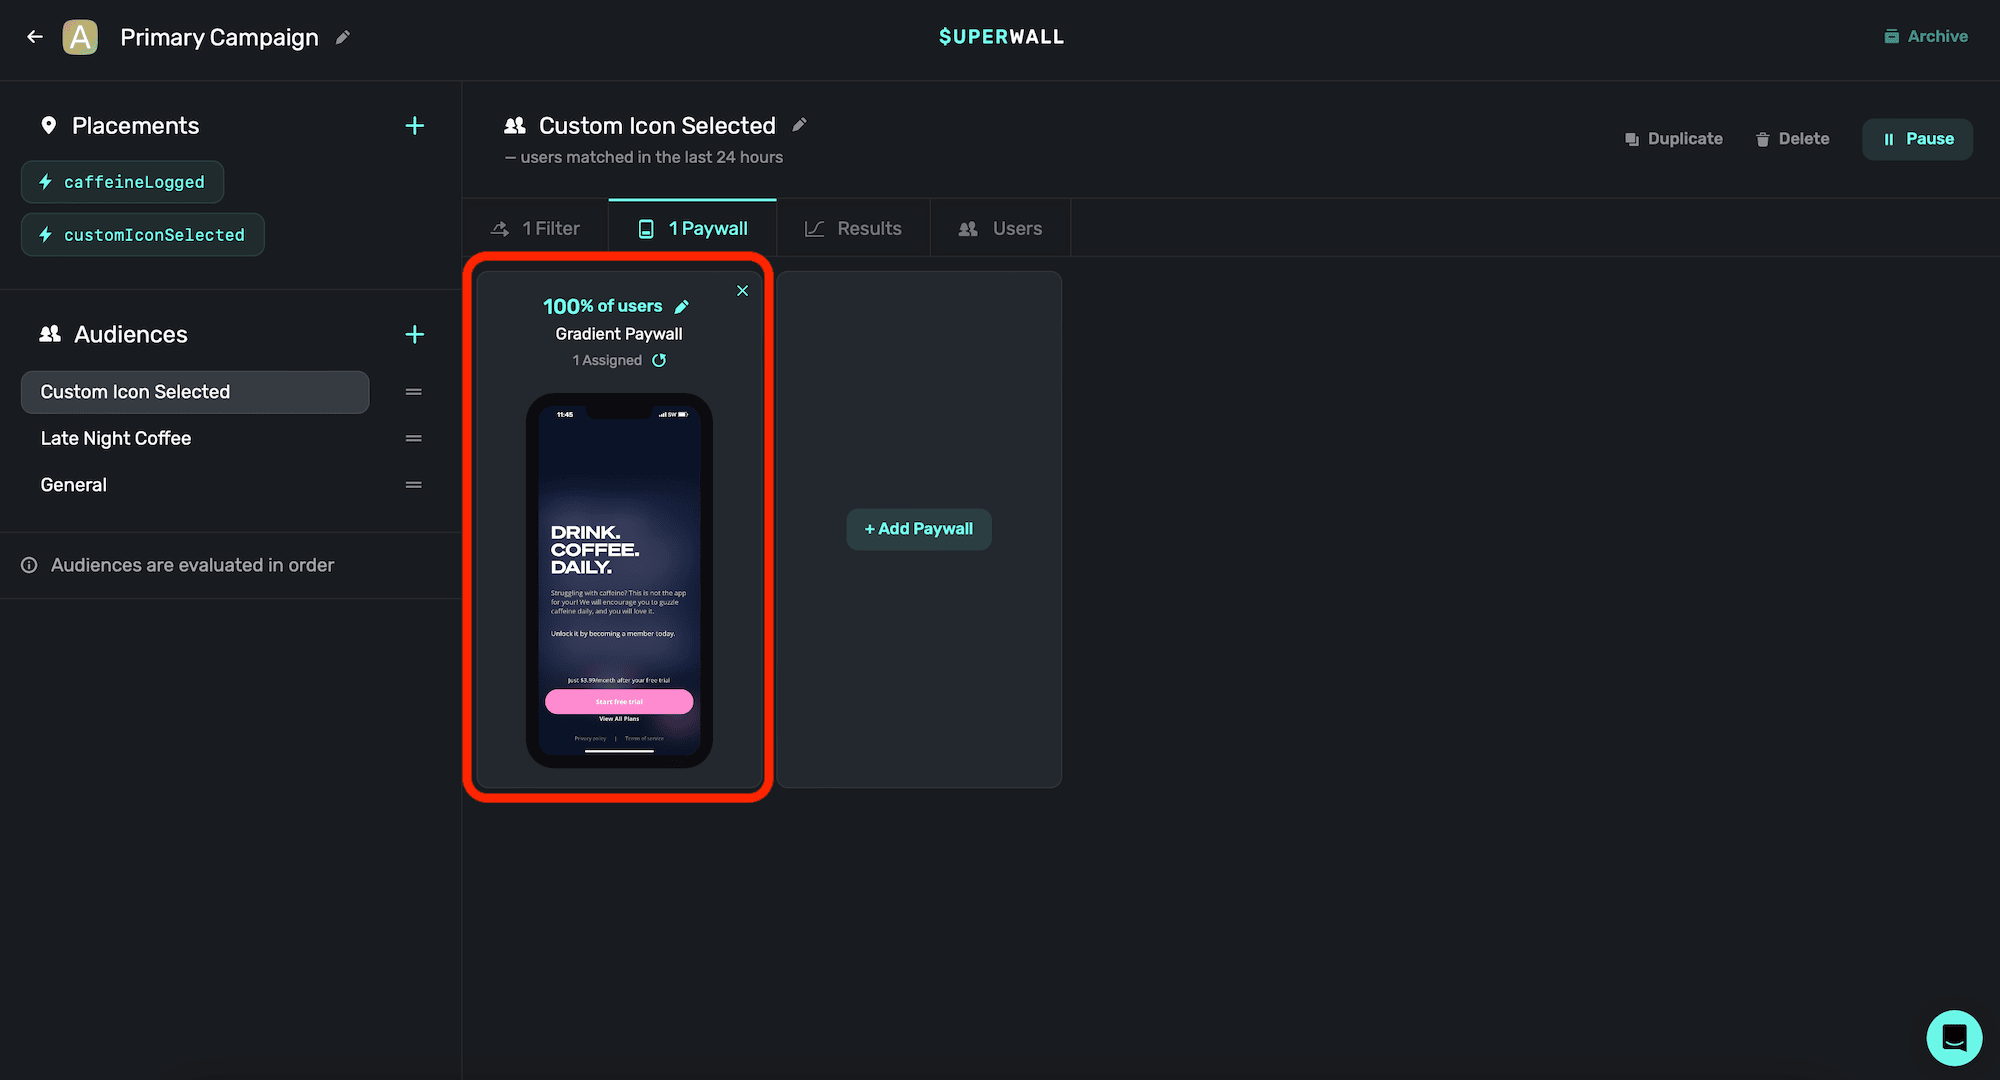
#### Step Two: Assign a paywall
You can use the same paywall across different campaigns, placements, filters and more. In our case, we have one that we to show. So, since this campaign has a paywall linked to it already — we are good to go:
#### Step Three: Register inside our app
Inside our caffeine tracking app, when the user taps a button to log caffeine, we would register the `caffeineLogged` event. This way, if the user is pro, the closure is called and the interface to log caffeine is shown. If they are not pro, then our paywall will show:
```swift
Button("Log") {
Superwall.shared.register(placement: "caffeineLogged") {
presentLogCaffeine.toggle()
}
}
```
And that's it!
Remember, you can pause placements at any point. So here, if you wanted to run a campaign where
logging caffeine was free for a weekend — no update would be required. Just tell your users, and
pause the placement in your Superwall dashboard. No app update required.
There are also several out-of-the box placements you can use, learn more about standard placements [here](/camapaigns-standard-placements).
# Standard Placements
Source: https://superwall.com/docs/campaigns-standard-placements
Standard placements are events that Superwall automatically manages. The following [Superwall Events](/tracking-analytics) are registered by the SDK and can be added as placements in campaigns to present paywalls:
* `app_install`
* `app_launch`
* `deepLink_open`
* `session_start`
* `paywall_decline`
* `transaction_fail`
* `transaction_abandon`
* `survey_response`
* `touches_began`
Visit [Superwall Events](/tracking-analytics) to see a full list of parameters that you can use with these events. Here are a few examples of how they might be used:
#### Using the `paywall_decline` event
This is registered when a user manually dismisses any paywall. You can combine this with rules to show a paywall when a user closes a specific paywall. First, [add](/campaigns-placements#adding-a-placement) the standard placement to a campaign:
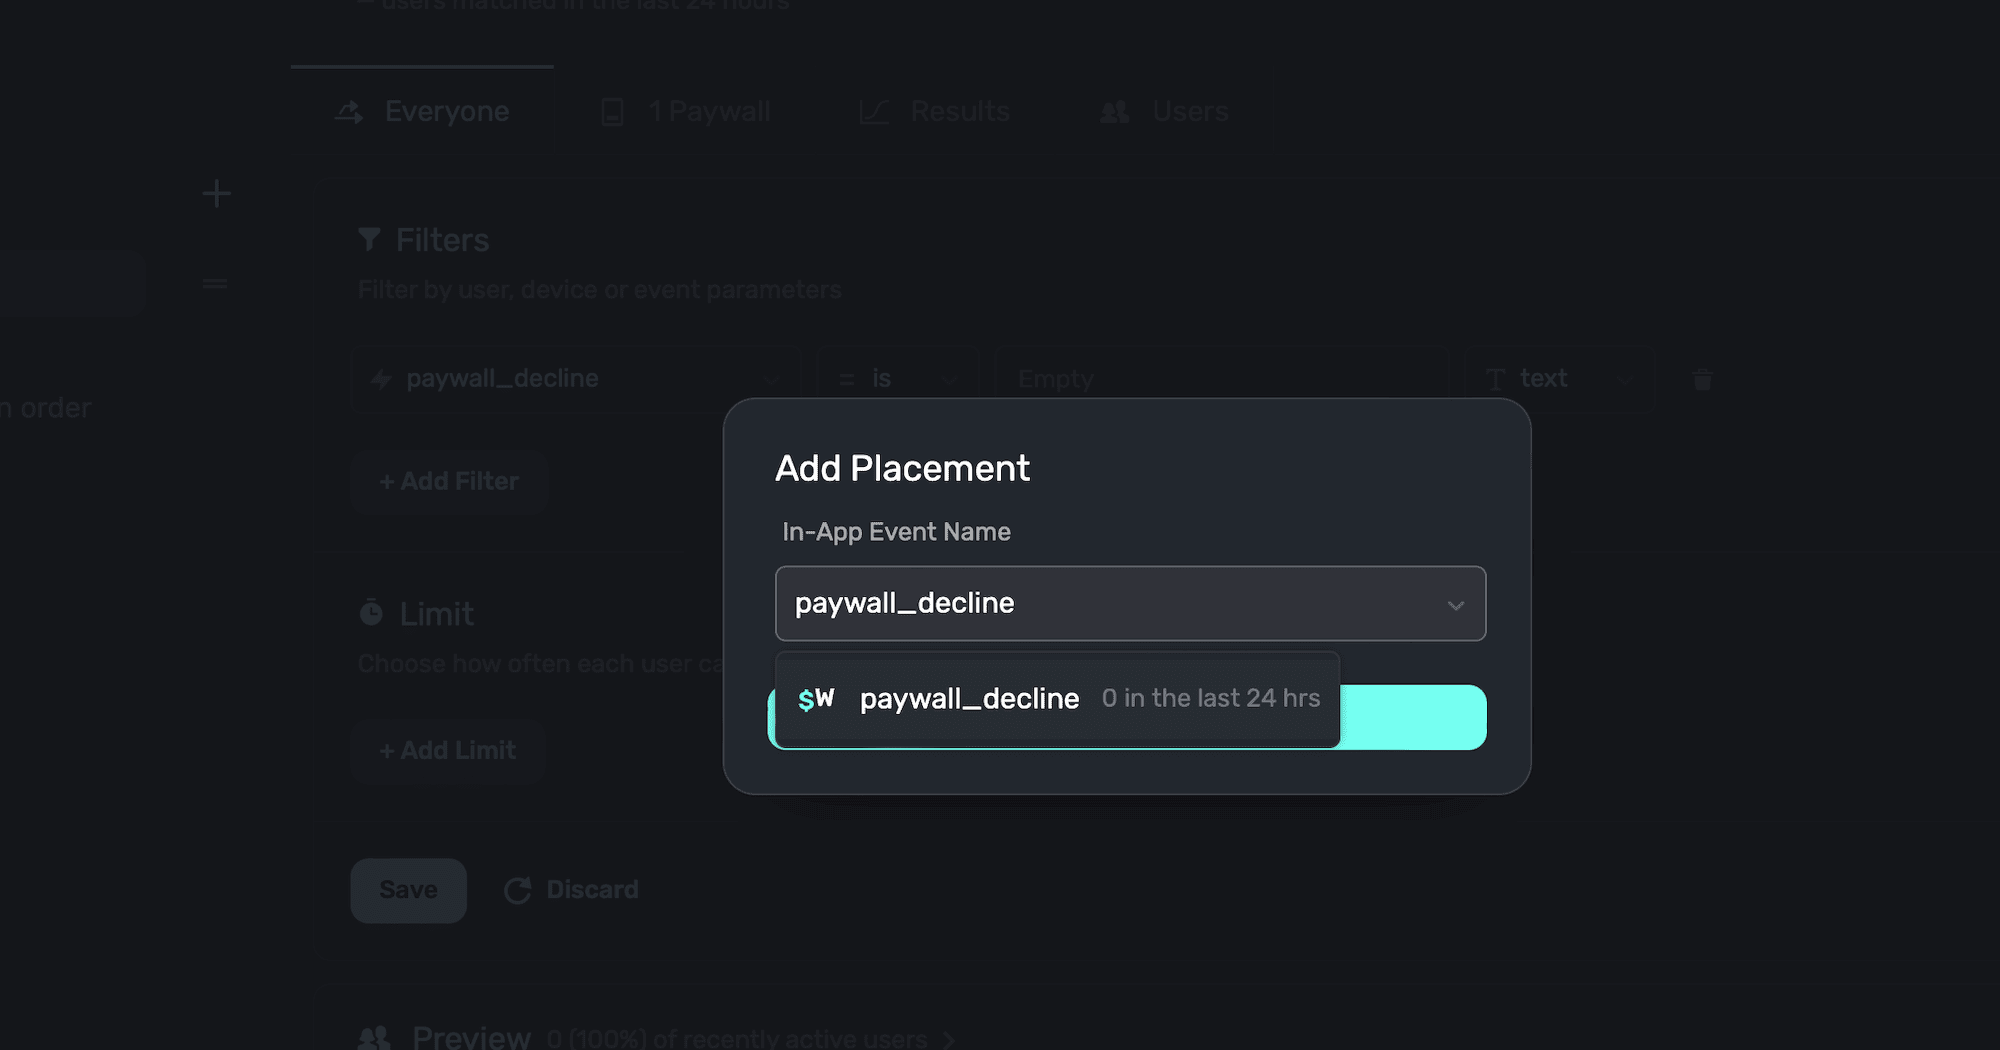
Then, create a filter in the audience using it:
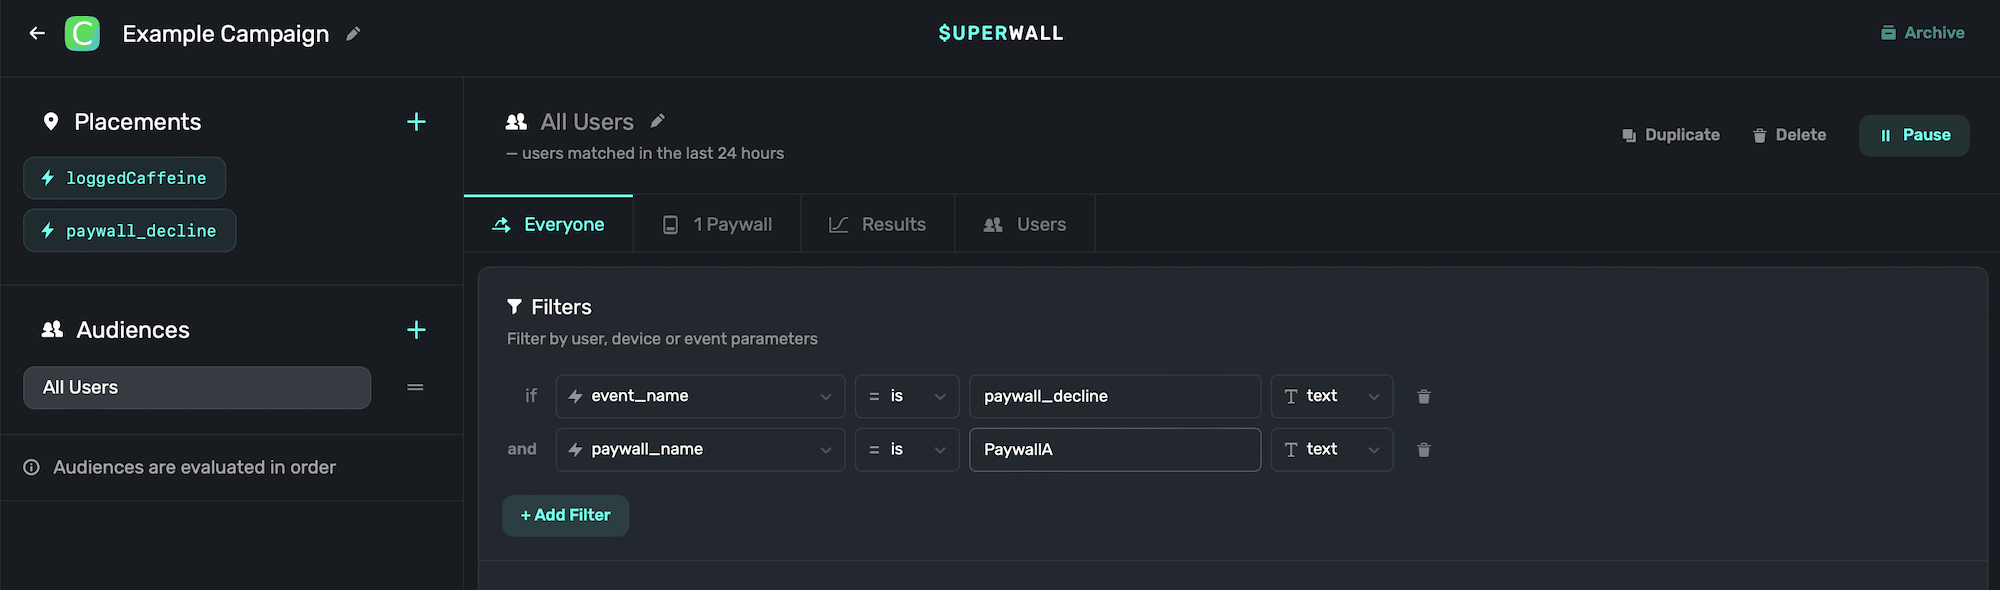
Here, when a user closes the paywall named `PaywallA`, a new paywall will show.
Note that you can't reference parameters that you've passed in to your original register call in your rules for `paywall_decline`.
#### Using the `survey_response` event
This is registered when a response to a paywall survey has been recorded. First, you need to make sure your paywall [has a survey attached](/surveys).
You can combine this with rules to show a paywall whenever a survey response is recorded or when the user gives a specific response. Again, [add](/campaigns-placements#adding-a-placement) the standard placement `survey_response` to a campaign. Then, add another condition using `survey_selected_option_title` that's equal to the text of a particular response.
For example, if the user selected a survey option named `Too Expensive`, you could present another paywall with a discounted option. This is a great opportunity to show a discounted paywall to improve your conversion rate.
#### Using the `deepLink_open` event
This is registered when a user opens the app via a deep link. First, you need to make sure to [tell Superwall when a deep link has been opened](/in-app-paywall-previews).
You can use the URL parameters of the deep link within your rules. Just [add](/campaigns-placements#adding-a-placement) the standard placement `deepLink_open` to a campaign. Then, you could set up a filter that fires based off of its parameters along with a `params.path` rule to see if its a certain path you've setup.
For example, you could make three conditions to match this deep link: `myapp://paywall?offer=July20`. Here's how:
1. Add the a rule to see if the event is `deepLink_open`. See the [first example](/campaigns-placements#using-the-paywall-decline-event) above using `paywall_decline` to see how to do this.
2. Add `params.offer` is equal to whatever you've made, like `July20` for a timeboxed offer you made in that month.
3. Then, you'd also add `params.path` is equal to the text of a path you setup, like `paywall`.
# Starting an Experiment
Source: https://superwall.com/docs/campaigns-starting-an-experiment
You run experiments in Superwall by adding multiple paywalls to an audience. To start an experiment:
1. Select an audience.
2. Click the Paywalls tab.
3. Add two or more paywalls.
Here's a .gif, beginning to end, setting up an experiment:
It's as simple as that to start a paywall experiment.
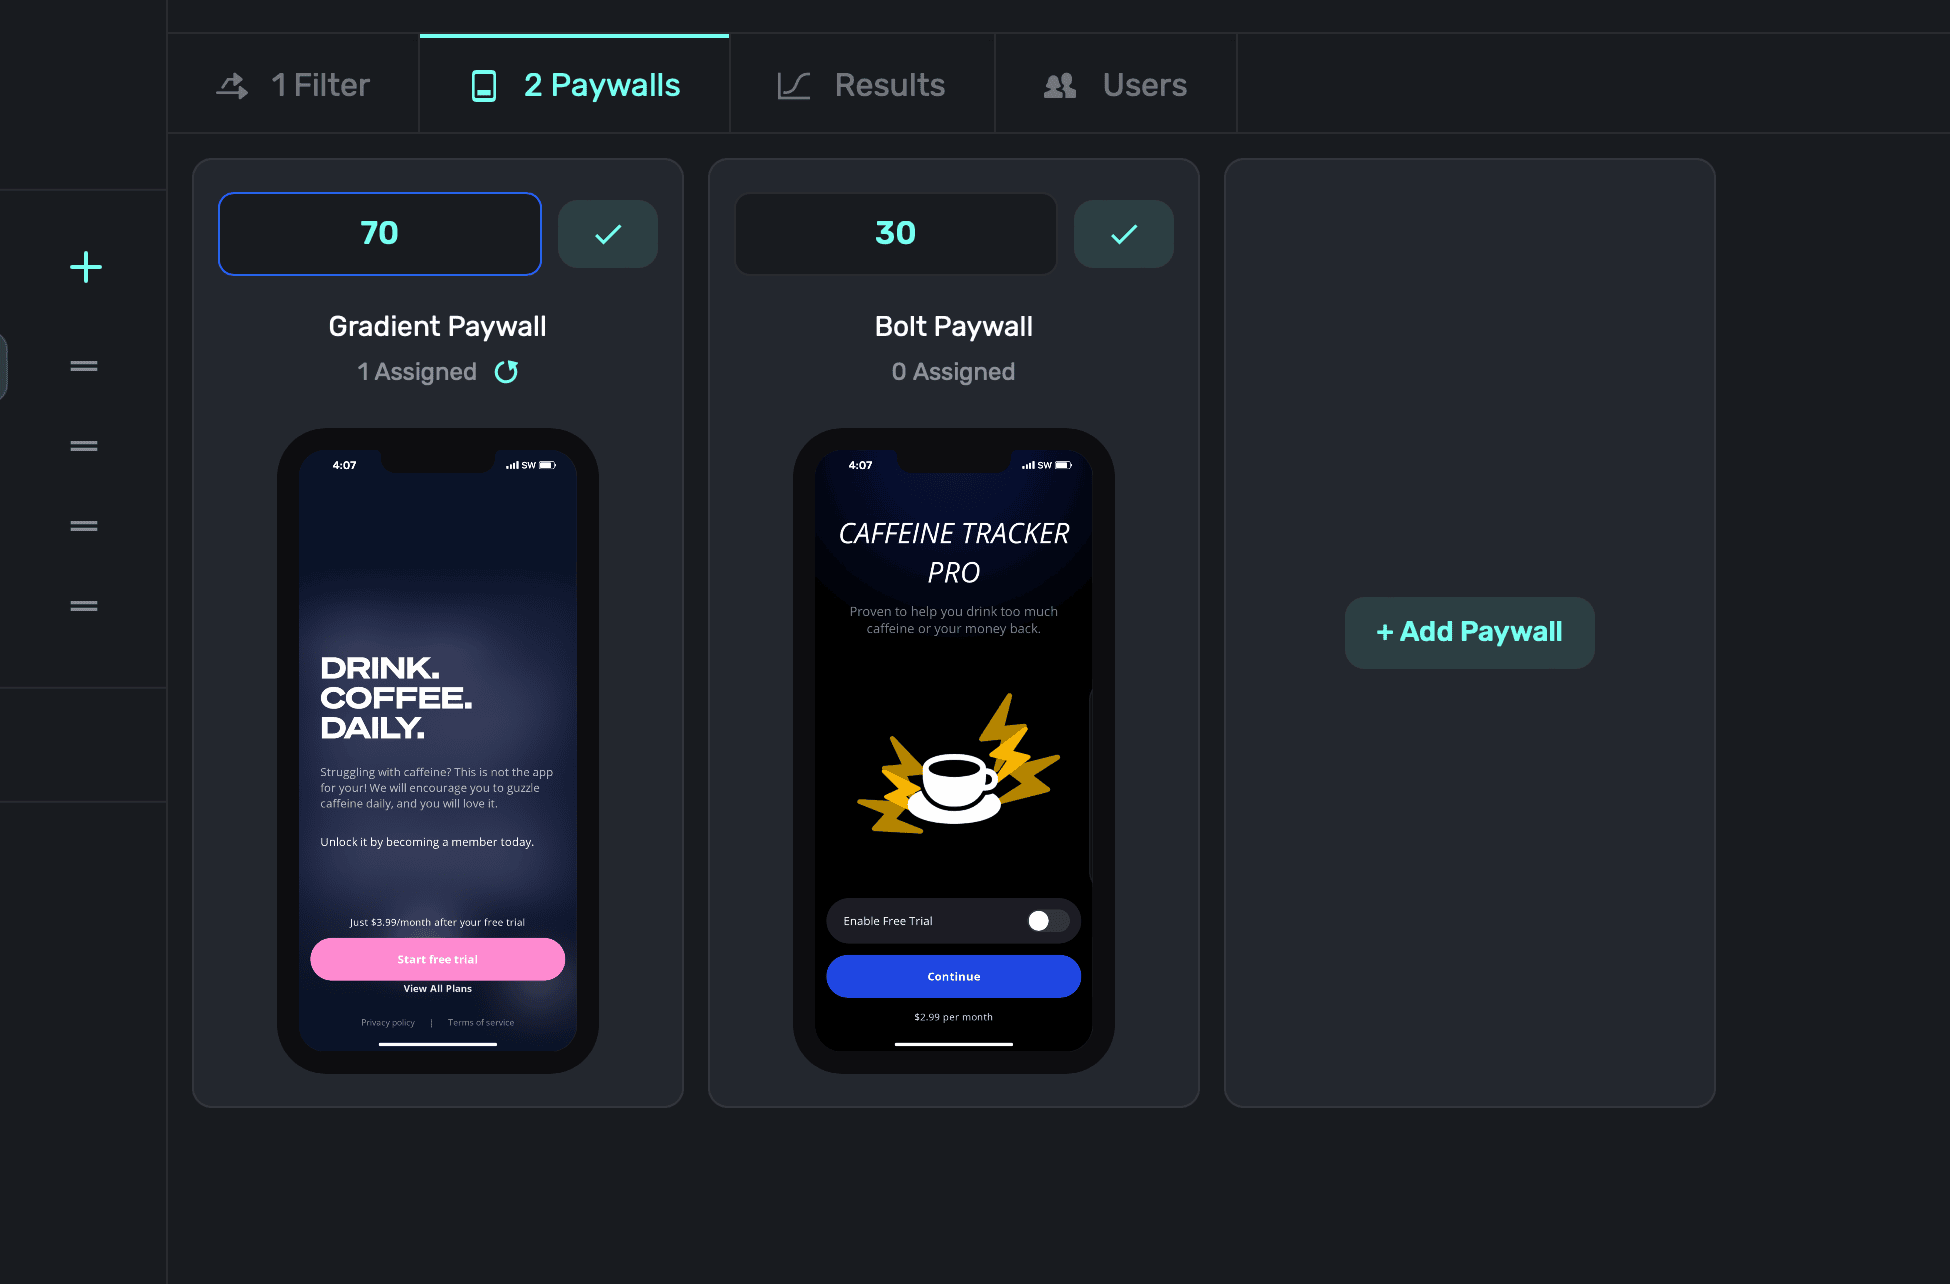
### Setting presentation percentages
You must set a presentation percentage between your paywalls within the experiment. This determines how often they'll show based off of the percentage set for each one.
To set a percentage, **click** the **pencil icon** above *any* of the paywalls attached to the audience:
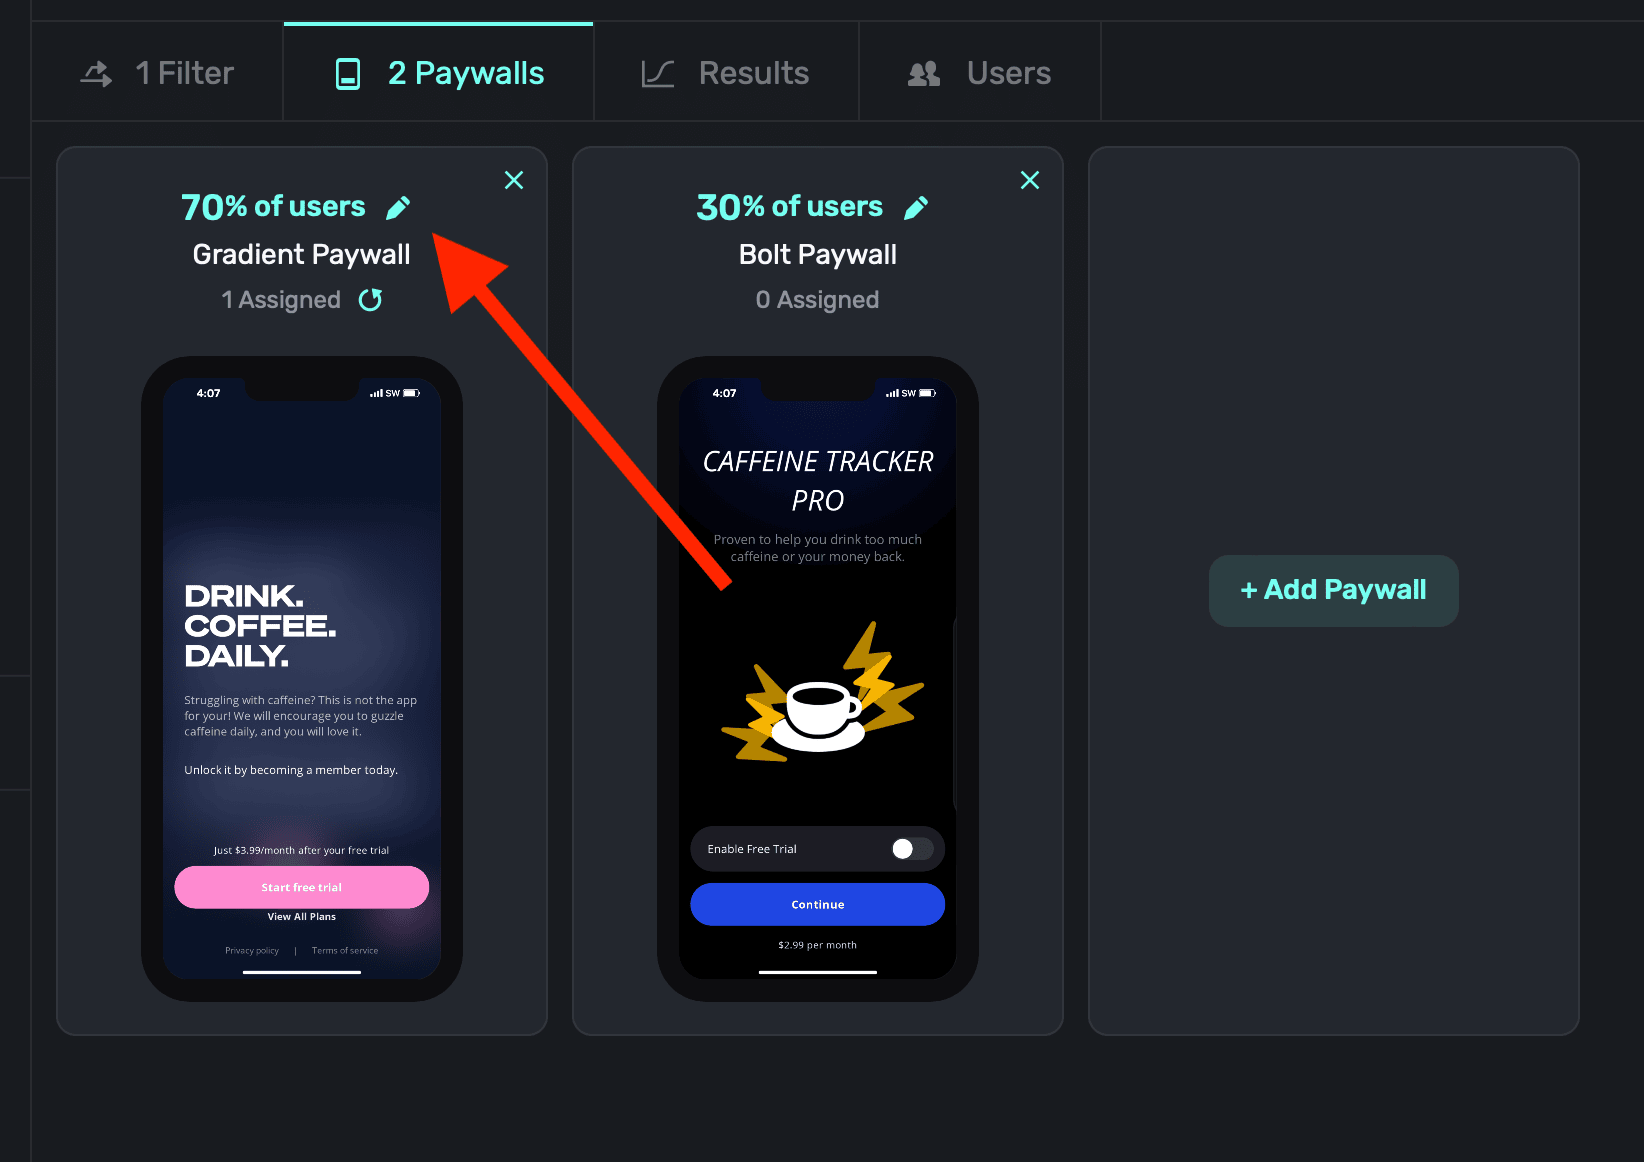
Then, assign percentages from 0%-100% for each of them. In total, your percentages should equal 100 (i.e. paywall A shows 10%, paywall B shows 30%, and paywall c shows 60% of the time) unless you're purposely creating a [holdout](/campaigns-starting-an-experiment#creating-holdouts). When you're done, **click** the **Checkmark** icon below any paywall:
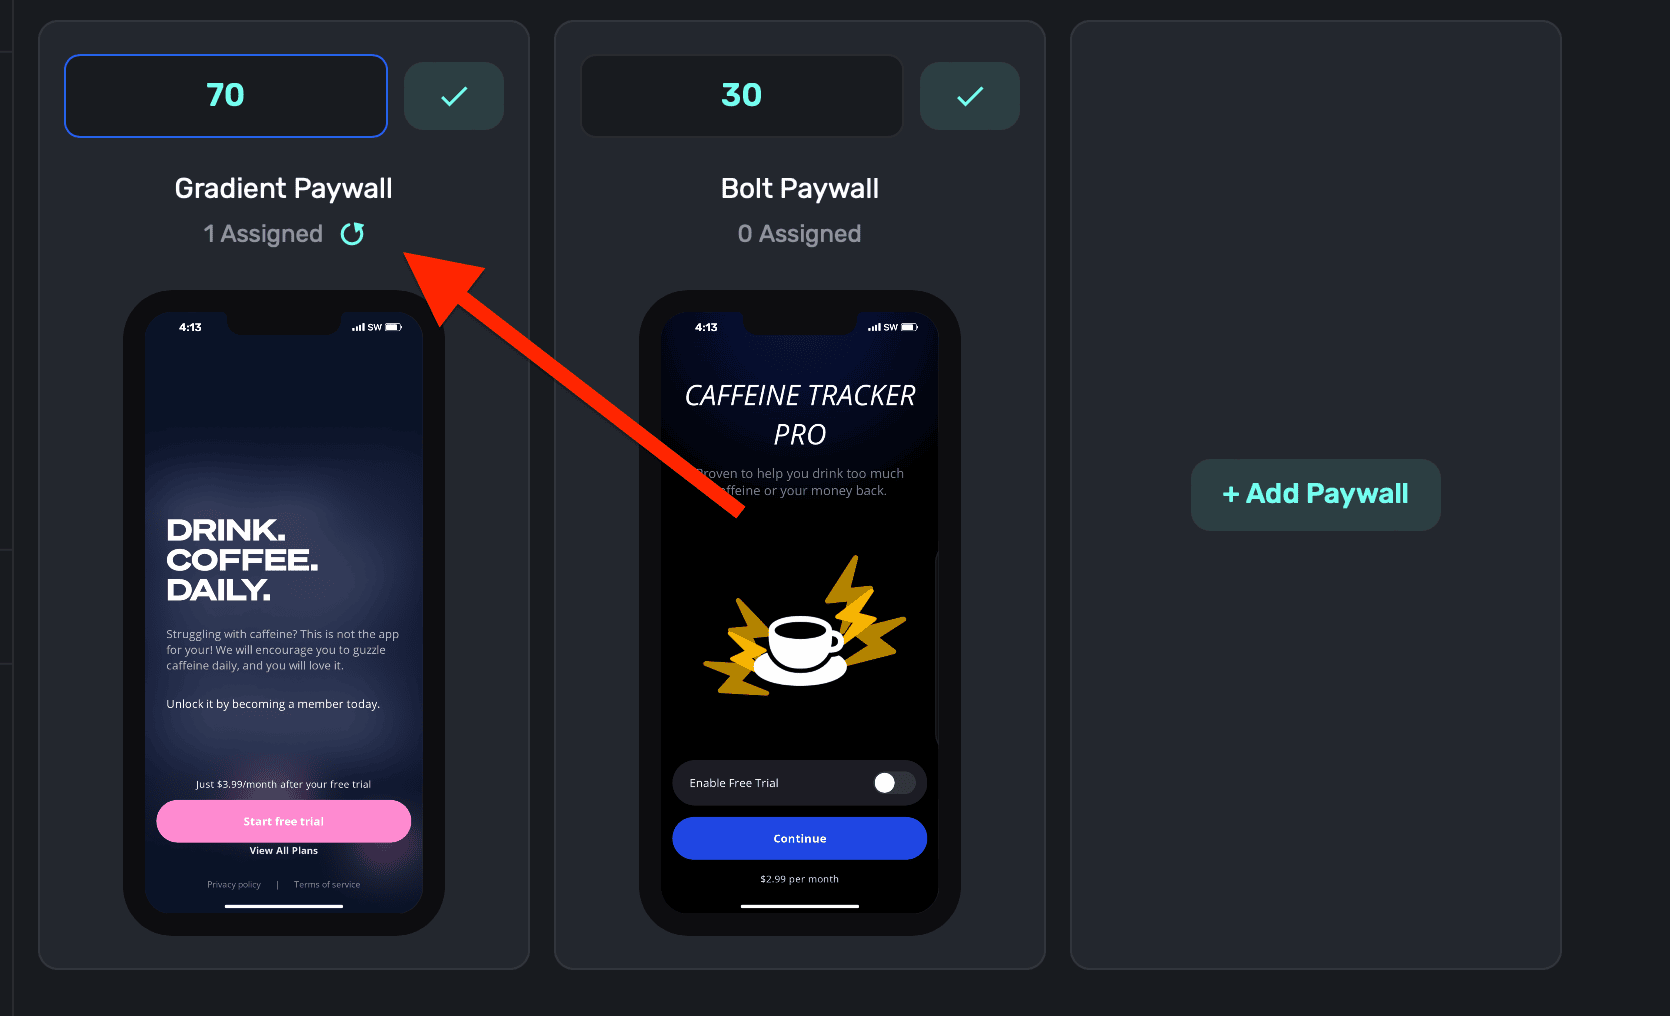
### Resetting assignments
If you change your experiment, or simply want to change the presentation percentages between your paywalls, you might want to reset your assignments. Remember that when an audience matches a user, it's *sticky* — and the same is true of when someone is matched to a paywall within an experiment.
So, if you want to make sure everyone is matched again to a paywall based off new percentages, **click** the refresh button below a paywall when editing percentages (next to where it says "X assigned"):
Resetting assignments also resets the stats for the experiment.
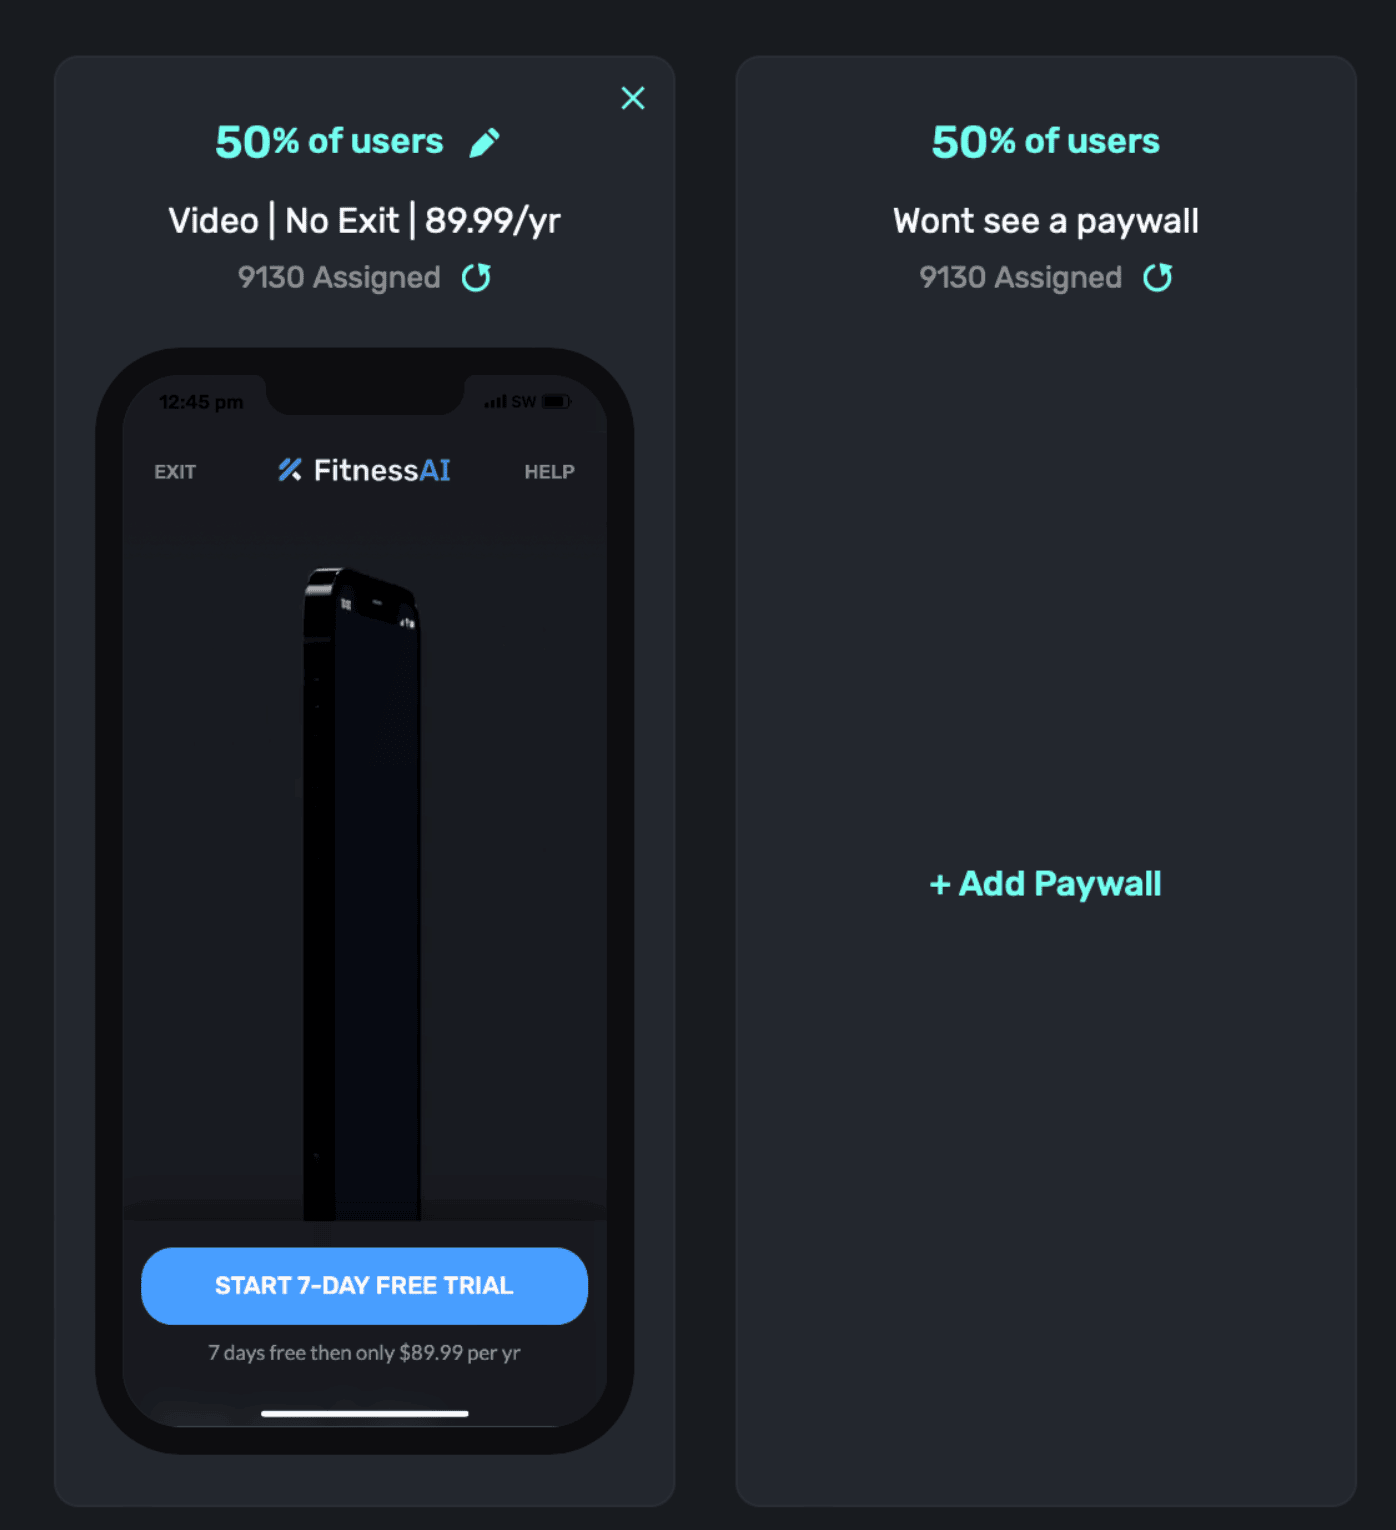
### Creating holdouts
A *holdout* occurs when you purposely edit an audience to *not* present a paywall in some cases. Setting a holdout is useful when you want to test the effectiveness of showing a paywall.
**To create a holdout, set your paywall presentation percentages to be less than 100% across all of the paywall you're using.**
Here's an example of one paywall set to show 50% of the time, meaning the other 50% of users who match this audience will be in a holdout:
It's common to pair holdouts to certain [placements](/campaigns-placements) to see whether a holdout increases or decreases transactions. The holdout group will act as a control which you can compare against.
### Removing variants
During an experiment, you may find that one or more paywalls are performing significantly worse than the others. In that case, you would probably consider removing it. You can simply remove the paywall, or set its presentation percent to 0%, and your experiment will continue. No metrics will be affected or reset. **Resetting assignments will reset metrics, removing paywalls will not.**
# Campaign Structure
Source: https://superwall.com/docs/campaigns-structure
Once you open a campaign, you can edit its details, placements, control experiments, view results, manage paywalls and more. The campaign detail screen is divided into three separate sections:
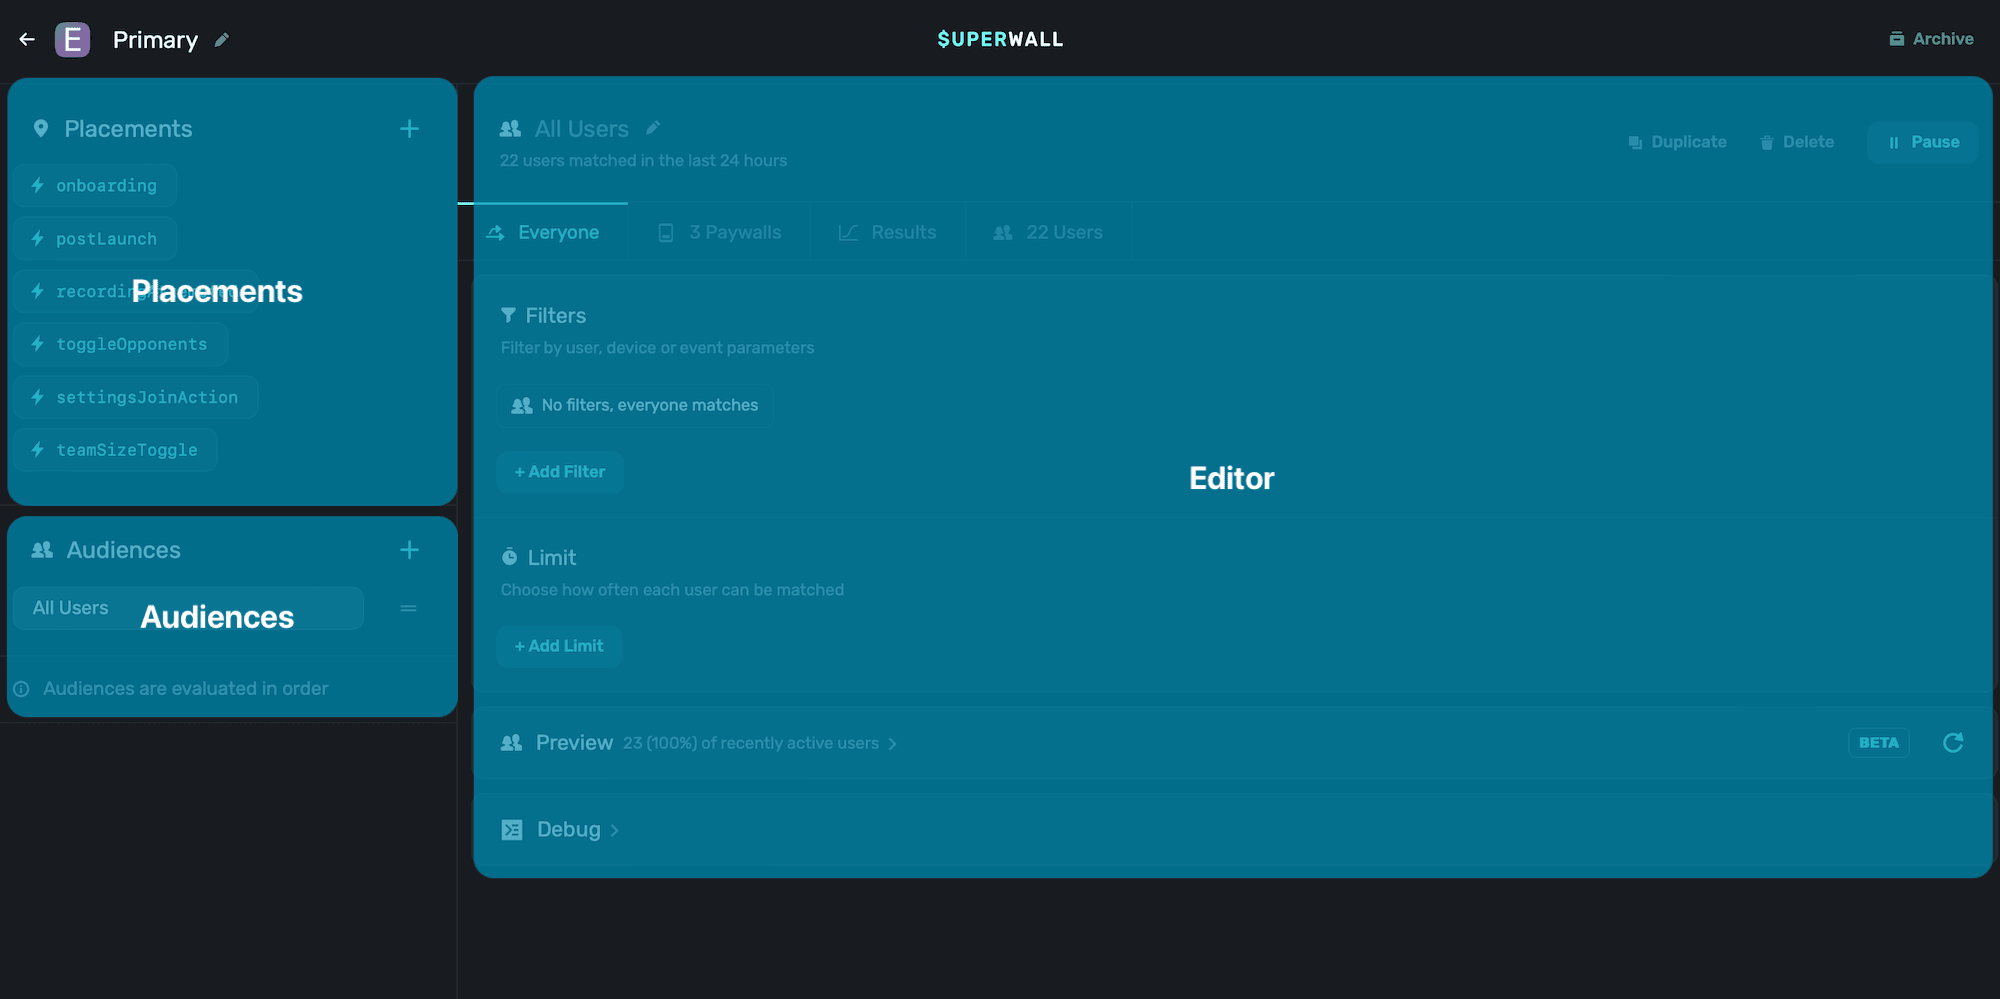
### Placements
Under the placements section, you can add, pause or delete existing placements. Placements are actions, or implicit events, which you can use to show a paywall or implement feature gating. Be liberal with adding placements, you can always pause them on-the-fly without app updates. Or, if you later decide to paywall a particular feature, it gives you more flexibility if you already have a placement for that particular action.
Learn more about placements [here](/campaigns-placements).
### Audiences
Audiences allow you to set up simple or complex filtering rules to match against certain users, show a particular paywall to them, view results of experiments and recent transactions resulting from them. All of your current audiences will show in the left-hand side of the campaign details screen.
Learn more about audiences [here](/campaigns-audience).
### Experiments
Audiences are also where you set up paywall experiments, and view their performance. Experiments allow you to show one or more paywalls, and see which one is "winning".
Learn more about experiments [here](/campaigns-starting-an-experiment).
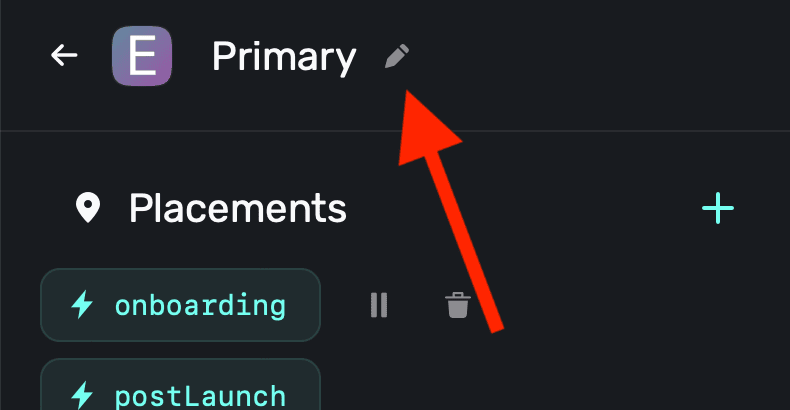
### Renaming campaigns
To rename a campaign, click on the pencil icon next to the campaign's name, located in the top-left hand side of the campaign details screen:
# Understanding Experiment Results
Source: https://superwall.com/docs/campaigns-understanding-experiment-results
To view the results of any paywall experiment that's running, **click** the **Results** tab in the campaign details view:
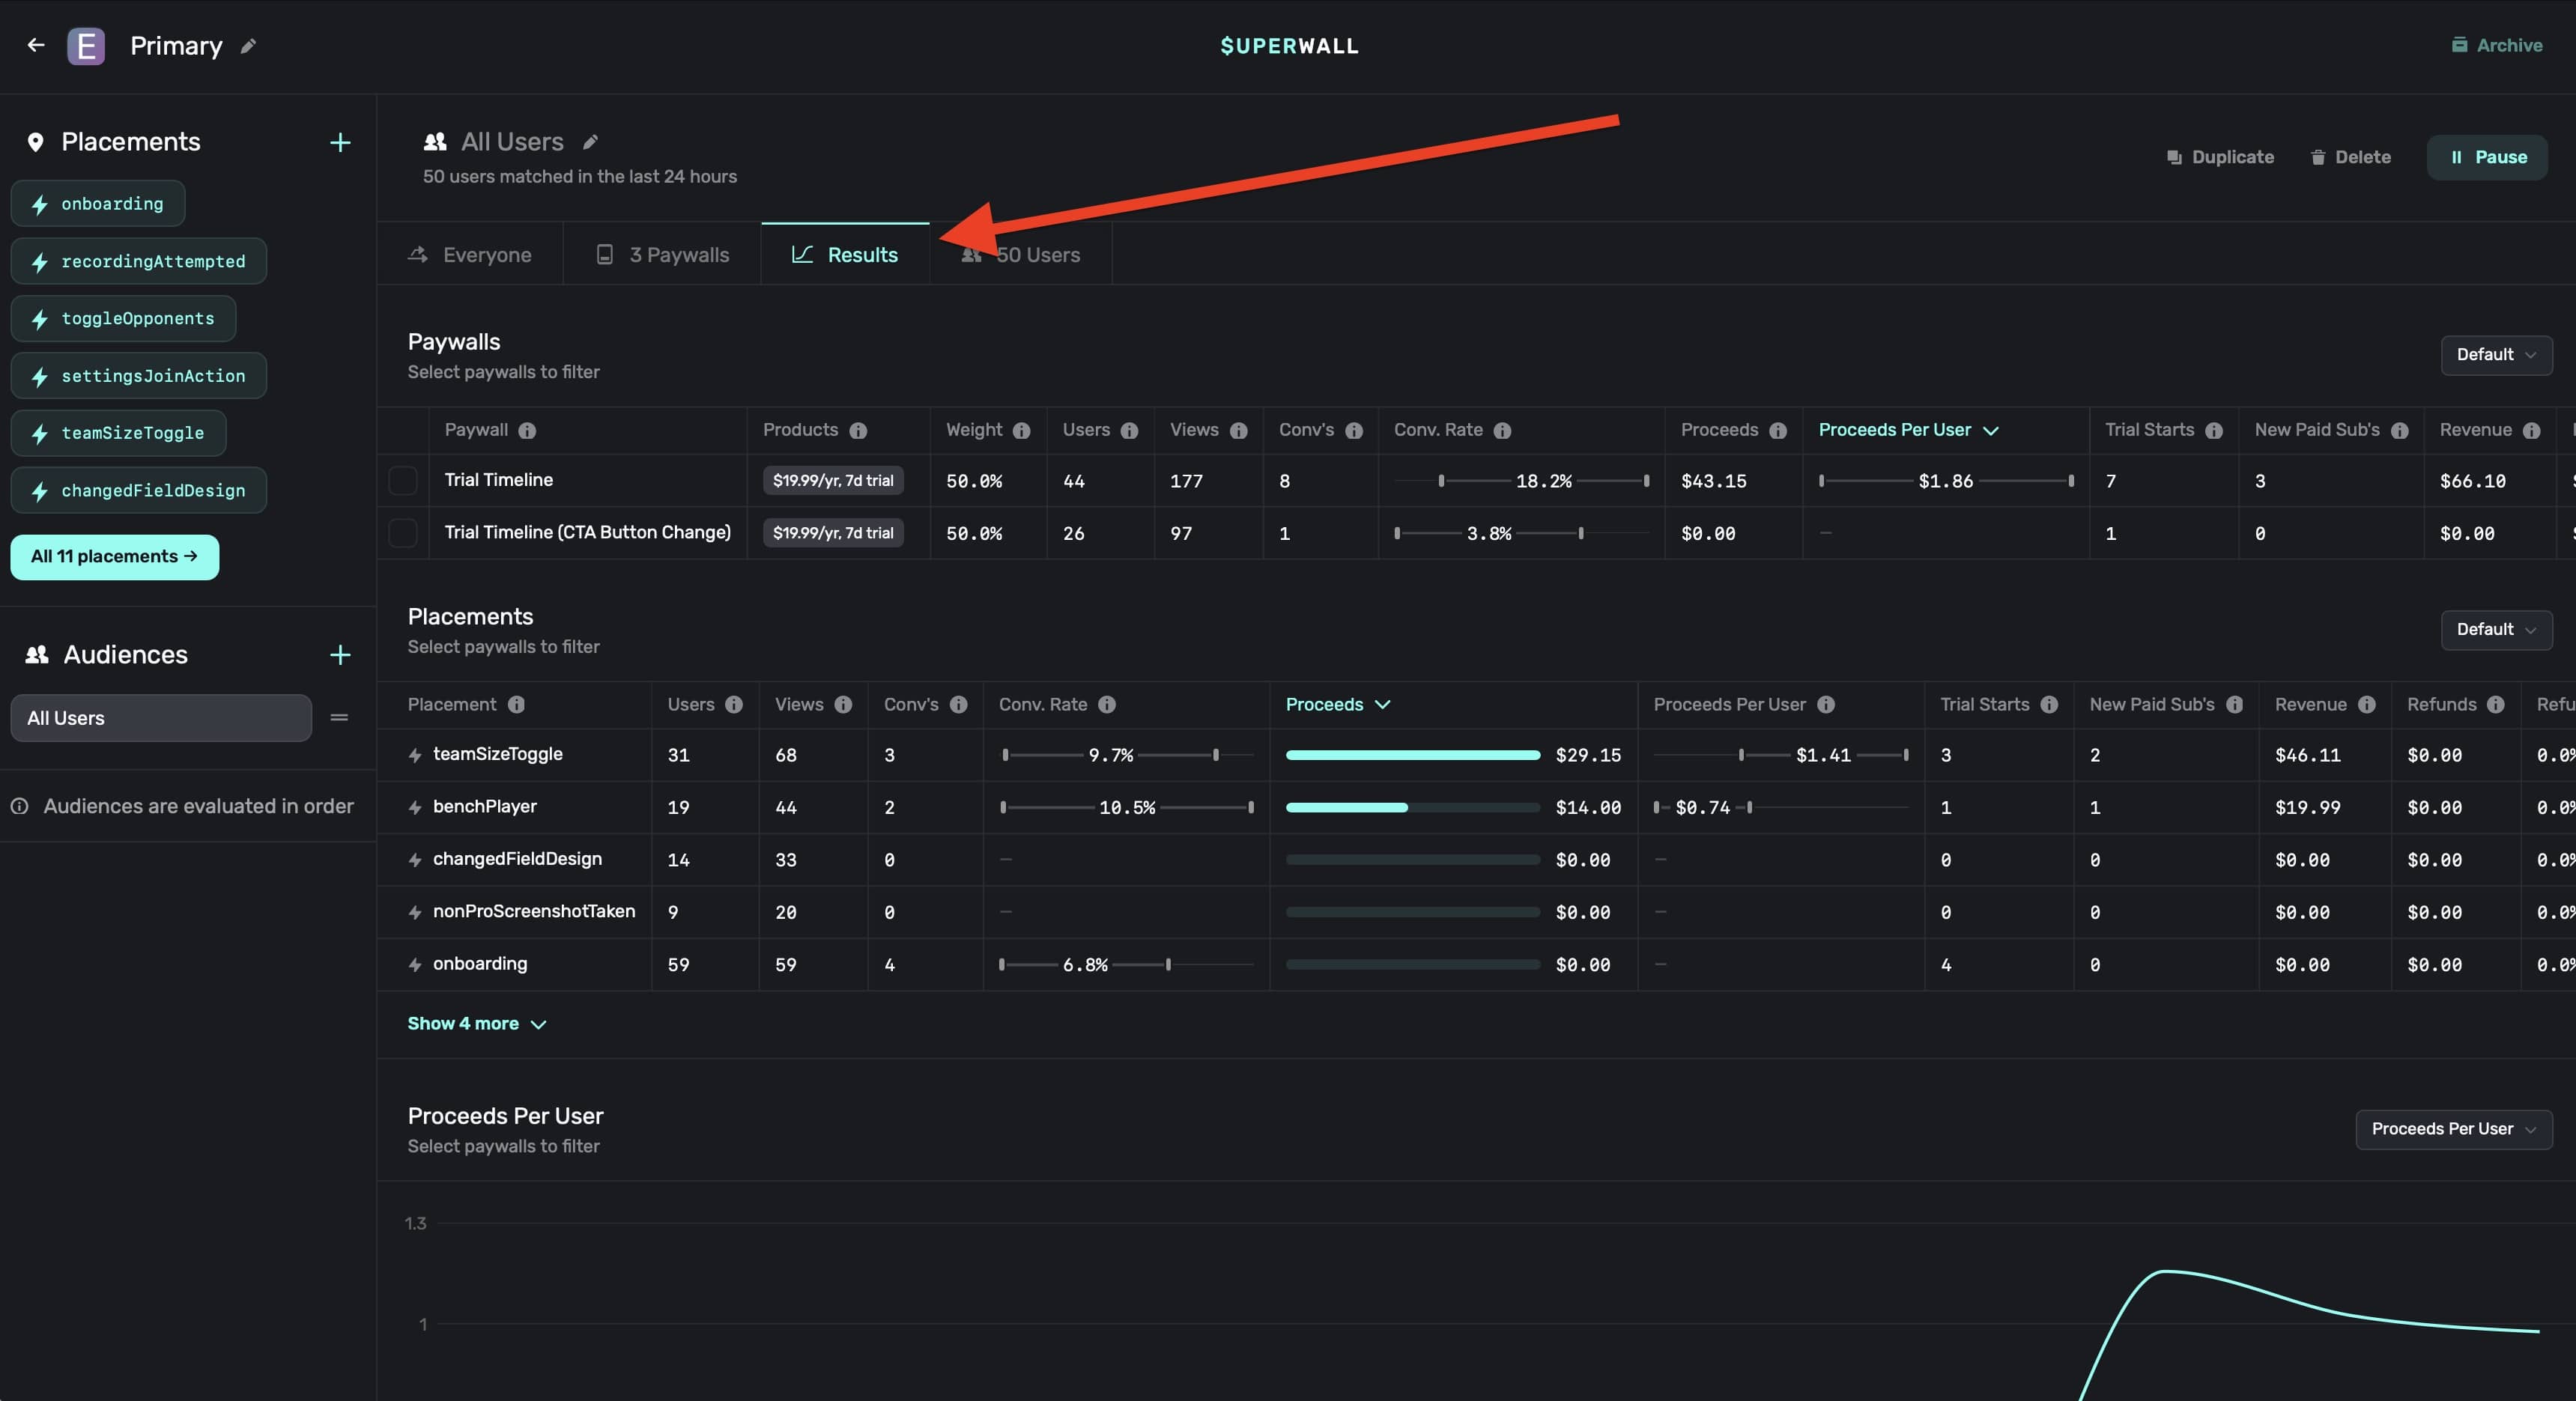
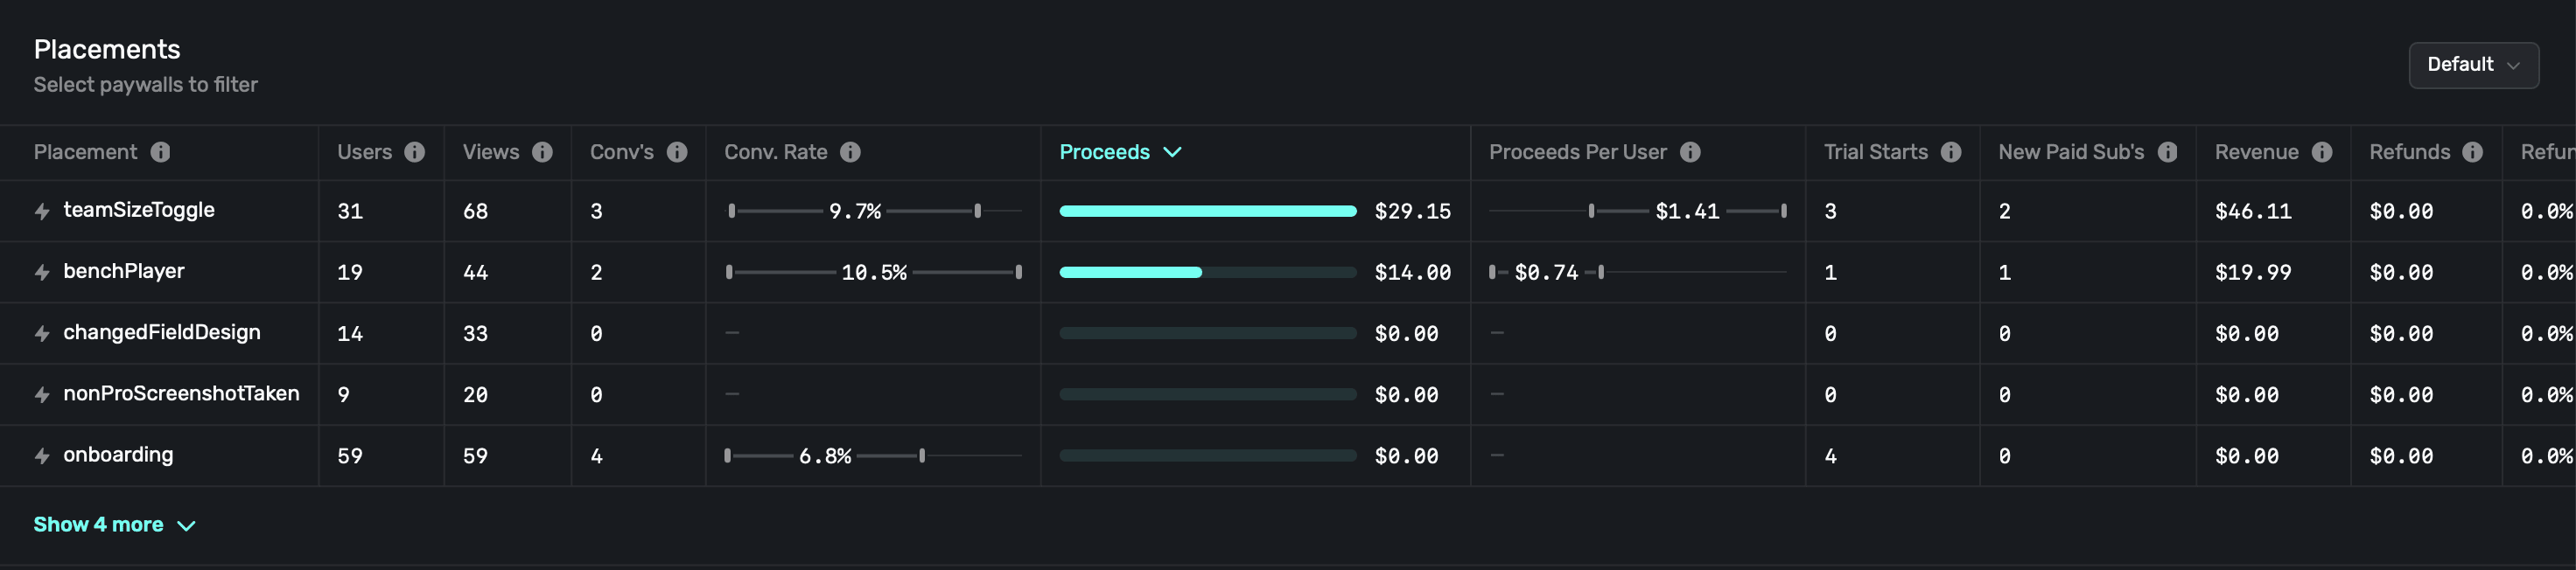
There are three main sections: **Paywalls**, **Placements**, and **Graphs (defaults to Proceeds Per User)**. Each section has a toggle at the top right to change associated metrics.
### Paywalls
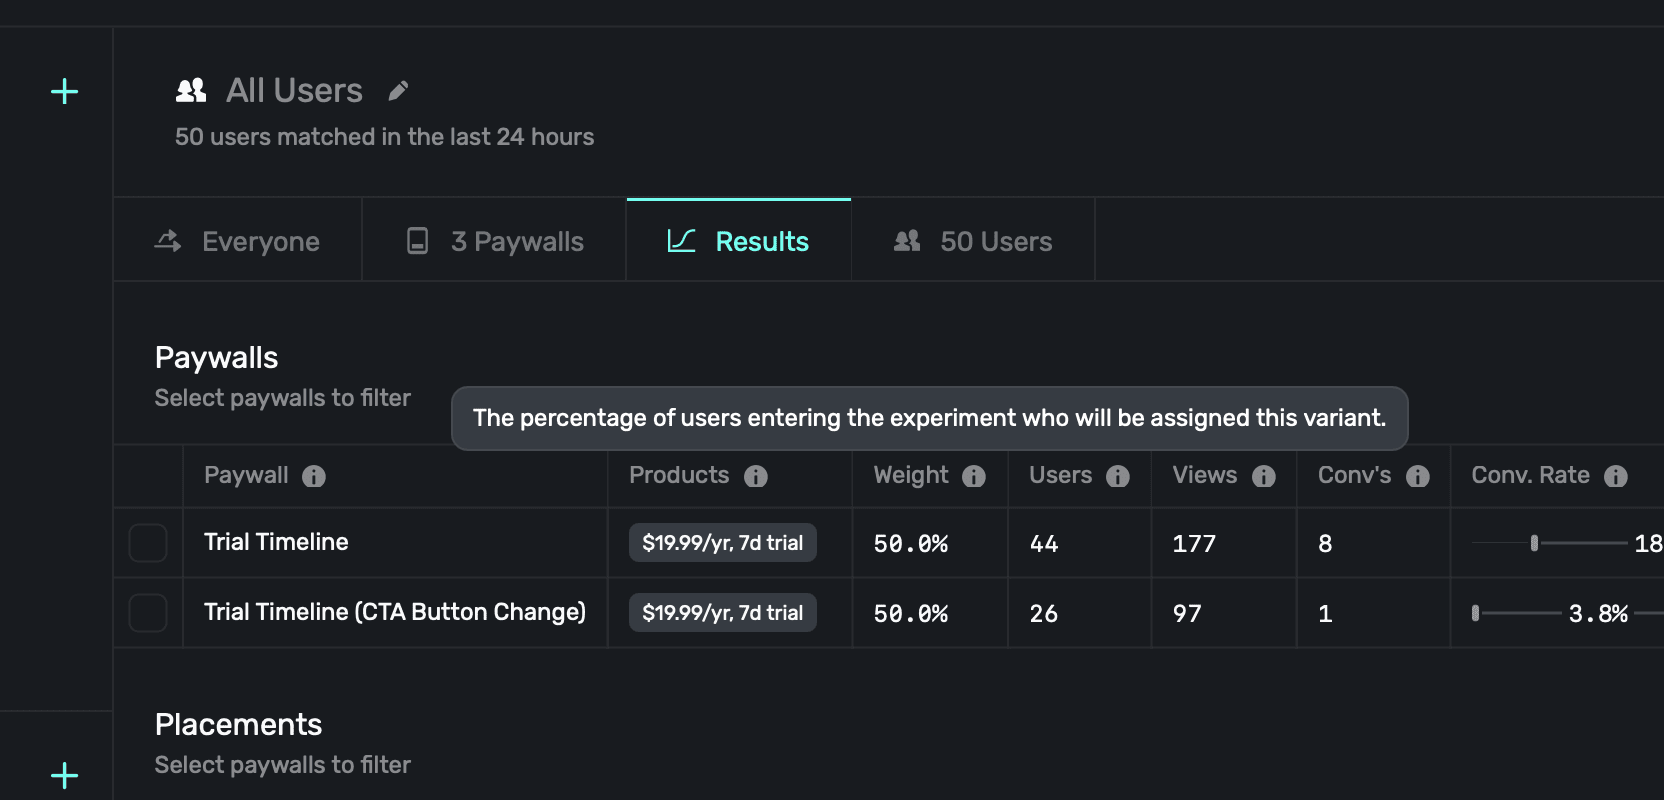
Here, you'll see each paywall being used (or that was used) in an experiment. Superwall will show you metrics such as proceeds, users and much more. There are several metric to explore, and you can hover over any of them to get more details about what each metric represents:
Subscription lifecycle events (i.e. renewals, cancellations, etc) are matched to paywall
conversions using unique identifiers provided by the platform at checkout and via webhook events.
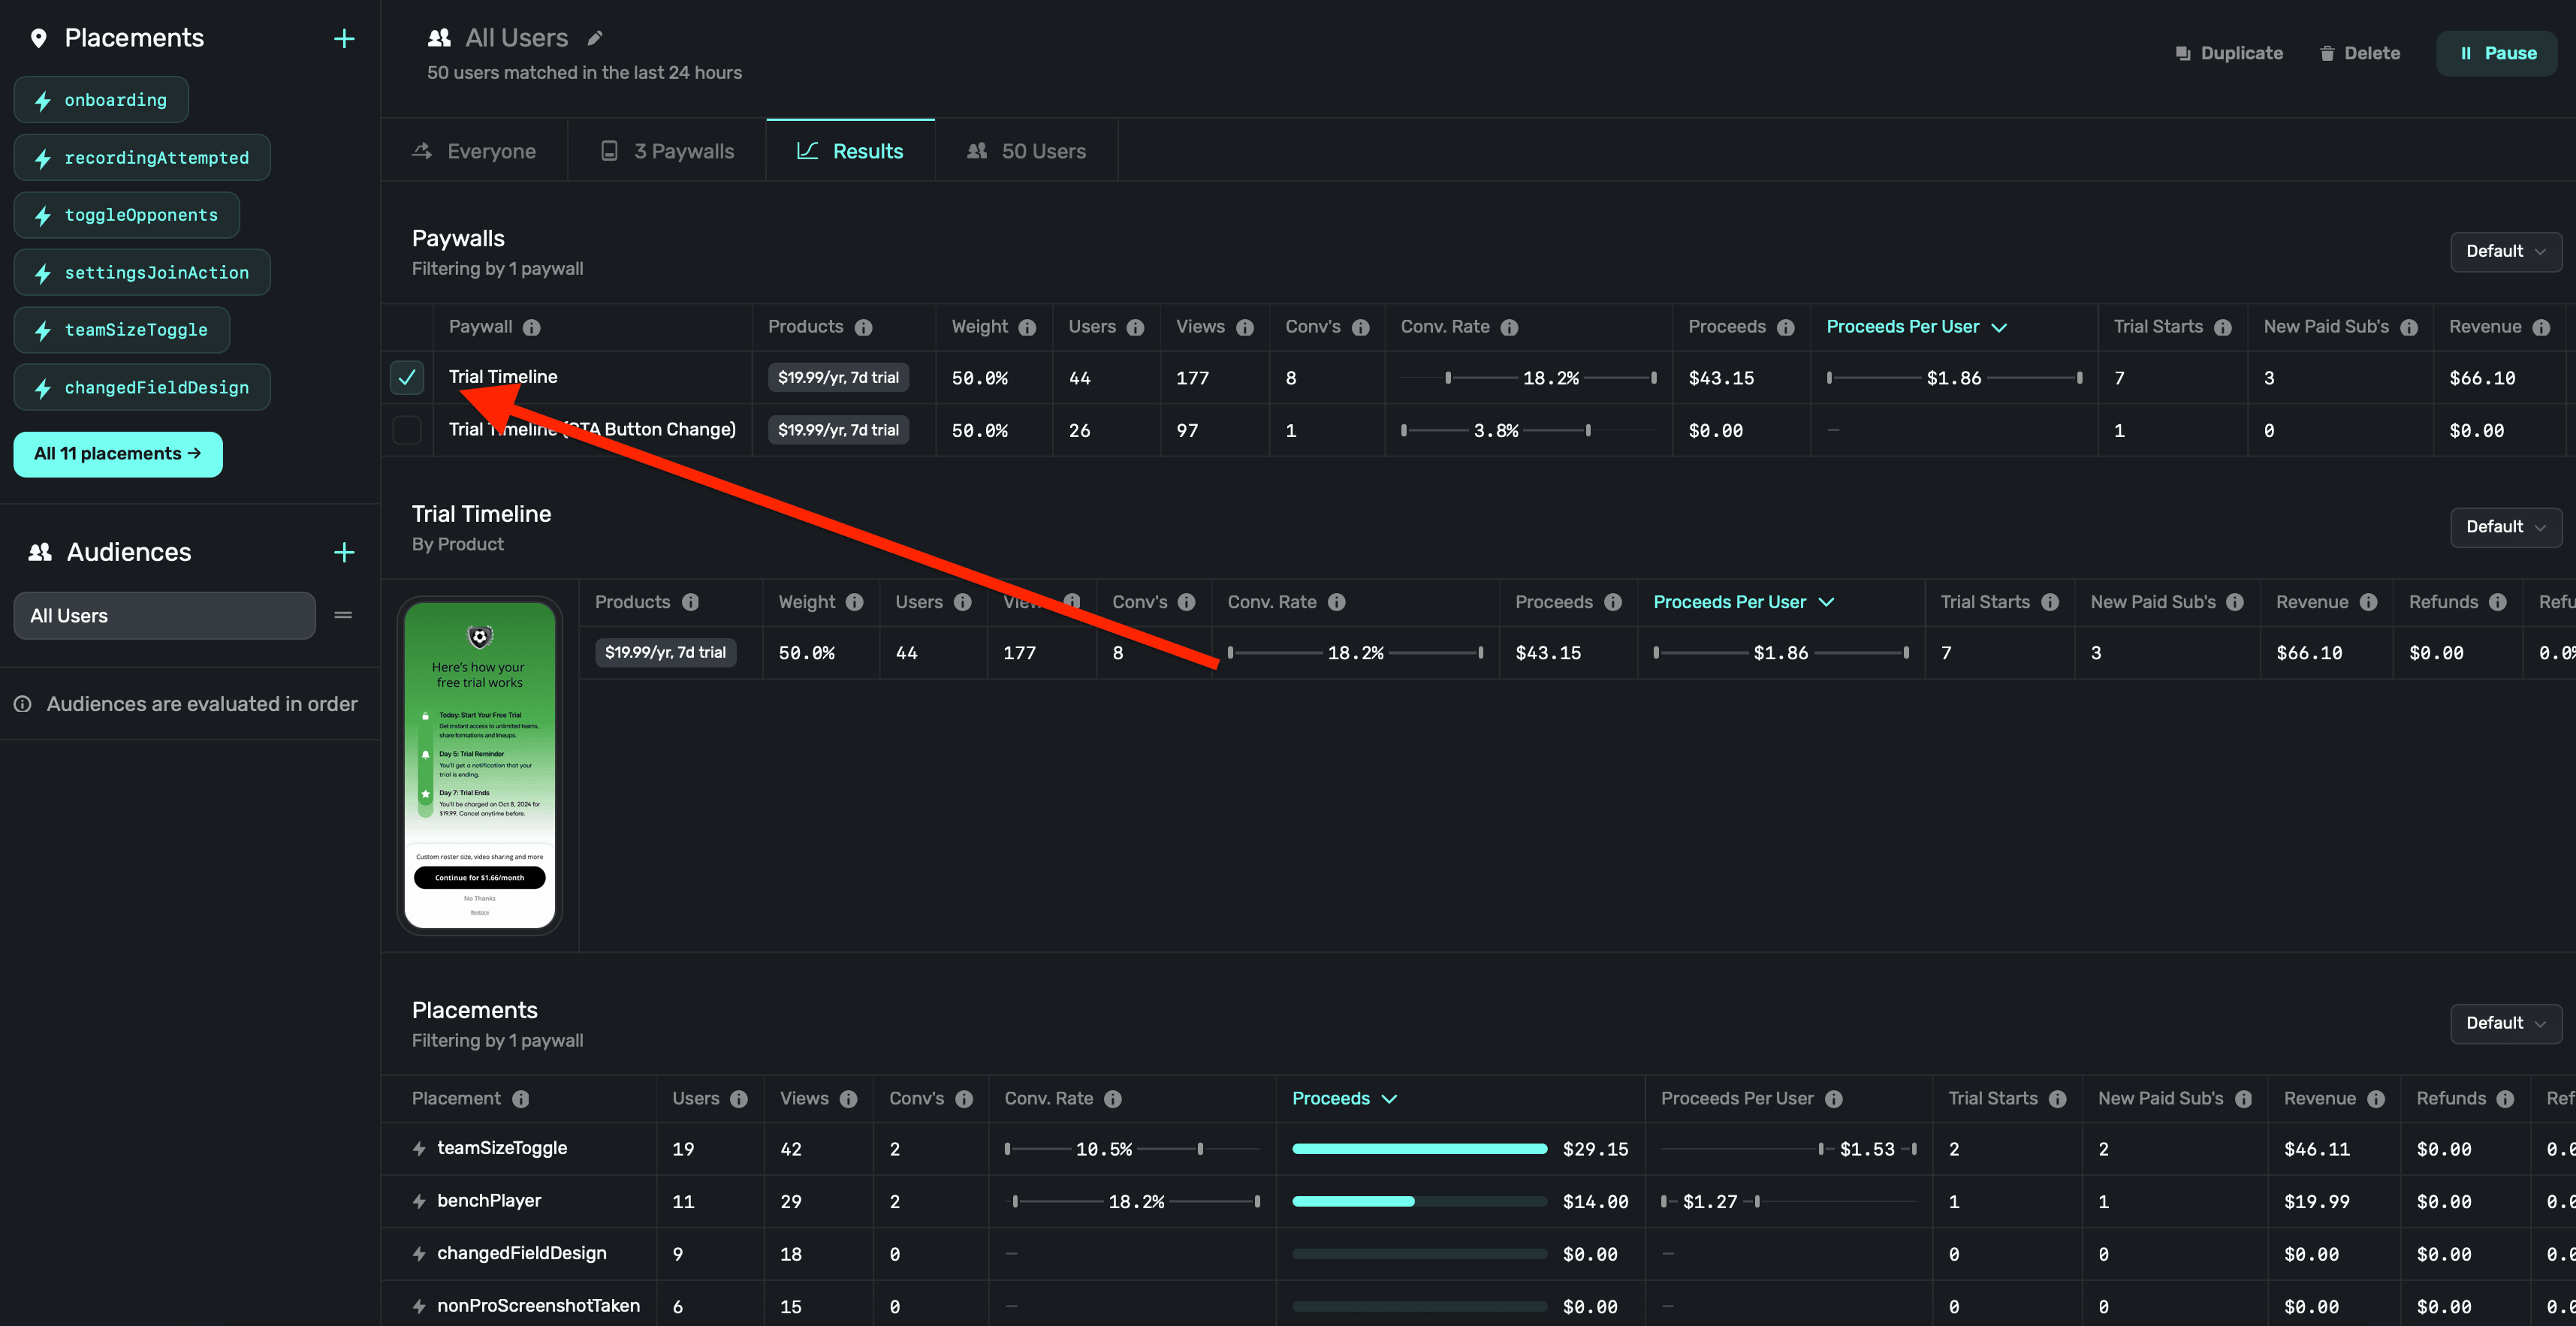
You can also filter results per paywall. Click the checkbox next to one to have the results page only show data for that specific paywall:
### Placements
Here, you can get a detailed breakdown of each placement associated with the campaign. This helps you form a clear picture of what features or actions are leading to conversions.
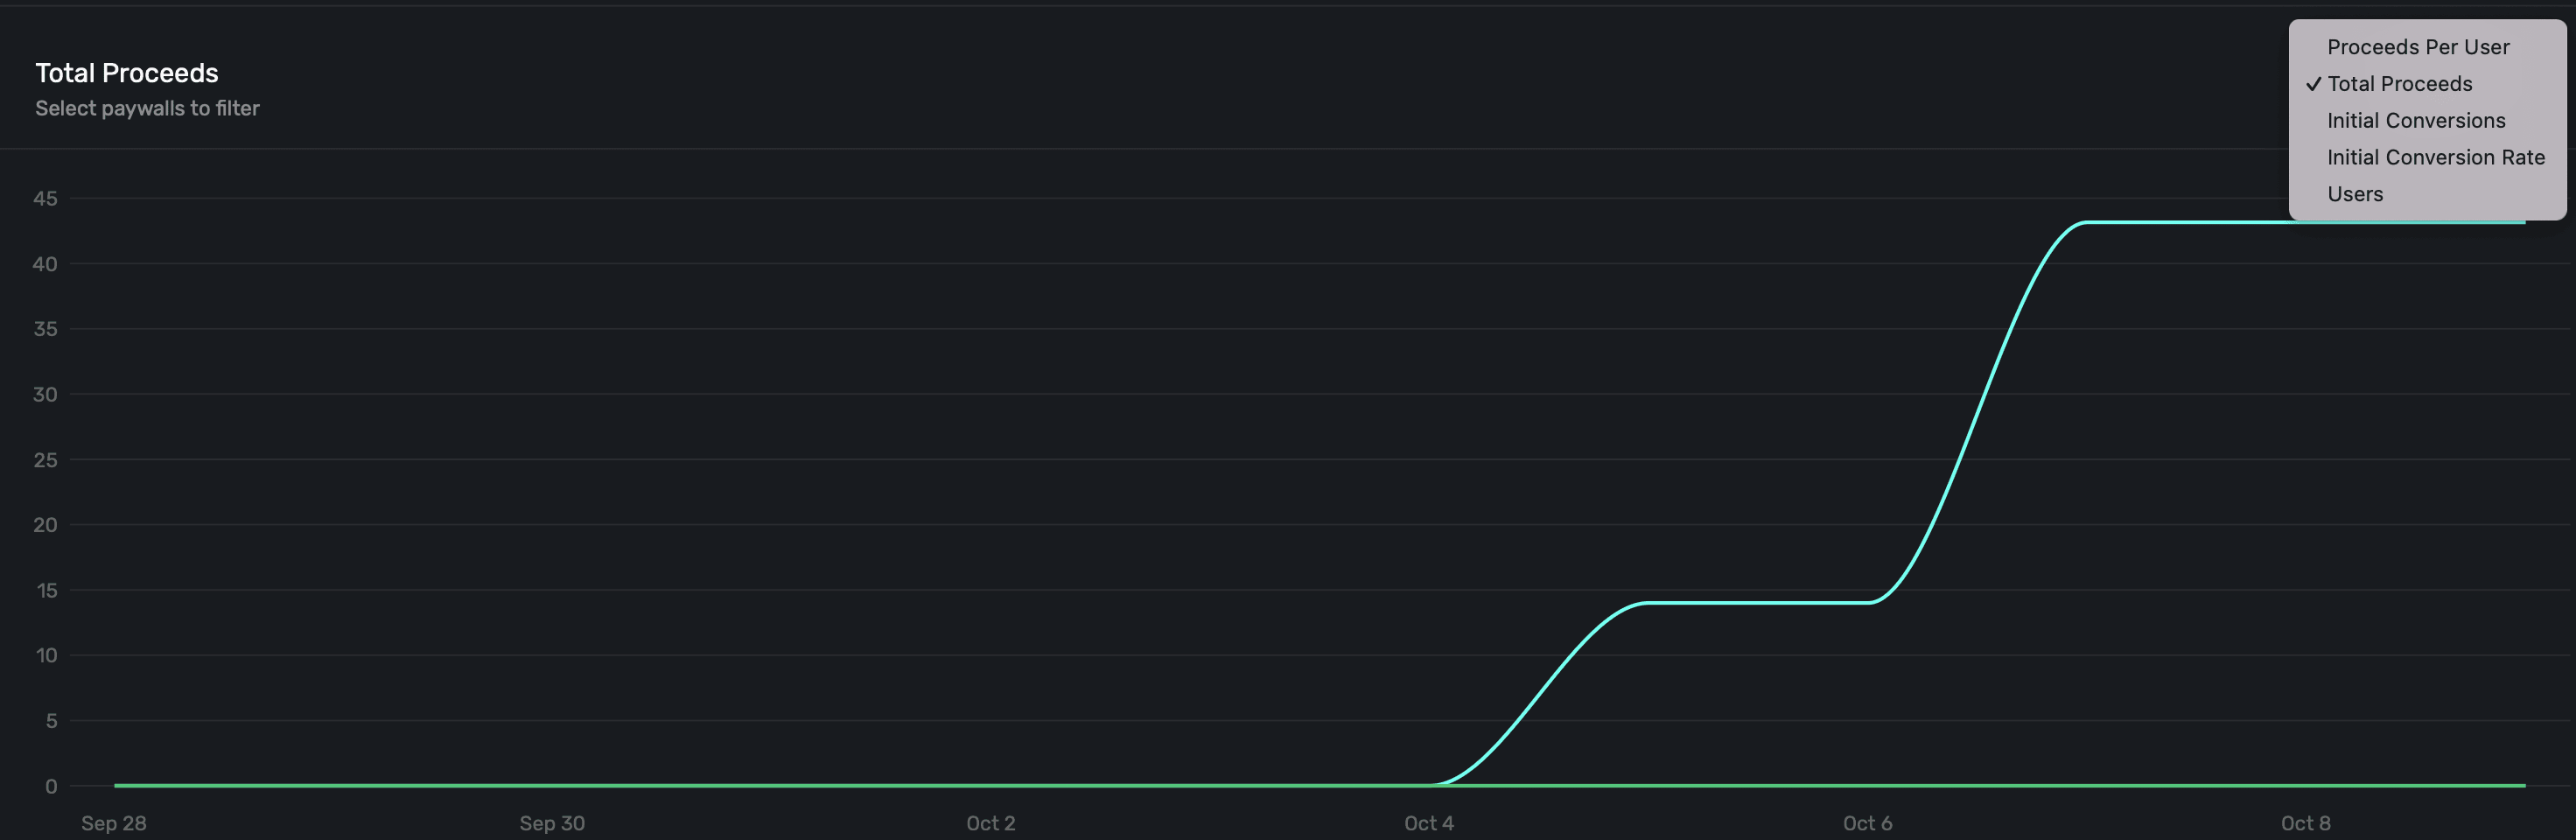
### Graphs
Finally, the last section has several graphs to explore campaign performance. It defaults to Proceeds Per User.
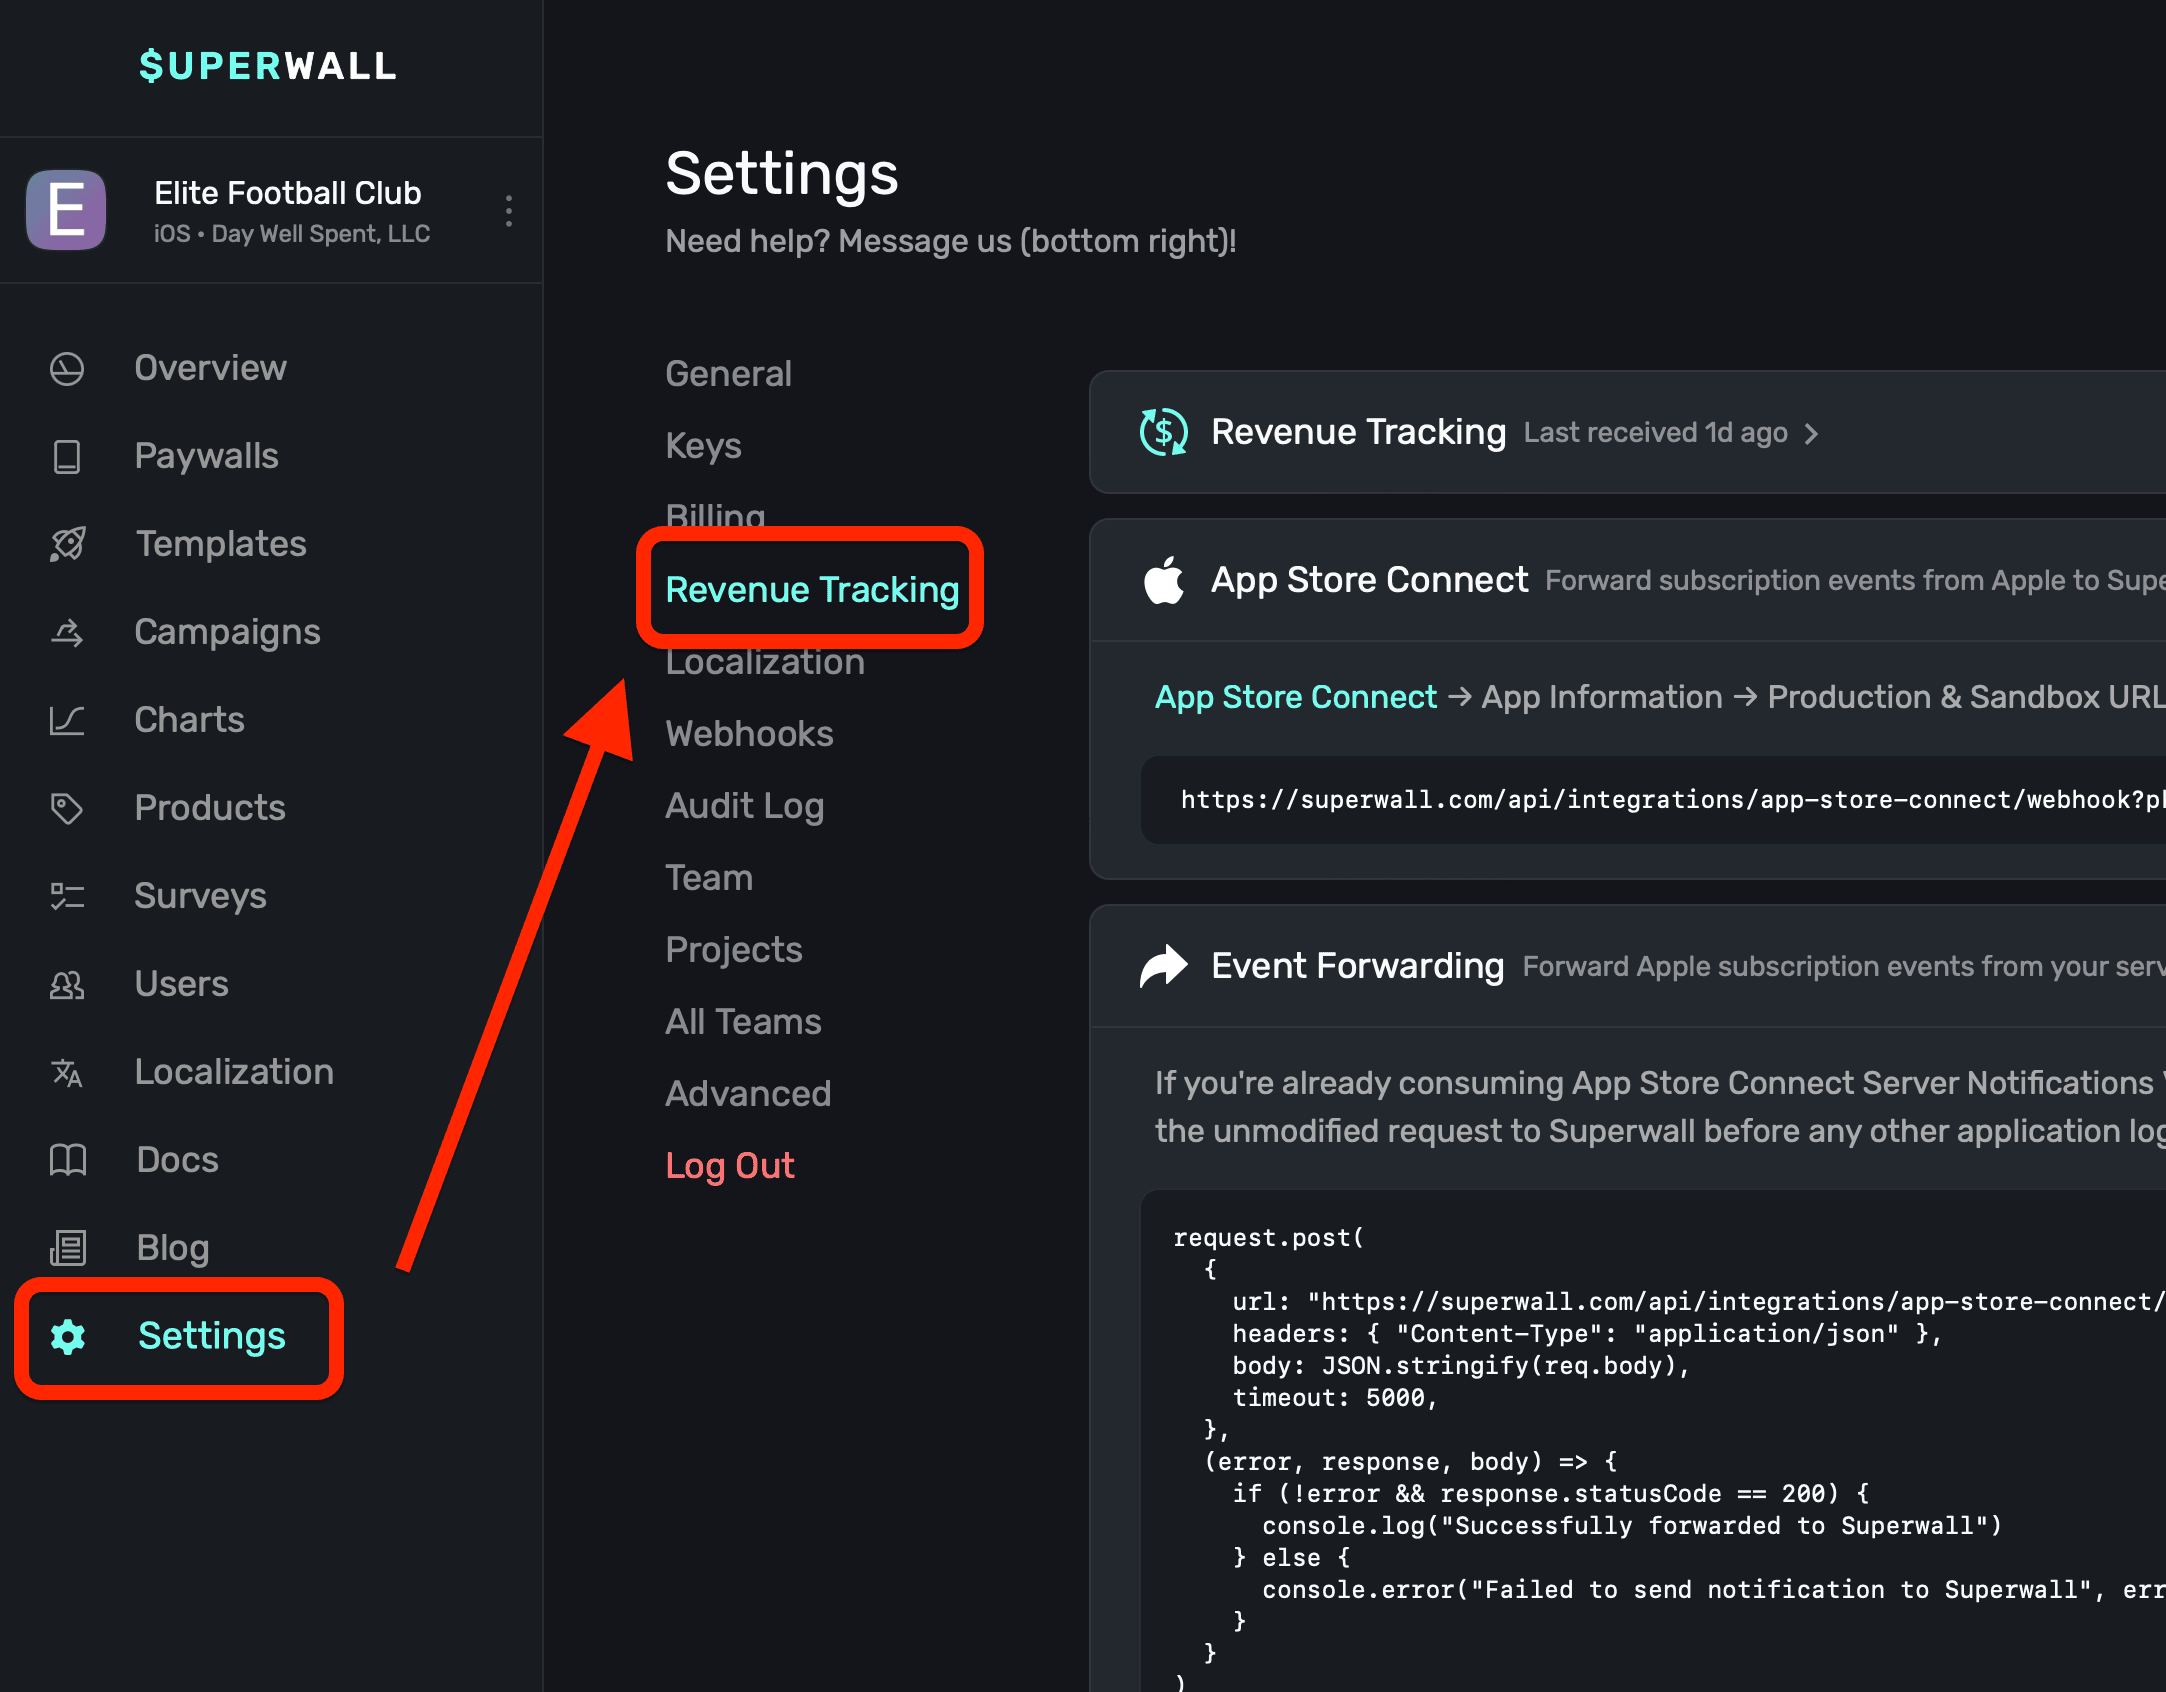
### Setting up revenue tracking
Before any metrics based on revenue will display, you need to set up revenue tracking. To set up revenue tracking:
1. **Click** on **Settings** in the dashboard.
2. **Click** on **Revenue Tracking**.
3. Use the guides to follow any of the revenue tracking methods. For more details, check out our [docs](/overview-settings-revenue-tracking).
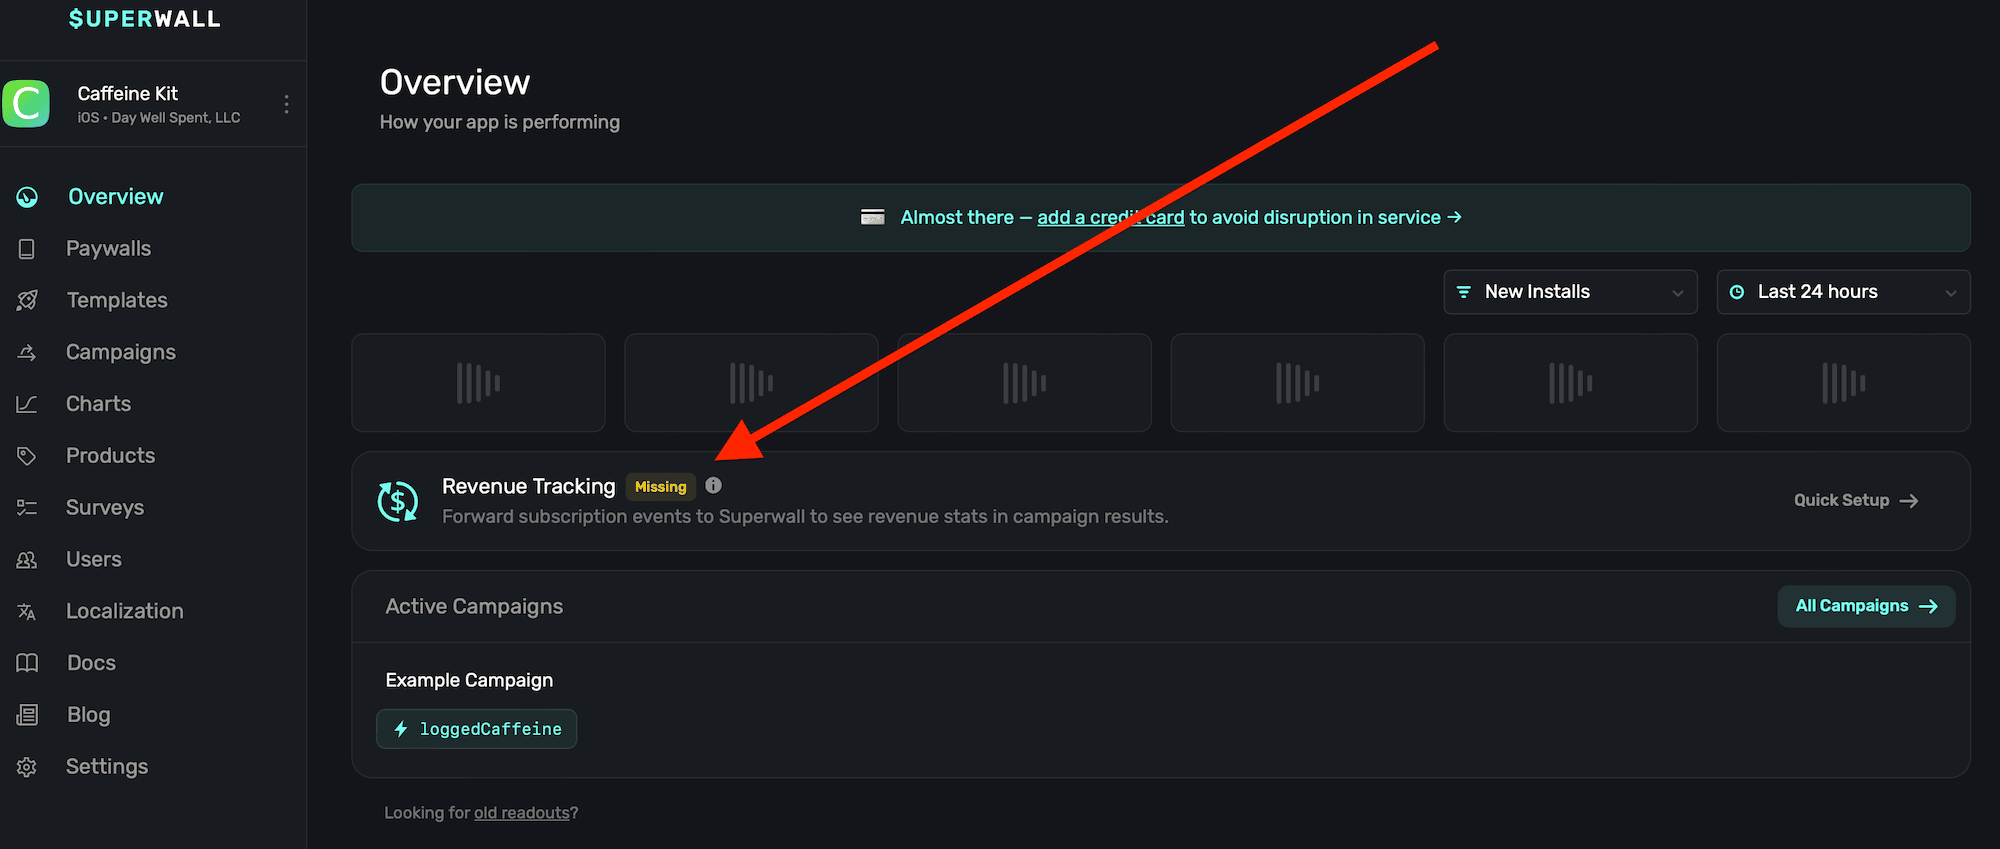
If you don't have revenue tracking setup, you will see a banner on your dashboard:
### A note on conversions, trial starts, and subscription starts
Each experiment will notably report **conversions**, **trials starts** and **subscription starts**. In some cases, it may seem like these numbers don't match up quite how you'd expect. That could be due to a few different reasons:
1. **Reporting methods:** Conversions are an *SDK reported* event, while trial and subscription starts are *server reported* events. Sometimes, the server events might be a little behind on their reporting — whereas SDK events are usually instantaneous.
2. **Understanding Resubscriptions and Cancellations:** When someone resubscribes or restarts a paused subscription through a paywall, it *won't* be considered a new trial or a new subscription start. However, it *will* be counted as a **conversion**. As such, any revenue generated will be linked to that paywall. If they later decide to cancel the subscription, the cancellation will also be linked to the same paywall.
3. **Attribution:** And finally, attribution can sometimes be a complicated metric to track. If something doesn't look right on your end, please feel free to reach out to us and we'll always export your data so you can exactly where our numbers are coming from.
### Confidence intervals
Use confidence intervals to gauge how each paywall is performing against the other ones in your experiments. Hover over a specific metric to view the confience interval (i.e. Conversion Rate, Proceeds Per User, etc.):
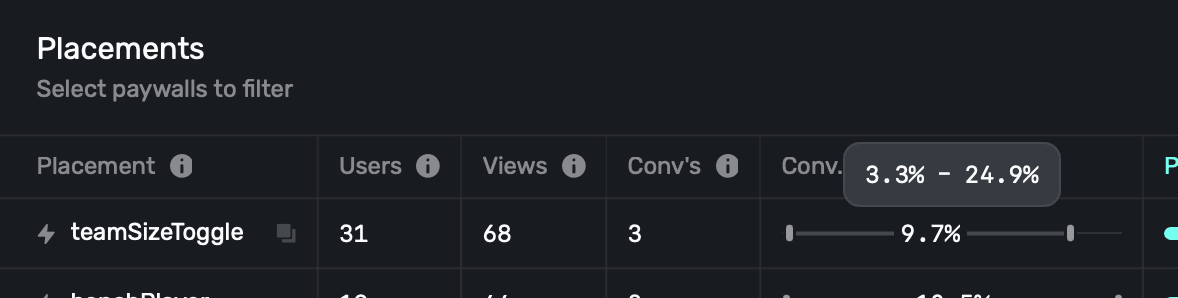
Keep in mind that these intervals represent the percentage of users converted, it doesn't take into account revenue. Put differently, paywall A could have a higher conversion rate, but with a much cheaper offering than paywall B. Paywall B could still be making more money, but at a lower conversion rate with the higher-priced product.
For more on confidence intervals, check out our in-depth [blog post](https://superwall.com/blog/confidence-intervals-in-experiment-readouts).
### Identifiers and cohorting with 3rd party analytics
If you scroll to the end of the experiment results table, you'll find some useful identifiers which you can use to interface with third-party tools you may be using:

1. **Experiment id:** The identifier of the experiment that the paywall is a part of.
2. **Variant id:** The identifier representing the variant the paywall represented in the experiment.
3. **Paywall id:** The identifier for the paywall in the experiment, which associates back to the variant.
To learn more about interfacing with 3rd party analytics, check out this [doc](/cohorting-in-3rd-party-tools).
# Charts
Source: https://superwall.com/docs/charts
View charts detailing important metrics about your app's subscription performance, paywalls and more.
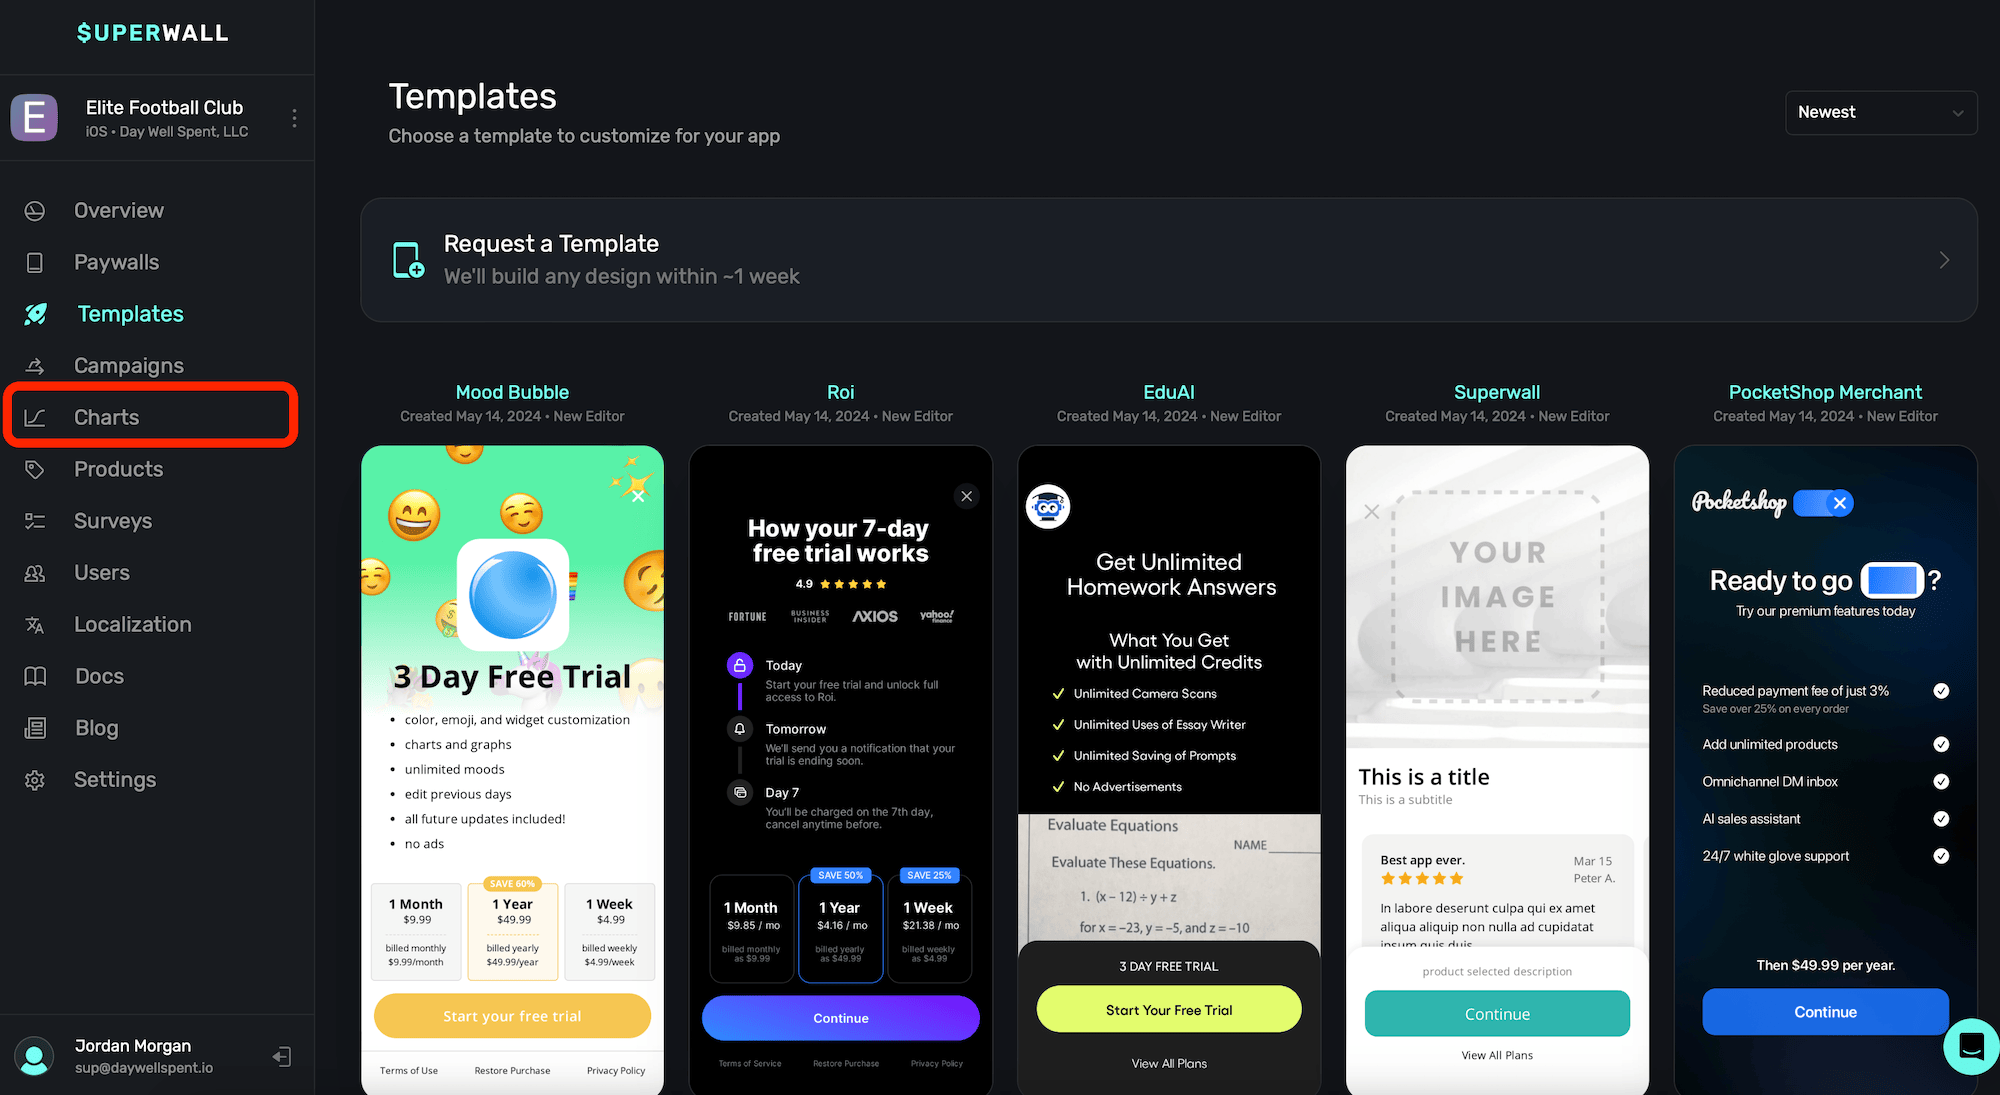
To view charts breaking down your app's performance, click the **Charts** button in the **sidebar**:
Check out a video overview of our charts on [YouTube](https://youtu.be/7UIO99LSvTQ).
### Chart types
Choose between different charts by making a selection from the left sidebar:
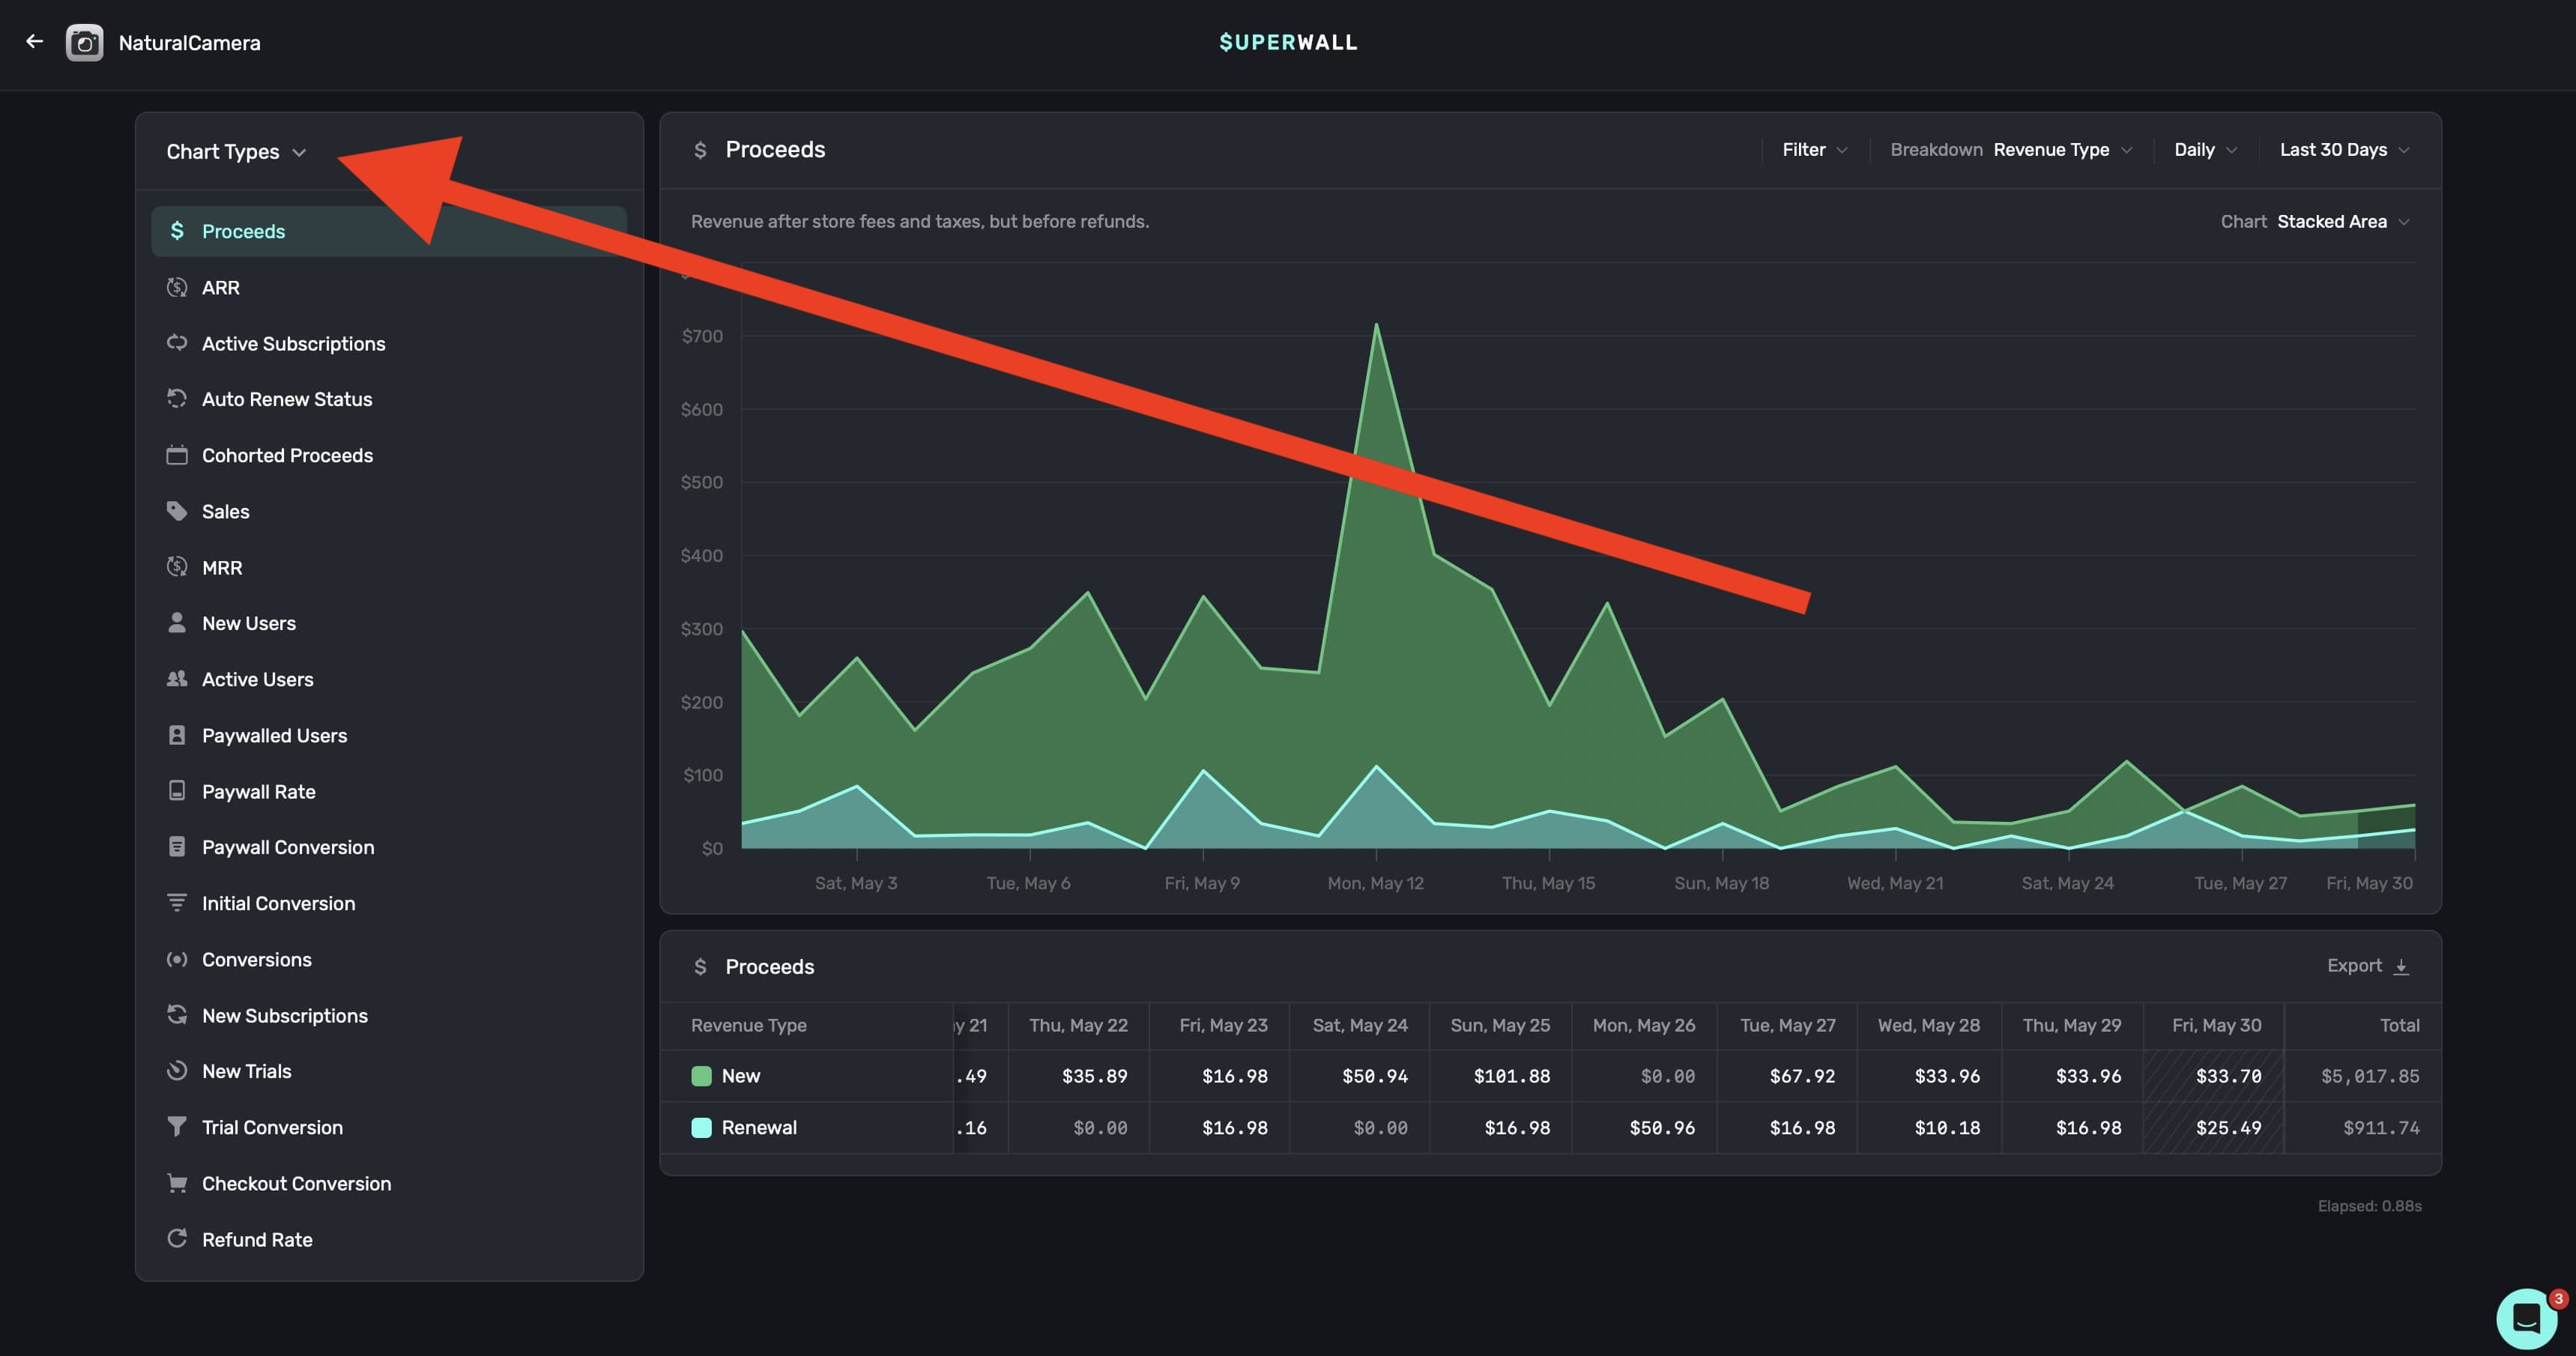
Currently, we offer the following charts:
1. **Proceeds:** Revenue after refunds, store fees, and taxes.
2. **Sales:** Revenue before refunds, taxes, and fees.
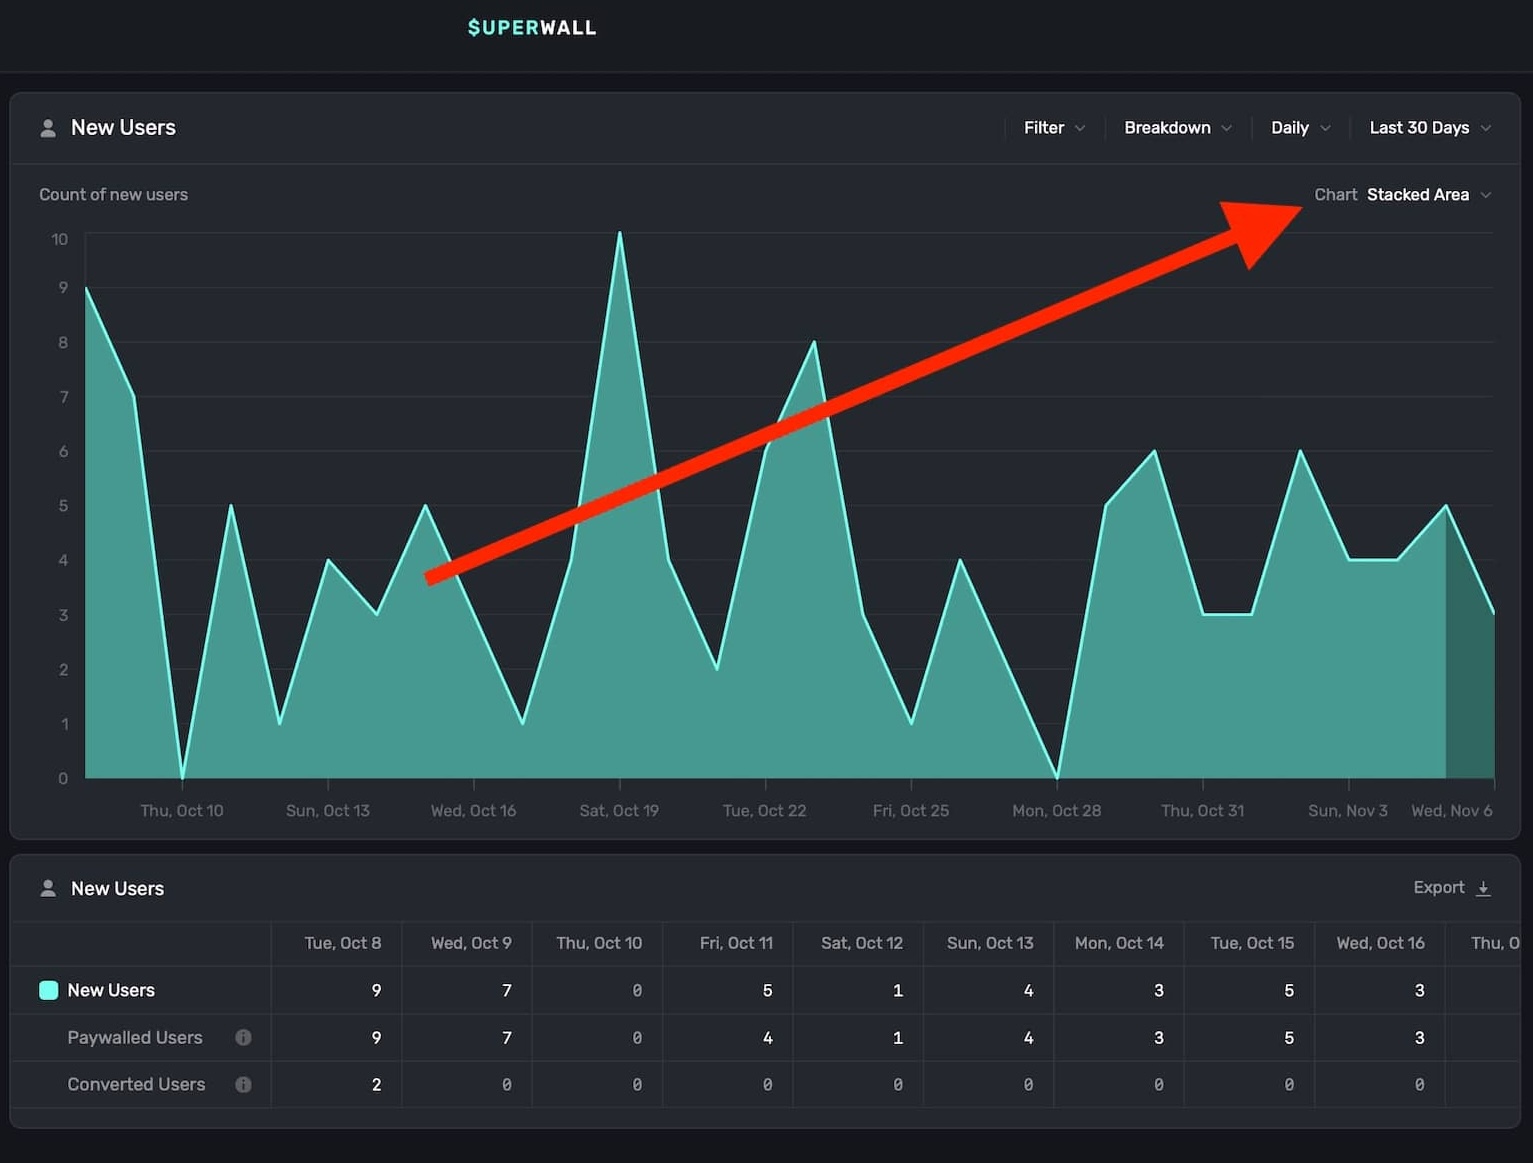
3. **New Users:** Count of new users.
4. **Active Users:** Count of active users.
5. **Paywalled Users:** Count of unique users who opened paywalls.
6. **Paywall Rate:** Percent of new users who opened paywalls.
7. **Paywall Conversion:** Percent of users who converted on a paywall.
8. **Initial Conversion:** Percent of new users who converted on a paywall.
9. **Conversions:** Count of paywall conversions (i.e. a completed transaction).
10. **New Subscriptions:** New subscriptions, cohorted by subscription start date.
11. **New Trials:** Trial starts, cohorted by trial start date.
12. **Trial Conversion:** Percentage of trials that converted to paid subscriptions.
13. **Checkout Conversion:** Percentage of users who converted after starting checkout.
14. **Refund Rate:** Ratio of refunds to gross proceeds, cohorted by first purchase date.
### Filtering chart data
To filter data on a chart, **click** the **Filter** button at the top right:
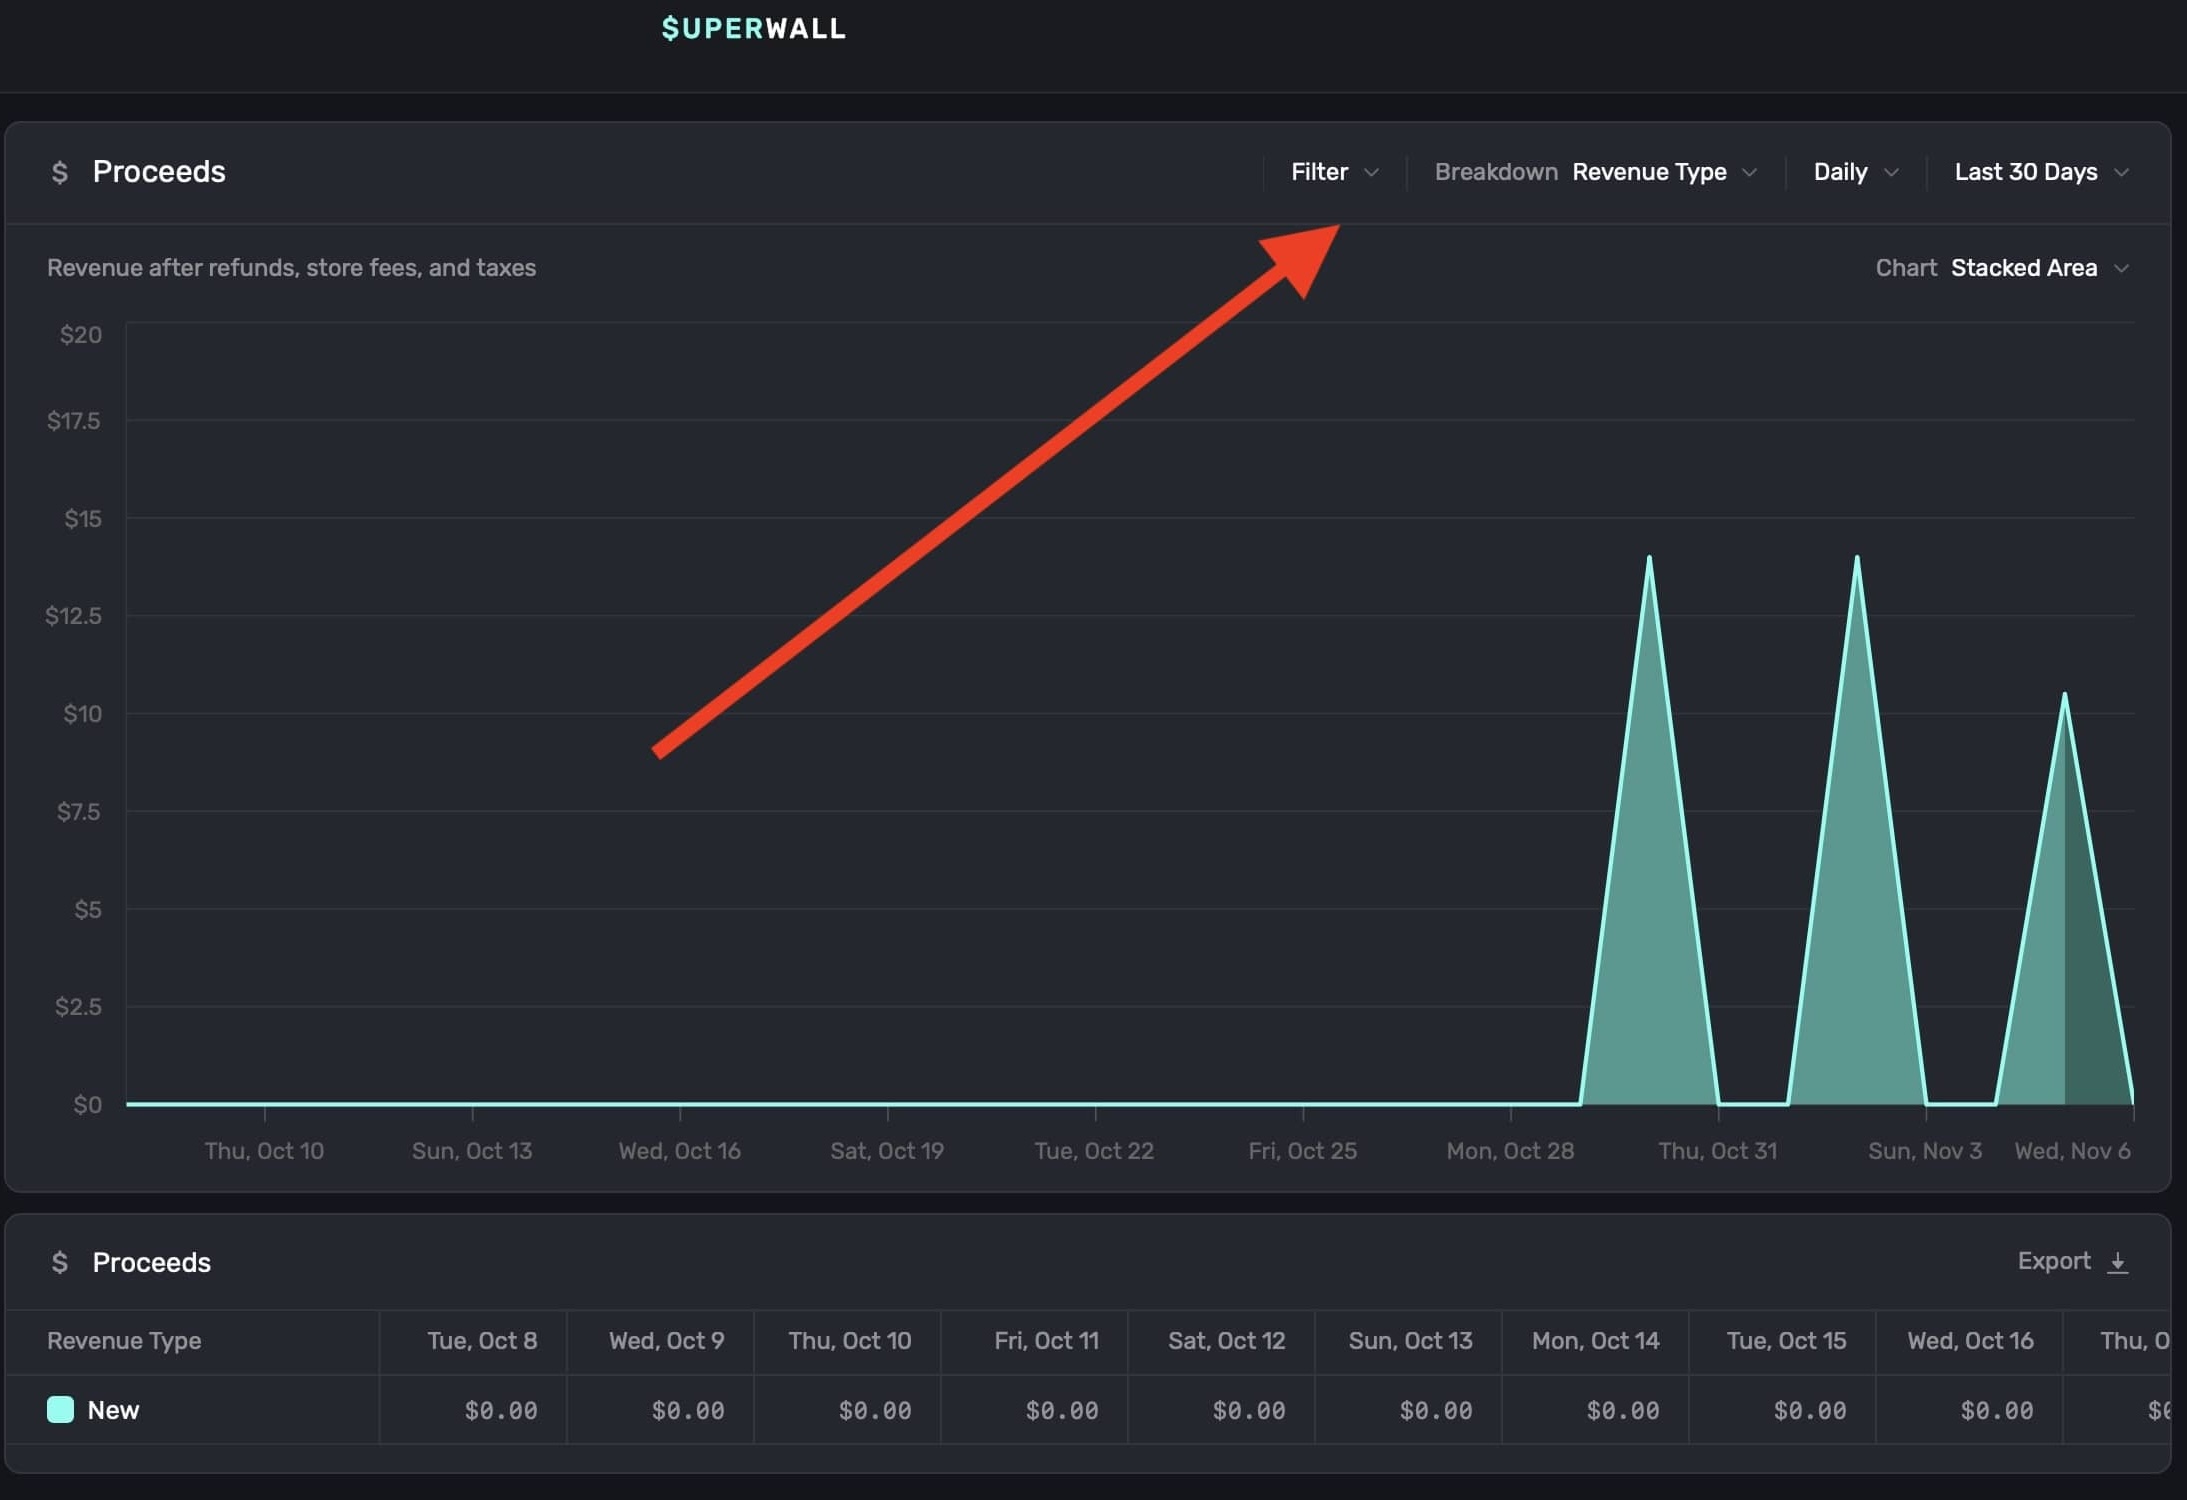
Filter data by choosing a filter type and **clicking** on **+ Add Filter** to apply it. You can add one, or several, filters:
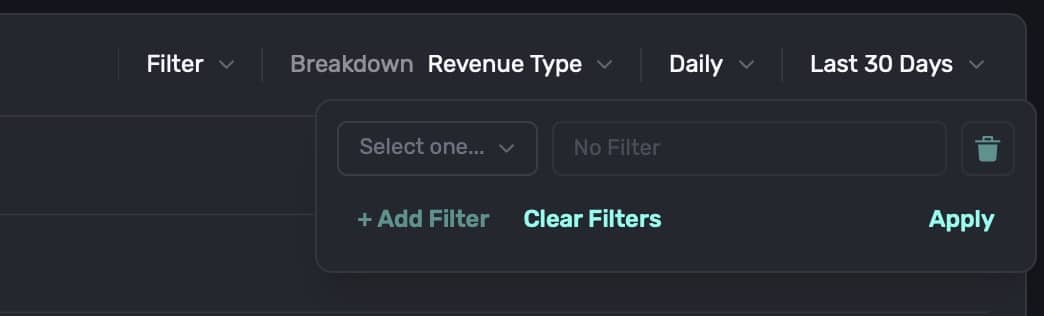
When you're done, **click** on the **Apply** button, and the chart will refresh with the data filtered by your selections:
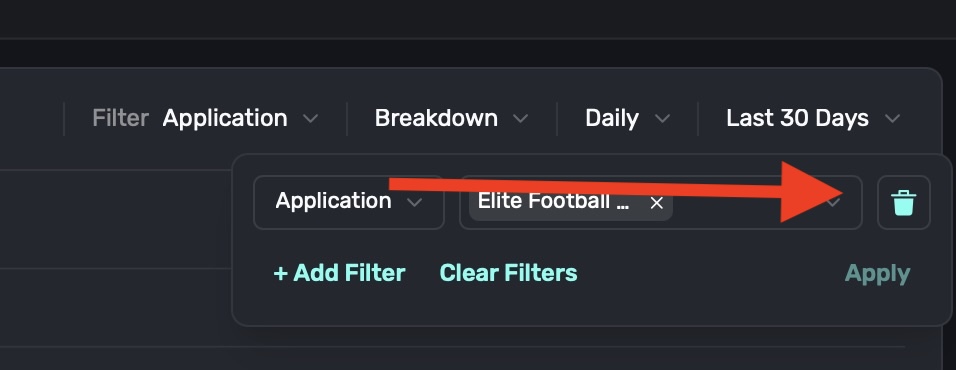
To remove an individual filter, **click** on the **trash can** icon on the trailing side of it:
To remove an individual component that's part of a filter (i.e. breaking down by "Application" and removing one of the included apps), **click** on the **X** button on its trailing side:

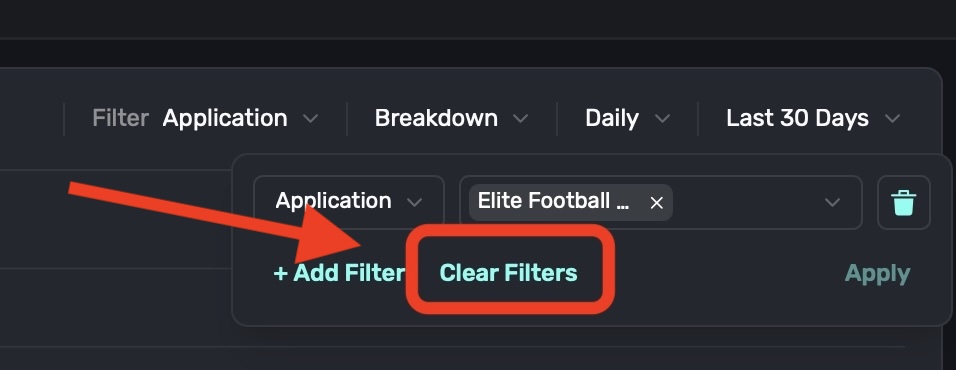
To remove all filters, **click** on the **Clear Filters** button:
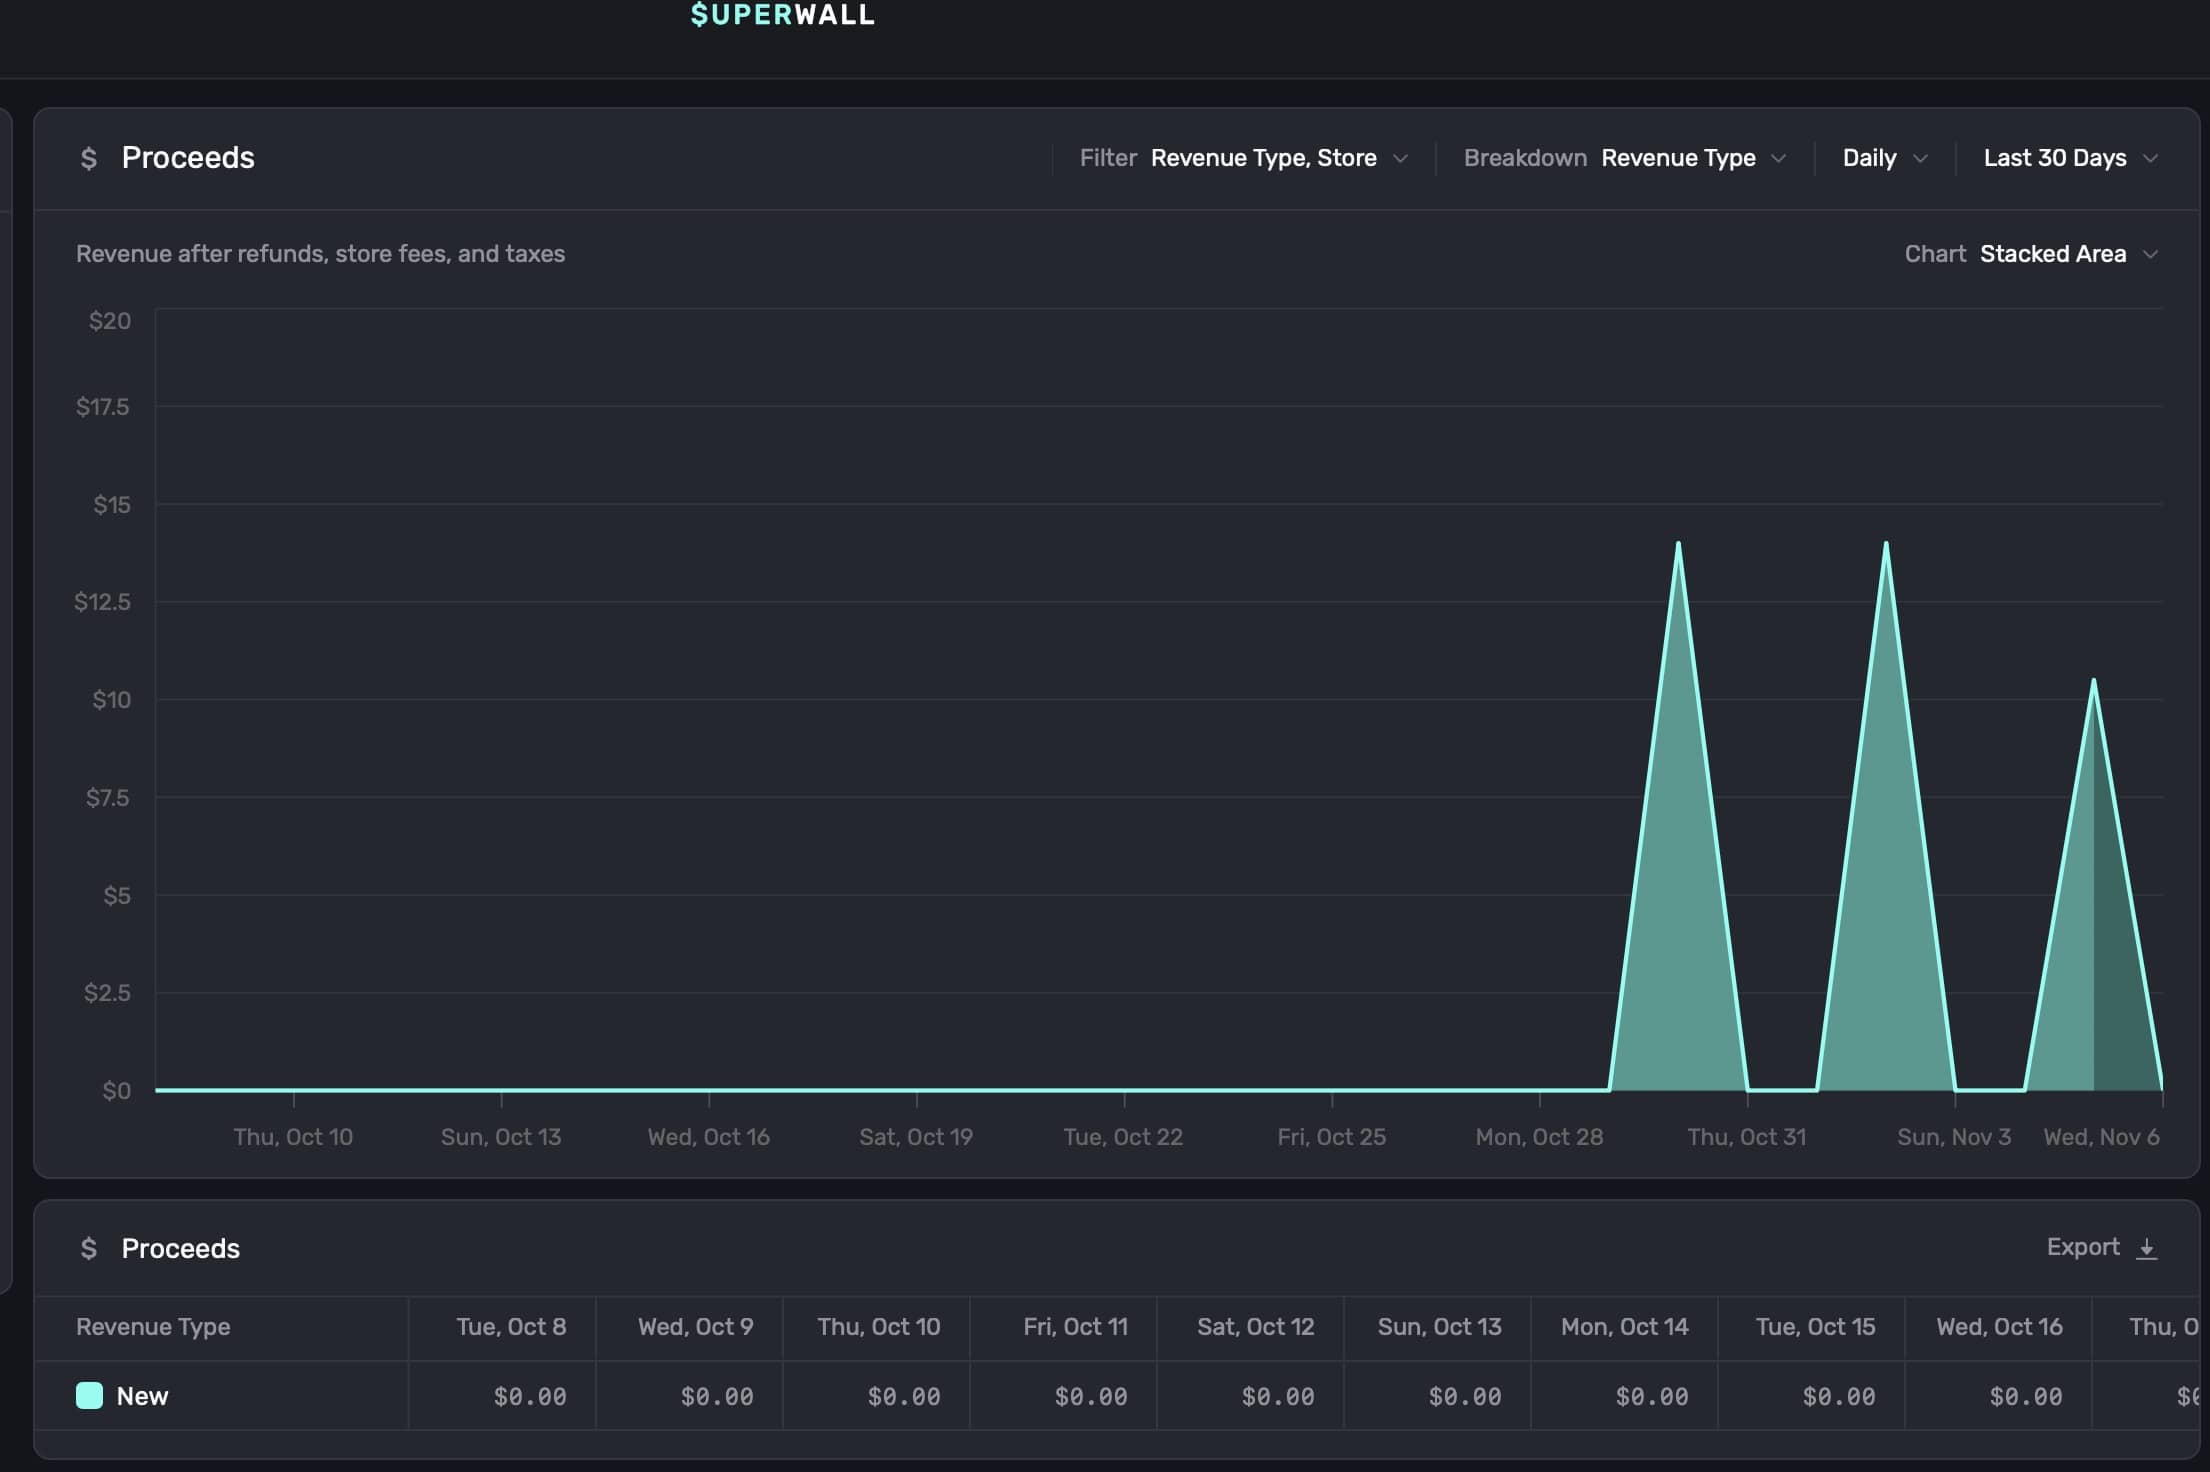
### Breaking down chart data
To break down data in a chart, **click** the **Breakdown** toggle at the top right:

The breakdowns available are tailored to the type of chart you have selected. After you apply a selection, the chart will automatically update. At the bottom of the chart, the data displayed will also be updated according to your breakdown selection:
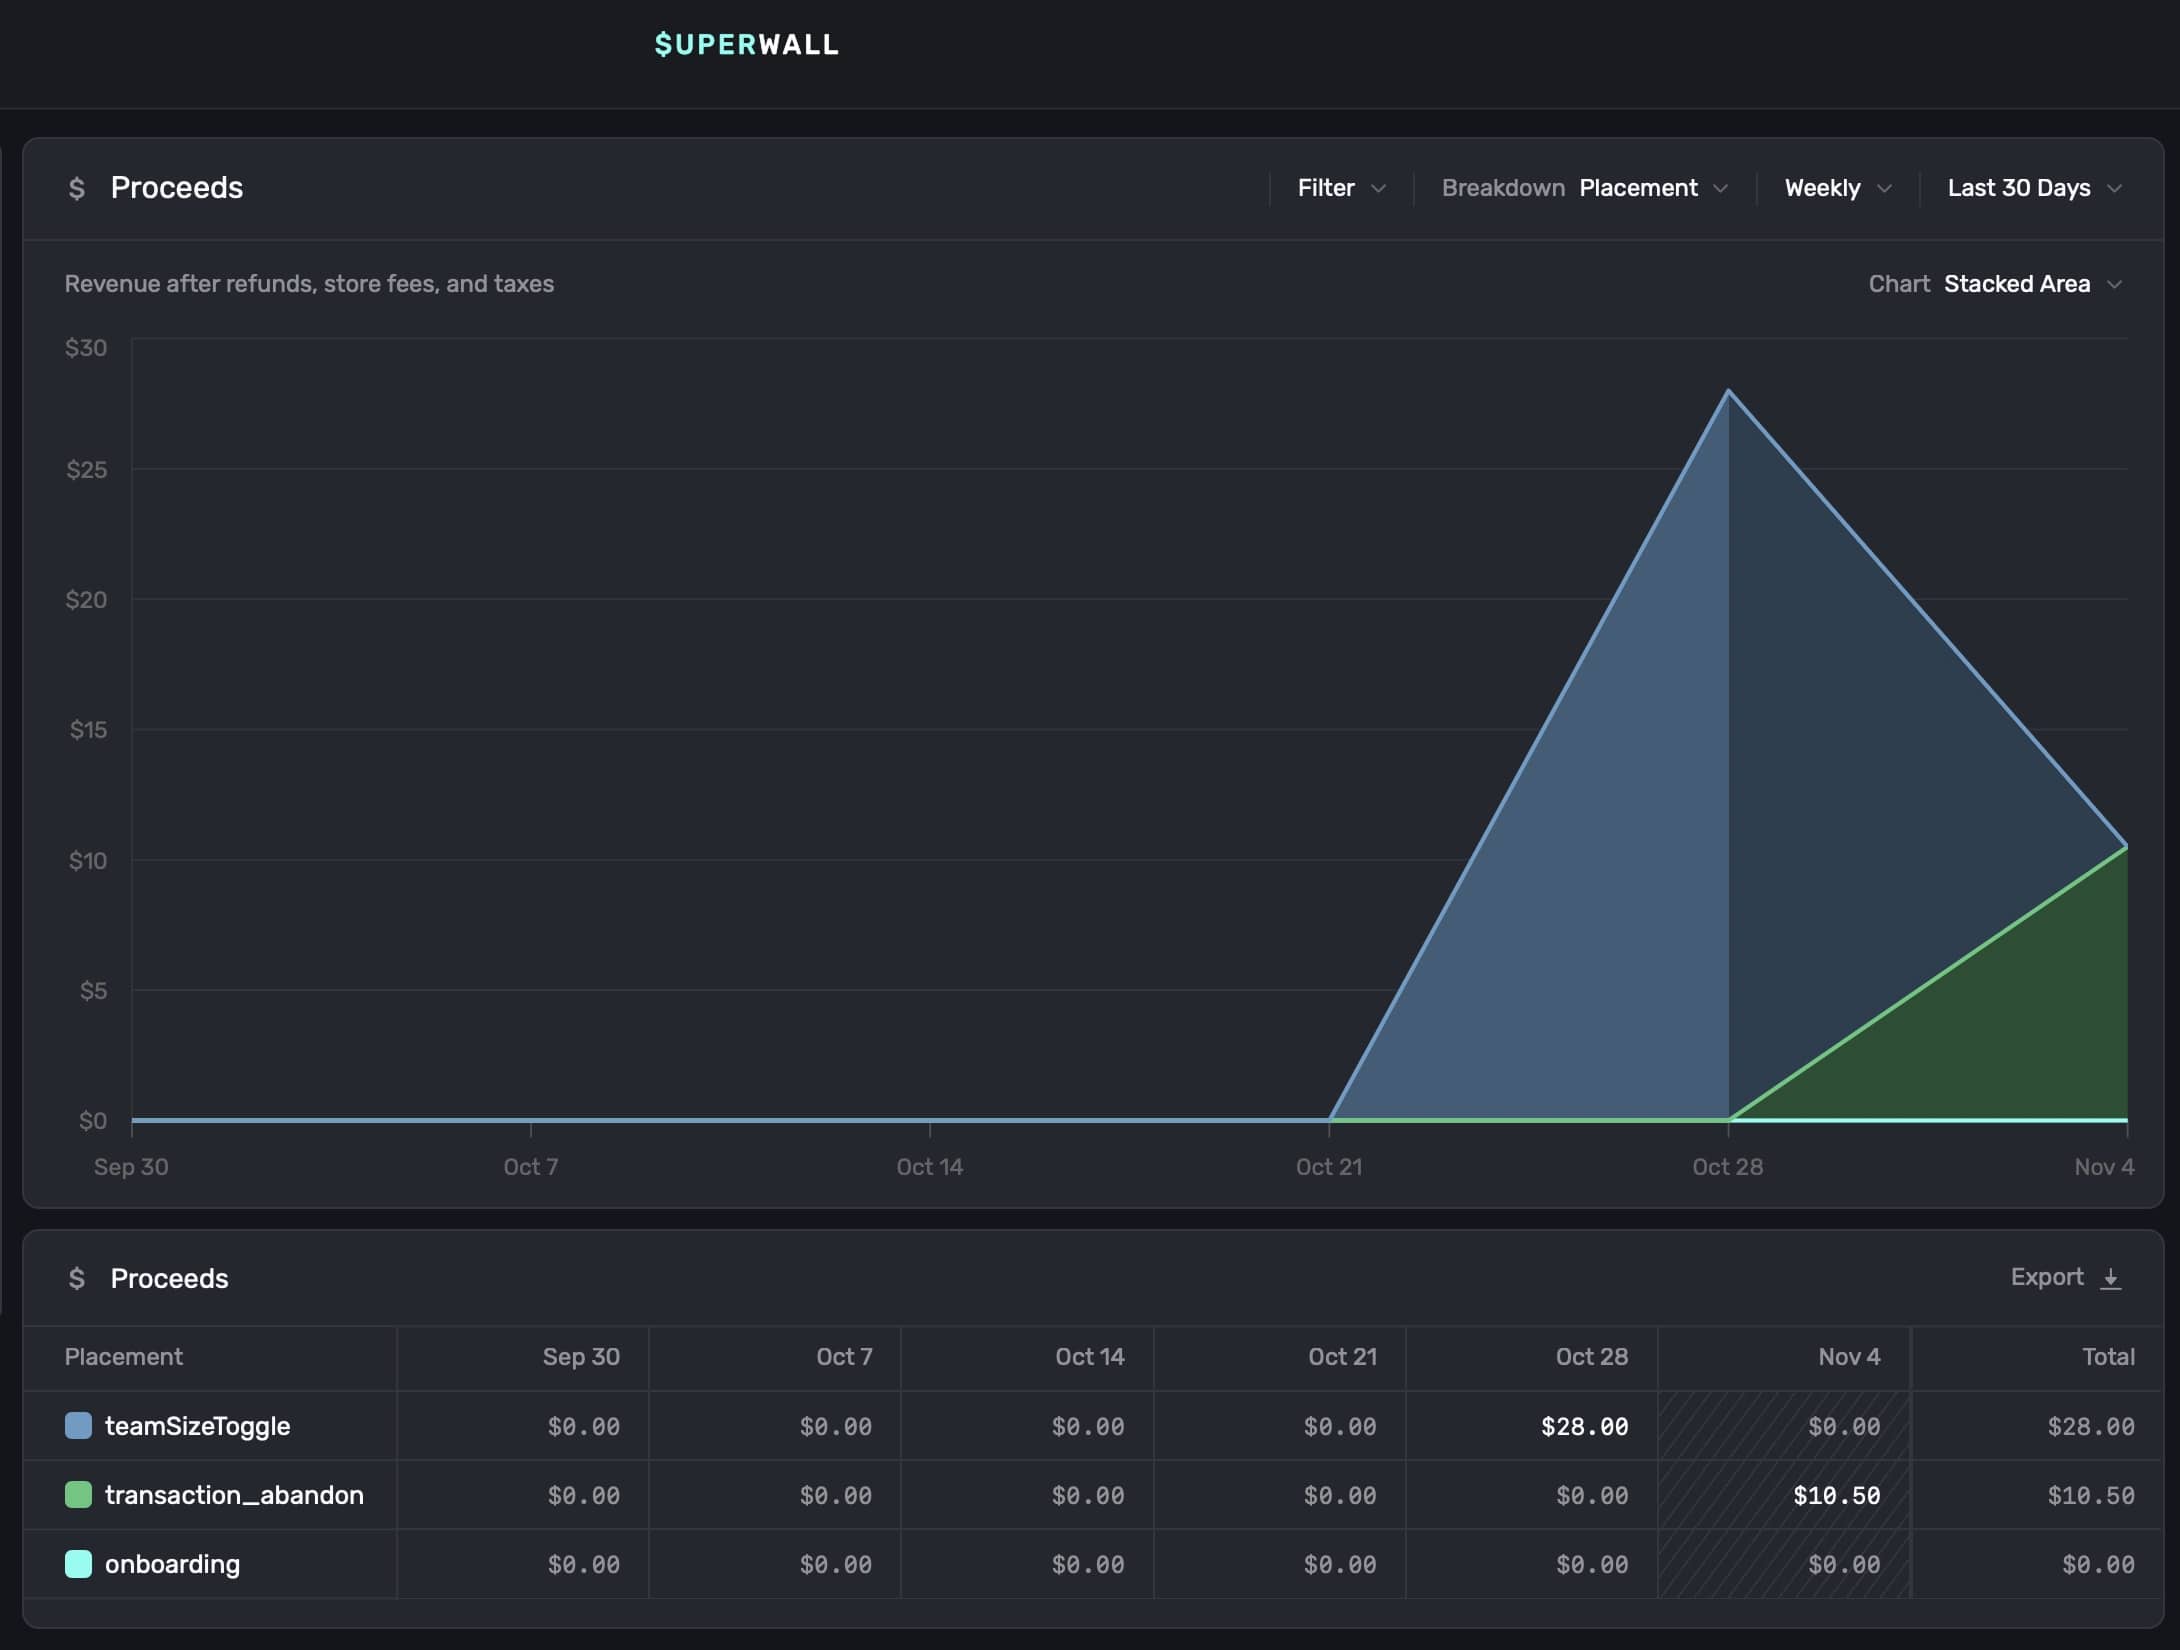
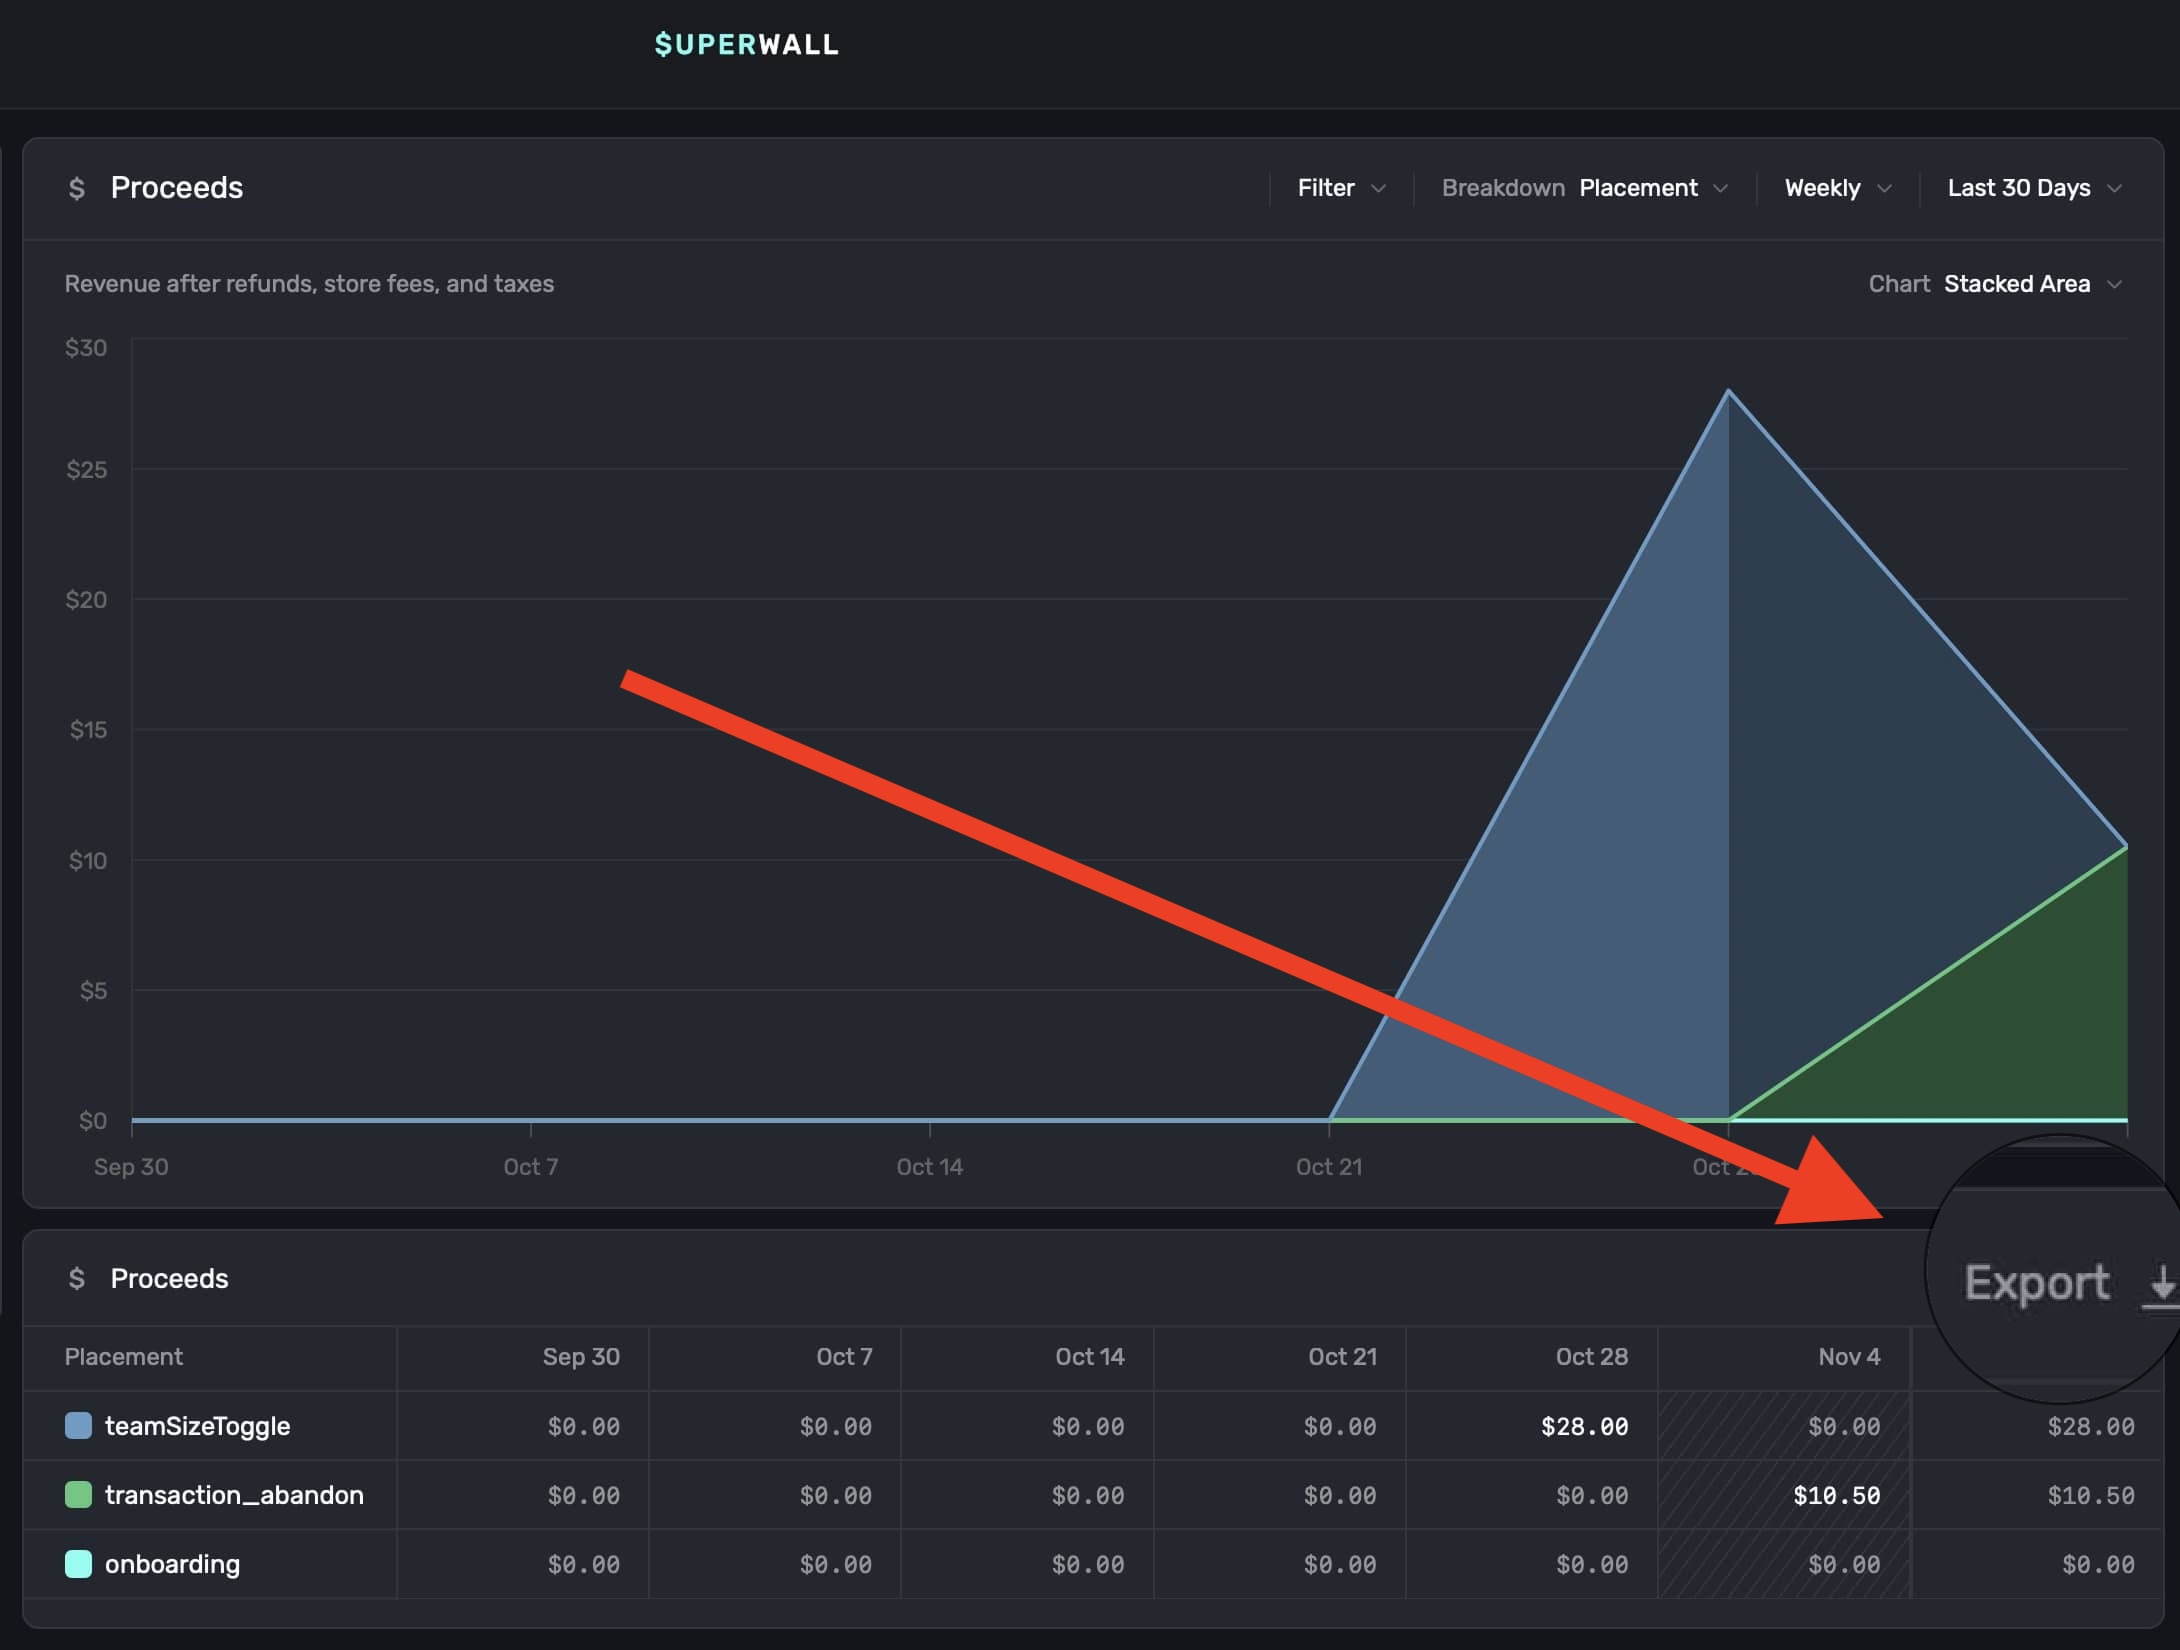
Breaking down a **Proceeds** chart by **Placements** is a powerful way to directly correlate features you make (or similar things you've paywalled) to your app's revenue growth.
### Selecting time ranges
To customize the time span and level of detail of the data displayed on the chart, use the two date toggles at the top right:
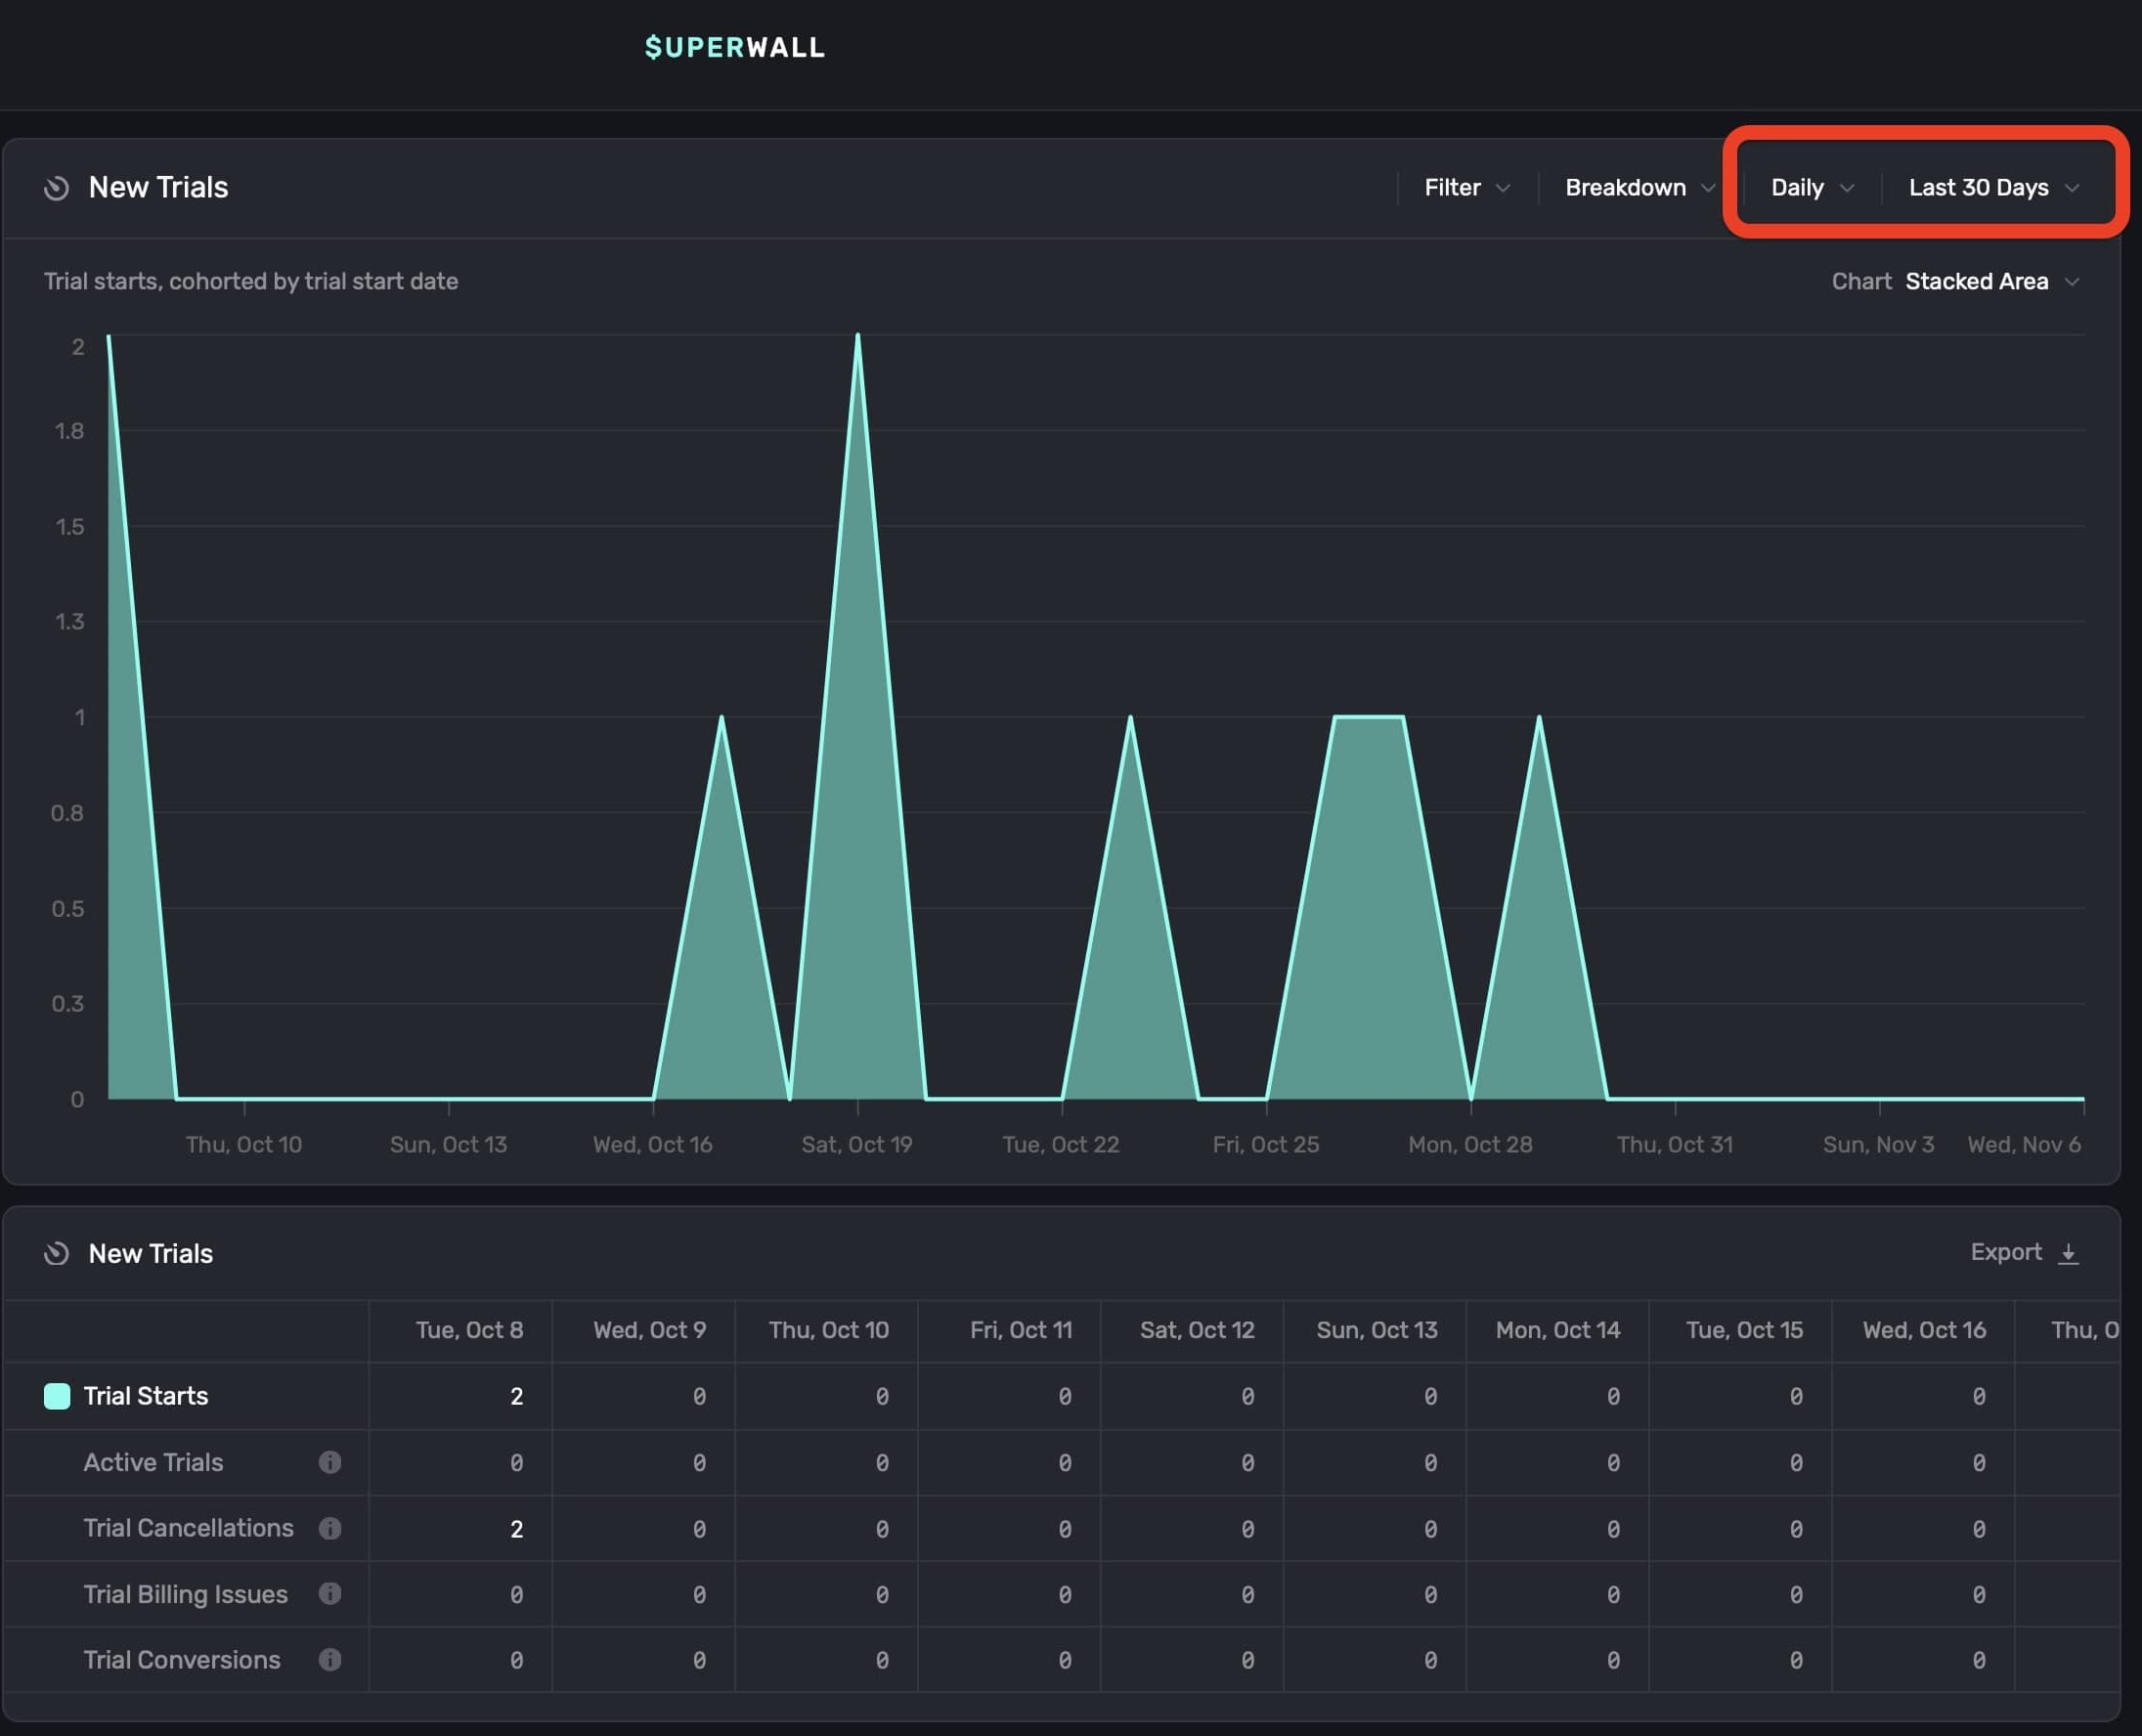
These controls adjust the chart's view interval and data range:
**Display Interval (First Dropdown):** Sets the interval at which data is displayed on the chart. Choose options like Hourly, Daily, Weekly, etc., to adjust how granular the data appears. Selecting "Auto" automatically optimizes the interval based on the selected date range.
**Data Fetch Range (Second Dropdown):** Defines the total date range from which data is fetched and displayed on the chart. Options include Yesterday, Last 7 Days, Last 30 Days, and more. The selected range determines the period of data used to populate the chart, regardless of the display interval setting.
You can also use natural language to set a data fetch range. For example, "last month", "two weeks ago", etc.
### Changing chart formats
Each chart type can display its data in different chart formats. To change the default display, **click** on the **Chart** button found at the top right:
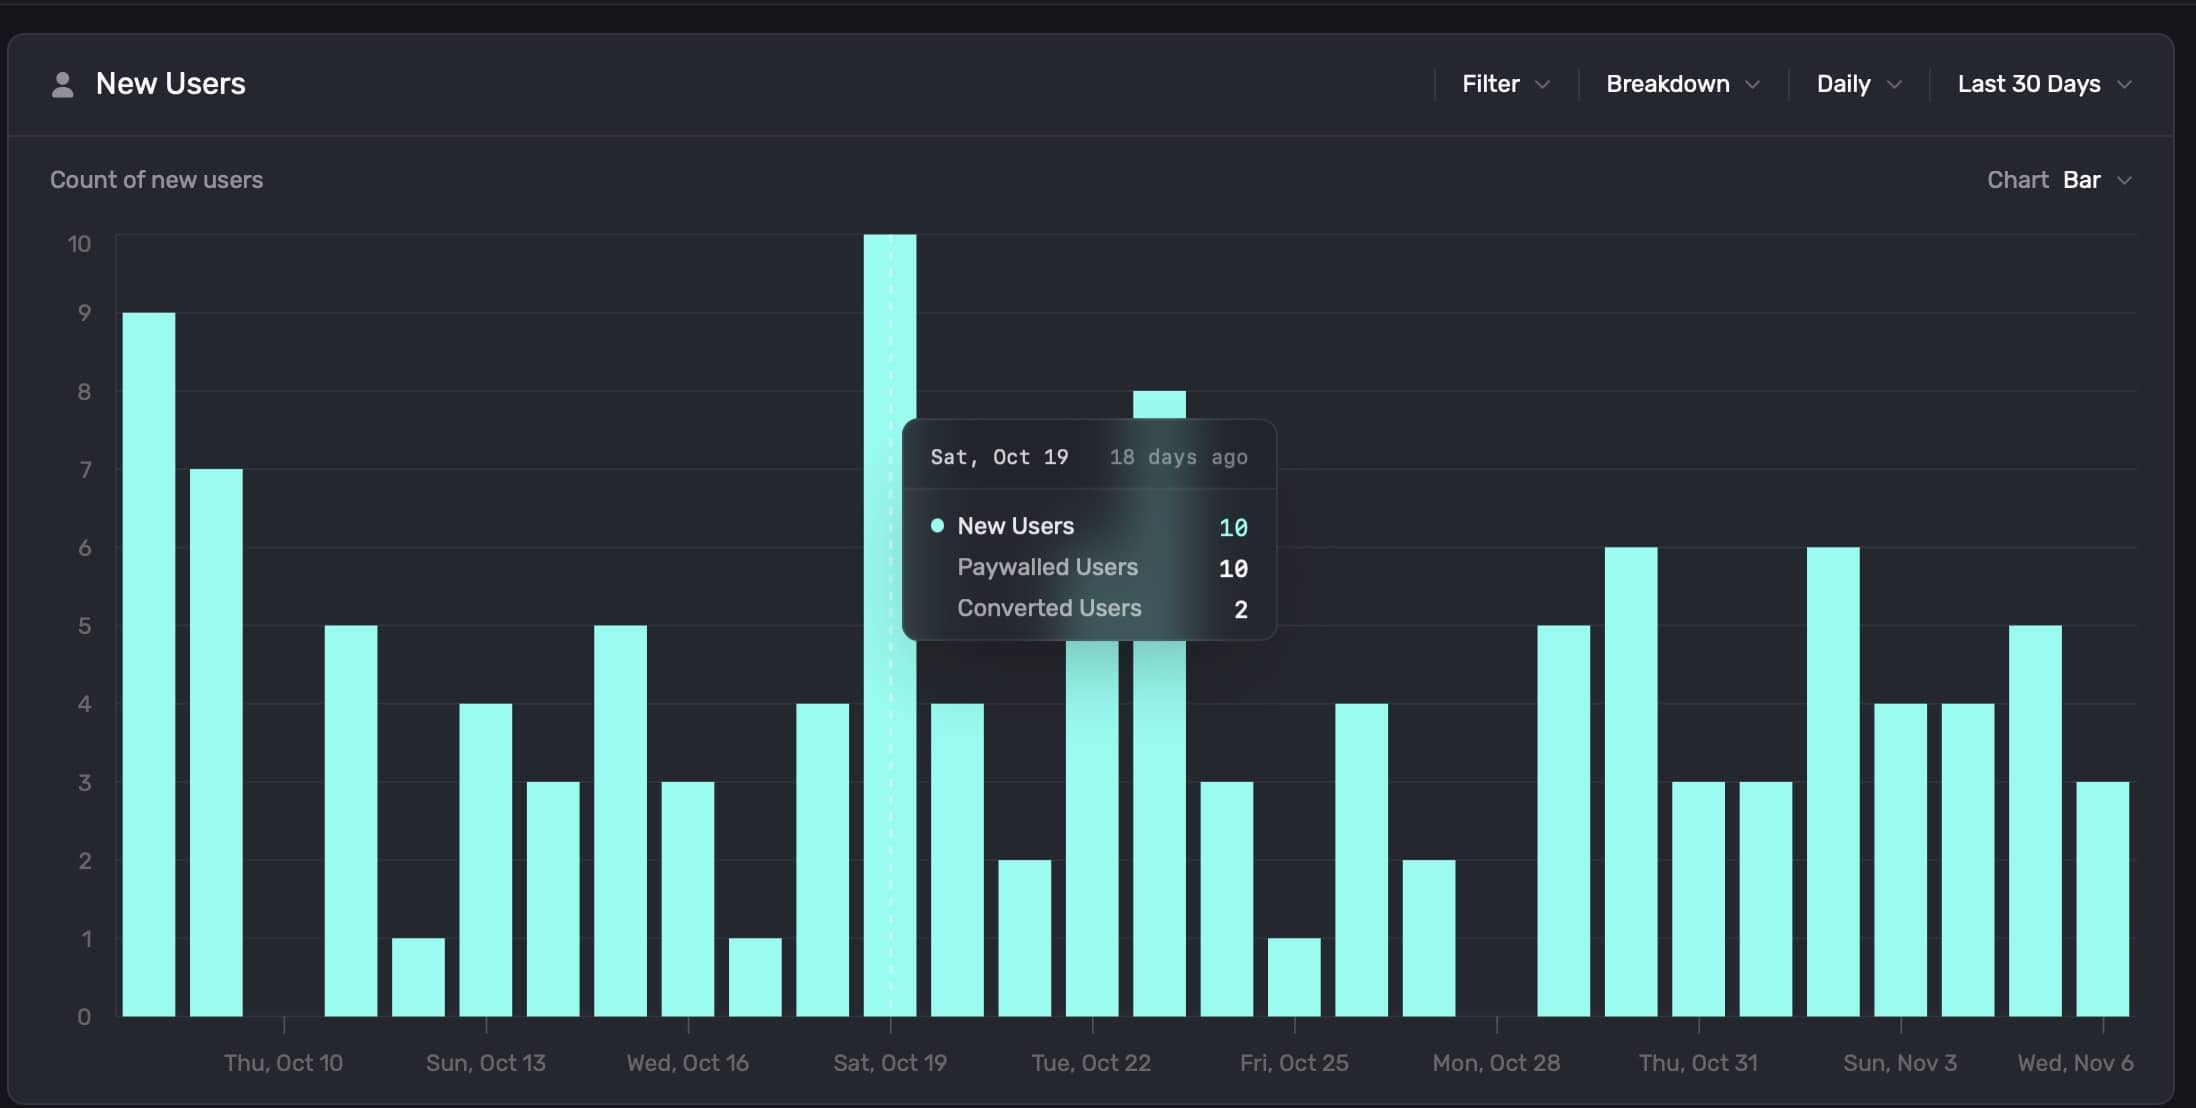
You can toggle the chart format between **Stacked Area**, **Line**, **Stacked Bar**, or **Bar**. Here is the same chart data in each format:
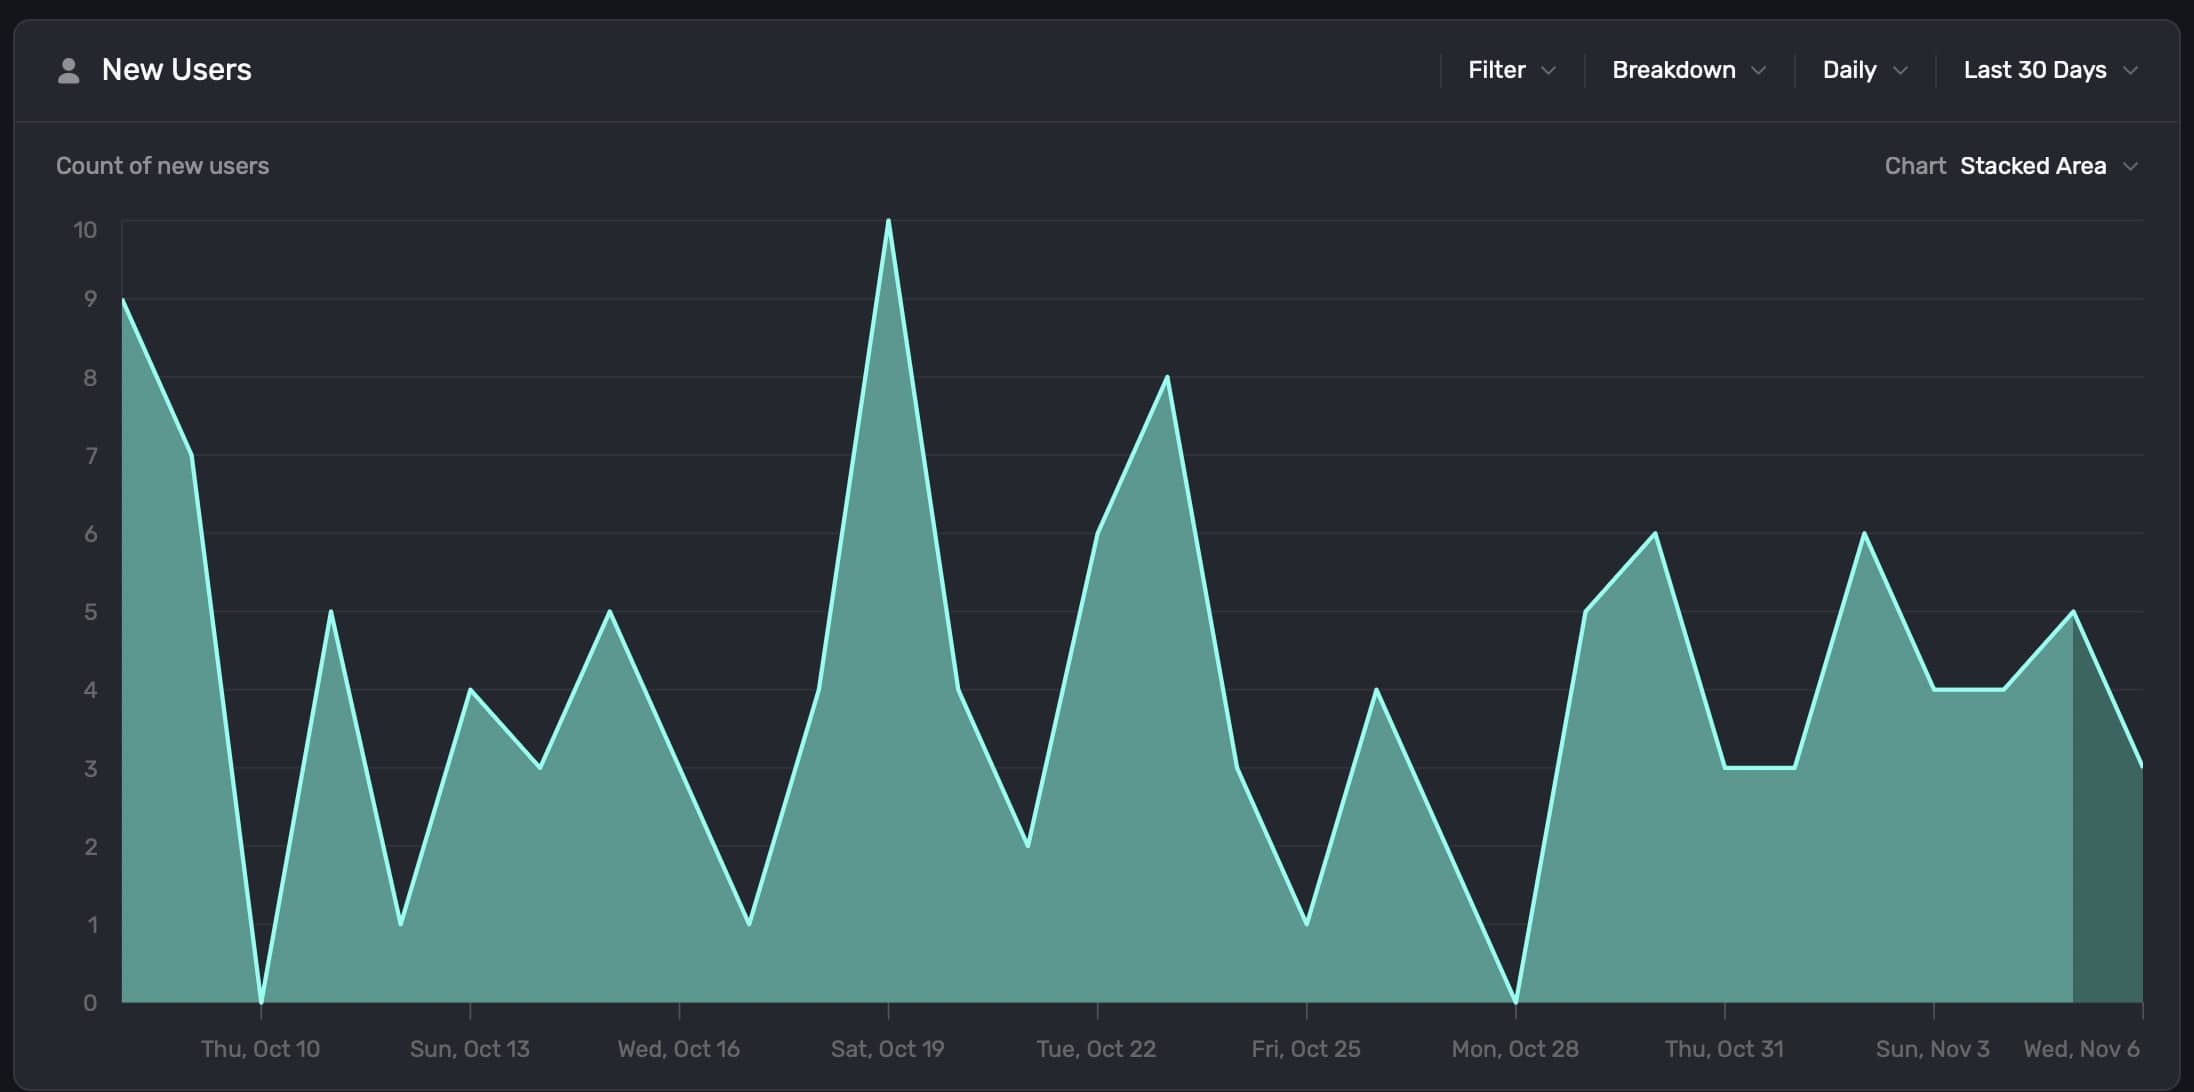
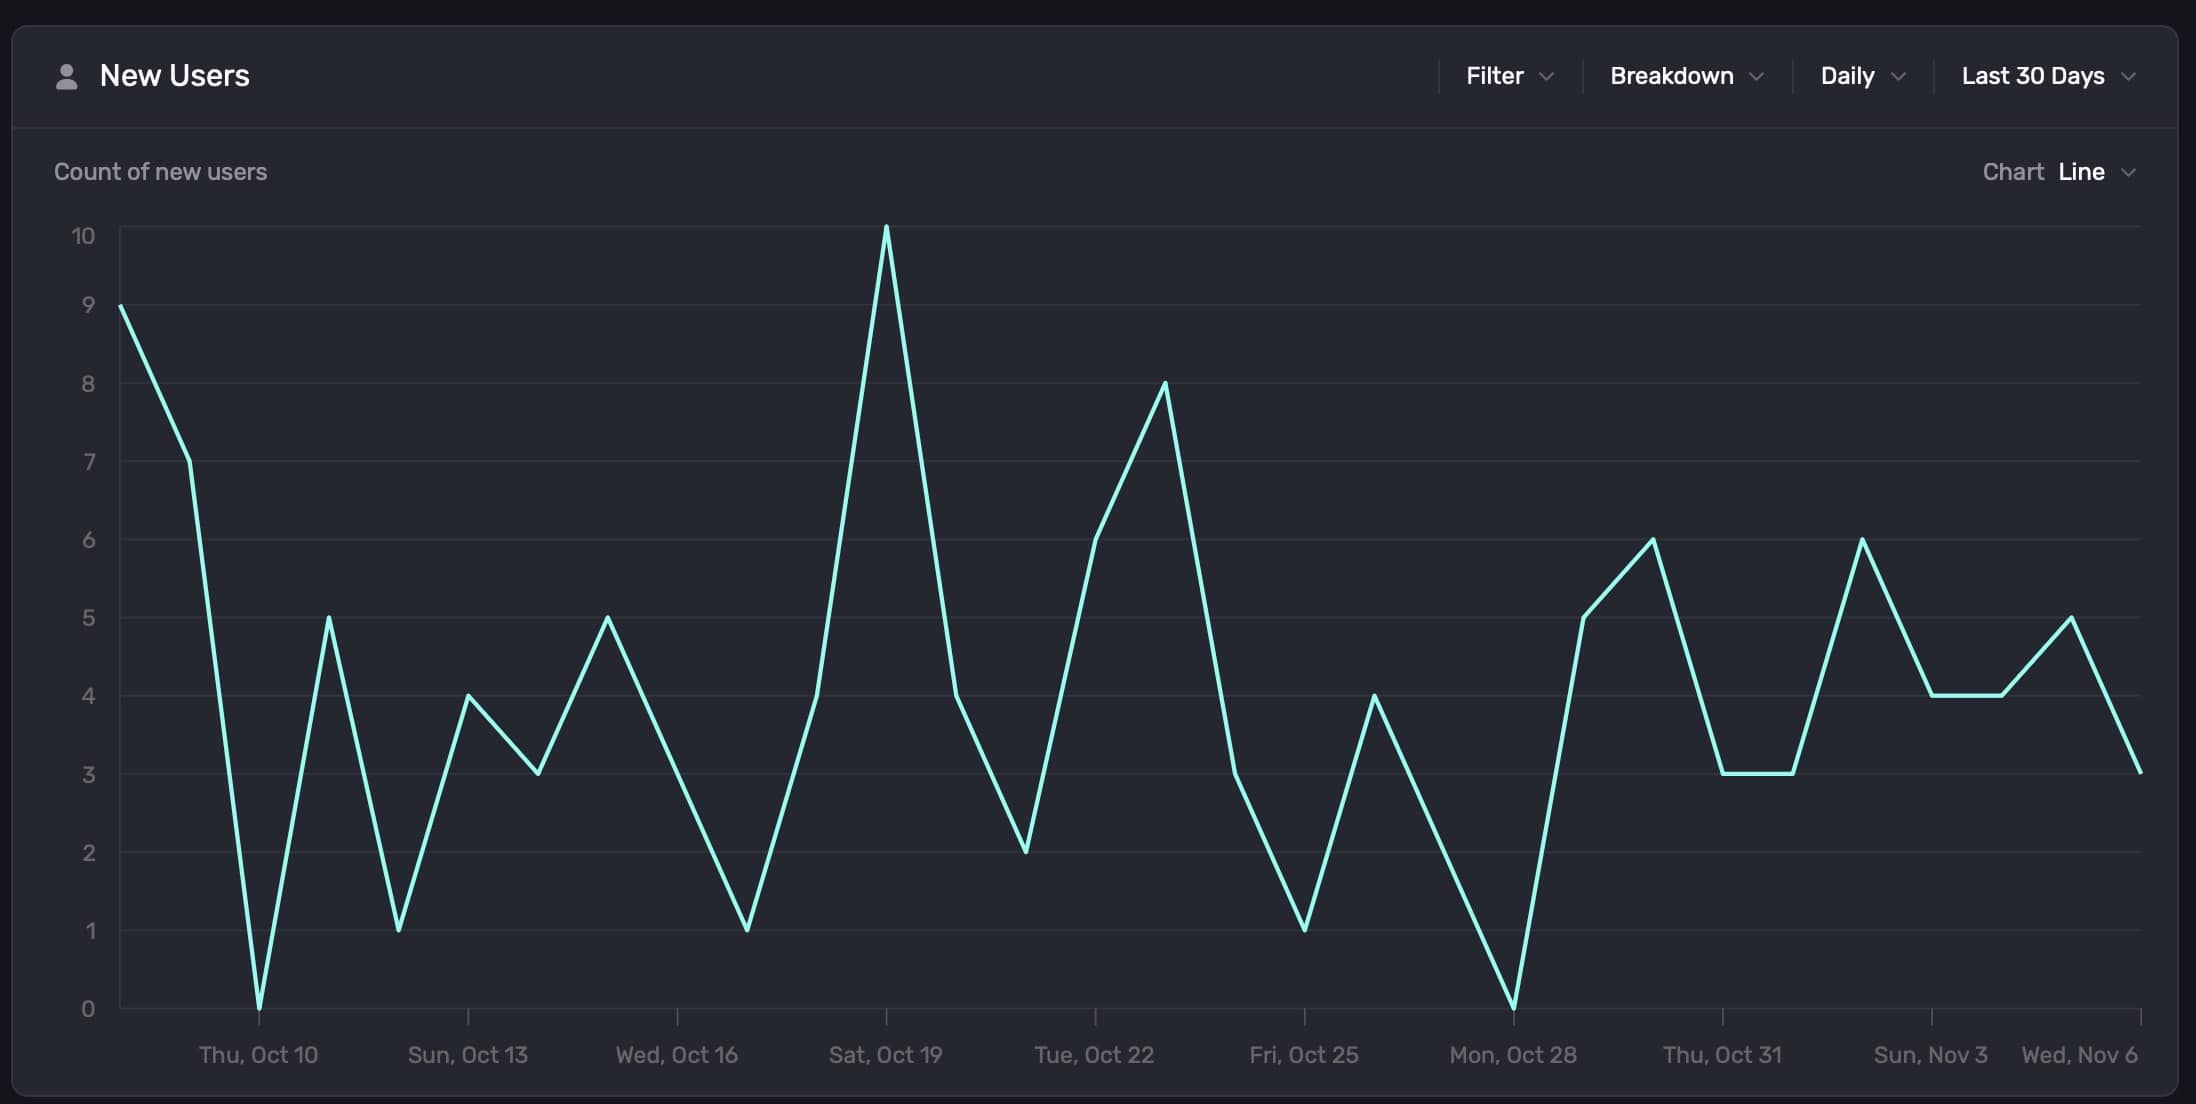
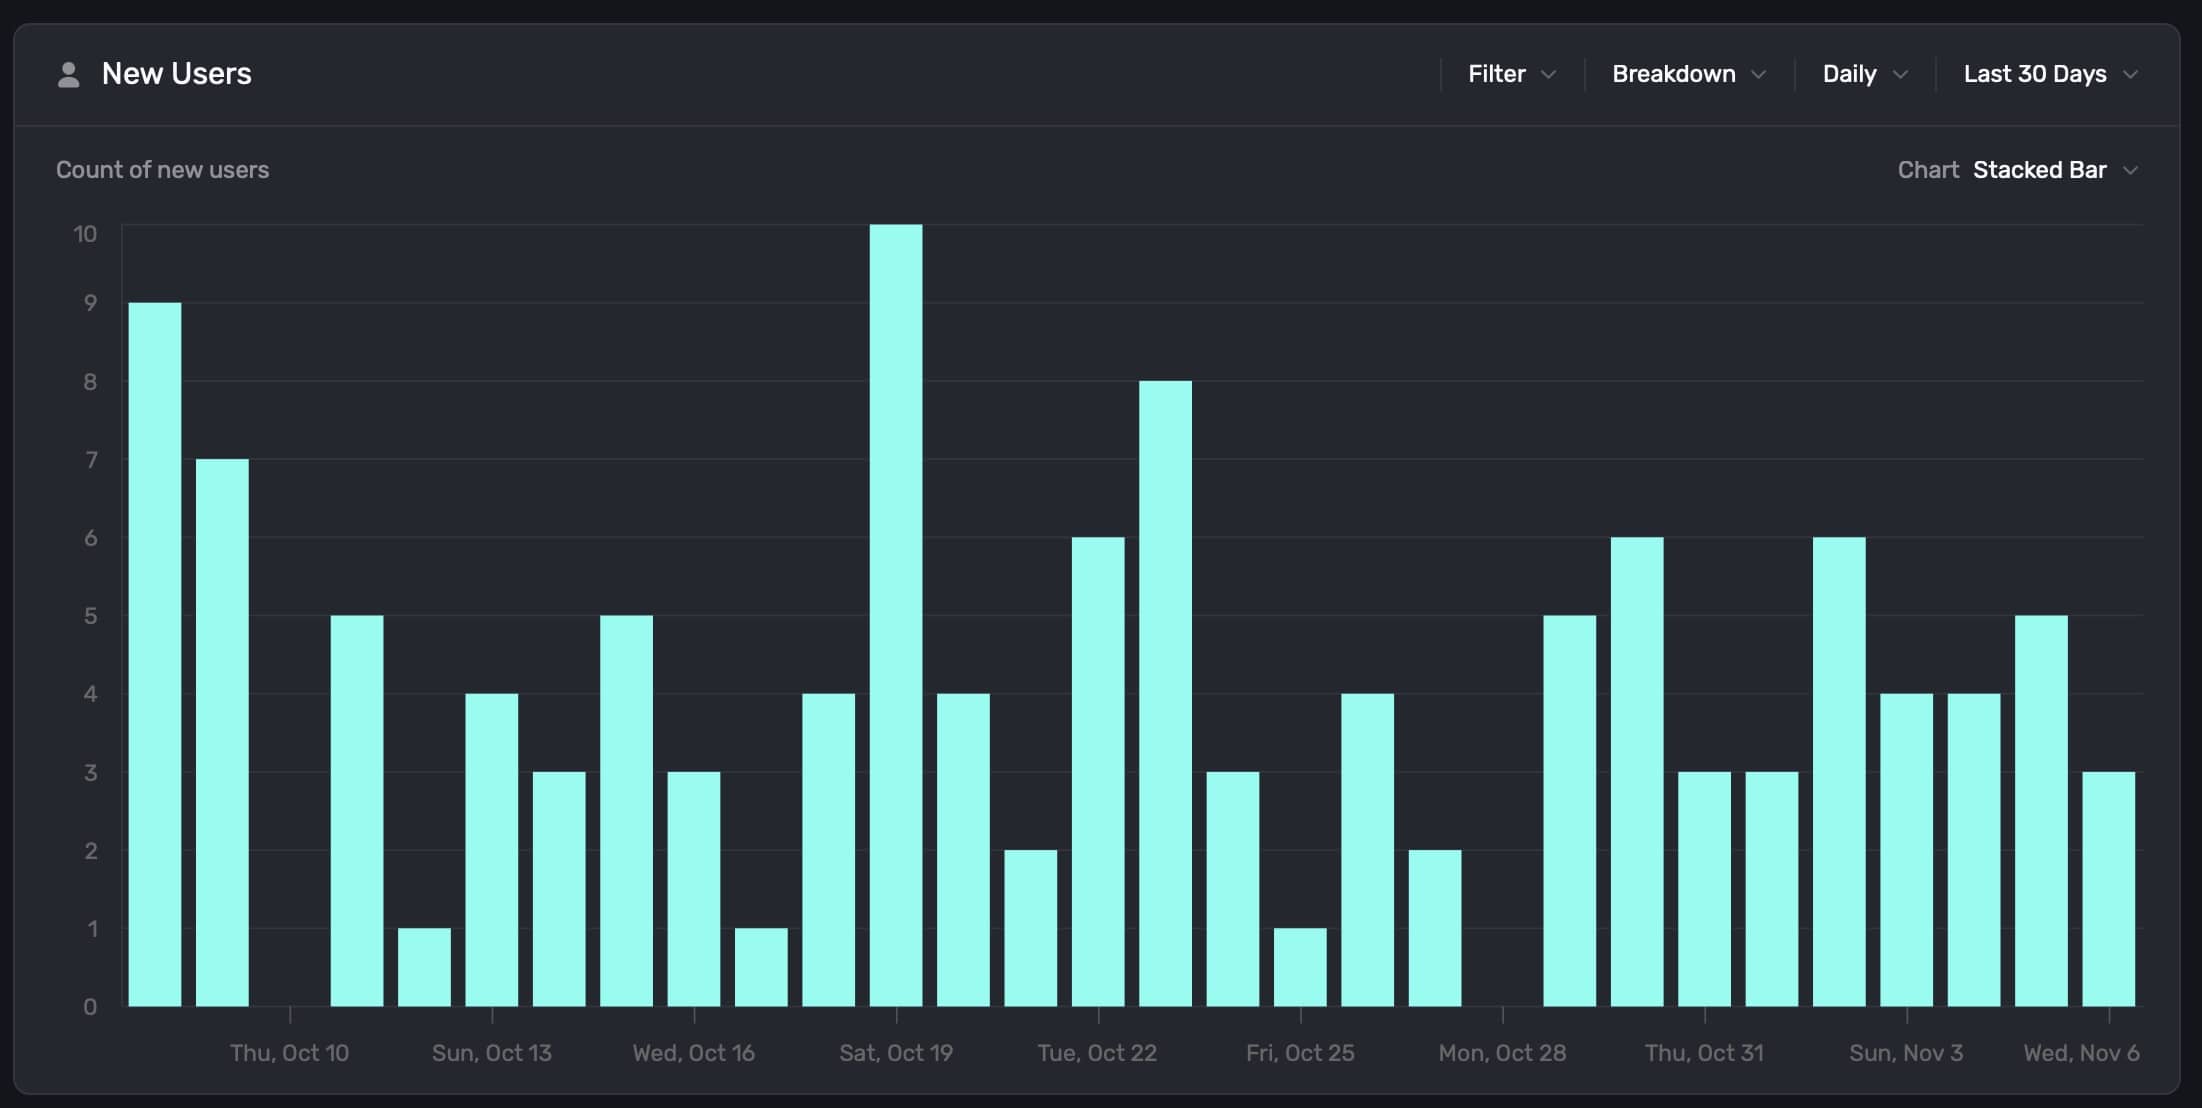
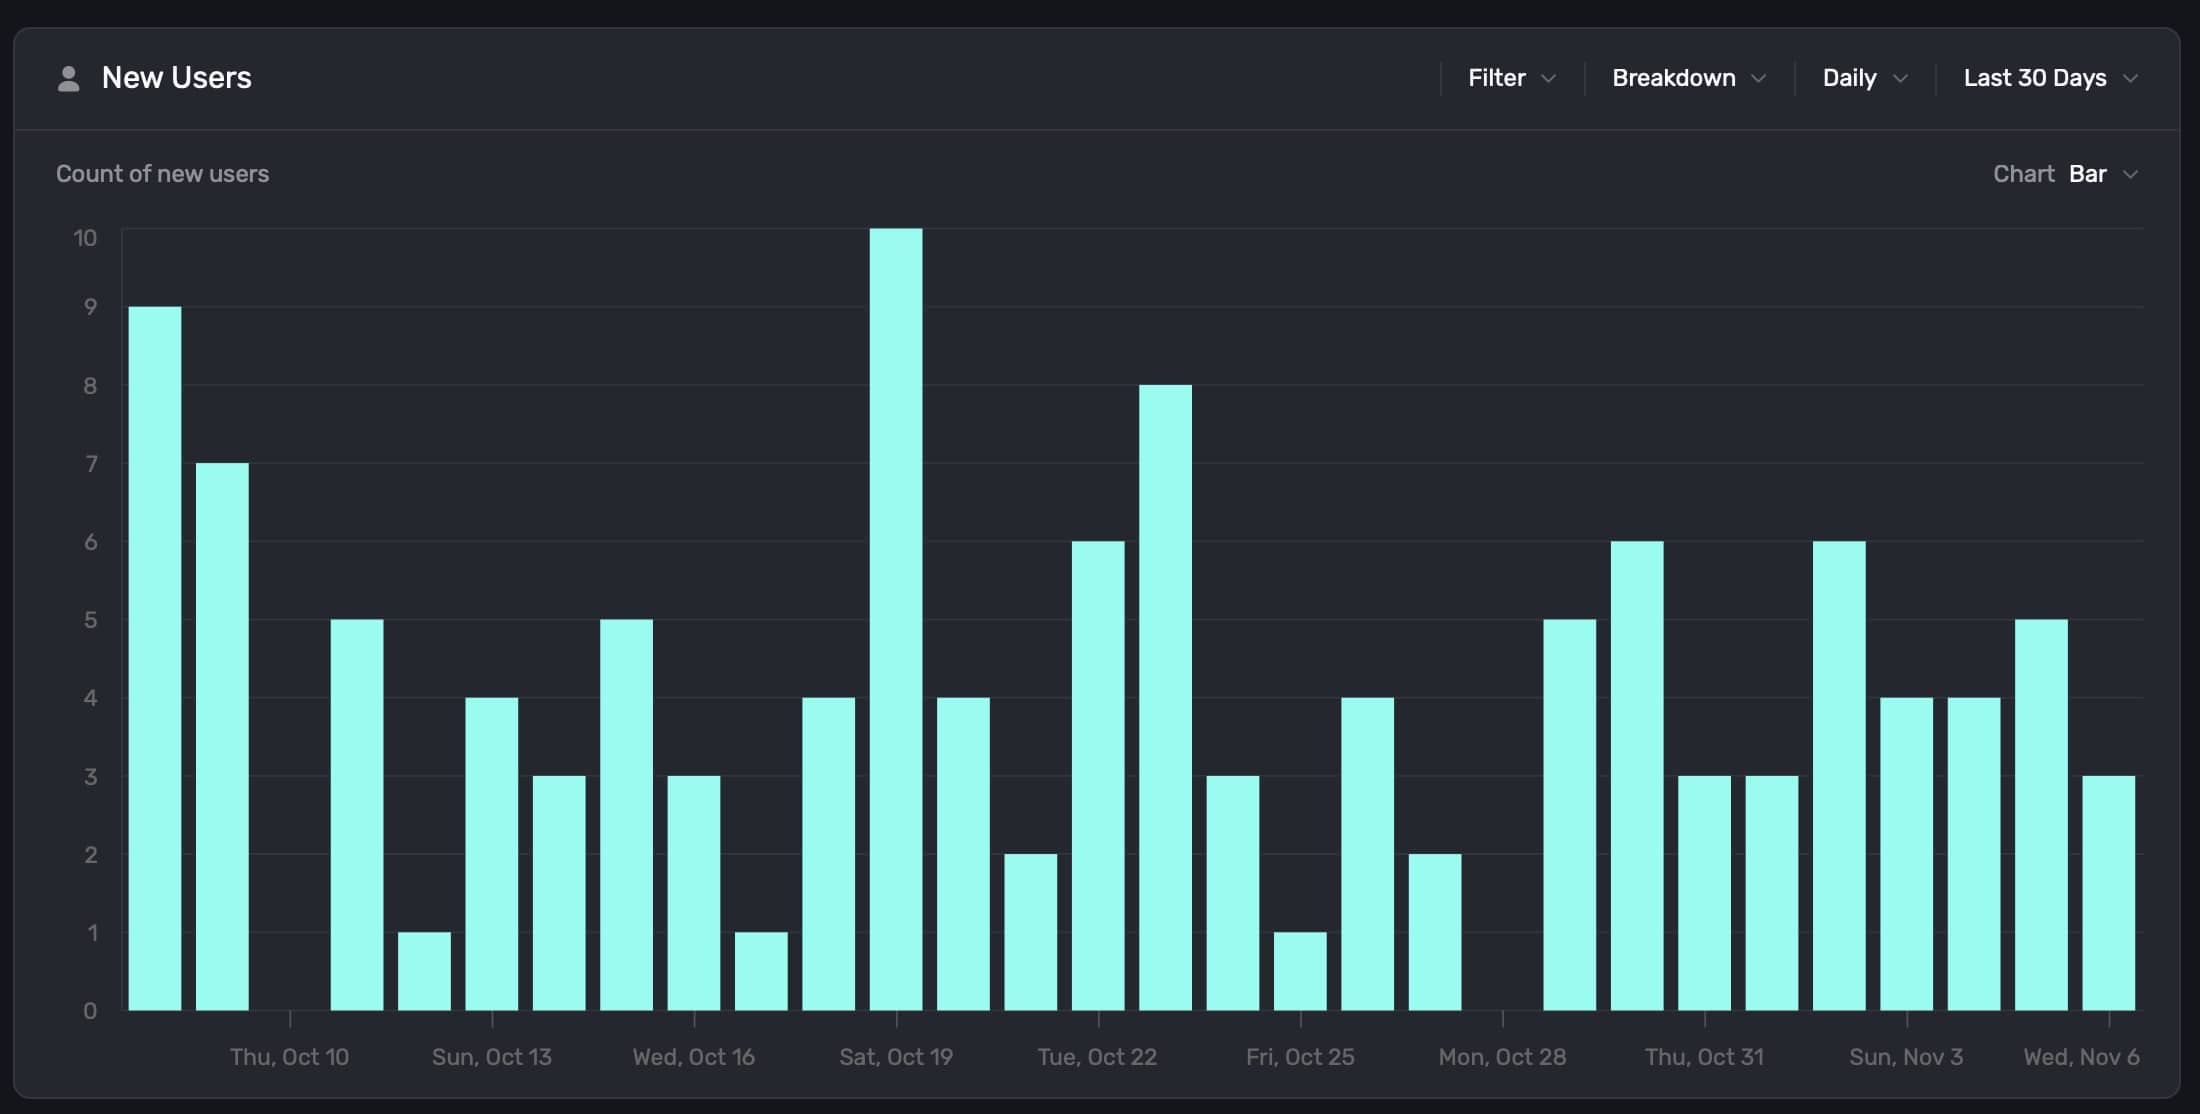
Additionally, you can hover any chart element to see more details about the data point:
### Exporting chart data
You can export any chart data as a `.csv` file. Just **click** the **Export** button at the bottom-right of any chart:
# Cohorting in 3rd Party Tools
Source: https://superwall.com/docs/cohorting-in-3rd-party-tools
To easily view Superwall cohorts in 3rd party tools, we recommend you set user attributes based on the experiments that users are included in. You can also use custom placements for creating analytics events for actions such as interacting with an element on a paywall.
```swift Swift
extension SuperwallService: SuperwallDelegate {
func handleSuperwallEvent(withInfo eventInfo: SuperwallEventInfo) {
if eventInfo.event.description == "trigger_fire" {
MyAnalyticsService.shared.setUserAttributes([
"sw_experiment_\(eventInfo.event.params["experiment_id"])": true,
"sw_variant_\(eventInfo.event.params["variant_id"])": true
])
}
}
}
```
```kotlin Kotlin
override fun handleSuperwallEvent(eventInfo: SuperwallEventInfo) {
when(eventInfo.event) {
is SuperwallEvent.TriggerFire -> {
MyAnalyticsService.shared.setUserAttributes(
mapOf(
"sw_experiment_${eventInfo.params.get("experiment_id").toString()}" to true,
"sw_variant_${eventInfo.params.get("variant_id").toString()}" to true
)
)
}
else -> {}
}
}
```
```dart Flutter
@override
void handleSuperwallEvent(SuperwallEventInfo eventInfo) async {
final experimentId = eventInfo.params?['experiment_id'];
final variantId = eventInfo.params?['variant_id'];
switch (eventInfo.event.type) {
case EventType.triggerFire:
MyAnalyticsService.shared.setUserAttributes({
"sw_experiment_$experimentId": true,
"sw_variant_$variantId": true
});
break;
default:
break;
}
}
```
```typescript React Native
handleSuperwallEvent(eventInfo: SuperwallEventInfo) {
const experimentId = eventInfo.params?['experiment_id']
const variantId = eventInfo.params?['variant_id']
if (!experimentId || !variantId) {
return
}
switch (eventInfo.event.type) {
case EventType.triggerFire:
MyAnalyticsService.shared.setUserAttributes({
`sw_experiment_${experimentId}`: true,
`sw_variant_${variantId}`: true
});
break;
default:
break;
}
}
```
Once you've set this up, you can easily ask for all users who have an attribute `sw_experiment_1234` and breakdown by both variants to see how users in a Superwall experiment behave in other areas of your app.
# Configuring the SDK
Source: https://superwall.com/docs/configuring-the-sdk
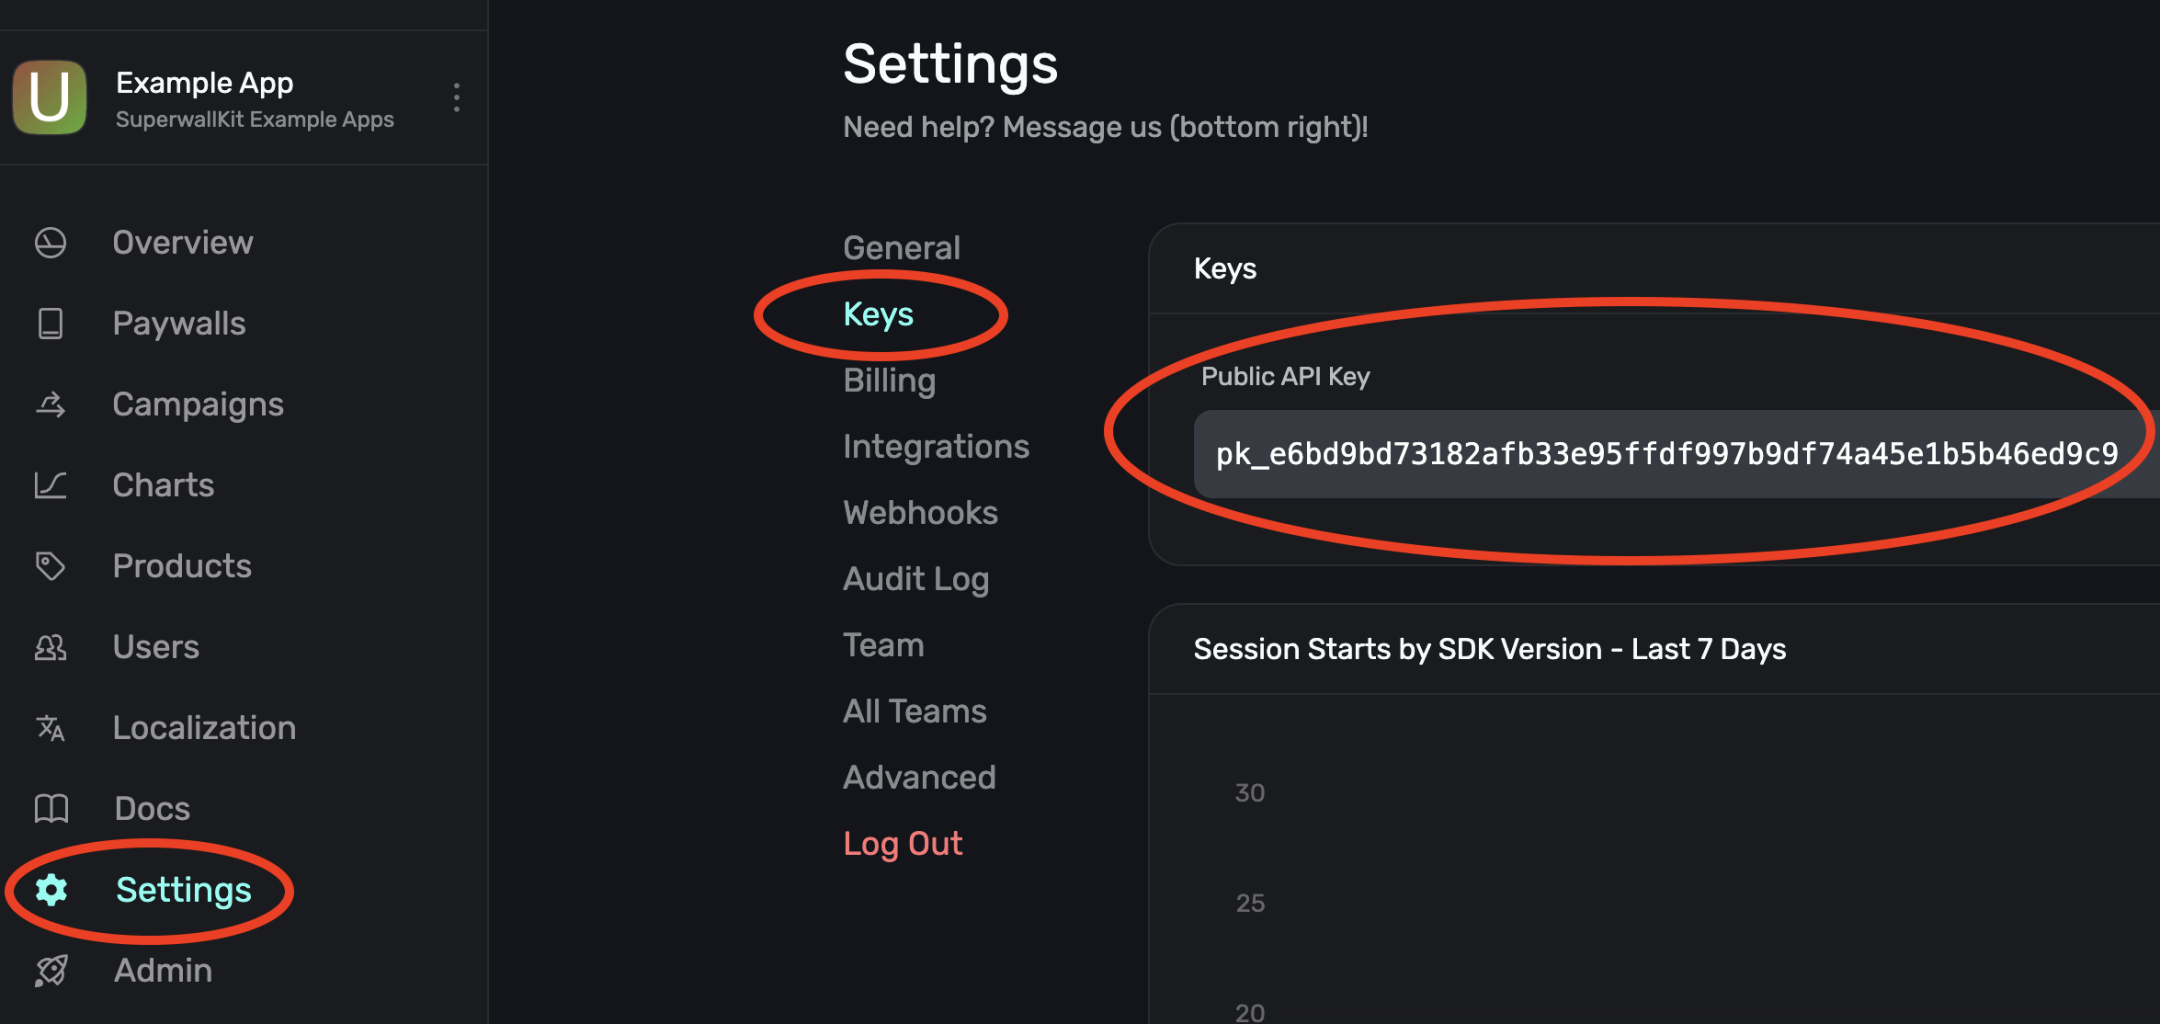
As soon as your app launches, you need to configure the SDK with your **Public API Key**. You'll retrieve this from the Superwall settings page.
If you haven't installed the SDK, [learn how to install the SDK]("/installation")
### Sign Up & Grab Keys
If you haven't already, [sign up for a free account](https://superwall.com/sign-up) on Superwall. Then, when you're through to the Dashboard, click **Settings** from the panel on the left, click **Keys** and copy your **Public API Key**:
### Initialize Superwall in your app
Begin by editing your main Application entrypoint. Depending on the
platform this could be `AppDelegate.swift` or `SceneDelegate.swift` for iOS,
`MainApplication.kt` for Android, `main.dart` in Flutter, or `App.tsx` for React Native:
```swift Swift-UIKit
// AppDelegate.swift
import UIKit
import SuperwallKit
@main
final class AppDelegate: UIResponder, UIApplicationDelegate {
func application(
_ application: UIApplication,
didFinishLaunchingWithOptions launchOptions: [UIApplication.LaunchOptionsKey: Any]?
) -> Bool {
Superwall.configure(apiKey: "MY_API_KEY") // Replace this with your API Key
return true
}
}
```
```swift SwiftUI
// App.swift
import SwiftUI
import SuperwallKit
@main
struct MyApp: App {
init() {
let apiKey = "MY_API_KEY" // Replace this with your API Key
Superwall.configure(apiKey: apiKey)
}
// etc...
}
```
```swift Objective-C
// AppDelegate.m
@import SuperwallKit;
- (BOOL)application:(UIApplication *)application didFinishLaunchingWithOptions:(NSDictionary *)launchOptions {
// Initialize the Superwall service.
[Superwall configureWithApiKey:@"MY_API_KEY"];
return YES;
}
```
```kotlin Kotlin
// MainApplication.kt
class MainApplication : android.app.Application(), SuperwallDelegate {
override fun onCreate() {
super.onCreate()
// Setup
Superwall.configure(this, "MY_API_KEY")
// OR using the DSL
configureSuperwall("MY_API_KEY") {
purchaseController = MyPurchaseController(this@MainApplication)
}
}
}
```
```dart Flutter
// main.dart
void initState() {
// Determine Superwall API Key for platform
String apiKey = Platform.isIOS ? "MY_IOS_API_KEY" : "MY_ANDROID_API_KEY";
Superwall.configure(apiKey);
}
```
```typescript React Native
// App.tsx
import { Platform } from "react-native"
import Superwall from "@superwall/react-native-superwall"
export default function App() {
React.useEffect(() => {
const apiKey = Platform.OS === "ios" ? "MY_IOS_API_KEY" : "MY_ANDROID_API_KEY"
Superwall.configure({
apiKey: apiKey,
})
}, [])
}
```
This configures a shared instance of `Superwall`, the primary class for interacting with the SDK's API. Make sure to replace `MY_API_KEY` with your public API key that you just retrieved.
By default, Superwall handles basic subscription-related logic for you. However, if you’d like
greater control over this process (e.g. if you’re using RevenueCat), you’ll want to pass in a
`PurchaseController` to your configuration call and manually set the `subscriptionStatus`. You can
also pass in `SuperwallOptions` to customize the appearance and behavior of the SDK. See
[Purchases and Subscription Status](/advanced-configuration) for more.
You've now configured Superwall!
For further help, check out our [iOS example apps](https://github.com/superwall/Superwall-iOS/tree/master/Examples) for working examples of implementing SuperwallKit.
# Creating Applications
Source: https://superwall.com/docs/creating-applications
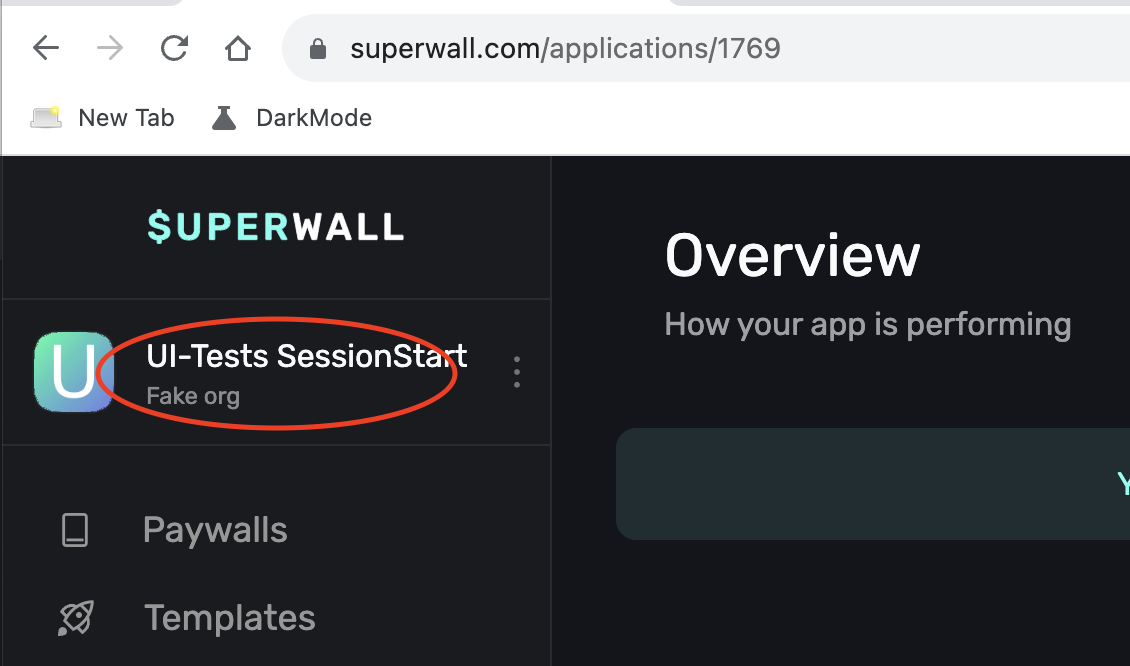
To create an application once you already have one, follow these steps:
Open the menu by selecting your existing application from the top-level side of
the sidebar
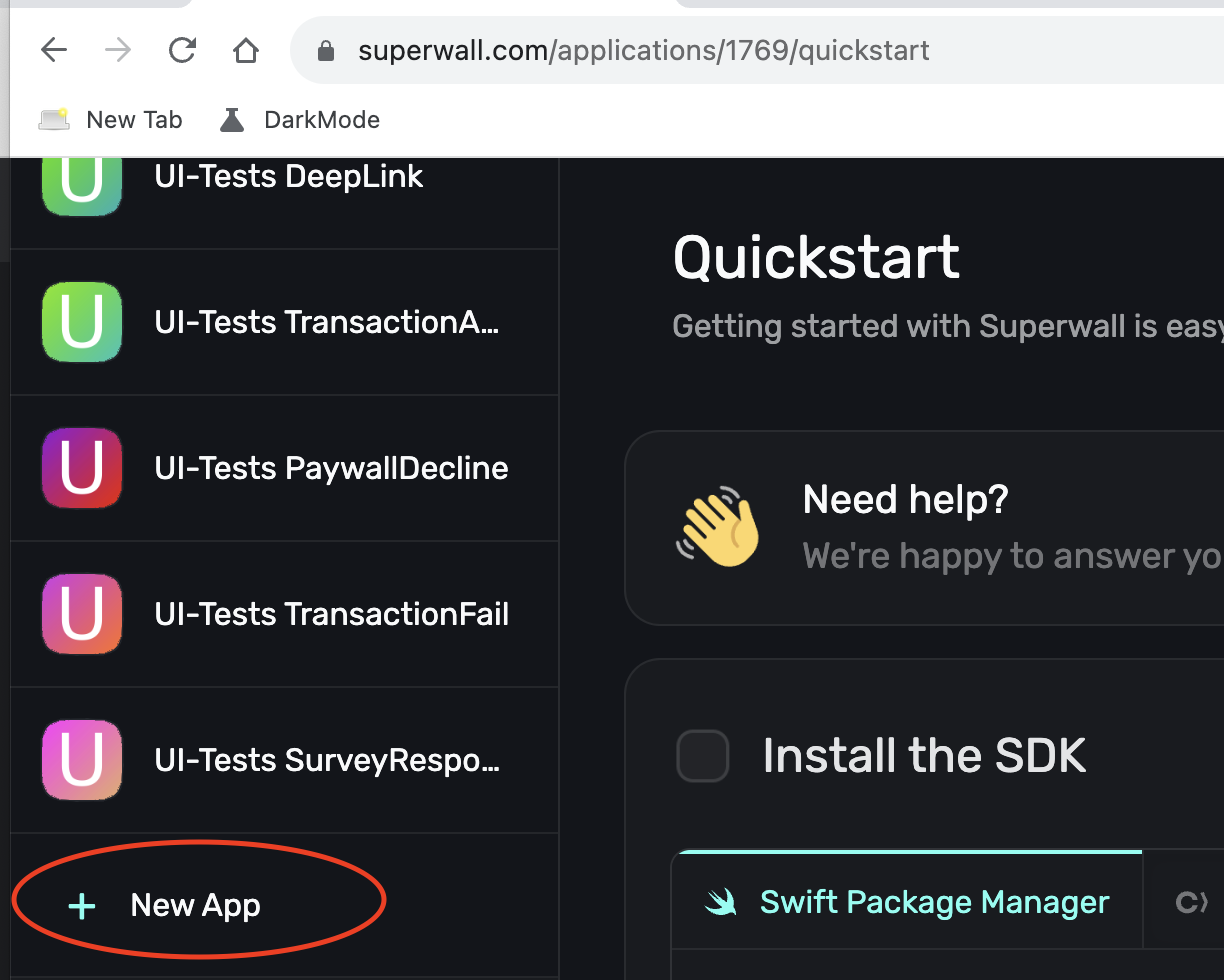
*You may need to scroll down if you have many apps*
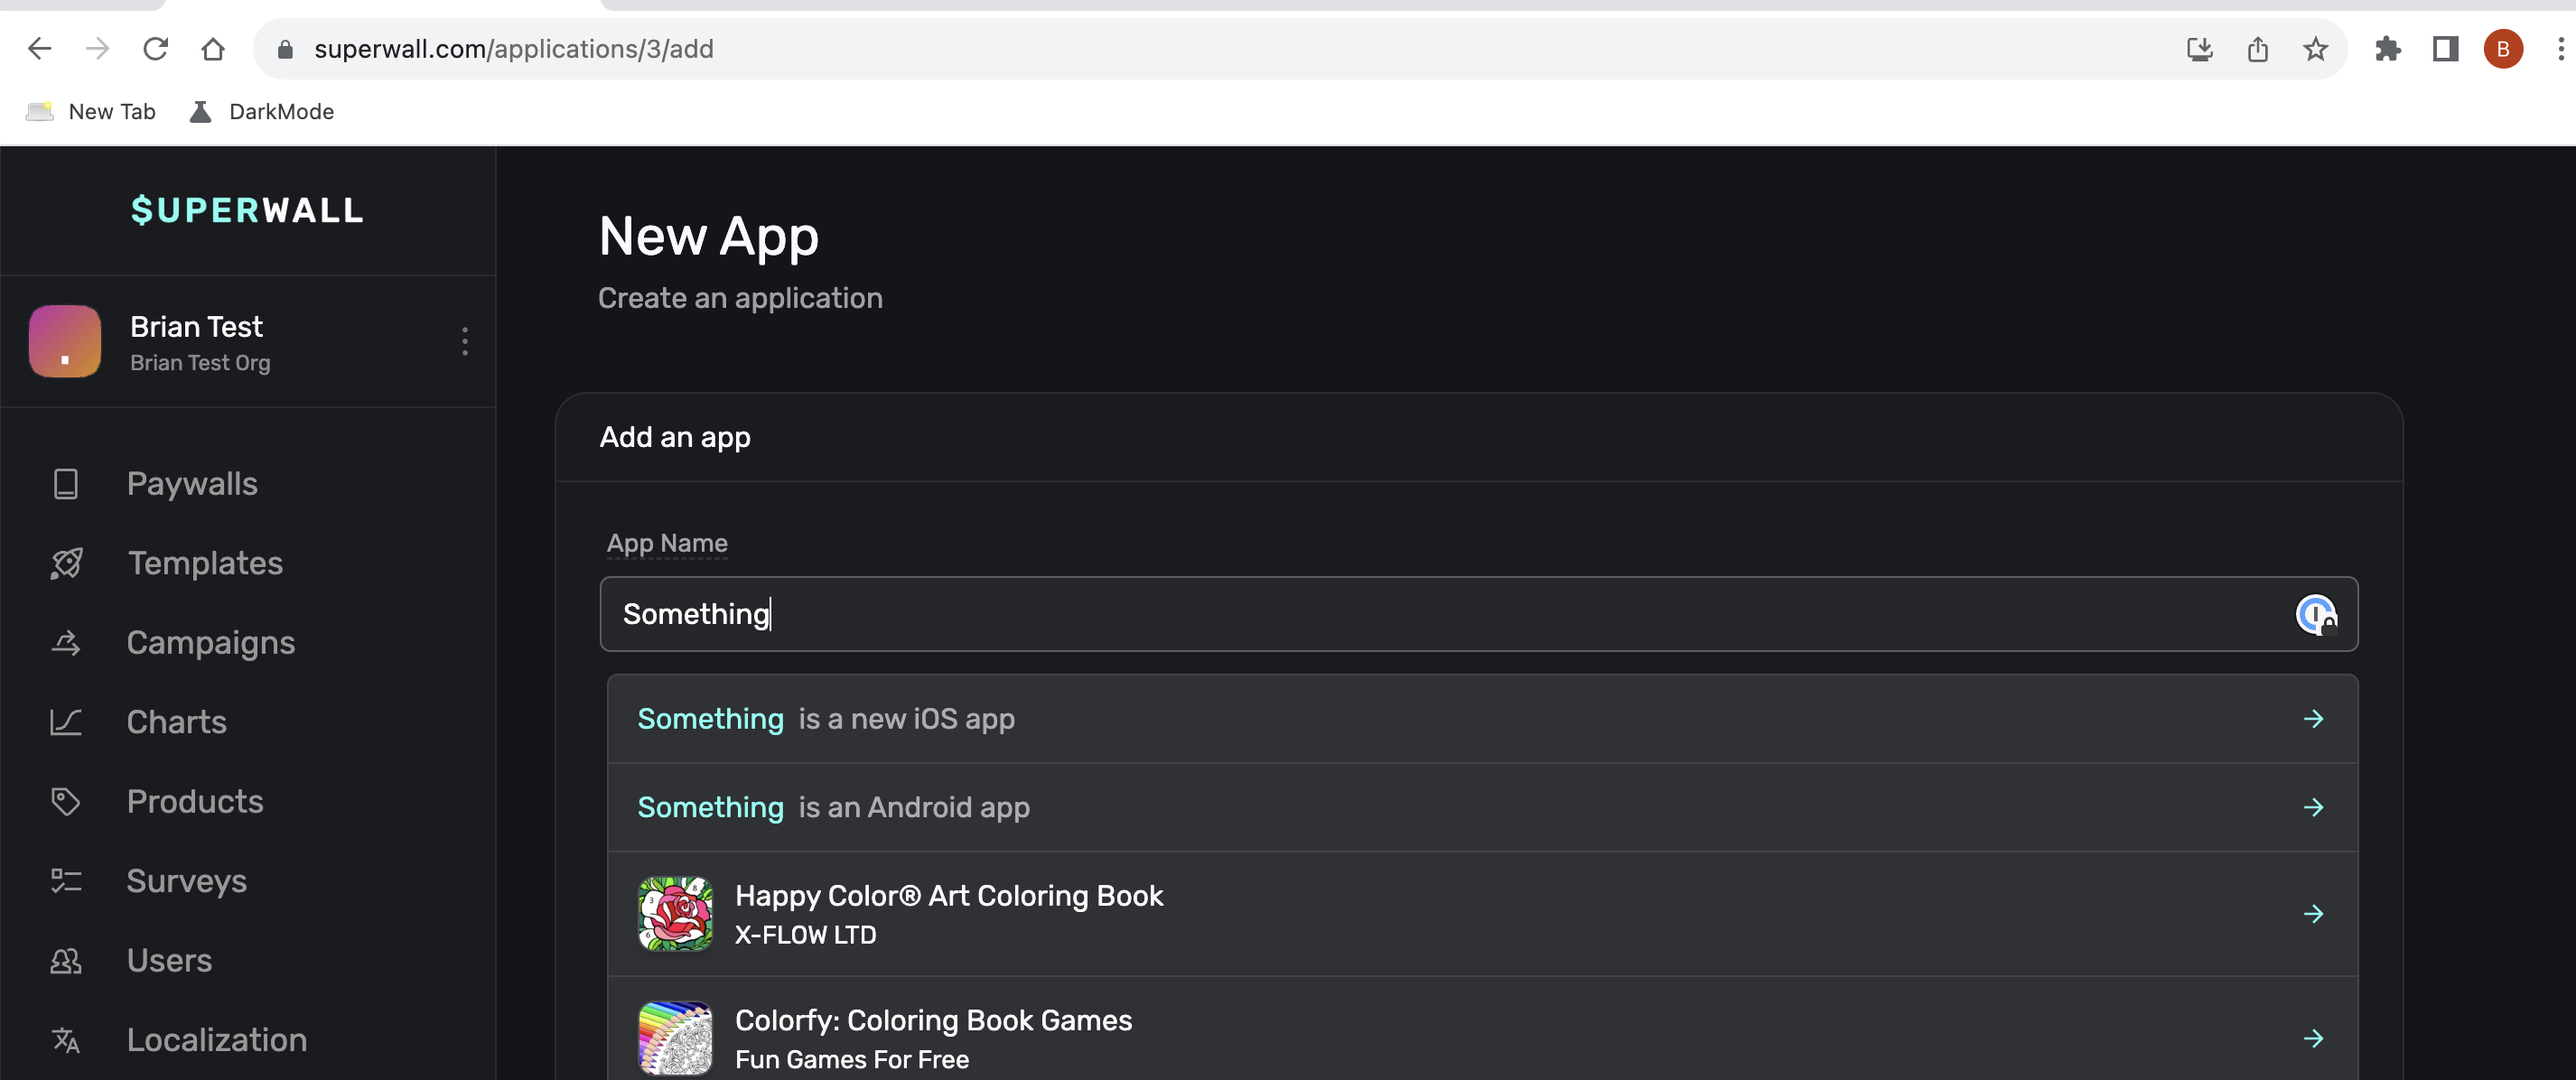
If your app is an iOS app it should be returned in the search. If it's not,
then you may need to click "`` is a new iOS app" or "`` is
an Android app"
Once you're all done, you should be able to see your new app and switch between
them using the app switcher on the top left that we used to get started! 🎉
# Custom Paywall Analytics
Source: https://superwall.com/docs/custom-paywall-analytics
Learn how to log events from paywalls, such as a button tap or product change, to forward to your analytics service.
You can create customized analytics tracking for any paywall event by using custom placements. With them, you can get callbacks for actions such as interacting with an element on a paywall sent to your [Superwall delegate](/using-superwall-delegate). This can be useful for tracking how users interact with your paywall and how that affects their behavior in other areas of your app.
For example, in the paywall below, perhaps you're interested in tracking when people switch the plan from "Standard" and "Pro":

You could create a custom placement [tap behavior](/paywall-editor-styling-elements#tap-behaviors) which fires when a segment is tapped:
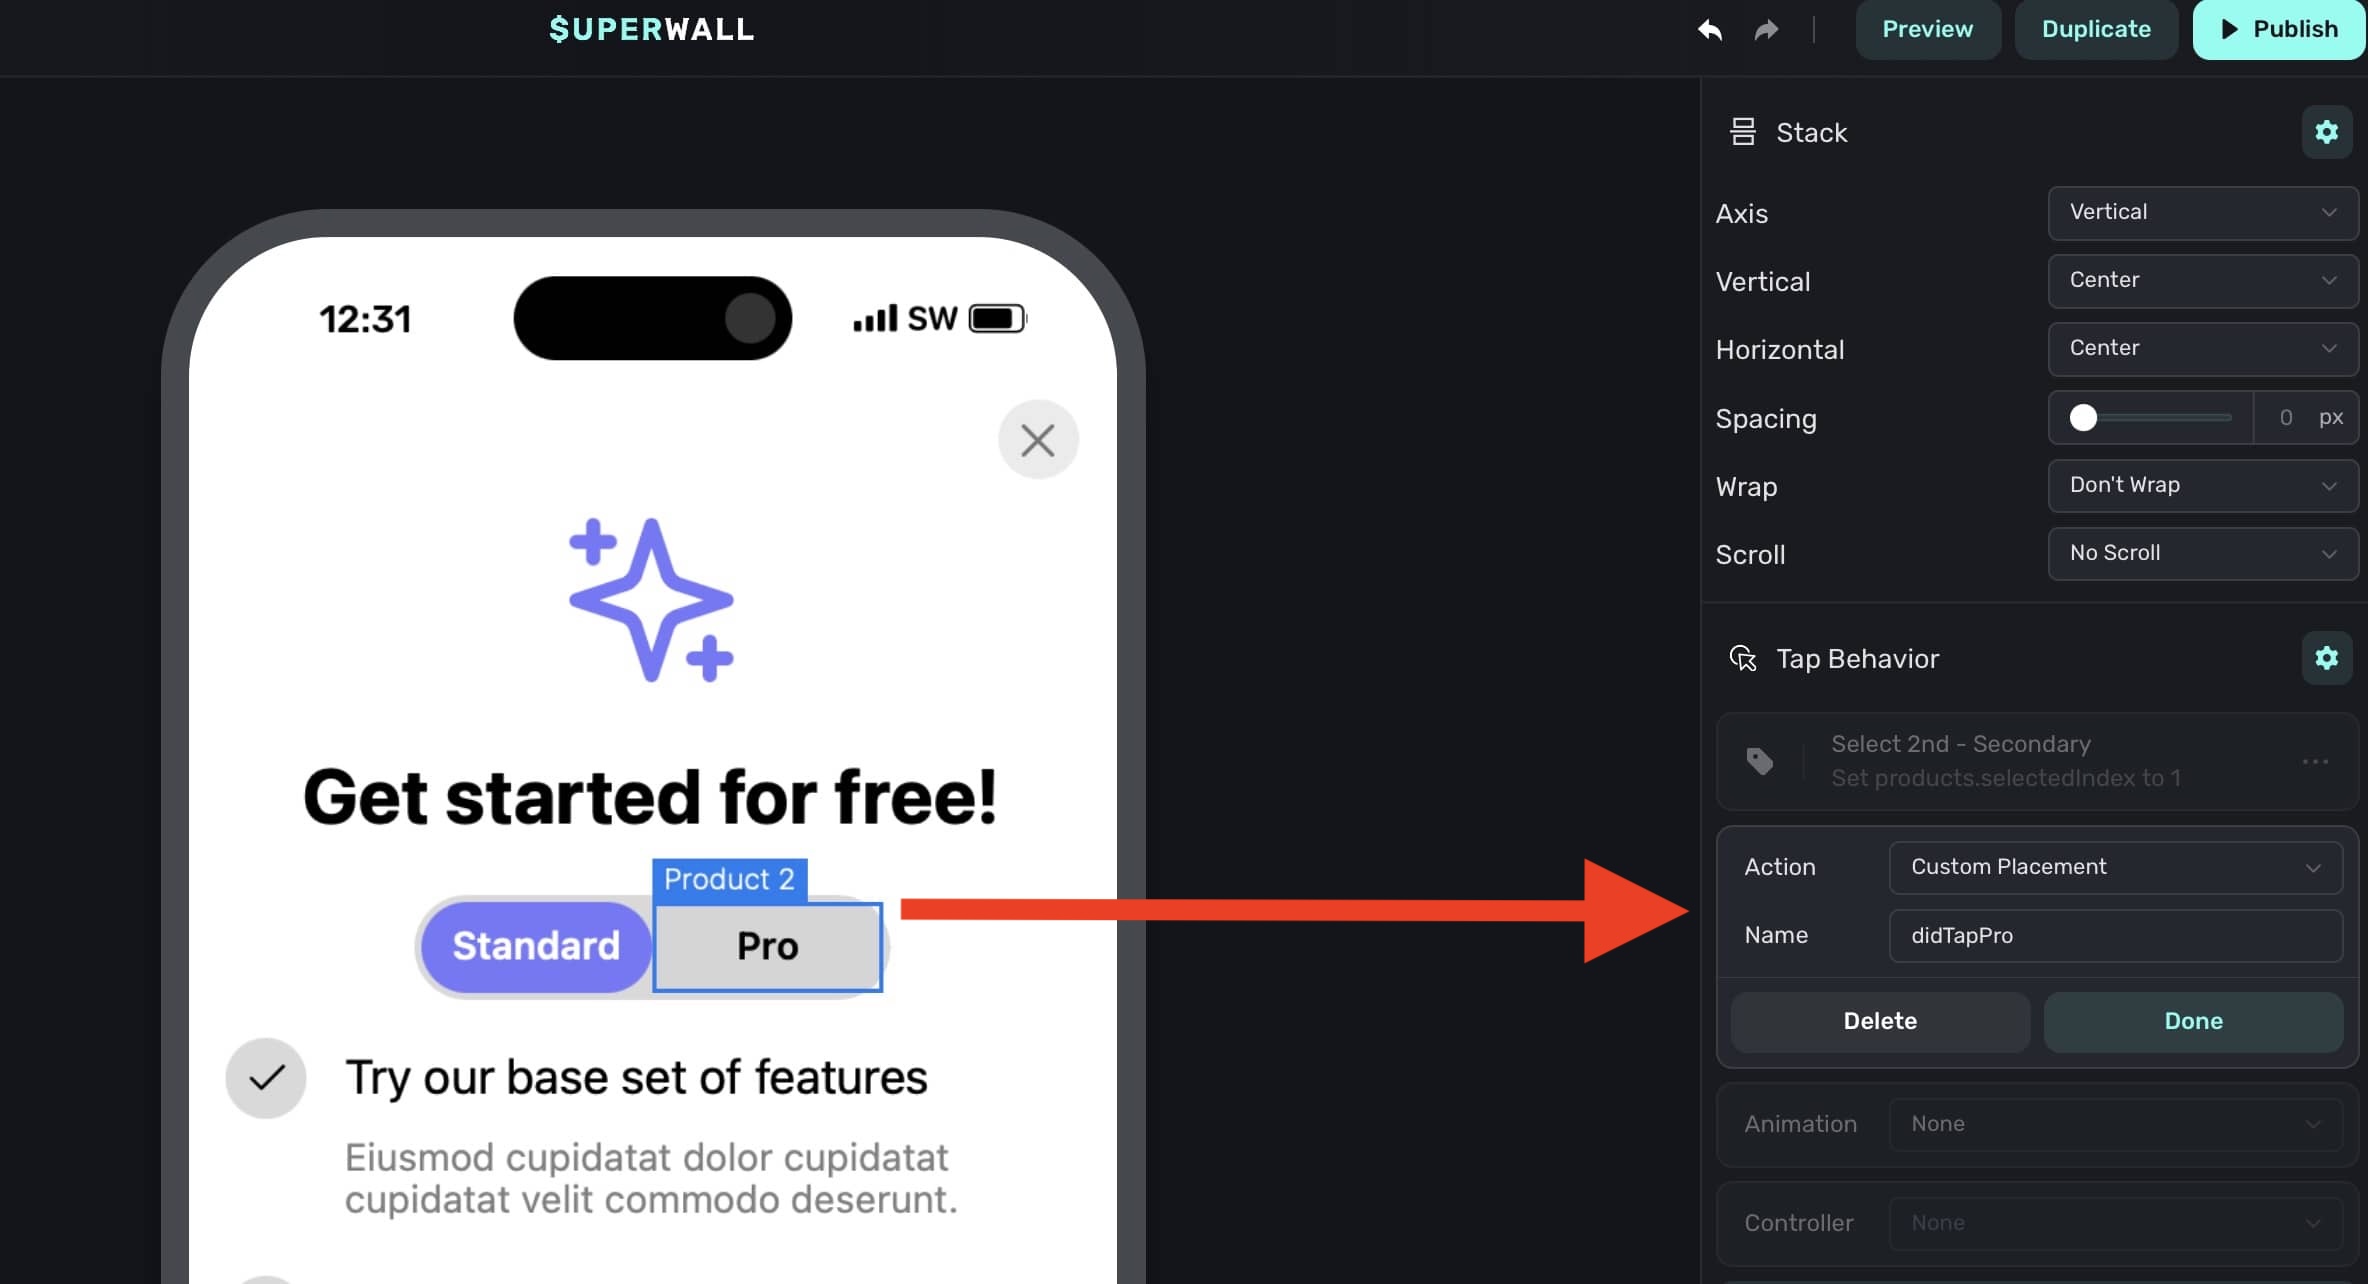
Then, you can listen for this placement and forward it to your analytics service:
```swift Swift
extension SuperwallService: SuperwallDelegate {
func handleSuperwallEvent(withInfo eventInfo: SuperwallEventInfo) {
switch eventInfo.event {
case let .customPlacement(name, params, paywallInfo):
// Prints out didTapPro or didTapStandard
print("\(name) - \(params) - \(paywallInfo)")
MyAnalyticsService.shared.send(event: name, params: params)
default:
print("Default event: \(eventInfo.event.description)")
}
}
}
```
For a walkthrough example, check out this [video on YouTube](https://youtu.be/4rM1rGRqDL0).
# Custom Paywall Actions
Source: https://superwall.com/docs/custom-paywall-events
You can set the click behavior of any element on a paywall to be a custom paywall action. This allows you to tie any tap in your paywall to hard-coded application logic.
For example, adding a custom action called `help_center` to a button in your paywall gives you the opportunity to present a help center whenever that button is pressed. To set this up, implement `handleCustomPaywallAction(withName:)` in your `SuperwallDelegate`:
```swift Swift
func handleCustomPaywallAction(withName name: String) {
if name == "help_center" {
HelpCenterManager.present()
}
}
```
```swift Objective-C
- (void)handleCustomPaywallActionWithName:(NSString *)name {
if ([name isEqualToString:"help_center"]) {
[HelpCenterManager present];
}
}
```
```kotlin Kotlin
override fun handleCustomPaywallAction(name: String) {
if (name == "help_center") {
HelpCenterManager.present()
}
}
```
```dart Flutter
@override
void handleCustomPaywallAction(String name) {
if (name == "help_center") {
HelpCenterManager.present();
}
}
```
```typescript React Native
handleCustomPaywallAction(name: string) {
if (name == "help_center") {
HelpCenterManager.present();
}
}
```
Remember to set `Superwall.shared.delegate`! For implementation details, see the [Superwall Delegate](/using-superwall-delegate) guide.
# Purchasing Products Outside of a Paywall
Source: https://superwall.com/docs/direct-purchasing
If you wish to purchase products directly on iOS and Android, use our SDK's `purchase` methods.
If you're using Superwall for revenue tracking, but want a hand with making purchases in your implementation, you can use our `purchase` methods:
```swift iOS
// For StoreKit 1
private func purchase(_ product: SKProduct) async throws -> PurchaseResult {
return await Superwall.shared.purchase(product)
}
// For StoreKit 2
private func purchase(_ product: StoreKit.Product) async throws -> PurchaseResult {
return await Superwall.shared.purchase(product)
}
// Superwall's `StoreProduct`
private func purchase(_ product: StoreProduct) async throws -> PurchaseResult {
return await Superwall.shared.purchase(product)
}
```
```kotlin Android
// Purchase product with first available baseplan
Superwall.instance.purchase("my_product_id")
// Purchase product with base plan and cheapest/free offer
Superwall.instance.purchase("my_product_id:base_plan:sw-auto")
// Purchase product with a specified offer
Superwall.instance.purchase("my_product_id:base_plan:offer")
// Purchase product with no offer
Superwall.instance.purchase("my_product_id:base_plan:sw-none")
```
For iOS, the `purchase()` method supports StoreKit 1, 2 and Superwall's abstraction over a product, `StoreProduct`. You can fetch the products you've added to Superwall via the `products(for:)` method. Similarly, in Android, you can fetch a product using a product identifier — and the first base plan will be selected:
```swift iOS
private func fetchProducts(for identifiers: Set) async -> Set {
return await Superwall.shared.products(for: identifiers)
}
```
```kotlin Android
val products = Superwall.instance.getProducts("id1", "id2")
```
If you already have your own product fetching code, simply pass the product representation to these methods. For example, in StoreKit 1 — an `SKProduct` instance, in StoreKit 2, `Product`, etc. Each `purchase()` implementation returns a `PurchaseResult`, which informs you of the transaction's resolution:
* `.cancelled`: The purchase was cancelled.
* `.purchased`: The product was purchased.
* `.pending`: The purchase is pending/deferred and requires action from the developer.
* `.failed(Error)`: The purchase failed for a reason other than the user cancelling or the payment pending.
# Creating a Countdown Timer
Source: https://superwall.com/docs/external-links/guide-countdown-timer
# Managing Connectivity Issues
Source: https://superwall.com/docs/external-links/guide-handling-connectivity-issues
# Building Mult-Tier Paywalls
Source: https://superwall.com/docs/external-links/guide-multi-tier-paywalls
# Flutter
Source: https://superwall.com/docs/external-links/guide-sdk-flutter
# iOS
Source: https://superwall.com/docs/external-links/guide-sdk-ios
# React Native
Source: https://superwall.com/docs/external-links/guide-sdk-rn
# Showing Paywalls
Source: https://superwall.com/docs/feature-gating
At the heart of Superwall's SDK lies `Superwall.shared.register(placement:params:handler:feature:)`.
This allows you to register a [placement](/campaigns-placements) to access a feature that may or may not be paywalled later in time. It also allows you to choose whether the user can access the feature even if they don't make a purchase.
Here's an example.
#### With Superwall
```swift Swift
func pressedWorkoutButton() {
// remotely decide if a paywall is shown and if
// navigation.startWorkout() is a paid-only feature
Superwall.shared.register(placement: "StartWorkout") {
navigation.startWorkout()
}
}
```
```swift Objective-C
- (void)pressedWorkoutButton {
// remotely decide if a paywall is shown and if
// navigation.startWorkout() is a paid-only feature
[[Superwall sharedInstance] registerWithPlacement:@"StartWorkout" params:nil handler:nil feature:^{
[navigation startWorkout];
}];
}
```
```kotlin Kotlin
fun pressedWorkoutButton() {
// remotely decide if a paywall is shown and if
// navigation.startWorkout() is a paid-only feature
Superwall.instance.register("StartWorkout") {
navigation.startWorkout()
}
}
```
```dart Flutter
void pressedWorkoutButton() {
// remotely decide if a paywall is shown and if
// navigation.startWorkout() is a paid-only feature
Superwall.shared.registerPlacement('StartWorkout', feature: () {
navigation.startWorkout();
});
}
```
```typescript React Native
// remotely decide if a paywall is shown and if
// navigation.startWorkout() is a paid-only feature
Superwall.shared.register({
placement: 'StartWorkout',
feature: () => {
navigation.navigate('LaunchedFeature', {
value: 'Non-gated feature launched',
});
}
});
```
#### Without Superwall
```swift Swift
func pressedWorkoutButton() {
if (user.hasActiveSubscription) {
navigation.startWorkout()
} else {
navigation.presentPaywall() { result in
if (result) {
navigation.startWorkout()
} else {
// user didn't pay, developer decides what to do
}
}
}
}
```
```swift Objective-C
- (void)pressedWorkoutButton {
if (user.hasActiveSubscription) {
[navigation startWorkout];
} else {
[navigation presentPaywallWithCompletion:^(BOOL result) {
if (result) {
[navigation startWorkout];
} else {
// user didn't pay, developer decides what to do
}
}];
}
}
```
```kotlin Kotlin
fun pressedWorkoutButton() {
if (user.hasActiveSubscription) {
navigation.startWorkout()
} else {
navigation.presentPaywall { result ->
if (result) {
navigation.startWorkout()
} else {
// user didn't pay, developer decides what to do
}
}
}
}
```
```dart Flutter
void pressedWorkoutButton() {
if (user.hasActiveSubscription) {
navigation.startWorkout();
} else {
navigation.presentPaywall().then((result) {
if (result) {
navigation.startWorkout();
} else {
// user didn't pay, developer decides what to do
}
});
}
}
```
```typescript React Native
function pressedWorkoutButton() {
if (user.hasActiveSubscription) {
navigation.startWorkout()
} else {
navigation.presentPaywall().then((result: boolean) => {
if (result) {
navigation.startWorkout()
} else {
// user didn't pay, developer decides what to do
}
})
}
}
```
### How registering placements presents paywalls
You can configure `"StartWorkout"` to present a paywall by [creating a campaign, adding the placement, and adding a paywall to an audience](/campaigns) in the dashboard.
1. The SDK retrieves your campaign settings from the dashboard on app launch.
2. When a placement is called that belongs to a campaign, audiences are evaluated ***on device*** and the user enters an experiment — this means there's no delay between registering a placement and presenting a paywall.
3. If it's the first time a user is entering an experiment, a paywall is decided for the user based on the percentages you set in the dashboard
4. Once a user is assigned a paywall for an audience, they will continue to see that paywall until you remove the paywall from the audience or reset assignments to the paywall.
5. After the paywall is closed, the Superwall SDK looks at the *Feature Gating* value associated with your paywall, configurable from the paywall editor under General > Feature Gating (more on this below)
1. If the paywall is set to ***Non Gated***, the `feature:` closure on `register(placement: ...)` gets called when the paywall is dismissed (whether they paid or not)
2. If the paywall is set to ***Gated***, the `feature:` closure on `register(placement: ...)` gets called only if the user is already paying or if they begin paying.
6. If no paywall is configured, the feature gets executed immediately without any additional network calls.
Given the low cost nature of how register works, we strongly recommend registering **all core functionality** in order to remotely configure which features you want to gate – **without an app update**.
```swift Swift
// on the welcome screen
func pressedSignUp() {
Superwall.shared.register(placement: "SignUp") {
navigation.beginOnboarding()
}
}
// in another view controller
func pressedWorkoutButton() {
Superwall.shared.register(placement: "StartWorkout") {
navigation.startWorkout()
}
}
```
```swift Objective-C
// on the welcome screen
- (void)pressedSignUp {
[[Superwall sharedInstance] registerWithPlacement:@"SignUp" params:nil handler:nil feature:^{
[navigation beginOnboarding];
}];
}
// In another view controller
- (void)pressedWorkoutButton {
[[Superwall sharedInstance] registerWithPlacement:@"StartWorkout" params:nil handler:nil feature:^{
[navigation startWorkout];
}];
}
```
```kotlin Kotlin
// on the welcome screen
fun pressedSignUp() {
Superwall.instance.register("SignUp") {
navigation.beginOnboarding()
}
}
// in another view controller
fun pressedWorkoutButton() {
Superwall.instance.register("StartWorkout") {
navigation.startWorkout()
}
}
```
```dart Flutter
// on the welcome screen
void pressedSignUp() {
Superwall.shared.registerPlacement("SignUp", feature: () {
navigation.beginOnboarding();
});
}
// In another view controller
void pressedWorkoutButton() {
Superwall.shared.registerPlacement("StartWorkout", feature: () {
navigation.startWorkout();
});
}
```
```typescript React Native
// on the welcome screen
function pressedSignUp() {
Superwall.shared.register({
placement: 'SignUp',
feature: () => {
navigation.beginOnboarding()
}
});
}
function pressedWorkoutButton() {
Superwall.shared.register({
placement: 'StartWorkout',
feature: () => {
navigation.startWorkout()
}
})
}
```
### Automatically Registered Placements
The SDK [automatically registers](/docs/tracking-analytics) some internal placements which can be used to present paywalls:
* `app_install`
* `app_launch`
* `deepLink_open`
* `session_start`
* `transaction_abandon`
* `transaction_fail`
* `paywall_close`
### Register. Everything.
To provide your team with ultimate flexibility, we recommend registering *all* of your analytics events, even if you don't pass feature blocks through. This way you can retroactively add a paywall almost anywhere – **without an app update**!
If you're already set up with an analytics provider, you'll typically have an `Analytics.swift` singleton (or similar) to disperse all your events from. Here's how that file might look:
```Swift Swift
import SuperwallKit
import Mixpanel
import Firebase
final class Analytics {
static var shared = Analytics()
func track(
event: String,
properties: [String: Any]
) {
// Superwall
Superwall.shared.register(placement: event, params: properties)
// Firebase (just an example)
Firebase.Analytics.logEvent(event, parameters: properties)
// Mixpanel (just an example)
Mixpanel.mainInstance().track(event: event, properties: properties)
}
}
// And thus ...
Analytics.shared.track(
event: "workout_complete",
properties: ["total_workouts": 17]
)
// ... can now be turned into a paywall moment :)
```
**Need to know if a paywall will show beforehand?**
In some circumstances, you might like to know if a particular placement will present a paywall. To do this, you can use `Superwall.shared.getPresentationResult(forPlacement:params:)`.
# Feature Gating in Paywall Settings
Source: https://superwall.com/docs/feature-gating-in-paywall-settings
You can toggle particular features to be either gated or non-gated without pushing app updates.
When a paywall is open in the editor, you'll see a setting for "Feature Gating" in the leading sidebar:
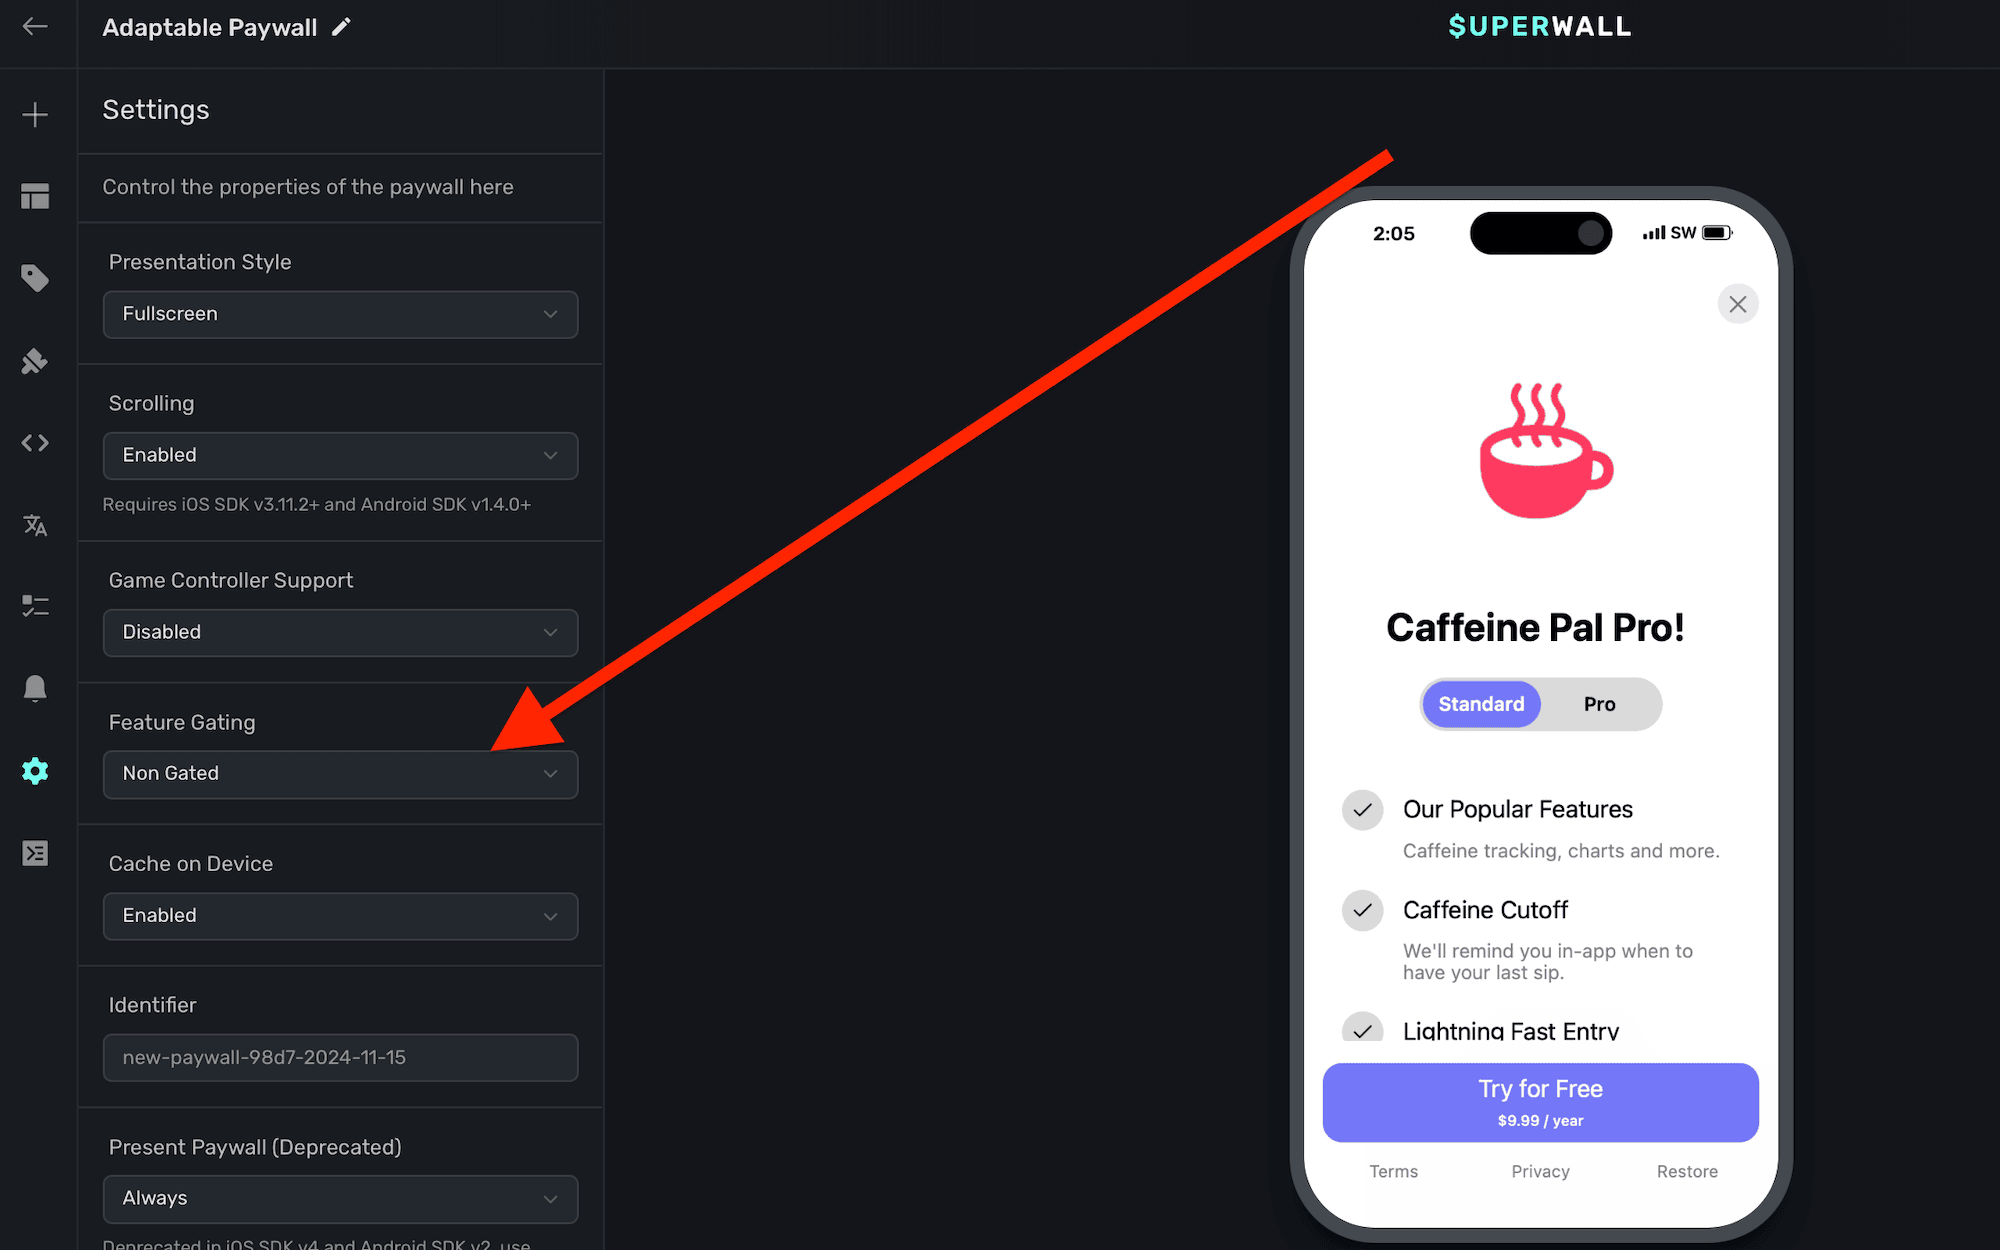
Feature gating allows your team to retroactively decide if this paywall is *Gated* or *Non Gated*
| Type | Behavior | Example |
| ----------------------- | ------------------------------------------------------------------------ | -------------------------------------------------------------------------------------------------------------------------------- |
| **Non Gated** (default) | Show Paywall → Execute Feature | When "Sign Up" button is pressed, show a paywall, then continue onboarding once the paywall is dismissed. |
| **Gated** | Show Paywall → Is user paying?If Yes → Execute FeatureIf No → Do Nothing | When "Start Workout" button is pressed, show a paywall, then continue once the paywall is dismissed only if the user subscribes. |
For a detailed explanation of how feature gating works, see the following flowchart:
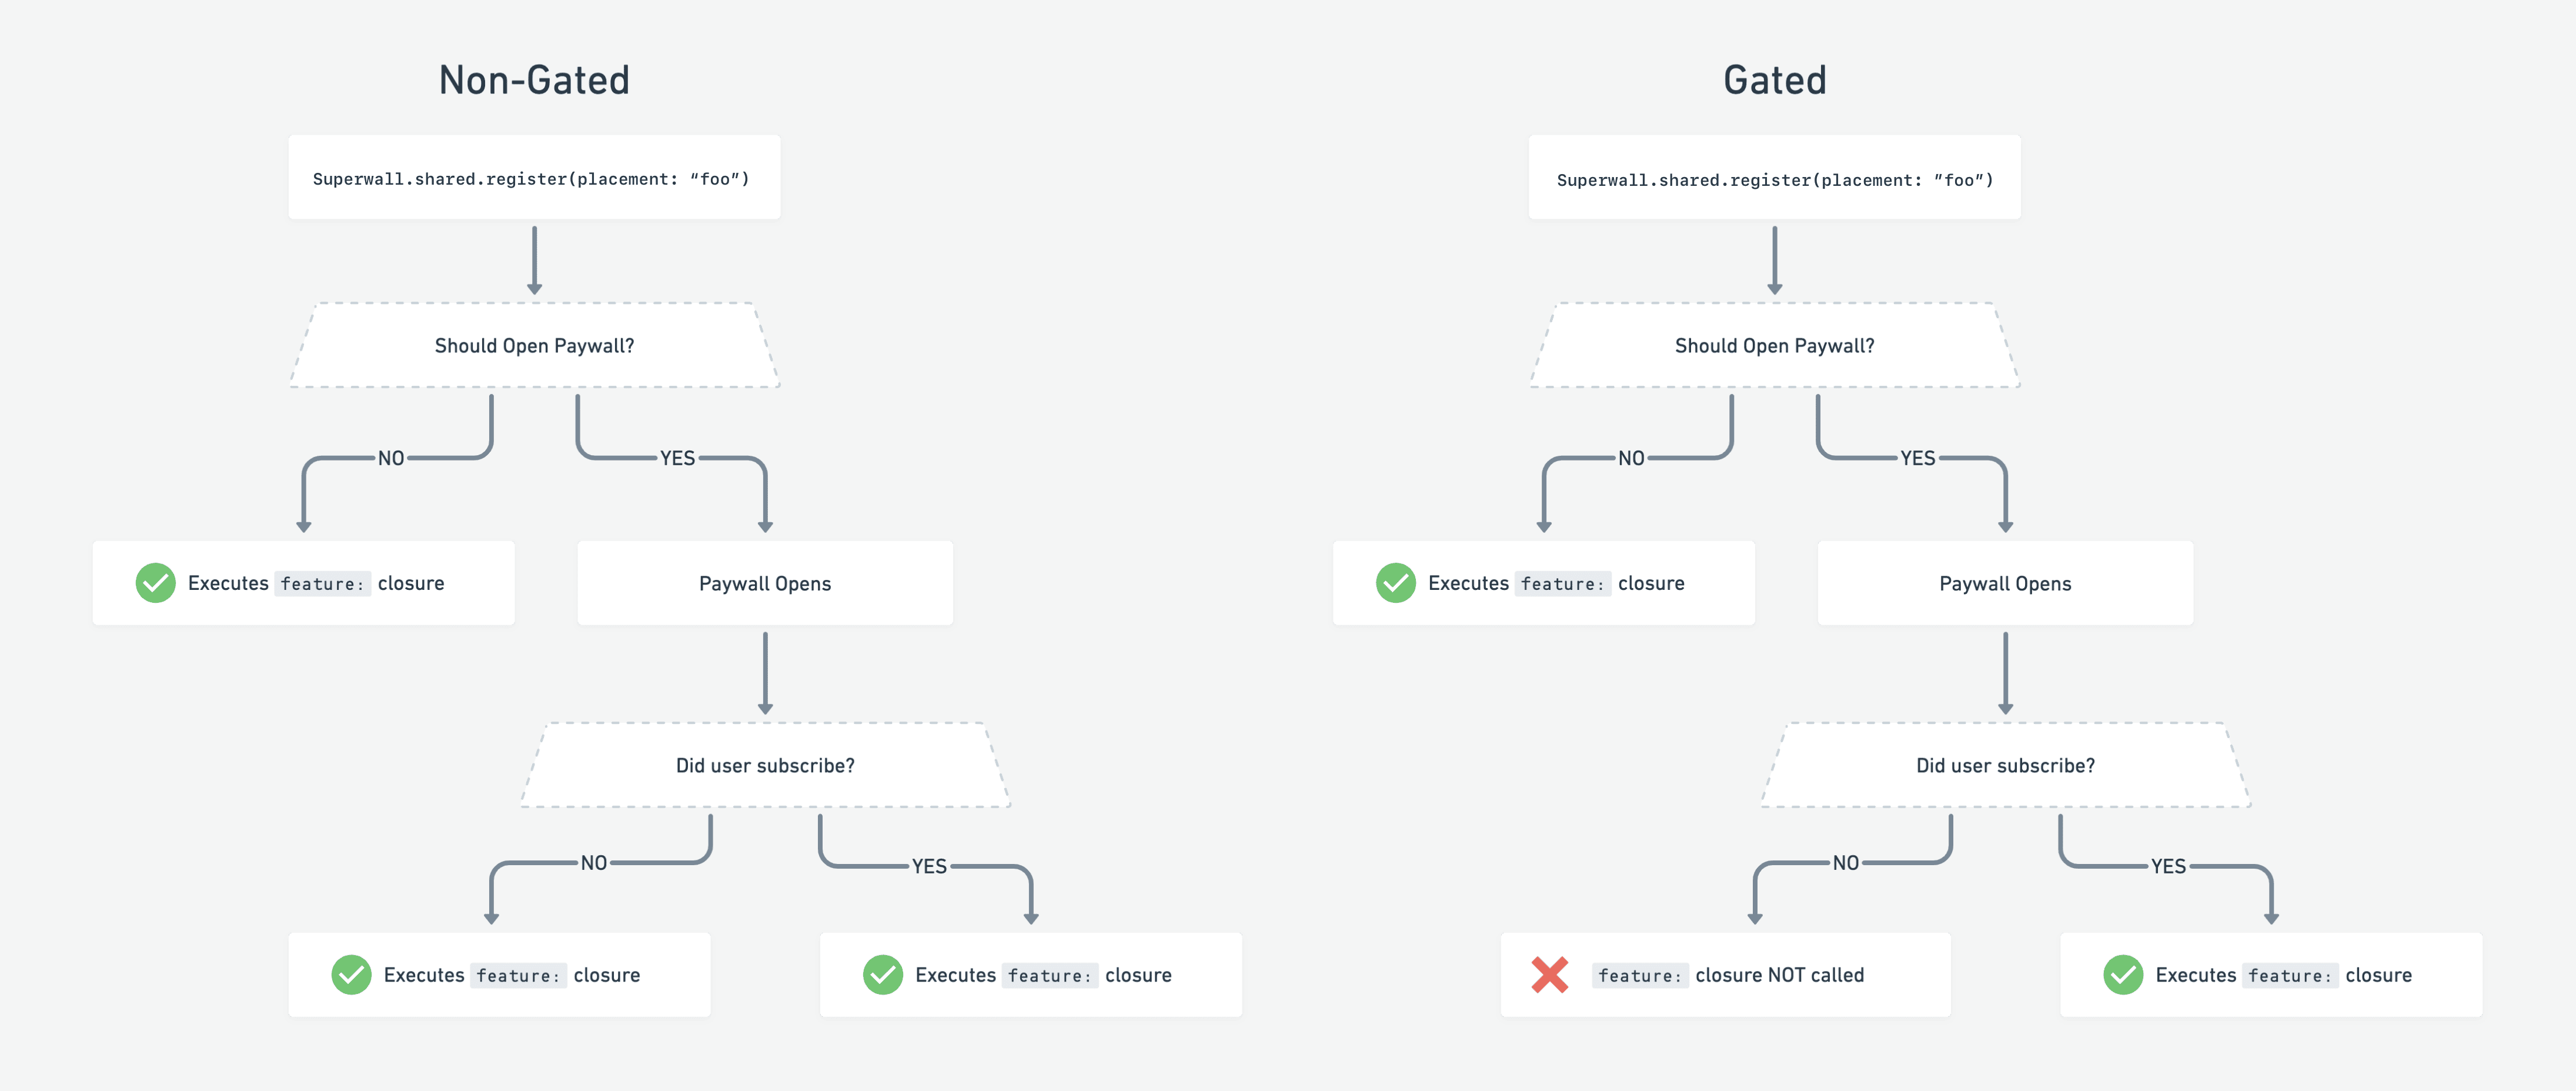
Remember, the feature is always executed if:
1. No campaign is configured for the placement.
2. The user is already paying or subscribed.
# Flutter
Source: https://superwall.com/docs/flutter
Superwall's Flutter SDK is now available — we can't wait for you to try it!
### Quickstart
Under the hood, Superwall needs an app for each platform you're launched on, one for iOS and one for Android. Creating a new Flutter app in Superwall automatically creates both of them for you. If you have one but not the other, follow [this guide](/creating-applications) to create one on the missing platform.
Follow the [installation guide](/installation-via-pubspec) to install the SDK.
Follow the [configuration guide](/configuring-the-sdk) to configure the SDK
You're all set! 🎉 Reach out to us on Intercom or by [email](mailto:team@superwall.com)
For any feedback, email [team@superwall.com](mailto:team@superwall.com)
# Game Controller Support
Source: https://superwall.com/docs/game-controller-support
SuperwallKit supports Game Controller input.
First, set the `SuperwallOption` `isGameControllerEnabled` to `true`:
```Swift Swift
let options = SuperwallOptions()
options.isGameControllerEnabled = true
Superwall.configure(apiKey: "MY_API_KEY", options: options);
```
For iOS, forward events to your paywall by calling `gamepadValueChanged(gamepad:element:)` from your own gamepad's `valueChanged` handler. In Android, forward motion
and key events using `dispatchKeyEvent` and `dispatchMotionEvent`:
```Swift Swift
controller.extendedGamepad?.valueChangedHandler = { gamepad, element in
// send values to Superwall
Superwall.shared.gamepadValueChanged(gamepad: gamepad, element: element)
// ... rest of your code
}
```
First set the `SuperwallOption` `isGameControllerEnabled` to `true`:
```Kotlin Kotlin
Superwall.instance.options.isGameControllerEnabled = true
```
Then Superwall will automatically listen for gamepad events and forward them to your paywall!
First set the `SuperwallOption` `isGameControllerEnabled` to `true`:
```dart Flutter
Superwall.instance.options.isGameControllerEnabled = true
```
Then Superwall will automatically listen for gamepad events and forward them to your paywall!
First set the `SuperwallOption` `isGameControllerEnabled` to `true`:
```typescript React Native
Superwall.instance.options.isGameControllerEnabled = true
```
Then Superwall will automatically listen for gamepad events and forward them to your paywall!
# Using New SDK Features
Source: https://superwall.com/docs/getting-started-with-our-sdks
Superwall's recent SDK updates bring several new improvements and features. Here's how to get started quickly.
With our latest iOS SDK (version 4) and updates for Android, Flutter, and React Native (version 2), plus recent product enhancements, Superwall delivers several improvements to the overall experience:
1. **Cross-platform entitlements:** Segment product offerings by tiers of service across your product suite.
2. **Entitlements in campaign filters:** Use powerful new campaign filtering capabilities, such as leveraging entitlements in filters.
3. **New product management:** Easily set up products and associate them to tiers of service using entitlements.
4. **StoreKit 2:** Finally, our iOS SDK uses [StoreKit 2](https://developer.apple.com/storekit/) by default (unless you're using Objective-C).
To see migration information, check out these guides for all of our SDKs:
* [iOS](/migrating-to-v4)
* [Android](/migrating-to-v2-android)
* [React Native](/migrating-to-v2-react-native)
* [Flutter](/migrating-to-v2-flutter)
### Entitlements
Products are now attached to an entitlement. By default, we provide an entitlement out of the box — and products can use one or more of them. If you are not using a [purchase controller](/advanced-configuration) or tiered services, then you don't have to think much about them. From an SDK standpoint, tracking subscription state worked similar to this:
```swift
if Superwall.shared.subscriptionState == .active/inactive {
// Some paid feature
}
```
Whereas now, you still look at `subscriptionStatus`, except it's no longer `.active`. Now, the `.active` case includes the active *entitlements*:
```swift
switch Superwall.shared.subscriptionStatus {
case .active(let entitlements):
print("Active entitlements: \(entitlements)")
case .inactive:
print("Inactive")
case .unknown:
print("Unknown")
}
```
Or, if you only have one entitlement you use to represent "pro" access, you can simplify your check:
```swift
// If you're only using one entitlement...
if Superwall.shared.subscriptionStatus.isActive{
// Has an active entitlement
}
```
Also, common [delegate](/using-superwall-delegate) methods have changed as well. As the migration guides above call out, `event` has been renamed to `placement`, so you'll see that reflected across our product and SDKs.
With entitlements, the paywall editor setting "Present Paywall" is now deprecated. Entitlements
replace them in the audience filter.
### Entitlements in campaign filters
Campaign filters now filter more operators, like `and` and `or`, and they also have access to product entitlements:
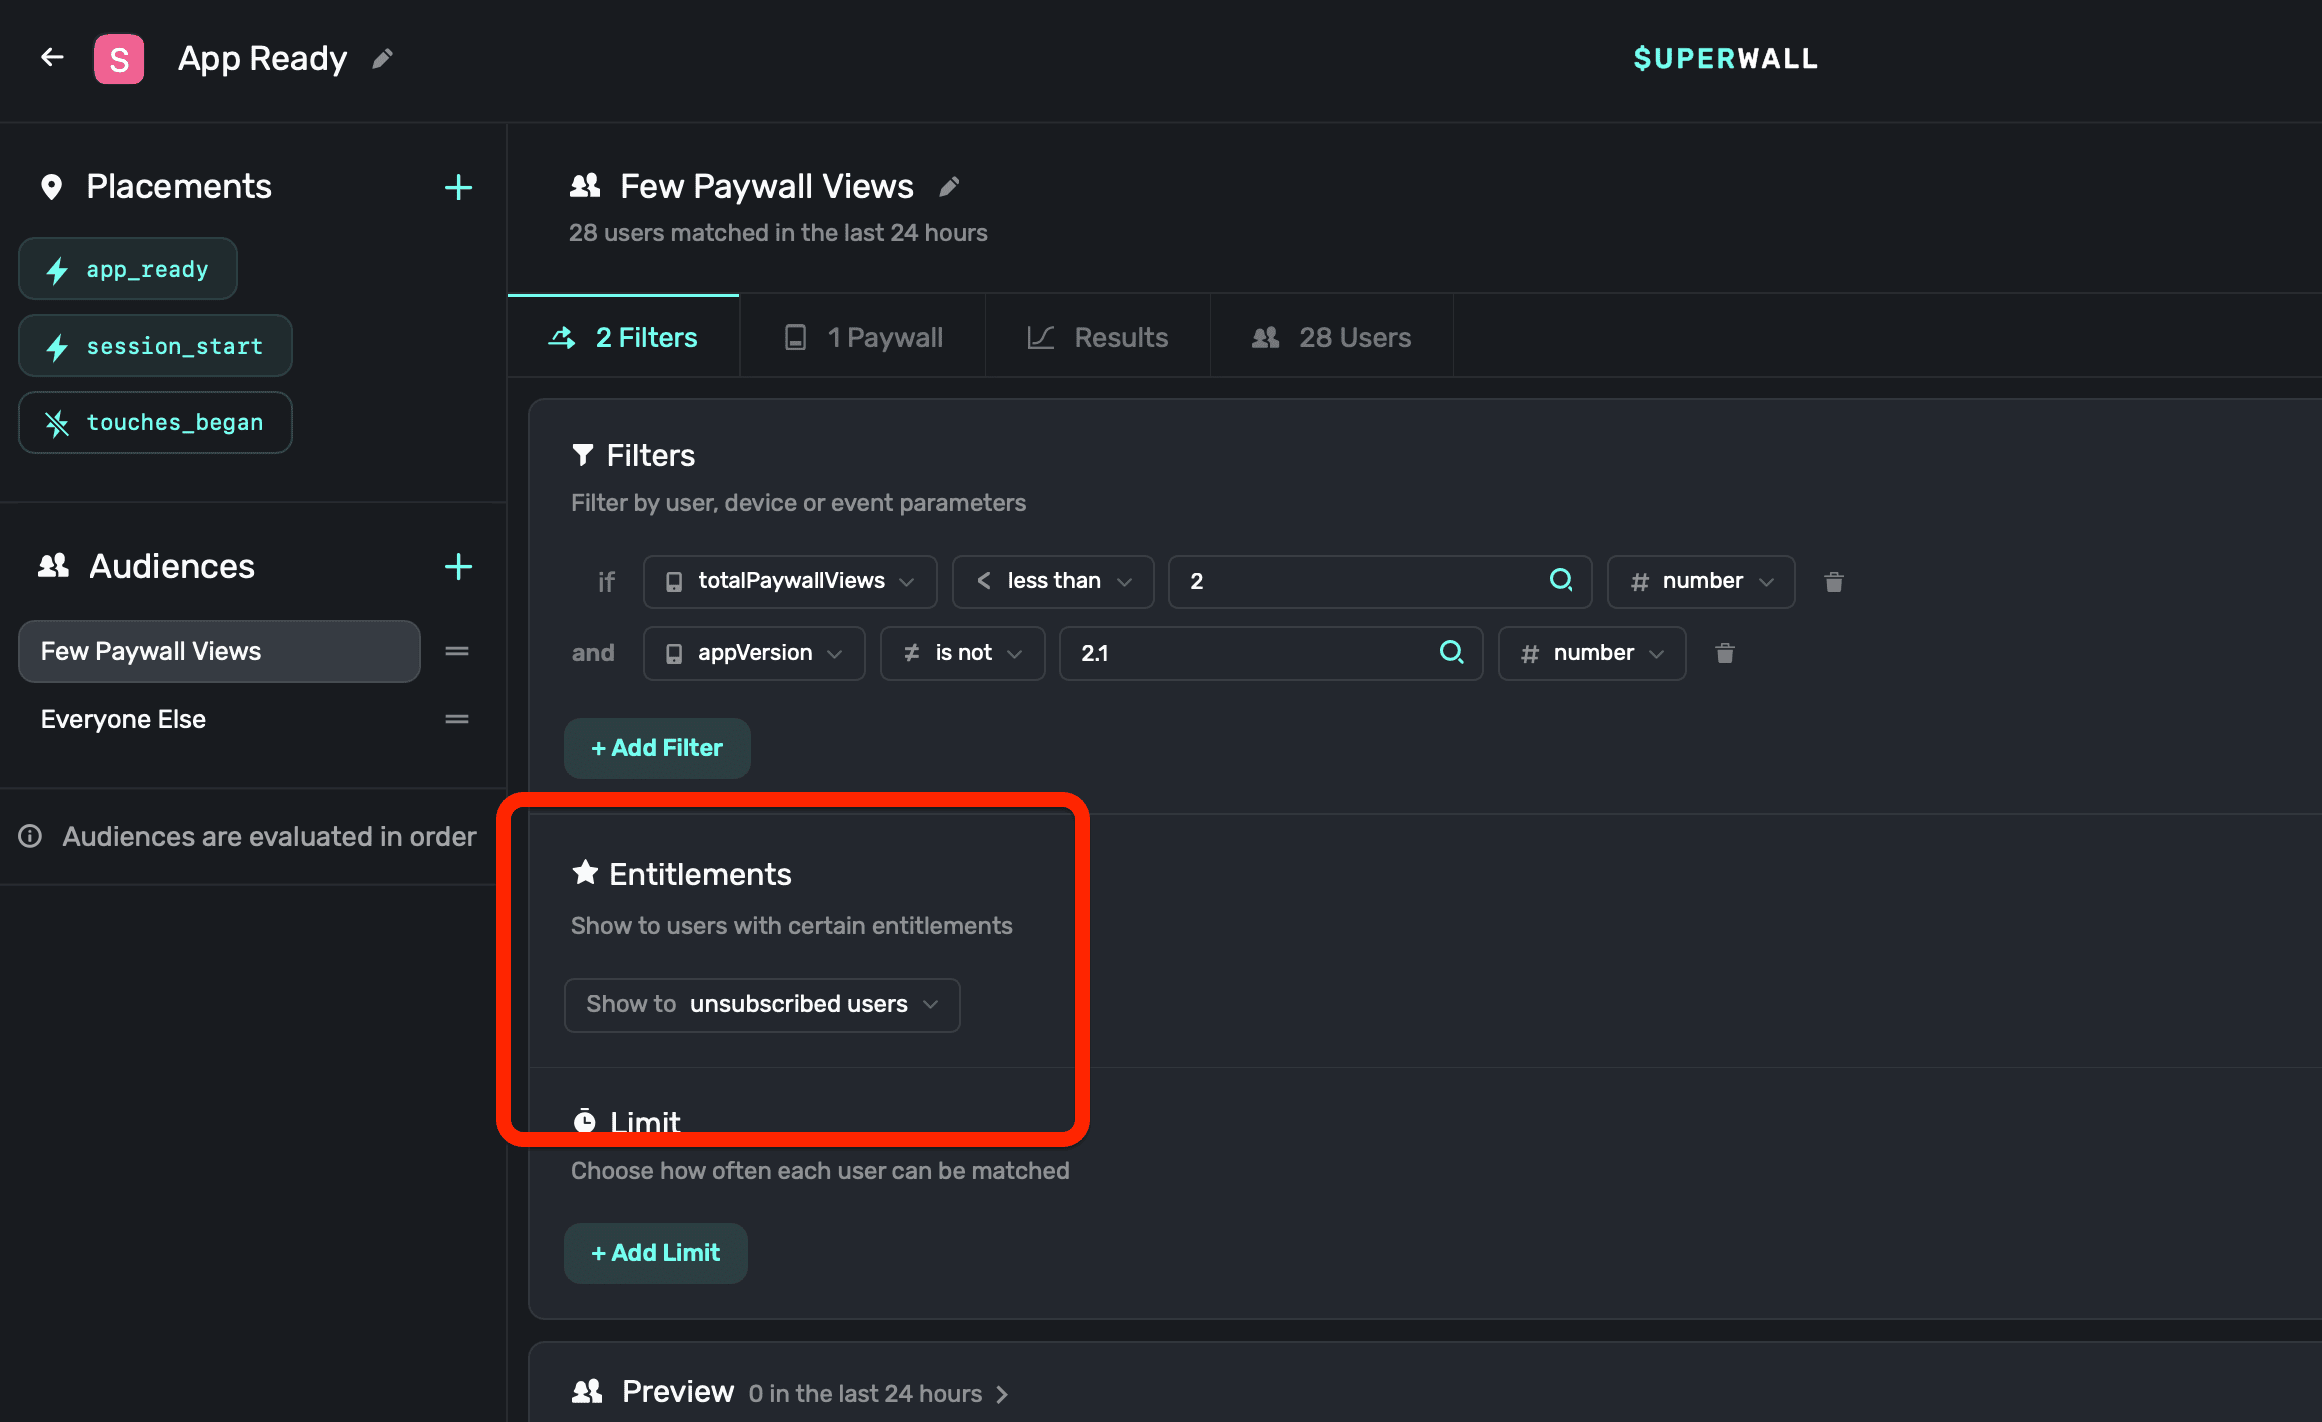
Using entitlements in campaign filtering opens up scenarios where you could filter down to tiers of service, such as "Match users who have the Silver entitlement active, but not Platinum.", etc.
### New product management
As mentioned above, products are now associated to an entitlement. When adding products, you can choose one or more entitlements that belong to it. For any previously added products, Superwall associates a default entitlement (`pro`) to them automatically.
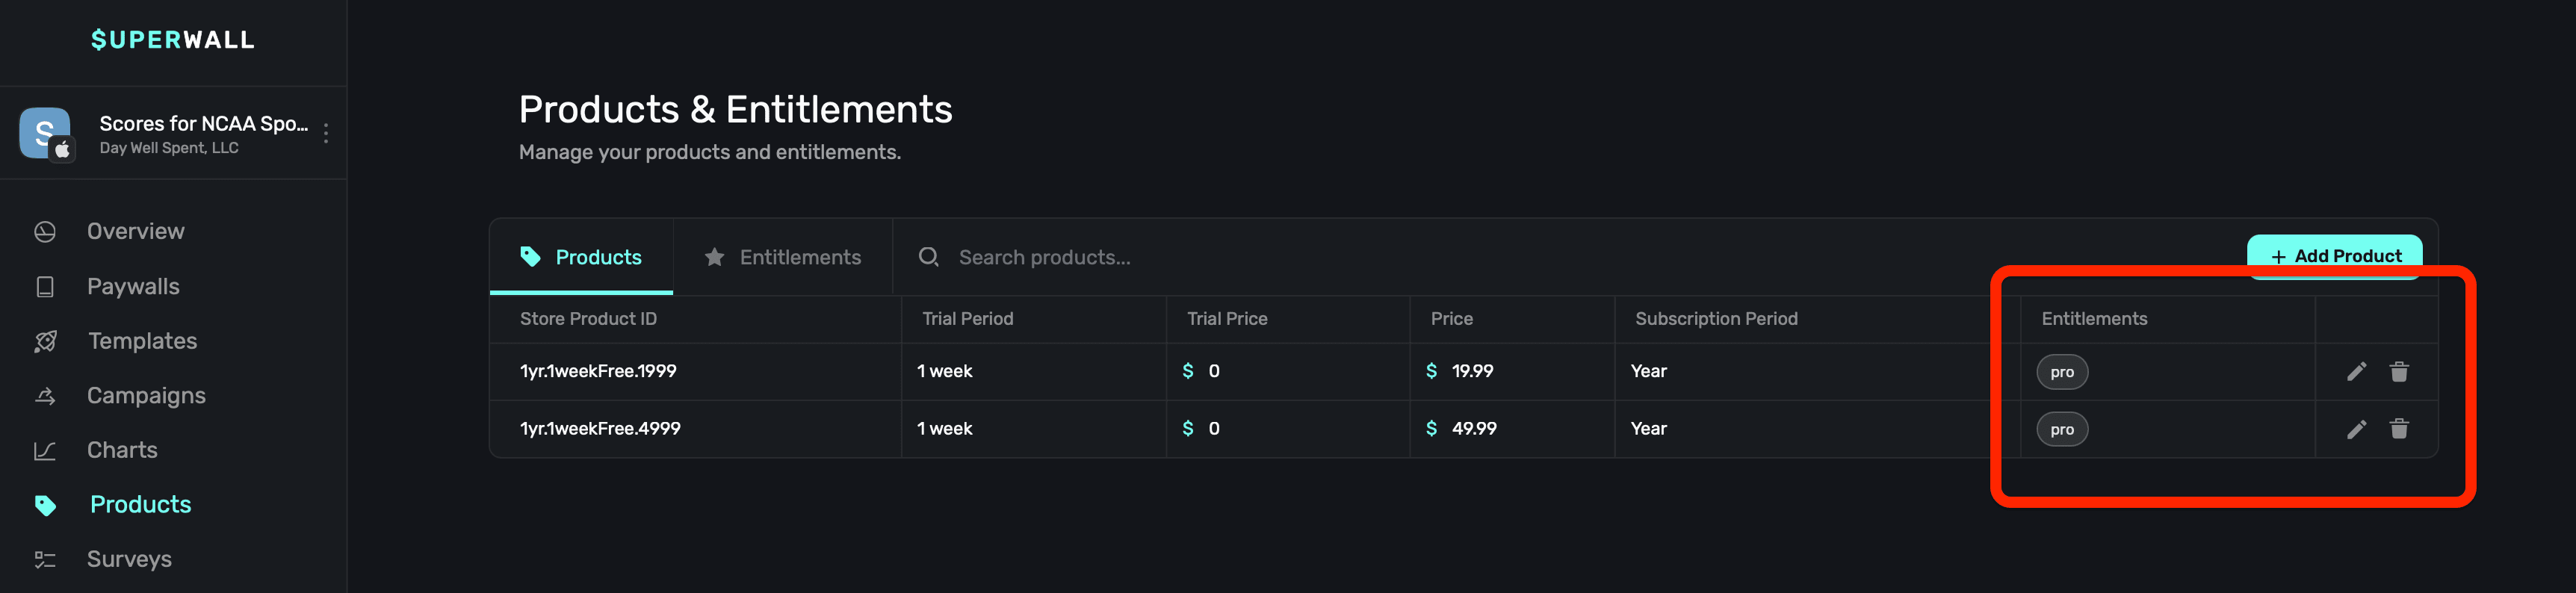
For more, check out our docs on [adding products](/products).
### StoreKit 2
Finally, our iOS SDK defaults to using StoreKit 2 in most cases. Refer to the migration guide above for our iOS SDK to learn more. StoreKit 2 support also opened up other enhancements for our SDK. You can now use Superwall to make purchases directly, like this:
```swift
// StoreKit 1 Products
let result = await Superwall.shared.purchase(sk1Product)
// StoreKit 2 Products
let result = await Superwall.shared.purchase(product)
// Superwall's abstraction over products
let result = await Superwall.shared.purchase(storeProduct)
```
The ability to make purchases directly along with [observer mode](/observer-mode) means that you can:
* Have Superwall handle all purchase logic.
* Track your revenue
* And enable metrics, charts and other data
...all for free.
# Handling Poor Network Conditions
Source: https://superwall.com/docs/handling-paywalls-during-poor-network-conditions
Superwall is built to handle any networking conditions, from poor network conditions to no network at all.
Superwall's SDK handles network issues as gracefully as possible, but there are still some scenarios to consider. The behavior will be different based on if `subscriptionStatus` evaluates to `.active(_)` or not.
**If it is `.active(_)`** and Superwall has already fetched or cached its configuration, then paywall presentation proceeds as it normally would. If Superwall was unable to fetch its configuration, the SDK waits one second to give it a chance to be retrieved. After that time, if it's not available — then a timeout event is tracked and the `onError` handler will be invoked with the error code 105. The "feature" block or closure will not be invoked:
```swift
Superwall.shared.register(placement: "foo") {
// Your feature logic
}
```
**If it's not `.active(_)`** then Superwall will retry network calls until we have retrieved the necessary data for up to one minute. If it's still unavailable, then the SDK fires the `onError` handler with the error code of `104`.
For more information, please visit this [blog post](https://superwall.com/blog/handling-connectivity-interruptions-with-superwall).
# Welcome
Source: https://superwall.com/docs/home
Superwall gives you the ability to remotely update your purchase screen (a.k.a. paywall), without shipping app updates. Changing things like pricing, design, location, text and discounts takes a few seconds from Superwall's dashboard.
**Here's how:**
1. Configure **SuperwallKit**, Superwall's SDK within your app.
2. SuperwallKit presents the right paywall at the right time, based on your dashboard settings.
Subscription logic is handled automatically by SuperwallKit but you can implement your own via
StoreKit, RevenueCat or any other payments SDK.
If you haven't already, [sign up for a free account](https://superwall.com/sign-up) to start building.
Updating from v3 of the SDK? Take a look at our [migration guide](/migrating-to-v4).
Our AI assisted docs search can answer almost any question you have. Just click search at the top (or ⌘+K) and type your question, and an answer will be created based off of the information in our documentation.
Get up and running with a guided tutorial when you sign up on Superwall.com
Learn how to run tests, build paywalls, and more
### How it Works
Superwall is built on 3 core principles:
1. [Placements](/campaigns-placements)
2. [Audiences](/campaigns-audience)
3. [Paywalls](/paywalls)
When your app registers a **placement**, evaluate the **audience** to decide which **paywall** to show the user.
Placements and audiences are grouped in a concept we call [Campaigns](/campaigns).
### Rapid Iteration
Paywalls and Campaigns are all defined in the [Superwall Dashboard](https://superwall.com/dashboard).
Integrating SuperwallKit into your app is usually the last time you’ll have to write paywall related code.
This allows you to iterate on 5 key aspects of your monetization flow, *without shipping app updates*:
1. Design
2. Text / Copy
3. Placement
4. Pricing
5. Discounts
### Paywalls
All paywalls are websites. Superwall uses a script called [Paywall.js](/docs/advanced-paywall-creation#paywalljs) to turn these websites into paywall templates. SuperwallKit loads these websites inside a `UIWebView` and executes javascript on them to replace text and template product information. This gives you the flexibility to turn any design into a paywall and update it remotely.
Since building websites can be tedious, we maintain a [growing list](https://templates.superwall.com/release/latest/gallery/) of highly converting paywall templates for you to choose from. These designs are used by some of the biggest apps on the App Store and are perfect to get you up and running in no time.
However, if you’d like to build your own paywall website from scratch, we recommend using Webflow. We maintain a cloneable [Webflow template](https://webflow.com/website/45-Paywall-Elements?ref=showcase-search\&searchValue=superwall) that includes \~50 of the most prominent paywall elements we’ve seen across thousands of apps, which you’re welcome to use. Another alternative is to just wait for us to build you a free paywall 👇
**Everyone gets a free paywall**
Superwall has built hundreds of paywalls for clients and has a unique vantage point on the industry. As a token of gratitude for signing up, we create a paywall for each customer, using best practices we've picked up along the way. Check your email for updates, we'll add it to your dashboard when it's ready.
### Rules
Rules allow you to conditionally show a paywall to a user. For example, you may want to only show users paywalls if they have no remaining credits or if their account is over 24 hours old.
Rule evaluations happen client side, so no network requests are fired to determine whether or not to show a paywall.
### Events
Events are added to campaigns and are registered via SuperwallKit. SuperwallKit listens for these events and evaluates their rules to determine whether or not to show a paywall.
### Diagram

# User Management
Source: https://superwall.com/docs/identity-management
It is necessary to uniquely identify users to track their journey within Superwall.
### Anonymous Users
Superwall automatically generates a random user ID that persists internally until the user deletes/reinstalls your app.
You can call `Superwall.shared.reset()` to reset this ID and clear any paywall assignments.
### Identified Users
If you use your own user management system, call `identify(userId:options:)` when you have a user's identity. This will alias your `userId` with the anonymous Superwall ID enabling us to load the user’s assigned paywalls.
Calling `Superwall.shared.reset()` will reset the on-device userId to a random ID and clear the paywall assignments.
Note that for Android apps, if you want the `userId` passed to the Play Store when making purchases, you'll also need to set `passIdentifiersToPlayStore` via `SuperwallOptions`. Be aware of Google's rules that the `userId` must not contain any personally identifiable information, otherwise the purchase could [be rejected](https://developer.android.com/reference/com/android/billingclient/api/BillingFlowParams.Builder#setObfuscatedAccountId).
```swift Swift
// After retrieving a user's ID, e.g. from logging in or creating an account
Superwall.shared.identify(userId: user.id)
// When the user signs out
Superwall.shared.reset()
```
```swift Objective-C
// After retrieving a user's ID, e.g. from logging in or creating an account
[[Superwall sharedInstance] identifyWithUserId:user.id];
// When the user signs out
[[Superwall sharedInstance] resetWithCompletionHandler:completion];
```
```kotlin Kotlin
// After retrieving a user's ID, e.g. from logging in or creating an account
Superwall.instance.identify(user.id)
// When the user signs out
Superwall.instance.reset()
```
```typescript React Native
// After retrieving a user's ID, e.g. from logging in or creating an account
Superwall.shared.identify(user.id);
// When the user signs out
Superwall.shared.reset();
```
```dart Flutter
// After retrieving a user's ID, e.g. from logging in or creating an account
Superwall.shared.identify(user.id);
// When the user signs out
Superwall.shared.reset();
```
**Advanced Use Case**
You can supply an `IdentityOptions` object, whose property `restorePaywallAssignments` you can set to `true`. This tells the SDK to wait to restore paywall assignments from the server before presenting any paywalls. This should only be used in advanced use cases. If you expect users of your app to switch accounts or delete/reinstall a lot, you'd set this when users log in to an existing account.
### Best Practices for a Unique User ID
* Do NOT make your User IDs guessable – they are public facing.
* Do NOT set emails as User IDs – this isn't GDPR compliant.
* Do NOT set IDFA or DeviceIds as User IDs – these are device specific / easily rotated by the operating system.
* Do NOT hardcode strings as User IDs – this will cause every user to be treated as the same user by Superwall.
**Identifying users from App Store server events**
On iOS, Superwall will set the value from `identify(userId:options:)` as the `applicationUsername` on `SKPayment`, which later comes back as the [appAccountToken](https://developer.apple.com/documentation/storekit/product/purchaseoption/3749440-appaccounttoken) in the notification to your server. Note that your application ID must be in a UUID format.
Begin showing paywalls!
# Deep Links and In-App Previews
Source: https://superwall.com/docs/in-app-paywall-previews
It's important to tell Superwall when a deep link has been opened. This enables two things:
1. Previewing paywalls on your device before going live.
2. Deep linking to specific [campaigns](/campaigns).
#### Adding a Custom URL Scheme
To handle deep links on iOS, you'll need to add a custom URL scheme for your app.
Open **Xcode**. In your **info.plist**, add a row called **URL Types**. Expand the automatically created **Item 0**, and inside the **URL identifier** value field, type your **Bundle ID**, e.g., **com.superwall.Superwall-SwiftUI**. Add another row to **Item 0** called **URL Schemes** and set its **Item 0** to a URL scheme you'd like to use for your app, e.g., **exampleapp**. Your structure should look like this:

With this example, the app will open in response to a deep link with the format **exampleapp\://**. You can [view Apple's documentation](https://developer.apple.com/documentation/xcode/defining-a-custom-url-scheme-for-your-app) to learn more about custom URL schemes.
#### Handling Deep Links (Swift)
Depending on whether your app uses a SceneDelegate, AppDelegate, or is written in SwiftUI, there are different ways to tell Superwall that a deep link has been opened.
Be sure to click the tab that corresponds to your architecture:
```swift AppDelegate.swift
import SuperwallKit
class AppDelegate: UIResponder, UIApplicationDelegate {
// NOTE: if your app uses a SceneDelegate, this will NOT work!
func application(_ app: UIApplication, open url: URL, options: [UIApplication.OpenURLOptionsKey : Any] = [:]) -> Bool {
return Superwall.shared.handleDeepLink(url)
}
}
```
```swift SceneDelegate.swift
import SuperwallKit
class SceneDelegate: UIResponder, UIWindowSceneDelegate {
// for cold launches
func scene(_ scene: UIScene, willConnectTo session: UISceneSession, options connectionOptions: UIScene.ConnectionOptions) {
if let url = connectionOptions.urlContexts.first?.url {
Superwall.shared.handleDeepLink(url)
}
}
// for when your app is already running
func scene(_ scene: UIScene, openURLContexts URLContexts: Set) {
if let url = URLContexts.first?.url {
Superwall.shared.handleDeepLink(url)
}
}
}
```
```swift SwiftUI
import SuperwallKit
@main
struct MyApp: App {
var body: some Scene {
WindowGroup {
ContentView()
.onOpenURL { url in
Superwall.shared.handleDeepLink(url) // handle your deep link
}
}
}
}
```
```swift Objective-C
// In your SceneDelegate.m
#import "SceneDelegate.h"
@import SuperwallKit;
@interface SceneDelegate ()
@end
@implementation SceneDelegate
- (void)scene:(UIScene *)scene willConnectToSession:(UISceneSession *)session options:(UISceneConnectionOptions *)connectionOptions {
[self handleURLContexts:connectionOptions.URLContexts];
}
- (void)scene:(UIScene *)scene openURLContexts:(NSSet *)URLContexts {
[self handleURLContexts:URLContexts];
}
#pragma mark - Deep linking
- (void)handleURLContexts:(NSSet *)URLContexts {
[URLContexts enumerateObjectsUsingBlock:^(UIOpenURLContext * _Nonnull context, BOOL * _Nonnull stop) {
[[Superwall sharedInstance] handleDeepLink:context.URL];
}];
}
@end
```
#### Adding a Custom Intent Filter
For Android, add the following to your `AndroidManifest.xml` file:
```xml
```
This configuration allows your app to open in response to a deep link with the format `exampleapp://` from your `MainActivity` class.
#### Handling Deep Links (Kotlin)
In your `MainActivity` (or the activity specified in your intent-filter), add the following Kotlin code to handle deep links:
```kotlin Kotlin
class MainActivity : AppCompatActivity() {
override fun onCreate(savedInstanceState: Bundle?) {
super.onCreate(savedInstanceState)
// Respond to deep links
respondToDeepLinks()
}
private fun respondToDeepLinks() {
intent?.data?.let { uri ->
Superwall.instance.handleDeepLink(uri)
}
}
}
```
Setting up deep links nearly mirrors the process for iOS, save for a few different changes. First, you'll need to add a custom URL scheme for your app.
From terminal, navigate to your Flutter project's root directory and open its Xcode workspace:
```bash
$ cd documents/projects/myFlutterApp
$ open ios/Runner.xcworkspace
```
In its **info.plist**, add a row called **URL Types**. Expand the automatically created **Item 0**, and inside the **URL identifier** value field, type your **Bundle ID**, e.g., **com.superwall.Superwall-SwiftUI**. Add another row to **Item 0** called **URL Schemes** and set its **Item 0** to `runner` to match Flutter's Xcode project name.
Here's an example of what it should look like if you open the Flutter target's `Info` pane:

#### Handling the Deep Link in Flutter
In your Flutter app, use the Superwall SDK to handle the deep link via `Superwall.shared.handleDeepLink(theLink);`. Here's a complete example:
```dart
import 'package:flutter/material.dart';
import 'package:superwallkit_flutter/superwallkit_flutter.dart';
import 'package:uni_links/uni_links.dart';
void main() {
runApp(const MyApp());
}
class MyApp extends StatefulWidget {
MyApp();
@override
_MyAppState createState() => _MyAppState();
}
class _MyAppState extends State {
@override
void initState() {
super.initState();
Superwall.configure('pk_6c131449acdef827c4b0dd639f9a499972ac3c45ccd8b8d3');
_handleIncomingLinks();
}
void _handleIncomingLinks() {
uriLinkStream.listen((Uri? uri) {
if (uri != null) {
Superwall.shared.handleDeepLink(uri);
}
}, onError: (Object err) {
print('Error receiving incoming link: $err');
});
}
@override
Widget build(BuildContext context) {
return MaterialApp(
home: Scaffold(
body: Center(
child: Text(
'Deep Link Preview Example',
style: TextStyle(fontSize: 24),
),
),
),
);
}
}
```
To make in-app previews work, you'll first want to add a URL scheme to your Xcode project's workspace. From terminal, navigate to your React Native project's root directory and open its Xcode workspace:
```bash
$ cd documents/projects/myReactNativeApp
$ open ios/theProjectName.xcworkspace
```
Open **Xcode**. In your **info.plist**, add a row called **URL Types**. Expand the automatically created **Item 0**, and inside the **URL identifier** value field, type your **Bundle ID**, e.g., **com.superwall.Superwall-SwiftUI**. Add another row to **Item 0** called **URL Schemes** and set its **Item 0** to a URL scheme you'd like to use for your app, e.g., **exampleapp**.
Here's an example of what it should look like if you open the target's `Info` pane:
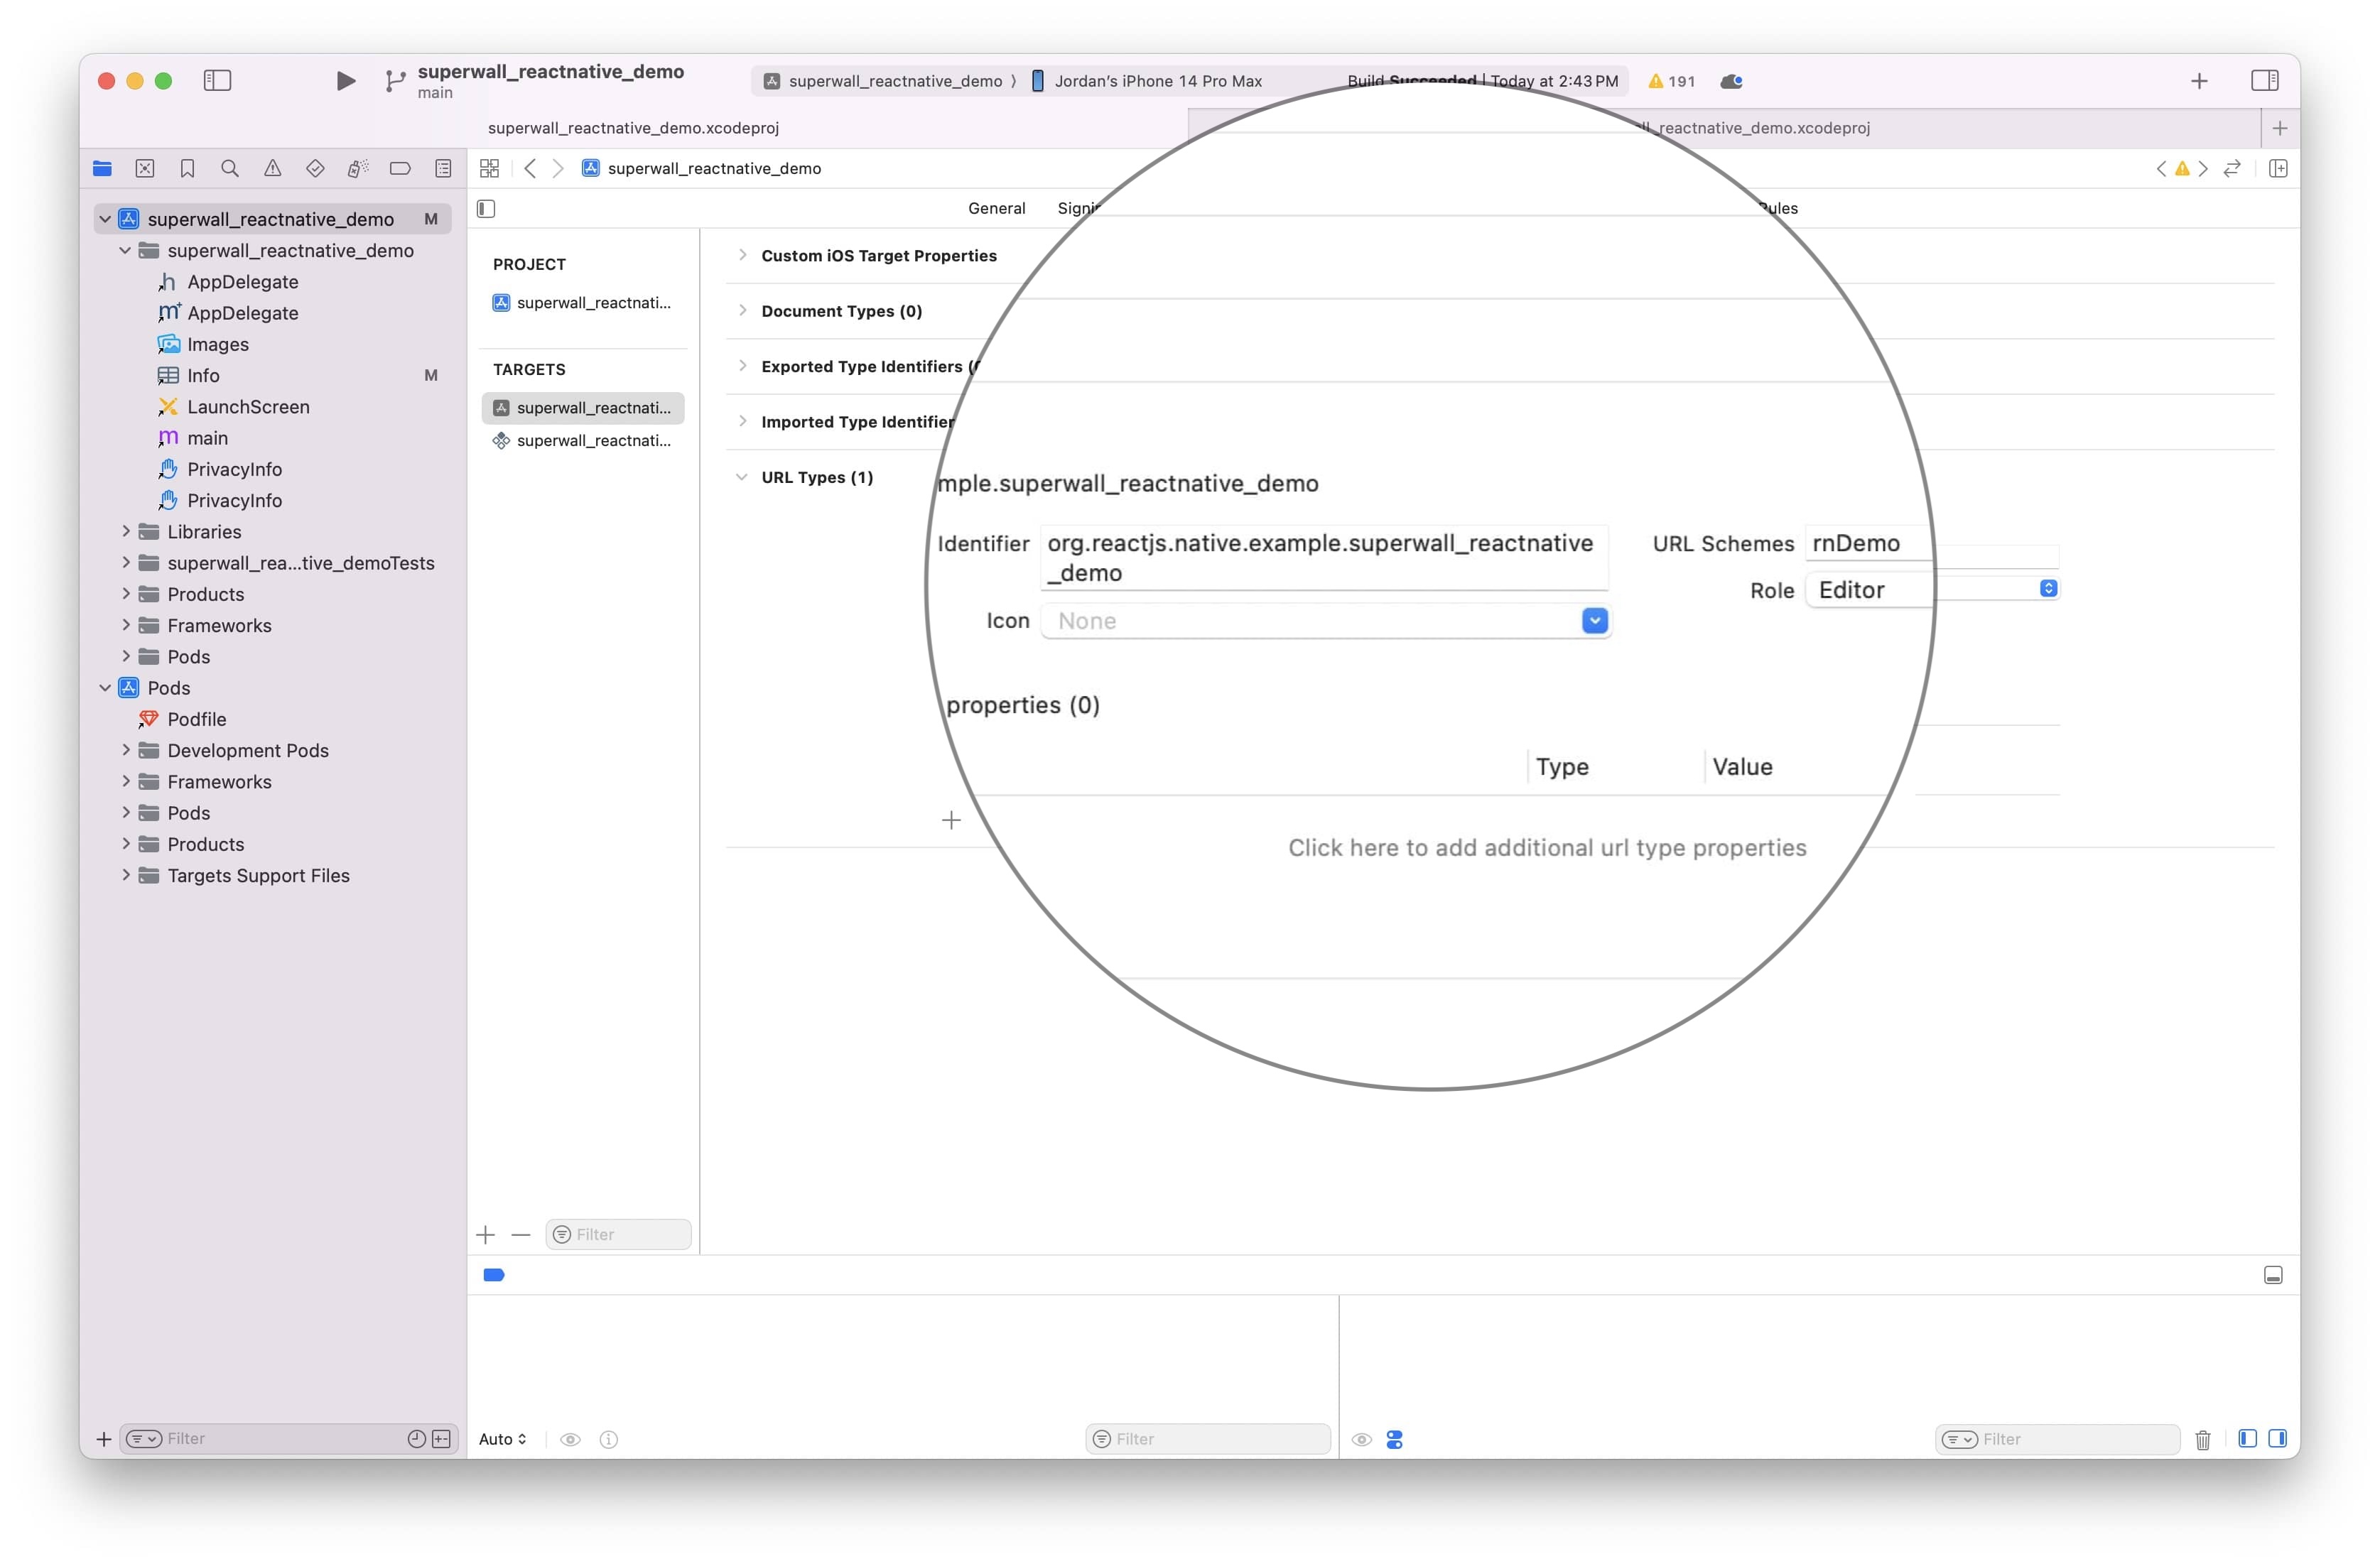
#### React Native Project setup
Next, you can use the Superwall SDK to handle the deeplink with `Superwall.shared.handleDeepLink(url);`. Here, we have code to ensure that the deep link opens a preview when the app is booted from the deep link, and when it's already in the foreground running:
```typescript
import React, { useEffect } from 'react';
import { Linking, AppState } from 'react-native';
import Superwall from '@superwall/react-native-superwall';
function handleDeepLink(url: string | null) {
if (url) {
Superwall.shared.handleDeepLink(url);
}
}
function App(): React.JSX.Element {
useEffect(() => {
Superwall.configure('YOUR_SUPERWALL_API_KEY');
const handleIncomingLink = async () => {
const url = await Linking.getInitialURL();
handleDeepLink(url);
};
// Handle any existing deep link on mount
handleIncomingLink();
const appStateSubscription = AppState.addEventListener('change', (nextAppState) => {
if (nextAppState === 'active') {
handleIncomingLink();
}
});
const linkingSubscription = Linking.addEventListener('url', (event) => {
handleDeepLink(event.url);
});
return () => {
appStateSubscription.remove();
linkingSubscription.remove();
};
}, []);
// Returning null since there's no UI for the example...
return null;
}
export default App;
```
### Previewing Paywalls
Next, build and run your app on your phone.
Then, head to the Superwall Dashboard. Click on **Settings** from the Dashboard panel on the left, then select **General**:
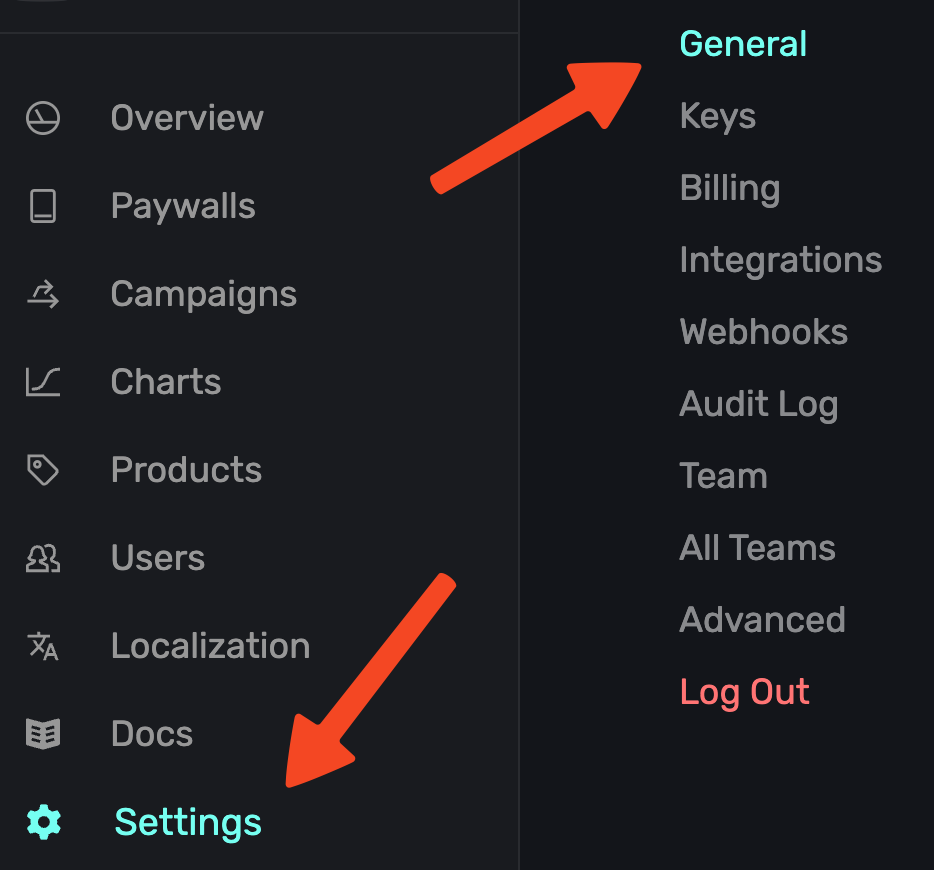
With the **General** tab selected, type your custom URL scheme, without slashes, into the **Apple Custom URL Scheme** field:
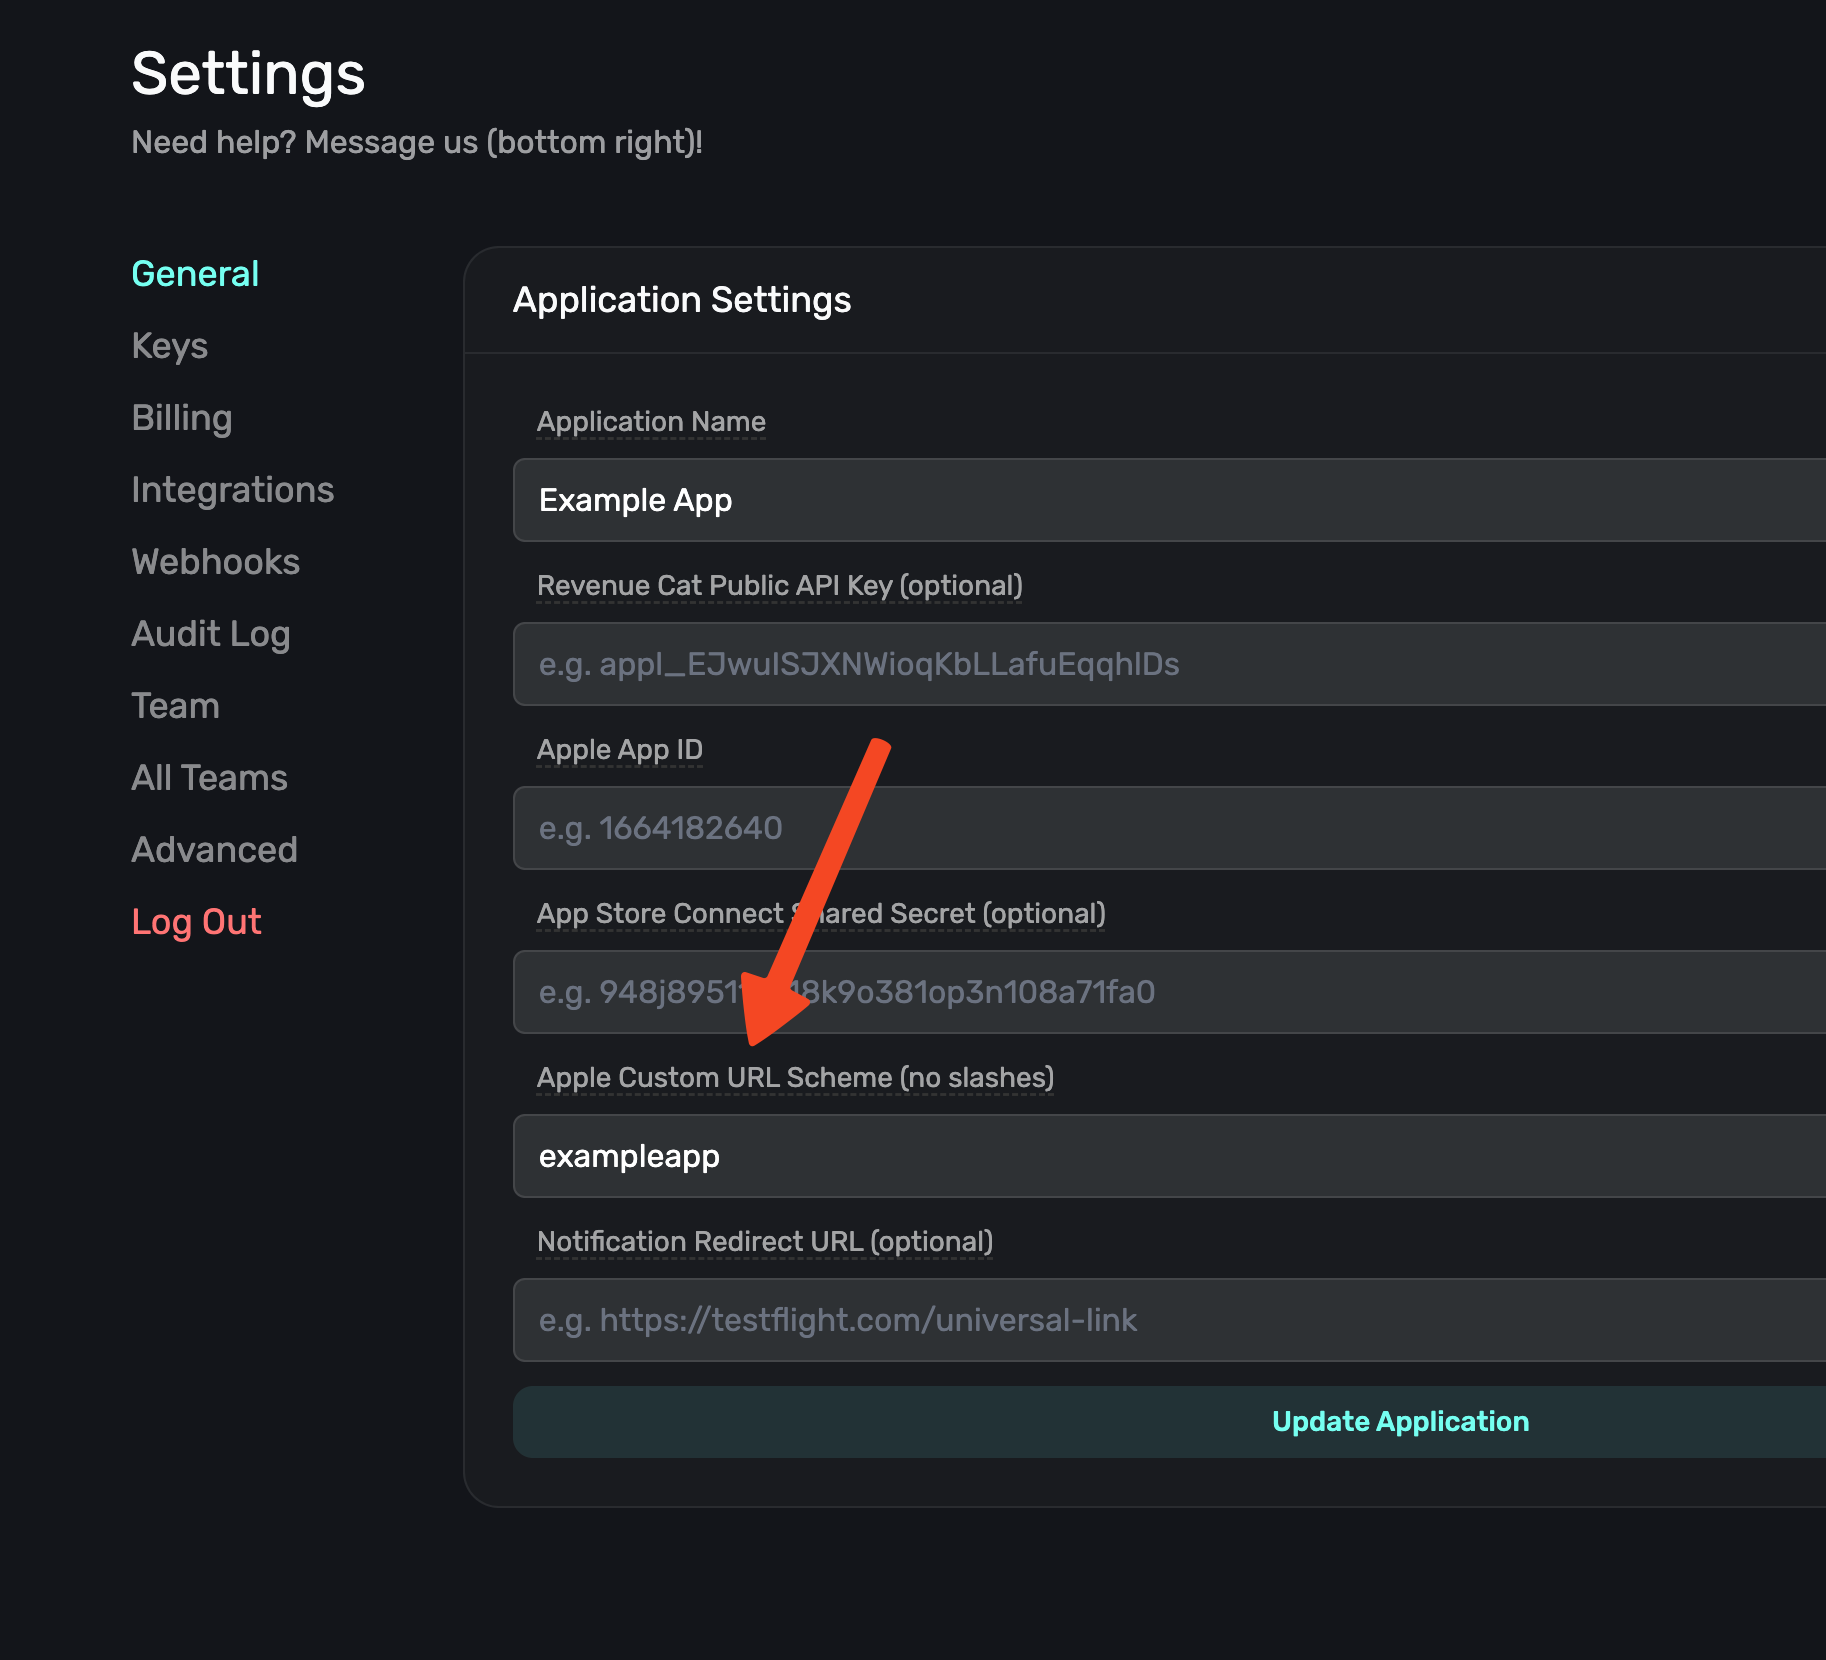
Next, open your paywall from the dashboard and click **Preview**. You'll see a QR code appear in a pop-up:
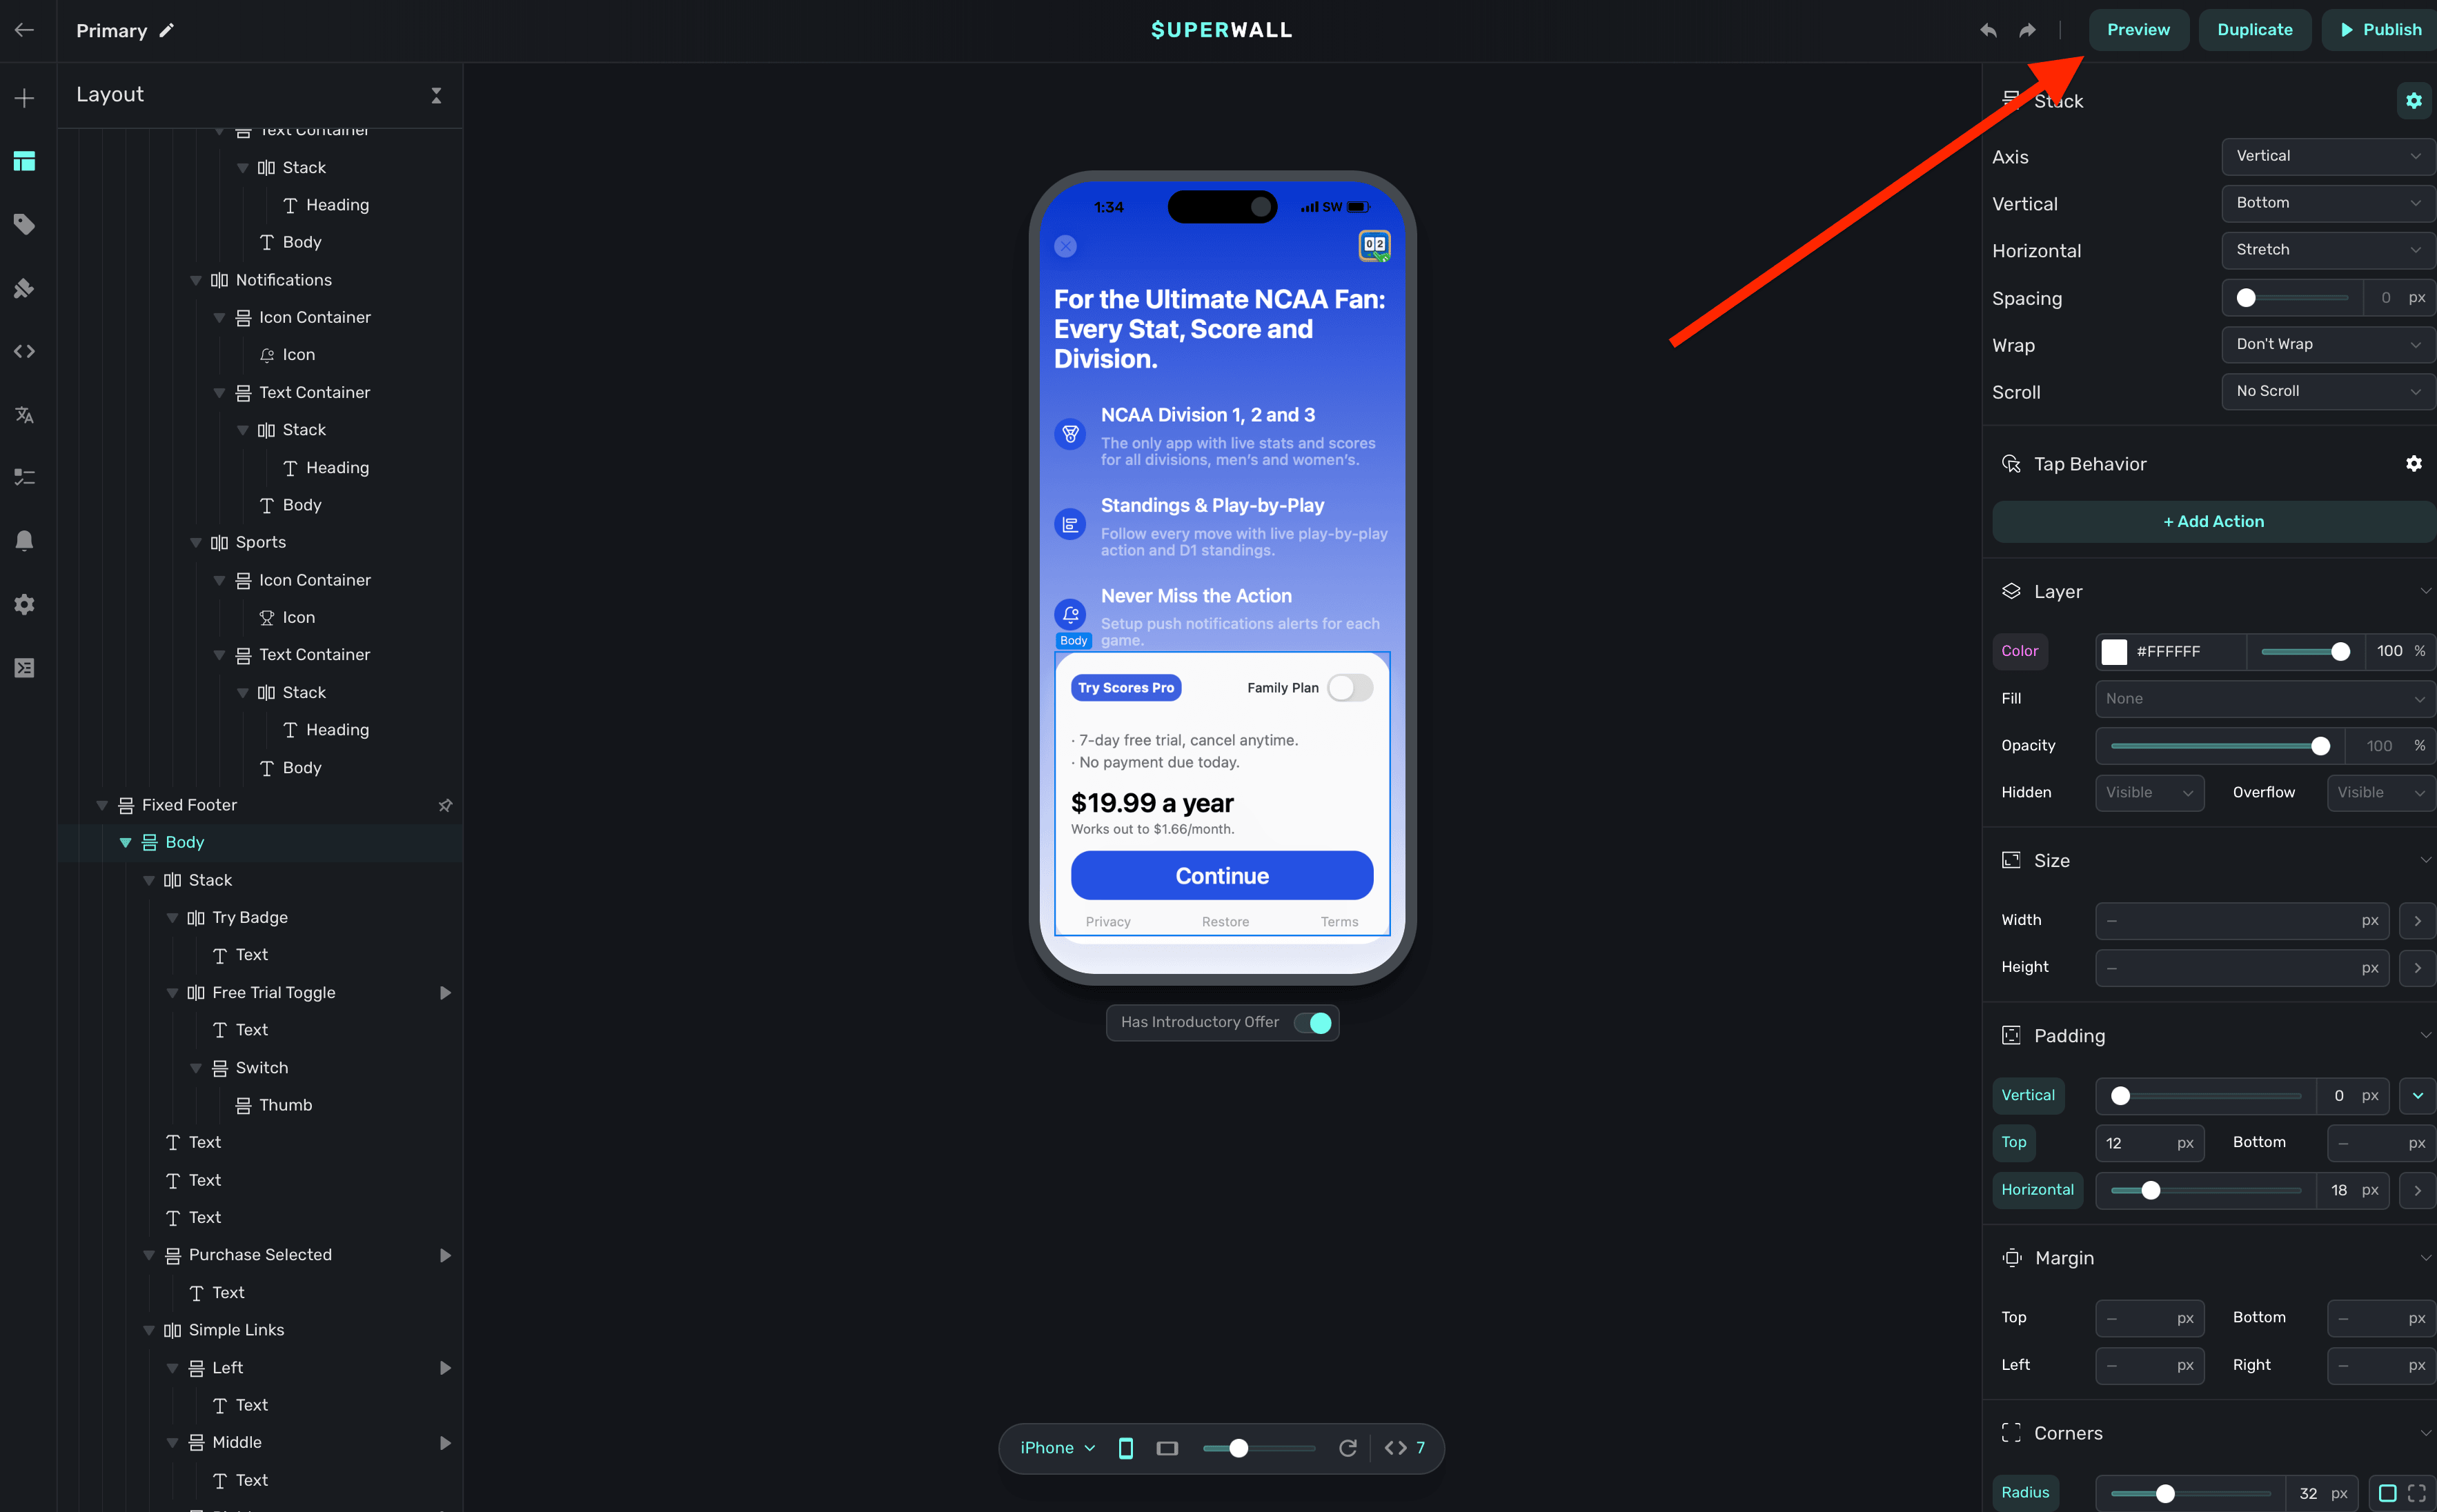
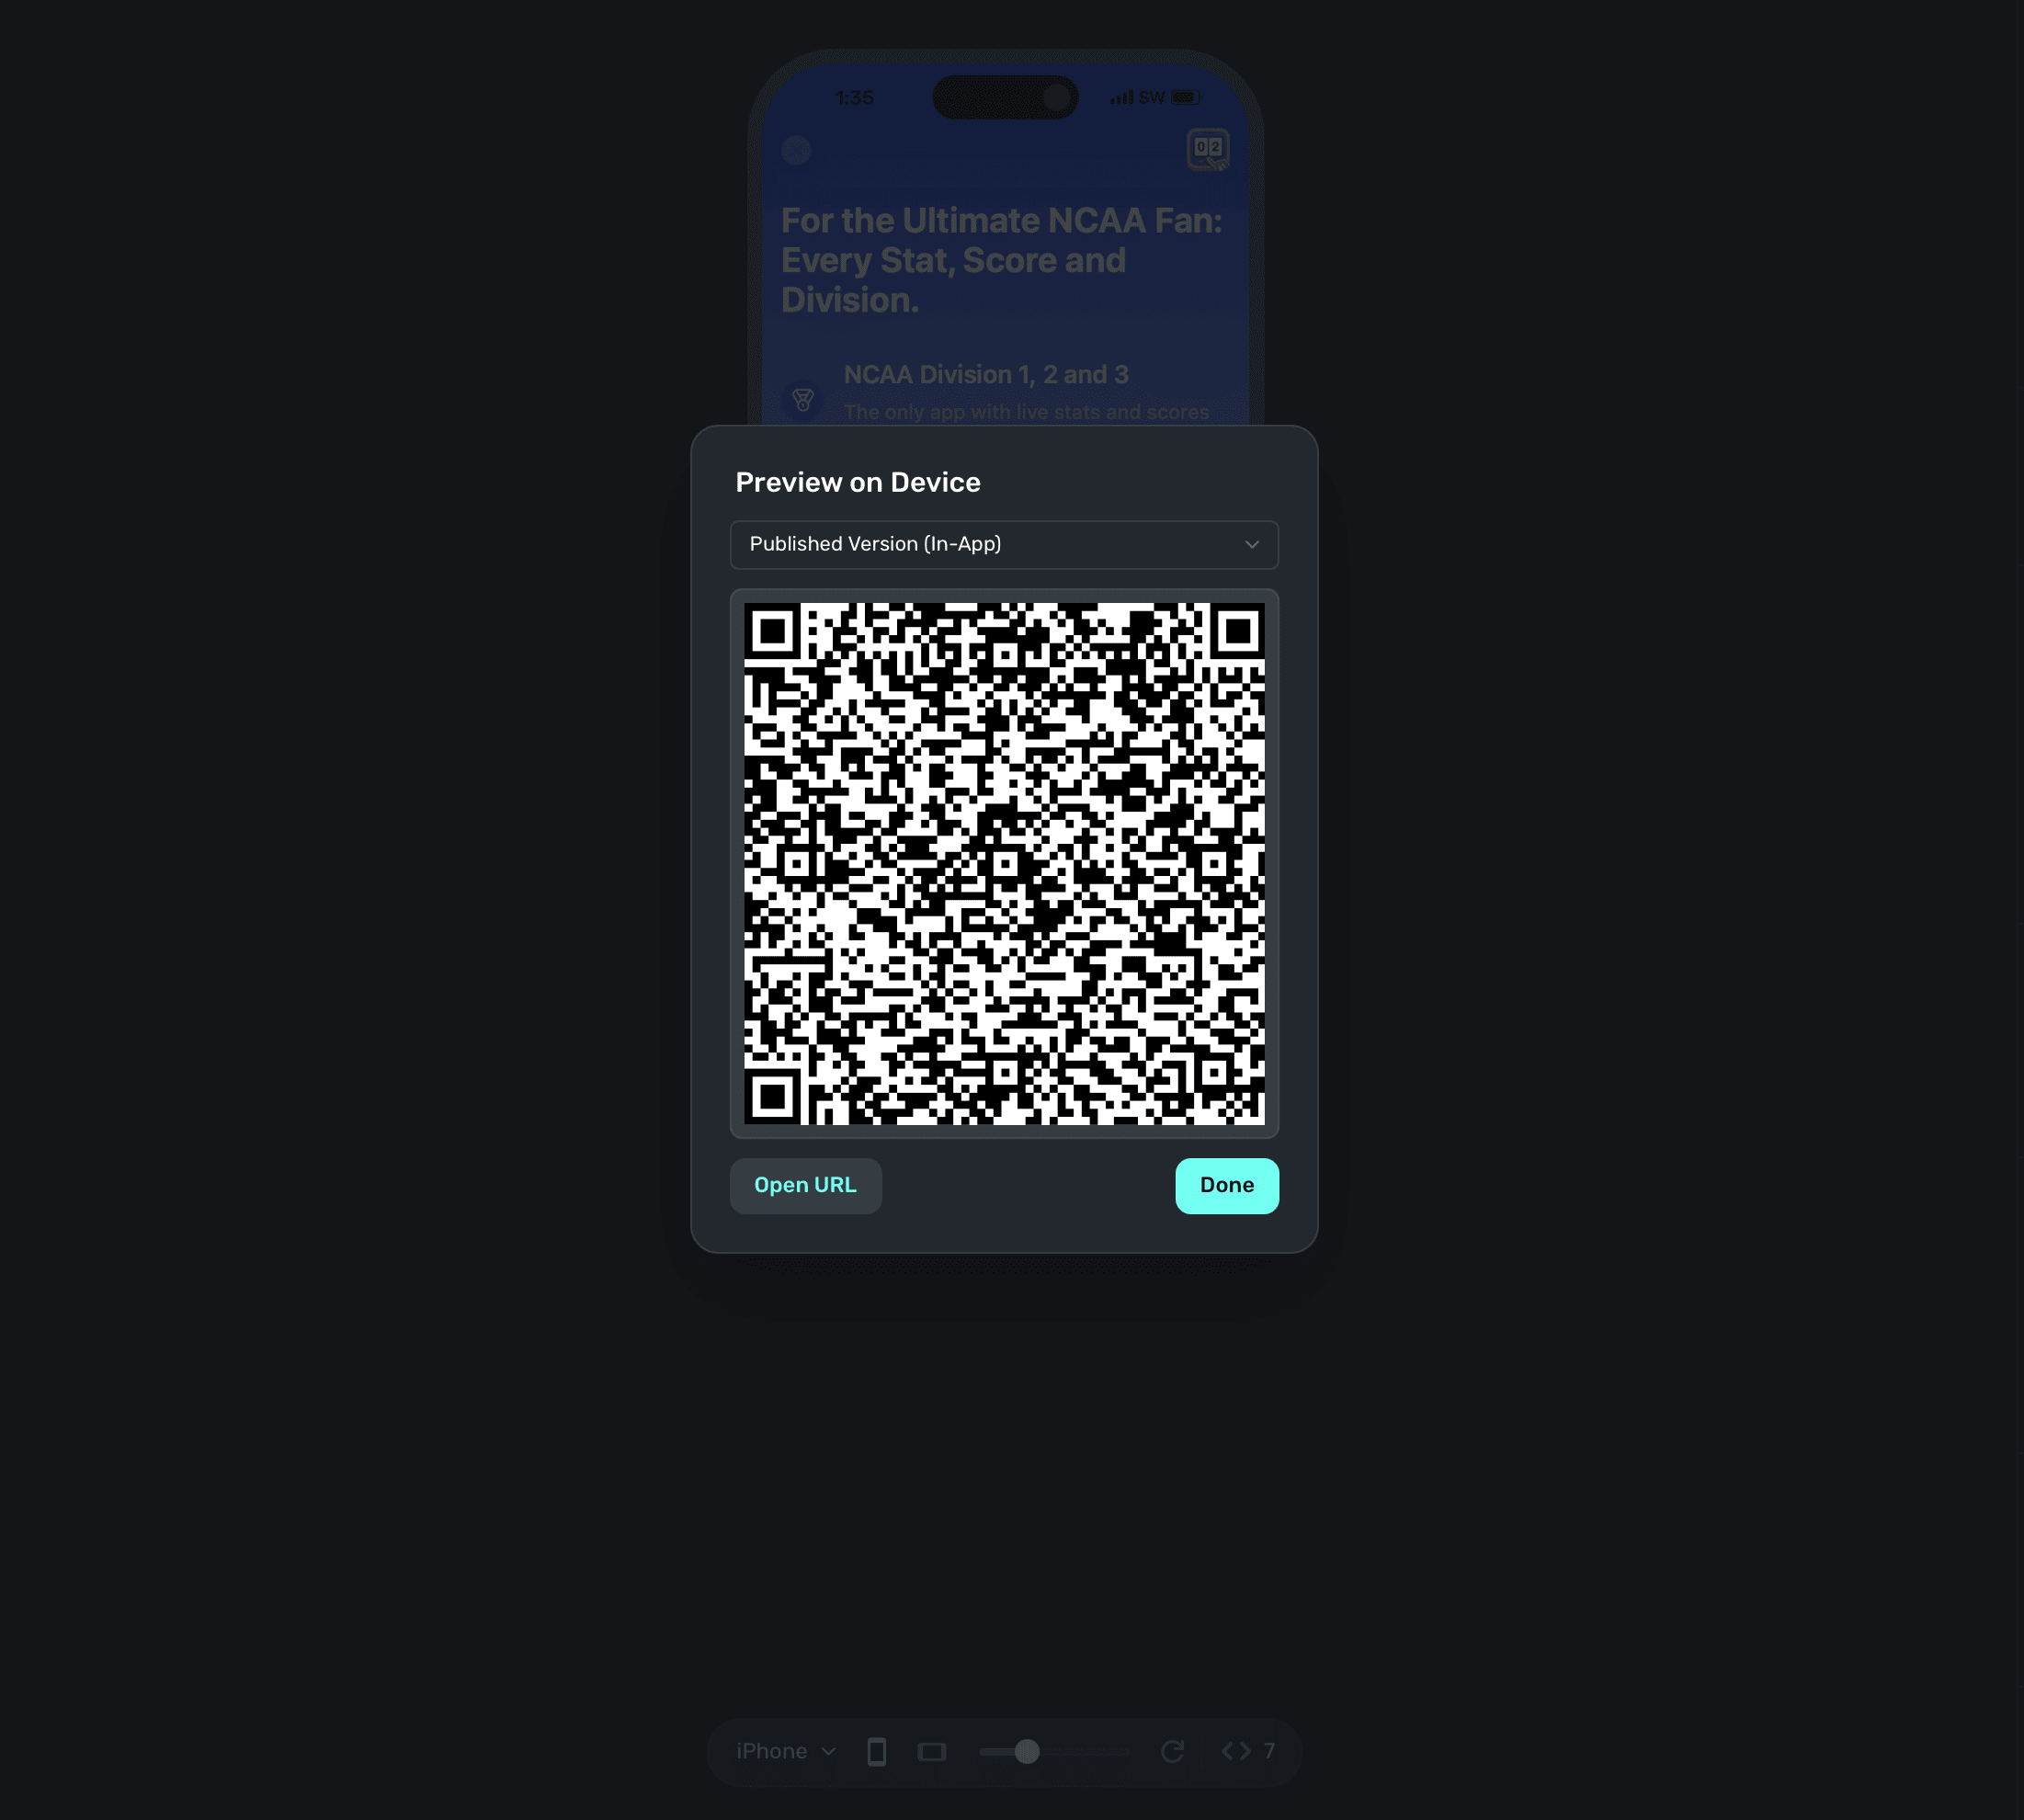
On your device, scan this QR code. You can do this via Apple's Camera app. This will take you to a paywall viewer within your app, where you can preview all your paywalls in different configurations.
### Using Deep Links to Present Paywalls
Deep links can also be used as a placement in a campaign to present paywalls. Simply add `deepLink_open` as an placement, and the URL parameters of the deep link can be used as parameters! You can also use custom placements for this purpose. [Read this doc](/presenting-paywalls-from-one-another) for examples of both.
# Installation
Source: https://superwall.com/docs/installation
Superwall can be installed with many different package managers. Please find your preferred package manager below.
### iOS
### Android
### Flutter
### React Native
# iOS - CocoaPods
Source: https://superwall.com/docs/installation-via-cocoapods
Install the Superwall iOS SDK via CocoaPods. To see the latest release, [check out the repository](https://github.com/superwall/Superwall-iOS).
## Install via CocoaPods
First, add the following to your Podfile:
`pod 'SuperwallKit', '< 5.0.0'
`
Next, run `pod repo update` to update your local spec repo. [Why?](https://stackoverflow.com/questions/43701352/what-exactly-does-pod-repo-update-do).
Finally, run `pod install` from your terminal. Note that in your target's **Build Settings -> User Script Sandboxing**, this value should be set to **No**.
### Updating to a New Release
To update to a new beta release, you'll need to update the version specified in the Podfile and then run `pod install` again.
### Import SuperwallKit
You should now be able to `import SuperwallKit`:
Swift:
`import SuperwallKit`
Objective-C:
`@import SuperwallKit;`
**And you're done!** Now you're ready to configure the SDK 👇
Begin configuring the SDK to show paywalls inside your App!
# Android - Gradle
Source: https://superwall.com/docs/installation-via-gradle
Install the Superwall Android SDK via Gradle. To see the latest release, [check out the repository](https://github.com/superwall/Superwall-Android).
## Install via Gradle
[Gradle](https://developer.android.com/build/releases/gradle-plugin) is the
preferred way to install Superwall for Android.
In your `build.gradle` or `build.gradle.kts` add the latest Superwall SDK. You
can find the [latest release here](https://github.com/superwall/Superwall-Android/releases).
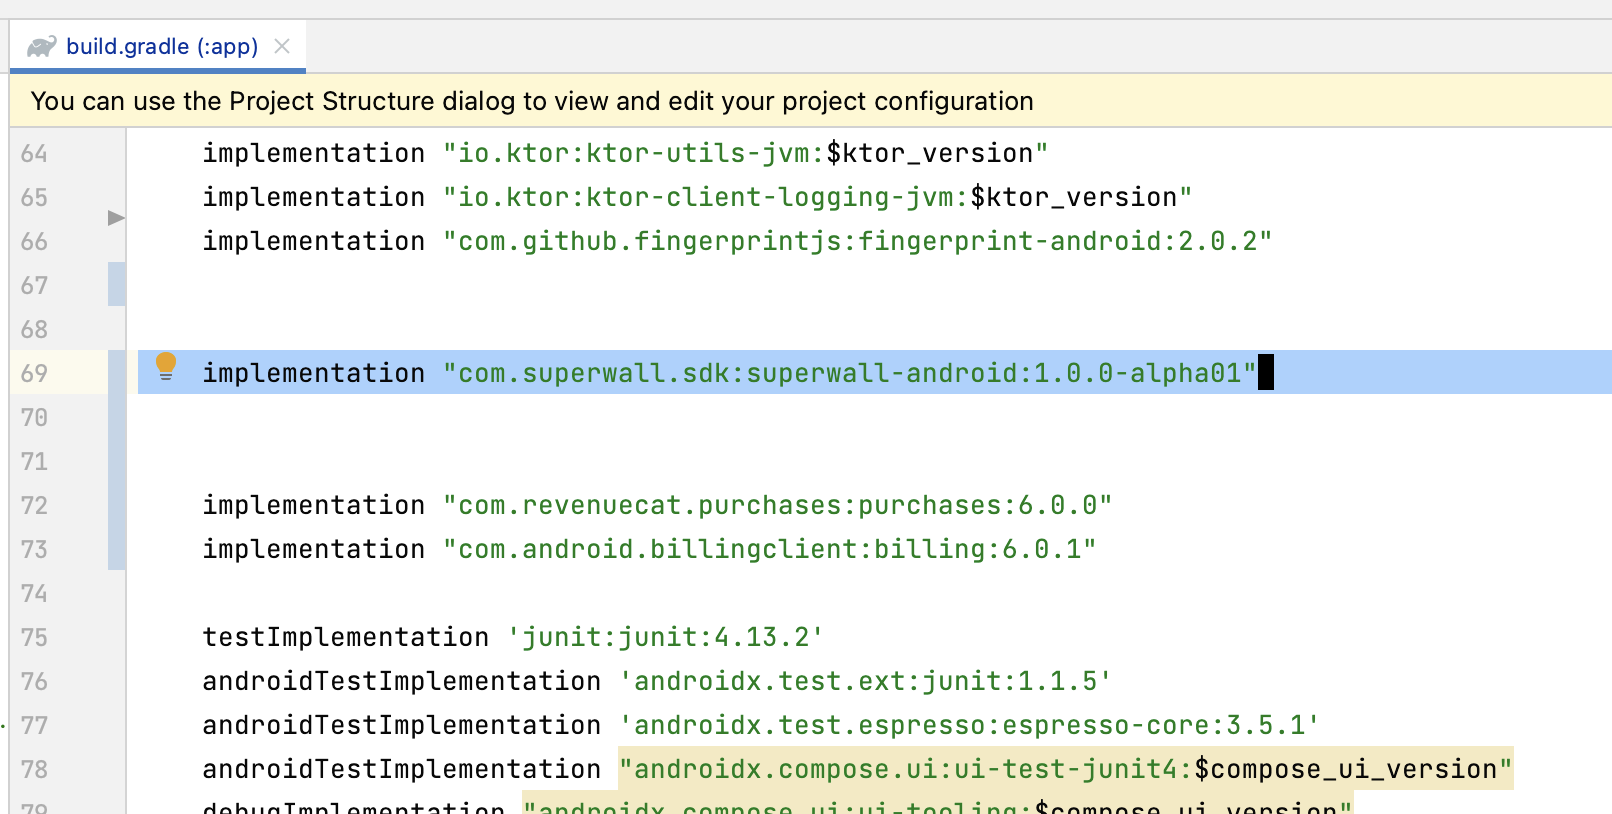
```gradle build.gradle
implementation "com.superwall.sdk:superwall-android:2.0.3"
```
```kotlin build.gradle.kts
implementation("com.superwall.sdk:superwall-android:2.0.3")
```
```toml libs.version.toml
[libraries]
superwall-android = { group = "com.superwall.sdk", name = "superwall-android", version = "2.0.0" }
// And in your build.gradle.kts
dependencies {
implementation(libs.superwall.android)
}
```
Make sure to run **Sync Now** to force Android Studio to update.
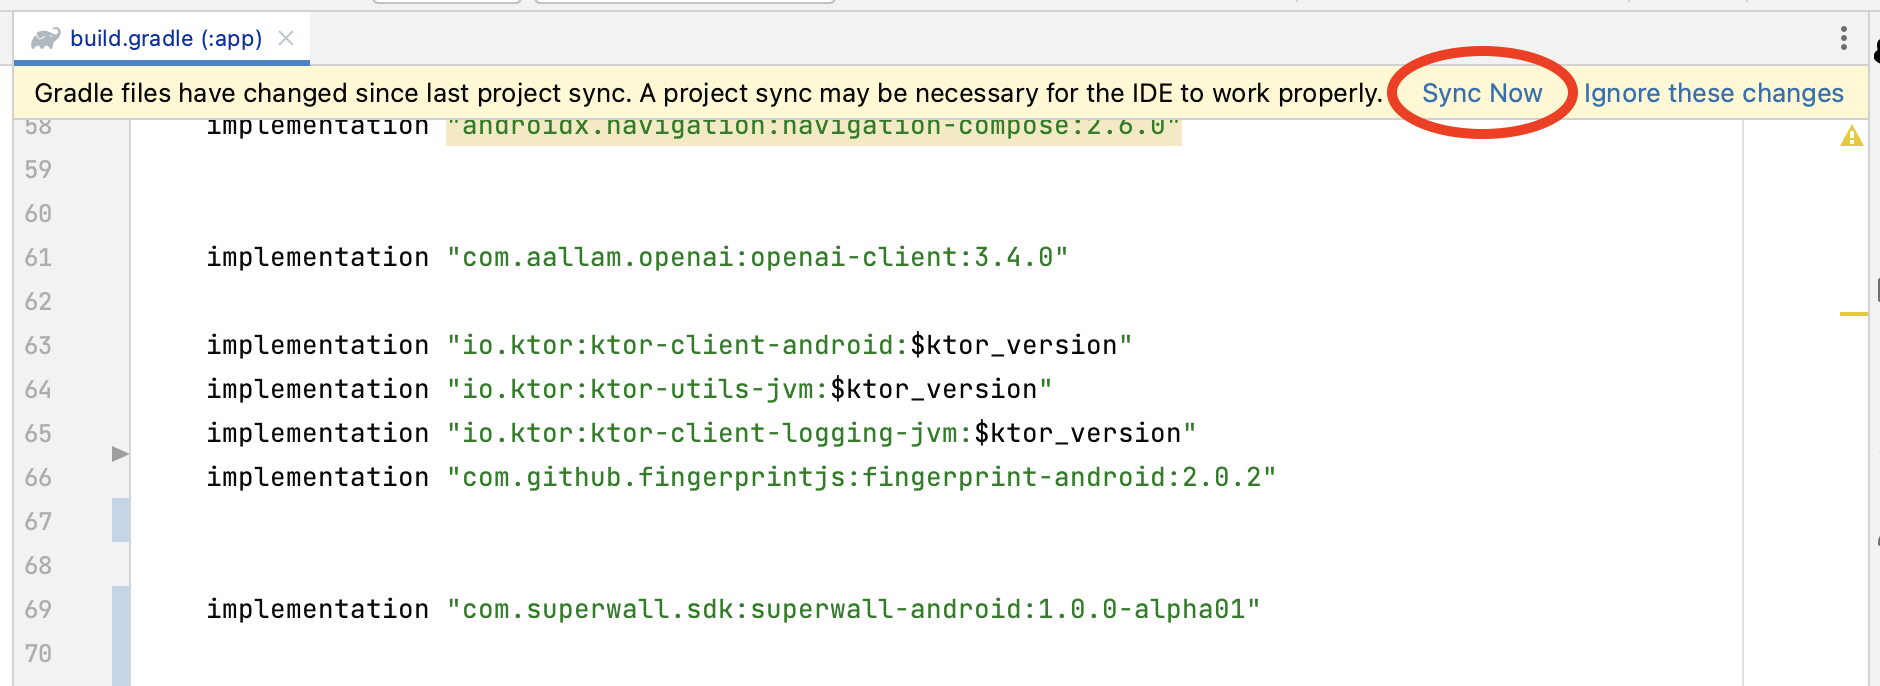
Go to your `AndroidManifest.xml` and add the following permissions:
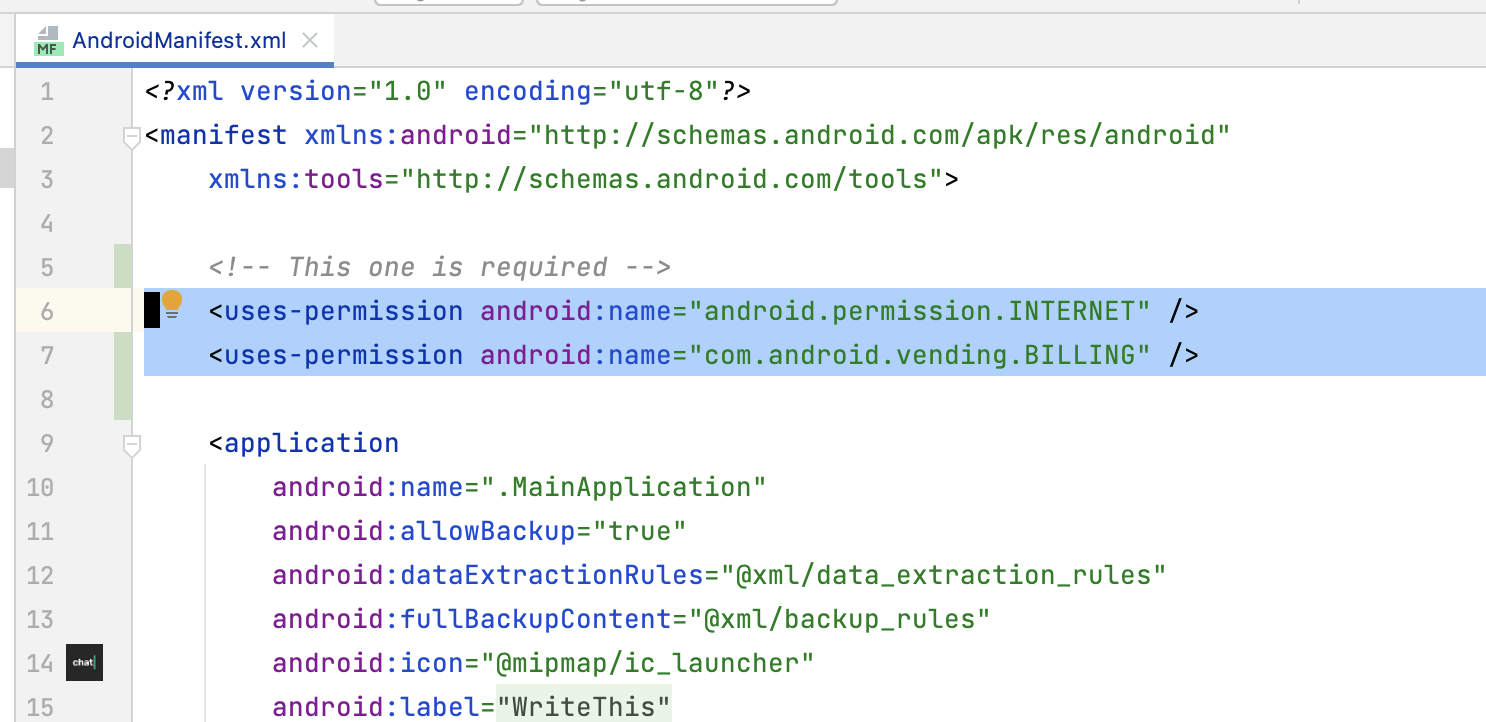
```xml AndroidManifest.xml
```
Then add our Activity to your `AndroidManifest.xml`:
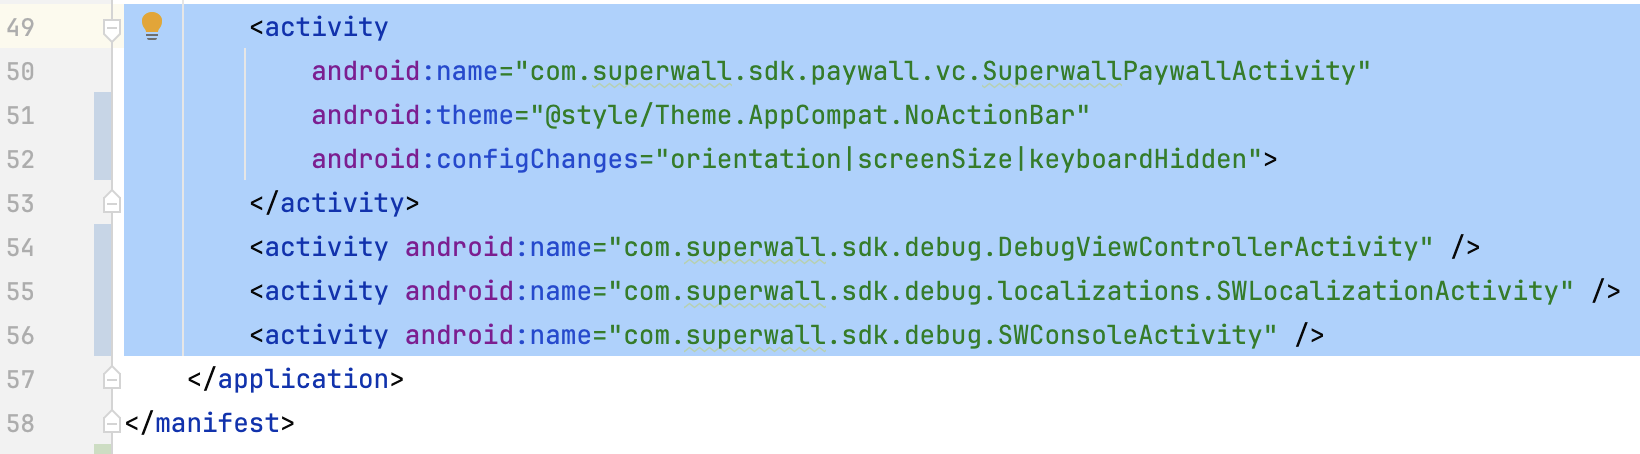
```xml AndroidManifest.xml
```
Set your app's theme in the `android:theme` section.
When choosing a device or emulator to run on make sure that it has the Play Store app and that you are signed in to your Google account on the Play Store.
**And you're done!** Now you're ready to configure the SDK 👇
Begin configuring the SDK to show paywalls inside your App!
# React Native - Package.json
Source: https://superwall.com/docs/installation-via-package
Install the Superwall React Native SDK via npm or yarn. To see the latest release, [check out the repository](https://github.com/superwall/react-native-superwall).
Note that Superwall does **not** refetch its configuration during hot reloads. So, if you add products, edit a paywall, or otherwise change anything with Superwall, re-run your app to see those changes.
## Option 1: React-Native package
To use Superwall in your React Native project, add `@superwall/react-native-superwall` as a dependency in your `package.json` file by using npm or yarn:
```bash npm
npm install @superwall/react-native-superwall
```
```bash yarn
yarn add @superwall/react-native-superwall
```
## Option 2: Using Expo
If you have an Expo project, you can add the dependency with npx:
```
npx expo install @superwall/react-native-superwall
```
Please note that Superwall does not support Expo Go. Expo Go only supports prebuilt Expo libraries; it cannot load third-party SDKs with custom native code. If you are using a **managed workflow**, create a [development build](https://docs.expo.dev/workflow/overview/#development-builds) to continue using Expo tools while including Superwall. Otherwise, you will encounter linking errors.
Here's a quick table to review your installation methods:
| **Workflow** | **Superwall Support** | **Notes** |
| --------------------- | --------------------------- | ------------------------------------ |
| **Expo Go** | ❌ Not supported | Expo Go cannot load native SDKs. |
| **Managed Workflow** | ℹ️ Requires additional step | Use a **Development Build**. |
| **Development Build** | ✅ Supported | Works with Expo tools + custom code. |
| **Unmanaged (Bare)** | ✅ Supported | Full control over native code. |
### iOS Deployment Target
Superwall requires iOS 14.0 or higher. Ensure your React Native project's iOS deployment target is 14.0 or higher by updating ios/Podfile.
```ruby
platform :ios, '14.0'
```
## Android Configuration
For Android projects, you'll also need to include Superwall's Maven repository.
First, install the `expo-build-properties` config plugin if your Expo project hasn’t yet:
```bash
npx expo install expo-build-properties
```
Then, add the following to your `app.json` or `app.config.js` file:
```json
{
"expo": {
"plugins": [
...
[
"expo-build-properties",
{
"android": {
"minSdkVersion": 26
}
}
]
]
}
}
```
Superwall requires a minimum SDK version of 26 or higher. Ensure your React Native project's Android SDK target is set to 26 or higher by updating `android/app/build.gradle`.
```gradle
android {
...
defaultConfig {
...
minSdkVersion 26
...
}
}
```
**And you're done!** Now you're ready to configure the SDK 👇
Begin configuring the SDK to show paywalls inside your App!
# Flutter - pubspec.yaml
Source: https://superwall.com/docs/installation-via-pubspec
Install the Superwall Flutter SDK via pub package manager. To see the latest release, [check out the repository](https://github.com/superwall/Superwall-Flutter).
## Install via pubspec.yaml
To use Superwall in your Flutter project, add `superwallkit_flutter` as a dependency in your `pubspec.yaml` file:
```yaml
dependencies:
superwallkit_flutter: ^2.0.5
```
After adding the dependency, run `dart pub get` in your terminal to fetch the package.
## Install via Command Line (Alternative)
You can also add the dependency directly from your terminal using the following command:
```bash
$ flutter pub add superwallkit_flutter
```
### iOS Deployment Target
Superwall requires iOS 14.0 or higher. Ensure your Flutter project's iOS deployment target is 14.0 or higher by updating ios/Podfile.
```ruby
platform :ios, '14.0'
```
### Android Configuration
First, add our SuperwallActivity to your `AndroidManifest.xml`:
```xml
```
Superwall requires a minimum SDK version of 26 or higher and a minimum compile SDK target of 34. Ensure your Flutter project's Android minimal SDK target is set to 26 or higher and that your compilation SDK target is 34 by updating `android/app/build.gradle`.
```gradle
android {
...
compileSdkVersion 34
...
defaultConfig {
...
minSdkVersion 26
...
}
}
```
To use the compile target SDK 34, you'll also need to ensure your Gradle version is 8.6 or higher and your Android Gradle plugin version is 8.4 or higher.
You can do that by checking your `gradle/wrapepr/gradle-wrapper.properties` file and ensuring it is updated to use the latest Gradle version:
```properties
distributionUrl=https\://services.gradle.org/distributions/gradle-8.6-bin.zip
```
And your `android/build.gradle` file is updated to use the latest Android Gradle plugin version:
```gradle
plugins {
id 'com.android.application' version '8.4.1' apply false
}
```
To find the latest compatible versions, you can always check the [Gradle Plugin Release Notes](https://developer.android.com/build/releases/gradle-plugin).
**And you're done!** Now you're ready to configure the SDK 👇
Begin configuring the SDK to show paywalls inside your App!
# iOS - Swift Package Manager
Source: https://superwall.com/docs/installation-via-spm
Install the Superwall iOS SDK via Swift Package Manager. To see the latest release, [check out the repository](https://github.com/superwall/Superwall-iOS).
## Install via Swift Package Manager
[Swift Package Manager](https://swift.org/package-manager/) is a tool for automating the distribution of Swift code and is integrated into the Swift compiler.
In **Xcode**, select **File ▸ Add Packages...**:
{" "}
**Then, paste the GitHub repository URL:**
```
https://github.com/superwall/Superwall-iOS
```
in the search bar. With the **Superwall-iOS** source selected, set the **Dependency Rule** to **Up to Next Major Version** with the lower bound set to **4.0.0**. Make sure your project name is selected in **Add to Project**. Then click **Add Package**:
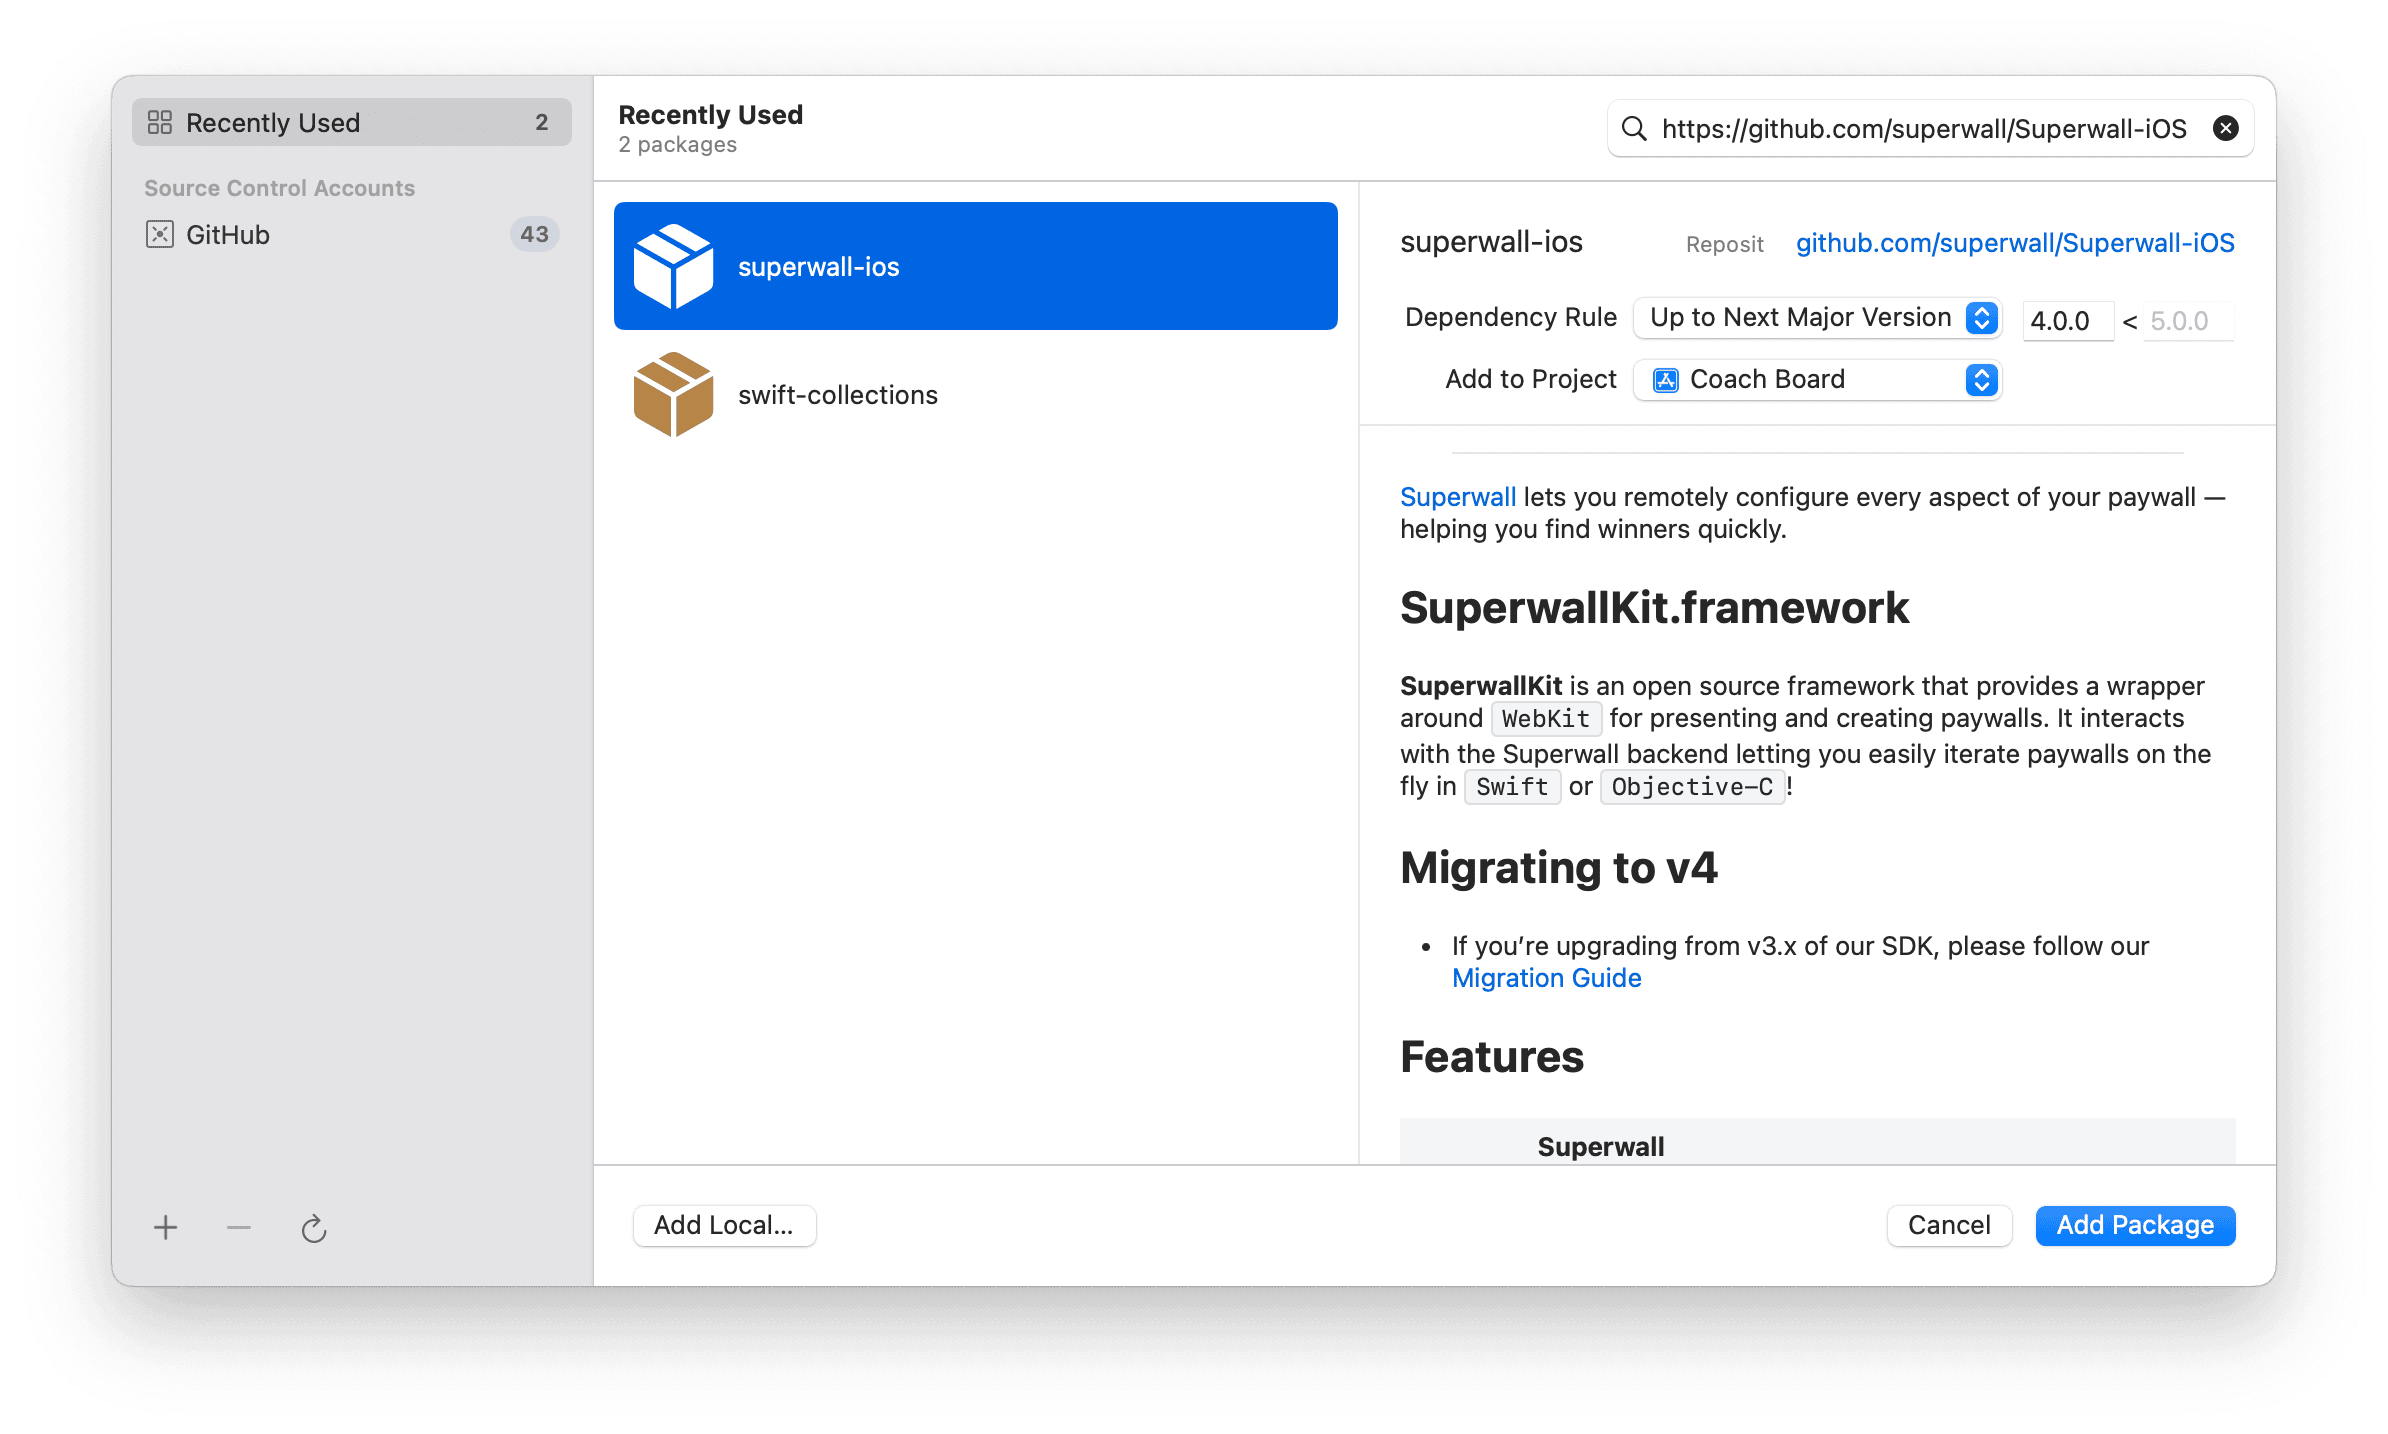
After the package has loaded, make sure **Add to Target** is set to your app's name and click **Add Package**:
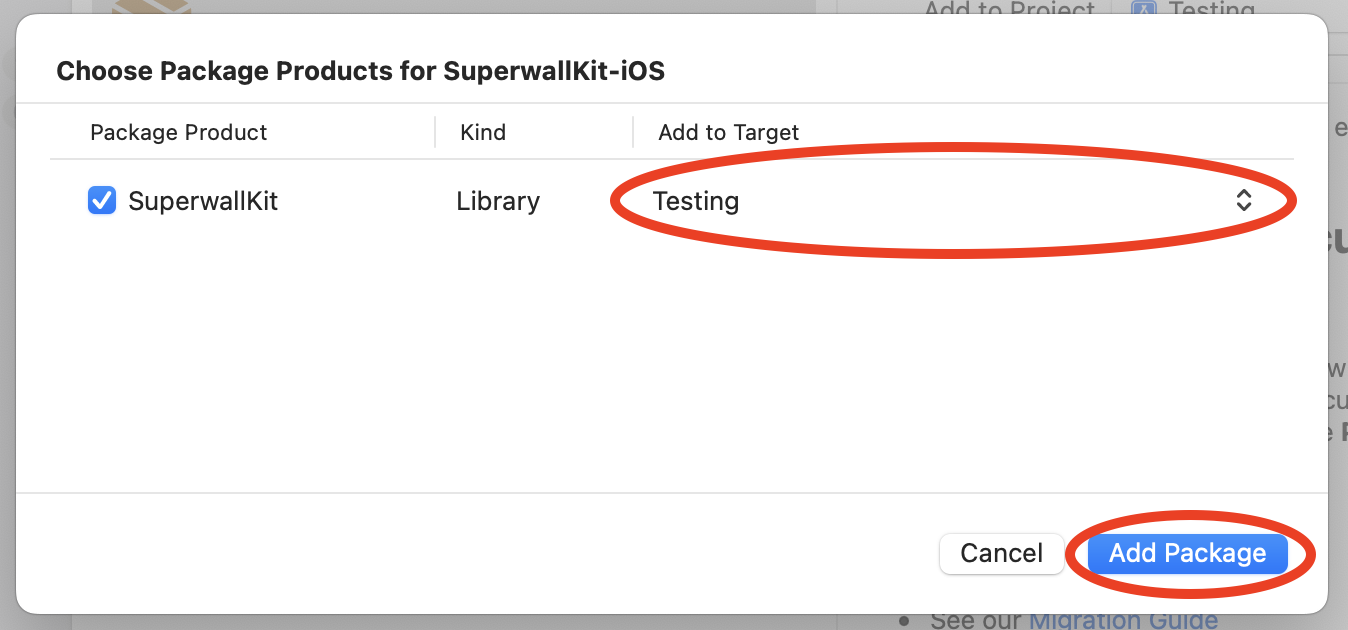
**And you're done!** Now you're ready to configure the SDK 👇
Begin configuring the SDK to show paywalls inside your App!
# iOS
Source: https://superwall.com/docs/ios
# 3rd Party Analytics (Legacy)
Source: https://superwall.com/docs/legacy/legacy_3rd-party-analytics
Superwall can easily be integrated with 3rd party analytics tools.
### Hooking up Superwall events to 3rd party tools
SuperwallKit automatically tracks some internal events. You can [view the list of events here](/legacy/legacy_tracking-analytics). We encourage you to also track them in your own analytics by implementing the [Superwall delegate](/legacy/legacy_using-superwall-delegate). Using the `handleSuperwallEvent(withInfo:)` function, you can forward events to your analytics service:
```Swift Swift
extension SuperwallService: SuperwallDelegate {
func handleSuperwallEvent(withInfo eventInfo: SuperwallEventInfo) {
print("analytics event called", eventInfo.event.description)
MyAnalyticsService.shared.track(
event: eventInfo.event.description,
params: eventInfo.params
)
}
}
```
```Swift Objective-C
- (void)didTrackSuperwallEventInfo:(SWKSuperwallEventInfo *)info {
NSLog(@"Analytics event called %@", info.event.description));
[[MyAnalyticsService shared] trackEvent:info.event.description params:info.params];
}
```
```kotlin Kotlin
override fun handleSuperwallEvent(eventInfo: SuperwallEventInfo) {
println("analytics event: ${eventInfo.event.rawName}")
MyAnalytics.shared.trac(eventInfo.event.rawName, eventInfo.params)
}
```
```dart Flutter
@override
void handleSuperwallEvent(SuperwallEventInfo eventInfo) async {
print("handleSuperwallEvent: $eventInfo");
// Example usage...
switch (eventInfo.event.type) {
case EventType.appOpen:
print("appOpen event");
case EventType.deviceAttributes:
print("deviceAttributes event: ${eventInfo.event.deviceAttributes} ");
case EventType.paywallOpen:
final paywallInfo = eventInfo.event.paywallInfo;
print("paywallOpen event: ${paywallInfo} ");
if (paywallInfo != null) {
final identifier = await paywallInfo.identifier;
print("paywallInfo.identifier: ${identifier} ");
final productIds = await paywallInfo.productIds;
print("paywallInfo.productIds: ${productIds} ");
}
default:
break;
}
}
```
```typescript React Native
handleSuperwallEvent(eventInfo: SuperwallEventInfo) {
console.log(`handleSuperwallEvent: ${eventInfo}`);
// Assuming eventInfo has a type property and other necessary properties
switch (eventInfo.event.type) {
case EventType.appOpen:
console.log("appOpen event");
break; // Don't forget to add break statements to prevent fall-through
case EventType.deviceAttributes:
console.log(`deviceAttributes event: ${eventInfo.event.deviceAttributes}`);
break;
case EventType.paywallOpen:
const paywallInfo = eventInfo.event.paywallInfo;
console.log(`paywallOpen event: ${paywallInfo}`);
if (paywallInfo !== null) {
paywallInfo.identifier().then((identifier: string) => {
console.log(`paywallInfo.identifier: ${identifier}`);
});
paywallInfo.productIds().then((productIds: string[]) => {
console.log(`paywallInfo.productIds: ${productIds}`);
});
}
break;
default:
break;
}
}
```
You might also want to set user attribute to allow for [Cohorting in 3rd Party Tools](/legacy/legacy_cohorting-in-3rd-party-tools)
Alternatively, if you want typed versions of all these events with associated values, you can access them via `eventInfo.event`:
```swift Swift
func handleSuperwallEvent(withInfo eventInfo: SuperwallEventInfo) {
switch eventInfo.event {
case .firstSeen:
break
case .appOpen:
break
case .appLaunch:
break
case .appInstall:
break
case .sessionStart:
break
case .appClose:
break
case .deepLink(let url):
break
case .triggerFire(let eventName, let result):
break
case .paywallOpen(let paywallInfo):
break
case .paywallClose(let paywallInfo):
break
case .transactionStart(let product, let paywallInfo):
break
case .transactionFail(let error, let paywallInfo):
break
case .transactionAbandon(let product, let paywallInfo):
break
case .transactionComplete(let transaction, let product, let paywallInfo):
break
case .subscriptionStart(let product, let paywallInfo):
break
case .freeTrialStart(let product, let paywallInfo):
break
case .transactionRestore(let paywallInfo):
break
case .userAttributes(let attributes):
break
case .nonRecurringProductPurchase(let product, let paywallInfo):
break
case .paywallResponseLoadStart(let triggeredEventName):
break
case .paywallResponseLoadNotFound(let triggeredEventName):
break
case .paywallResponseLoadFail(let triggeredEventName):
break
case .paywallResponseLoadComplete(let triggeredEventName, let paywallInfo):
break
case .paywallWebviewLoadStart(let paywallInfo):
break
case .paywallWebviewLoadFail(let paywallInfo):
break
case .paywallWebviewLoadComplete(let paywallInfo):
break
case .paywallWebviewLoadTimeout(let paywallInfo):
break
case .paywallProductsLoadStart(let triggeredEventName, let paywallInfo):
break
case .paywallProductsLoadFail(let triggeredEventName, let paywallInfo):
break
case .paywallProductsLoadComplete(let triggeredEventName):
break
case .subscriptionStatusDidChange:
break
}
}
```
```kotlin Kotlin
override fun handleSuperwallEvent(eventInfo: SuperwallEventInfo) {
when(eventInfo.event) {
is SuperwallEvent.AppClose -> TODO()
is SuperwallEvent.AppInstall -> TODO()
is SuperwallEvent.AppLaunch -> TODO()
is SuperwallEvent.AppOpen -> TODO()
is SuperwallEvent.DeepLink -> TODO()
is SuperwallEvent.FirstSeen -> TODO()
is SuperwallEvent.FreeTrialStart -> TODO()
is SuperwallEvent.NonRecurringProductPurchase -> TODO()
is SuperwallEvent.PaywallClose -> TODO()
is SuperwallEvent.PaywallDecline -> TODO()
is SuperwallEvent.PaywallOpen -> TODO()
is SuperwallEvent.PaywallPresentationRequest -> TODO()
is SuperwallEvent.PaywallProductsLoadComplete -> TODO()
is SuperwallEvent.PaywallProductsLoadFail -> TODO()
is SuperwallEvent.PaywallProductsLoadStart -> TODO()
is SuperwallEvent.PaywallResponseLoadComplete -> TODO()
is SuperwallEvent.PaywallResponseLoadFail -> TODO()
is SuperwallEvent.PaywallResponseLoadNotFound -> TODO()
is SuperwallEvent.PaywallResponseLoadStart -> TODO()
is SuperwallEvent.PaywallWebviewLoadComplete -> TODO()
is SuperwallEvent.PaywallWebviewLoadFail -> TODO()
is SuperwallEvent.PaywallWebviewLoadStart -> TODO()
is SuperwallEvent.PaywallWebviewLoadTimeout -> TODO()
is SuperwallEvent.SessionStart -> TODO()
is SuperwallEvent.SubscriptionStart -> TODO()
is SuperwallEvent.SubscriptionStatusDidChange -> TODO()
is SuperwallEvent.SurveyClose -> TODO()
is SuperwallEvent.SurveyResponse -> TODO()
is SuperwallEvent.TransactionAbandon -> TODO()
is SuperwallEvent.TransactionComplete -> TODO()
is SuperwallEvent.TransactionFail -> TODO()
is SuperwallEvent.TransactionRestore -> TODO()
is SuperwallEvent.TransactionStart -> TODO()
is SuperwallEvent.TransactionTimeout -> TODO()
is SuperwallEvent.TriggerFire -> TODO()
is SuperwallEvent.UserAttributes -> TODO()
}
}
```
```dart Flutter
@override
void handleSuperwallEvent(SuperwallEventInfo eventInfo) async {
// Example usage...
switch (eventInfo.event.type) {
case EventType.appOpen:
print("appOpen event");
case EventType.deviceAttributes:
print("deviceAttributes event: ${eventInfo.event.deviceAttributes} ");
case EventType.paywallOpen:
final paywallInfo = eventInfo.event.paywallInfo;
print("paywallOpen event: ${paywallInfo} ");
if (paywallInfo != null) {
final identifier = await paywallInfo.identifier;
print("paywallInfo.identifier: ${identifier} ");
final productIds = await paywallInfo.productIds;
print("paywallInfo.productIds: ${productIds} ");
}
default:
break;
}
}
```
```typescript React Native
handleSuperwallEvent(eventInfo: SuperwallEventInfo) {
console.log(`handleSuperwallEvent: ${eventInfo}`);
// Assuming eventInfo has a type property and other necessary properties
switch (eventInfo.event.type) {
case EventType.appOpen:
console.log("appOpen event");
break; // Don't forget to add break statements to prevent fall-through
case EventType.deviceAttributes:
console.log(`deviceAttributes event: ${eventInfo.event.deviceAttributes}`);
break;
case EventType.paywallOpen:
const paywallInfo = eventInfo.event.paywallInfo;
console.log(`paywallOpen event: ${paywallInfo}`);
if (paywallInfo !== null) {
paywallInfo.identifier().then((identifier: string) => {
console.log(`paywallInfo.identifier: ${identifier}`);
});
paywallInfo.productIds().then((productIds: string[]) => {
console.log(`paywallInfo.productIds: ${productIds}`);
});
}
break;
default:
break;
}
}
```
### Using events to see purchased products
If your goal is simply to view which product was purchased from a paywall, you don't need a [purchase controller](/legacy/legacy_advanced-configuration) for that (though it can be done in one). Using a `SuperwallDelegate`, you can leverage the `transactionComplete` event, which provides direct access to the purchased product via `product`:
```swift
import SwiftUI
import SuperwallKit
class SWDelegate: SuperwallDelegate {
func handleSuperwallEvent(withInfo eventInfo: SuperwallEventInfo) {
switch eventInfo.event {
case .transactionComplete(let transaction, let product, let paywallInfo):
print("Converted from paywall: \(product.productIdentifier)")
default:
print("\(#function) - \(eventInfo.event)")
}
}
}
@main
struct AwesomeApp: App {
init() {
Superwall.configure(apiKey: "MY_API_KEY")
Superwall.shared.delegate = self.swDelegate
}
var body: some Scene {
WindowGroup {
ContentView()
.onAppear { Superwall.shared.register(event: "test_event") }
}
}
}
```
In that example, as soon as a user converts on a paywall, the product identifier will be printed to the console:
```bash
Converted from paywall: ex.someProduct.identifier
```
# Purchases and Subscription Status (Legacy)
Source: https://superwall.com/docs/legacy/legacy_advanced-configuration
By default, Superwall handles basic subscription-related logic for you:
1. **Purchasing**: When the user initiates a checkout on a paywall.
2. **Restoring**: When the user restores previously purchased products.
3. **Subscription Status**: When the user's subscription status changes to active or expired (by checking the local receipt).
However, if you want more control, you can pass in a `PurchaseController` when configuring the SDK via `configure(apiKey:purchaseController:options:)` and manually set `Superwall.shared.subscriptionStatus` to take over this responsibility.
### Step 1: Creating a `PurchaseController`
A `PurchaseController` handles purchasing and restoring via protocol methods that you implement. You pass in your purchase controller when configuring the SDK:
```swift Swift
// MyPurchaseController.swift
import SuperwallKit
import StoreKit
final class MyPurchaseController: PurchaseController {
static let shared = MyPurchaseController()
// 1
func purchase(product: SKProduct) async -> PurchaseResult {
// TODO
// ----
// Purchase via StoreKit, RevenueCat, Qonversion or however
// you like and return a valid PurchaseResult
return .purchased // .cancelled, .pending, .failed(Error), .restored
}
// 2
func restorePurchases() async -> Bool {
// TODO
// ----
// Restore purchases and return true if successful.
return true // false
}
}
```
```swift Objective-C
@import SuperwallKit;
@import StoreKit;
// MyPurchaseController
@interface MyPurchaseController: NSObject
+ (instancetype)sharedInstance;
@end
@implementation MyPurchaseController
+ (instancetype)sharedInstance
{
static MyPurchaseController *sharedInstance = nil;
static dispatch_once_t onceToken;
dispatch_once(&onceToken, ^{
sharedInstance = [MyPurchaseController new];
});
return sharedInstance;
}
// 1
- (void)purchaseWithProduct:(SKProduct * _Nonnull)product completion:(void (^ _Nonnull)(enum SWKPurchaseResult, NSError * _Nullable))completion {
// TODO
// ----
// Purchase via StoreKit, RevenueCat, Qonversion or however
// you like and return a valid SWKPurchaseResult
completion(SWKPurchaseResultPurchased, nil);
}
// 2
- (void)restorePurchasesWithCompletion:(void (^ _Nonnull)(BOOL))completion {
// TODO
// ----
// Restore purchases and return YES if successful.
completion(YES);
}
@end
```
```kotlin Kotlin
// MyPurchaseController.kt
class MyPurchaseController(val context: Context): PurchaseController {
// 1
override suspend fun purchase(activity: Activity, product: SkuDetails): PurchaseResult {
// TODO
// ----
// Purchase via GoogleBilling, RevenueCat, Qonversion or however
// you like and return a valid PurchaseResult
return PurchaseResult.Purchased()
}
// 2
override suspend fun restorePurchases(): RestorationResult {
// TODO
// ----
// Restore purchases and return true if successful.
return RestorationResult.Success()
}
}
```
```dart Flutter
// MyPurchaseController.dart
class MyPurchaseController extends PurchaseController {
// 1
@override
Future purchaseFromAppStore(String productId) async {
// TODO
// ----
// Purchase via StoreKit, RevenueCat, Qonversion or however
// you like and return a valid PurchaseResult
return PurchaseResult.purchased;
}
@override
Future purchaseFromGooglePlay(
String productId,
String? basePlanId,
String? offerId
) async {
// TODO
// ----
// Purchase via Google Billing, RevenueCat, Qonversion or however
// you like and return a valid PurchaseResult
return PurchaseResult.purchased;
}
// 2
@override
Future restorePurchases() async {
// TODO
// ----
// Restore purchases and return true if successful.
return RestorationResult.restored;
}
}
```
```typescript React Native
export class MyPurchaseController extends PurchaseController {
// 1
async purchaseFromAppStore(productId: string): Promise {
// TODO
// ----
// Purchase via StoreKit, RevenueCat, Qonversion or however
// you like and return a valid PurchaseResult
}
async purchaseFromGooglePlay(
productId: string,
basePlanId?: string,
offerId?: string
): Promise {
// TODO
// ----
// Purchase via Google Billing, RevenueCat, Qonversion or however
// you like and return a valid PurchaseResult
}
// 2
async restorePurchases(): Promise {
// TODO
// ----
// Restore purchases and return true if successful.
}
}
```
Here’s what each method is responsible for:
1. Purchasing a given product. In here, enter your code that you use to purchase a product. Then, return the result of the purchase as a `PurchaseResult`. For Flutter, this is separated into purchasing from the App Store and Google Play. This is an enum that contains the following cases, all of which must be handled:
1. `.cancelled`: The purchase was cancelled.
2. `.purchased`: The product was purchased.
3. `.pending`: The purchase is pending/deferred and requires action from the developer.
4. `.failed(Error)`: The purchase failed for a reason other than the user cancelling or the payment pending.
5. `.restored`: The purchase was restored. This happens when the user tries to purchase a product that they've already purchased, resulting in a transaction whose `transactionDate` is before the the date you initiated the purchase.
2. Restoring purchases. Here, you restore purchases and return a boolean indicating whether the restoration was successful or not.
### Step 2: Configuring the SDK With Your `PurchaseController`
Pass your purchase controller to the `configure(apiKey:purchaseController:options:)` method:
```swift Swift
// AppDelegate.swift
import UIKit
import SuperwallKit
@main
class AppDelegate: UIResponder, UIApplicationDelegate {
func application(_ application: UIApplication, didFinishLaunchingWithOptions launchOptions: [UIApplication.LaunchOptionsKey: Any]?) -> Bool {
Superwall.configure(
apiKey: "MY_API_KEY",
purchaseController: MyPurchaseController.shared // <- Handle purchases on your own
)
return true
}
}
```
```swift Objective-C
// AppDelegate.m
@import SuperwallKit;
@implementation AppDelegate
- (BOOL)application:(UIApplication *)application didFinishLaunchingWithOptions:(NSDictionary *)launchOptions {
// Override point for customization after application launch.
[Superwall configureWithApiKey:@"MY_API_KEY" purchaseController:[MyPurchaseController sharedInstance] options:nil completion:nil];
return YES;
}
```
```kotlin Kotlin
// MainApplication.kt
class MainApplication : android.app.Application(), SuperwallDelegate {
override fun onCreate() {
super.onCreate()
Superwall.configure(this, "MY_API_KEY", MyPurchaseController(this))
// OR using the DSL
configureSuperwall("MY_API_KEY") {
purchaseController = MyPurchaseController(this@MainApplication)
}
}
}
```
```dart Flutter
// main.dart
void initState() {
// Determine Superwall API Key for platform
String apiKey = Platform.isIOS ? "MY_IOS_API_KEY" : "MY_ANDROID_API_KEY";
// Create the purchase controller
MyPurchaseController purchaseController = MyPurchaseController();
Superwall.configure(apiKey, purchaseController);
}
```
```typescript React Native
export default function App() {
React.useEffect(() => {
const apiKey = Platform.OS === "ios" ? "MY_IOS_API_KEY" : "MY_ANDROID_API_KEY"
const purchaseController = new MyPurchaseController()
Superwall.configure(apiKey, undefined, purchaseController)
}, [])
}
```
### Step 3: Keeping `subscriptionStatus` Up-To-Date
You **must** set `Superwall.shared.subscriptionStatus` every time the user's subscription status changes, otherwise the SDK won't know who to show a paywall to. This is an enum that has three possible cases:
1. **`.unknown`**: This is the default value. In this state, paywalls will not show and their presentation will be ***automatically delayed*** until `subscriptionStatus` changes to a different value.
2. **`.active`**: Indicates that the user has an active subscription. Paywalls will not show in this state unless you remotely set the paywall to ignore subscription status.
3. **`.inactive`**: Indicates that the user doesn't have an active subscription. Paywalls can show in this state.
Here's how you might do this:
```swift Swift
import SuperwallKit
// On app launch, when you are waiting to determine a user's subscription status.
Superwall.shared.subscriptionStatus = .unknown
// When a subscription is purchased, restored, validated, expired, etc...
myService.subscriptionStatusDidChange {
if user.hasActiveSubscription {
Superwall.shared.subscriptionStatus = .active
} else {
Superwall.shared.subscriptionStatus = .inactive
}
}
```
```swift Objective-C
@import SuperwallKit;
// when you are waiting to determine a user's subscription status
[Superwall sharedInstance].subscriptionStatus = SWKSubscriptionStatusUnknown;
// when a subscription is purchased, restored, validated, expired, etc...
[myService setSubscriptionStatusDidChange:^{
if (user.hasActiveSubscription) {
[Superwall sharedInstance].subscriptionStatus = SWKSubscriptionStatusActive;
} else {
[Superwall sharedInstance].subscriptionStatus = SWKSubscriptionStatusInactive;
}
}];
```
```kotlin Kotlin
// On app launch, when you are waiting to determine a user's subscription status.
Superwall.instance.subscriptionStatus = SubscriptionStatus.UNKNOWN
// When a subscription is purchased, restored, validated, expired, etc...
myService.subscriptionStatusDidChange {
if (it.hasActiveSubscription) {
Superwall.instance.subscriptionStatus = SubscriptionStatus.ACTIVE
} else {
Superwall.instance.subscriptionStatus = SubscriptionStatus.INACTIVE
}
}
```
```dart Flutter
// On app launch, when you are waiting to determine a user's subscription status.
Superwall.shared.setSubscriptionStatus(SubscriptionStatus.unknown);
// When a subscription is purchased, restored, validated, expired, etc...
myService.addSubscriptionStatusListener((hasActiveSubscription) {
if (hasActiveSubscription) {
Superwall.shared.setSubscriptionStatus(SubscriptionStatus.active);
} else {
Superwall.shared.setSubscriptionStatus(SubscriptionStatus.inactive);
}
});
```
```typescript React Native
// On app launch, when you are waiting to determine a user's subscription status.
Superwall.shared.setSubscriptionStatus(SubscriptionStatus.UNKNOWN)
// When a subscription is purchased, restored, validated, expired, etc...
myService.addSubscriptionStatusListener((hasActiveSubscription: boolean) => {
if (hasActiveSubscription) {
Superwall.shared.setSubscriptionStatus(SubscriptionStatus.ACTIVE)
} else {
Superwall.shared.setSubscriptionStatus(SubscriptionStatus.INACTIVE)
}
})
```
`subscriptionStatus` is cached between app launches
### Listening for subscription status changes
If you need a simple way to observe when a user's subscription status changes, on iOS you can use the `Publisher` for it. Here's an example:
```swift
subscribedCancellable = Superwall.shared.$subscriptionStatus
.receive(on: DispatchQueue.main)
.sink { [weak self] status in
switch status {
case .unknown:
self?.subscriptionLabel.text = "Loading subscription status."
case .active:
self?.subscriptionLabel.text = "You currently have an active subscription. Therefore, the paywall will never show. For the purposes of this app, delete and reinstall the app to clear subscriptions."
case .inactive:
self?.subscriptionLabel.text = "You do not have an active subscription so the paywall will show when clicking the button."
}
}
```
You can do similar tasks with the `SuperwallDelegate`, such as [viewing which product was purchased from a paywall](/legacy/legacy_3rd-party-analytics#using-events-to-see-purchased-products).
# Cohorting in 3rd Party Tools (Legacy)
Source: https://superwall.com/docs/legacy/legacy_cohorting-in-3rd-party-tools
To easily view Superwall cohorts in 3rd party tools, we recommend you set user attributes based on the experiments that users are included in. You can also use custom placements for creating analytic events for actions such as interacting with an element on a paywall.
```swift Swift
extension SuperwallService: SuperwallDelegate {
func handleSuperwallEvent(withInfo eventInfo: SuperwallEventInfo) {
if eventInfo.event.description == "trigger_fire" {
MyAnalyticsService.shared.setUserAttributes([
"sw_experiment_\(eventInfo.event.params["experiment_id"])": true,
"sw_variant_\(eventInfo.event.params["variant_id"])": true
])
}
}
}
```
```kotlin Kotlin
override fun handleSuperwallEvent(eventInfo: SuperwallEventInfo) {
when(eventInfo.event) {
is SuperwallEvent.TriggerFire -> {
MyAnalyticsService.shared.setUserAttributes(
mapOf(
"sw_experiment_${eventInfo.params.get("experiment_id").toString()}" to true,
"sw_variant_${eventInfo.params.get("variant_id").toString()}" to true
)
)
}
else -> {}
}
}
```
```dart Flutter
@override
void handleSuperwallEvent(SuperwallEventInfo eventInfo) async {
final experimentId = eventInfo.params?['experiment_id'];
final variantId = eventInfo.params?['variant_id'];
switch (eventInfo.event.type) {
case EventType.triggerFire:
MyAnalyticsService.shared.setUserAttributes({
"sw_experiment_$experimentId": true,
"sw_variant_$variantId": true
});
break;
default:
break;
}
}
```
```typescript React Native
handleSuperwallEvent(eventInfo: SuperwallEventInfo) {
const experimentId = eventInfo.params?['experiment_id']
const variantId = eventInfo.params?['variant_id']
if (!experimentId || !variantId) {
return
}
switch (eventInfo.event.type) {
case EventType.triggerFire:
MyAnalyticsService.shared.setUserAttributes({
`sw_experiment_${experimentId}`: true,
`sw_variant_${variantId}`: true
});
break;
default:
break;
}
}
```
Once you've set this up, you can easily ask for all users who have an attribute `sw_experiment_1234` and breakdown by both variants to see how users in a Superwall experiment behave in other areas of your app.
### Creating custom analytics tracking using custom placements
By using custom placements, you can create analytic events for actions such as interacting with an element on a paywall. This can be useful for tracking how users interact with your paywall and how that affects their behavior in other areas of your app.
For example, in the paywall below, perhaps you're interested in tracking when people switch the plan from "Standard" and "Pro":

You could create a custom placement [tap behavior](/paywall-editor-styling-elements#tap-behaviors) which fires when a segment is tapped:

Then, you can listen for this event and forward it to your analytics service:
```swift Swift
extension SuperwallService: SuperwallDelegate {
func handleSuperwallEvent(withInfo eventInfo: SuperwallEventInfo) {
switch eventInfo.event {
case let .customPlacement(name, params, paywallInfo):
// Prints out didTapPro or didTapStandard
print("\(name) - \(params) - \(paywallInfo)")
MyAnalyticsService.shared.send(event: name, params: params)
default:
print("Default event: \(eventInfo.event.description)")
}
}
}
```
# Configuring the SDK (Legacy)
Source: https://superwall.com/docs/legacy/legacy_configuring-the-sdk
As soon as your app launches, you need to configure the SDK with your **Public API Key**. You'll retrieve this from the Superwall settings page.
If you haven't installed the SDK, [learn how to install the SDK](/legacy/legacy_installation)
### Sign Up & Grab Keys
If you haven't already, [sign up for a free account](https://superwall.com/sign-up) on Superwall. Then, when you're through to the Dashboard, click **Settings** from the panel on the left, click **Keys** and copy your **Public API Key**:

### Initialize Superwall in your app
Begin by editing your main Application entrypoint. Depending on the
platform this could be `AppDelegate.swift` or `SceneDelegate.swift` for iOS,
`MainApplication.kt` for Android, `main.dart` in Flutter, or `App.tsx` for React Native:
```swift Swift-UIKit
// AppDelegate.swift
import UIKit
import SuperwallKit
@main
final class AppDelegate: UIResponder, UIApplicationDelegate {
func application(
_ application: UIApplication,
didFinishLaunchingWithOptions launchOptions: [UIApplication.LaunchOptionsKey: Any]?
) -> Bool {
Superwall.configure(apiKey: "MY_API_KEY") // Replace this with your API Key
return true
}
}
```
```swift SwiftUI
// App.swift
import SwiftUI
import SuperwallKit
@main
struct MyApp: App {
init() {
let apiKey = "MY_API_KEY" // Replace this with your API Key
Superwall.configure(apiKey: apiKey)
}
// etc...
}
```
```swift Objective-C
// AppDelegate.m
@import SuperwallKit;
- (BOOL)application:(UIApplication *)application didFinishLaunchingWithOptions:(NSDictionary *)launchOptions {
// Initialize the Superwall service.
[Superwall configureWithApiKey:@"MY_API_KEY"];
return YES;
}
```
```kotlin Kotlin
// MainApplication.kt
class MainApplication : android.app.Application(), SuperwallDelegate {
override fun onCreate() {
super.onCreate()
// Setup
Superwall.configure(this, "MY_API_KEY")
// OR using the DSL
configureSuperwall("MY_API_KEY") {
purchaseController = MyPurchaseController(this@MainApplication)
}
}
}
```
```dart Flutter
// main.dart
void initState() {
// Determine Superwall API Key for platform
String apiKey = Platform.isIOS ? "MY_IOS_API_KEY" : "MY_ANDROID_API_KEY";
Superwall.configure(apiKey);
}
```
```typescript React Native
// App.tsx
import { Platform } from "react-native"
import Superwall from "@superwall/react-native-superwall"
export default function App() {
React.useEffect(() => {
const apiKey = Platform.OS === "ios" ? "MY_IOS_API_KEY" : "MY_ANDROID_API_KEY"
Superwall.configure(apiKey)
}, [])
}
```
This configures a shared instance of `Superwall`, the primary class for interacting with the SDK's API. Make sure to replace `MY_API_KEY` with your public API key that you just retrieved.
By default, Superwall handles basic subscription-related logic for you. However, if you’d like
greater control over this process (e.g. if you’re using RevenueCat), you’ll want to pass in a
`PurchaseController` to your configuration call and manually set the `subscriptionStatus`. You can
also pass in `SuperwallOptions` to customize the appearance and behavior of the SDK. See
[Purchases and Subscription Status](/legacy/legacy_advanced-configuration) for more.
You've now configured Superwall!
For further help, check out our [iOS example apps](https://github.com/superwall/Superwall-iOS/tree/master/Examples) for working examples of implementing SuperwallKit.
# Custom Paywall Actions (Legacy)
Source: https://superwall.com/docs/legacy/legacy_custom-paywall-events
You can set the click behavior of any element on a paywall to be a custom paywall action. This allows you to tie any tap in your paywall to hard-coded application logic.
For example, adding a custom action called `help_center` to a button in your paywall gives you the opportunity to present a help center whenever that button is pressed. To set this up, implement `handleCustomPaywallAction(withName:)` in your `SuperwallDelegate`:
```swift Swift
func handleCustomPaywallAction(withName name: String) {
if name == "help_center" {
HelpCenterManager.present()
}
}
```
```swift Objective-C
- (void)handleCustomPaywallActionWithName:(NSString *)name {
if ([name isEqualToString:"help_center"]) {
[HelpCenterManager present];
}
}
```
```kotlin Kotlin
override fun handleCustomPaywallAction(name: String) {
if (name == "help_center") {
HelpCenterManager.present()
}
}
```
```dart Flutter
@override
void handleCustomPaywallAction(String name) {
if (name == "help_center") {
HelpCenterManager.present();
}
}
```
```typescript React Native
handleCustomPaywallAction(name: string) {
if (name == "help_center") {
HelpCenterManager.present();
}
}
```
Remember to set `Superwall.shared.delegate`! For implementation details, see the [Superwall Delegate](/legacy/legacy_using-superwall-delegate) guide.
# Showing Paywalls (Legacy)
Source: https://superwall.com/docs/legacy/legacy_feature-gating
At the heart of Superwall's SDK lies `Superwall.shared.register(event:params:handler:feature:)`.
This allows you to register a [placement](/campaigns-placements) to access a feature that may or may not be paywalled later in time. It also allows you to choose whether the user can access the feature even if they don't make a purchase.
Here's an example.
We are in the process of updating our docs and SDK to rename `event` to `placement`. If you see `event` anywhere, you can mentally replace it with `placement`. They mean the same thing.
#### With Superwall
```swift Swift
func pressedWorkoutButton() {
// remotely decide if a paywall is shown and if
// navigation.startWorkout() is a paid-only feature
Superwall.shared.register(event: "StartWorkout") {
navigation.startWorkout()
}
}
```
```swift Objective-C
- (void)pressedWorkoutButton {
// remotely decide if a paywall is shown and if
// navigation.startWorkout() is a paid-only feature
[[Superwall sharedInstance] registerWithEvent:@"StartWorkout" params:nil handler:nil feature:^{
[navigation startWorkout];
}];
}
```
```kotlin Kotlin
fun pressedWorkoutButton() {
// remotely decide if a paywall is shown and if
// navigation.startWorkout() is a paid-only feature
Superwall.instance.register("StartWorkout") {
navigation.startWorkout()
}
}
```
```dart Flutter
void pressedWorkoutButton() {
// remotely decide if a paywall is shown and if
// navigation.startWorkout() is a paid-only feature
Superwall.shared.registerEvent('StartWorkout', feature: () {
navigation.startWorkout();
});
}
```
```typescript React Native
// remotely decide if a paywall is shown and if
// navigation.startWorkout() is a paid-only feature
Superwall.shared.register('StartWorkout').then(() => {
navigation.startWorkout();
}
```
#### Without Superwall
```swift Swift
func pressedWorkoutButton() {
if (user.hasActiveSubscription) {
navigation.startWorkout()
} else {
navigation.presentPaywall() { result in
if (result) {
navigation.startWorkout()
} else {
// user didn't pay, developer decides what to do
}
}
}
}
```
```swift Objective-C
- (void)pressedWorkoutButton {
if (user.hasActiveSubscription) {
[navigation startWorkout];
} else {
[navigation presentPaywallWithCompletion:^(BOOL result) {
if (result) {
[navigation startWorkout];
} else {
// user didn't pay, developer decides what to do
}
}];
}
}
```
```kotlin Kotlin
fun pressedWorkoutButton() {
if (user.hasActiveSubscription) {
navigation.startWorkout()
} else {
navigation.presentPaywall { result ->
if (result) {
navigation.startWorkout()
} else {
// user didn't pay, developer decides what to do
}
}
}
}
```
```dart Flutter
void pressedWorkoutButton() {
if (user.hasActiveSubscription) {
navigation.startWorkout();
} else {
navigation.presentPaywall().then((result) {
if (result) {
navigation.startWorkout();
} else {
// user didn't pay, developer decides what to do
}
});
}
}
```
```typescript React Native
function pressedWorkoutButton() {
if (user.hasActiveSubscription) {
navigation.startWorkout()
} else {
navigation.presentPaywall().then((result: boolean) => {
if (result) {
navigation.startWorkout()
} else {
// user didn't pay, developer decides what to do
}
})
}
}
```
### How it works:
You can configure `"StartWorkout"` to present a paywall by [creating a campaign, adding the placement, and adding a rule](/campaigns) in the dashboard.
1. The SDK retrieves your campaign settings from the dashboard on app launch.
2. When a placement is called that belongs to a campaign, rules are evaluated ***on device*** and the user enters an experiment — this means there's no delay between registering a placement and presenting a paywall.
3. If it's the first time a user is entering an experiment, a paywall is decided for the user based on the percentages you set in the dashboard
4. Once a user is assigned a paywall for a rule, they will continue to see that paywall until you remove the paywall from the rule or reset assignments to the paywall.
5. After the paywall is closed, the Superwall SDK looks at the *Feature Gating* value associated with your paywall, configurable from the paywall editor under General > Feature Gating (more on this below)
1. If the paywall is set to ***Non Gated***, the `feature:` closure on `register(event: ...)` gets called when the paywall is dismissed (whether they paid or not)
2. If the paywall is set to ***Gated***, the `feature:` closure on `register(event: ...)` gets called only if the user is already paying or if they begin paying.
6. If no paywall is configured, the feature gets executed immediately without any additional network calls.
Given the low cost nature of how register works, we strongly recommend registering **all core functionality** in order to remotely configure which features you want to gate – **without an app update**.
```swift Swift
// on the welcome screen
func pressedSignUp() {
Superwall.shared.register(event: "SignUp") {
navigation.beginOnboarding()
}
}
// in another view controller
func pressedWorkoutButton() {
Superwall.shared.register(event: "StartWorkout") {
navigation.startWorkout()
}
}
```
```swift Objective-C
// on the welcome screen
- (void)pressedSignUp {
[[Superwall sharedInstance] registerWithEvent:@"SignUp" params:nil handler:nil feature:^{
[navigation beginOnboarding];
}];
}
// In another view controller
- (void)pressedWorkoutButton {
[[Superwall sharedInstance] registerWithEvent:@"StartWorkout" params:nil handler:nil feature:^{
[navigation startWorkout];
}];
}
```
```kotlin Kotlin
// on the welcome screen
fun pressedSignUp() {
Superwall.instance.register("SignUp") {
navigation.beginOnboarding()
}
}
// in another view controller
fun pressedWorkoutButton() {
Superwall.instance.register("StartWorkout") {
navigation.startWorkout()
}
}
```
```dart Flutter
// on the welcome screen
void pressedSignUp() {
Superwall.shared.registerEvent("SignUp", feature: () {
navigation.beginOnboarding();
});
}
// In another view controller
void pressedWorkoutButton() {
Superwall.shared.registerEvent("StartWorkout", feature: () {
navigation.startWorkout();
});
}
```
```typescript React Native
// on the welcome screen
function pressedSignUp() {
Superwall.shared.registerEvent("SignUp").then(() => {
navigation.beginOnboarding()
})
}
function pressedWorkoutButton() {
Superwall.shared.register("StartWorkout").then(() => {
navigation.startWorkout()
})
}
```
### Placement Parameters
You can send parameters along with any placement you create. For example, if you had a caffeine logging app — perhaps you'd have a placement for logging caffeine:
```swift
// In iOS...
Superwall.shared.register(event: "caffeineLogged") {
store.log(amountToLog)
}
```
Now, imagine you could log caffeine from several different touch points in your app. You may wish to know *where* the user tried to log caffeine from, and you could tie a parameter to the `caffeineLogged` placement to do this:
```swift iOS
Superwall.shared.register(event: "caffeineLogged", params: ["via":"logging_page"]) {
store.log(amountToLog)
}
```
```kotlin Android
val params: Map = mapOf(
"via" to "logging_page"
)
Superwall.instance.register("caffeineLogged", params = params) {
store.log(amountToLog)
}
```
```dart Flutter
final params = {"via": "logging_page"};
Superwall.shared.registerEvent(
"event",
params: params,
feature: () {
logToStore(100);
}
);
```
```typescript React Native
Superwall.shared.register('caffeineLogged',
new Map([['via', 'logging_page']]),
undefined,
() => {
console.log('show coffee');
}
);
```
The `via` parameter could now be used all throughout Superwall. You could create a new [audience](/campaigns-audience) which has filters for each place users logged caffeine from, and unique paywalls for each of them.
Parameter placements can be used in three primary ways:
1. **Audience Filtering:** As mentioned above, you can filter against parameters when creating audiences. Following our example, you'd create a **placement parameter** named **via** and then choose how to filter off of the parameter's value:
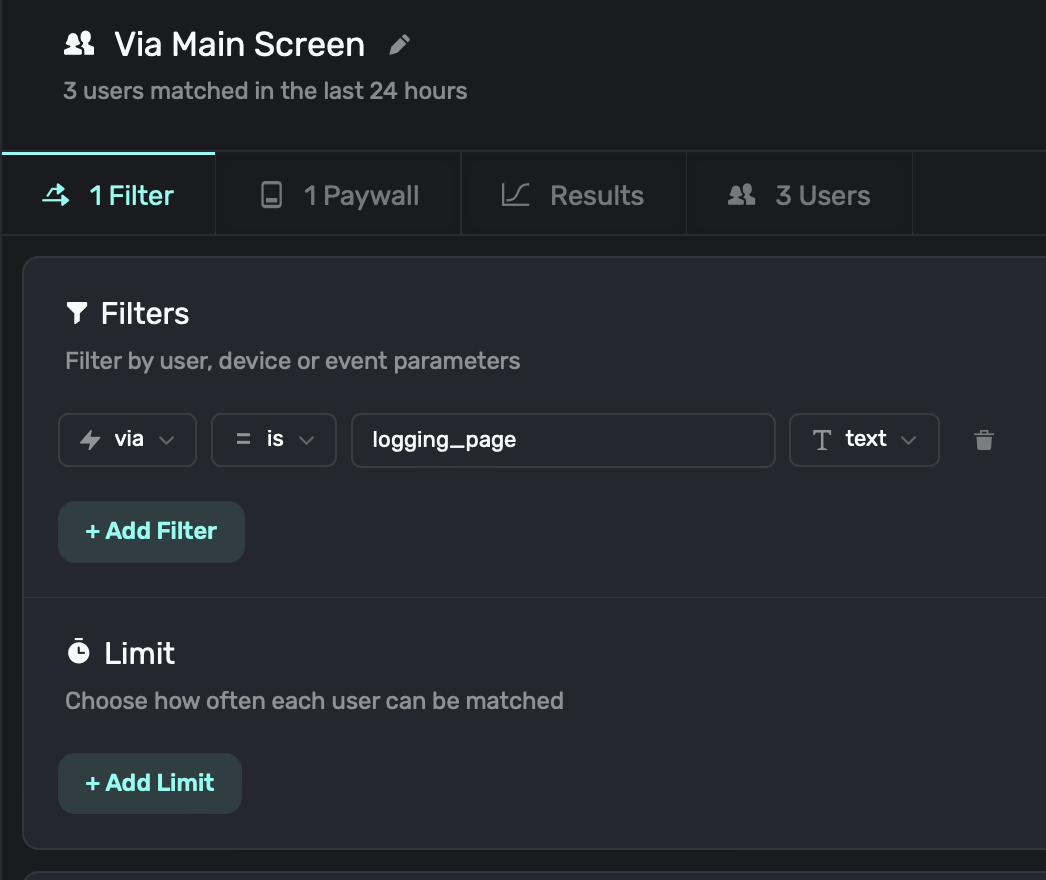
2. **Templating in Text:** Parameters are available in our [paywall editor](/paywall-editor-overview), so you can easily use them in text components too:
```
Hey {{user.firstName}}! FitnessAI offers tons of {{user.fitnessGoal}} workouts to help you reach your goals :)
```
3. **Interfacing with Analytics:** Another common scenario is cohorting with your own analytics. See this [doc](/cohorting-in-3rd-party-tools) for more.
### Feature Gating from the Paywall Editor
##### Paywall Editor > General > Settings > Feature Gating
Feature gating allows your team to retroactively decide if this paywall is *Gated* or *Non Gated*
| Type | Behavior | Example |
| ----------------------- | ------------------------------------------------------------------------ | -------------------------------------------------------------------------------------------------------------------------------- |
| **Non Gated** (default) | Show Paywall → Execute Feature | When "Sign Up" button is pressed, show a paywall, then continue onboarding once the paywall is dismissed. |
| **Gated** | Show Paywall → Is user paying?If Yes → Execute FeatureIf No → Do Nothing | When "Start Workout" button is pressed, show a paywall, then continue once the paywall is dismissed only if the user subscribes. |
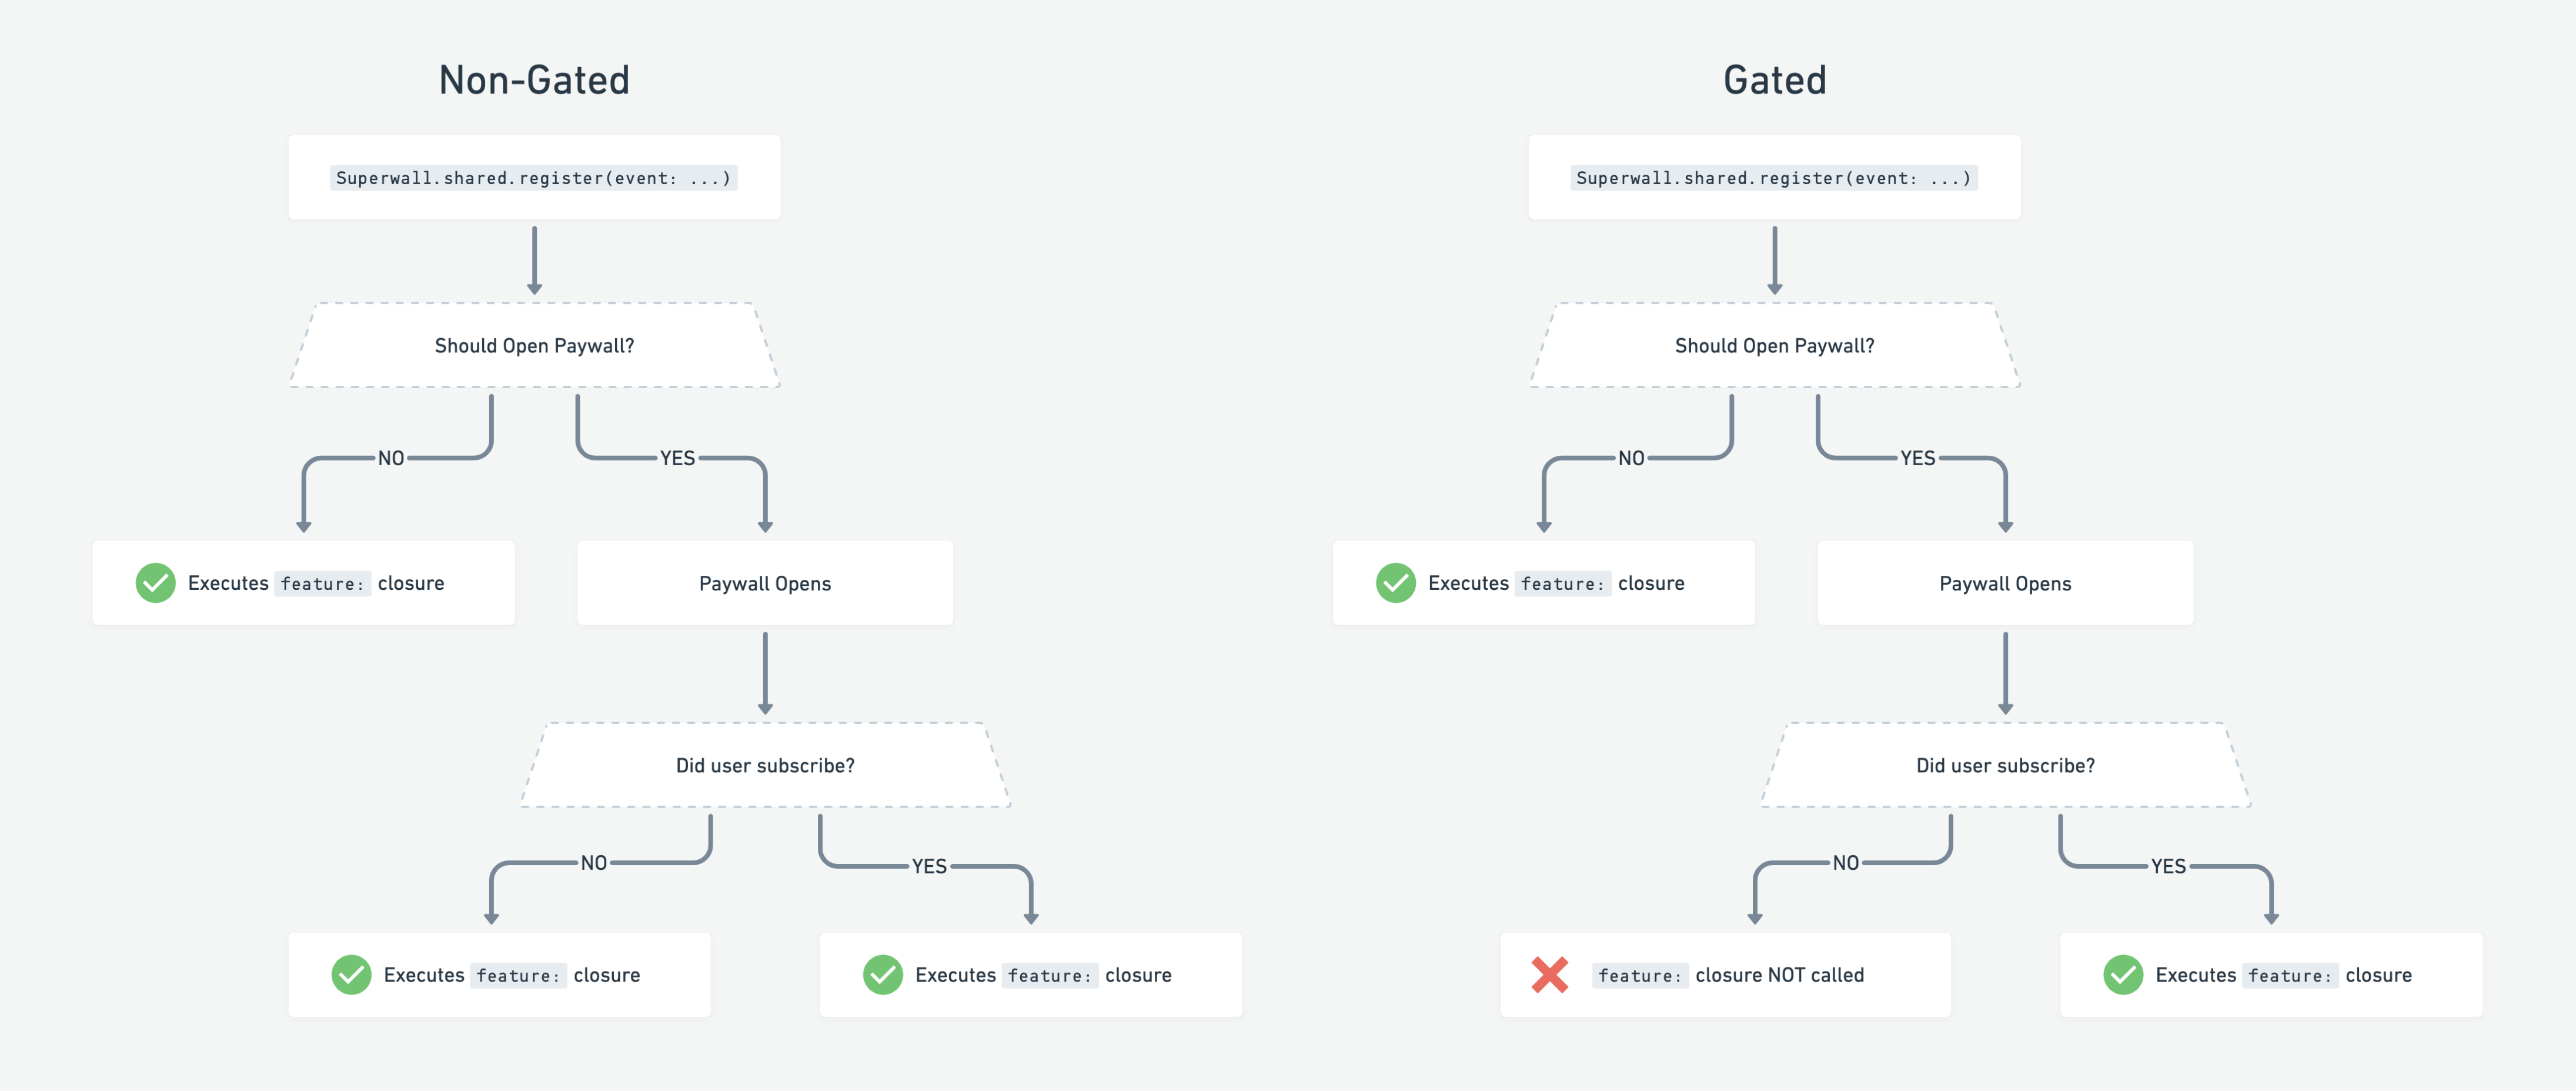
Remember, the feature is always executed if:
1. No campaign is configured for the placement
2. The user is already paying
### Using the Handler
You can provide a `PaywallPresentationHandler` to `register`, whose functions provide status updates for a paywall:
* `onDismiss`: Called when the paywall is dismissed. Accepts a `PaywallInfo` object containing info about the dismissed paywall.
* `onPresent`: Called when the paywall did present. Accepts a `PaywallInfo` object containing info about the presented paywall.
* `onError`: Called when an error occurred when trying to present a paywall. Accepts an `Error` indicating why the paywall could not present.
* `onSkip`: Called when a paywall is skipped. Accepts a `PaywallSkippedReason` enum indicating why the paywall was skipped.
```swift Swift
let handler = PaywallPresentationHandler()
handler.onDismiss { paywallInfo in
print("The paywall dismissed. PaywallInfo:", paywallInfo)
}
handler.onPresent { paywallInfo in
print("The paywall presented. PaywallInfo:", paywallInfo)
}
handler.onError { error in
print("The paywall presentation failed with error \(error)")
}
handler.onSkip { reason in
switch reason {
case .userIsSubscribed:
print("Paywall not shown because user is subscribed.")
case .holdout(let experiment):
print("Paywall not shown because user is in a holdout group in Experiment: \(experiment.id)")
case .noRuleMatch:
print("Paywall not shown because user doesn't match any rules.")
case .eventNotFound:
print("Paywall not shown because this placement isn't part of a campaign.")
}
}
Superwall.shared.register(event: "campaign_trigger", handler: handler) {
// Feature launched
}
```
```swift Objective-C
SWKPaywallPresentationHandler *handler = [[SWKPaywallPresentationHandler alloc] init];
[handler onDismiss:^(SWKPaywallInfo * _Nonnull paywallInfo) {
NSLog(@"The paywall dismissed. PaywallInfo: %@", paywallInfo);
}];
[handler onPresent:^(SWKPaywallInfo * _Nonnull paywallInfo) {
NSLog(@"The paywall presented. PaywallInfo: %@", paywallInfo);
}];
[handler onError:^(NSError * _Nonnull error) {
NSLog(@"The paywall presentation failed with error %@", error);
}];
[handler onSkip:^(enum SWKPaywallSkippedReason reason) {
switch (reason) {
case SWKPaywallSkippedReasonUserIsSubscribed:
NSLog(@"Paywall not shown because user is subscribed.");
break;
case SWKPaywallSkippedReasonHoldout:
NSLog(@"Paywall not shown because user is in a holdout group.");
break;
case SWKPaywallSkippedReasonNoRuleMatch:
NSLog(@"Paywall not shown because user doesn't match any rules.");
break;
case SWKPaywallSkippedReasonEventNotFound:
NSLog(@"Paywall not shown because this placement isn't part of a campaign.");
break;
case SWKPaywallSkippedReasonNone:
// The paywall wasn't skipped.
break;
}
}];
[[Superwall sharedInstance] registerWithEvent:@"campaign_trigger" params:nil handler:handler feature:^{
// Feature launched.
}];
```
```kotlin Kotlin
val handler = PaywallPresentationHandler()
handler.onDismiss {
println("The paywall dismissed. PaywallInfo: ${it}")
}
handler.onPresent {
println("The paywall presented. PaywallInfo: ${it}")
}
handler.onError {
println("The paywall errored. Error: ${it}")
}
handler.onSkip {
when (it) {
is PaywallSkippedReason.EventNotFound -> {
println("The paywall was skipped because the placement was not found.")
}
is PaywallSkippedReason.Holdout -> {
println("The paywall was skipped because the user is in a holdout group.")
}
is PaywallSkippedReason.NoRuleMatch -> {
println("The paywall was skipped because no rule matched.")
}
is PaywallSkippedReason.UserIsSubscribed -> {
println("The paywall was skipped because the user is subscribed.")
}
}
}
Superwall.instance.register(event = "campaign_trigger", handler = handler) {
// Feature launched
}
```
```dart Flutter
PaywallPresentationHandler handler = PaywallPresentationHandler();
handler.onPresent((paywallInfo) async {
String name = await paywallInfo.name;
print("Handler (onPresent): $name");
});
handler.onDismiss((paywallInfo) async {
String name = await paywallInfo.name;
print("Handler (onDismiss): $name");
});
handler.onError((error) {
print("Handler (onError): ${error}");
});
handler.onSkip((skipReason) async {
String description = await skipReason.description;
if (skipReason is PaywallSkippedReasonHoldout) {
print("Handler (onSkip): $description");
final experiment = await skipReason.experiment;
final experimentId = await experiment.id;
print("Holdout with experiment: ${experimentId}");
} else if (skipReason is PaywallSkippedReasonNoRuleMatch) {
print("Handler (onSkip): $description");
} else if (skipReason is PaywallSkippedReasonEventNotFound) {
print("Handler (onSkip): $description");
} else if (skipReason is PaywallSkippedReasonUserIsSubscribed) {
print("Handler (onSkip): $description");
} else {
print("Handler (onSkip): Unknown skip reason");
}
});
Superwall.shared.registerEvent("campaign_trigger", handler: handler, feature: () {
// Feature launched
});
```
```typescript React Native
const handler = new PaywallPresentationHandler()
handler.onPresent((paywallInfo) => {
const name = paywallInfo.name
console.log(`Handler (onPresent): ${name}`)
})
handler.onDismiss((paywallInfo) => {
const name = paywallInfo.name
console.log(`Handler (onDismiss): ${name}`)
})
handler.onError((error) => {
console.log(`Handler (onError): ${error}`)
})
handler.onSkipHandler((skipReason) => {
const description = skipReason.description
if (skipReason instanceof PaywallSkippedReasonHoldout) {
console.log(`Handler (onSkipHandler): ${description}`)
const experiment = skipReason.experiment
const experimentId = experiment.id
console.log(`Holdout with experiment: ${experimentId}`)
} else if (skipReason instanceof PaywallSkippedReasonNoRuleMatch) {
console.log(`Handler (onSkip): ${description}`)
} else if (skipReason instanceof PaywallSkippedReasonEventNotFound) {
console.log(`Handler (onSkip): ${description}`)
} else if (skipReason instanceof PaywallSkippedReasonUserIsSubscribed) {
console.log(`Handler (onSkip): ${description}`)
} else {
console.log(`Handler (onSkip): Unknown skip reason`)
}
})
Superwall.shared.register("campaign_trigger", undefined, handler).then(() => {
// Feature launched
})
```
Wanting to see which product was just purchased from a paywall? Use the [SuperwallDelegate](/3rd-party-analytics#using-events-to-see-purchased-products).
### Automatically Registered Placements
The SDK [automatically registers](/docs/tracking-analytics) some internal placements which can be used to present paywalls:
* `app_install`
* `app_launch`
* `deepLink_open`
* `session_start`
* `transaction_abandon`
* `transaction_fail`
* `paywall_close`
### Register. Everything.
To provide your team with ultimate flexibility, we recommend registering *all* of your analytics events, even if you don't pass feature blocks through. This way you can retroactively add a paywall almost anywhere – **without an app update**!
If you're already set up with an analytics provider, you'll typically have an `Analytics.swift` singleton (or similar) to disperse all your events from. Here's how that file might look:
```Swift Swift
import SuperwallKit
import Mixpanel
import Firebase
final class Analytics {
static var shared = Analytics()
func track(
event: String,
properties: [String: Any]
) {
// Superwall
Superwall.shared.register(event: event, params: properties)
// Firebase (just an example)
Firebase.Analytics.logEvent(event, parameters: properties)
// Mixpanel (just an example)
Mixpanel.mainInstance().track(event: event, properties: properties)
}
}
// And thus ...
Analytics.shared.track(
event: "workout_complete",
properties: ["total_workouts": 17]
)
// ... can now be turned into a paywall moment :)
```
**Need to know if a paywall will show beforehand?**
In some circumstances, you might like to know if a particular event will present a paywall. To do this, you can use `Superwall.shared.getPresentationResult(forEvent:params:)`.
### Handling Network Issues
Superwall's SDK handles network issues as gracefully as possible, but there are still some scenarios to consider. The behavior will be different based on if `subscriptionStatus` evaluates to `.active` or not.
**If it is `.active`** and Superwall has already fetched or cached its configuration, then paywall presentation proceeds as it normally would. If Superwall was unable to fetch its configuration, the SDK waits one second to give it a chance to be retrieved. After that time, if it's not available — then a timeout event is tracked and the `onSkip` handler will be invoked with a reason of `userIsSubscribed`. The "feature" block or closure will then be invoked:
```swift
Superwall.shared.register(event: "foo") {
// Your feature logic
}
```
**If it's not `.active`** then Superwall will retry network calls until we have retrieved the necessary data for up to one minute. If it's still unavailable, then the SDK fires the `onError` handler with the error type of `noConfig`.
# User Management (Legacy)
Source: https://superwall.com/docs/legacy/legacy_identity-management
It is necessary to uniquely identify users to track their journey within Superwall.
### Anonymous Users
Superwall automatically generates a random user ID that persists internally until the user deletes/reinstalls your app.
You can call `Superwall.shared.reset()` to reset this ID and clear any paywall assignments.
### Identified Users
If you use your own user management system, call `identify(userId:options:)` when you have a user's identity. This will alias your `userId` with the anonymous Superwall ID enabling us to load the user’s assigned paywalls.
Calling `Superwall.shared.reset()` will reset the on-device userId to a random ID and clear the paywall assignments.
Note that for Android apps, if you want the `userId` passed to the Play Store when making purchases, you'll also need to set `passIdentifiersToPlayStore` via `SuperwallOptions`. Be aware of Google's rules that the `userId` must not contain any personally identifiable information, otherwise the purchase could [be rejected](https://developer.android.com/reference/com/android/billingclient/api/BillingFlowParams.Builder#setObfuscatedAccountId).
```swift Swift
// After retrieving a user's ID, e.g. from logging in or creating an account
Superwall.shared.identify(userId: user.id)
// When the user signs out
Superwall.shared.reset()
```
```swift Objective-C
// After retrieving a user's ID, e.g. from logging in or creating an account
[[Superwall sharedInstance] identifyWithUserId:user.id];
// When the user signs out
[[Superwall sharedInstance] resetWithCompletionHandler:completion];
```
```kotlin Kotlin
// After retrieving a user's ID, e.g. from logging in or creating an account
Superwall.instance.identify(user.id)
// When the user signs out
Superwall.instance.reset()
```
```typescript React Native
// After retrieving a user's ID, e.g. from logging in or creating an account
Superwall.shared.identify(user.id);
// When the user signs out
Superwall.shared.reset();
```
```dart Flutter
// After retrieving a user's ID, e.g. from logging in or creating an account
Superwall.shared.identify(user.id);
// When the user signs out
Superwall.shared.reset();
```
**Advanced Use Case**
You can supply an `IdentityOptions` object, whose property `restorePaywallAssignments` you can set to `true`. This tells the SDK to wait to restore paywall assignments from the server before presenting any paywalls. This should only be used in advanced use cases. If you expect users of your app to switch accounts or delete/reinstall a lot, you'd set this when users log in to an existing account.
### Best Practices for a Unique User ID
* Do NOT make your User IDs guessable – they are public facing.
* Do NOT set emails as User IDs – this isn't GDPR compliant.
* Do NOT set IDFA or DeviceIds as User IDs – these are device specific / easily rotated by the operating system.
* Do NOT hardcode strings as User IDs – this will cause every user to be treated as the same user by Superwall.
**Identifying users from App Store server events**
On iOS, Superwall will set the value from `identify(userId:options:)` as the `applicationUsername` on `SKPayment`, which later comes back as the [appAccountToken](https://developer.apple.com/documentation/storekit/product/purchaseoption/3749440-appaccounttoken) in the notification to your server. Note that your application ID must be in a UUID format.
Begin showing paywalls!
# Deep Links and In-App Previews (Legacy)
Source: https://superwall.com/docs/legacy/legacy_in-app-paywall-previews
It's important to tell Superwall when a deep link has been opened. This enables two things:
1. Previewing paywalls on your device before going live.
2. Deep linking to specific [campaigns](/campaigns).
#### Adding a Custom URL Scheme
To handle deep links on iOS, you'll need to add a custom URL scheme for your app.
Open **Xcode**. In your **info.plist**, add a row called **URL Types**. Expand the automatically created **Item 0**, and inside the **URL identifier** value field, type your **Bundle ID**, e.g., **com.superwall.Superwall-SwiftUI**. Add another row to **Item 0** called **URL Schemes** and set its **Item 0** to a URL scheme you'd like to use for your app, e.g., **exampleapp**. Your structure should look like this:

With this example, the app will open in response to a deep link with the format **exampleapp\://**. You can [view Apple's documentation](https://developer.apple.com/documentation/xcode/defining-a-custom-url-scheme-for-your-app) to learn more about custom URL schemes.
#### Handling Deep Links (Swift)
Depending on whether your app uses a SceneDelegate, AppDelegate, or is written in SwiftUI, there are different ways to tell Superwall that a deep link has been opened.
Be sure to click the tab that corresponds to your architecture:
```swift AppDelegate.swift
import SuperwallKit
class AppDelegate: UIResponder, UIApplicationDelegate {
// NOTE: if your app uses a SceneDelegate, this will NOT work!
func application(_ app: UIApplication, open url: URL, options: [UIApplication.OpenURLOptionsKey : Any] = [:]) -> Bool {
return Superwall.shared.handleDeepLink(url)
}
}
```
```swift SceneDelegate.swift
import SuperwallKit
class SceneDelegate: UIResponder, UIWindowSceneDelegate {
// for cold launches
func scene(_ scene: UIScene, willConnectTo session: UISceneSession, options connectionOptions: UIScene.ConnectionOptions) {
if let url = connectionOptions.urlContexts.first?.url {
Superwall.shared.handleDeepLink(url)
}
}
// for when your app is already running
func scene(_ scene: UIScene, openURLContexts URLContexts: Set) {
if let url = URLContexts.first?.url {
Superwall.shared.handleDeepLink(url)
}
}
}
```
```swift SwiftUI
import SuperwallKit
@main
struct MyApp: App {
var body: some Scene {
WindowGroup {
ContentView()
.onOpenURL { url in
Superwall.shared.handleDeepLink(url) // handle your deep link
}
}
}
}
```
```swift Objective-C
// In your SceneDelegate.m
#import "SceneDelegate.h"
@import SuperwallKit;
@interface SceneDelegate ()
@end
@implementation SceneDelegate
- (void)scene:(UIScene *)scene willConnectToSession:(UISceneSession *)session options:(UISceneConnectionOptions *)connectionOptions {
[self handleURLContexts:connectionOptions.URLContexts];
}
- (void)scene:(UIScene *)scene openURLContexts:(NSSet *)URLContexts {
[self handleURLContexts:URLContexts];
}
#pragma mark - Deep linking
- (void)handleURLContexts:(NSSet *)URLContexts {
[URLContexts enumerateObjectsUsingBlock:^(UIOpenURLContext * _Nonnull context, BOOL * _Nonnull stop) {
[[Superwall sharedInstance] handleDeepLink:context.URL];
}];
}
@end
```
#### Adding a Custom Intent Filter
For Android, add the following to your `AndroidManifest.xml` file:
```xml
```
This configuration allows your app to open in response to a deep link with the format `exampleapp://` from your `MainActivity` class.
#### Handling Deep Links (Kotlin)
In your `MainActivity` (or the activity specified in your intent-filter), add the following Kotlin code to handle deep links:
```kotlin Kotlin
class MainActivity : AppCompatActivity() {
override fun onCreate(savedInstanceState: Bundle?) {
super.onCreate(savedInstanceState)
// Respond to deep links
respondToDeepLinks()
}
private fun respondToDeepLinks() {
intent?.data?.let { uri ->
Superwall.instance.handleDeepLink(uri)
}
}
}
```
Setting up deep links nearly mirrors the process for iOS, save for a few different changes. First, you'll need to add a custom URL scheme for your app.
From terminal, navigate to your Flutter project's root directory and open its Xcode workspace:
```bash
$ cd documents/projects/myFlutterApp
$ open ios/Runner.xcworkspace
```
In its **info.plist**, add a row called **URL Types**. Expand the automatically created **Item 0**, and inside the **URL identifier** value field, type your **Bundle ID**, e.g., **com.superwall.Superwall-SwiftUI**. Add another row to **Item 0** called **URL Schemes** and set its **Item 0** to `runner` to match Flutter's Xcode project name.
Here's an example of what it should look like if you open the Flutter target's `Info` pane:

#### Handling the Deep Link in Flutter
In your Flutter app, use the Superwall SDK to handle the deep link via `Superwall.shared.handleDeepLink(theLink);`. Here's a complete example:
```dart
import 'package:flutter/material.dart';
import 'package:superwallkit_flutter/superwallkit_flutter.dart';
import 'package:uni_links/uni_links.dart';
void main() {
runApp(const MyApp());
}
class MyApp extends StatefulWidget {
MyApp();
@override
_MyAppState createState() => _MyAppState();
}
class _MyAppState extends State {
@override
void initState() {
super.initState();
Superwall.configure('pk_6c131449acdef827c4b0dd639f9a499972ac3c45ccd8b8d3');
_handleIncomingLinks();
}
void _handleIncomingLinks() {
uriLinkStream.listen((Uri? uri) {
if (uri != null) {
Superwall.shared.handleDeepLink(uri);
}
}, onError: (Object err) {
print('Error receiving incoming link: $err');
});
}
@override
Widget build(BuildContext context) {
return MaterialApp(
home: Scaffold(
body: Center(
child: Text(
'Deep Link Preview Example',
style: TextStyle(fontSize: 24),
),
),
),
);
}
}
```
To make in-app previews work, you'll first want to add a URL scheme to your Xcode project's workspace. From terminal, navigate to your React Native project's root directory and open its Xcode workspace:
```bash
$ cd documents/projects/myReactNativeApp
$ open ios/theProjectName.xcworkspace
```
Open **Xcode**. In your **info.plist**, add a row called **URL Types**. Expand the automatically created **Item 0**, and inside the **URL identifier** value field, type your **Bundle ID**, e.g., **com.superwall.Superwall-SwiftUI**. Add another row to **Item 0** called **URL Schemes** and set its **Item 0** to a URL scheme you'd like to use for your app, e.g., **exampleapp**.
Here's an example of what it should look like if you open the target's `Info` pane:

#### React Native Project setup
Next, you can use the Superwall SDK to handle the deeplink with `Superwall.shared.handleDeepLink(url);`. Here, we have code to ensure that the deep link opens a preview when the app is booted from the deep link, and when it's already in the foreground running:
```typescript
import React, { useEffect } from 'react';
import { Linking, AppState } from 'react-native';
import Superwall from '@superwall/react-native-superwall';
function handleDeepLink(url: string | null) {
if (url) {
Superwall.shared.handleDeepLink(url);
}
}
function App(): React.JSX.Element {
useEffect(() => {
Superwall.configure('YOUR_SUPERWALL_API_KEY');
const handleIncomingLink = async () => {
const url = await Linking.getInitialURL();
handleDeepLink(url);
};
// Handle any existing deep link on mount
handleIncomingLink();
const appStateSubscription = AppState.addEventListener('change', (nextAppState) => {
if (nextAppState === 'active') {
handleIncomingLink();
}
});
const linkingSubscription = Linking.addEventListener('url', (event) => {
handleDeepLink(event.url);
});
return () => {
appStateSubscription.remove();
linkingSubscription.remove();
};
}, []);
// Returning null since there's no UI for the example...
return null;
}
export default App;
```
### Previewing Paywalls
Next, build and run your app on your phone.
Then, head to the Superwall Dashboard. Click on **Settings** from the Dashboard panel on the left, then select **General**:

With the **General** tab selected, type your custom URL scheme, without slashes, into the **Apple Custom URL Scheme** field:

Next, open your paywall from the dashboard and click **Preview**. You'll see a QR code appear in a pop-up:


On your device, scan this QR code. You can do this via Apple's Camera app. This will take you to a paywall viewer within your app, where you can preview all your paywalls in different configurations.
### Using Deep Links to Present Paywalls
Deep links can also be used as a placement in a campaign to present paywalls. Simply add `deepLink_open` as an placement, and the URL parameters of the deep link can be used as parameters! You can also use custom placements for this purpose. [Read this doc](/legacy/legacy_presenting-paywalls-from-one-another) for examples of both.
# Installation (Legacy)
Source: https://superwall.com/docs/legacy/legacy_installation
Superwall can be installed with many different package managers. Please find your preferred package manager below.
### iOS
### Android
### Flutter
### React Native
# iOS - CocoaPods (Legacy)
Source: https://superwall.com/docs/legacy/legacy_installation-via-cocoapods
Install the Superwall iOS SDK via CocoaPods. To see the latest release, [check out the repository](https://github.com/superwall/Superwall-iOS).
## Install via CocoaPods
First, add the following to your Podfile:
`pod 'SuperwallKit', '< 4.0.0'
`
Next, run `pod repo update` to update your local spec repo. [Why?](https://stackoverflow.com/questions/43701352/what-exactly-does-pod-repo-update-do)
Finally, run `pod install` from your terminal.
### Updating to a New Release
To update to a new beta release, you'll need to update the version specified in the Podfile and then run `pod install` again.
### Import SuperwallKit
You should now be able to `import SuperwallKit`:
Swift:
`import SuperwallKit`
Objective-C:
`@import SuperwallKit;`
**And you're done!** Now you're ready to configure the SDK 👇
Begin configuring the SDK to show paywalls inside your App!
# Android - Gradle (Legacy)
Source: https://superwall.com/docs/legacy/legacy_installation-via-gradle
Install the Superwall Android SDK via Gradle. To see the latest release, [check out the repository](https://github.com/superwall/Superwall-Android).
## Install via Gradle
[Gradle](https://developer.android.com/build/releases/gradle-plugin) is the
preferred way to install Superwall for Android.
In your `build.gradle` or `build.gradle.kts` add the latest Superwall SDK. You
can find the [latest release here](https://github.com/superwall/Superwall-Android/releases).

```gradle build.gradle
implementation "com.superwall.sdk:superwall-android:1.3.2"
```
```kotlin build.gradle.kts
implementation("com.superwall.sdk:superwall-android:1.3.2")
```
```toml libs.version.toml
[libraries]
superwall-android = { group = "com.superwall.sdk", name = "superwall-android", version = "2.0.0-Alpha.1" }
// And in your build.gradle.kts
dependencies {
implementation(libs.superwall.android)
}
```
Make sure to run **Sync Now** to force Android Studio to update.

Go to your `AndroidManifest.xml` and add the following permissions:

```xml AndroidManifest.xml
```
Then add our Activity to your `AndroidManifest.xml`:

```xml AndroidManifest.xml
```
Set your app's theme in the `android:theme` section.
When choosing a device or emulator to run on make sure that it has the Play Store app and that you are signed in to your Google account on the Play Store.
**And you're done!** Now you're ready to configure the SDK 👇
Begin configuring the SDK to show paywalls inside your App!
# React Native - Package.json (Legacy)
Source: https://superwall.com/docs/legacy/legacy_installation-via-package
Install the Superwall React Native SDK via npm or yarn. To see the latest release, [check out the repository](https://github.com/superwall/react-native-superwall).
Note that Superwall does **not** refetch its configuration during hot reloads. So, if you add products, edit a paywall, or otherwise change anything with Superwall, re-run your app to see those changes.
## Option 1: React-Native package
To use Superwall in your React Native project, add `@superwall/react-native-superwall` as a dependency in your `package.json` file by using npm or yarn:
```bash npm
npm install @superwall/react-native-superwall
```
```bash yarn
yarn add @superwall/react-native-superwall
```
## Option 2: Using Expo
If you have an Expo project, you can add the dependency with npx:
```
npx expo install @superwall/react-native-superwall
```
Please note that Superwall does not support Expo Go. Expo Go only supports prebuilt Expo libraries; it cannot load third-party SDKs with custom native code. If you are using a **managed workflow**, create a [development build](https://docs.expo.dev/workflow/overview/#development-builds) to continue using Expo tools while including Superwall. Otherwise, you will encounter linking errors.
Here's a quick table to review your installation methods:
| **Workflow** | **Superwall Support** | **Notes** |
| --------------------- | --------------------------- | ------------------------------------ |
| **Expo Go** | ❌ Not supported | Expo Go cannot load native SDKs. |
| **Managed Workflow** | ℹ️ Requires additional step | Use a **Development Build**. |
| **Development Build** | ✅ Supported | Works with Expo tools + custom code. |
| **Unmanaged (Bare)** | ✅ Supported | Full control over native code. |
### iOS Deployment Target
Superwall requires iOS 14.0 or higher. Ensure your React Native project's iOS deployment target is 14.0 or higher by updating ios/Podfile.
```ruby
platform :ios, '14.0'
```
## Android Configuration
For Android projects, you'll also need to include Superwall's Maven repository.
First, install the `expo-build-properties` config plugin if your Expo project hasn’t yet:
```bash
npx expo install expo-build-properties
```
Then, add the following to your `app.json` or `app.config.js` file:
```json
{
"expo": {
"plugins": [
...
[
"expo-build-properties",
{
"android": {
"minSdkVersion": 26
}
}
]
]
}
}
```
Superwall requires a minimum SDK version of 26 or higher. Ensure your React Native project's Android SDK target is set to 26 or higher by updating `android/app/build.gradle`.
```gradle
android {
...
defaultConfig {
...
minSdkVersion 26
...
}
}
```
**And you're done!** Now you're ready to configure the SDK 👇
Begin configuring the SDK to show paywalls inside your App!
# Flutter - pubspec.yaml (Legacy)
Source: https://superwall.com/docs/legacy/legacy_installation-via-pubspec
Install the Superwall Flutter SDK via pub package manager. To see the latest release, [check out the repository](https://github.com/superwall/Superwall-Flutter).
## Install via pubspec.yaml
To use Superwall in your Flutter project, add `superwallkit_flutter` as a dependency in your `pubspec.yaml` file:
```yaml
dependencies:
superwallkit_flutter: ^0.0.27
```
After adding the dependency, run `dart pub get` in your terminal to fetch the package.
## Install via Command Line (Alternative)
You can also add the dependency directly from your terminal using the following command:
```bash
$ flutter pub add superwallkit_flutter
```
### iOS Deployment Target
Superwall requires iOS 14.0 or higher. Ensure your Flutter project's iOS deployment target is 14.0 or higher by updating ios/Podfile.
```ruby
platform :ios, '14.0'
```
### Android Configuration
Superwall requires a minimum SDK version of 26 or higher and a minimum compile SDK target of 34. Ensure your Flutter project's Android minimal SDK target is set to 26 or higher and that your compilation SDK target is 34 by updating `android/app/build.gradle`.
```gradle
android {
...
compileSdkVersion 34
...
defaultConfig {
...
minSdkVersion 26
...
}
}
```
To use the compile target SDK 34, you'll also need to ensure your Gradle version is 8.6 or higher and your Android Gradle plugin version is 8.4 or higher.
You can do that by checking your `gradle/wrapepr/gradle-wrapper.properties` file and ensuring it is updated to use the latest Gradle version:
```properties
distributionUrl=https\://services.gradle.org/distributions/gradle-8.6-bin.zip
```
And your `android/build.gradle` file is updated to use the latest Android Gradle plugin version:
```gradle
plugins {
id 'com.android.application' version '8.4.1' apply false
}
```
To find the latest compatible versions, you can always check the [Gradle Plugin Release Notes](https://developer.android.com/build/releases/gradle-plugin).
**And you're done!** Now you're ready to configure the SDK 👇
Begin configuring the SDK to show paywalls inside your App!
# iOS - Swift Package Manager (Legacy)
Source: https://superwall.com/docs/legacy/legacy_installation-via-spm
Install the Superwall iOS SDK via Swift Package Manager. To see the latest release, [check out the repository](https://github.com/superwall/Superwall-iOS).
## Install via Swift Package Manager
[Swift Package Manager](https://swift.org/package-manager/) is a tool for automating the distribution of Swift code and is integrated into the Swift compiler.
In **Xcode**, select **File ▸ Add Packages...**:
{" "}
**Then, paste the GitHub repository URL:**
```
https://github.com/superwall/Superwall-iOS
```
in the search bar. With the **Superwall-iOS** source selected, set the **Dependency Rule** to **Up to Next Major Version** with the lower bound set to **3.0.0**. Make sure your project name is selected in **Add to Project**. Then click **Add Package**:

After the package has loaded, make sure **Add to Target** is set to your app's name and click **Add Package**:

**And you're done!** Now you're ready to configure the SDK 👇
Begin configuring the SDK to show paywalls inside your App!
# Pre-Launch Checklist (Legacy)
Source: https://superwall.com/docs/legacy/legacy_pre-launch-checklist
Ready to ship your app with Superwall? Here is a last minute checklist to give you confidence that you're ready to ship without issue.
In your Superwall account, make sure you've got a card on file to avoid any service disruptions.
Go to `Settings->Billing` in your Superwall account to add one if you haven't yet.
Set up your products in their respective storefront first, whether that's App Store Connect or
Google Play. Once you've done that, add them into Superwall. All of their respective identifiers
should match what they are in each storefront. For more details, refer to this
[page](/products).
Each paywall should display one or more of those previously added products. You can associate
them easily on the left hand side of the paywall editor.

Be sure your paywall presents and our SDK is configured in your app. If you need to double check
things, check out the [docs for the relevant platform](/legacy/legacy_configuring-the-sdk).
Next, after your paywall shows in Testflight and beta builds, make sure you can successfully
purchase a product, start a trial or kick off a subscription. If you run into an issue, try
these steps in our [troubleshooting guide](/legacy/legacy_troubleshooting). They solve a majority of the
common problems.
Finally, make sure that your subscriptions have been approved in each storefront. On App Store
Connect, for example, you'll have to send off each one individually for review. If this is your
initial launch, you can have them approved alongside the first build of your app.
If everything looks good here, you should be ready to launch with Superwall.
### Bonus Steps
These aren't essential, but they are good to think about to make sure you're leveraging all Superwall has to offer.
No matter how much you optimize flows, designs or copy — the truth is that, statistically speaking, the majority of users will not convert. Finding out why is key, and you can do that with our surveys that you can attach to any paywall.
Once a user closes a paywall, we'll present the survey attached to it. See how to set them up [here](/surveys).
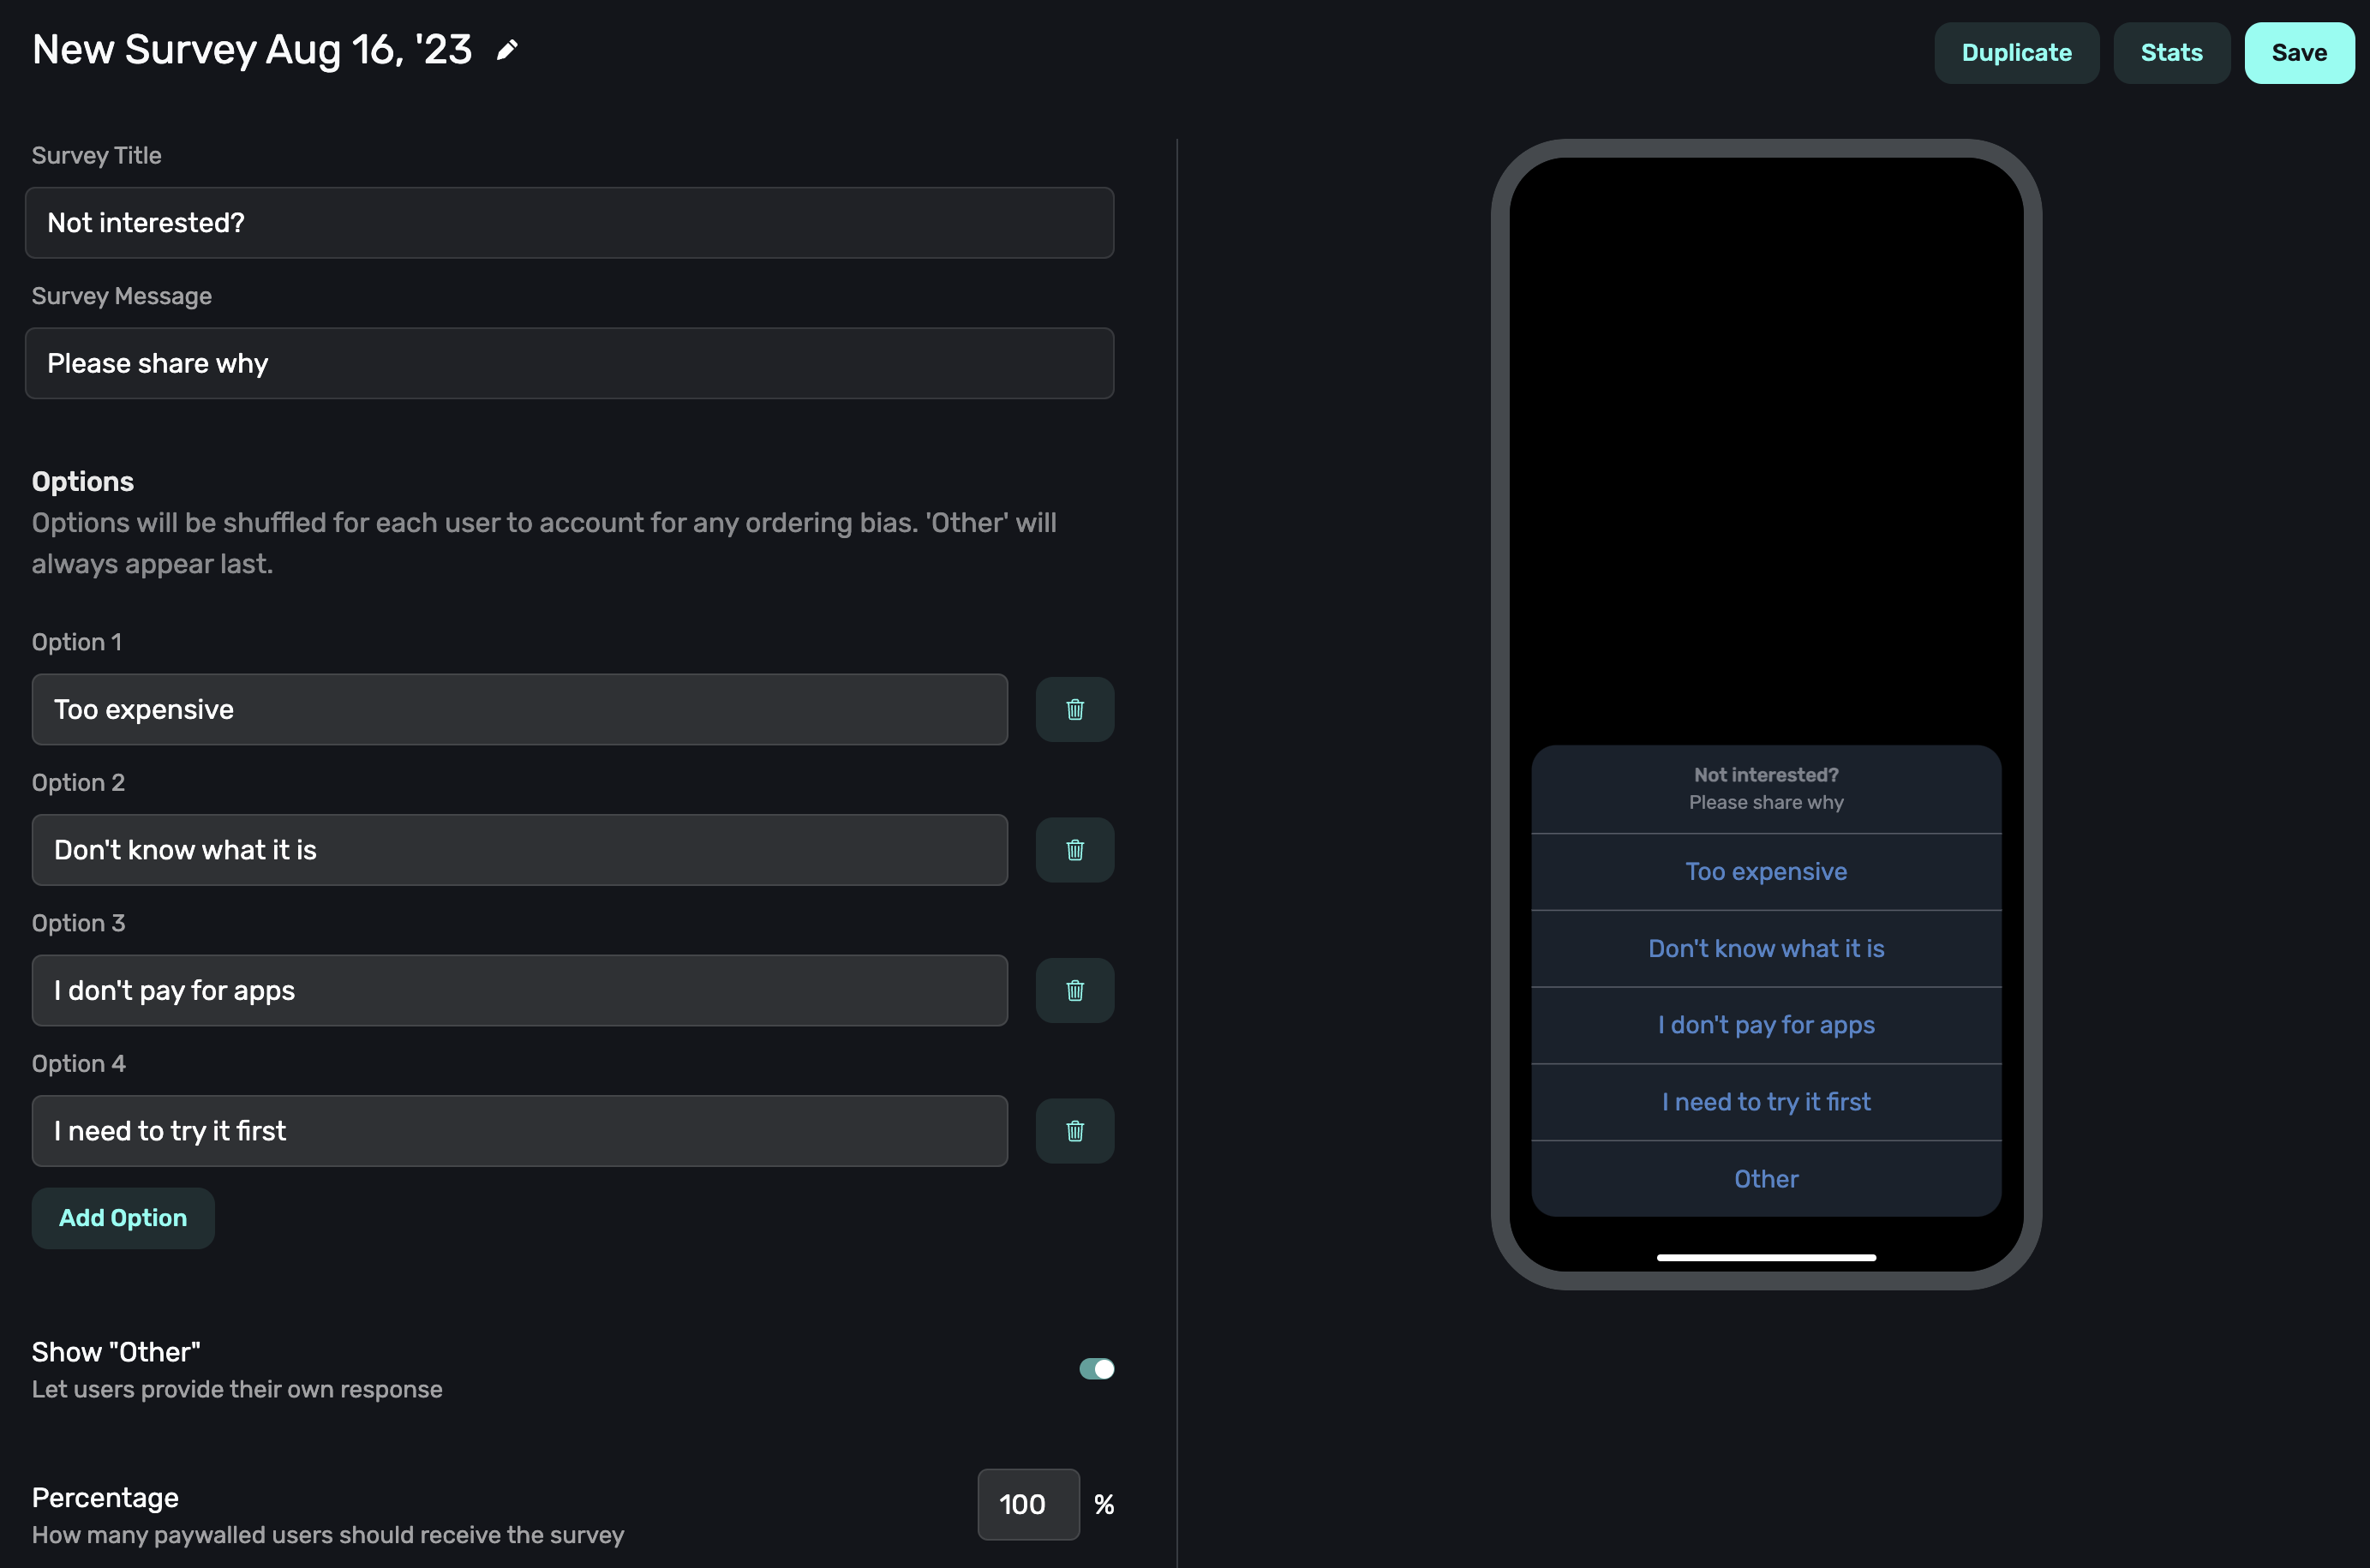
If you're new to Superwall, it might be tempting to use one, do-it-all placement — like `showPaywall` or something similar. We don't recommend this, please use an individual placement for each action or scenario that could possibly trigger a paywall. The more placements you have, the more flexible you can be. It opens up things like:
1. Showing a particular paywall based on a placement. For example, in a caffeine tracking app, two of them might be `caffeineLogged` and `viewedCharts`. Later, you could tailor the paywall based on which placement was fired.
2. You can dynamically make some placements "Pro" or temporarily free to test feature gating without submitting app updates.
3. In your campaign view, you can see which placements resulted in conversions. This helps you see what particular features users might value the most.
The easy advice is to simply create a placement for each action that might be paywalled. For a quick video on how to use placements, check out this [YouTube Short](https://youtube.com/shorts/lZx8fAL8Nvw?feature=shared).
Audiences are how Superwall can segment users by filtering by several different values such as the time of day, app version and more. This lets you target different paywalls to certain audiences. To see an example of how you might set up an advanced example, see this video:
# Retrieving and Presenting a Paywall Yourself (Legacy)
Source: https://superwall.com/docs/legacy/legacy_presenting
Use this technique to get an instance of a paywall manually, using either UIKit, SwiftUI, or Jetpack Compose.
If you want complete control over the paywall presentation process, you can use `getPaywall(forEvent:params:paywallOverrides:delegate:)`. This returns the `UIViewController` subclass `PaywallViewController`, which you can then present however you like. Or, you can use a SwiftUI `View` via `PaywallView`. The following is code is how you'd mimic [register](/legacy/legacy_feature-gating):
```swift Swift
final class MyViewController: UIViewController {
private func presentPaywall() async {
do {
// 1
let paywallVc = try await Superwall.shared.getPaywall(
forEvent: "campaign_trigger",
delegate: self
)
self.present(paywallVc, animated: true)
} catch let skippedReason as PaywallSkippedReason {
// 2
switch skippedReason {
case .holdout,
.noRuleMatch,
.eventNotFound,
.userIsSubscribed:
break
}
} catch {
// 3
print(error)
}
}
private func launchFeature() {
// Insert code to launch a feature that's behind your paywall.
}
}
// 4
extension MyViewController: PaywallViewControllerDelegate {
func paywall(
_ paywall: PaywallViewController,
didFinishWith result: PaywallResult,
shouldDismiss: Bool
) {
if shouldDismiss {
paywall.dismiss(animated: true)
}
switch result {
case .purchased,
.restored:
launchFeature()
case .declined:
let closeReason = paywall.info.closeReason
let featureGating = paywall.info.featureGatingBehavior
if closeReason != .forNextPaywall && featureGating == .nonGated {
launchFeature()
}
}
}
}
```
```swift Objective-C
@interface MyViewController : UIViewController
- (void)presentPaywall;
@end
@interface MyViewController ()
@end
@implementation MyViewController
- (void)presentPaywall {
// 1
[[Superwall sharedInstance] getPaywallForEvent:@"campaign_trigger" params:nil paywallOverrides:nil delegate:self completion:^(SWKGetPaywallResult * _Nonnull result) {
if (result.paywall != nil) {
[self presentViewController:result.paywall animated:YES completion:nil];
} else if (result.skippedReason != SWKPaywallSkippedReasonNone) {
switch (result.skippedReason) {
// 2
case SWKPaywallSkippedReasonHoldout:
case SWKPaywallSkippedReasonUserIsSubscribed:
case SWKPaywallSkippedReasonEventNotFound:
case SWKPaywallSkippedReasonNoRuleMatch:
case SWKPaywallSkippedReasonNone:
break;
};
} else if (result.error) {
// 3
NSLog(@"%@", result.error);
}
}];
}
-(void)launchFeature {
// Insert code to launch a feature that's behind your paywall.
}
// 4
- (void)paywall:(SWKPaywallViewController *)paywall didFinishWithResult:(enum SWKPaywallResult)result shouldDismiss:(BOOL)shouldDismiss {
if (shouldDismiss) {
[paywall dismissViewControllerAnimated:true completion:nil];
}
SWKPaywallCloseReason closeReason;
SWKFeatureGatingBehavior featureGating;
switch (result) {
case SWKPaywallResultPurchased:
case SWKPaywallResultRestored:
[self launchFeature];
break;
case SWKPaywallResultDeclined:
closeReason = paywall.info.closeReason;
featureGating = paywall.info.featureGatingBehavior;
if (closeReason != SWKPaywallCloseReasonForNextPaywall && featureGating == SWKFeatureGatingBehaviorNonGated) {
[self launchFeature];
}
break;
}
}
@end
```
```swift SwiftUI
import SuperwallKit
struct MyAwesomeApp: App {
@State var store: AppStore = .init()
init() {
Superwall.configure(apiKey: "MyAPIKey")
}
var body: some Scene {
WindowGroup {
ContentView()
.fullScreenCover(isPresented: $store.showPaywall) {
// You can just use 'event' at a minimum. The 'feature'
// Closure fires if they convert
PaywallView(event: "myEvent", onSkippedView: { skip in
switch skip {
case .userIsSubscribed,
.holdout(_),
.noRuleMatch,
.eventNotFound:
MySkipView()
}
}, onErrorView: { error in
MyErrorView()
}, feature: {
// User is subscribed as a result of the paywall purchase
// Or they already were (which would happen in `onSkippedView`)
})
}
}
}
}
```
```kotlin Kotlin
// This is an example of how to use `getPaywall` to use a composable`
import androidx.compose.foundation.layout.Arrangement
import androidx.compose.foundation.layout.Box
import androidx.compose.foundation.layout.Column
import androidx.compose.foundation.layout.fillMaxSize
import androidx.compose.material3.CircularProgressIndicator
import androidx.compose.material3.Text
import androidx.compose.runtime.Composable
import androidx.compose.runtime.LaunchedEffect
import androidx.compose.runtime.mutableStateOf
import androidx.compose.runtime.remember
import androidx.compose.ui.Alignment
import androidx.compose.ui.Modifier
import androidx.compose.ui.viewinterop.AndroidView
import com.superwall.sdk.Superwall
import com.superwall.sdk.paywall.presentation.get_paywall.getPaywall
import com.superwall.sdk.paywall.presentation.internal.request.PaywallOverrides
import com.superwall.sdk.paywall.vc.PaywallView
import com.superwall.sdk.paywall.vc.delegate.PaywallViewCallback
@Composable
fun PaywallComposable(
event: String,
params: Map? = null,
paywallOverrides: PaywallOverrides? = null,
callback: PaywallViewCallback,
errorComposable: @Composable ((Throwable) -> Unit) = { error: Throwable ->
// Default error composable
Text(text = "No paywall to display")
},
loadingComposable: @Composable (() -> Unit) = {
// Default loading composable
Box(modifier = Modifier.fillMaxSize()) {
Column(
modifier = Modifier.align(Alignment.Center),
verticalArrangement = Arrangement.Center,
horizontalAlignment = Alignment.CenterHorizontally
) {
CircularProgressIndicator()
}
}
}
) {
val viewState = remember { mutableStateOf(null) }
val errorState = remember { mutableStateOf(null) }
val context = LocalContext.current
LaunchedEffect(Unit) {
try {
val newView = Superwall.instance.getPaywall(event, params, paywallOverrides, callback)
newView.encapsulatingActivity = context as? Activity
newView.beforeViewCreated()
viewState.value = newView
} catch (e: Throwable) {
errorState.value = e
}
}
when {
viewState.value != null -> {
viewState.value?.let { viewToRender ->
DisposableEffect(viewToRender) {
viewToRender.onViewCreated()
onDispose {
viewToRender.beforeOnDestroy()
viewToRender.encapsulatingActivity = null
CoroutineScope(Dispatchers.Main).launch {
viewToRender.destroyed()
}
}
}
AndroidView(
factory = { context ->
viewToRender
}
)
}
}
errorState.value != null -> {
errorComposable(errorState.value!!)
}
else -> {
loadingComposable()
}
}
}
```
This does the following:
1. Gets the paywall view controller.
2. Handles the cases where the paywall was skipped.
3. Catches any presentation errors.
4. Implements the delegate. This is called when the user is finished with the paywall. First, it checks `shouldDismiss`. If this is true then is dismissed the paywall from view before launching any features. This may depend on the `result` depending on how you first presented your view. Then, it switches over the `result`. If the result is `purchased` or `restored` the feature can be launched. However, if the result is `declined`, it checks that the the `featureGating` property of `paywall.info` is `nonGated` and that the `closeReason` isn't `.forNextPaywall`.
### Best practices
1. **Make sure to prevent a paywall from being accessed after a purchase has occurred**.
If a user purchases from a paywall, it is your responsibility to make sure that the user can't access that paywall again. For example, if after successful purchase you decide to push a new view on to the navigation stack, you should make sure that the user can't go back to access the paywall.
2. **Make sure the paywall view controller deallocates before presenting it elsewhere**.
If you have a paywall view controller presented somewhere and you try to present
the same view controller elsewhere, you will get a crash. For example, you may
have a paywall in a tab bar controller, and then you also try to present it
modally. We plan on improving this, but currently it's your responsibility to
ensure this doesn't happen.
3. **Listening for Loading State Changes**.
If you have logic that depends on the progress of the paywall's loading state, you can use the delegate function `paywall(_:loadingStateDidChange)`. Or, if you have an instance of a `PaywallViewController`, you can use the published property on iOS:
```swift
let stateSub = paywall.$loadingState.sink { state in
print(state)
}
```
# Presenting Paywalls from One Another (Legacy)
Source: https://superwall.com/docs/legacy/legacy_presenting-paywalls-from-one-another
Learn how to present a different paywall from one that's already presented.
It's possible to present another paywall from one already showing. This can be useful if you want to highlight a special discount, offer, or emphasize another feature more effectively using a different paywall. Check out the example here:
* A [placement](/campaigns-placements) is evaluated when the button is tapped. Superwall sees that the user isn't subscribed, so a paywall is shown.
* Next, the user taps the "Custom Icons Too 👀" button.
* The current paywall dismisses, and then presents the icons-centric paywall.

You can extend this technique to be used with several other interesting standard placements. For
example, presenting a paywall when the user abandons a transaction, responds to a survey and more.
Check out the examples [here](/campaigns-standard-placements#standard-placements).
There are two different ways you can do this, with [custom placements](/paywall-editor-styling-elements#tap-behaviors) or by using [deep links](/legacy/legacy_in-app-paywall-previews). We recommend using custom placements, as the setup is a little easier.
Custom placements minimum SDK requirements are 3.7.3 for iOS, 1.2.4 for Android, 1.2.2 for
flutter, and 1.2.6 for React Native.
They both have the same idea, though. You create a new campaign specifically for this purpose, attach a paywall and either add a filter (for deep linking) or a new placement (for custom placements) to match users to it.
While it's not *required* to make a new campaign, it is best practice. Then, if you later have
other paywalls you wish to open in the same manner, you can simply add a new
[audience](/campaigns-audience) for them in the campaign you make from the steps below.
### Use Custom Placements
Select a component on your paywall and add a **Custom Placement** Tap Behavior, and name it whatever you wish (i.e. showIconPaywall).
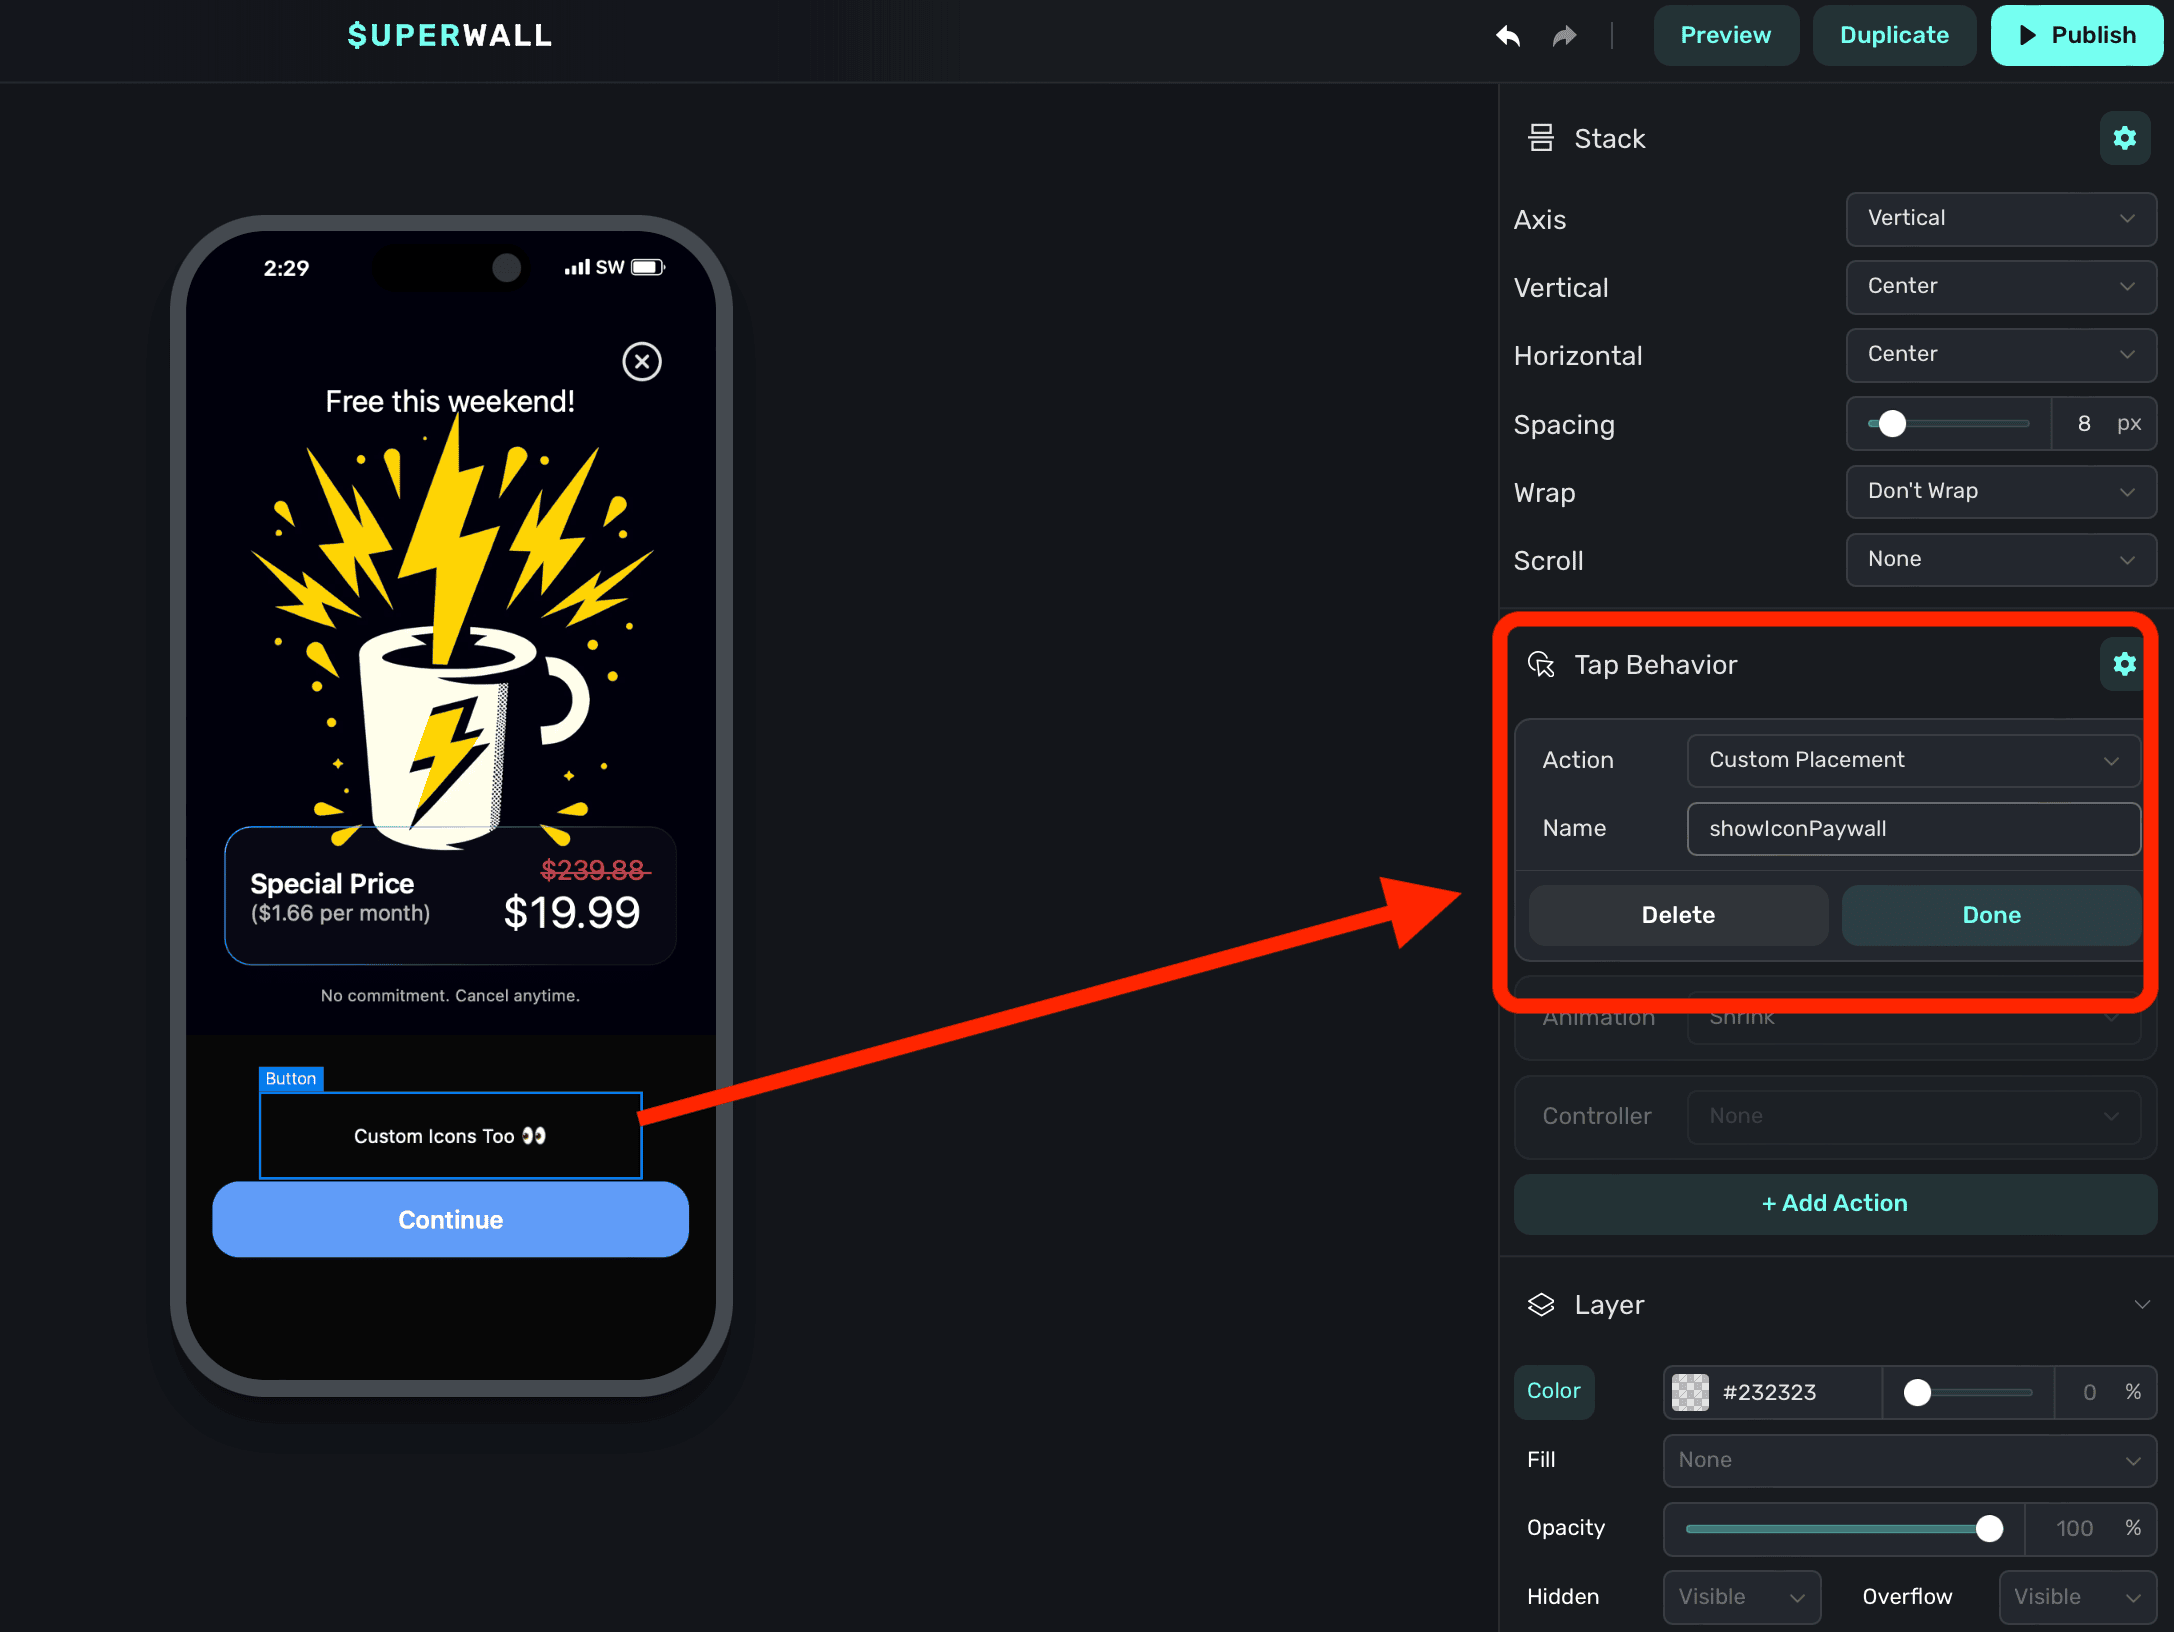
Finally, be sure to click **Publish** at the top of the editor to push your changes live
Create a new [campaign](/campaigns) specifically for this purpose, here — it's called "Custom Placement Example":
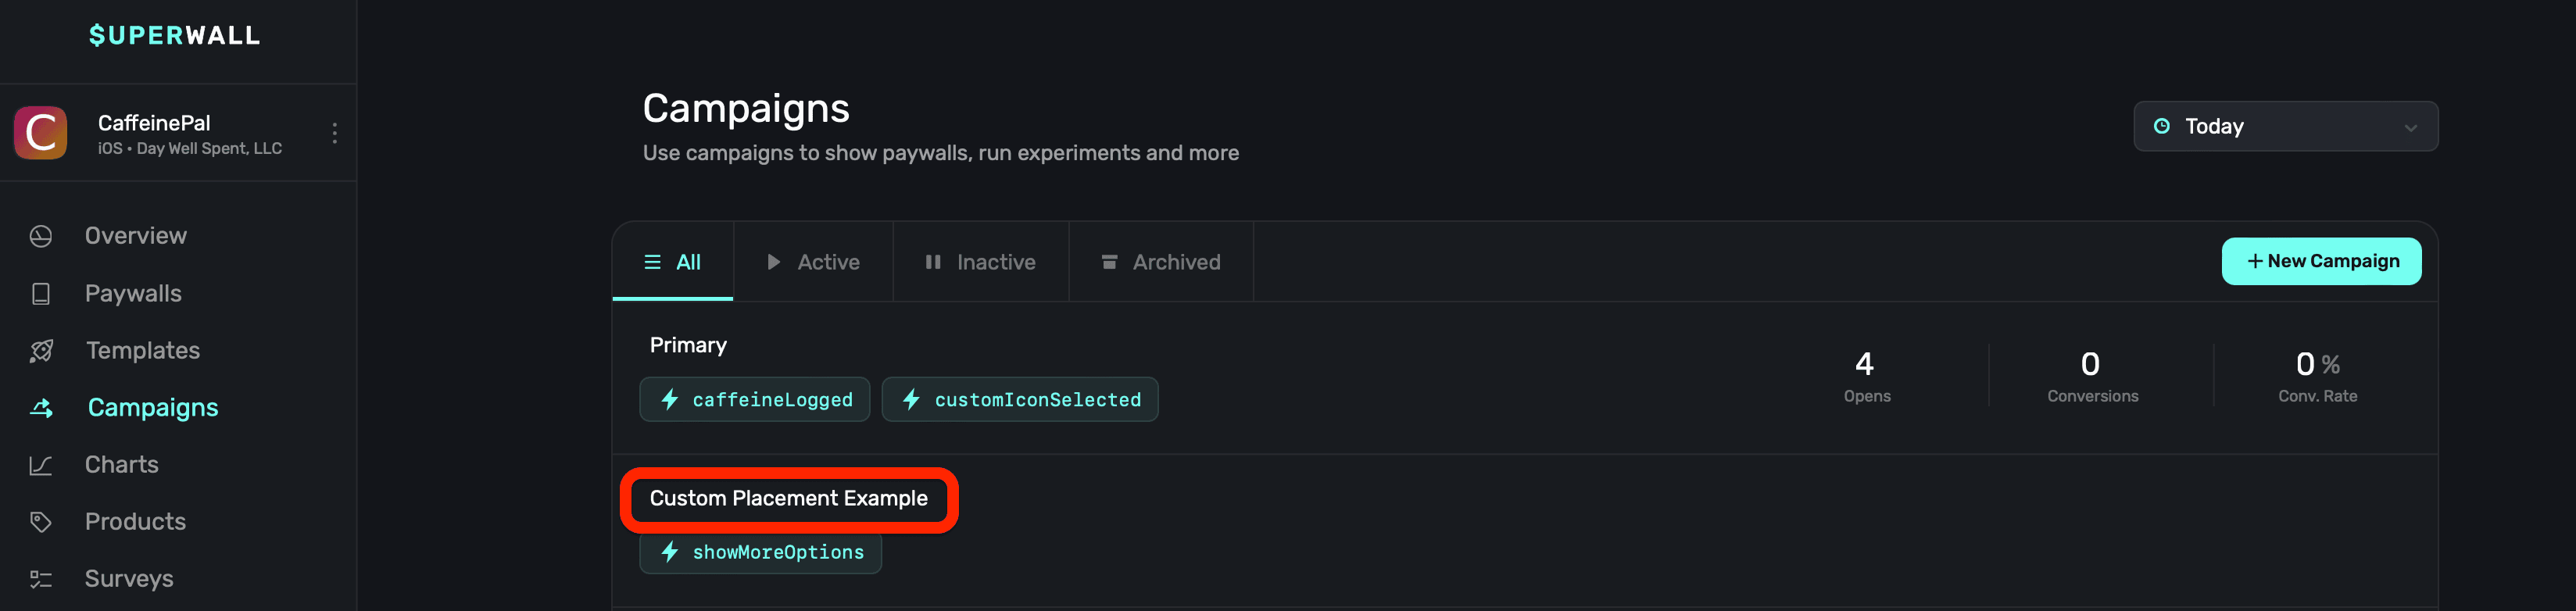
In your new campaign, [add a new placement](/campaigns-placements#adding-a-placement) that matches the name of your custom action you added in step one. For us, that's `showIconPaywall`:
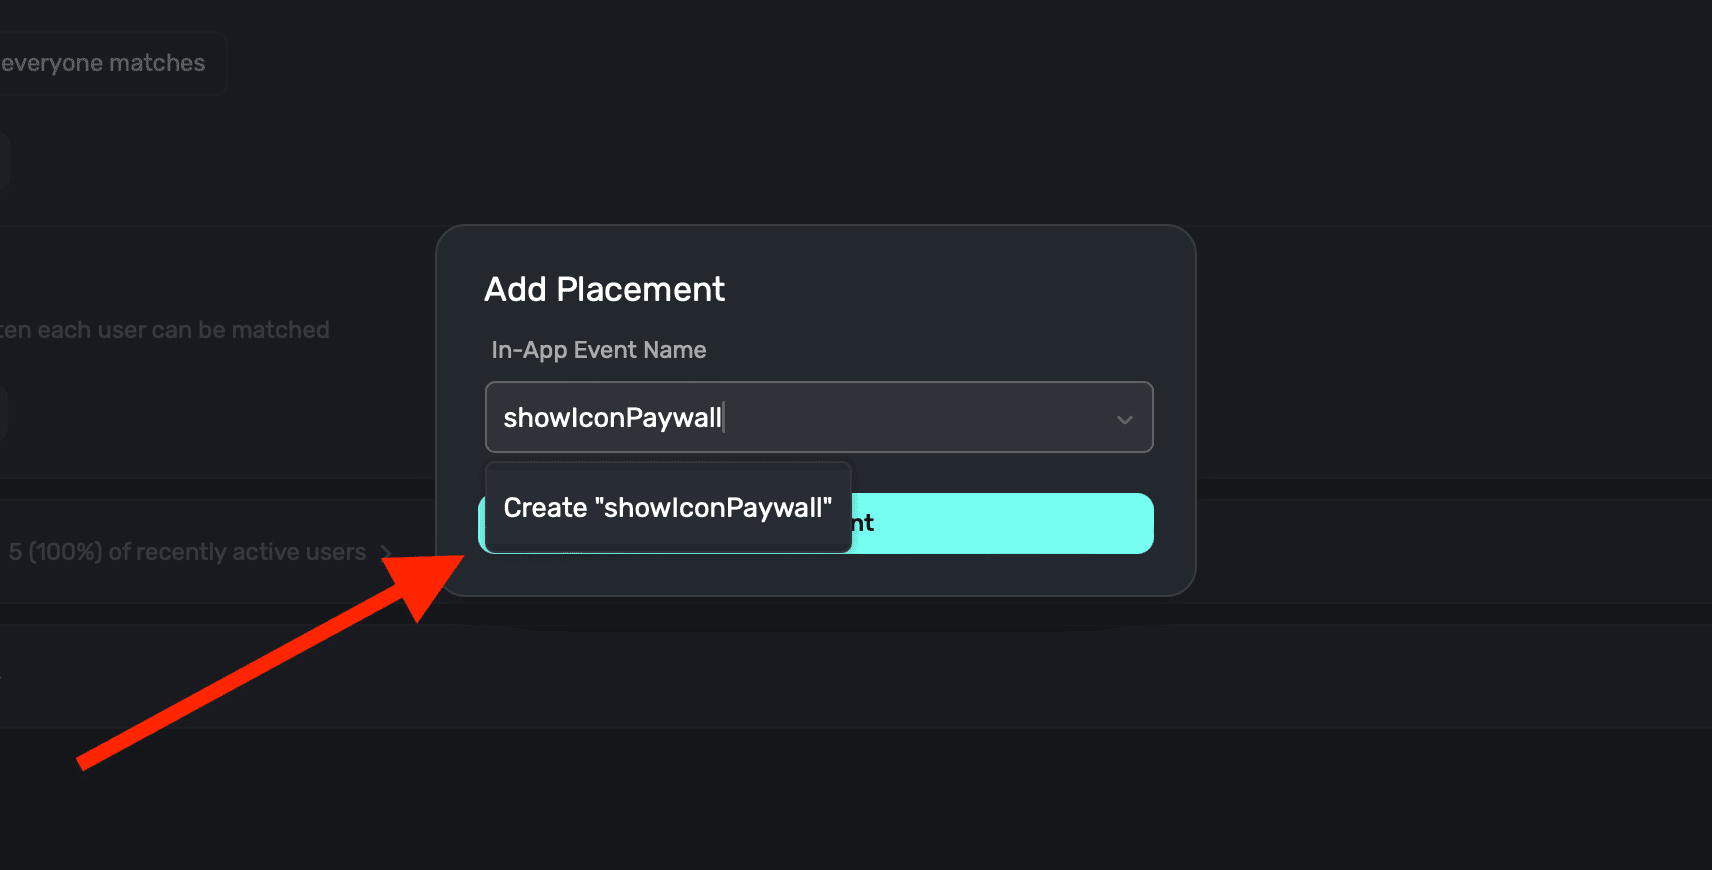
Finally, choose a paywall that should present by **clicking** on the **Paywalls** button at the top:
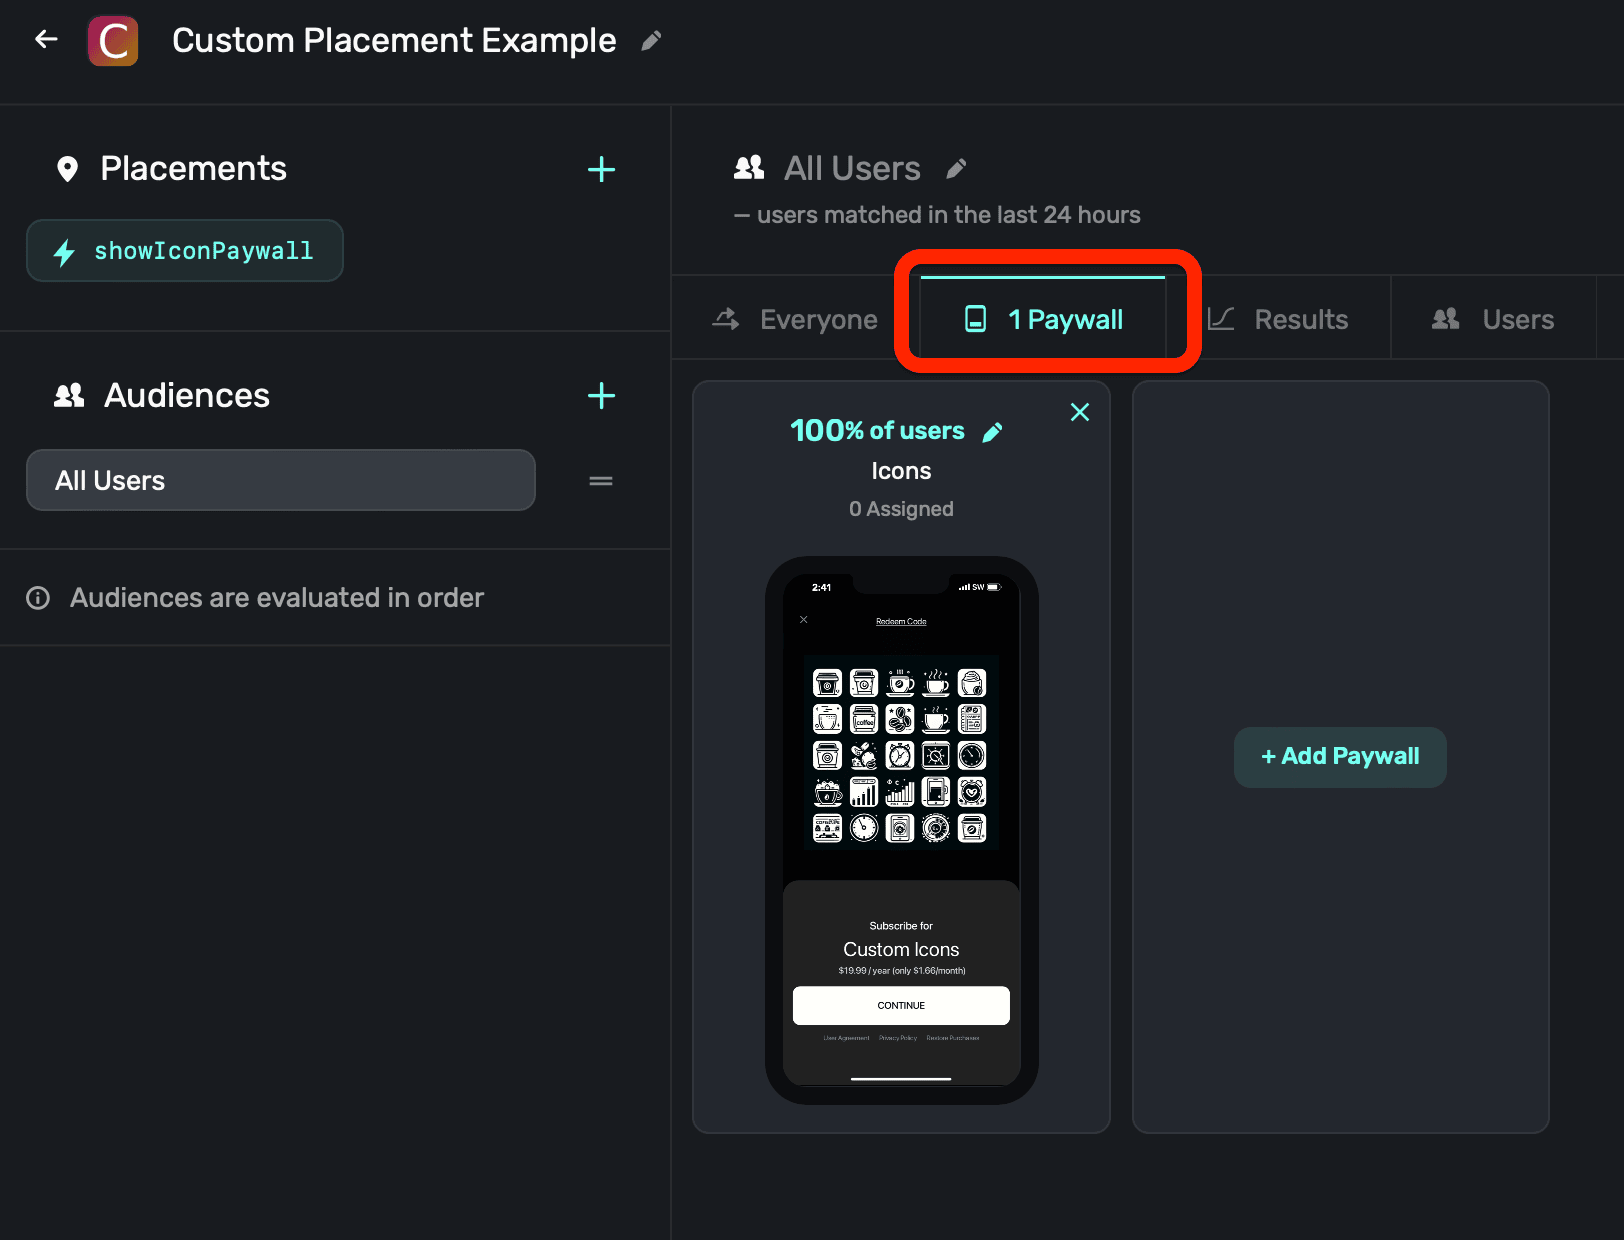
### Use Deep Links
You'll need [deep links](/legacy/legacy_in-app-paywall-previews) set up for your app. This is how Superwall
will query parameters and later launch your desired paywall.
Choose the paywall you want to open another paywall from. Then, click the element (a button, text, etc.) that should open the new paywall:
1. In its component properties on the right-hand side, add a **Tap Behavior**.
2. Set its **Action** to **Open Url**.
3. For the URL, use your deep link scheme from step one, and then append a parameter which will represent which other paywall to present. This is specific to your app, but here — `offer` is the key and `icons` is the value. Your resulting URL should be constructed like this: `deepLinkScheme://?someKey=someValue`.
4. Set its **Type** to **Deep Link**.
5. Click **Done**.
Here's what it should look like (again, with your own values here):
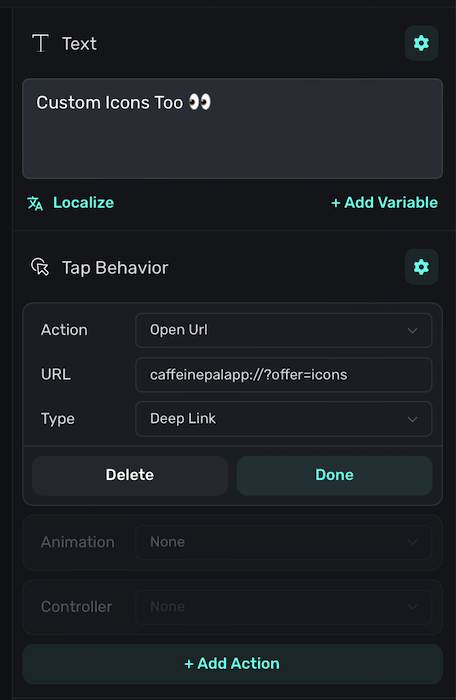
Finally, be sure to click **Publish** at the top of the editor to push your changes live.
Create a new [campaign](/campaigns) specifically for this purpose, here — it's called "Deeplink Example":
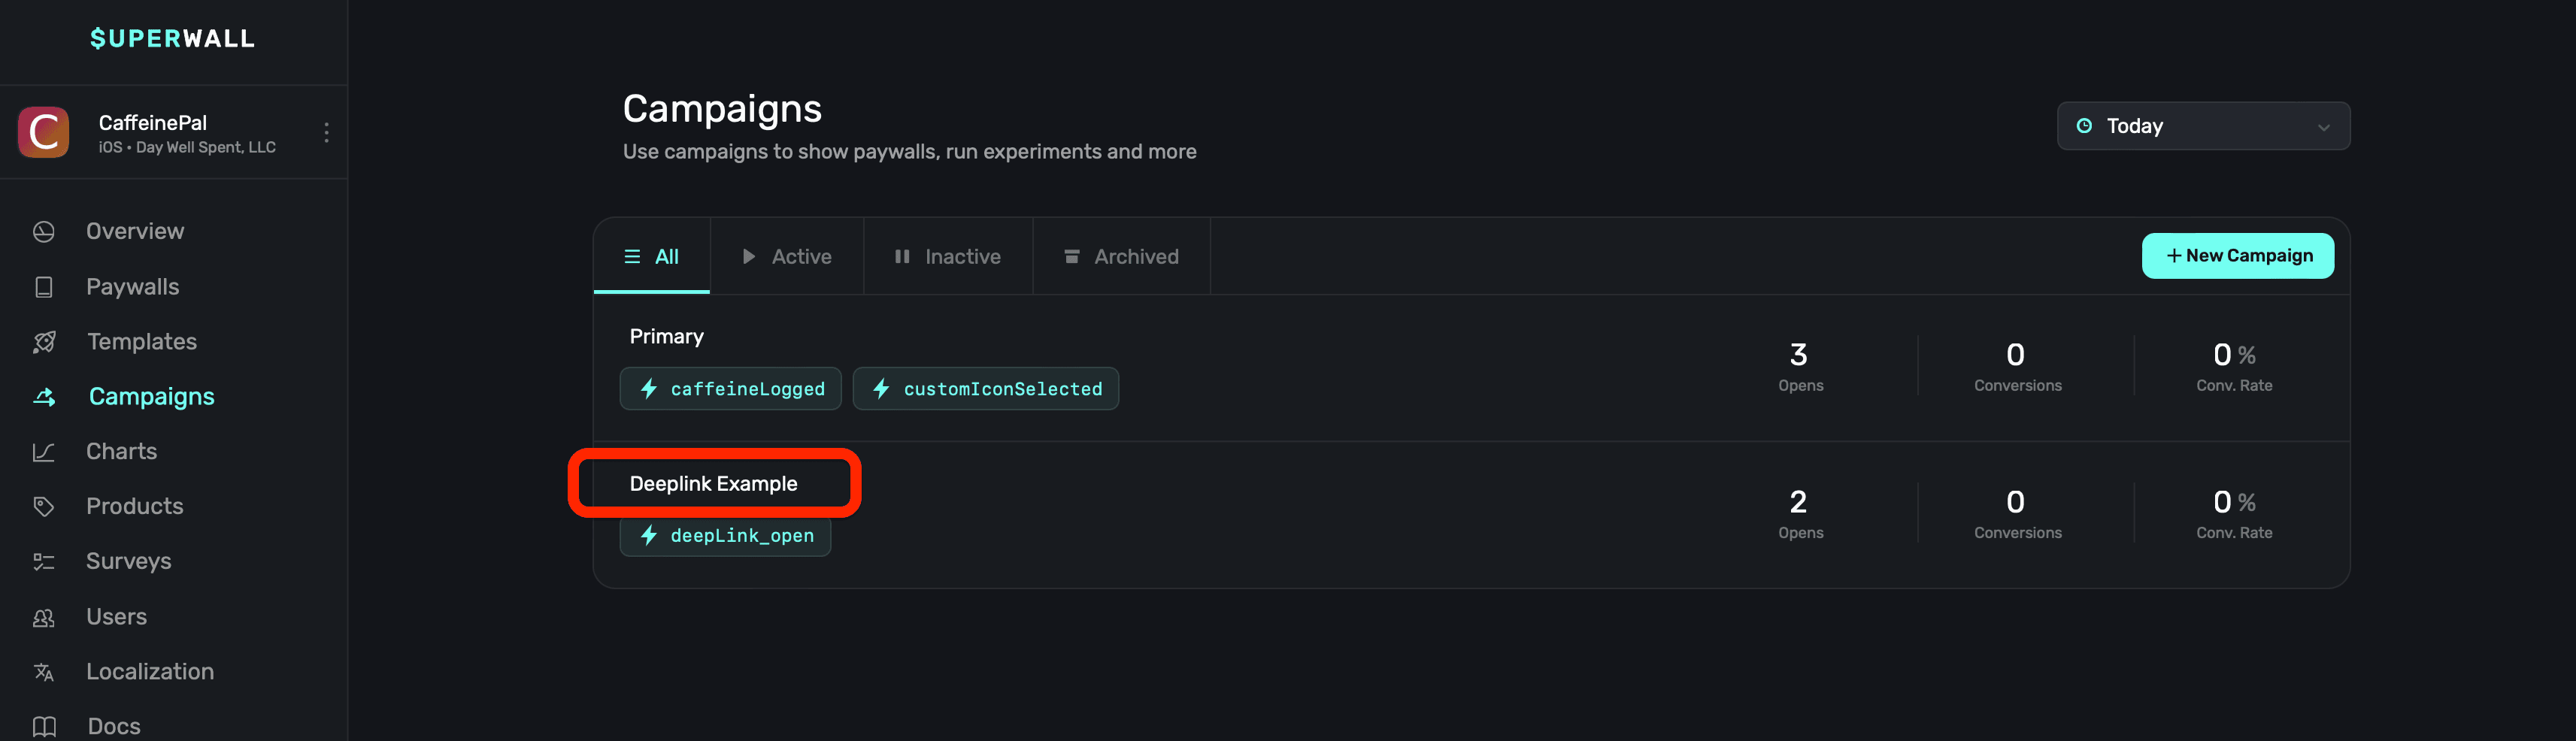
In your new campaign, [add a placement](/campaigns-placements#adding-a-placement) for the `deepLink_open` standard placement:
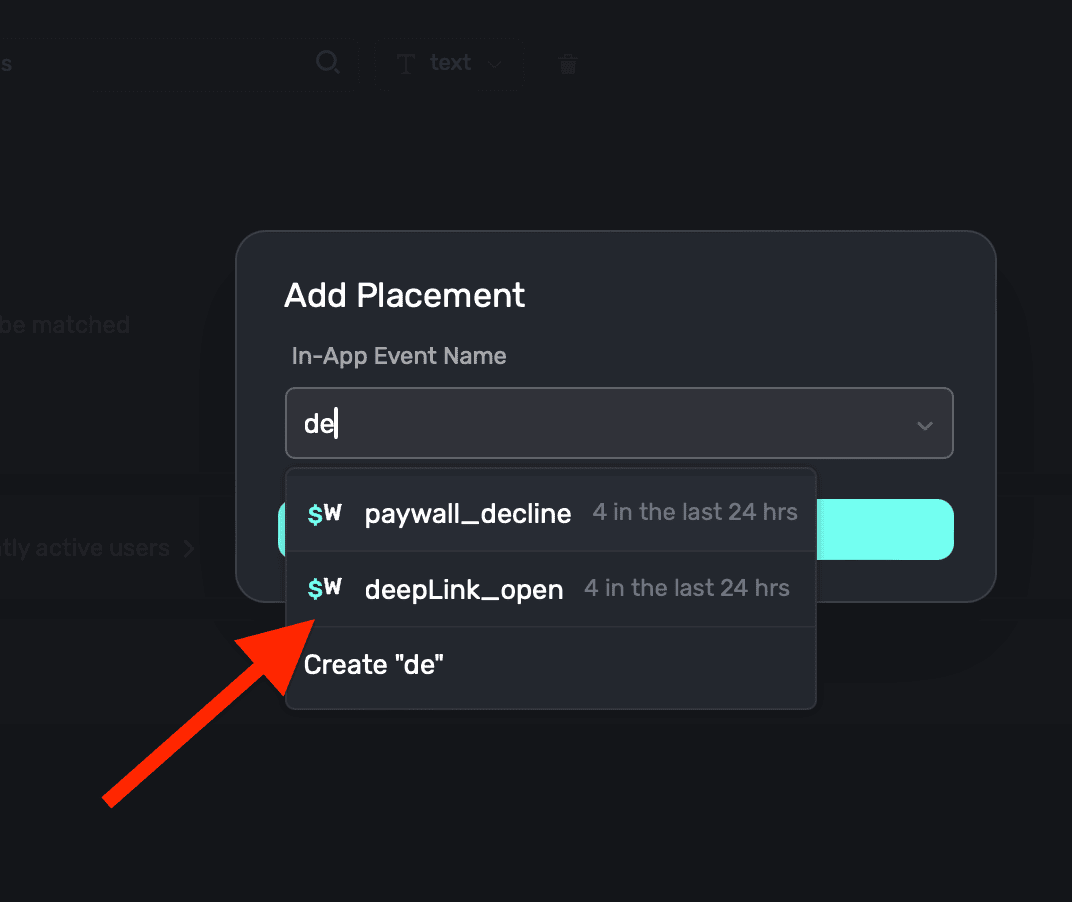
Edit the default audience's filter to match `params.[whatever-you-named-the-parameter]`. Recall that in our example, the parameter was `offer` and the value was `icons`. So here, we'd type `params.offer` and **click** the **+** button:
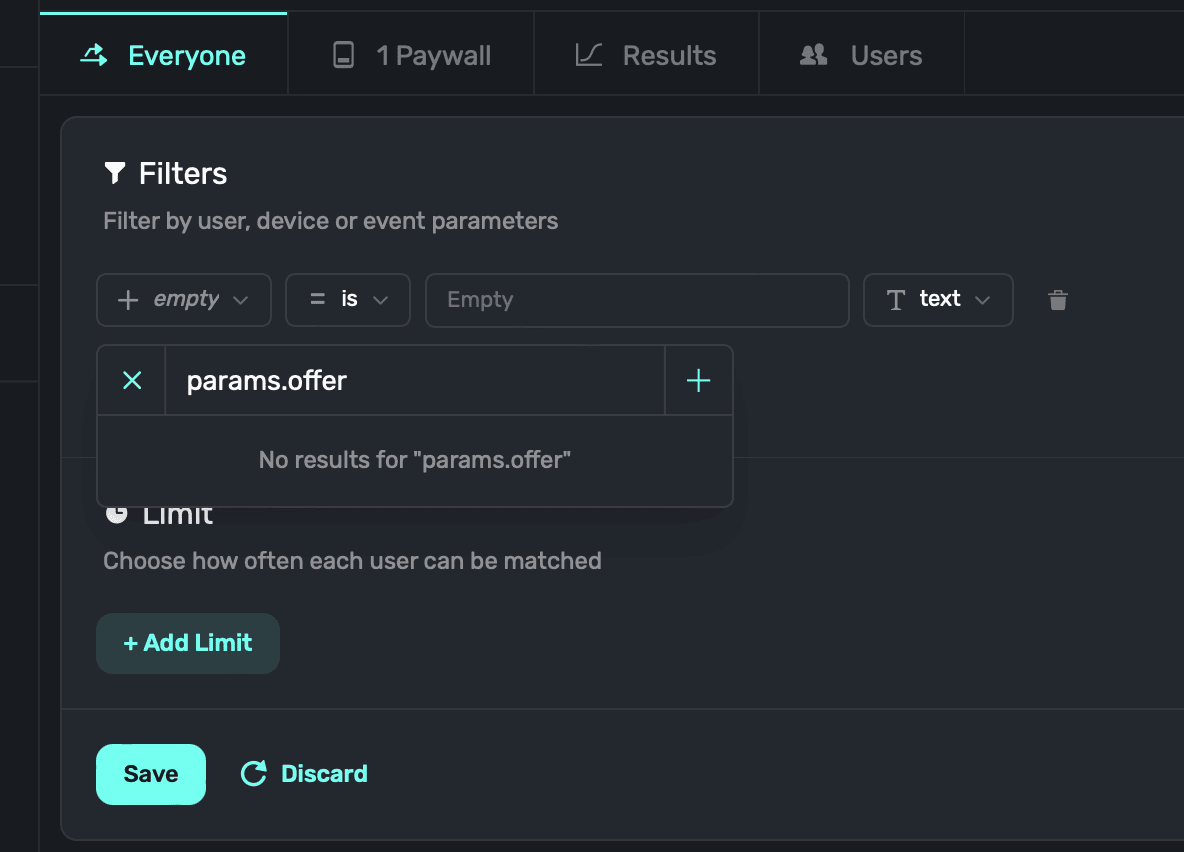
Superwall will ask what type of new parameter this is — choose **Placement** and enter the parameter name once more (i.e. "offer"). Click **Save**:
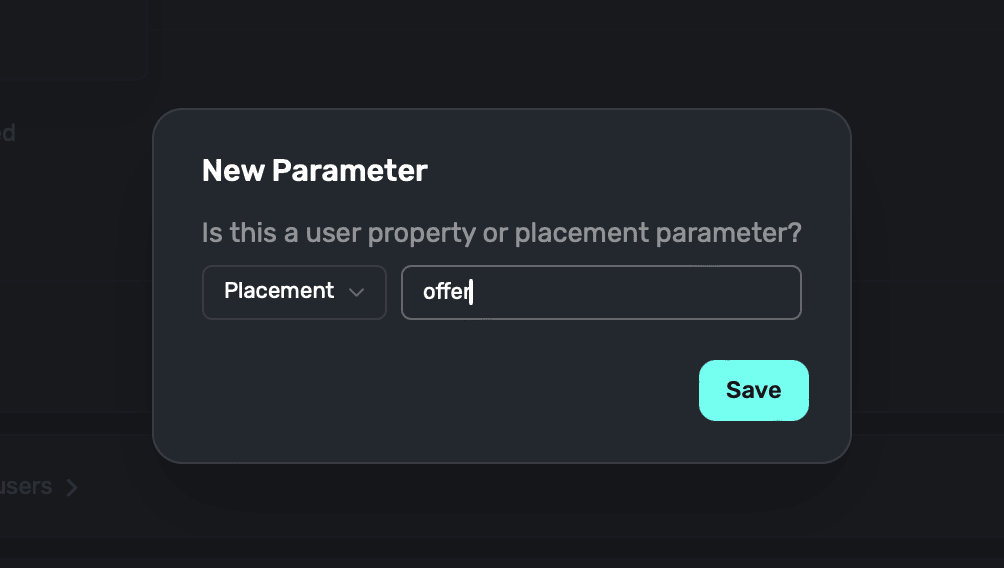
Finally, choose the **is** operator and type in the value of your parameter (in our case, "icons"). Then, **click** the **+ Add Filter** button. Here's what it should look like:
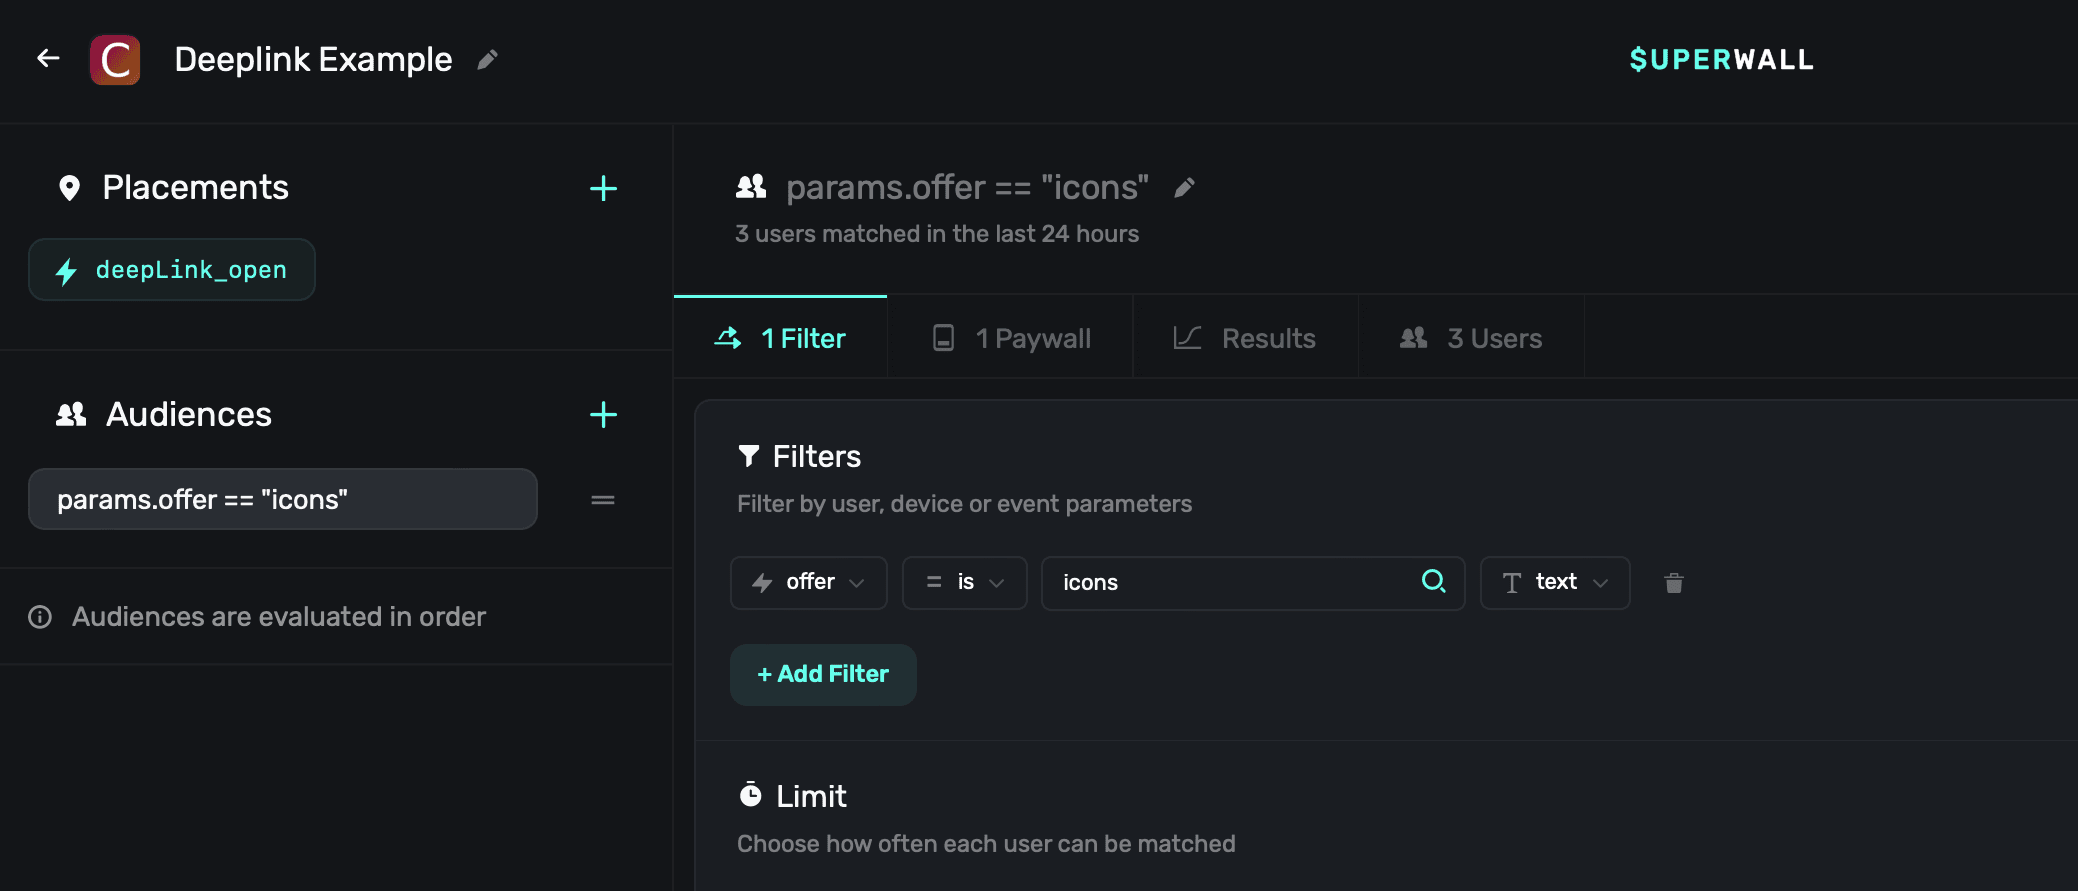
Finally, choose a paywall that should present by **clicking** on the **Paywalls** button at the top:
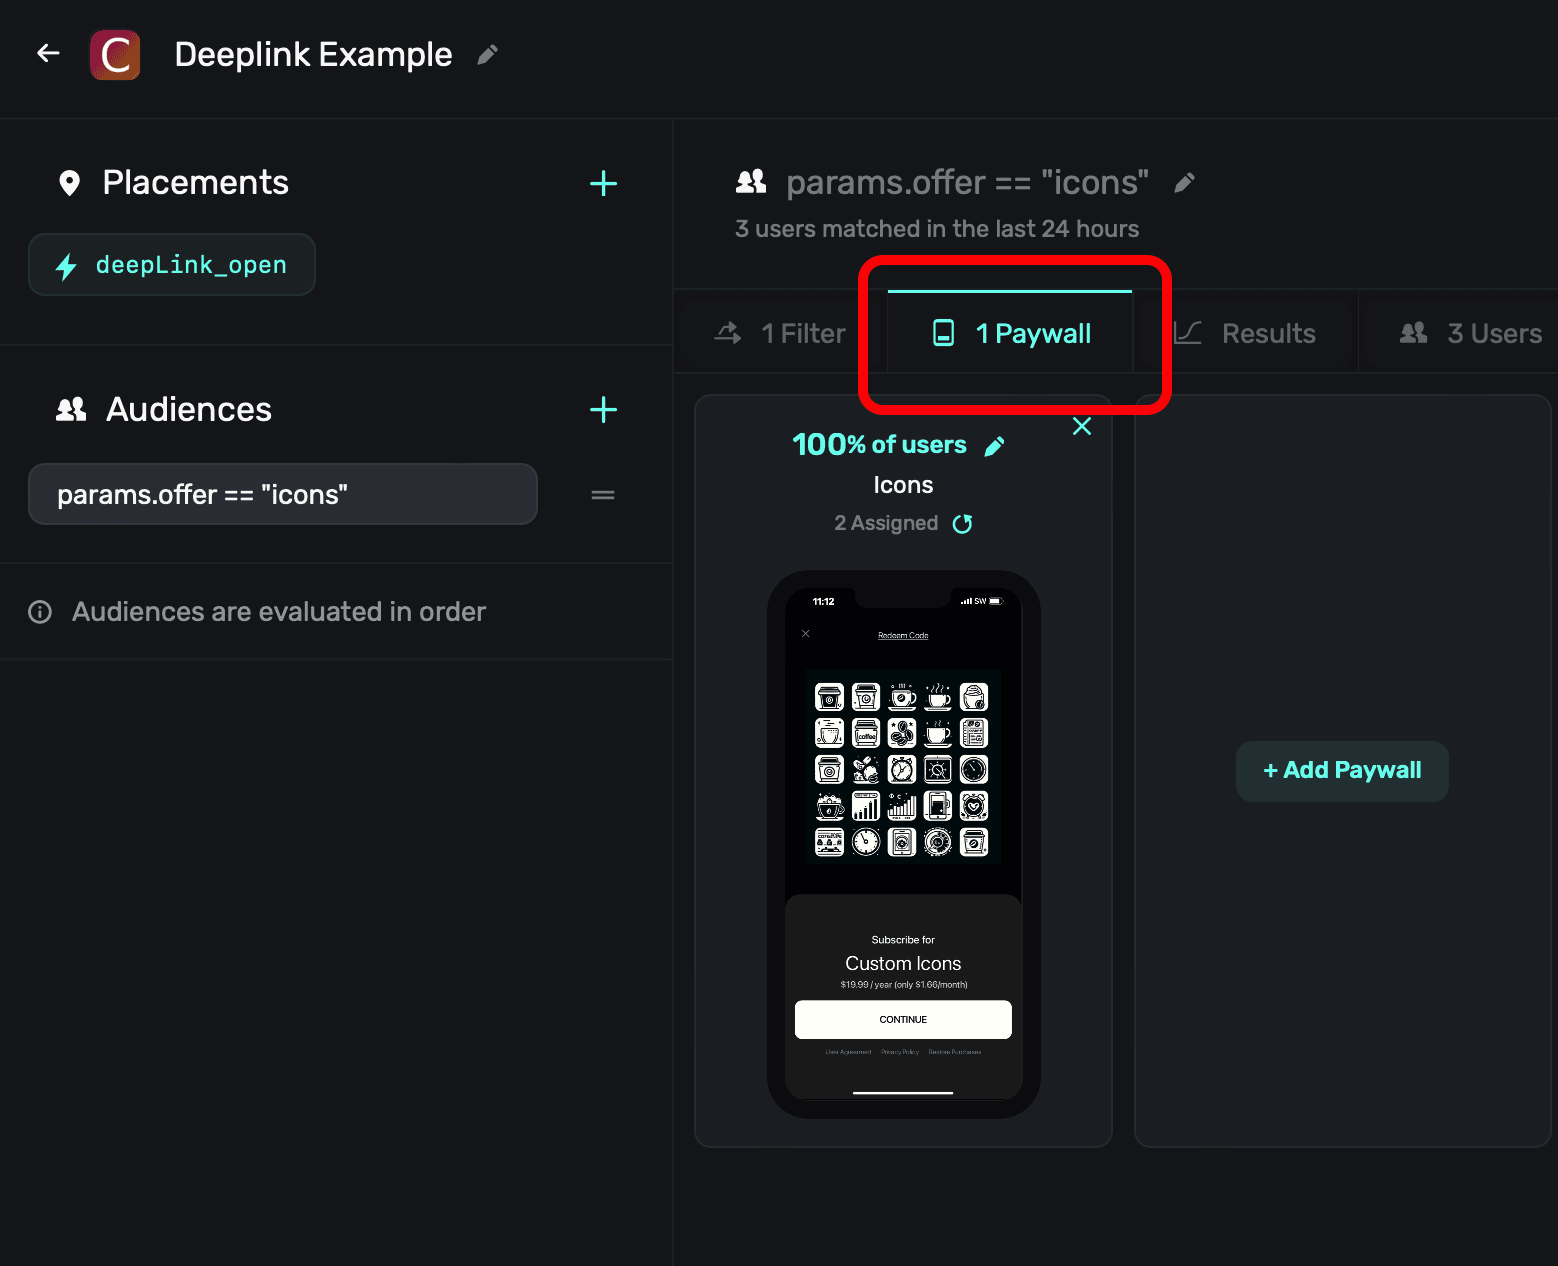
### Test Opens
After following the steps above for either method, be sure to test out your presentation. Open the relevant paywall on a device and tap on whichever button should trigger the logic. The currently presented paywall should dismiss, and then immediately after — the other paywall will show.
# Setting User Attributes (Legacy)
Source: https://superwall.com/docs/legacy/legacy_setting-user-properties
By setting user attributes, you can display information about the user on the paywall. You can also define [audiences](/campaigns-audience) in a campaign to determine which paywall to show to a user, based on their user attributes.
You do this by passing a `[String: Any?]` dictionary of attributes to `Superwall.shared.setUserAttributes(_:)`:
```swift Swift
let attributes: [String: Any] = [
"name": user.name,
"apnsToken": user.apnsTokenString,
"email": user.email,
"username": user.username,
"profilePic": user.profilePicUrl
]
Superwall.shared.setUserAttributes(attributes) // (merges existing attributes)
```
```swift Objective-C
NSDictionary *attributes = @{
@"name": user.name,
@"apnsToken": user.apnsTokenString,
@"email": user.email,
@"username": user.username,
@"profilePic": user.profilePicUrl
};
[[Superwall sharedInstance] setUserAttributes:attributes]; // (merges existing attributes)
```
```kotlin Kotlin
val attributes = mapOf(
"name" to user.name,
"apnsToken" to user.apnsTokenString,
"email" to user.email,
"username" to user.username,
"profilePic" to user.profilePicUrl
)
Superwall.instance.setUserAttributes(attributes) // (merges existing attributes)
```
```dart Flutter
Map attributes = {
"name": user.name,
"apnsToken": user.apnsTokenString,
"email": user.email,
"username": user.username,
"profilePic": user.profilePicUrl
};
Superwall.shared.setUserAttributes(attributes); // (merges existing attributes)
```
```typescript React Native
const attributes = {
name: user.name,
apnsToken: user.apnsTokenString,
email: user.email,
username: user.username,
profilePic: user.profilePicUrl,
};
Superwall.shared.setUserAttributes(attributes);
```
This is a merge operation, such that if the existing user attributes dictionary
already has a value for a given property, the old value is overwritten. Other
existing properties will not be affected. To unset/delete a value, you can pass `nil`
for the value.
You can reference user attributes in [campaign filters](/campaigns-audience) to help decide when to display your paywall. When you configure your paywall, you can also reference the user attributes in its text variables. For more information on how to that, see [Configuring a Paywall](/paywall-editor-overview).
In the future, you'll be able to use user attributes to email/notify users about
discounts.
Begin showing paywalls!
# Superwall Events (Legacy)
Source: https://superwall.com/docs/legacy/legacy_tracking-analytics
The SDK automatically tracks some events, which power the charts in the dashboard.
We encourage you to track them in your own analytics as described in [3rd Party Analytics](/legacy/legacy_3rd-party-analytics).
The following Superwall events can be used as triggers to present paywalls:
* `app_install`
* `app_launch`
* `deepLink_open`
* `session_start`
* `paywall_decline`
* `transaction_fail`
* `transaction_abandon`
* `survey_response`
For more info about how to use these, check out [how to add them using a Placement](/campaigns-placements#adding-a-placement).
The full list of events is as follows:
| Event Name | Action | Parameters |
| ------------------------------------------------------------- | --------------------------------------------------------------------------------------------------------------------------------------------- | ------------------------------------------------------------------------------------------------------------------------------------------------------------------------------------------------------------------------------------------------------------------------------------------------------------------------------------------------------------------------------------------------------------------------------------------------------------------------------------------------------------------------------------------------------------------------------------------------------------------------------------------------------------------------------------------------------------------------------------------------------------------------------------------------------------------------------------------------------------------------------------------------------------------------------------------------------------------------------------------------------------------------------------------------------------------------------------------------------------------------------------------------------------------------------------------------------------------------------------------------------------------------------------------------------------------------------------------------------------------------------------------------------------------------------------------------------------------------------------------------------------------------------------------------------------------------------------------------------------------------------------------------------------------------------------------------------------------------------------------------------------------------------------------------------------------------------------------------------------------------------------------------------------------------------------------------------------------------------------------------------------------------------------------------------------------------------------------------------------------------------------------------------------------------------------------------------------------------------------------------------------------------------------------------------------------------------------------------------------------------------------------------ |
| app\_install | When the SDK is configured for the first time | \["is\_superwall": true, "app\_session\_id": String, "using\_purchase\_controller": Bool] |
| app\_launch | When the app is launched from a cold start | Same as app\_install |
| session\_start | When the app is opened either from a cold start, or after at least 60 minutes since last app\_close. | Same as app\_install |
| first\_seen | When the user is first seen in the app, regardless of whether the user is logged in or not. | Same as app\_install |
| app\_close | Anytime the app leaves the foreground | Same as app\_install |
| app\_open | Anytime the app enters the foreground | Same as app\_install |
| subscription\_start | When the user successfully completes a transaction for a subscription product with no introductory offers | \["product\_period\_days": String, "product\_price": String, "presentation\_source\_type": String?, "paywall\_response\_load\_complete\_time": String?, "product\_language\_code": String, "product\_trial\_period\_monthly\_price": String, "paywall\_products\_load\_duration": String?, "product\_currency\_symbol": String, "is\_superwall": true, "app\_session\_id": String, "product\_period\_months": String, "presented\_by\_event\_id": String?, "product\_id": String, "trigger\_session\_id": String, "paywall\_webview\_load\_complete\_time": String?, "paywall\_response\_load\_start\_time": String?, "product\_raw\_trial\_period\_price": String, "feature\_gating": Int, "paywall\_id": String, "product\_trial\_period\_daily\_price": String, "product\_period\_years": String, "presented\_by": String, "product\_period": String, "paywall\_url": String, "paywall\_name": String, "paywall\_identifier": String, "paywall\_products\_load\_start\_time": String?, "product\_trial\_period\_months": String, "product\_currency\_code": String, "product\_period\_weeks": String, "product\_periodly": String, "product\_trial\_period\_text": String, "paywall\_webview\_load\_start\_time": String?, "paywall\_products\_load\_complete\_time": String?, "primary\_product\_id": String, "product\_trial\_period\_yearly\_price": String, "paywalljs\_version": String?, "product\_trial\_period\_years": String, "tertiary\_product\_id": String, "paywall\_products\_load\_fail\_time": String?, "product\_trial\_period\_end\_date": String, "product\_weekly\_price": String, "variant\_id": String, "presented\_by\_event\_timestamp": String?, "paywall\_response\_load\_duration": String?, "secondary\_product\_id": String, "product\_trial\_period\_days": String, "product\_monthly\_price": String, "paywall\_product\_ids": String, "product\_locale": String, "product\_daily\_price": String, "product\_raw\_price": String, "product\_yearly\_price": String, "product\_trial\_period\_price": String, "product\_localized\_period": String, "product\_identifier": String, "experiment\_id": String, "is\_free\_trial\_available": Bool, "product\_trial\_period\_weeks": String, "paywall\_webview\_load\_duration": String?, "product\_period\_alt": String, "product\_trial\_period\_weekly\_price": String, "presented\_by\_event\_name": String?] |
| freeTrial\_start | When the user successfully completes a transaction for a subscription product with an introductory offer | Same as subscription\_start |
| nonRecurringProduct\_purchase | When the user purchased a non recurring product | Same as subscription\_start |
| transaction\_start | When the payment sheet is displayed to the user | Same as subscription\_start |
| transaction\_abandon | When the user cancels a transaction | Same as subscription\_start |
| transaction\_fail | When the payment sheet fails to complete a transaction (ignores user canceling the transaction) | Same as subscription\_start + \["message": String] |
| transaction\_restore | When the user successfully restores their purchases | Same as subscription\_start |
| transaction\_complete | When the user completes checkout in the payment sheet and any product was "purchased" | Same as subscription\_start + \["web\_order\_line\_item\_id": String, "app\_bundle\_id": String, "config\_request\_id": String, "state": String, "subscription\_group\_id": String, "is\_upgraded": String, "expiration\_date": String, "trigger\_session\_id": String, "original\_transaction\_identifier": String, "id": String, "transaction\_date": String, "is\_superwall": true, "store\_transaction\_id": String, "original\_transaction\_date": String, "app\_session\_id": String] |
| paywall\_close | When a paywall is closed (either by user interaction or do to a transaction succeeding) | \["paywall\_webview\_load\_complete\_time": String?, "paywall\_url": String, "paywall\_response\_load\_start\_time": String?, "paywall\_products\_load\_fail\_time": String?, "secondary\_product\_id": String, "feature\_gating": Int, "paywall\_response\_load\_complete\_time": String?, "is\_free\_trial\_available": Bool, "is\_superwall": true, "presented\_by": String, "paywall\_name": String, "paywall\_response\_load\_duration": String?, "paywall\_identifier": String, "paywall\_webview\_load\_start\_time": String?, "paywall\_products\_load\_complete\_time": String?, "paywall\_product\_ids": String, "tertiary\_product\_id": String, "paywall\_id": String, "app\_session\_id": String, "paywall\_products\_load\_start\_time": String?, "primary\_product\_id": String, "survey\_attached": Bool, "survey\_presentation": String?] |
| [paywall\_decline](/campaigns-placements#implicit-placements) | When a user manually dismisses a paywall. | Same as paywall\_close |
| paywall\_open | When a paywall is opened | Same as paywall\_close |
| paywallWebviewLoad\_start | When a paywall's URL begins to load | Same as paywall\_close |
| paywallWebviewLoad\_fail | When a paywall's URL fails to load | Same as paywall\_close |
| paywallWebviewLoad\_timeout | When the loading of a paywall's website times out. | Same as paywall\_close |
| paywallWebviewLoad\_complete | When a paywall's URL completes loading | Same as paywall\_close |
| trigger\_fire | When a tracked event triggers a paywall. | \["trigger\_name": String, "trigger\_session\_id": String, "variant\_id": String?, "experiment\_id": String?, "paywall\_identifier": String?, "result": String, "unmatched\_rule\_``": "``"]. unmatched\_rule\_`` indicates why a rule (with a specfiic experiment id) didn't match. It will only exist if the result is no\_rule\_match. Its outcome will either be OCCURRENCE, referring to the limit applied to a rule, or EXPRESSION. |
| paywallResponseLoad\_start | When a paywall's request to Superwall's servers has started | Same as app\_install +\["is\_triggered\_from\_event": Bool] |
| paywallResponseLoad\_fail | When a paywall's request to Superwall's servers has failed | Same as paywallResponseLoad\_start |
| paywallResponseLoad\_complete | When a paywall's request to Superwall's servers is complete | Same as paywallResponseLoad\_start |
| paywallResponseLoad\_notFound | When a paywall's request to Superwall's servers returned a 404 error. | Same as paywallResponseLoad\_start |
| paywallProductsLoad\_start | When the request to load the paywall's products started. | Same as paywallResponseLoad\_start |
| paywallProductsLoad\_fail | When the request to load the paywall's products failed. | Same as paywallResponseLoad\_start |
| paywallProductsLoad\_complete | When the request to load the paywall's products completed. | Same as paywallResponseLoad\_start |
| user\_attributes | When the user attributes are set. | \["aliasId": String, "seed": Int, "app\_session\_id": String, "applicationInstalledAt": String, "is\_superwall": true, "application\_installed\_at": String] + provided attributes |
| subscriptionStatus\_didChange | When the user's subscription status changes | \["is\_superwall": true, "app\_session\_id": String, "subscription\_status": String] |
| paywallPresentationRequest | When something happened during the paywall presentation, whether a success or failure. | \["source\_event\_name": String, "status": String, "is\_superwall": true, "app\_session\_id": String, "pipeline\_type": String, "status\_reason": String] |
| [deepLink\_open](/campaigns-placements#implicit-placements) | When a user opens the app via a deep link. | \["url": String, "path": String", "pathExtension": String, "lastPathComponent": String, "host": String, "query": String, "fragment": String] + any query parameters in the deep link URL |
| [survey\_response](/using-implicit-events#survey%5Fresponse) | When the response to a paywall survey as been recorded. | Same as subscription\_start + \["survey\_selected\_option\_title": String, "survey\_custom\_response": String, "survey\_id": String, "survey\_assignment\_key": String, "survey\_selected\_option\_id": String] |
| touches\_began | When the user touches the app's UIWindow for the first time. This is only tracked if there is an active touches\_began trigger in a campaign. | Same as app\_install |
| device\_attributes | When device attributes are sent to the backend every session. | \["app\_session\_id": String, "is\_superwall": Bool, "publicApiKey": String, "platform": String, "appUserId": String, "aliases":\[String], "vendorId": String, "appVersion": String, "osVersion": String, "deviceModel": String, "deviceLocale": String, "deviceLanguageCode": String, "deviceCurrencyCode": String, "deviceCurrencySymbol": String, "interfaceType": String, "timezoneOffset": Int, "radioType": String, "interfaceStyle": String, isLowPowerModeEnabled: Bool, "bundleId": String, "appInstallDate": String, "isMac": Bool, "daysSinceInstall": Int, "minutesSinceInstall": Int, "daysSinceLastPaywallView": Int?, "minutesSinceLastPaywallView": Int?, "totalPaywallViews": Int, "utcDate": String, "localDate": String, "utcTime": String, "localTime": String, "utcDateTime": String, "localDateTime": String, "isSandbox": String, "subscriptionStatus": String, "isFirstAppOpen": Bool, "sdkVersion": String, "sdkVersionPadded": String, "appBuildString": String, "appBuildStringNumber": Int?] |
# Troubleshooting (Legacy)
Source: https://superwall.com/docs/legacy/legacy_troubleshooting
### My paywall has unexpected presentation behaviour
If you are seeing a paywall when you think you shouldn't or vice versa, we recommend running through the following list to debug:
1. If you're [implementing subscription-related logic yourself](/legacy/legacy_advanced-configuration), check when you're setting `Superwall.shared.subscriptionStatus`. It's important that the variable here is kept in sync with the subscription status of the user. If it isn't, the paywall won't display when it is supposed to. If the status is `.unknown` or `.active`, the paywall won't show (unless you're specifically overriding that). [See here](/legacy/legacy_docs/advanced-configuration) for more information about that.
2. Check your device. If you have already purchased a subscription on your device, your paywall wouldn't show again. If on iOS and you're using a local StoreKit file in your app for testing purposes, deleting and reinstalling your app will reset your device's subscription status.
3. Check your [campaign](/campaigns). Are you sending the necessary properties along with your trigger to match the rule? Is your trigger event name spelt correctly? If you have a holdout group in your campaign double check that this isn't the reason your paywall isn't displaying.
4. Check that the products on your paywall are available and their identifiers are correct. If not, you'll see an error printed to the console. On iOS, if you're using a StoreKit configuration file to test, make sure to add your products before trying to present the paywall.
### How can I debug paywall presentation in production?
If you know the userId of an account that's having trouble with paywalls, search for it in the Users tab on the dashboard. Clicking on it will reveal the user's events log. Whenever a paywall is or isn't shown, you'll see a `paywallPresentationRequest` event. Expanding that will give you a `status` and `status_reason` from which you can figure out what the issue is. If you're seeing `subscription_status_timeout` as a reason, it means that it took longer than 5 seconds to get the subscription status. This could be because you're not setting `Superwall.shared.subscriptionStatus` correctly or there's an issue with internet.
We recommend calling `identify(userId:)` in your app with the same userId that you use in your analytics to make life easier.
### In sandbox on iOS, my paywall shows free trial text but when I go to purchase, it doesn't show a free trial
If you've previously purchased a product within a subscription group and then deleted and reinstalled the app while testing in sandbox, this could happen. To fix this, restore products and try again. This is because we use the on-device receipt to determine whether a free trial is available. In sandbox, the app's receipt isn't retrieved until a purchase or restore is made. Therefore, the SDK won't be able to accurately determine whether the free trial is available. Fortunately, this won't happen in production.
### My products aren't loading or aren't working in production
If your products haven't loaded you'll get an error message printed to the console. Run through the following list to solve this:
1. On the Superwall dashboard:
1. Check that you have added products to all paywalls in the paywall editor. If any paywall doesn't contain a valid identifier you will see a error message in the console.
2. For iOS apps:
1. In Xcode:
1. If you're using a StoreKit configuration file locally, make sure your products have been added to it, either manually or by syncing with App Store Connect.
2. Make sure your app's bundle ID is the same as your app in App Store Connect.
3. Check you've added in-app purchase capability to your app's Xcode project.
2. On App Store Connect:
1. Make sure your free and paid apps agreements status are active.
2. Make sure that your tax and banking information has been added.
3. Make sure your product status is 'Ready to Submit'.
4. Check that the IDs of your products match those in the paywall.
5. Make sure you've waited at least 15 minutes after creating a product.
3. In Production:
1. Make sure you have waited for at least 72 hours after the release of a new app for your products to appear in your app. As soon as they appear on your App Store page, you'll know they're available in-app.
3. For Android apps:
1. Users in Russia and Belarus don't have access to Google Billing. In this instance, products won't load and paywalls won't show. The `onError` `PaywallPresentationHandler` handler will get called.
2. Make sure the device or emulator you're running on has the Play Store app and that you are signed in to your Google account on the Play Store.
3. Make sure your `applicationId` matches the applicationId on the Play Store.
4. If you're using RevenueCat:
1. Check that your product IDs are added to RevenueCat and associated with an entitlement.
2. If you're using offerings, make sure your product is associated with one.
# Using RevenueCat (Legacy)
Source: https://superwall.com/docs/legacy/legacy_using-revenuecat
If you want to use RevenueCat to handle your subscription-related logic with Superwall, follow this guide.
Not using RevenueCat? No problem! Superwall works out of the box without any additional SDKs.
Integrate RevenueCat with Superwall in one of two ways:
1. **Using a purchase controller:** Use this route if you want to maintain control over purchasing logic and code.
2. **Using PurchasesAreCompletedBy:** Here, you don't use a purchase controller and you tell RevenueCat that purchases are completed by your app using StoreKit 1. In this mode, RevenueCat will observe the purchases that the Superwall SDK makes. For more info [see here](https://www.revenuecat.com/docs/migrating-to-revenuecat/sdk-or-not/finishing-transactions).
#### 1. Create a PurchaseController
Create a new file called `RCPurchaseController.swift` or `RCPurchaseController.kt`, then copy and paste the following:
```swift Swift
import SuperwallKit
import RevenueCat
import StoreKit
enum PurchasingError: Error {
case productNotFound
}
final class RCPurchaseController: PurchaseController {
// MARK: Sync Subscription Status
/// Makes sure that Superwall knows the customers subscription status by
/// changing `Superwall.shared.subscriptionStatus`
func syncSubscriptionStatus() {
assert(Purchases.isConfigured, "You must configure RevenueCat before calling this method.")
Task {
for await customerInfo in Purchases.shared.customerInfoStream {
// Gets called whenever new CustomerInfo is available
let hasActiveSubscription = !customerInfo.entitlements.activeInCurrentEnvironment.isEmpty // Why? -> https://www.revenuecat.com/docs/entitlements#entitlements
if hasActiveSubscription {
Superwall.shared.subscriptionStatus = .active
} else {
Superwall.shared.subscriptionStatus = .inactive
}
}
}
}
// MARK: Handle Purchases
/// Makes a purchase with RevenueCat and returns its result. This gets called when
/// someone tries to purchase a product on one of your paywalls.
func purchase(product: SKProduct) async -> PurchaseResult {
do {
guard let storeProduct = await Purchases.shared.products([product.productIdentifier]).first else {
throw PurchasingError.productNotFound
}
// This must be initialized before initiating the purchase.
let purchaseDate = Date()
let revenueCatResult = try await Purchases.shared.purchase(product: storeProduct)
if revenueCatResult.userCancelled {
return .cancelled
} else {
if let transaction = revenueCatResult.transaction,
purchaseDate > transaction.purchaseDate {
return .restored
} else {
return .purchased
}
}
} catch let error as ErrorCode {
if error == .paymentPendingError {
return .pending
} else {
return .failed(error)
}
} catch {
return .failed(error)
}
}
// MARK: Handle Restores
/// Makes a restore with RevenueCat and returns `.restored`, unless an error is thrown.
/// This gets called when someone tries to restore purchases on one of your paywalls.
func restorePurchases() async -> RestorationResult {
do {
_ = try await Purchases.shared.restorePurchases()
return .restored
} catch let error {
return .failed(error)
}
}
}
```
```kotlin Kotlin
// RCPurchaseController.kt
import android.app.Activity
import android.content.Context
import com.android.billingclient.api.ProductDetails
import com.revenuecat.purchases.*
import com.revenuecat.purchases.interfaces.GetStoreProductsCallback
import com.revenuecat.purchases.interfaces.PurchaseCallback
import com.revenuecat.purchases.interfaces.ReceiveCustomerInfoCallback
import com.revenuecat.purchases.interfaces.UpdatedCustomerInfoListener
import com.revenuecat.purchases.models.StoreProduct
import com.revenuecat.purchases.models.StoreTransaction
import com.revenuecat.purchases.models.SubscriptionOption
import com.revenuecat.purchases.models.googleProduct
import com.superwall.sdk.Superwall
import com.superwall.sdk.delegate.PurchaseResult
import com.superwall.sdk.delegate.RestorationResult
import com.superwall.sdk.delegate.SubscriptionStatus
import com.superwall.sdk.delegate.subscription_controller.PurchaseController
import kotlinx.coroutines.CompletableDeferred
// Extension function to convert callback to suspend function
suspend fun Purchases.awaitProducts(productIds: List): List {
val deferred = CompletableDeferred>()
getProducts(productIds, object : GetStoreProductsCallback {
override fun onReceived(storeProducts: List) {
deferred.complete(storeProducts)
}
override fun onError(error: PurchasesError) {
// Not sure about this cast...
deferred.completeExceptionally(Exception(error.message))
}
})
return deferred.await()
}
interface PurchaseCompletion {
var storeTransaction: StoreTransaction
var customerInfo: CustomerInfo
}
// Create a custom exception class that wraps PurchasesError
private class PurchasesException(val purchasesError: PurchasesError) : Exception(purchasesError.toString())
suspend fun Purchases.awaitPurchase(activity: Activity, storeProduct: StoreProduct): PurchaseCompletion {
val deferred = CompletableDeferred()
purchase(PurchaseParams.Builder(activity, storeProduct).build(), object : PurchaseCallback {
override fun onCompleted(storeTransaction: StoreTransaction, customerInfo: CustomerInfo) {
deferred.complete(object : PurchaseCompletion {
override var storeTransaction: StoreTransaction = storeTransaction
override var customerInfo: CustomerInfo = customerInfo
})
}
override fun onError(error: PurchasesError, p1: Boolean) {
deferred.completeExceptionally(PurchasesException(error))
}
})
return deferred.await()
}
suspend fun Purchases.awaitRestoration(): CustomerInfo {
val deferred = CompletableDeferred()
restorePurchases(object : ReceiveCustomerInfoCallback {
override fun onReceived(purchaserInfo: CustomerInfo) {
deferred.complete(purchaserInfo)
}
override fun onError(error: PurchasesError) {
deferred.completeExceptionally(error as Throwable)
}
})
return deferred.await()
}
class RCPurchaseController(val context: Context): PurchaseController, UpdatedCustomerInfoListener {
init {
Purchases.logLevel = LogLevel.DEBUG
Purchases.configure(PurchasesConfiguration.Builder(context, "MY_ANDROID_API_KEY").build())
// Make sure we get the updates
Purchases.sharedInstance.updatedCustomerInfoListener = this
}
fun syncSubscriptionStatus() {
// Refetch the customer info on load
Purchases.sharedInstance.getCustomerInfoWith {
if (hasAnyActiveEntitlements(it)) {
setSubscriptionStatus(SubscriptionStatus.ACTIVE)
} else {
setSubscriptionStatus(SubscriptionStatus.INACTIVE)
}
}
}
/**
* Callback for RC customer updated info
*/
override fun onReceived(customerInfo: CustomerInfo) {
if (hasAnyActiveEntitlements(customerInfo)) {
setSubscriptionStatus(SubscriptionStatus.ACTIVE)
} else {
setSubscriptionStatus(SubscriptionStatus.INACTIVE)
}
}
/**
* Initiate a purchase
*/
override suspend fun purchase(
activity: Activity,
productDetails: ProductDetails,
basePlanId: String?,
offerId: String?
): PurchaseResult {
// Find products matching productId from RevenueCat
val products = Purchases.sharedInstance.awaitProducts(listOf(productDetails.productId))
// Choose the product which matches the given base plan.
// If no base plan set, select first product or fail.
val product = products.firstOrNull { it.googleProduct?.basePlanId == basePlanId }
?: products.firstOrNull()
?: return PurchaseResult.Failed("Product not found")
return when (product.type) {
ProductType.SUBS, ProductType.UNKNOWN -> handleSubscription(activity, product, basePlanId, offerId)
ProductType.INAPP -> handleInAppPurchase(activity, product)
}
}
private fun buildSubscriptionOptionId(basePlanId: String?, offerId: String?): String =
buildString {
basePlanId?.let { append("$it") }
offerId?.let { append(":$it") }
}
private suspend fun handleSubscription(
activity: Activity,
storeProduct: StoreProduct,
basePlanId: String?,
offerId: String?
): PurchaseResult {
storeProduct.subscriptionOptions?.let { subscriptionOptions ->
// If subscription option exists, concatenate base + offer ID.
val subscriptionOptionId = buildSubscriptionOptionId(basePlanId, offerId)
// Find first subscription option that matches the subscription option ID or default
// to letting revenuecat choose.
val subscriptionOption = subscriptionOptions.firstOrNull { it.id == subscriptionOptionId }
?: subscriptionOptions.defaultOffer
// Purchase subscription option, otherwise fail.
if (subscriptionOption != null) {
return purchaseSubscription(activity, subscriptionOption)
}
}
return PurchaseResult.Failed("Valid subscription option not found for product.")
}
private suspend fun purchaseSubscription(activity: Activity, subscriptionOption: SubscriptionOption): PurchaseResult {
val deferred = CompletableDeferred()
Purchases.sharedInstance.purchaseWith(
PurchaseParams.Builder(activity, subscriptionOption).build(),
onError = { error, userCancelled ->
deferred.complete(if (userCancelled) PurchaseResult.Cancelled() else PurchaseResult.Failed(error.message))
},
onSuccess = { _, _ ->
deferred.complete(PurchaseResult.Purchased())
}
)
return deferred.await()
}
private suspend fun handleInAppPurchase(activity: Activity, storeProduct: StoreProduct): PurchaseResult =
try {
Purchases.sharedInstance.awaitPurchase(activity, storeProduct)
PurchaseResult.Purchased()
} catch (e: PurchasesException) {
when (e.purchasesError.code) {
PurchasesErrorCode.PurchaseCancelledError -> PurchaseResult.Cancelled()
else -> PurchaseResult.Failed(e.message ?: "Purchase failed due to an unknown error")
}
}
/**
* Restore purchases
*/
override suspend fun restorePurchases(): RestorationResult {
try {
if (hasAnyActiveEntitlements(Purchases.sharedInstance.awaitRestoration())) {
return RestorationResult.Restored()
} else {
return RestorationResult.Failed(Exception("No active entitlements"))
}
} catch (e: Throwable) {
return RestorationResult.Failed(e)
}
}
/**
* Check if the customer has any active entitlements
*/
private fun hasAnyActiveEntitlements(customerInfo: CustomerInfo): Boolean {
val entitlements = customerInfo.entitlements.active.values.map { it.identifier }
return entitlements.isNotEmpty()
}
private fun setSubscriptionStatus(subscriptionStatus: SubscriptionStatus) {
if (Superwall.initialized) {
Superwall.instance.setSubscriptionStatus(subscriptionStatus)
}
}
}
```
```dart Flutter
import 'package:flutter/services.dart';
import 'package:purchases_flutter/purchases_flutter.dart';
import 'package:superwallkit_flutter/superwallkit_flutter.dart' hide LogLevel;
class RCPurchaseController extends PurchaseController {
// MARK: Configure and sync subscription Status
/// Makes sure that Superwall knows the customers subscription status by
/// changing `Superwall.shared.subscriptionStatus`
Future syncSubscriptionStatus() async {
// Configure RevenueCat
await Purchases.setLogLevel(LogLevel.debug);
PurchasesConfiguration configuration = Platform.isIOS ? PurchasesConfiguration("MY_IOS_API_KEY") : PurchasesConfiguration("MY_ANDROID_API_KEY");
await Purchases.configure(configuration);
// Listen for changes
Purchases.addCustomerInfoUpdateListener((customerInfo) {
// Gets called whenever new CustomerInfo is available
bool hasActiveEntitlementOrSubscription = customerInfo.hasActiveEntitlementOrSubscription(); // Why? -> https://www.revenuecat.com/docs/entitlements#entitlements
if (hasActiveEntitlementOrSubscription) {
Superwall.shared.setSubscriptionStatus(SubscriptionStatus.active);
} else {
Superwall.shared.setSubscriptionStatus(SubscriptionStatus.inactive);
}
});
}
// MARK: Handle Purchases
/// Makes a purchase from App Store with RevenueCat and returns its
/// result. This gets called when someone tries to purchase a product on
/// one of your paywalls from iOS.
@override
Future purchaseFromAppStore(String productId) async {
// Find products matching productId from RevenueCat
List products = await PurchasesAdditions.getAllProducts([productId]);
// Get first product for product ID (this will properly throw if empty)
StoreProduct? storeProduct = products.firstOrNull;
if (storeProduct == null) {
return PurchaseResult.failed("Failed to find store product for $productId");
}
PurchaseResult purchaseResult = await _purchaseStoreProduct(storeProduct);
return purchaseResult;
}
/// Makes a purchase from Google Play with RevenueCat and returns its
/// result. This gets called when someone tries to purchase a product on
/// one of your paywalls from Android.
@override
Future purchaseFromGooglePlay(String productId, String? basePlanId, String? offerId) async {
// Find products matching productId from RevenueCat
List products = await PurchasesAdditions.getAllProducts([productId]);
// Choose the product which matches the given base plan.
// If no base plan set, select first product or fail.
String storeProductId = "$productId:$basePlanId";
// Try to find the first product where the googleProduct's basePlanId matches the given basePlanId.
StoreProduct? matchingProduct;
// Loop through each product in the products list.
for (final product in products) {
// Check if the current product's basePlanId matches the given basePlanId.
if (product.identifier == storeProductId) {
// If a match is found, assign this product to matchingProduct.
matchingProduct = product;
// Break the loop as we found our matching product.
break;
}
}
// If a matching product is not found, then try to get the first product from the list.
StoreProduct? storeProduct = matchingProduct ?? (products.isNotEmpty ? products.first : null);
// If no product is found (either matching or the first one), return a failed purchase result.
if (storeProduct == null) {
return PurchaseResult.failed("Product not found");
}
switch (storeProduct.productCategory) {
case ProductCategory.subscription:
SubscriptionOption? subscriptionOption = await _fetchGooglePlaySubscriptionOption(storeProduct, basePlanId, offerId);
if (subscriptionOption == null) {
return PurchaseResult.failed("Valid subscription option not found for product.");
}
return await _purchaseSubscriptionOption(subscriptionOption);
case ProductCategory.nonSubscription:
return await _purchaseStoreProduct(storeProduct);
case null:
return PurchaseResult.failed("Unable to determine product category");
}
}
Future _fetchGooglePlaySubscriptionOption(
StoreProduct storeProduct,
String? basePlanId,
String? offerId,
) async {
final subscriptionOptions = storeProduct.subscriptionOptions;
if (subscriptionOptions != null && subscriptionOptions.isNotEmpty) {
// Concatenate base + offer ID
final subscriptionOptionId = _buildSubscriptionOptionId(basePlanId, offerId);
// Find first subscription option that matches the subscription option ID or use the default offer
SubscriptionOption? subscriptionOption;
// Search for the subscription option with the matching ID
for (final option in subscriptionOptions) {
if (option.id == subscriptionOptionId) {
subscriptionOption = option;
break;
}
}
// If no matching subscription option is found, use the default option
subscriptionOption ??= storeProduct.defaultOption;
// Return the subscription option
return subscriptionOption;
}
return null;
}
Future _purchaseSubscriptionOption(SubscriptionOption subscriptionOption) async {
// Define the async perform purchase function
Future performPurchase() async {
// Attempt to purchase product
CustomerInfo customerInfo = await Purchases.purchaseSubscriptionOption(subscriptionOption);
return customerInfo;
}
PurchaseResult purchaseResult = await _handleSharedPurchase(performPurchase);
return purchaseResult;
}
Future _purchaseStoreProduct(StoreProduct storeProduct) async {
// Define the async perform purchase function
Future performPurchase() async {
// Attempt to purchase product
CustomerInfo customerInfo = await Purchases.purchaseStoreProduct(storeProduct);
return customerInfo;
}
PurchaseResult purchaseResult = await _handleSharedPurchase(performPurchase);
return purchaseResult;
}
// MARK: Shared purchase
Future _handleSharedPurchase(Future Function() performPurchase) async {
try {
// Store the current purchase date to later determine if this is a new purchase or restore
DateTime purchaseDate = DateTime.now();
// Perform the purchase using the function provided
CustomerInfo customerInfo = await performPurchase();
// Handle the results
if (customerInfo.hasActiveEntitlementOrSubscription()) {
DateTime? latestTransactionPurchaseDate = customerInfo.getLatestTransactionPurchaseDate();
// If no latest transaction date is found, consider it as a new purchase.
bool isNewPurchase = (latestTransactionPurchaseDate == null);
// If the current date (`purchaseDate`) is after the latestTransactionPurchaseDate,
bool purchaseHappenedInThePast = latestTransactionPurchaseDate?.isBefore(purchaseDate) ?? false;
if (!isNewPurchase && purchaseHappenedInThePast) {
return PurchaseResult.restored;
} else {
return PurchaseResult.purchased;
}
} else {
return PurchaseResult.failed("No active subscriptions found.");
}
} on PlatformException catch (e) {
var errorCode = PurchasesErrorHelper.getErrorCode(e);
if (errorCode == PurchasesErrorCode.paymentPendingError) {
return PurchaseResult.pending;
} else if (errorCode == PurchasesErrorCode.purchaseCancelledError) {
return PurchaseResult.cancelled;
} else {
return PurchaseResult.failed(e.message ?? "Purchase failed in RCPurchaseController");
}
}
}
// MARK: Handle Restores
/// Makes a restore with RevenueCat and returns `.restored`, unless an error is thrown.
/// This gets called when someone tries to restore purchases on one of your paywalls.
@override
Future restorePurchases() async {
try {
await Purchases.restorePurchases();
return RestorationResult.restored;
} on PlatformException catch (e) {
// Error restoring purchases
return RestorationResult.failed(e.message ?? "Restore failed in RCPurchaseController");
}
}
}
// MARK: Helpers
String _buildSubscriptionOptionId(String? basePlanId, String? offerId) {
String result = '';
if (basePlanId != null) {
result += basePlanId;
}
if (offerId != null) {
if (basePlanId != null) {
result += ':';
}
result += offerId;
}
return result;
}
extension CustomerInfoAdditions on CustomerInfo {
bool hasActiveEntitlementOrSubscription() {
return (activeSubscriptions.isNotEmpty || entitlements.active.isNotEmpty);
}
DateTime? getLatestTransactionPurchaseDate() {
Map allPurchaseDates = this.allPurchaseDates;
if (allPurchaseDates.entries.isEmpty) {
return null;
}
DateTime latestDate = DateTime.fromMillisecondsSinceEpoch(0);
allPurchaseDates.forEach((key, value) {
DateTime date = DateTime.parse(value);
if (date.isAfter(latestDate)) {
latestDate = date;
}
});
return latestDate;
}
}
extension PurchasesAdditions on Purchases {
static Future> getAllProducts(List productIdentifiers) async {
final subscriptionProducts = await Purchases.getProducts(productIdentifiers, productCategory: ProductCategory.subscription);
final nonSubscriptionProducts = await Purchases.getProducts(productIdentifiers, productCategory: ProductCategory.nonSubscription);
final combinedProducts = [...subscriptionProducts, ...nonSubscriptionProducts];
return combinedProducts;
}
}
```
```typescript React Native
import { Platform } from "react-native"
import Superwall, {
PurchaseController,
PurchaseResult,
RestorationResult,
SubscriptionStatus,
PurchaseResultCancelled,
PurchaseResultFailed,
PurchaseResultPending,
PurchaseResultPurchased,
PurchaseResultRestored,
} from "@superwall/react-native-superwall"
import Purchases, {
type CustomerInfo,
PRODUCT_CATEGORY,
type PurchasesStoreProduct,
type SubscriptionOption,
PURCHASES_ERROR_CODE,
type MakePurchaseResult,
} from "react-native-purchases"
export class RCPurchaseController extends PurchaseController {
configureAndSyncSubscriptionStatus() {
// Configure RevenueCat
Purchases.setLogLevel(Purchases.LOG_LEVEL.DEBUG)
const apiKey =
Platform.OS === "ios" ? "MY_REVENUECAT_IOS_API_KEY" : "MY_REVENUECAT_ANDROID_API_KEY"
Purchases.configure({ apiKey })
// Listen for changes
Purchases.addCustomerInfoUpdateListener((customerInfo) => {
const hasActiveEntitlementOrSubscription =
this.hasActiveEntitlementOrSubscription(customerInfo)
Superwall.shared.setSubscriptionStatus(
hasActiveEntitlementOrSubscription ? SubscriptionStatus.ACTIVE : SubscriptionStatus.INACTIVE
)
})
}
async purchaseFromAppStore(productId: string): Promise {
const products = await Promise.all([
Purchases.getProducts([productId], PRODUCT_CATEGORY.SUBSCRIPTION),
Purchases.getProducts([productId], PRODUCT_CATEGORY.NON_SUBSCRIPTION),
]).then((results) => results.flat())
// Assuming an equivalent for Dart's firstOrNull is not directly available in TypeScript,
// so using a simple conditional check
const storeProduct = products.length > 0 ? products[0] : null
if (!storeProduct) {
return new PurchaseResultFailed("Failed to find store product for $productId")
}
return await this._purchaseStoreProduct(storeProduct)
}
async purchaseFromGooglePlay(
productId: string,
basePlanId?: string,
offerId?: string
): Promise {
// Find products matching productId from RevenueCat
const products = await Promise.all([
Purchases.getProducts([productId], PRODUCT_CATEGORY.SUBSCRIPTION),
Purchases.getProducts([productId], PRODUCT_CATEGORY.NON_SUBSCRIPTION),
]).then((results) => results.flat())
// Choose the product which matches the given base plan.
// If no base plan set, select first product or fail.
const storeProductId = `${productId}:${basePlanId}`
// Initialize matchingProduct as null explicitly
let matchingProduct: PurchasesStoreProduct | null = null
// Loop through each product in the products array
for (const product of products) {
// Check if the current product's identifier matches the given storeProductId
if (product.identifier === storeProductId) {
// If a match is found, assign this product to matchingProduct
matchingProduct = product
// Break the loop as we found our matching product
break
}
}
let storeProduct: PurchasesStoreProduct | null =
matchingProduct ??
(products.length > 0 && typeof products[0] !== "undefined" ? products[0] : null)
// If no product is found (either matching or the first one), return a failed purchase result.
if (storeProduct === null) {
return new PurchaseResultFailed("Product not found")
}
switch (storeProduct.productCategory) {
case PRODUCT_CATEGORY.SUBSCRIPTION:
const subscriptionOption = await this._fetchGooglePlaySubscriptionOption(
storeProduct,
basePlanId,
offerId
)
if (subscriptionOption === null) {
return new PurchaseResultFailed("Valid subscription option not found for product.")
}
return await this._purchaseSubscriptionOption(subscriptionOption)
case PRODUCT_CATEGORY.NON_SUBSCRIPTION:
return await this._purchaseStoreProduct(storeProduct)
default:
return new PurchaseResultFailed("Unable to determine product category")
}
}
private async _purchaseStoreProduct(
storeProduct: PurchasesStoreProduct
): Promise {
const performPurchase = async (): Promise => {
// Attempt to purchase product
const makePurchaseResult = await Purchases.purchaseStoreProduct(storeProduct)
return makePurchaseResult
}
return await this.handleSharedPurchase(performPurchase)
}
private async _fetchGooglePlaySubscriptionOption(
storeProduct: PurchasesStoreProduct,
basePlanId?: string,
offerId?: string
): Promise {
const subscriptionOptions = storeProduct.subscriptionOptions
if (subscriptionOptions && subscriptionOptions.length > 0) {
// Concatenate base + offer ID
const subscriptionOptionId = this.buildSubscriptionOptionId(basePlanId, offerId)
// Find first subscription option that matches the subscription option ID or use the default offer
let subscriptionOption: SubscriptionOption | null = null
// Search for the subscription option with the matching ID
for (const option of subscriptionOptions) {
if (option.id === subscriptionOptionId) {
subscriptionOption = option
break
}
}
// If no matching subscription option is found, use the default option
subscriptionOption = subscriptionOption ?? storeProduct.defaultOption
// Return the subscription option
return subscriptionOption
}
return null
}
private buildSubscriptionOptionId(basePlanId?: string, offerId?: string): string {
let result = ""
if (basePlanId !== null) {
result += basePlanId
}
if (offerId !== null) {
if (basePlanId !== null) {
result += ":"
}
result += offerId
}
return result
}
private async _purchaseSubscriptionOption(
subscriptionOption: SubscriptionOption
): Promise {
// Define the async perform purchase function
const performPurchase = async (): Promise => {
// Attempt to purchase product
const purchaseResult = await Purchases.purchaseSubscriptionOption(subscriptionOption)
return purchaseResult
}
const purchaseResult: PurchaseResult = await this.handleSharedPurchase(performPurchase)
return purchaseResult
}
private async handleSharedPurchase(
performPurchase: () => Promise
): Promise {
try {
// Store the current purchase date to later determine if this is a new purchase or restore
const purchaseDate = new Date()
// Perform the purchase using the function provided
const makePurchaseResult = await performPurchase()
// Handle the results
if (this.hasActiveEntitlementOrSubscription(makePurchaseResult.customerInfo)) {
const latestTransactionPurchaseDate = new Date(makePurchaseResult.transaction.purchaseDate)
// If no latest transaction date is found, consider it as a new purchase.
const isNewPurchase = latestTransactionPurchaseDate === null
// If the current date (`purchaseDate`) is after the latestTransactionPurchaseDate,
const purchaseHappenedInThePast = latestTransactionPurchaseDate
? purchaseDate > latestTransactionPurchaseDate
: false
if (!isNewPurchase && purchaseHappenedInThePast) {
return new PurchaseResultRestored()
} else {
return new PurchaseResultPurchased()
}
} else {
return new PurchaseResultFailed("No active subscriptions found.")
}
} catch (e: any) {
// Catch block to handle exceptions, adjusted for TypeScript
if (e.userCancelled) {
return new PurchaseResultCancelled()
}
if (e.code === PURCHASES_ERROR_CODE.PAYMENT_PENDING_ERROR) {
return new PurchaseResultPending()
} else {
return new PurchaseResultFailed(e.message)
}
}
}
async restorePurchases(): Promise {
try {
await Purchases.restorePurchases()
return RestorationResult.restored()
} catch (e: any) {
return RestorationResult.failed(e.message)
}
}
private hasActiveEntitlementOrSubscription(customerInfo: CustomerInfo): Boolean {
return (
customerInfo.activeSubscriptions.length > 0 ||
Object.keys(customerInfo.entitlements.active).length > 0
)
}
}
```
As discussed in [Purchases and Subscription Status](/legacy/legacy_advanced-configuration), this `PurchaseController` is responsible for handling the subscription-related logic. Take a few moments to look through the code to understand how it does this.
#### 2. Configure Superwall
Initialize an instance of `RCPurchaseController` and pass it in to `Superwall.configure(apiKey:purchaseController)`:
```swift Swift
let purchaseController = RCPurchaseController()
Superwall.configure(
apiKey: "MY_API_KEY",
purchaseController: purchaseController
)
```
```swift Objective-C
RCPurchaseController *purchaseController = [RCPurchaseController alloc] init];
[Superwall
configureWithApiKey:@"MY_API_KEY"
purchaseController:purchaseController
options:options
completion:nil
];
```
```kotlin Kotlin
val purchaseController = RCPurchaseController(this)
Superwall.configure(
this,
"MY_API_KEY",
purchaseController
)
// Make sure we sync the subscription status
// on first load and whenever it changes
purchaseController.syncSubscriptionStatus()
```
```dart Flutter
RCPurchaseController purchaseController = RCPurchaseController();
Superwall.configure(
apiKey,
purchaseController: purchaseController
);
await purchaseController.syncSubscriptionStatus();
```
```typescript React Native
React.useEffect(() => {
const apiKey = Platform.OS === "ios" ? "MY_SUPERWALL_IOS_API_KEY" : "MY_SUPERWALL_ANDROID_API_KEY"
const purchaseController = new RCPurchaseController()
Superwall.configure(apiKey, null, purchaseController)
purchaseController.configureAndSyncSubscriptionStatus()
}, [])
```
#### 3. Sync the subscription status
Then, call `purchaseController.syncSubscriptionStatus()` to keep Superwall's subscription status up to date with RevenueCat.
That's it! Check out our [RevenueCat iOS example app](https://github.com/superwall/Superwall-iOS/tree/master/Examples/UIKit%2BRevenueCat) for a working example of this integration.
### Using PurchasesAreCompletedBy
If you're using RevenueCat's [PurchasesAreCompletedBy](https://www.revenuecat.com/docs/migrating-to-revenuecat/sdk-or-not/finishing-transactions), you don't need to create a purchase controller. Register your placements, present a paywall — and Superwall will take care of completing any purchase the user starts. However, there are a few things to note if you use this setup:
1. Here, you aren't using RevenueCat's [entitlements](https://www.revenuecat.com/docs/getting-started/entitlements#entitlements) as a source of truth. If your app is multiplatform, you'll need to consider how to link up pro features or purchased products for users.
2. If you require custom logic when purchases occur, then you'll want to add a purchase controller. In that case, Superwall handles purchasing flows and RevenueCat will still observe transactions to power their analytics and charts.
3. Be sure that user identifiers are set the same way across Superwall and RevenueCat.
4. Finally, make sure that RevenueCat is using StoreKit 1.
Example:
```swift
Superwall.configure(apiKey: "superwall_public_key")
Superwall.shared.identify(userId: user.identifier)
Purchases.configure(with:
.builder(withAPIKey: "revcat_public_key")
.with(purchasesAreCompletedBy: .myApp, storeKitVersion: .storeKit1)
.with(appUserID: user.identifier)
.build()
)
```
For more information on observer mode, visit [RevenueCat's docs](https://www.revenuecat.com/docs/migrating-to-revenuecat/sdk-or-not/finishing-transactions).
# Using the Superwall Delegate (Legacy)
Source: https://superwall.com/docs/legacy/legacy_using-superwall-delegate
Use a Superwall delegate to help interface with 3rd party analytics, see which product was purchased on a paywall, handle custom events and more.
Use a Superwall's delegate to extend our SDK's functionality across several surface areas by assigning to the `delegate` property:
```swift Swift
class SWDelegate: SuperwallDelegate {
// Implement delegate methods here
}
// After configuring the SDK...
Superwall.shared.delegate = SWDelegate()
```
```swift Objective-C
// In its own file...
#import
@import SuperwallKit;
@interface SWDelegate : NSObject
@end
@implementation SWDelegate
// Implement delegate methods here
@end
// After configuring the SDK...
[[Superwall sharedInstance] setDelegate:[SWDelegate new]];
```
```kotlin Kotlin
class SWDelegate : SuperwallDelegate {
// Implement delegate methods here
}
// When configuring the SDK...
Superwall.shared.delegate = SWDelegate()
```
```dart Flutter
import 'package:superwall_flutter/superwall_flutter.dart';
class SWDelegate extends SuperwallDelegate {
// Implement delegate methods here
}
// When configuring the SDK...
void configureSDK() {
Superwall.shared.setDelegate(SWDelegate());
}
```
```typescript React Native
import {
PaywallInfo,
SubscriptionStatus,
SuperwallDelegate,
SuperwallEventInfo,
EventType,
} from '@superwall/react-native-superwall';
// Implement delegate methods
export class SWDelegate extends SuperwallDelegate {
}
// In your app.tsx...
import { SWDelegate } from './SWDelegate';
export default function App() {
const delegate = new SWDelegate();
React.useEffect(() => {
const setupSuperwall = async () => {
// After configuring the SDK...
Superwall.shared.setDelegate(delegate);
};
}, []);
}
```
Some common use cases for using the Superwall delegate include:
* **Custom actions:** [Respond to custom tap actions from a paywall.](/legacy/legacy_custom-paywall-events#custom-paywall-actions)
* **Respond to purchases:** [See which product was purchased from the presented paywall.](/legacy/legacy_3rd-party-analytics#using-events-to-see-purchased-products)
* **Analytics:** [Forward events from Superwall to your own analytics.](/legacy/legacy_3rd-party-analytics)
Below are some commonly used implementations when using the delegate.
### Superwall Events
Most of what occurs in Superwall can be viewed using the delegate method to respond to events:
```swift
class SWDelegate: SuperwallDelegate {
func handleSuperwallEvent(withInfo eventInfo: SuperwallEventInfo) {
switch eventInfo.event {
case .transactionComplete(let transaction, let product, let paywallInfo):
print("Converted from paywall originalTransactionIdentifier: \(transaction?.originalTransactionIdentifier ?? "")")
print("Converted from paywall storeTransactionId: \(transaction?.storeTransactionId ?? "")")
print("Converted from paywall productIdentifier: \(product.productIdentifier)")
print("Converted from paywall paywallInfo: \(paywallInfo.identifier)")
case .transactionRestore(let restoreType, let paywallInfo):
print("transactionRestore restoreType \(restoreType)")
case let .customPlacement(name, params, paywallInfo):
// Forward Mixpanel/Ampltiude/etc
print("\(name) - \(params) - \(paywallInfo)")
default:
// And several more events to use...
print("Default event: \(eventInfo.event.description)")
}
}
}
```
### Paywall Custom Actions
Using the [custom tap action](/legacy/legacy_custom-paywall-events), you can respond to any arbitrary event from a paywall:
```swift
class SWDelegate: SuperwallDelegate {
func handleCustomPaywallAction(withName name: String) {
if name == "showHelpCenter" {
DispatchQueue.main.asyncAfter(deadline: .now() + 0.33) {
self.showHelpCenter.toggle()
}
}
}
}
```
### Subscription status changes
You can be informed of subscription status changes using the delegate. If you need to set or handle the status on your own, use a [purchase controller](/legacy/legacy_advanced-configuration) — this function is only for informational, tracking or similar purposes:
```swift
class SWDelegate: SuperwallDelegate {
func subscriptionStatusDidChange(to newValue: SubscriptionStatus) {
// Log or handle subscription change in your Ui
}
}
```
### Paywall events
The delegate also has callbacks for several paywall events, such dismissing, presenting, and more. Here's an example:
```swift
class SWDelegate: SuperwallDelegate {
func didPresentPaywall(withInfo paywallInfo: PaywallInfo) {
// paywallInfo will contain all of the presented paywall's info
}
}
```
# Passing in options (Legacy)
Source: https://superwall.com/docs/legacy/legacy_using-superwalloptions
When configuring the SDK you can pass in options that configure Superwall, the paywall presentation, and its appearance.
### Logging
Logging is enabled by default in the SDK and is controlled by two properties: `level` and `scopes`.
`level` determines the minimum log level to print to the console. There are five types of log level:
1. **debug**: Prints all logs from the SDK to the console. Useful for debugging your app if something isn't working as expected.
2. **info**: Prints errors, warnings, and useful information from the SDK to the console.
3. **warn**: Prints errors and warnings from the SDK to the console.
4. **error**: Only prints errors from the SDK to the console.
5. **none**: Turns off all logs.
The SDK defaults to `info`.
`scopes` defines the scope of logs to print to the console. For example, you might only care about logs relating to `paywallPresentation` and `paywallTransactions`. This defaults to `.all`. Check out [LogScope](https://sdk.superwall.me/documentation/superwallkit/logscope) for all possible cases.
You set these properties like this:
```swift Swift
let options = SuperwallOptions()
options.logging.level = .warn
options.logging.scopes = [.paywallPresentation, .paywallTransactions]
Superwall.configure(apiKey:"MY_API_KEY", options: options);
// Or you can set:
Superwall.shared.logLevel = .warn
```
```swift Objective-C
SWKSuperwallOptions *options = [[SWKSuperwallOptions alloc] init];
options.logging.level = SWKLogLevelWarn;
[Superwall
configureWithApiKey:@"pk_e6bd9bd73182afb33e95ffdf997b9df74a45e1b5b46ed9c9"
purchaseController:nil
options:options
completion:nil
];
[Superwall sharedInstance].logLevel = SWKLogLevelWarn;
```
```kotlin Kotlin
val options = SuperwallOptions()
options.logging.level = LogLevel.warn
options.logging.scopes = EnumSet.of(LogScope.paywallPresentation, LogScope.paywallTransactions)
Superwall.configure(
this,
apiKey = "MY_API_KEY",
options = options
)
// Or you can set:
Superwall.instance.logLevel = LogLevel.warn
// Or use the configuration DSL
configureSuperwall("MY_API_KEY") {
options {
logging {
level = LogLevel.warn
scopes = EnumSet.of(LogScope.paywallPresentation, LogScope.paywallTransactions)
}
}
}
```
```dart Flutter
SuperwallOptions options = SuperwallOptions();
options.logging.level = LogLevel.arn;
options.logging.scopes = { LogScope.paywallPresentation, LogScope.paywallTransactions };
Superwall.configure(
"MY_API_KEY",
options: options
);
// Or you can set:
Superwall.instance.logLevel = LogLevel.warn;
```
```typescript React Native
const options = SuperwallOptions()
options.logging.level = LogLevel.Warn
options.logging.scopes = [LogScope.PaywallPresentation, LogScope.PaywallTransactions]
Superwall.configure(
"MY_API_KEY",
null,
options: options
);
// Or you can set:
Superwall.instance.logLevel = LogLevel.Warn
```
### Preloading Paywalls
Paywalls are preloaded by default when the app is launched from a cold start. The paywalls that are preloaded are determined by the list of events that result in a paywall for the user when [registered](/docs/feature-gating). Preloading is smart, only preloading paywalls that belong to rules that could be matched.
Paywalls are cached by default, which means after they load once, they don't need to be reloaded from the network unless you make a change to them on the dashboard. However, if you have a lot of paywalls, preloading may increase network usage of your app on first load of the paywalls and result in slower loading times overall.
You can turn off preloading by setting `shouldPreload` to `false`:
```swift Swift
let options = SuperwallOptions()
options.paywalls.shouldPreload = false
Superwall.configure(apiKey: "MY_API_KEY", options: options)
```
```swift Objective-C
SWKSuperwallOptions *options = [[SWKSuperwallOptions alloc] init];
options.paywalls.shouldPreload = false;
[Superwall
configureWithApiKey:@"MY_API_KEY"
purchaseController:nil
options:options
completion:nil
];
```
```kotlin Kotlin
val options = SuperwallOptions()
options.paywalls.shouldPreload = false
Superwall.configure(
this,
apiKey = "MY_API_KEY",
options = options
)
// Or using the configuration DSL
configureSuperwall("MY_API_KEY") {
options {
paywalls {
shouldPreload = false
}
}
}
```
```dart Flutter
SuperwallOptions options = SuperwallOptions();
options.paywalls.shouldPreload = false;
Superwall.configure(
"MY_API_KEY",
options: options
);
```
```typescript React Native
const options = SuperwallOptions()
options.paywalls.shouldPreload = false
Superwall.configure(
"MY_API_KEY",
null,
options: options
);
// Or you can set:
Superwall.instance.logLevel = LogLevel.Warn
```
Then, if you'd like to preload paywalls for specific event names you can use `preloadPaywalls(forEvents:)`:
```swift Swift
Superwall.shared.preloadPaywalls(forEvents: ["campaign_trigger"]);
```
```swift Objective-C
NSMutableSet *eventNames = [NSMutableSet set];
[eventNames addObject:@"campaign_trigger"];
[[Superwall sharedInstance] preloadPaywallsForEvents:eventNames];
```
```kotlin Kotlin
val eventNames = setOf("campaign_trigger")
Superwall.instance.preloadPaywalls(eventNames)
```
```dart Flutter
var eventNames = {"campaign_trigger"};
Superwall.shared.preloadPaywallsForEvents(eventNames);
```
```typescript React Native
// Coming soon
```
If you'd like to preload all paywalls you can use `preloadAllPaywalls()`:
```swift Swift
Superwall.shared.preloadAllPaywalls()
```
```swift Objective-C
[[Superwall sharedInstance] preloadAllPaywalls];
```
```kotlin Kotlin
Superwall.instance.preloadAllPaywalls()
```
```dart Flutter
Superwall.shared.preloadAllPaywalls();
```
```typescript React Native
// Coming soon
```
Note: These methods will not reload any paywalls that have already been preloaded.
### External Data Collection
By default, Superwall sends all registered events and properties back to the Superwall servers. However, if you have privacy concerns, you can stop this by setting `isExternalDataCollectionEnabled` to `false`:
```swift Swift
let options = SuperwallOptions()
options.isExternalDataCollectionEnabled = false
Superwall.configure(apiKey: "MY_API_KEY", options: options)
```
```swift Objective-C
SWKSuperwallOptions *options = [[SWKSuperwallOptions alloc] init];
options.isExternalDataCollectionEnabled = false;
[Superwall configureWithApiKey:@"MY_API_KEY" purchaseController:nil options:options completion:nil];
```
```kotlin Kotlin
val options = SuperwallOptions()
options.isExternalDataCollectionEnabled = false
Superwall.configure(
this,
apiKey = "MY_API_KEY",
options = options
)
// Or using the configuration DSL
configureSuperwall("MY_API_KEY") {
options {
isExternalDataCollectionEnabled = false
}
}
```
```dart Flutter
SuperwallOptions options = SuperwallOptions();
options.isExternalDataCollectionEnabled = false;
Superwall.configure(
"MY_API_KEY",
options: options
);
```
```typescript React Native
const options = SuperwallOptions()
options.isExternalDataCollectionEnabled = false
Superwall.configure(
"MY_API_KEY",
options: options
);
```
Disabling this will not affect your ability to create triggers based on properties.
### Automatically Dismissing the Paywall
By default, Superwall automatically dismisses the paywall when a product is purchased or restored. You can disable this by setting `automaticallyDismiss` to `false`:
```swift Swift
let options = SuperwallOptions()
options.paywalls.automaticallyDismiss = false
Superwall.configure(apiKey: "MY_API_KEY", options: options)
```
```swift Objective-C
SWKSuperwallOptions *options = [[SWKSuperwallOptions alloc] init];
options.automaticallyDismiss = false;
[Superwall configureWithApiKey:@"MY_API_KEY" purchaseController:nil options:options completion:^{}];
```
```kotlin Kotlin
val options = SuperwallOptions()
options.paywalls.automaticallyDismiss = false
Superwall.configure(
this,
apiKey = "MY_API_KEY",
options = options
)
// Or using the configuration DSL
configureSuperwall("MY_API_KEY") {
options {
paywalls {
automaticallyDismiss = false
}
}
}
```
```dart Flutter
SuperwallOptions options = SuperwallOptions();
options.paywalls.automaticallyDismiss = false;
Superwall.configure(
"MY_API_KEY",
options: options
);
```
```typescript React Native
const options = SuperwallOptions()
options.paywalls.automaticallyDismiss = false
Superwall.configure(
"MY_API_KEY",
null,
options: options
);
```
To manually dismiss the paywall , call `Superwall.shared.dismiss()`.
### Custom Restore Failure Message
You can set the title, message and close button title for the alert that appears after a restoration failure:
```swift Swift
let options = SuperwallOptions()
options.paywalls.restoreFailed.title = "My Title"
options.paywalls.restoreFailed.message = "My message"
options.paywalls.restoreFailed.closeButtonTitle = "Close"
Superwall.configure(apiKey: "MY_API_KEY", options: options)
```
```swift Objective-C
SWKSuperwallOptions *options = [[SWKSuperwallOptions alloc] init];
options.paywalls.restoreFailed.title = @"My Title";
options.paywalls.restoreFailed.message = @"My message";
options.paywalls.restoreFailed.closeButtonTitle = @"Close";
[Superwall configureWithApiKey:@"MY_API_KEY" purchaseController:nil options:options completion:nil];
```
```kotlin Kotlin
val options = SuperwallOptions()
options.paywalls.restoreFailed.title = "My Title"
options.paywalls.restoreFailed.message = "My message"
options.paywalls.restoreFailed.closeButtonTitle = "Close"
Superwall.configure(
this,
apiKey = "MY_API_KEY",
options = options
)
// Or using the configuration DSL
configureSuperwall("MY_API_KEY") {
options {
paywalls {
restoreFailed.title = "My Title"
restoreFailed.message = "My message"
restoreFailed.closeButtonTitle = "Close"
}
}
}
```
```dart Flutter
SuperwallOptions options = SuperwallOptions();
options.paywalls.restoreFailed.title = "My Title";
options.paywalls.restoreFailed.message = "My message";
options.paywalls.restoreFailed.closeButtonTitle = "Close";
Superwall.configure(
"MY_API_KEY",
options: options
);
```
```typescript React Native
const options = SuperwallOptions()
options.paywalls.restoreFailed.title = "My Title"
options.paywalls.restoreFailed.message = "My message";
options.paywalls.restoreFailed.closeButtonTitle = "Close";
Superwall.configure(
"MY_API_KEY",
null,
options: options
);
```
### Haptic Feedback
On iOS, the paywall uses haptic feedback by default after a user purchases or restores a product, opens a URL from the paywall, or closes the paywall. To disable this, set the `isHapticFeedbackEnabled` `PaywallOption` to false:
```swift Swift
let options = SuperwallOptions()
options.paywalls.isHapticFeedbackEnabled = false
Superwall.configure(apiKey: "MY_API_KEY", options: options)
```
```swift Objective-C
SWKSuperwallOptions *options = [[SWKSuperwallOptions alloc] init];
options.isHapticFeedbackEnabled = false;
[Superwall configureWithApiKey:@"MY_API_KEY" purchaseController:nil options:options completion:^{}];
```
```dart Flutter
SuperwallOptions options = SuperwallOptions();
options.paywalls.isHapticFeedbackEnabled = false;
Superwall.configure(
"MY_API_KEY",
options: options
);
```
```typescript React Native
const options = SuperwallOptions()
options.paywalls.isHapticFeedbackEnabled = false;
Superwall.configure(
"MY_API_KEY",
null,
options: options
);
```
Note: Android does not use haptic feedback.
### Transaction Background View
During a transaction, we add a `UIActivityIndicator` behind the view to indicate a loading status. However, you can remove this by setting the `transactionBackgroundView` to `nil`:
```swift Swift
let options = SuperwallOptions()
options.paywalls.transactionBackgroundView = nil
Superwall.configure(apiKey: "MY_API_KEY", options: options)
```
```swift Objective-C
SWKSuperwallOptions *options = [[SWKSuperwallOptions alloc] init];
options.paywalls.transactionBackgroundView = SWKTransactionBackgroundViewNone;
[Superwall
configureWithApiKey:@"MY_API_KEY"
purchaseController:nil
options:options
completion:nil
];
```
```kotlin Kotlin
val options = SuperwallOptions()
options.paywalls.transactionBackgroundView = null
Superwall.configure(
this,
apiKey = "MY_API_KEY",
options = options
)
// Or using the configuration DSL
configureSuperwall("MY_API_KEY") {
options {
paywalls {
transactionBackgroundView = null
}
}
}
```
```dart Flutter
SuperwallOptions options = SuperwallOptions();
options.paywalls.transactionBackgroundView = TransactionBackgroundView.none;
Superwall.configure(
"MY_API_KEY",
options: options
);
```
```typescript React Native
const options = SuperwallOptions()
options.paywalls.transactionBackgroundView = TransactionBackgroundView.none
Superwall.configure(
"MY_API_KEY",
null,
options: options
);
```
### Purchase Failure Alert
When a purchase fails, we automatically present an alert with the error message. If you'd like to show your own alert after failure, set the `shouldShowPurchaseFailureAlert` `PaywallOption` to `false`:
```swift Swift
let options = SuperwallOptions()
options.paywalls.shouldShowPurchaseFailureAlert = false
Superwall.configure(apiKey: "MY_API_KEY", options: options)
```
```swift Objective-C
SWKSuperwallOptions *options = [[SWKSuperwallOptions alloc] init];
options.paywalls.shouldShowPurchaseFailureAlert = false;
[Superwall
configureWithApiKey:@"MY_API_KEY"
purchaseController:nil
options:options
completion:nil
];
```
```kotlin Kotlin
val options = SuperwallOptions()
options.paywalls.shouldShowPurchaseFailureAlert = false
Superwall.configure(
this,
apiKey = "MY_API_KEY",
options = options
)
// Or using the configuration DSL
configureSuperwall("MY_API_KEY") {
options {
paywalls {
shouldShowPurchaseFailureAlert = false
}
}
}
```
```dart Flutter
SuperwallOptions options = SuperwallOptions();
options.paywalls.shouldShowPurchaseFailureAlert = false;
Superwall.configure(
"MY_API_KEY",
options: options
);
```
```typescript React Native
const options = SuperwallOptions()
options.paywalls.shouldShowPurchaseFailureAlert = false;
Superwall.configure(
"MY_API_KEY",
null,
options: options
);
```
### Locale Identifier
When evaluating rules, the device locale identifier is set to `autoupdatingCurrent`. However, you can override this if you want to test a specific locale:
```swift Swift
let options = SuperwallOptions()
options.localeIdentifier = "en_GB"
Superwall.configure(apiKey: "MY_API_KEY", options: options)
```
```swift Objective-C
SWKSuperwallOptions *options = [[SWKSuperwallOptions alloc] init];
options.localeIdentifier = @"en_GB";
[Superwall configureWithApiKey:@"MY_API_KEY" purchaseController:nil options:options completion:^{}];
```
```kotlin Kotlin
val options = SuperwallOptions()
options.localeIdentifier = "en_GB"
Superwall.configure(
this,
apiKey = "MY_API_KEY",
options = options
)
// Or using the configuration DSL
configureSuperwall("MY_API_KEY") {
options {
localeIdentifier = "en_GB"
}
}
```
```dart Flutter
SuperwallOptions options = SuperwallOptions();
options.localeIdentifier = "en_GB";
Superwall.configure(
"MY_API_KEY",
options: options
);
```
```typescript React Native
const options = SuperwallOptions()
options.localeIdentifier = "en_GB";
Superwall.configure(
"MY_API_KEY",
null,
options: options
);
```
For a list of locales that are available on iOS, take a look at [this list](https://gist.github.com/jacobbubu/1836273). You can also preview your paywall in different locales using [In-App Previews](/legacy/legacy_in-app-paywall-previews).
### Game Controller
If you're using a game controller, you can enable this in `SuperwallOptions` too. Check out our [Game Controller Support](../game-controller-support) article.
Take a look at [SuperwallOptions](https://sdk.superwall.me/documentation/superwallkit/superwalloptions) in our SDK reference for more info.
# RevenueCat Migration Guide
Source: https://superwall.com/docs/migrating-from-revenuecat-to-superwall
A guide to migrating from RevenueCat to Superwall.
If you're looking to migrate off RevenueCat and use Superwall, here's what you'll need to do along with a few considerations. Your setup can look a little different depending on how you're using RevenueCat, so we'll break it down into a few different sections. Jump to the one that fits your current architecture.
### If you're currently using RevenueCat and not Superwall
If you've not installed or shipped the Superwall SDK, and are only using RevenueCat — then it's a matter of removing one SDK and adding the other:
1. Remove the RevenueCat SDK from your project.
2. Install the Superwall SDK by following the [installation guide](/installation).
3. Update any local data models to correlate purchase status.
For step 3, you might've been doing something similar to this to see if a user was subscribed:
```swift
// In RevenueCat's SDK
let customerInfo = try? await Purchases.shared.customerInfo()
return customerInfo.entitlements.active["Pro"]?.isActive ?? false
```
In Superwall, the concept is similar. You query active entitlements:
```swift
switch Superwall.shared.subscriptionStatus {
case .active(let entitlements):
logger.info("User has active entitlements: \(entitlements)")
handler(true)
case .inactive:
logger.info("User is free plan.")
handler(false)
case .unknown:
logger.info("User is inactive.")
handler(false)
}
```
Or, if you're only dealing with one entitlement, you can simplify the above to:
```swift
if Superwall.shared.subscriptionStatus.isActive {
// The user has an active entitlement
}
```
### If you're using a [PurchaseController](/advanced-configuration) with Superwall and RevenueCat
In this case, it's mostly a matter of removing the `PurchaseController` implementation. Remember, a purchase controller is for manually assigning a subscription state to a user and performing purchase logic. Superwall's SDK does all of that out of the box without any code from you:
```swift
// Remove the `PurchaseController` implementation from your app.
// Change this code...
let purchaseController = RCPurchaseController()
Superwall.configure(
apiKey: "MY_API_KEY",
purchaseController: purchaseController
)
// To this...
Superwall.configure(apiKey: "MY_API_KEY")
```
Now, when Superwall is configured without a purchase controller, the SDK takes over all purchasing, restoring and entitlement management.
### If you're using observer mode
If you're using RevenueCat today just with [observer mode](/using-revenuecat#using-purchasesarecompletedby) — you're free to continue to do so. Simply install the Superwall SDK and continue on.
### Considerations
1. **Paywalls:** RevenueCat's paywalls can be displayed if an entitlement isn't active, manually, or by providing custom logic. Superwall can do all of those presentation methods as well. The core difference is with Superwall, typically users [register a placement](/feature-gating) at the call site instead of looking at an entitlement. This means you can show a paywall based on one or several conditions, not just whether or not a user has an entitlement.
2. **Purchases:** Superwall uses the relevant app storefront (App Store or Google Play) to check for a source of truth for purchases. This is tied to the account logged into the device. For example, if a user is logged into the same Apple ID across an iPad, Mac and iPhone — any subscription they buy in-app will work on all of those devices too. RevenueCat uses a similar approach, so there typically isn't much you need to do. If any subscription status issues arise, typically restoring the user's purchases puts things into place.
Even if you're using [web checkout](/web-checkout-overview) with either platform, Superwall allows you to manually assign a subscription state to a user via [a `PurchaseController`](/advanced-configuration).
3. **Platform differences:** Like all products, Superwall and RevenueCat bring different features to the table, even though there are a lot of similarities. While both offer subscription SDKs, paywalls, and analytics - it helps to familiarize yourself with how Superwall is different. Superwall works on the foundations of registering placements and filtering users who activate them into audiences. Superwall groups those concepts together into [campaigns](/campaigns). This means that you're ready from day one to run all sorts of price tests, paywall experiments, and more.
In terms of reporting, RevenueCat currently offers some metrics like LTV and MRR that you may still need. If so, you can continue using RevenueCat alongside Superwall in [observer mode](/using-revenuecat#using-purchasesarecompletedby) and all of your dashboard analytics should work as they always have.
***
Whatever your setup, Superwall is ready to meet you where you're at. Whether you want to go all-in with Superwall, use it with RevenueCat or any other approach, our SDK is flexible enough to support you.
# Migrating from v1 to v2 - Android
Source: https://superwall.com/docs/migrating-to-v2-android
SuperwallKit 2.0 is a major release of Superwall's Android SDK. This introduces breaking changes.
## Migration steps
## 1. Update code references
### 1.1 Rename references from `event` to `placement`
In some most cases, the updates are simple and consist of renaming `events` to `placements` where necessary, for others, you'll need to run through this list to manually update your code.
| Before | After |
| ------------------------------------ | ---------------------------------------- |
| fun register(event:) | fun register(placement:) |
| fun preloadPaywalls(forEvents:) | fun preloadPaywalls(forPlacements:) |
| fun getPaywall(forEvent:) | fun getPaywall(forPlacement:) |
| fun getPresentationResult(forEvent:) | fun getPresentationResult(forPlacement:) |
| TriggerResult.EventNotFound | TriggerResult.PlacementNotFound |
| TriggerResult.NoRuleMatch | TriggerResult.NoAudienceMatch |
### 1.2 If using Compose and Paywall Composable
The `PaywallComposable` has been removed from the main Superwall SDK and moved into an optional `superwall-compose` library.
To use it, besides including the main superwall library, you'll now need to also include a `superwall-compose` artifact
```gradle
implementation "com.superwall.sdk:superwall-compose:2.0.0"
```
## 2. Replacing getPaywall with PaywallBuilder
The default method for retrieving a paywall to display it yourself is changing to use the Builder pattern, allowing you more flexibility
in both retrieving and displaying paywalls. The builder allows for improved customisation of your paywall experience, allowing you to pass
in both custom Shimmer and Loading views by implementing proper interfaces.
Usage example:
```kotlin Android
val paywallView = PaywallBuilder("placement_name")
.params(mapOf("key" to "value"))
.overrides(PaywallOverrides())
.delegate(mySuperwallDelegate)
.shimmerView(MyShimmerView(context))
.purchaseLoadingView(MyPurchaseLoadingView(context))
.activity(activity)
.build()
```
### 3. Getting the purchased product
The `onDismiss` block of the `PaywallPresentationHandler` now accepts both a `PaywallInfo` object and a `PaywallResult` object. This allows you to easily access
the purchased product from the result when the paywall dismisses.
### 4. Entitlements
The `subscriptionStatus` has been changed to accept a set of `Entitlement` objects. This allows you to give access to entitlements based on products purchased.
For example, in your app you might have Bronze, Silver, and Gold subscription tiers, i.e. entitlements, which entitle a user to access a certain set of features within your app.
Every subscription product must be associated with one or more entitlements, which is controlled via the dashboard. Superwall will already have associated all your
products with a default entitlement. If you don't use more than one entitlement tier within your app and you only use subscription products, you don't need to do anything extra.
However, if you use one-time purchases or multiple entitlements, you should review your products and their entitlements. In general, consumables should not be associated with an
entitlement, whereas non-consumables should be. Check your products [here](https://superwall.com/applications/:app/products/v2).
If you're using a `PurchaseController`, you'll need to set the `entitlements` with the `subscriptionStatus`:
| Before | After |
| ----------------------------------------------------------------- | ------------------------------------------------------------------------------- |
| Superwall.shared.setSubscriptionStatus(SubscriptionStatus.ACTIVE) | Superwall.shared.setSubscriptionStatus(SubscriptionStatus.Active(entitlements)) |
You can get the `ProductDetails` and their associated entitlements from Superwall by calling the method `products(for:)`. Here is an example of how you'd sync your subscription
status with Superwall using these methods:
```kotlin With Play Billing
suspend fun syncSubscriptionStatus() {
// We await for configuration to be set so our entitlements are available
Superwall.instance.configurationStateListener.first { it is ConfigurationStatus.Configured }
// Query purchases from your BillingClient
val subscriptionPurchases = queryPurchasesOfType(BillingClient.ProductType.SUBS)
val inAppPurchases = queryPurchasesOfType(BillingClient.ProductType.INAPP)
val allPurchases = subscriptionPurchases + inAppPurchases
val hasActivePurchaseOrSubscription =
allPurchases.any { it.purchaseState == Purchase.PurchaseState.PURCHASED }
val status: SubscriptionStatus =
if (hasActivePurchaseOrSubscription) {
subscriptionPurchases
.flatMap {
// Extract the productId
it.products
}.toSet() // Ensure uniqueness
.flatMap {
// Receive entitlements
val res = entitlementsInfo.byProductId(it)
res
}.toSet()
.let { entitlements ->
if (entitlements.isNotEmpty()) {
SubscriptionStatus.Active(entitlements)
} else {
SubscriptionStatus.Inactive
}
}
} else {
SubscriptionStatus.Inactive
}
Superwall.instance.setSubscriptionStatus(status)
}
```
```kotlin with RevenueCat
fun syncSubscriptionStatus() {
Purchases.sharedInstance.getCustomerInfoWith {
if (hasAnyActiveEntitlements(it)) {
setSubscriptionStatus(
SubscriptionStatus.Active(
it.entitlements.active
.map {
Entitlement(it.key, Entitlement.Type.SERVICE_LEVEL)
}.toSet(),
),
)
} else {
setSubscriptionStatus(SubscriptionStatus.Inactive)
}
}
}
```
You can listen to the flowable property `Superwall.instance.subscriptionStatus` to be notified when the subscriptionStatus changes. Or you can use the `SuperwallDelegate`
method `subscriptionStatusDidChange(from:to:)`, which replaces `subscriptionStatusDidChange(to:)`.
### 5. Paywall Presentation Condition
In the Paywall Editor you can choose whether to always present a paywall or ask the SDK to check the user subscription before presenting a paywall.
For users on v2 of the SDK, this is replaced with a check on the entitlements within the audience filter. As you migrate your users from v1 to v2 of the
SDK, you'll need to make sure you set both the entitlements check and the paywall presentation condition in the paywall editor.
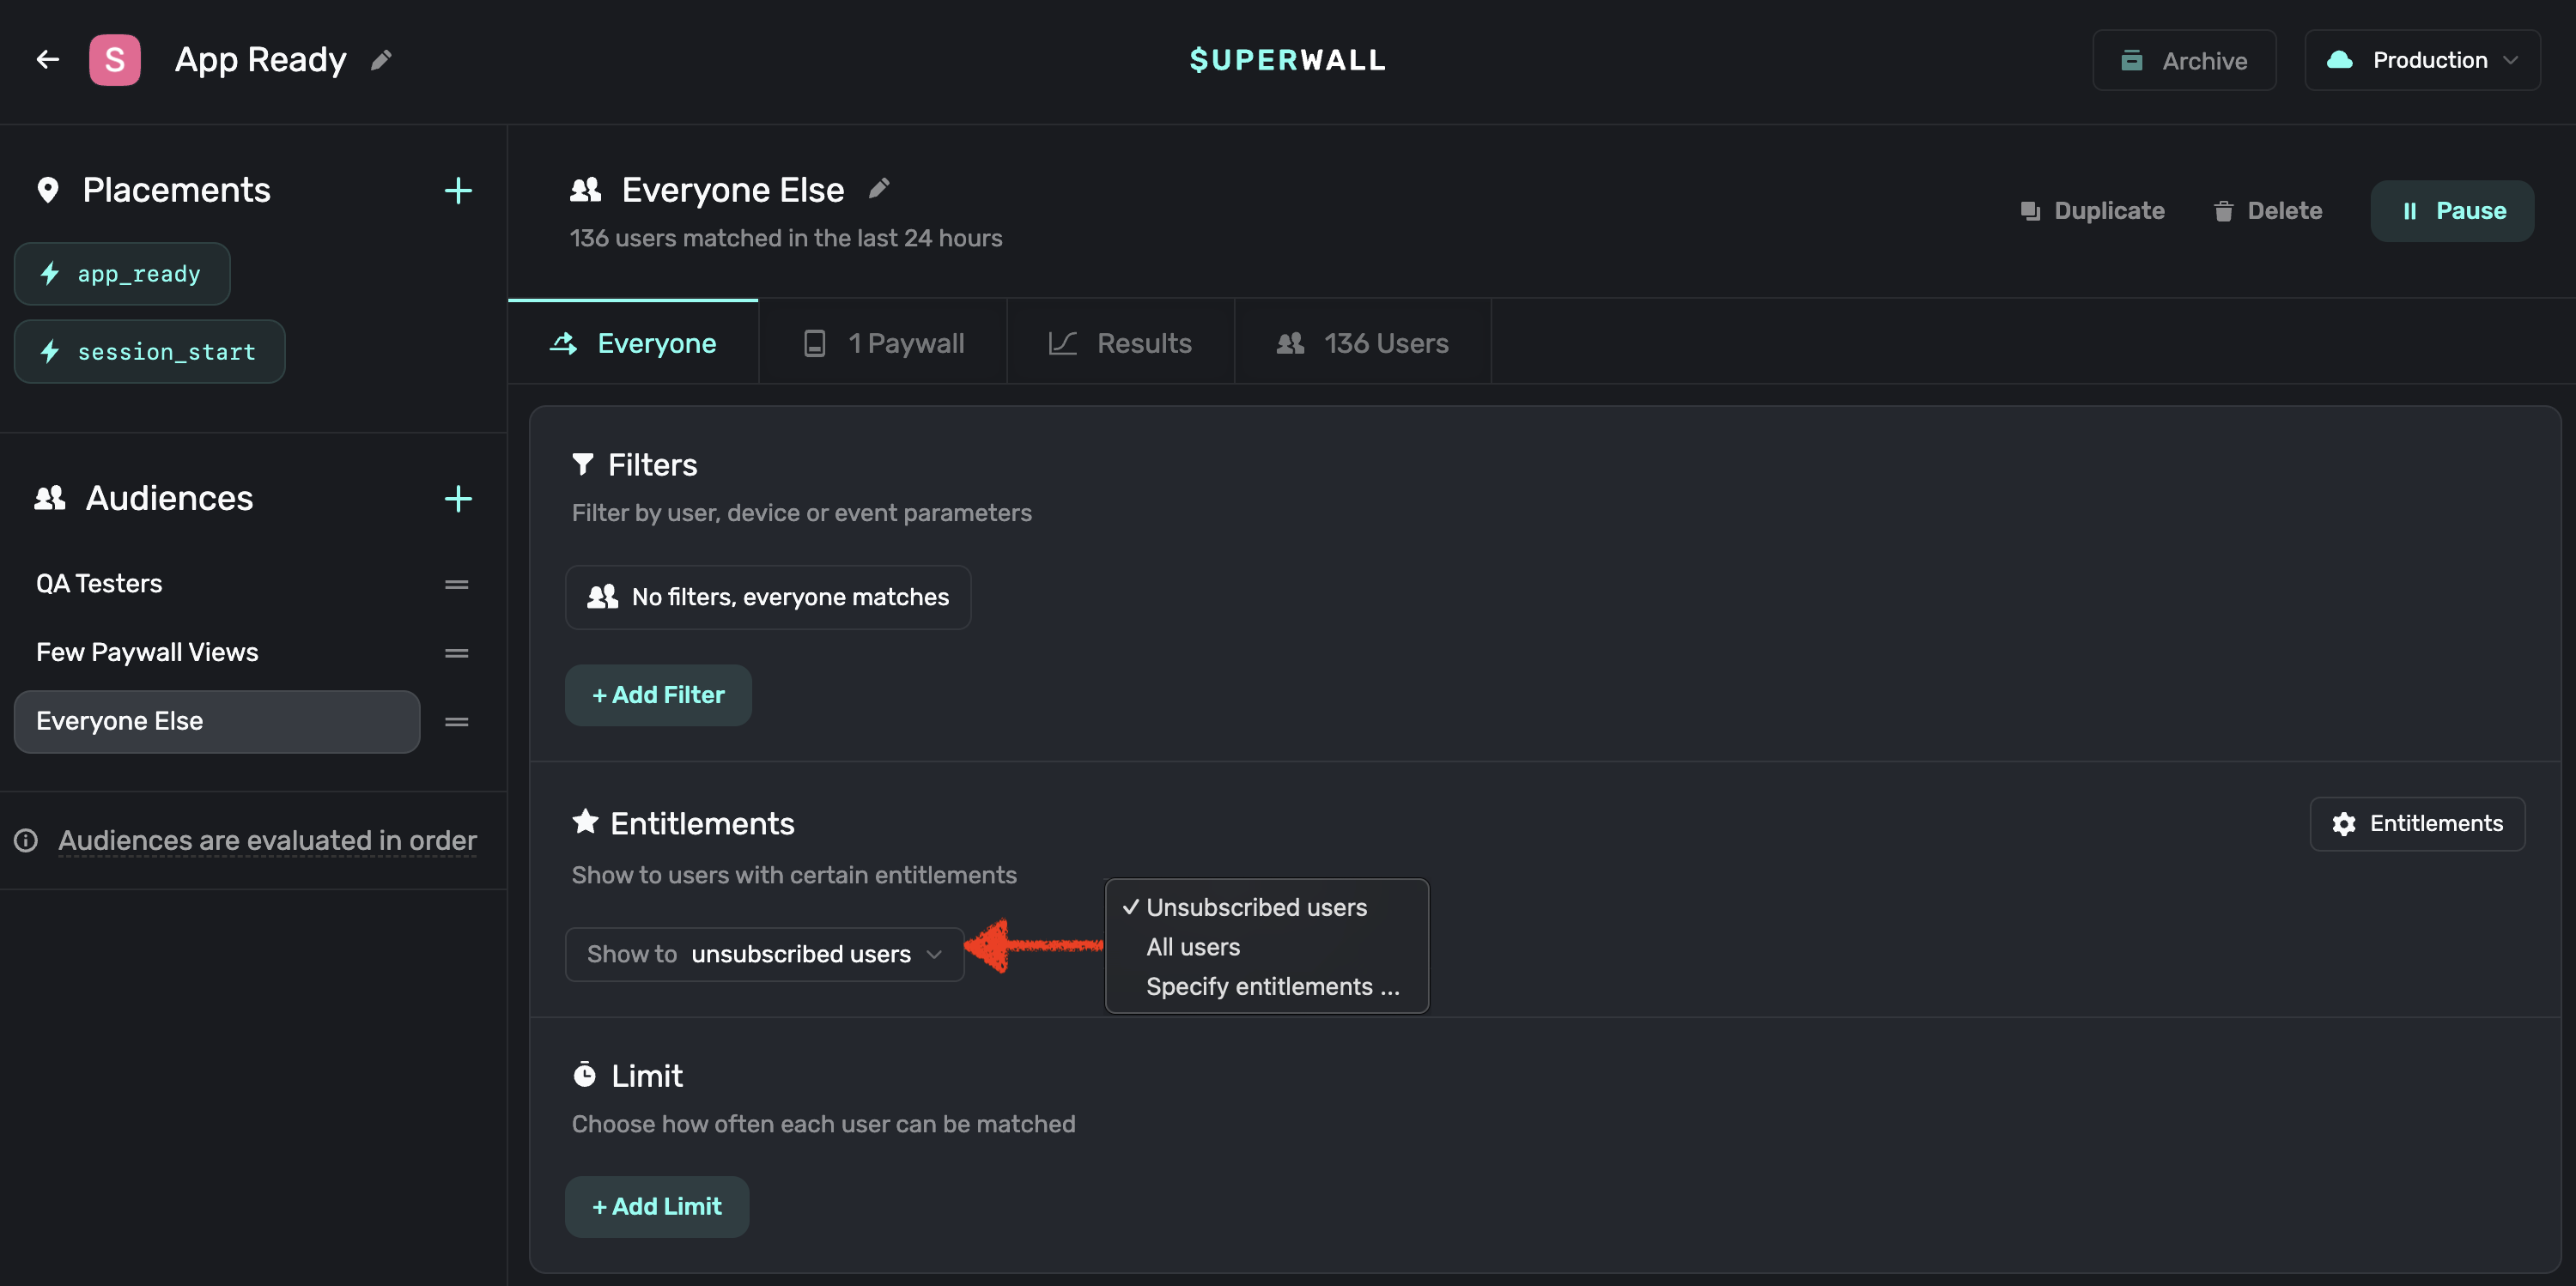
## 6. Check out the full change log
You can view this on [our GitHub page](https://github.com/superwall/Superwall-Android/blob/develop/CHANGELOG.md).
## 7. Check out our updated example apps
All of our [example apps](https://github.com/superwall/Superwall-Android/tree/develop/example) have been updated to use the latest SDK. We now only have two apps: Basic and Advanced. Basic shows you the basic integration of Superwall
without needing a purchase controller or multiple entitlements. Advanced has multiple flavors, showing you how to use entitlements within your app as well as optionally using a purchase controller with Play Billing or RevenueCat.
# Migrating from v1 to v2 - Flutter
Source: https://superwall.com/docs/migrating-to-v2-flutter
SuperwallKit 2.0 is a major release of Superwall's Flutter SDK. This introduces breaking changes.
## Migration steps
## 1. Update code references
### 1.1 Rename references from `event` to `placement`
In some cases, you should be able to update references using the automatic renaming suggestions that Xcode provides. For other cases where this hasn't been possible, you'll need to run through this list to manually update your code.
| Before | After |
| ------------------------------------ | ---------------------------------------- |
| fun registerEvent(event:) | fun registerPlacement(placement:) |
| fun preloadPaywalls(forEvents:) | fun preloadPaywalls(forPlacements:) |
| fun getPaywall(forEvent:) | fun getPaywall(forPlacement:) |
| fun getPresentationResult(forEvent:) | fun getPresentationResult(forPlacement:) |
| TriggerResult.eventNotFound | TriggerResult.placementNotFound |
## 2. SuperwallBuilder
To make tracking and reacting to subscription status changes easier, we've introduced a new `SuperwallBuilder` widget.
Using it is quite simple - just add it to your widget tree and every time the subscription status is changed, the builder function
will be invoked, triggering a re-render of it's child widgets.
For example, here's a simple implementation that will change the text based on the subscription status:
```dart Flutter
SuperwallBuilder(
builder: (context, status) => Center(
child: Text('Subscription Status: ${status}'),
)
)
```
### 3. Getting the purchased product
The `onDismiss` block of the `PaywallPresentationHandler` now accepts both a `PaywallInfo` object and a `PaywallResult` object. This allows you to easily access
the purchased product from the result when the paywall dismisses.
### 4. Entitlements
The `subscriptionStatus` has been changed to accept a set of `Entitlement` objects. This allows you to give access to entitlements based on products purchased.
For example, in your app you might have Bronze, Silver, and Gold subscription tiers, i.e. entitlements, which entitle a user to access a certain set of features within your app.
Every subscription product must be associated with one or more entitlements, which is controlled via the dashboard. Superwall will already have associated all your
products with a default entitlement. If you don't use more than one entitlement tier within your app and you only use subscription products, you don't need to do anything extra.
However, if you use one-time purchases or multiple entitlements, you should review your products and their entitlements. In general, consumables should not be associated with an
entitlement, whereas non-consumables should be. Check your products [here](https://superwall.com/applications/:app/products/v2).
If you're using a `PurchaseController`, you'll need to set the `entitlements` with the `subscriptionStatus`:
| Before | After |
| ----------------------------------------------------------------- | -------------------------------------------------------------------------------------------- |
| Superwall.shared.setSubscriptionStatus(SubscriptionStatus.active) | Superwall.shared.setSubscriptionStatus(SubscriptionStatusActive(entitlements: entitlements)) |
Here is an example of how you'd sync your subscription status with Superwall using these methods:
```dart RevenueCat
// Only necessary if you're using a PurchaseController.
// Otherwise, Superwall does this automatically.
fun syncSubscriptionStatus() {
Purchases.addCustomerInfoUpdateListener((customerInfo) async {
// Gets called whenever new CustomerInfo is available
final entitlements = customerInfo.entitlements.active.keys
.map((id) => Entitlement(id: id))
.toSet();
final hasActiveEntitlementOrSubscription = customerInfo
.hasActiveEntitlementOrSubscription(); // Why? -> https://www.revenuecat.com/docs/entitlements#entitlements
if (hasActiveEntitlementOrSubscription) {
await Superwall.shared.setSubscriptionStatus(
SubscriptionStatusActive(entitlements: entitlements));
} else {
await Superwall.shared
.setSubscriptionStatus(SubscriptionStatusInactive());
}
});
}
```
You can listen to the published property `Superwall.shared.subscriptionStatus` to be notified when the subscriptionStatus changes. Or you can use the `SuperwallDelegate`
method `subscriptionStatusDidChange(from:to:)`, which replaces `subscriptionStatusDidChange(to:)`.
### 5. Paywall Presentation Condition
In the Paywall Editor you can choose whether to always present a paywall or ask the SDK to check the user subscription before presenting a paywall.
For users on v1 of the SDK, this is replaced with a check on the entitlements within the audience filter. As you migrate your users from v1 to v2 of the
SDK, you'll need to make sure you set both the entitlements check and the paywall presentation condition in the paywall editor.

## 6. Check out the full change log
You can view this on [our GitHub page](https://github.com/superwall/Superwall-Flutter/blob/main/CHANGELOG.md).
## 7. Check out our updated example apps
All of our [example apps](https://github.com/superwall/Superwall-Flutter/tree/main/example) have been updated to use the latest SDK. We now only have two apps: Basic and Advanced. Basic shows you the basic integration of Superwall
without needing a purchase controller or multiple entitlements. Advanced shows you how to use entitlements within your app as well as optionally using a purchase controller with StoreKit or RevenueCat.
# Migrating from v1 to v2 - React Native
Source: https://superwall.com/docs/migrating-to-v2-react-native
SuperwallKit 2.0 is a major release of Superwall's React Native SDK. This introduces breaking changes.
## Migration steps
## 1. Update code references
### 1.1 Update the `configure` and `register` functions
The register and configure functions now use an object with named parameters as their argument.
Before:
```typescript (Before)
Superwall.configure(apiKey, options, purchaseController, completion)
Superwall.shared.register(event, params, handler, feature)
```
Now:
```typescript (Now)
Superwall.configure({
apiKey,
options,
purchaseController,
completion,
})
Superwall.shared.register({
placement,
params,
handler,
feature,
})
```
### 1.2 Rename references from `event` to `placement`
In some cases, you should be able to update references using the automatic renaming suggestions in your editor. For other cases where this hasn't been possible, you'll need to run through this list to manually update your code.
| Before | After |
| ------------------------------------------ | --------------------------------------------- |
| async register(event) | async register(placement) |
| async preloadPaywalls(eventNames) | async preloadPaywalls(placementNames) |
| async getPresentationResult(event, params) | async getPresentationResult(placement,params) |
| TriggerResult.eventNotFound | TriggerResult.placementNotFound |
| TriggerResult.noRuleMatch | TriggerResult.noAudienceMatch |
### 2. Getting the purchased product
The `onDismiss` block of the `PaywallPresentationHandler` now accepts both a `PaywallInfo` object and a `PaywallResult` object. This allows you to easily access
the purchased product from the result when the paywall dismisses.
### 3. Entitlements
The `subscriptionStatus` has been changed to accept a set of `Entitlement` objects. This allows you to give access to entitlements based on products purchased.
For example, in your app you might have Bronze, Silver, and Gold subscription tiers, i.e. entitlements, which entitle a user to access a certain set of features within your app.
Every subscription product must be associated with one or more entitlements, which is controlled via the dashboard. Superwall will already have associated all your
products with a default entitlement. If you don't use more than one entitlement tier within your app and you only use subscription products, you don't need to do anything extra.
However, if you use one-time purchases or multiple entitlements, you should review your products and their entitlements. In general, consumables should not be associated with an
entitlement, whereas non-consumables should be. Check your products [here](https://superwall.com/applications/:app/products/v2).
If you're using a `PurchaseController`, you'll need to set the `entitlements.status` instead of the `subscriptionStatus`:
| Before | After |
| ----------------------------------------------------------------- | ------------------------------------------------------------------------------- |
| Superwall.shared.setSubscriptionStatus(SubscriptionStatus.ACTIVE) | Superwall.shared.setSubscriptionStatus(SubscriptionStatus.Active(entitlements)) |
Here is an example of how you'd sync your subscription status with Superwall if you were using RevenueCat for example:
```typescript RevenueCat
syncSubscriptionStatus() {
Purchases.addCustomerInfoUpdateListener((customerInfo) => {
const entitlements = Object.keys(customerInfo.entitlements.active).map((id) => ({
id,
}))
Superwall.shared.setSubscriptionStatus(
entitlements.length === 0
? SubscriptionStatus.Inactive()
: SubscriptionStatus.Active(entitlements)
)
})
}
```
You can listen to the emitter property `Superwall.shared.subscriptionStatusEmitter` to be notified when the subscriptionStatus changes by passing in a `change` listener. Or you can use the `SuperwallDelegate`
method `subscriptionStatusDidChange(from:to:)`, which replaces `subscriptionStatusDidChange(to:)`.
### 4. Paywall Presentation Condition
In the Paywall Editor you can choose whether to always present a paywall or ask the SDK to check the user subscription before presenting a paywall.
For users on v2 of the SDK, this is replaced with a check on the entitlements within the audience filter. As you migrate your users from v1 to v2 of the
SDK, you'll need to make sure you set both the entitlements check and the paywall presentation condition in the paywall editor.

## 5. Check out the full change log
You can view this on [our GitHub page](https://github.com/superwall/react-native-superwall/blob/master/CHANGELOG.md).
## 6. Check out our updated example apps
All of our example apps ([standard React Native](https://github.com/superwall/react-native-superwall/tree/main/example) and [Expo](https://github.com/superwall/react-native-superwall/tree/main/expo-example)) have been updated to use the latest SDK. We now only have two apps: Basic and Advanced. Basic shows you the basic integration of Superwall without needing a purchase controller or multiple entitlements. Advanced shows you how to use entitlements within your app as well as optionally using a purchase controller with RevenueCat.
# Migrating from v2 to v3 - iOS
Source: https://superwall.com/docs/migrating-to-v3
SuperwallKit 3.0 is a major release of Superwall's iOS SDK, previously known as `Paywall`. This introduces breaking changes.
Note that the minimum deployment target has changed for v3 from iOS 11 to iOS 13
This is so that we can use newer APIs internally and externally.
## Migration steps
### 1. Update Swift Package Manager dependency (if needed)
Our GitHub URL has changed. Although you can keep using the old one, its best if you replace it with the newer one. If you're using Swift Package Manager to handle dependencies:
* Select your project from the **Project Navigator**, select your project under **Project** and click **Package Dependencies**.
* Remove the old dependency for `paywall-ios`.
* Click **+** and search for our new url [https://github.com/superwall/Superwall-iOS](https://github.com/superwall/Superwall-iOS) in the search bar.
* Set the **Dependency Rule** to **Up to Next Major Version** with the lower bound set to **3.0.0**.
* Make sure your project name is selected in **Add to Project**.
* Then, **Add Package**.
Sometimes Xcode keeps the old framework reference around by accident, so select your target in Xcode, then go to Build Phases, and ensure that your target’s Link Binary with Libraries section references SuperwallKit, and remove the reference to Paywall if it was still there.

If you have any Xcode issues during building you might need to clean the build folder by going to
**Product** > **Clean Build Folder** and then restart Xcode.
### 1.1 Update CocoaPods dependency (if needed)
If instead you're using CocoaPods to manage dependencies, in your Podfile update the reference to the Pod from `Paywall` to `SuperwallKit` then run `pod install`:
| Before | After |
| ------------------------- | ------------------------------ |
| pod 'Paywall', '\< 3.0.0' | pod 'SuperwallKit', '\< 4.0.0' |
### 1.2 Update Framework References
Since our framework is now called `SuperwallKit`, you'll now need to explicitly import `SuperwallKit` instead of `Paywall` throughout your code:
#### Swift
| Before | After |
| -------------- | ------------------- |
| import Paywall | import SuperwallKit |
#### Objective-C
| Before | After |
| ---------------- | --------------------- |
| @import Paywall; | @import SuperwallKit; |
## 2. Update code references
In some cases, you should be able to update references using the automatic renaming suggestions that Xcode provides. For other cases where this hasn't been possible, you'll need to run through this list to manually update your code.
### 2.1 Update references to `Paywall.foo` to `Superwall.shared.foo`
You'll see errors saying `Cannot find 'Paywall' in scope`. This is because the main class for interacting with our API is now called `Superwall`. All variables and functions (apart from configure) are now instance functions. This means you'll need to use the shared instance `Superwall.shared`.
### 2.2 Triggering is now registering
Previously you'd use `Paywall.track(...)` to implicitly trigger a paywall, and `Paywall.trigger(...)` to explicitly trigger a paywall. This was confusing as they essentially did the same thing. `Paywall.track` provided completion blocks for what happened on the paywall when really you needed to know what to do next. We wanted to make this simpler so at the heart of this release is `Superwall.shared.register(event:params:handler:feature:)`. This allows you to register an event to access a feature that may or may not be paywalled later in time. It also allows you to choose whether the user can access the feature even if they don't make a purchase.
You can read our docs on [how register works](/docs/feature-gating) to learn more.
Given the low cost nature of how register works, we strongly recommend wrapping all core functionality in a register `feature` block in order to remotely configure which features you want to gate – without an app update.
For SwiftUI apps, we have removed the `.triggerPaywall` view modifier in favor of this register function.
### **2.3 Rename `PaywallDelegate` to `SuperwallDelegate`**
The following method has changed:
| Before | After |
| ----------------------------------------------------------------------- | --------------------------------------------------------------------- |
| func trackAnalyticsEvent(withName name: String, params: \[String: Any]) | func handleSuperwallEventInfo(withInfo eventInfo: SuperwallEventInfo) |
This has a `SuperwallEventInfo` parameter. This has a `params` dictionary and an `event` enum whose cases contain associated values. Note that the methods for handling subscription-related logic no longer exist inside `SuperwallDelegate`, as discussed in the next section.
### 2.4 Handling subscription-related logic
SuperwallKit now handles all subscription-related logic by default making integration super easy. We track the user's subscription status for you and expose the published property `Superwall.shared.subscriptionStatus`. This means that if you were previously using StoreKit you can simply delete that code and let SuperwallKit handle it.
However, if you're using RevenueCat or still want to keep control over subscription-related logic, you'll need to conform to the `PurchaseController` protocol. This is a protocol that handles purchasing and restoring, much like the `PaywallDelegate` did in v2.x of the SDK. You set the purchase controller when you configure the SDK. You can read more about that in our [Purchases and Subscription Status](/docs/advanced-configuration) guide.
The following methods were previously in the `PaywallDelegate` but are now in the `PurchaseController` and have changed slightly:
#### Purchasing
| Before | After |
| --------------------------------- | --------------------------------------------------------- |
| func purchase(product: SKProduct) | func purchase(product: SKProduct) async -> PurchaseResult |
Here, you purchase the product but then return the result of the purchase as a `PurchaseResult` enum case. Make sure you handle all cases of `PurchaseResult`.
#### Restoring
| Before | After |
| ----------------------------------------------------------- | -------------------------------------------------- |
| func restorePurchases(completion: @escaping (Bool) -> Void) | func restorePurchases() async -> RestorationResult |
This has changed to an async function that returns the result of restoring a purchase. If you need help converting between completion blocks and async, [check out this article](https://wwdcbysundell.com/2021/wrapping-completion-handlers-into-async-apis/).
#### Subscription Status
| Before | After |
| ------------------------------- | ------------------------------------------------------------ |
| func isUserSubscribed() -> Bool | Superwall.shared.subscriptionStatus = .active (or .inactive) |
`isUserSubscribed()` has been removed in favor of a `subscriptionStatus` variable which you **must** set every time the user's subscription status changes. On first app install this starts off as `.unknown` until you determine the user's subscription status and set it to `.active` when they have an active subscription, or `.inactive` when they don't. Paywalls will not show until the user's subscription status is set.
You can [check out our docs](/docs/advanced-configuration) for detailed info about implementing the `PurchaseController`.
### 2.5 Rename `PaywallOptions` to `SuperwallOptions`
This now clearly defines which of the options are explicit to paywalls vs other configuration options within the SDK.
### 2.6 Configuring and Identity management
When configuring the API, you now no longer provide a userId or delegate.
| Before | After |
| ------------------------------------------ | -------------------------------------------------------- |
| configure(apiKey:userId:delegate:options:) | configure(apiKey:purchaseController:options:completion:) |
To use the optional delegate, set `Superwall.shared.delegate`. To identify a user, use `Superwall.shared.identify(userId:options:)`.
You can [read more](/docs/identity-management) about identity management in our docs.
## 3. Check out the full change log
You can view this on [our GitHub page](https://github.com/superwall/Superwall-iOS/blob/master/CHANGELOG.md).
## 4. Check out our updated example apps
All of our example apps have been updated to use the latest SDK. We have created a dedicated app that shows you how to integrate Superwall with RevenueCat. In addition, we have added an Objective-C app.
## 5. Read our docs and view the updated iOS SDK documentation
Visit the links in the sidebar or [click here to go to the iOS SDK docs](https://sdk.superwall.me/documentation/superwallkit/).
# Migrating from v3 to v4 - iOS
Source: https://superwall.com/docs/migrating-to-v4
SuperwallKit 4.0 is a major release of Superwall's iOS SDK. This introduces breaking changes.
## Migration steps
## 1. Update code references
### 1.1 Rename references from `event` to `placement`
In some cases, you should be able to update references using the automatic renaming suggestions that Xcode provides. For other cases where this hasn't been possible, you'll need to run through this list to manually update your code.
| Before | After |
| ------------------------------------- | ----------------------------------------- |
| func register(event:) | func register(placement:) |
| func preloadPaywalls(forEvents:) | func preloadPaywalls(forPlacements:) |
| func getPaywall(forEvent:) | func getPaywall(forPlacement:) |
| func getPresentationResult(forEvent:) | func getPresentationResult(forPlacement:) |
| TriggerResult.eventNotFound | TriggerResult.placementNotFound |
### 1.2 Update PurchaseController method
The following has been changed in the `PurchaseController`:
| Before | After |
| --------------------------------------------------------- | ------------------------------------------------------------ |
| func purchase(product: SKProduct) async -> PurchaseResult | func purchase(product: StoreProduct) async -> PurchaseResult |
This provides a `StoreProduct` object, which contains information about the product to be purchased.
## 2. StoreKit 2
The SDK defaults to using StoreKit 2 for users who are on iOS 15+. However, you can choose to stay on StoreKit 1 by setting the `SuperwallOption` `storeKitVersion` to `.storeKit1`.
There are a few caveats to this however.
In the following scenarios, the SDK will choose StoreKit 1 automatically:
1. If you're using Objective-C and using a `PurchaseController`.
2. If you're using Objective-C and observing purchases by setting the `SuperwallOption` `shouldObservePurchases` to `true`.
3. If you have set the key `SKIncludeConsumableInAppPurchaseHistory` to `true` in your info.plist, the SDK will use StoreKit 1 for everyone who isn't on iOS 18+.
If you're using Objective-C and using `purchase(_:)` you must manually set the `SuperwallOption` `storeKitVersion` to `.storeKit1`.
If you're using a `PurchaseController`, you access the StoreKit 2 product to purchase using `product.sk2Product` and the StoreKit 1 product `product.sk1Product` if
you're using StoreKit 1. You should take the above scenarios into account when choosing which product to purchase.
### 3. Getting the purchased product
The `onDismiss` block of the `PaywallPresentationHandler` now accepts both a `PaywallInfo` object and a `PaywallResult` object. This allows you to easily access
the purchased product from the result when the paywall dismisses.
### 4. Entitlements
The `subscriptionStatus` has been changed to accept a set of `Entitlement` objects. This allows you to give access to entitlements based on products purchased.
For example, in your app you might have Bronze, Silver, and Gold subscription tiers, i.e. entitlements, which entitle a user to access a certain set of features within your app.
Every subscription product must be associated with one or more entitlements, which is controlled via the dashboard. Superwall will already have associated all your
products with a default entitlement. If you don't use more than one entitlement tier within your app and you only use subscription products, you don't need to do anything extra.
However, if you use one-time purchases or multiple entitlements, you should review your products and their entitlements. In general, consumables should not be associated with an
entitlement, whereas non-consumables should be. Check your products [here](https://superwall.com/applications/:app/products/v2).
If you're using a `PurchaseController`, you'll need to set the `entitlements.status` instead of the `subscriptionStatus`:
| Before | After |
| --------------------------------------------- | ---------------------------------------------------------------- |
| Superwall.shared.subscriptionStatus = .active | Superwall.shared.subscriptionStatus = .active(Set(entitlements)) |
You can get the `StoreProducts` and their associated entitlements from Superwall by calling the method `products(for:)`. Here is an example of how you'd sync your subscription
status with Superwall using these methods:
```swift Swift
func syncSubscriptionStatus() async {
var products: Set = []
for await verificationResult in Transaction.currentEntitlements {
switch verificationResult {
case .verified(let transaction):
products.insert(transaction.productID)
case .unverified:
break
}
}
let storeProducts = await Superwall.shared.products(for: products)
let entitlements = Set(storeProducts.flatMap { $0.entitlements })
await MainActor.run {
Superwall.shared.subscriptionStatus = .active(entitlements)
}
}
```
```swift RevenueCat
func syncSubscriptionStatus() {
assert(Purchases.isConfigured, "You must configure RevenueCat before calling this method.")
Task {
for await customerInfo in Purchases.shared.customerInfoStream {
// Gets called whenever new CustomerInfo is available
let superwallEntitlements = customerInfo.entitlements.activeInCurrentEnvironment.keys.map {
Entitlement(id: $0)
}
await MainActor.run { [superwallEntitlements] in
if superwallEntitlements.isEmpty {
Superwall.shared.subscriptionStatus = .inactive
} else {
Superwall.shared.subscriptionStatus = .active(Set(superwallEntitlements))
}
}
}
}
}
```
You can listen to the published property `Superwall.shared.subscriptionStatus` to be notified when the subscriptionStatus changes. Or you can use the `SuperwallDelegate`
method `subscriptionStatusDidChange(from:to:)`, which replaces `subscriptionStatusDidChange(to:)`.
### 5. Paywall Presentation Condition
In the Paywall Editor you can choose whether to always present a paywall or ask the SDK to check the user subscription before presenting a paywall.
For users on v4 of the SDK, this is replaced with a check on the entitlements within the audience filter. As you migrate your users from v3 to v4 of the
SDK, you'll need to make sure you set both the entitlements check and the paywall presentation condition in the paywall editor.

## 6. Check out the full change log
You can view this on [our GitHub page](https://github.com/superwall/Superwall-iOS/blob/master/CHANGELOG.md).
## 7. Check out our updated example apps
All of our example apps have been updated to use the latest SDK. We now only have two apps: Basic and Advanced. Basic shows you the basic integration of Superwall
without needing a purchase controller or multiple entitlements. Advanced shows you how to use entitlements within your app as well as optionally using a purchase controller
with StoreKit or RevenueCat.
## 8. Read our docs and view the updated iOS SDK documentation
Visit the links in the sidebar or [click here to go to the iOS SDK docs](https://sdk.superwall.me/documentation/superwallkit/).
# Observer Mode
Source: https://superwall.com/docs/observer-mode
Use Observer mode to report purchases made outside of Superwall so they'll appear in your dashboard. Available for iOS and Android.
If you wish to make purchases outside of Superwall's SDK and paywalls, you can use **observer mode** to report purchases that will appear in the Superwall dashboard, such as transactions:
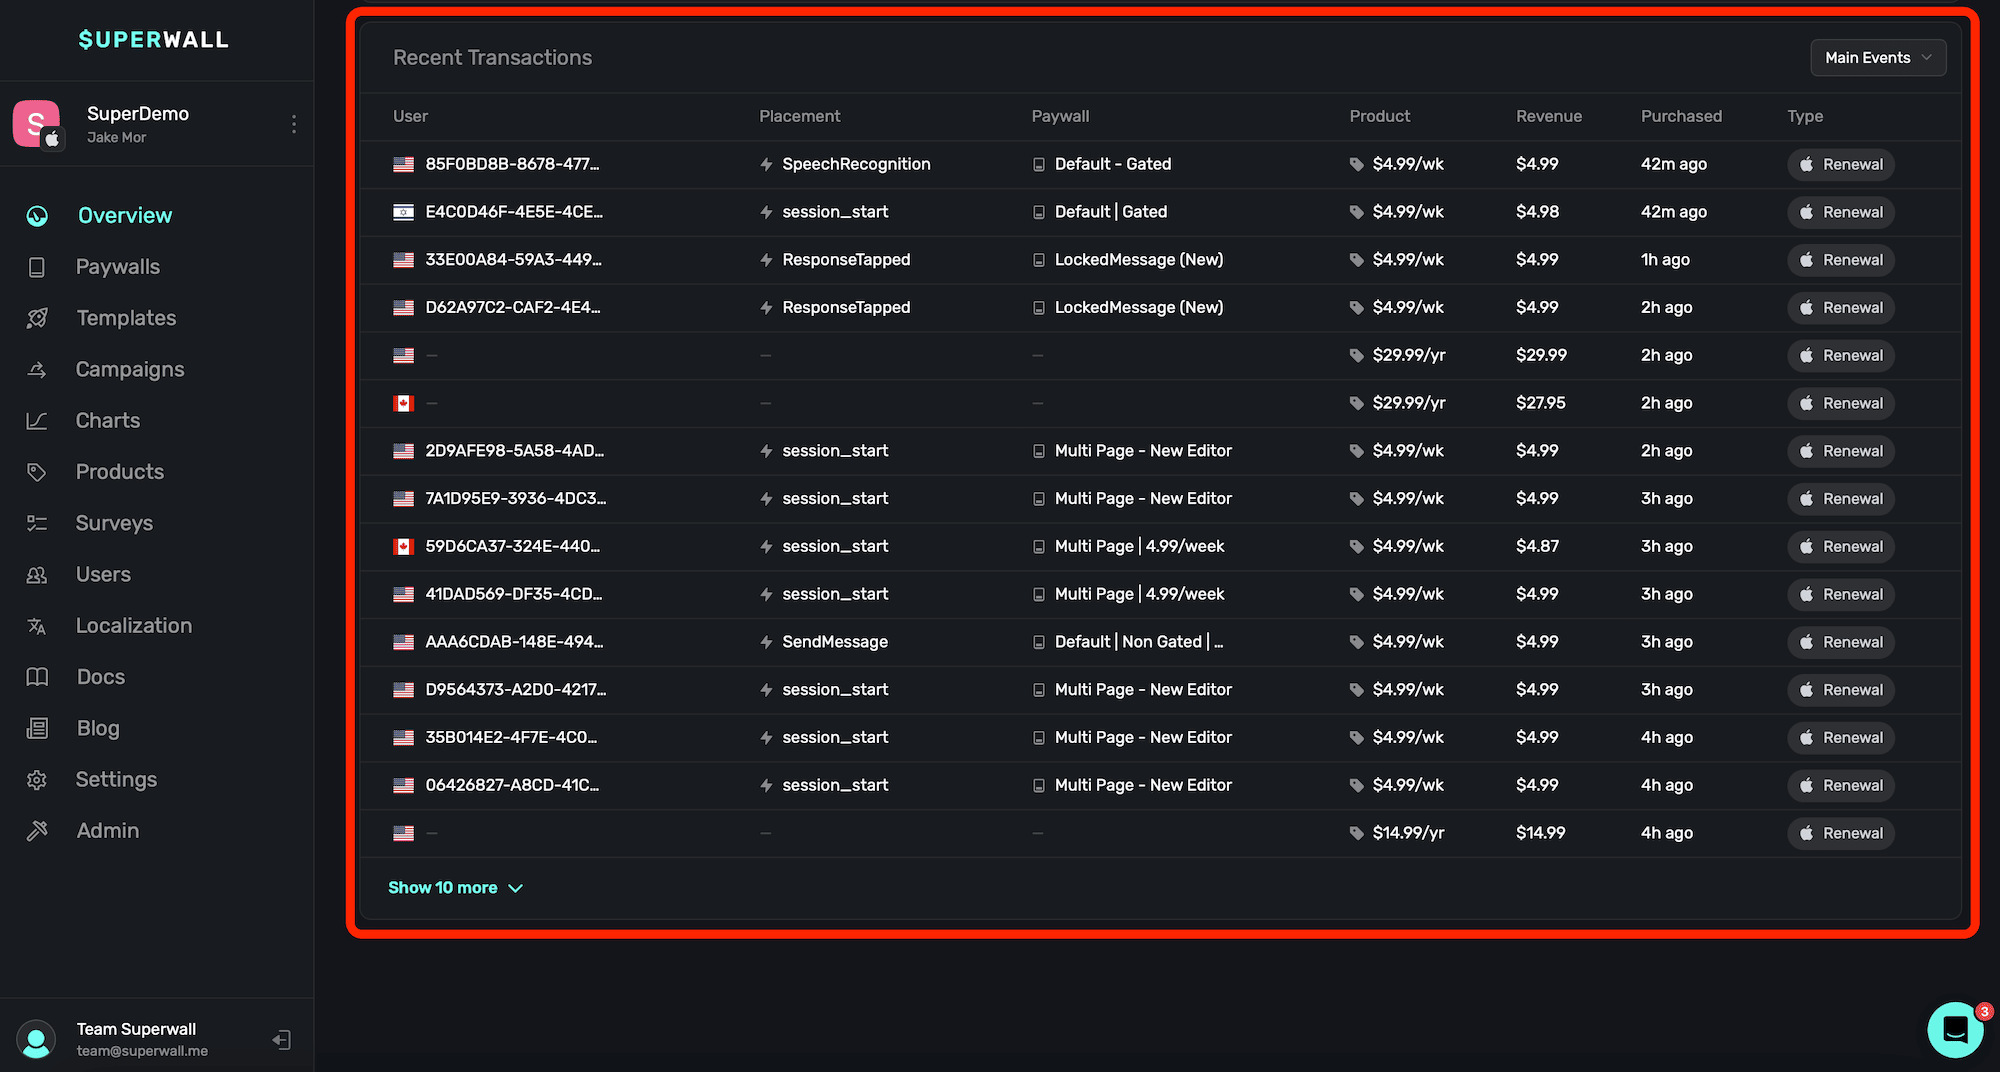
This is useful if you are using Superwall solely for revenue tracking, and you're making purchases using frameworks like StoreKit or Google Play Billing Library directly. Observer mode will also properly link user identifiers to transactions. To enable observer mode, set it using `SuperwallOptions` when configuring the SDK:
```swift iOS
let options = SuperwallOptions()
options.shouldObservePurchases = true
Superwall.configure(apiKey: "your_api_key", options: options)
```
```kotlin Android (Automatic)
val options = SuperwallOptions()
options.shouldObservePurchases = true
Superwall.configure(this, "your_api_key", options = options)
// In your purchase methods, replace Google's billing code with Superwall's proxy
val productDetailsParams =
SuperwallBillingFlowParams.ProductDetailsParams
.newBuilder()
.setOfferToken("test_offer_token")
.setProductDetails(mockProductDetails)
.build()
val params =
SuperwallBillingFlowParams
.newBuilder()
.setIsOfferPersonalized(true)
.setObfuscatedAccountId(...)
.setObfuscatedProfileId(...)
.setProductDetailsParamsList(listOf(productDetailsParams))
.build()
billingClient.launchBillingFlowWithSuperwall()
```
```kotlin Android (Manual)
val options = SuperwallOptions()
options.shouldObservePurchases = true
Superwall.configure(this, "your_api_key", options = options)
// In your purchase methods, begin by tracking the purchase start
Superwall.instance.observePurchaseStart(productDetails)
// On succesful purchase
Superwall.instance.observePurchaseResult(billingResult, purchases)
// On purchase error
Superwall.instance.observePurchaseError(productDetails, error)
```
There are a few things to keep in mind when using observer mode:
1. On iOS, if you're using StoreKit 2, then Superwall solely reports transaction completions. If you're using StoreKit 1, then Superwall will report transaction starts, abandons, and completions.
2. When using observer mode, you can't make purchases using our SDK — such as `Superwall.shared.purchase(aProduct)`.
For more on setting up revenue tracking, check out this [doc](/overview-settings-revenue-tracking).
# Managing Localization Updates
Source: https://superwall.com/docs/overview-localization
If you're only dealing with one paywall, or trying to get started with localizing — read this
[doc](/paywall-editor-localization) first.
When you make changes to a localized string referenced across more than one paywall, or one is changed via a localization platform provider — you can review those changes by **clicking** on the **Localization** button from the sidebar:
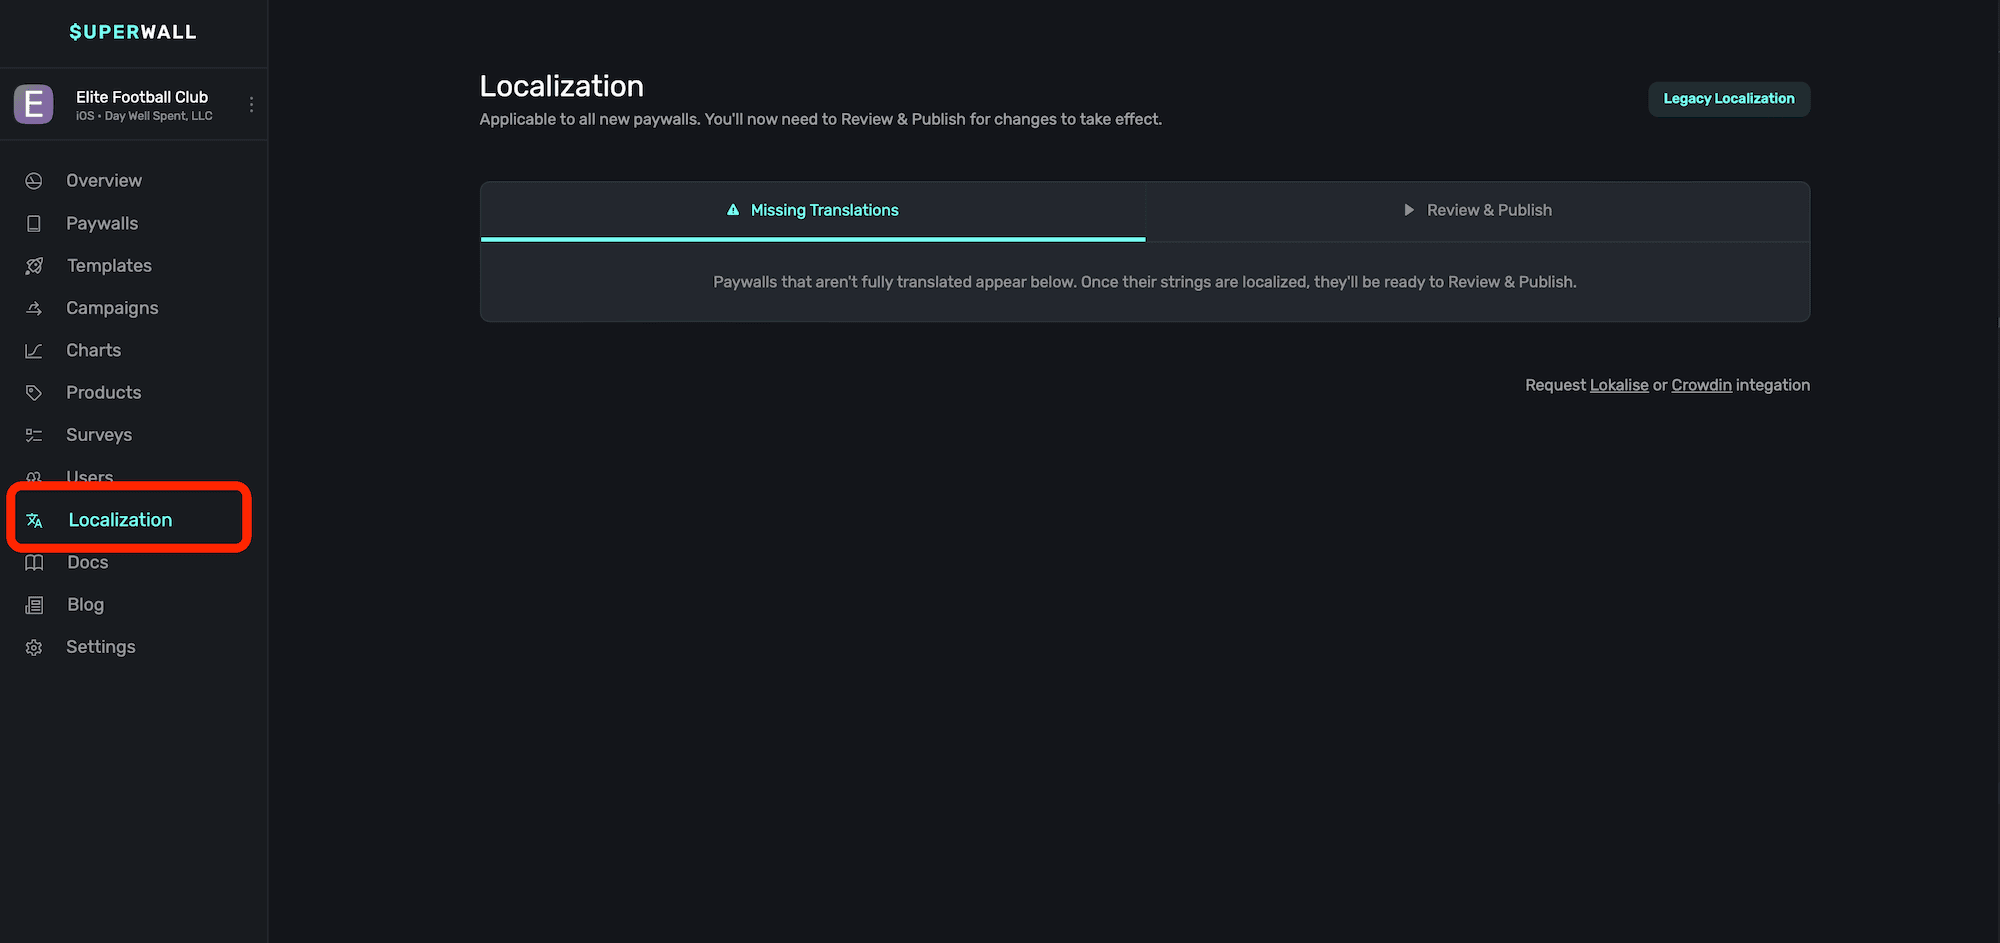
You can also use the `⌘+5` keyboard shortcut to open the Localization page from the Overview
screen.
When you open the Localization page, you'll see two primary sections:
1. **Missing Translations:** Any keys that are missing a localized value will show up here to address.
2. **Review & Publish:** Any localizations that have changed which are used on multiple paywalls (or changed from an external localization provider) show up here. Paywalls using any edited localization key here will continue to use the "old" value it had before it was changed, and you can publish the updates live for the other paywalls after reviewing them.
For example, here the key `dominate_the_pitch` had its value changed on Paywall A and it's now live. But, here, Paywall B also references the key `dominate_the_pitch`, so you can hover over each locale identifier and see its old and new value. From there, you can either ignore those changes or put them live for each paywall.
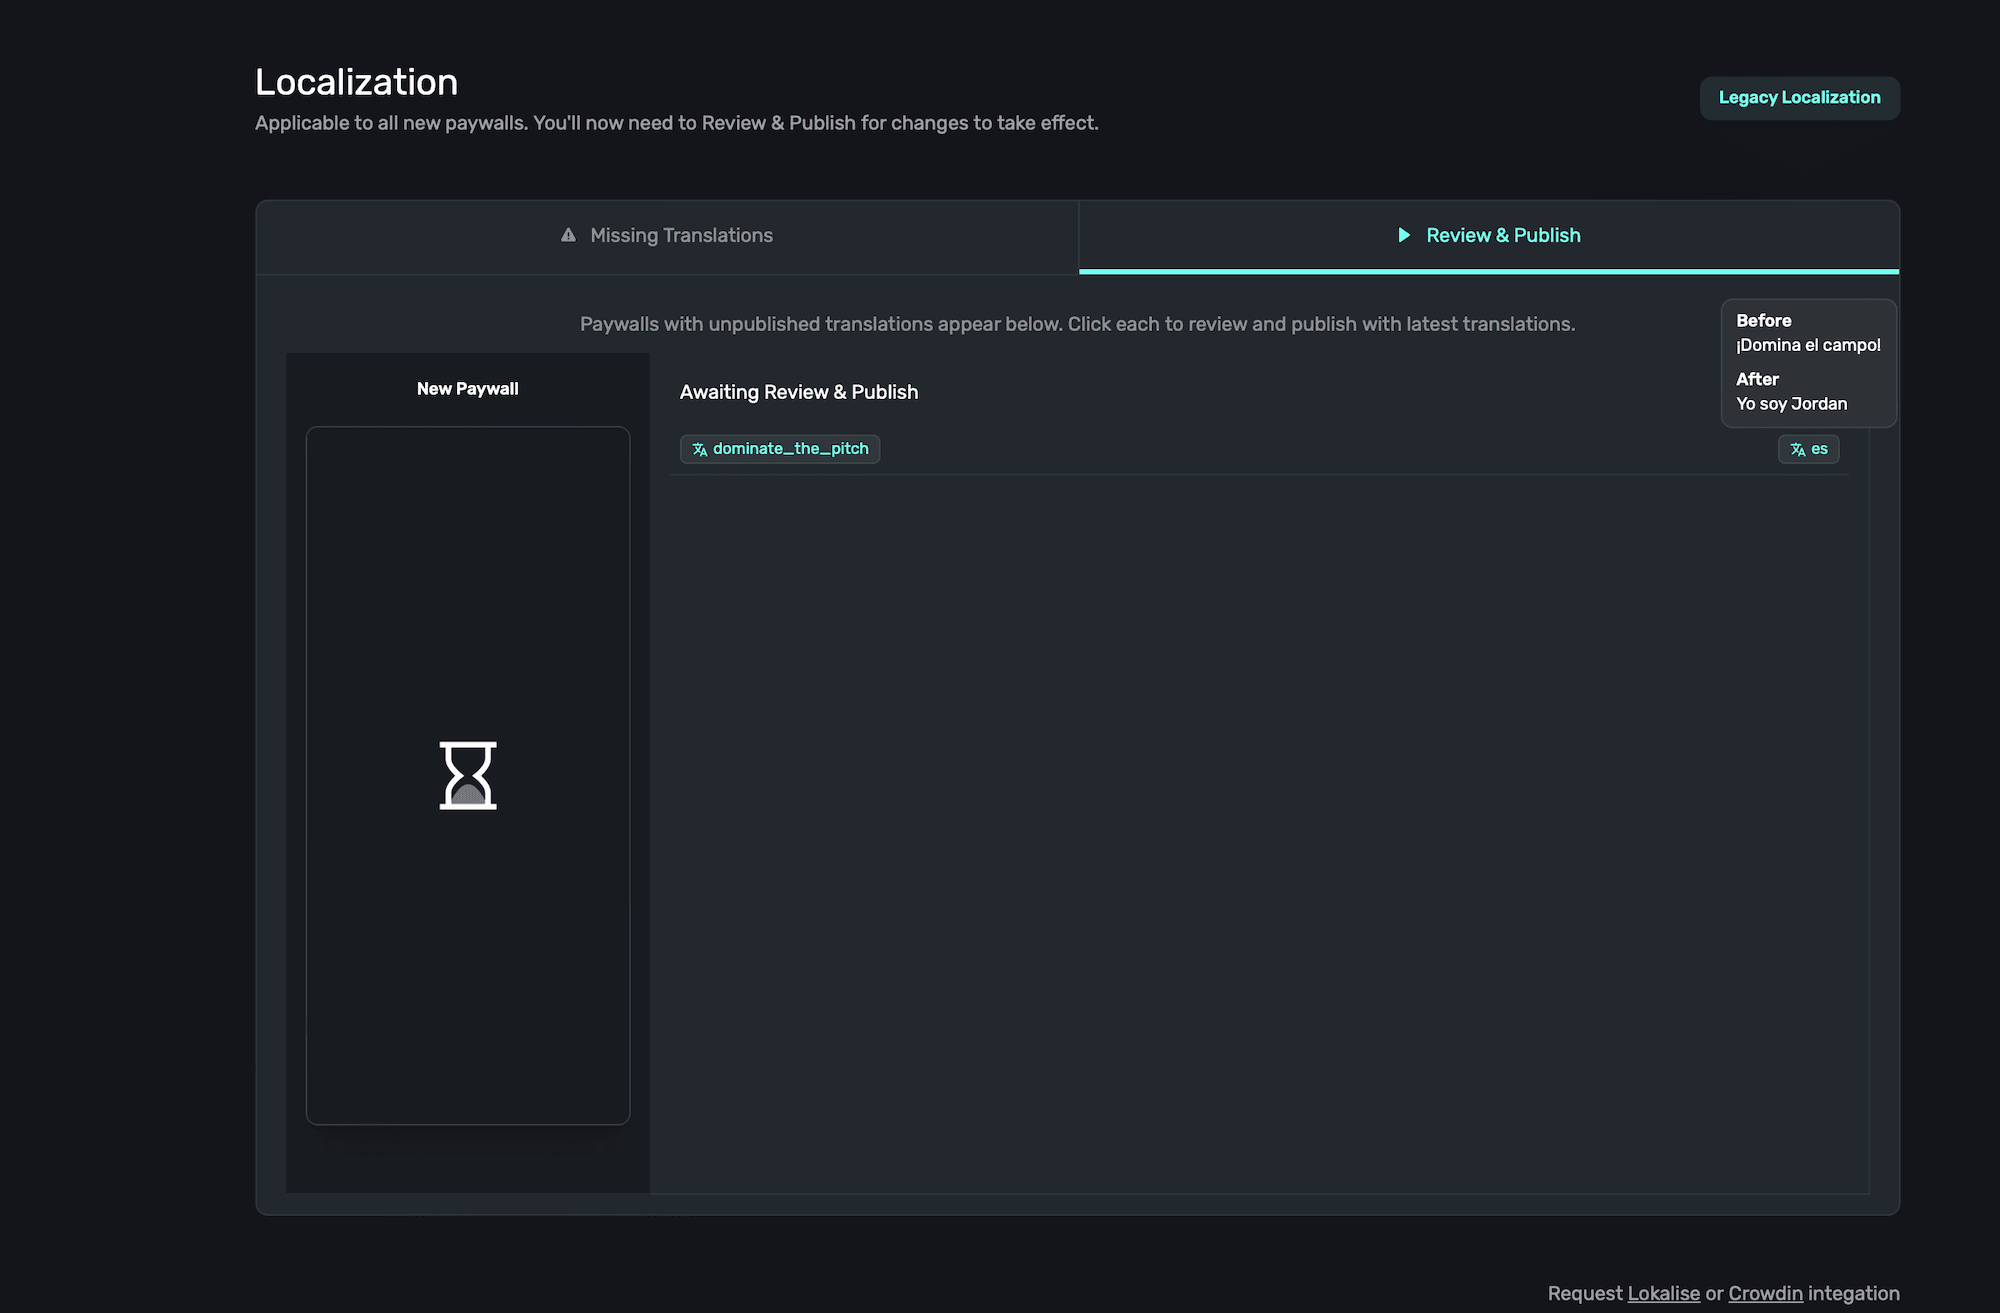
# Overview
Source: https://superwall.com/docs/overview-metrics
The Overview page gives you a holistic look at how your app is performing, complete with easy-to-find key metrics and top-level campaign data.
Once you've logged into Superwall, you'll be taken to the **Overview** page. Here, you can view key metrics and important campaign performance about your app.
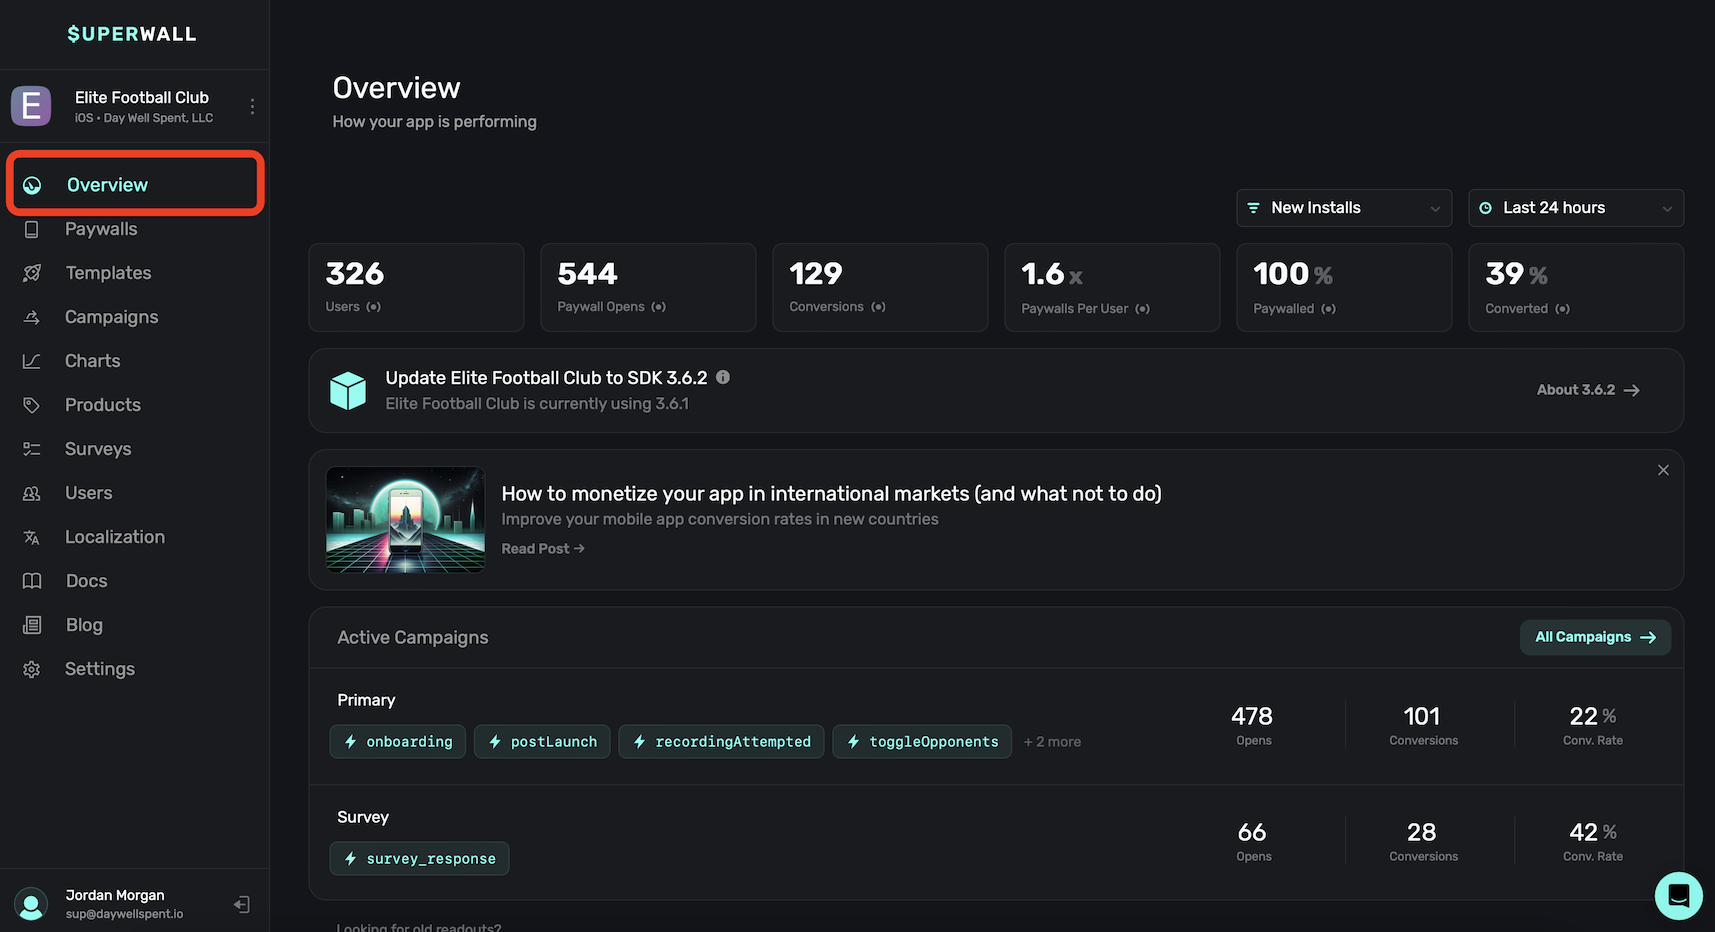
You can toggle between your other apps to view with the Overview page too. Just use the toggle at the top left to choose another app.
When you log in for the first time or add a new app, the Overview page will reflect a "Quickstart"
wizard to help you get up and running. Complete the interactive checklist to finish your Superwall
integration:

The overview dashboard is broken down between five main sections:
1. **Toggles:** Switch between new install or all users, and apply different time filters between them.
2. **Key Metrics:** Critical data about how your app is performing.
3. **SDK Alerts & News:** Alerts about new SDK versions available and company news.
4. **Campaigns:** Breakdowns of your active campaigns.
5. **Recent Transactions:** Displays the most recent transactions from the selected app.

### New installs versus all users
Using the toggles at the top, you can switch between viewing data about **New Installs** or **All Users**, along with changing date ranges between either of them:
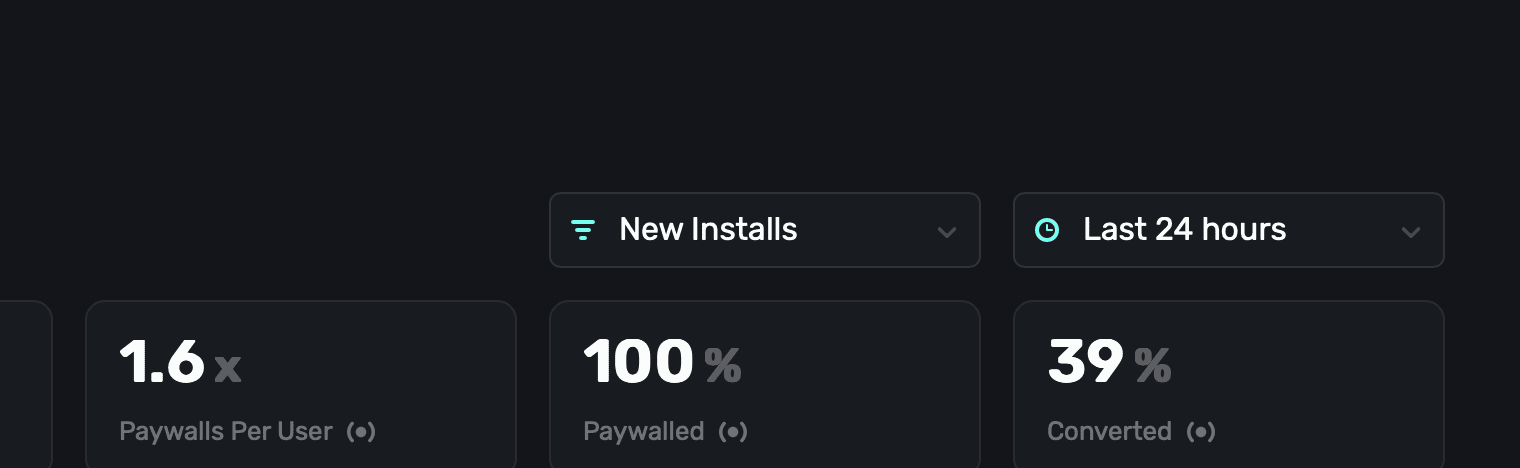
Here's the difference between New Installs and All Users:
* **New Installs:** Represents users who installed your app within the selected time frame.
* **All Users:** Represents any user of your app, including returning and new users.
### Changing dates
Use the toggles at the top to change date ranges:
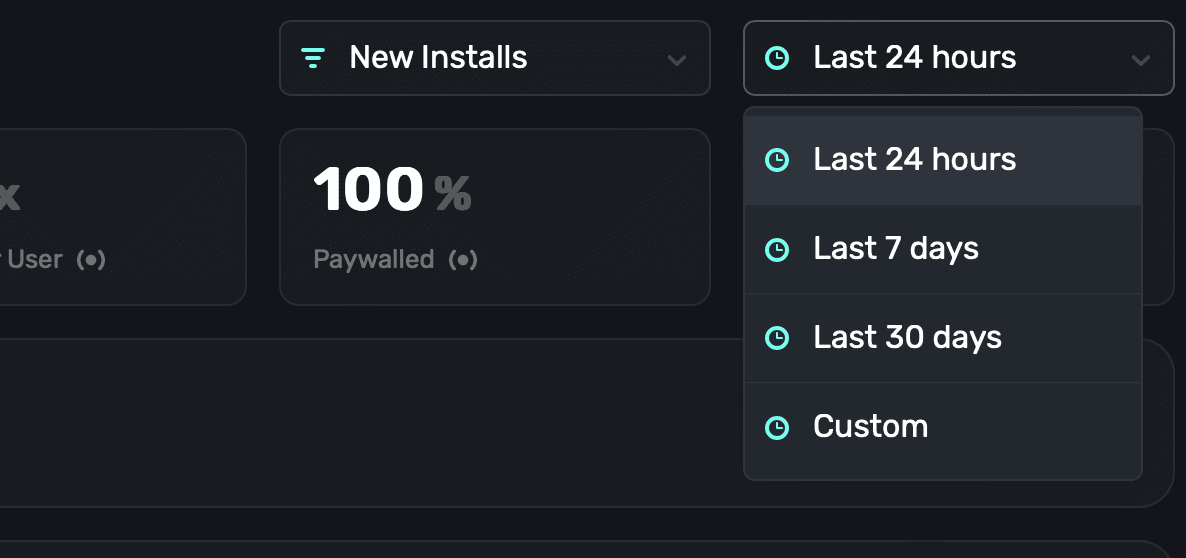
All of the key metrics and campaign data will be updated based on the range you select. If you need fine-grain control, choose **Custom** and choose any date range you like.
### Key metrics
View insightful metrics at the top of the overview page:

Here's what they mean, from left-to-right:
Each metric is representative of the data you've selected from the toggles above them.
| Name | Description |
| ----------------- | --------------------------------------------------------------------------------------------------------- |
| Users | The number of unique users who opened your app. |
| Paywall Opens | How many paywall presentations occurred. |
| Conversions | A total number of Conversions resulting from a presented paywall. |
| Paywalls Per User | The percentage of paywalls shown per user. Remember, each user may see more than one paywall per session. |
| Paywalled | The percentage of how many users were shown a paywall in total. |
| Converted | The percentage of users who converted (trial or paid). |
Use these metrics as a way to quickly get a sense of how your app is performing from a monetization standpoint.
Click on any metric to view a chart breakdown with more details about it.
### Campaigns
The active campaigns section gives you a quick overview of how your selected app's campaigns are performing:
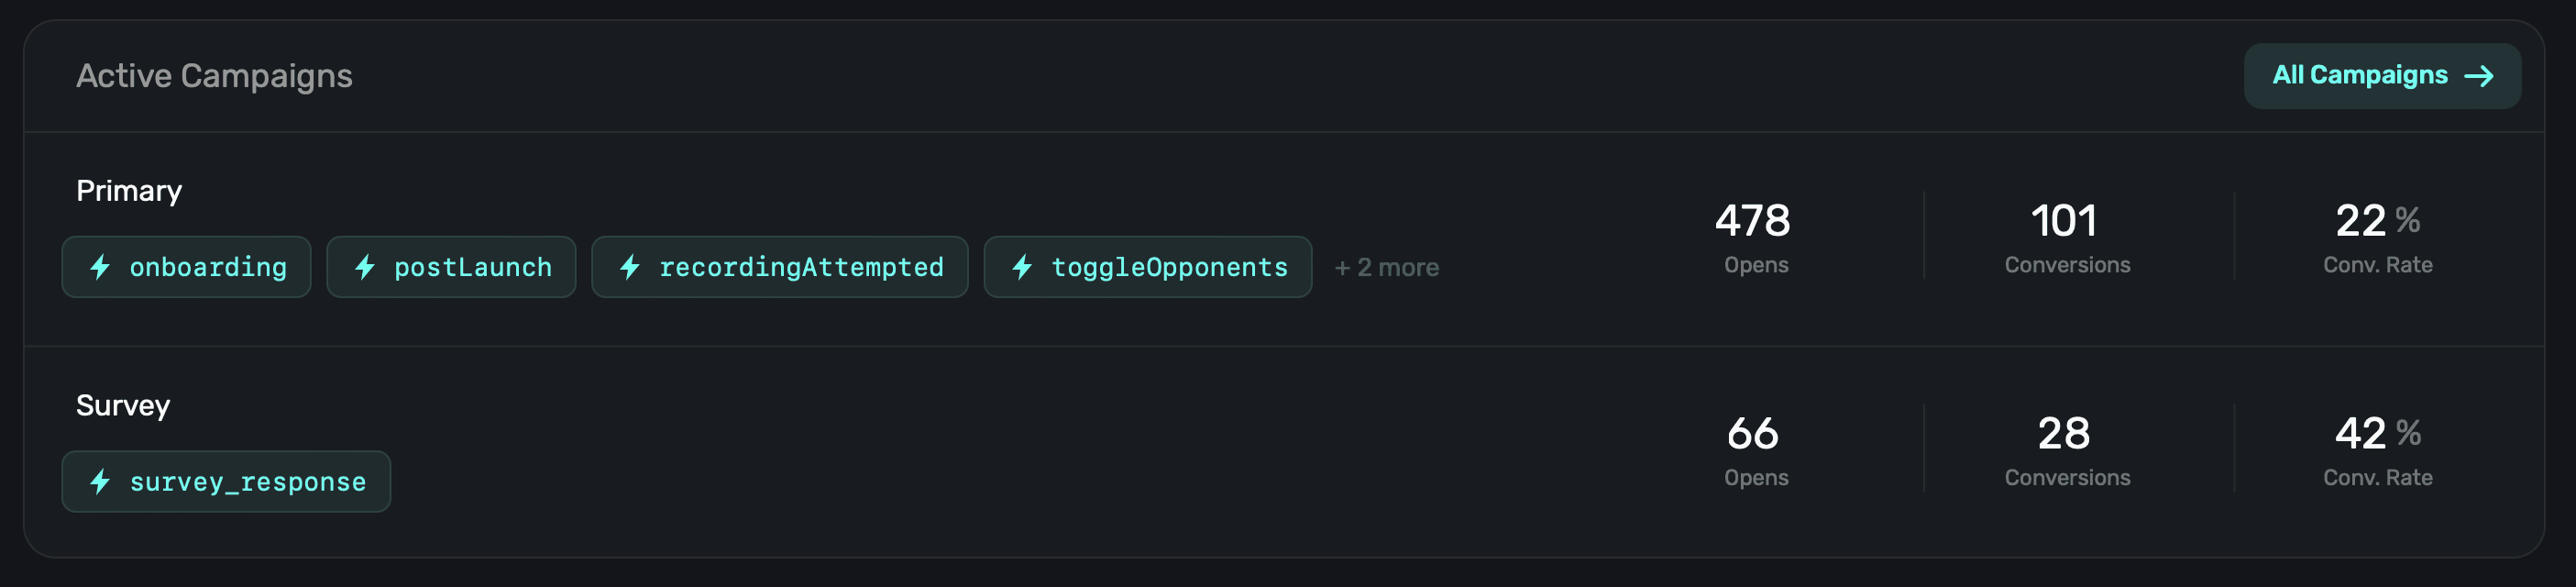
For each campaign, Superwall will show:
* The **[placements](https://youtube.com/shorts/lZx8fAL8Nvw)** in-use by the campaign.
* How many **opens** those placements resulted in. Put differently, how many paywall presentations have occurred for the campaign.
* How many **conversions** the campaign has produced.
* The **conversion rate** the campaign currently holds.
Like the metrics section, all the data here is representative of the users or new installs and
time frame you've chosen from the toggles at the top of the Overview page.
Click on any campaign to dig deeper into them. If you would like to view all campaigns (active or paused), click **All Campaigns** at the top-right. Learn more about campaign [here](/campaigns).
### Recent transactions
To view recent transactions from your app, use the "Recent Transactions" view:
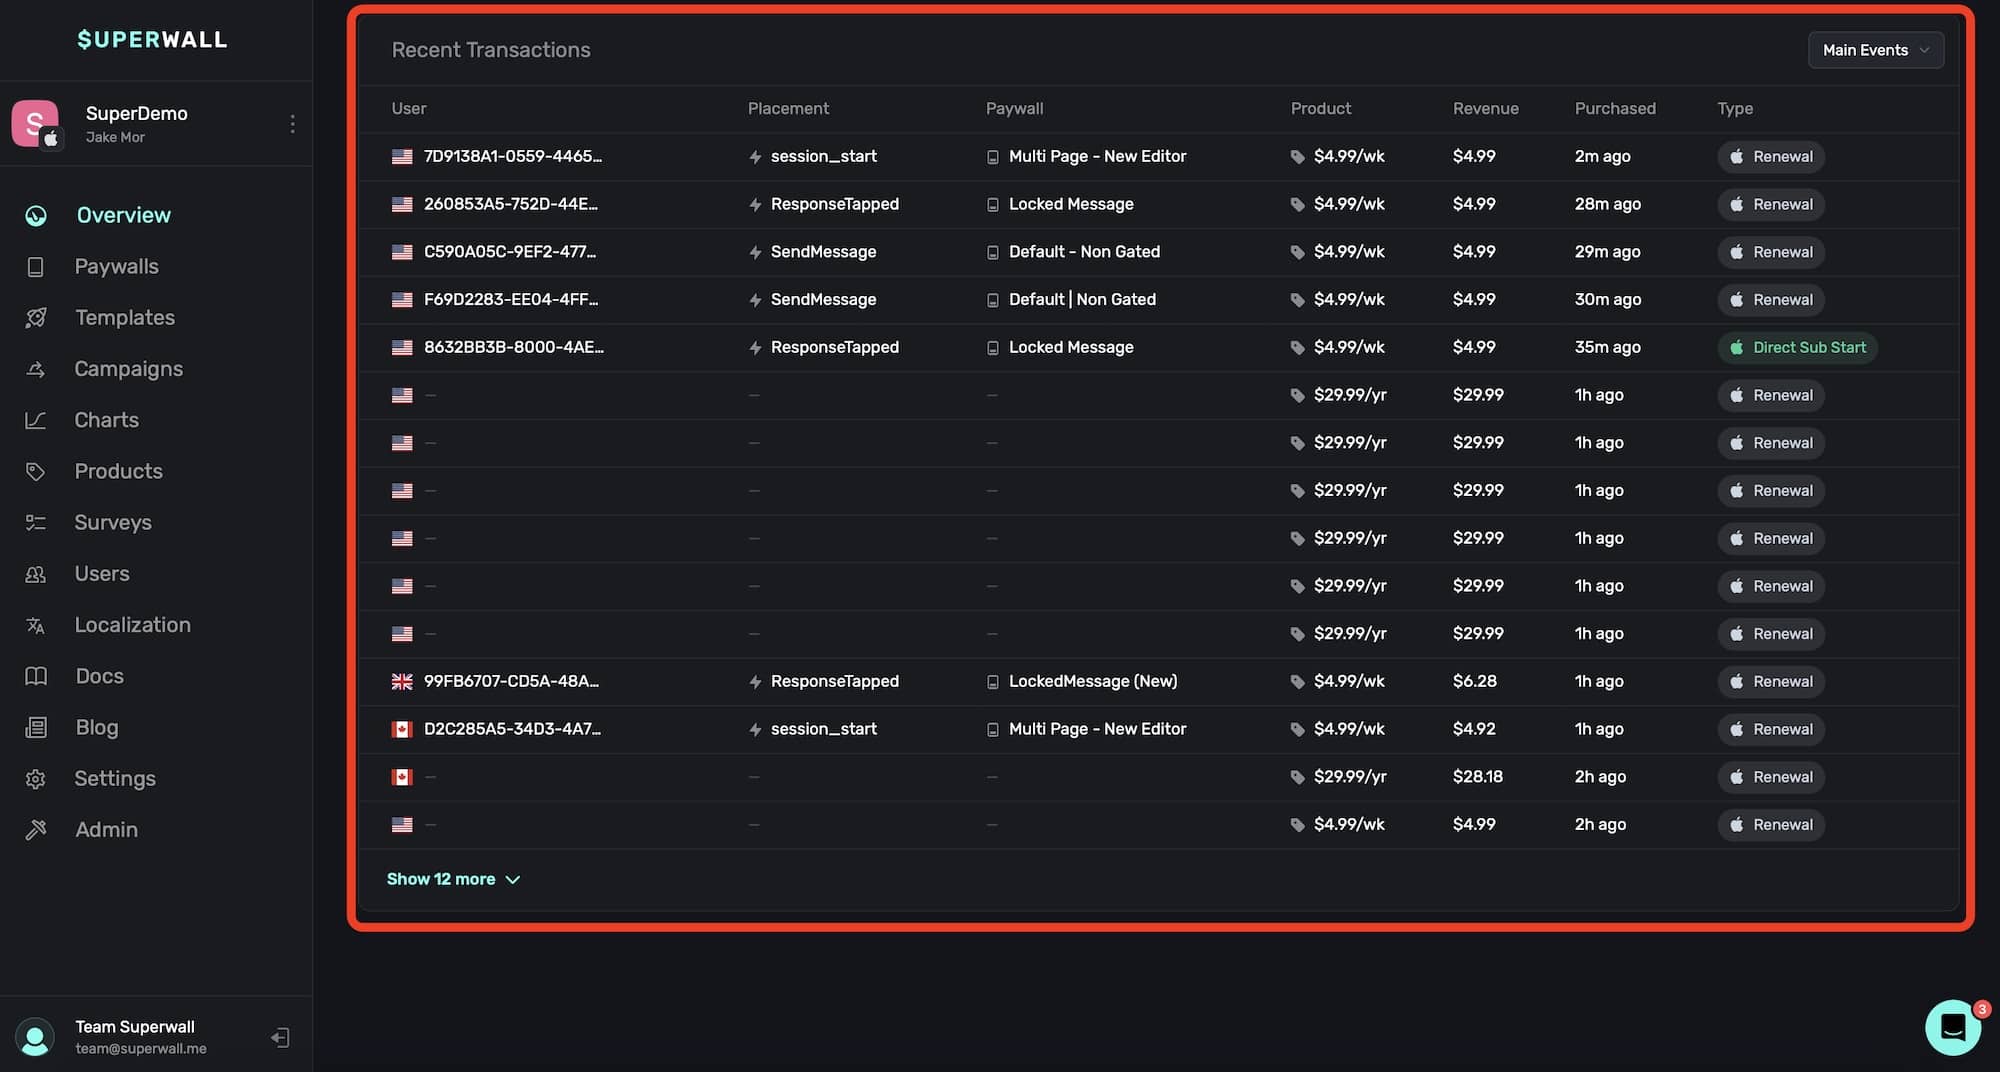
The transaction view displays:
* **User**: The user ID the event belongs to, along with an emoji flag representing their territory. Click on this value to quickly copy it to your clipboard.
* **Placement**: The placement that the event associates to. You can click this to open the campaign that the placement belongs to.
* **Paywall**: The paywall that the event took place on. Click this value to quickly open a modal preview of the paywall.
* **Product**: The product the event represents. Hover over this value to get a tooltip that will display the product's identifier.
* **Revenue**: Any revenue generated from the event.
* **Purchased**: The time the event occurred.
* **Type**: The event type. The list of events can be found below.
Keep in mind that Superwall displays transaction events based on the moment a server notification is received from the relevant store front. That means that the timing of the event may not necessarily be right when it actually occurred.
#### Transaction event types
Each of the following transaction types can show up in the transaction view:
| Event Name | Description |
| ------------------------- | ---------------------------------------------------------------------------- |
| **Main Events (Default)** | A collection of key subscription events for tracking purposes. |
| **All Events** | Includes every possible subscription-related event for complete tracking. |
| **Paywall Conversion** | Triggered when a user successfully converts or starts a trial via a paywall. |
| **Trial Start** | Indicates the beginning of a free trial period. |
| **Direct Sub Start** | A subscription starts without a trial period. |
| **One Time Purchase** | A non-subscription, single-payment transaction is completed. |
| **Intro Offer** | A user subscribes using an introductory offer. |
| **Trial Convert** | A trial that successfully converted into a paid subscription. |
| **Renewal** | An existing subscription renews for another billing period. |
| **Refund** | A user is refunded for a previous purchase. |
| **Trial Cancel** | A user cancels their trial before it converts to a paid subscription. |
| **Trial Expire** | A free trial ends without converting to a paid subscription. |
| **Cancel** | A user cancels their active subscription. |
| **Uncancel** | A previously canceled subscription is reactivated before expiration. |
| **Expire** | A subscription fully expires and is no longer active. |
You can filter the transaction view by any of these using the toggle at the top right:

If you see the paywall or placement values blank — don't worry. This means the user started a subscription, reactivated or whatever the event may be out *outside* of your app. Typically, this occurs when they visit their Apple ID's settings and change subscription or products there manually. Further, processing simply represents just that — Superwall received an event, but some of the details are still being fetched. Typically, this shouldn't make more than a few minutes.
# General
Source: https://superwall.com/docs/overview-settings
Use the Settings area to set up API keys, metadata and more.
To access settings for your Superwall account, **click** the **Settings** button in the sidebar:
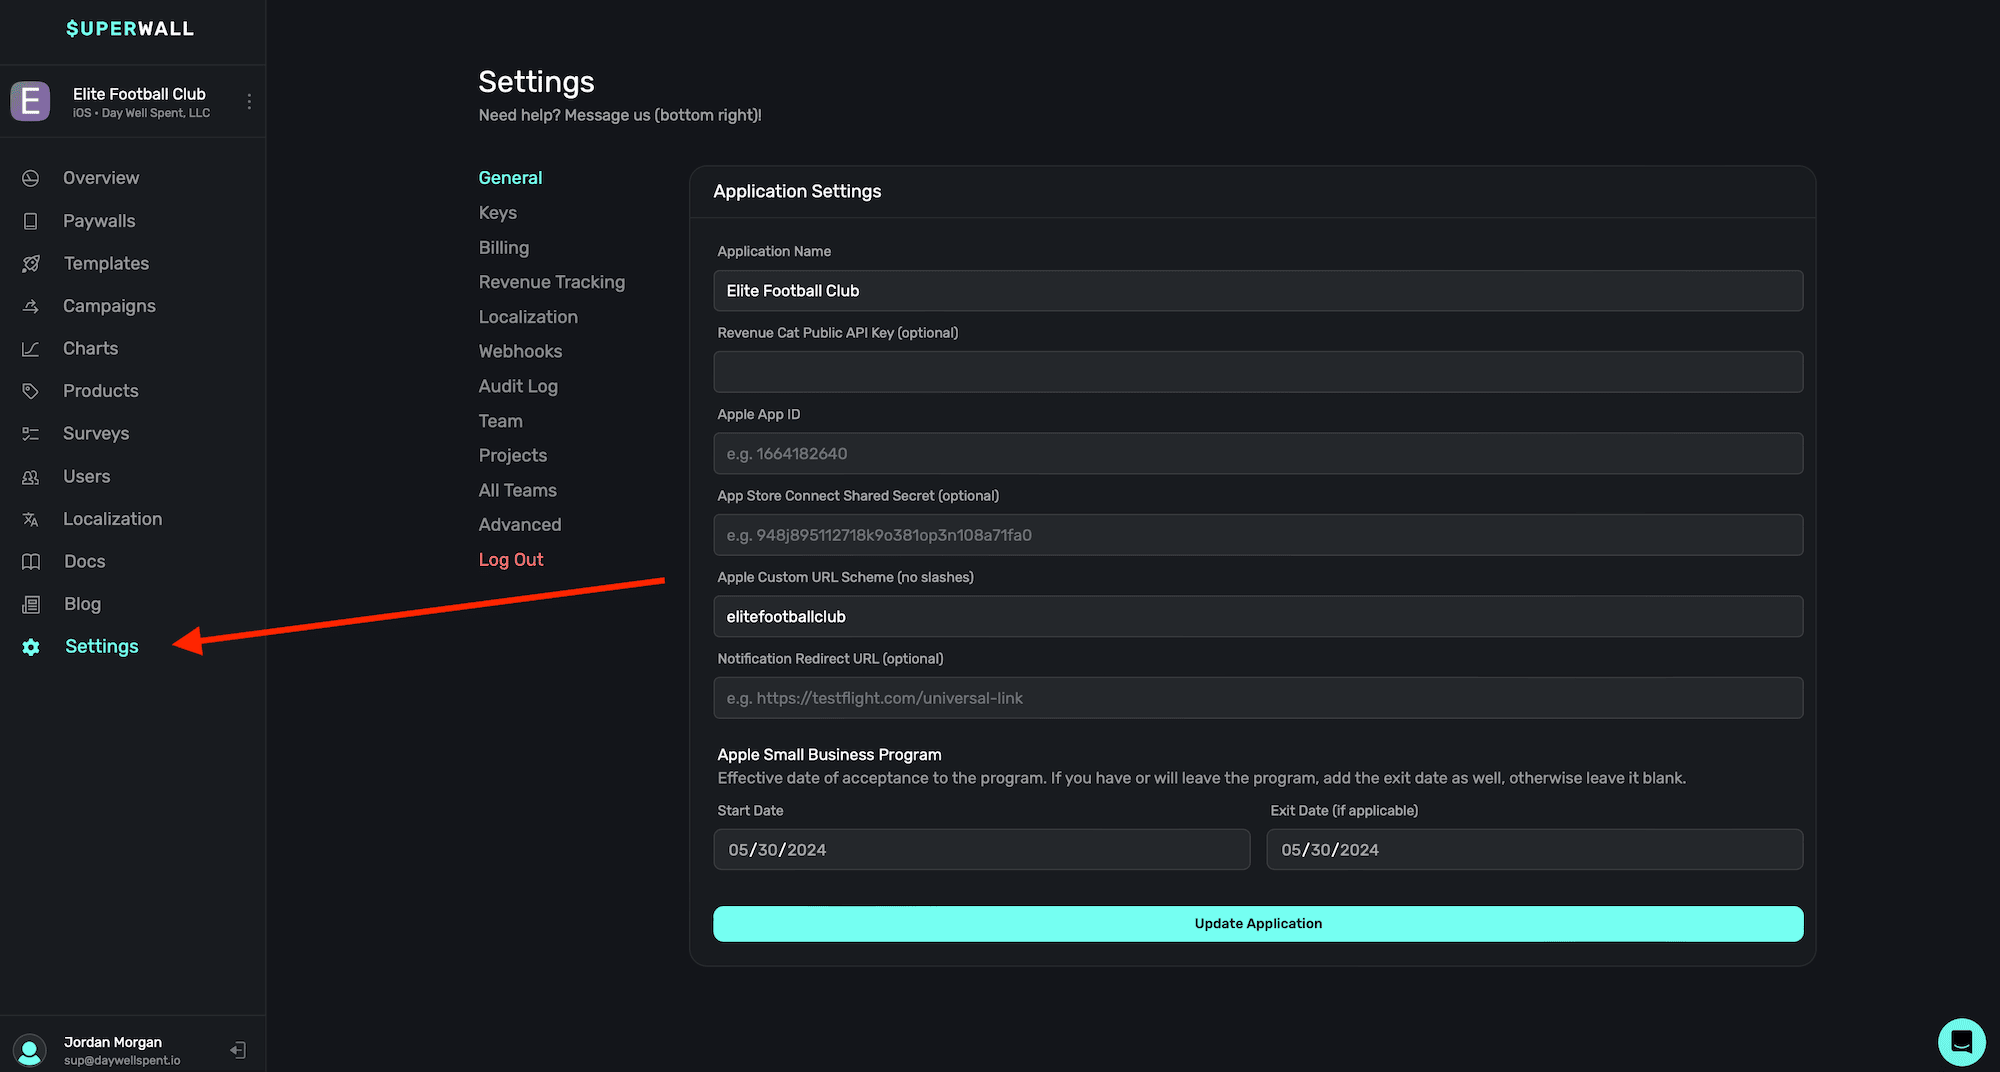
Under the General section, you can set or edit metadata and some integration API keys for your app:
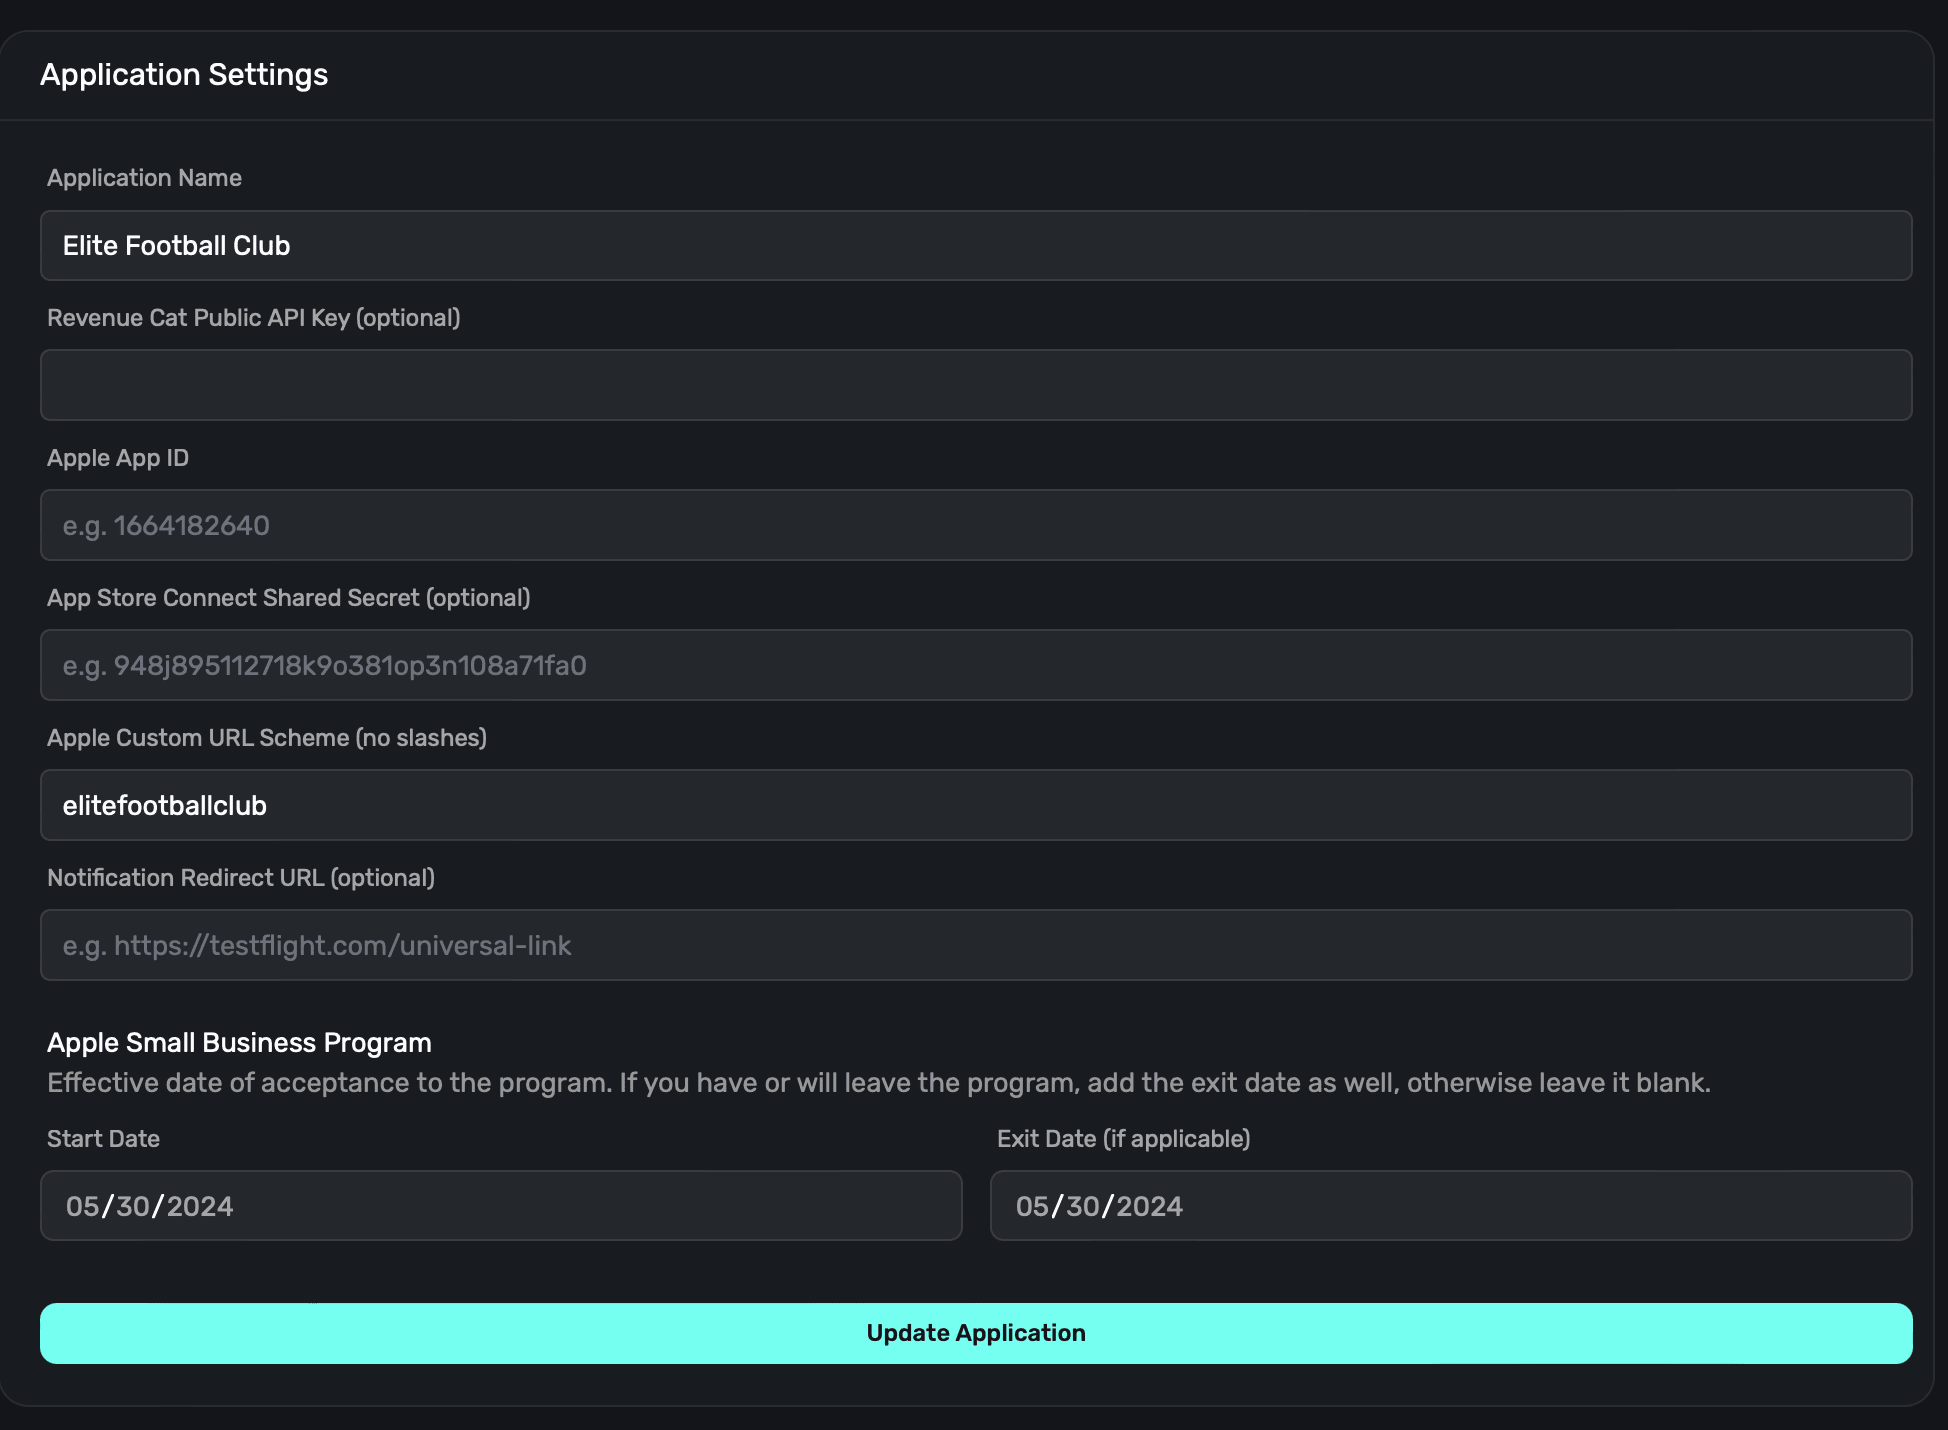
Some sections will hide or show depending on the platform your app is on. For example, for an
Android app, Superwall will hide Apple-specific items.
**Name**
The name for your application in Superwall. This isn't user-facing and only used within Superwall. You can change it anytime.
**Revenue Cat Public API Key**
Add in your Revenue Cat [public API key](https://www.revenuecat.com/docs/welcome/authentication) to have Superwall automatically pull in product identifiers. Note that you'll need to create products in Superwall along with their pricing — this just makes it a bit easier to do by fetching identifiers for you.
**Apple App ID**
Fill in your app's Apple identifier here. You can find it by going to **App Store Connect -> General -> App Information**.
**Apple Custom URL Scheme**
We use URL schemes to perform deep link logic and for in-app previews of paywalls for iOS apps. To learn more about setting up deep links, visit this [doc](/in-app-paywall-previews#using-deep-links-to-present-paywalls).
**Google Custom URL Scheme**
We use URL schemes to perform deep link logic and for in-app previews of paywalls for Android apps. To learn more about setting up deep links, visit this [doc](/in-app-paywall-previews#using-deep-links-to-present-paywalls).
**Apple Small Business Program**
If you are a part of Apple's small business program, add in the date you were accepted into it. Optionally, add the date you were removed (if applicable). We'll use this to accurately report revenue metrics.
If you added your Apple Small Business program status later on, Superwall will accurately reflect
revenue for any new data. It doesn't backfill existing revenue metrics.
### Application settings
Here, you can enter metadata about your iOS app that corresponds to your Stripe integration.
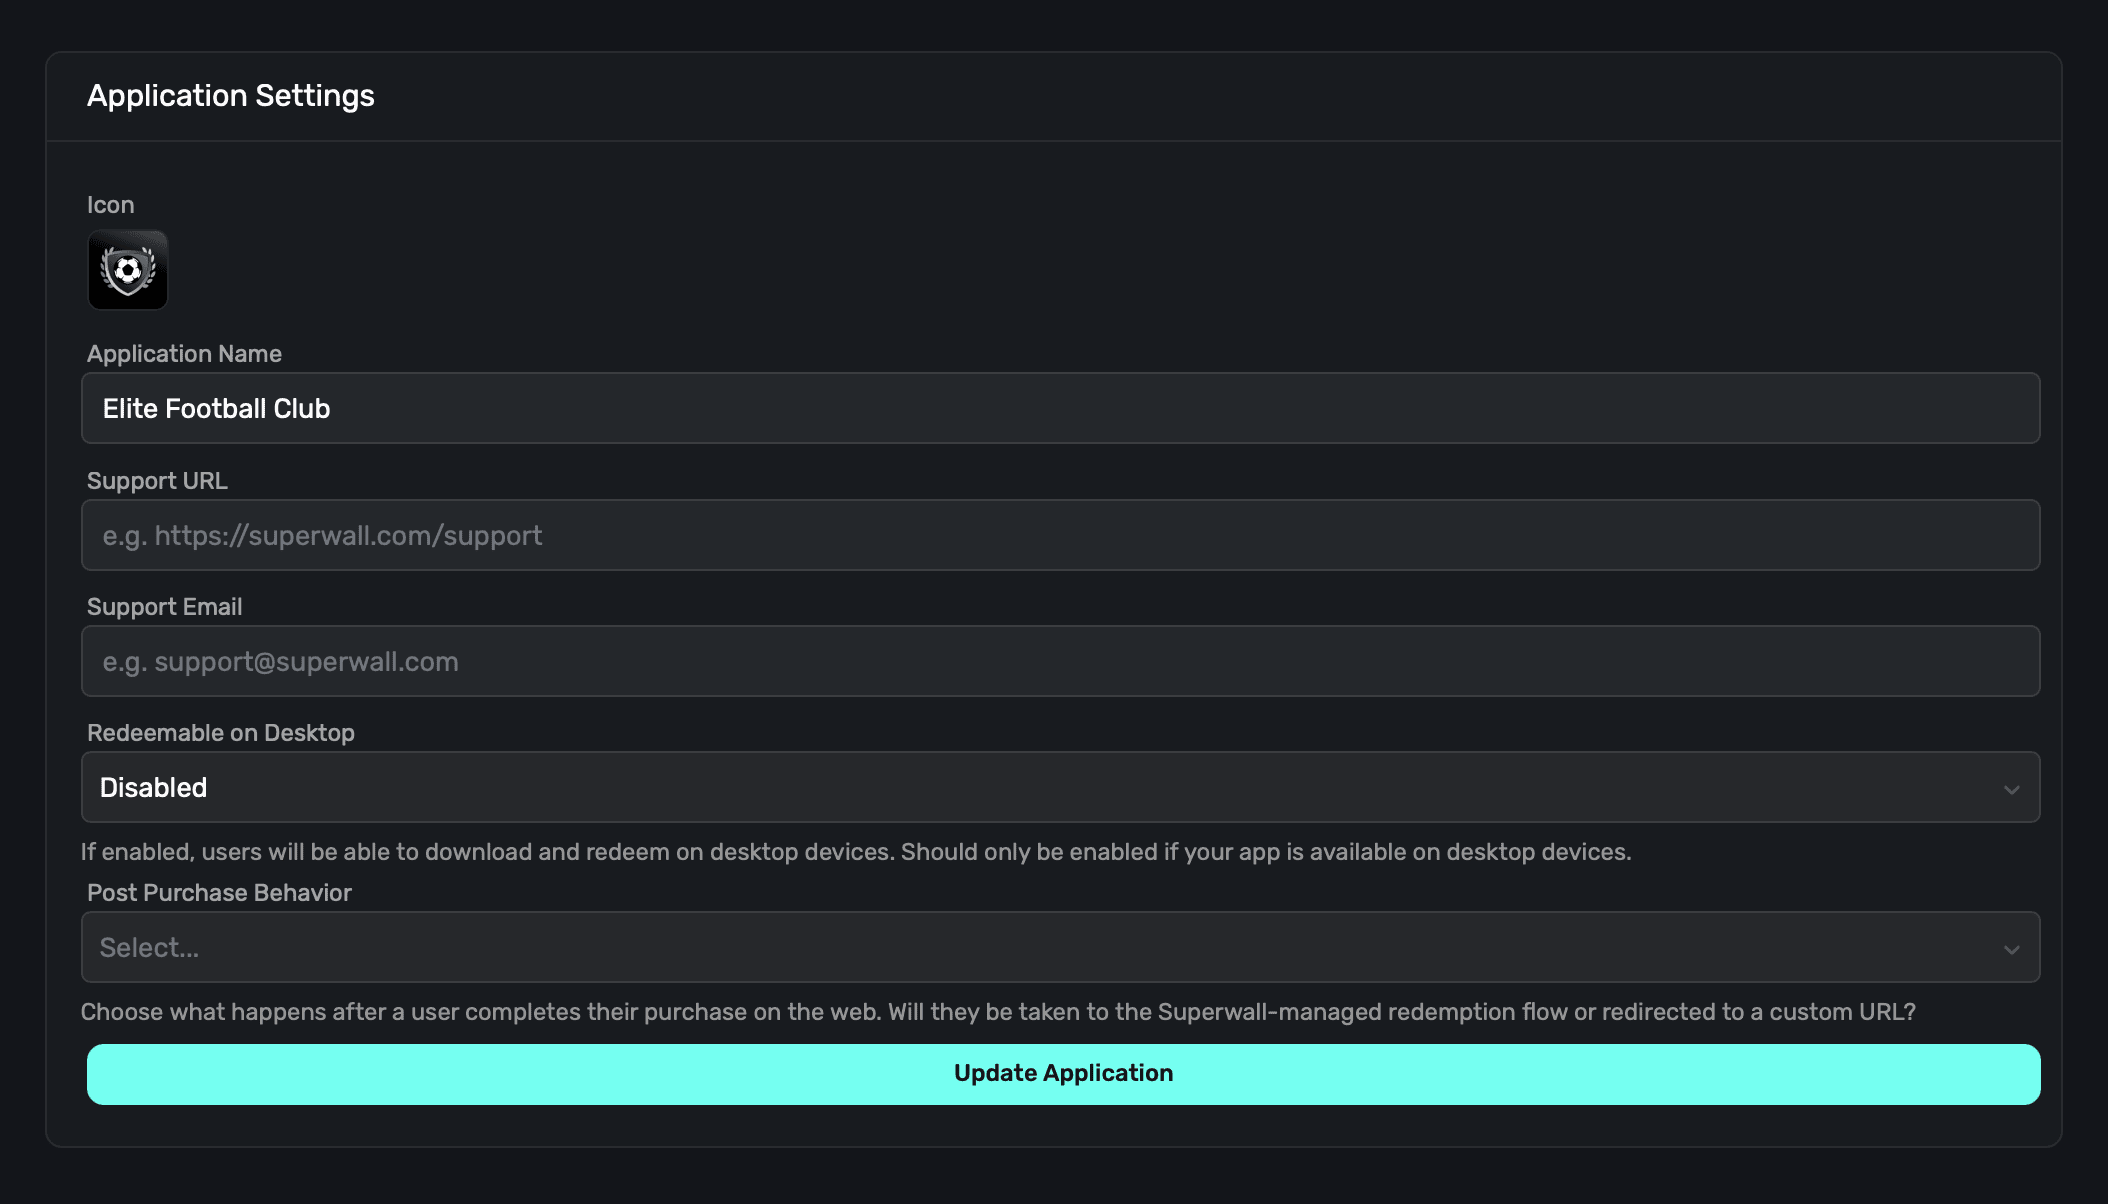
1. **Icon:** An icon to represent your app, we recommend using the same one that your iOS app does. This will appear on the checkout and subscription management pages.
2. **Web Paywall Domain:** The domain your paywalls will be shown from. This was set when the Stripe app was created, and cannot be changed.
3. **Application Name:** The name of your app, we recommend using the same name as your iOS app.
4. **Support URL:** A URL to your support page. This will be shown on the checkout and subscription management pages.
5. **Support Email:** An email you provide customers for support questions and general reach out
6. **Redeemable on Desktop:** If your app is an iPad app on Mac, enable this option so that users can redeem products on their Mac. If you aren't using iPads Apps on the Mac, you can disable this. If this is disabled, Superwall enforces redemption on an iOS device.
### Stripe Live Configuration
This section allows you to connect Stripe keys with Superwall. You will need a:
1. **Publishable Key:** A Stripe publishable key. Stripe creates this key for you, you don't need to generate it yourself.
2. **Secret Key:** A Stripe secret key that you create. Once you've made one, paste it here.
You can find these keys [in your Stripe account](https://dashboard.stripe.com/apikeys). If you need help getting set up, check out the docs [here](/web-checkout-configuring-stripe-keys-and-settings).
### Stripe Sandbox Configuration
The sandbox configuration allows you to test purchasing flows with your web checkout integration. If you need to find these keys, you can find them in [your Stripe account](https://dashboard.stripe.com/test/apikeys).
1. **Publishable Key:** A Stripe publishable key. Stripe creates this key for you, you don't need to generate it yourself.
2. **Secret Key:** A Stripe secret key that you create. Once you've made one, paste it here.
### iOS configuration
This section has critical information for your iOS app. Without it, web checkout won't work.
1. **Apple Custom URL Scheme (no slashes)**: Your custom URL scheme. If you haven't set this up, view the [documentation](/in-app-paywall-previews).
2. **Apple App ID**: Your app's Apple ID. You can find this in **App Store Connect -> General -> App Information**.

# Advanced
Source: https://superwall.com/docs/overview-settings-advanced
In the **Advanced** section within **Settings**, you can view system health and remove your app:
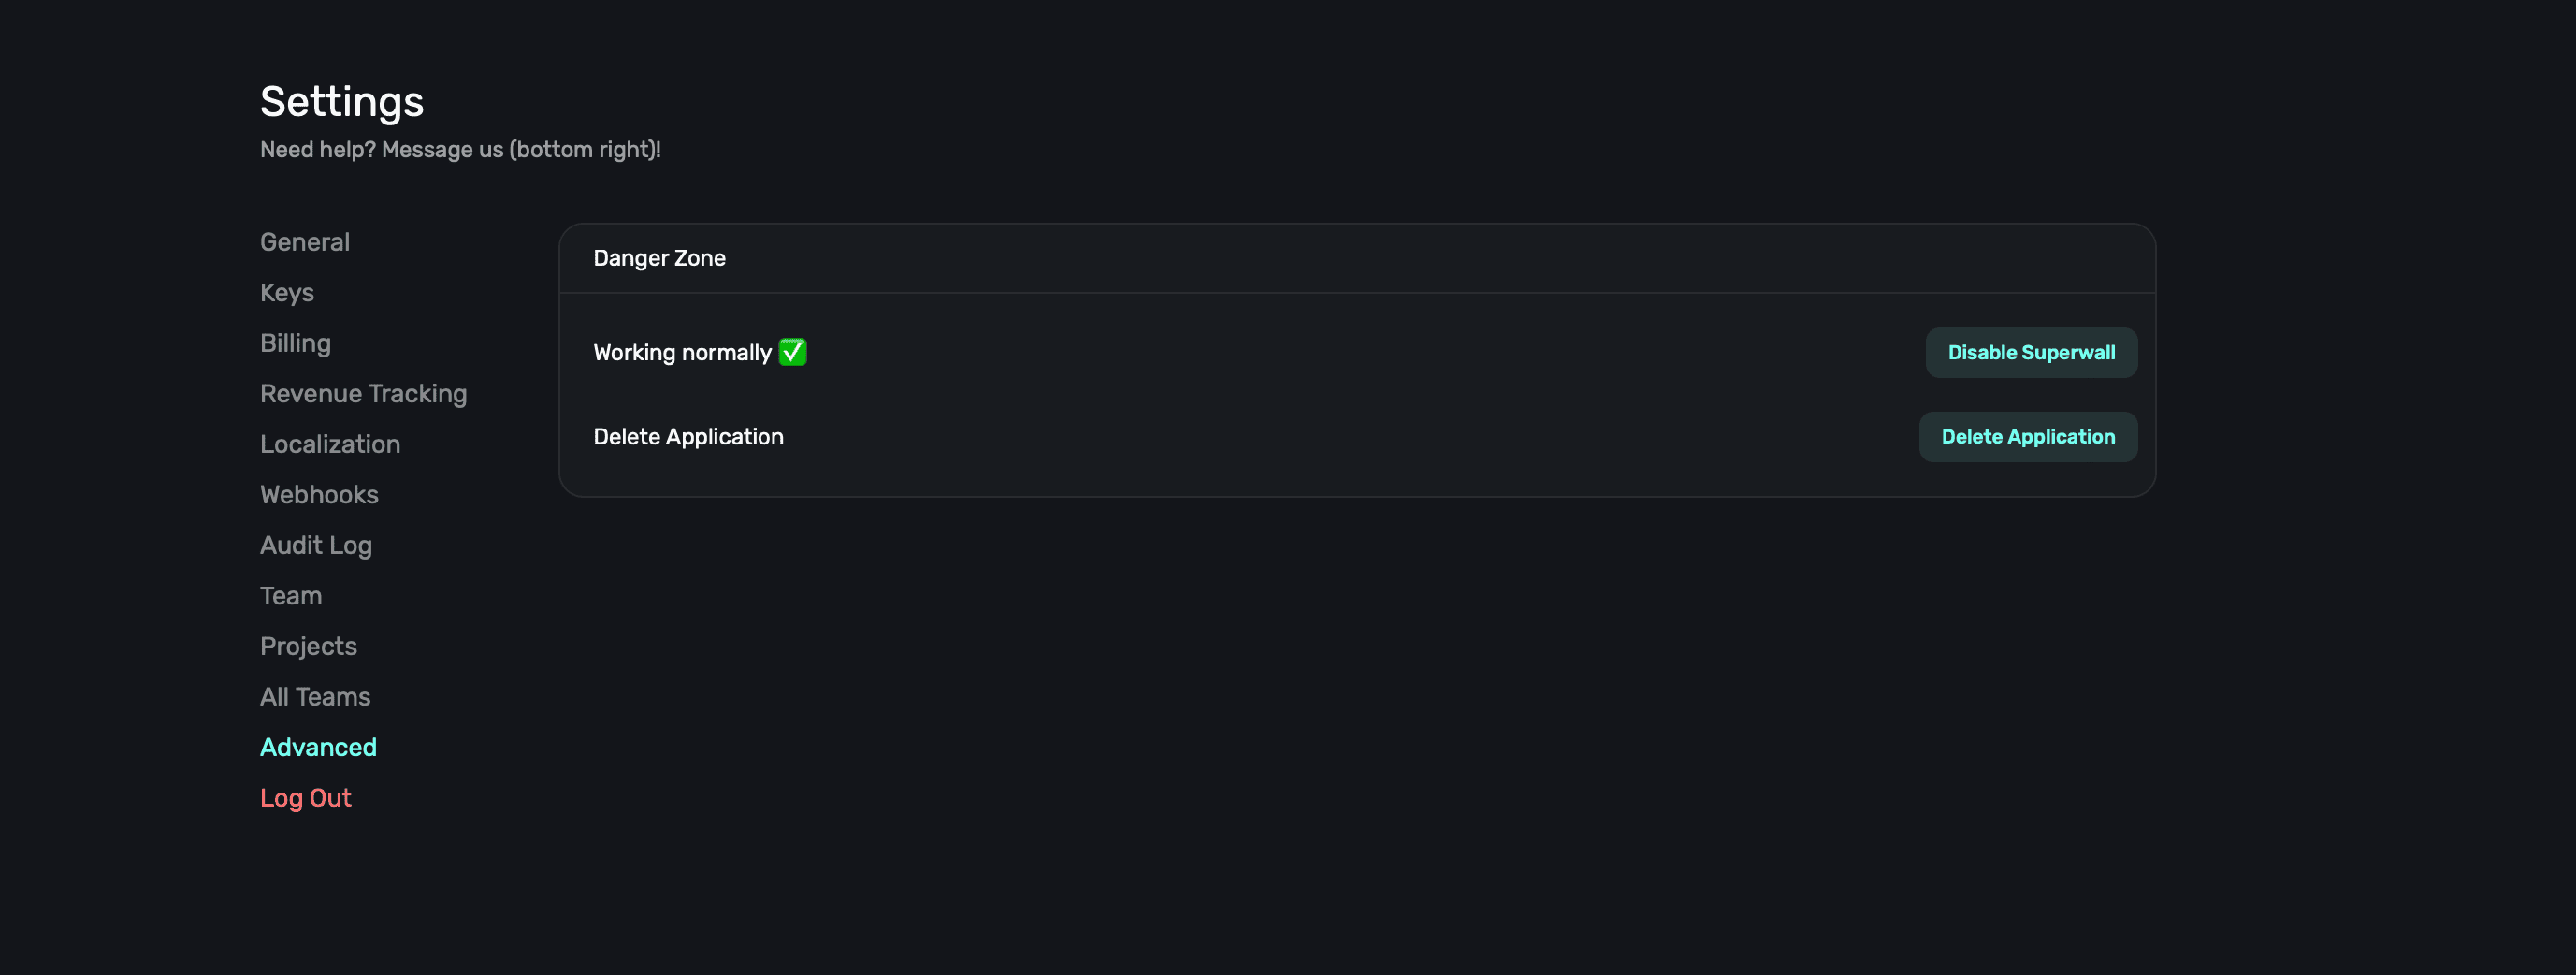
### Disabling Superwall
If you'd like to temporarily disable Superwall, **click** the **Disable Superwall** button. You can later resume it, but disabling Superwall stops all paywalls from being presented or placements being evaluated.
### Removing your app
To permanently remove your app from Superwall, **click** the **Delete Application** button. You cannot undo this action.
# All teams
Source: https://superwall.com/docs/overview-settings-all-teams
In the **All Teams** section within **Settings**, you can easily view each team that's part of your Superwall account:
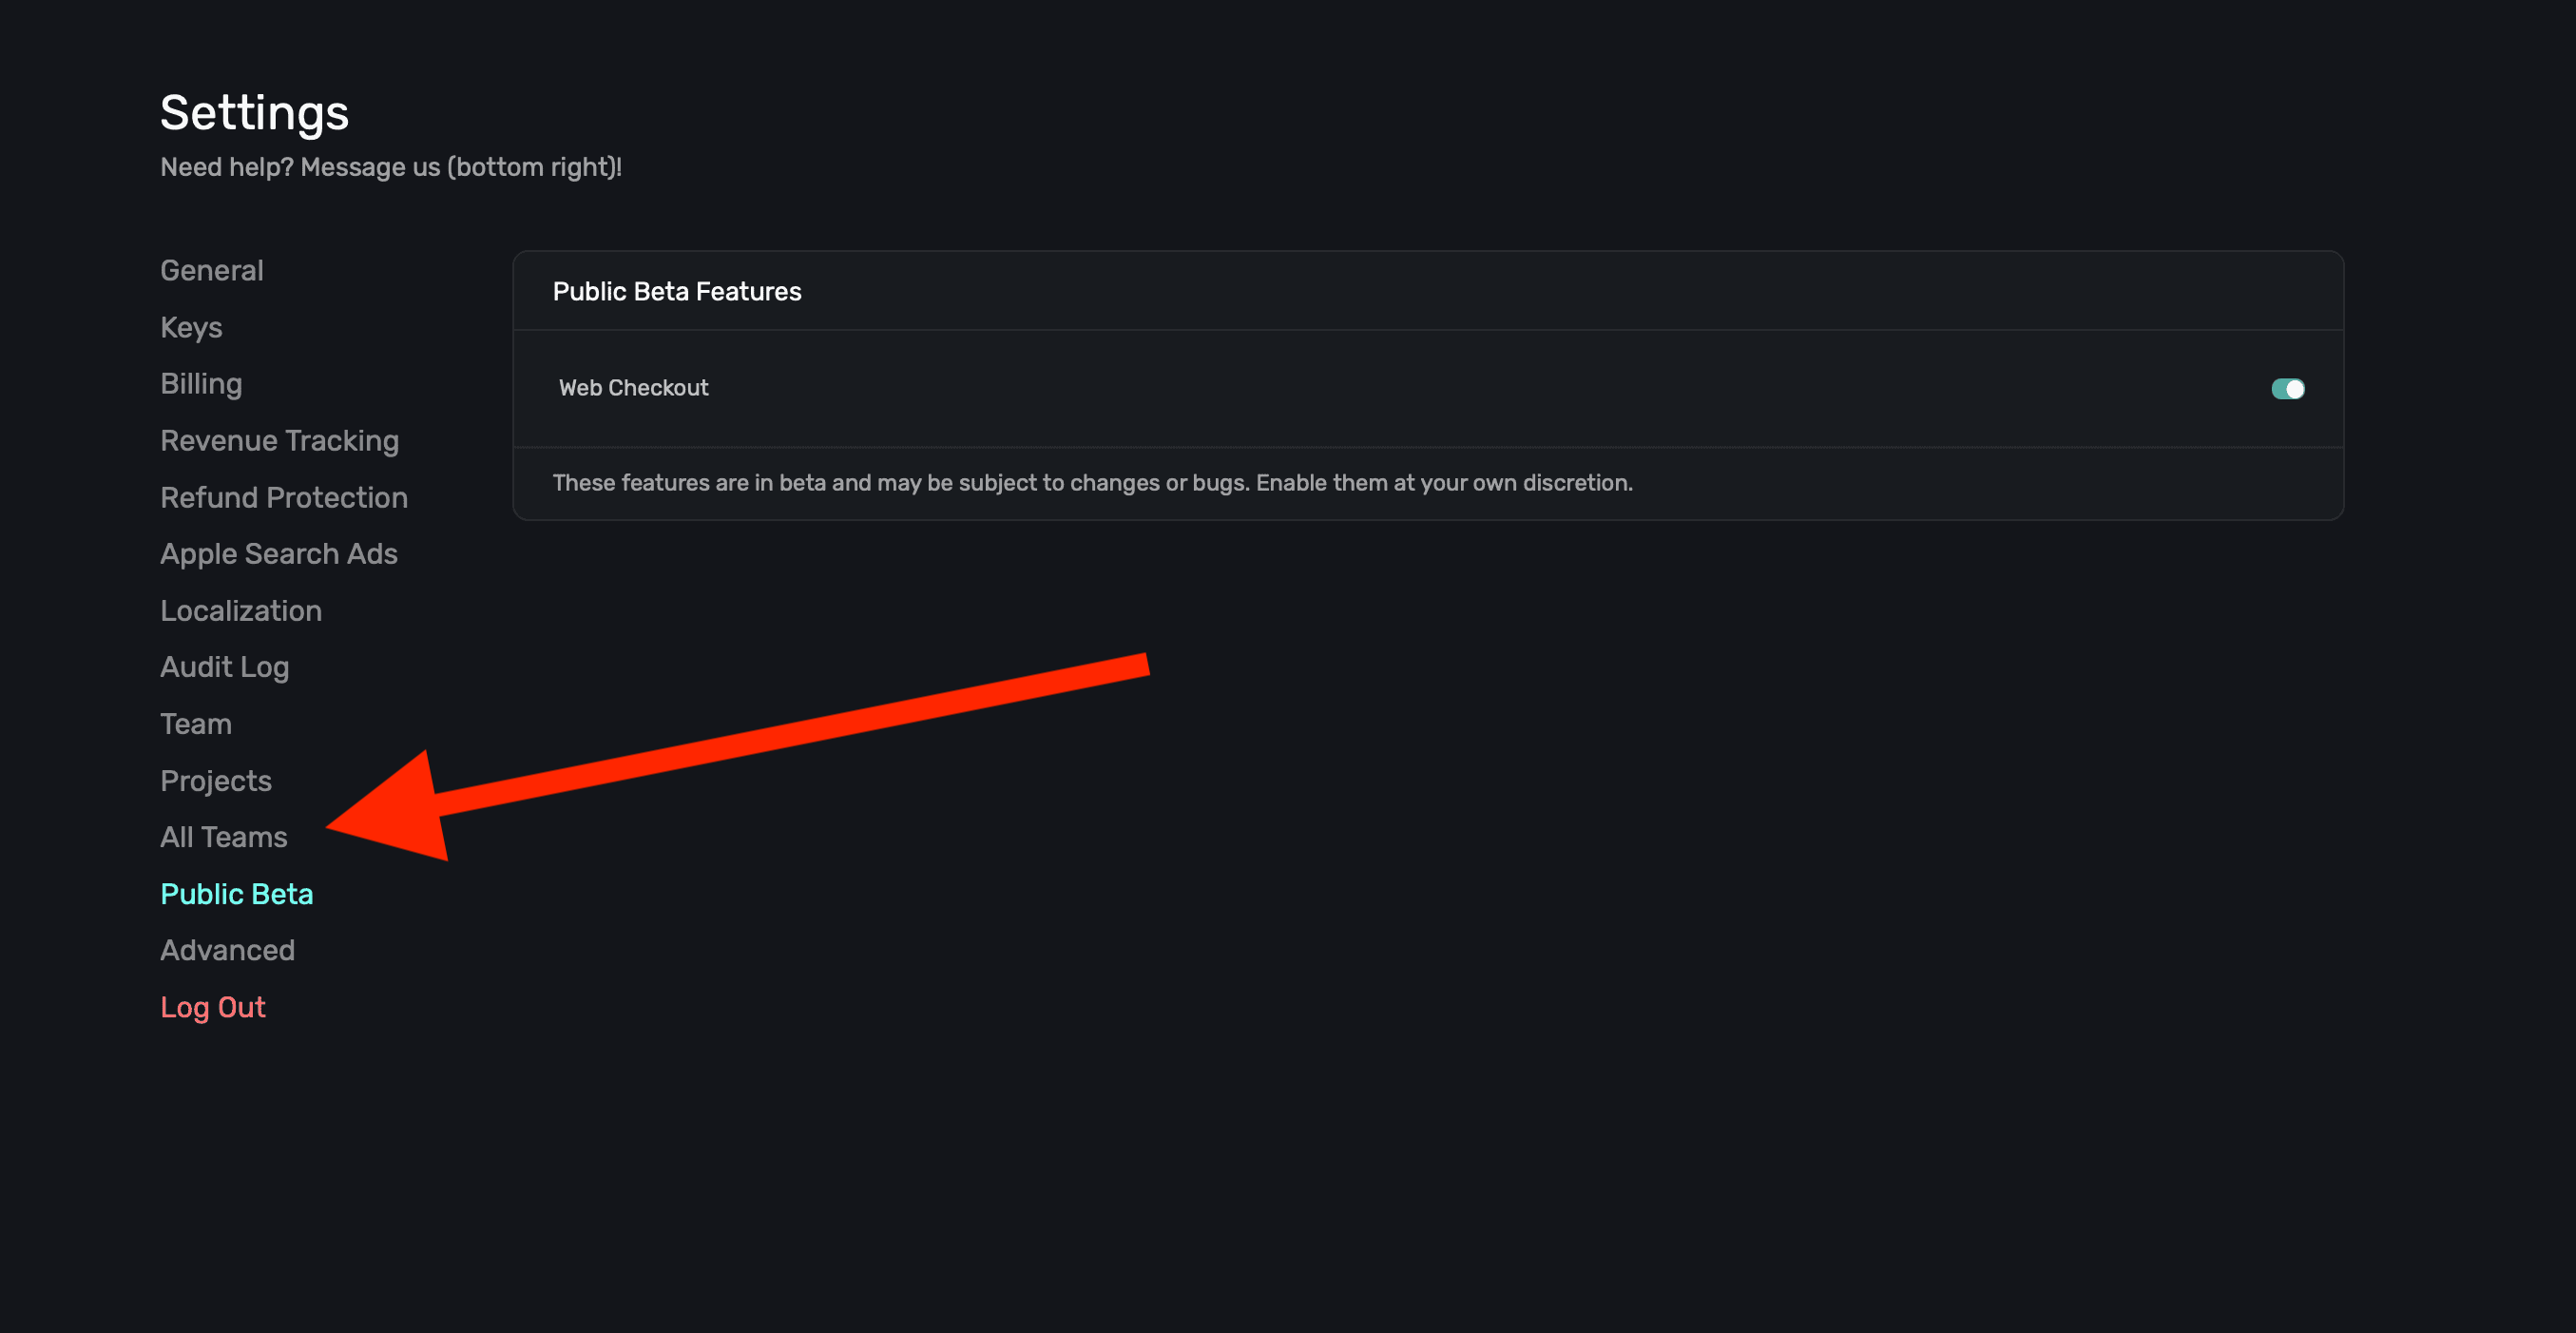
When you click on that link, a modal appears to quickly filter through available options:
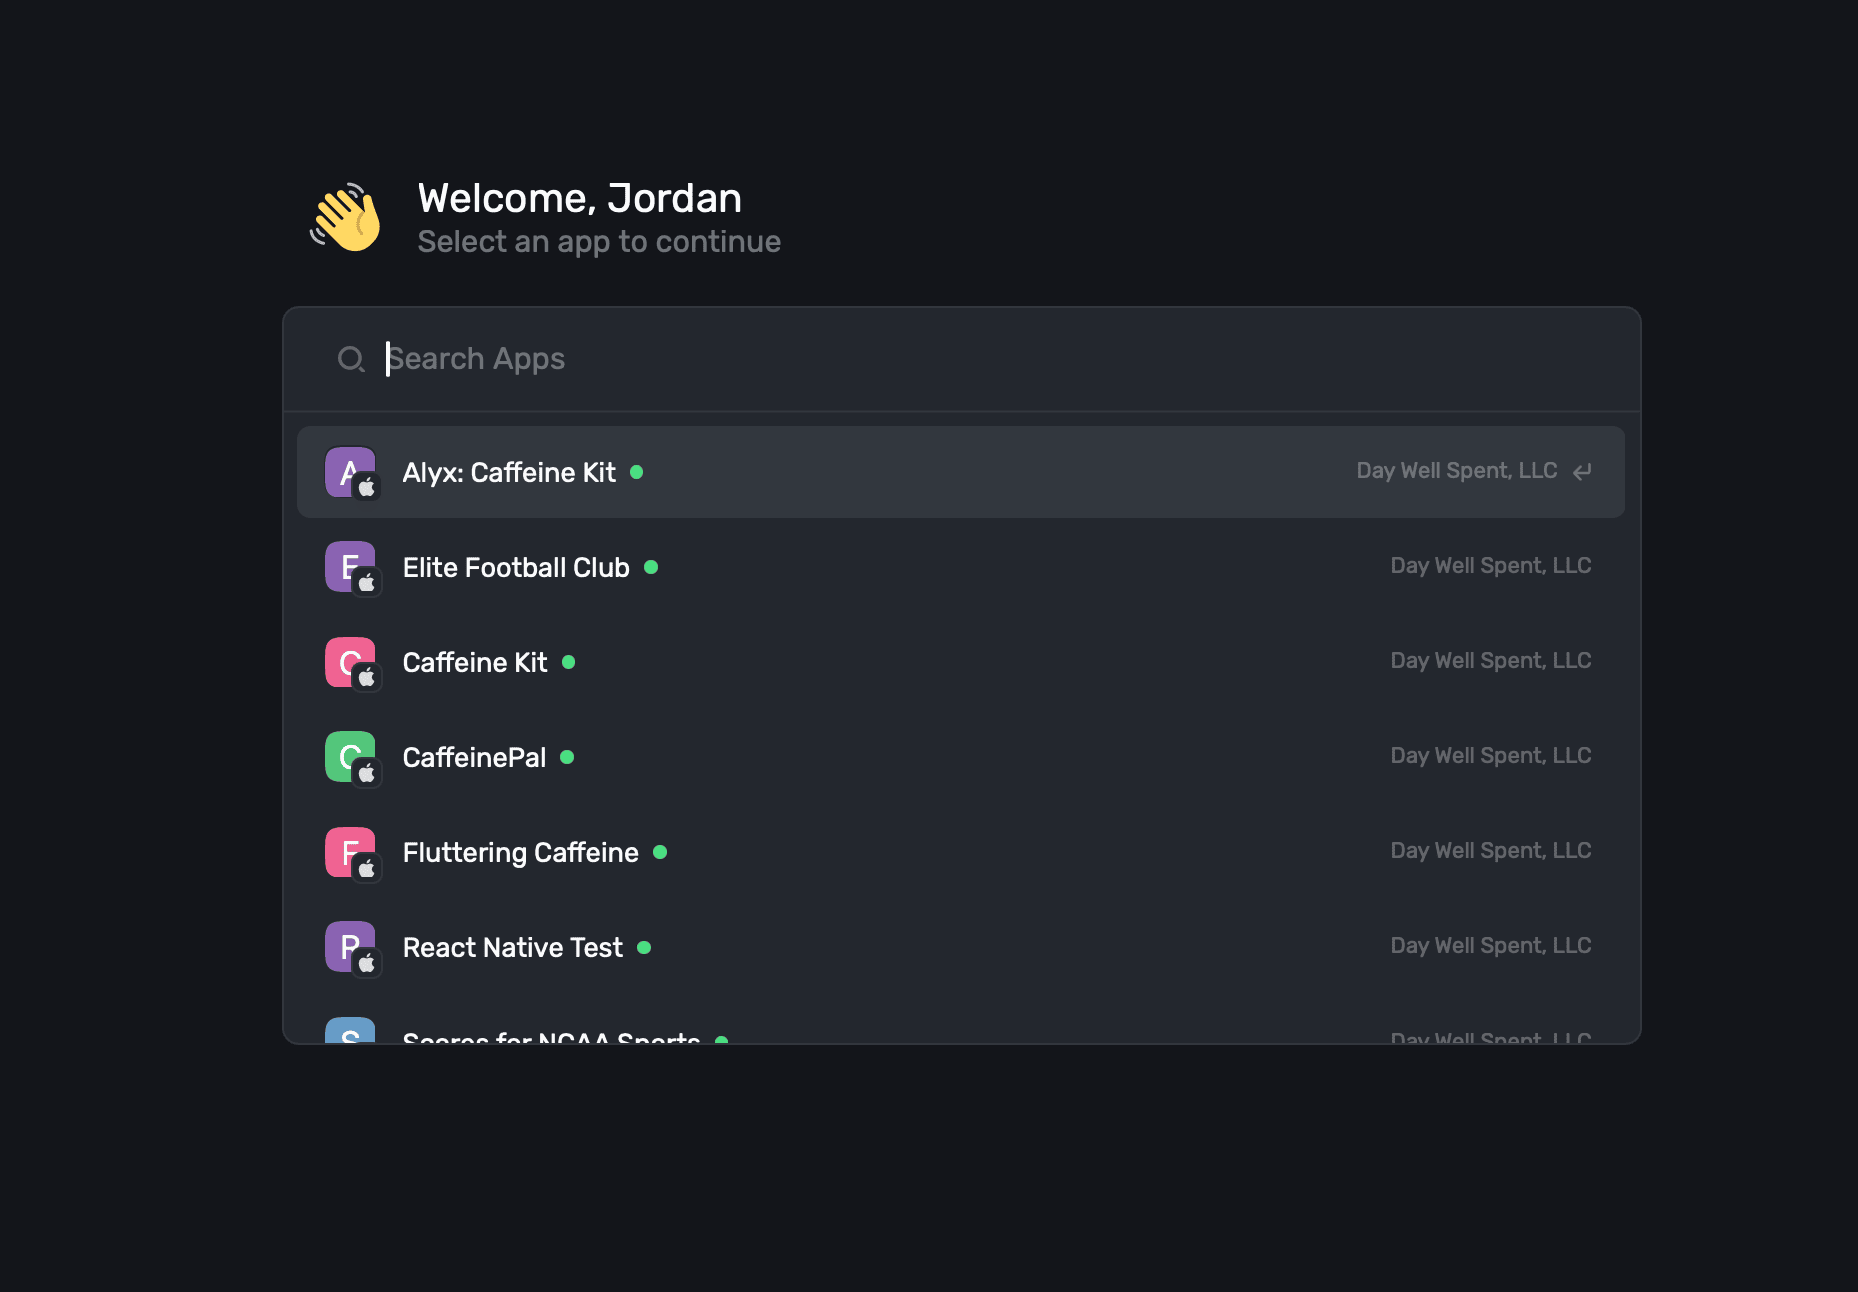
You can also activate this by using the ⌘+K keyboard shortcut.
# Apple Search Ads
Source: https://superwall.com/docs/overview-settings-apple-search-ads
Integrate Apple Search Ads with Superwall. View details on users acquired via search ads, visualize conversions from Apple Search Ads in charts, and create powerful campaign filters to target users using search ad data. Search ad integration requires 3.12.0 of the Superwall SDK or higher.
In the **Apple Search Ads** section within **Settings**, you can the enable Apple Search Ads integration with Superwall:
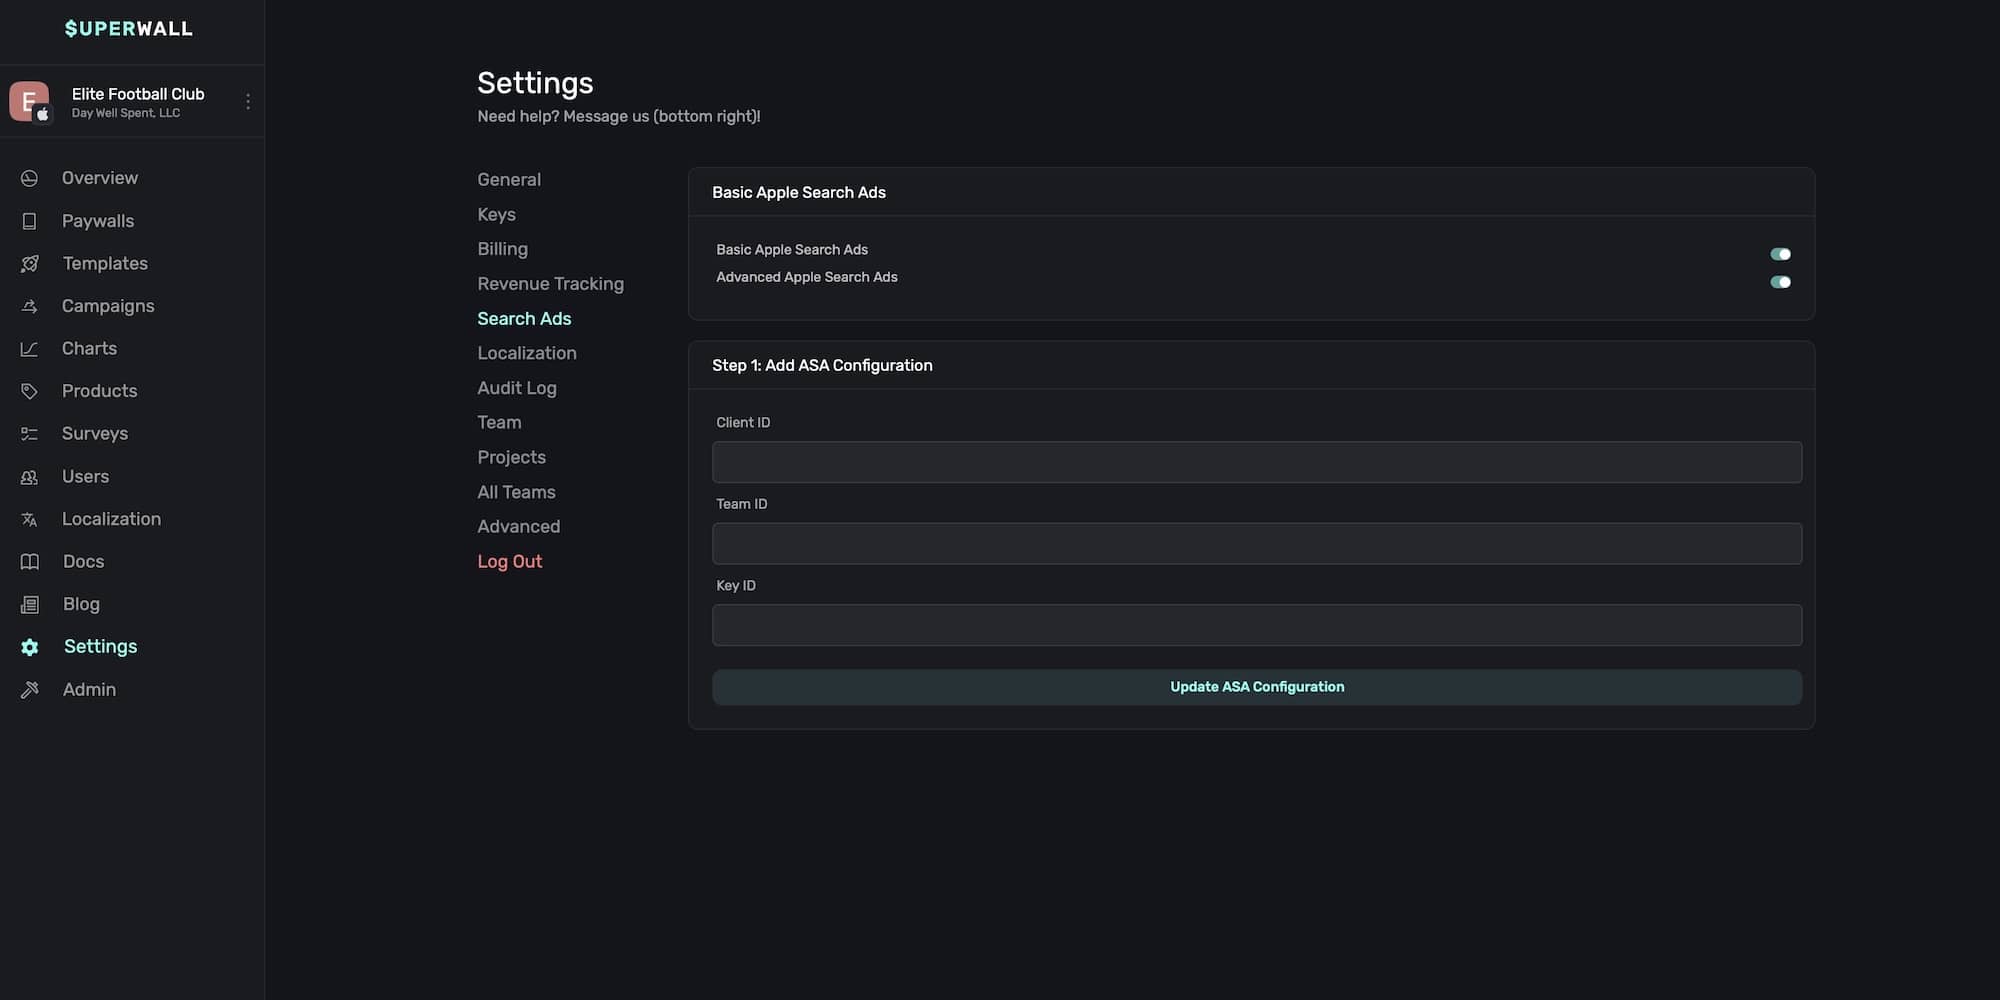
Apple offers two different search ad services, "Basic" and "Advanced" tiers. Superwall supports
both of them, though more data is available with the Advanced ads.
### Basic search ads setup
If you're only using basic search ads, **click** the toggle next to **Basic Apple Search Ads** to enable the integration:
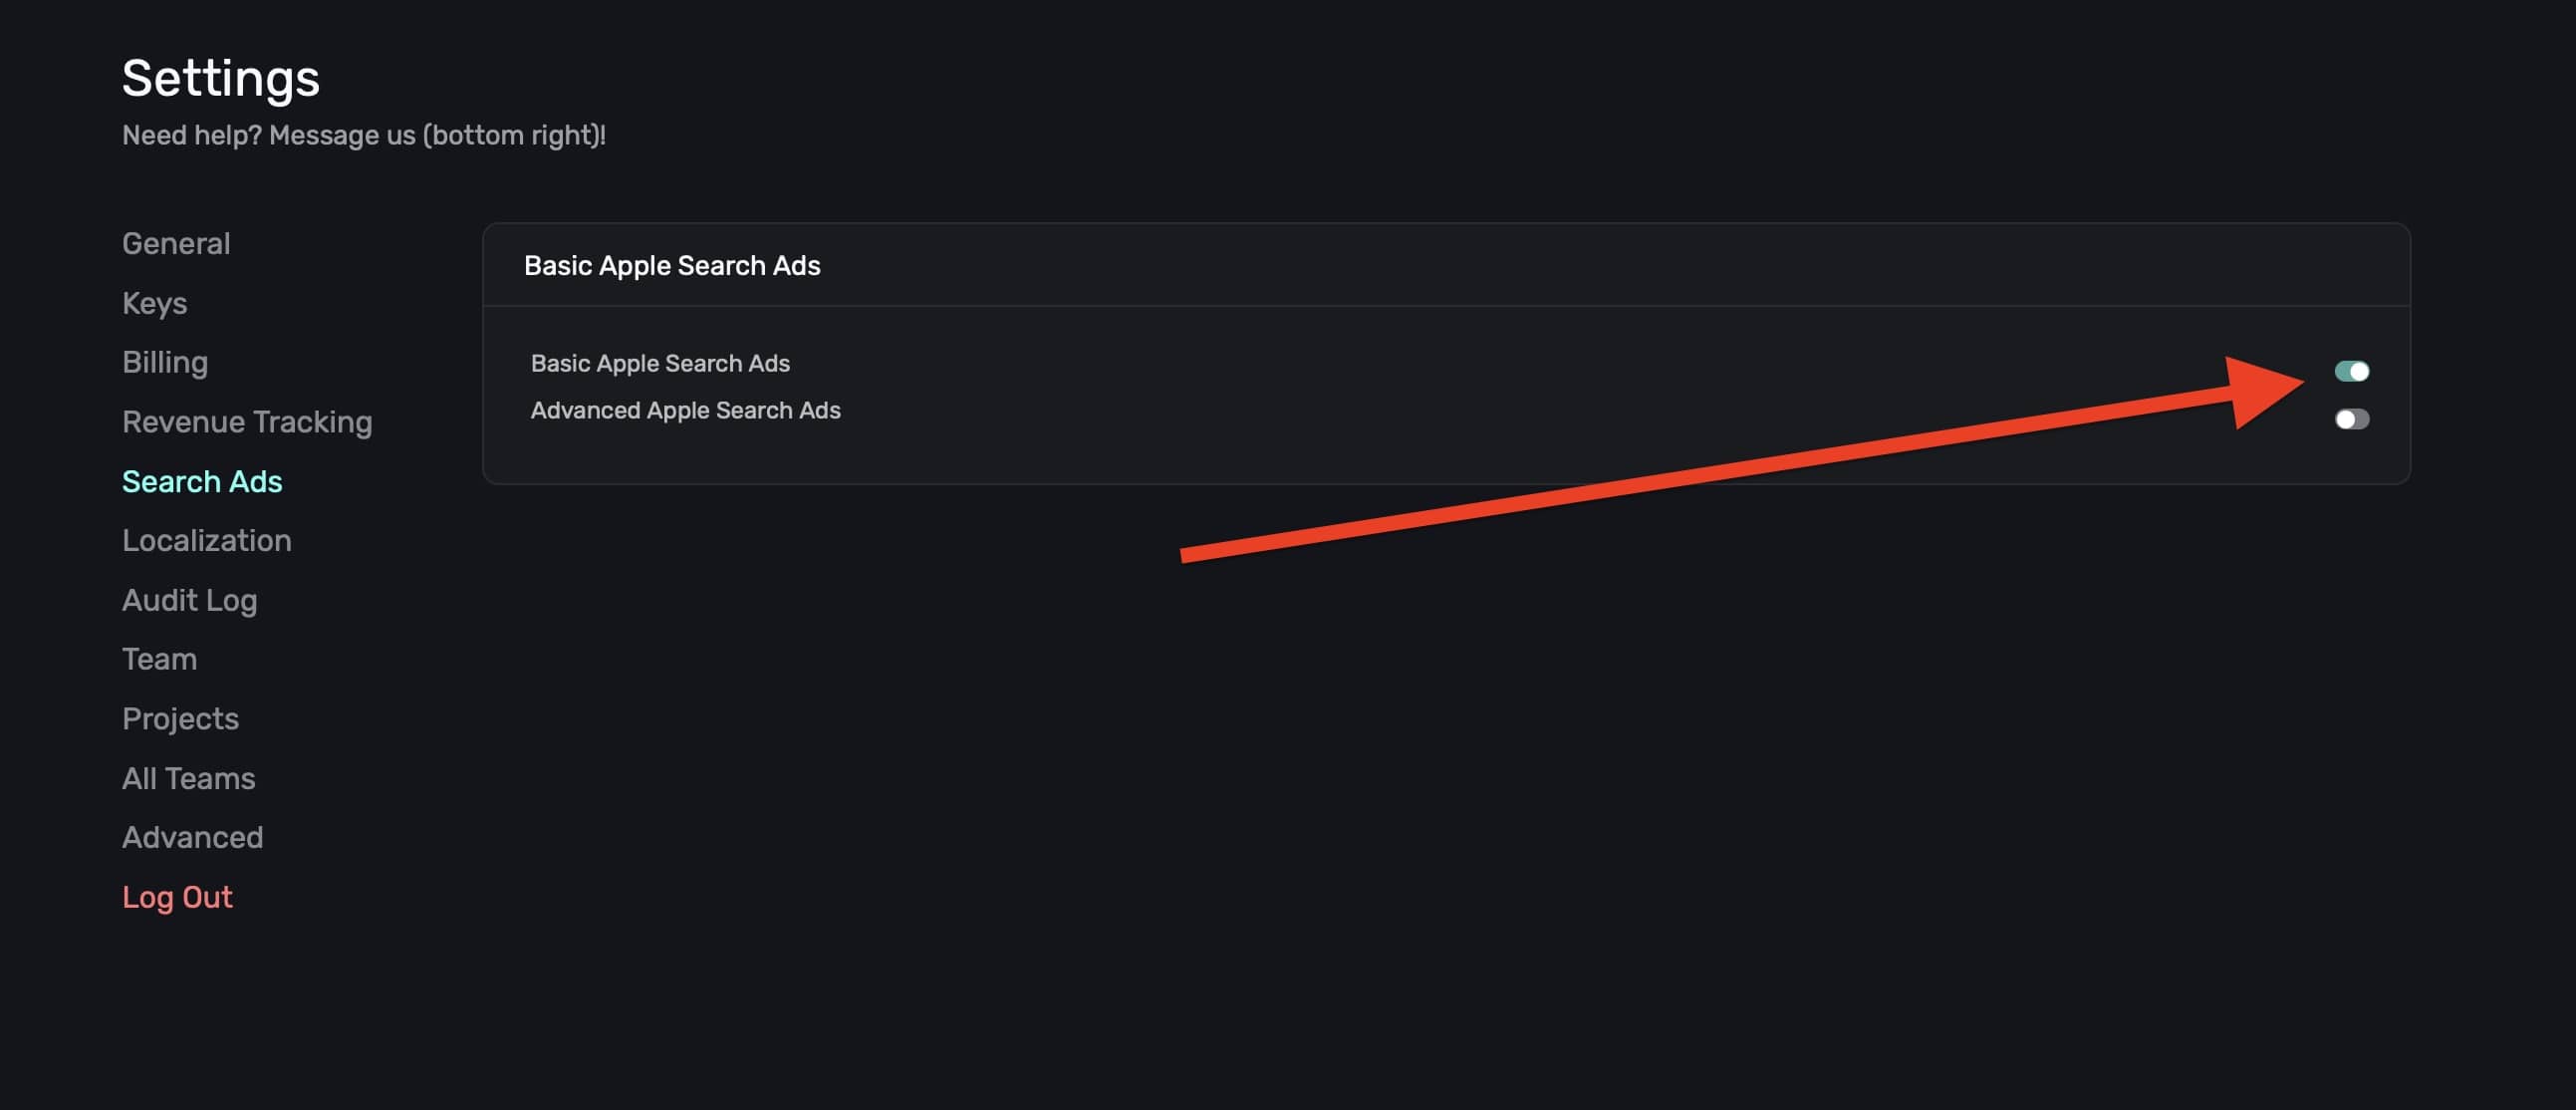
That's it, you're all set. With basic Apple Search Ads enabled, you'll be to see users acquired via search ads in the [users page](/overview-users).
To see what you can do with advanced search ads data, skip down to the [use cases](#use-cases) section.
### Advanced search ads setup
Advanced search ads takes a few more steps since it requires the [Campaign Management API](https://searchads.apple.com/help/campaigns/0022-use-the-campaign-management-api). The overview is as follows, with more details about each step below them:
* First, you'll need to create a user in Apple Search Ads **using a different Apple Account** than your primary Apple Account.
* This new user will need to be set up with either the API Account Manager or API Account Read Only role.
* Then, you'll generate three things by pasting in a public key from Superwall: a client ID, team ID and key ID.
* Finally, you'll enter those three values into Superwall.
**Step One: Invite a new user**
1. Go to [searchads.apple.com](https://searchads.apple.com) and click **Sign In -> Advanced**.
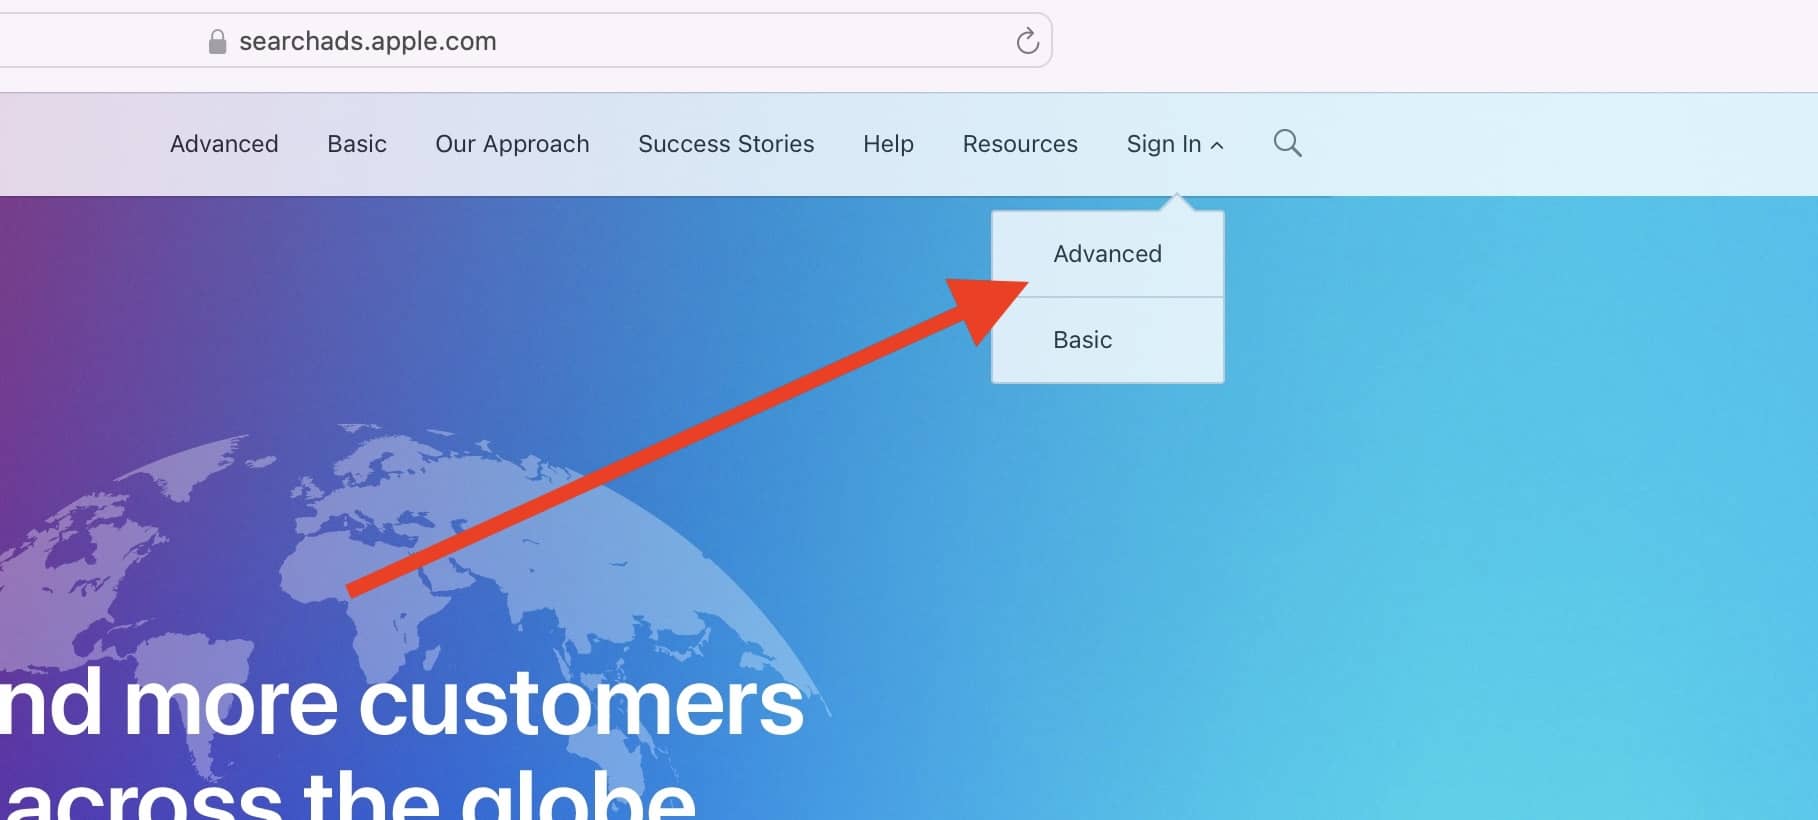
2. Locate your account name in the top right corner and click **Account Name -> Settings**.
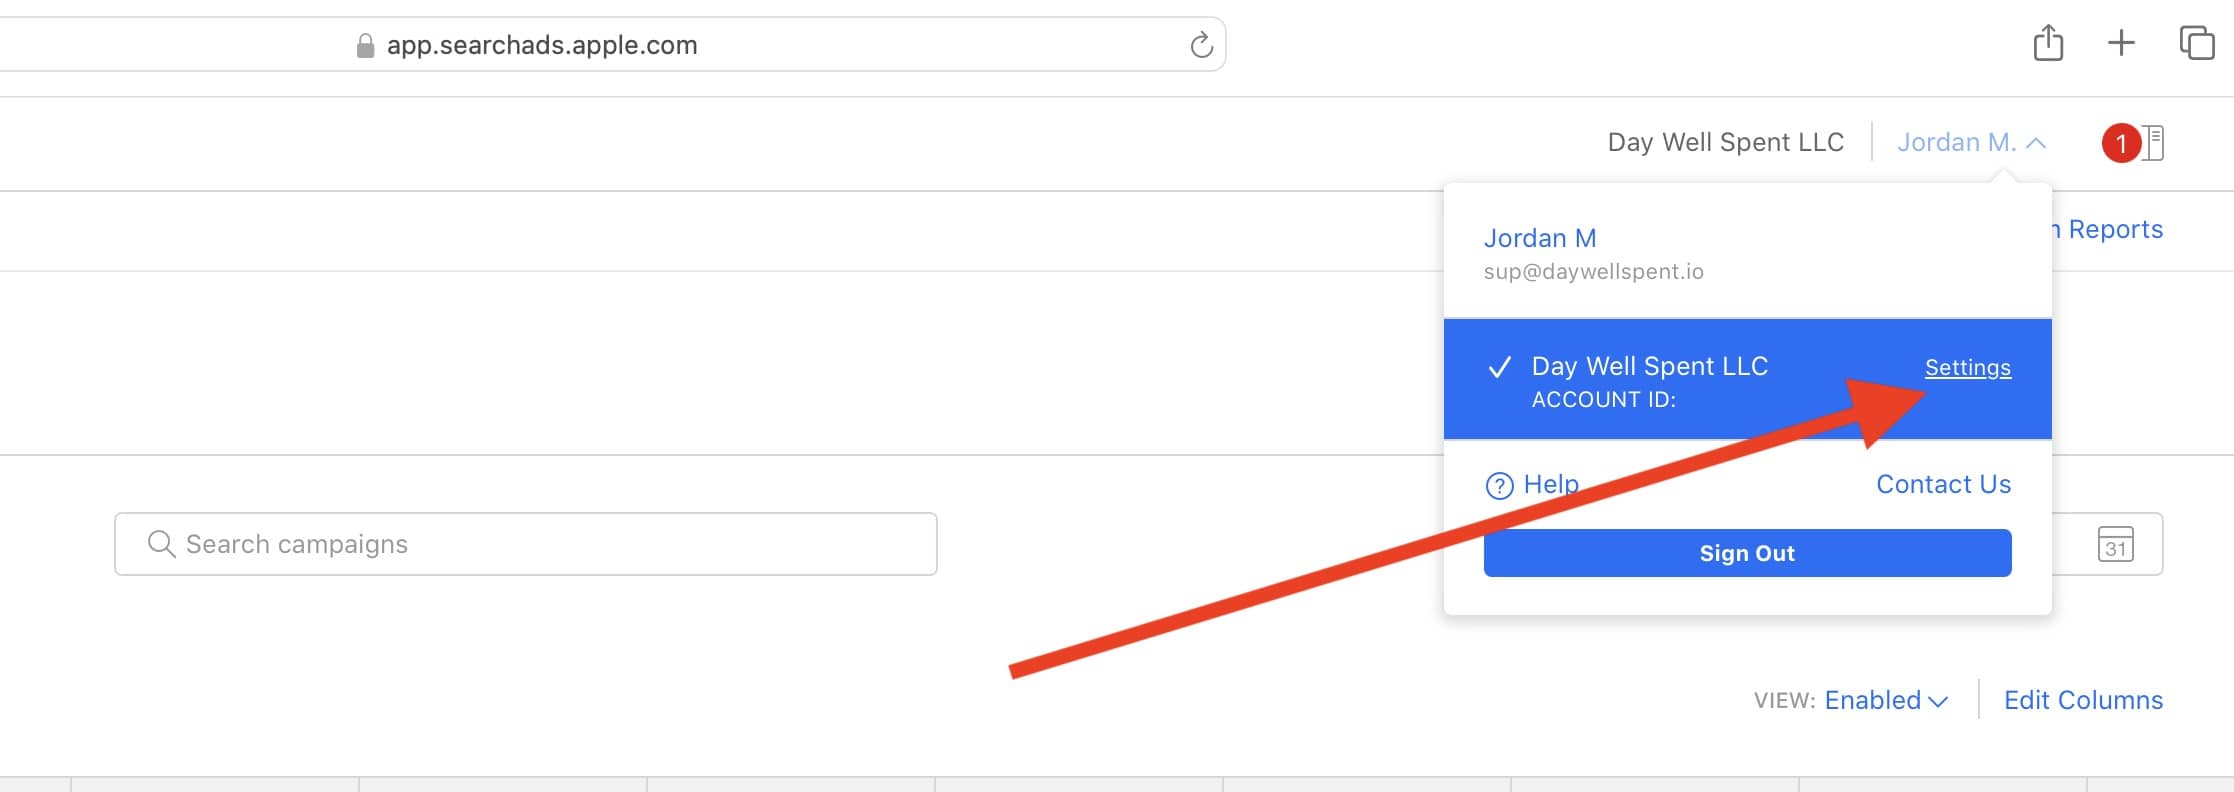
3. Under User Management, click **Invite Users**.
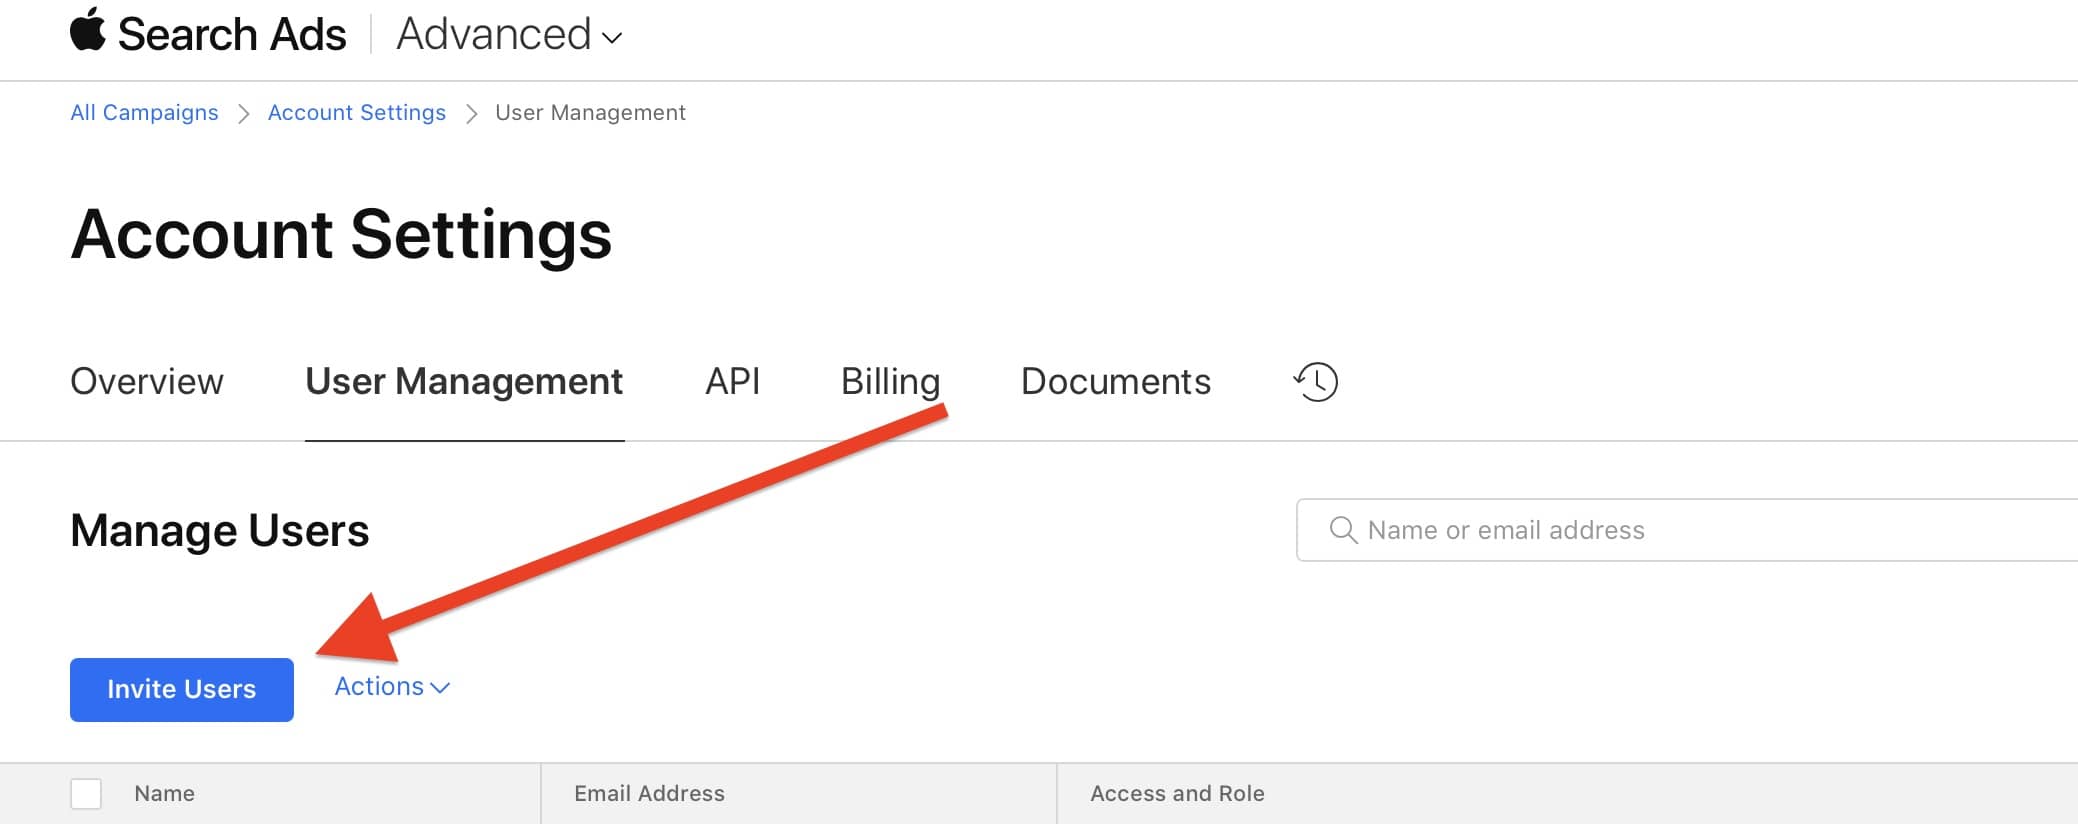
4. Grant the user appropriate permissions and enter in the rest of the details. The email address here is the one you'll want to use to create a new user in Apple Search Ads:
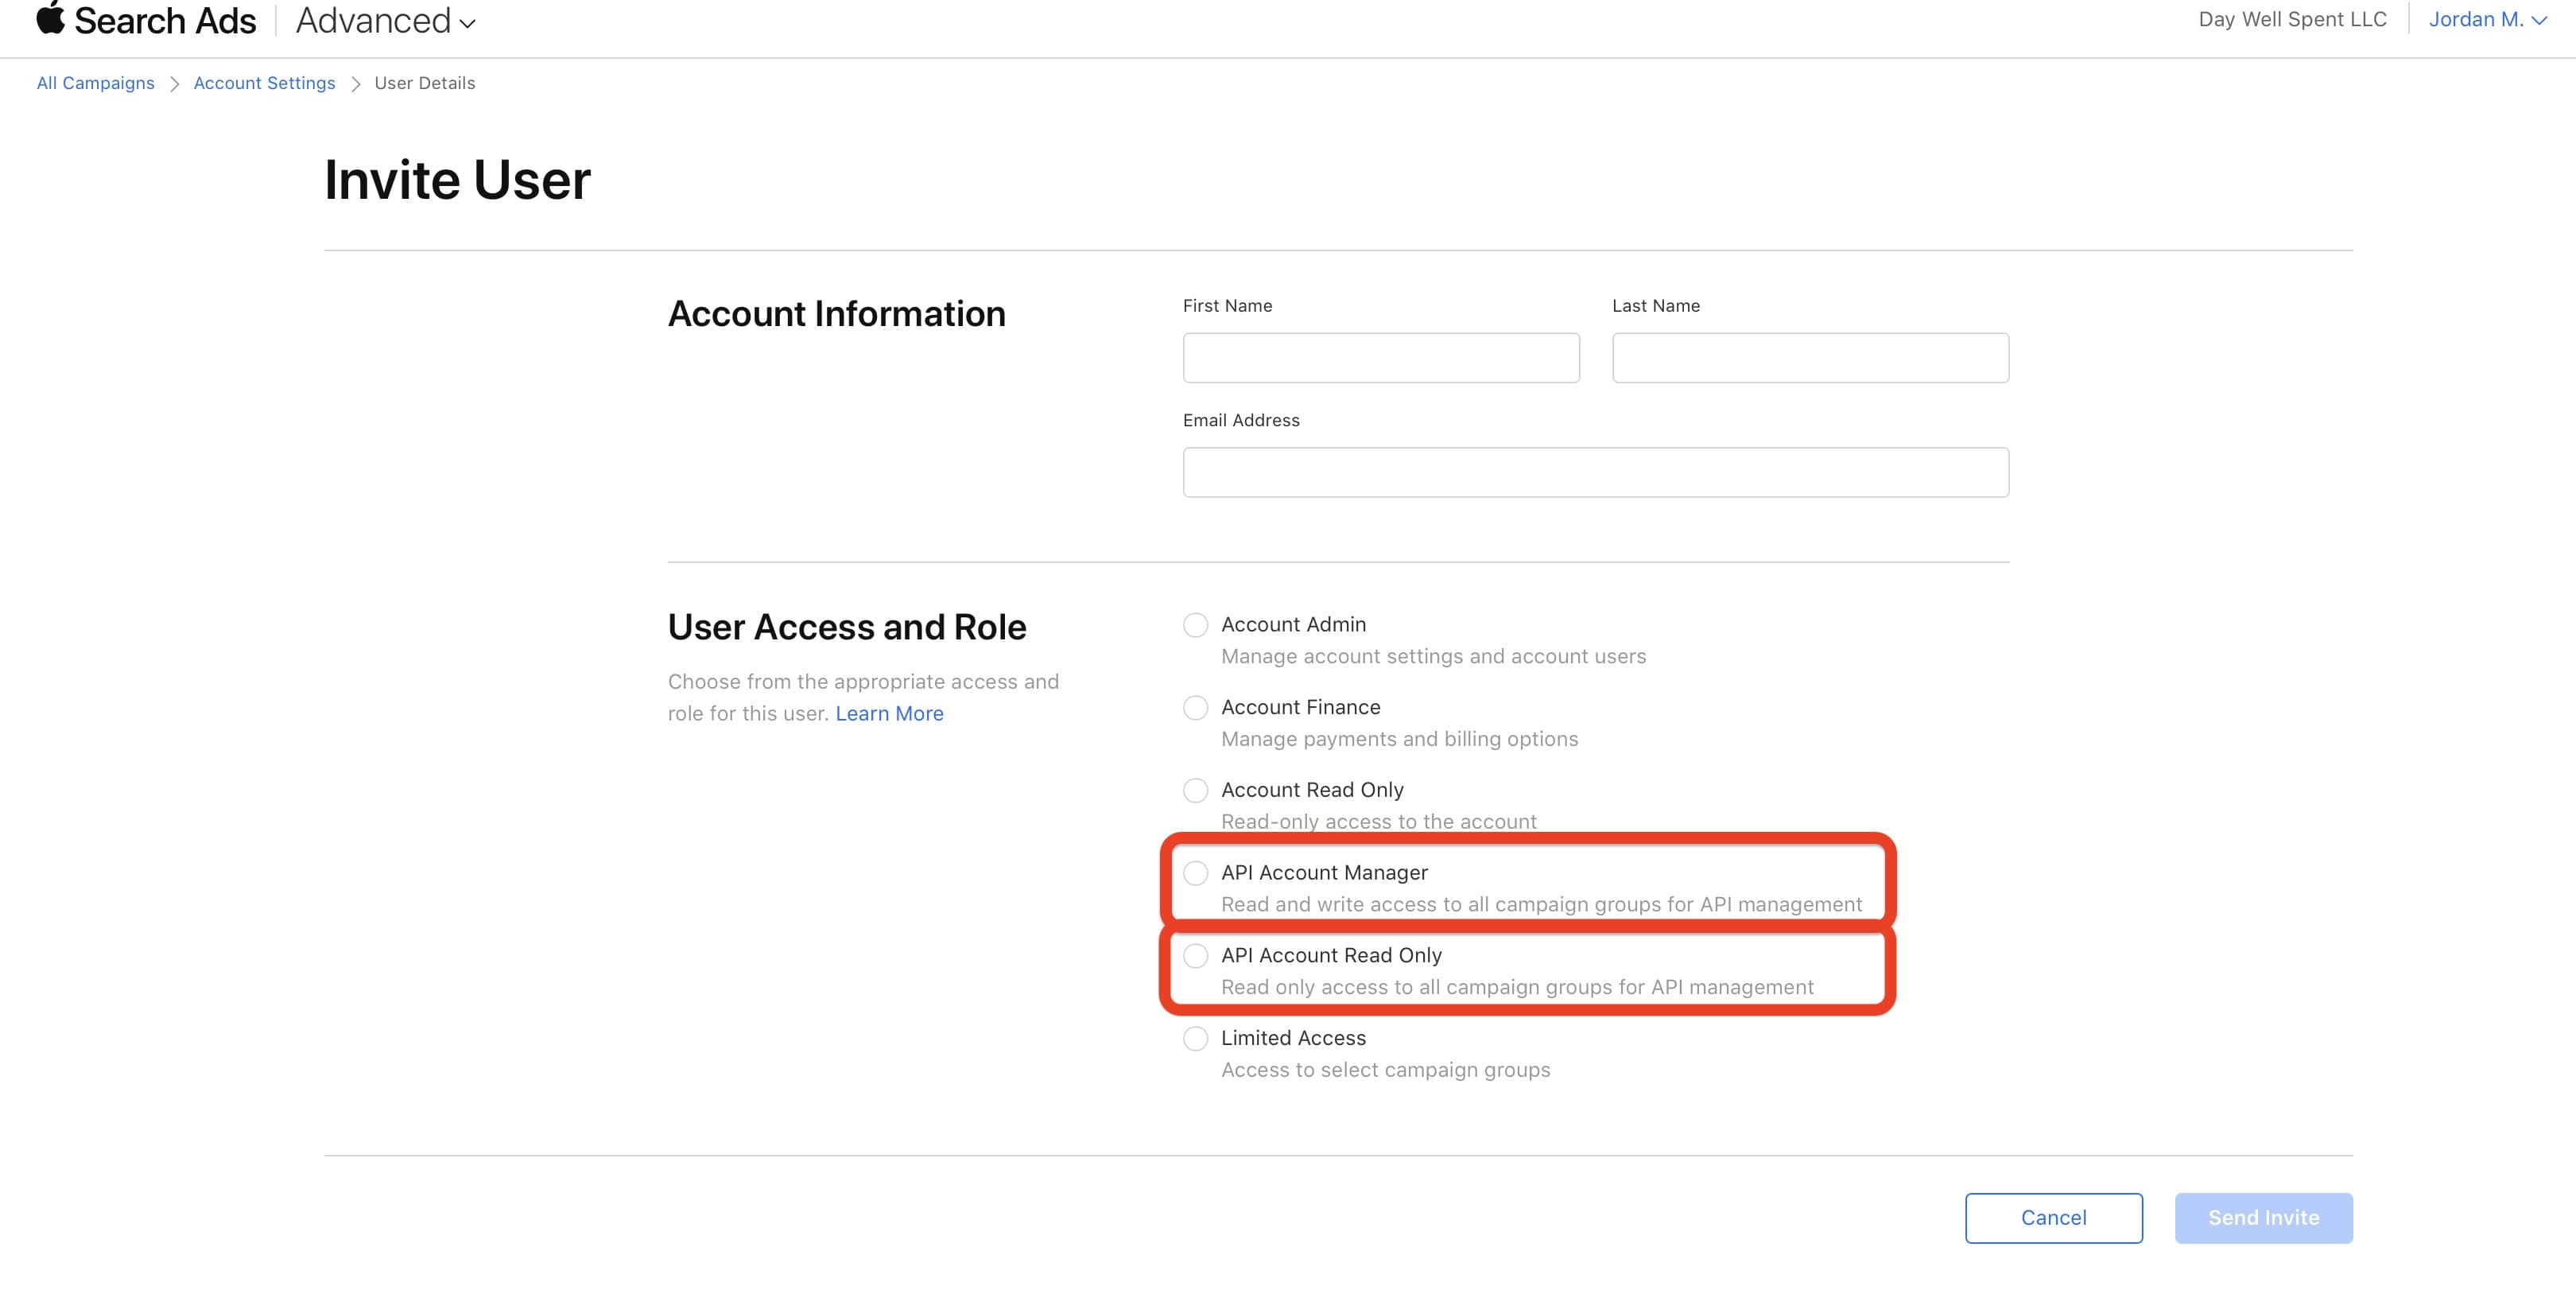
**Step Two: Accept the invitation**
Open the email and follow Apple's instructions to set up a new user with Apple Search ads. The email will look similar to this:
Once you've accepted the invitation using the invited Apple Account:
1. Once again, go to [searchads.apple.com](https://searchads.apple.com) and click **Sign In -> Advanced**.

2. Locate your account name in the top right corner and click **Account Name -> Settings**.

3. Over in Superwall, go to the **Settings -> Apple Search Ads -> click copy** under the public key:
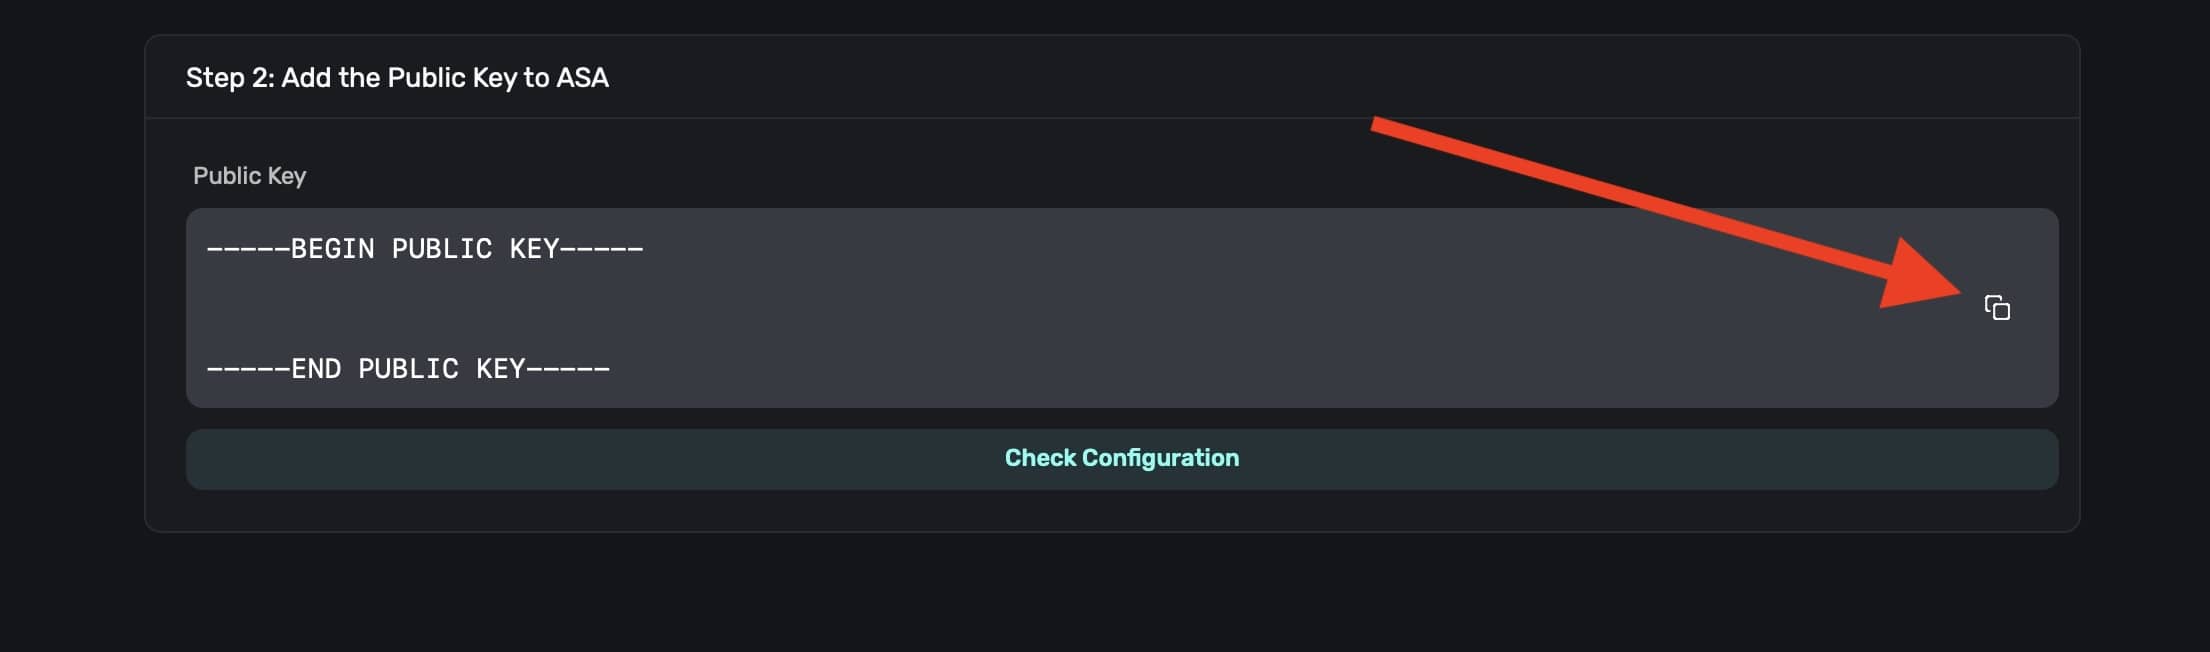
4. Back in Apple Search Ads, paste the public key under **Public Key** and click **Generate API Client**:
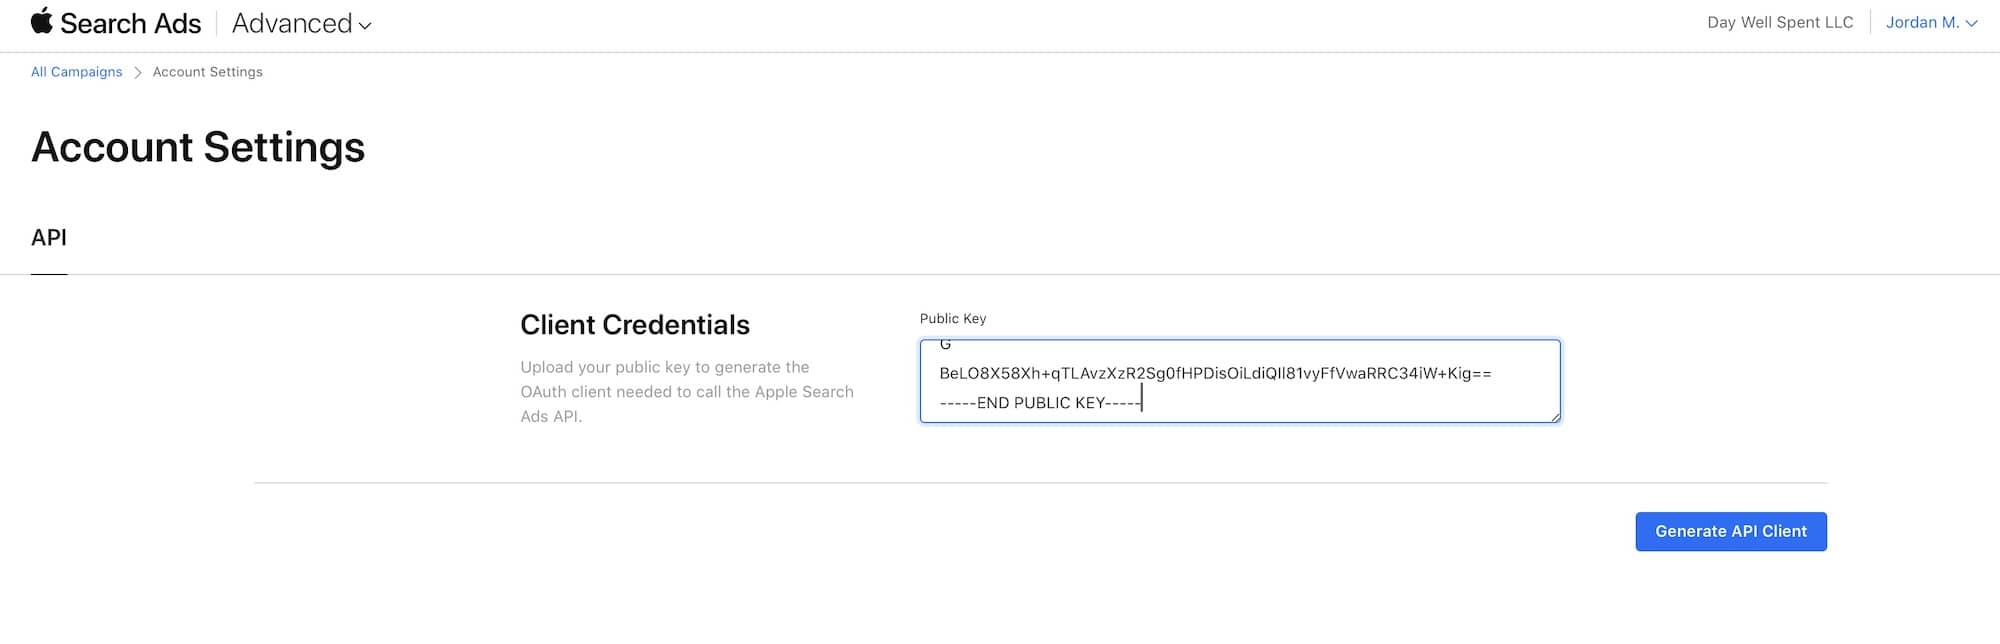
**Step Three: Generate the client ID, team ID and key ID**
Now, you should see three values that have been generated by Apple Search Ads, a client ID, team ID and key ID.
1. Copy each generated value.
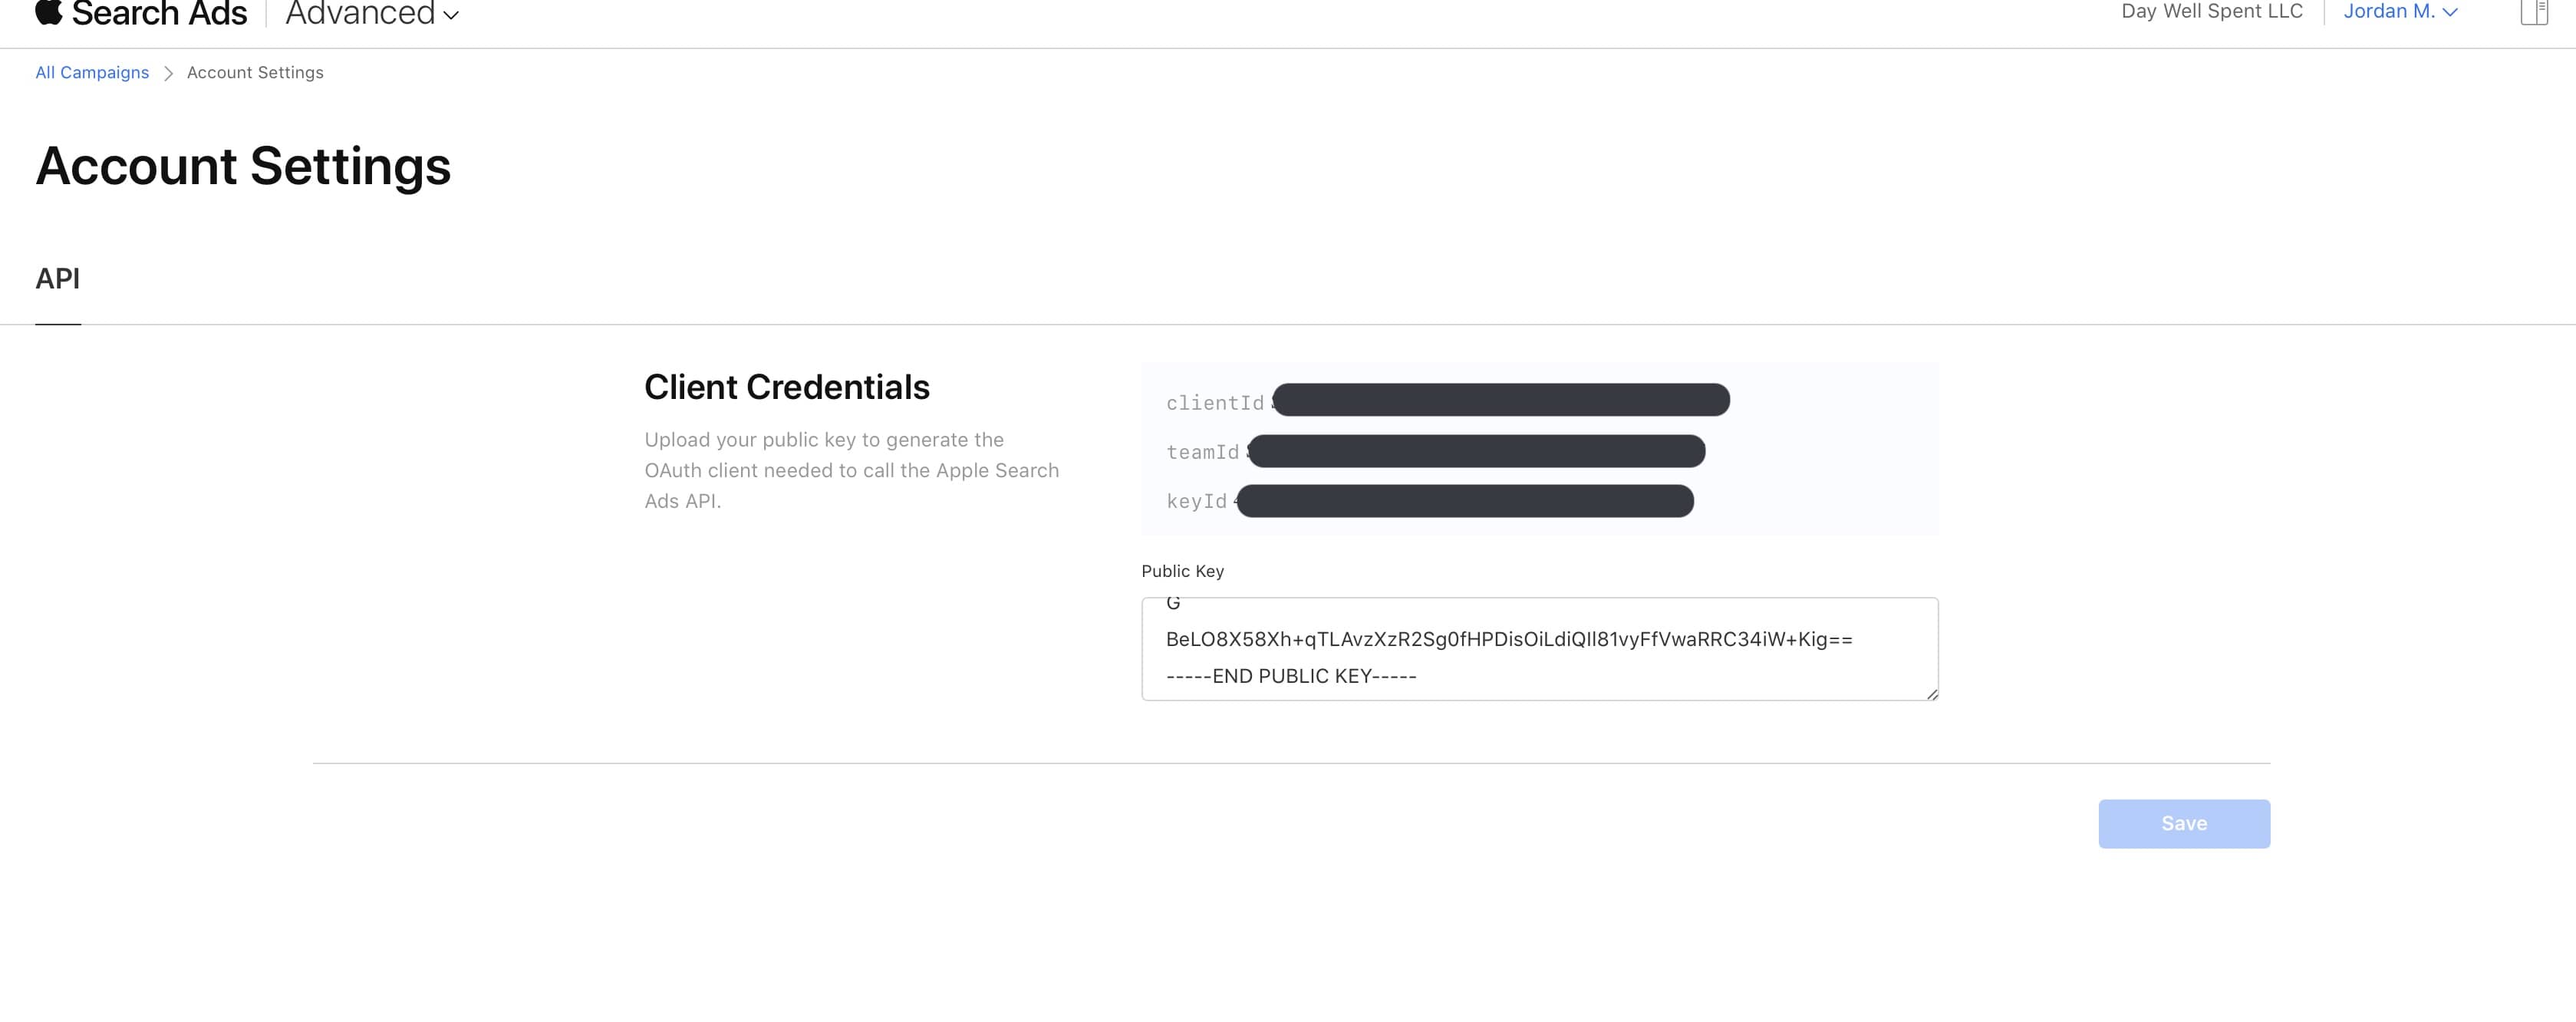
2. In Superwall, paste each value in and click "Update ASA Configuration."
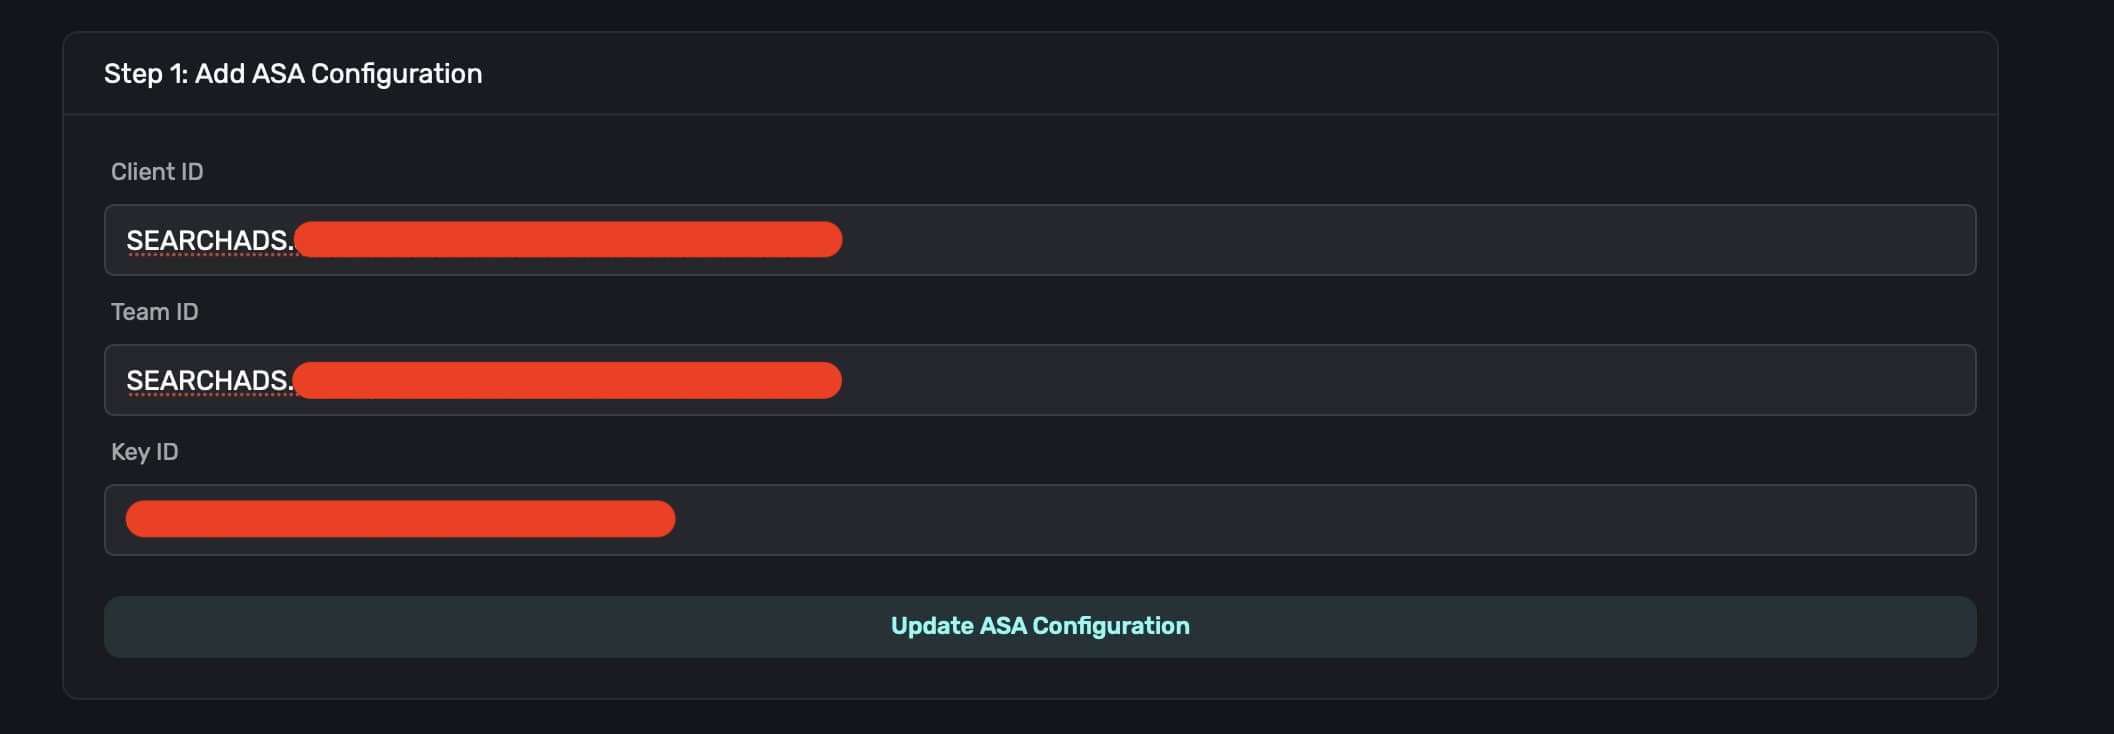
3. Finally, click on "Check Configuration" and confirm everything is set up properly.

### Use cases
Once you've enabled Apple Search Ads, you can use the data in a few ways. First, users who've been acquired from a search ad will display that information in the users page under "Apple Search Ads." This is available with either the basic or advanced search ads. This can be useful for understanding the quality of users acquired from search ads.
If you're using advanced search ads, you get significantly more capabilities:
* You can leverage search ad data in your campaigns. This opens up the ability to do things like showing a specific paywall to a user who was acquired via a search ad, tailor messaging from the keyword that was used, and more.
* You can view search ads data in charts, breaking down metrics by campaign name and more.
#### Viewing users acquired via Apple Search Ads
If any user was acquired via a search ad, you'll see that data in the [users page](/overview-users). This can be useful for understanding the quality of users acquired from search ads:
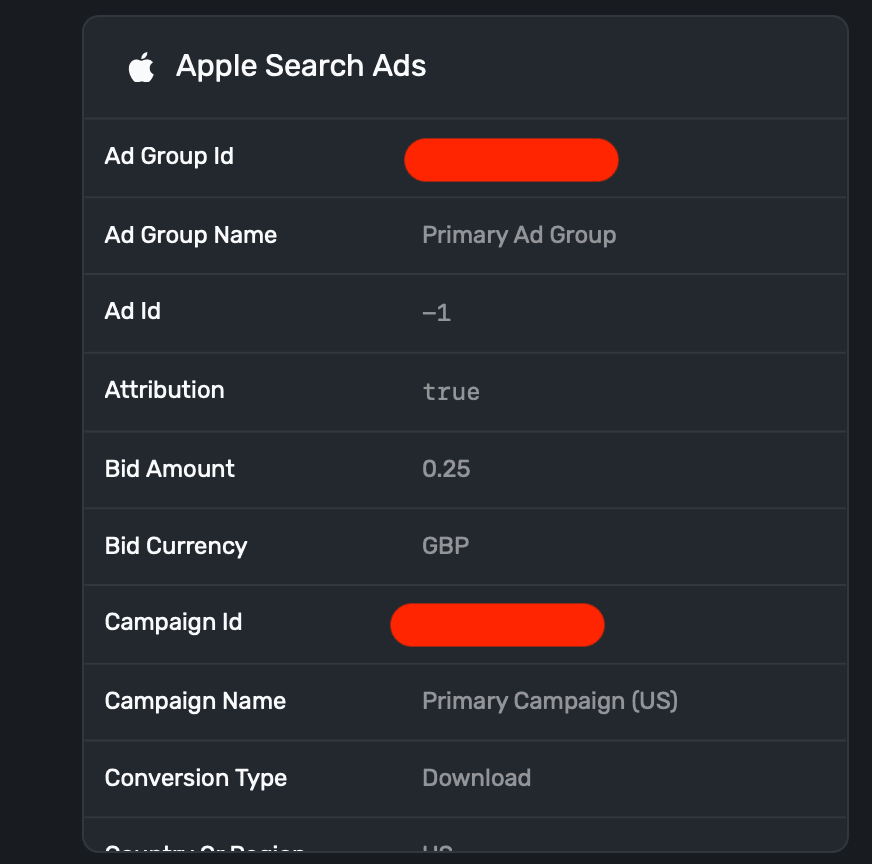
Here's a breakdown of the attributes you'll see:
| Attribute | Example | Description |
| ----------------- | --------------------- | -------------------------------------------------------------------------------------------------------------------------------------------- |
| Ad Group Id | 1684936422 | The identifier for the ad group. Use Get Ad Group-Level Reports to correlate your attribution response by adGroupId. |
| Ad Group Name | Primary Ad Group | The name of the ad group for organizational and reporting purposes. |
| Ad Id | -1 | The identifier representing the assignment relationship between an ad object and an ad group. Applies to devices running iOS 15.2 and later. |
| Attribution | true | A Boolean value indicating if the attribution was successful. Returns true if a user clicks an ad up to 30 days before downloading your app. |
| Bid Amount | 0.25 | The cost-per-click (CPC) bid amount placed for this ad group. |
| Bid Currency | GBP | The currency used for the bid amount. |
| Campaign Id | 1633810596 | The unique identifier for the campaign. Use Get Campaign-Level Reports to correlate your attribution response by campaignId. |
| Campaign Name | Primary Campaign (US) | The name of the campaign, useful for tracking and organizational purposes. |
| Conversion Type | Download | The type of conversion, either Download or Redownload. |
| Country Or Region | US | The country or region for the campaign. |
| Keyword Id | 1685193881 | The identifier for the keyword. |
| Keyword Name | baskeball app | The specific keyword that triggered the ad. |
| Match Type | EXACT | The keyword matching type used to trigger the ad (e.g., EXACT, BROAD, or PHRASE). |
| Org Id | 3621140 | The identifier of the organization that owns the campaign. This is the same as your account in the Apple Search Ads UI. |
#### Using search ad data in campaigns
Using the table above, you can turn around and use any of those values to create [campaign filters](/campaigns-audience#filters):
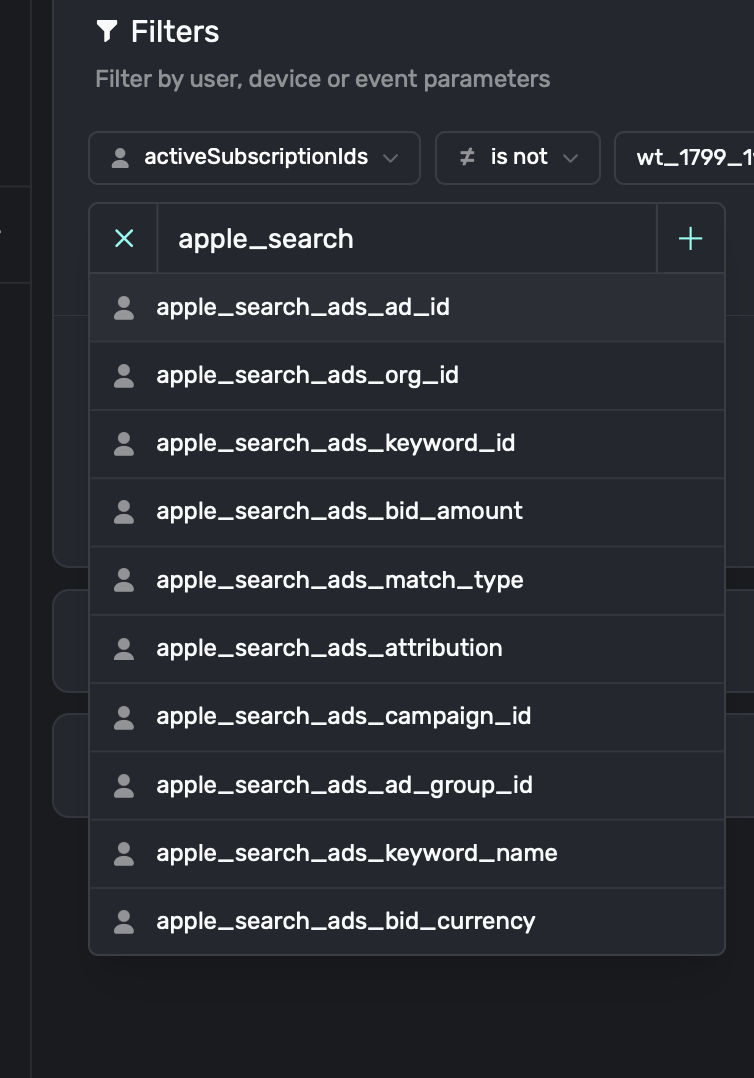
There is a delay from the moment a user downloads your app via a search ad to the time that event
is sent to Superwall from Apple's servers. For that reason, using search ad data as a filter on
events like an app's launch is discouraged.
#### Charts
Use data from Apple Search Ads in our [charts](/charts) as a breakdown and filter:
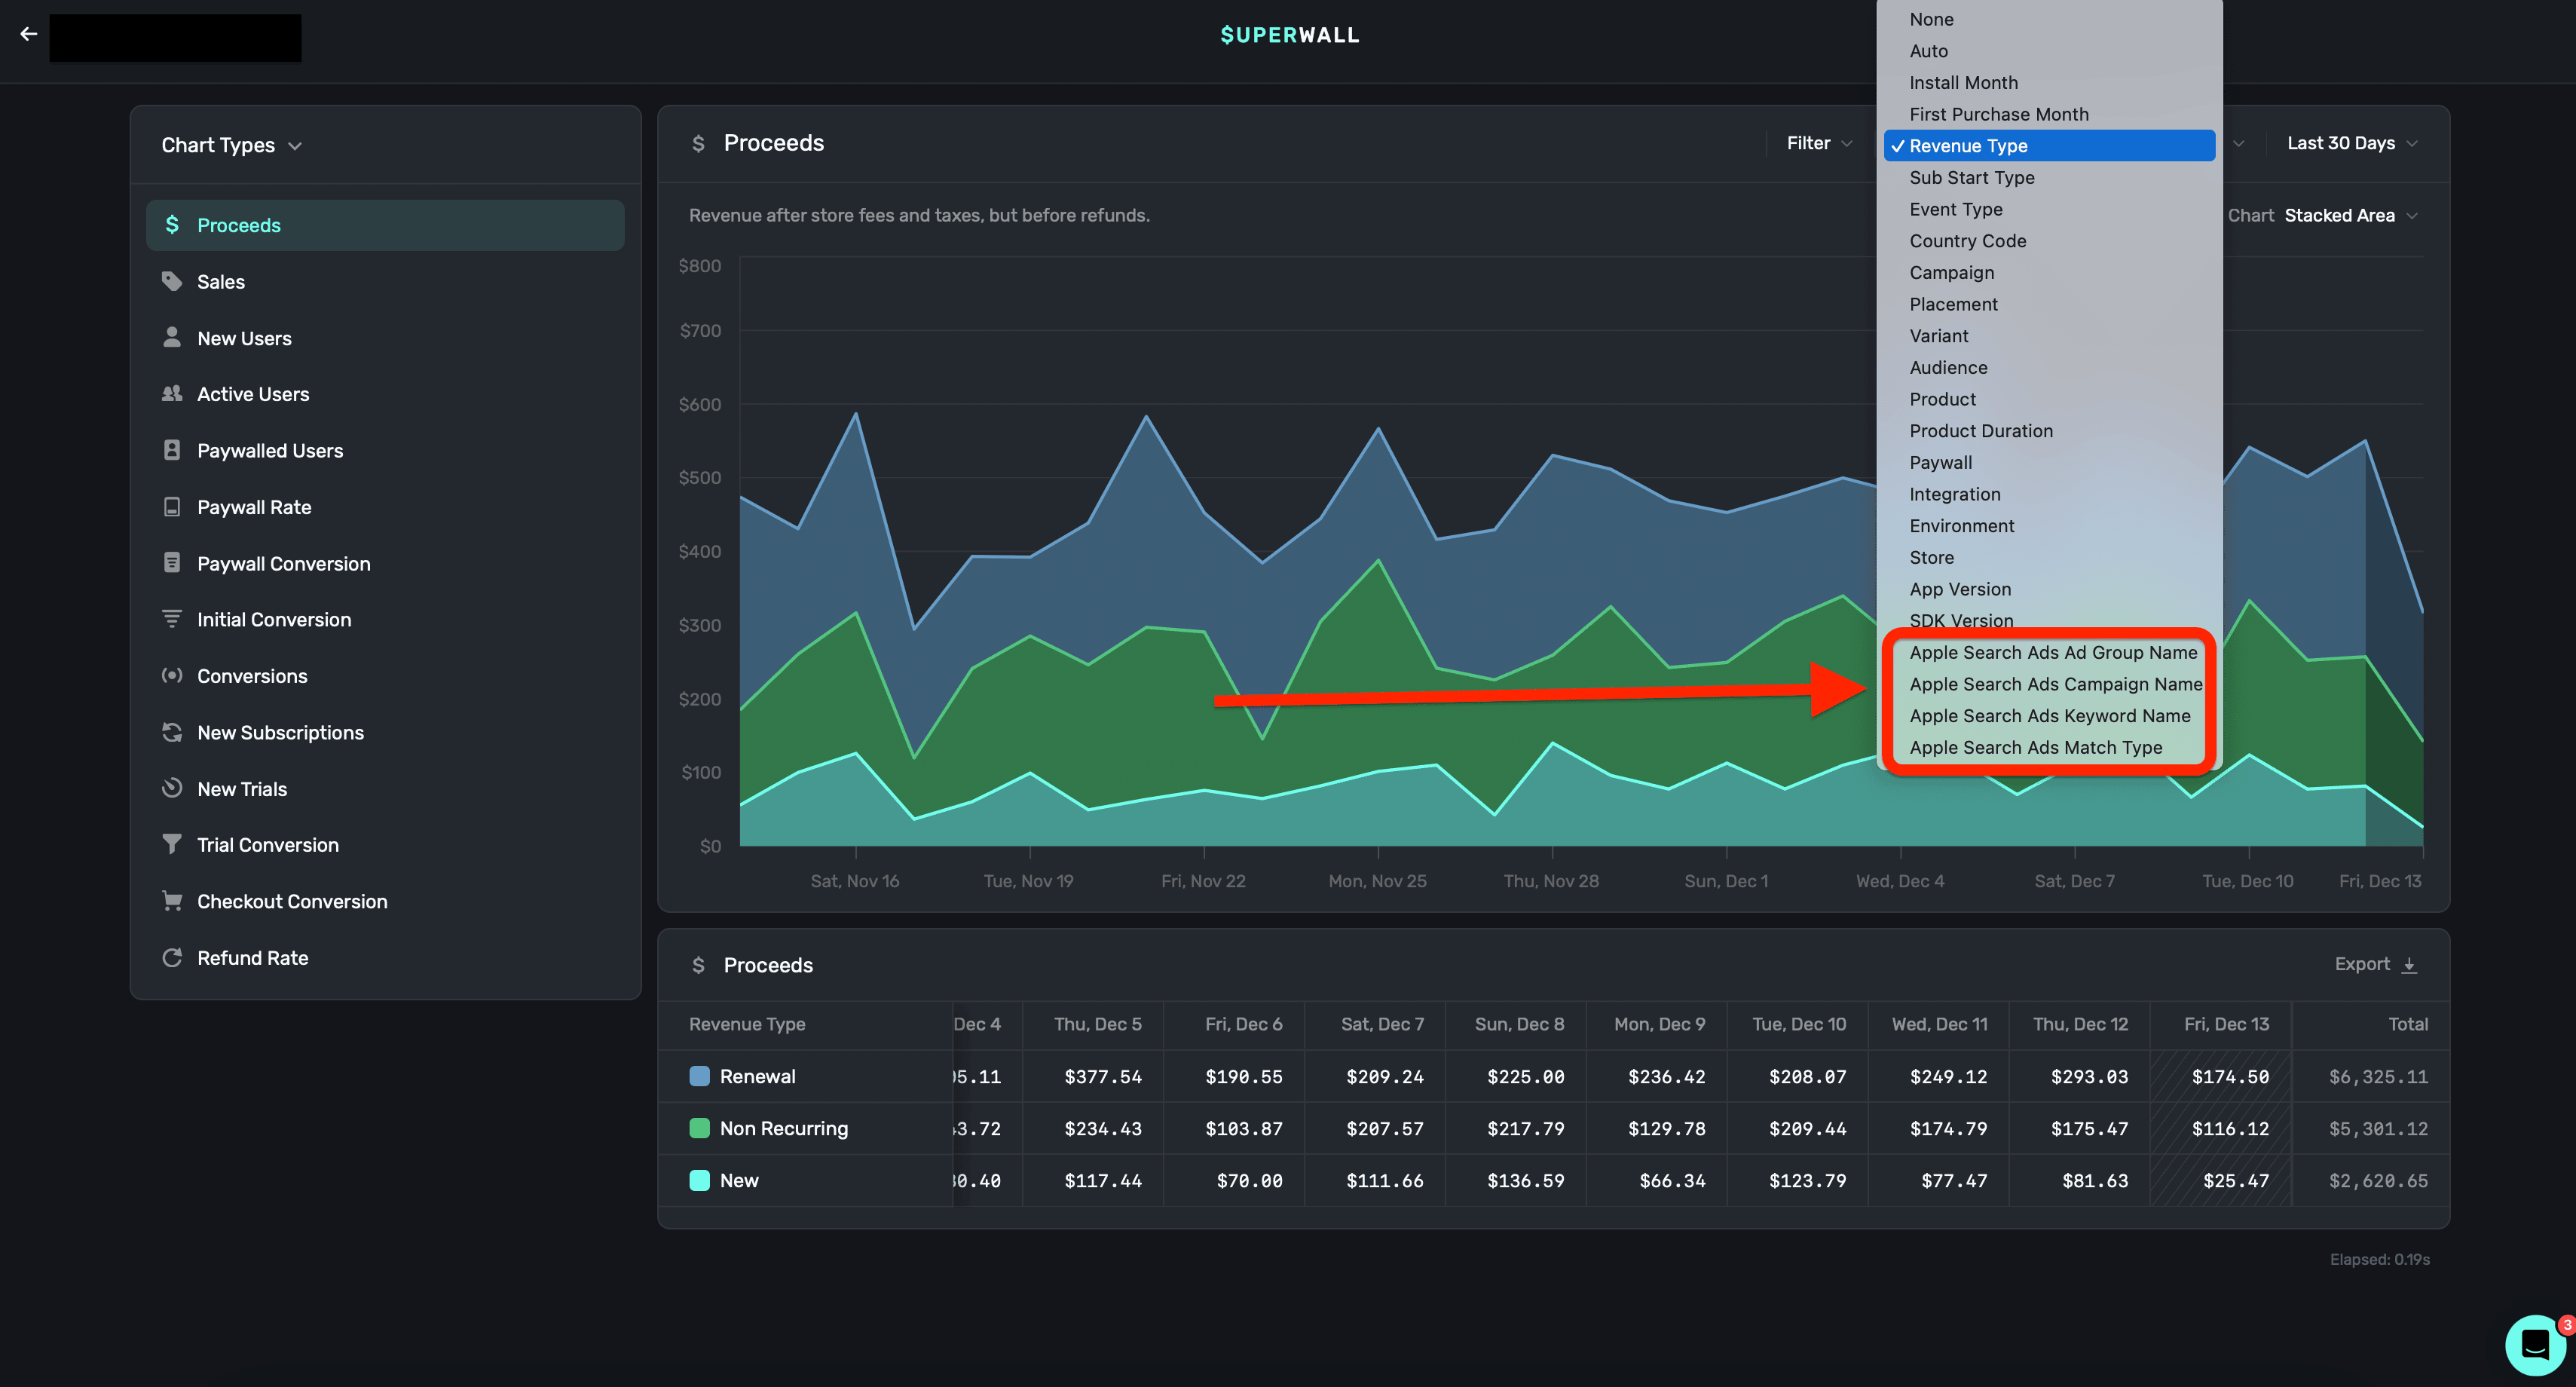
Apple Search Ads data can be used in the following charts:
* **Proceeds**
* **Sales**
* **Conversions**
* **New Subscriptions**
* **New Trials**
* **Trial Conversions**
* **Refund Rate**
As far as search ads data, you can create breakdowns using the following:
* **Ad Group Name**
* **Campaign Name**
* **Keywords Match Name**
* **Match Type**
Some common use cases here are:
* Attributing new trials from a search campaign.
* Seeing which keywords generate the most revenue.
* Understanding the quality of users acquired from a search ad.
* etc.
# Audit Log
Source: https://superwall.com/docs/overview-settings-audit-log
In the **Audit Log** section within **Settings**, you can view virtually any action taken by users within Superwall:
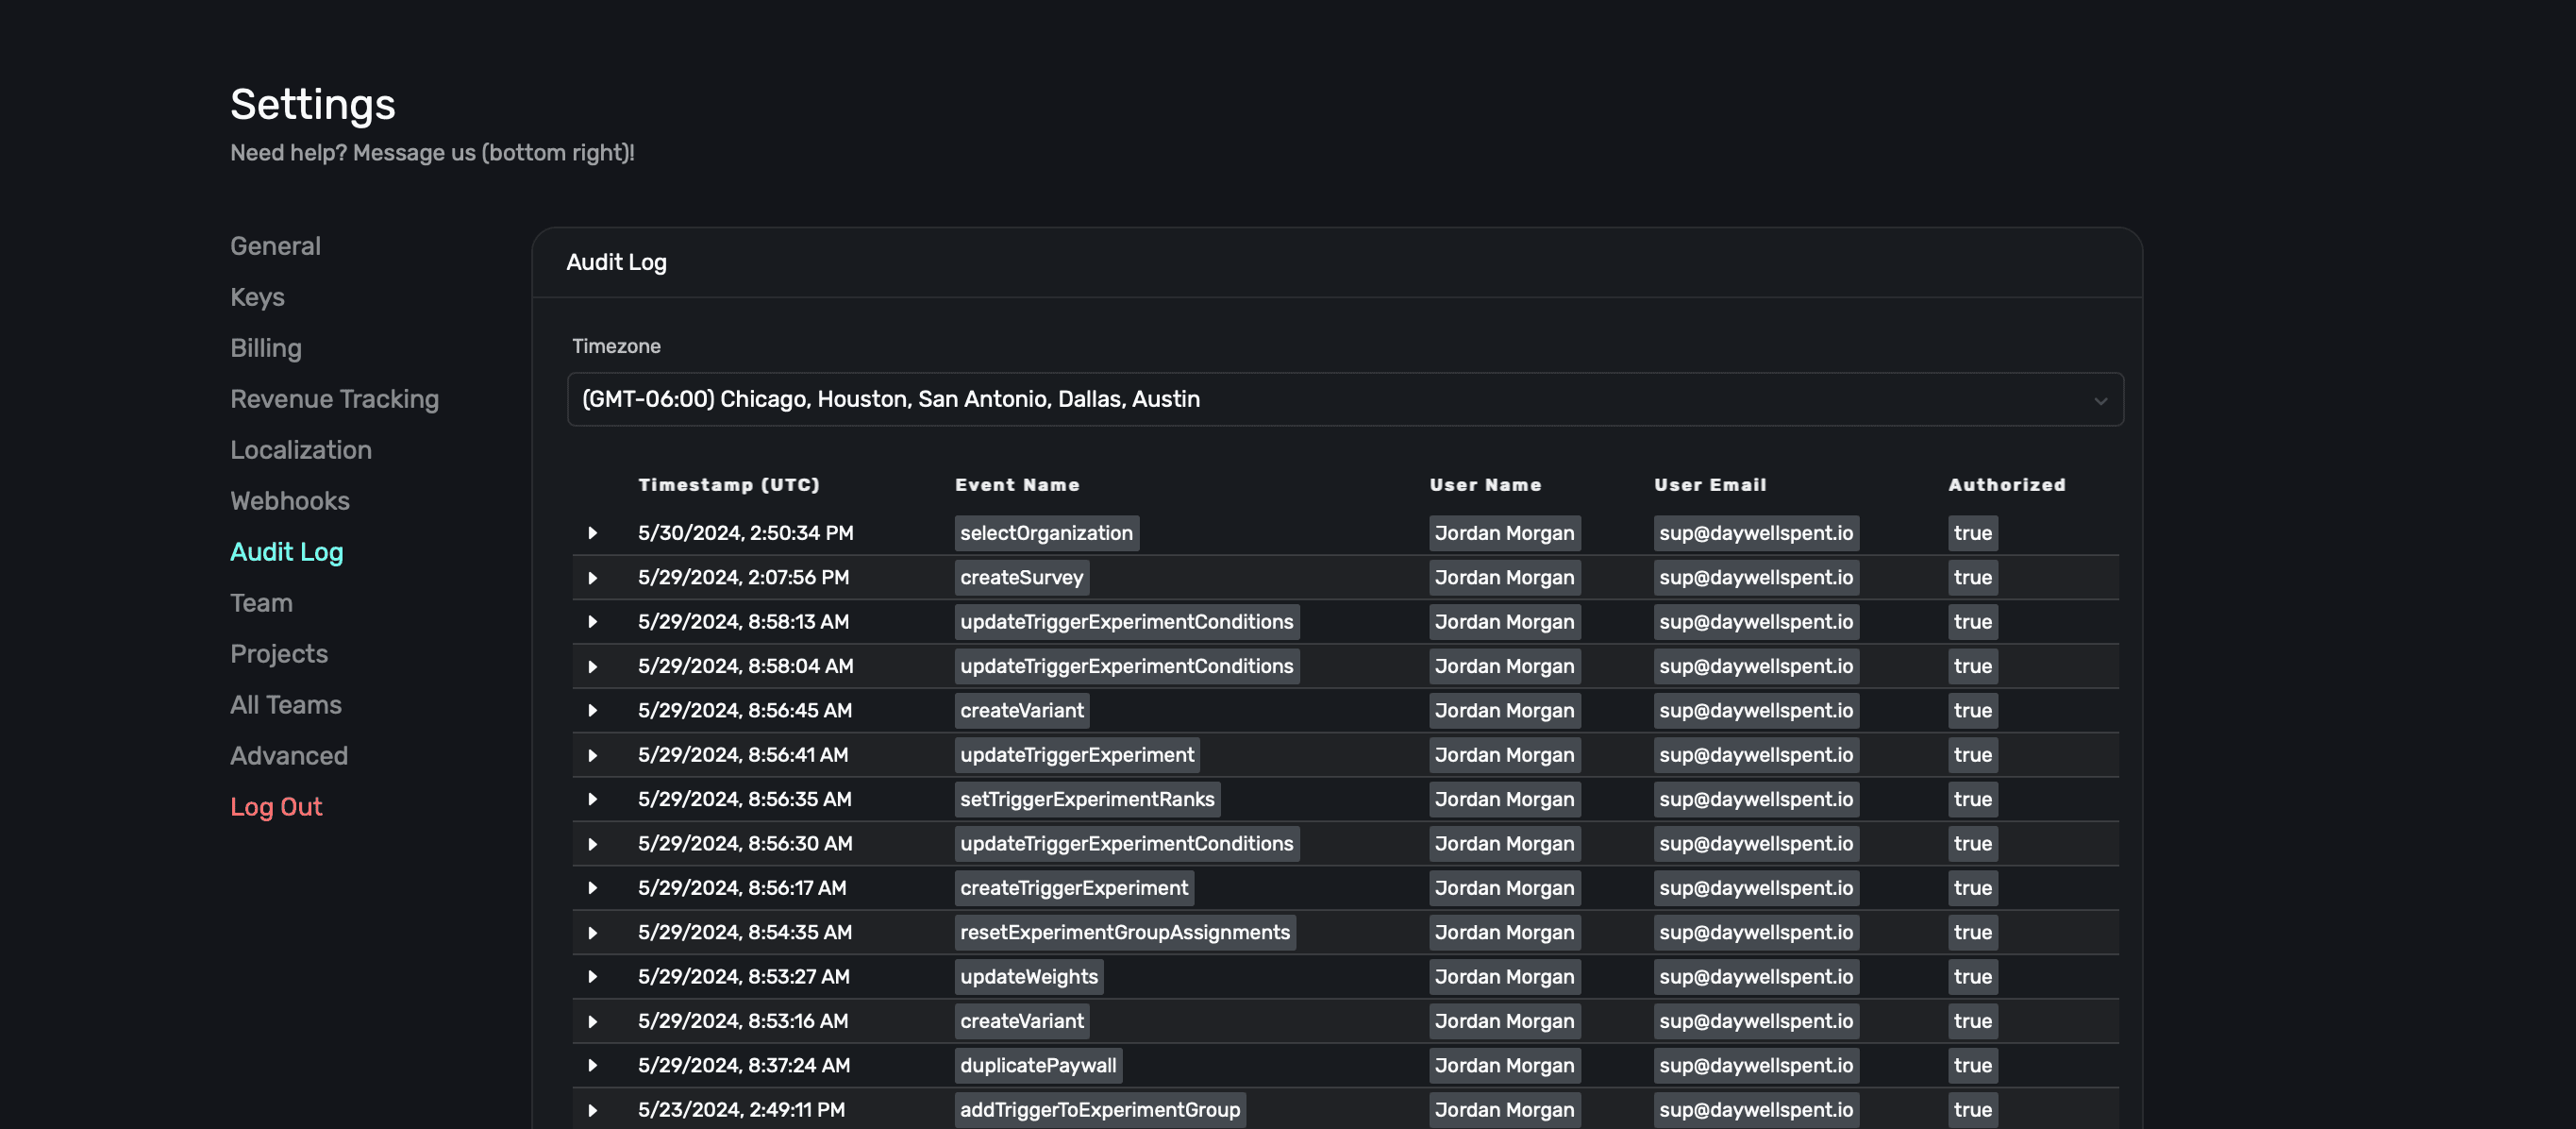
This is useful to see all of the actions you, or others within your team, have made:

To view details about any of the actions, simply click on the row to expand it:
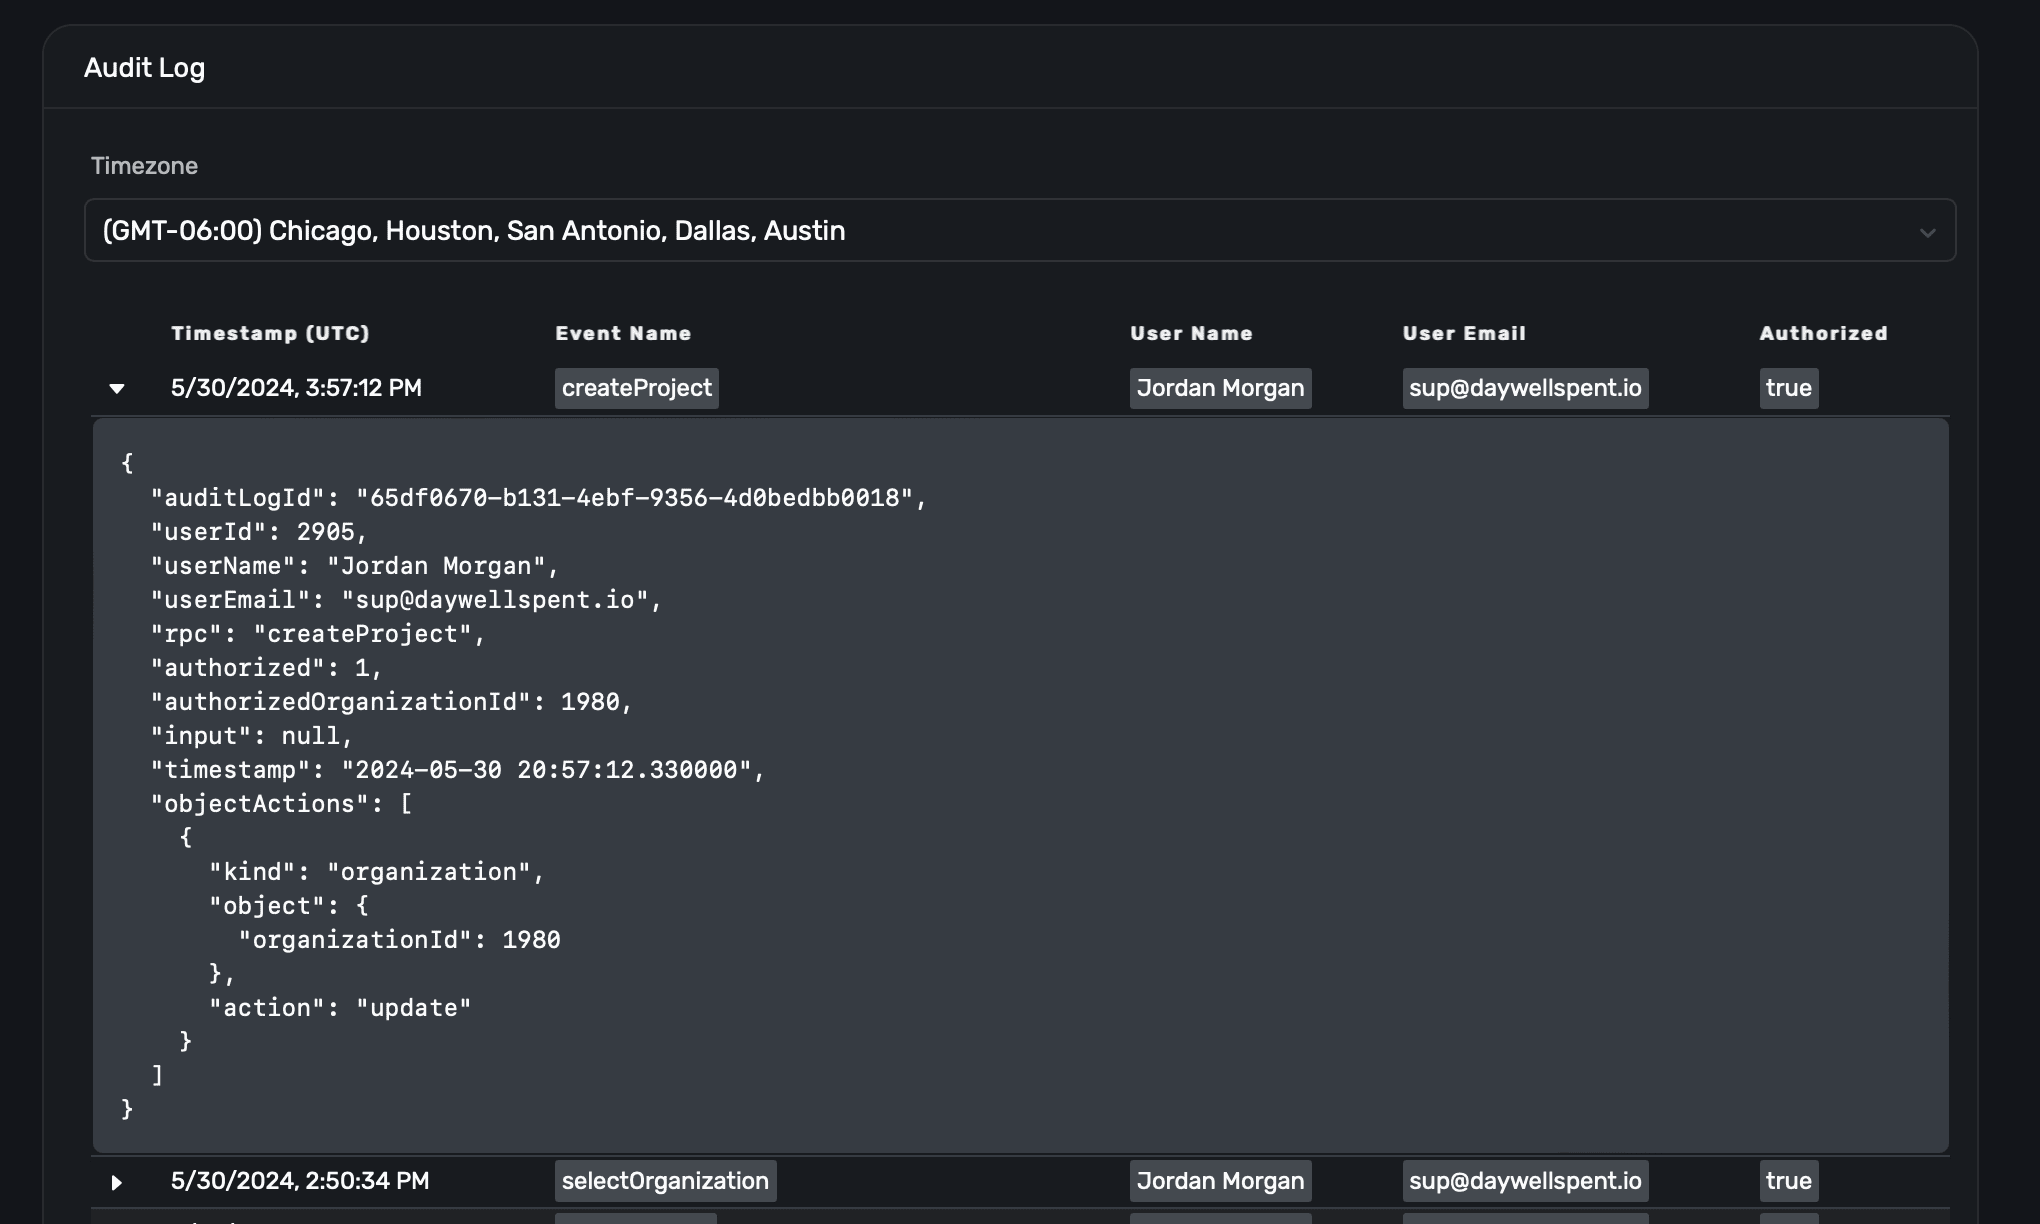
# Billing
Source: https://superwall.com/docs/overview-settings-billing
In the **Billing** section in **Settings**, you can enter, or change, billing details for your Superwall account:
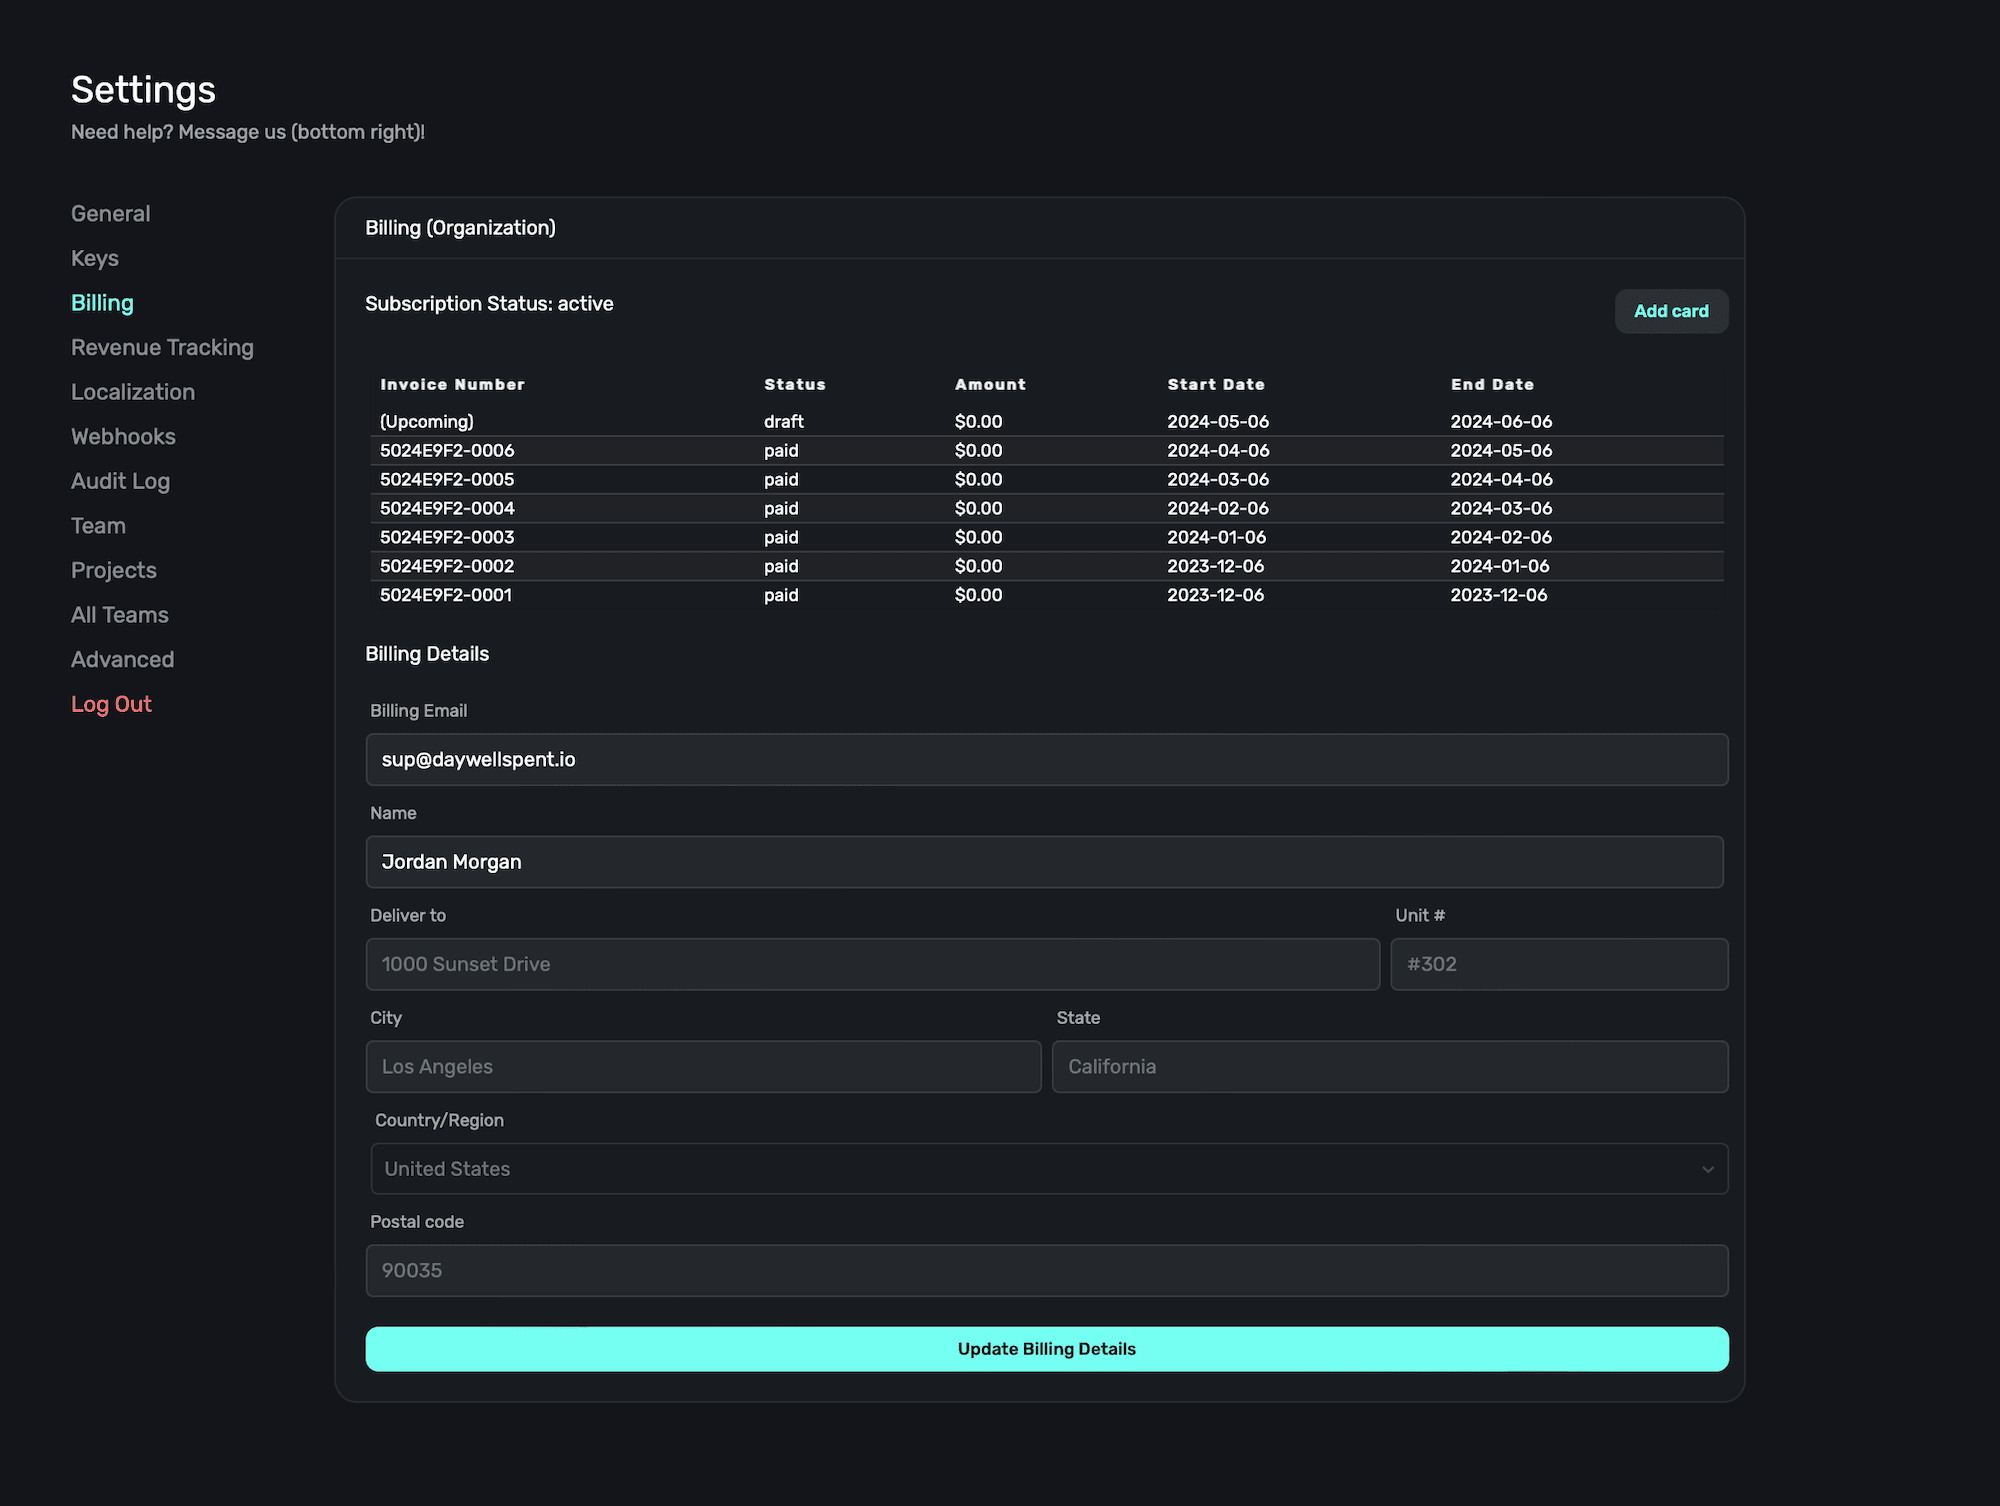
### Enter or edit billing details
Below the invoice section, you can enter (or edit) your billing details at any point. When you're finished, **click** the **Update Billing Details** button to save your changes.
### View past invoices
You can view upcoming and previous invoices from Superwall in this section, along with your subscription status right above it as well. The table will show payment status, the amount owed or paid, and the period the invoice fell within.
You can also click any invoice row to download it as a .pdf.
### Entering in or editing a card on file
To enter in a credit card for payments, **click** the **Add Card** button above the invoice section:
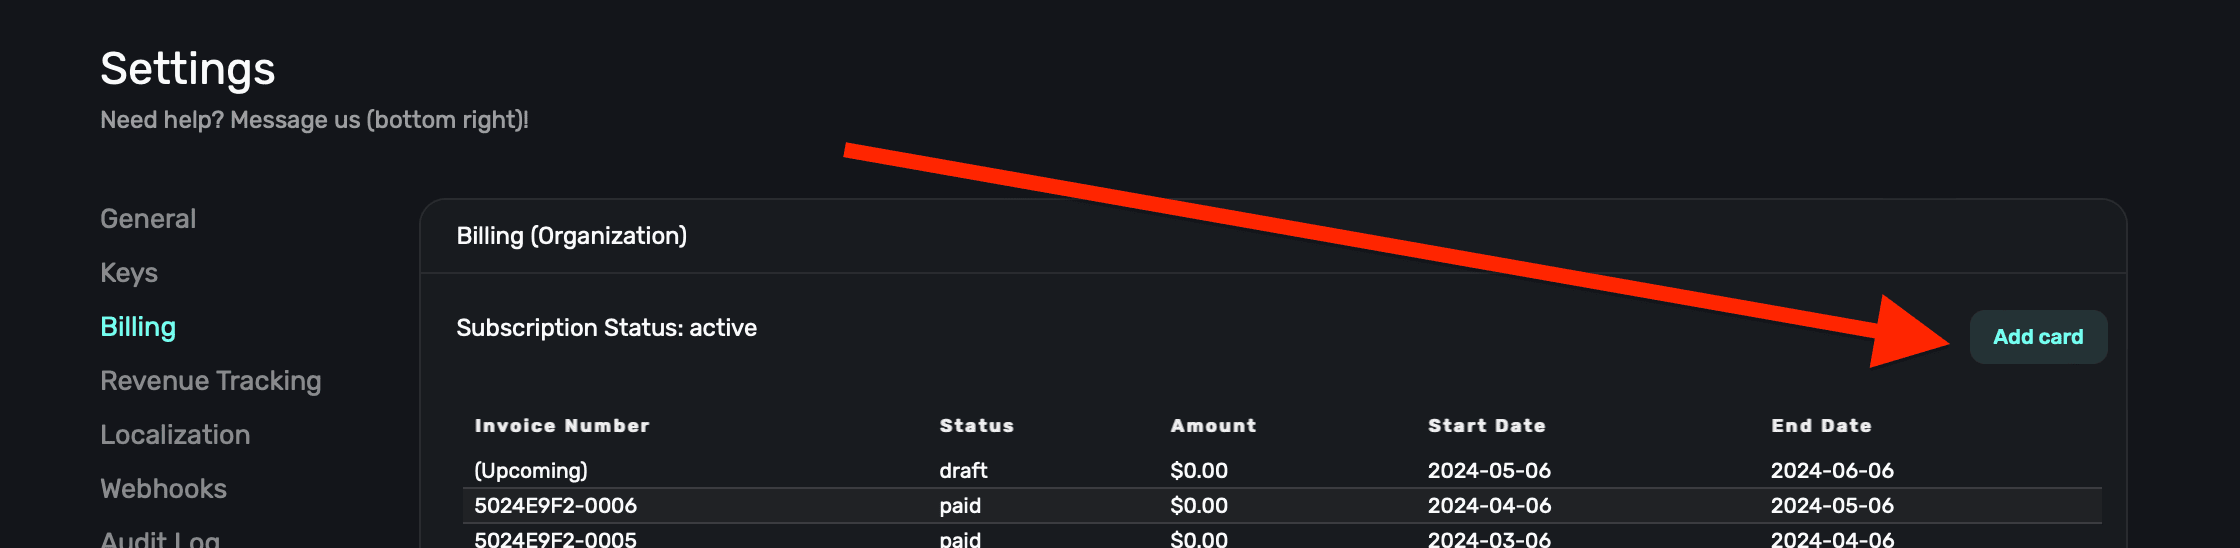
From there, you can manually enter in your card details:
Or, you can use the Autofill Link service by clicking the green "Autofill Link" button:
If you have a card already present, you can remove it and add a different one here as well.
If you have any questions about your billing details or invoices, please feel free to reach out to us.
# Keys
Source: https://superwall.com/docs/overview-settings-keys
In the **Keys** section under **Settings**, you can easily view or copy your API key, view session starts by the last seven days, and app version sessions from the last seven days.
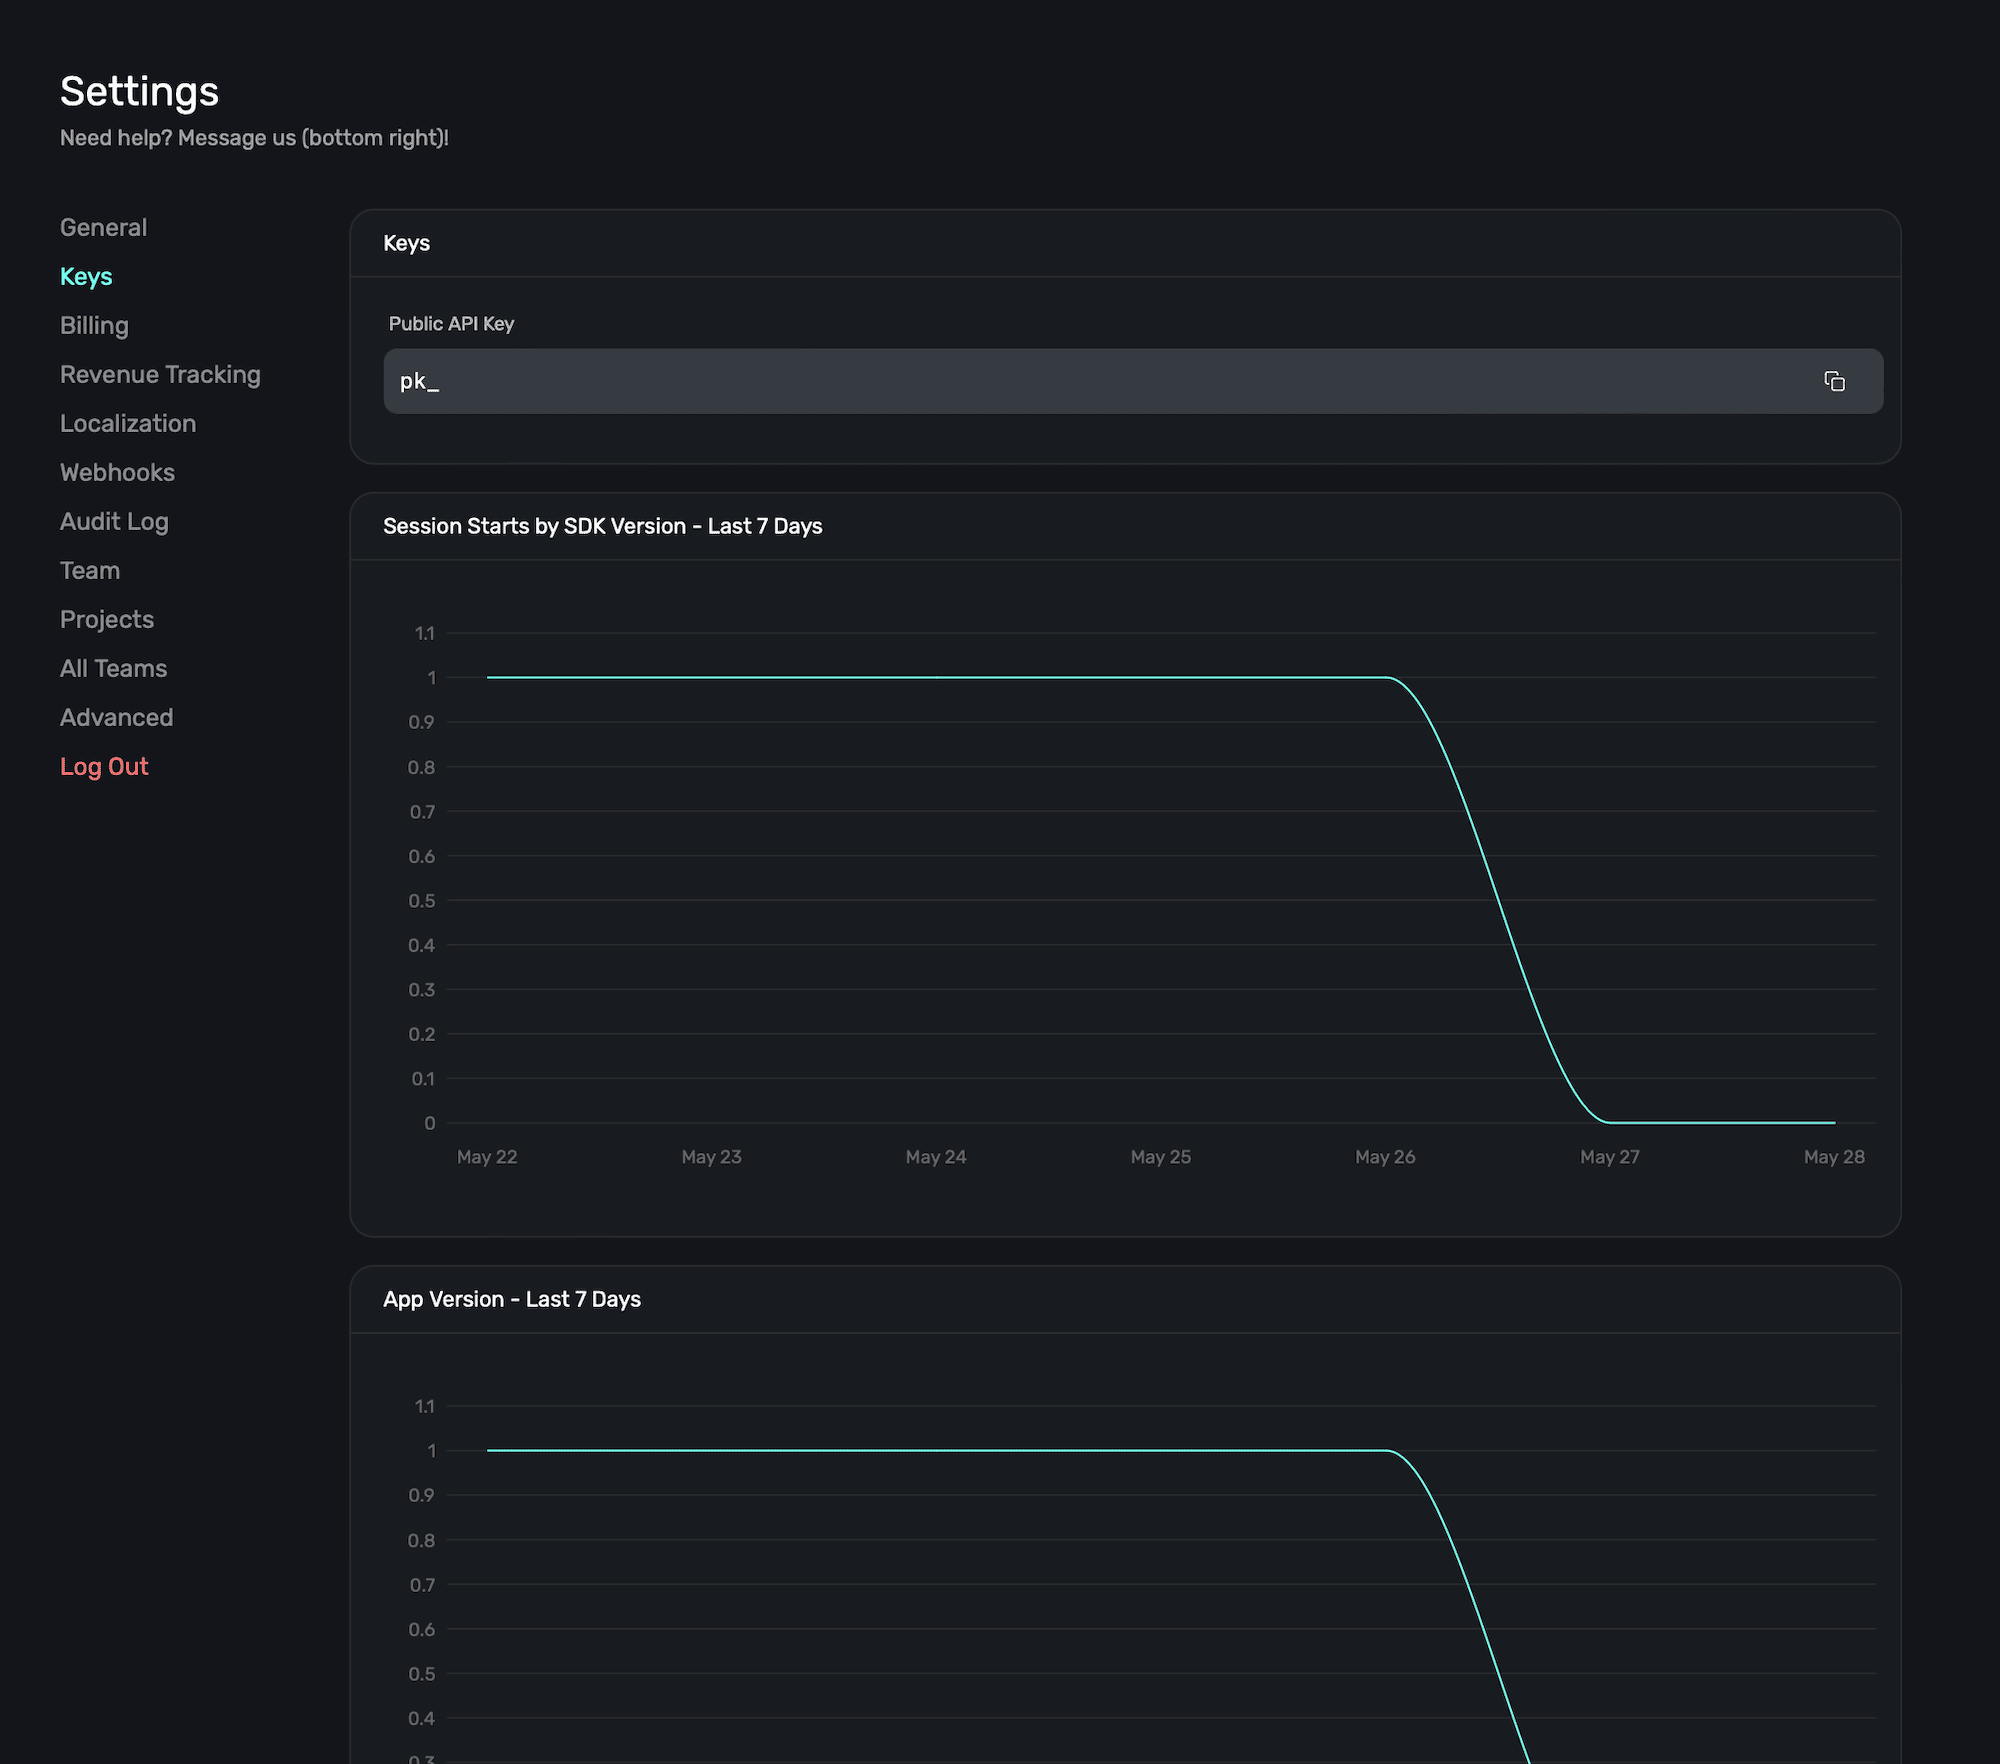
### API Key
You'll use your API key to initialize the Superwall client in your apps. Each one is prepended with `pk_` and then the identifier. To easily copy it, **click** the **Copy** icon on the right-hand side:
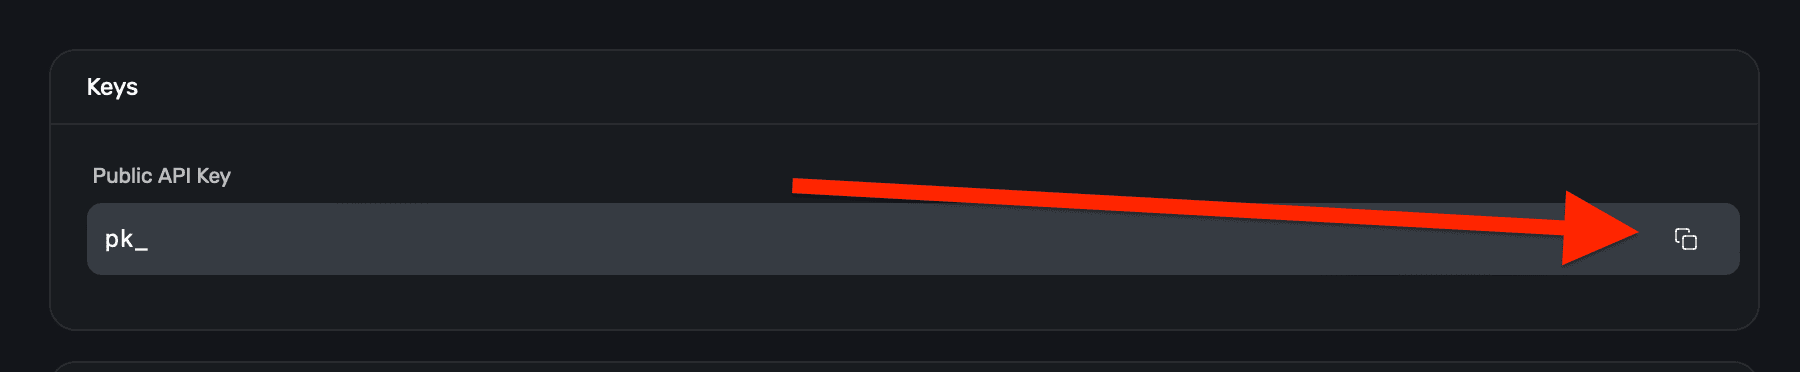
### Session starts by SDK version
Use the session starts by SDK chart to see how many sessions are being started, split out by the SDK version of Superwall.
This helps debug any potential issues that may occur by comparing sessions against the version of our SDK users are on. Of course, if your issue appears to be related to Superwall's SDK — always feel free to reach out so we can investigate.
### App version
Similarly, the app version chart helps you narrow down issues by showing sessions split out by app versions. If the use of our SDK didn't change, but your app version did, and an issue is occurring — then it may related to your app specific logic.
# Projects
Source: https://superwall.com/docs/overview-settings-projects
In the **Projects** section within **Settings**, you logically group your apps together (regardless of the platform they are on):
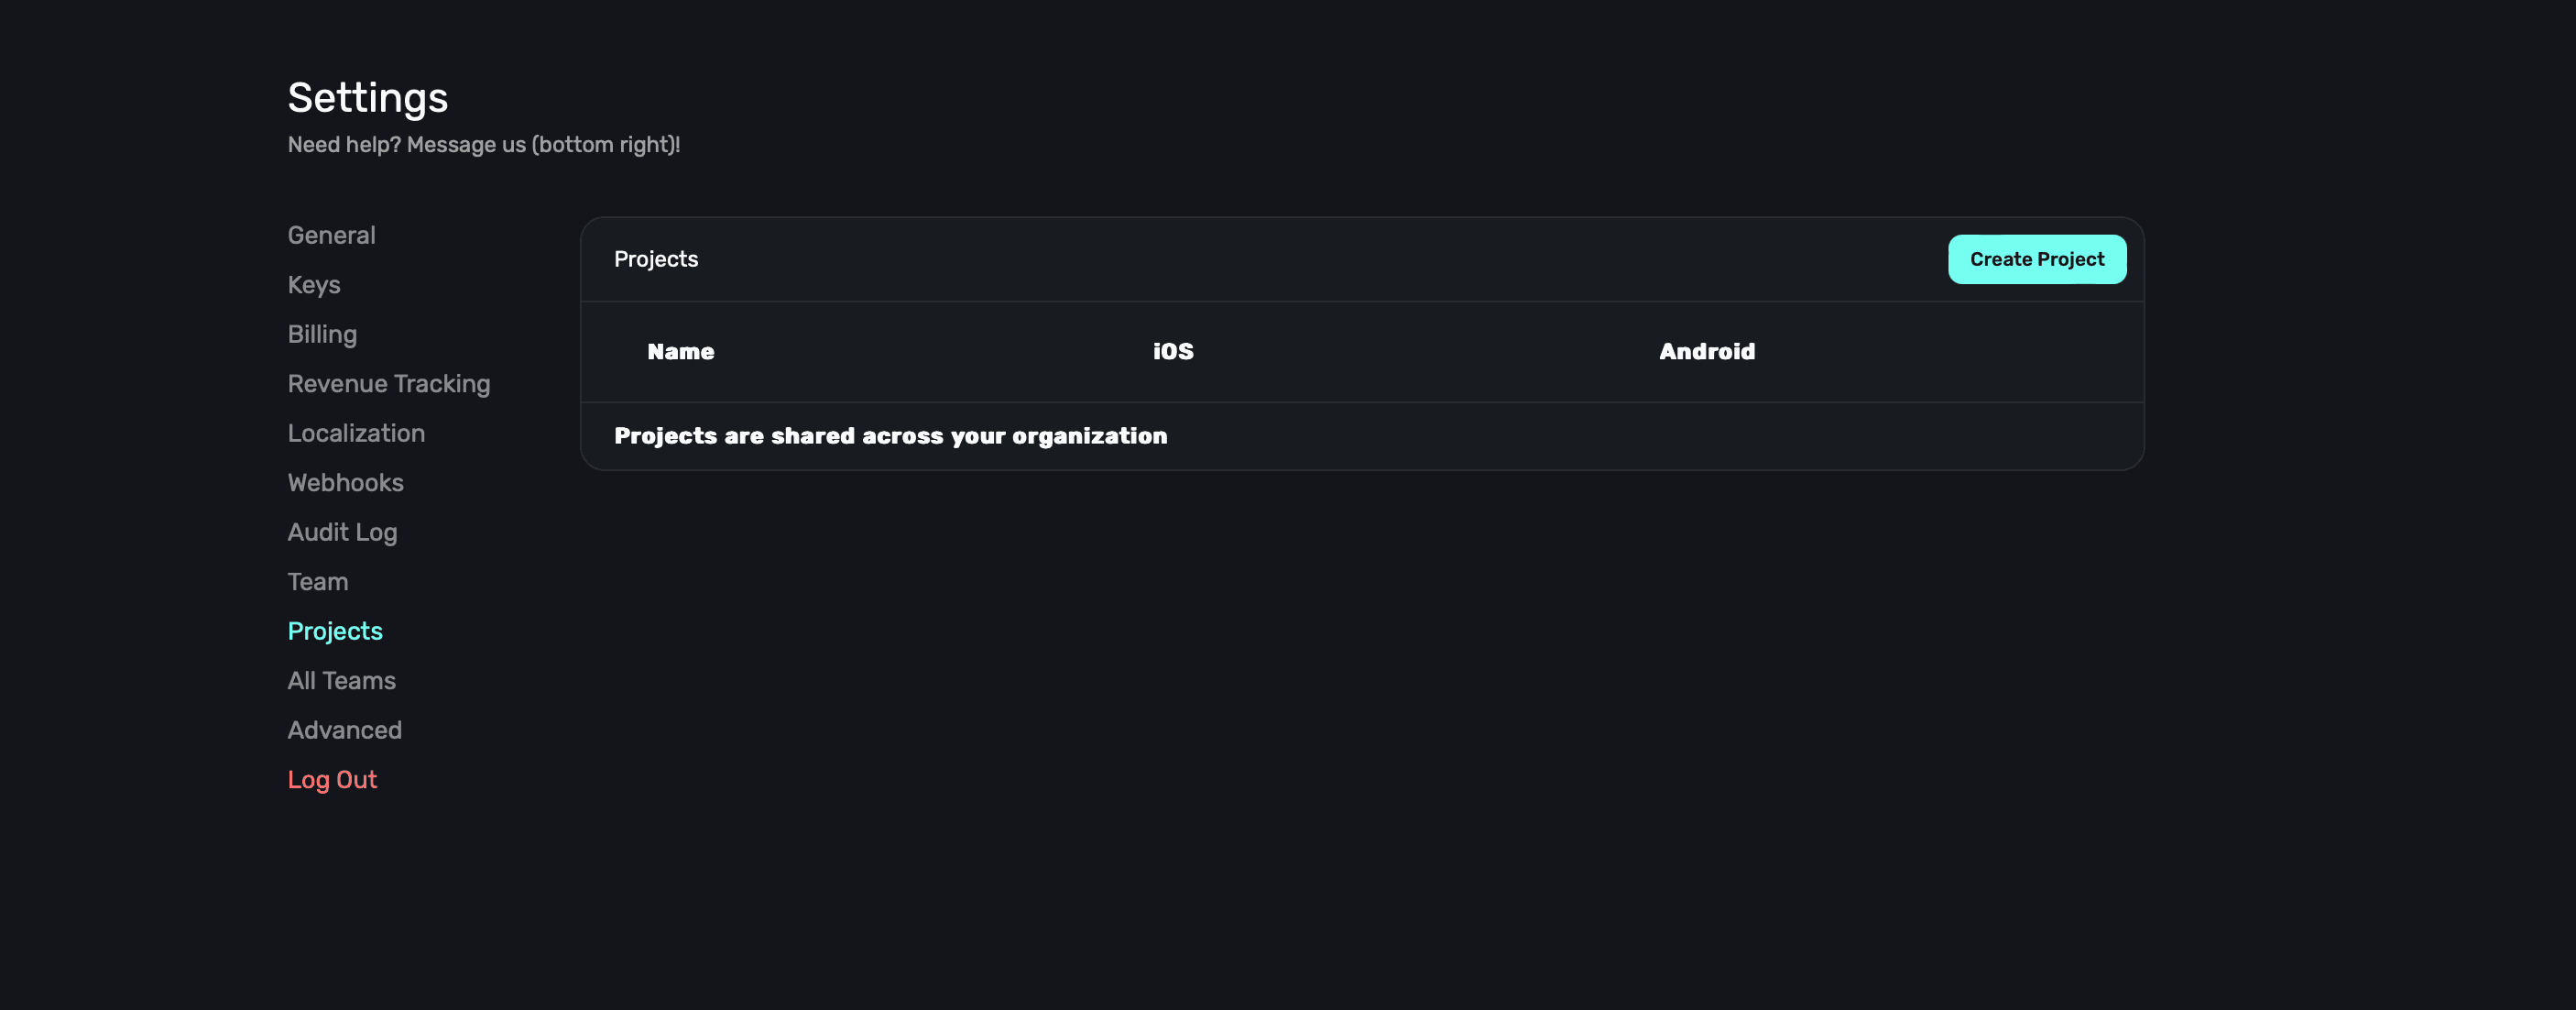
Projects are typically the same app on multiple platforms. That is, the same app on iOS and Android. Grouping them together as a project can help with organization and make reporting a bit easier to manage.
### Creating a new project
To create a new project, **click** the **Create Project** button at the top right:
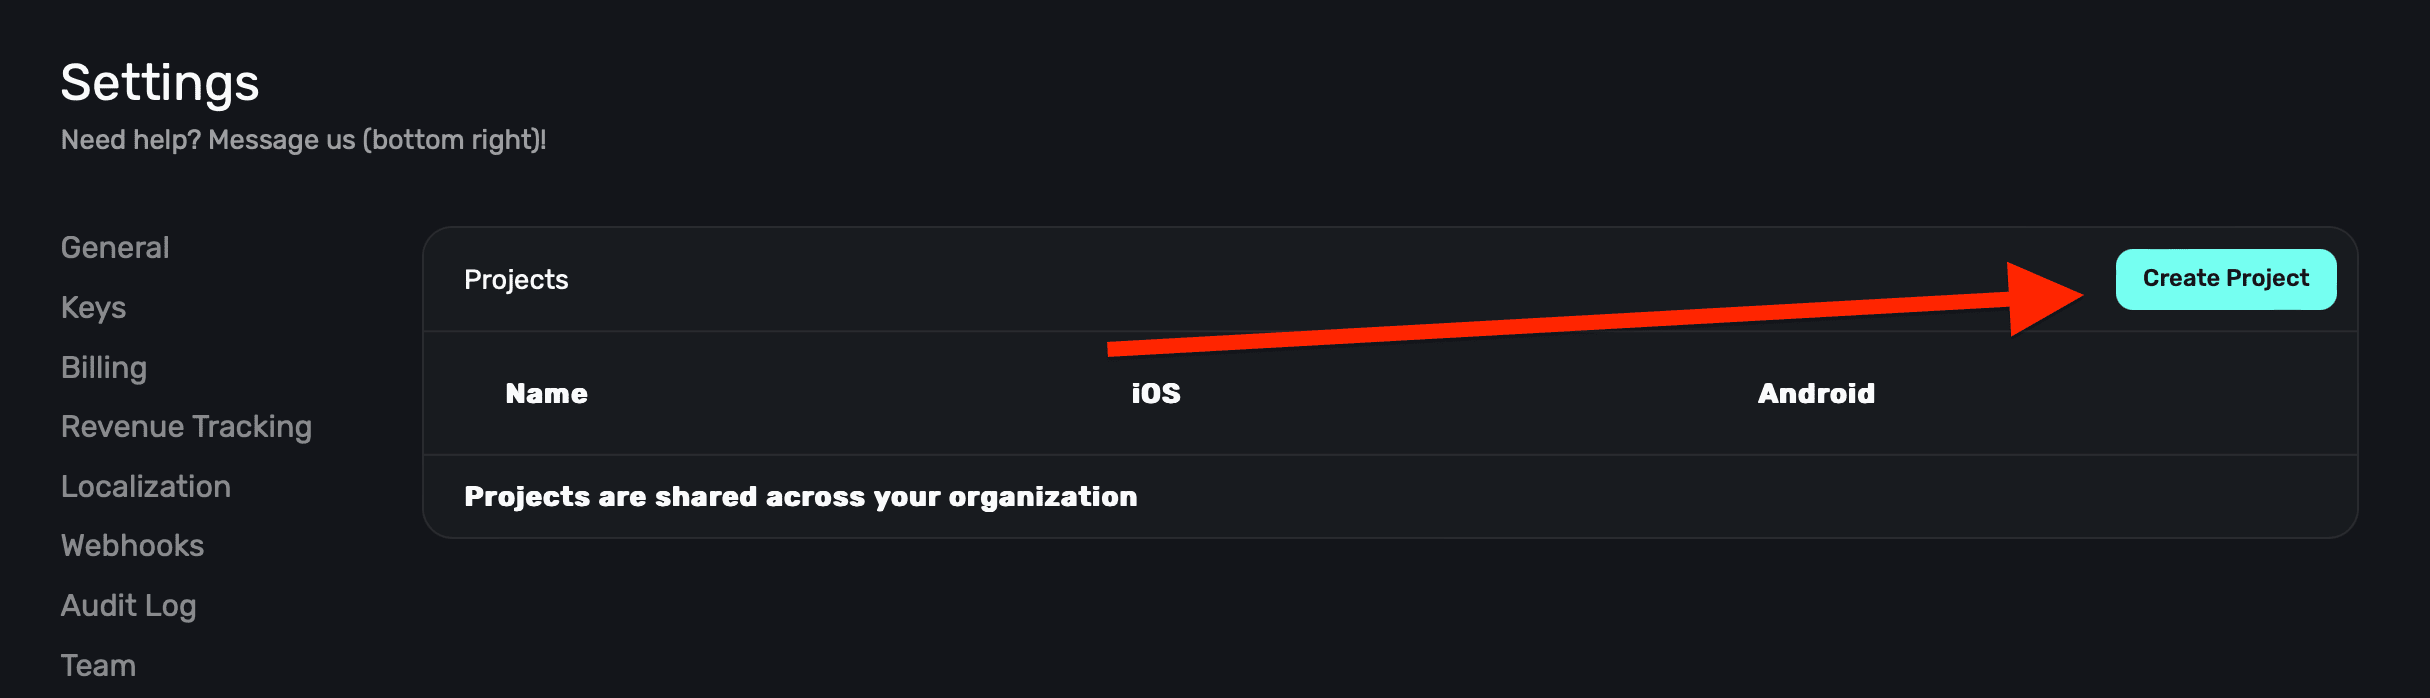
From there, give it a name and **click** the **Save** button:
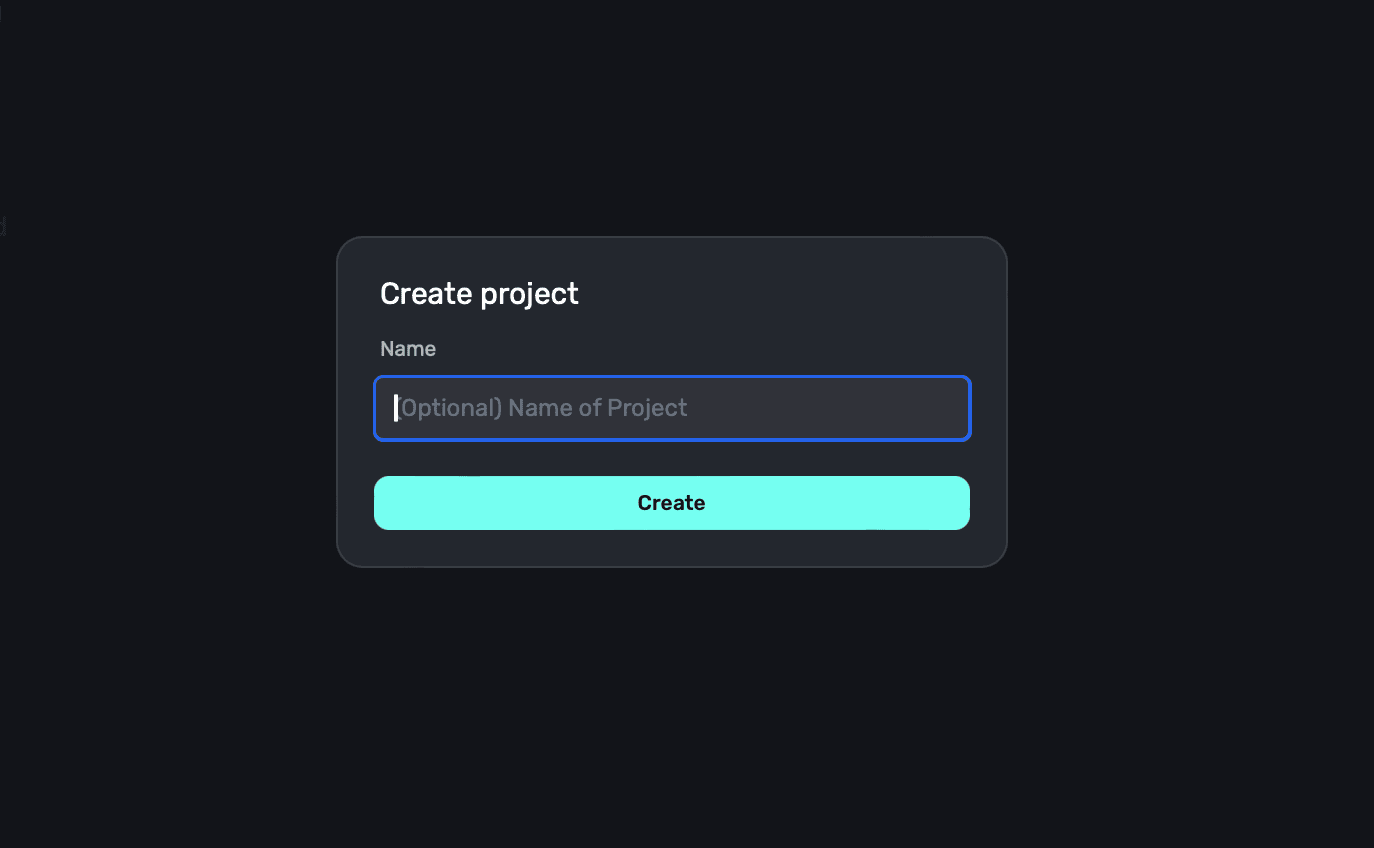
### Adding apps to a project
After you've created a project, you can select an app for the iOS and Android platform by clicking their respective buttons:
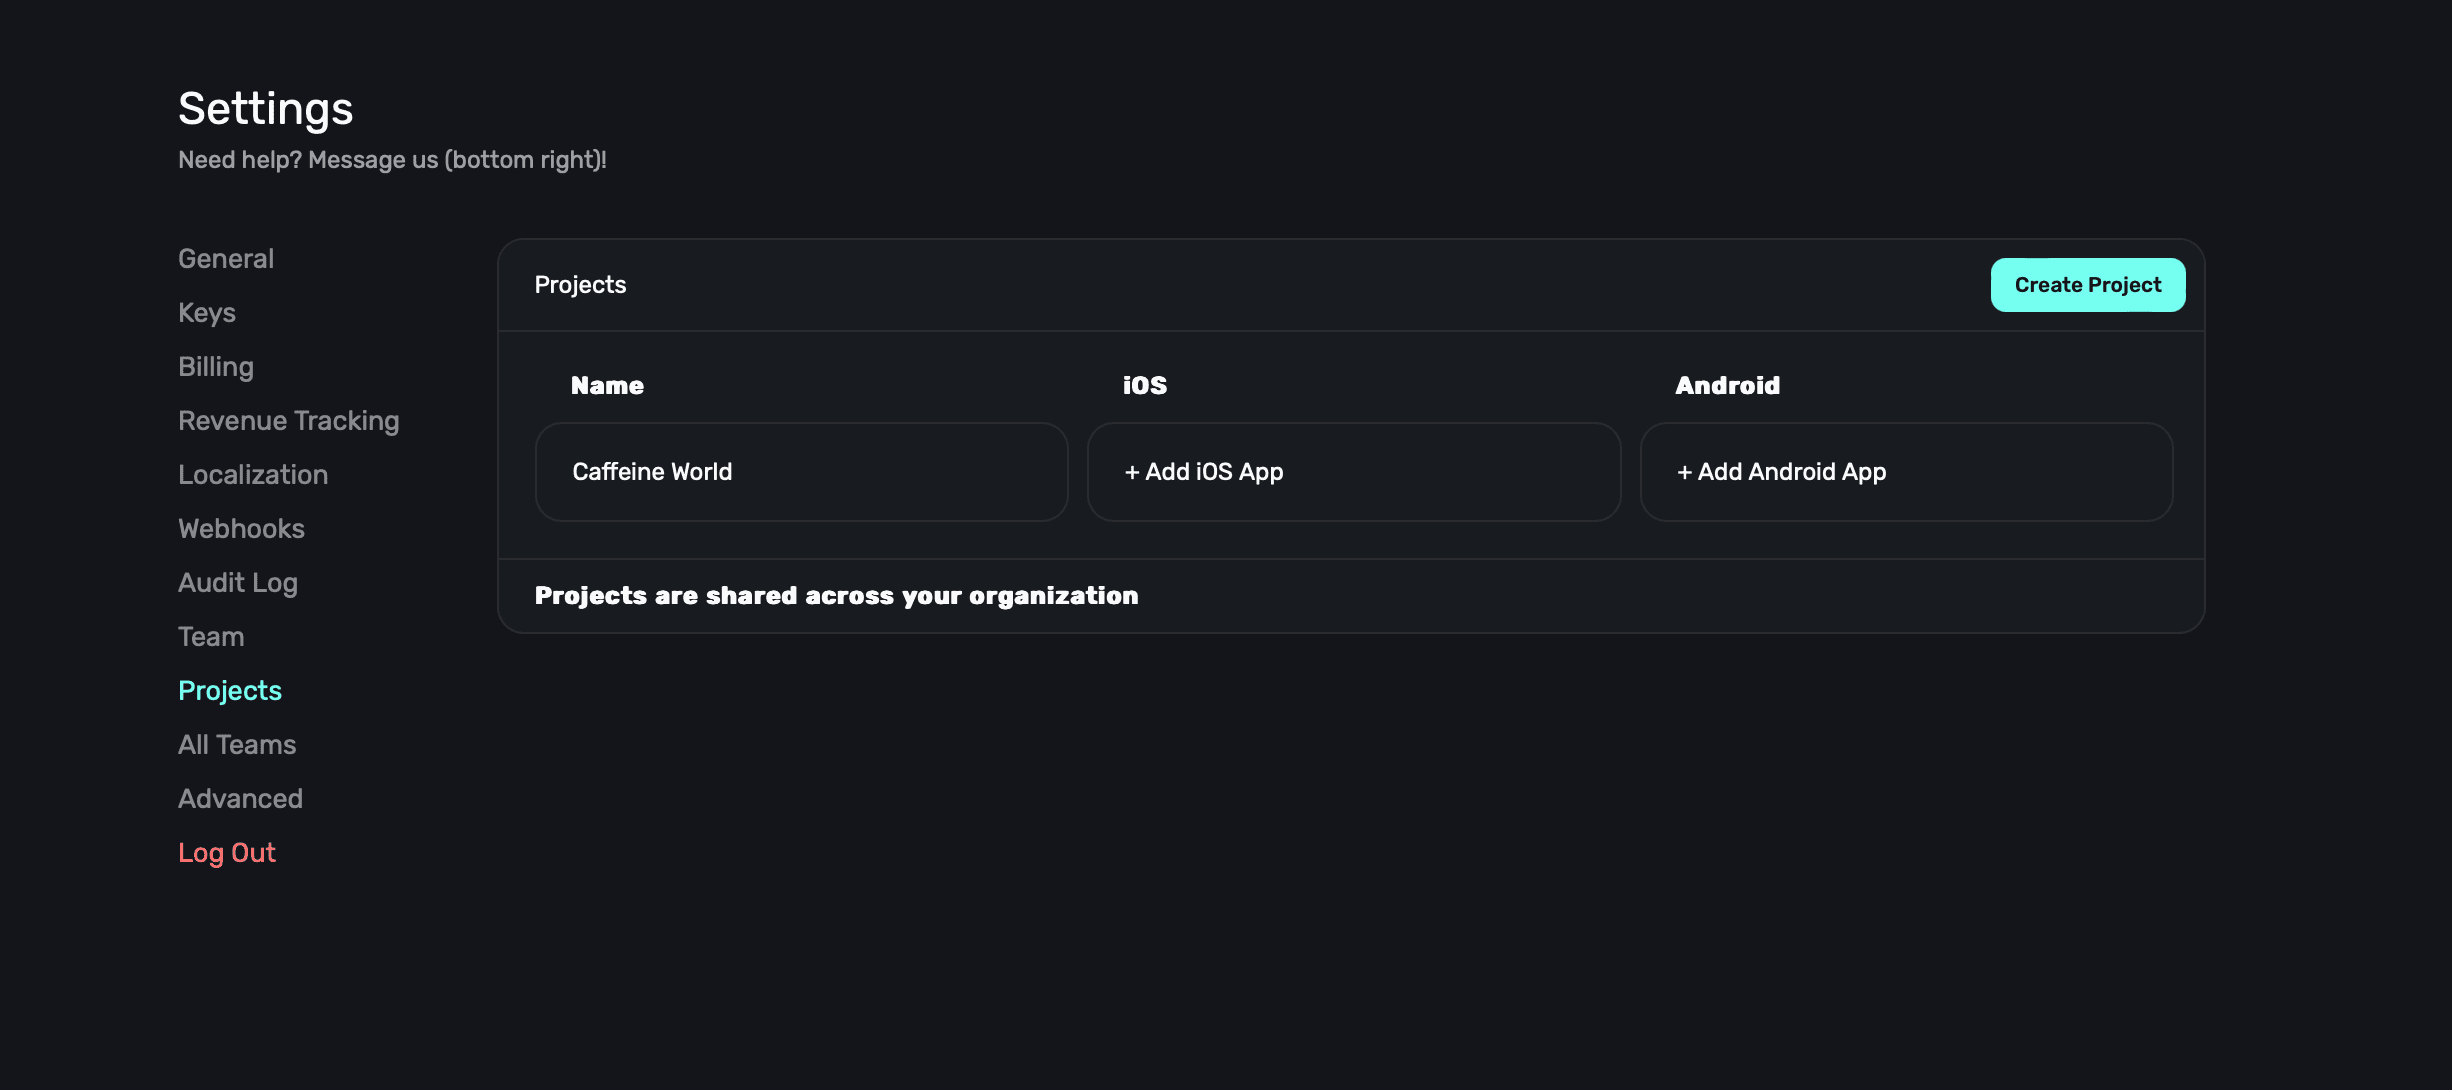
# Public Beta
Source: https://superwall.com/docs/overview-settings-public-beta
In the **Public Beta** section within **Settings**, you can opt-in to Superwall beta features:
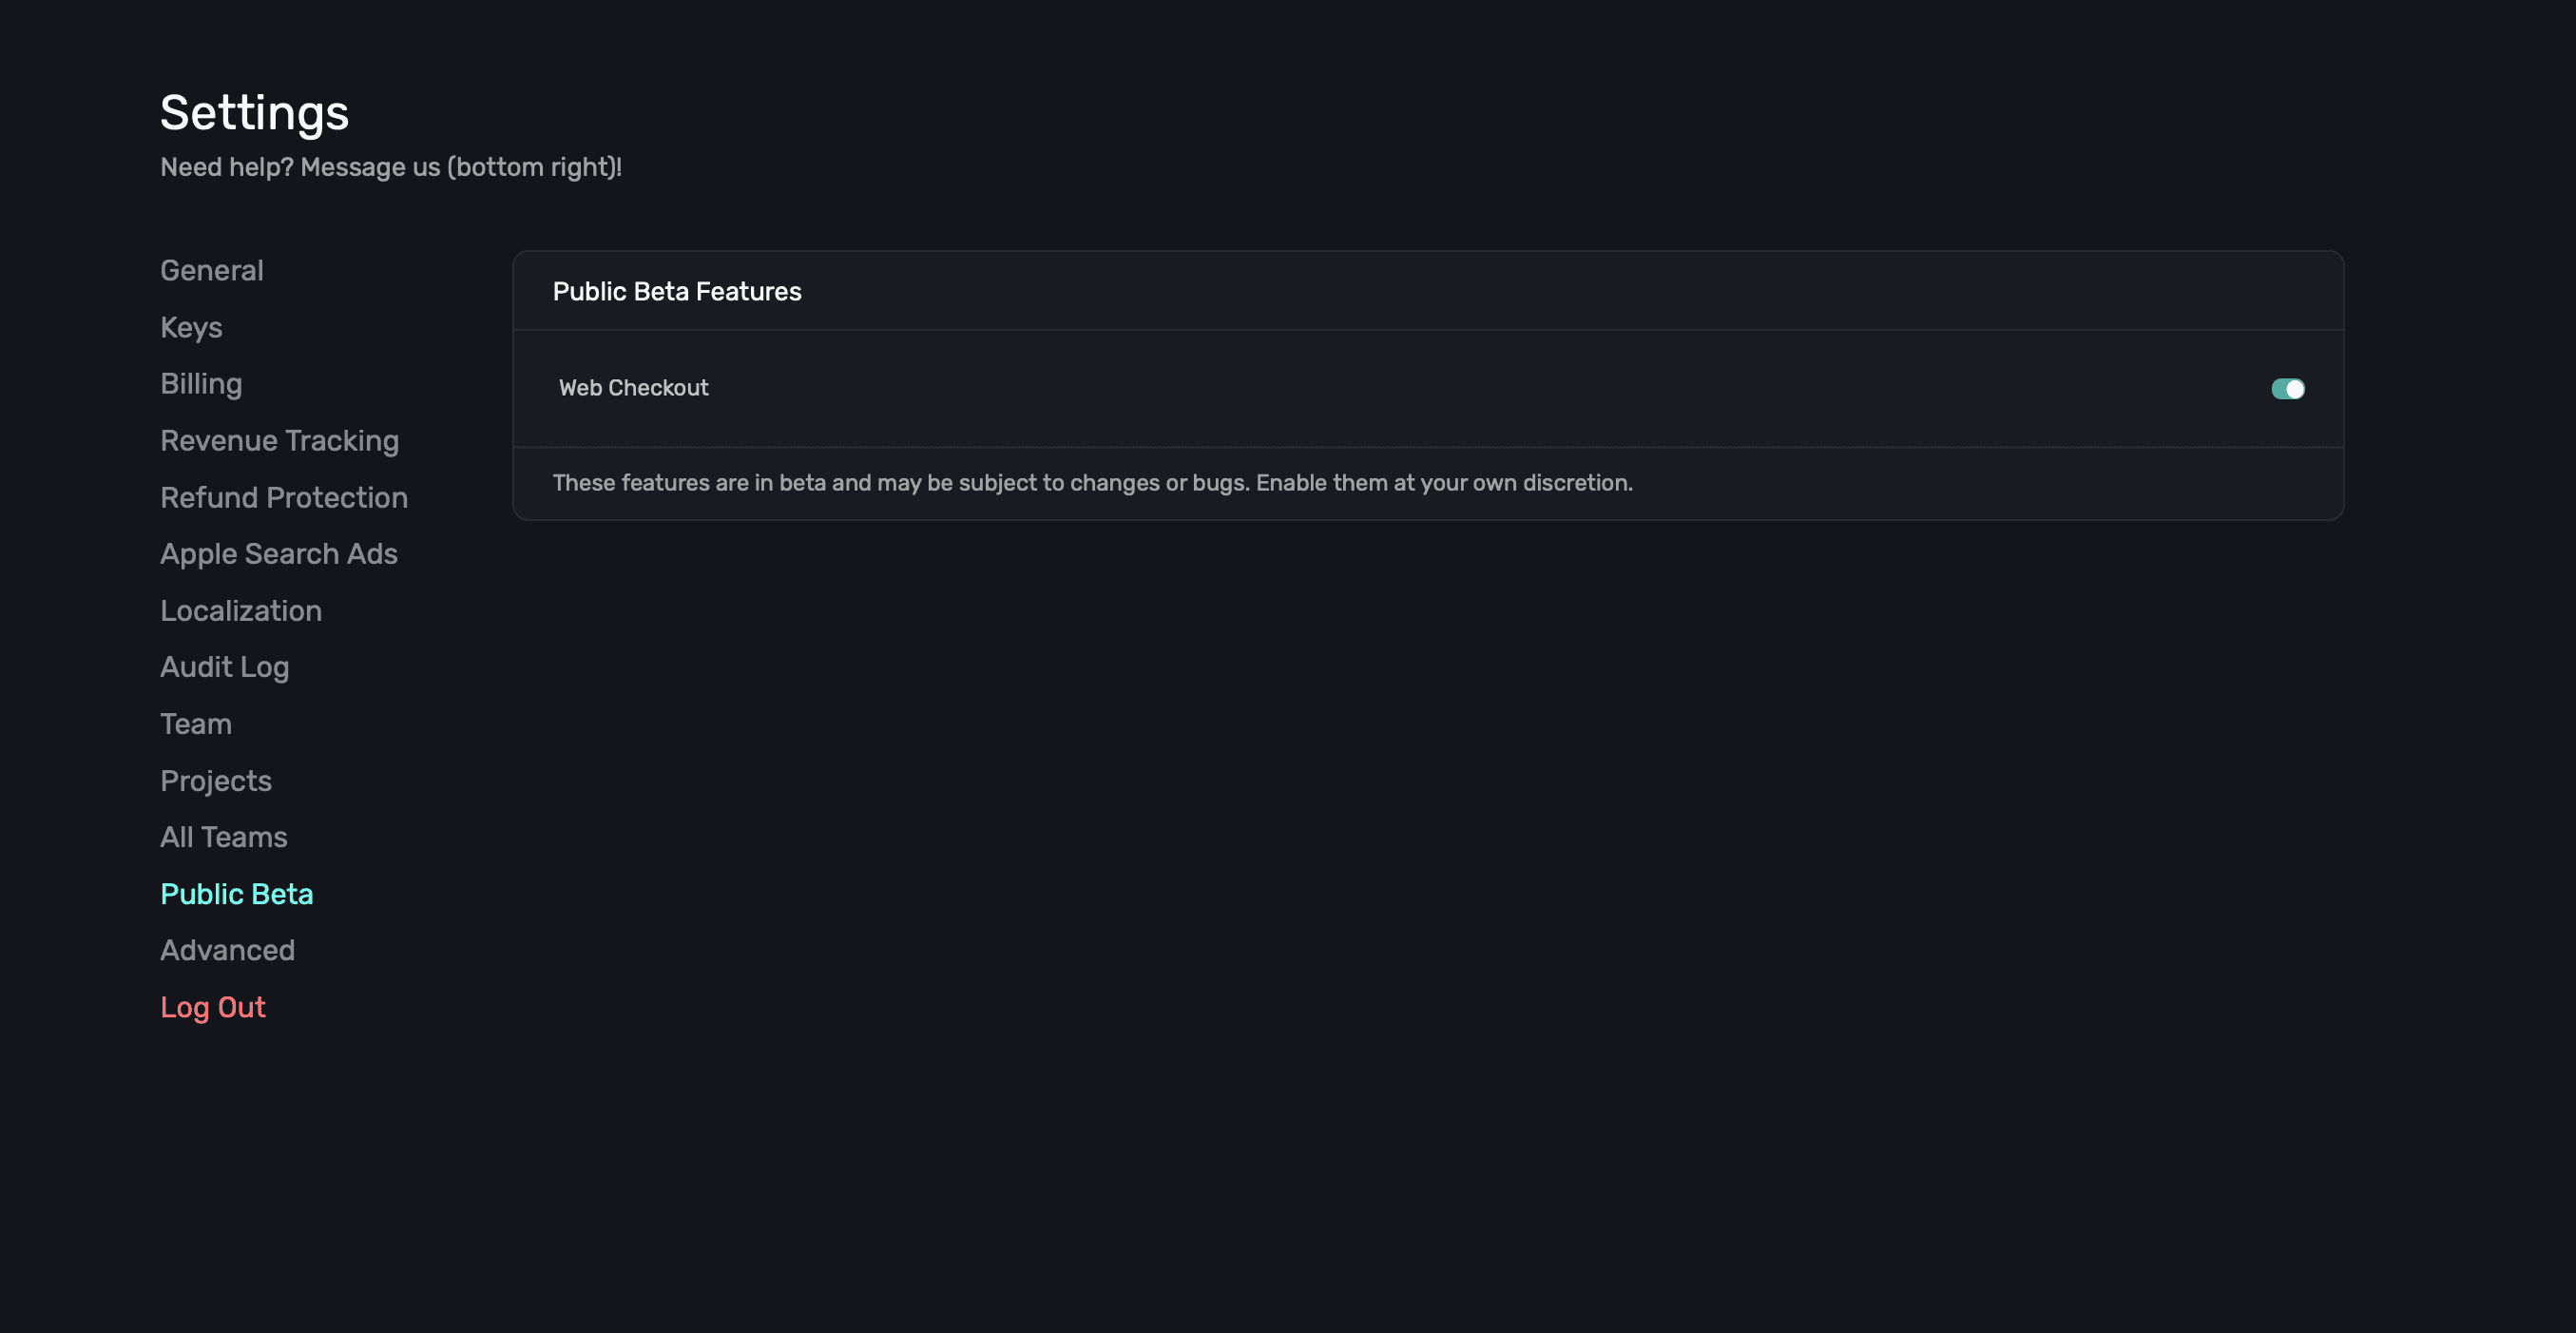
Simply toggle which features you'd like to activate for your Superwall account.
These features are in beta for a reason. You may encounter bugs or errors.
# Refund Protection
Source: https://superwall.com/docs/overview-settings-refund-protection
In the **Refund Protection** section under **Settings**, you can configure settings to better equip Apple to handle refund requests from your iOS app. This could result in fewer refunds being issued based on the context you provide Apple:
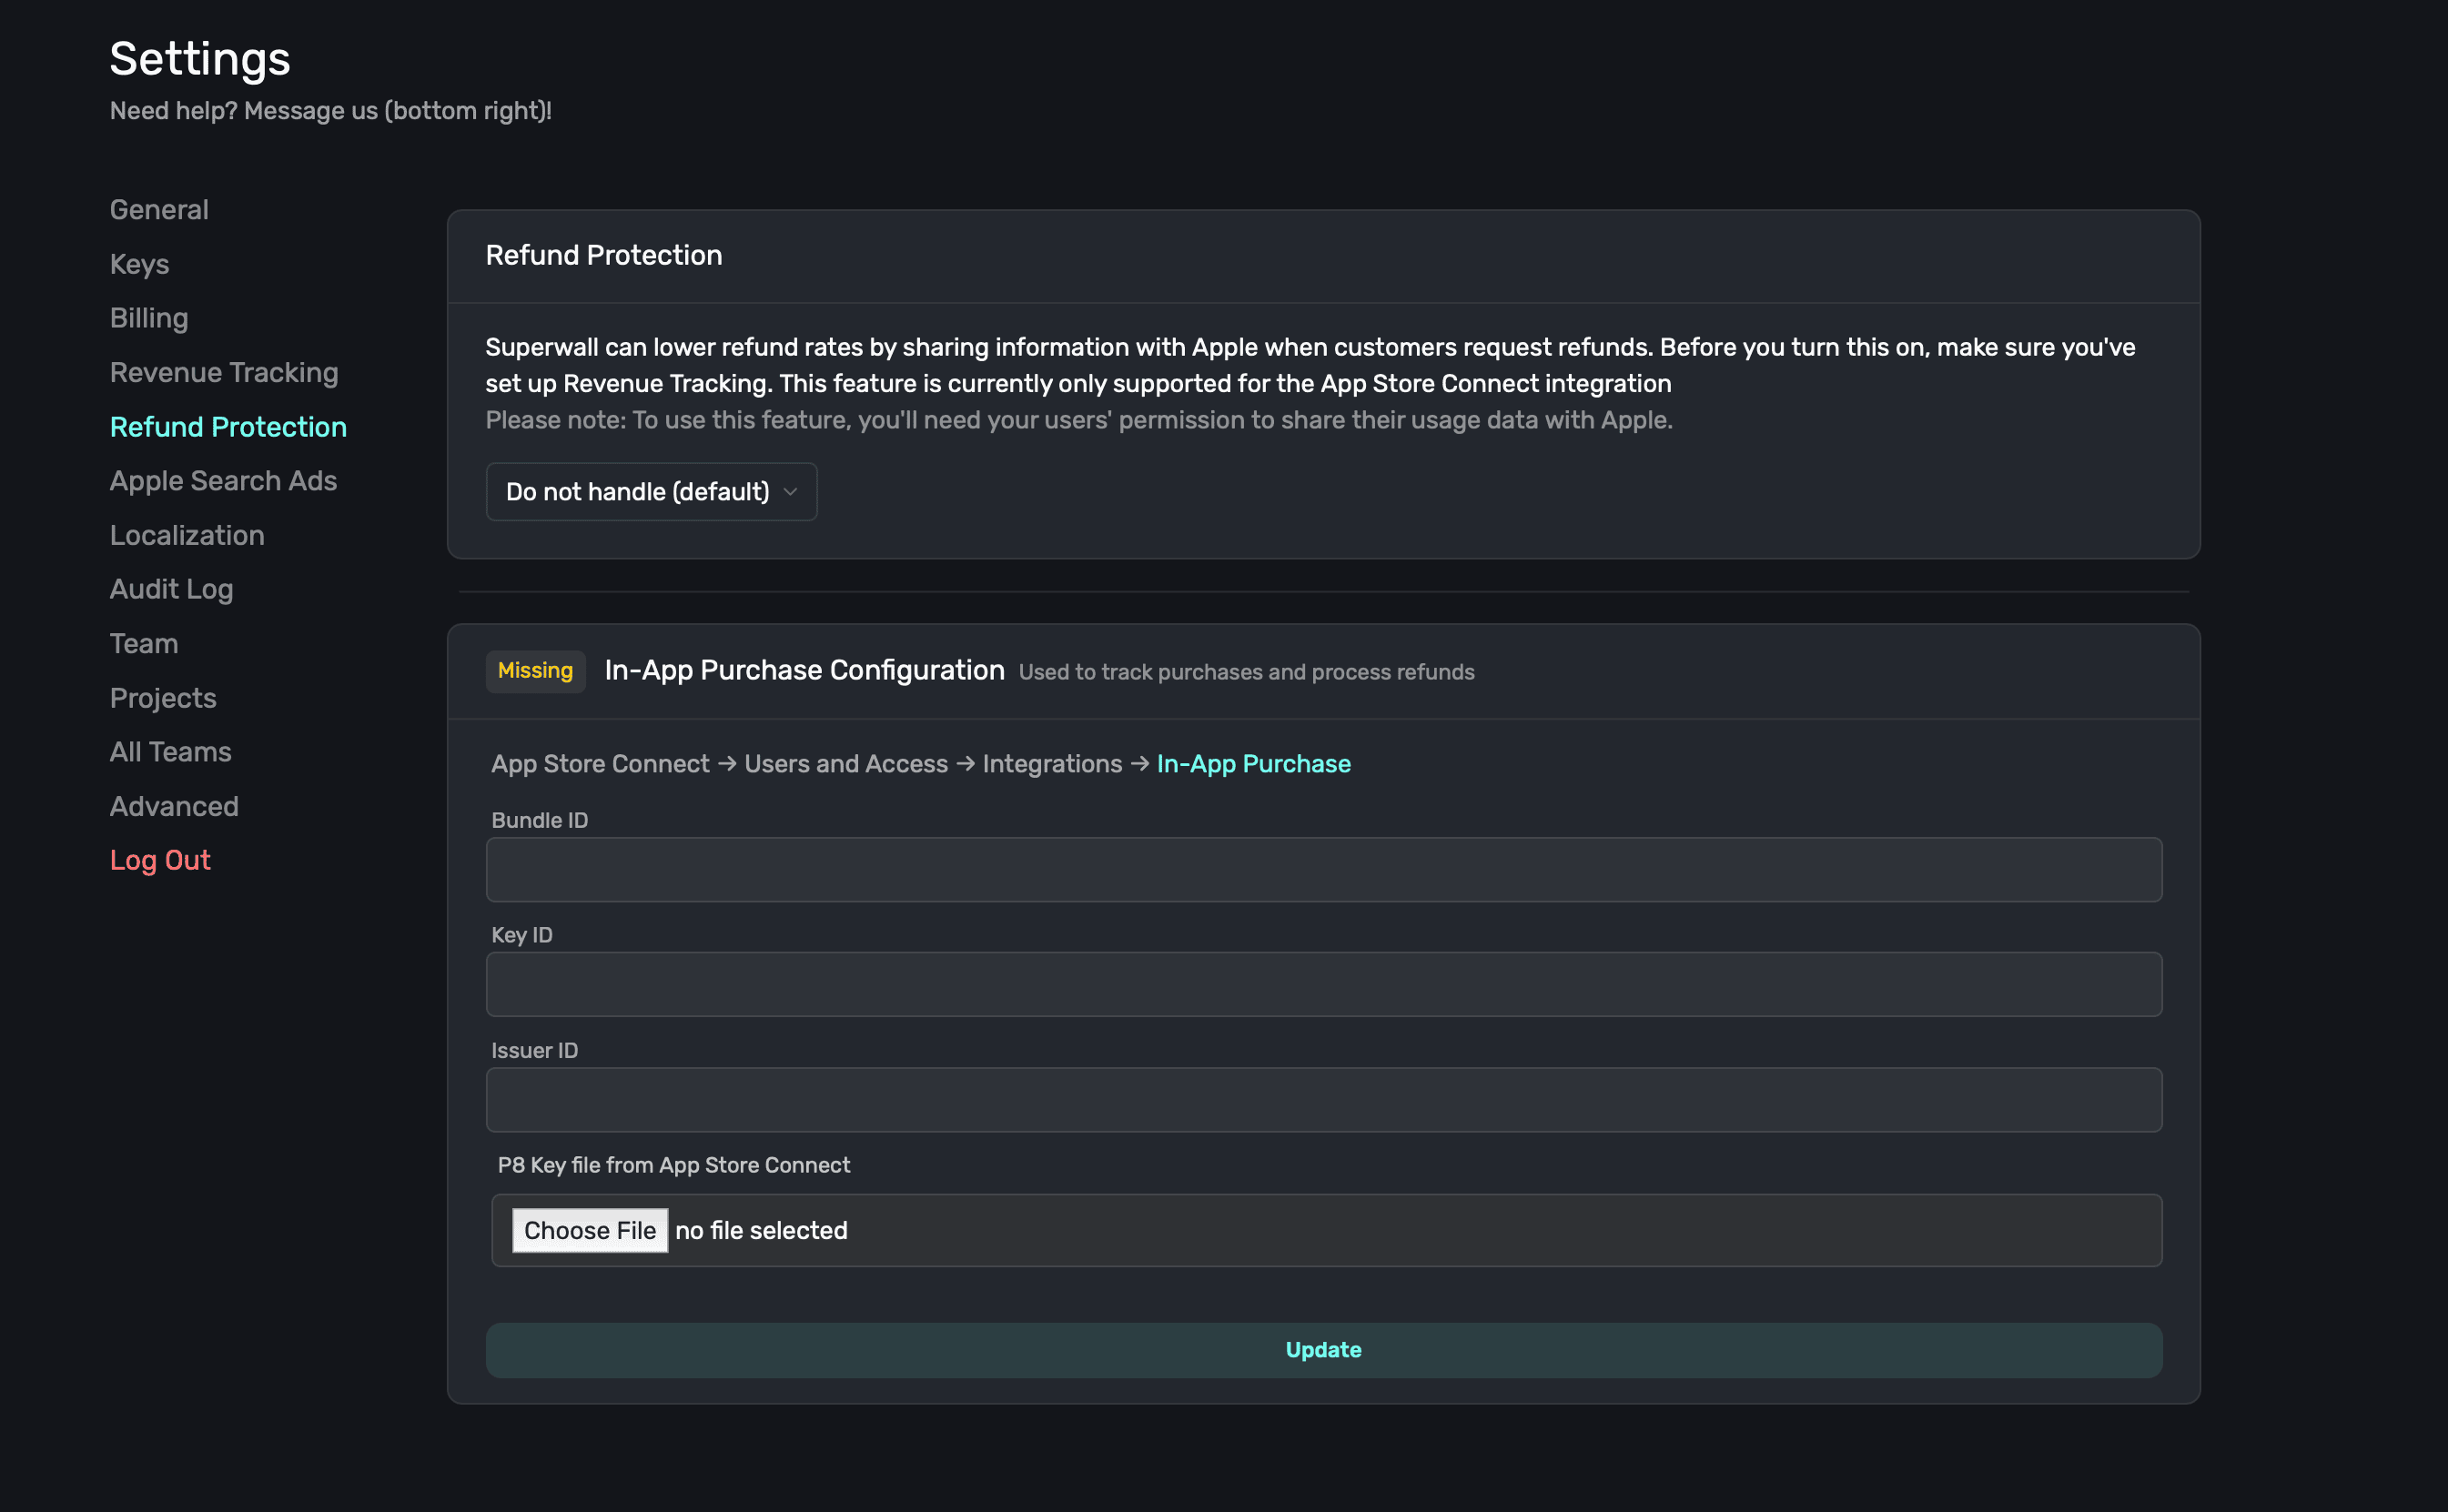
Before you configure this, make sure you have [revenue tracking](/overview-settings-revenue-tracking) set up.
### Refund protection options
When you opt into refund protection, there are four different options to choose from:
1. **Do not handle (default):** The default option, which means Apple will handle refunds as they see fit.
2. **Ask Apple to grant all refunds:** This option will inform Apple to grant **all** refunds, regardless of the context you provide.
3. **Ask Apple to decline all refunds:** This option will inform Apple that you wish to default to declining refunds. For example, if you have an app that has a credits-based system and a user requests a refund, you may want to try and decline that refund if the services were provided.
4. **Submit data and let Apple decide:** This option will inform Apple that you wish to submit data to them for each refund request. This data could be used to help Apple make a more informed decision on whether to grant or decline the refund.
### In-app purchase Configuration
You'll need to have in-app purchases configured with Superwall to use refund protection. For more information on setup, check this doc [out](/overview-settings-revenue-tracking#in-app-purchase-configuration).
# Revenue Tracking
Source: https://superwall.com/docs/overview-settings-revenue-tracking
In the **Revenue Tracking** section under **Settings**, you can setup revenue tracking three different ways. Revenue tracking is required to show revenue metrics in the Superwall dashboard.
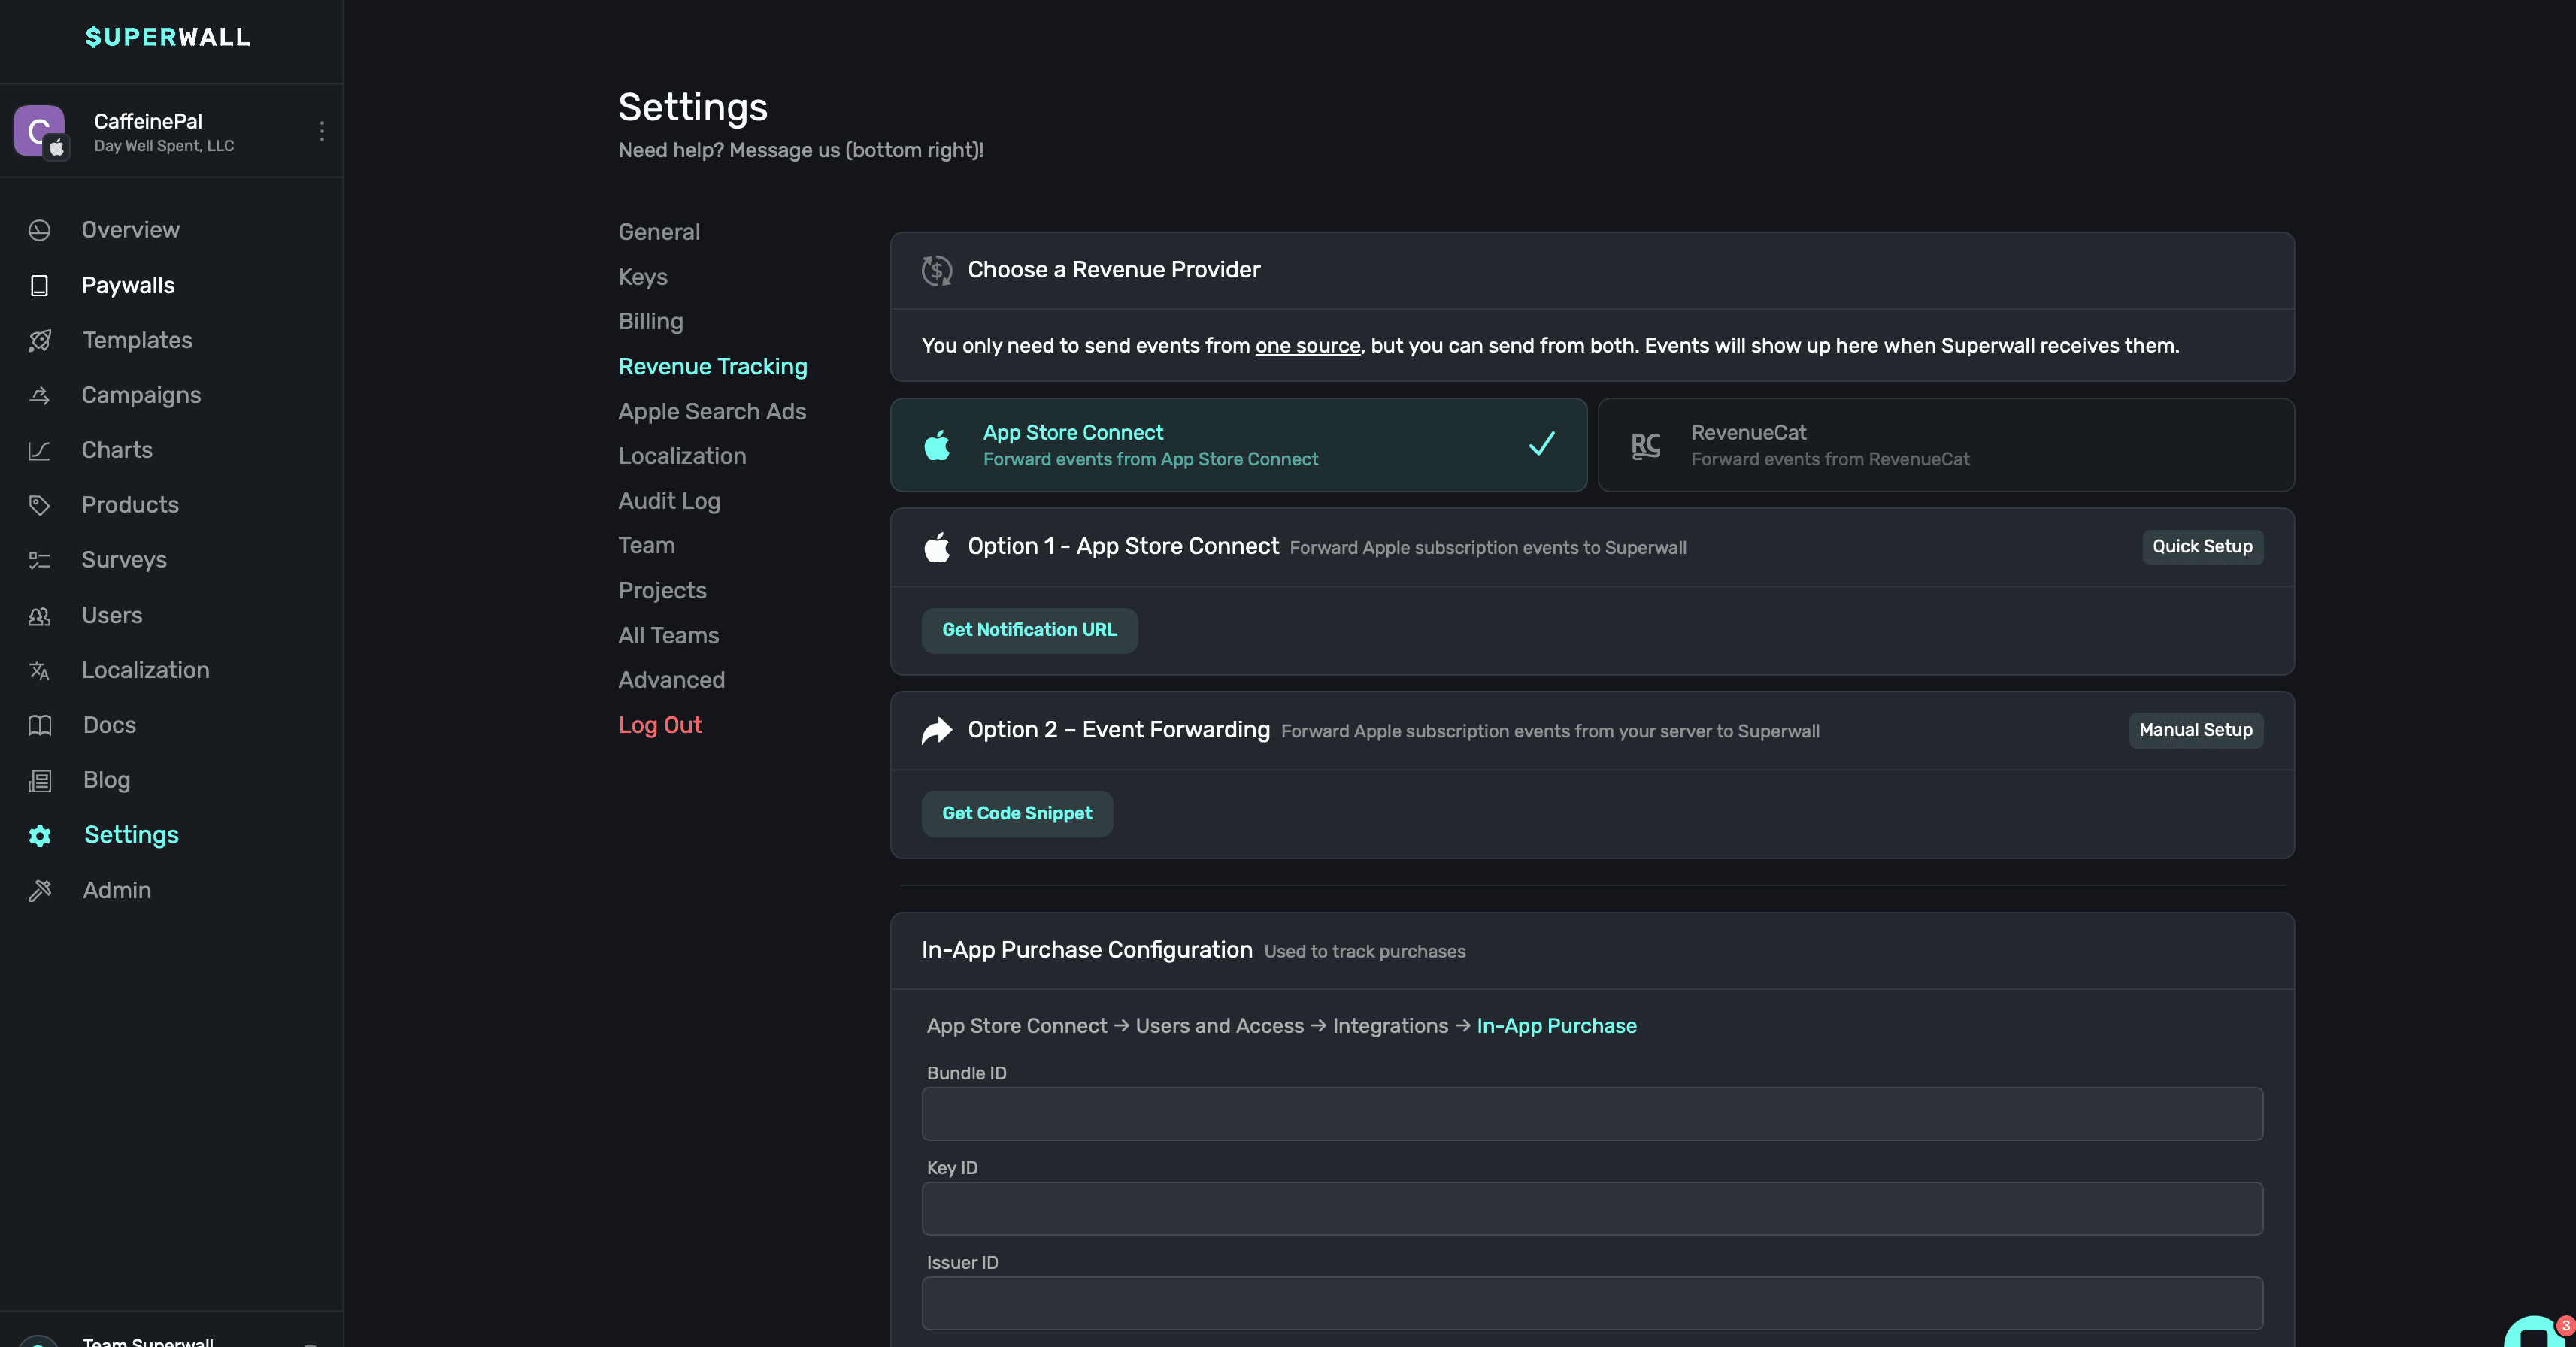
Choose only **one** of the three methods below. As soon as you've completed the steps for any of
them, you should see integrated events begin to show up in Superwall's metrics.
### Revenue tracking status
Your revenue tracking status will be listed at the top, indicating if you've successfully set it up or not:

### Method 1: App Store Connect
Use this method to forward subscriptions events from App Store Connect back to Superwall. To get started, go to **App Store Connect → App Information → App Store Server Notifications → Production & Sandbox URL fields:**
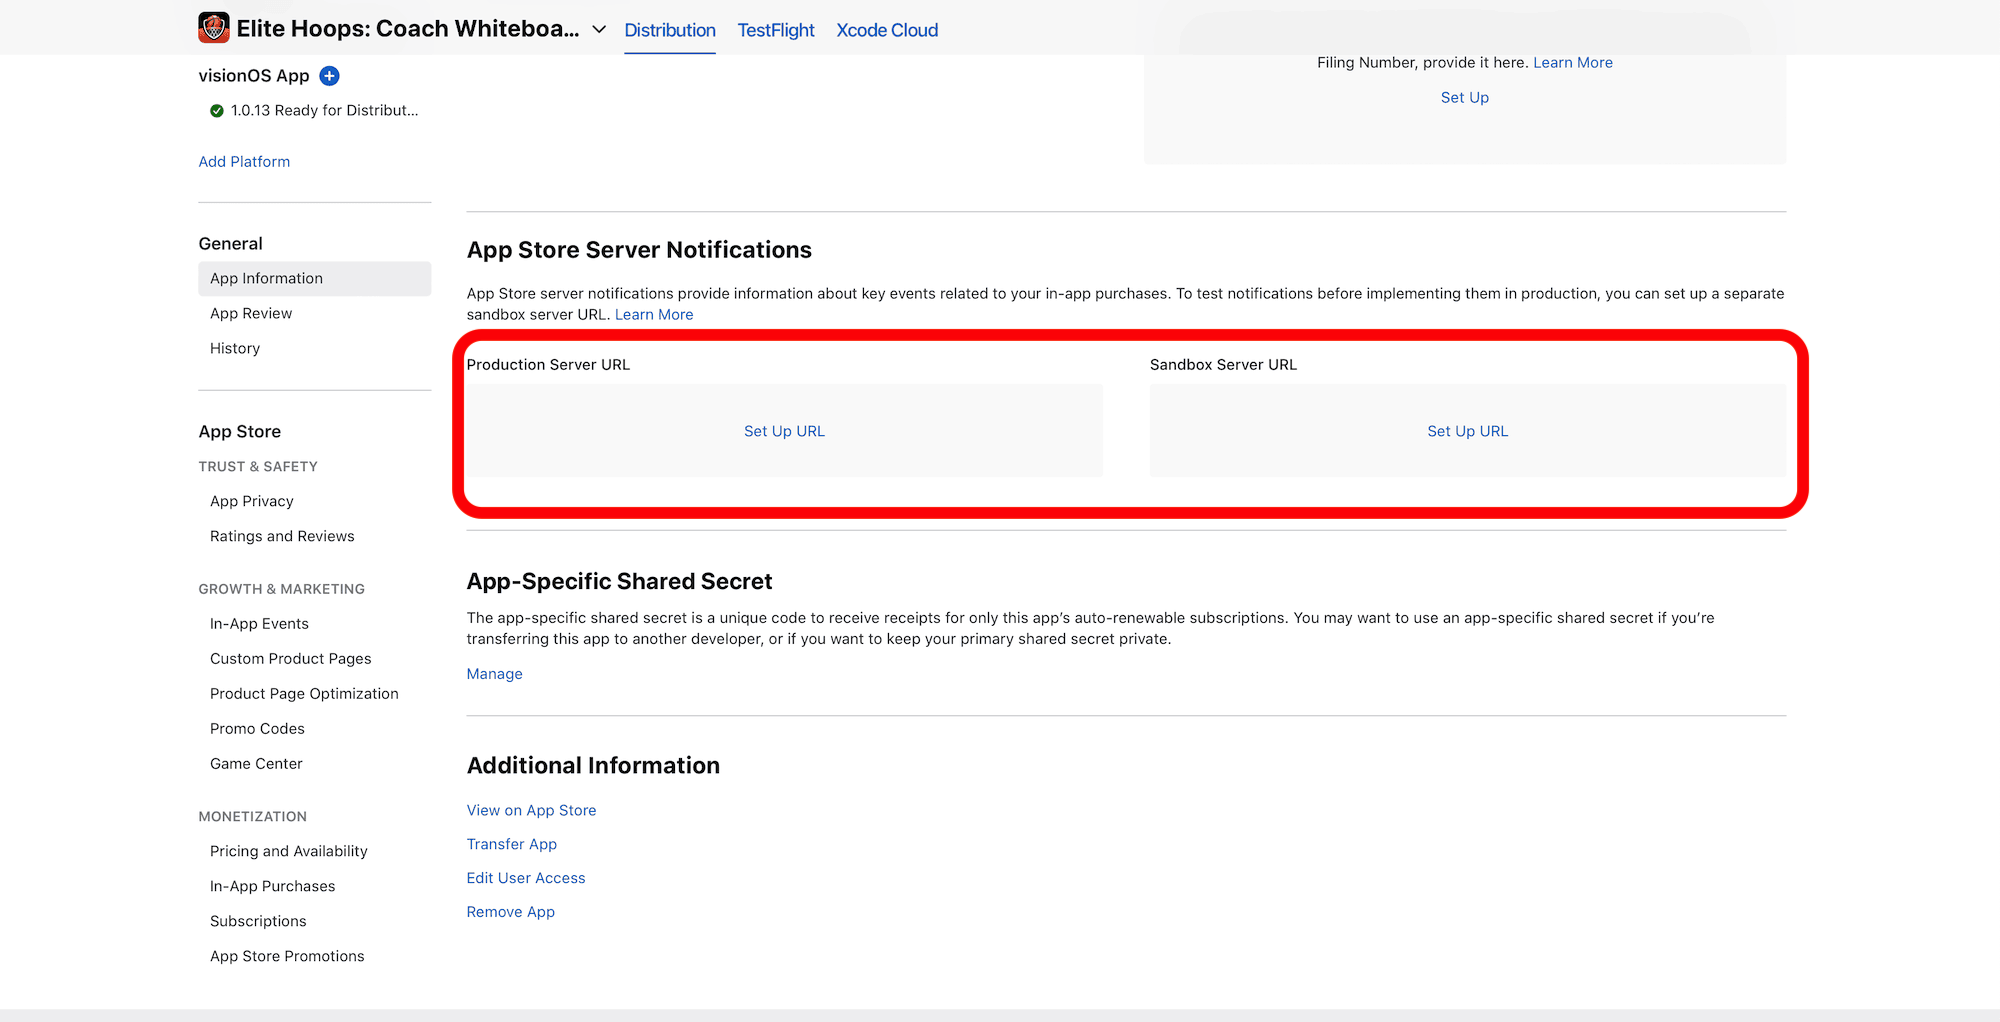
For the URL, use the value in Superwall that was prefilled by clicking the copy button:
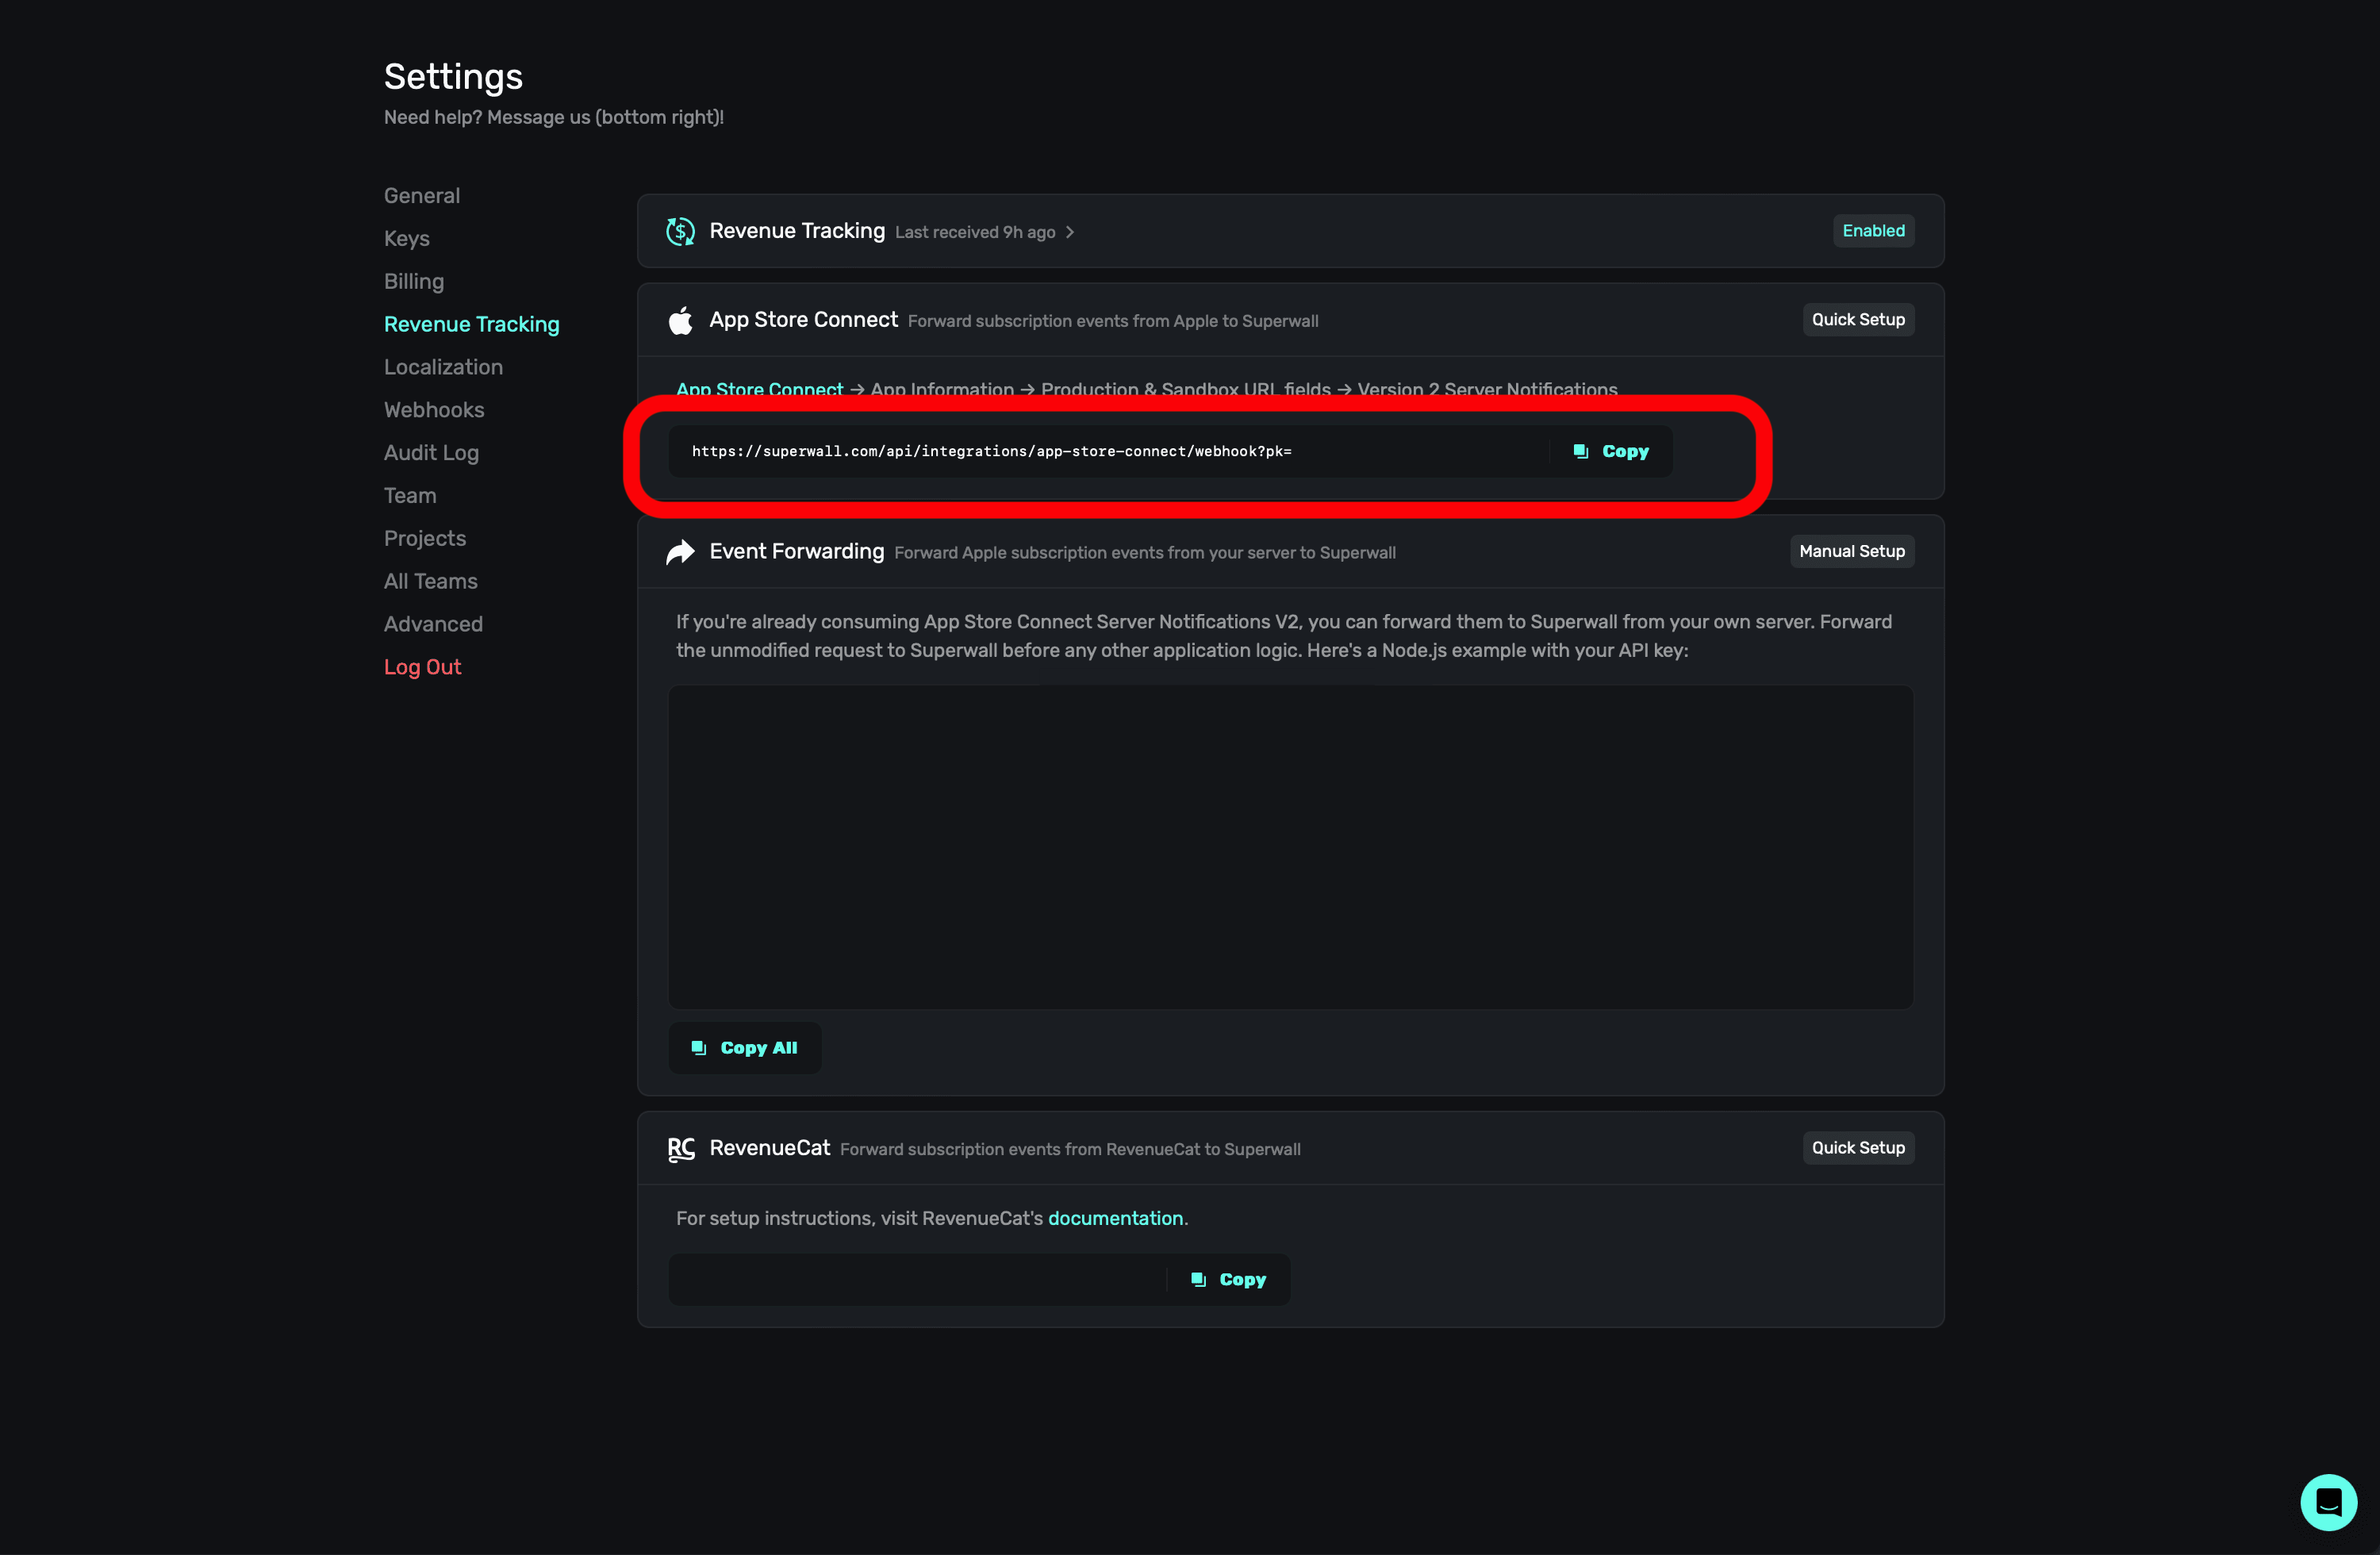
Then, enter this in App Store Connect modal:
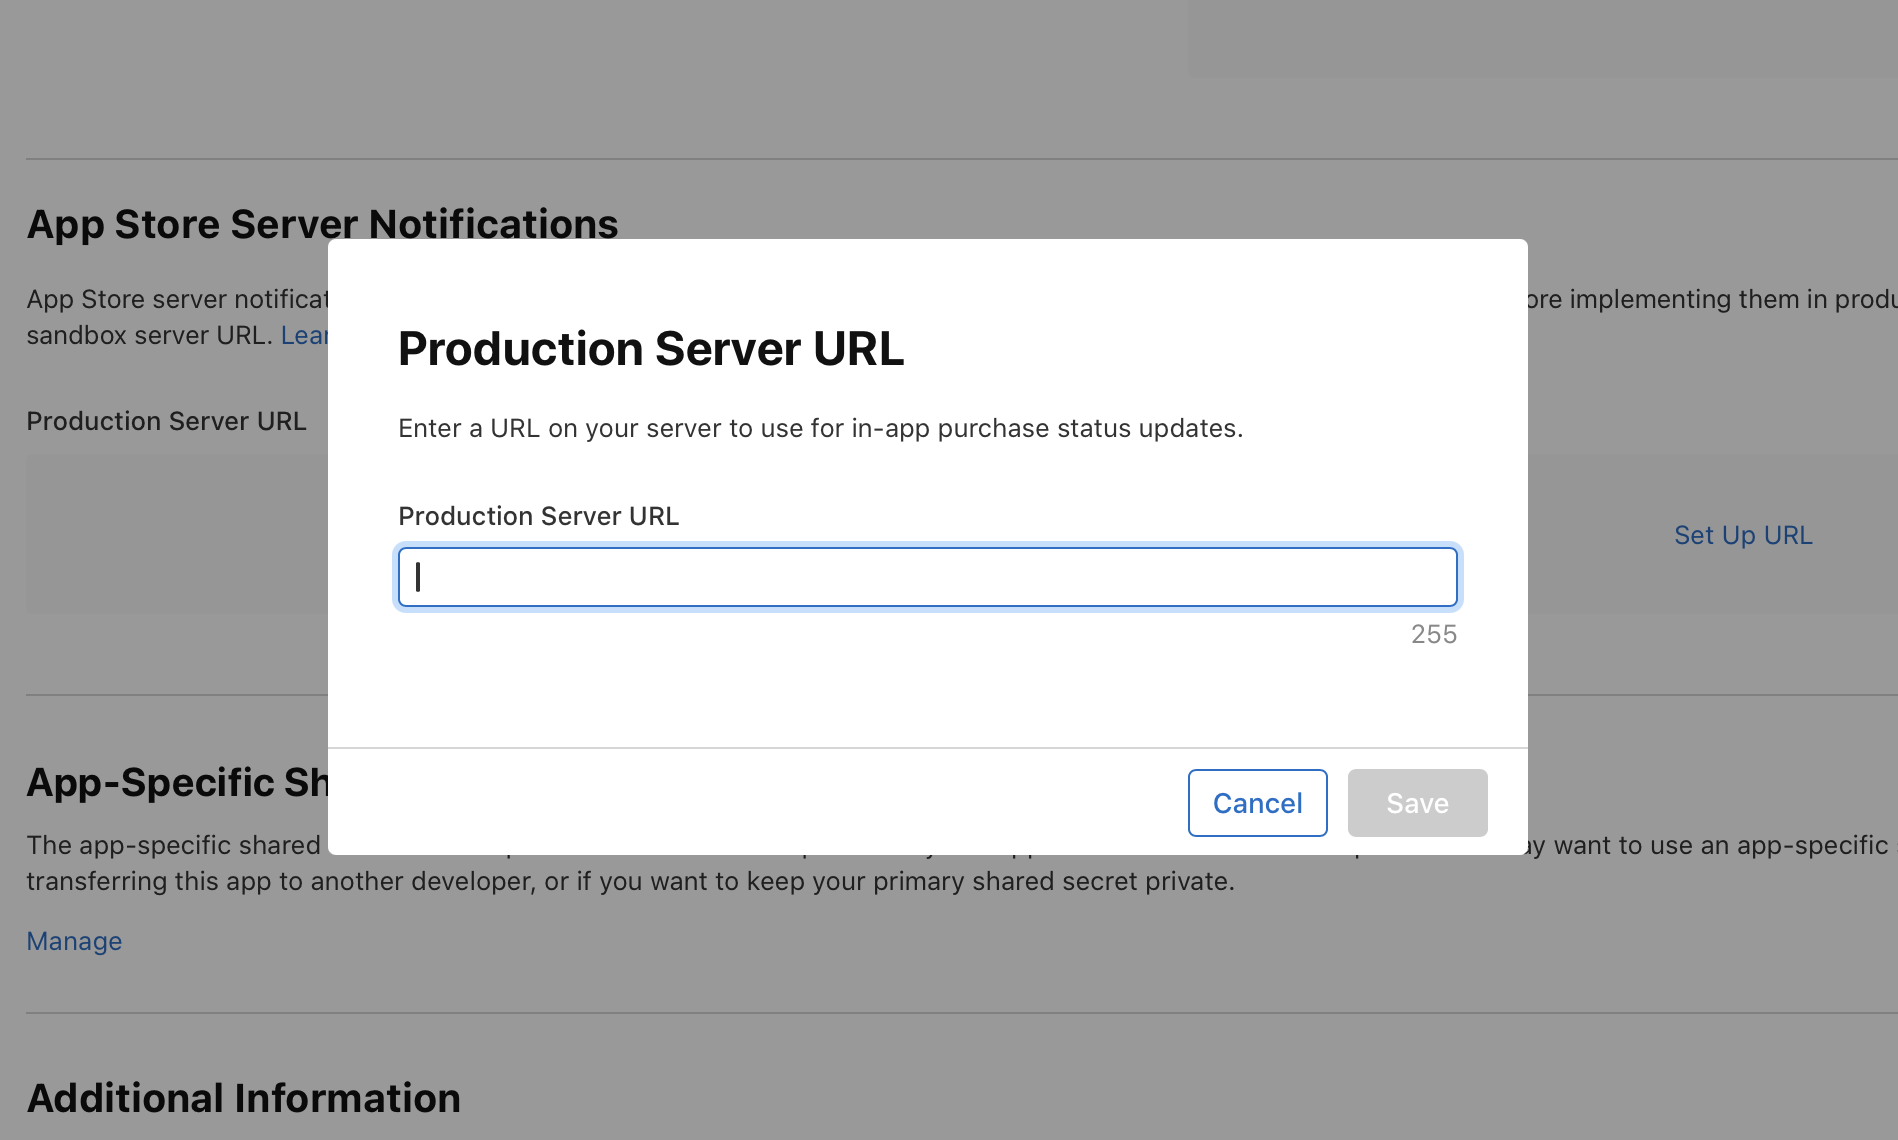
**Click** the **Save** button once you've entered in the URL.
### Method 2: Event Forwarding
If you handle subscription logic on your own server and are using Apple's subscription events notifications, use this method. It will forward Apple subscription events from your server to Superwall.
To implement this method, simply forward the **unmodified request** to Superwall before any other application logic.
Here's a Node.js example, just be sure to use your own API key in place of `YOUR_PRIVATE_KEY` in the snippet below:
Your private key is **not** the same as your public key. Superwall will prefill your private key in the code snippets on the Revenue Tracking page for both Event Forwarding and App Store Connect setup.
```javascript
request.post(
{
url: "https://superwall.com/api/integrations/app-store-connect/webhook?pk=YOUR_PRIVATE_KEY",
headers: { "Content-Type": "application/json" },
body: JSON.stringify(req.body),
timeout: 5000,
},
(error, response, body) => {
if (!error && response.statusCode == 200) {
console.log("Successfully forwarded to Superwall")
} else {
console.error("Failed to send notification to Superwall", error)
}
}
)
```
### Method 3: RevenueCat
Finally, if you're using Revenue Cat, you can forward subscription events from RevenueCat to back to Superwall. For implementation details, please refer to their [documentation](https://www.revenuecat.com/docs/superwall).
### Tracking Revenue with RevenueCat for iOS and Android Projects
If you are using RevenueCat and have *both* an Android and iOS app under the same project, be aware that you should have **two** Superwall apps (one for Android and iOS). Then, you can link them together as one project under [Settings -> Projects](/overview-settings-projects). In your RevenueCat project, you can refer to either the iOS or Android key from Superwall. Superwall will still segment the data by platform.
Here's an example, this app has both an Android and iOS project in Superwall. Both of them use RevenueCat:
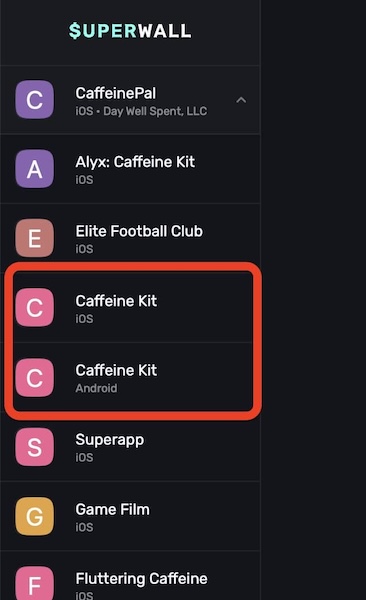
In Superwall, those have been linked together as a project:
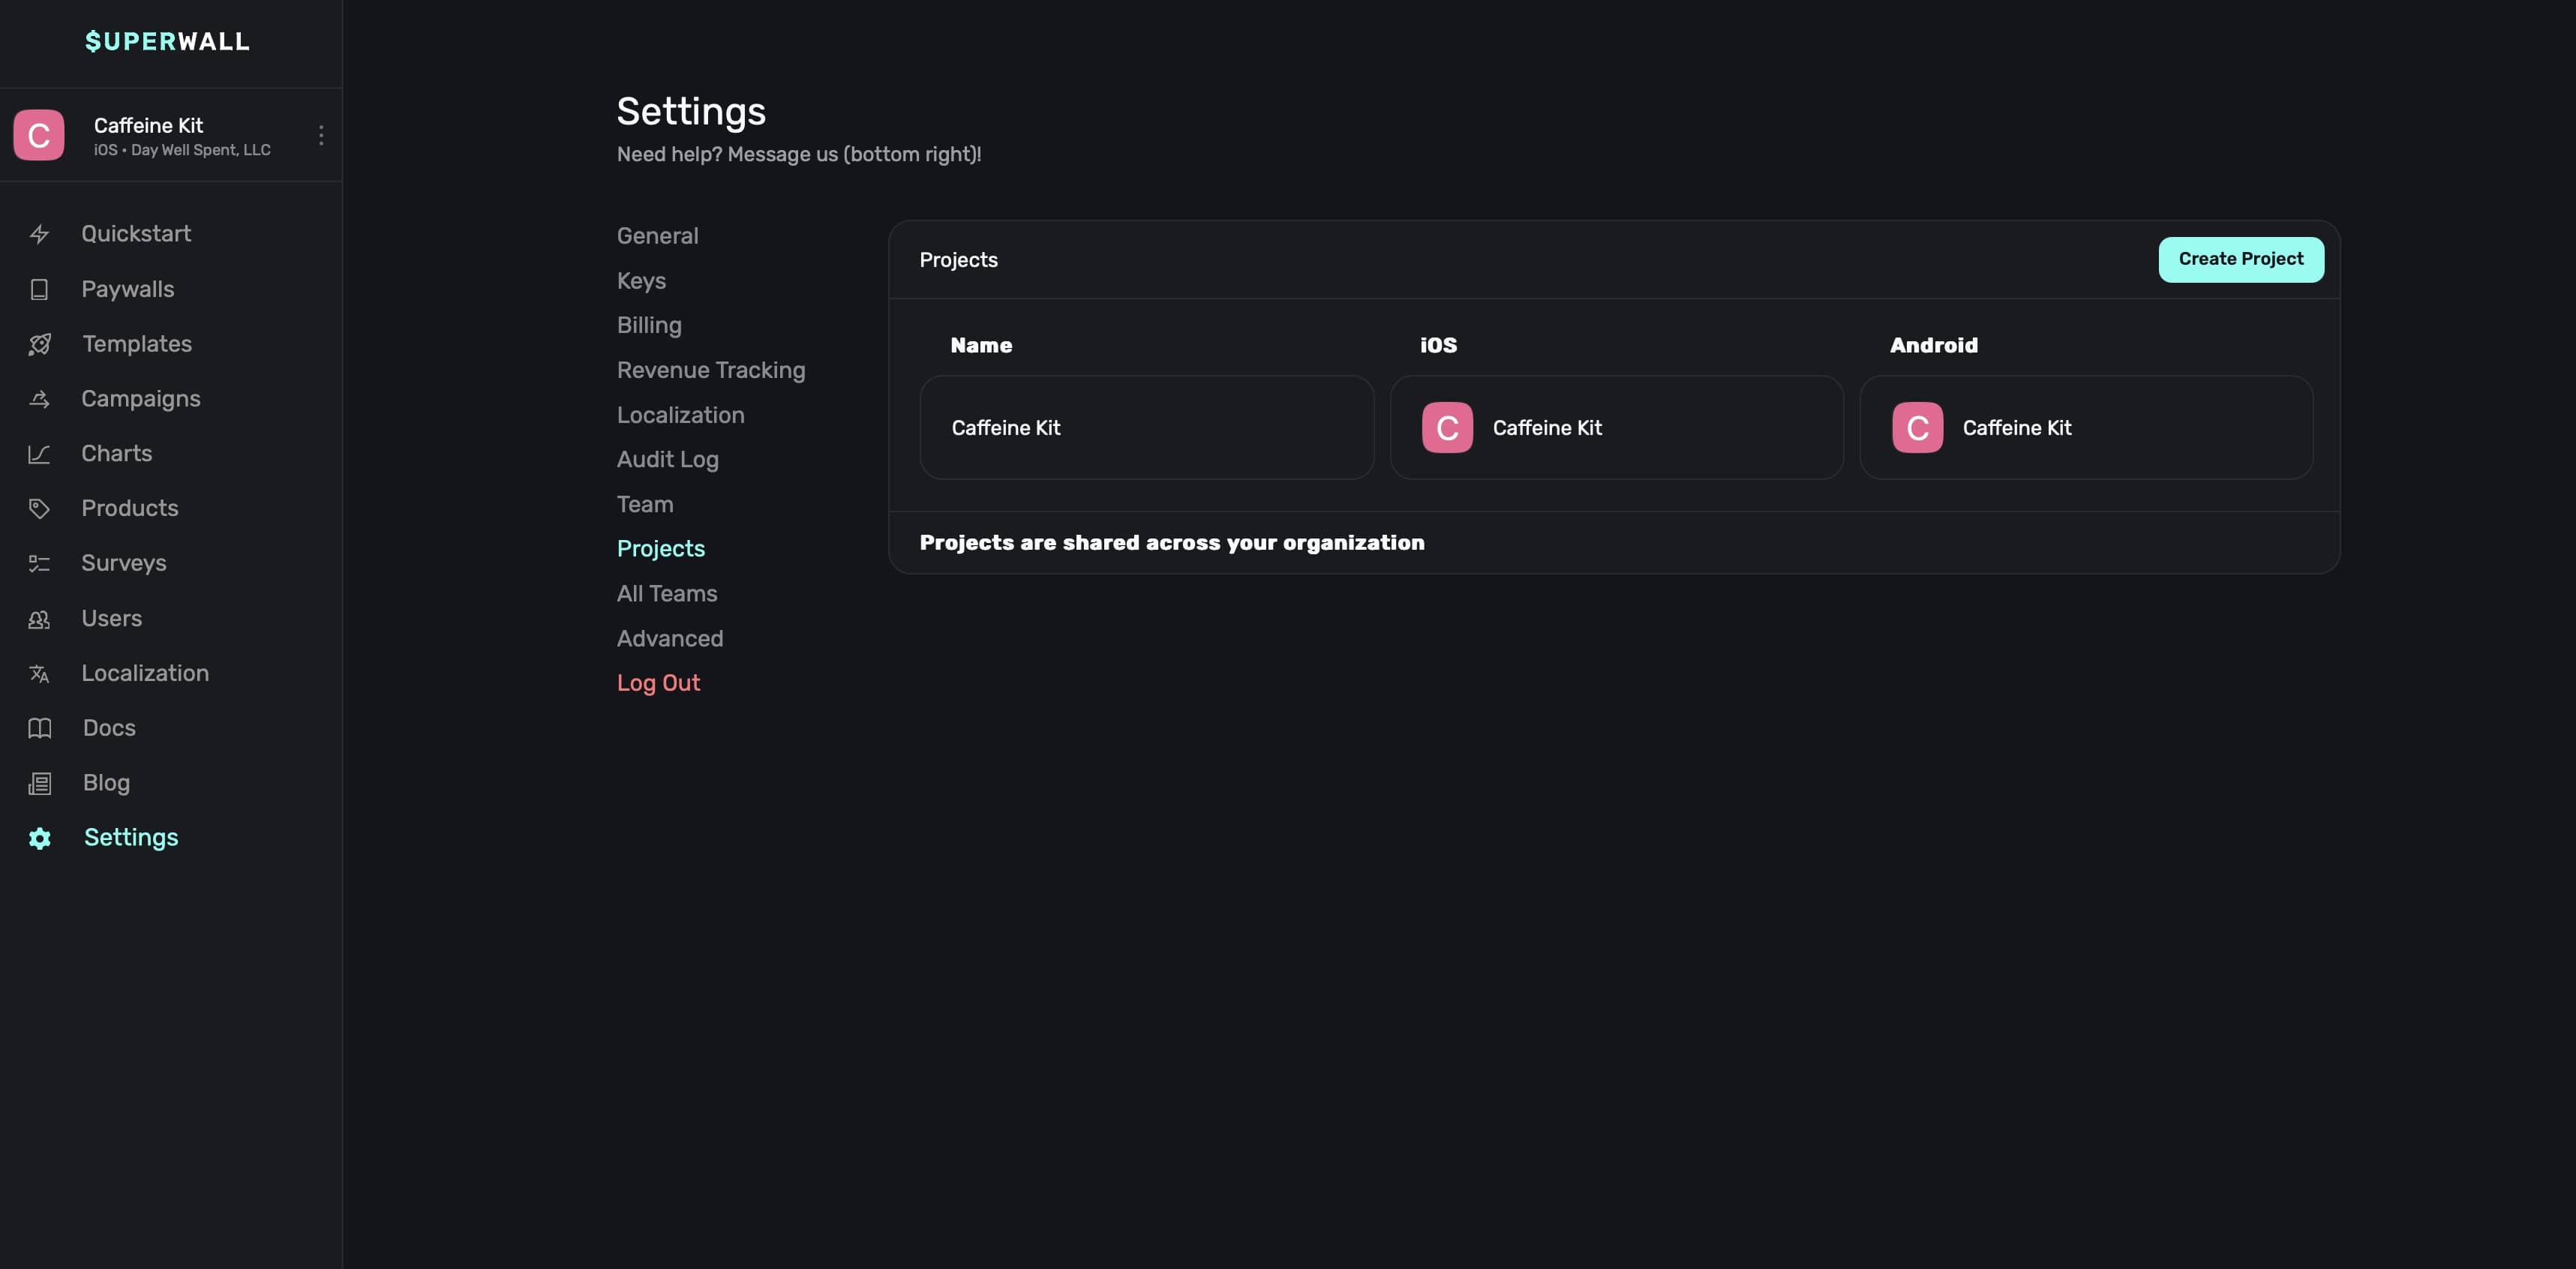
For *either* the iOS or Android project, go to **Settings -> Revenue Tracking -> RevenueCat** and get the integration token (or make one if you haven't yet):
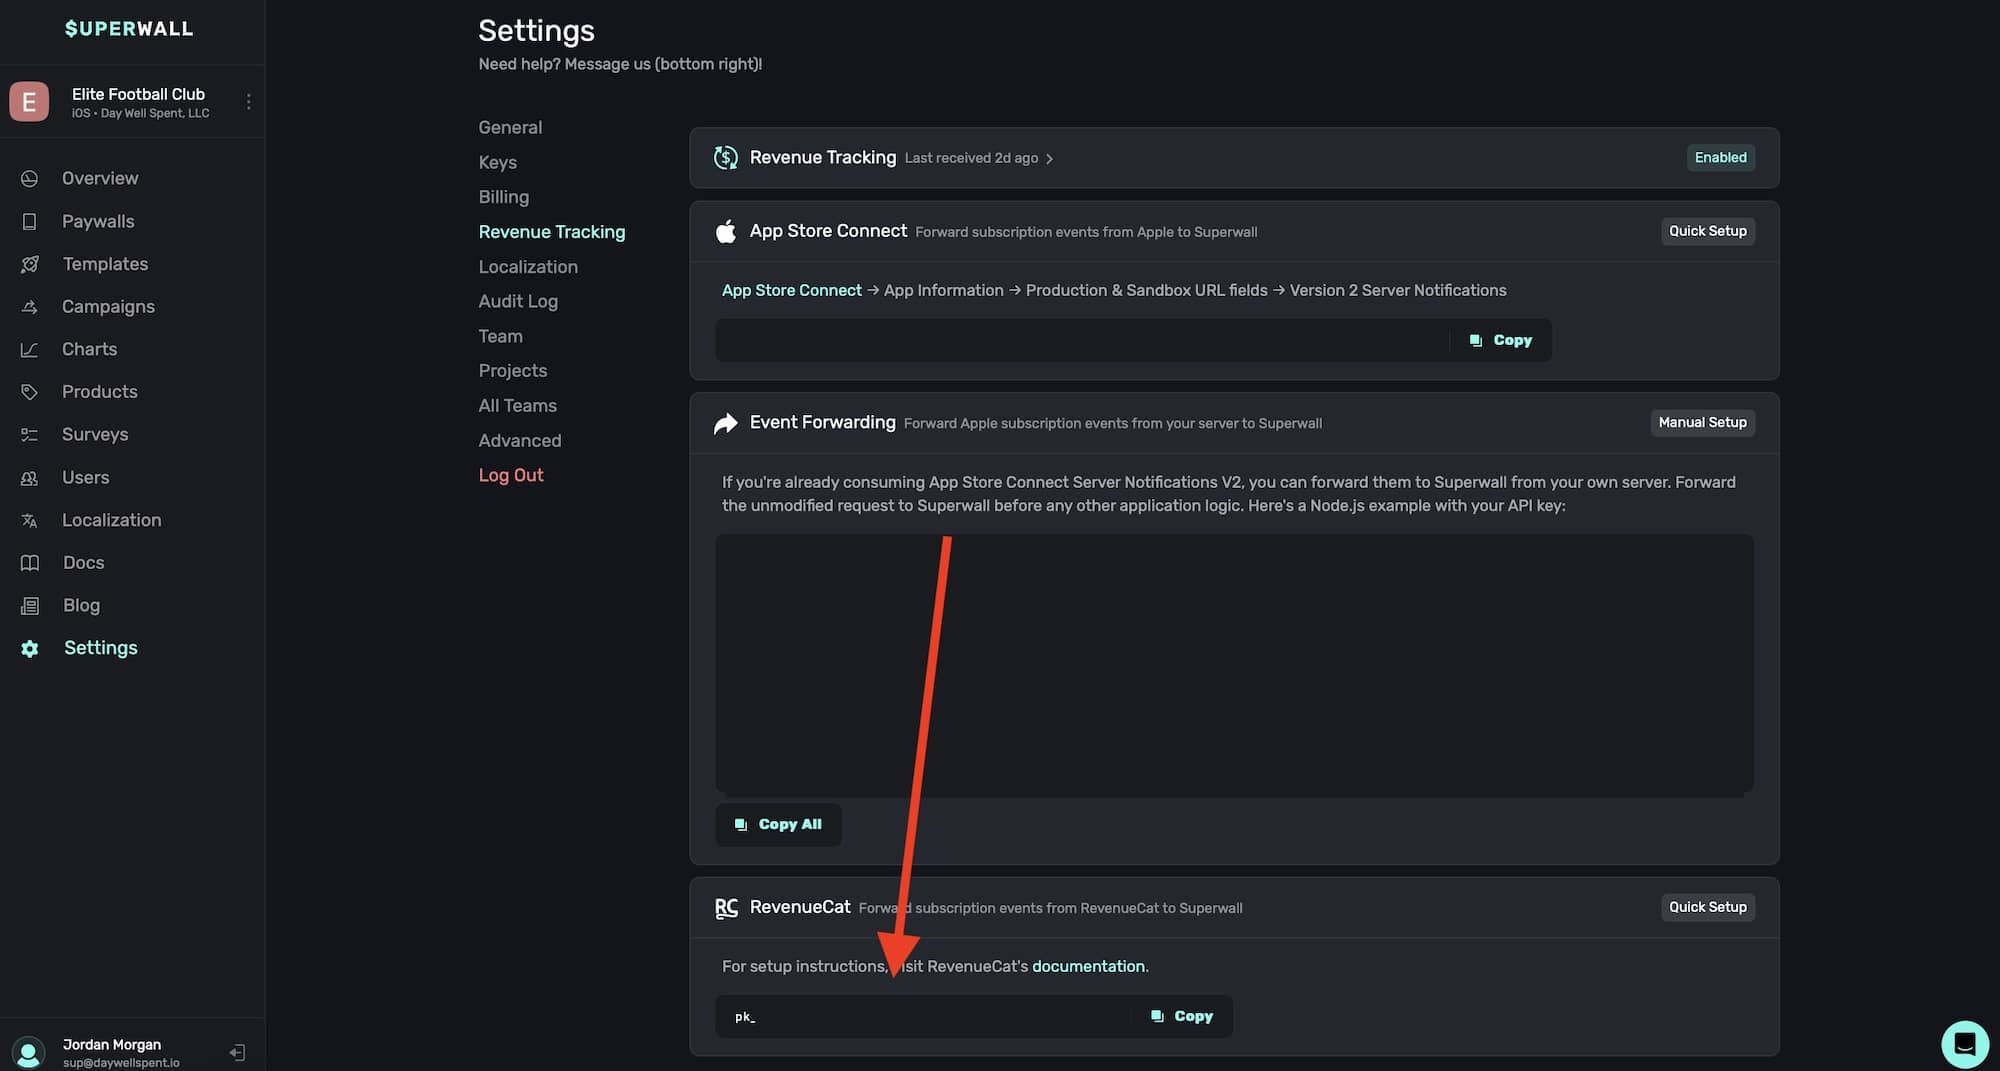
Finally, in RevenueCat, use the token in their integration settings for Superwall:
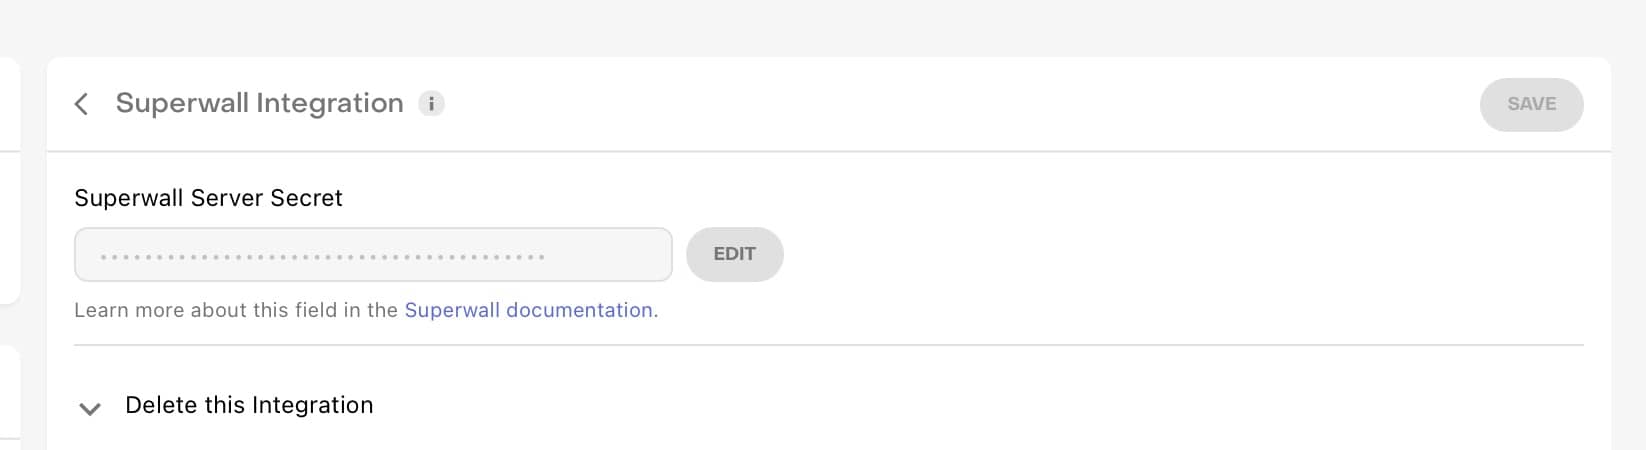
### In-App Purchase configuration
Complete this step once your products are live and approved by App Store review.
Setting up the in-app purchase configuration for iOS apps allows Superwall to power features like refund consumption.
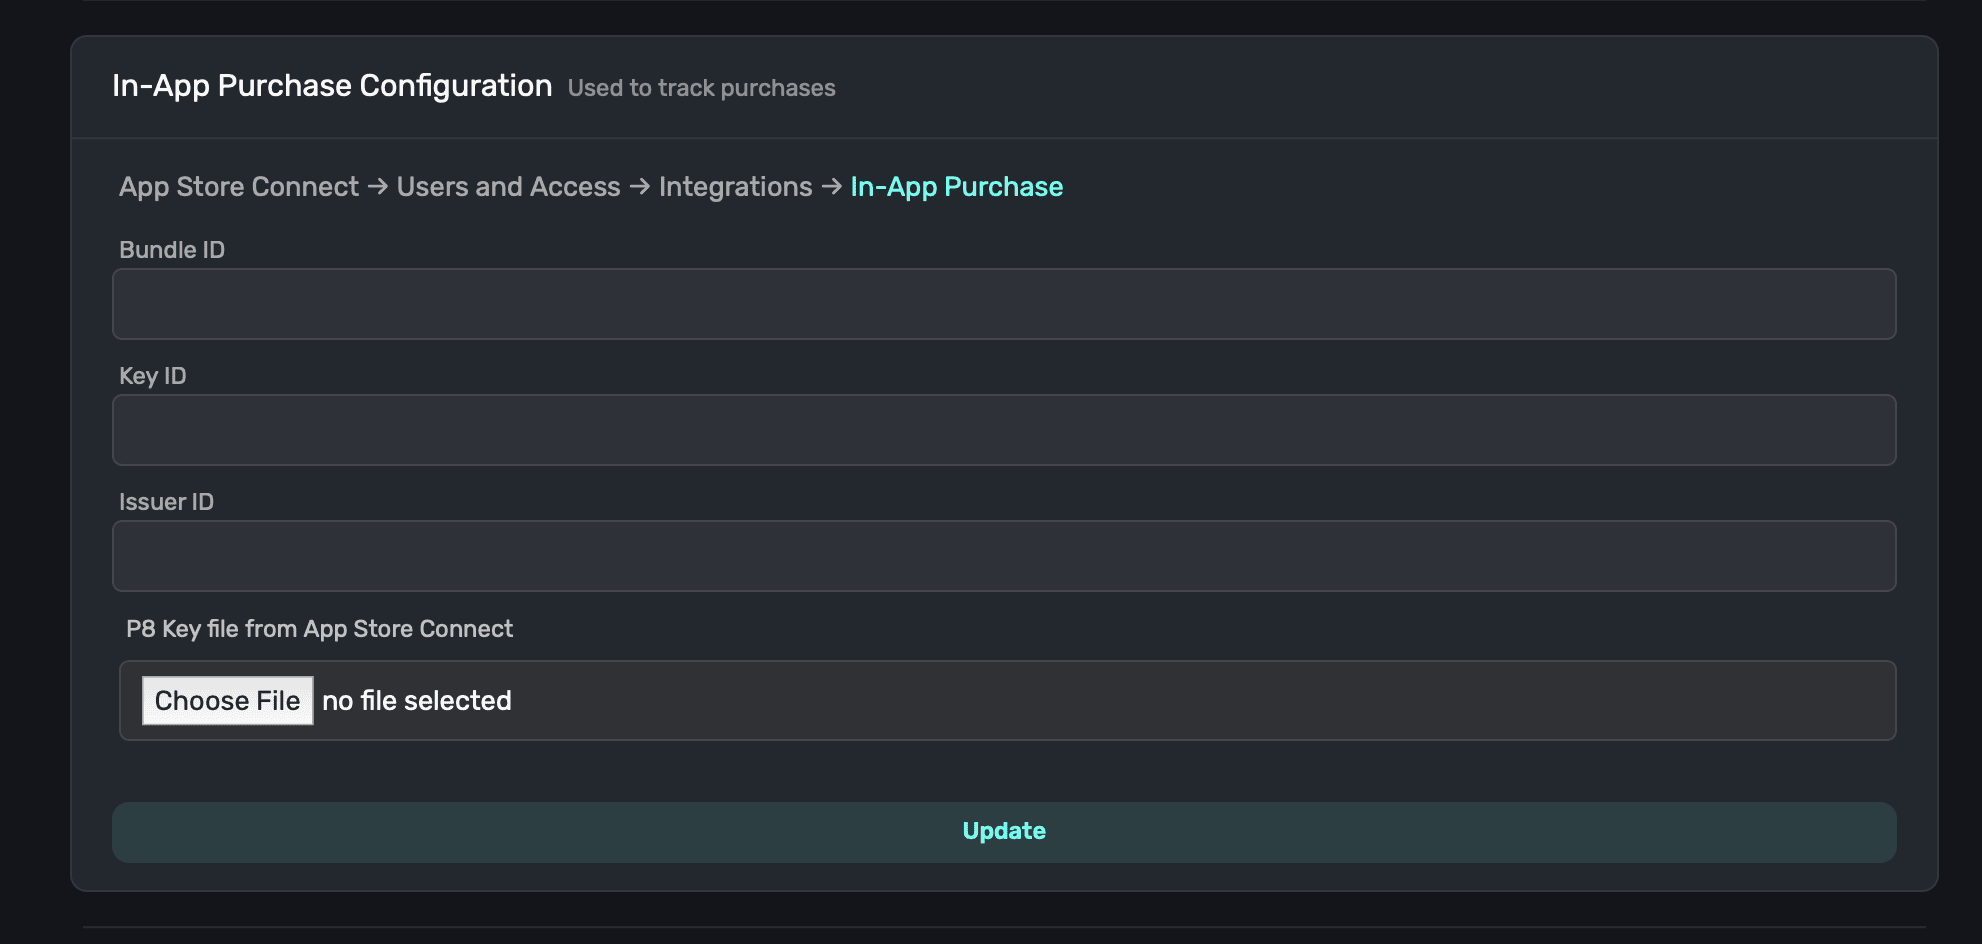
To complete setup, follow these steps:
* Navigate to [App Store Connect](https://appstoreconnect.apple.com).
* Click on **Users and Access**.
* Click on **Integrations** at the top.
* Under **Keys**, choose **In-App Purchase**.
* Click on **+** to create a new key if you don't have one. Add a name, and click **Generate**.
You can reuse the **same key** for all of the apps falling under the same App Store Connect account. Though, you must still have access to the one-time download of its generated P8 key file. If you don't have access to this anymore, simply create a new one.
* **Click** on "**Download In-App Purchase Key**" for the new key. On the resulting modal, click **Download**.
**IMPORTANT**: You only have one chance to download the key file. Make sure to save it in a secure location.
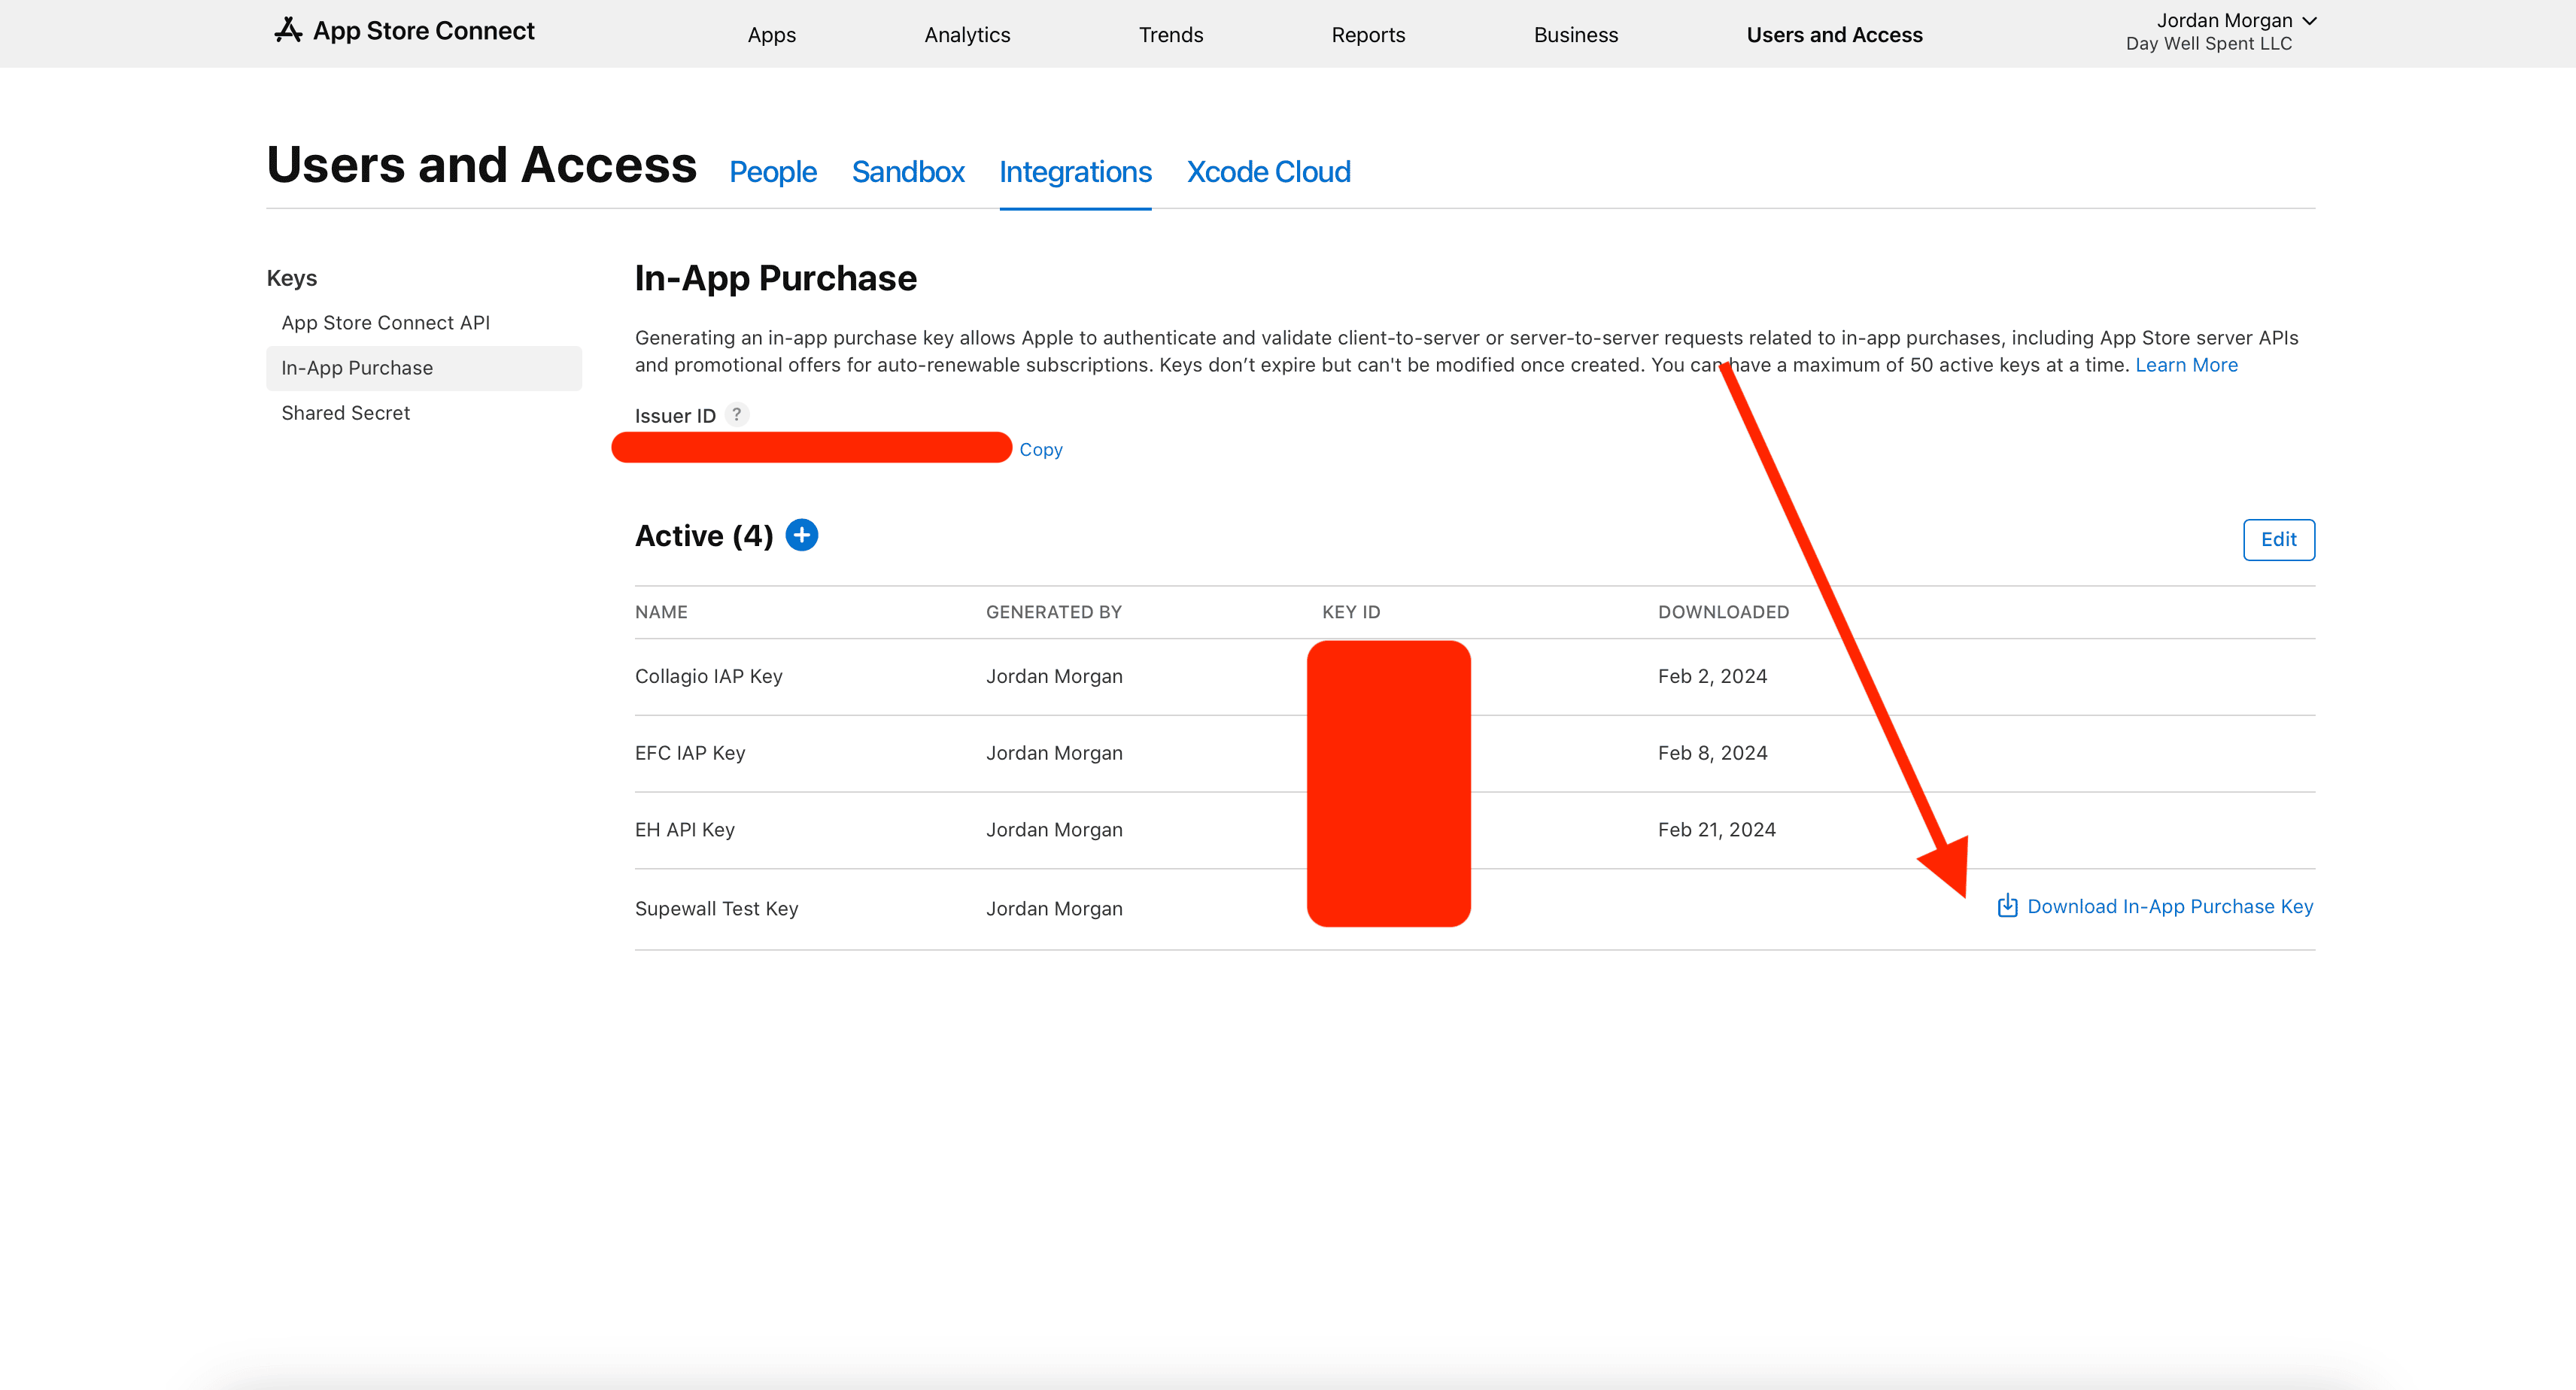
* Upload the key file you downloaded in the previous step to Superwall under "P8 Key File."
* Fill in the **Bundle ID** of your app.
* Enter the **Key ID** of the key you created in App Store Connect. You can find it in the "Key ID" column shown in the image from step 3. Locate the row for the key you made and copy the corresponding Key ID here.
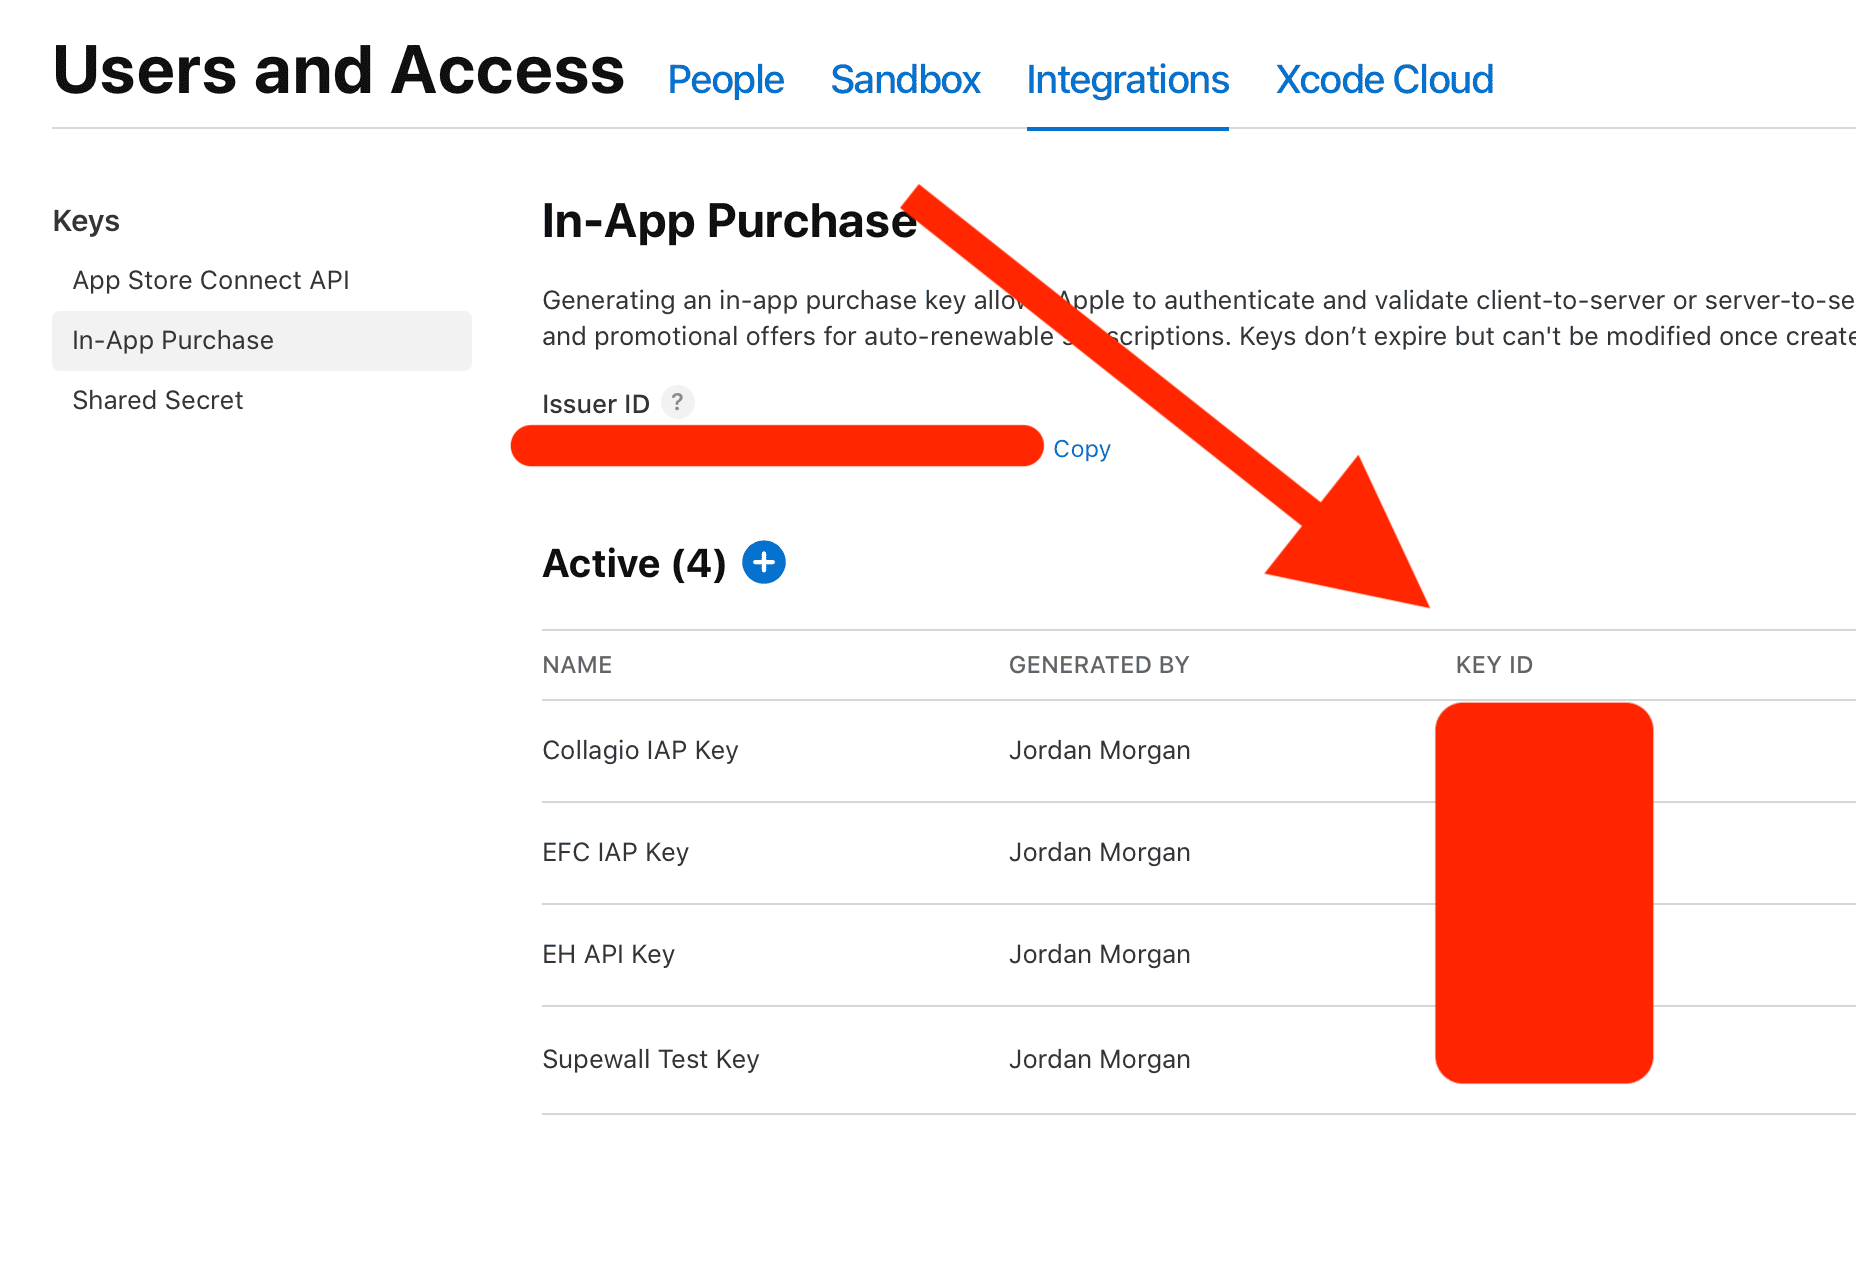
* For **Issuer ID**, fill in the value found at **Users and Access -> Integrations -> In-App Purchase** in App Store Connect:
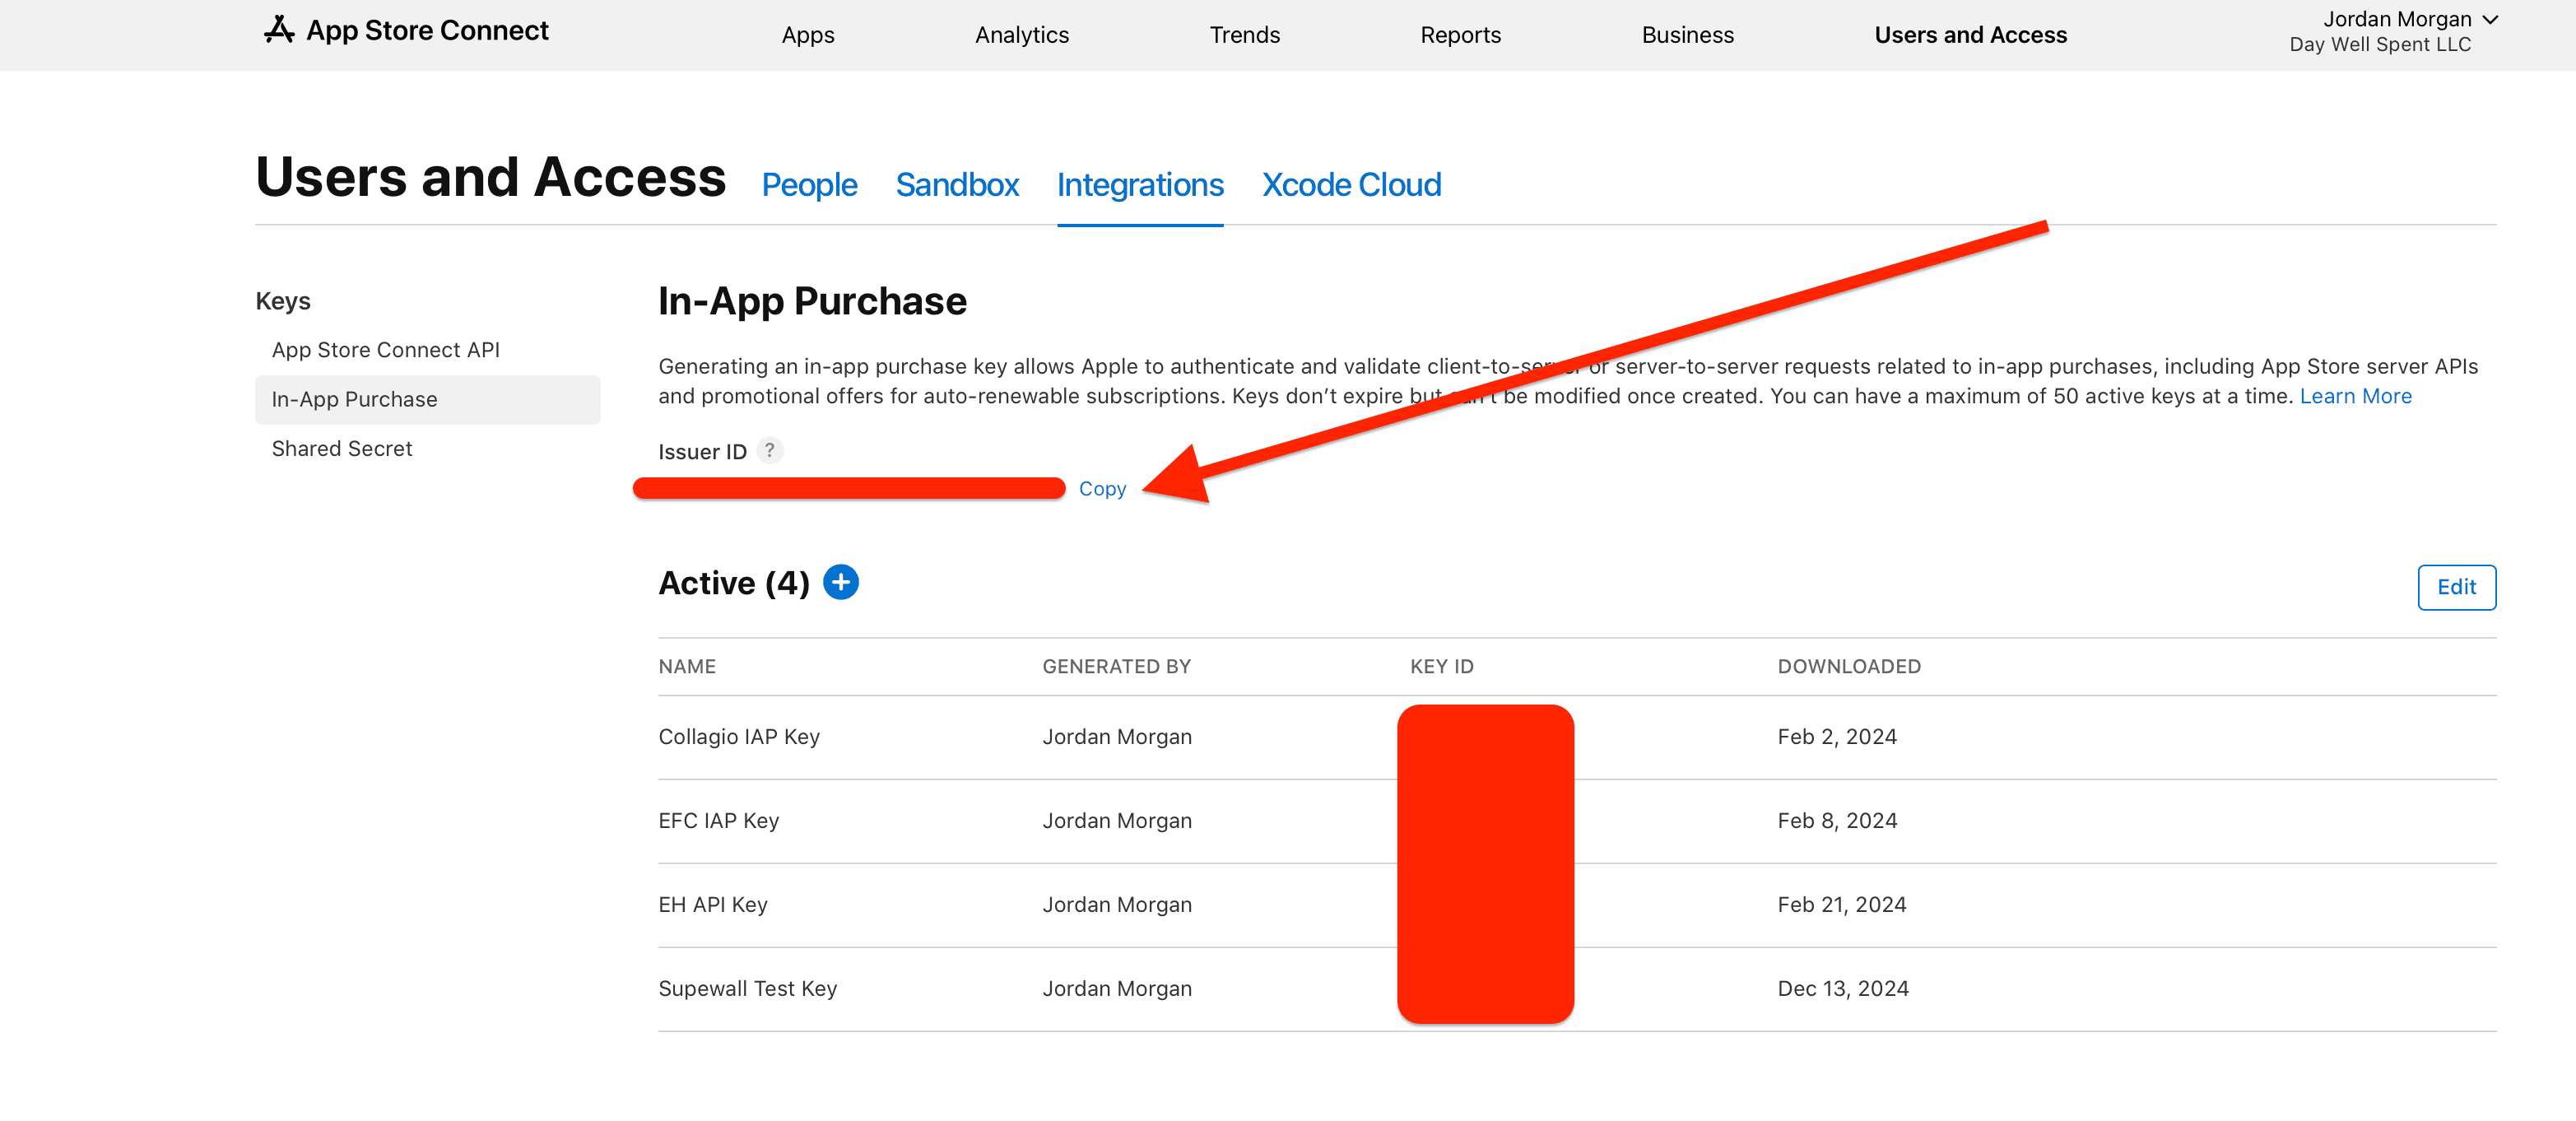
* **Click** on **Update** and confirm everything is setup correctly.
### App Store Connect API
Complete this step once your products are live and approved by App Store review.
Setting up the App Store Connect API helps Superwall pull product data from the App Store.
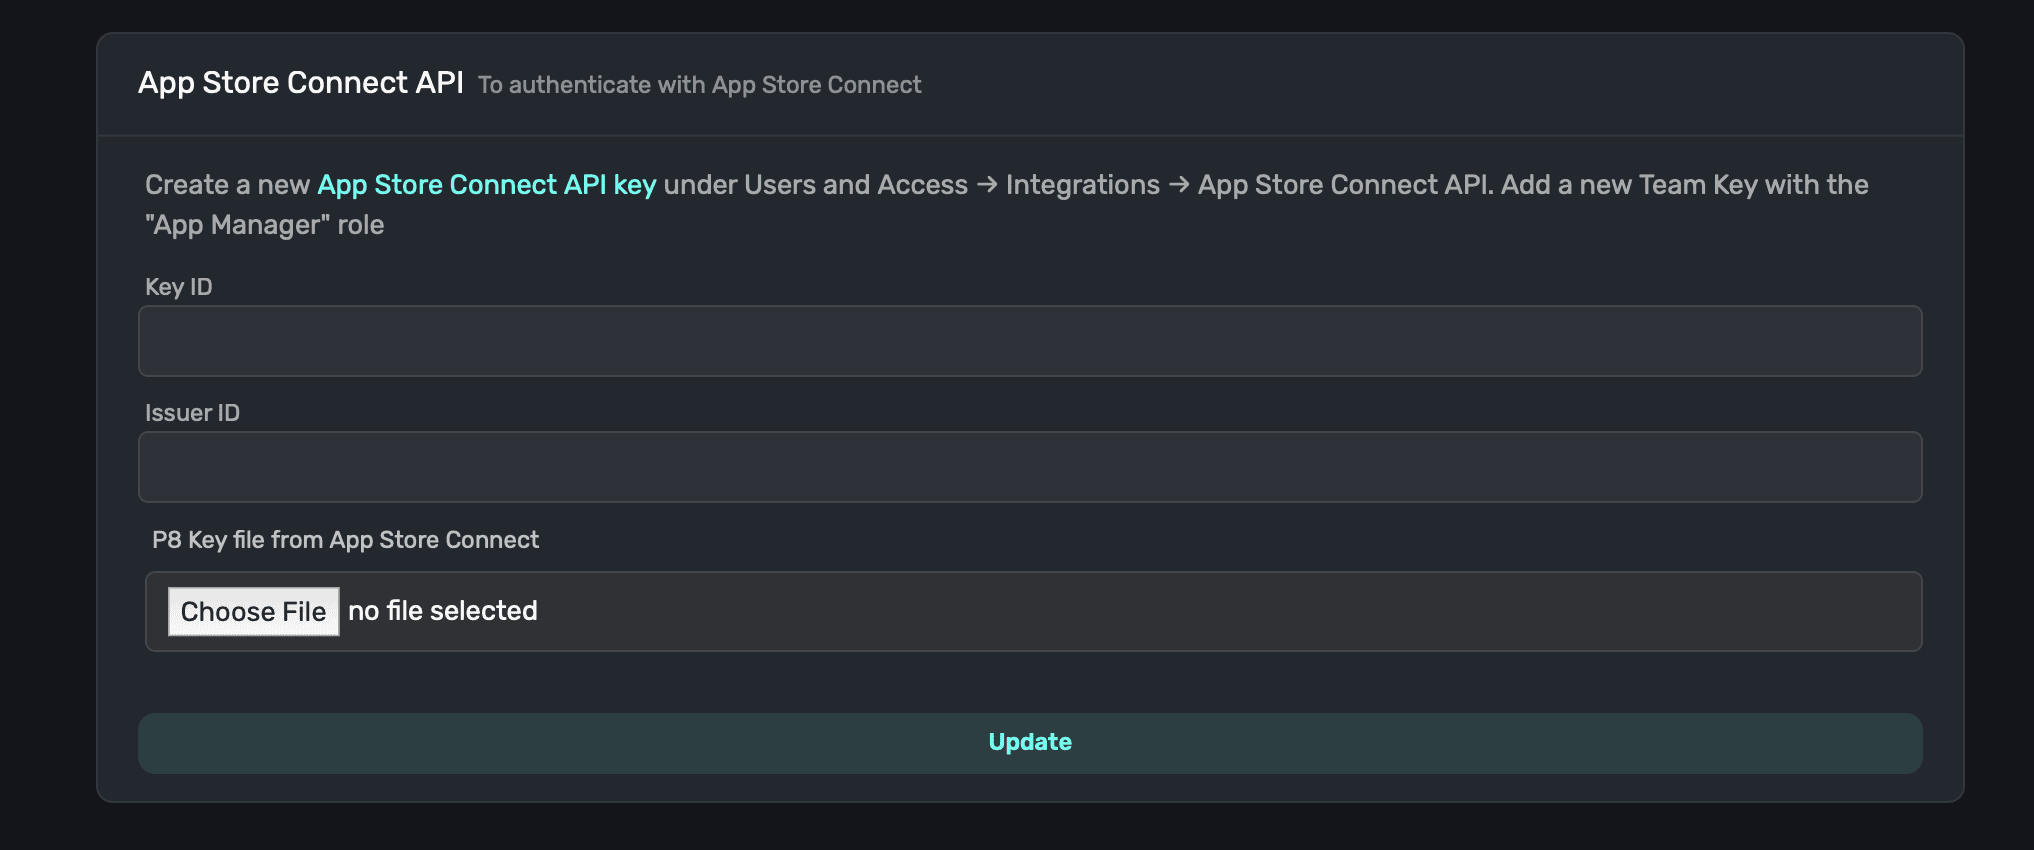
To complete setup, follow these steps:
* Navigate to [App Store Connect](https://appstoreconnect.apple.com).
* Click on **Users and Access**.
* Click on **Integrations** at the top.
* Under **Keys**, choose **App Store Connect API**.
* Choose **Team Keys** and create a new one.
* Add a name, and for **Role** choose **App Manager**.
* **Click** on **Generate**.
* **Click** on **Download** for the new key. On the resulting modal, click **Download**.
**IMPORTANT**: You only have one chance to download the key file. Make sure to save it in a secure location.
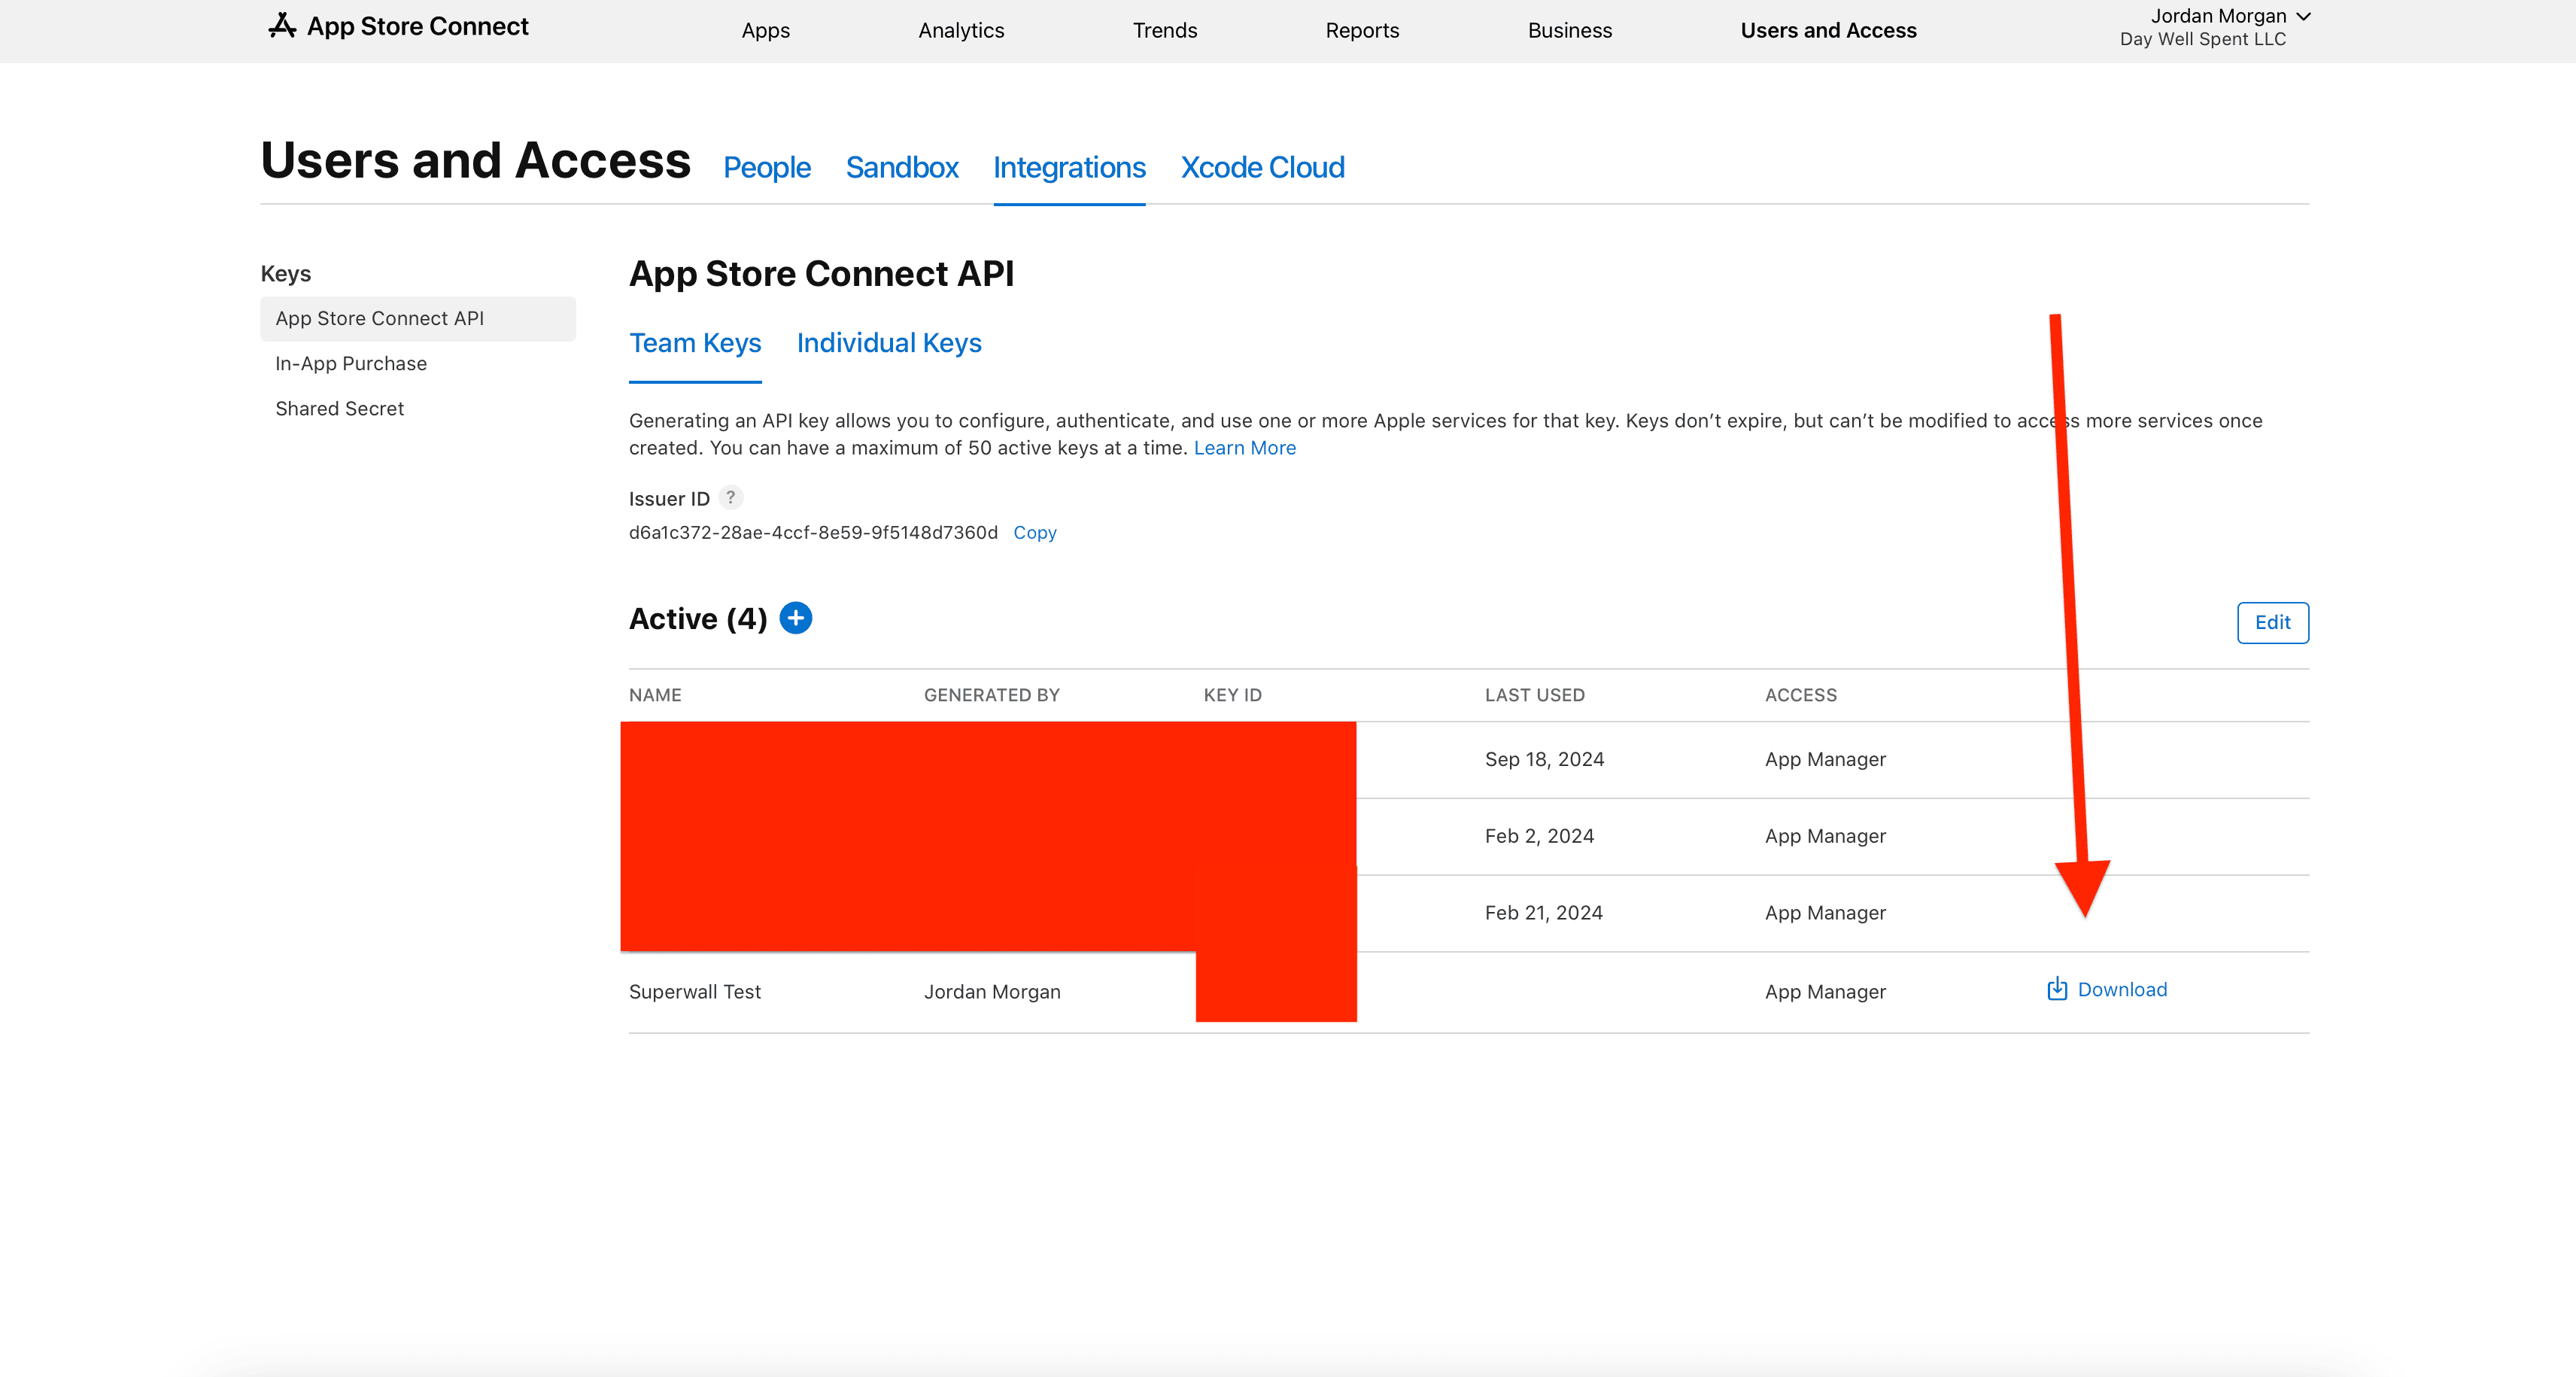
* Upload the key file you downloaded in the previous step to Superwall under "P8 Key File."
* Enter the **Key ID** of the key you created in App Store Connect. You can find it in the "Key ID" column shown in the image from step 3. Locate the row for the key you made and copy the corresponding Key ID here.
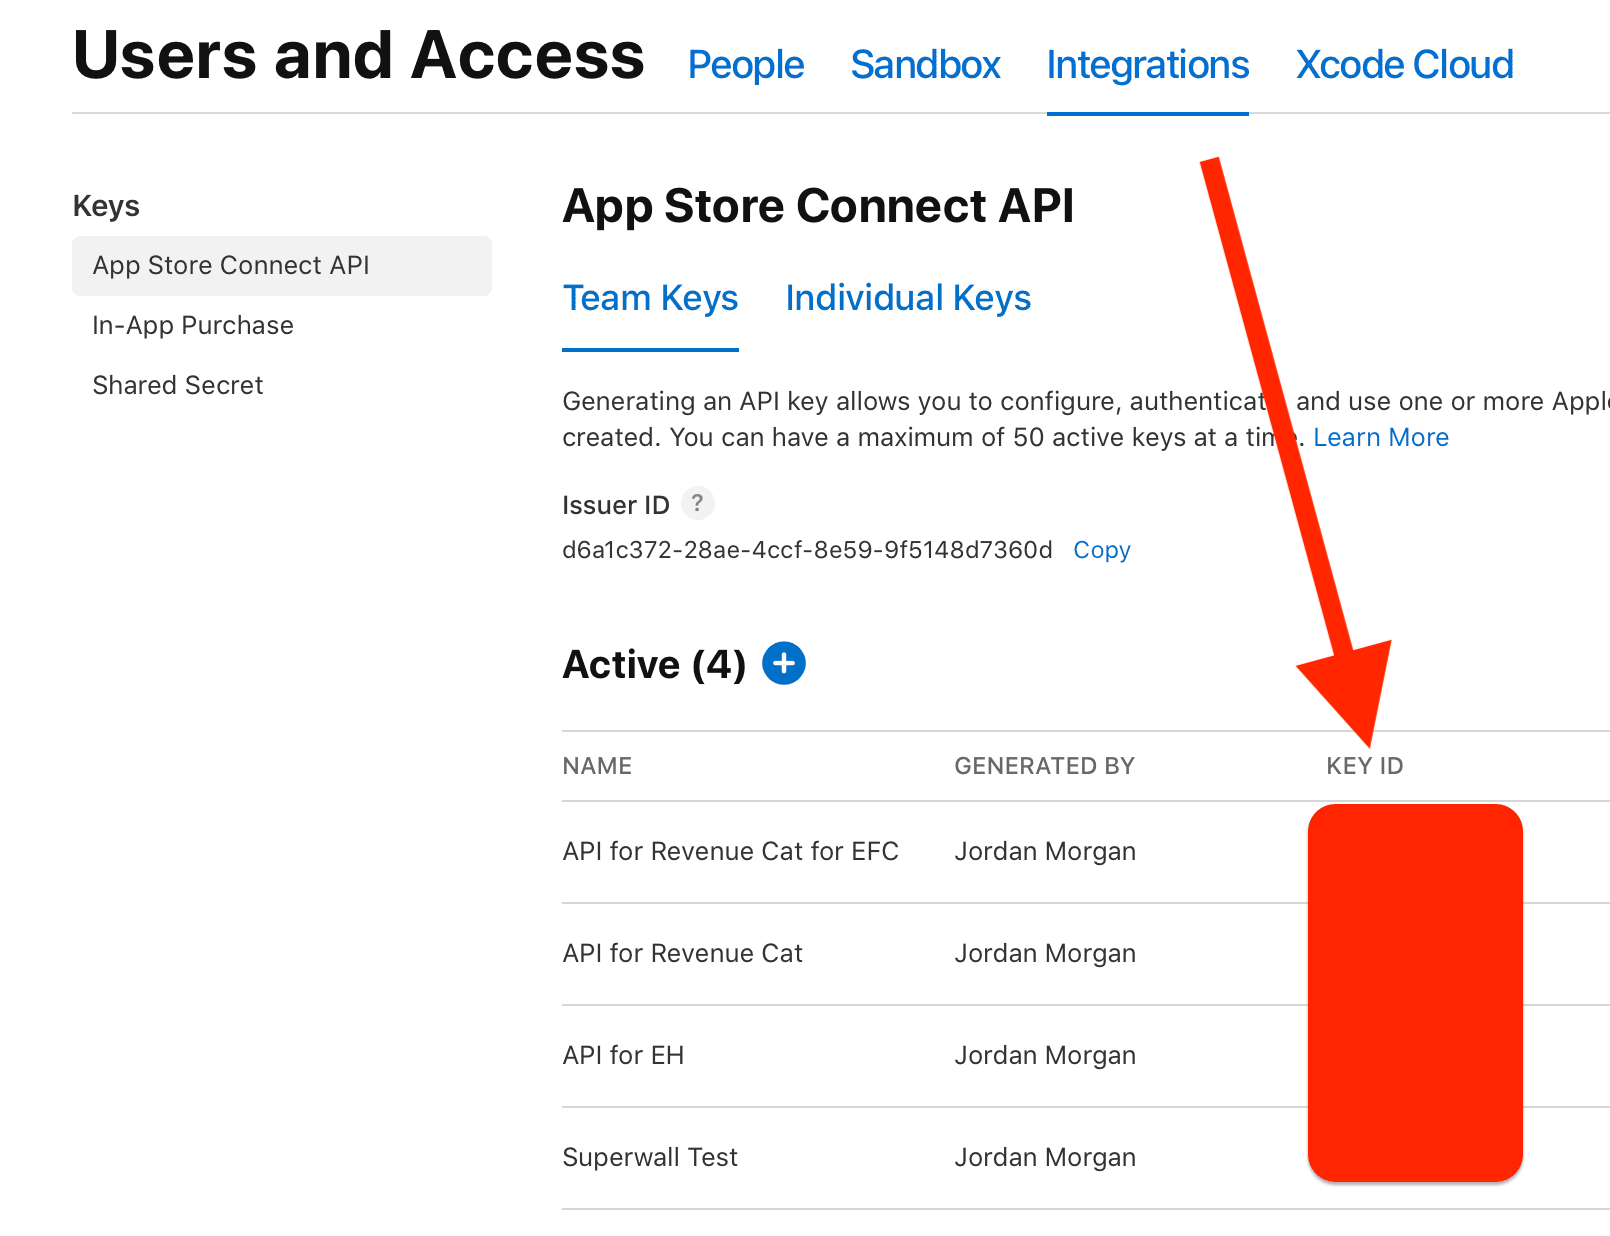
* For **Issuer ID**, fill in the value found at **Users and Access -> Integrations -> In-App Purchase** in App Store Connect:

* **Click** on **Update** and confirm everything is setup correctly.
# Team
Source: https://superwall.com/docs/overview-settings-team
In the **Team** section within **Settings**, you can view and edit your Superwall team:
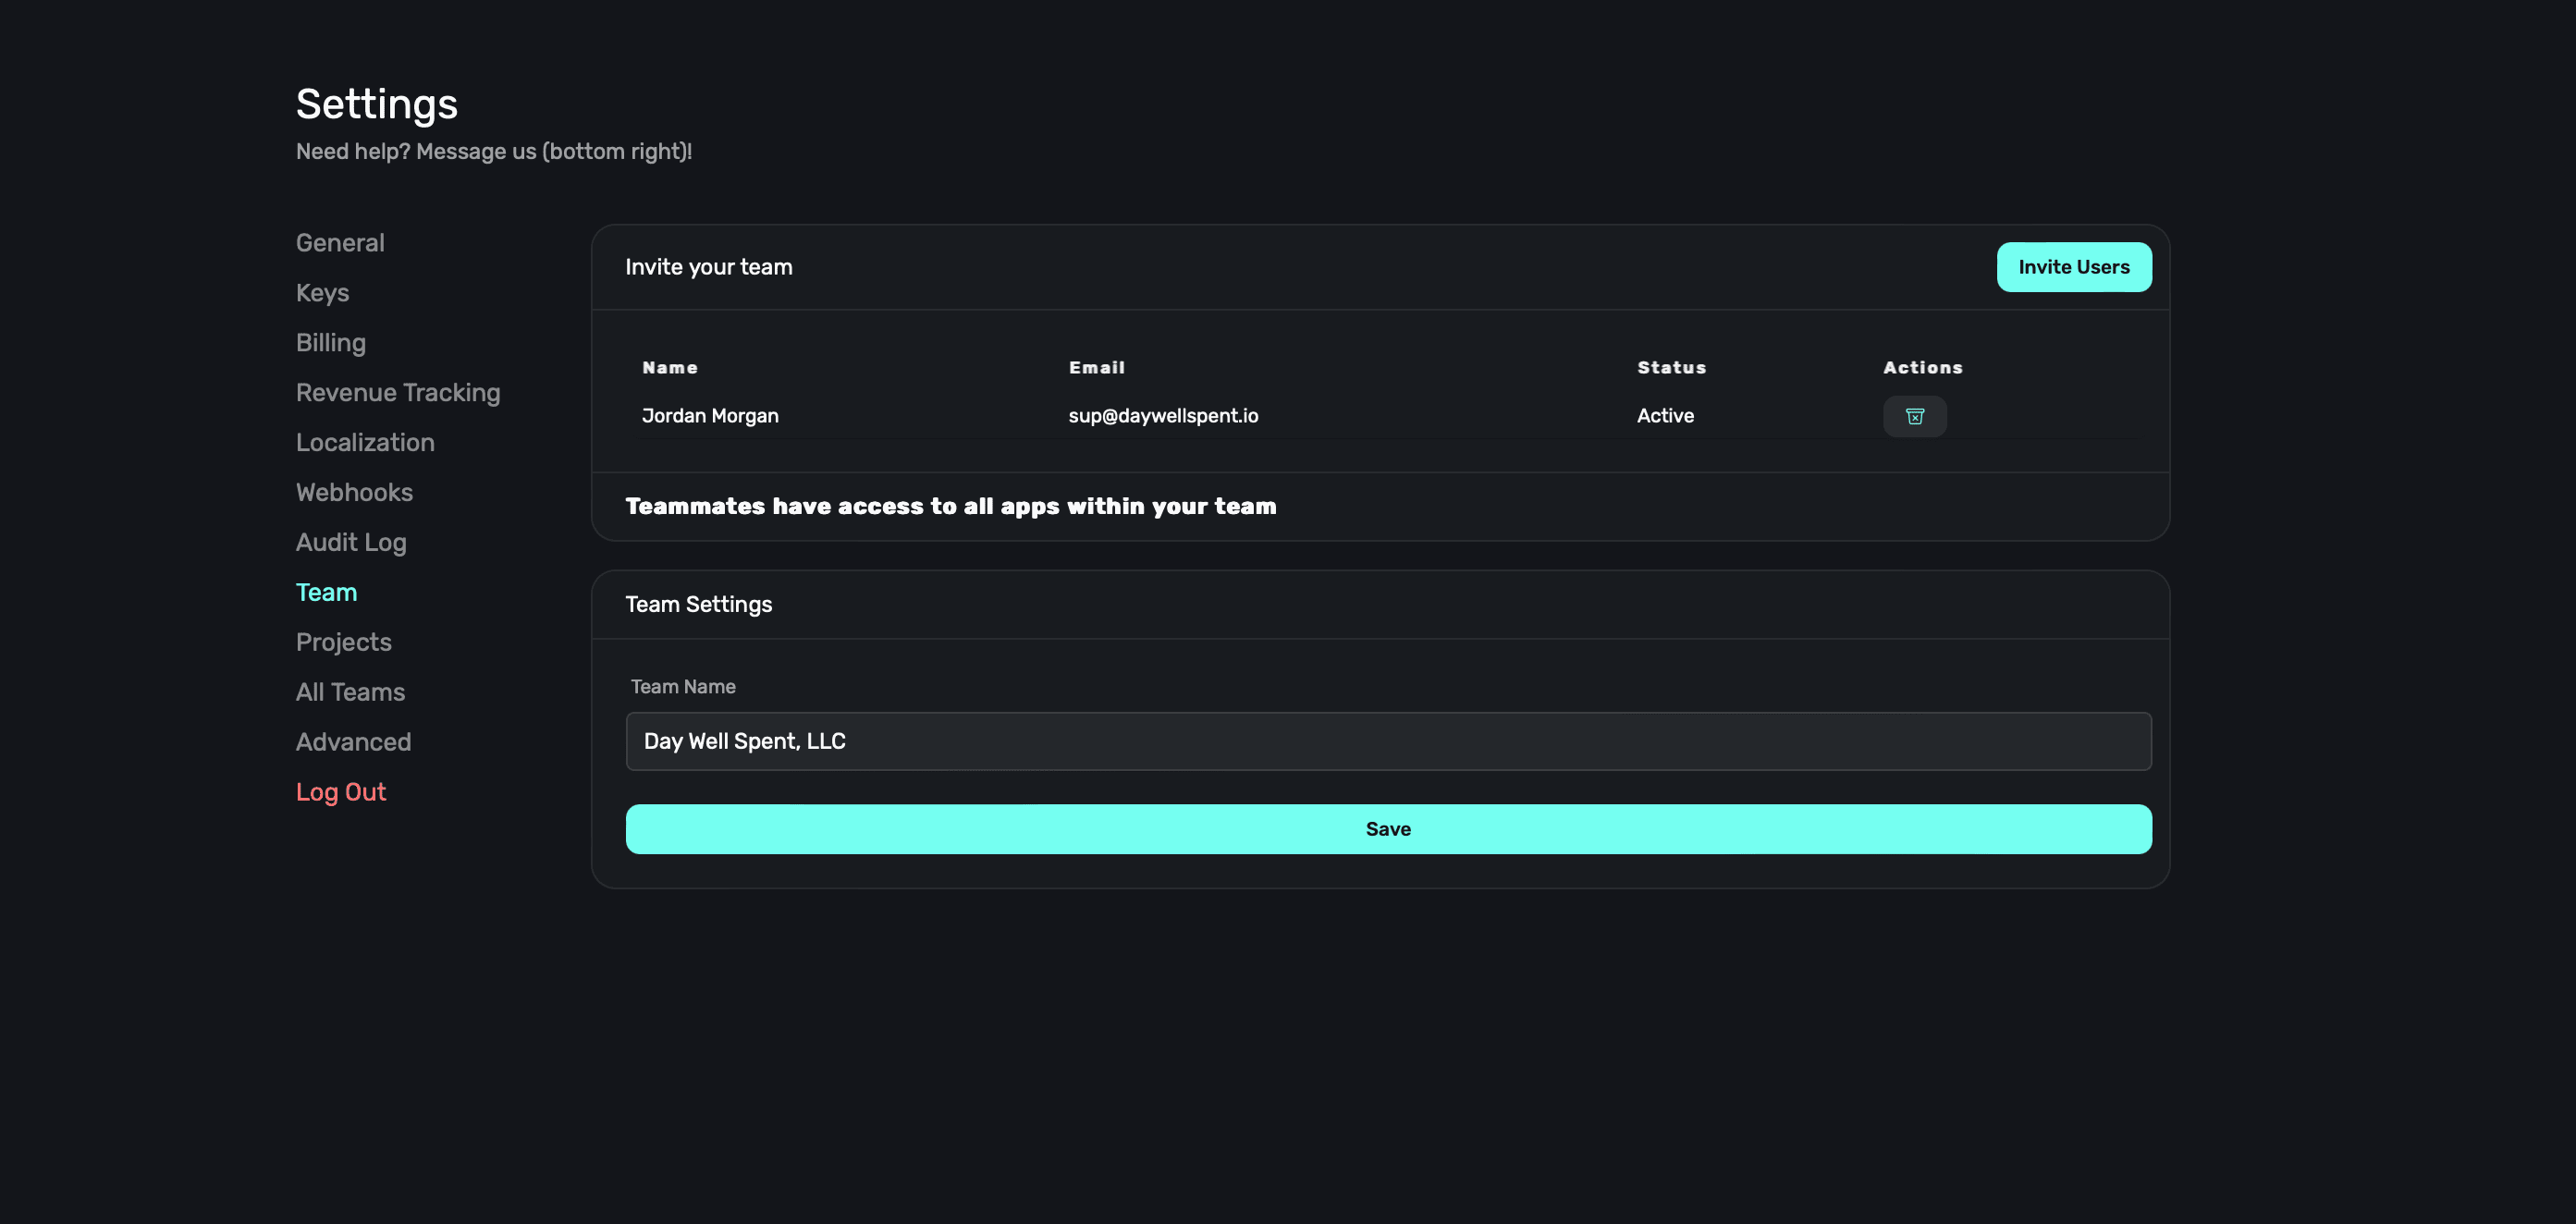
Team members have access to all of your apps within Superwall, making collaboration seamless.
### Invite users
To invite a user to collaborate on your apps, **click** on the **Invite Users** button at the top right:
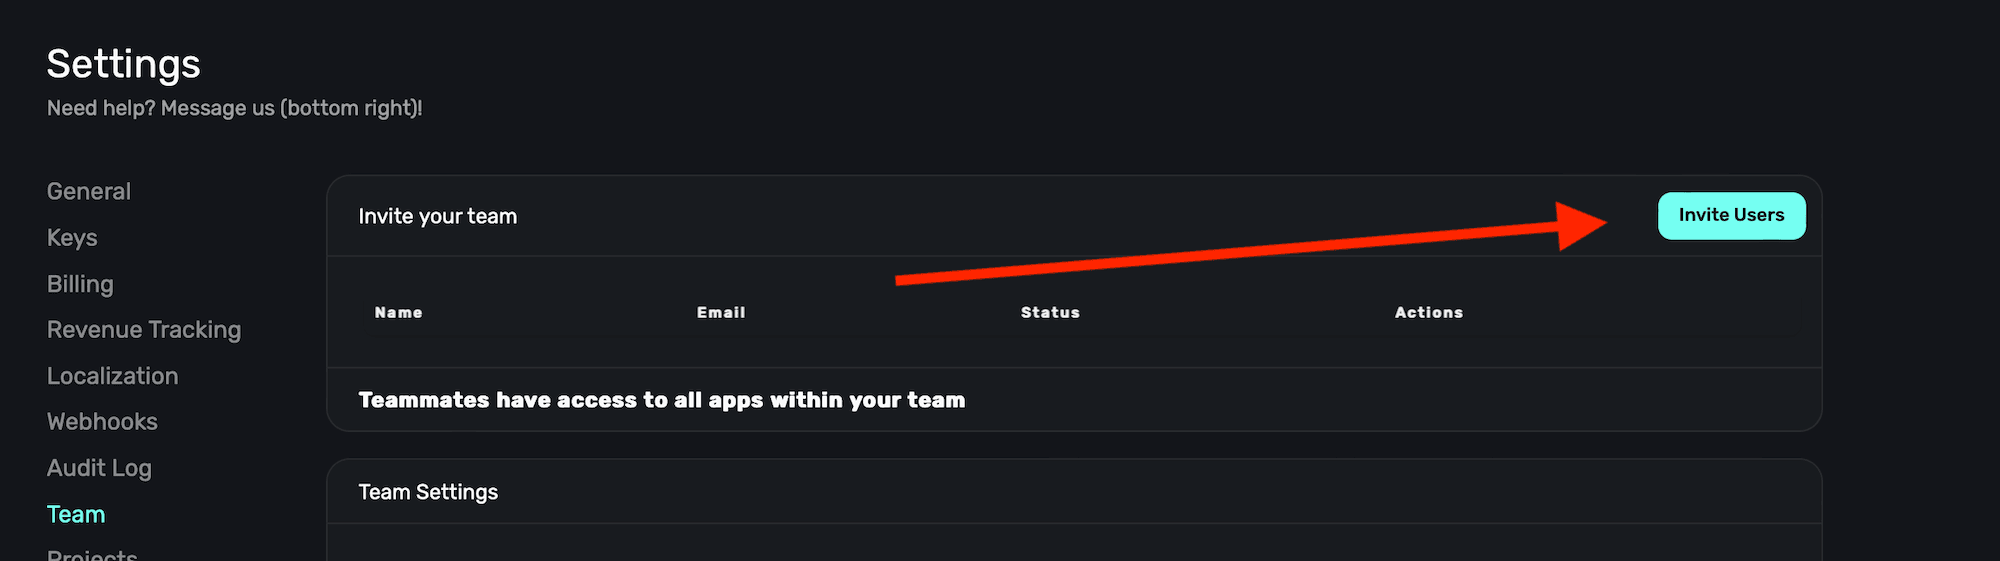
From there, fill out the details (name and email address) and **click** the **Invite** button:
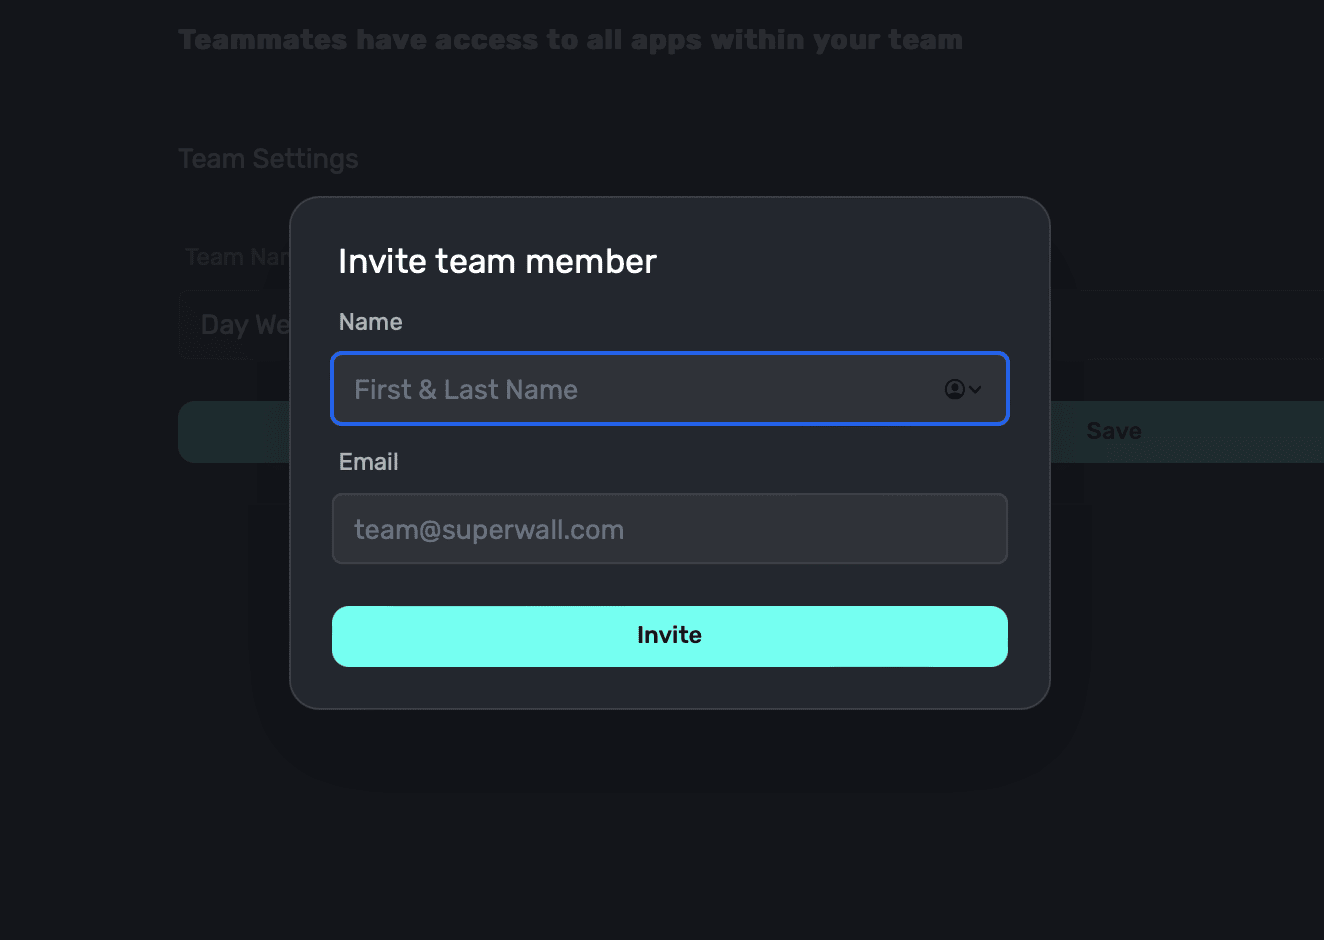
Once the user accepts the invite, they'll show up in your Team section. You can add or remove team members at anytime. To remove a team member, **click** the **trashcan** icon under **Actions**.
### Renaming your team
To rename your team, enter in a new value name under the **Team Name** section, and **click** the **Save** button:
# Users
Source: https://superwall.com/docs/overview-users
Get a snapshot view of users who recently triggered a placement in your app.
To view information about users who've recently triggered a placement in your app, **click** on the **Users** button in the sidebar:
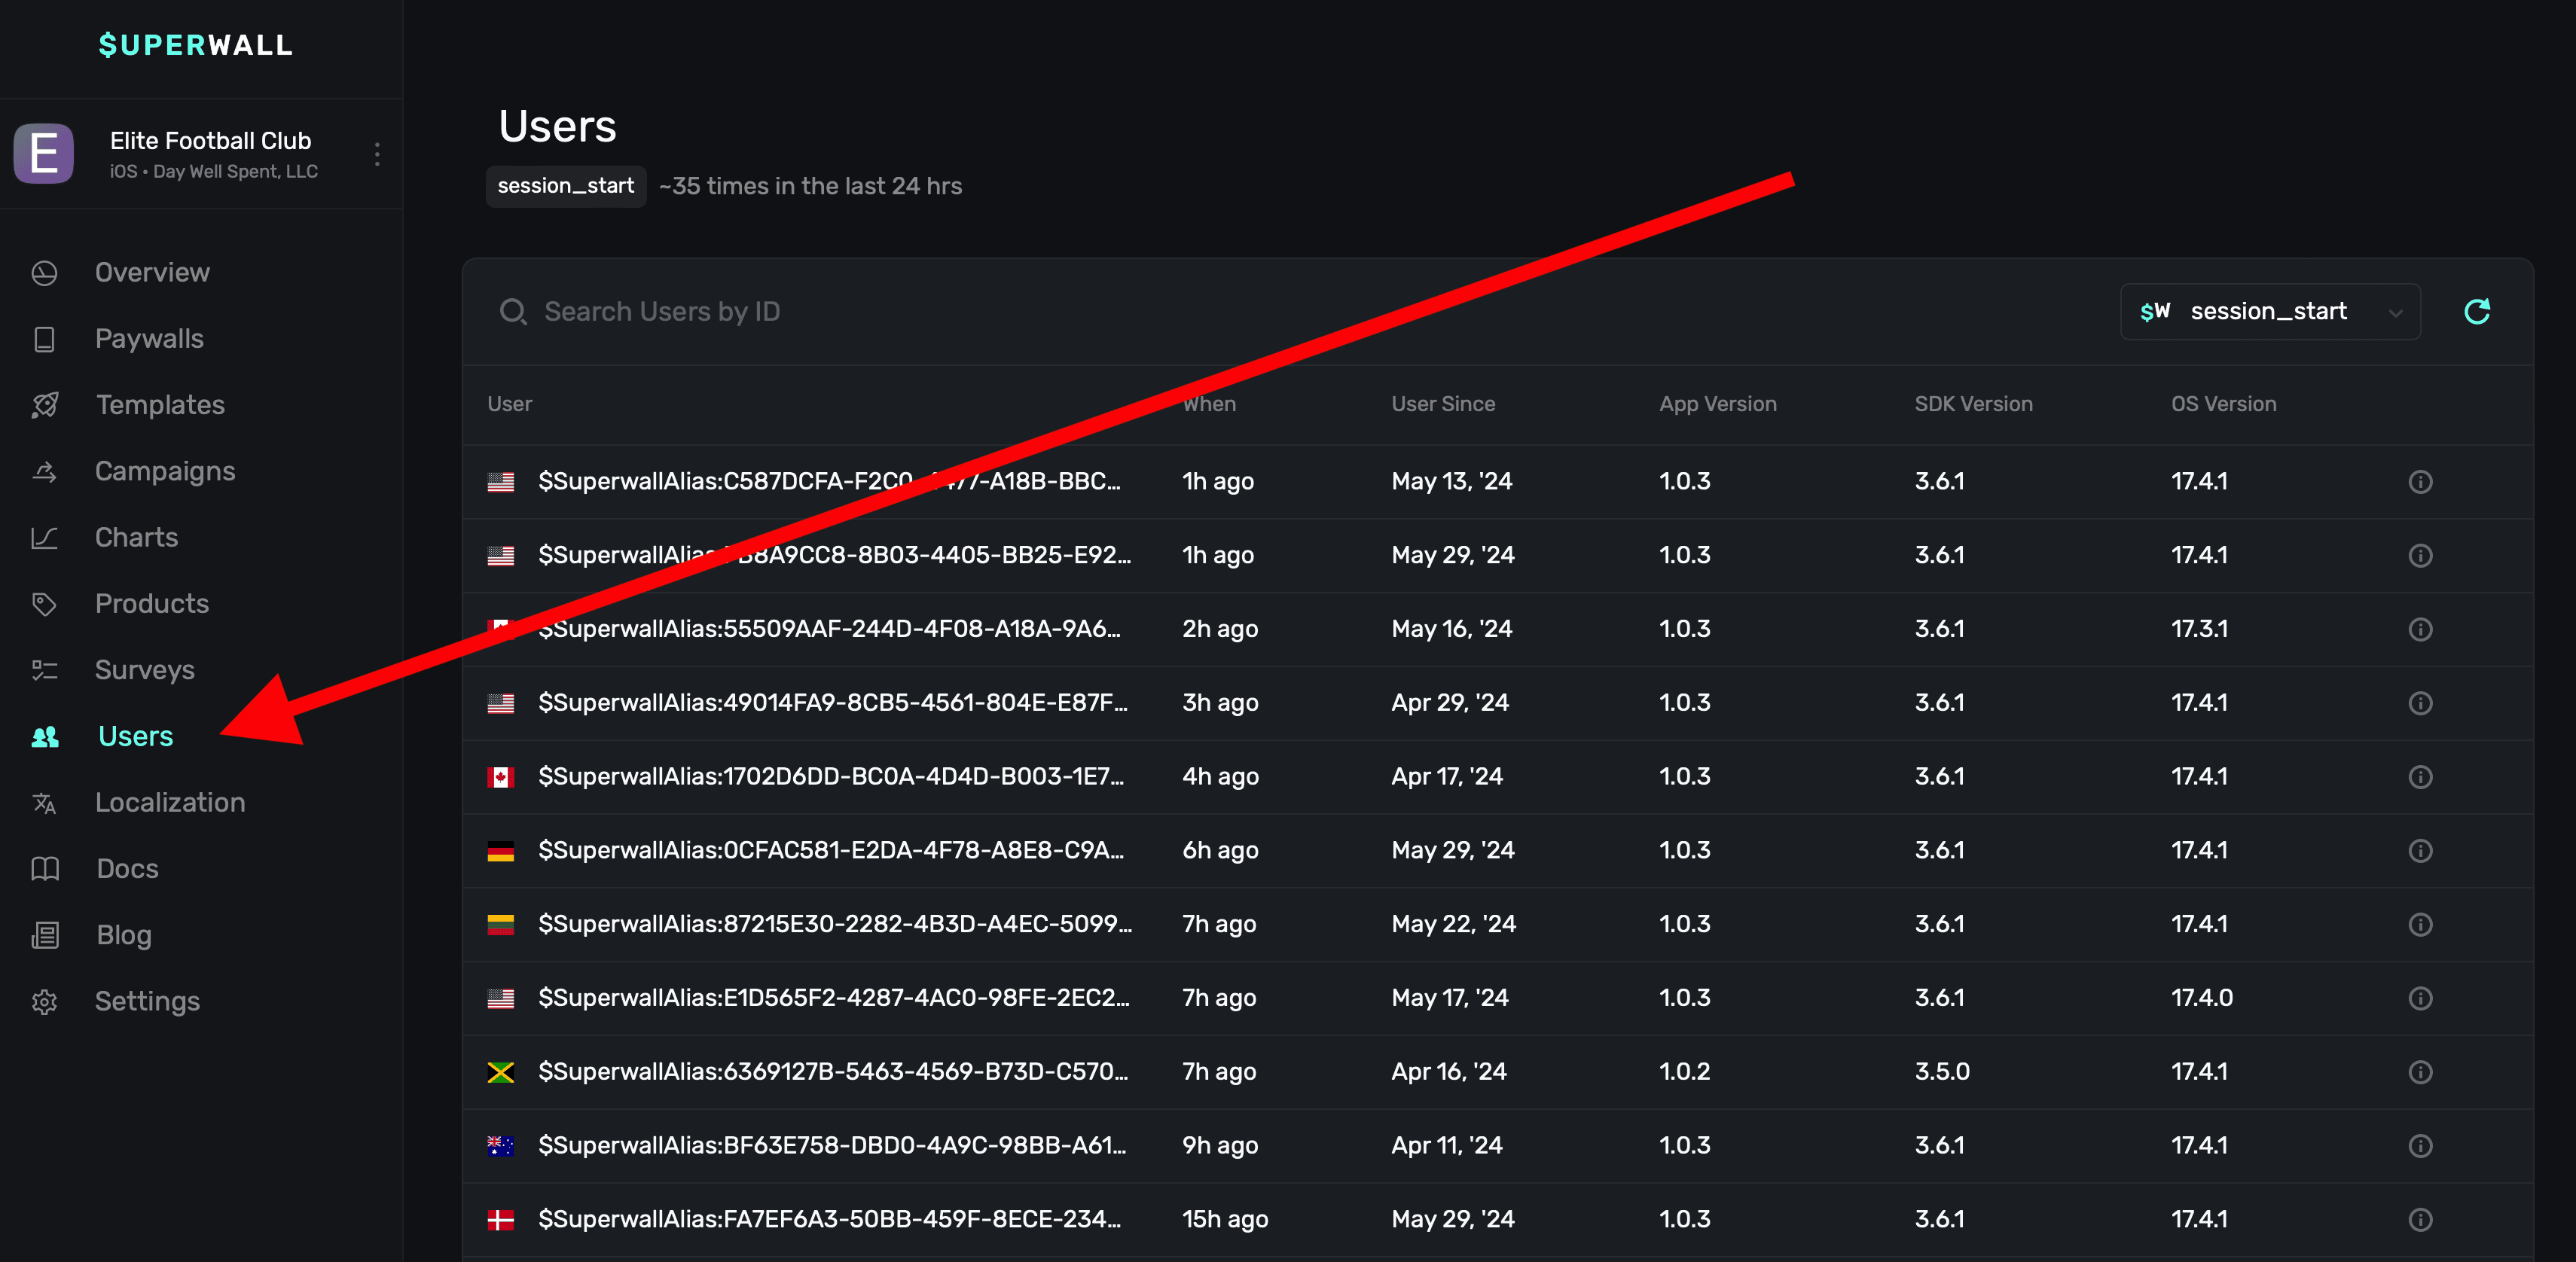
Once there, you'll see a list of users who've had a session within the last 24 hours by default (or you can filter them by a specific event):
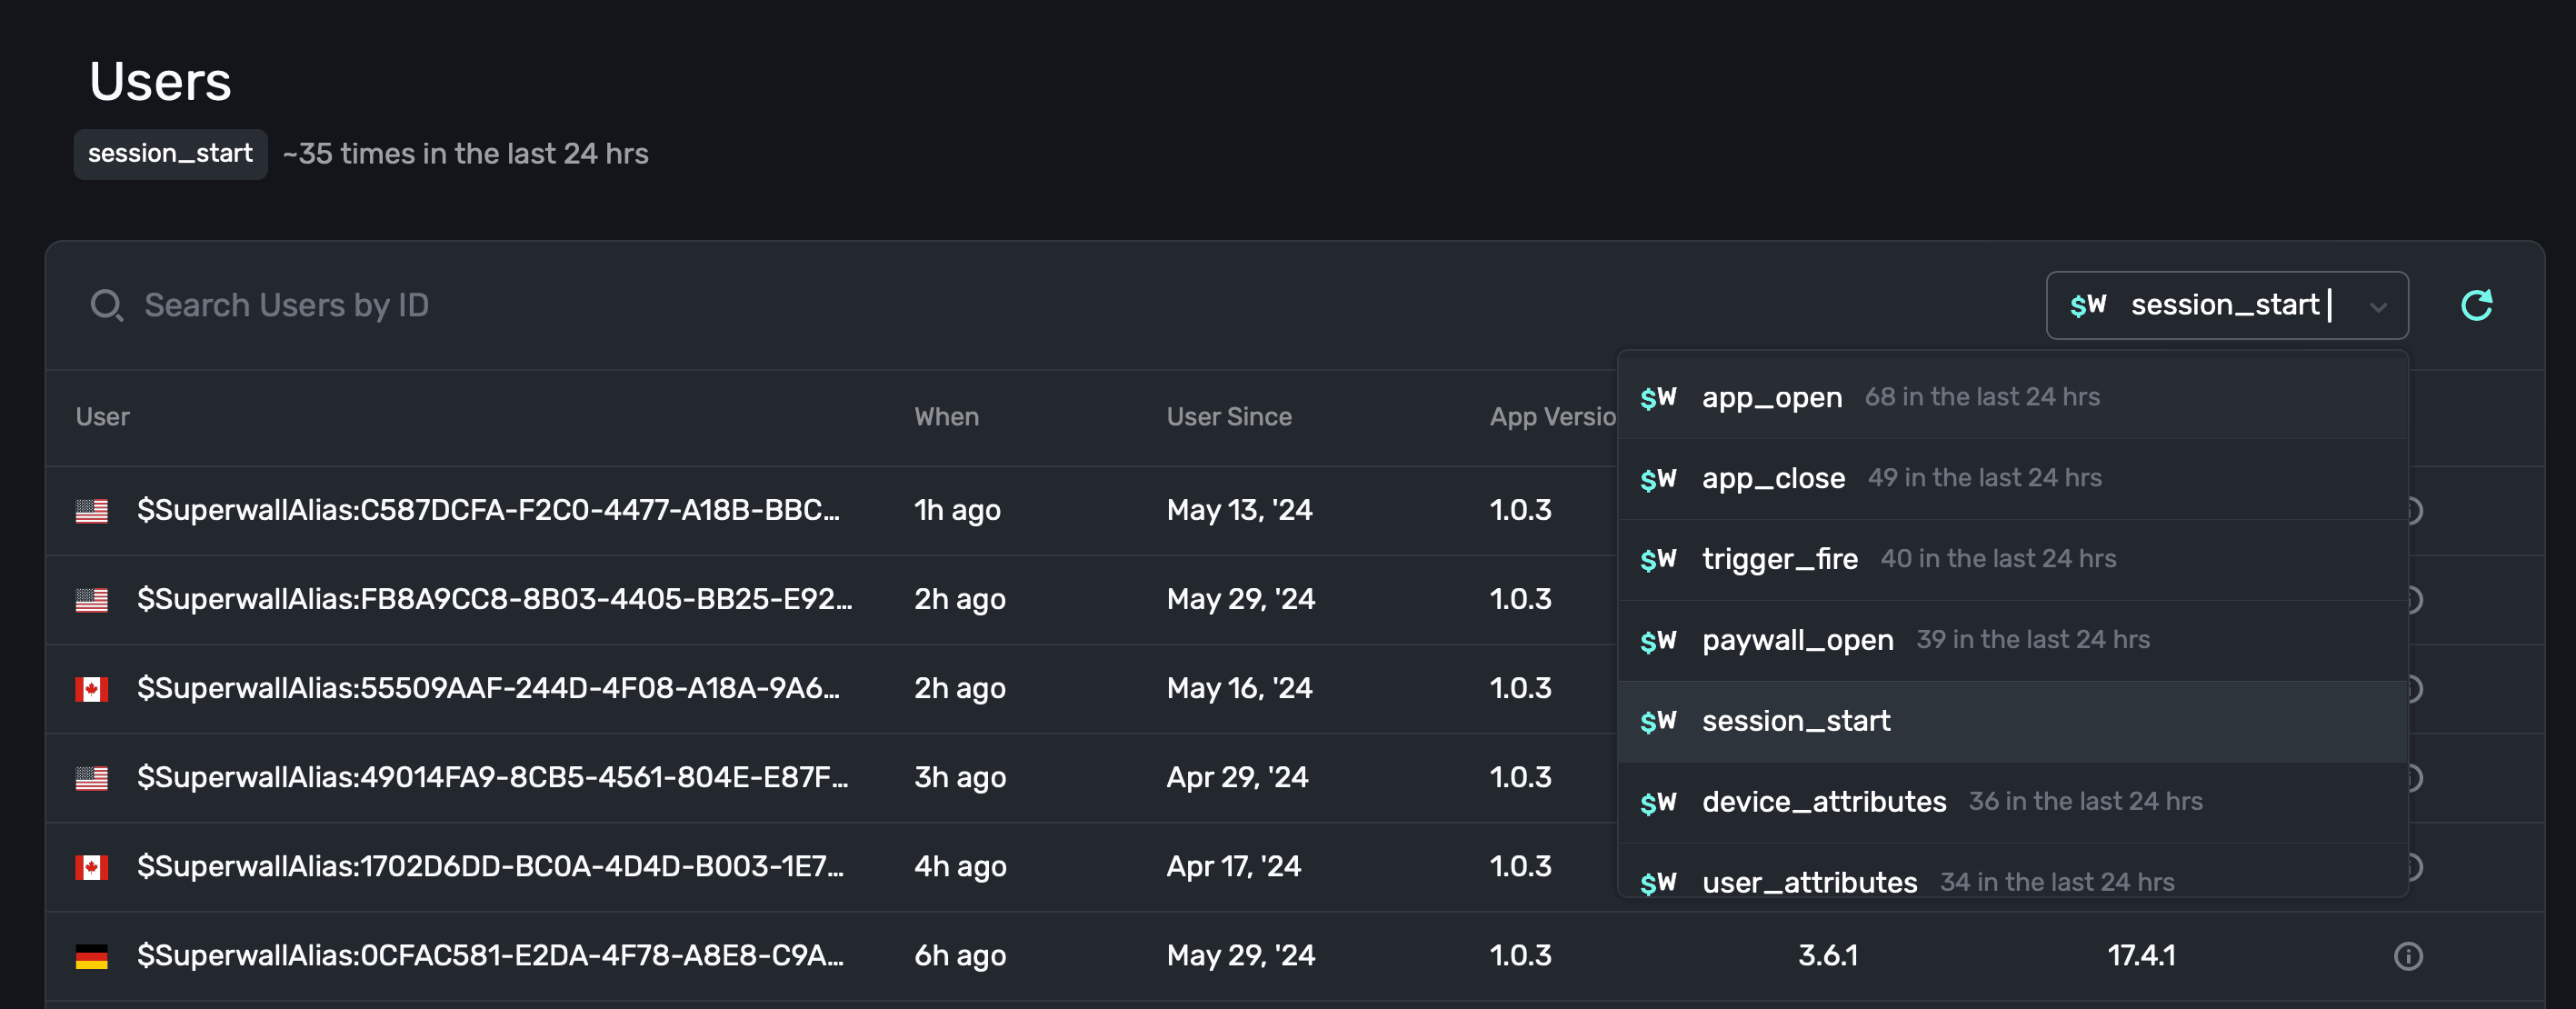
### Searching by user identifier
If you need to find a specific user, use the search box at the top:
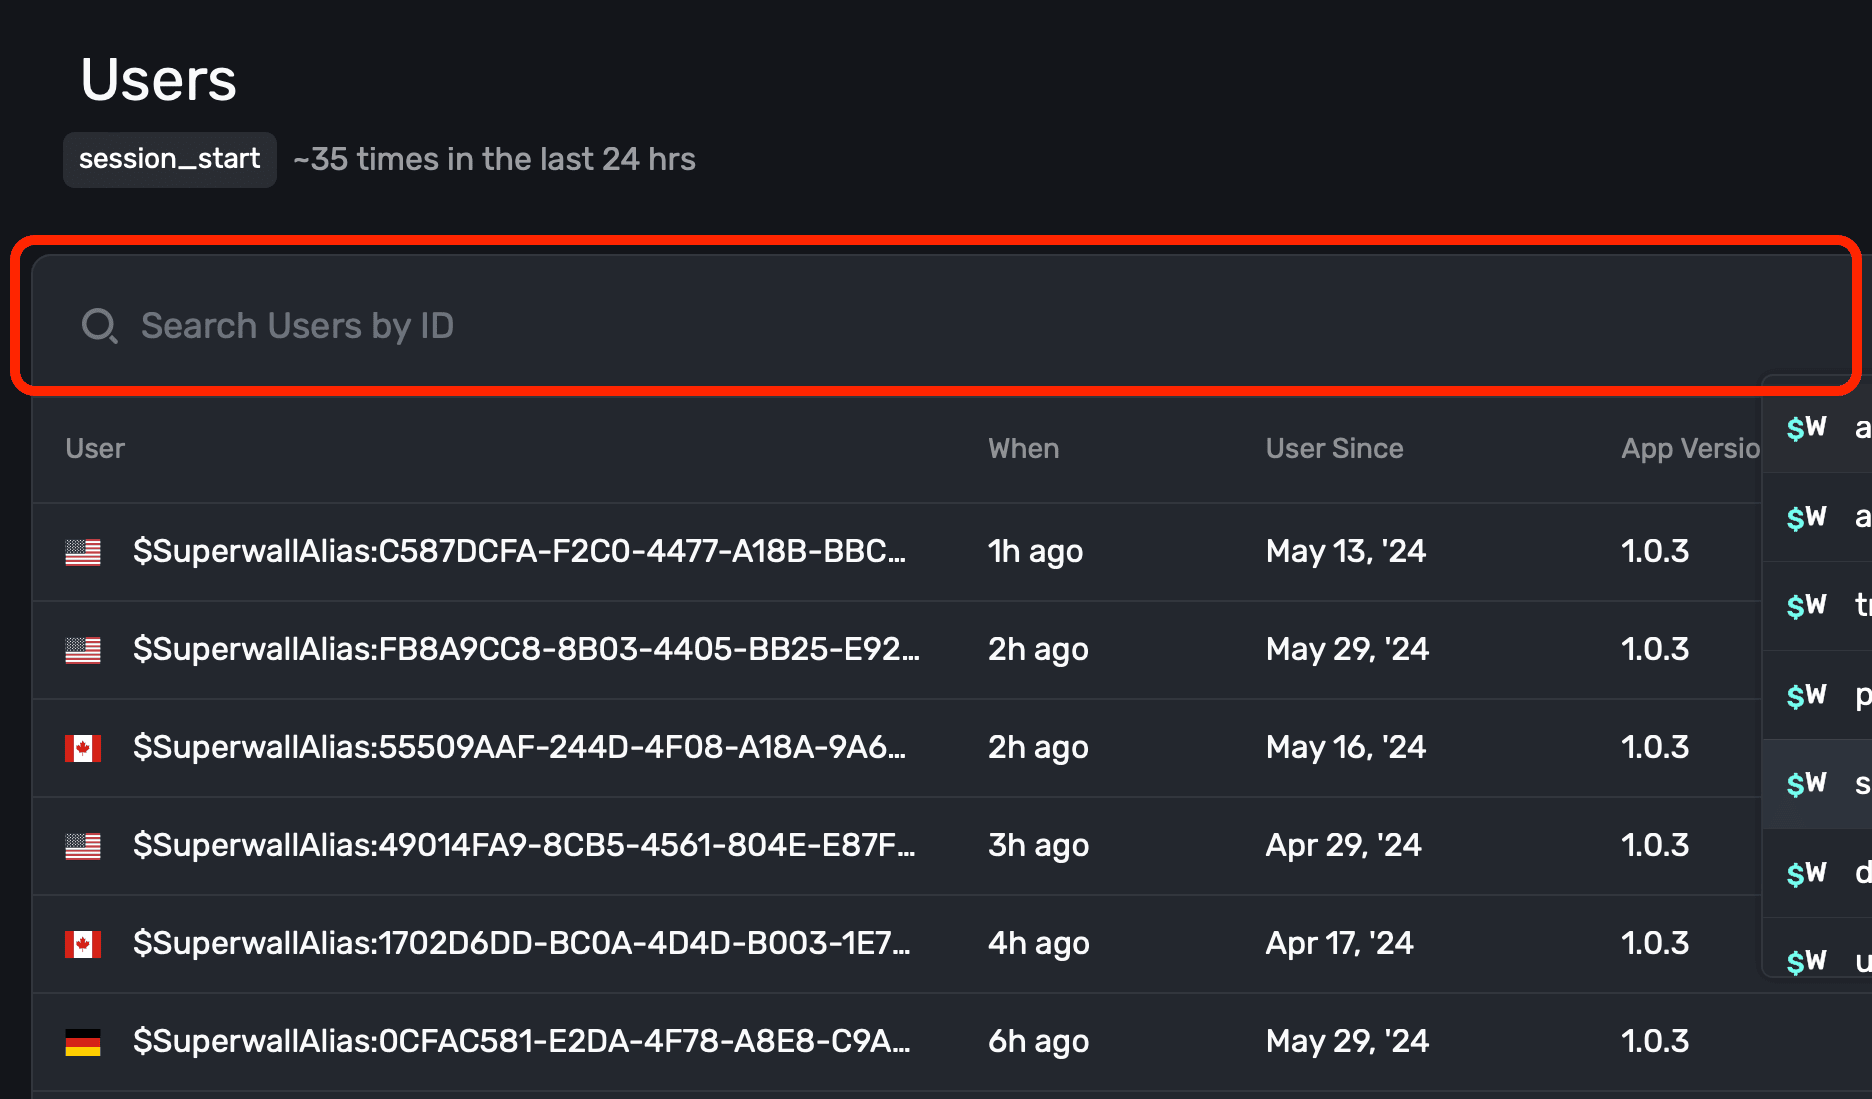
This will find users by their Superwall identifier (i.e. `$SuperwallAlias:44409AAF-244D-9F08-A18A-8F66B52FDZ01`). Hit **Enter** once you've copied or typed in an identifier, and the matched user's details will display.
### Filtering by event
Use the toggle at the right-hand side to toggle by a specific [placement](/campaigns-placements) or [standard placement](/campaigns-standard-placements) (such as session start, app close, app open, etc).
Below, Superwall displays all of the users who declined a paywall within the last 24 hours:

Once you've chosen a placement, **click** the **refresh icon** to view the matched users.
Any placements that are specific to your own app (i.e. ones that you've manually added to a campaign) will show with your app's logo next to it. All of Superwall's standard placements will have a Superwall logo.
Another great use of the Users dashboard? Get a quick preview of how many times one of your
placements has fired within the last day. Choose one from the placement toggle, and then you can
quickly see how many times it's been hit by the resulting users Superwall returns.
### Viewing user profiles
To see more details about a user, click anywhere on one of the rows. Then, the user profile will be presented:
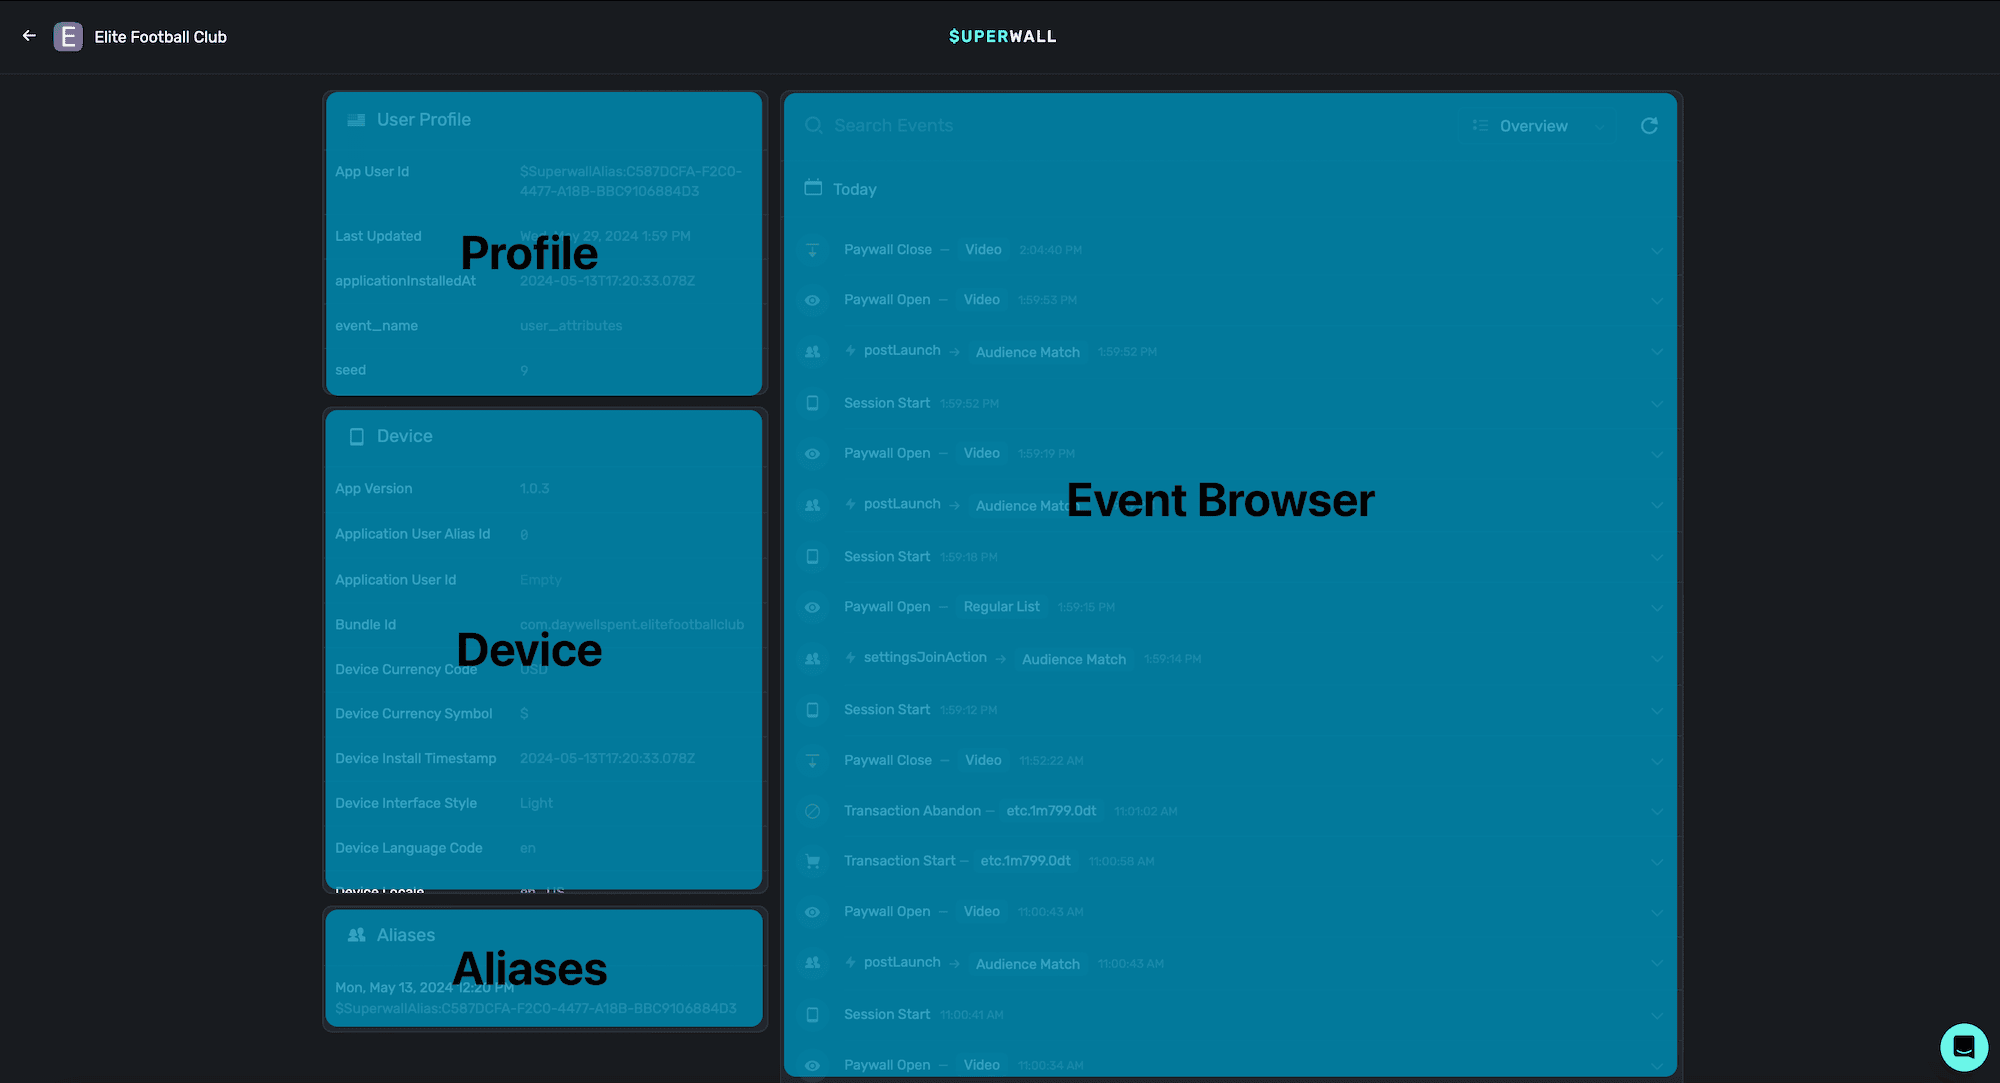
It's divided into four main sections:
1. **Profile:** This houses basic information about the user, such as their install date, user seed and more.
2. **Device:** Details about the device the user was on when the last placement was matched. View the version of the app they were on, the bundle id, install timestamps and more.
3. **Aliases:** Any alias that Superwall has assigned the user will show here. Read more about how user aliases are created [here](/identity-management).
4. **Event Browser:** Browse all of the recent placements the user has matched against. Search and filter by them, and click on any one of them to see more details about it.
The user profile contains a wealth of information. You can search events by name by using the **Search Events** textbox, and quickly filter by event domains using the toggle at the top-right of the event browser:
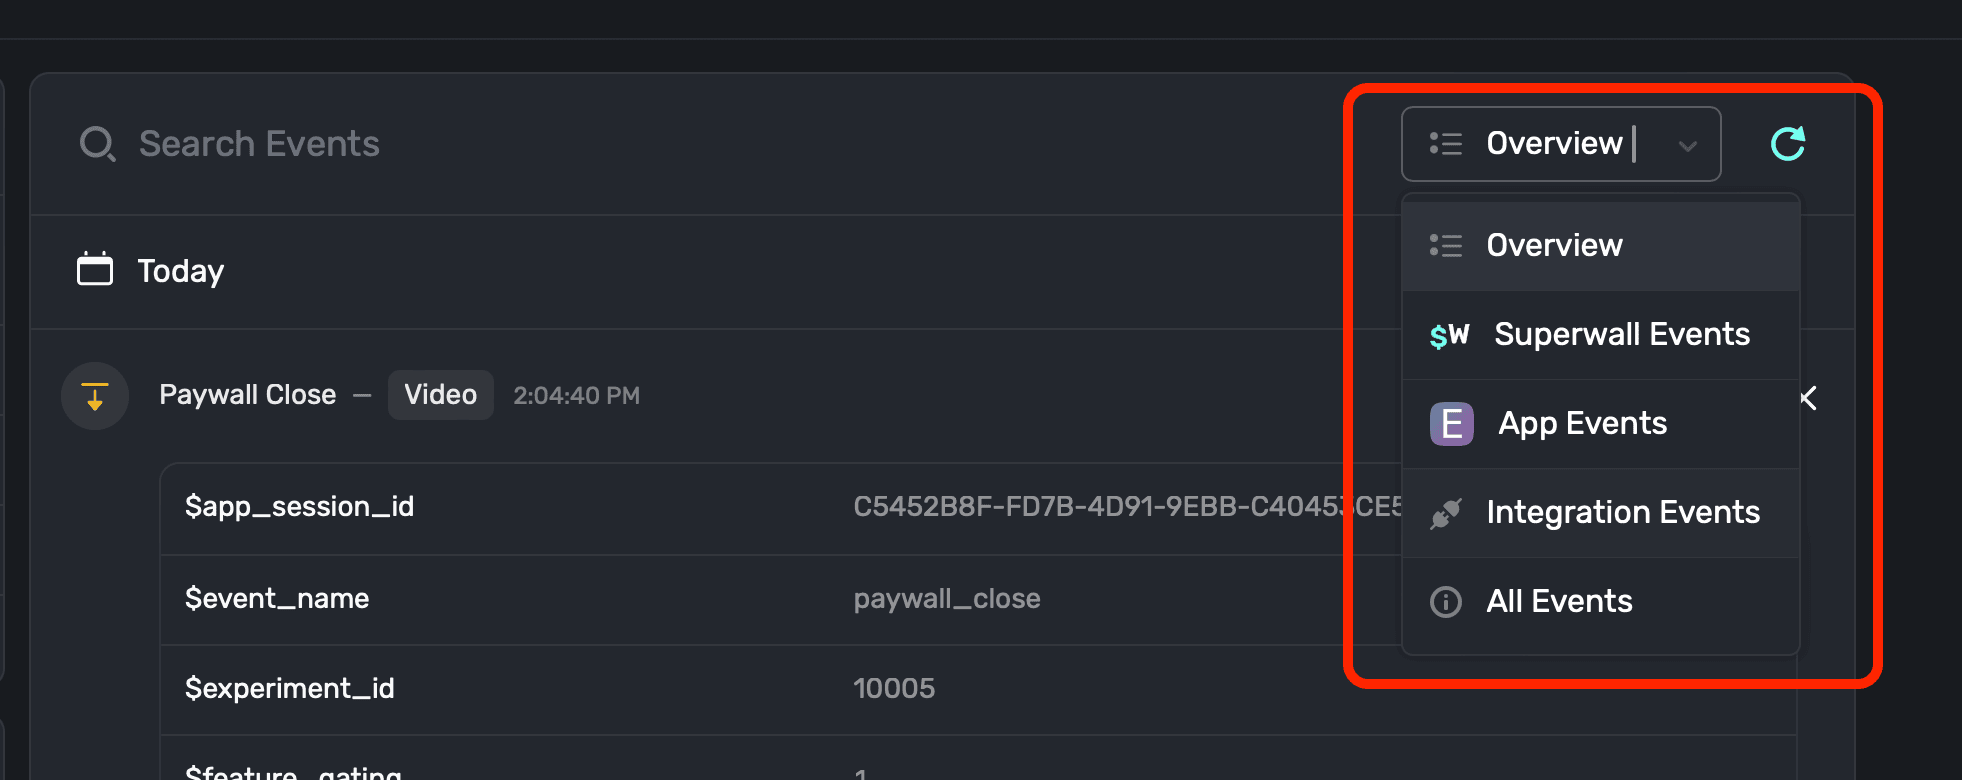
The domains of events you can search and filter by are:
1. **Overview:** The default option, this shows all of the key events from today.
2. **Superwall Events:** These are [events](/tracking-analytics) automatically tracked by Superwall.
3. **App Events:** Placements that you've manually added to a campaign.
4. **Integration Events:** If you've integrated any 3rd party services, such as Revenue Cat, those events will show here.
5. **All Events:** Displays every single event that's occurred today.
Events from App Store Connect do not currently show here yet.
To learn more about any specific event, just click on it and you'll be presented with extra details:
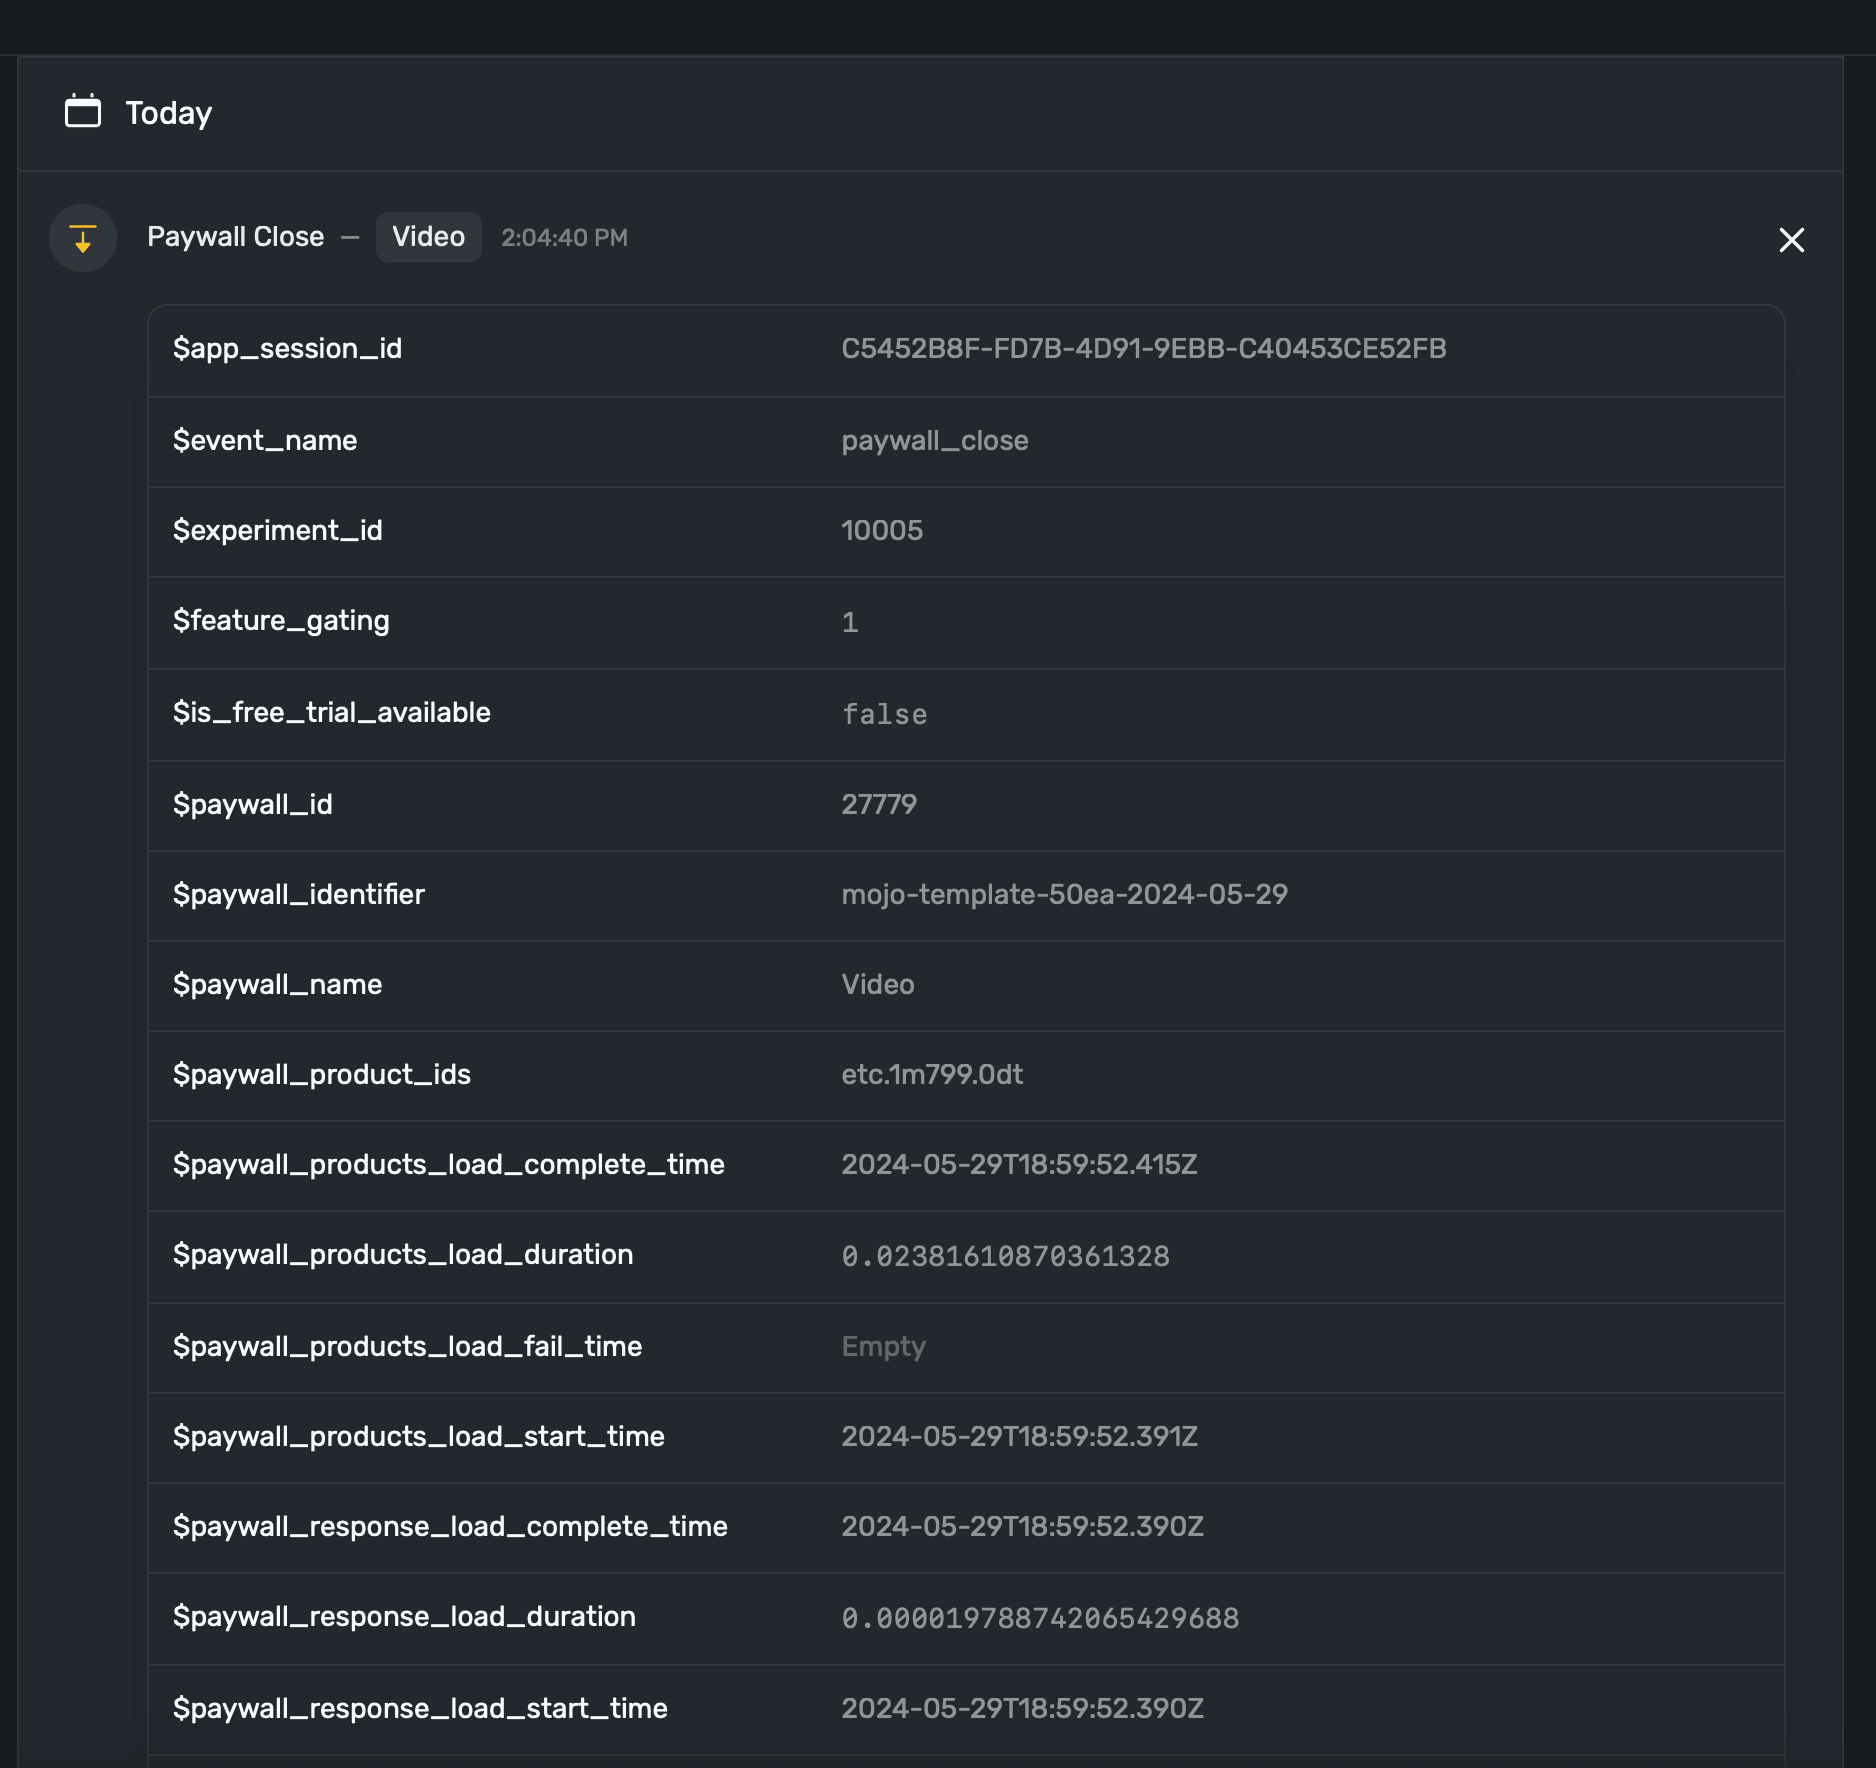
# Autoscroll
Source: https://superwall.com/docs/paywall-editor-autoscroll-component
Use Superwall's autoscroll component to create marquee-like content that automatically scrolls.
### Adding an autoscroll component
The autoscroll component was built to make creating marquee-like content easy. To use the autoscroll component:
1. In the left sidebar, click **+** to add a new element.
2. Choose **Autoscroll** under the "Layout" header.
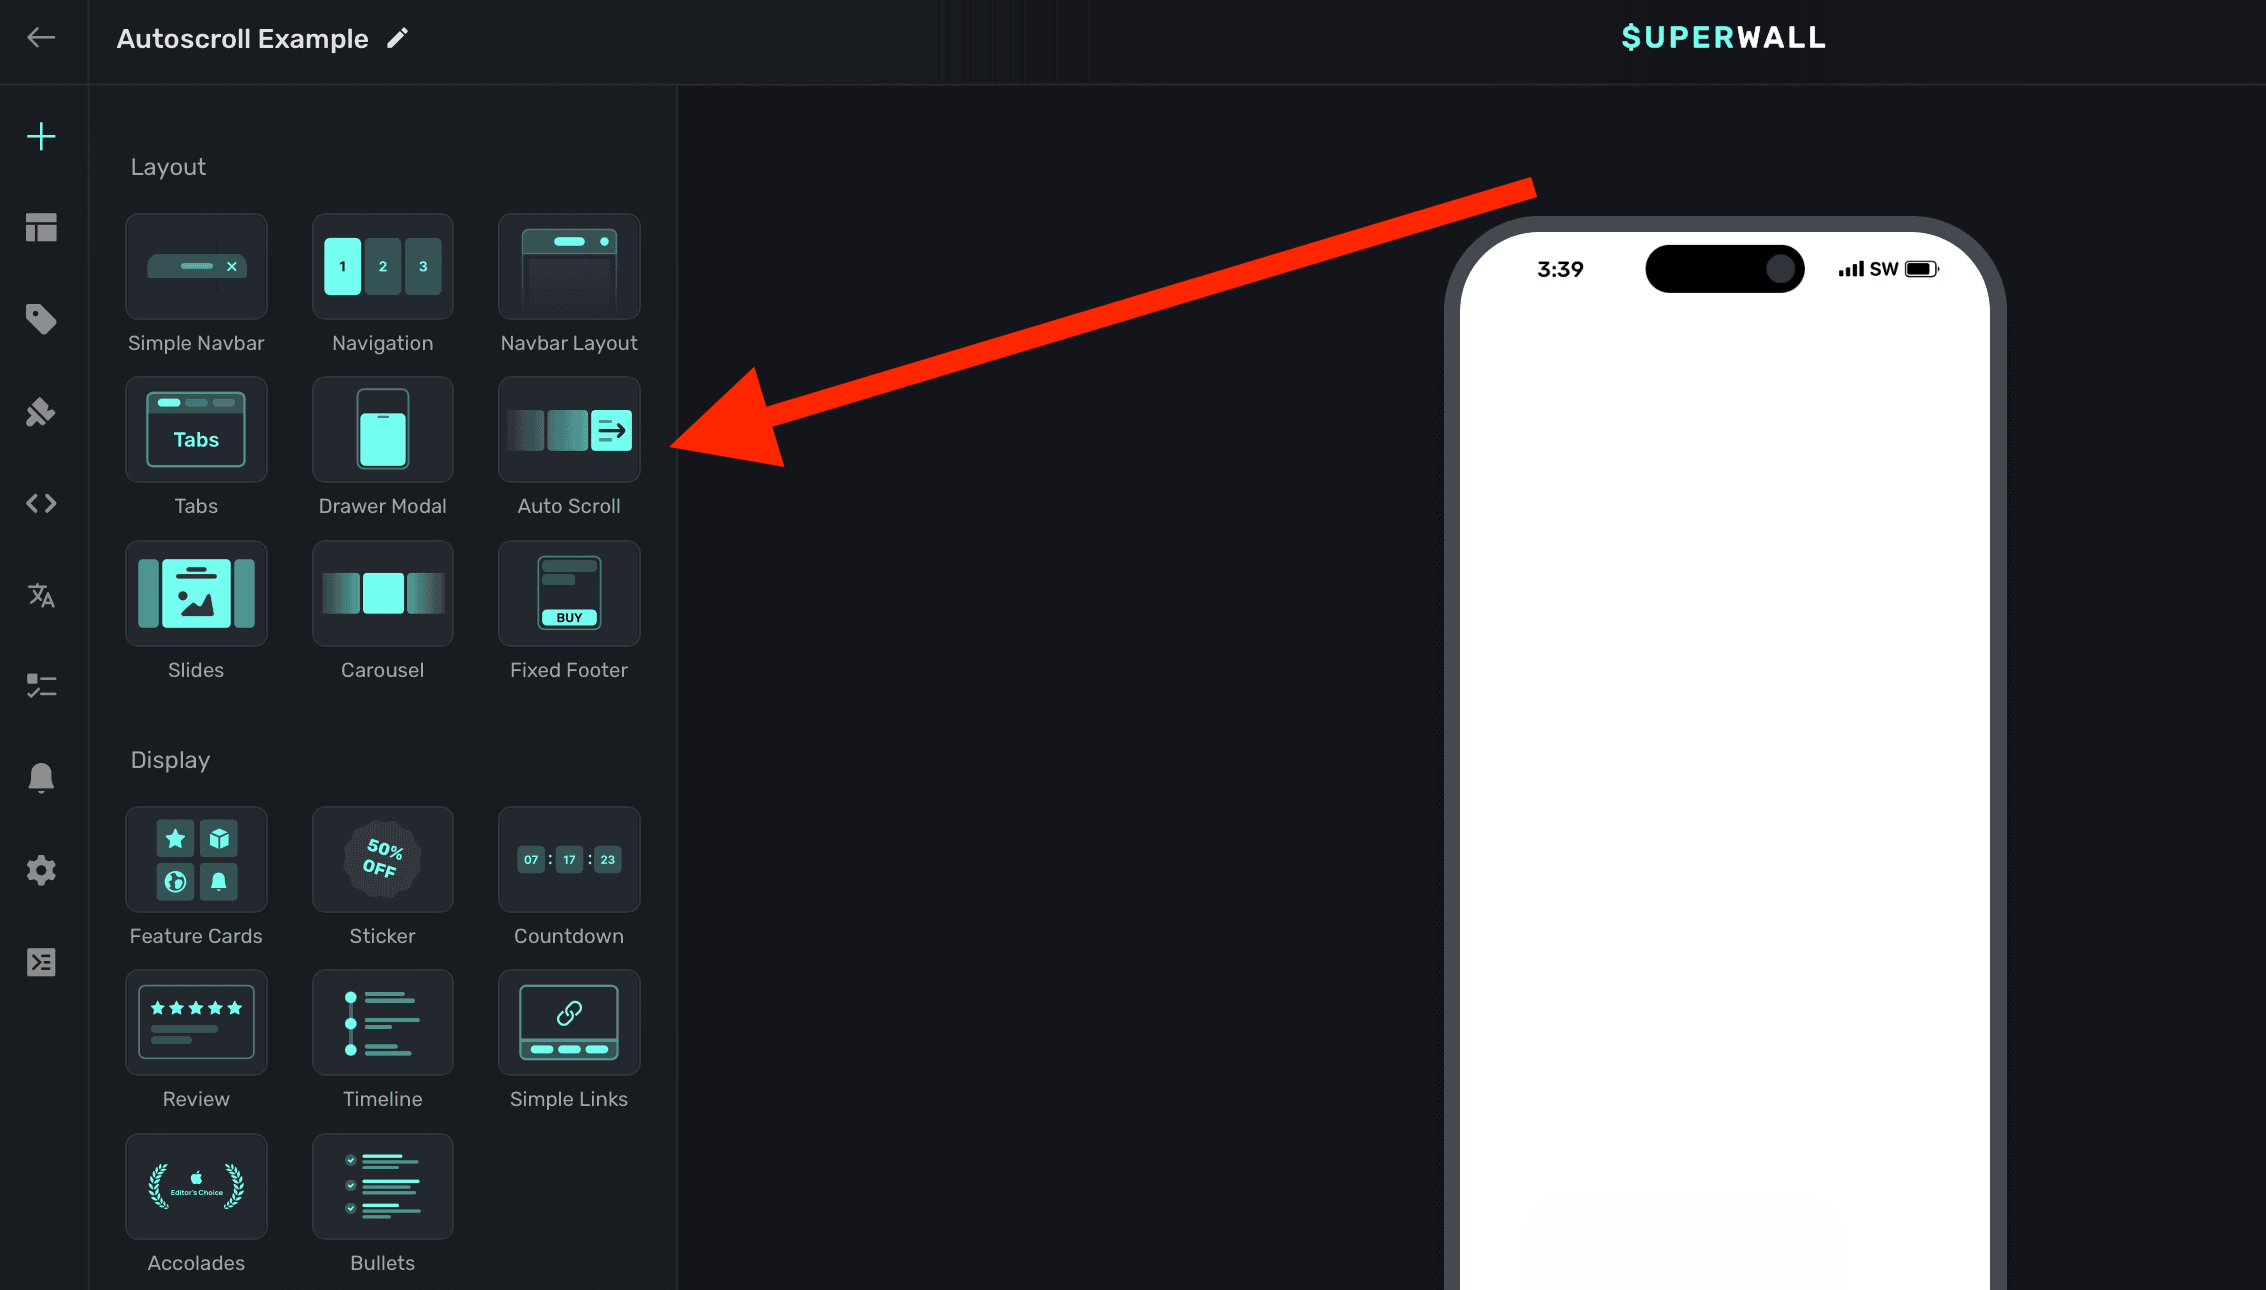
The autoscroll component requires an explicit `width` set. Generally, setting this to 100% of the viewport's width works well. This is also the default size set:

### Adding contents to autoscroll
The autoscroll component has a few demonstration items added to it by default. You can remove these and add your own content:
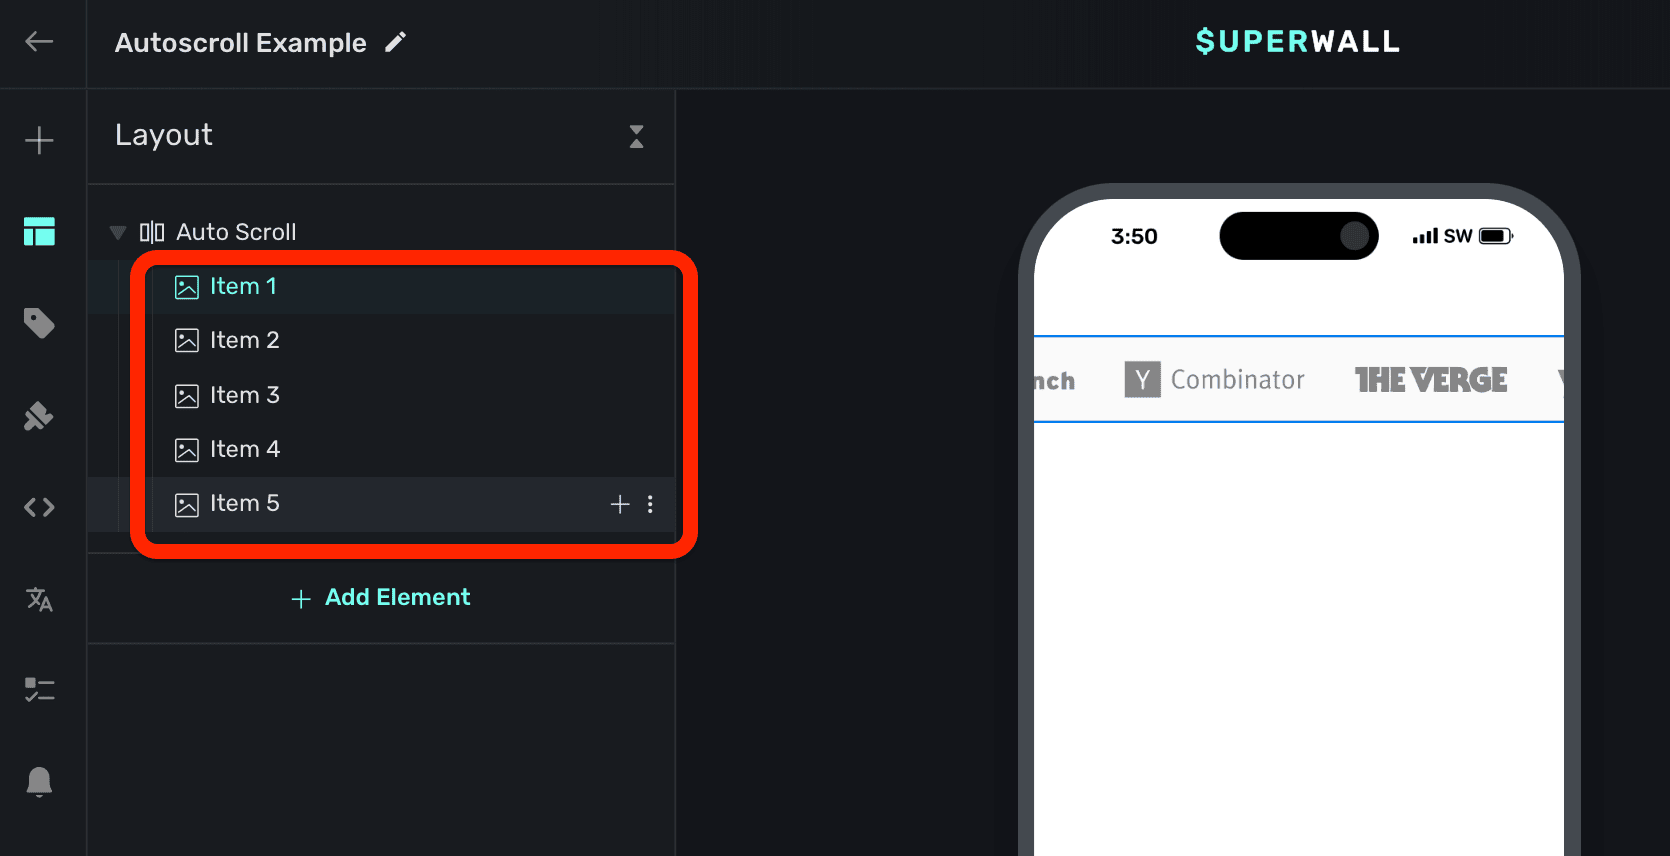
### Controlling scroll speed
To control the scrolling speed, change the `Infinite Scroll Speed` property when the autoscroll component is selected. When it's first added, this value is intentionally set low so you can configure the component first. Change this to a higher value to see its content scroll:
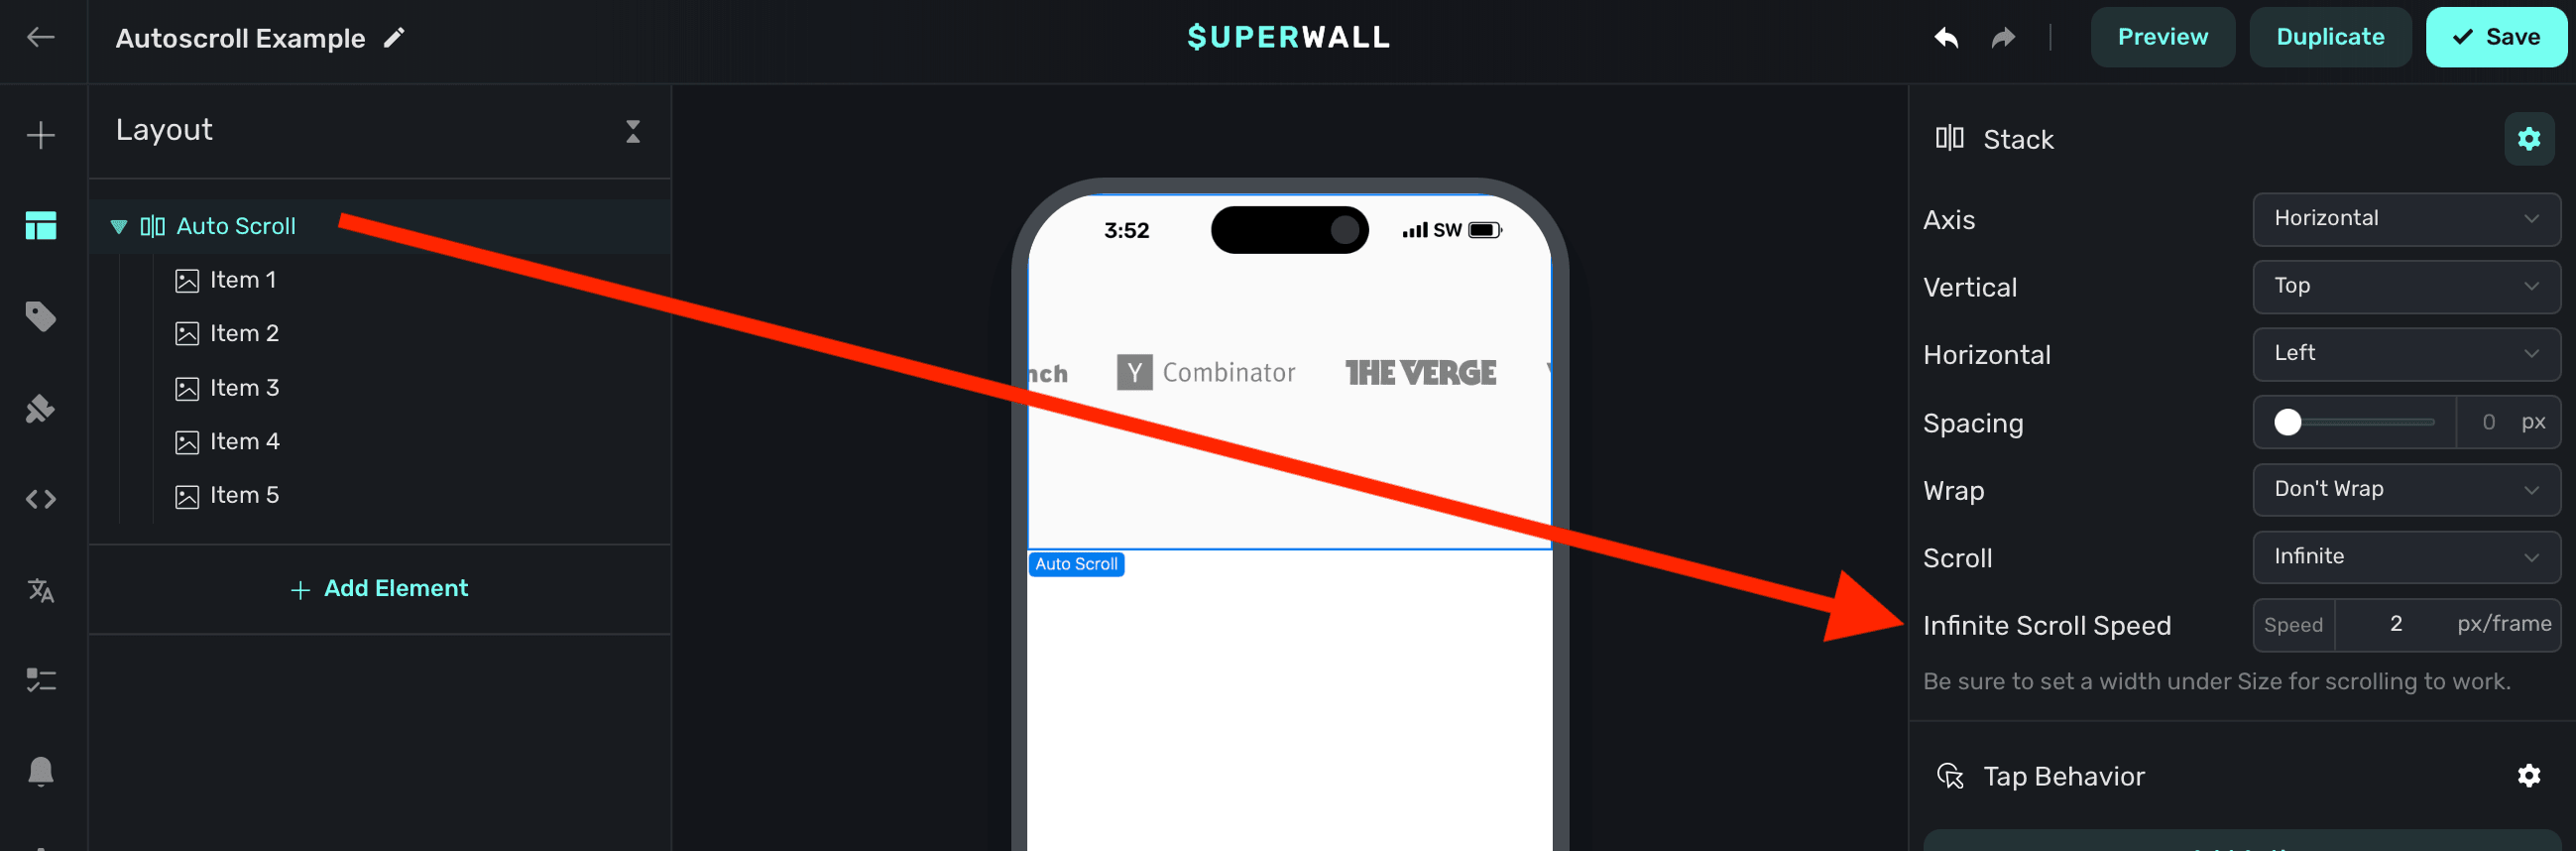
# Carousel
Source: https://superwall.com/docs/paywall-editor-carousel-component
Use Superwall's carousel component to have items automatically progress through slides.
### Adding a carousel component
The carousel component was built to make progressing slide designs easy. It's similar to a [slides component](/paywall-editor-slides-component), except it automatically progresses through its contents instead of being primarily gesture driven. To use the carousel component:
1. In the left sidebar, click **+** to add a new element.
2. Choose **Carousel** under the "Layout" header.
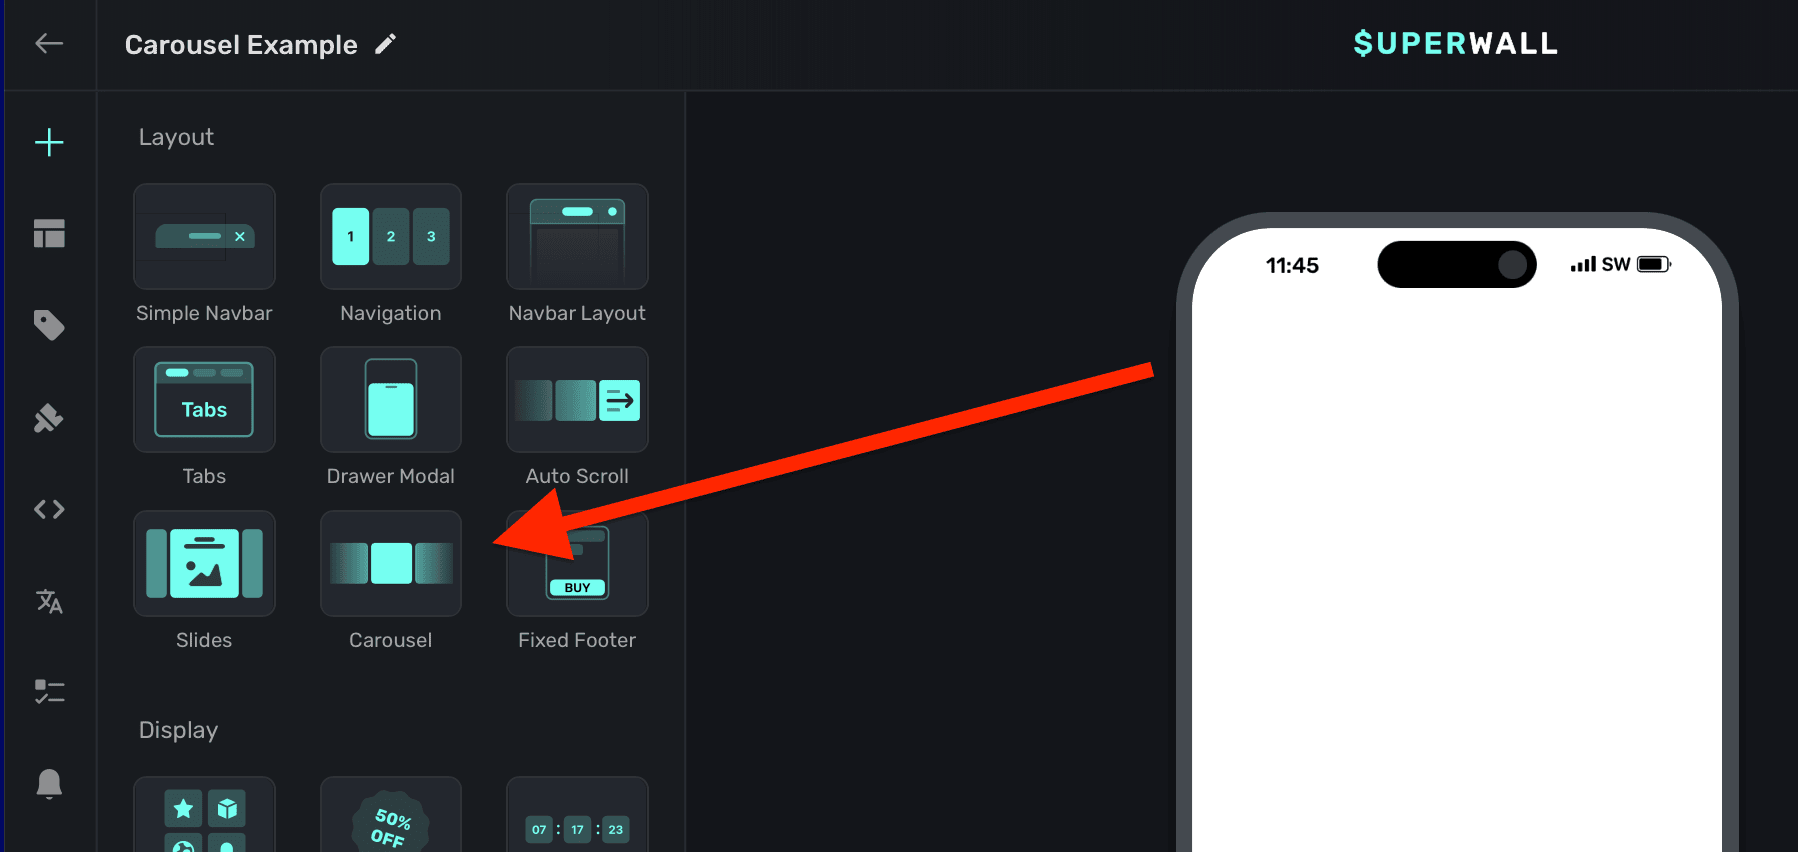
The carousel component requires an explicit `width` set. Generally, setting this to 100% of the viewport's width works well. This is also the default size set:
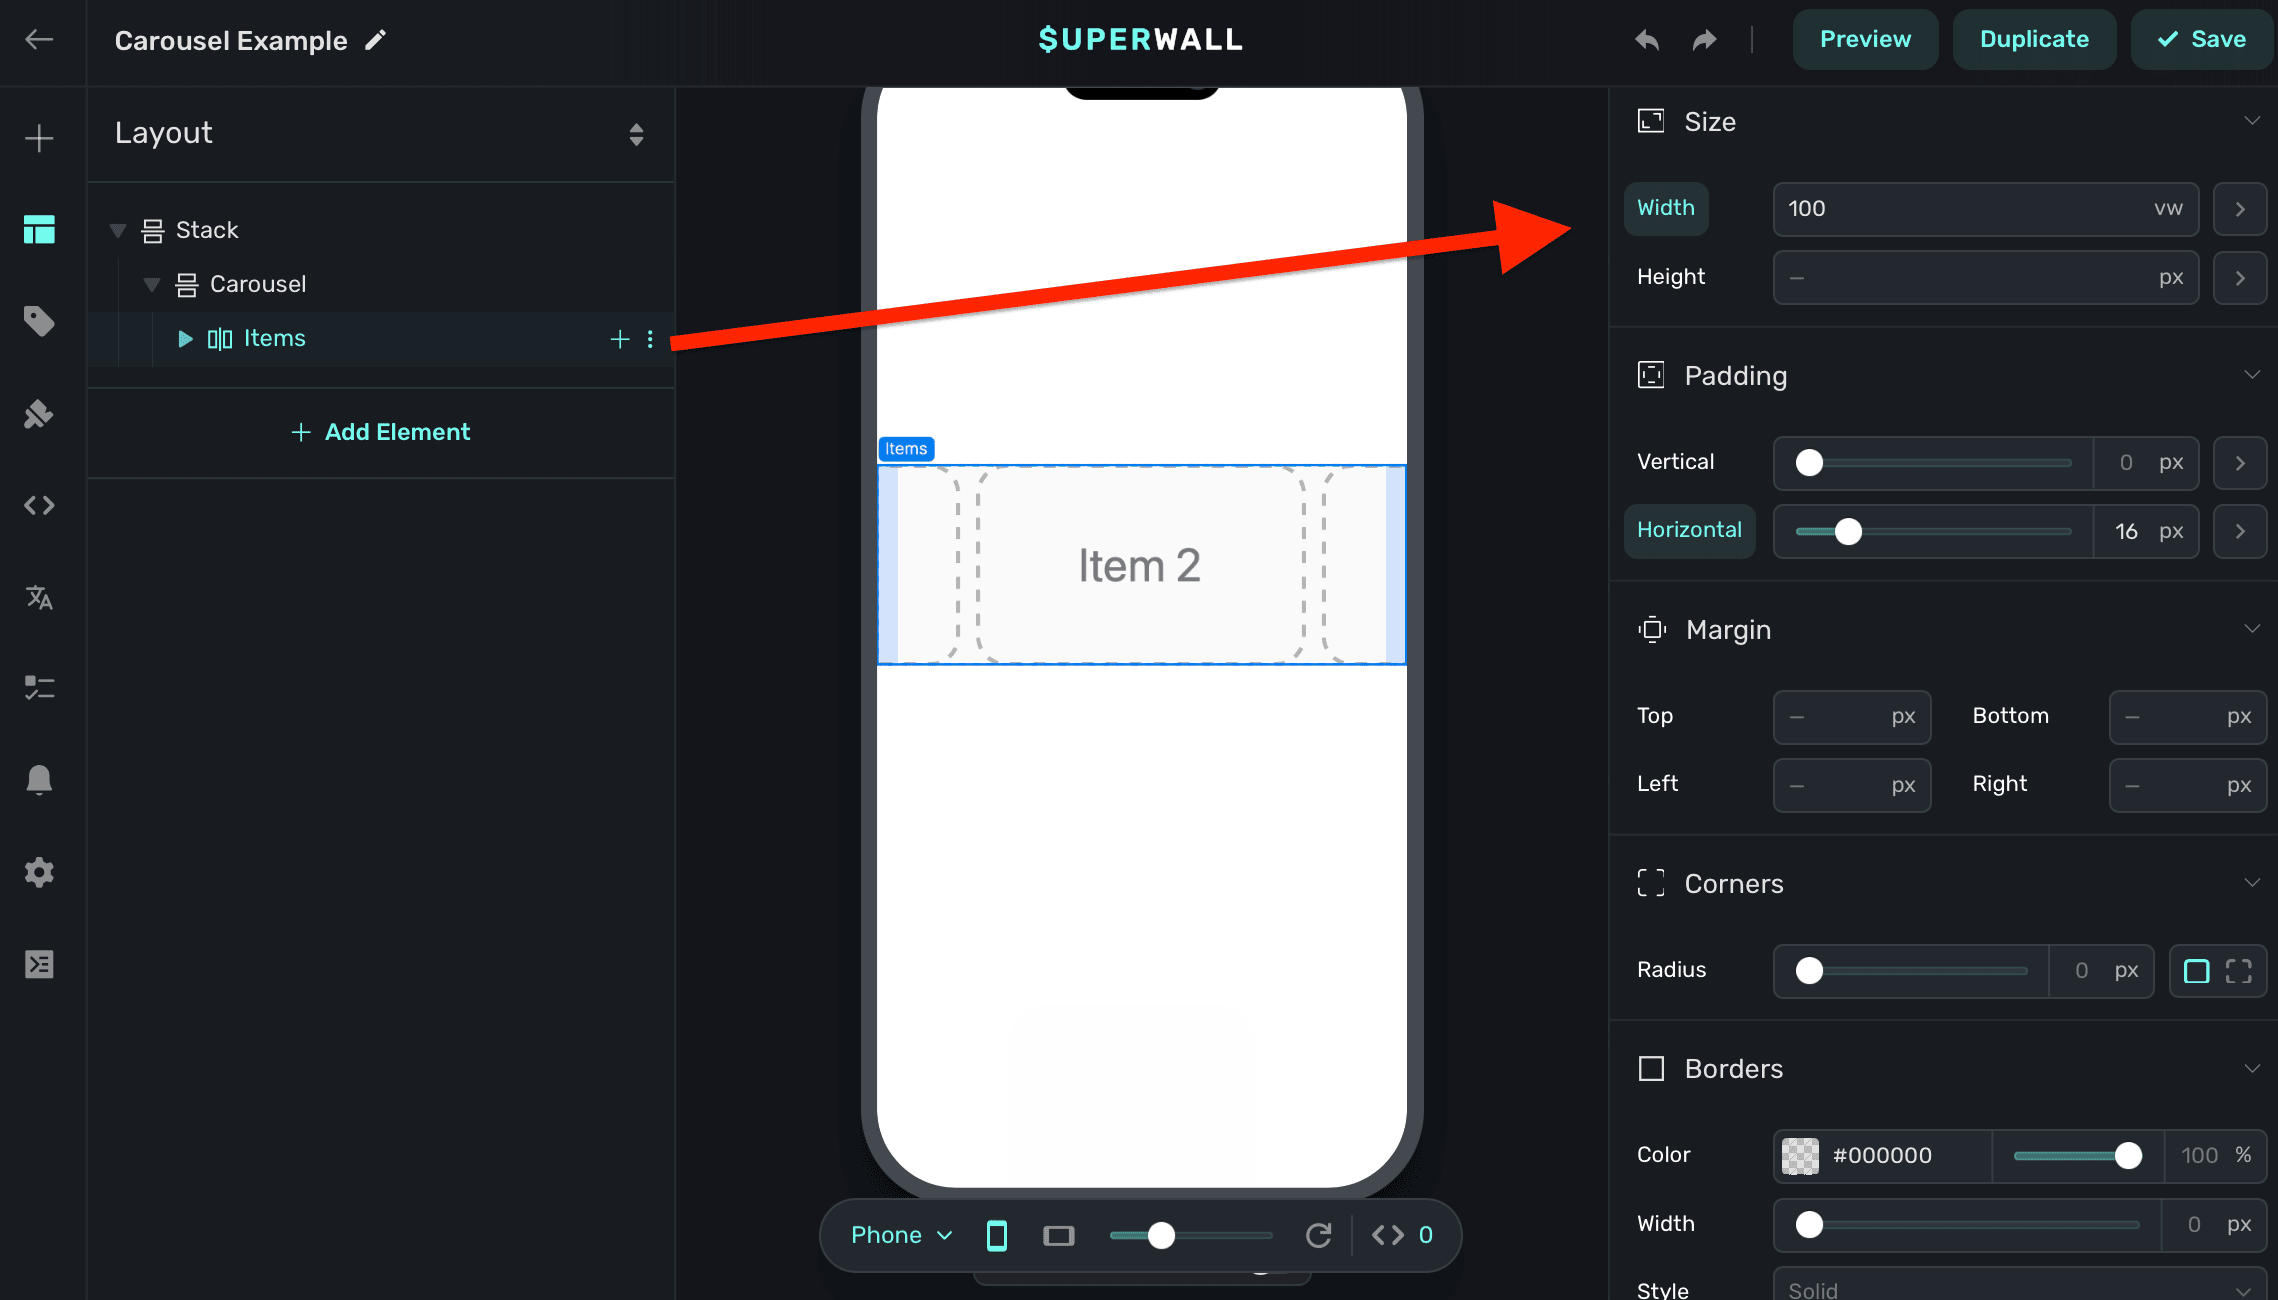
By default:
* The carousel `Scroll` property is set to `Paging`. Required.
* It's `Wrap` property is set to `Don't Wrap`. Required.
* The `Snap Position` property is set to `Center`. Editable.
* `Auto Paging` is set to `Enabled`. Editable.
* Finally, `Paging Delay` is intentionally set low to help with designing its content. Set it to a higher value to see the carousel in action.
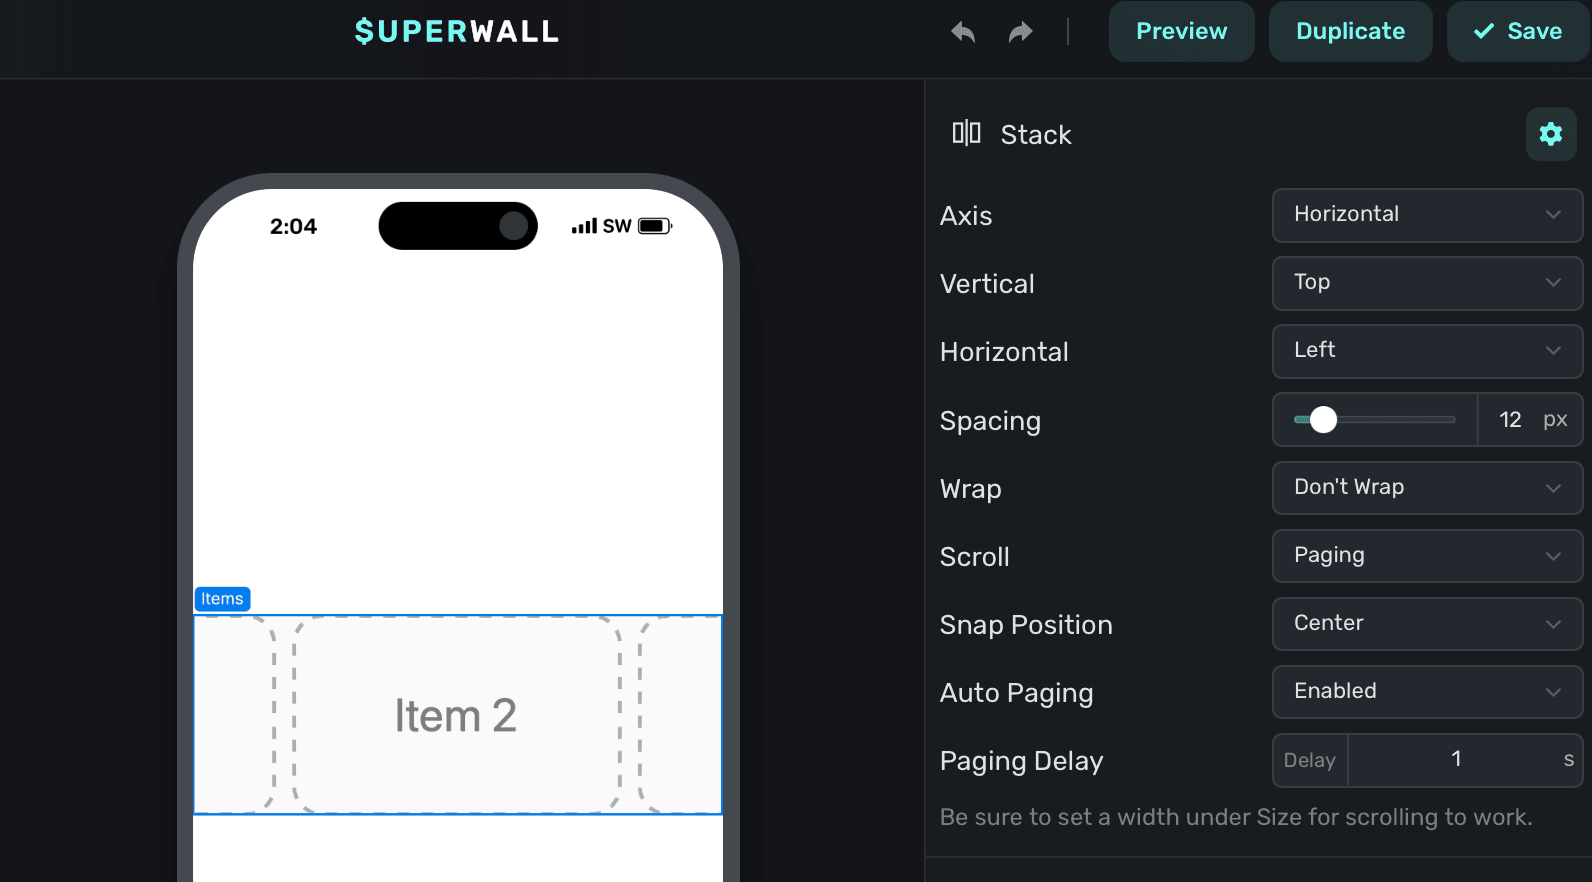
### Adding contents to carousels
The carousel component has a few demonstration items added to it by default. You can remove these and add your own content:
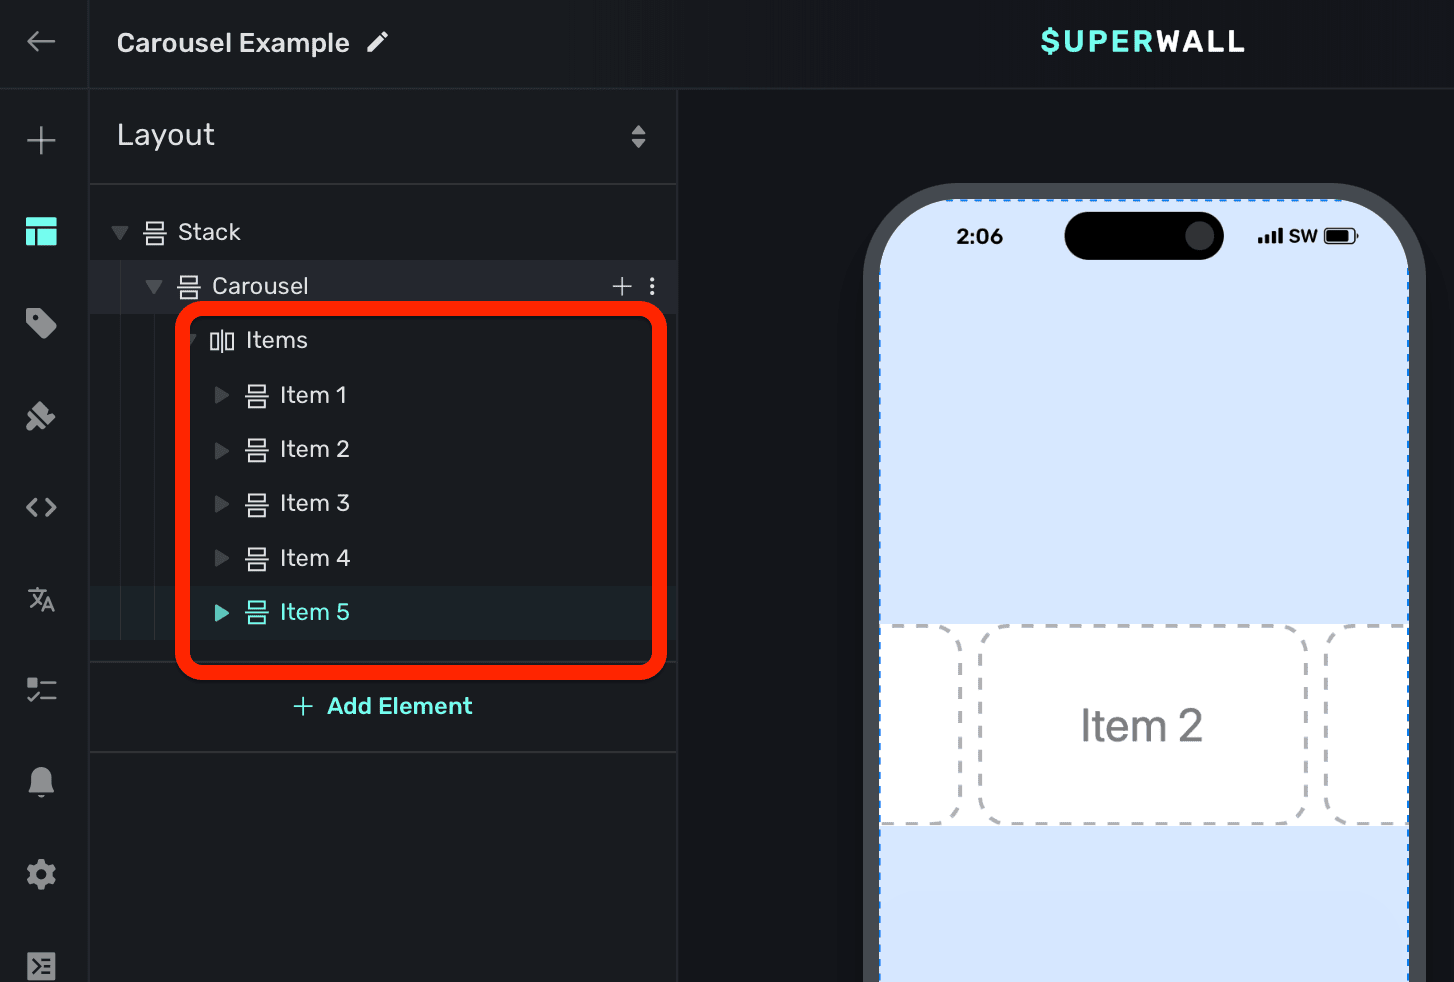
### Tracking or updating the displayed element in a carousel
When a carousel element is added, Superwall automatically creates an element variable for it (accessed through the **[Variables](/paywall-editor-variables)** tab in the left sidebar, or the variables button in the **[floating toolbar](/paywall-editor-floating-toolbar)**). Its name will match whatever is in the element hierarchy in the left sidebar:
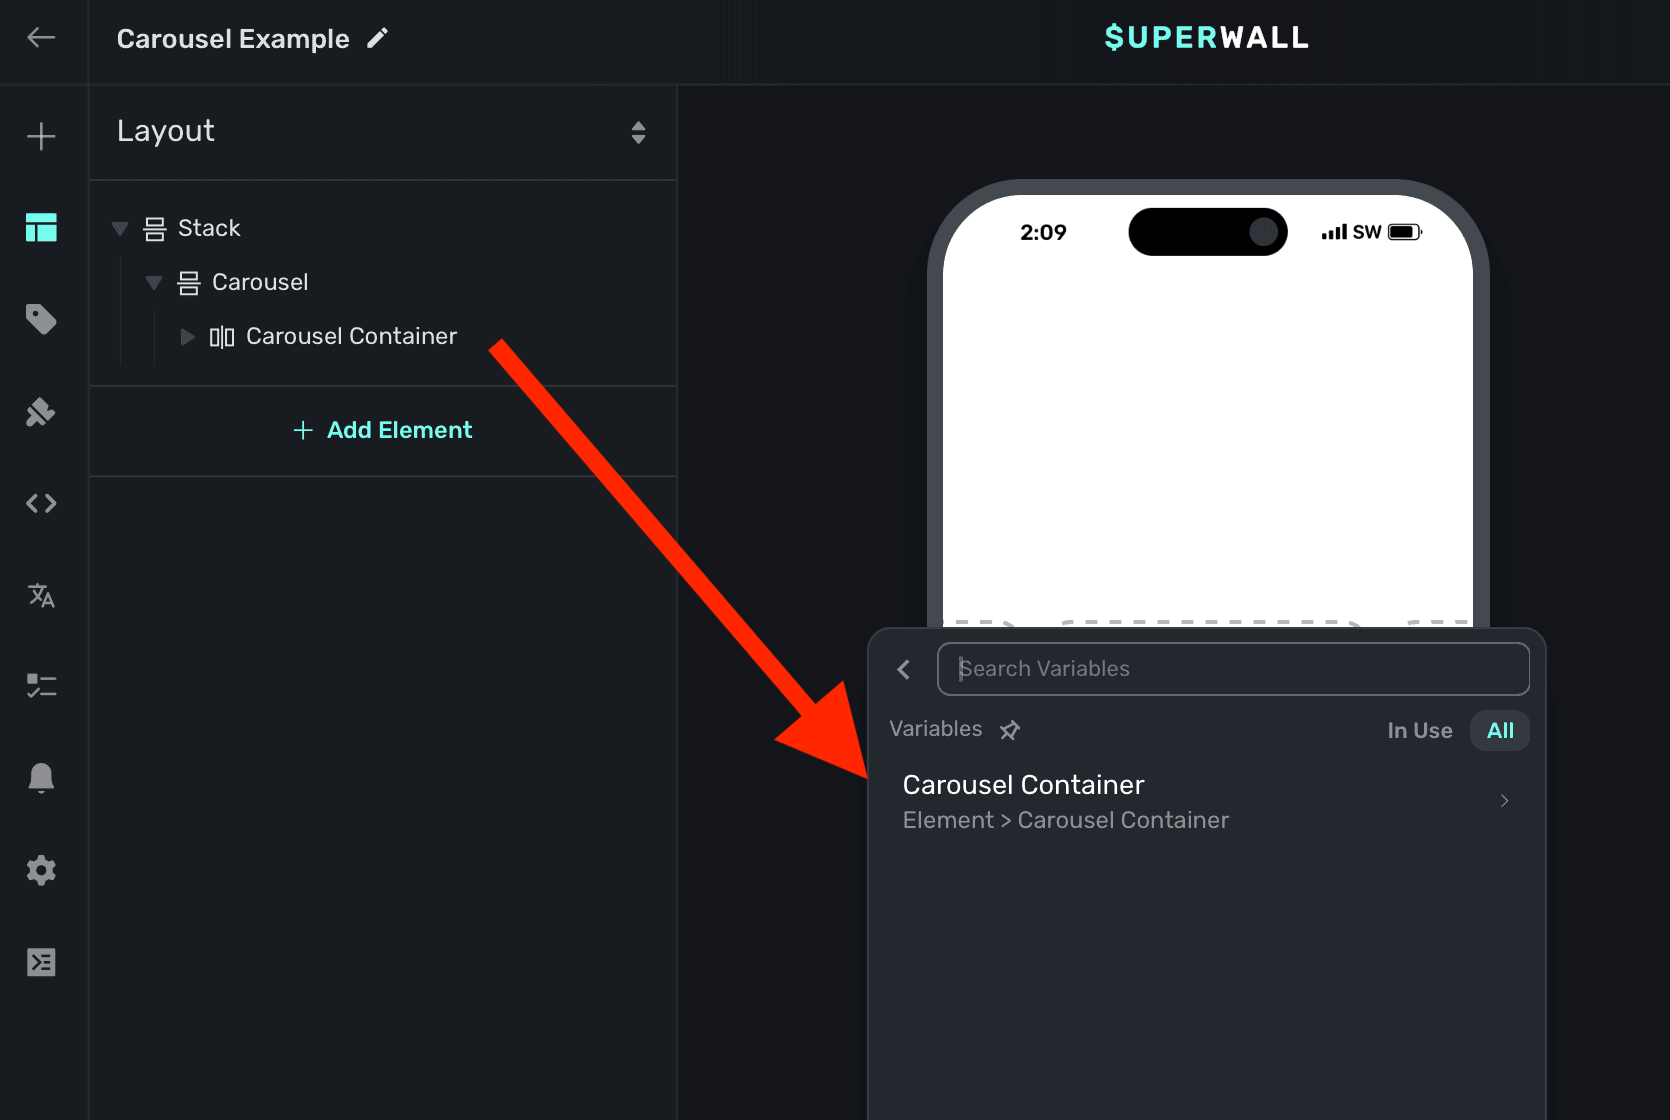
You can use this to:
* Select a product based off of the index of the carousel.
* Have a button progress to the next slide.
* Change text using [dynamic values](/paywall-editor-dynamic-values) based on the index.
* etc.
The variable's name is derived by the node's unique identifier. You don't need to set or generally
be aware of this value.
For example, here the button progresses to the next slide by incrementing the slides `Child Page Index` variable:
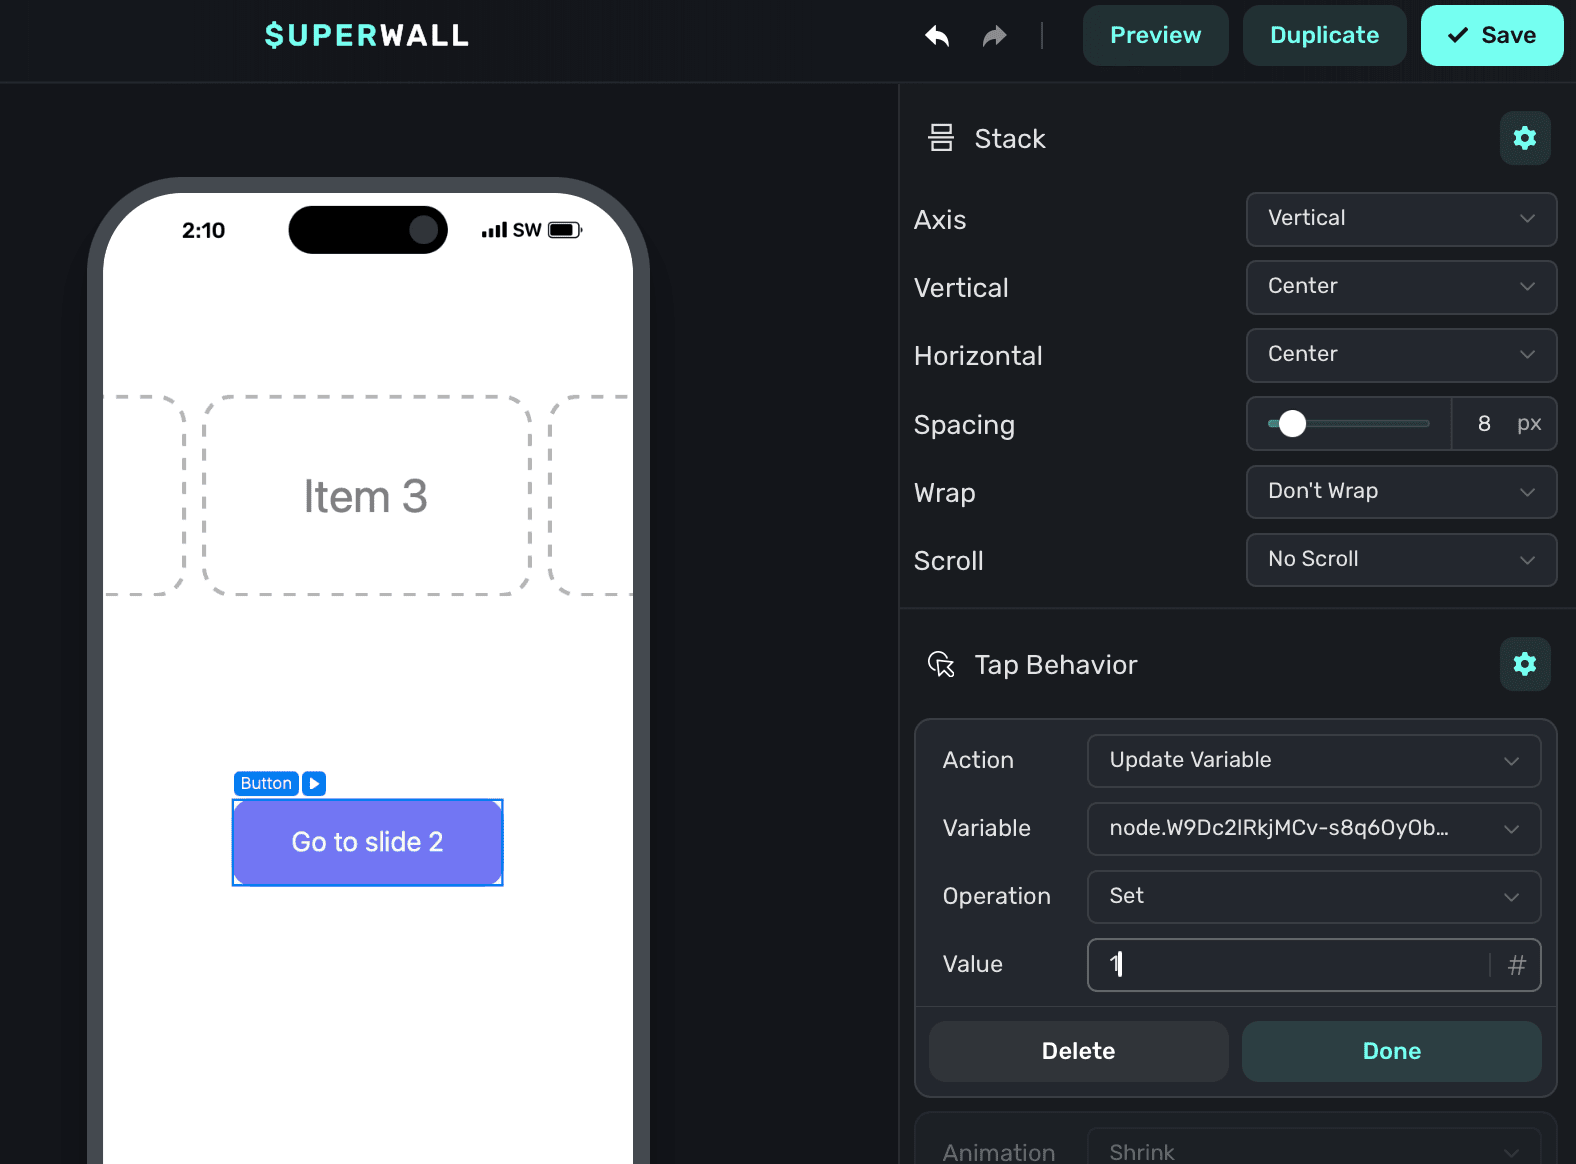
As another example, we could change the text to represent the different product periods we've set up for our fictional products of weekly, monthly and annual. By using a dynamic value, we can simply check which carousel index is showing and change the text accordingly:
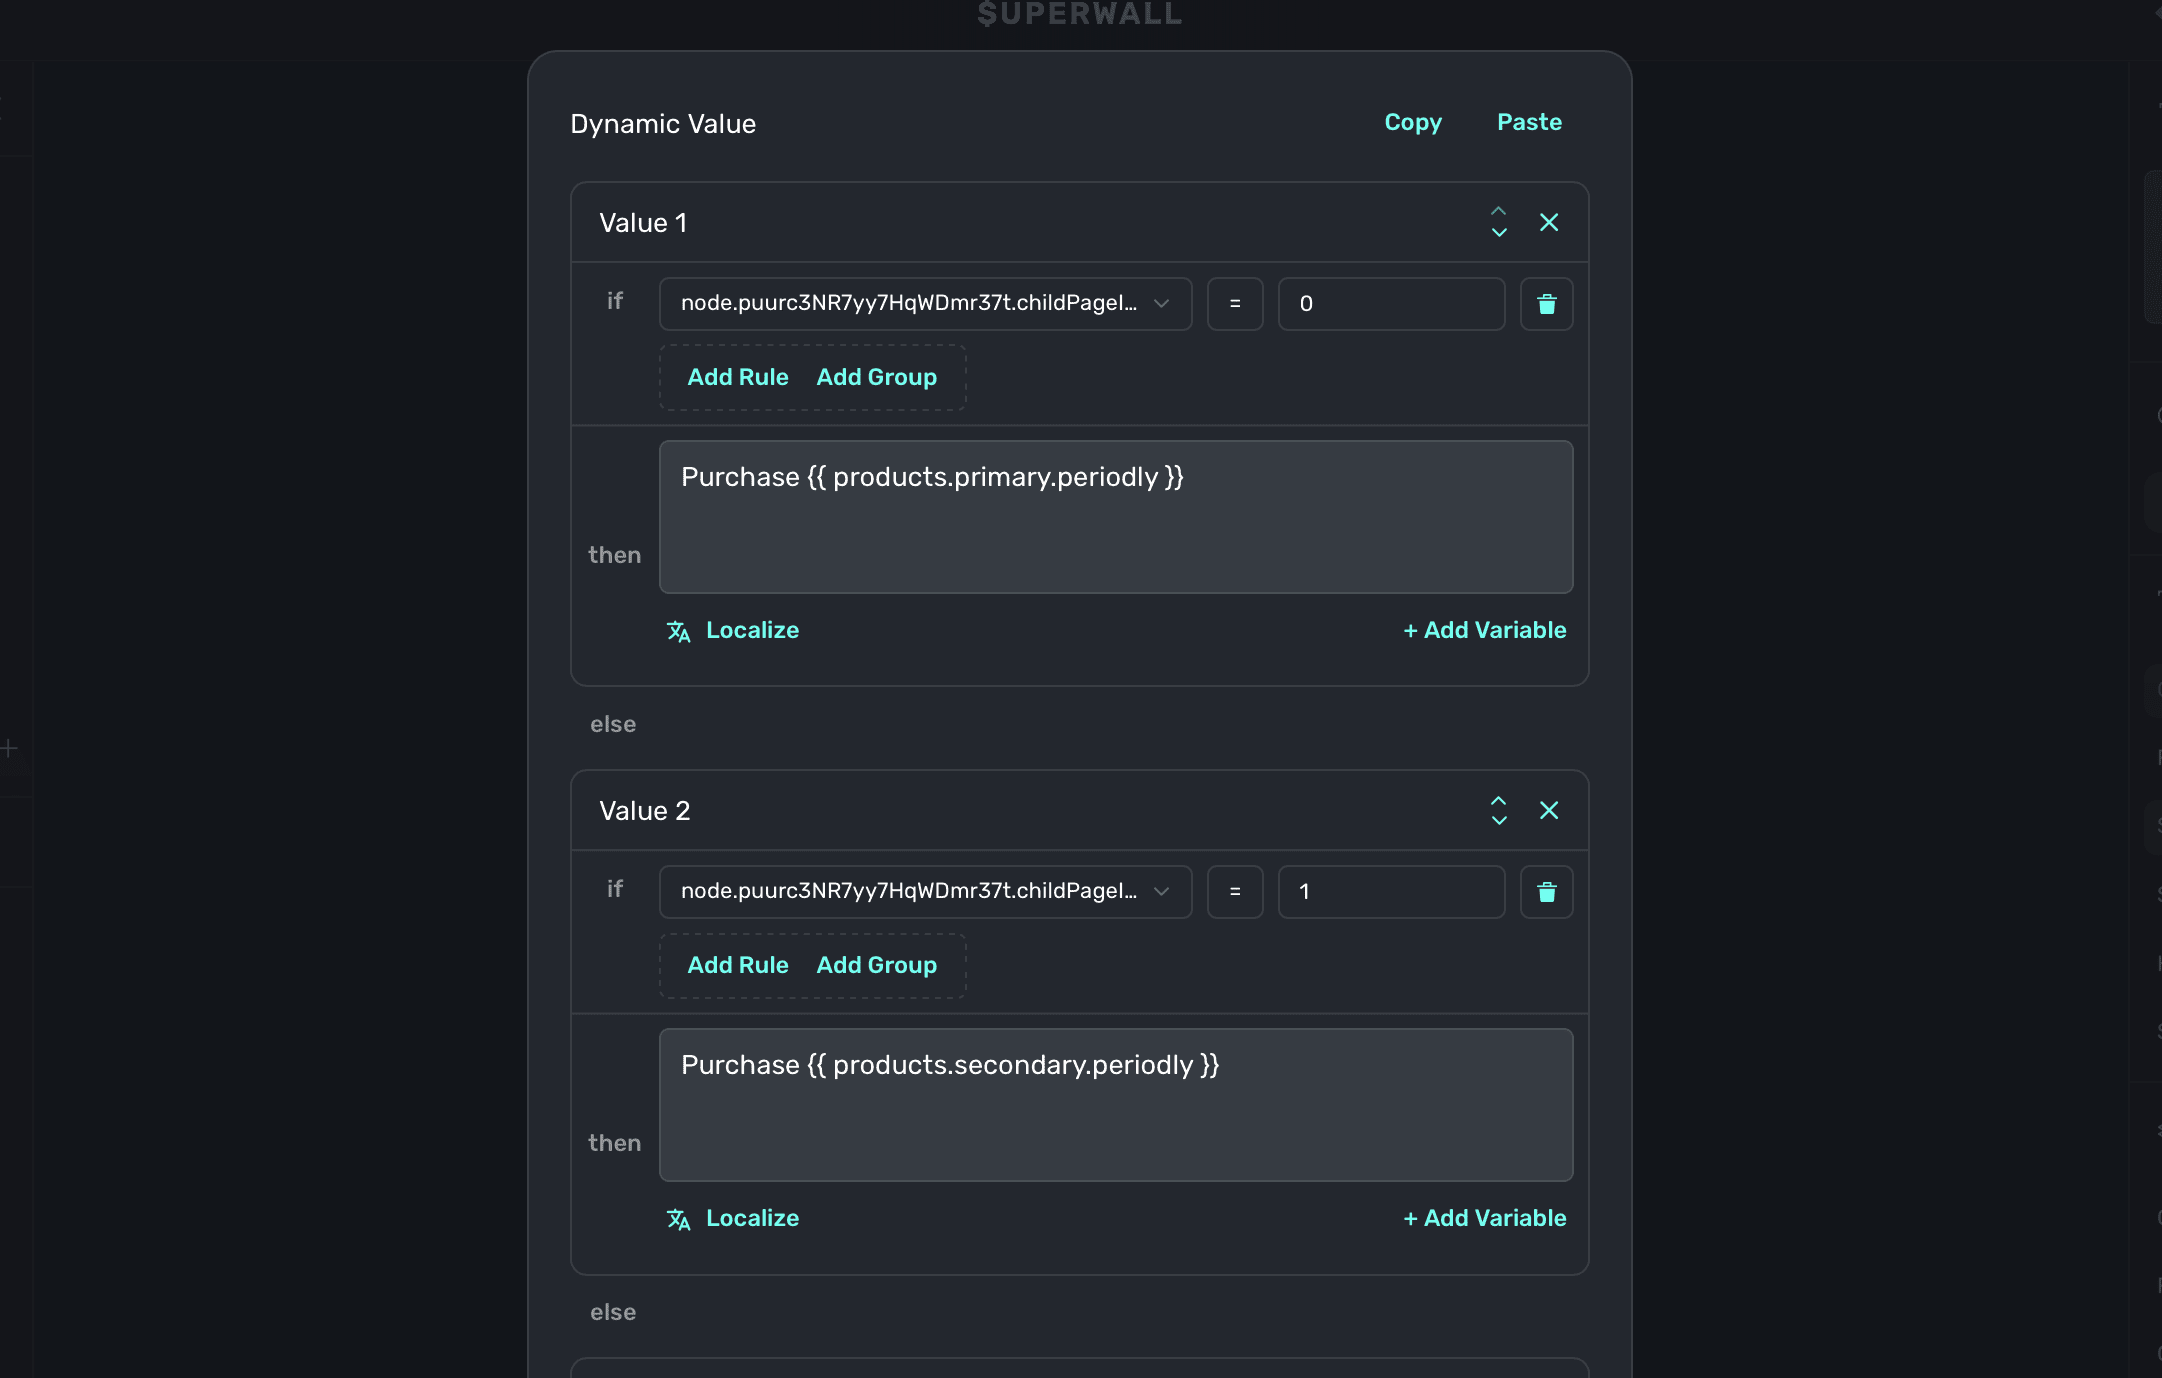
# Debugger
Source: https://superwall.com/docs/paywall-editor-debugger
To view the paywall debugger, click the **Debugger** button from the **sidebar**
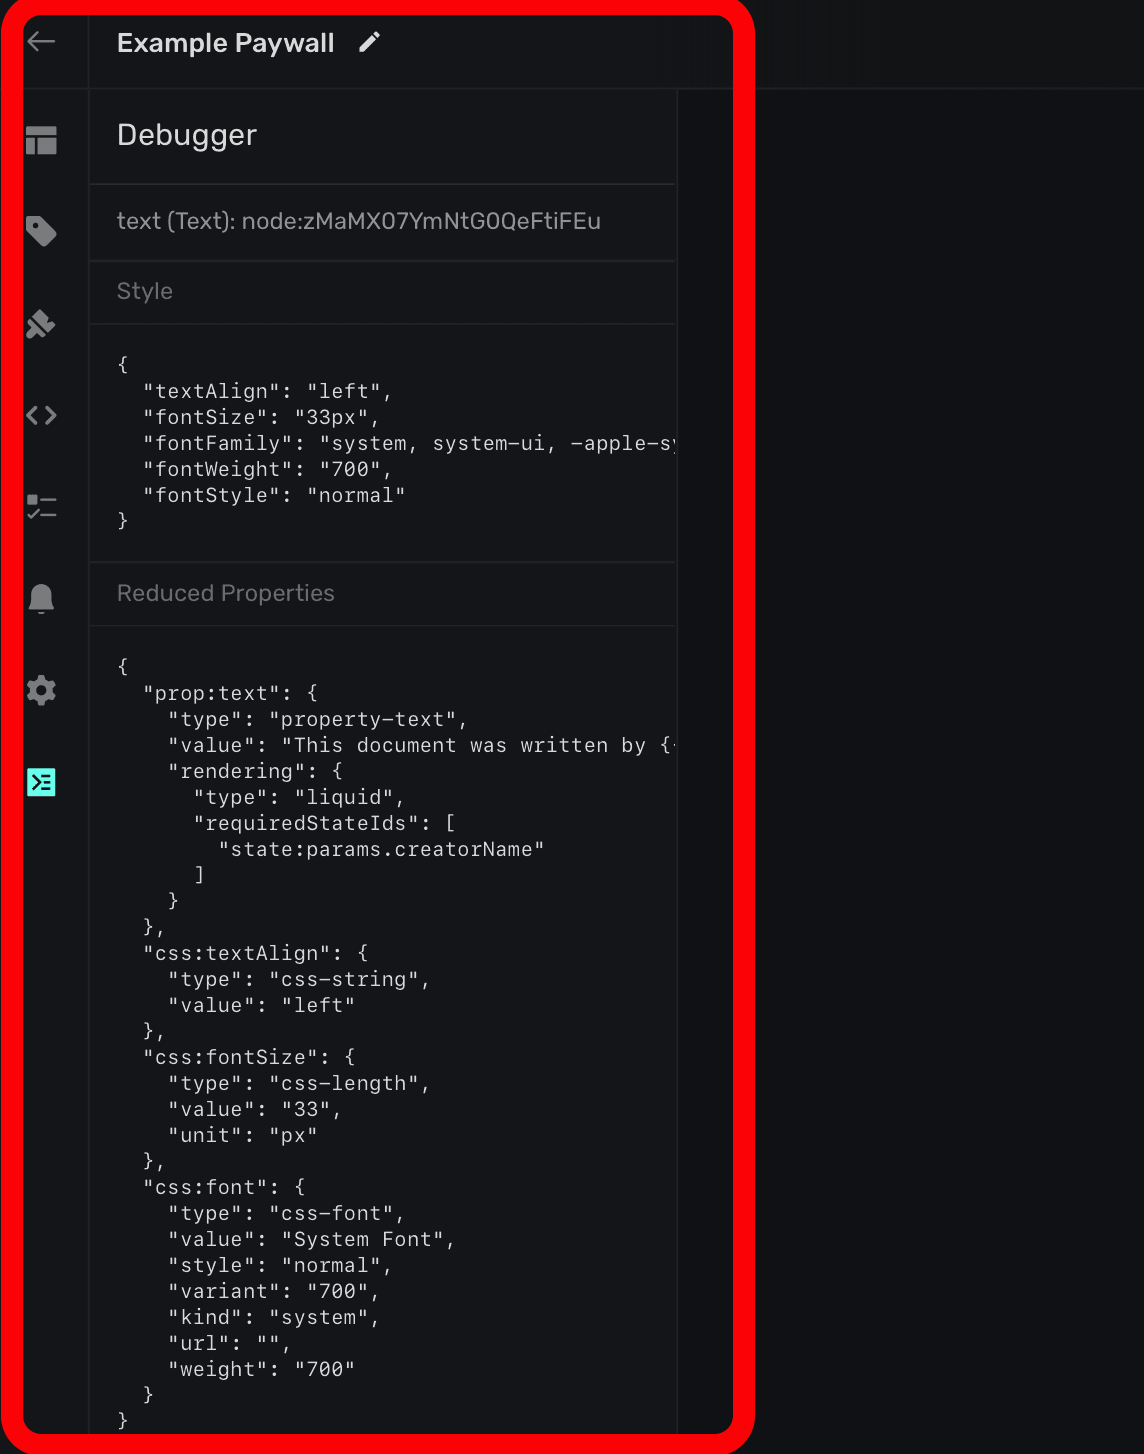
The debugger shows a raw representation of selected components. This is useful if you're trying to debug layouts or designs, since the CSS Superwall is generating will show here. It also will show what variables are applied and what they're specifically being evaluated to.
In this example, there is a variable called "Safe Area Top", set to 64 pixels. It's been set to the component's horiztonal padding for demonstration purposes:
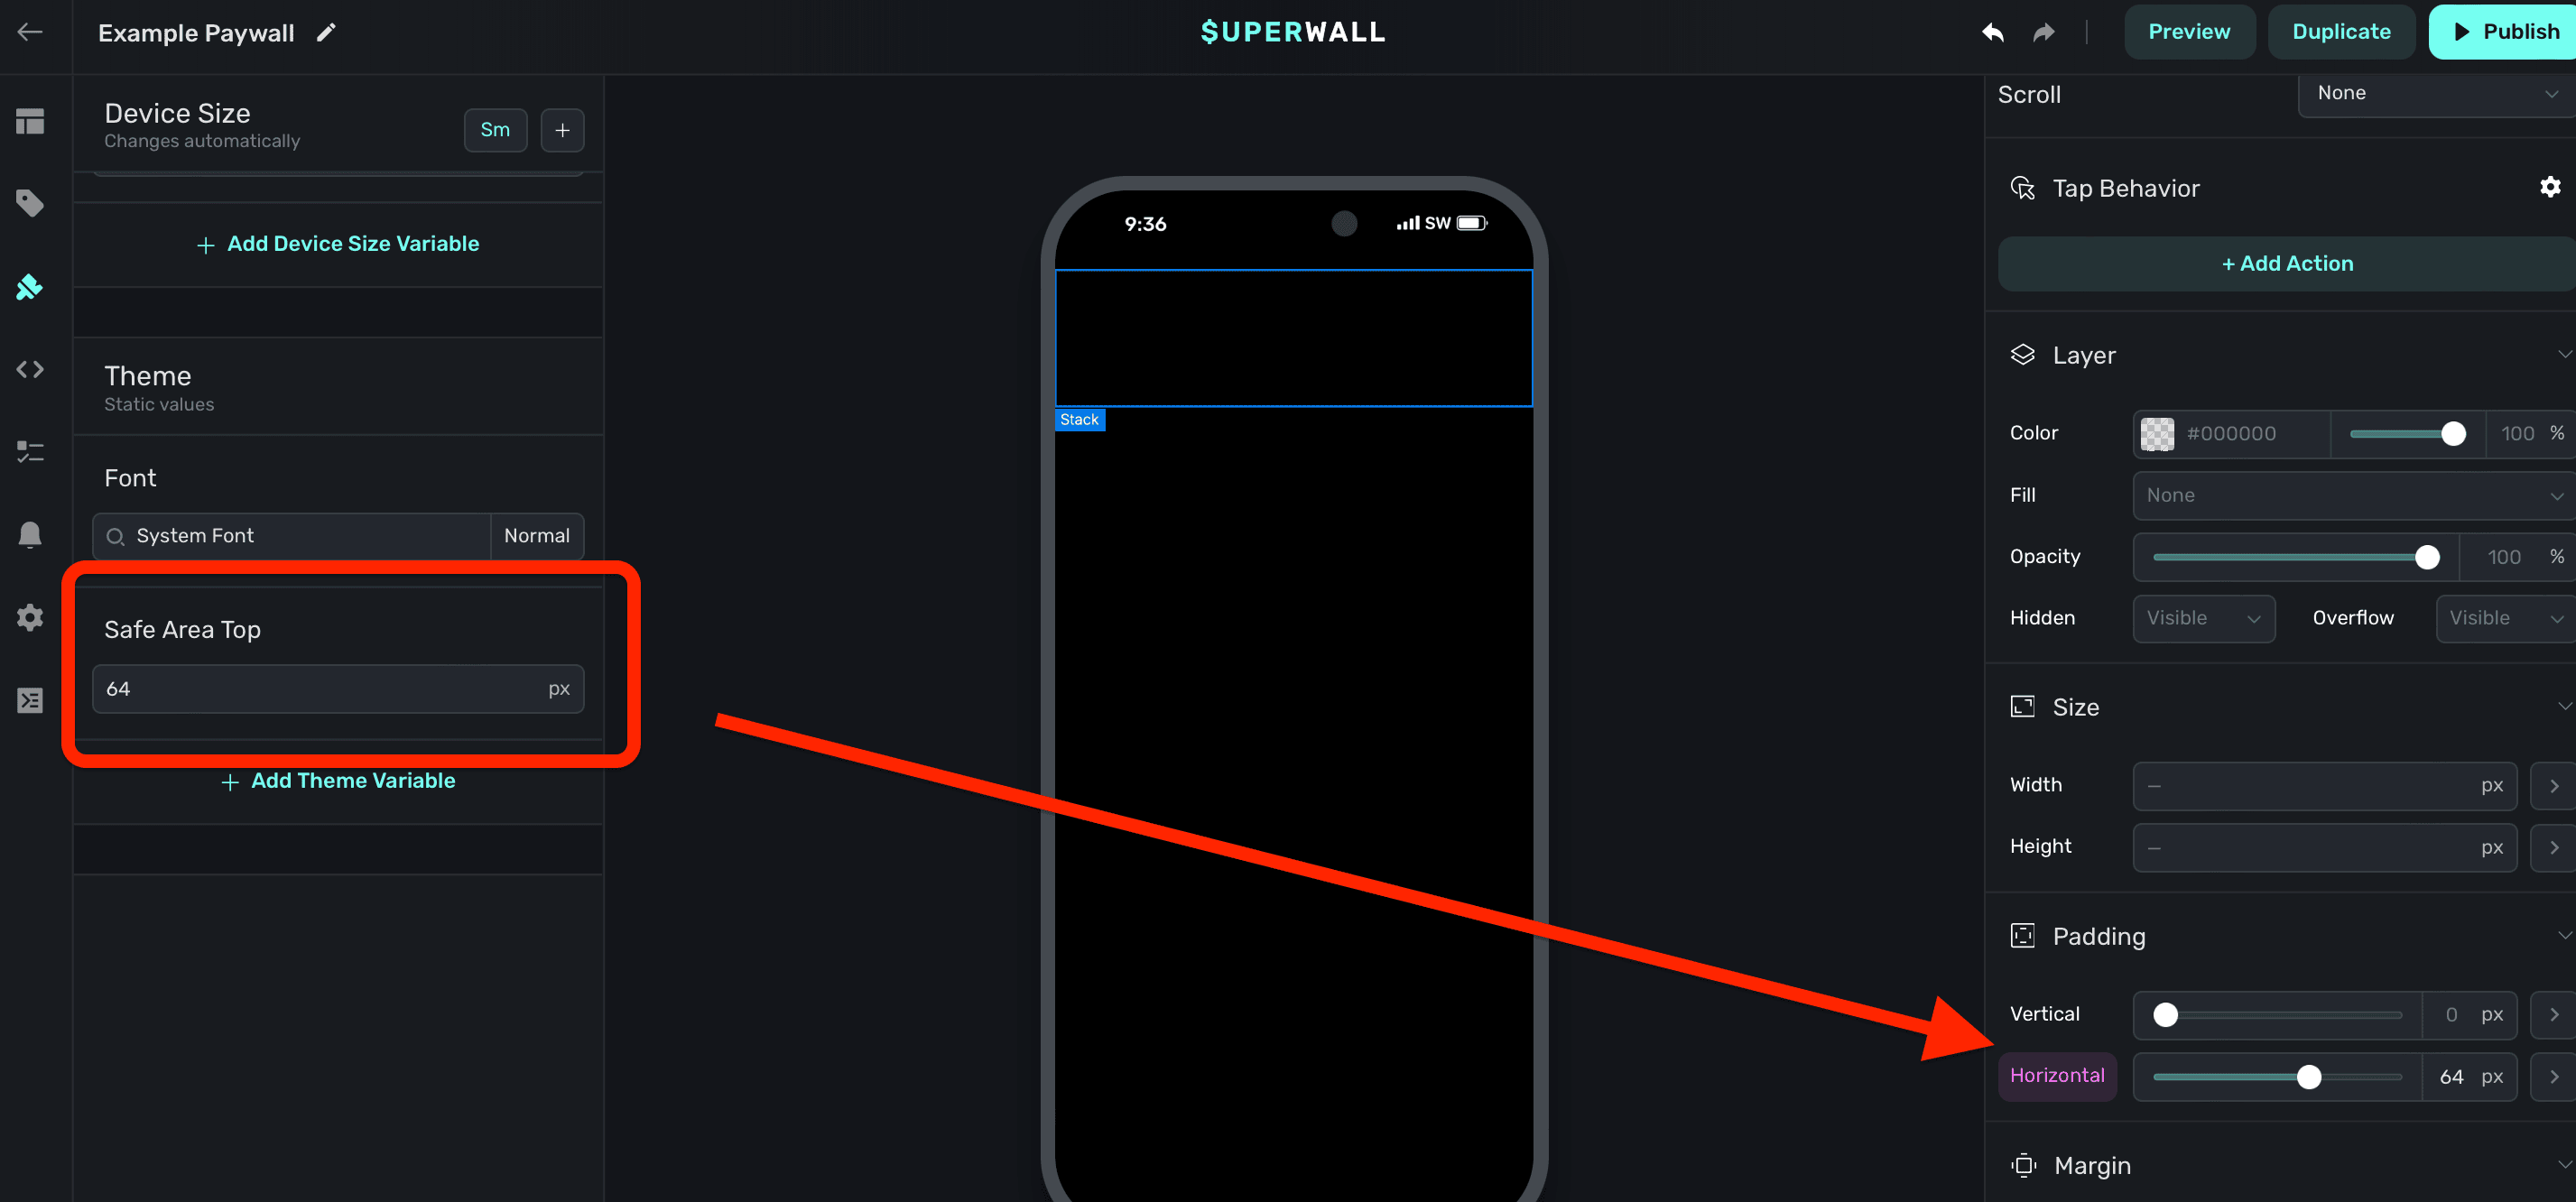
When the component is selected, and the debugger is opened — you can confirm that variable is being applied to the component's padding:
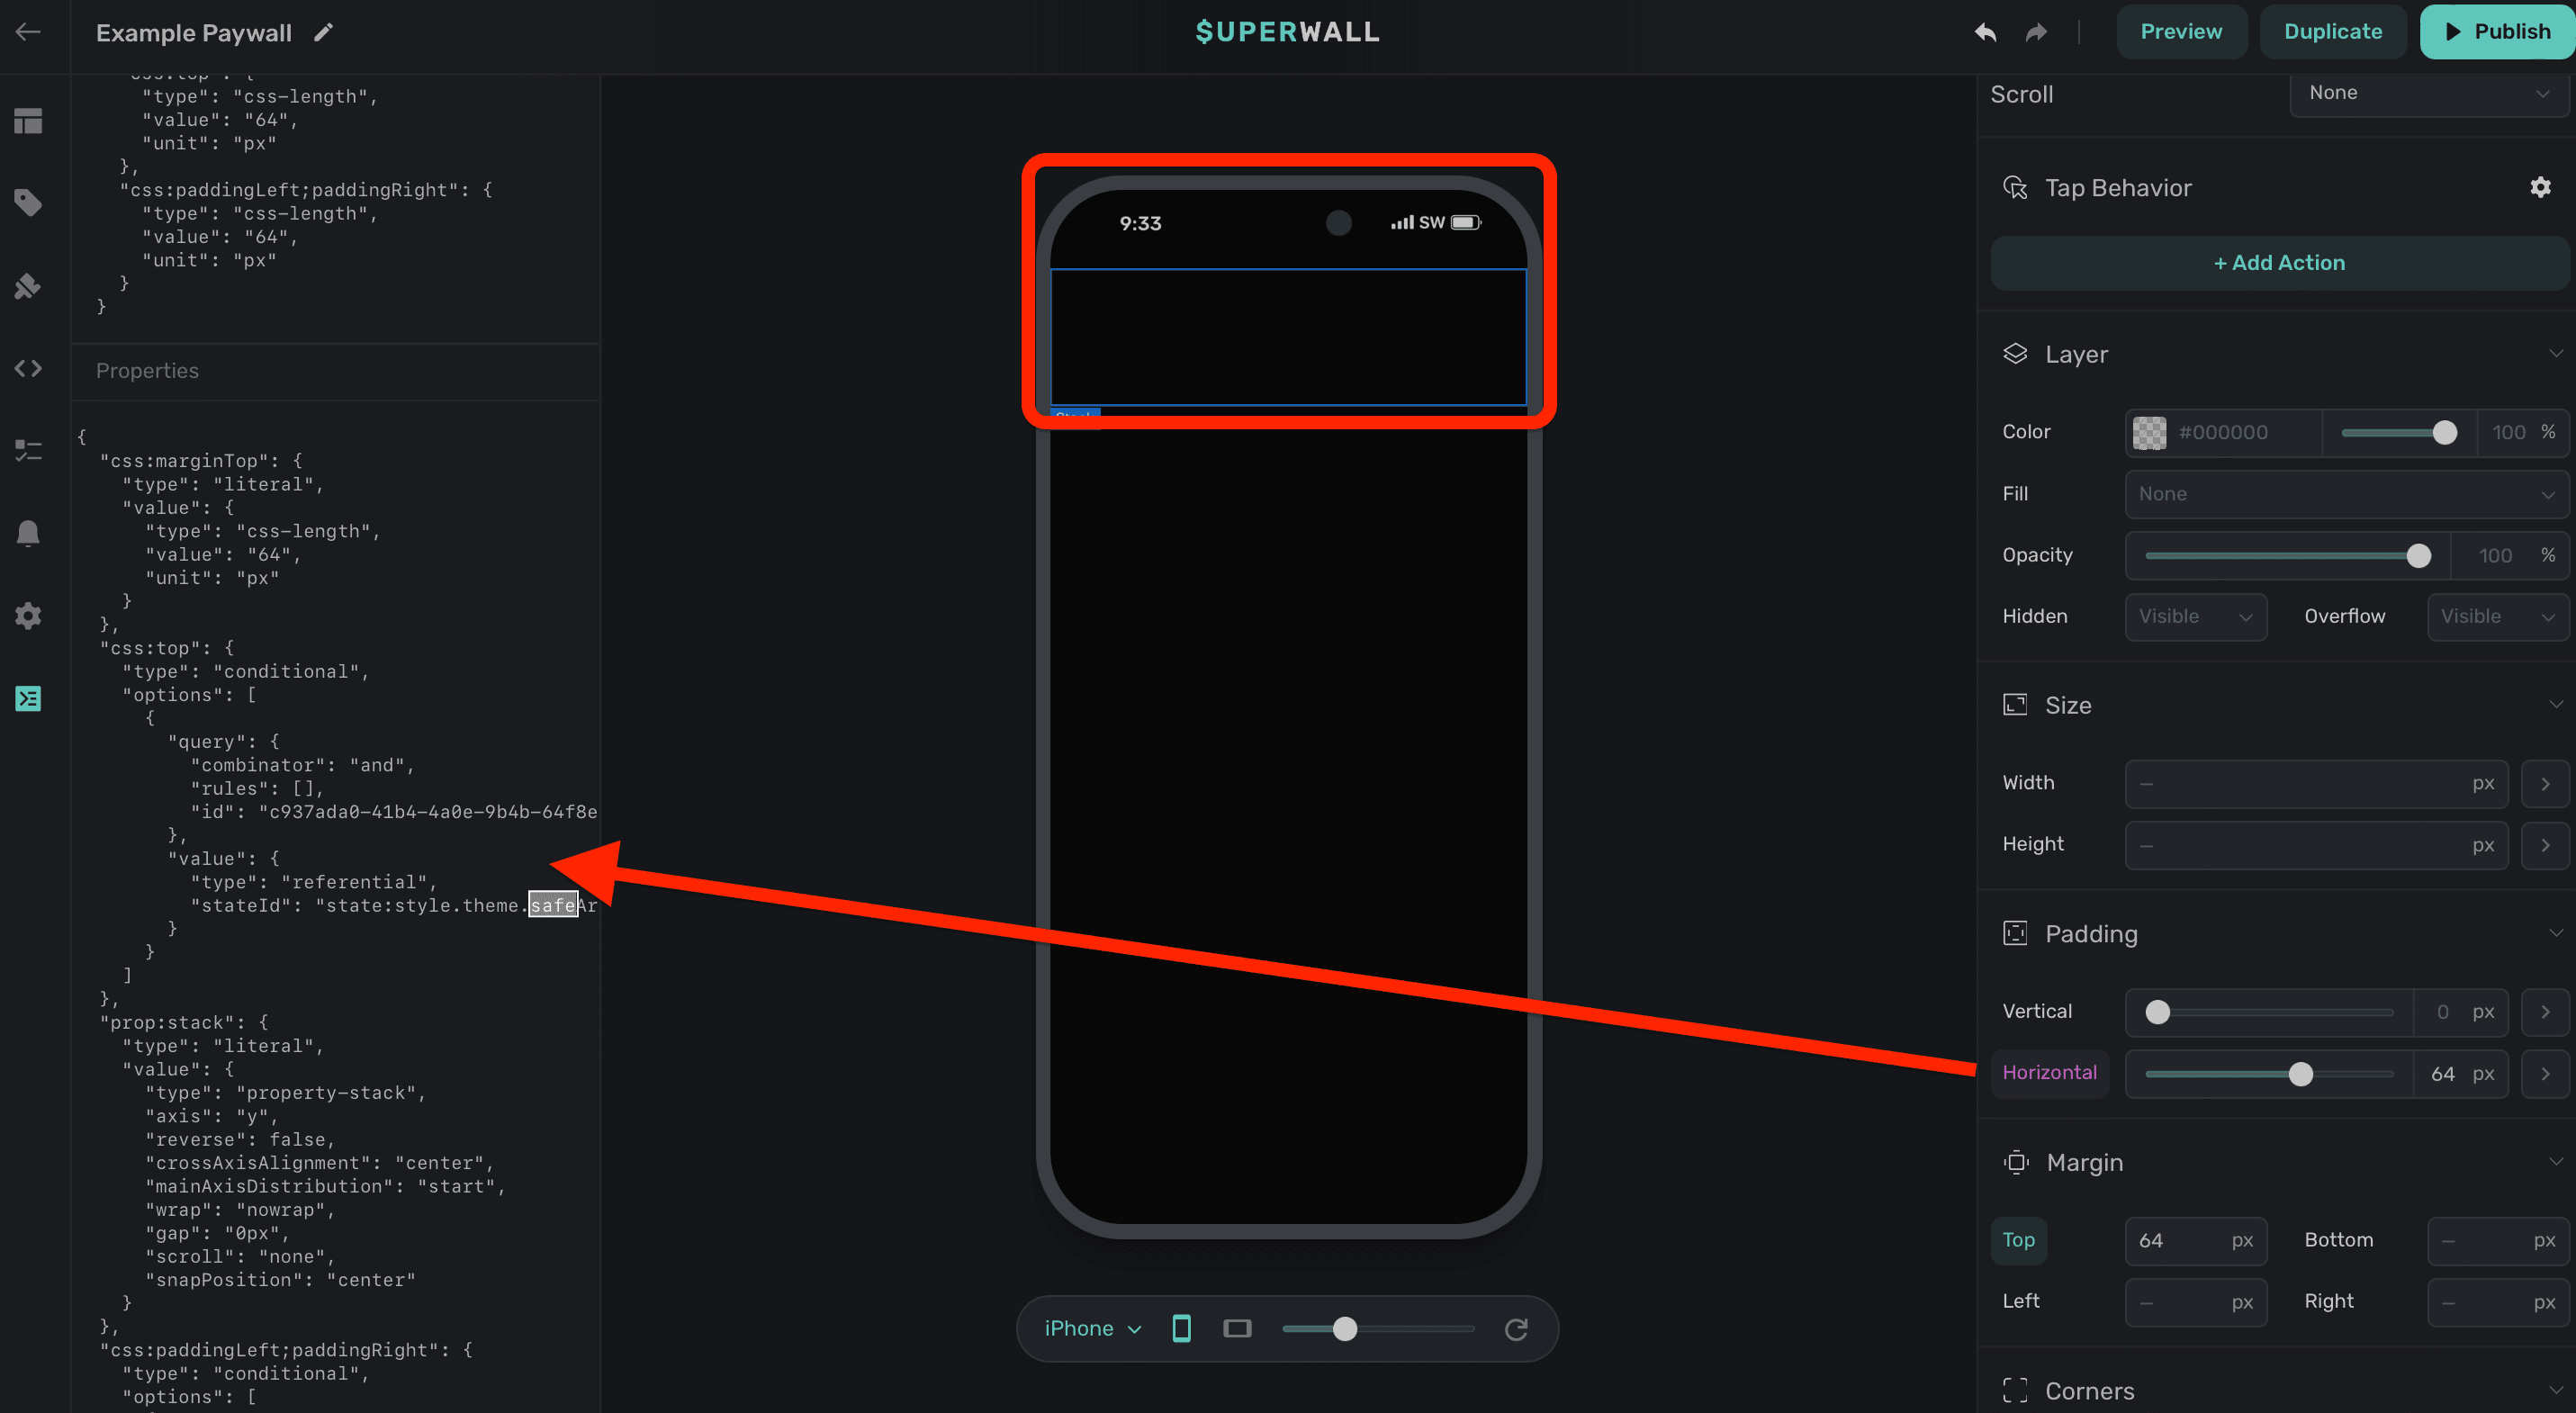
If you're unsure of why a paywall has a design quirk or isn't displaying as you'd expect, open the debugger and take a look at the CSS.
# Drawers
Source: https://superwall.com/docs/paywall-editor-drawer-component
Use Superwall's drawer component to display content presented in response to a button tap or a variable changing.
### Adding a drawer component
The drawer component was built to make displaying contents from a bottom drawer easy, right out of the box. To use the drawer component:
1. In the left sidebar, click **+** to add a new element.
2. Choose **Drawer** under the "Base Elements" header.
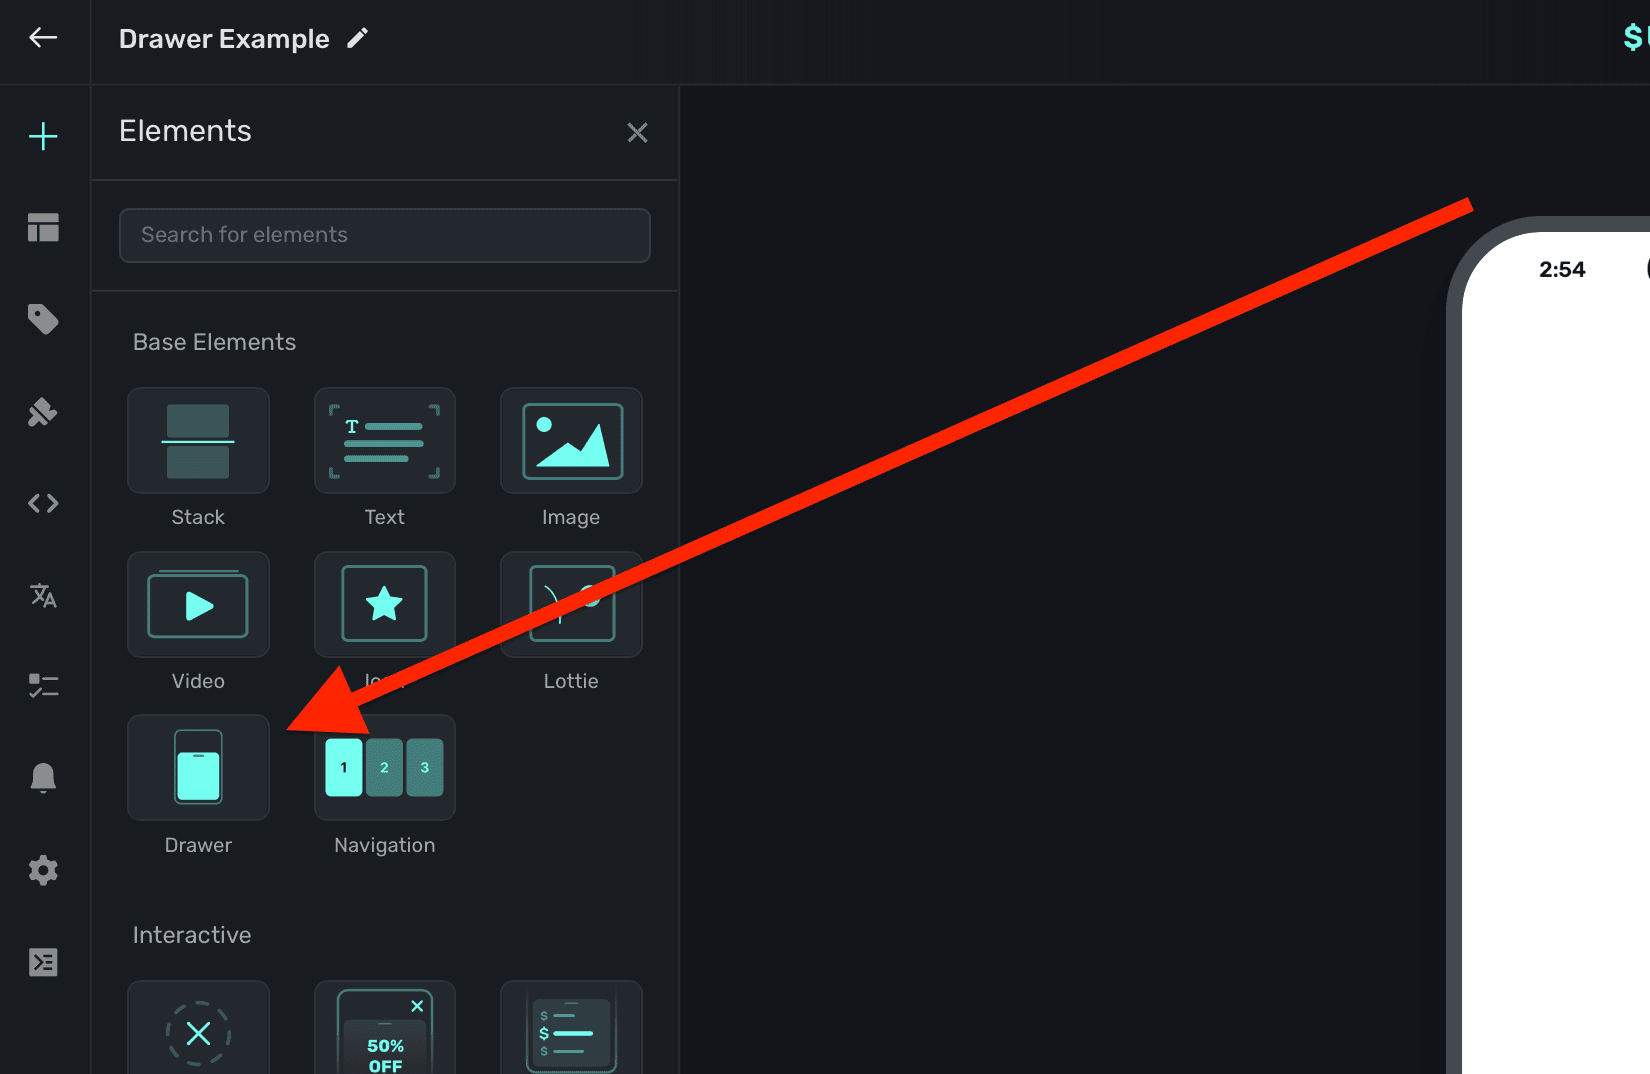
Drawers will automatically show a dimming view behind them when presented. Tapping on it will dismiss the drawer. By default, they are interactive — meaning they can be dismissed via a drag gesture. You can also change this to be `manual`, letting you explicity control when it presents or dismisses. Toggle this under the `Dismissable` property:
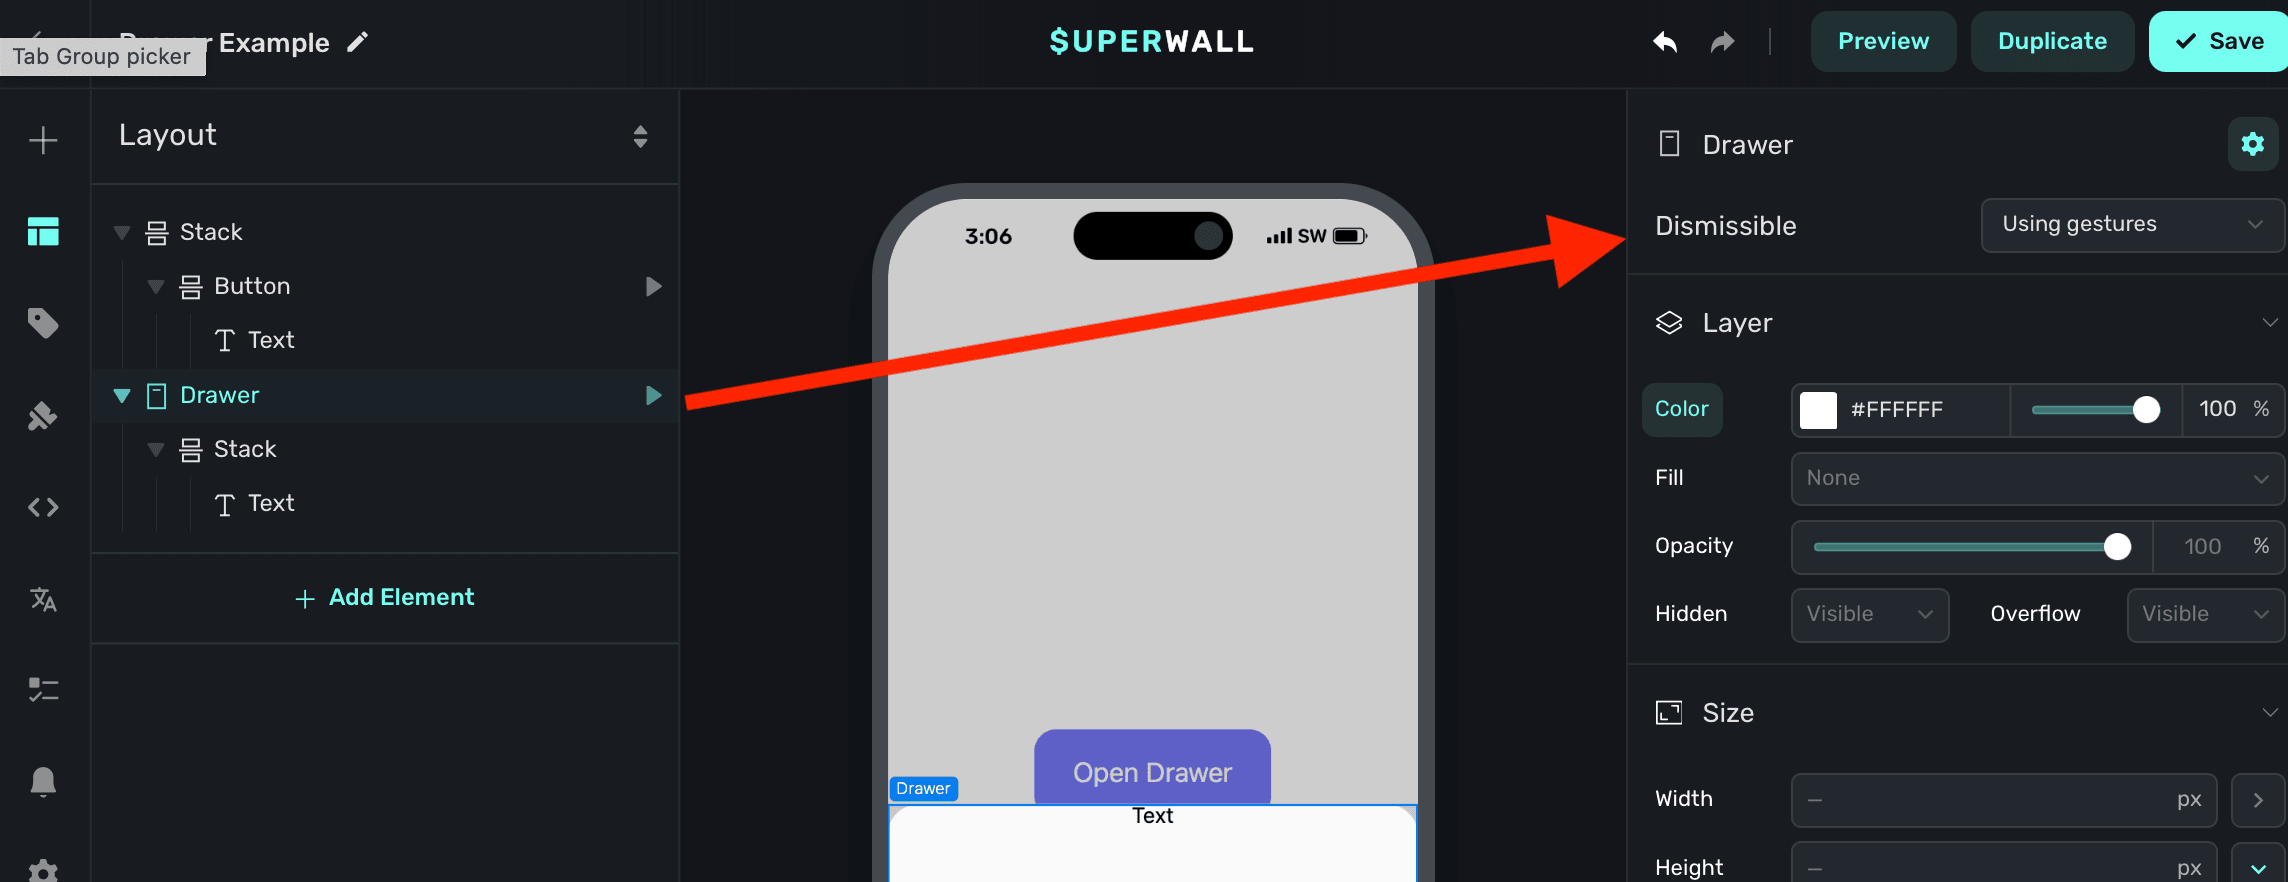
### Presenting drawers
When a drawer element is added, Superwall automatically creates an element variable for it (accessed through the **[Variables](/paywall-editor-variables)** tab in the left sidebar, or the variables button in the **[floating toolbar](/paywall-editor-floating-toolbar)**). Its name will match whatever is in the element hierarchy in the left sidebar:
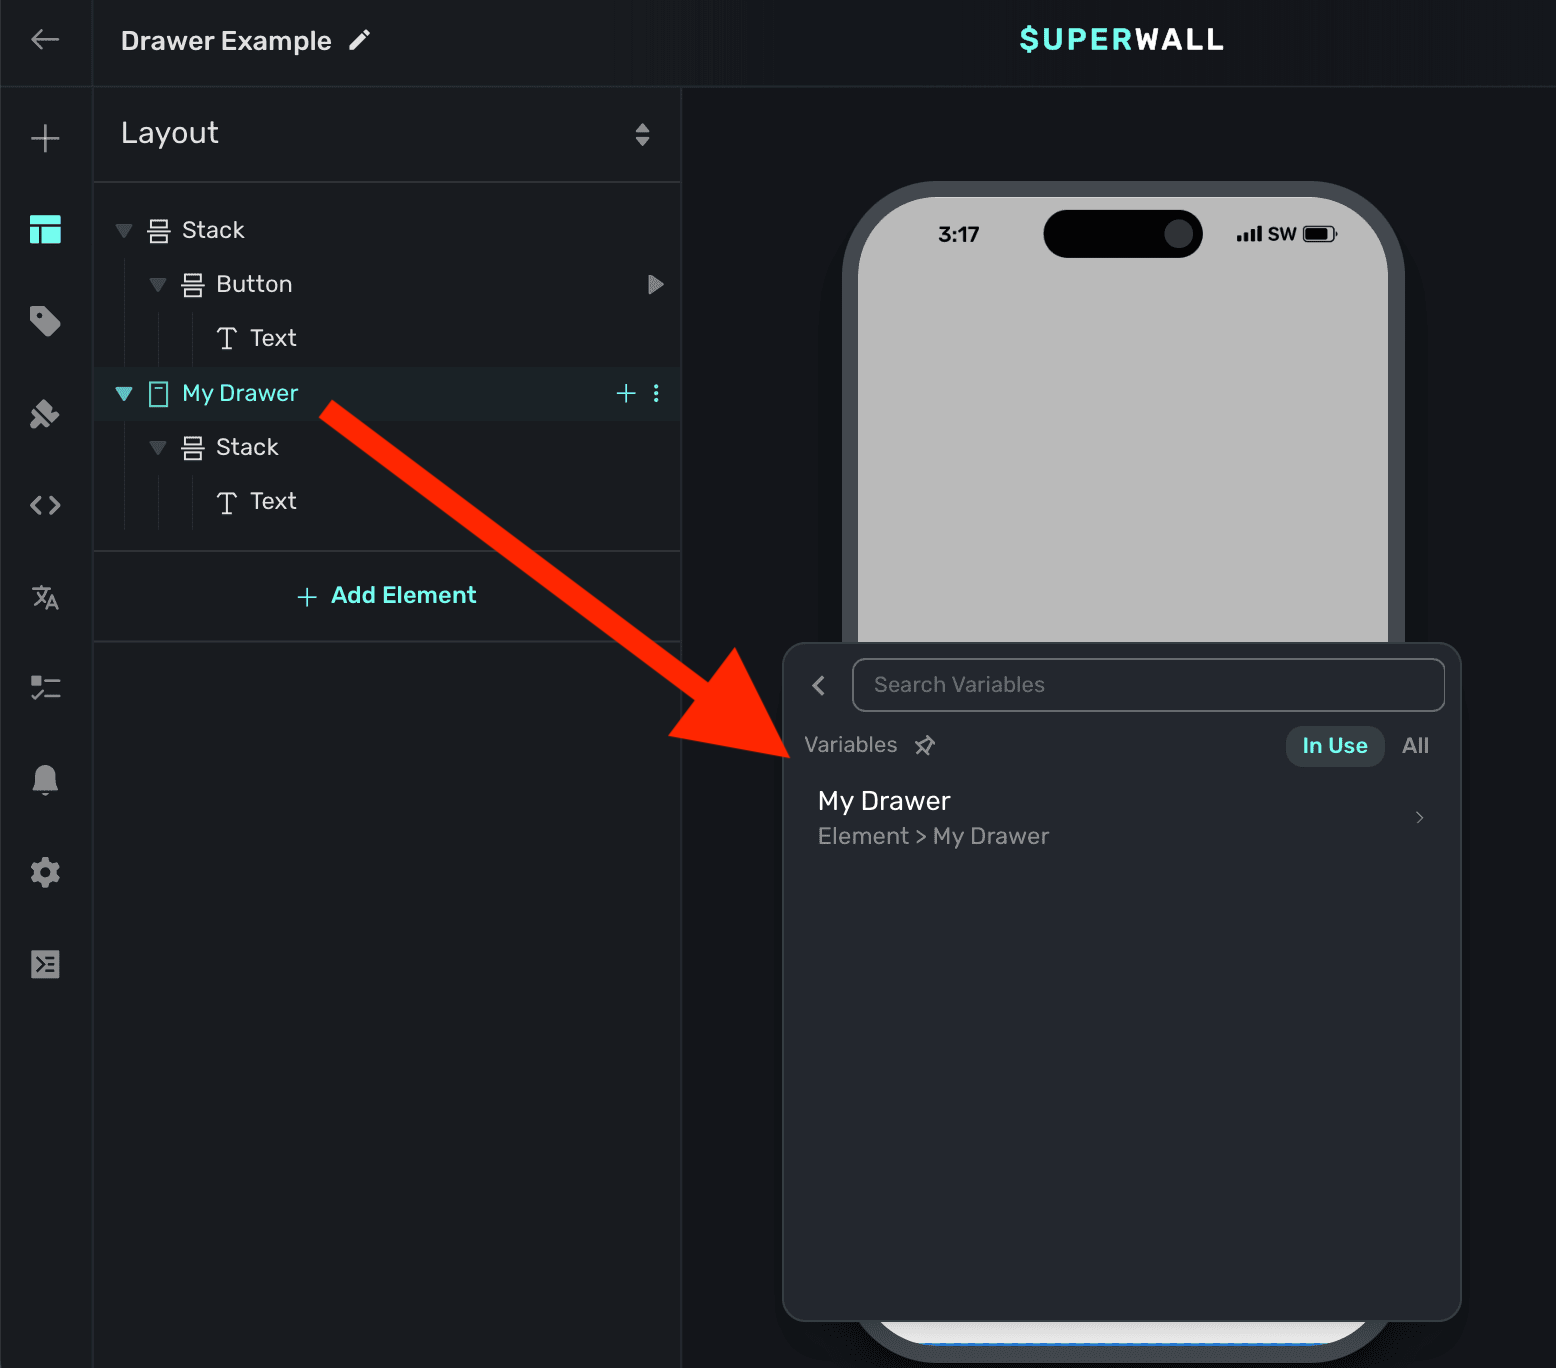
To toggle its open state, you can use a tap behavior on a button or another element. In this example, we add a [tap behavior](/paywall-editor-styling-elements#tap-behaviors) to the button, which toggles the element variable's `Is Open` value:
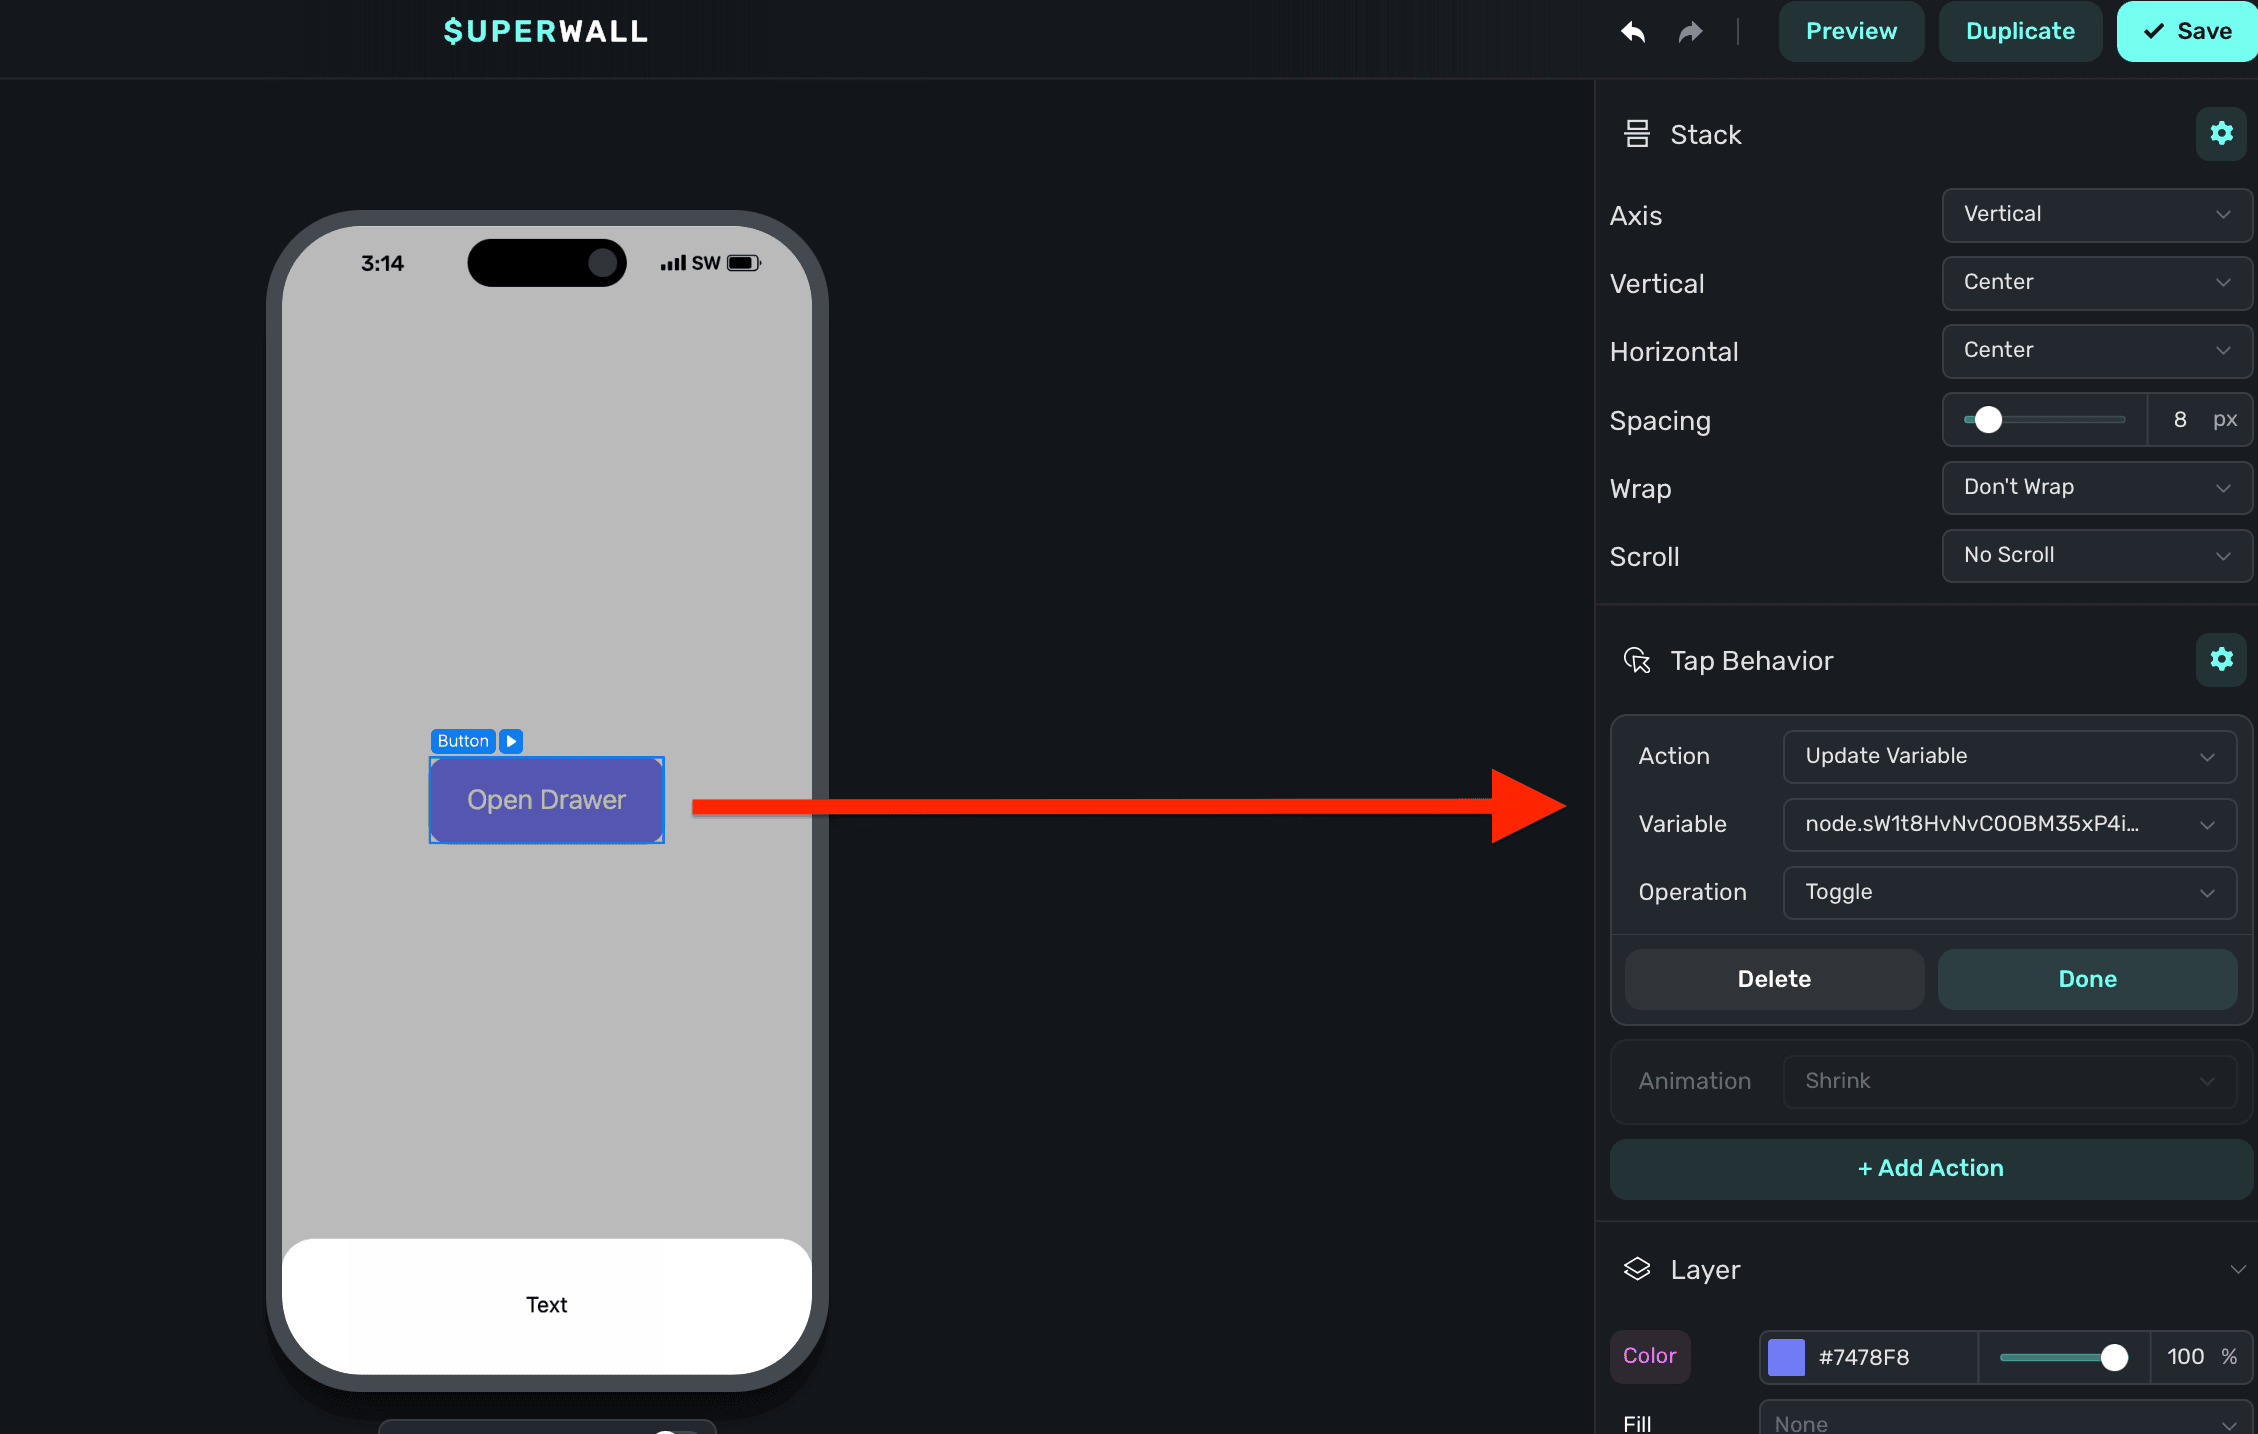
The variable's name is derived by the node's unique identifier. You don't need to set or generally be aware of this value.
### Adding content to drawers
By default, drawers have a minimum height set. This is a general size that works well, but in most cases you'll want to add a [stack](/paywall-editor-stacks) and have the drawer derive its height from that. Or, you can add a stack and set its height equal to the drawer's minimum height. Generally, that approach is not as flexible since you likely want the drawer's height to be determined by the content inside of it:
By default, there is a minimum height on the drawer. Here, we've removed that so that the inner stack will control its height:
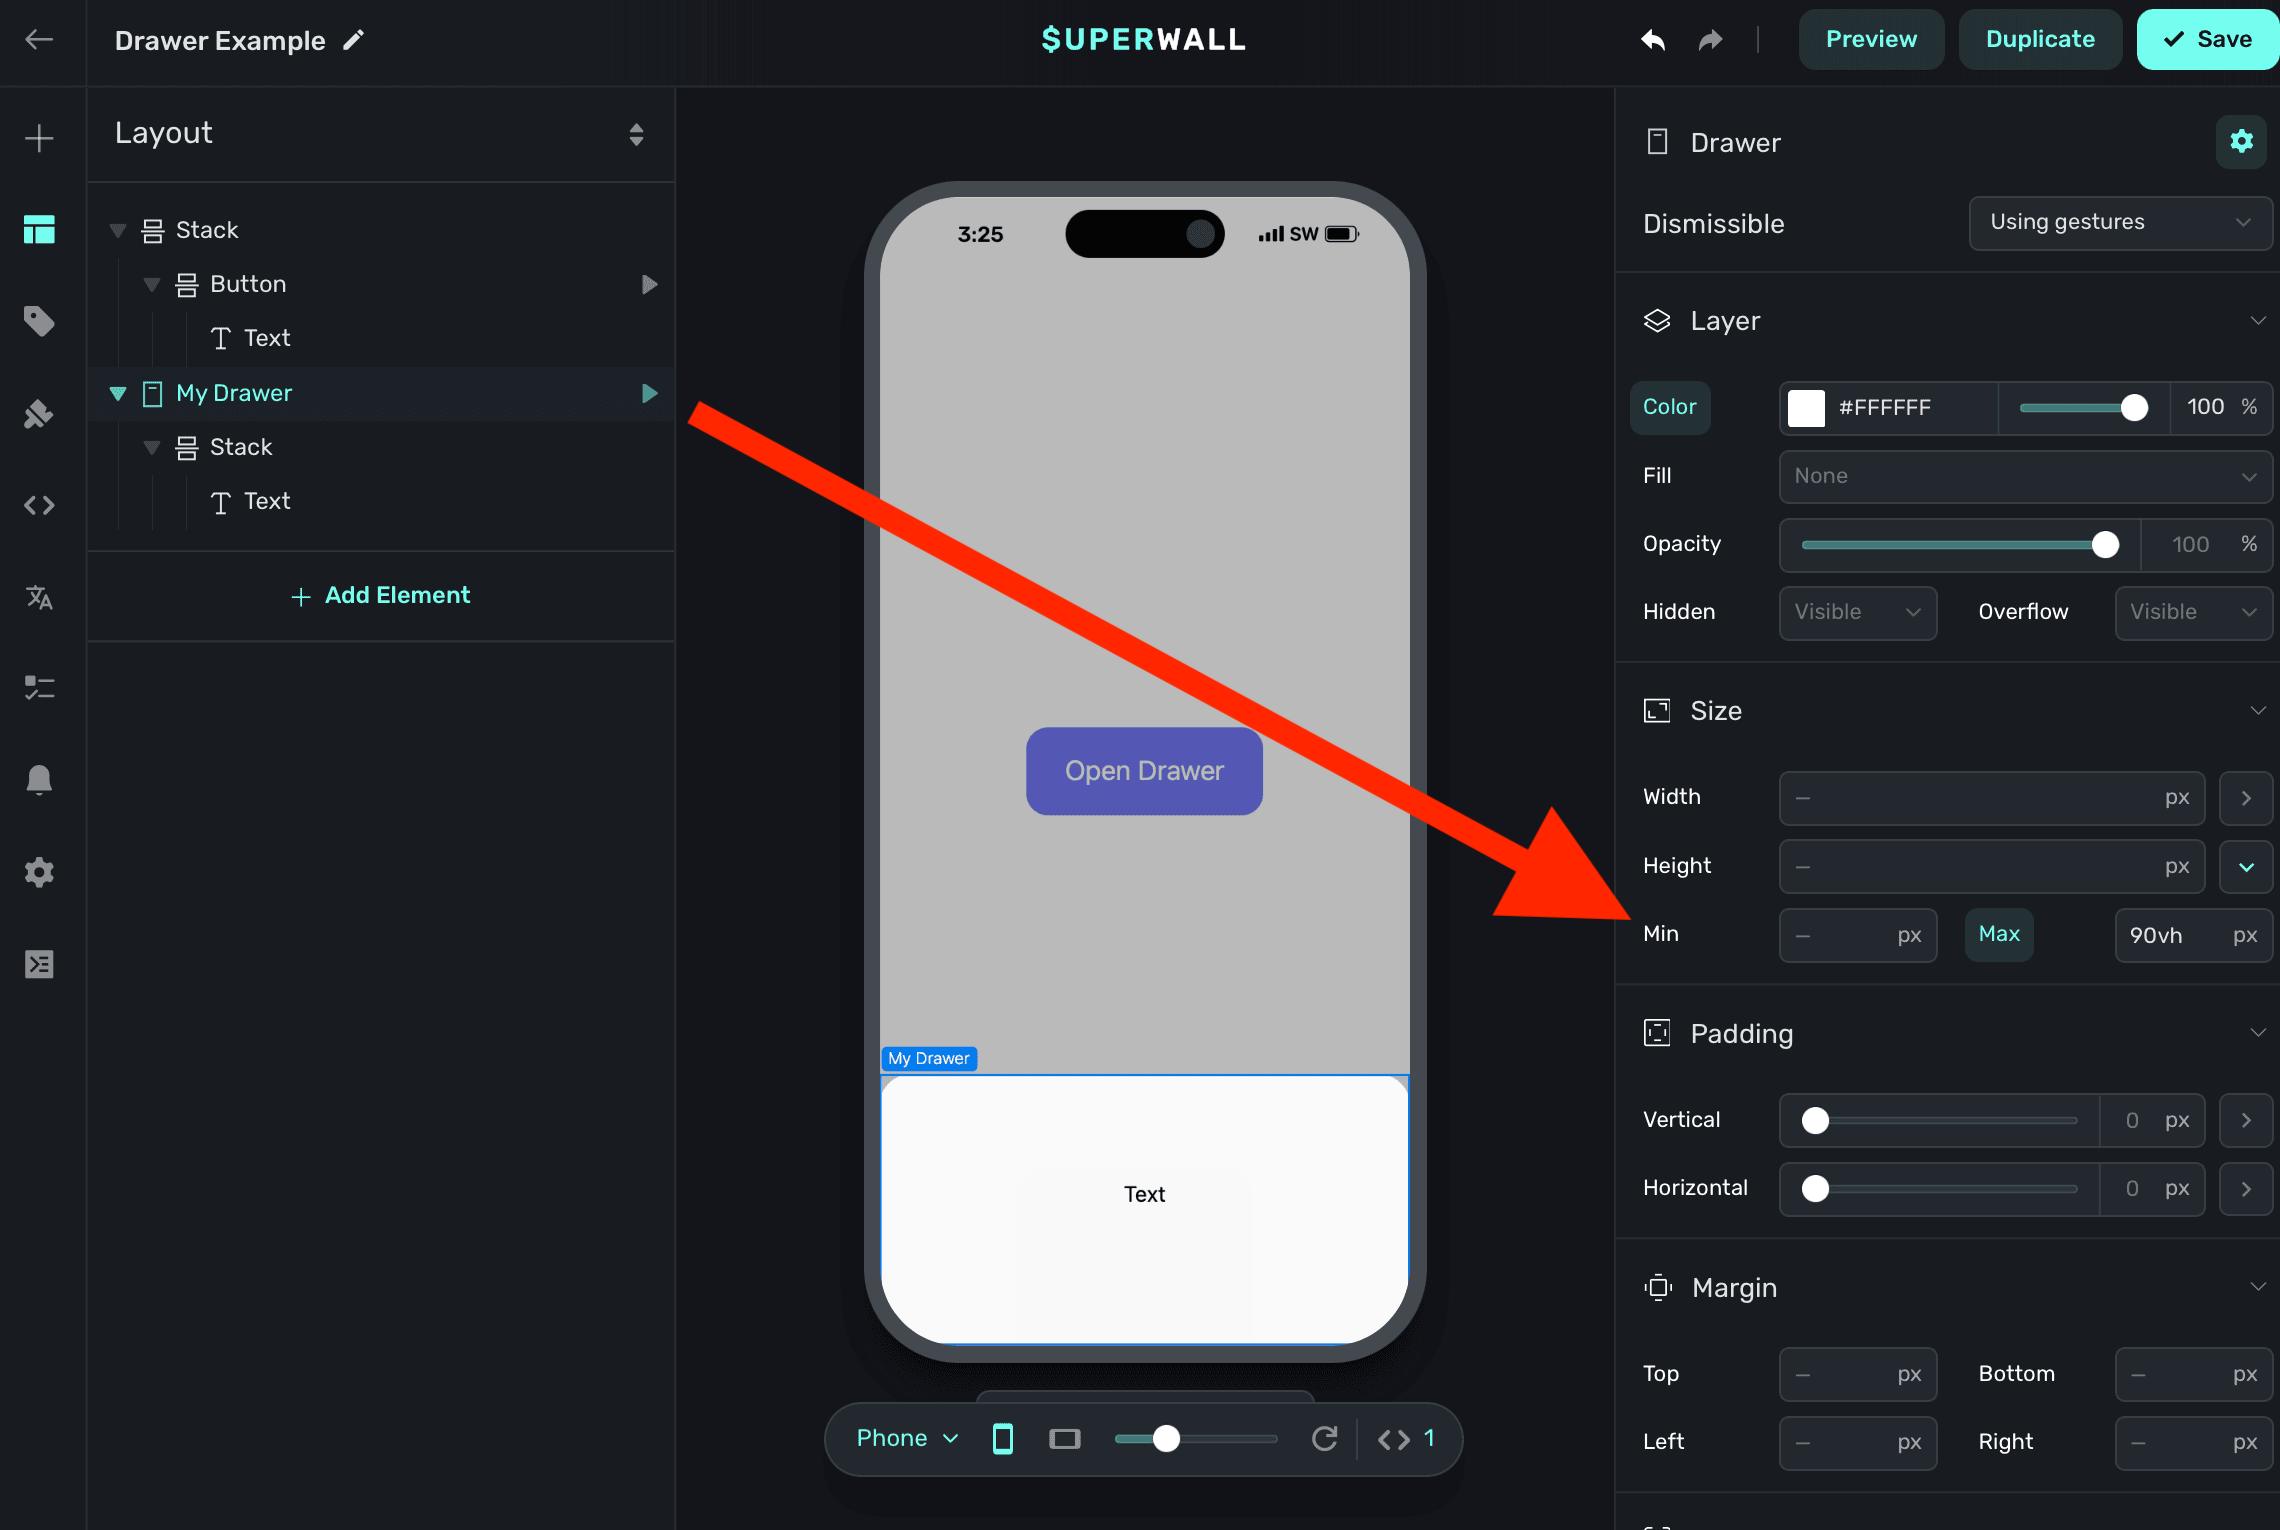
Since the drawer's minimum height was cleared, now it'll derive its height from the stack inside of it:
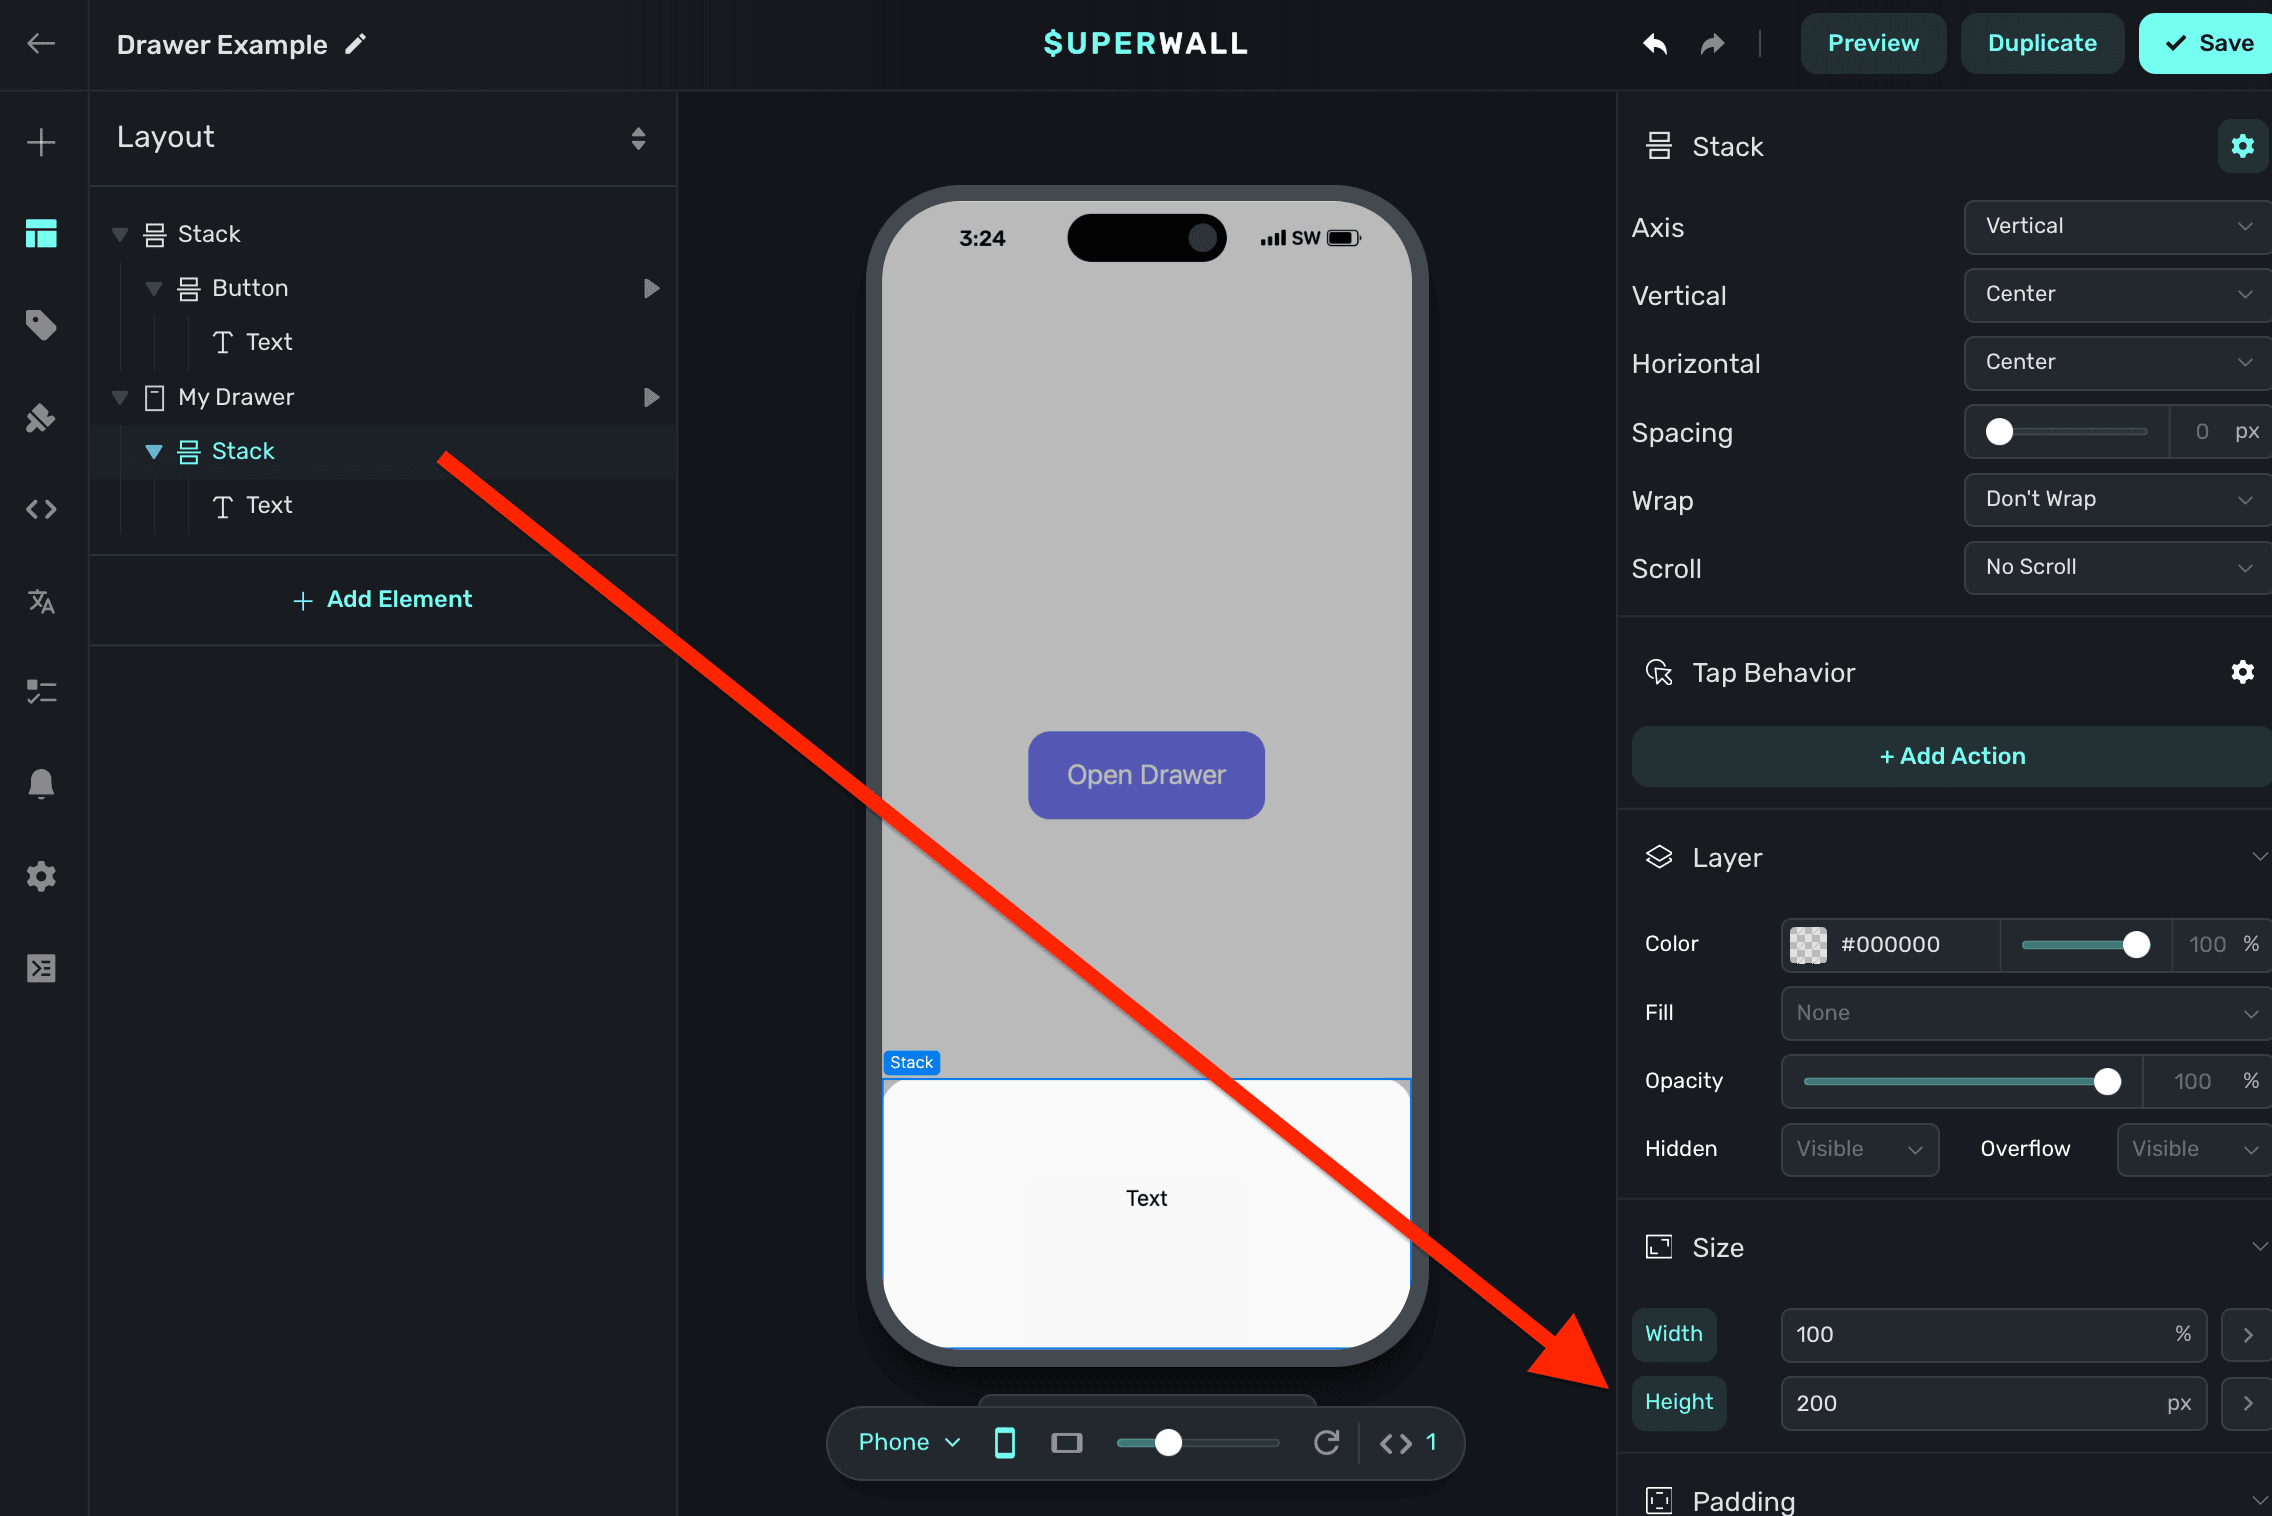
# Duplicating Paywalls
Source: https://superwall.com/docs/paywall-editor-duplicating-paywalls
To duplicate a paywall live, click the **Duplicate** button in the top-right side of the editor:
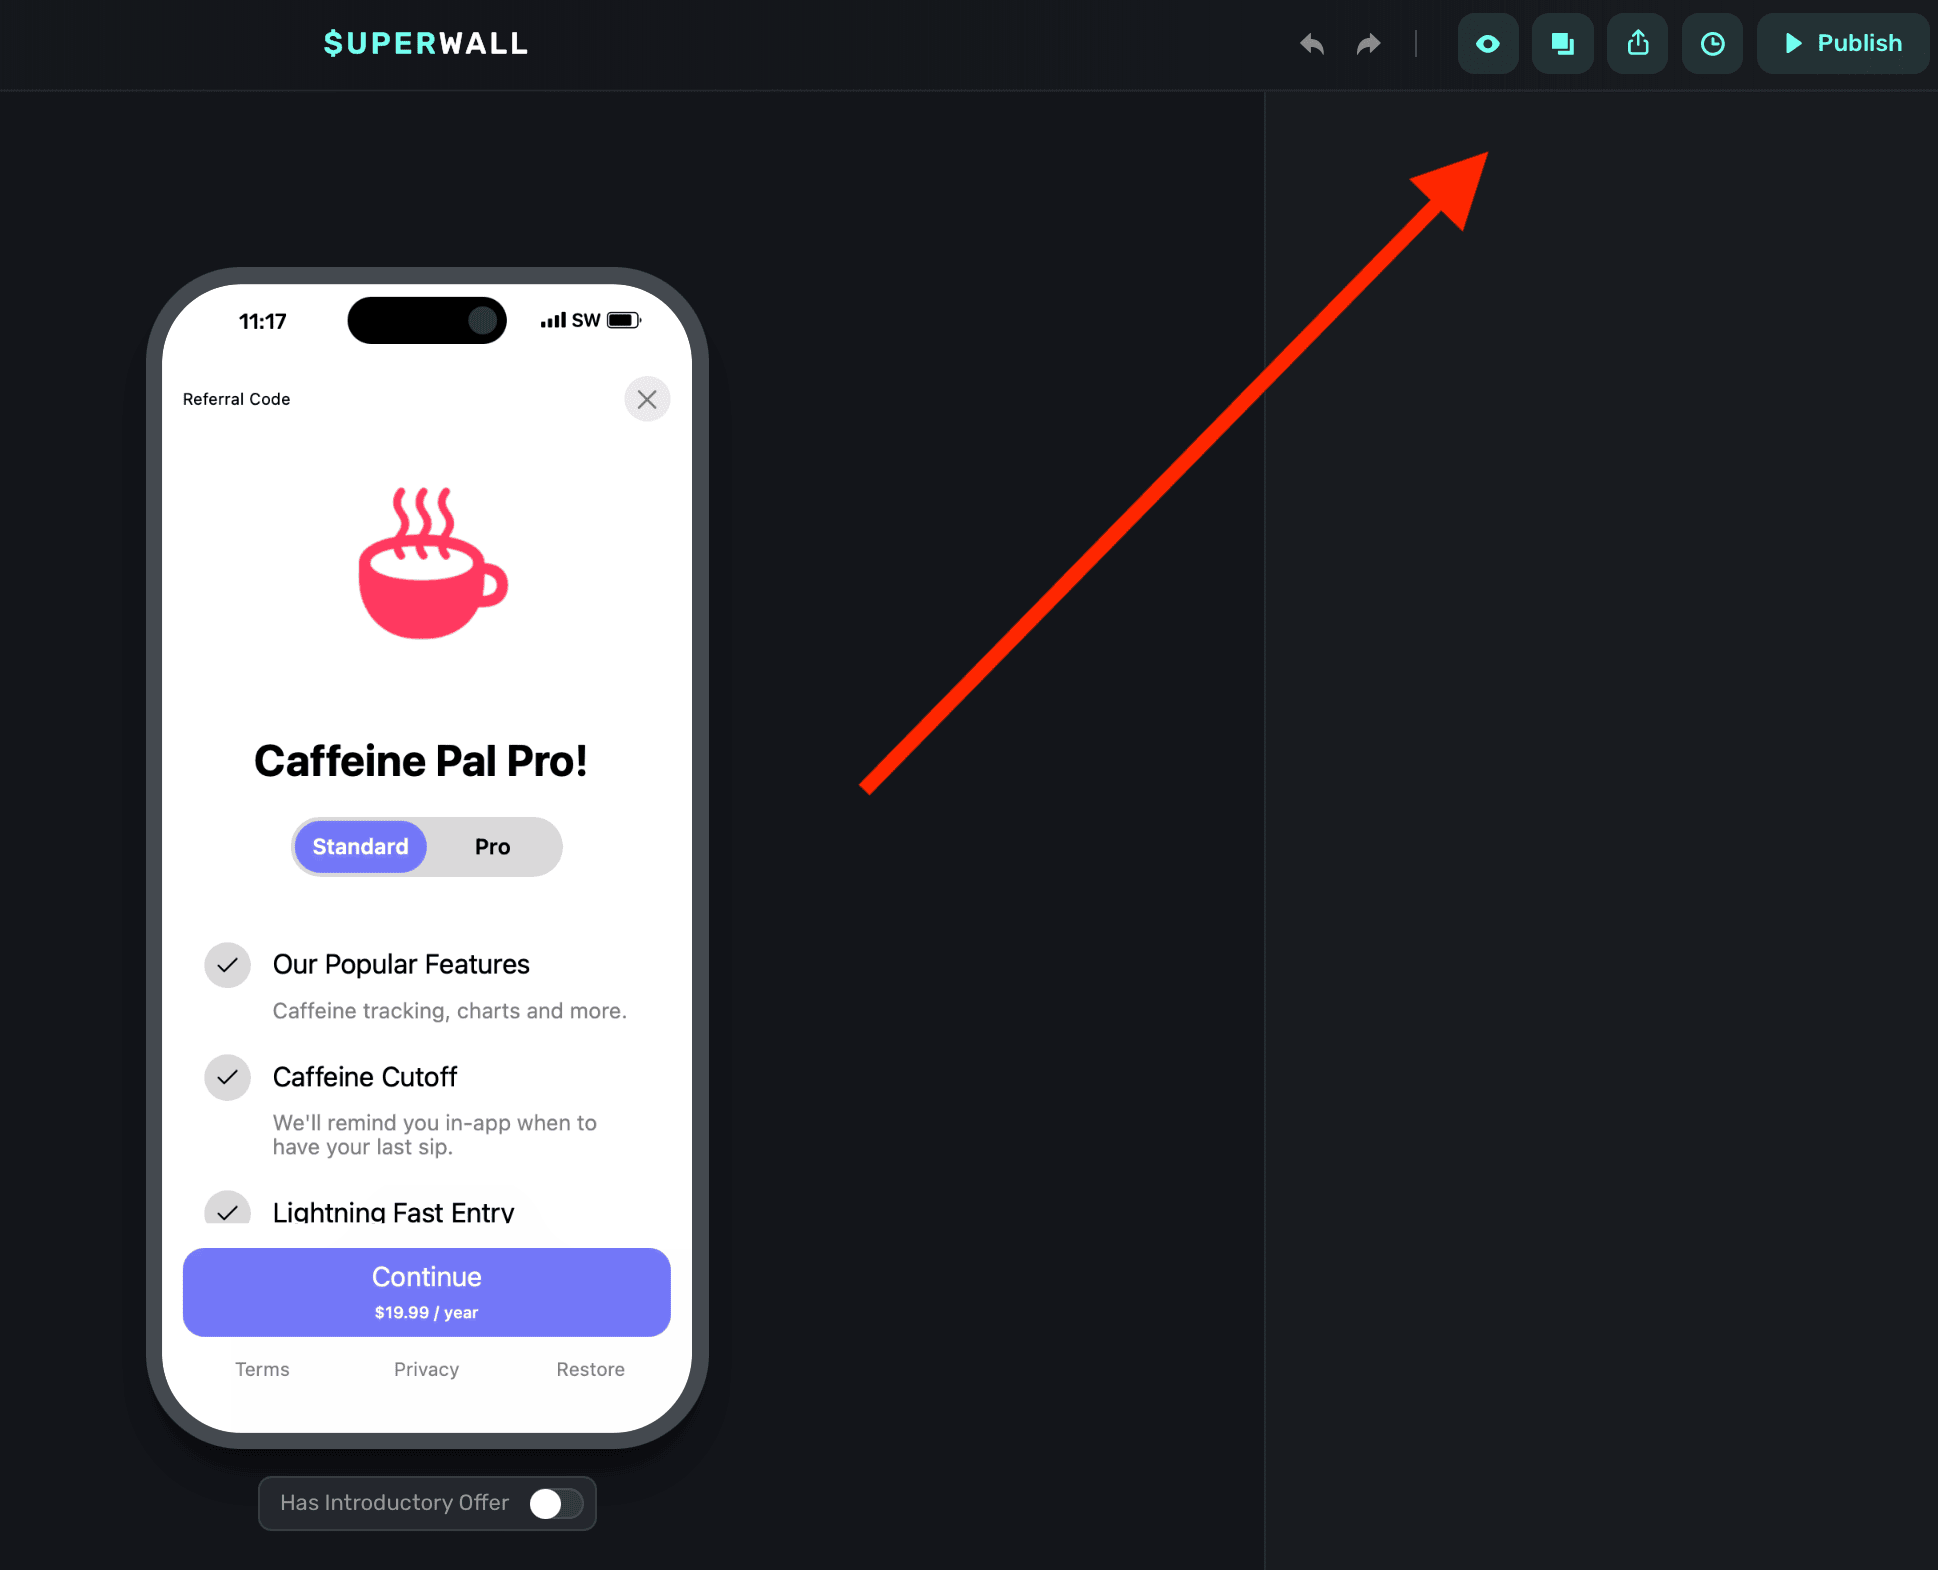
Additionally, you can duplicate a paywall by opening the **Paywalls** view from the left-hand sidebar for any app you have. Below any paywall to duplicate, click the **Duplicate** button at the bottom:
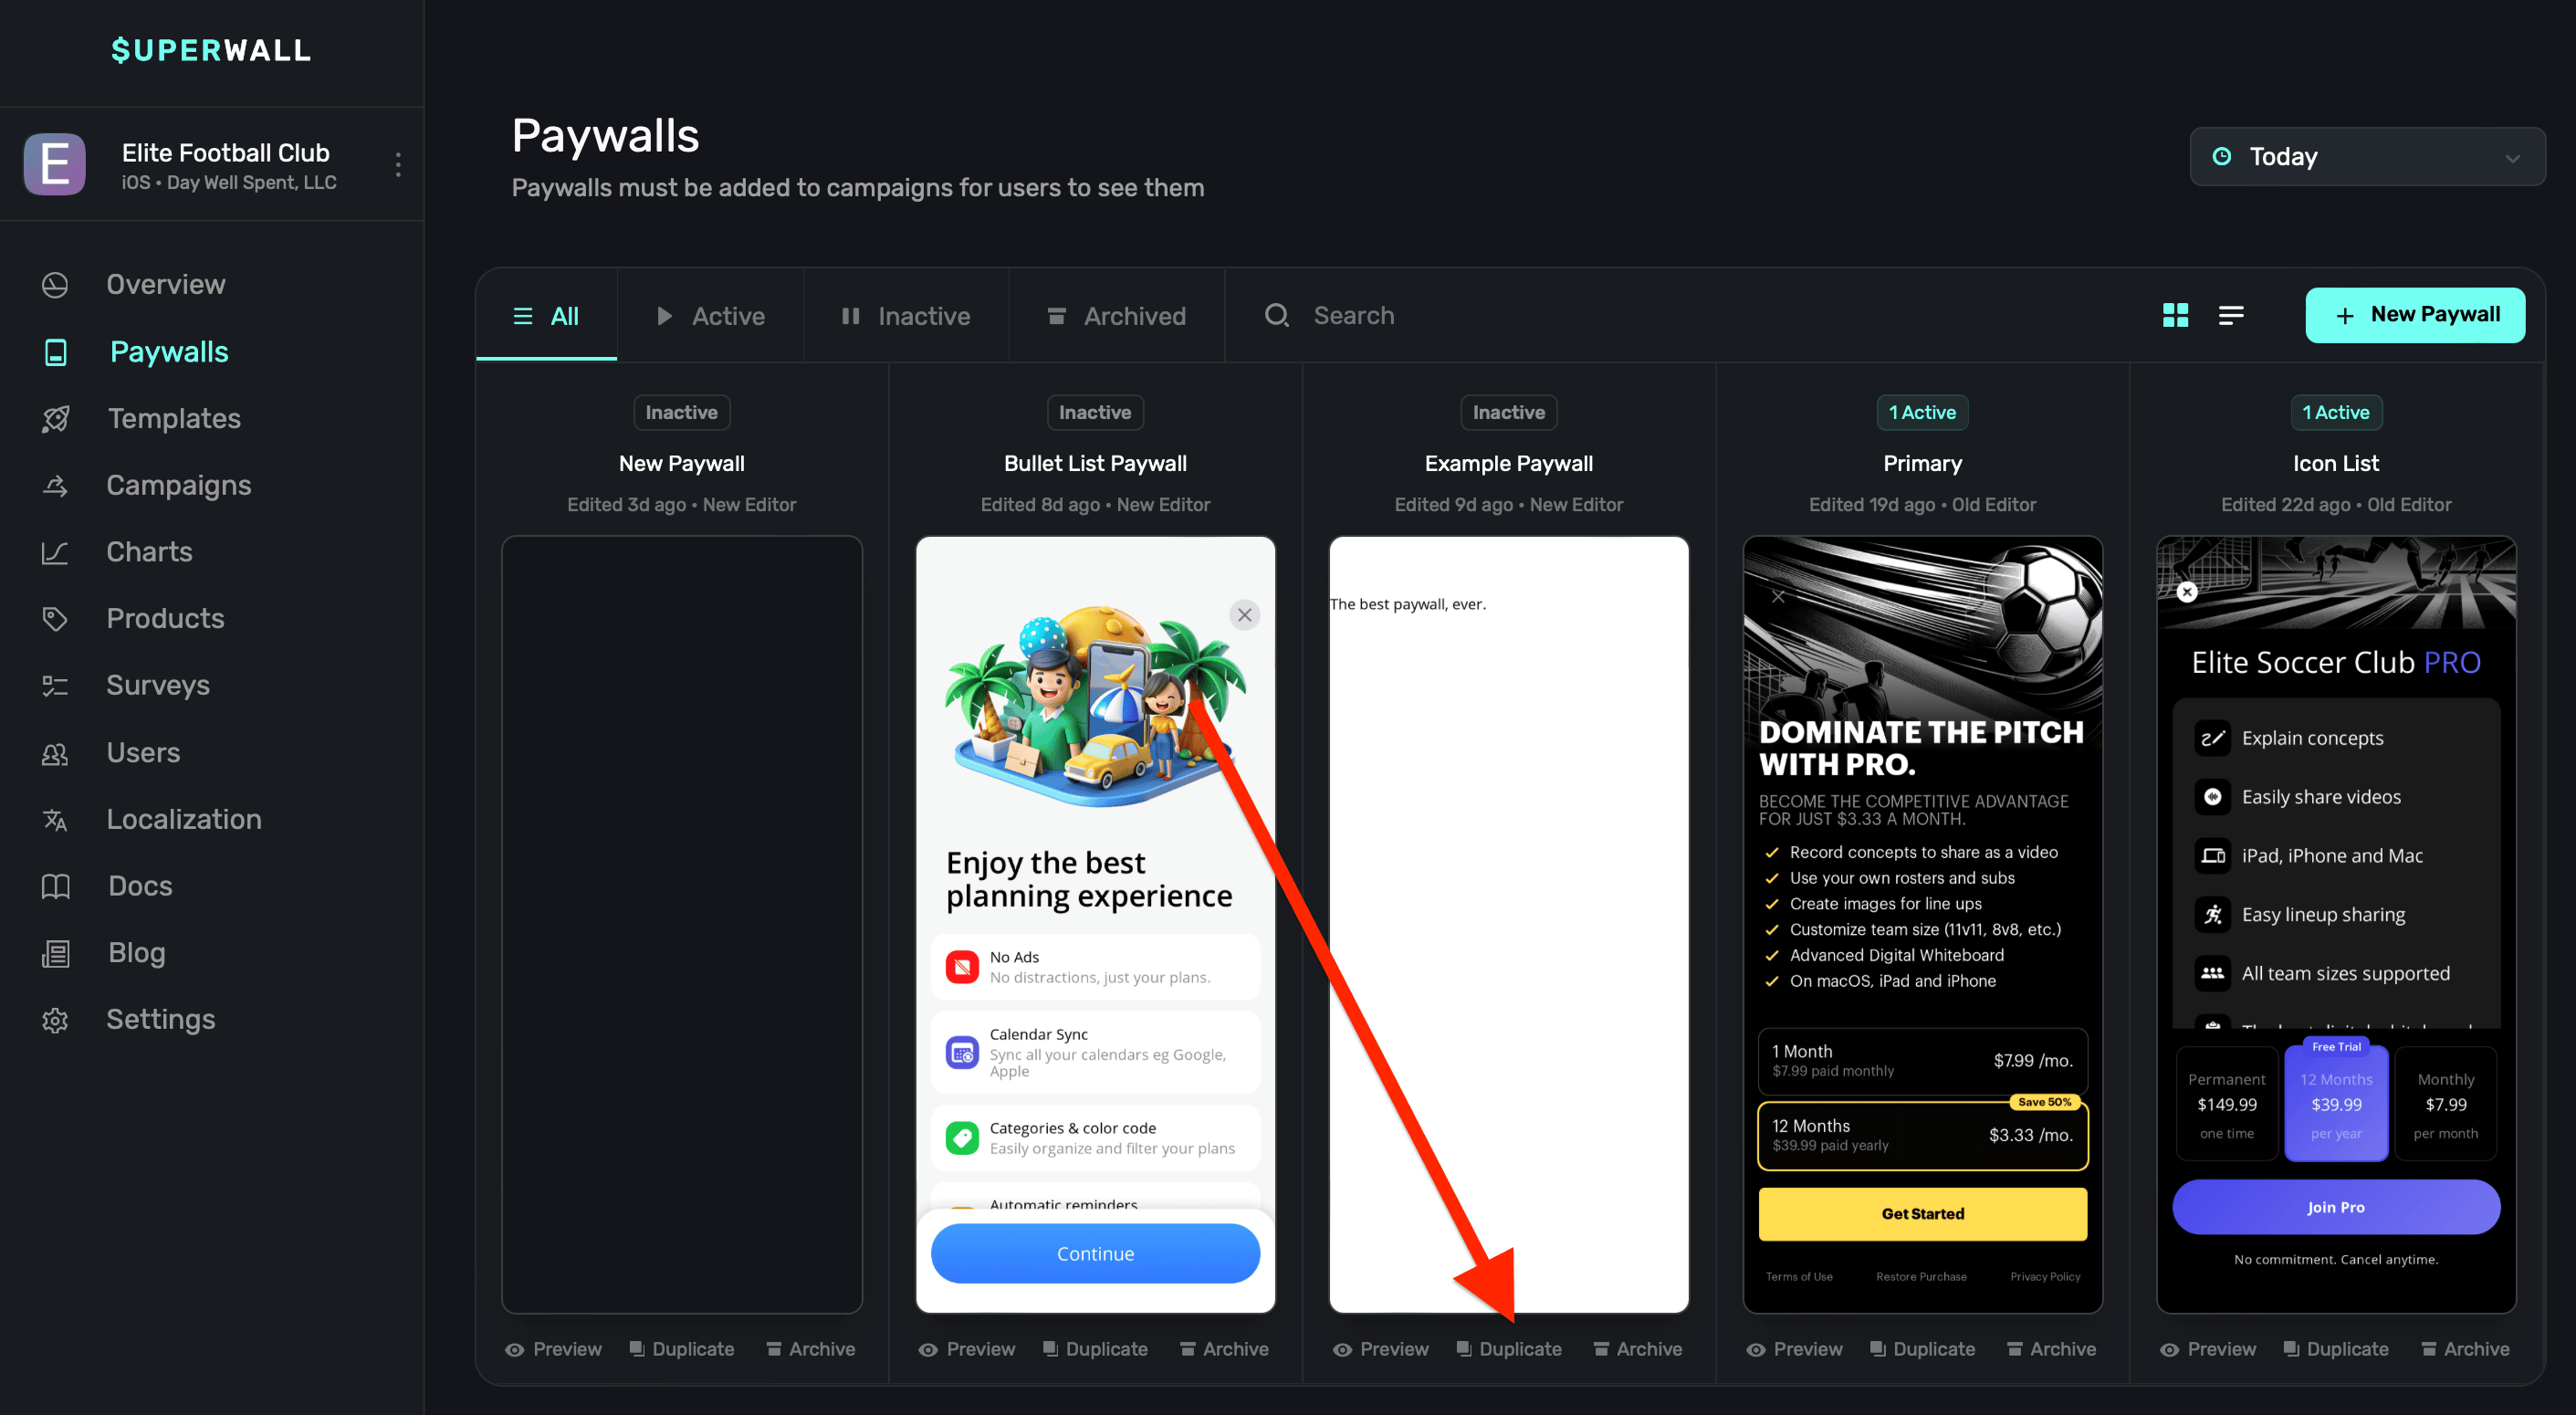
# Dynamic Values
Source: https://superwall.com/docs/paywall-editor-dynamic-values
Dynamic Values allow you to create rules and control flow statements to conditionally apply variables. You can use it for things like:
* Changing the text of a component based on which product is selected.
* Hide and show a modal from a button click.
To open the dynamic values editor, **click** on either the gear icon in the **component editor**, or simply **click** on any property in the **component editor**. In the dropdown, choose **Dynamic**:
When the dynamic values editor shows, **click** on **Add Value** to get started.
### Assigning variables without conditions
**First off, to simply assign a variable *without* a condition, you still use the dynamic values editor.** For example, if you want some text component's color to match something you have in your [theme](paywall-editor-theme) — just select it and don't insert any rule.
Here, we set the text to the theme's primary color:
### Setting dynamic values
The dynamic values editor works like most control flow interfaces. You set a condition, and choose what should happen when it's met. You can chain multiple conditions together, too. Or, simply use an if/else format.
Check out this example:
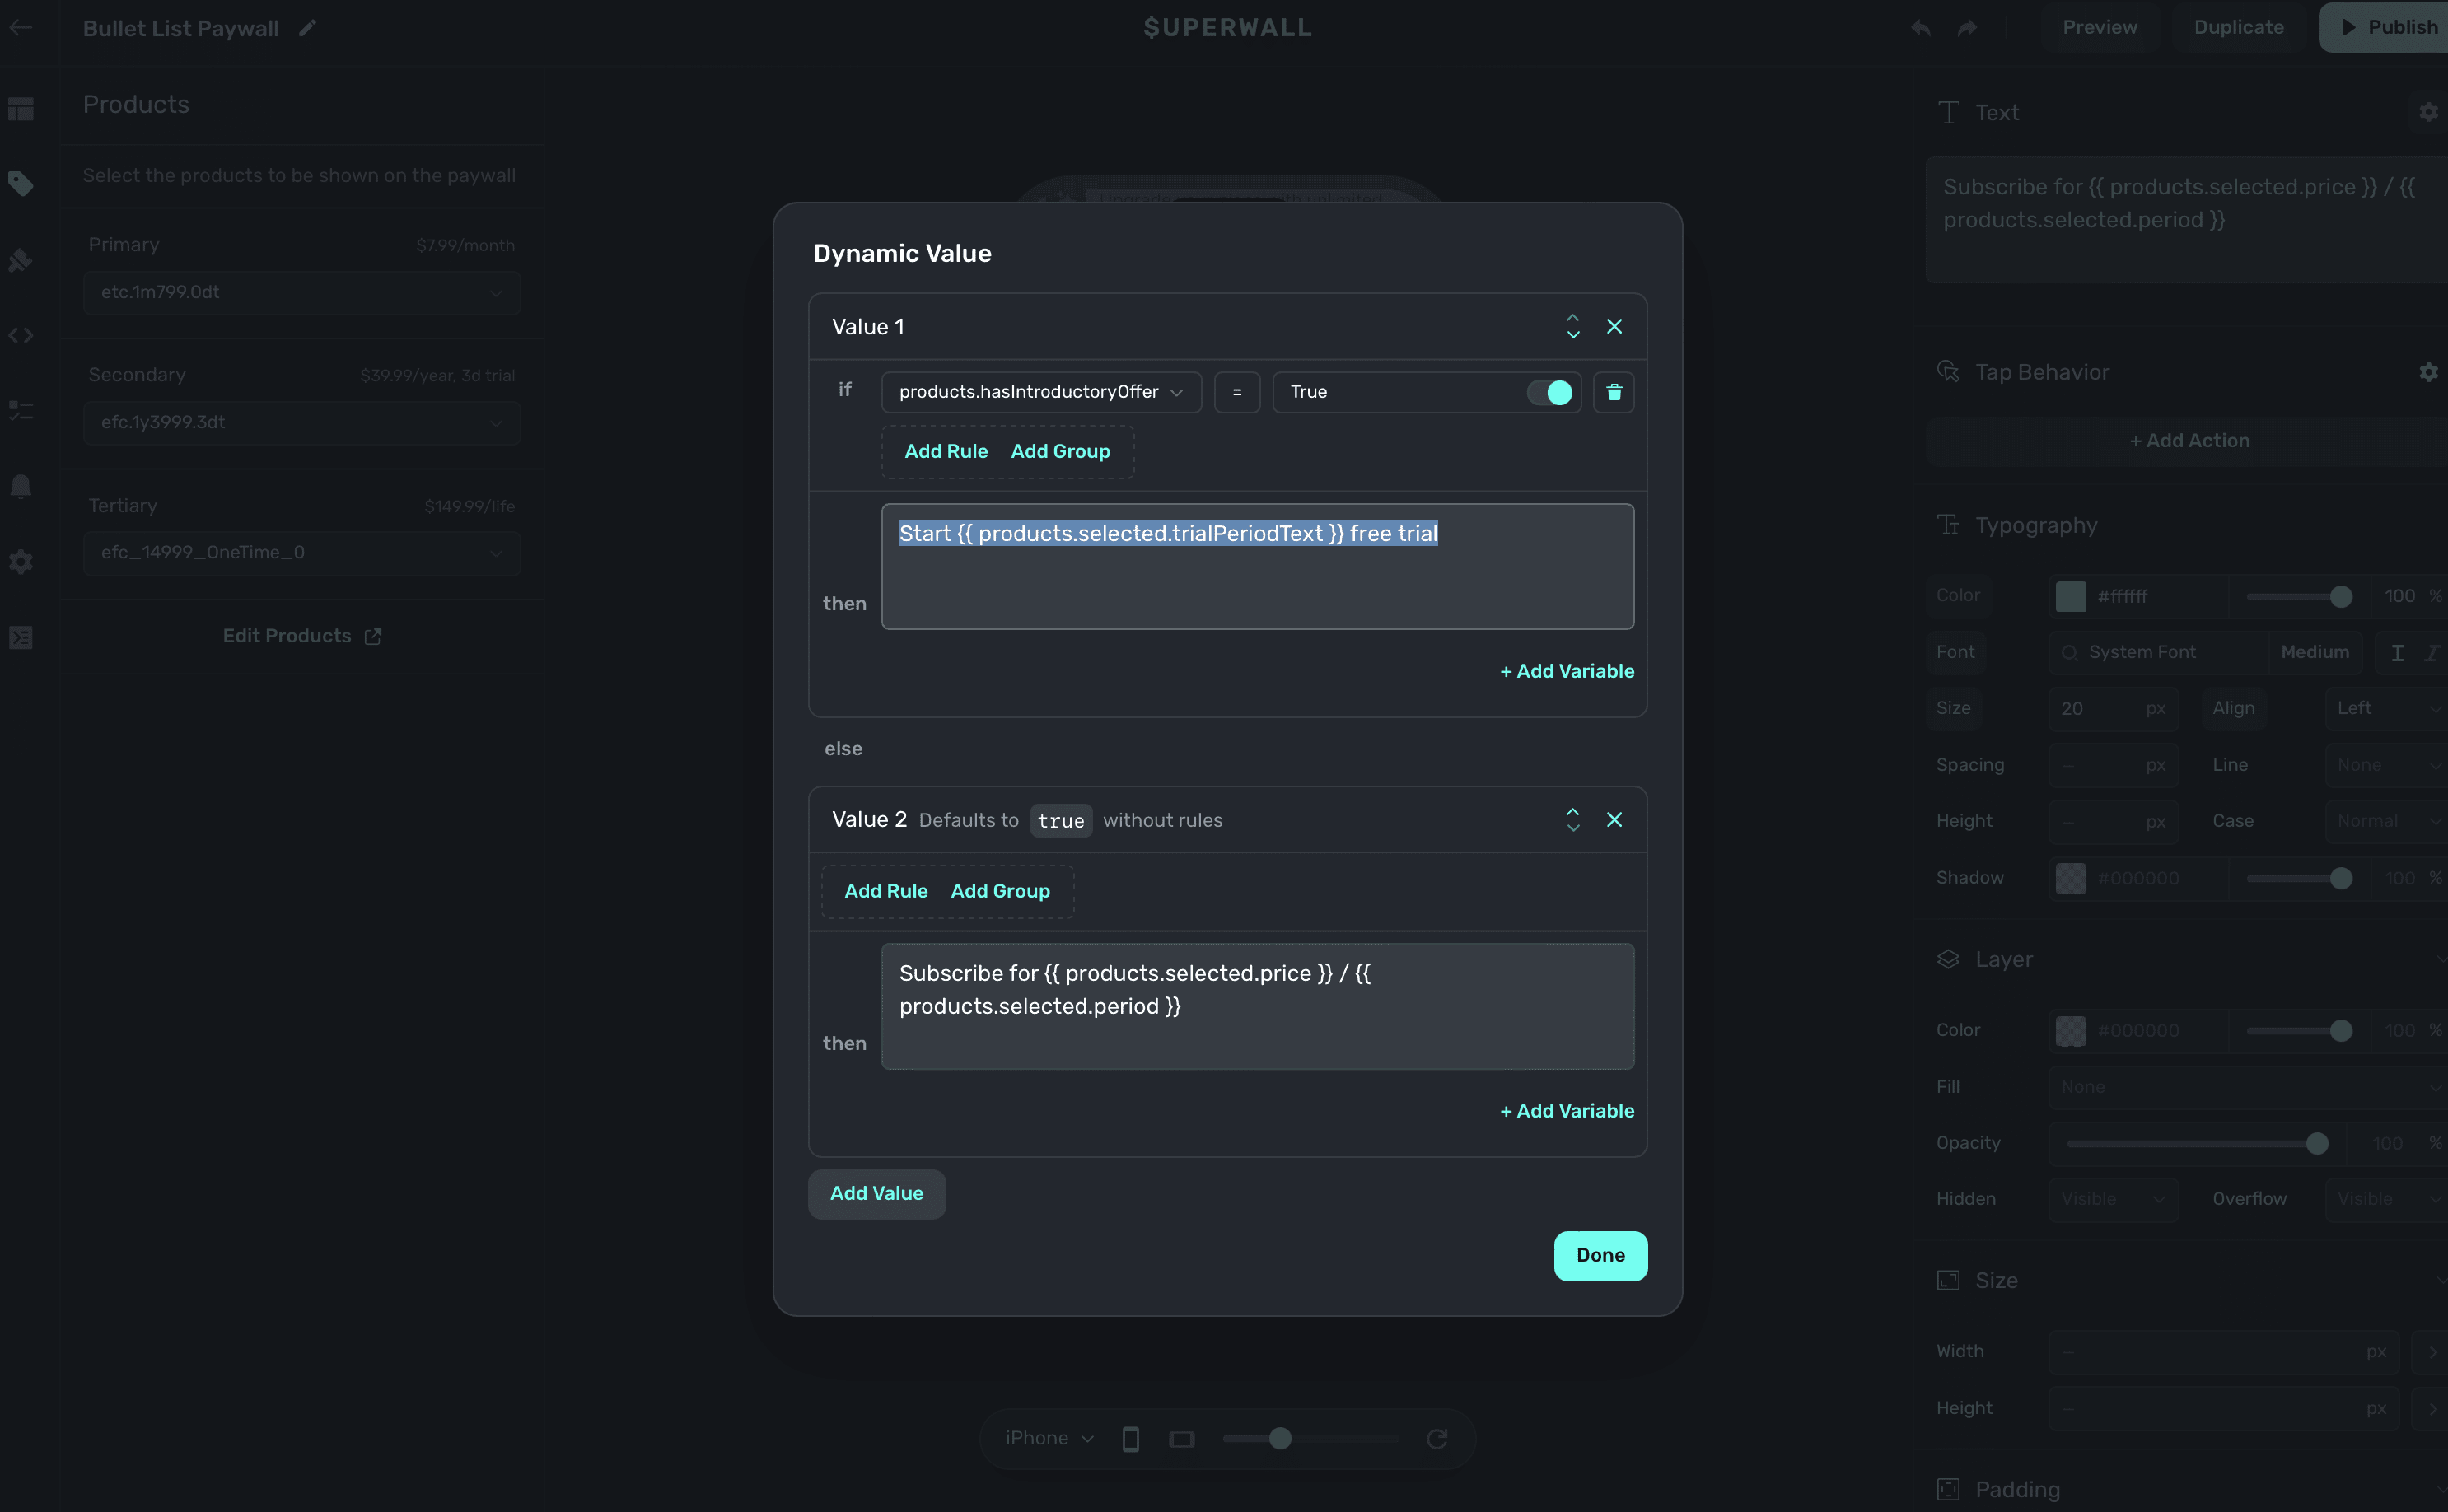
Notice how you can use [variables](/paywall-editor-variables) within the dynamic values editor,
too.
It's saying:
1. When the product has an introductory offer (i.e. the condition)
2. Then set the text of the component to "Start \{\{ products.selected.trialPeriodText }} free trial" (i.e. what to do when a condition is met)
3. Otherwise, set it to "Subscribe for \{\{ products.selected.price }} / \{\{ products.selected.period }}."
You can also add rules within a group.
### Rules versus group
When you add a condition, you'll have the choice to either add a rule or a group:
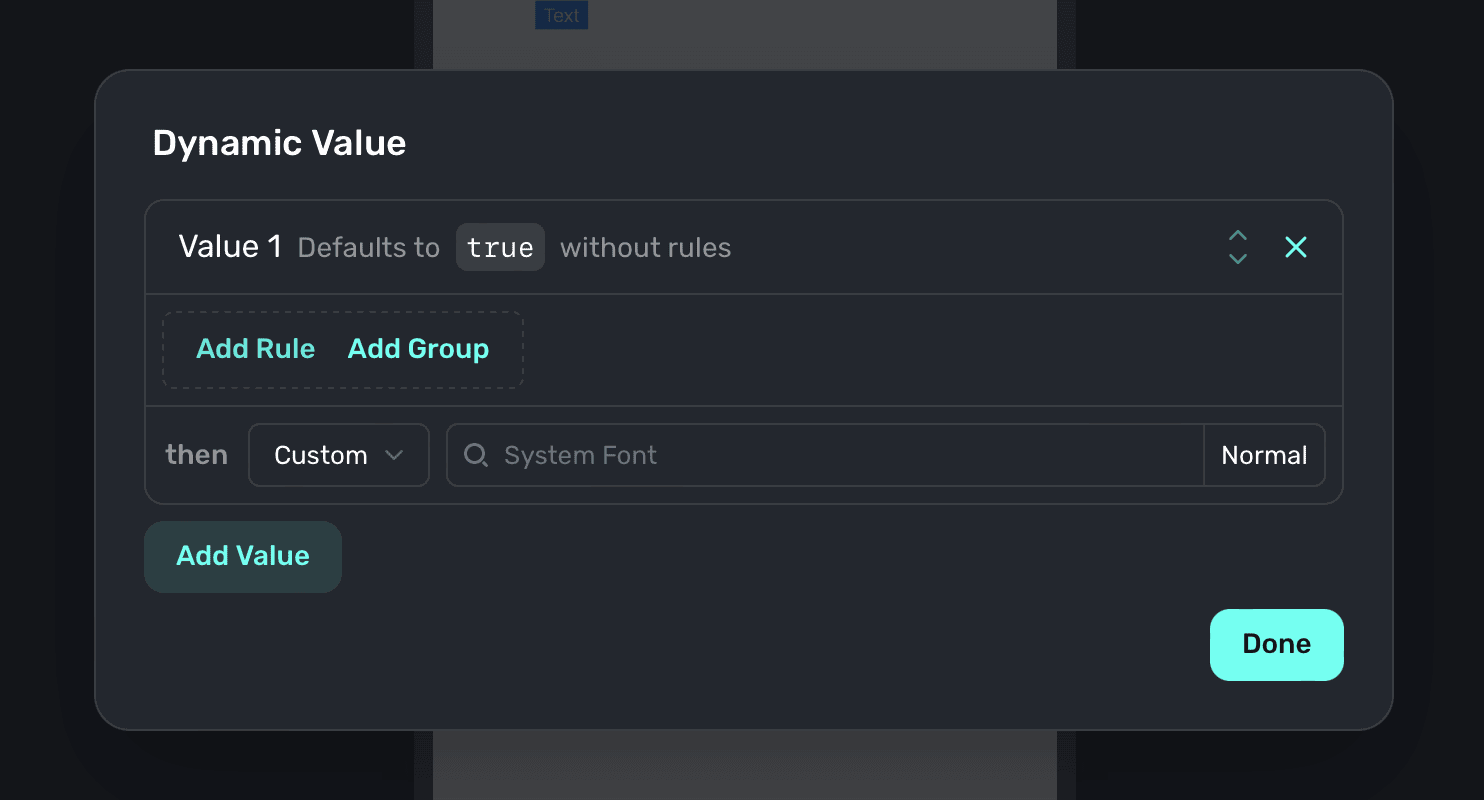
Think about them like this:
* Use **rule** when you have one condition you're checking.
* Ex: If the user has a free trial available, do this.
* Use **group** when you need to aggregate several conditions together to check.
* Ex: If the user has a free trial available *and* they are in the United States, do this.
* Use **both** of them together to check complex conditions.
* Ex: If the user has a free trial available *and* they are in the United States, *and* they are on a certain version, do this.
In programming terms, it's a bit like this:
```swift
if user.hasPro && (user.isLegacy && user.isEligibleForProPlus) {
showUpsellToLegacyUsers()
}
```
The first part of that statement would be a **rule** and the second check that's grouped together would be a **group**.
You can add rules within groups, or more groups within an existing group.
### Free trial detection
A common use-case of dynamic values is to conditionally show or hide components, or change copy, based on whether or not the user is eligible for a free trial. To do this, set up a dynamic value as follows:
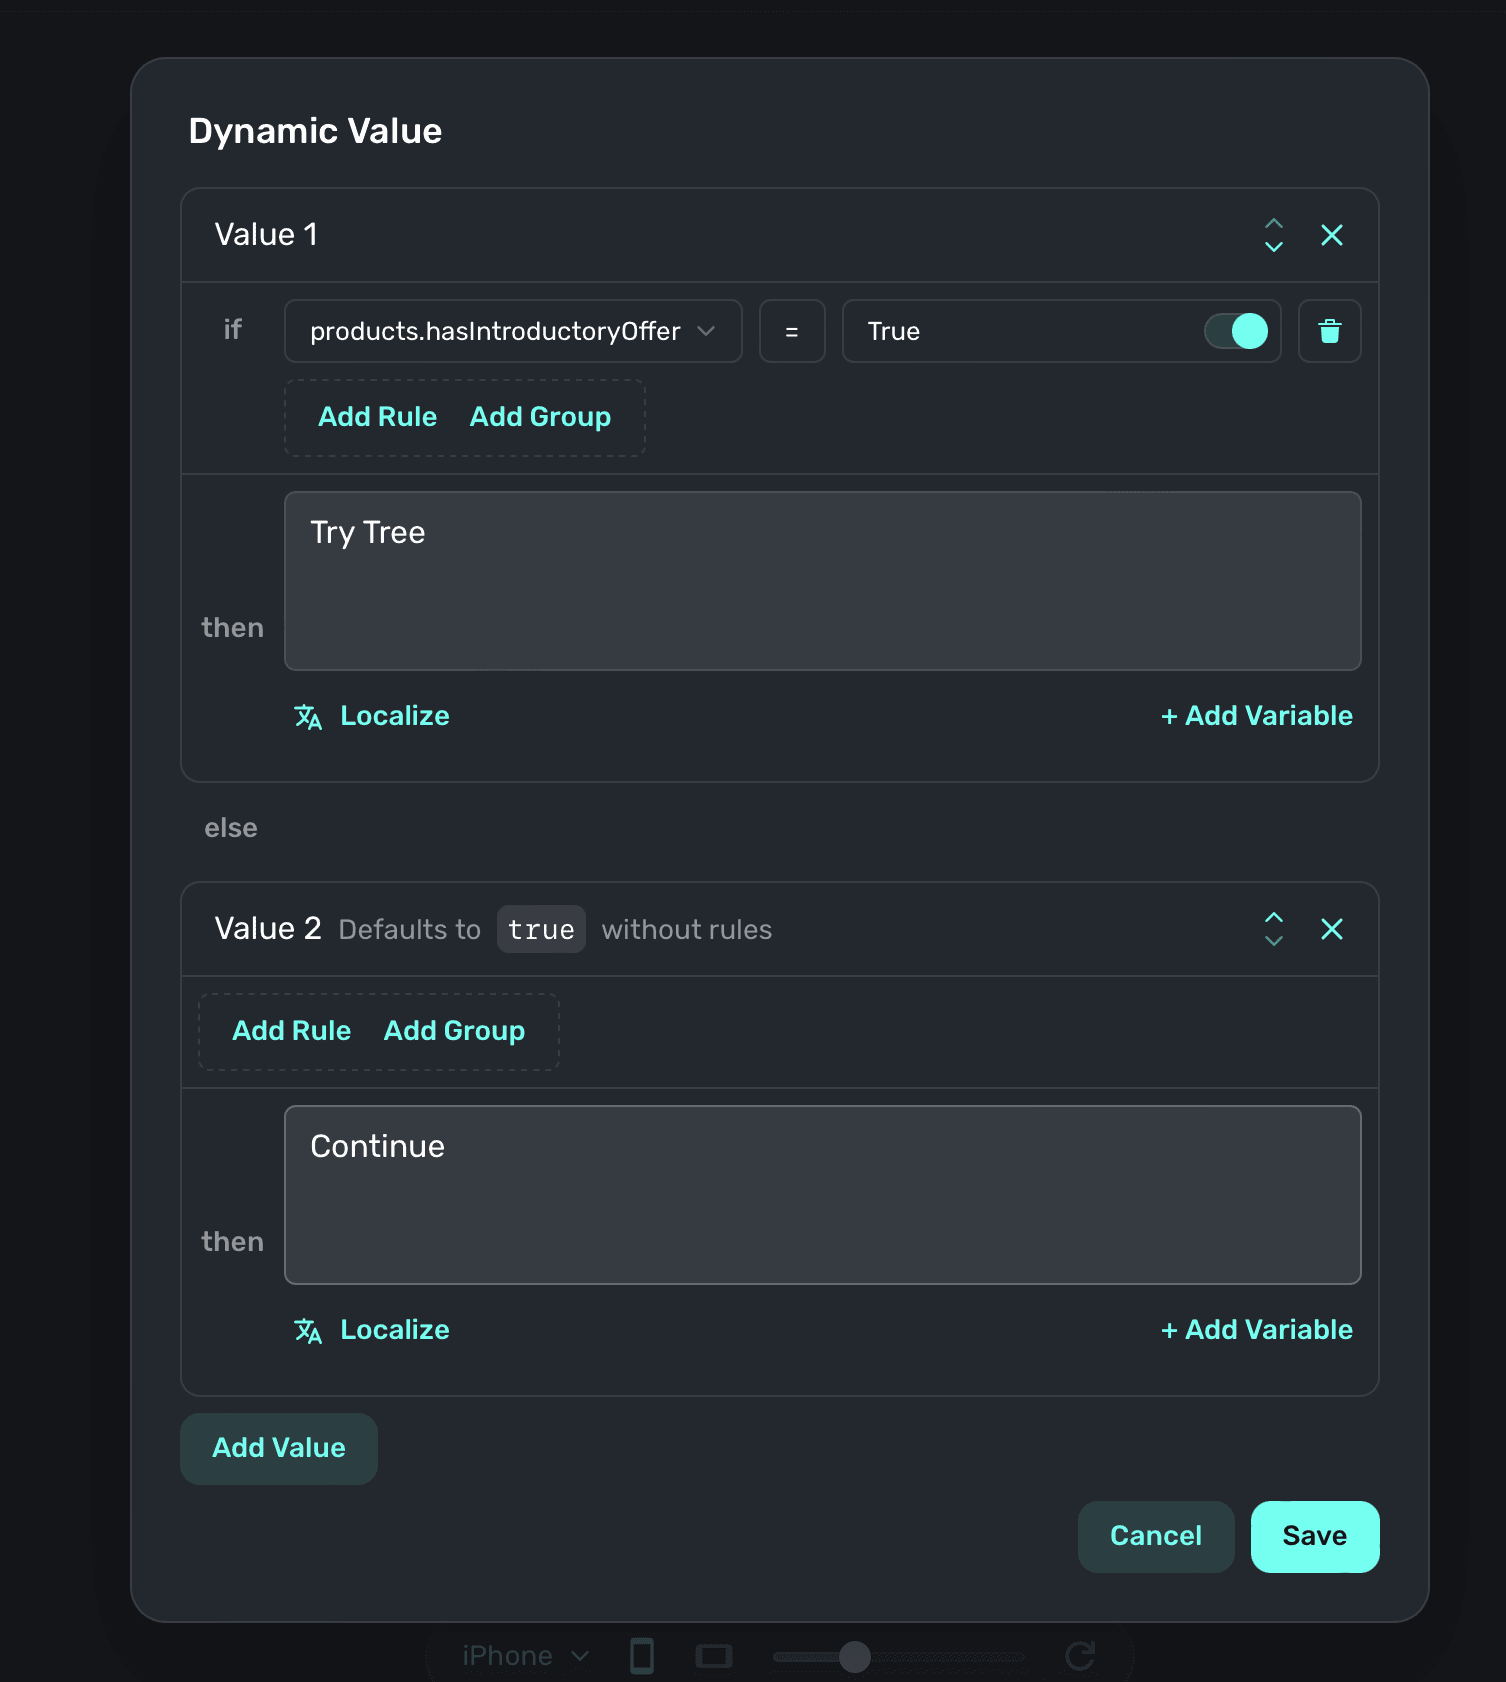
In short, use `products.hasIntroductoryOffer` to detect whether or not a free trial is available.
If a user has already claimed a free trial for any of the products within the subscription group,
this value will be `false`.
### Examples
This text component's color is to set to the theme's primary color without any condition (ie. it
should always be this color).
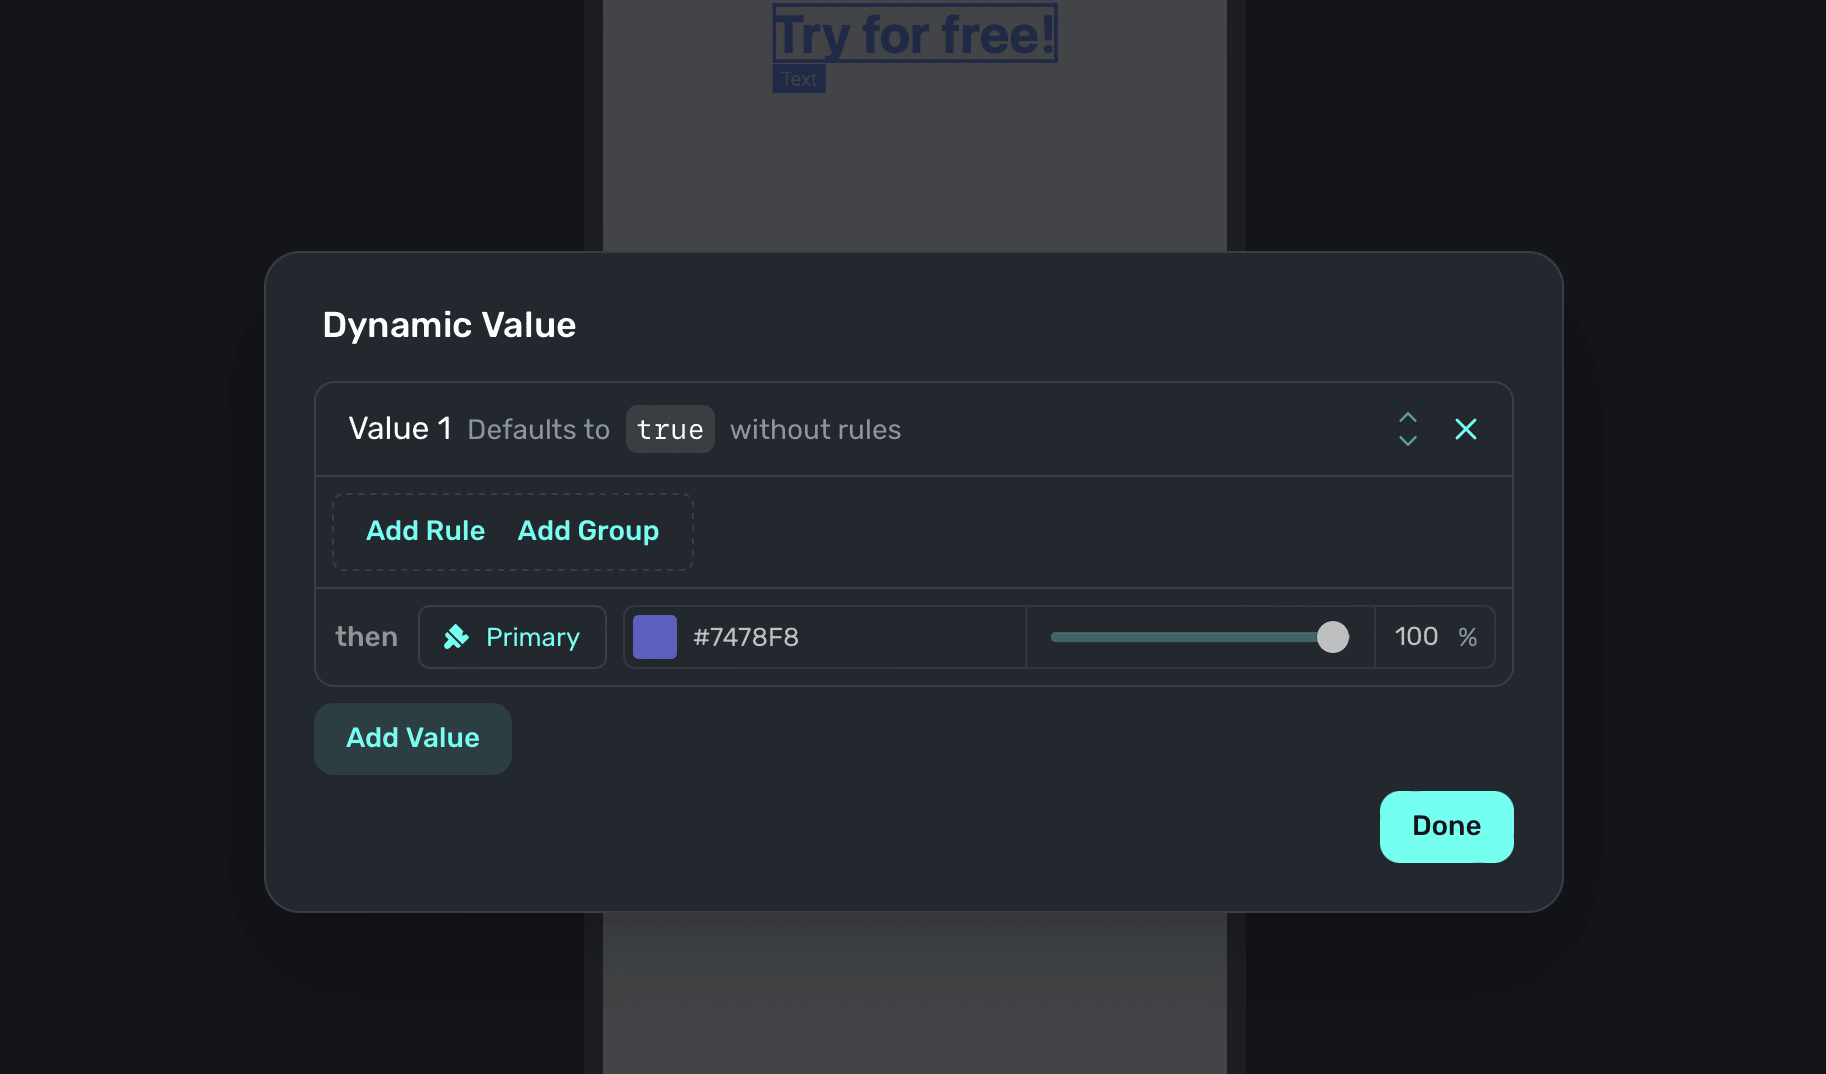
If the product has an introductory offer, the text component will read "Try for free".
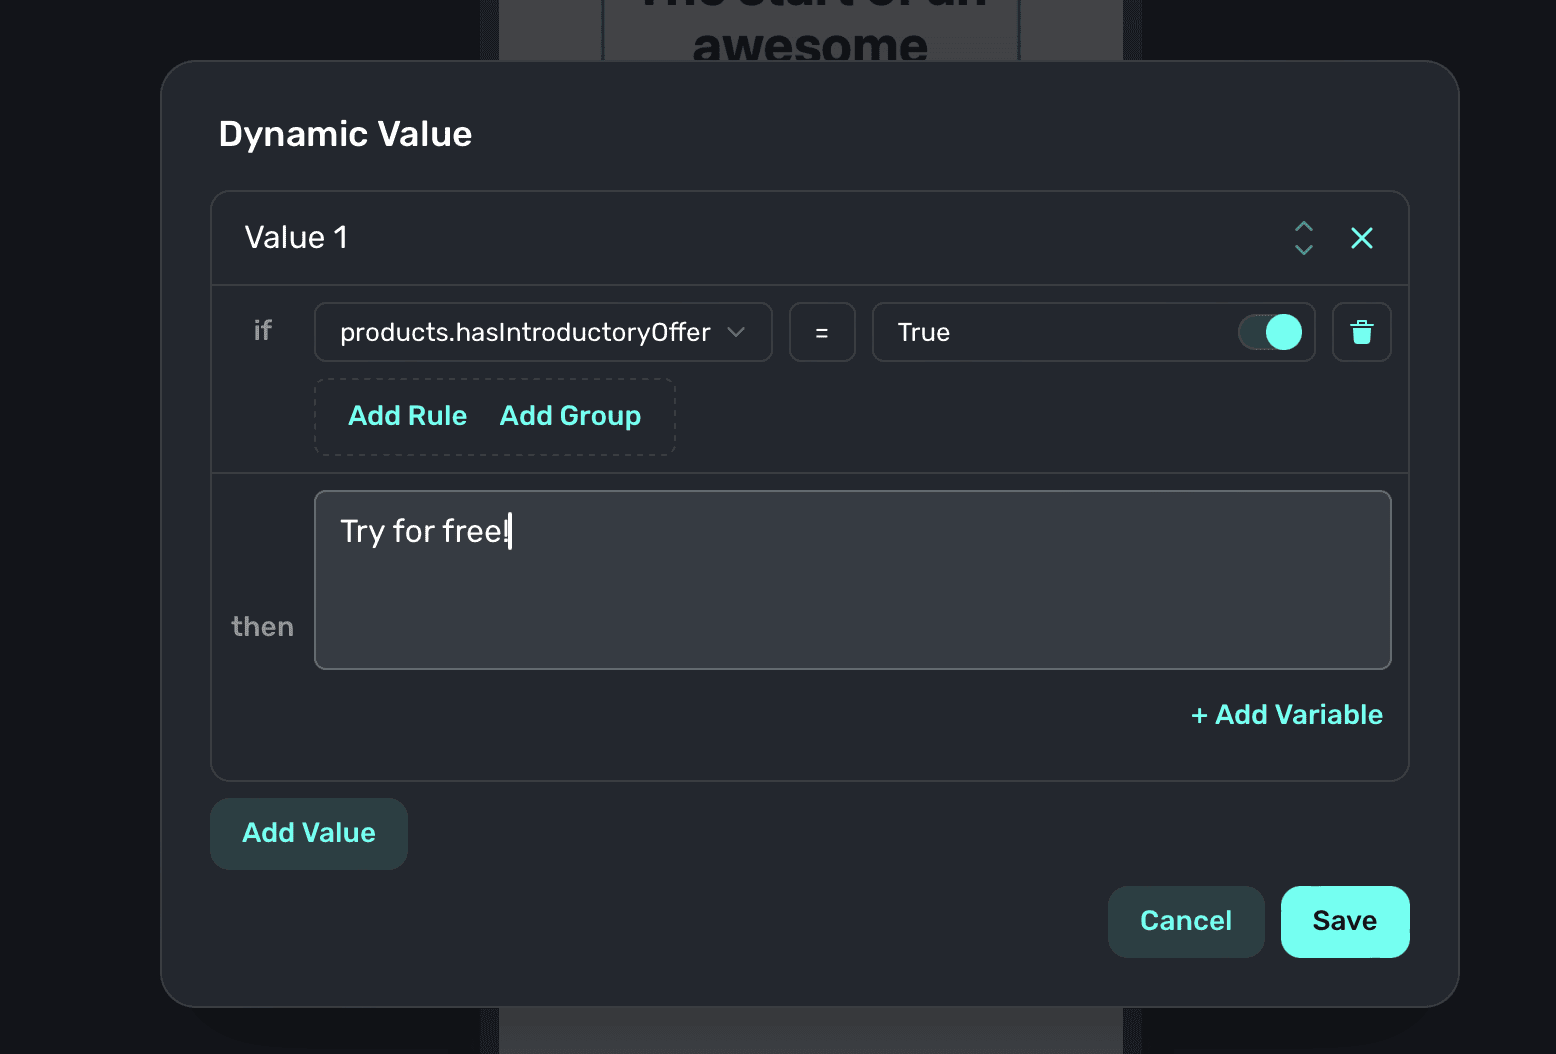
Here, we set the text to be larger than it normally would be if the user an introductory offer
and they haven't seen a paywall in 3 days.
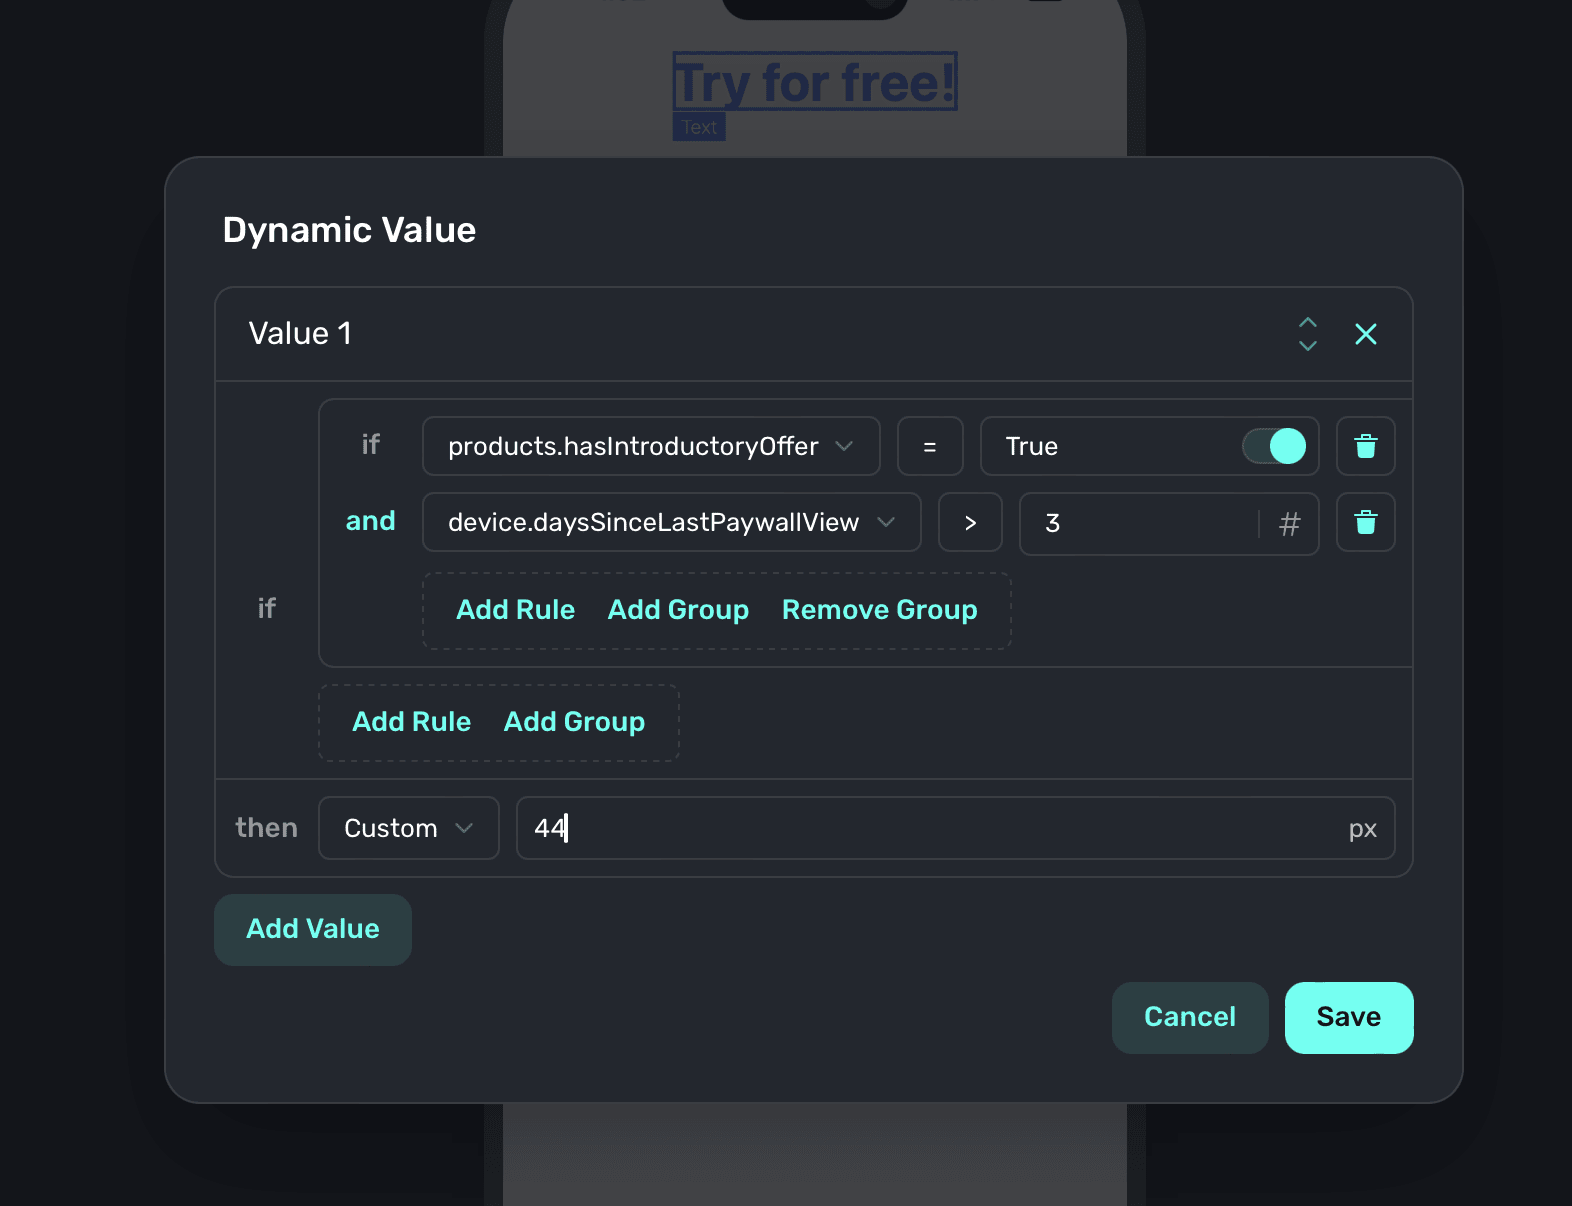
Here, some text is set if the user's app version is greater than `1.1.0` and they are on an
iPhone. If those are true, and they have an introductory offer — the text "Power up your iPhone
like never before" is used.
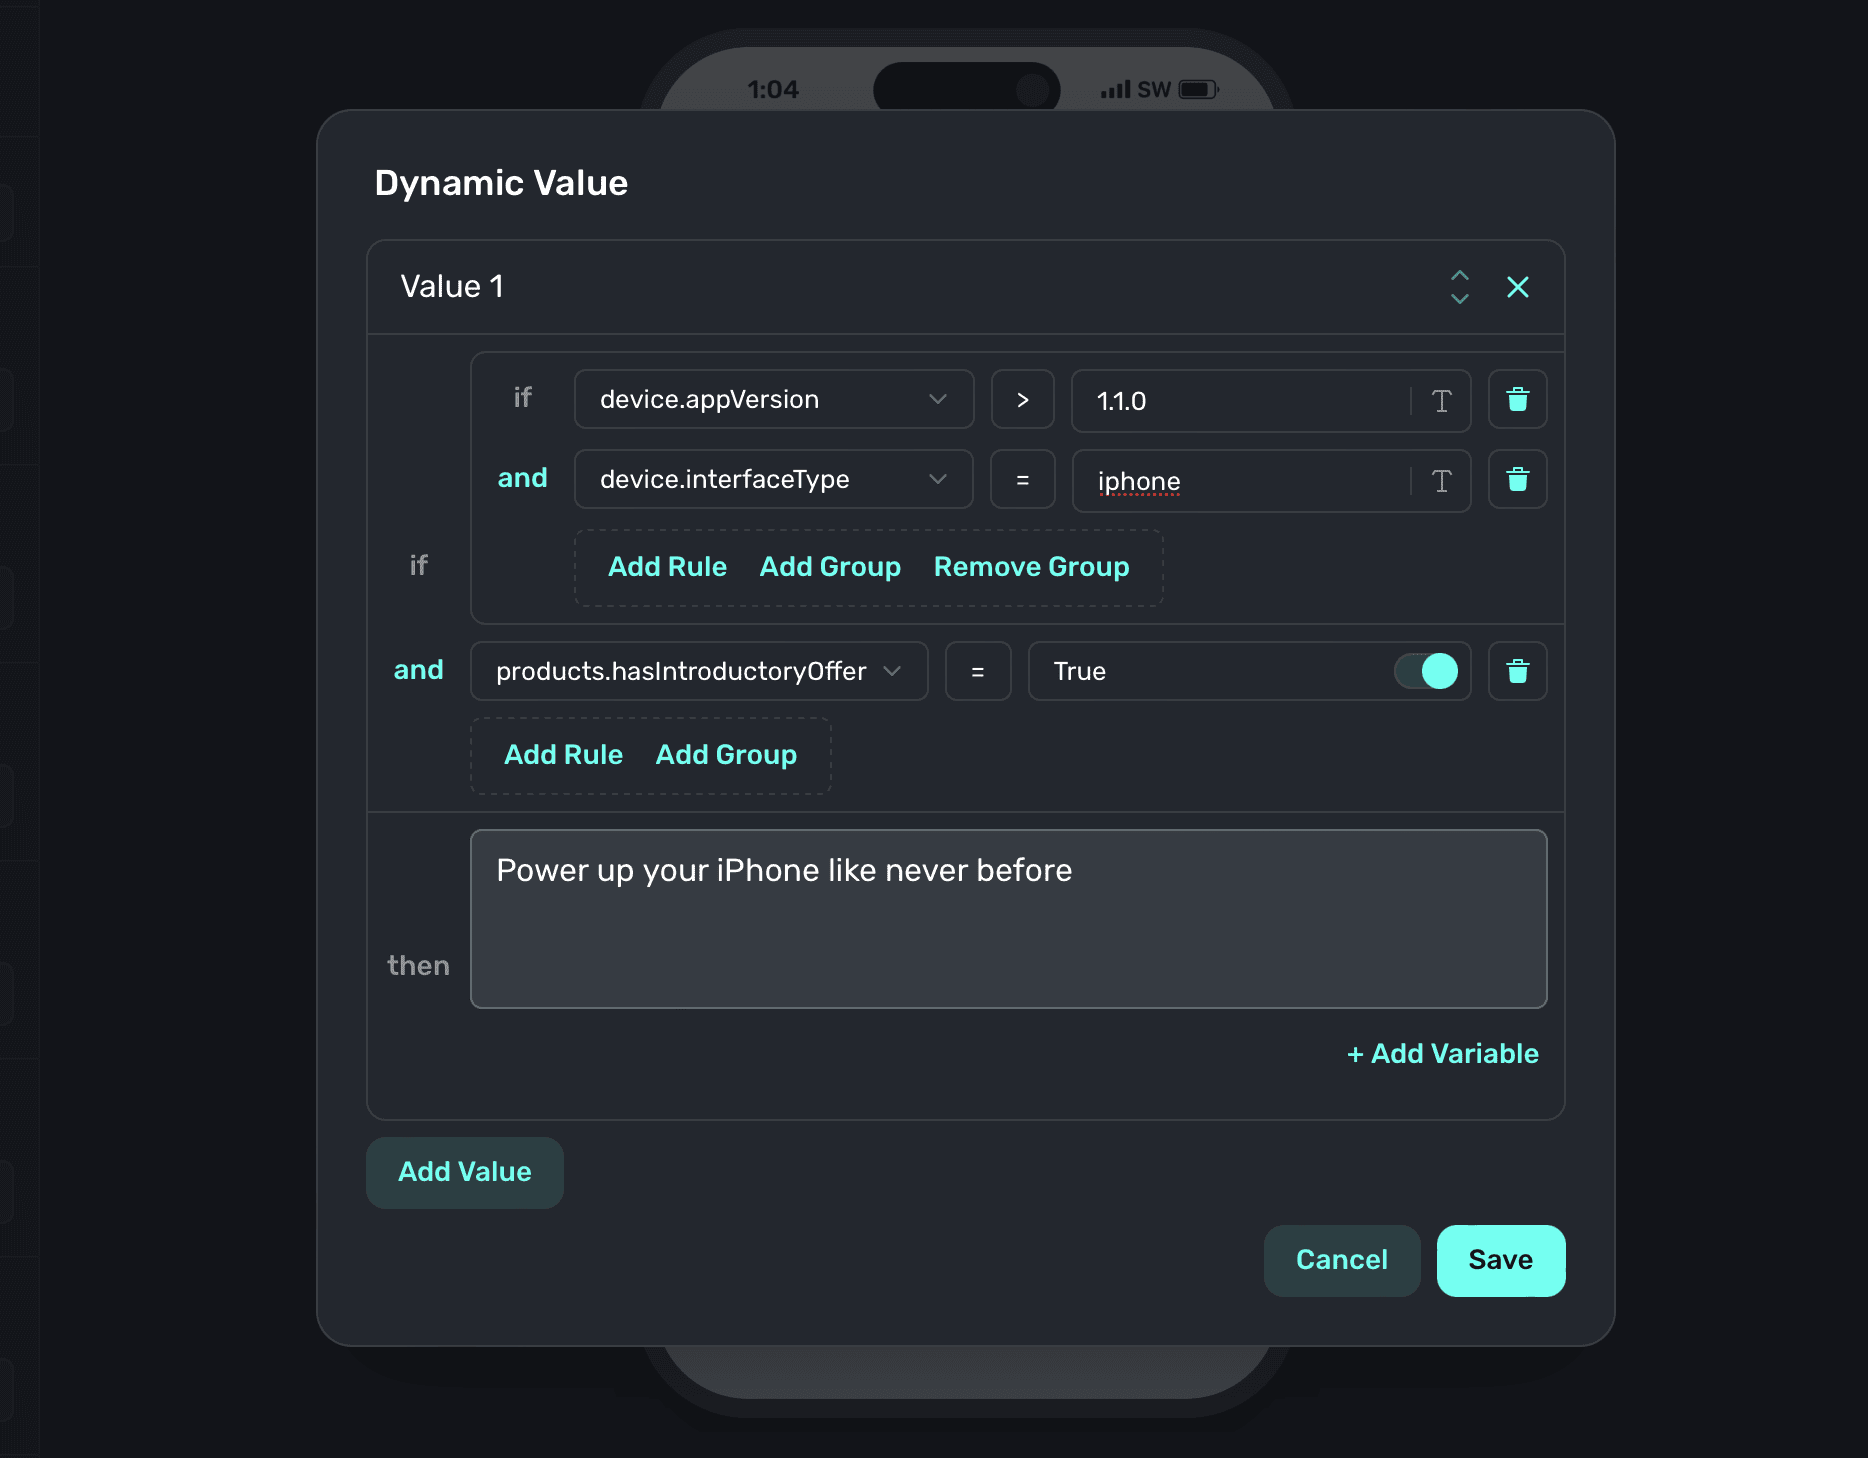
# Floating Toolbar
Source: https://superwall.com/docs/paywall-editor-floating-toolbar
In the **device preview** area, there is a floating toolbar at the bottom:
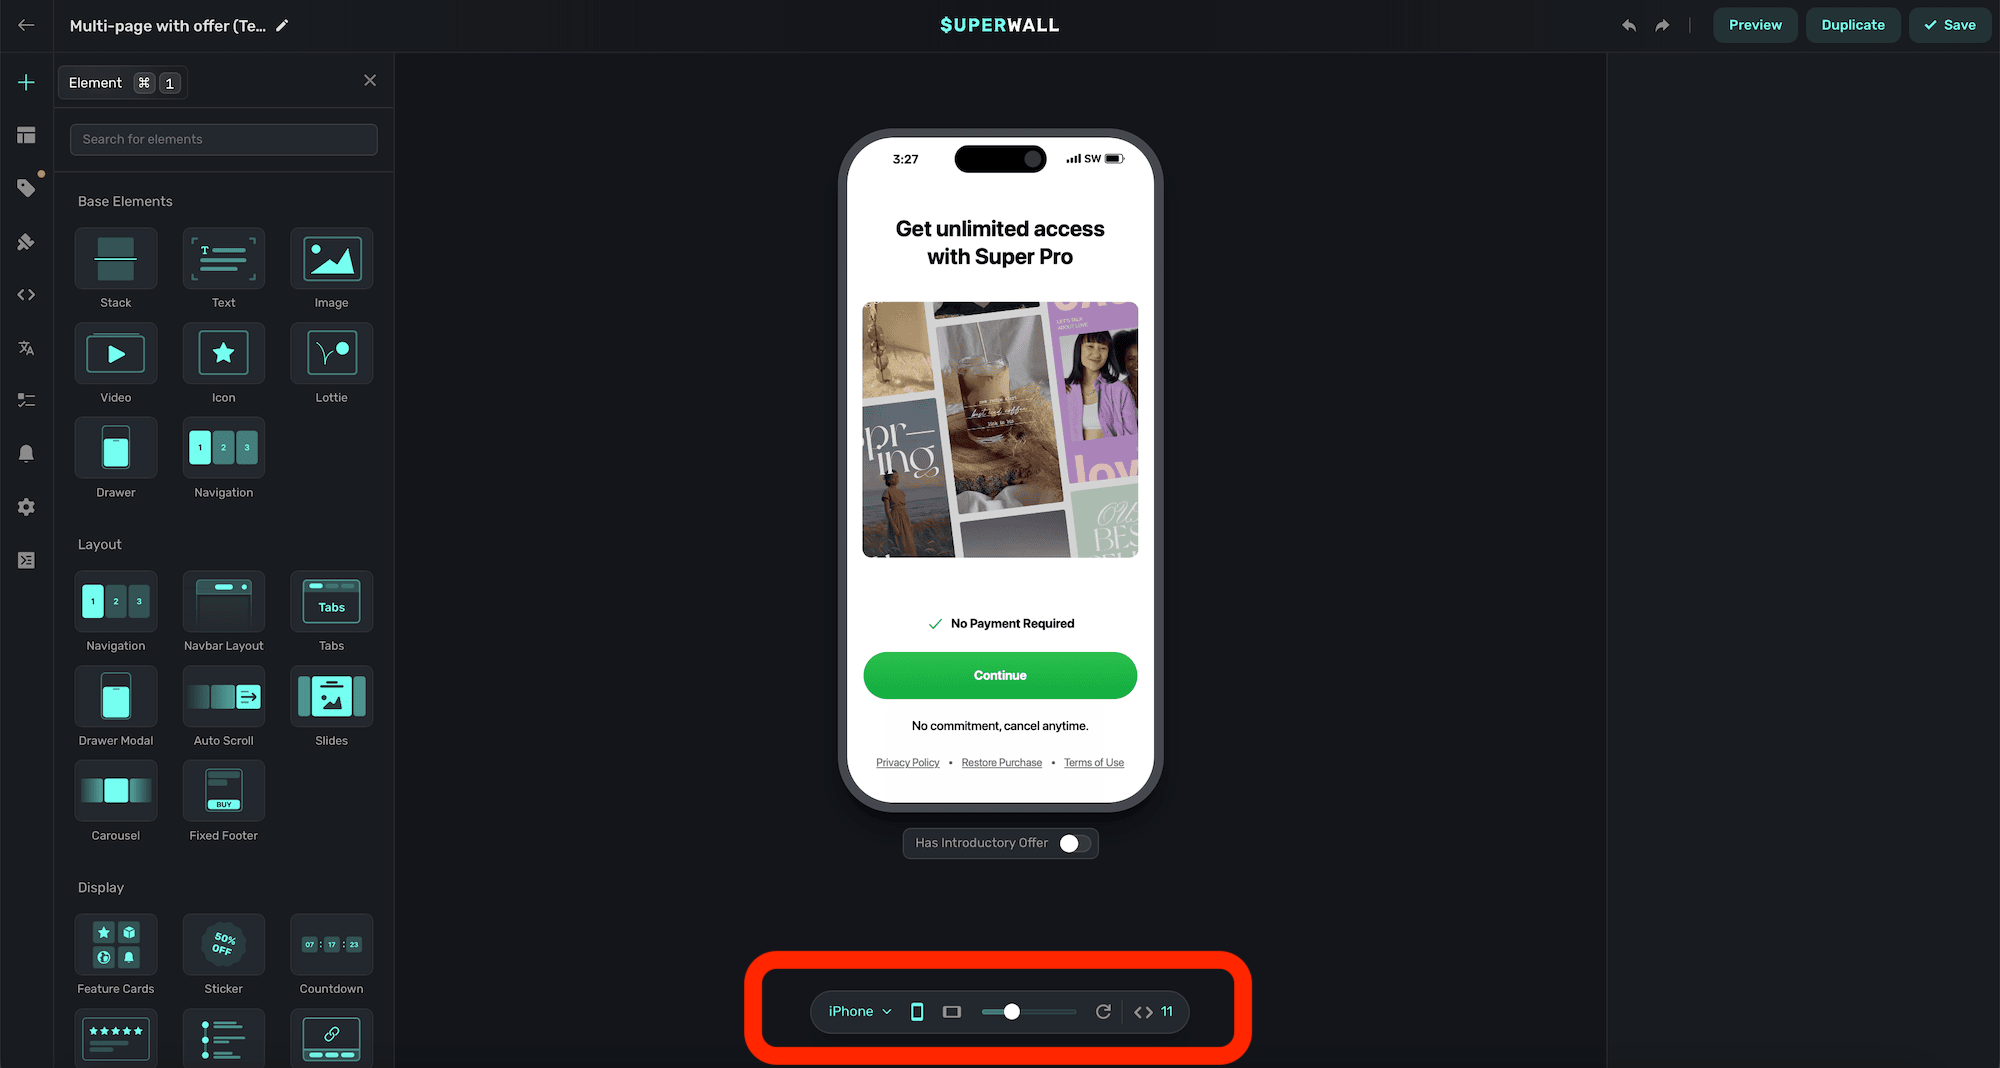
Use it to better preview your paywall designs, and see what it'll look like at different sizes or orientations. Here's what the options do, from left-to-right:
### Device
Use the device toggle to switch between:
* **iPhone SE:** A generalized smaller iPhone device preview.
* **iPhone:** A generalized iPhone device preview.
* **iPad:** A generalized iPad device preview.
* **Desktop:** A generalized desktop-sized preview.
### Orientation
Use the orientation button to switch between portrait and landscape:
### Zoom
Use the zoom slider to adjust the preview scale of the paywall preview:

### Refresh
You can manually refresh the paywall device preview with the circle arrow button. You won't lose any progress when clicking this, as your changes are always saved locally.
### Variables
Use the variable window to quickly reference or edit variables used across your paywall. You can toggle by variables in use, or all of them.

# Layout
Source: https://superwall.com/docs/paywall-editor-layout
The **Layout** tab in the **sidebar** provides a visual outline of your paywall's components. Hovering over elements will highlight them in the device preview:
### Adding elements
Click the **+** in the left sidebar or in the **Layout** tab to select an element to add to your paywall. This will present our library of components along with any snippets you've made (along with some of our own stock recipes):
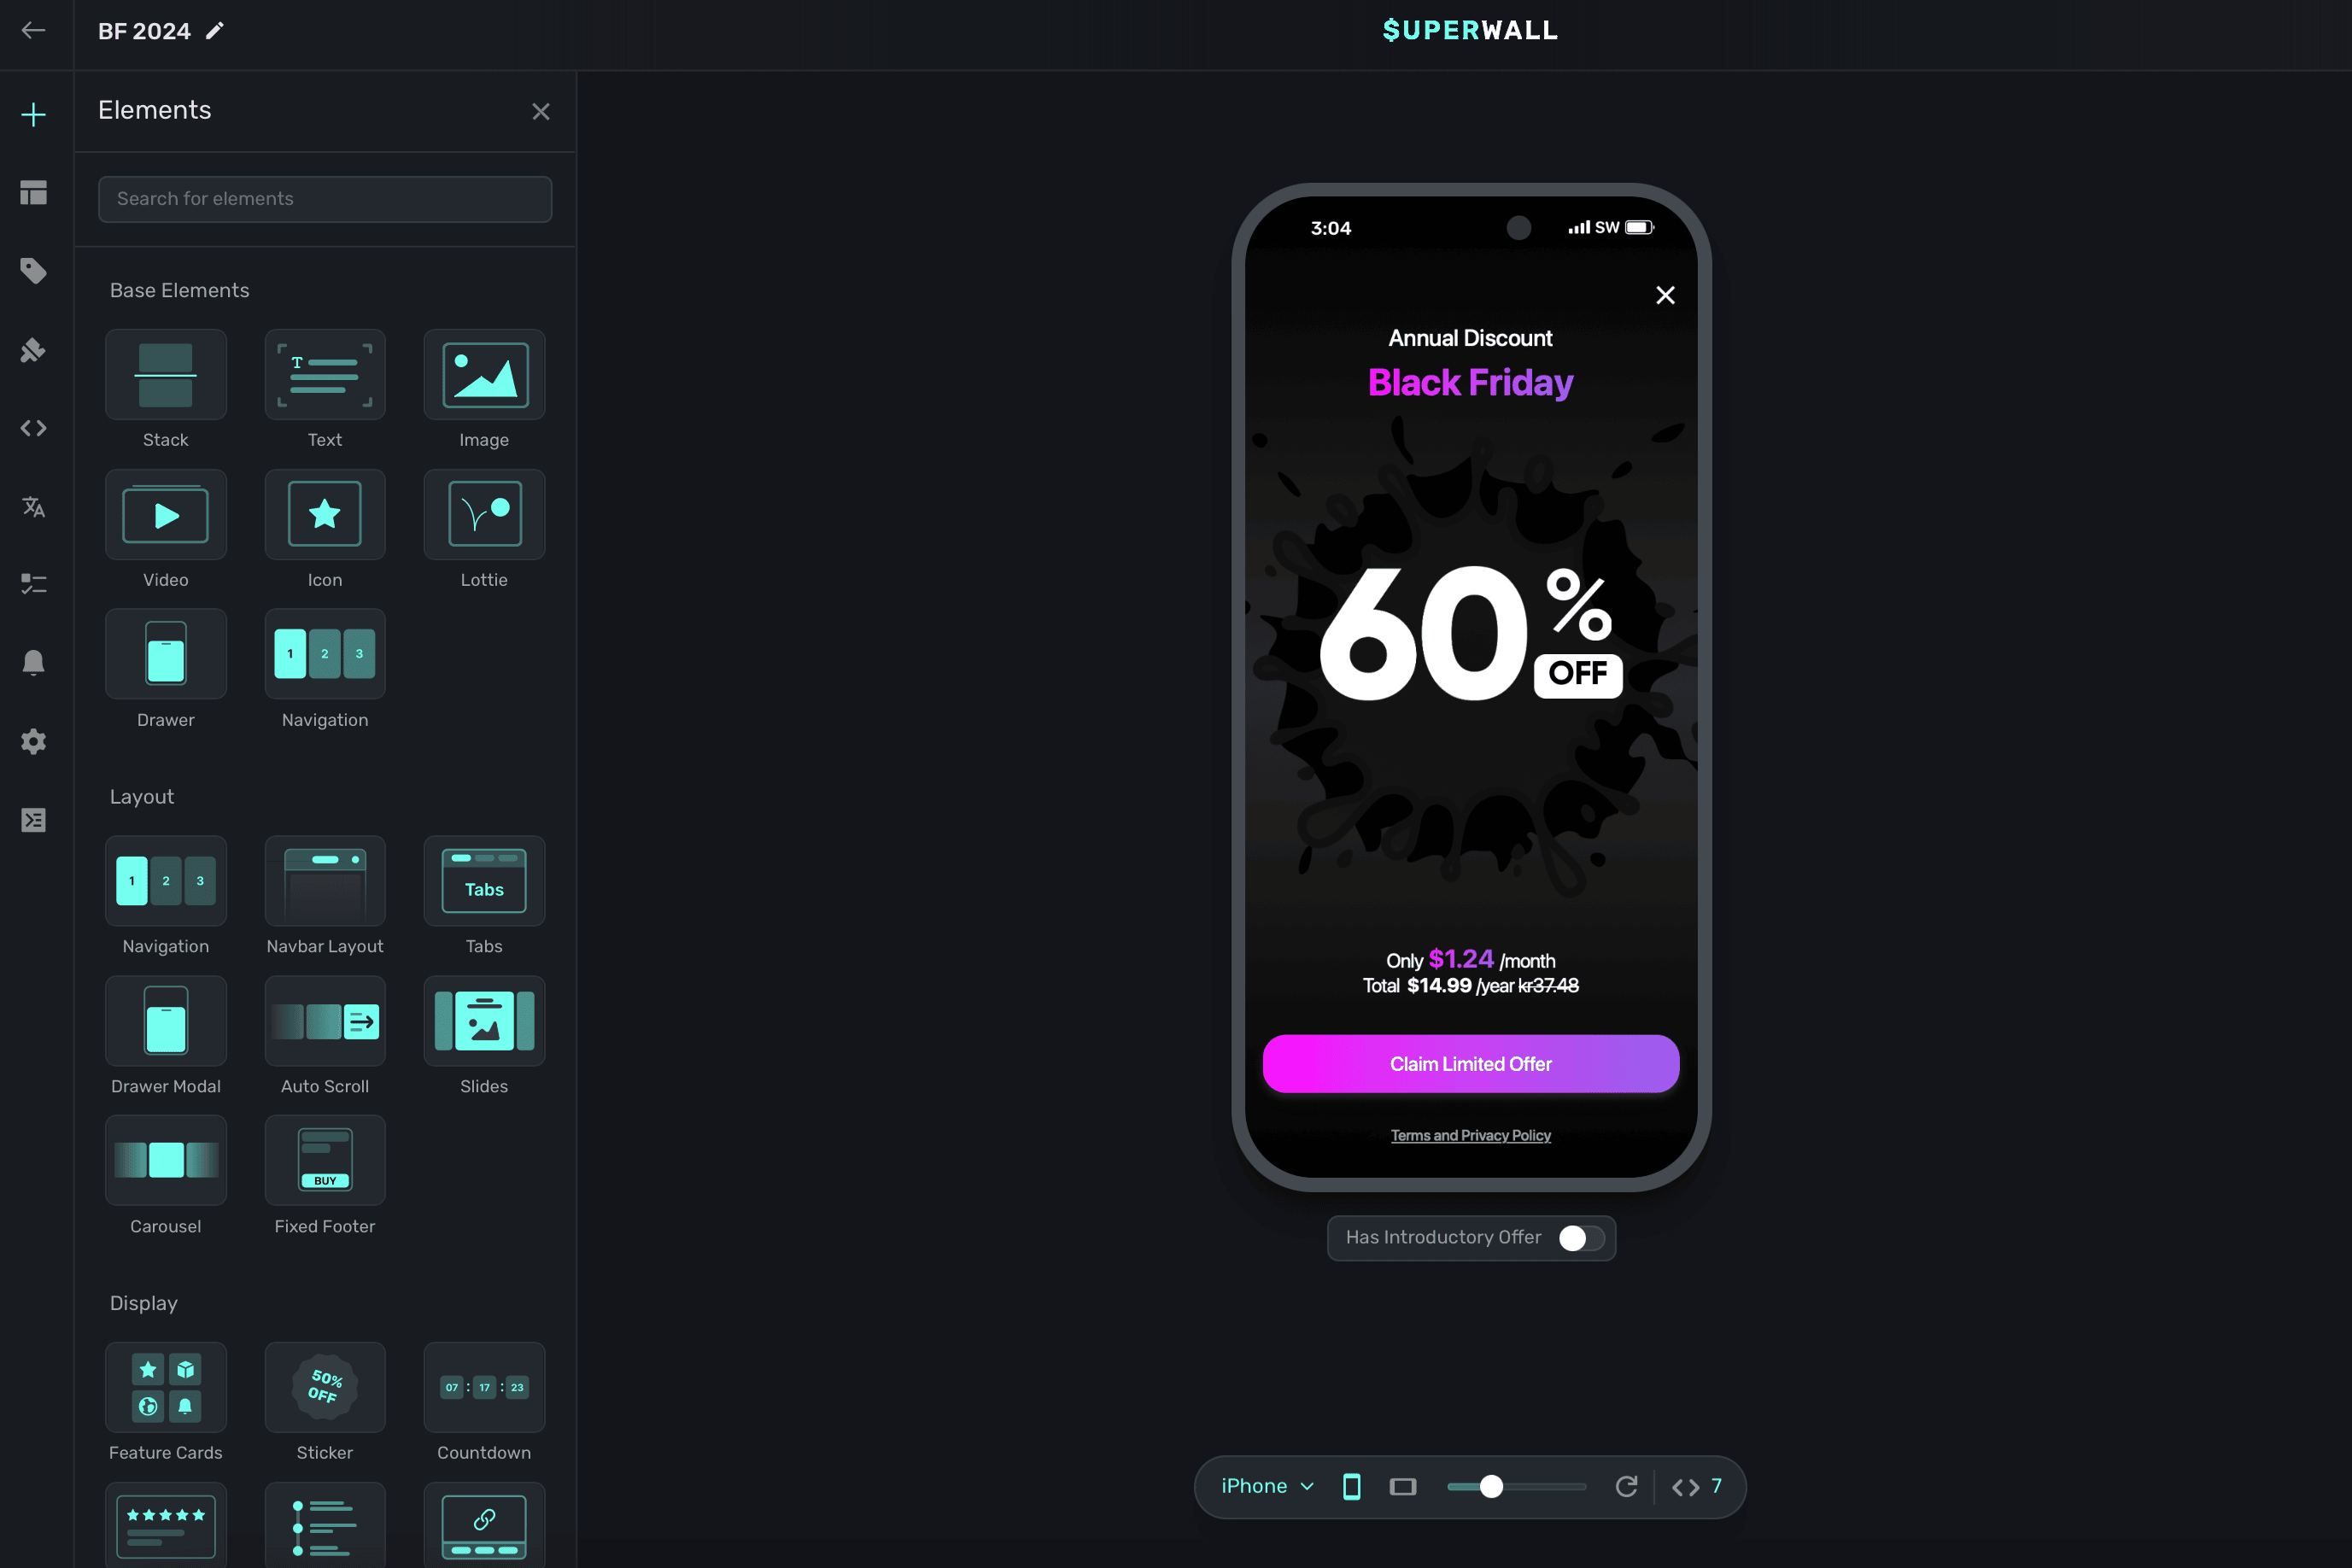
At the top, you can choose from our core, fundamental building blocks such as a stack, text and more.
Most of your layouts should probably start with a Stack component. From there, add child elements
to them to construct any layout.
Our stock components include:
* **Stack:** The foundation of any layout, it works like CSS Flexbox layout. Check out this [reference](https://flexbox.help) if you're new to Flexbox rules, alignment or just need a refresher.
* **Text:** Text components that can use [variables](/paywall-editor-variables), different font styles and more.
* **Image:** Add any image, or URL where it's located, to your paywall.
* **Video:** Add any video, or URL where it's located, to your paywall. You can choose to loop it, show or hide playback controls, mute it or toggle autoplay. We support most file formats but we do recommend keeping the file size around 2-5 megabytes.
* **Icon:** Superwall has over 1,000 searchable icons to available, along with the ability to edit their weight and color. You can browse them by category by clicking on the right hand side:
* **Lottie:** A [Lottie](https://airbnb.design/lottie/) file. Either point to a URL of where it's located at, or upload one yourself. You can also customize looping, playback speed and more.
* **Drawer:** A basic drawer which presents from the bottom that can be configured to dismiss via fluid gestures or manually.
* **Navigation:** A container to set up multi-page designs, complete with a transition style.
### Snippets
Snippets allow you to aggregate one or more components together to reuse. For example, if you have a stack component with an icon and a text label, you could group that together to use as a component either in the current paywall, or another one later.
To add a snippet, select the **component** you want to use for your snippet and click the **bookmark** icon:
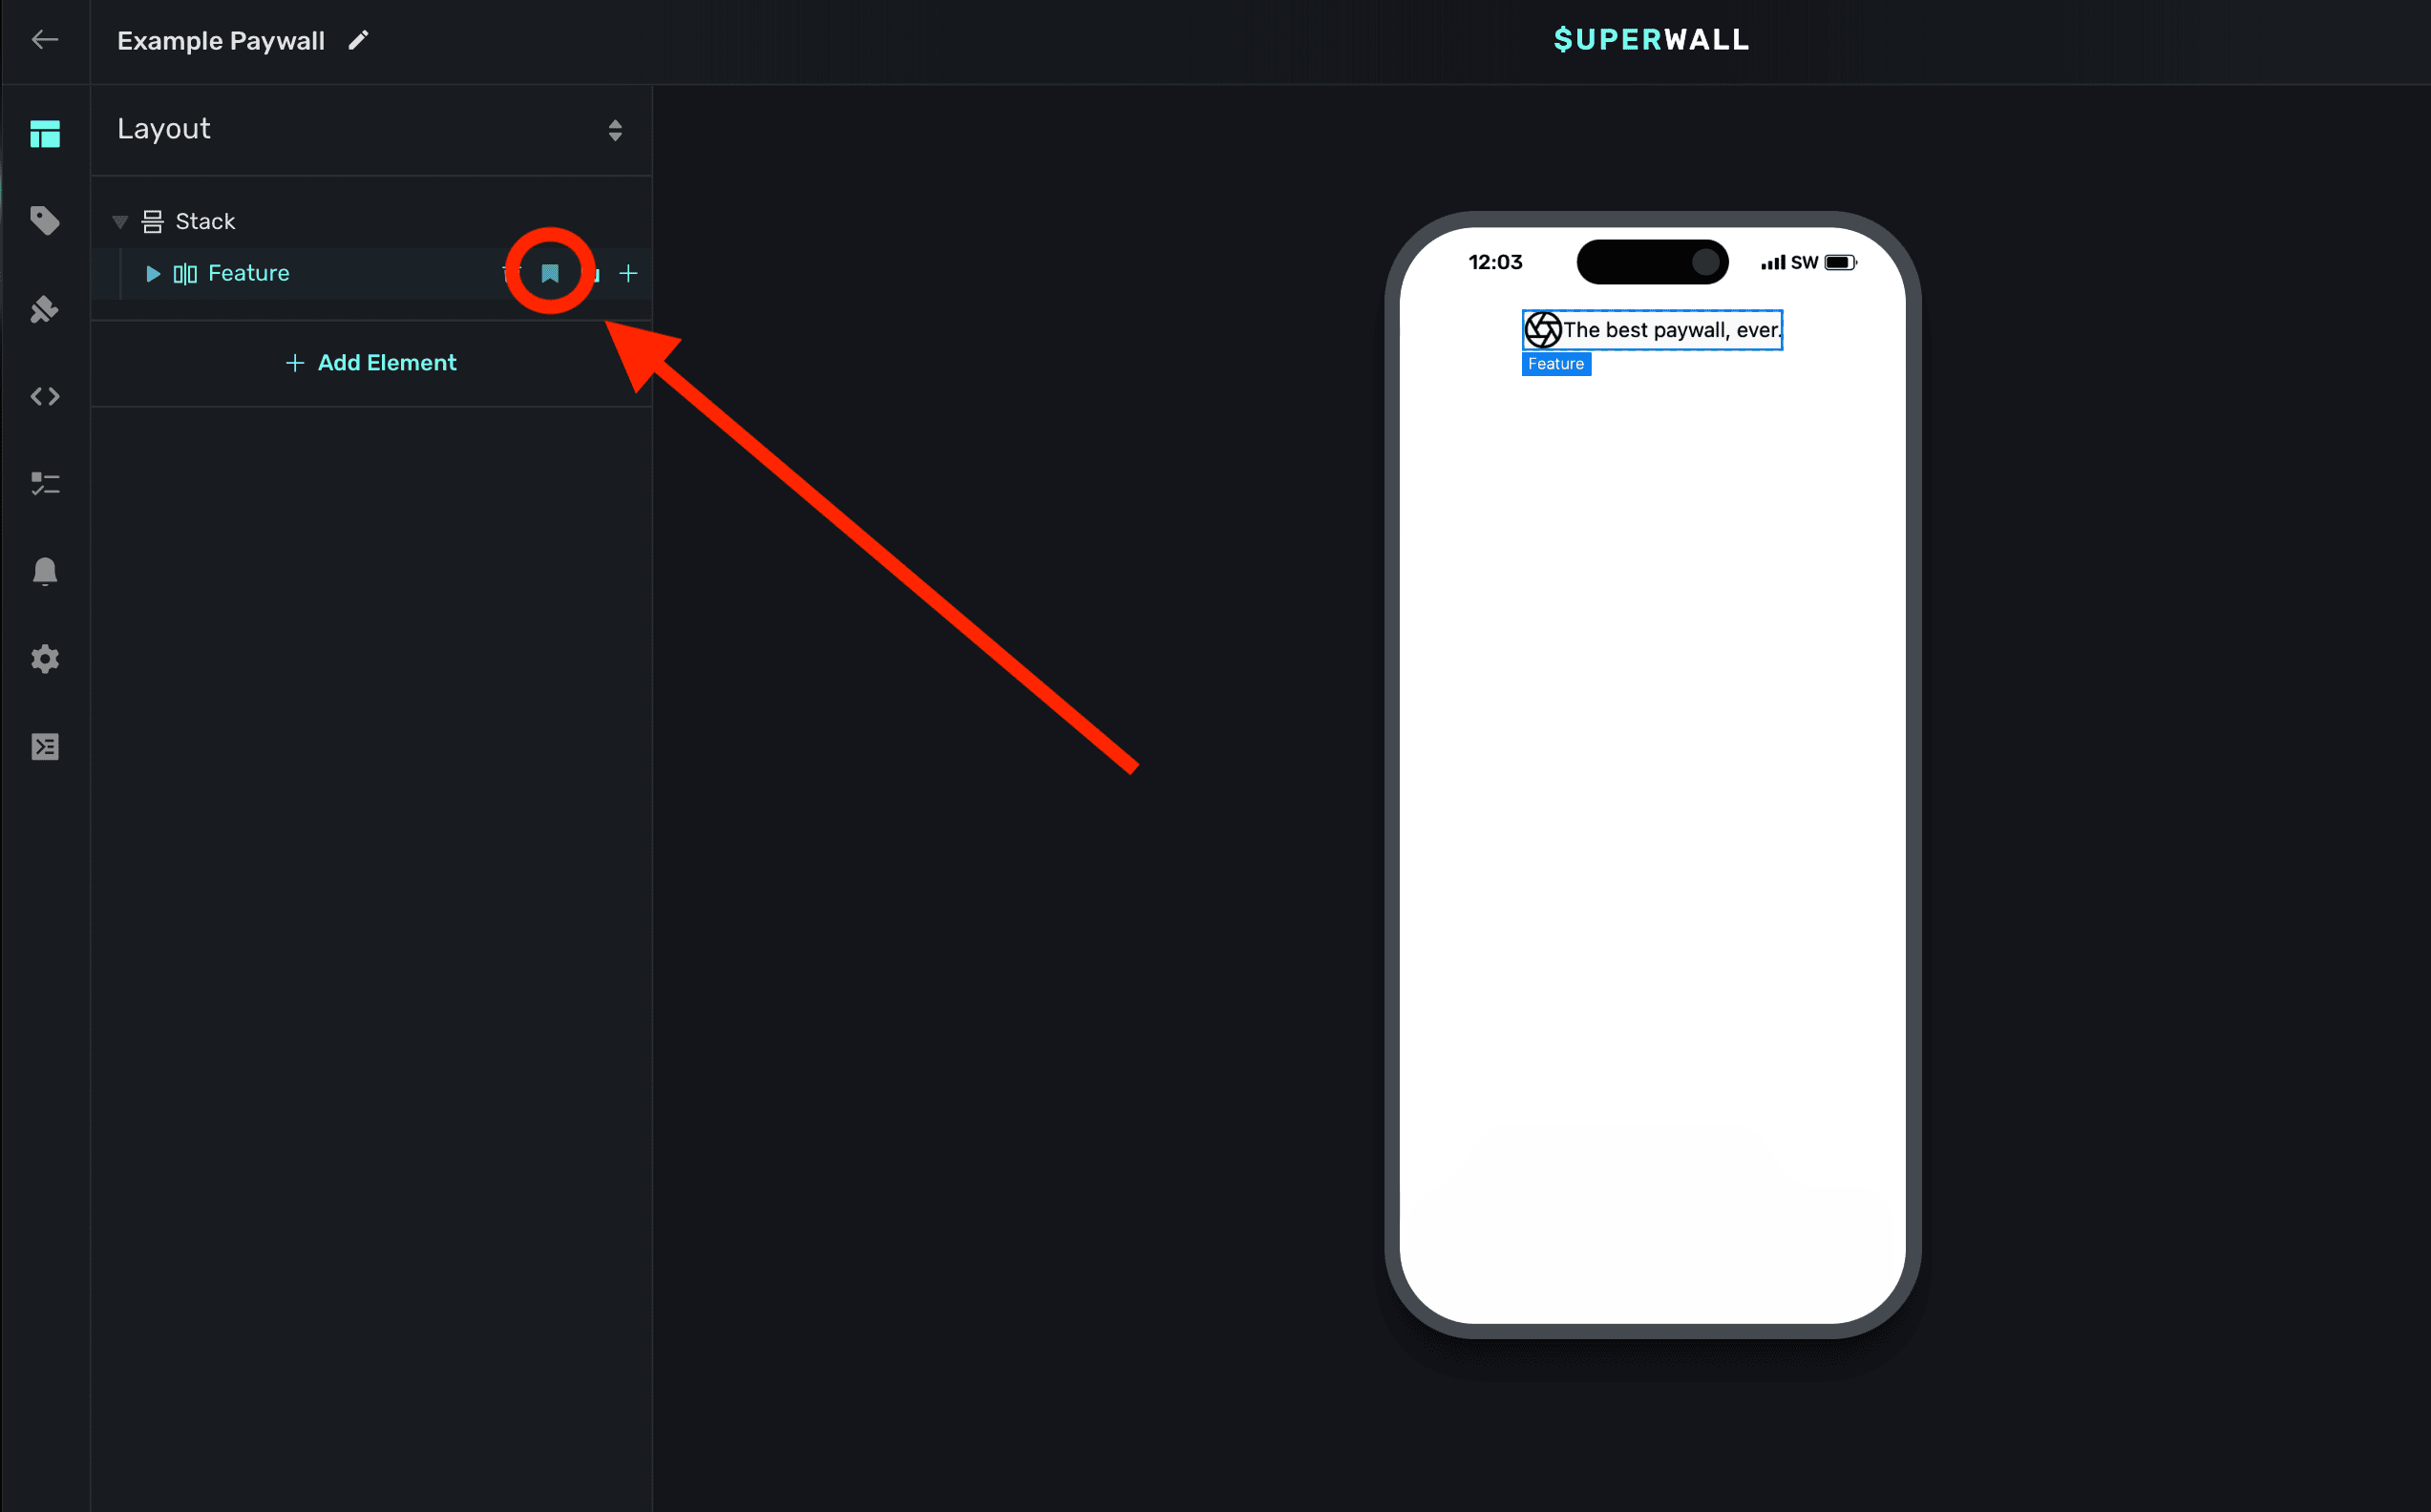
Then, give your snippet a name and add a description. When you're finished, click **Save**:
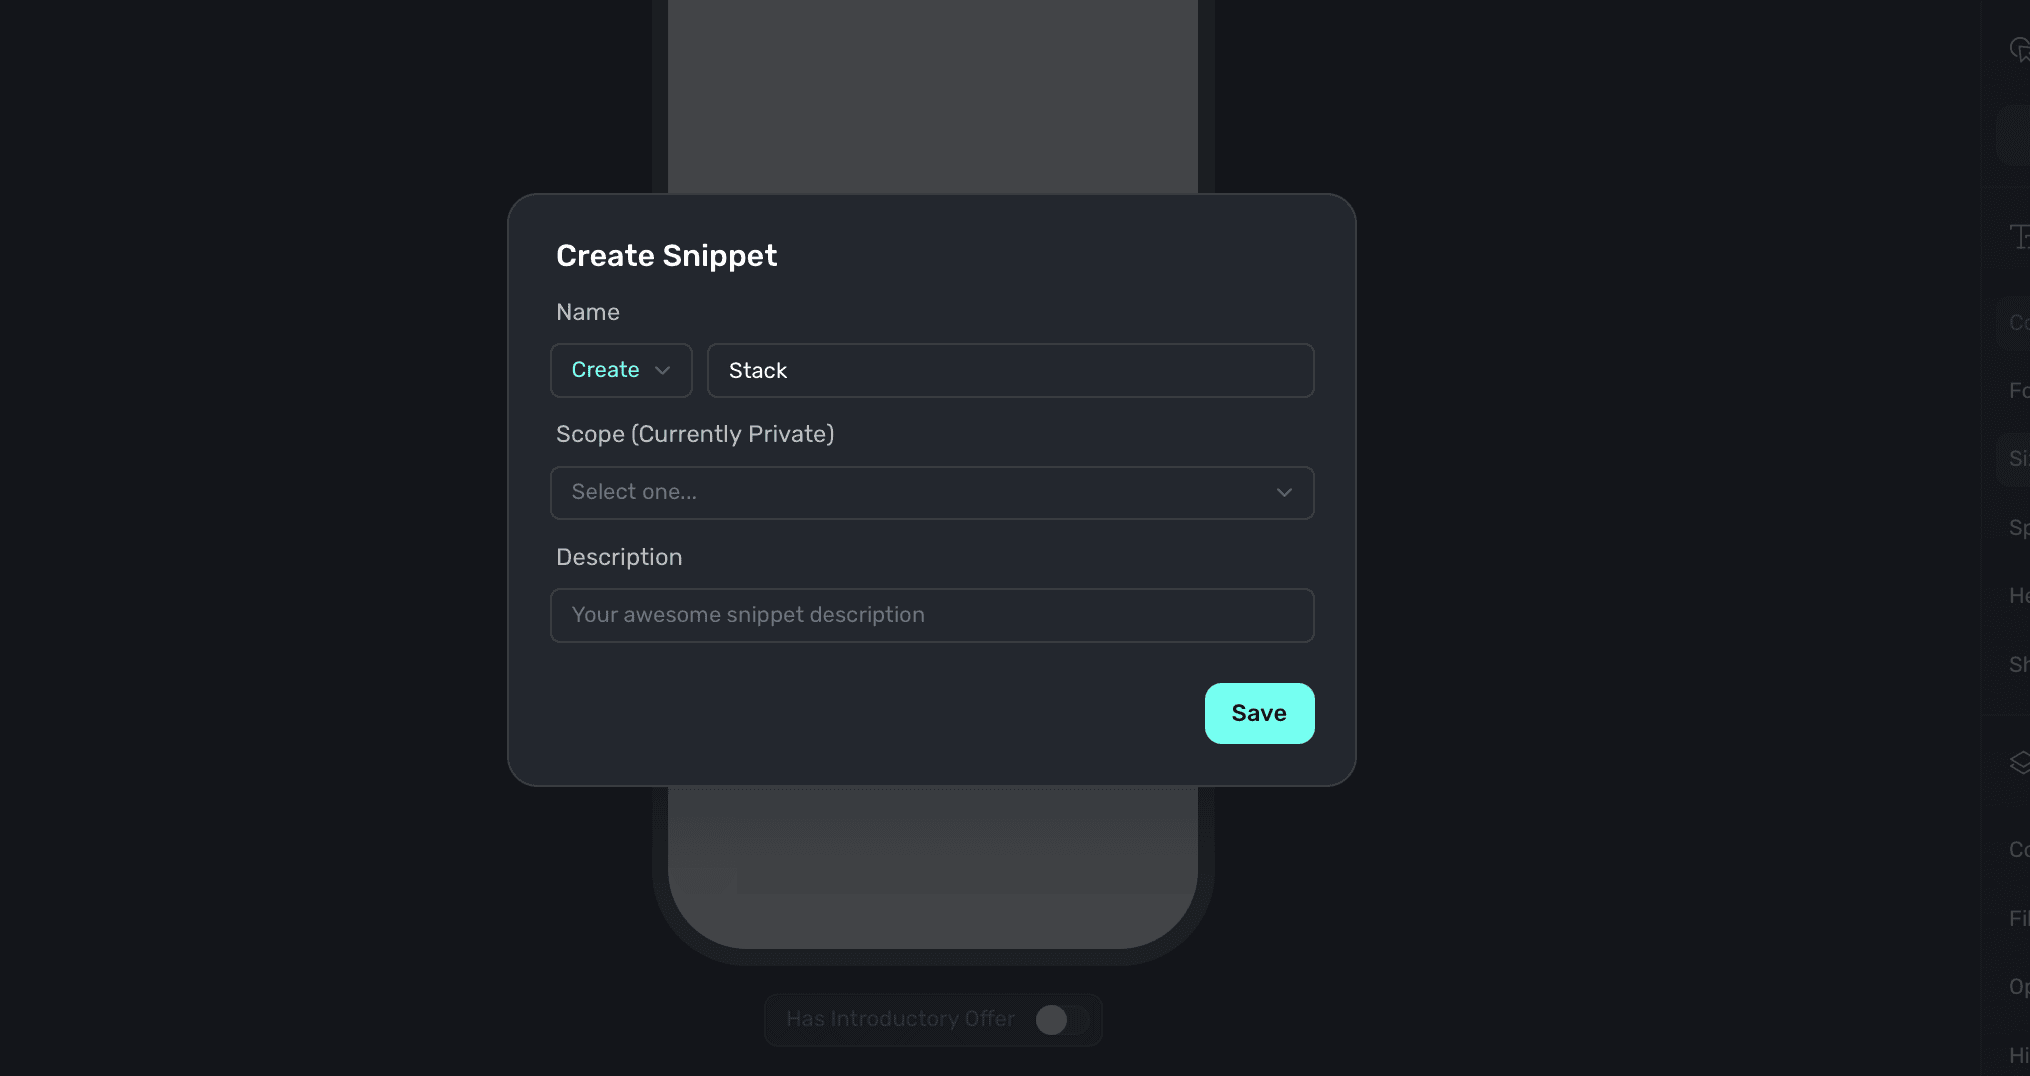
From then on, you can reuse it when adding a new component to any paywall. You'll see your own snippets at the bottom. Here's an example of a few custom snippets:
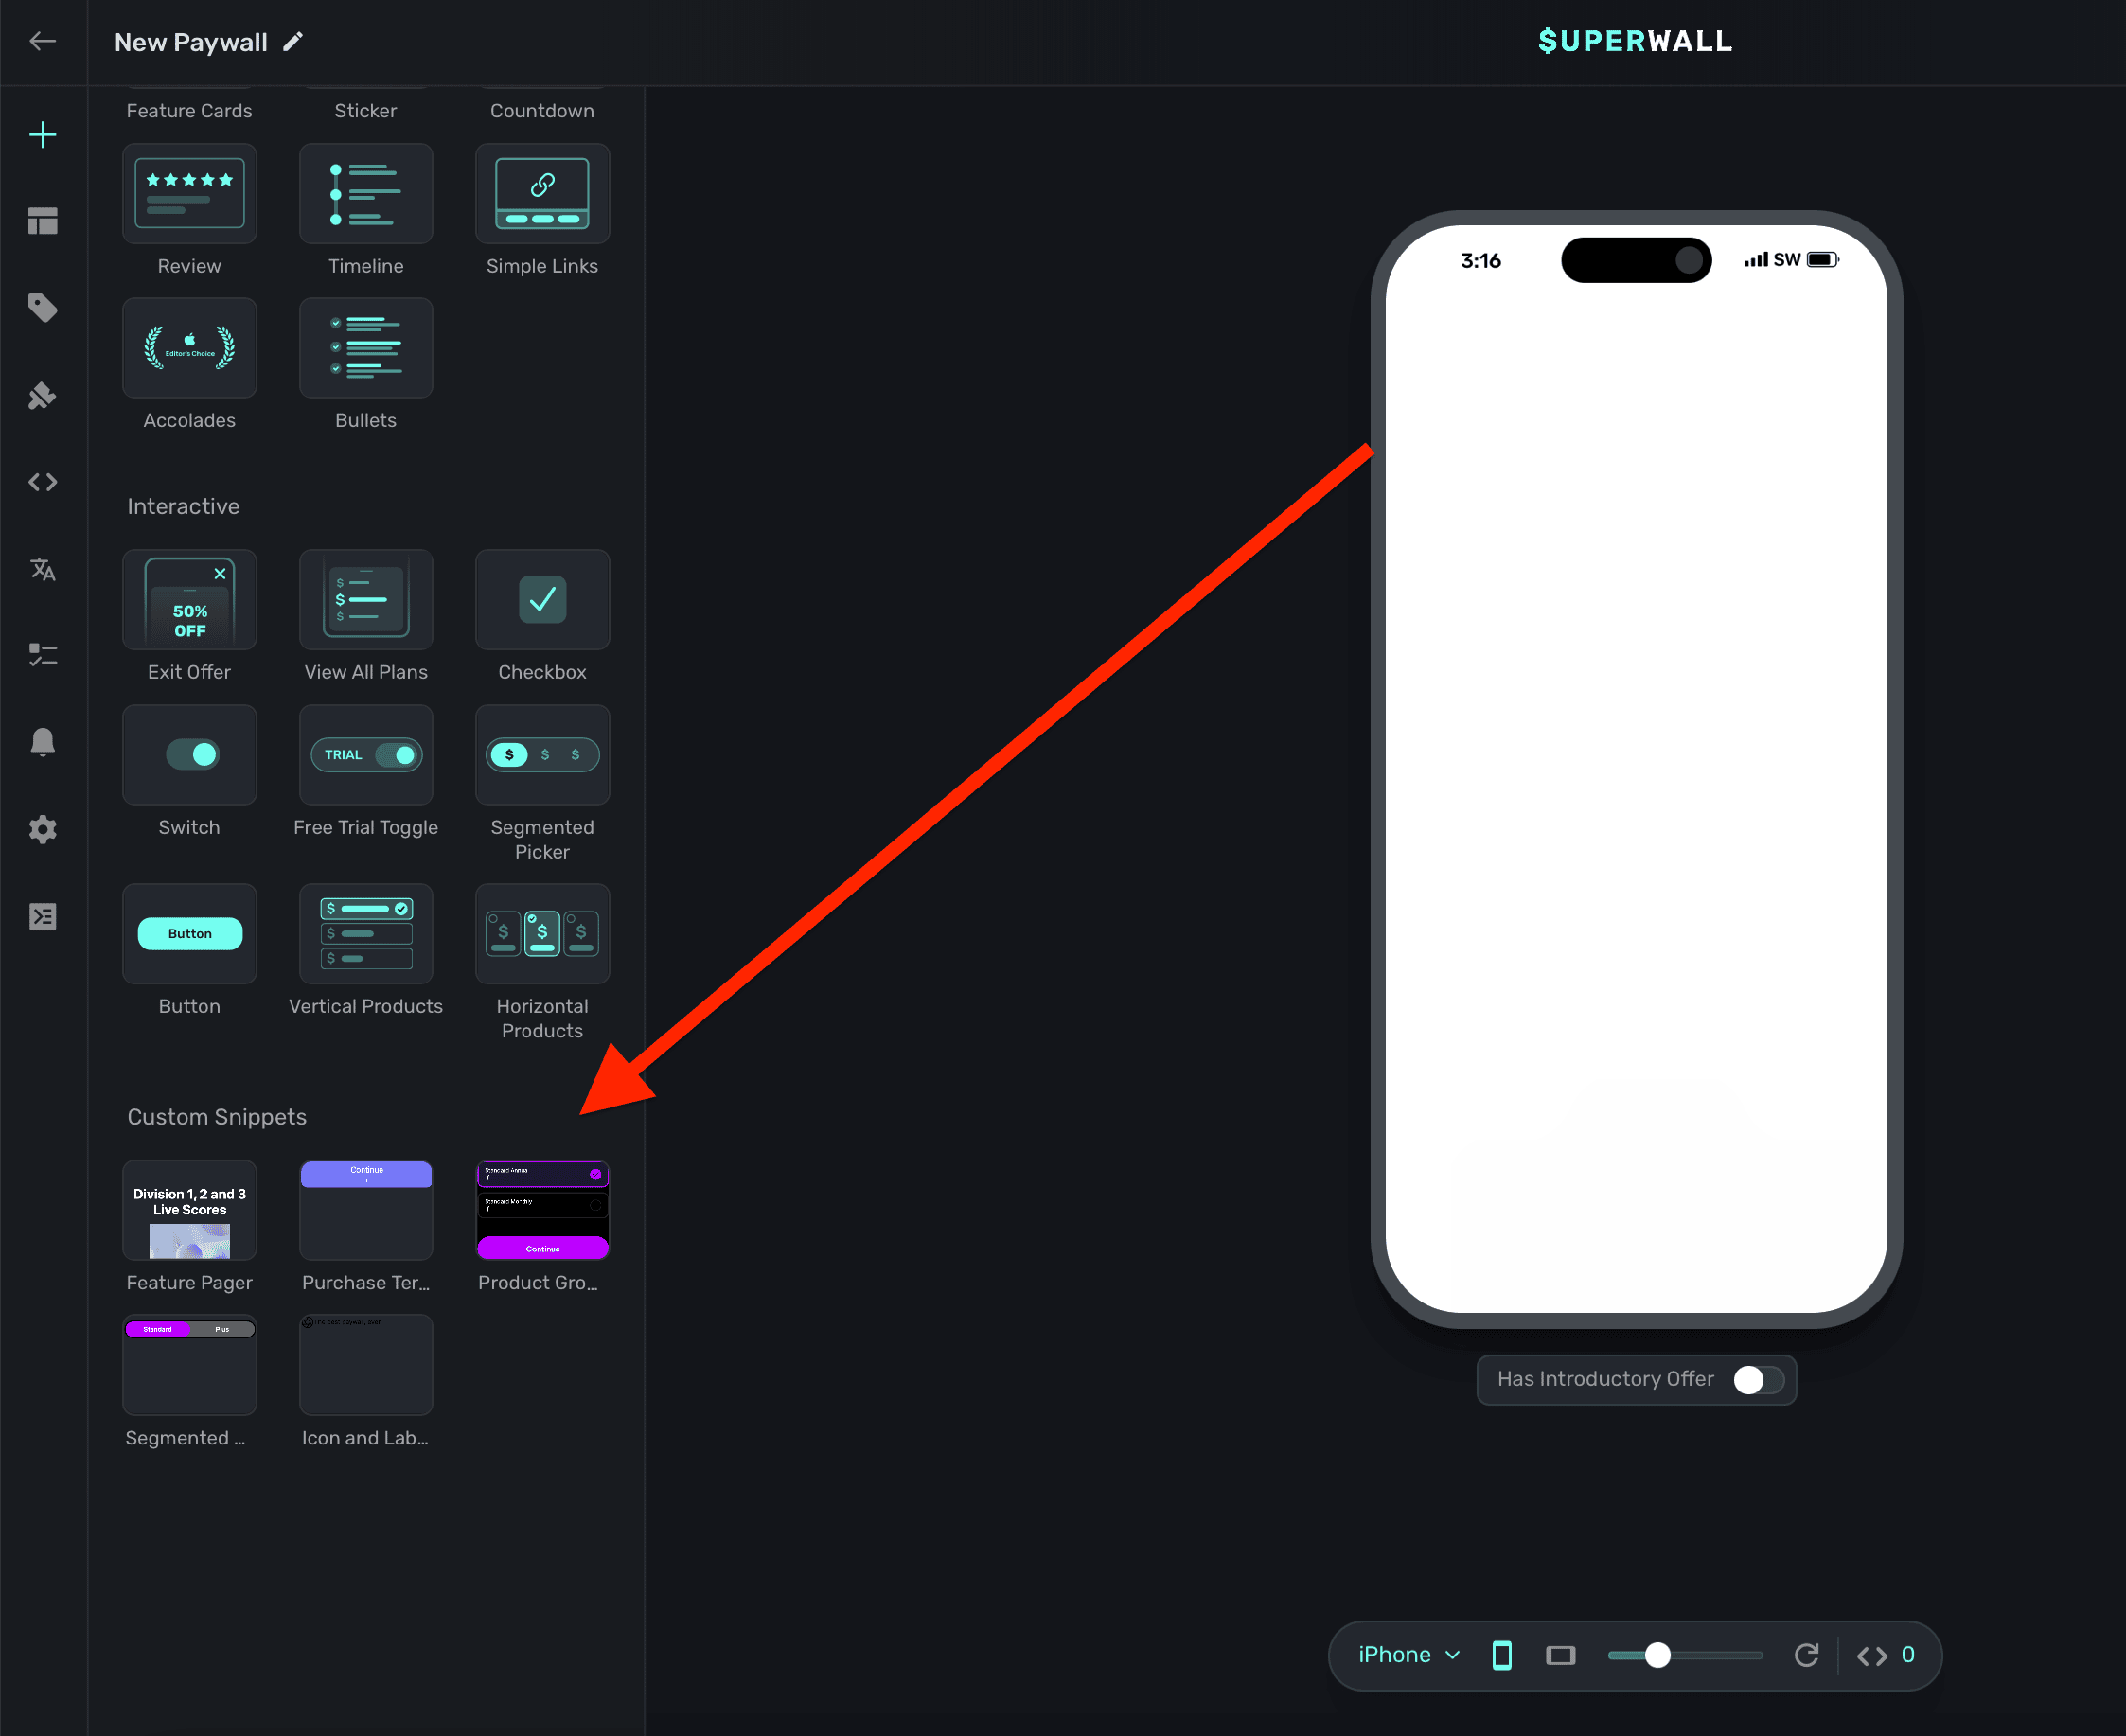
Note that you can edit any snippet you add, it will *not* overwrite the original snippet. If you do want any edits you make to be used as a snippet, simply make another snippet with the one you've edited.
### Re-ordering components or adding them as children
To reorder components on your paywall, you can simply drag and drop them in the **Layout** tab:
1. **Hovering on** another component will add the current component you're dragging as a child of the other component.
2. **Hovering above or below** other components will reorder the component you're dragging either above or below the other component.
You'll see a box filled in when you're adding a component as a child component, or you'll see a thin line to indicate you're reordering components. In the image below, notice how "The second cool feature" should be listed in the middle. Simply dragging it above the component in the middle will correctly reorder it:
Reordering and adding components as children is all done via the **Layout** tab. It'll always represent the current hierarchy of your paywall's components.
### Deleting, renaming and copying elements
You can delete and copy components by selecting them in the **Layout** tab and then clicking on one of the following icons as seen in this image:
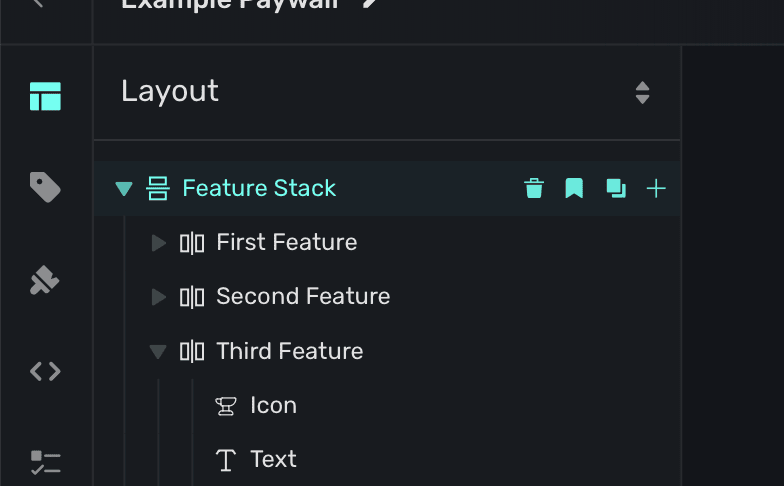
From left to right, here's what each icon does:
* **Trashcan:** Deletes the component.
* **Bookmark:** Creates a snippet from the component.
* **Square on Square:** Copies the component.
* **Plus sign:** Adds a new component.
To **rename** a component, **double click** on its current name to edit it.
### Undo and redo
If you make a mistake, most actions can be undone the `command/control+Z` keyboard shortcut. At the top right of the editor, you'll also see the common undo and redo icons:
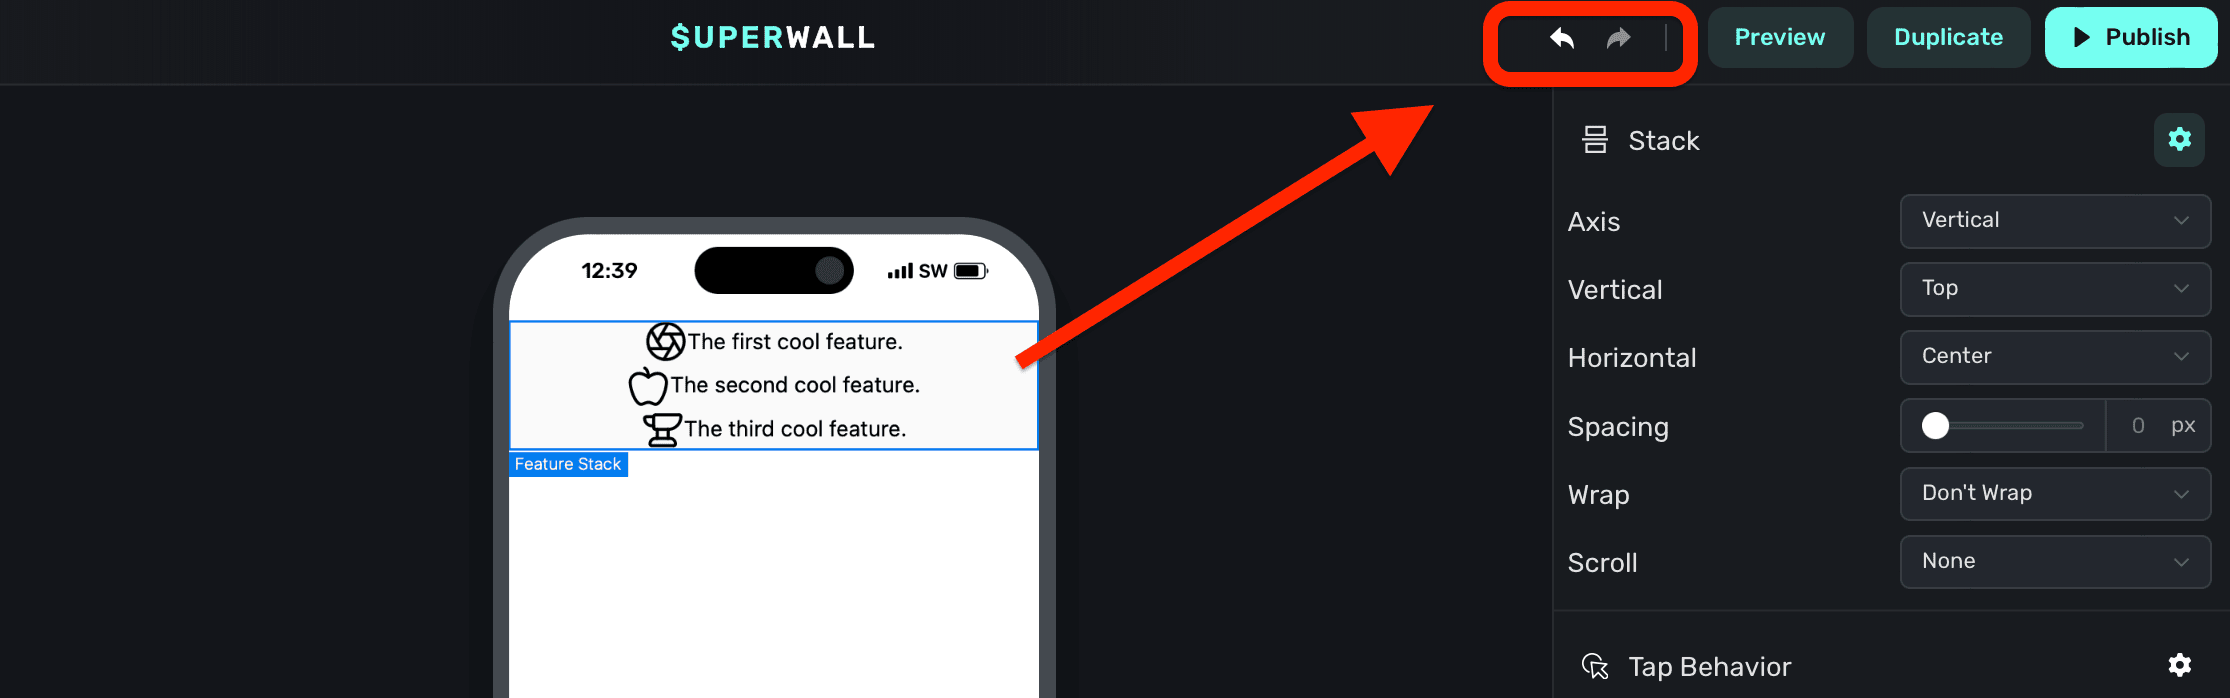
### Component editor
Any component you select will open its editable properties in the **component editor**, which is on the right side of the editor window. You can change padding, text and anything related to a component here. To learn more, check out the dedicated page over editing components [here](/paywall-editor-styling-elements).
# Liquid
Source: https://superwall.com/docs/paywall-editor-liquid
Liquid is a templating language that you can use to easily build text in your paywall. The simpliest way to get started is simply by referencing a variable
with curly brackets. `{{ user.firstName }}` will output the user's first name. (Assuming you've called `setUserAttributes` with `firstName` previously in the SDK).
However, Liquid is much more flexible then simple curly brakets. It also offers "filters" which allow you to operate on the
variables before outputting them. Ex: `{{ 1 | plus: 3 }}` will output `4`. They work left to right and do not support order of
operations. (You can get around this limitation by using `assign`).
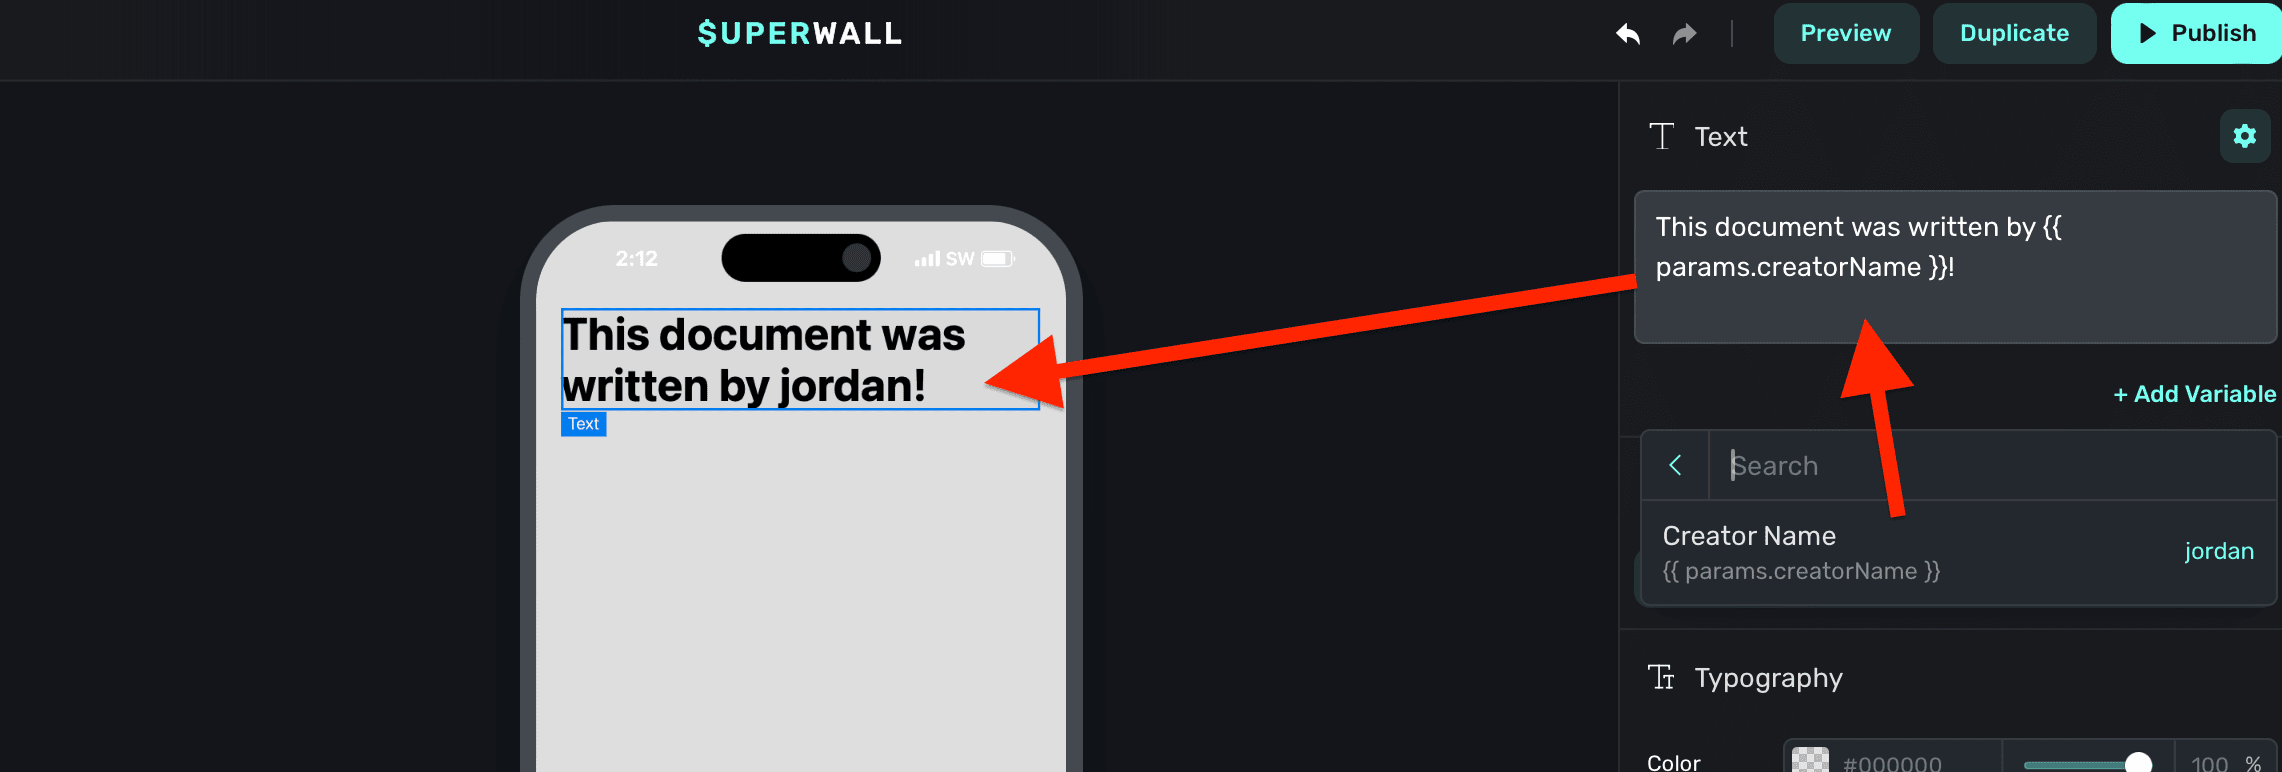
### Liquid syntax formatting
In text, you can use [Liquid filters](https://shopify.github.io/liquid/filters/abs/) to modify output. To use filters, add a pipe after the variable. Then, add in one or more filters:
```
// Results in 17, the absolute value of -17
{{ -17 | abs }}
```
For example, to capitalize a text variable, you would write:
```
// If the name was "jordan", this results in "JORDAN"
{{ user.name | upcase }}
```
## Liquid inside Image URLs
You can use Liquid for any image URL in the Superwall editor. It can either be the entire URL, or interpolated with an existing one:
```javascript
// As the entire URL...
{{ user.profilePicture1 }}
// Or interpolated within one...
https://myApp.cdn.{{ events.activeEvent }}
```
You can access any variable available too ([including user created ones](https://superwall.com/docs/feature-gating#placement-parameters)), which makes it the right tool to display dynamic content for your images. Here are some examples:
* **User Profile Picture in a Dating App:** Display the profile image of a user that someone has tapped on:
`https://datingApp.cdn.{{ user.profilePicture1 }}`
* **Event-Specific Banners for Sports Apps:** Pull in images like team logos or event banners for ongoing or upcoming games: `https://sportsApp.cdn.{{ events.currentGame.teamLogo }}`
Here's an example:
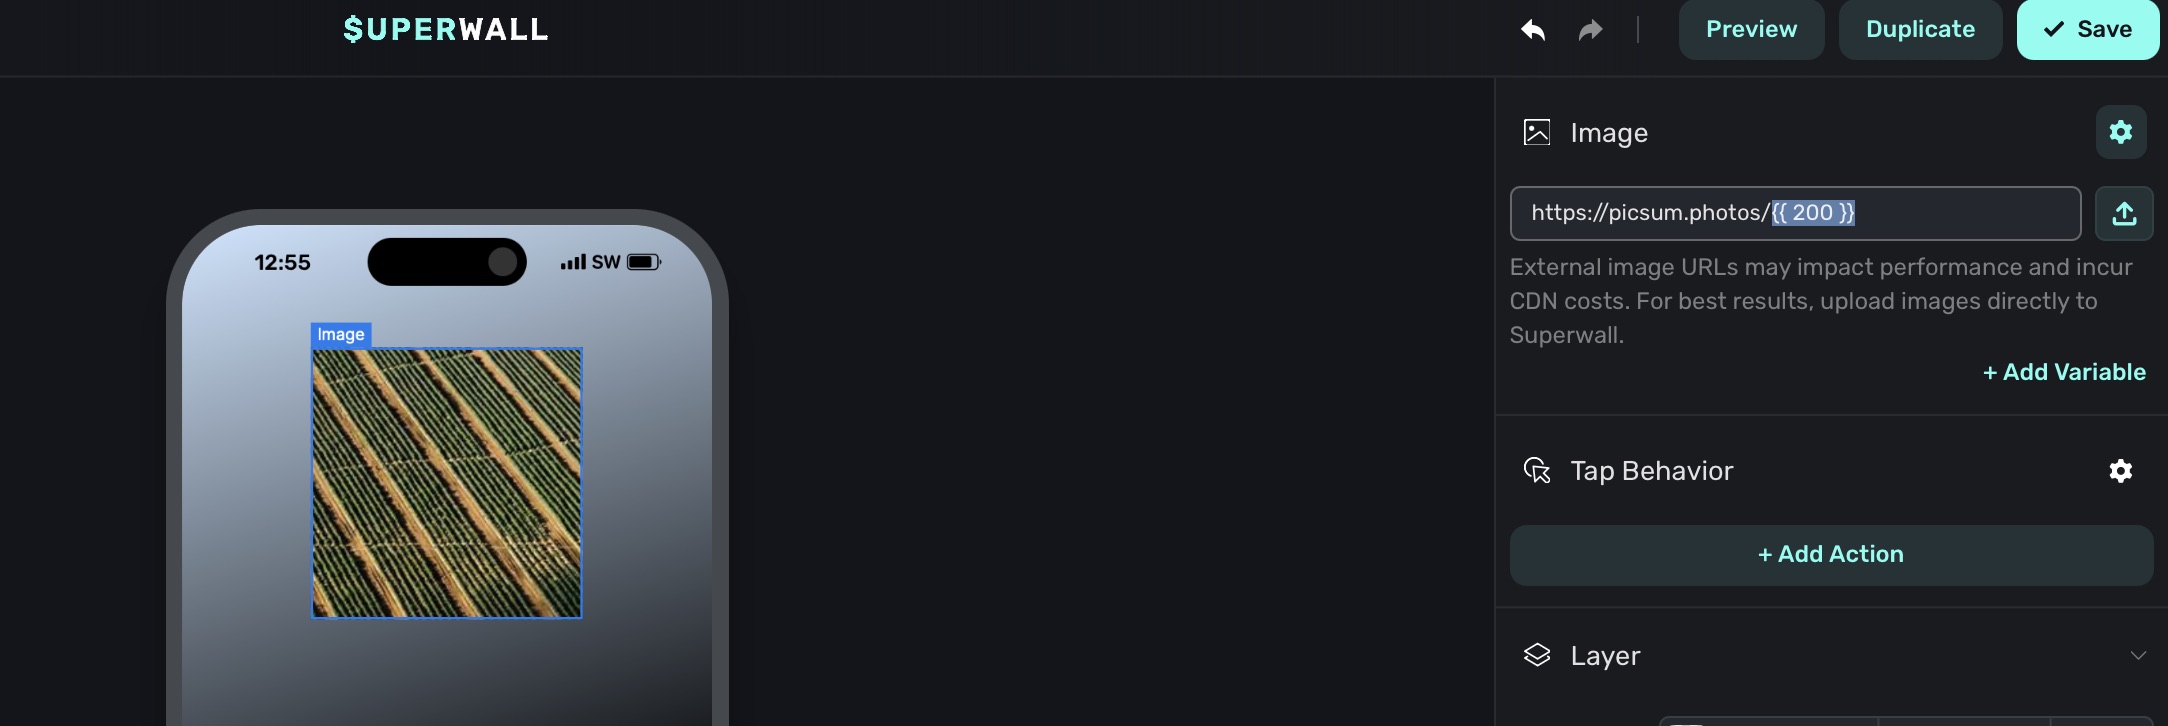
## Custom Liquid filters
To make it easier to express dates & countdowns we've added several non-standard filters to our Liquid engine.
### `date_add`
Add a specified amount of time to a date.
**Usage**:
`[date string] | date_add: [number|ms string], (unit)`
There are two ways to specify the amount of time
to add:
1. By passing a number and a unit as arguments. The unit can be one of `seconds`, `minutes`, `hours`, `days`, `weeks`,
`months`, or `years`. For example, `{{ "2024-08-06T07:16:26.802Z" | date_add: 1, "days" }}` adds one day to the
date.
2. By using the ['ms'](https://github.com/vercel/ms?tab=readme-ov-file#ms) style of specifying a duration. This format is flexible
but generally you specify a number followed by a unit as part of a single string. Ex: `1d` (1 day), `2h` (2 hours), `30m` (30 minutes), etc.
For example, `{{ "2024-08-06T07:16:26.802Z" | date_add: "1d" }}` adds one day to the date.
You can chain multiple `date_add` and `date_subtract` filters together to add or subtract multiple units of time.
Ex: `{{ "2024-08-06T07:16:26.802Z" | date_add: 1, "days" | date_add: 2, "hours" }}` adds one day and two hours to the date.
**More Examples**:
```liquid
{{ "2024-08-06T07:16:26.802Z" | date_add_minutes: 30 }}
// Output -> '2024-08-06T07:46:26.802Z'
```
### `date_subtract`
Subtract a specified amount of time from a date.
**Usage**:
`[date string] | date_subtract: [number|ms string], (unit)`
There are two ways to specify the amount of time
to subtract:
1. By passing a number and a unit as arguments. The unit can be one of `seconds`, `minutes`, `hours`, `days`, `weeks`,
`months`, or `years`. For example, `{{ "2024-08-06T07:16:26.802Z" | date_subtract: 1, "days" }}` subtracts one day from the
date.
2. By using the ['ms'](https://github.com/vercel/ms?tab=readme-ov-file#ms) style of specifying a duration. This format is flexible
but generally you specify a number followed by a unit as part of a single string. Ex: `1d` (1 day), `2h` (2 hours), `30m` (30 minutes), etc.
For example, `{{ "2024-08-06T07:16:26.802Z" | date_subtract: "1d" }}` subtracts one day to the date.
You can chain multiple `date_add` and `date_subtract` filters together to add or subtract multiple units of time.
Ex: `{{ "2024-08-06T07:16:26.802Z" | date_subtract: 1, "days" | date_subtract: 2, "hours" }}` subtracts one day and two hours from the date.
**More Examples**:
```liquid
{{ "2024-08-06T07:16:26.802Z" | date_subtract_minutes: 30 }}
// Output -> '2024-08-06T06:46:26.802Z'
```
### `date`
Format a date in a specific way.
**Usage**:
`[date string] | date: [format string]`
The [`date`](https://liquidjs.com/filters/date.html) filter is a standard Liquid filter that formats a date. You can use it to format a date in any way that
Javascript's default date utility can parse. For example, `{{ "2024-08-06T07:16:26.802Z" | date: "%s" }}` formats the
date as a Unix timestamp. Here are some common date formats:
**Common Formats**
| Format | Example Output | Description |
| ------------------- | ------------------------- | ---------------------------------------------------------------------------- |
| `%s` | `1722929186` | Unix timestamp |
| `%Y-%m-%d %H:%M:%S` | `2024-08-06 07:16:26` | Year, month, day, hour, minute, second |
| `%a %b %e %T %Y` | `Sun Aug 6 07:16:26 2024` | Abbreviated day of the week, abbreviated month, day of the month, time, year |
| `%m/%d/%y` | `08/06/24` | Month, day, year (Common US Format) |
**Format Reference**
| Format | Example | Description |
| ------ | ---------- | --------------------------------------------- |
| %a | Tue | Shorthand day of the week |
| %A | Tuesday | Full day of the week |
| %b | Aug | Shorthand month |
| %B | August | Full month |
| %d | 06 | Zero padded day of the month |
| %H | 07 | Zero padded 24-hour hour |
| %I | 07 | Zero padded 12-hour hour |
| %j | 219 | Day of the year |
| %m | 08 | Zero padded month |
| %M | 16 | Zero padded minute |
| %p | AM | AM or PM |
| %S | 26 | Zero padded second |
| %U | 31 | Week number of the year, starting with Sunday |
| %W | 31 | Week number of the year, starting with Monday |
| %x | 8/6/2024 | Locale date |
| %X | 7:16:26 AM | Locale time |
| %y | 24 | Two digit year |
| %Y | 2024 | Four digit year |
| %z | +0000 | Timezone offset |
| %% | % | Literal % |
**More Examples**:
```liquid
{{ "2024-08-06T07:16:26.802Z" | date: "%Y-%m-%d %H:%M" }}
// Output -> '2024-08-06 00:16'
{{ "2024-08-06T07:16:26.802Z" | date: "%B %d, %Y" }}
// Output -> 'August 06, 2024'
{{ "2024-08-06T07:16:26.802Z" | date: "%I:%M %p" }}
// Output -> '12:16 AM'
{{ "2024-08-06T07:16:26.802Z" | date: "%A, %B %d, %Y" }}
// Output -> 'Tuesday, August 06, 2024'
```
### `countdown_from`
Calculates and formats the difference between two dates as a countdown.
**Usage**:
`[end_date string] | countdown_from: [start_date string], (style), (max unit)`
* `end_date` (required): The end date of the countdown.
* `start_date` (required): The start date of the countdown. Almost always `state.now`.
* `style` (optional): The style of the countdown. Can be one of `digital`, `narrow`, `short`, `long`, `long_most_significant`. The default is `digital`.
* `digital`: Displays the countdown in the format `HH:MM:SS`.
* `narrow`: Displays the countdown in the format `1d 2h 3m 4s`.
* `short`: Displays the countdown in the format `2 hr, 3 min, 4 sec`.
* `long`: Displays the countdown in the format `2 hours, 3 minutes, 4 seconds`.
* `long_most_significant`: Displays the countdown in the format `2 hours, 3 minutes, 4 seconds`, but only shows the most significant unit. Ex: `2 hours` if the countdown is less than 1 day or `3 days` if the countdown is less than 1 month.
* `max unit` (optional): The maximum unit to display in the countdown. Can be one of `years`, `months`, `weeks`, `days`, `hours`, `minutes`, or `seconds`. The default is `hours`. This means for a digital countdown of 72 hours would be represented as `72:00:00`, rather than `3 days`.
* `column` (optional): The column to display in the countdown. Can be one of `years`, `months`, `weeks`, `days`, `hours`, `minutes`, or `seconds`. This means for a digital countdown with the column set to `minutes`, the countdown `47:12:03` would be represented as `12`.
**Common Usage**:
```liquid
// Simple countdown timer
{{ device.deviceInstalledAt | date_add: '3d' | countdown_from: state.now }}
// Output -> '03:00:19'
// Fixed end date, with a message
Our summer sale ends in {{ "2024-08-06T07:16:26.802Z" | countdown_from: state.now, "long_most_significant" }}!
// Output -> Our summer sales ends in 3 days!
// Countdown with a custom column
{{ "2024-08-06T07:16:26.802Z" | countdown_from: state.now, "long", "days", "minutes" }}
// Output -> 12
// One hour countdown timer, starting from the moment a paywall is opened, formatted with just the hour and minute, i.e. 59:36 for fifty-nine minutes, thirty-six seconds
{{ device.localDateTime | date_add: "60m" | countdown_from: state.now, "long", "days", "minutes" }}:{% assign seconds = device.localDateTime | date_add: "60m" | countdown_from: state.now, "long", "days", "seconds" %}{% if seconds < 10 %}0{{ seconds }}{% else %}{{ seconds }}{% endif %}
```
In practice you will almost always use `state.now` as the start date. This is a special variable
that represents the current time. Referencing it will ensure that the countdown re-renders every
second.
# Paywall Localization
Source: https://superwall.com/docs/paywall-editor-localization
To localize your paywall, **click** on the **Localization** button from the **sidebar**:
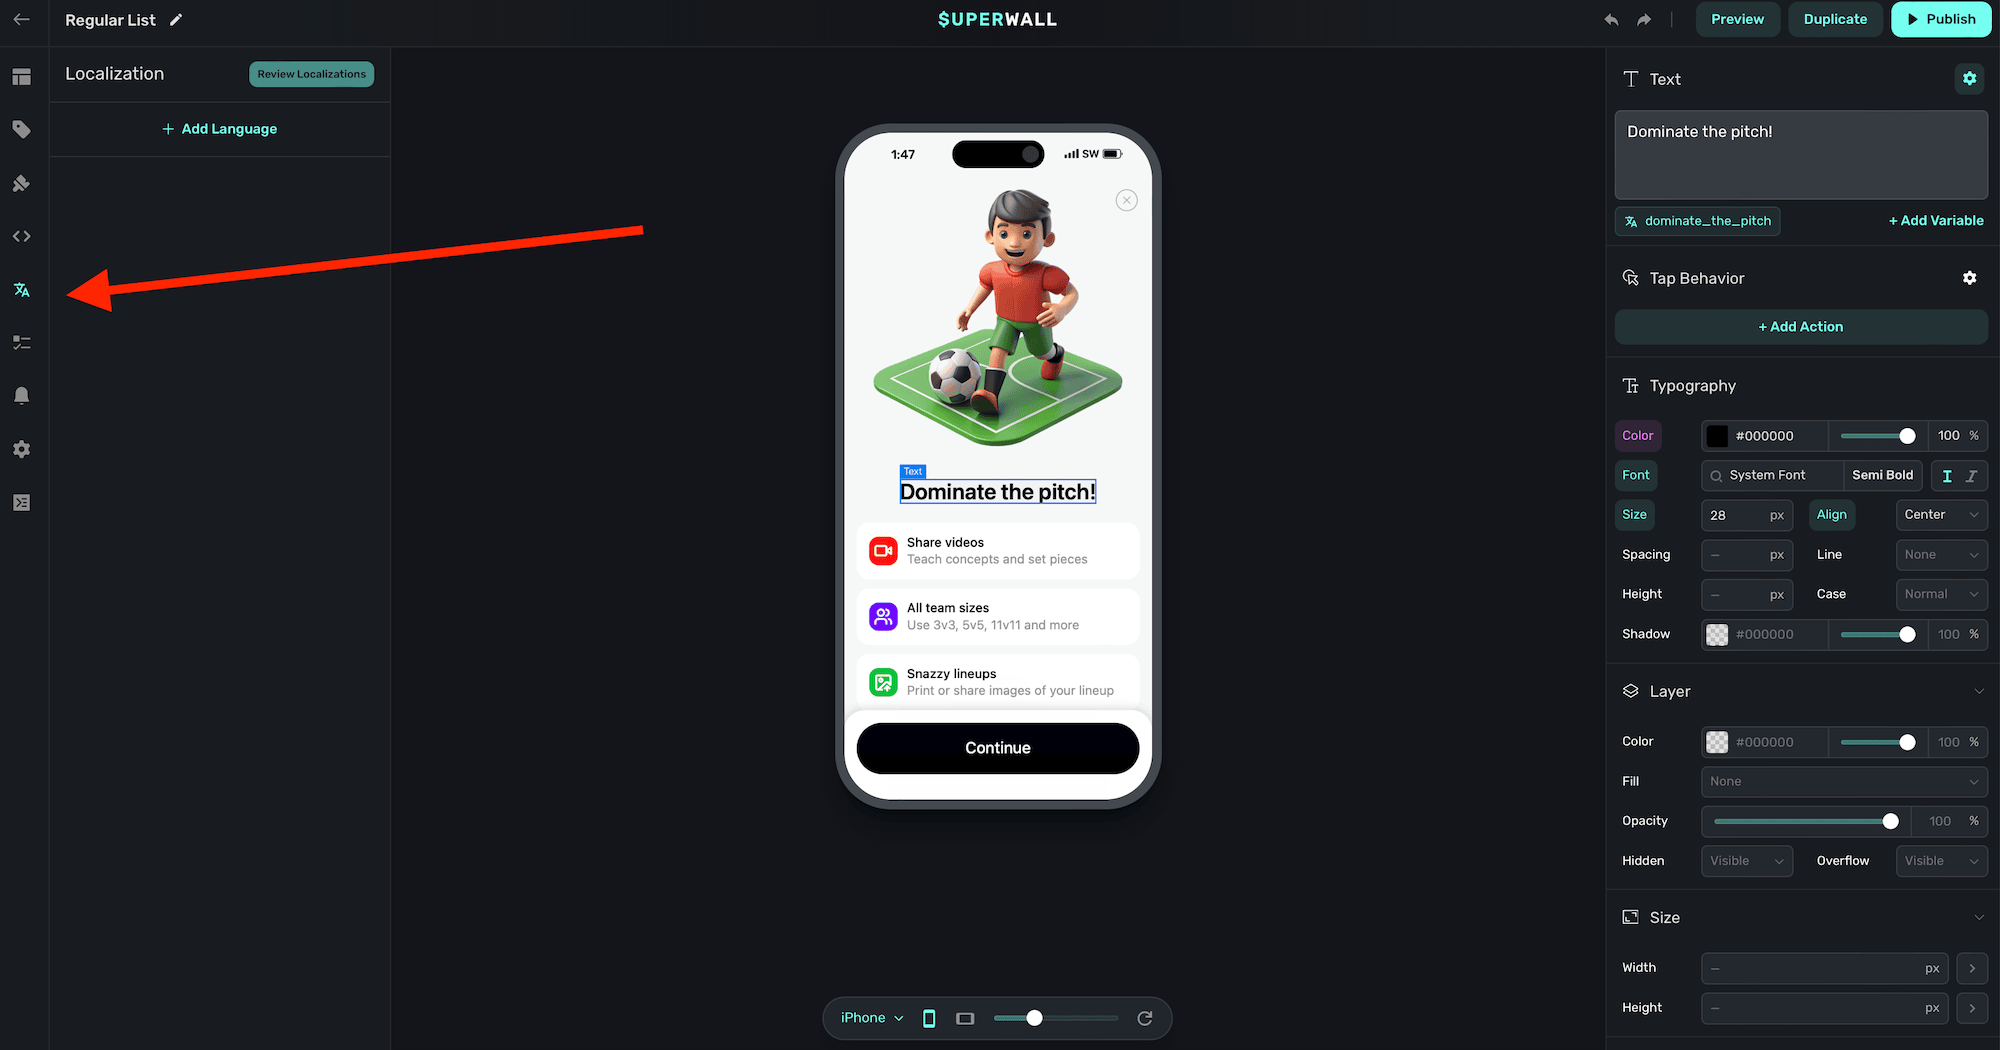
### Adding localizations and languages
After opening the localization panel referenced above, **click** on the **Add Language** button. Choose the language identifier of the locale you're localizing for, and **click** on **Add**:
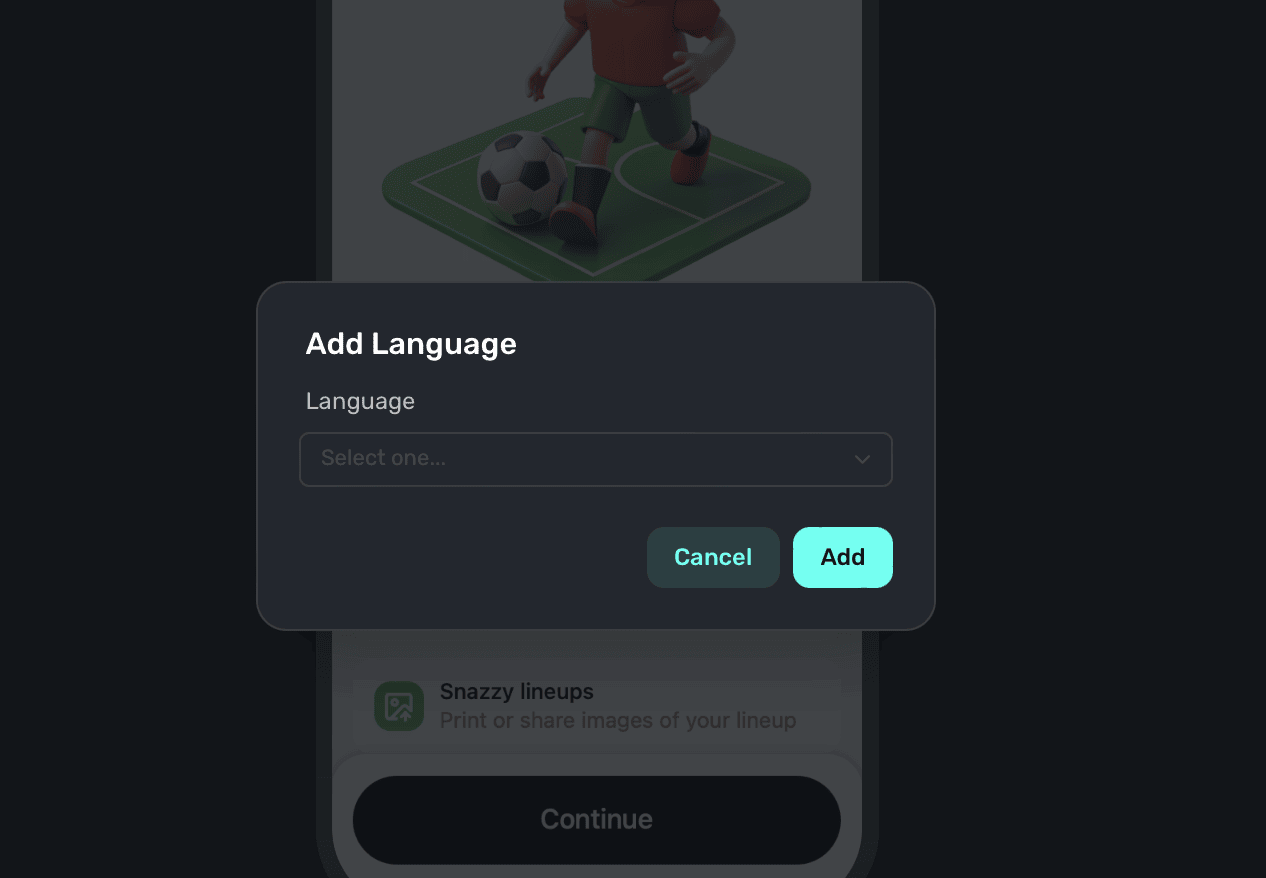
If there are any existing text components on your paywall, all of them with currently *unlocalized* strings will populate in the sidebar (in this example, we're localizing our text for Spanish speakers):
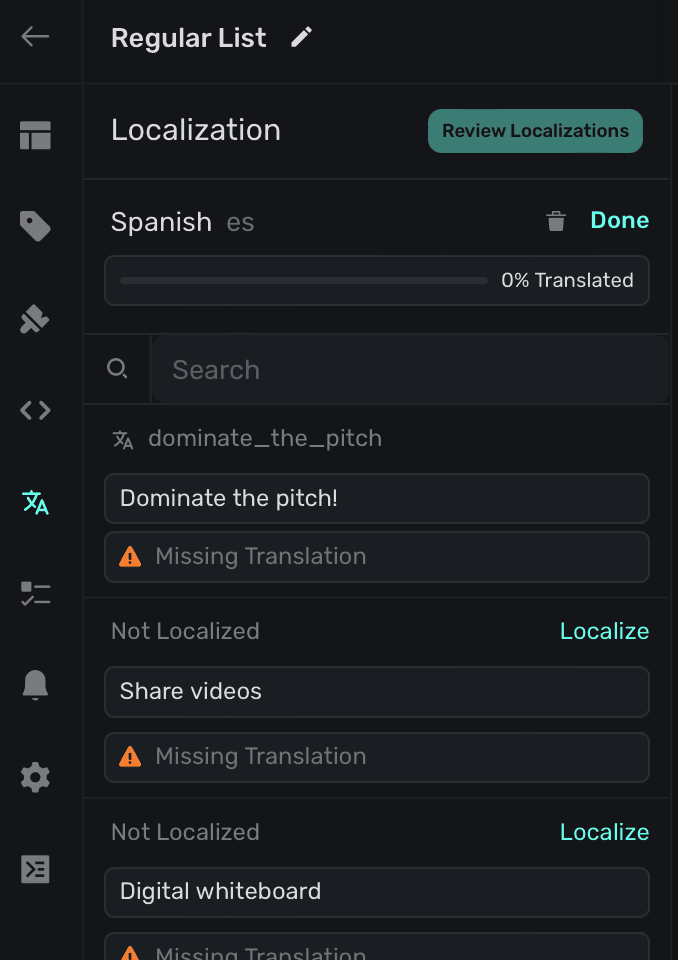
Click on the **Localize** button on any of them to enter in localized values. When you're done, click **Save**:
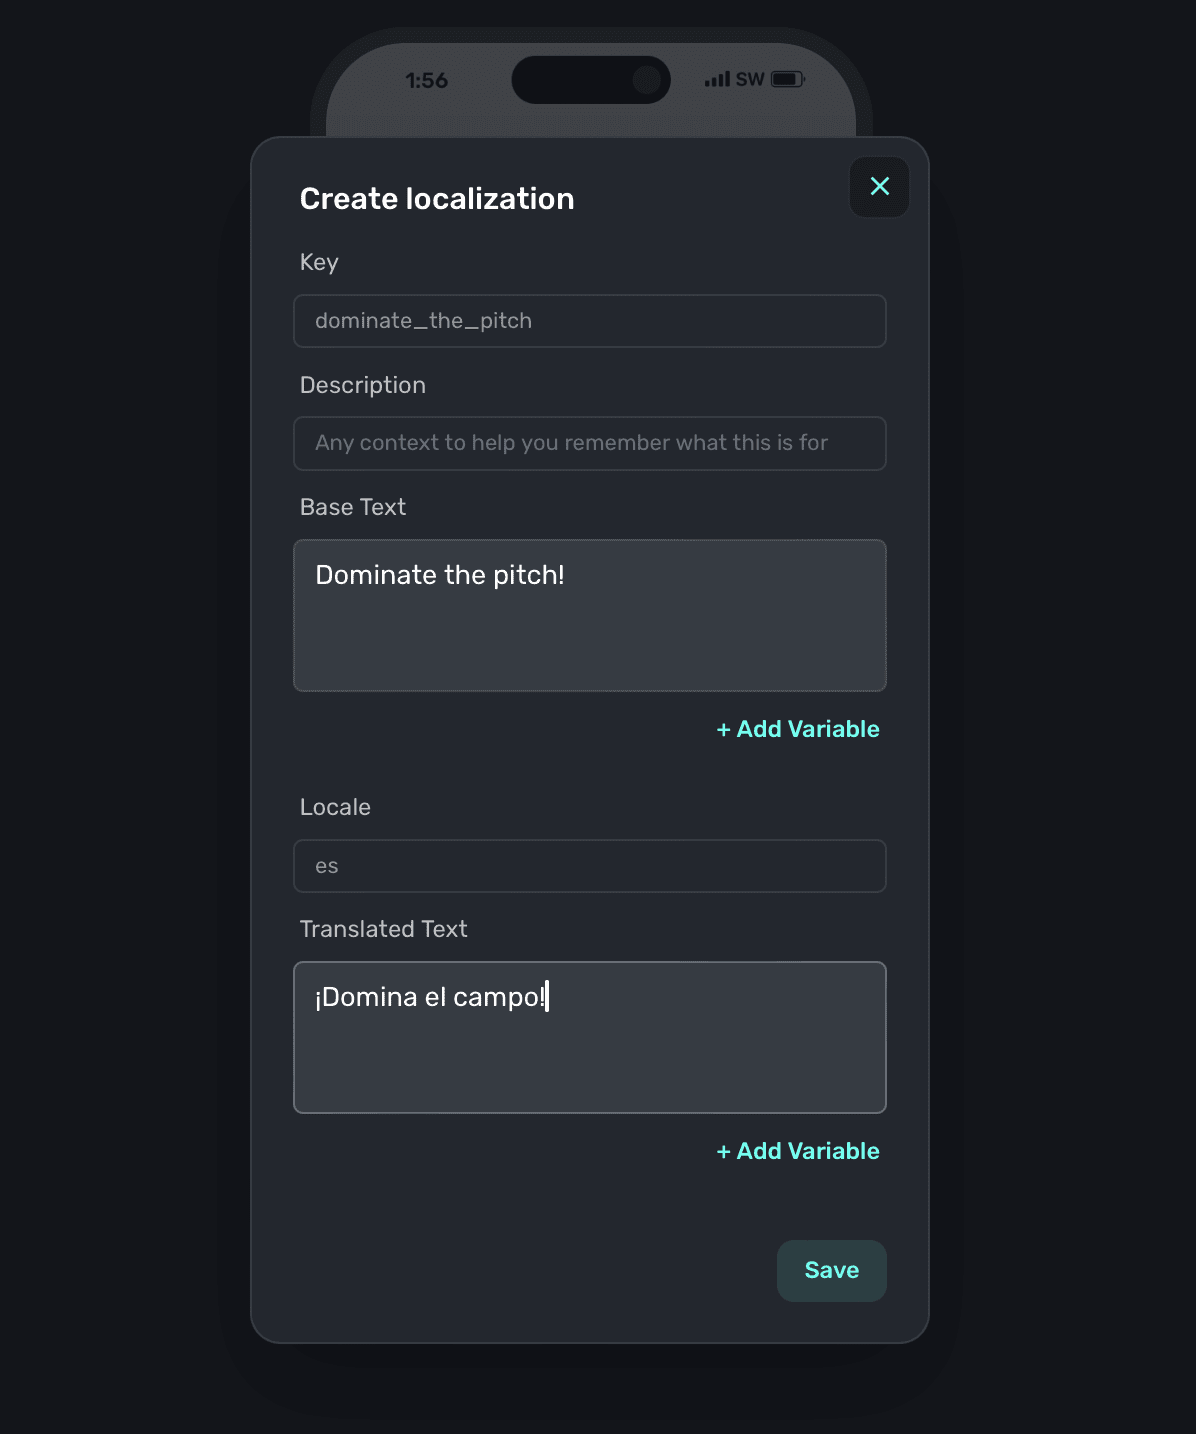
From there, go through and localize all of the values. Keep an eye on the progress bar at the top to see how far along you are. Remember to **click** on the **Publish** button at the top right of the editor to commit any localization edits.
When you are localizing strings, the editor will reflect the locale you're editing against so you
can see a live preview of how the text will appear.
### Associating localized strings to new or existing text components
When you add new text components, or need to associate a different localization to an existing one — **click** the **Localize** button when the text component is selected. You can either use an existing localized string, or add a new one by clicking the plus button:
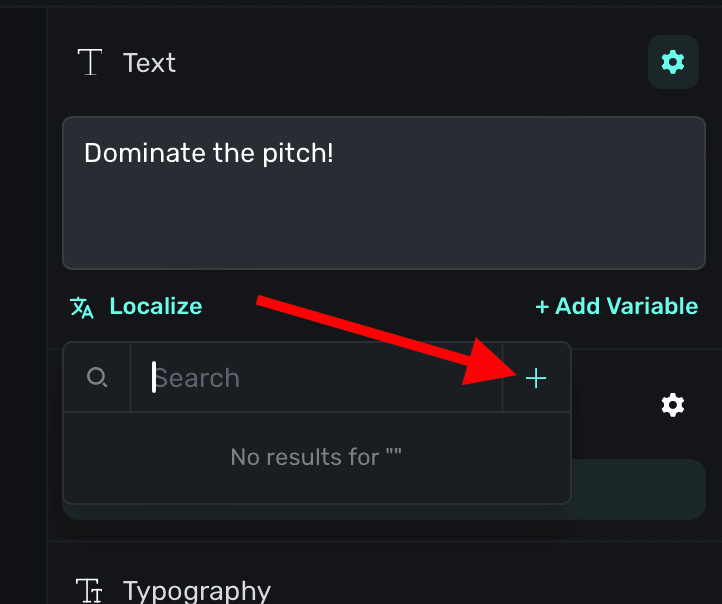
When a text component has a localized string attached to it, you'll see the localized string's key in place of the localize button:
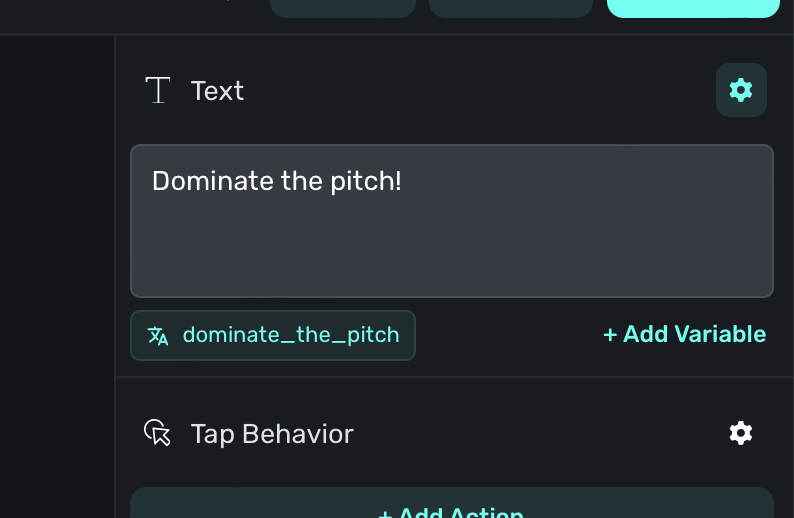
You can use variables with localized strings, too. Simply use liquid syntax within your localized
string values to access any variable. Currently, variables themselves are not able to be
localized. Learn more about using variables [here](/paywall-editor-variables).
### Localized strings are globally available
Any localized strings you enter are available across any paywall attached to your app. As such, the general localizing flow typically looks like this:
1. Add a new language to localize within the paywall editor.
2. Add or edit strings within the editor in the localization tab.
3. If you later update, change or add any other strings across paywalls, you can triage them within the Localization tab on your app's overview page. See this [doc](/overview-localization) for more.
## Using .strings files
You can download and import .strings files to speed up your translations. This is ideal when you are using external localization services or have a large number of strings to localize.
### Exporting .strings files
Select **Localization** from the left sidebar, **click** on the **Import** button. Choose "Download template" and the .strings file will be downloaded with all of your currently localized strings:
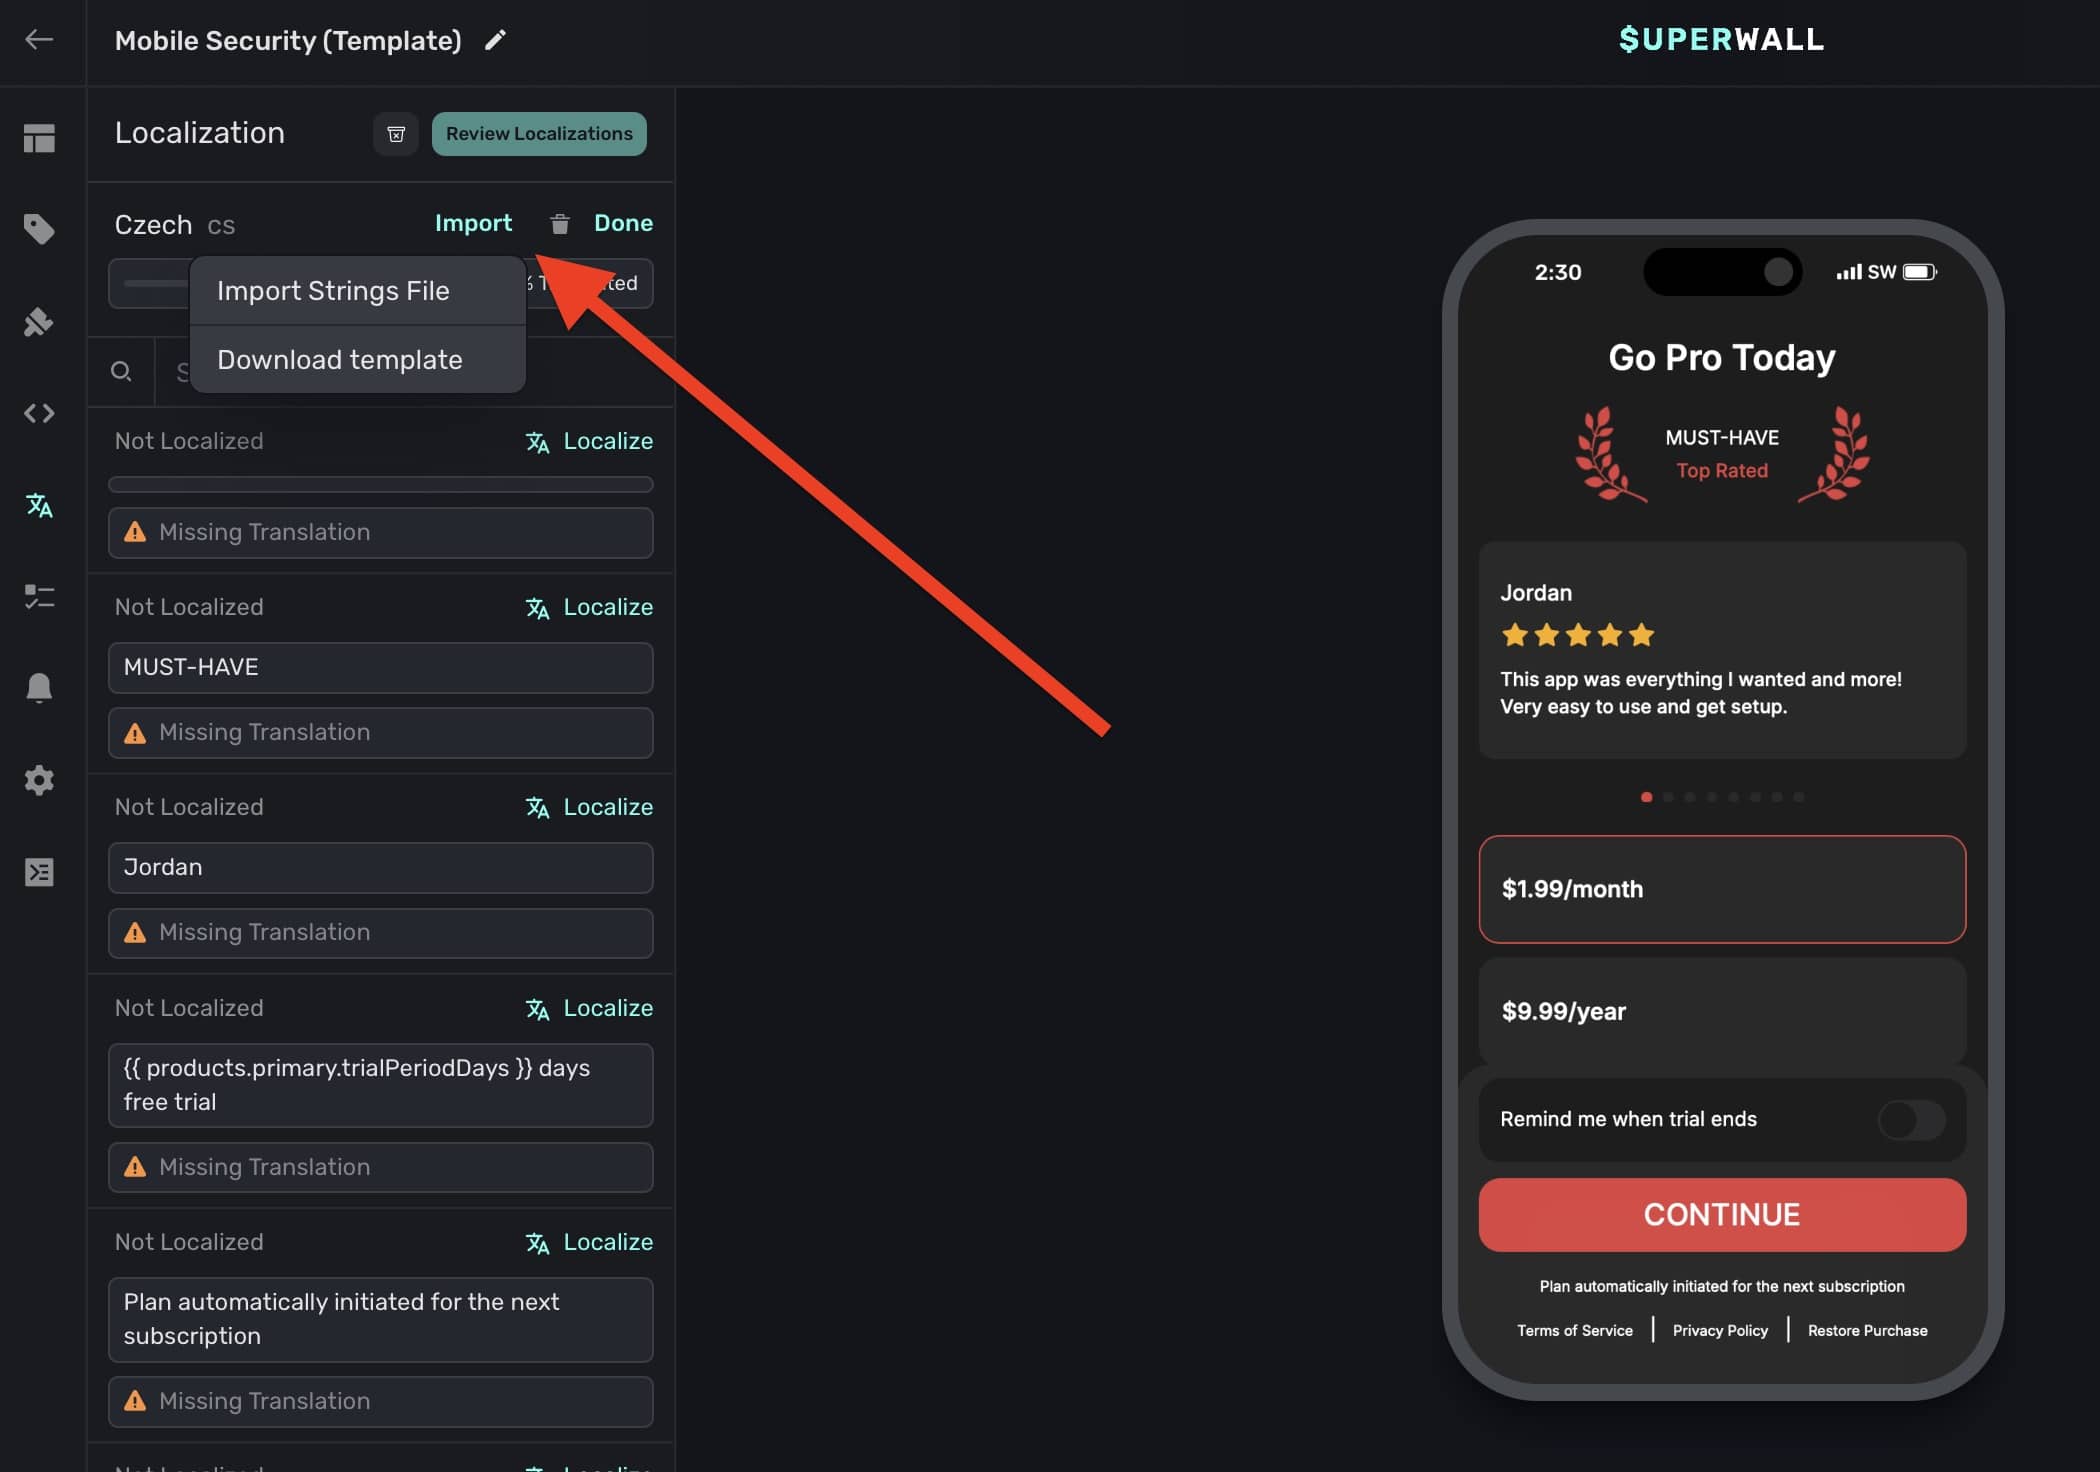
### Importing .strings files
Select **Localization** from the left sidebar, **click** on the **Import** button. Choose "Import Strings File" and select your local .strings file to upload. Then, all of the updated values will be reflected in the editor.
### Testing localized strings
You can preview how localized strings will appear on device. To set this up:
1. Make sure you've got [in-app previews](/in-app-paywall-previews) configured.
2. Open the paywall editor and click "Preview":
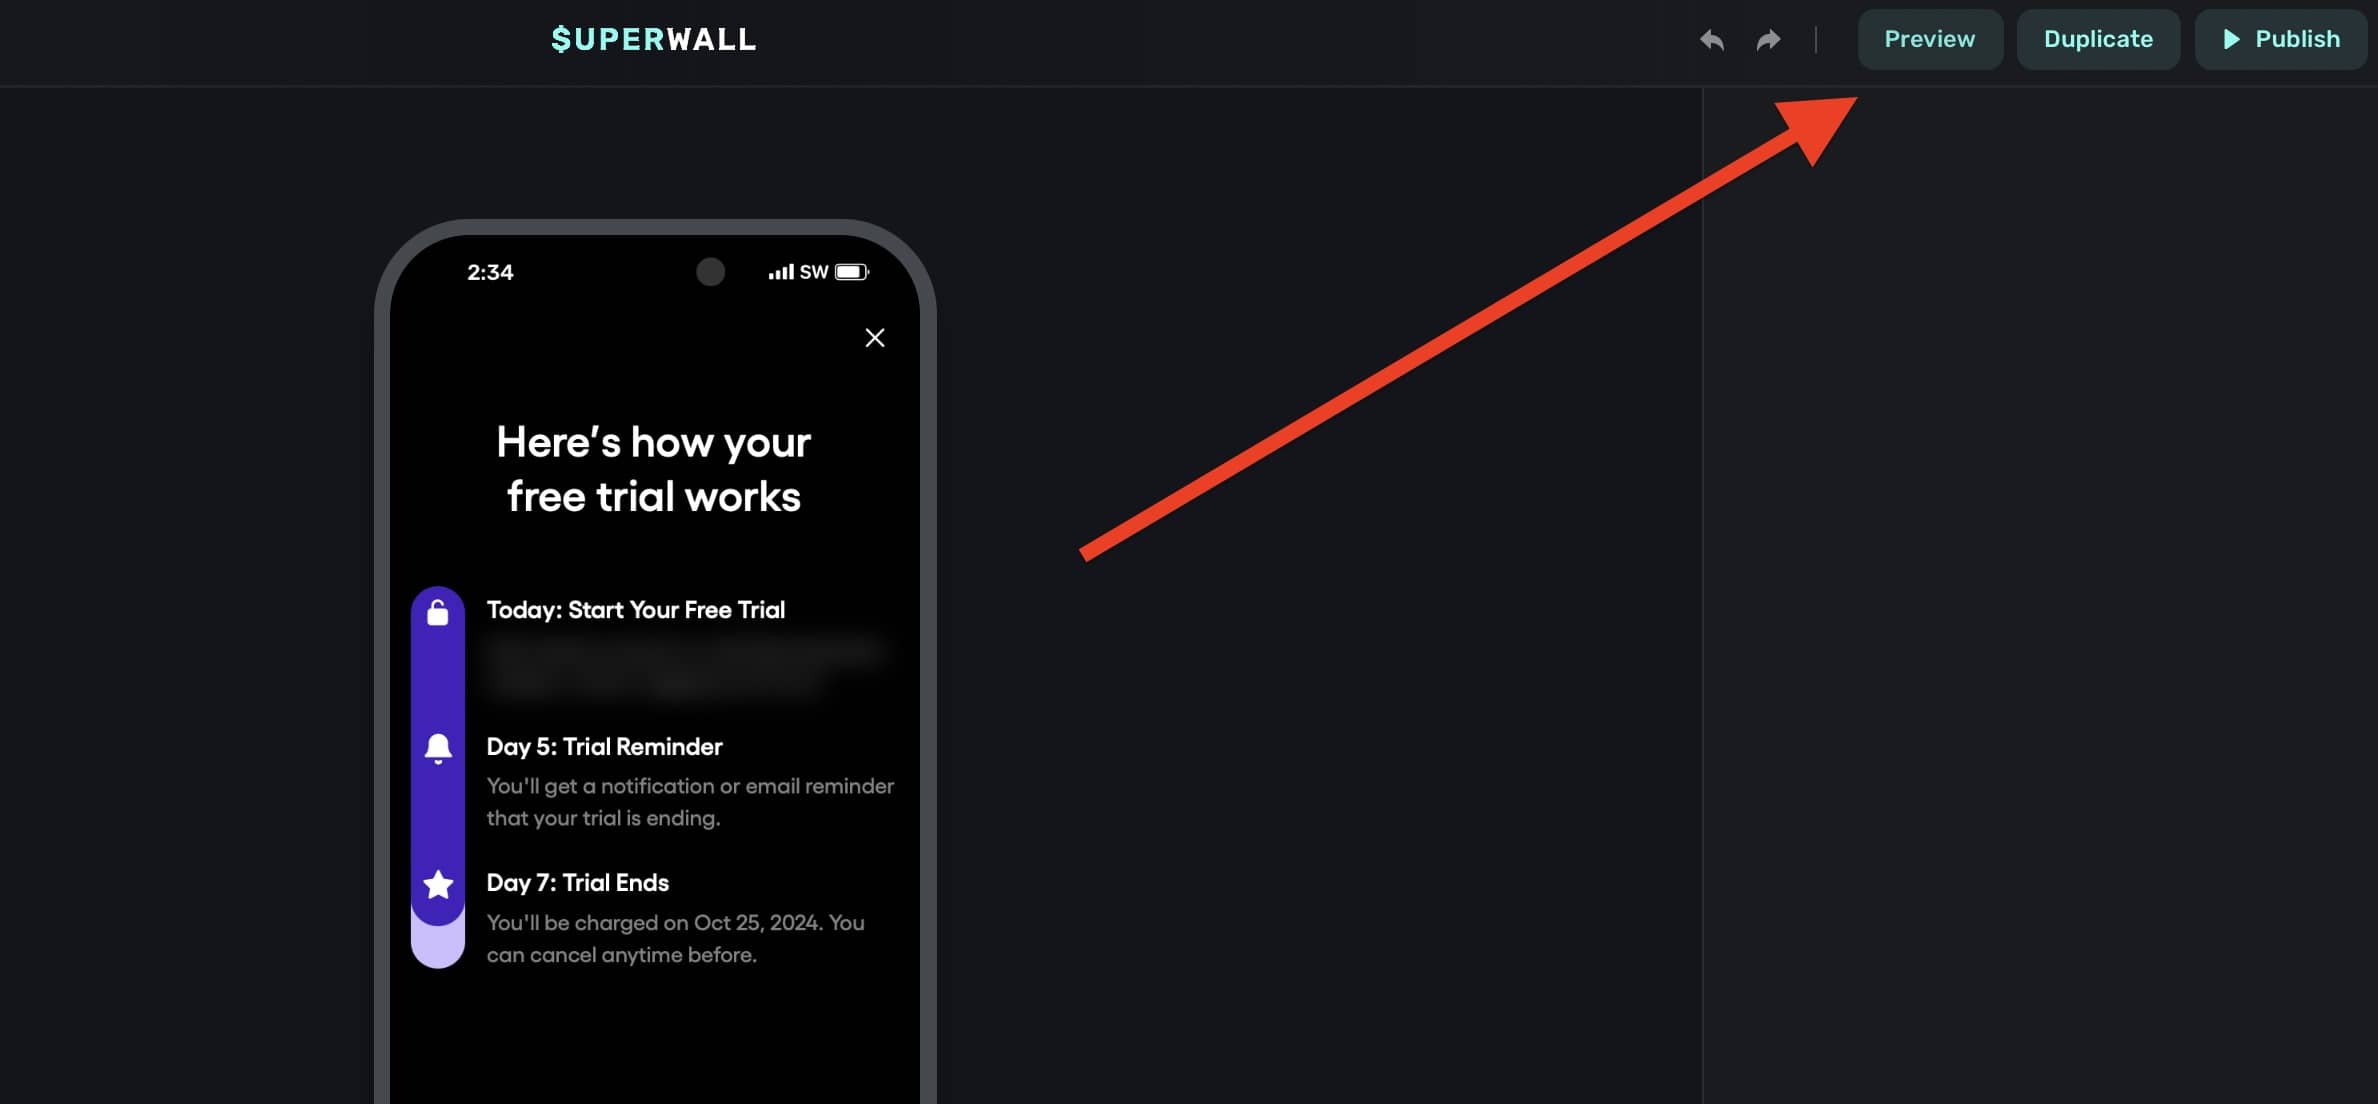
3. When it opens, tap the menu located at the top left and choose "Localization":
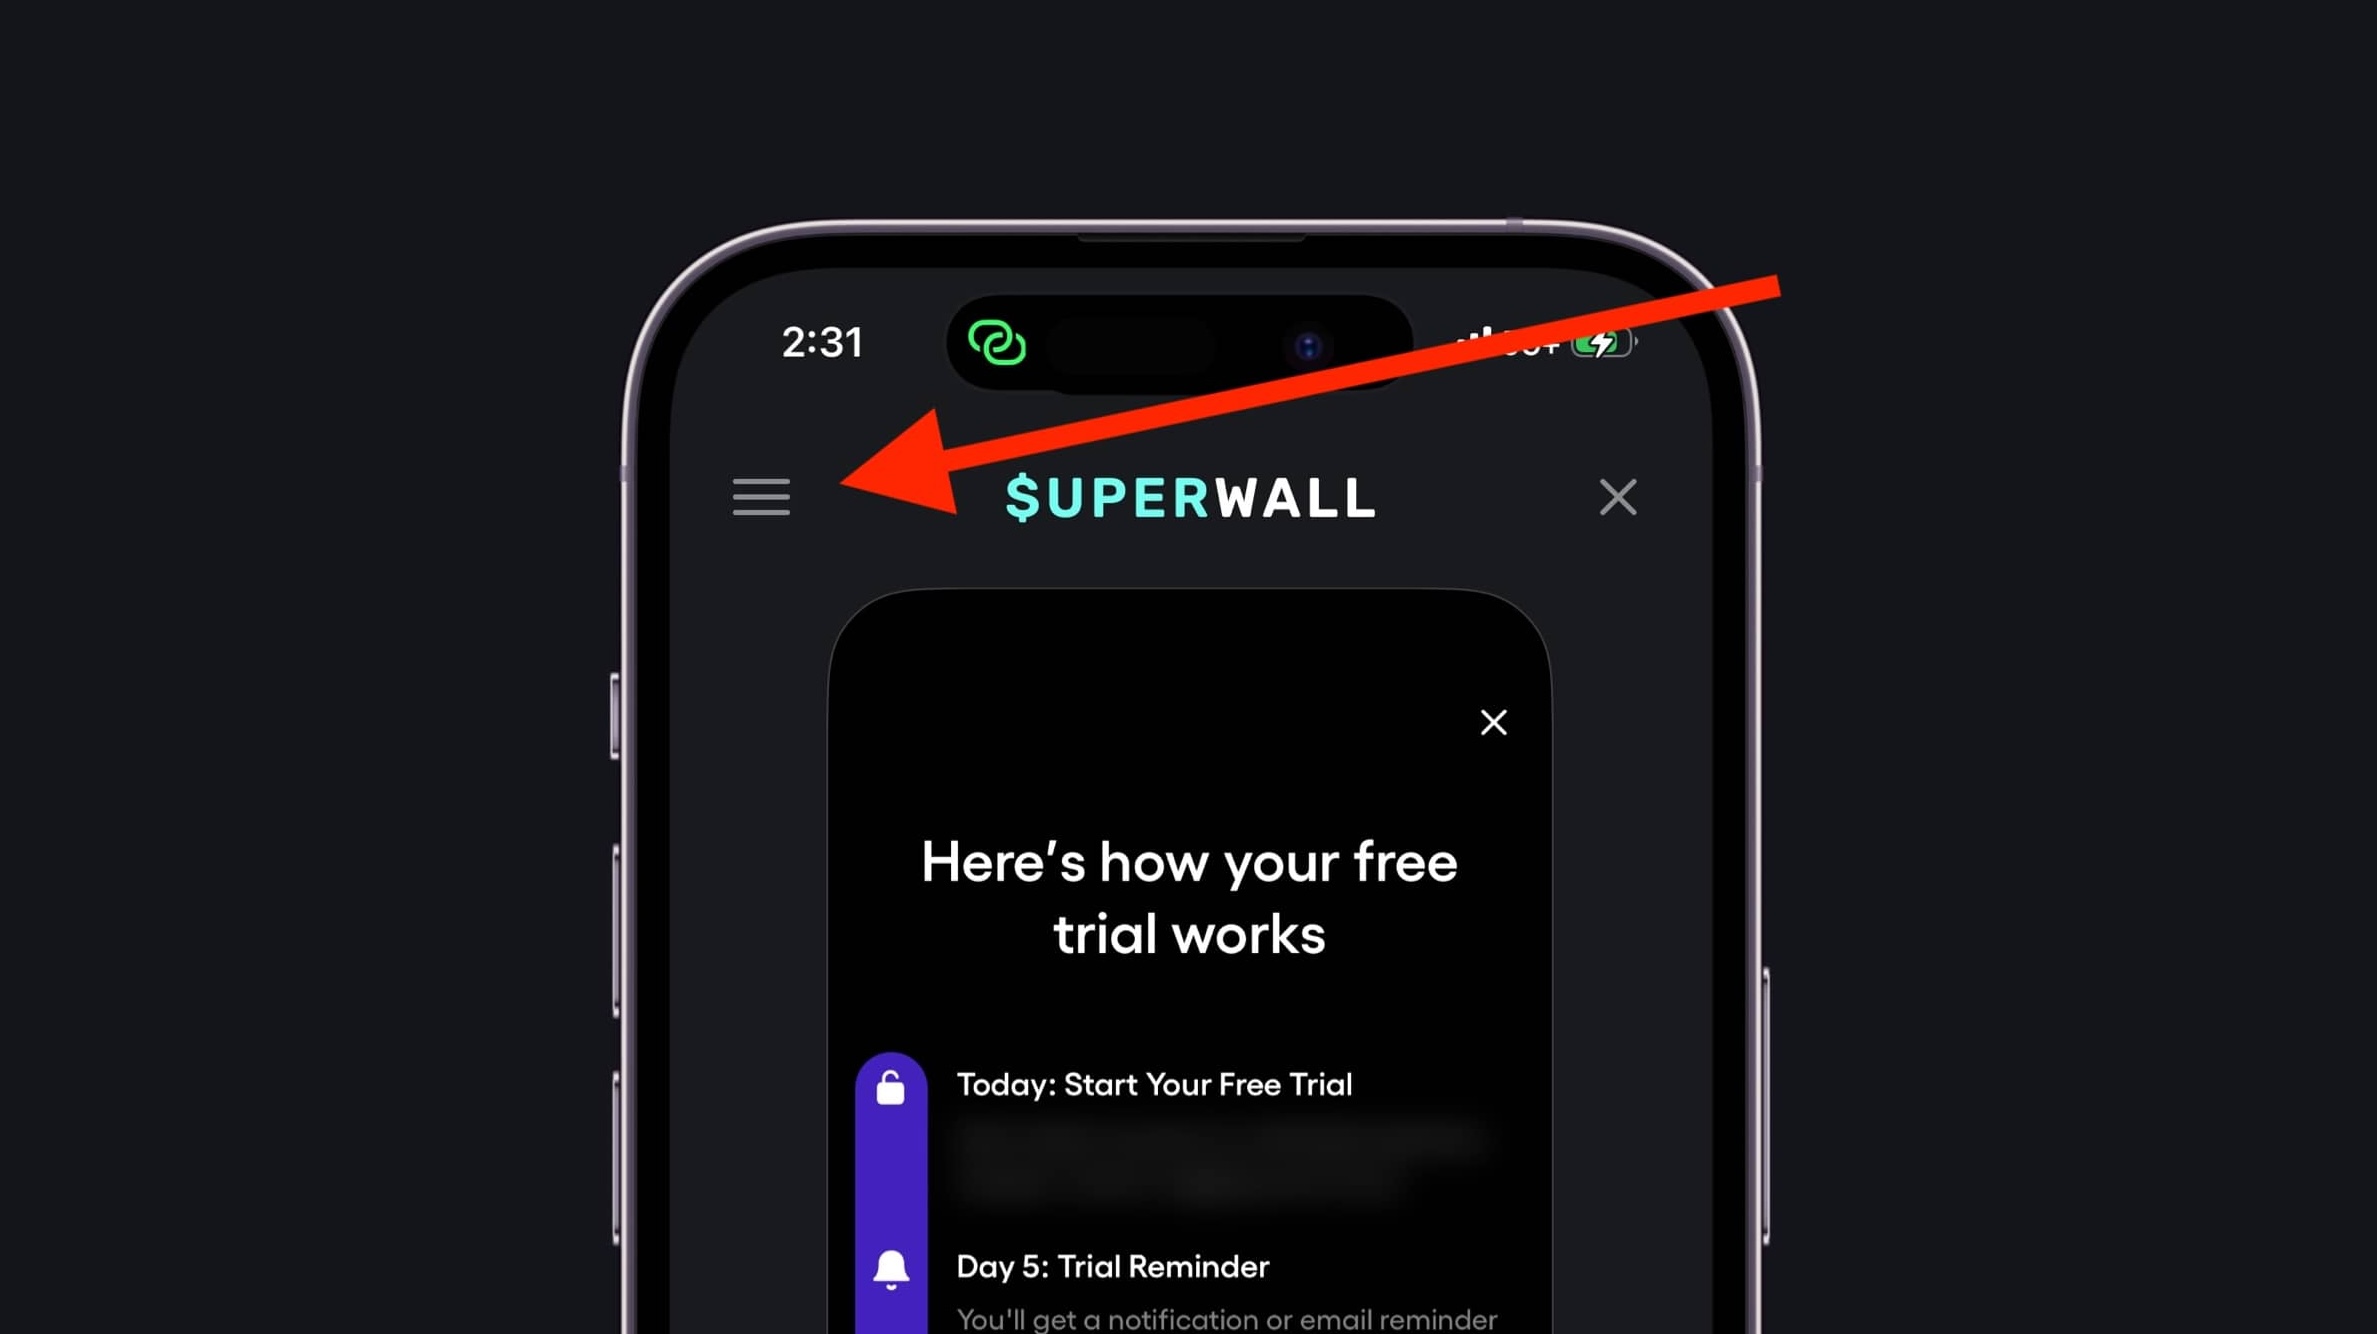
4. Then, select the language to display and the preview will reload with it:
# Navigation
Source: https://superwall.com/docs/paywall-editor-navigation-component
Use Superwall's navigation component to navigate through pages of content.
### Adding a navigation component
The navigation component was built to make paging, or navigating through paywall content, easy. To use the navigation component:
1. In the left sidebar, click **+** to add a new element.
2. Choose **Navigation** under the "Base Elements" header.
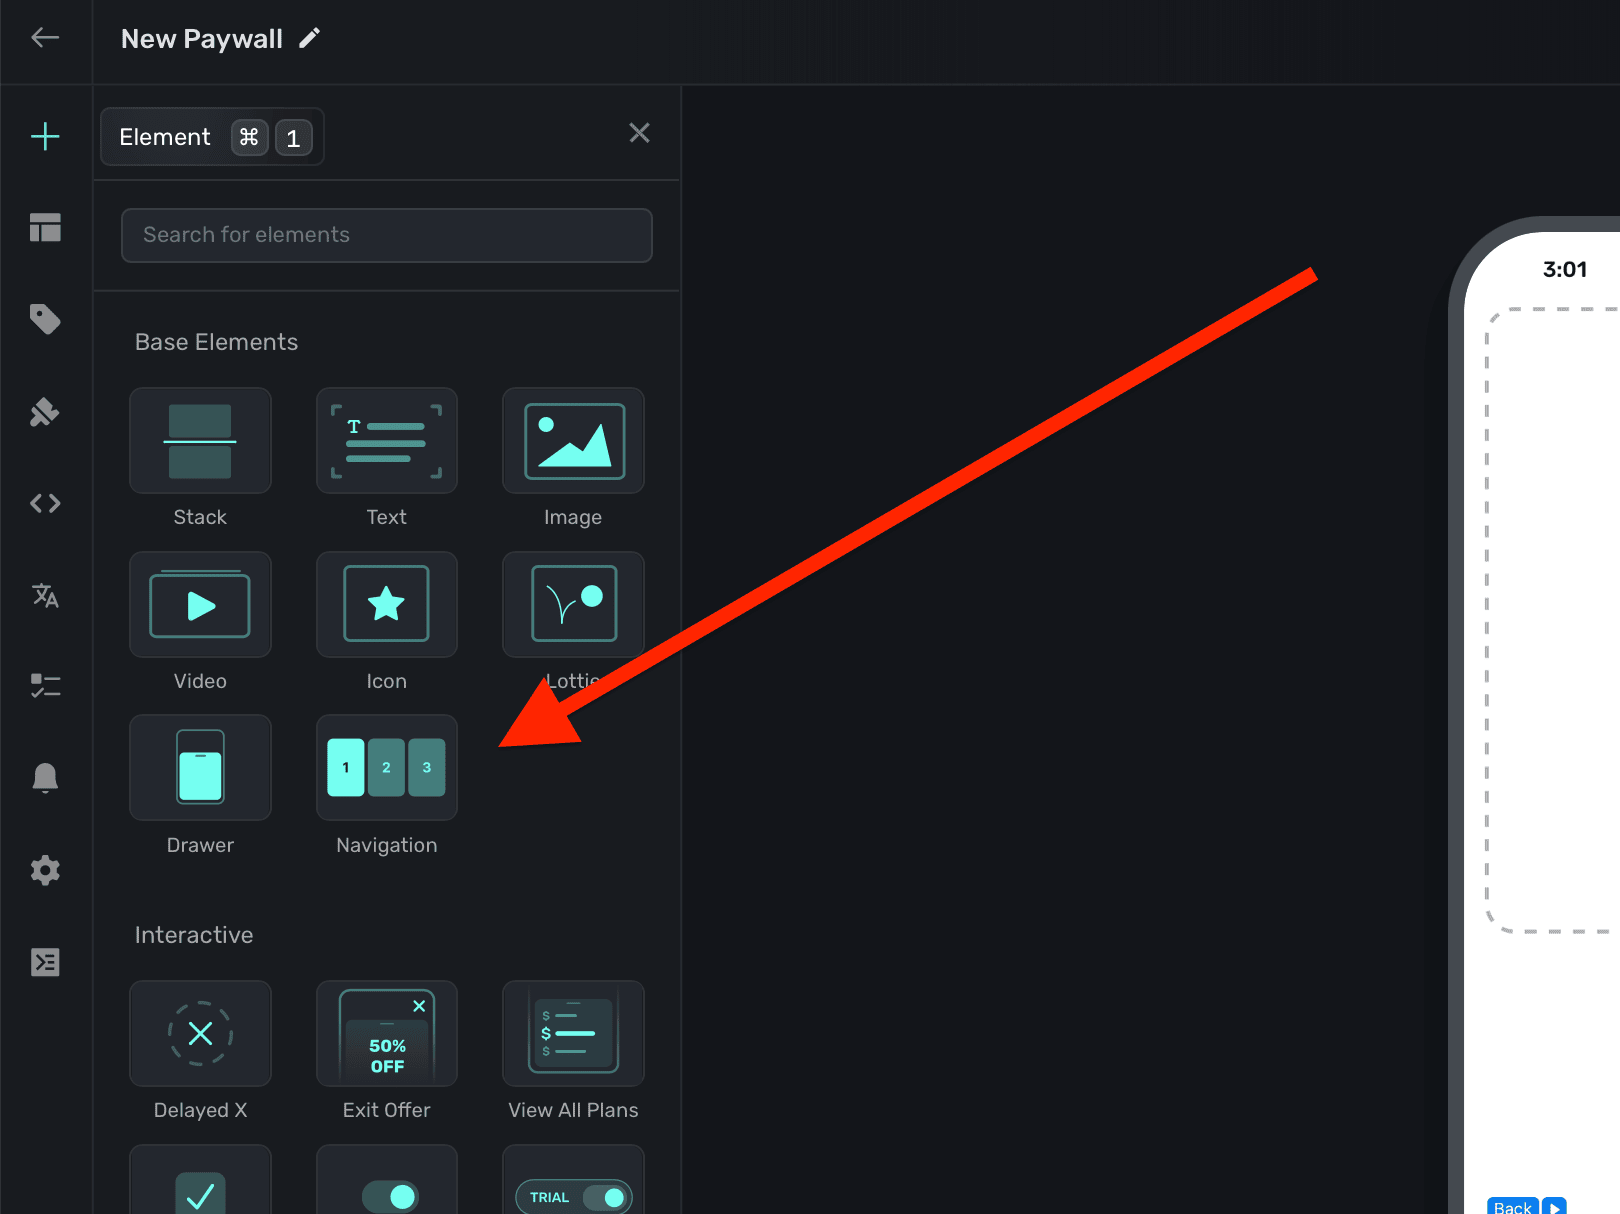
You'll see the navigation component in the element hierarchy. **In most cases, you'll want a navigation's width to be 100% of the viewport**:
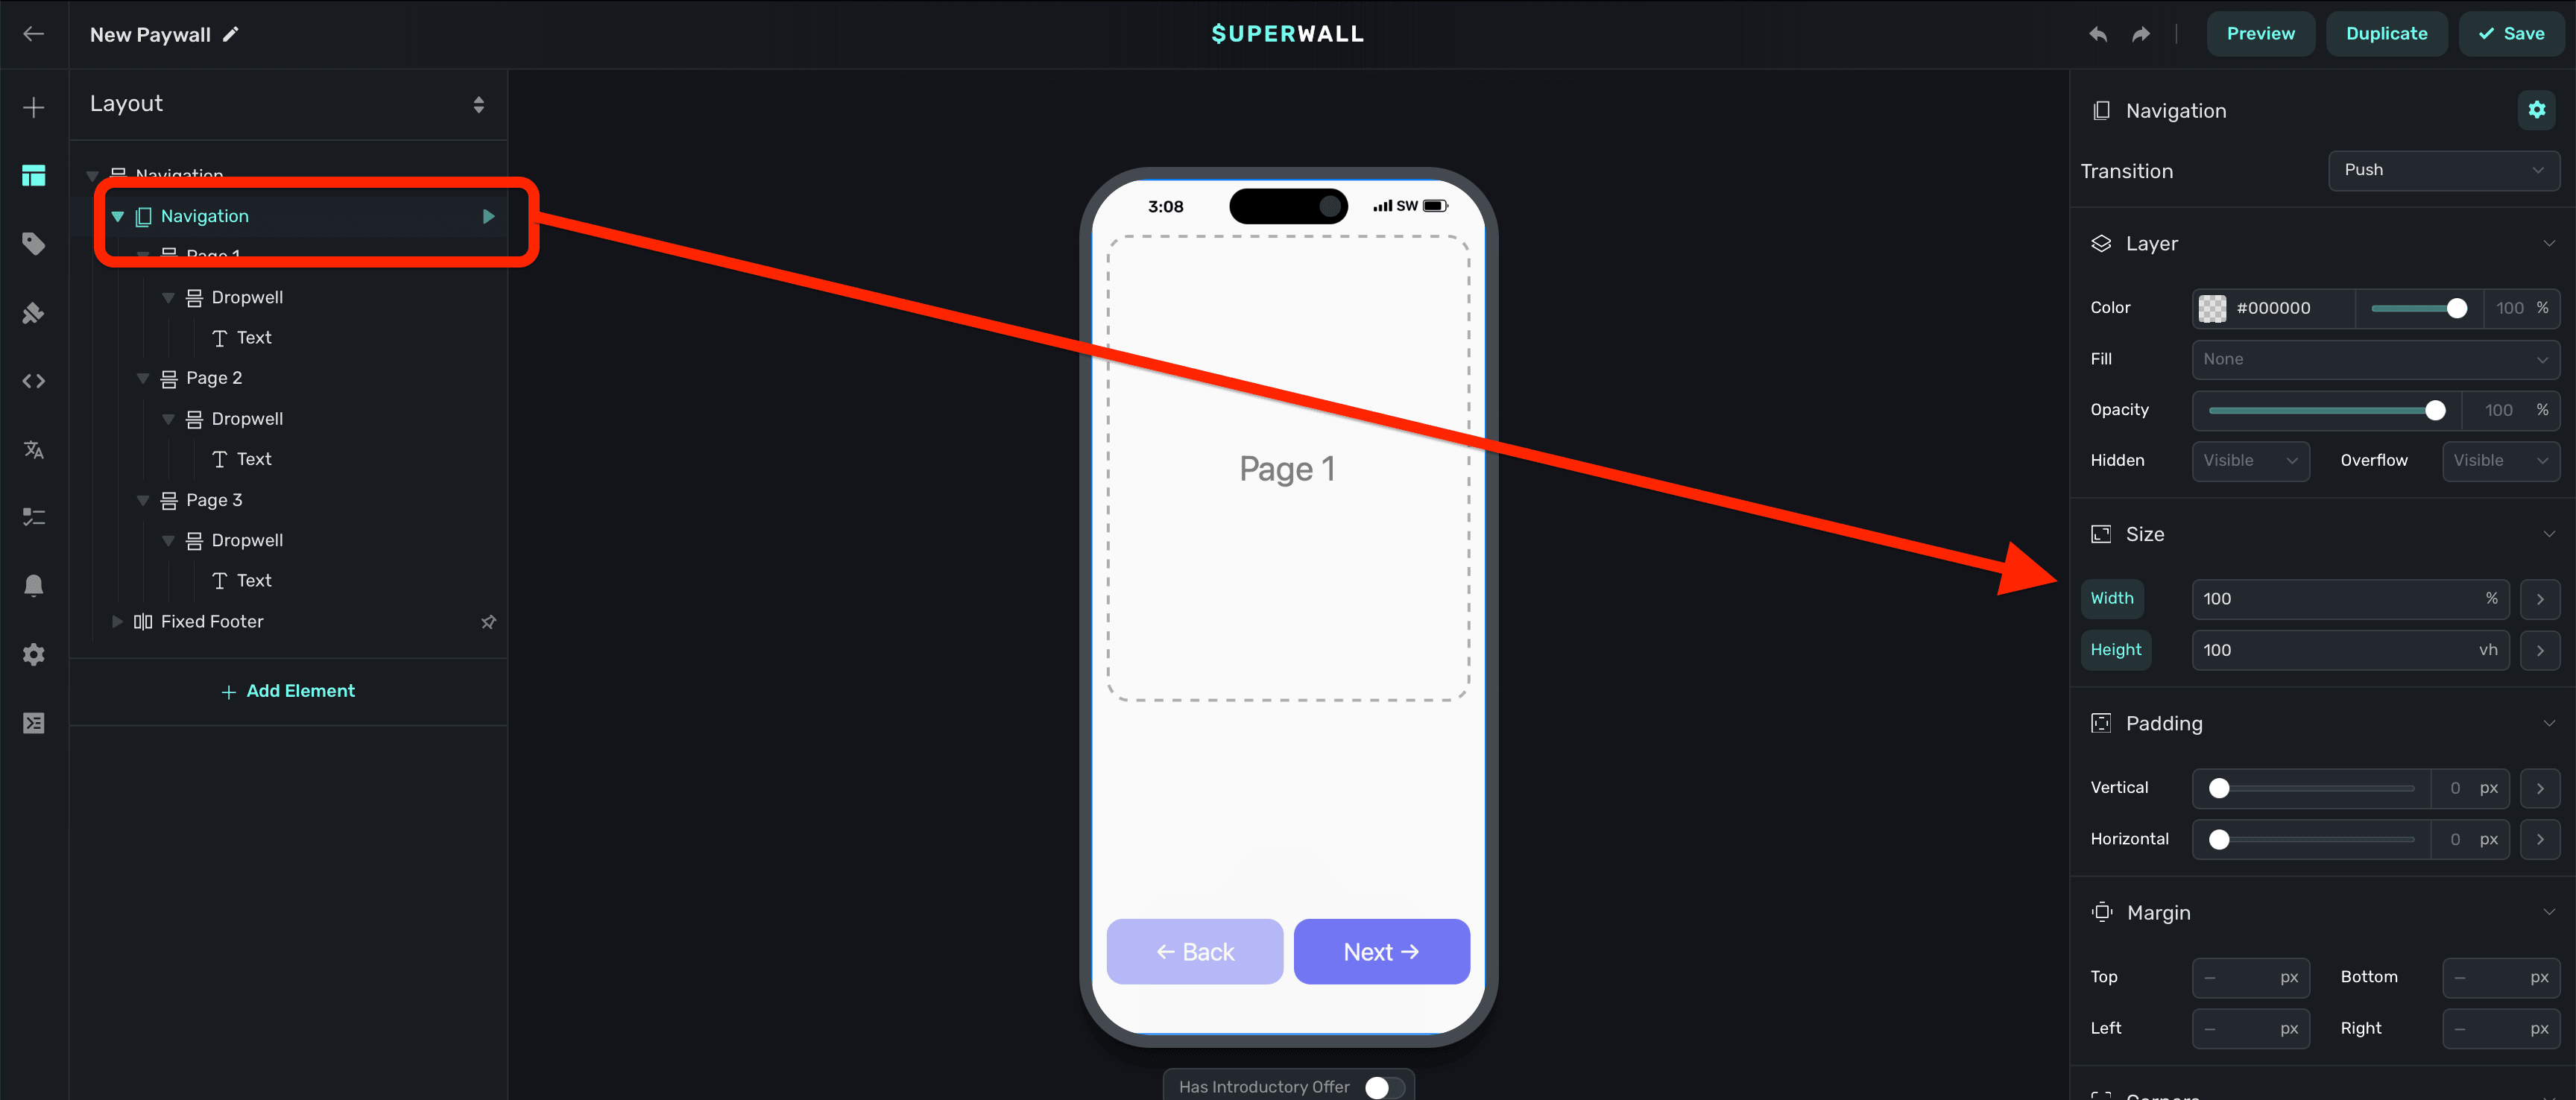
From there, add in content to create pages using [stacks](/paywall-editor-stacks):
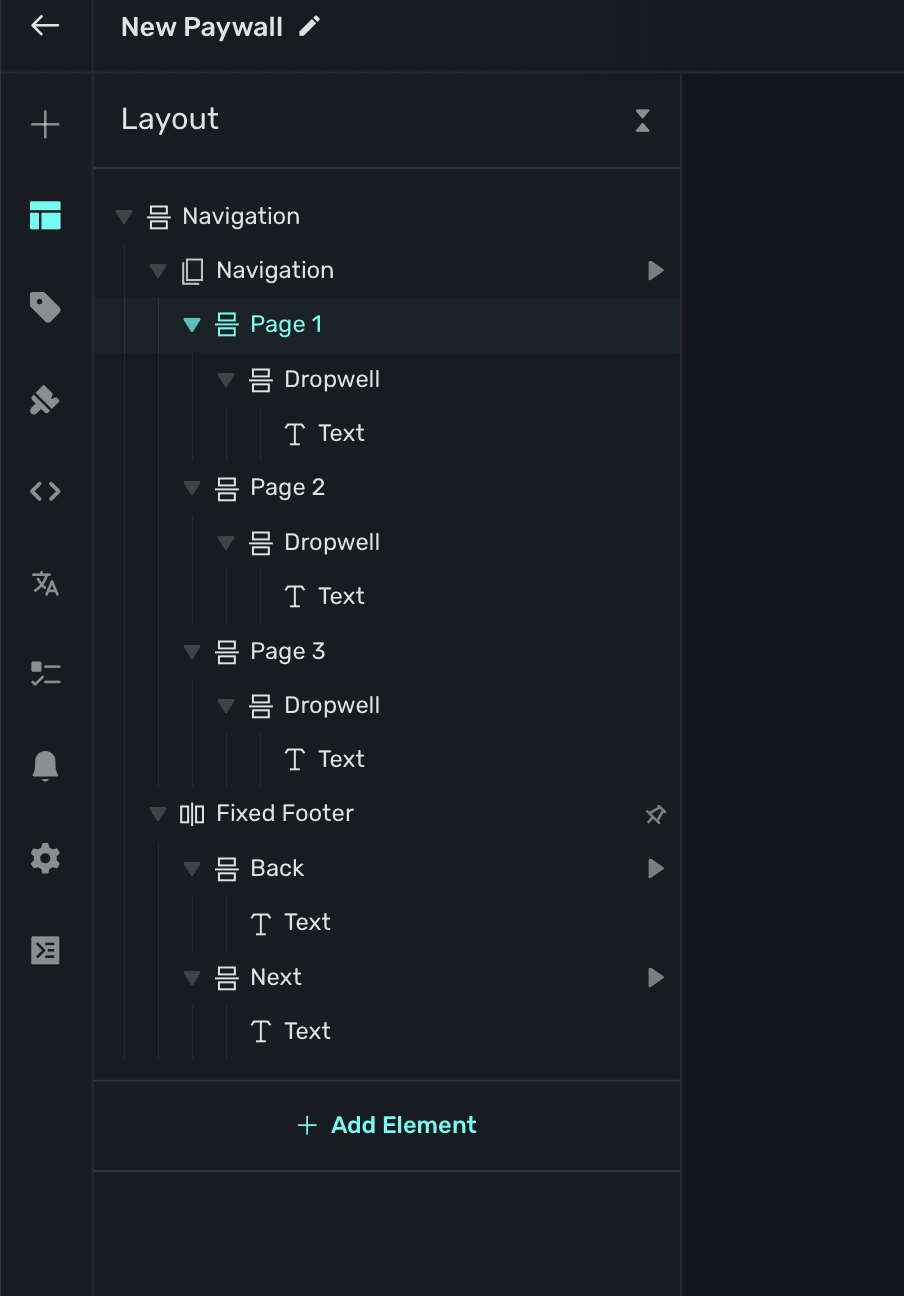
Similar to the parent navigation element, it helps to have the width of your stacks be 100% of the parent.
### Changing pages
When a navigation element is added, Superwall automatically creates an element variable for it (accessed through the **[Variables](/paywall-editor-variables)** tab in the left sidebar, or the variables button in the **[floating toolbar](/paywall-editor-floating-toolbar)**). Its name will match whatever is in the element hierarchy in the left sidebar:
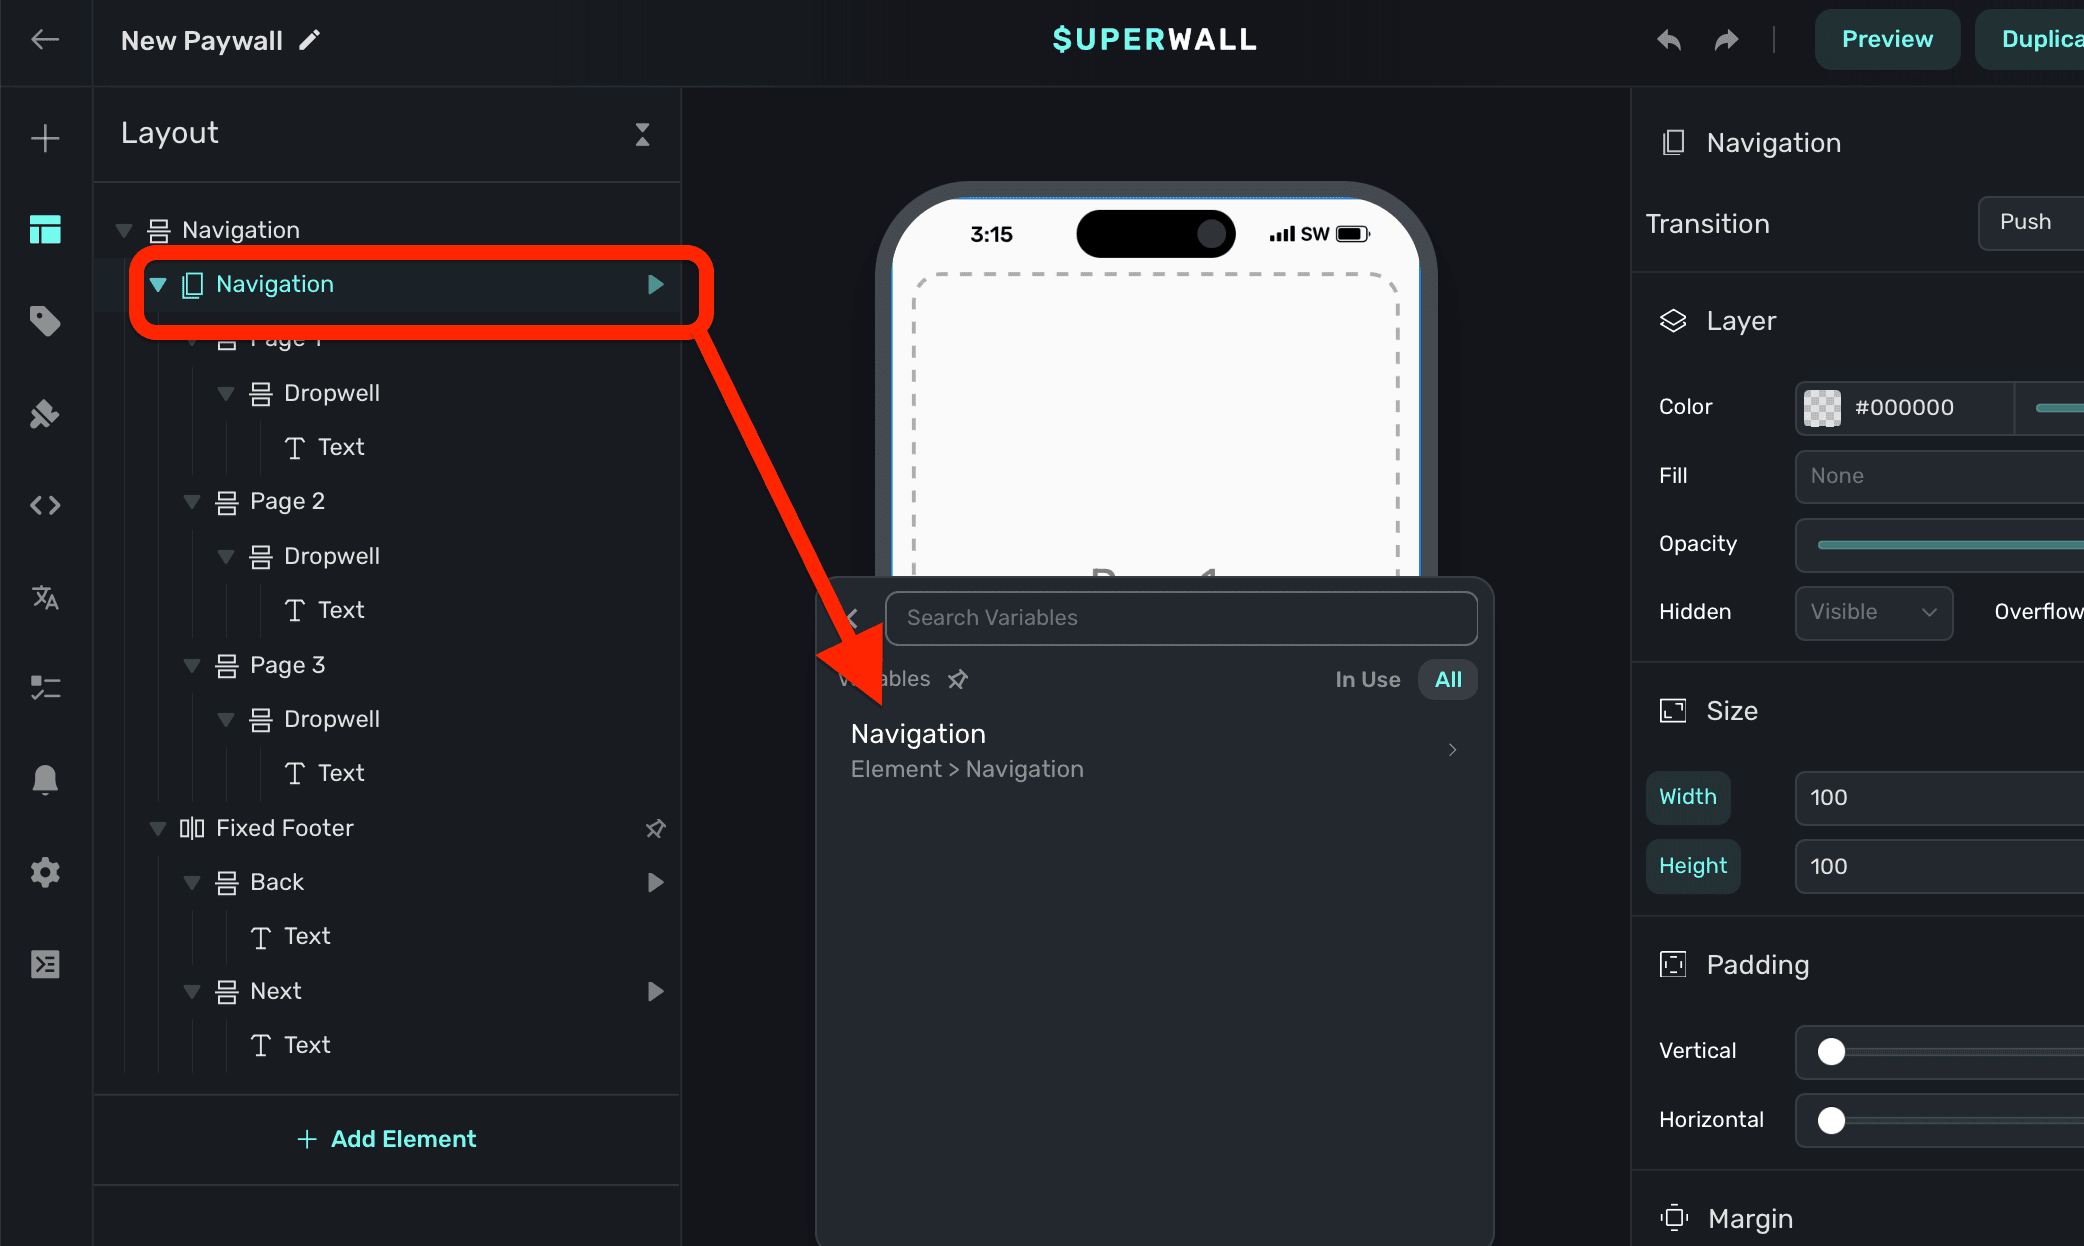
Each top-level child within the navigation component represents a *current index* value, starting from 0. Changing this value will change which page is displayed. In this example, we add a [tap behavior](/paywall-editor-styling-elements#tap-behaviors) to the button, which increments the element variable's `current index` value:
The variable's name is derived by the node's unique identifier. You don't need to set or generally be aware of this value.
### Editing transitions
A navigation component has four different transitions to use. Edit them by **clicking** on the navigation component from the left sidebar, and then selecting a value in the trailing sidebar:
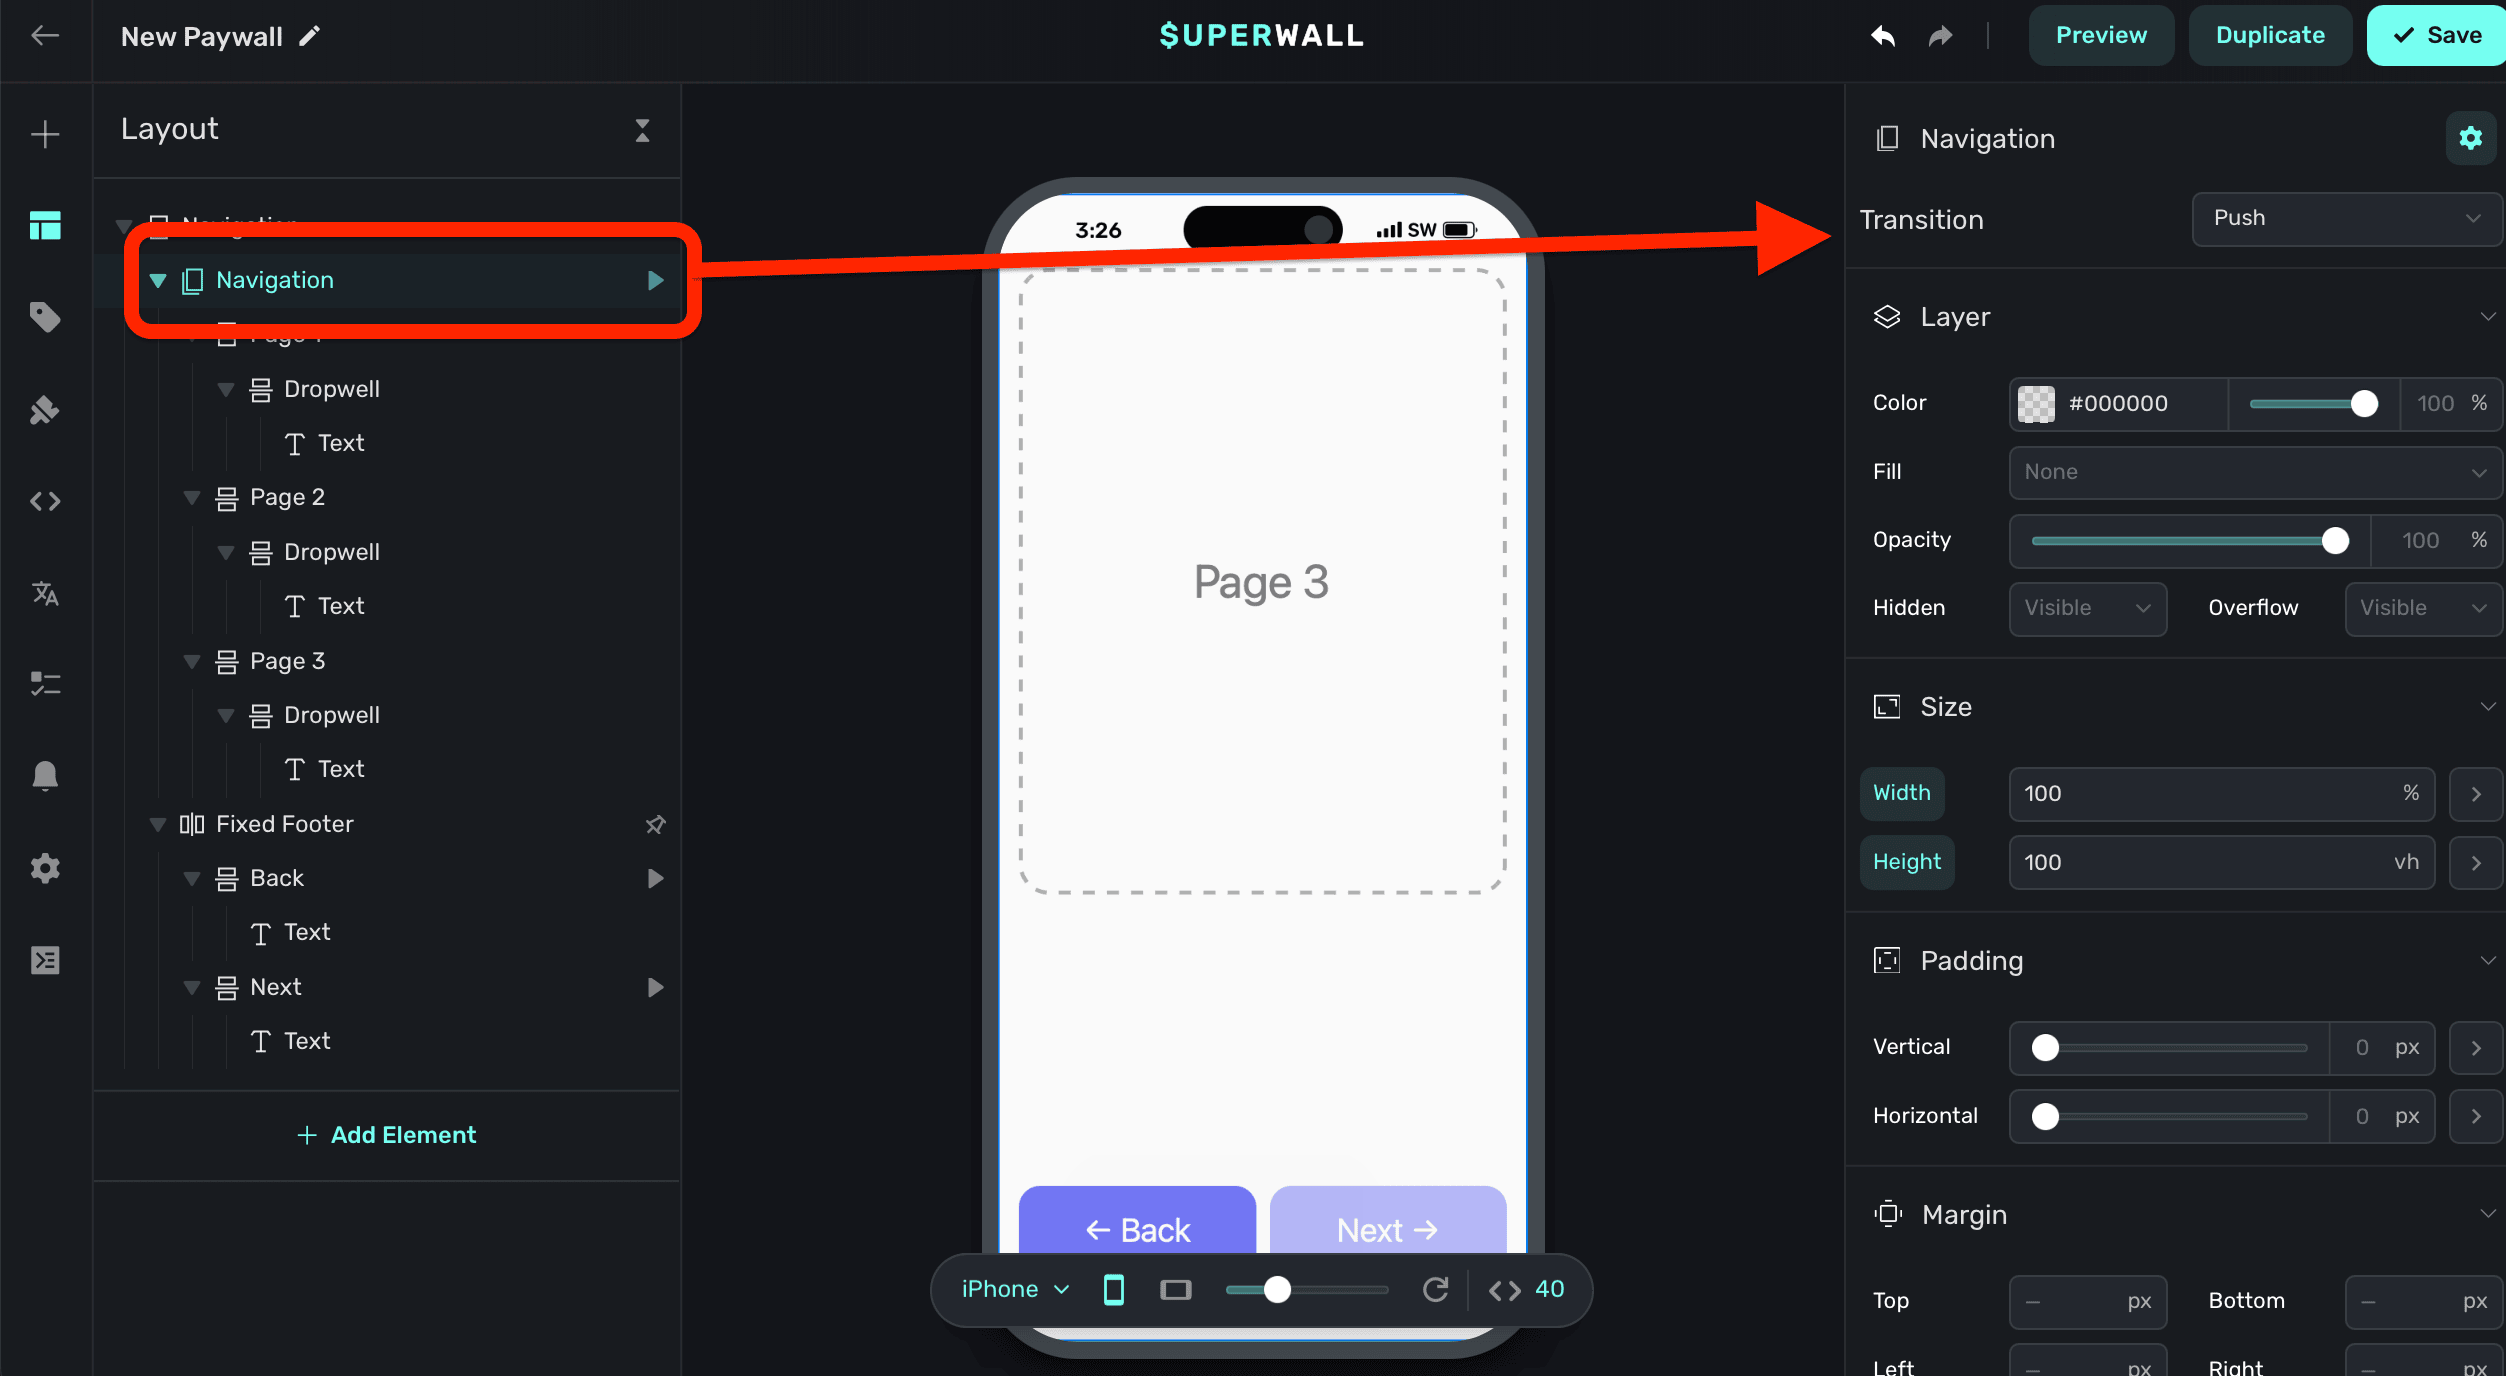
Available transitions are:
1. **No Transition:** No animation will occur during page changes.
2. **Push:** Each page is pushed on or off of the next page, similar to navigation stacks in iOS.
3. **Fade:** Each page change results in an opacity fade in or out.
4. **Slide:** Similar to push, but the animation results in a smooth transition between pages, much like scrolling through a carousel would look.
# Notifications
Source: https://superwall.com/docs/paywall-editor-notifications
To configure a notification which displays before a free trials ends, click the **Notifications** button from the **sidebar**
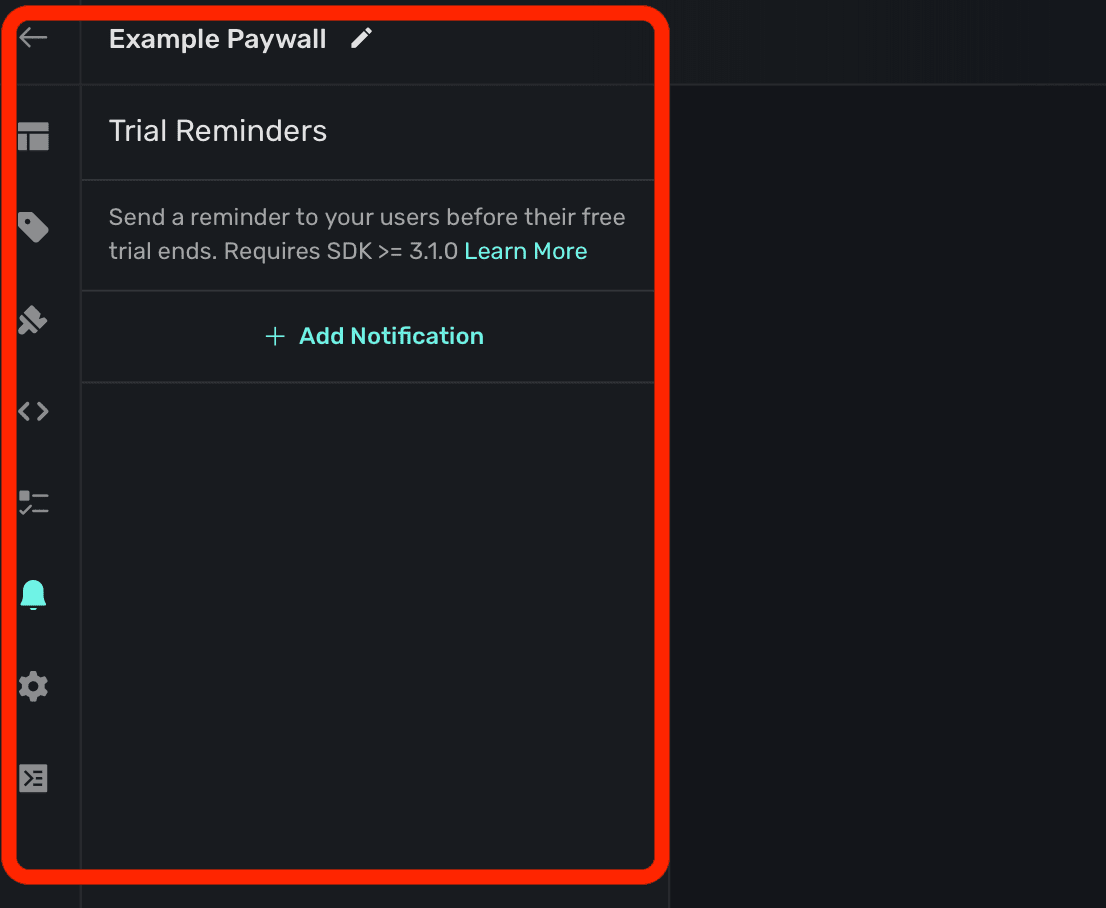
You can add a local notification that fires after a number of days when a free trial has been purchased. After the user starts a free trial, it will ask them to enable notifications if they haven't already done so.
In sandbox mode, the free trial reminder will fire after x minutes, instead of x days.
### Configuration
To turn on a trial reminder notification, click **+ Add Notification**. From there, there are four fields to configure:
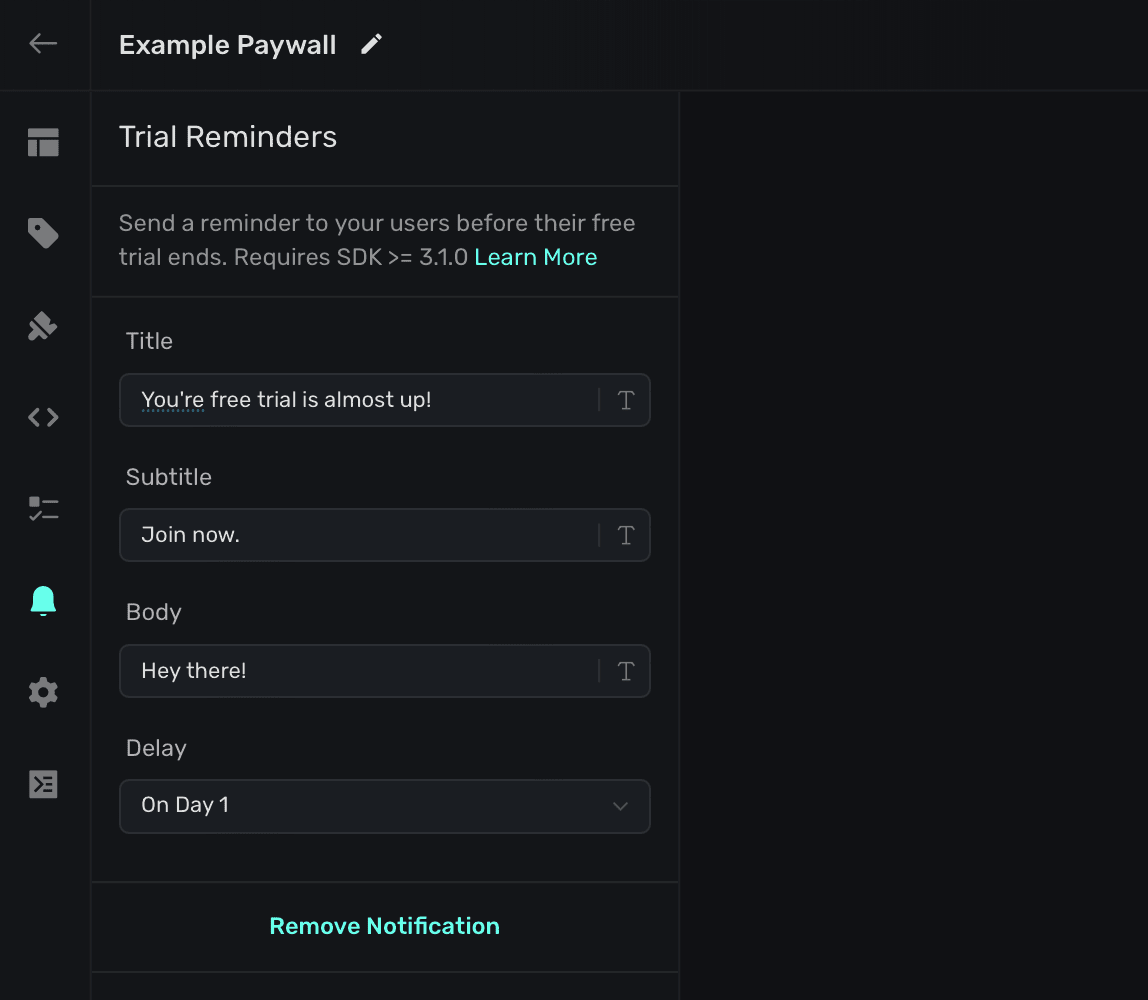
1. **Title**: Shows at the top of the notification.
2. **Subtitle**: Displays directly below the title in a smaller font. Not required.
3. **Body**: Shows in the primary body of the notification.
4. **Delay**: Any delay you'd like to apply after the free trial begins.
Here's where those values show up on a notification:

Also, keep in mind that these will be scheduled as a local notification as soon as they are configured.
# Getting Started with the Paywall Editor
Source: https://superwall.com/docs/paywall-editor-overview
Use Superwall's best-in-class editor to bring virtually any paywall design to life, complete with advanced U.X. patterns. Or, browse our growing list of paywall templates to get started quickly.
There are two primary ways to create a paywall:
1. Using our editor from scratch.
2. Or, start with a [template](https://superwall.com/applications/:app/templates) and edit it to fit your needs.
### Using the Editor
On the Superwall dashboard under **Paywalls**, click **+ New Paywall** and select **From Scratch**:

The Paywall Editor consists of 3 sections:
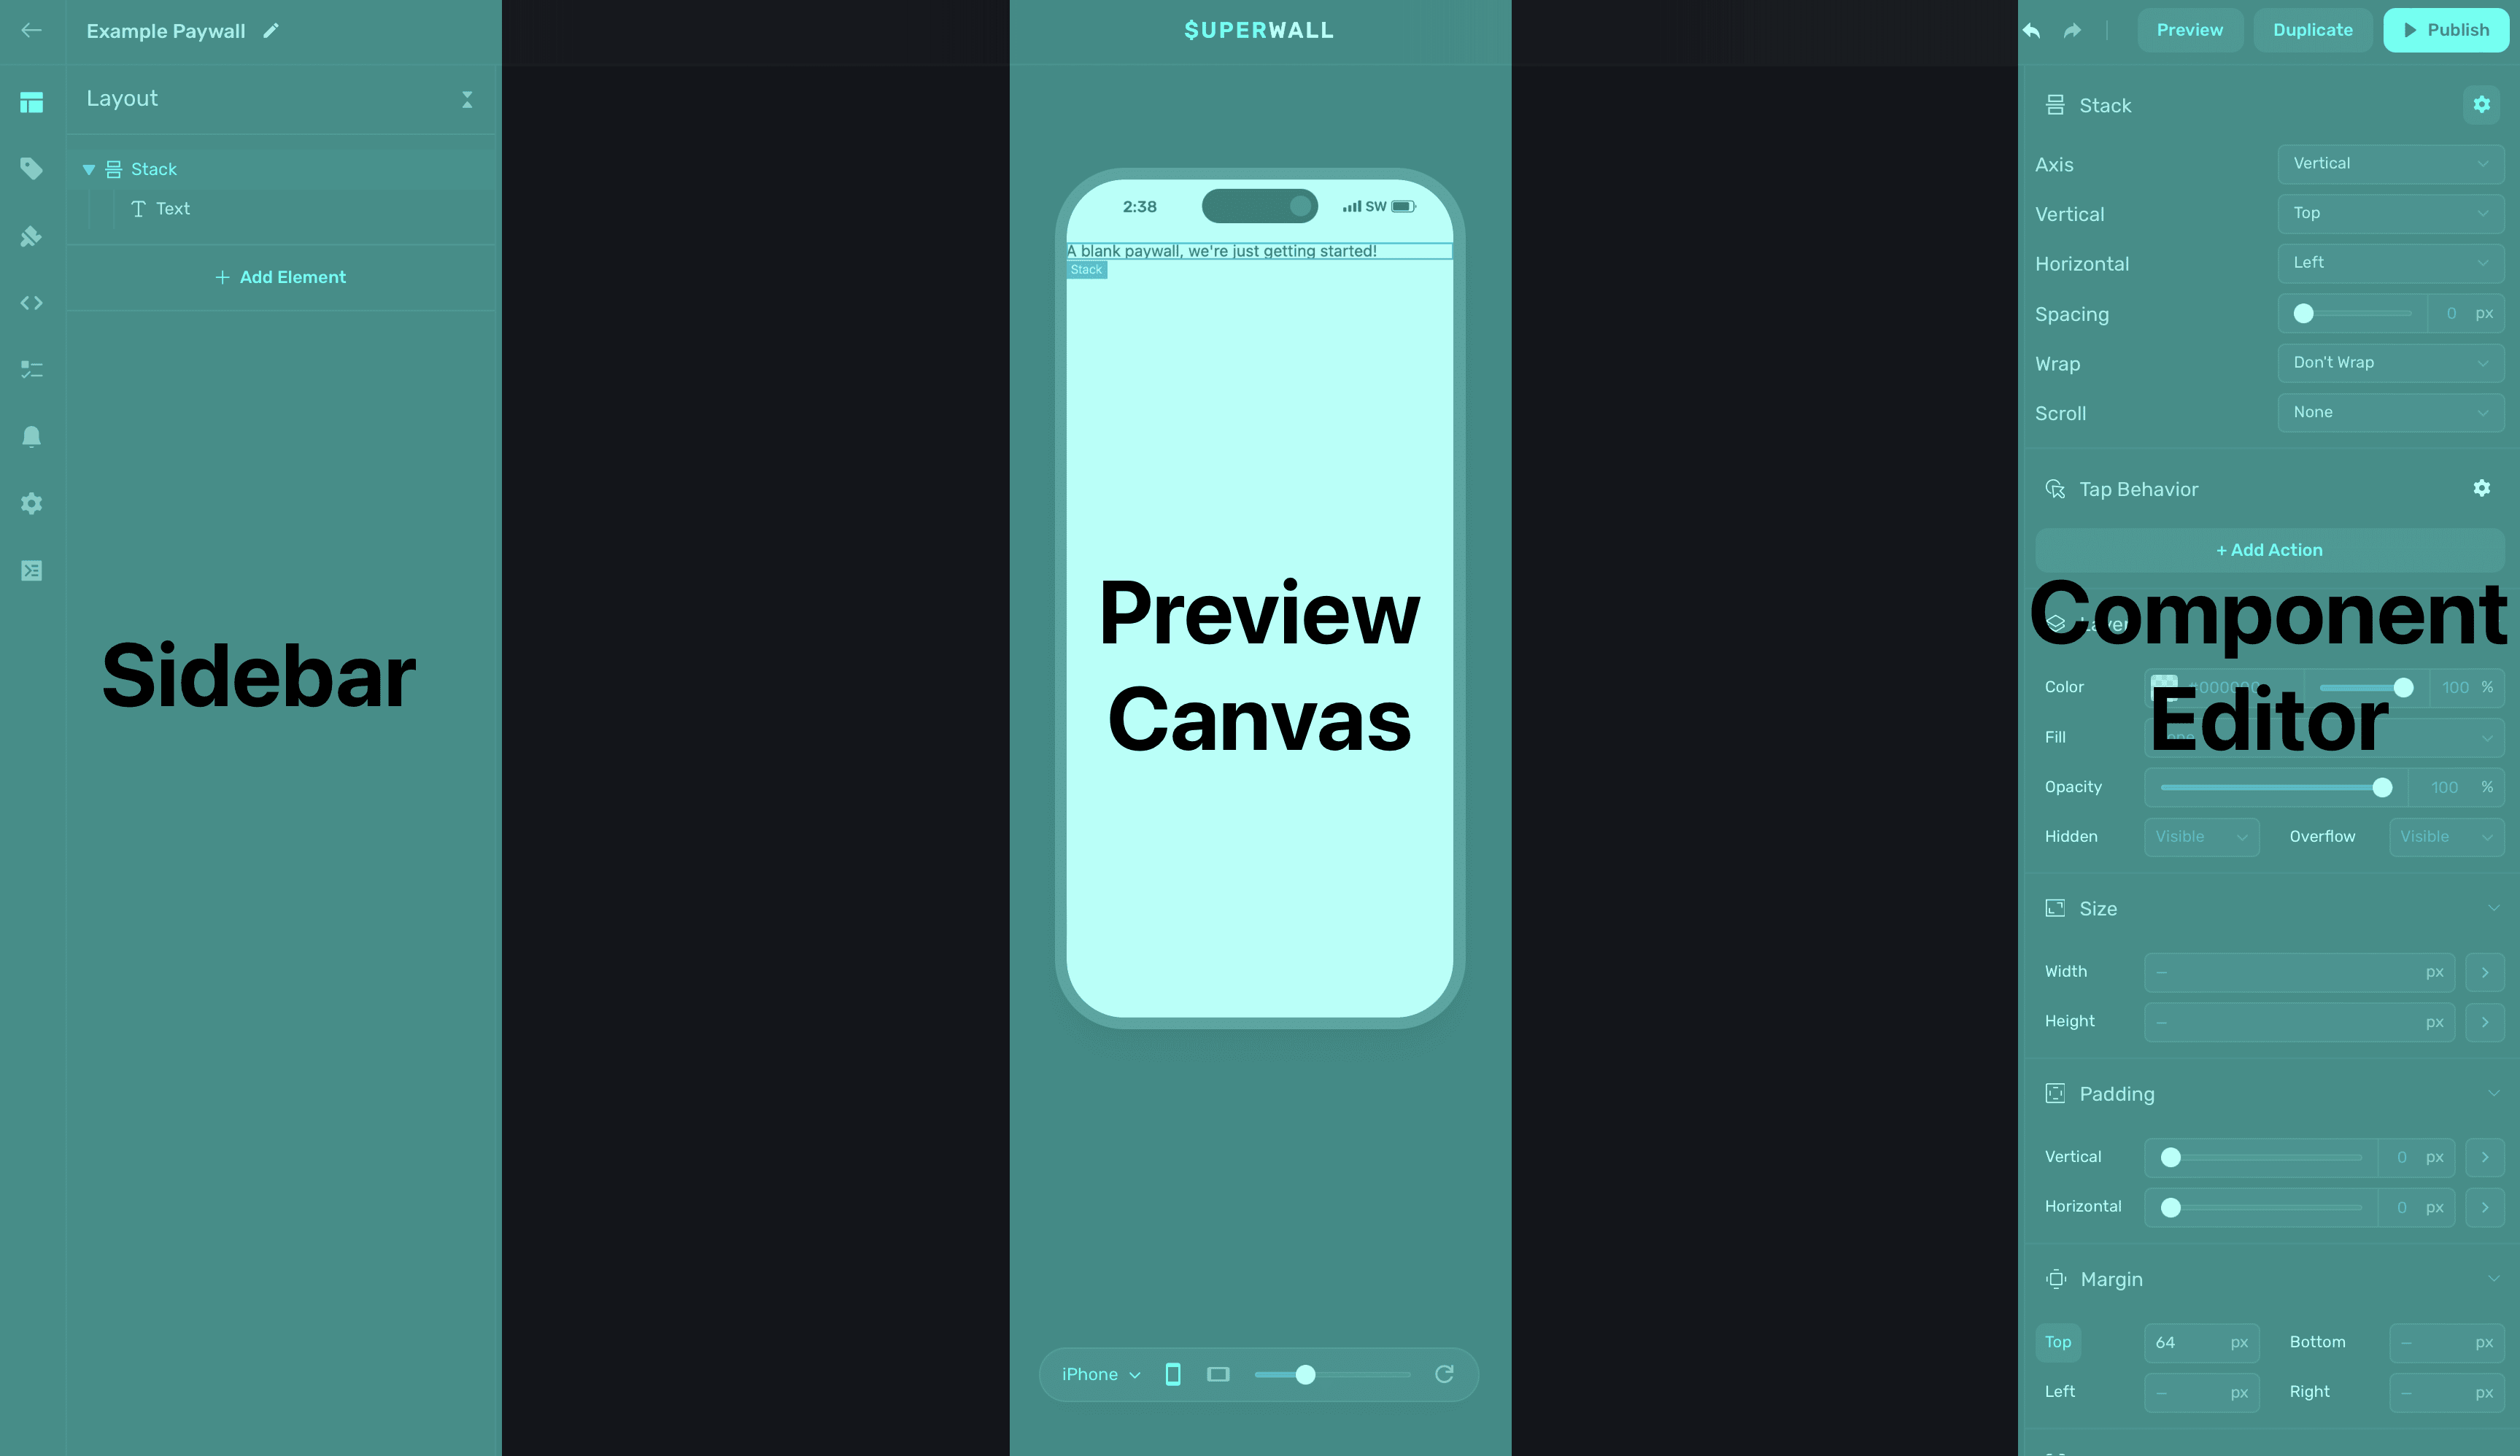
1. **Sidebar -** General paywall settings, designs and products to show on the paywall. You can toggle through its sections using keyboard shortcuts such as `command/control 1/2/3`, etc.
2. **[Device Preview](/paywall-editor-previewing) -** An interactive preview of your paywall on a mock device.
3. **Component Editor -** Fully customize components, use variables and more on your paywall.
### Starting with a Template
On the Superwall dashboard under **Paywalls**, click **+ New Paywall** and select **Use Template**:

This will redirect you to the templates page where you can browse different types of paywall templates. Clicking on one will allow you to preview it:
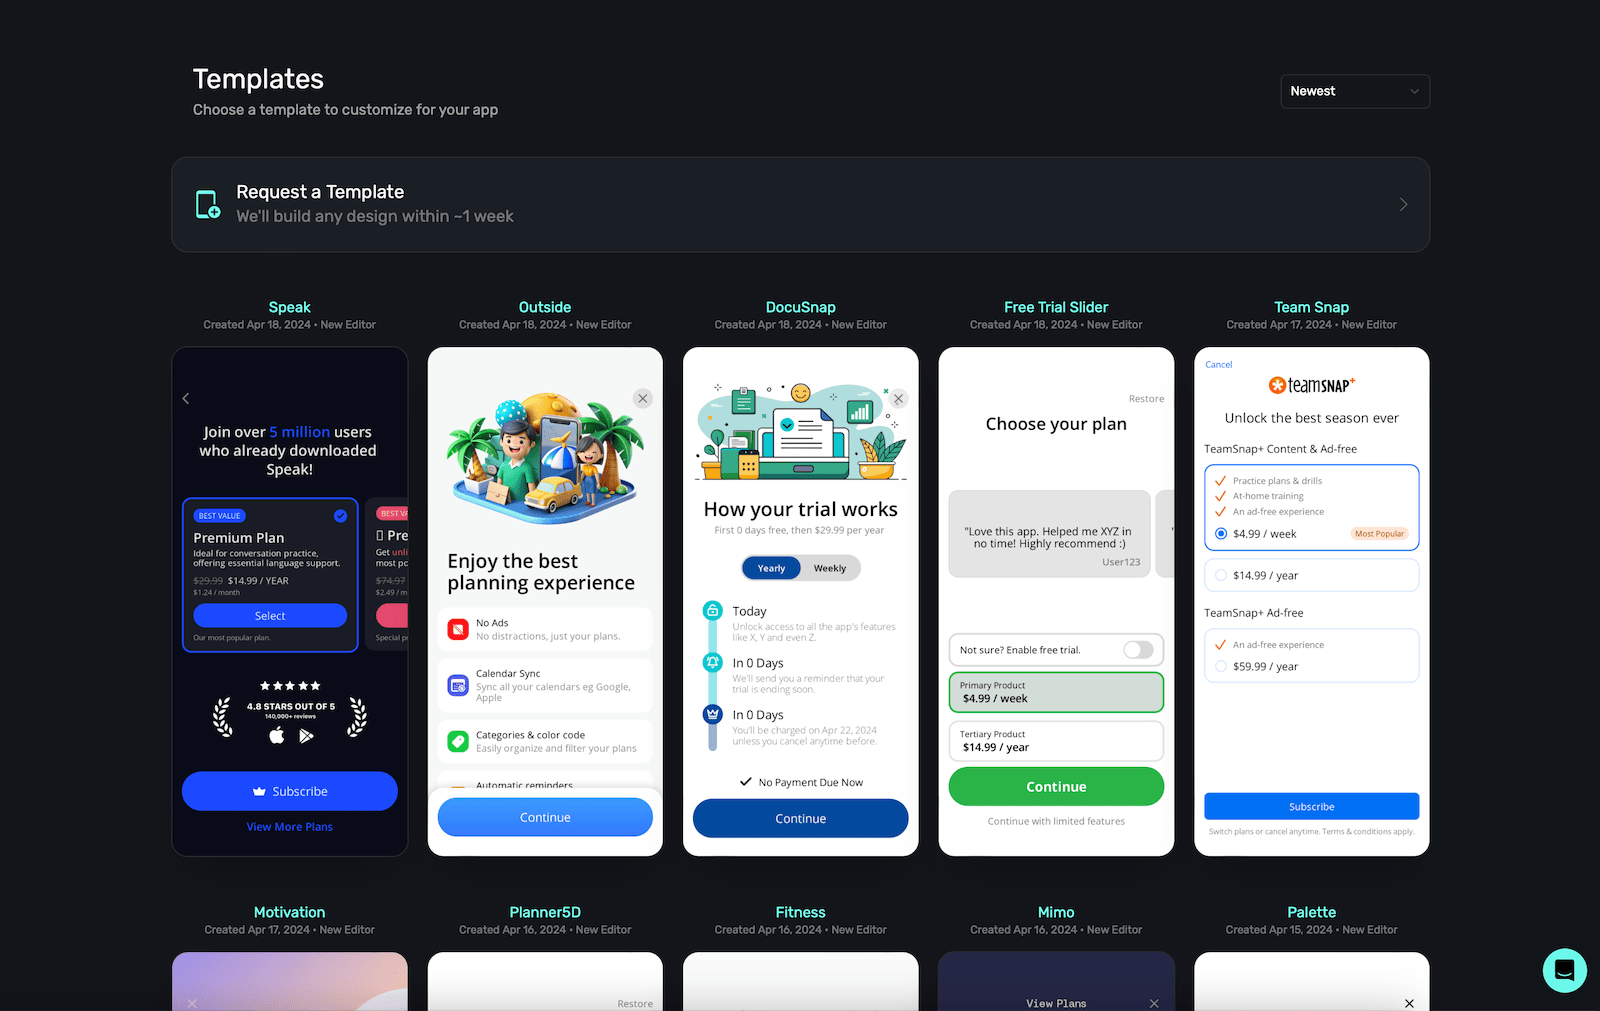
Click **Use Template**, and it will open in our editor ready to customize:
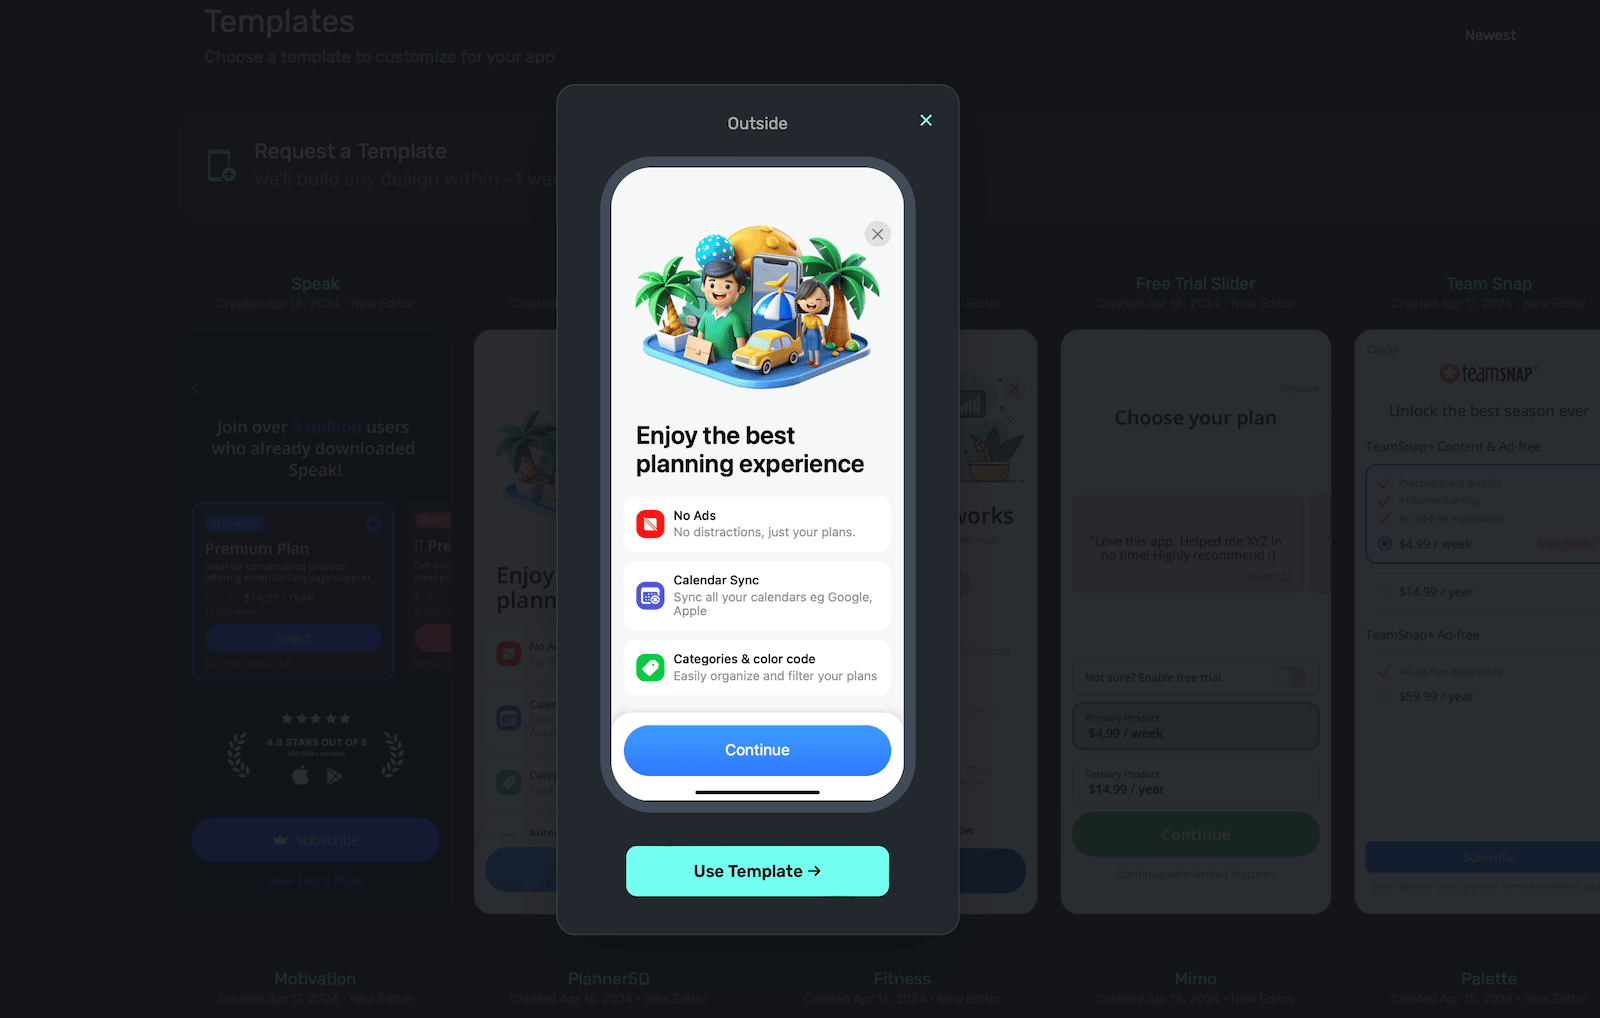
### Request a Design
If you have an existing design in Figma, Sketch or something similar, you can ask Superwall to create it for you in our editor. Please allow about five business days from the date of your request (give or take). Once it's finished, it'll be uploaded to your Superwall account.
To request one, on the Superwall dashboard under **Paywalls**, click **+ New Paywall** and select **Request a Template**:
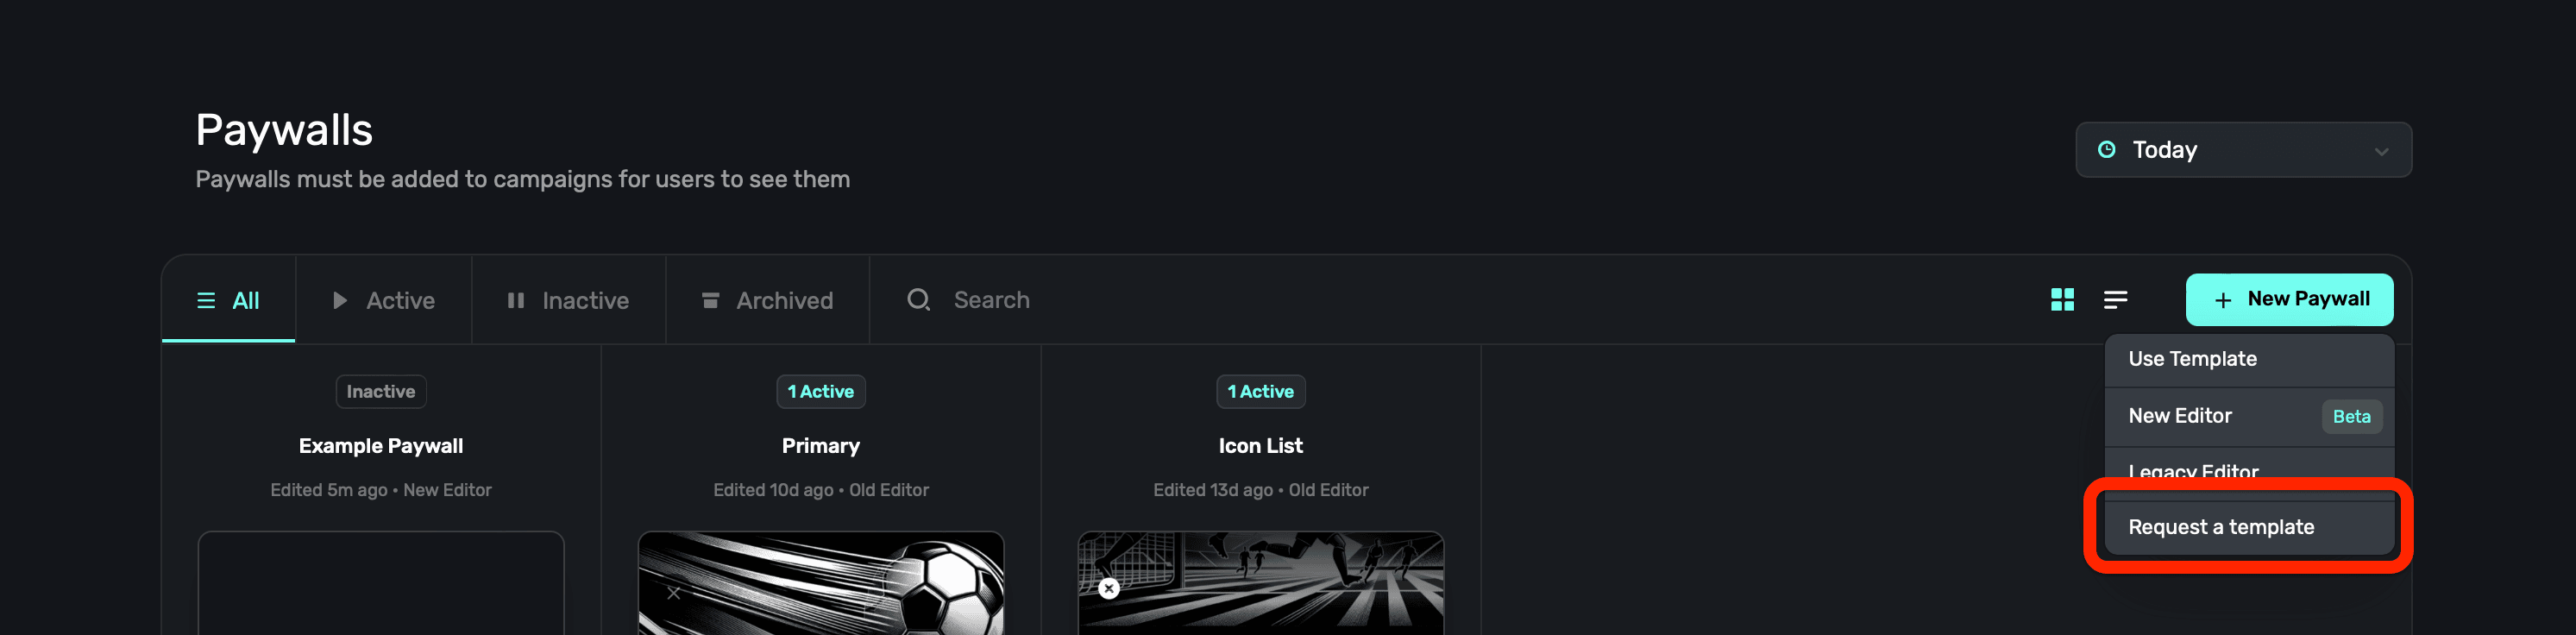
### Legacy Editor
If you're still using our legacy editor, you can still access those docs [here](/configuring-a-paywall). If you're not sure which editor you're using, any legacy editor will have a `v3` or lower in the URL:
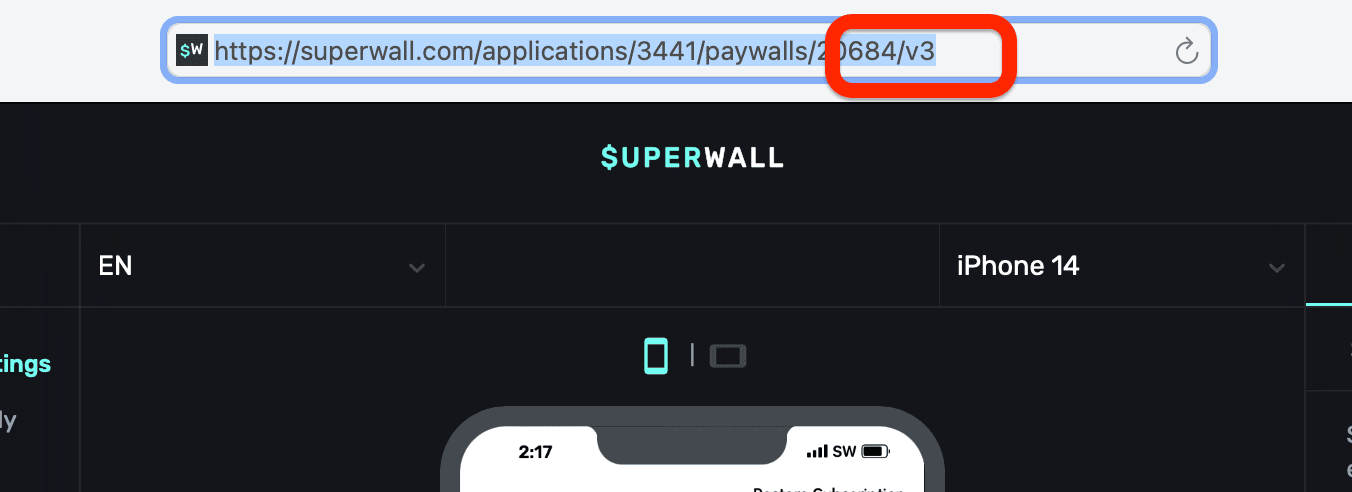
# Previewing
Source: https://superwall.com/docs/paywall-editor-previewing
To preview a paywall on device, click **Preview** in the top-right side of the editor:
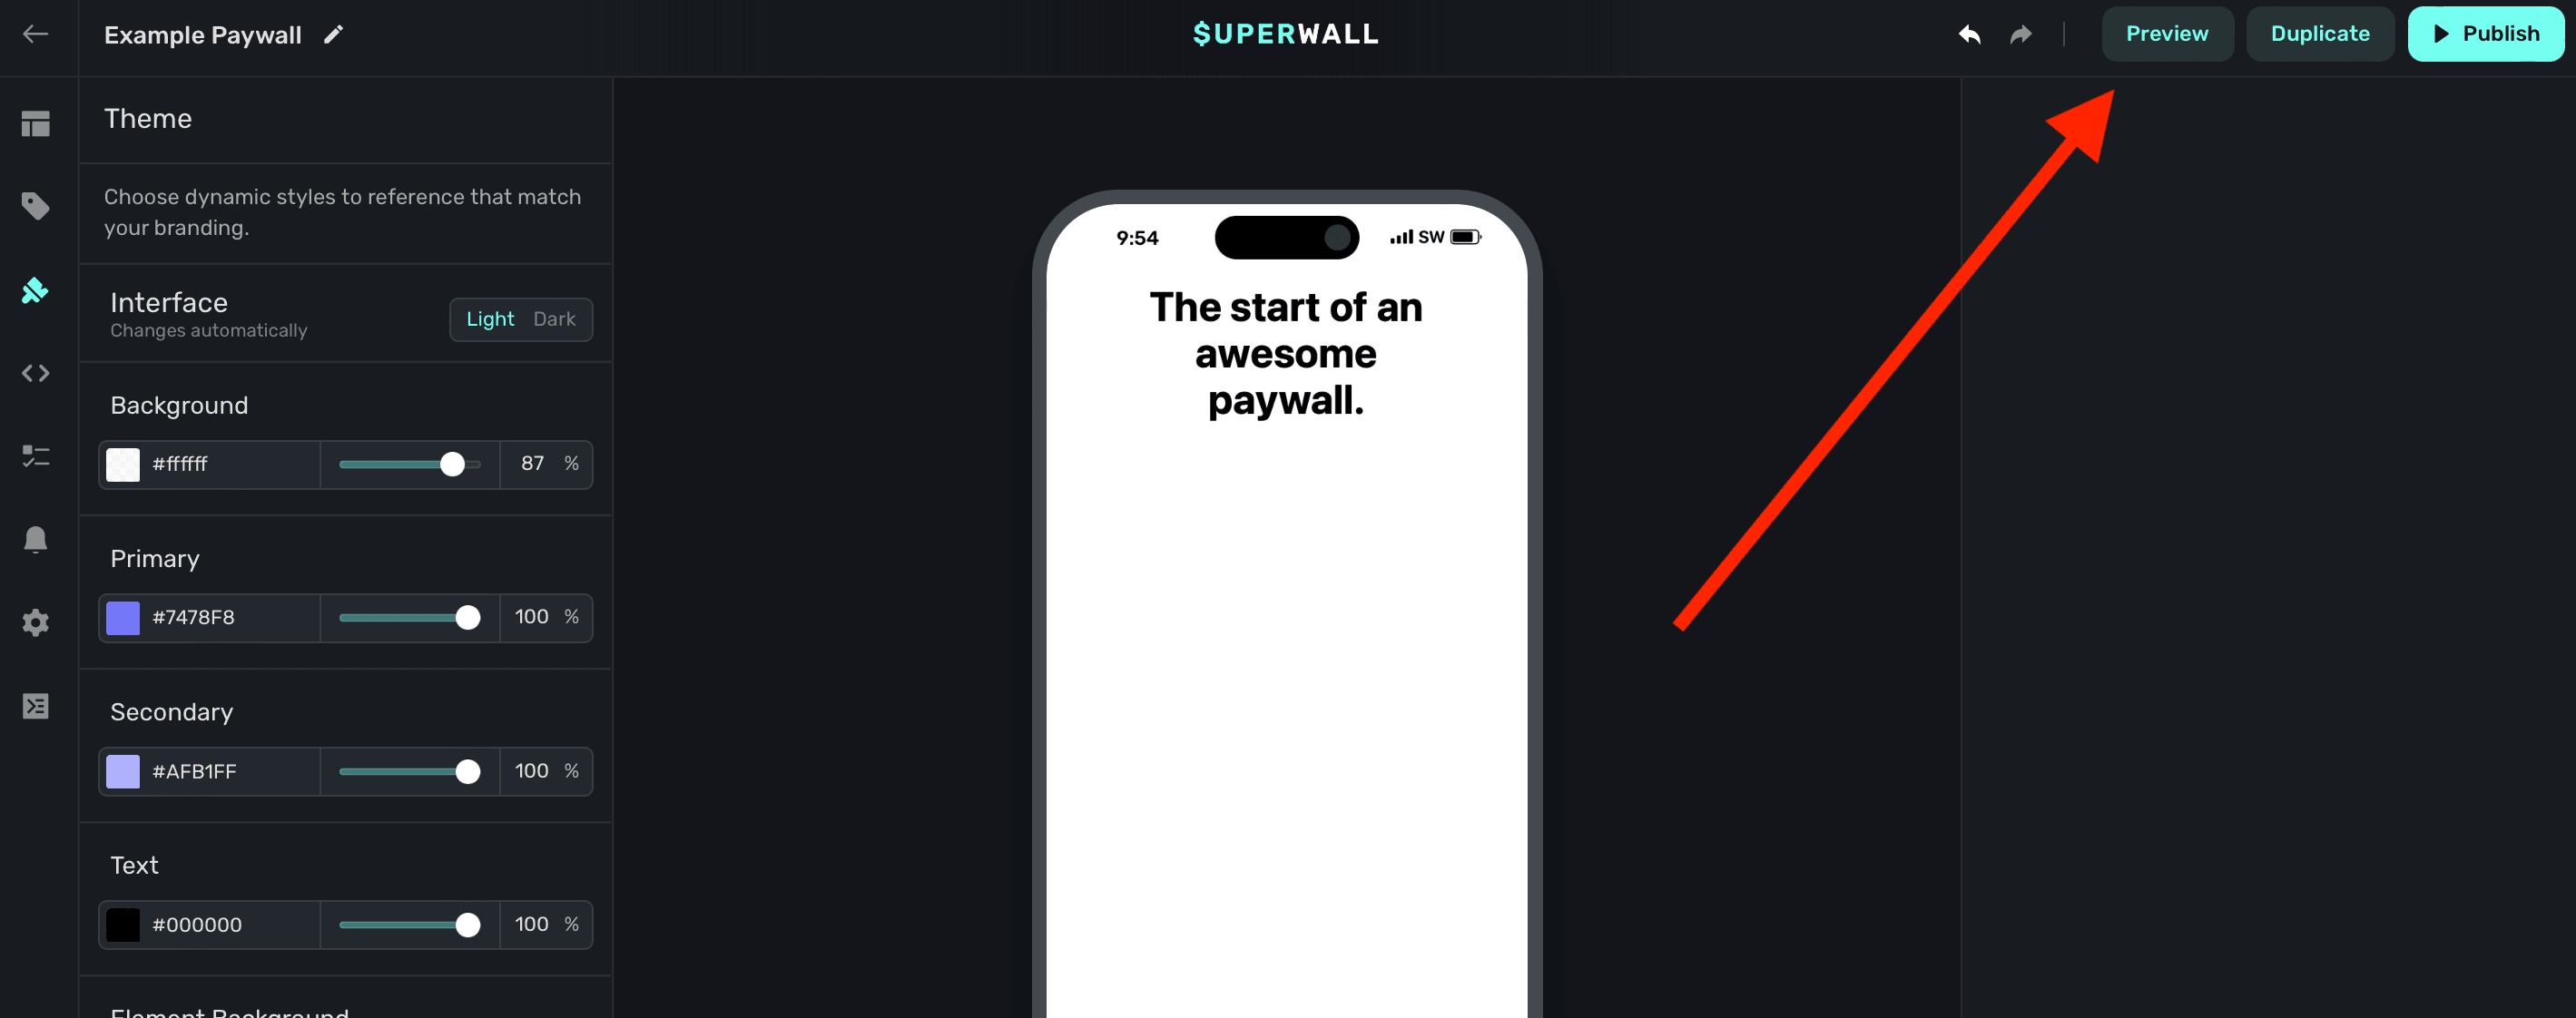
To enable this functionality, you'll need to use deep links.
#### Adding a Custom URL Scheme (iOS)
To handle deep links on iOS, you'll need to add a custom URL scheme for your app.
Open **Xcode**. In your **info.plist**, add a row called **URL Types**. Expand the automatically created **Item 0**, and inside the **URL identifier** value field, type your **Bundle ID**, e.g., **com.superwall.Superwall-SwiftUI**. Add another row to **Item 0** called **URL Schemes** and set its **Item 0** to a URL scheme you'd like to use for your app, e.g., **exampleapp**. Your structure should look like this:

With this example, the app will open in response to a deep link with the format **exampleapp\://**. You can [view Apple's documentation](https://developer.apple.com/documentation/xcode/defining-a-custom-url-scheme-for-your-app) to learn more about custom URL schemes.
#### Adding a Custom Intent Filter (Android)
For Android, add the following to your `AndroidManifest.xml` file:
```xml
```
This configuration allows your app to open in response to a deep link with the format `exampleapp://` from your `MainActivity` class.
#### Handling Deep Links (iOS)
Depending on whether your app uses a SceneDelegate, AppDelegate, or is written in SwiftUI, there are different ways to tell Superwall that a deep link has been opened.
Be sure to click the tab that corresponds to your architecture:
```swift AppDelegate.swift
import SuperwallKit
class AppDelegate: UIResponder, UIApplicationDelegate {
// NOTE: if your app uses a SceneDelegate, this will NOT work!
func application(\_ app: UIApplication, open url: URL, options: [UIApplication.OpenURLOptionsKey : Any] = [:]) -> Bool {
return Superwall.shared.handleDeepLink(url)
}
}
```
```swift SceneDelegate.swift
import SuperwallKit
class SceneDelegate: UIResponder, UIWindowSceneDelegate {
// for cold launches
func scene(_ scene: UIScene, willConnectTo session: UISceneSession, options connectionOptions: UIScene.ConnectionOptions) {
if let url = connectionOptions.urlContexts.first?.url {
Superwall.shared.handleDeepLink(url)
}
}
// for when your app is already running
func scene(_ scene: UIScene, openURLContexts URLContexts: Set) {
if let url = URLContexts.first?.url {
Superwall.shared.handleDeepLink(url)
}
}
}
```
```swift SwiftUI
import SuperwallKit
@main
struct MyApp: App {
var body: some Scene {
WindowGroup {
ContentView()
.onOpenURL { url in
Superwall.shared.handleDeepLink(url) // handle your deep link
}
}
}
}
```
```swift Objective-C
// In your SceneDelegate.m
#import "SceneDelegate.h"
@import SuperwallKit;
@interface SceneDelegate ()
@end
@implementation SceneDelegate
- (void)scene:(UIScene *)scene willConnectToSession:(UISceneSession *)session options:(UISceneConnectionOptions *)connectionOptions {
[self handleURLContexts:connectionOptions.URLContexts];
}
- (void)scene:(UIScene *)scene openURLContexts:(NSSet *)URLContexts {
[self handleURLContexts:URLContexts];
}
#pragma mark - Deep linking
- (void)handleURLContexts:(NSSet *)URLContexts {
[URLContexts enumerateObjectsUsingBlock:^(UIOpenURLContext * _Nonnull context, BOOL * _Nonnull stop) {
[[Superwall sharedInstance] handleDeepLink:context.URL];
}];
}
@end
```
#### Handling Deep Links (Android)
In your `MainActivity` (or the activity specified in your intent-filter), add the following Kotlin code to handle deep links:
```kotlin Kotlin
class MainActivity : AppCompatActivity() {
override fun onCreate(savedInstanceState: Bundle?) {
super.onCreate(savedInstanceState)
// Respond to deep links
respondToDeepLinks()
}
private fun respondToDeepLinks() {
intent?.data?.let { uri ->
Superwall.instance.handleDeepLink(uri)
}
}
}
```
### Previewing Paywalls
Next, build and run your app on your phone.
Then, head to the Superwall Dashboard. Click on **Settings** from the Dashboard panel on the left, then select **General**:

With the **General** tab selected, type your custom URL scheme, without slashes, into the **Apple Custom URL Scheme** field:

Next, open your paywall from the dashboard and click **Preview**. You'll see a QR code appear in a pop-up:
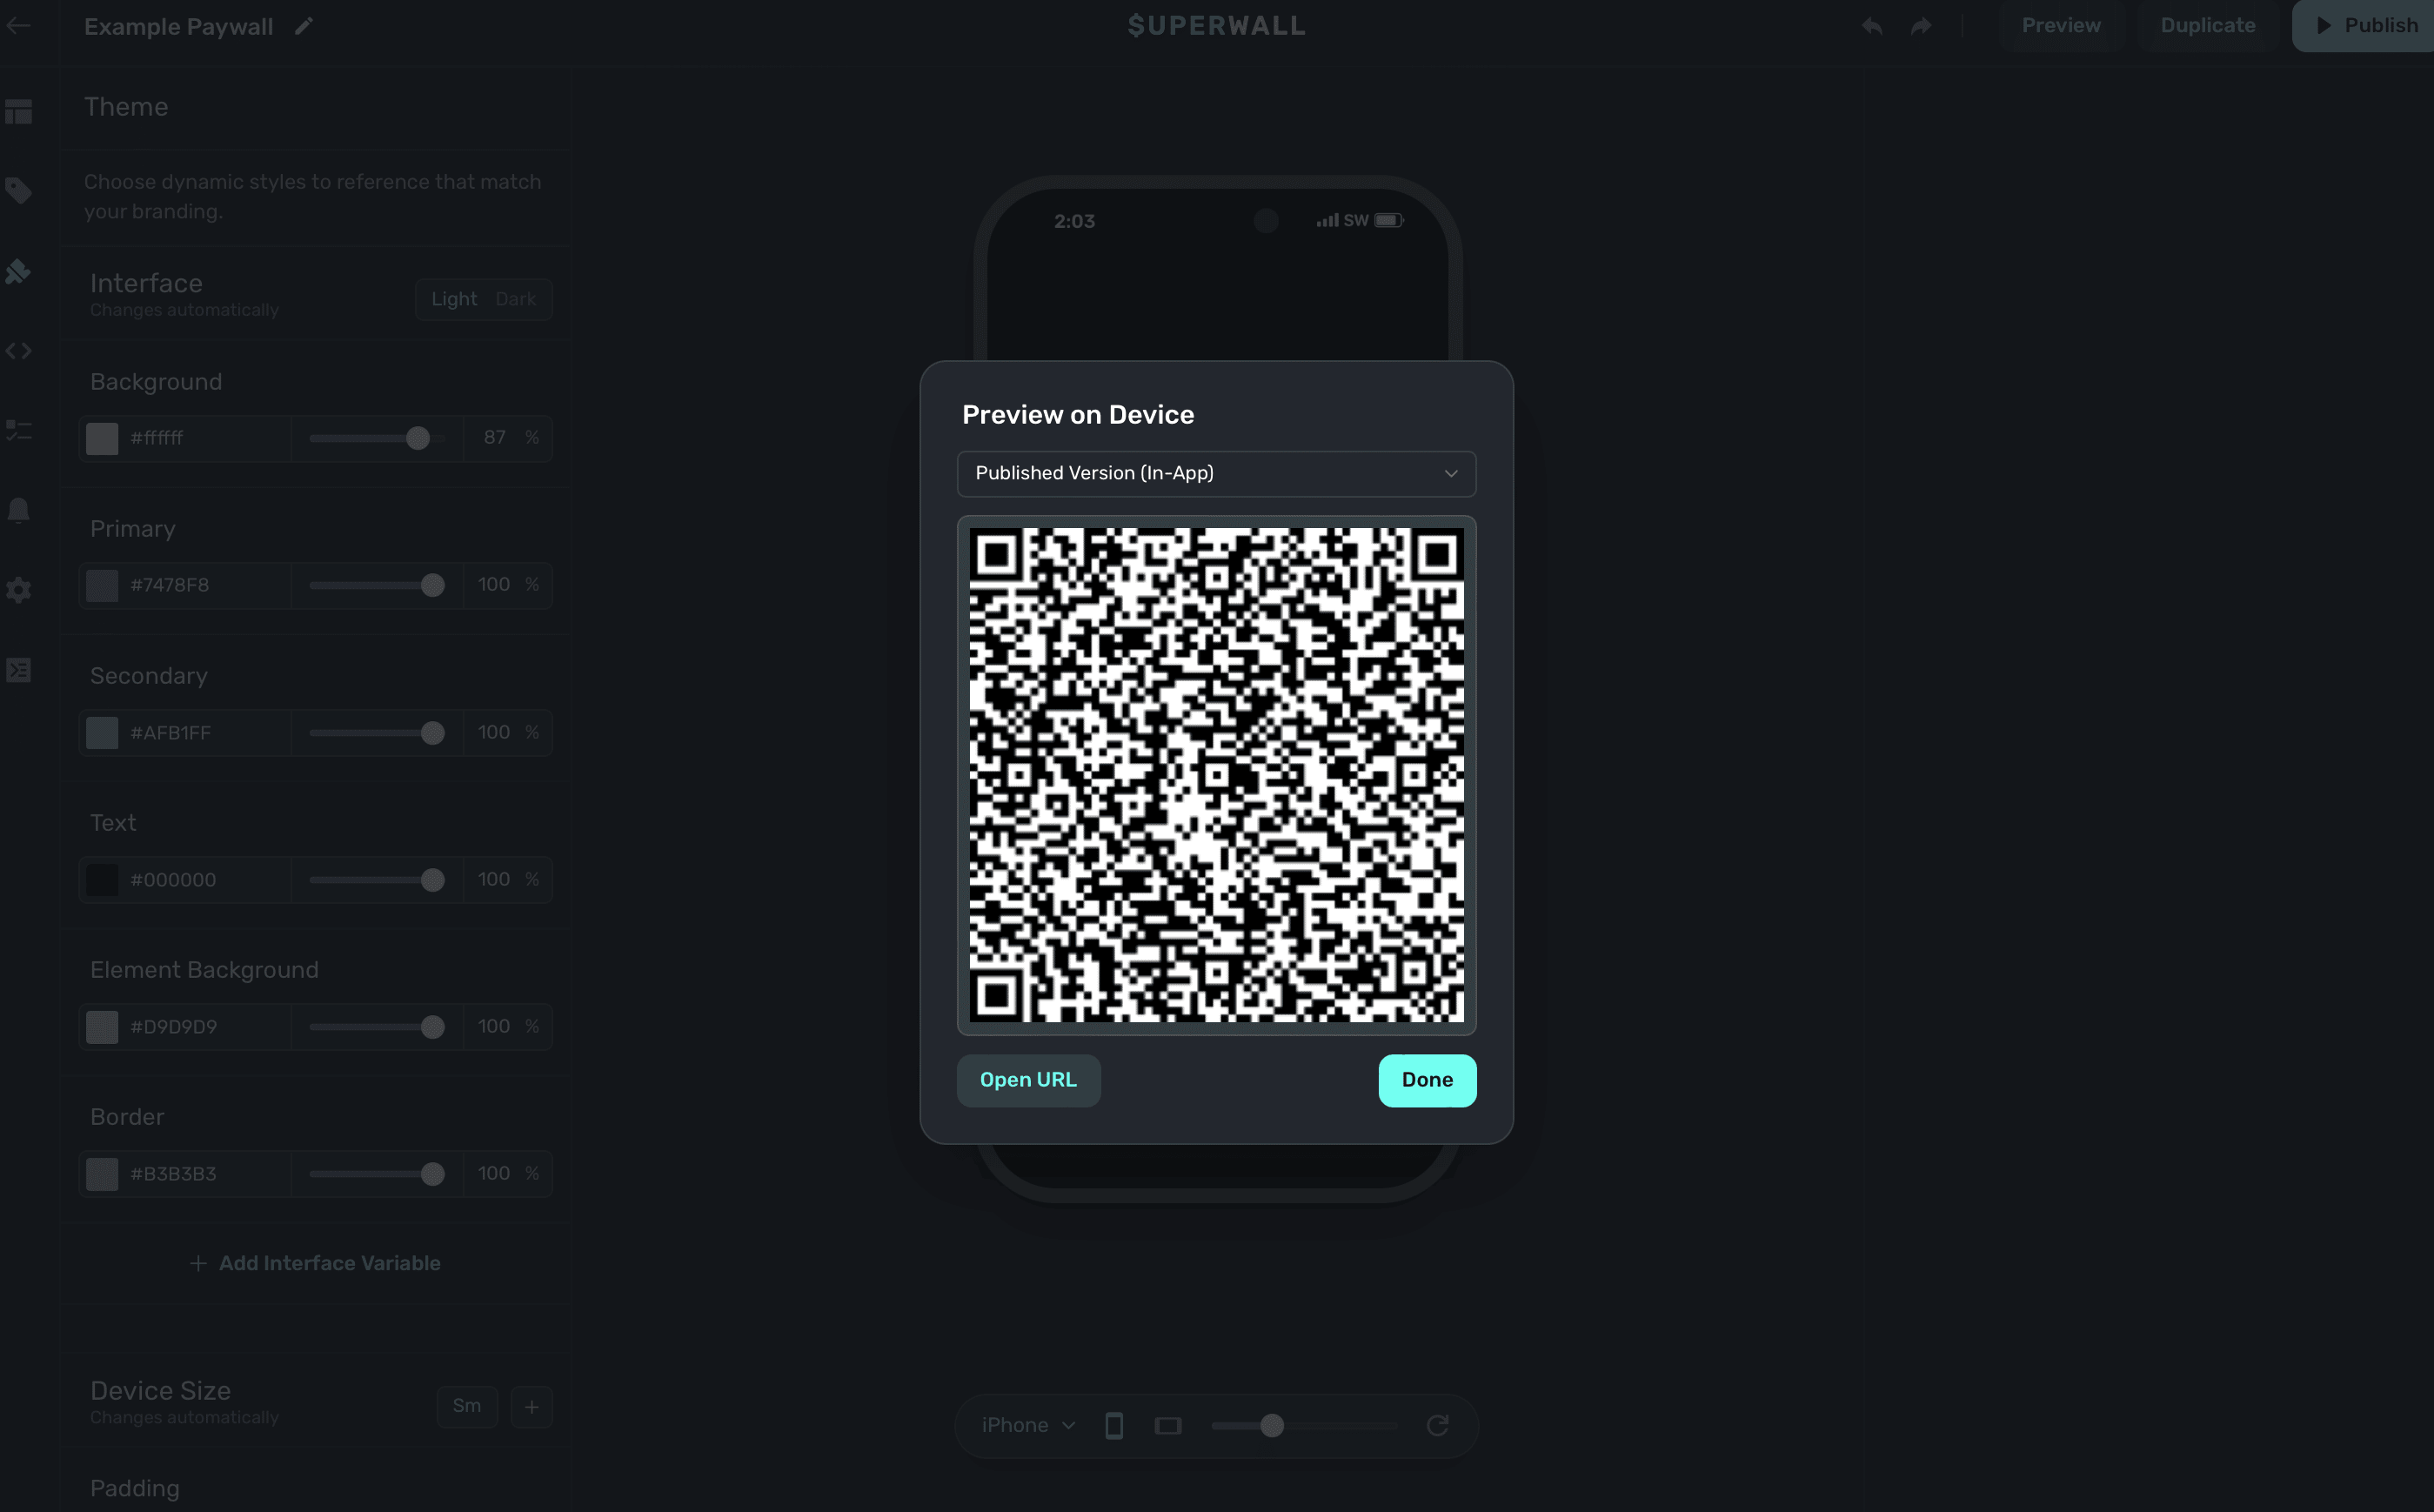
On your device, scan this QR code. You can do this via Apple's Camera app. This will take you to a paywall viewer within your app, where you can preview all your paywalls in different configurations.
```
```
# Products
Source: https://superwall.com/docs/paywall-editor-products
To add products to your paywall, click the **Products** button from the **sidebar**:
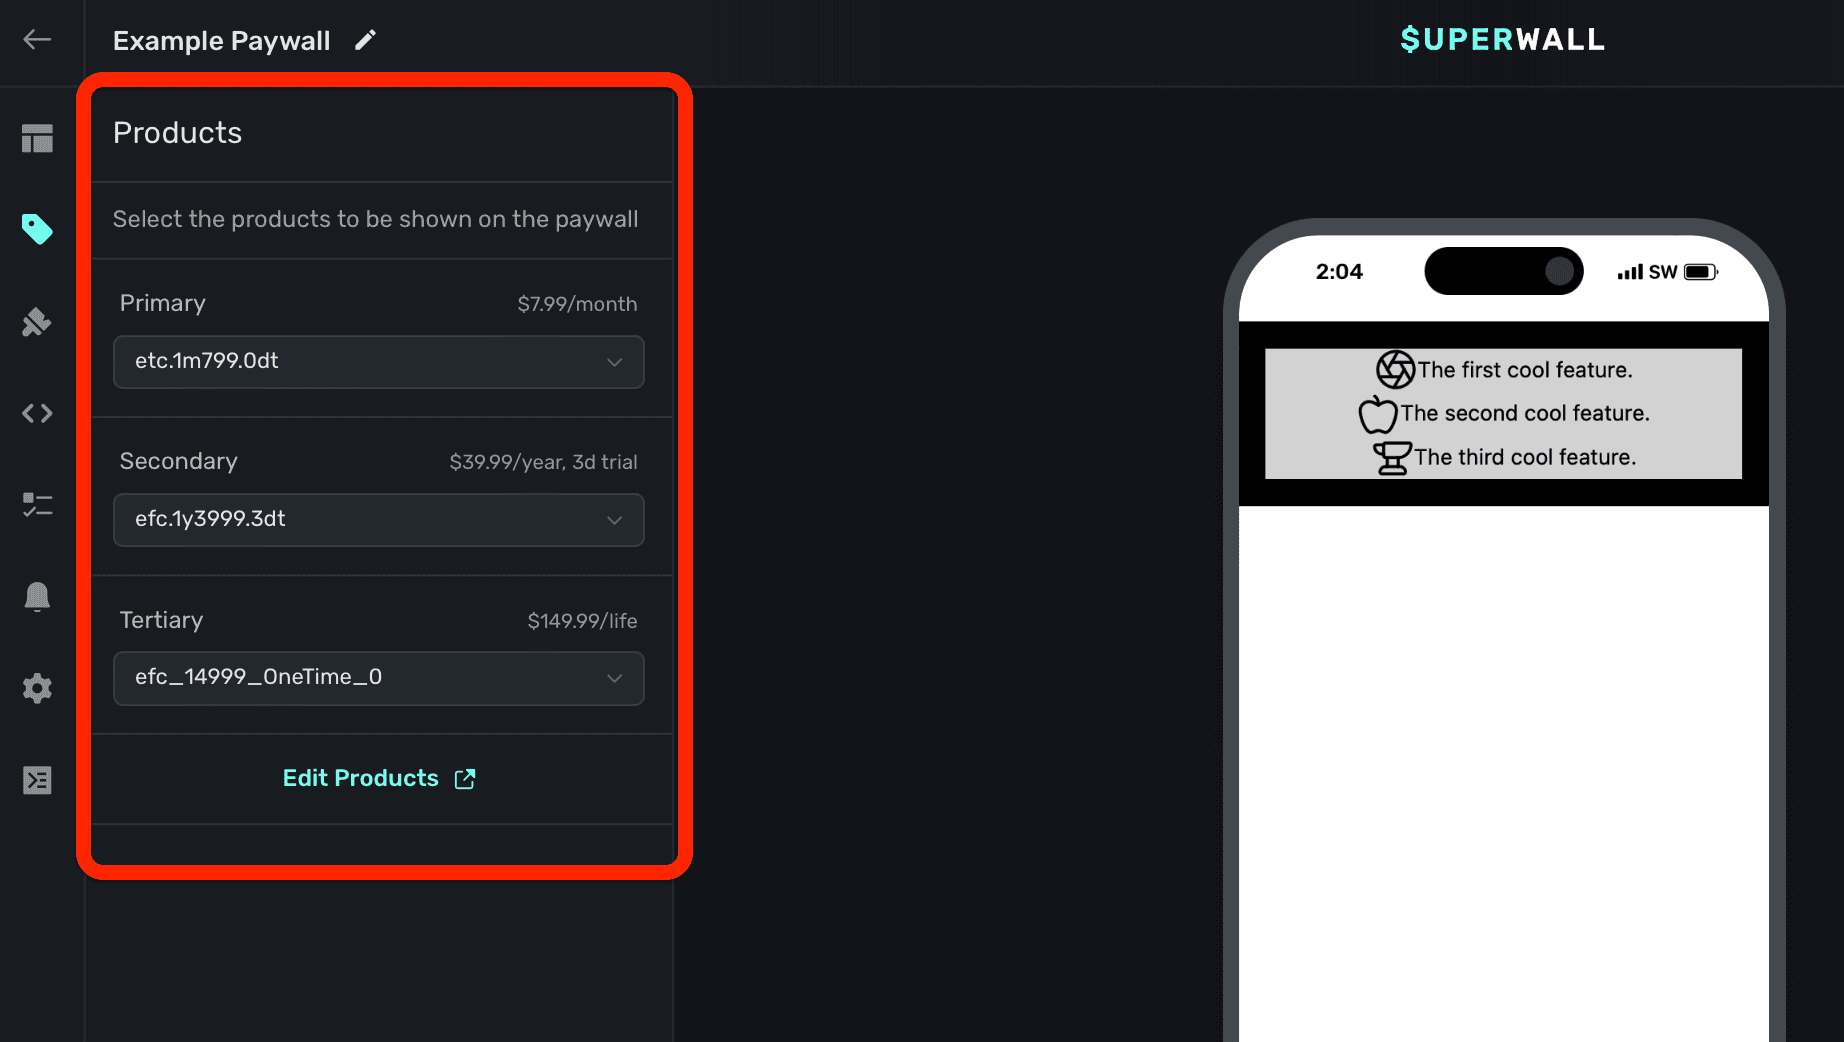
If you haven't added products to your app, do that first. Check out this [doc](/products) for
more.
### Choosing products
You can display as many products as you see fit on your paywall. Superwall will automatically fill in a name for the first three added ("primary", "secondary", and "tertiary") but you're free to name them anything else. Regardless, the name is used to reference them using Liquid Syntax in the editor. For example, `products.primary.price`.
It's important to remember that *you* retain full control over which of your products show in a paywall, and how. For example, use them along with [dynamic values](/paywall-editor-dynamic-values) to hide or show them to create any U.X. your design calls for.
### Understanding the selected product and selected product index variables
The `products.selected` variable will always represent any product the user has selected on your paywall. By default, it will be the *first* product you've added. In addition, the `products.selectedIndex` variable will also be updated as products are selected. This opens up many patterns to use, such as customizing copy, images, videos, or anything else based on which product the user has tapped on.
Many of our [built-in elements](/paywall-editor-layout#adding-elements) which display products will update these values. If you wish to add a custom element which selects a product, **click** on the element and add a **[tap behavior](/paywall-editor-styling-elements#tap-behaviors)** to choose a product (the selected index will update automatically as a result).
### Customizing pricing copy
In my most cases, Superwall will format your product's price in a localized manner. For example, look at this paywall from left-to-right:
1. The primary product is displayed in the button.
2. Below it, the call-to-action button formats its text as `Subscribe for {{ products.selected.price }} / {{ products.selected.period }} `.
3. That means any selected product's price will display with a similar pattern in the call-to-action button.
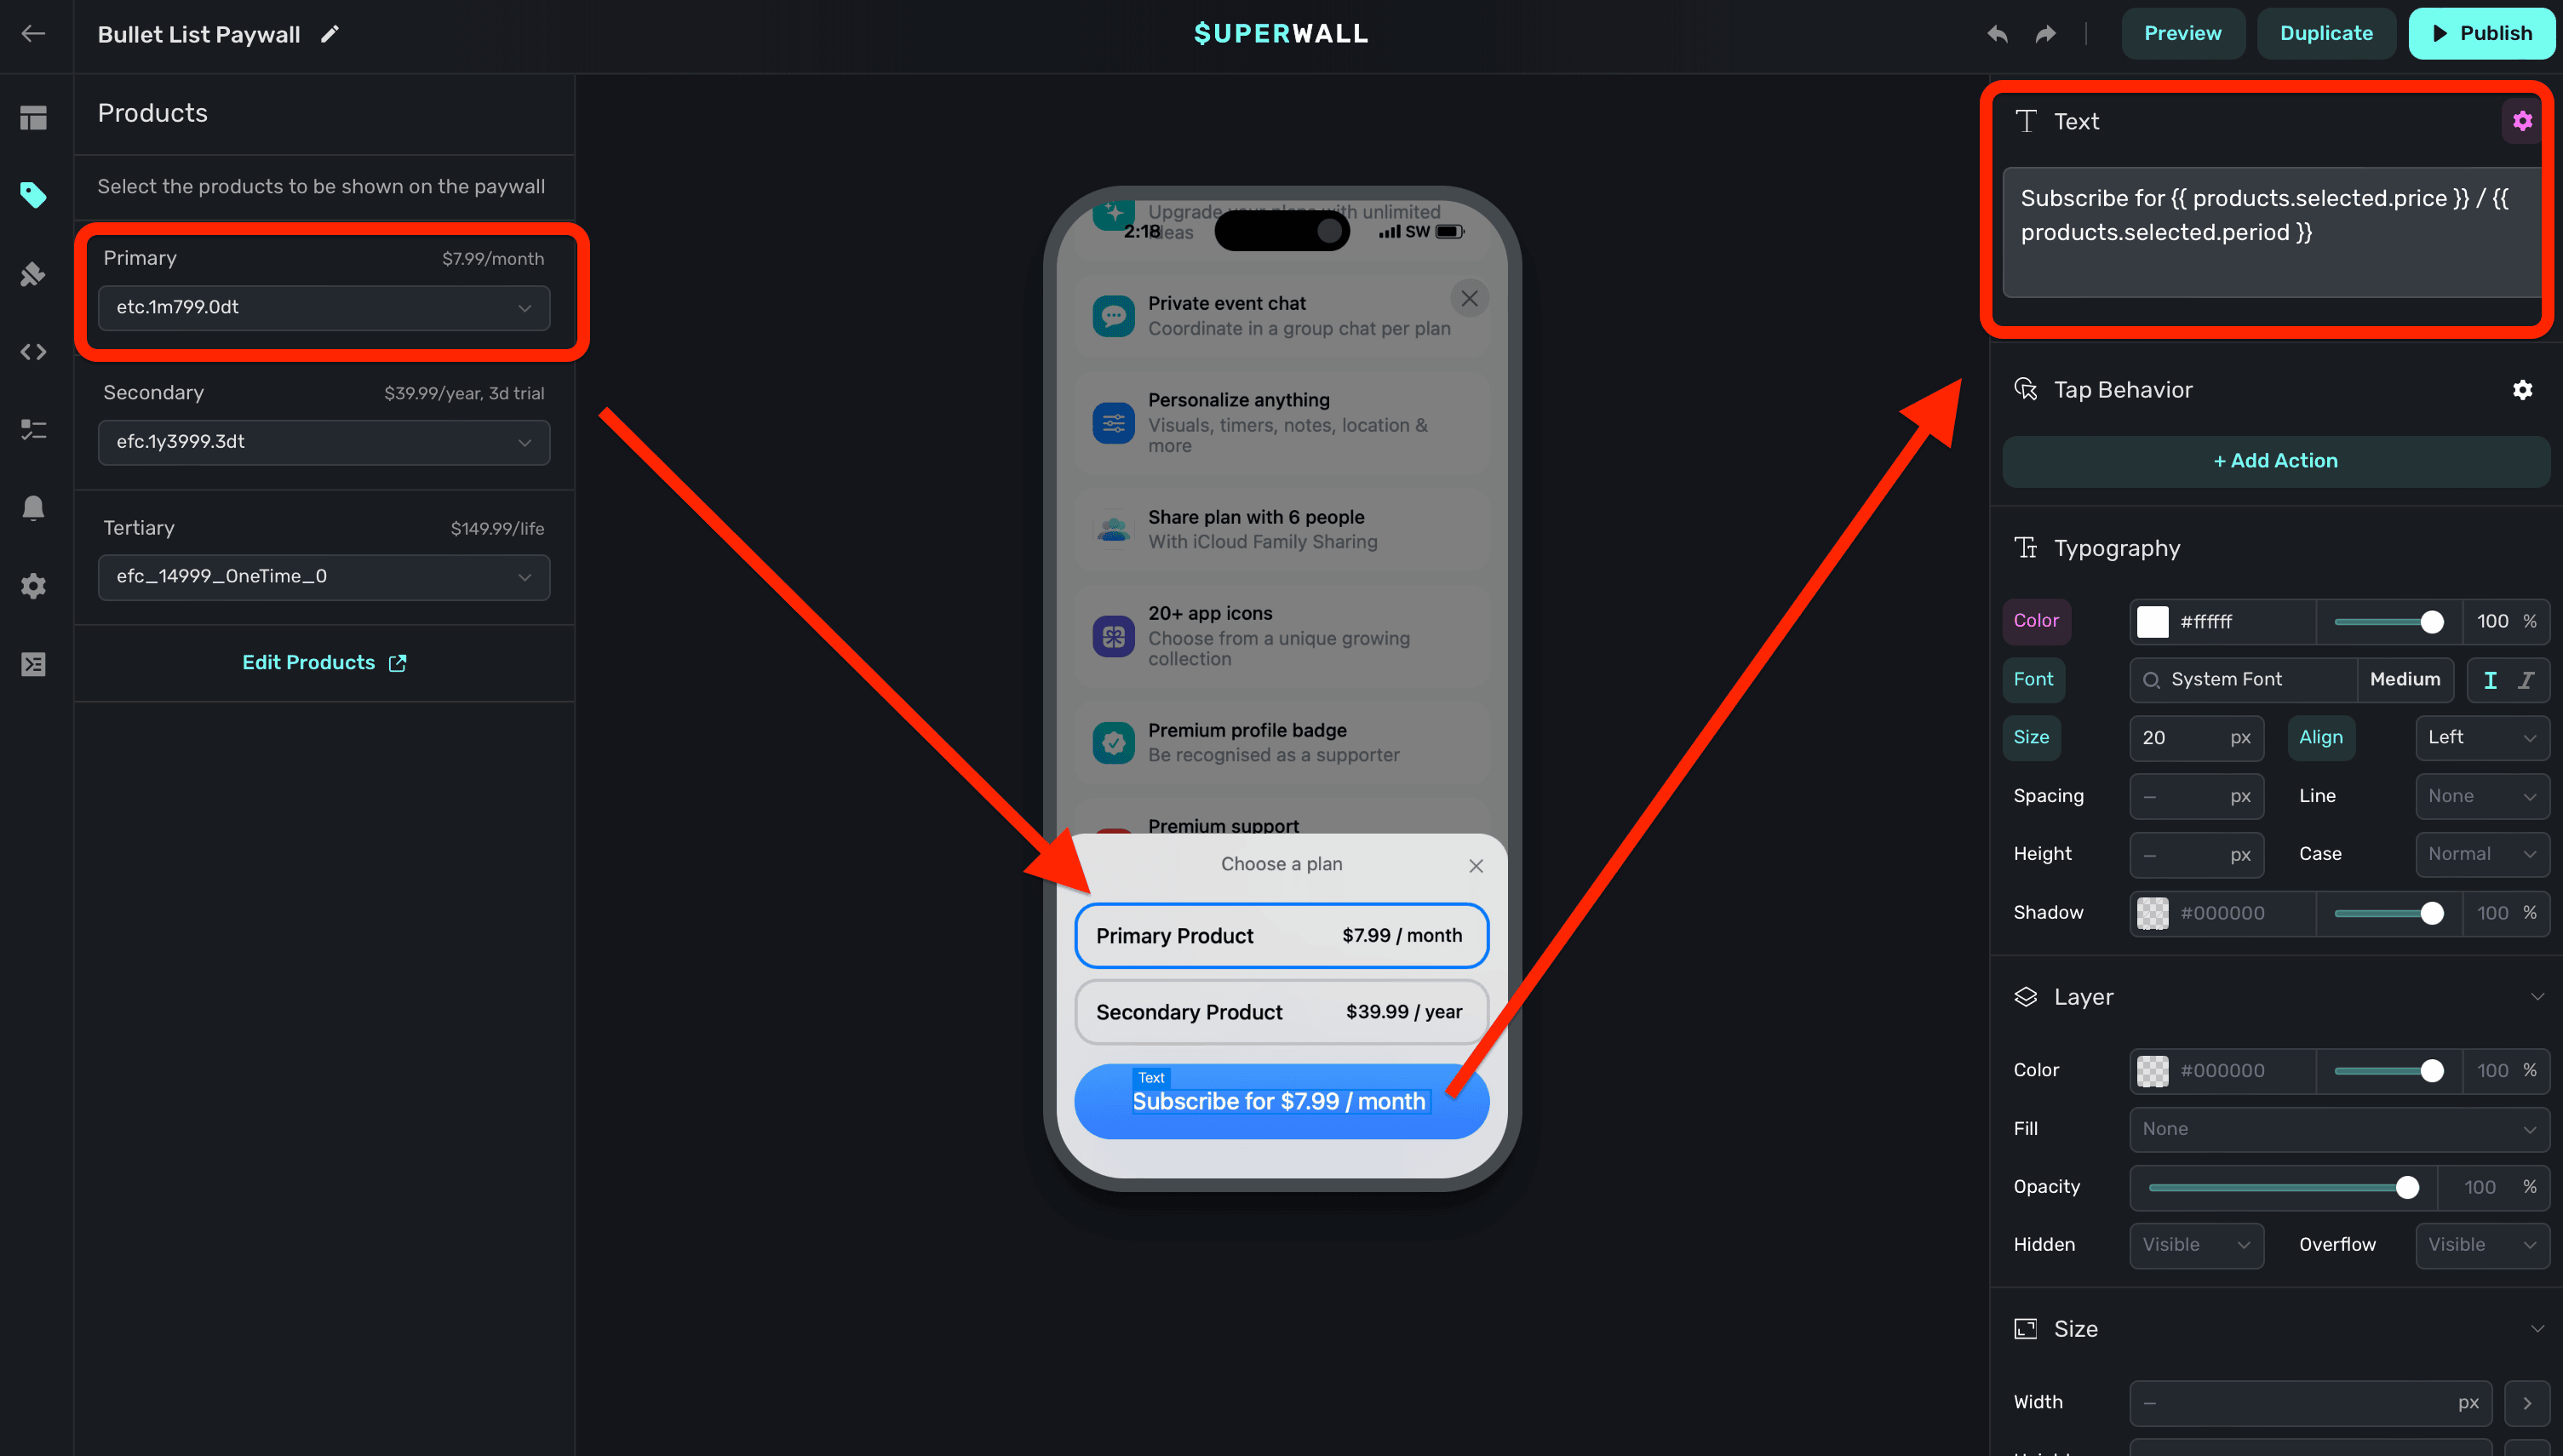
You can use [Liquid syntax](https://shopify.github.io/liquid/) to format prices in several different ways. For example, if you wanted to show an annual price differently, you could write `Subscribe for only {{ products.primary.monthlyPrice }} / month.` to display the localized price in monthly terms. If a product cost \$120.00 a year, then the text would read as "Subscribe for only \$10.00 / month."
Copy like this is achieved by using variables. To learn more about them, visit this [page](/paywall-editor-variables).
### Offer pricing copy
A common use-case is showing copy that reflects the selected product's trial or offer terms. Consider this example product:
| Product Identifier | Trial | Trial Price | Price | Period |
| ---------------------- | ------ | ----------- | ------- | ------ |
| myapp.annual40.1wkFree | 1 week | Free | \$39.99 | 1 year |
In Superwall, all data for the one-week free trial is found in the `trial` liquid variables, which are a part of a `product`. Below, critical details about its duration, offer price and more are shown in the example paywall. Take note of the text box on the right, which shows how these variables can be used:
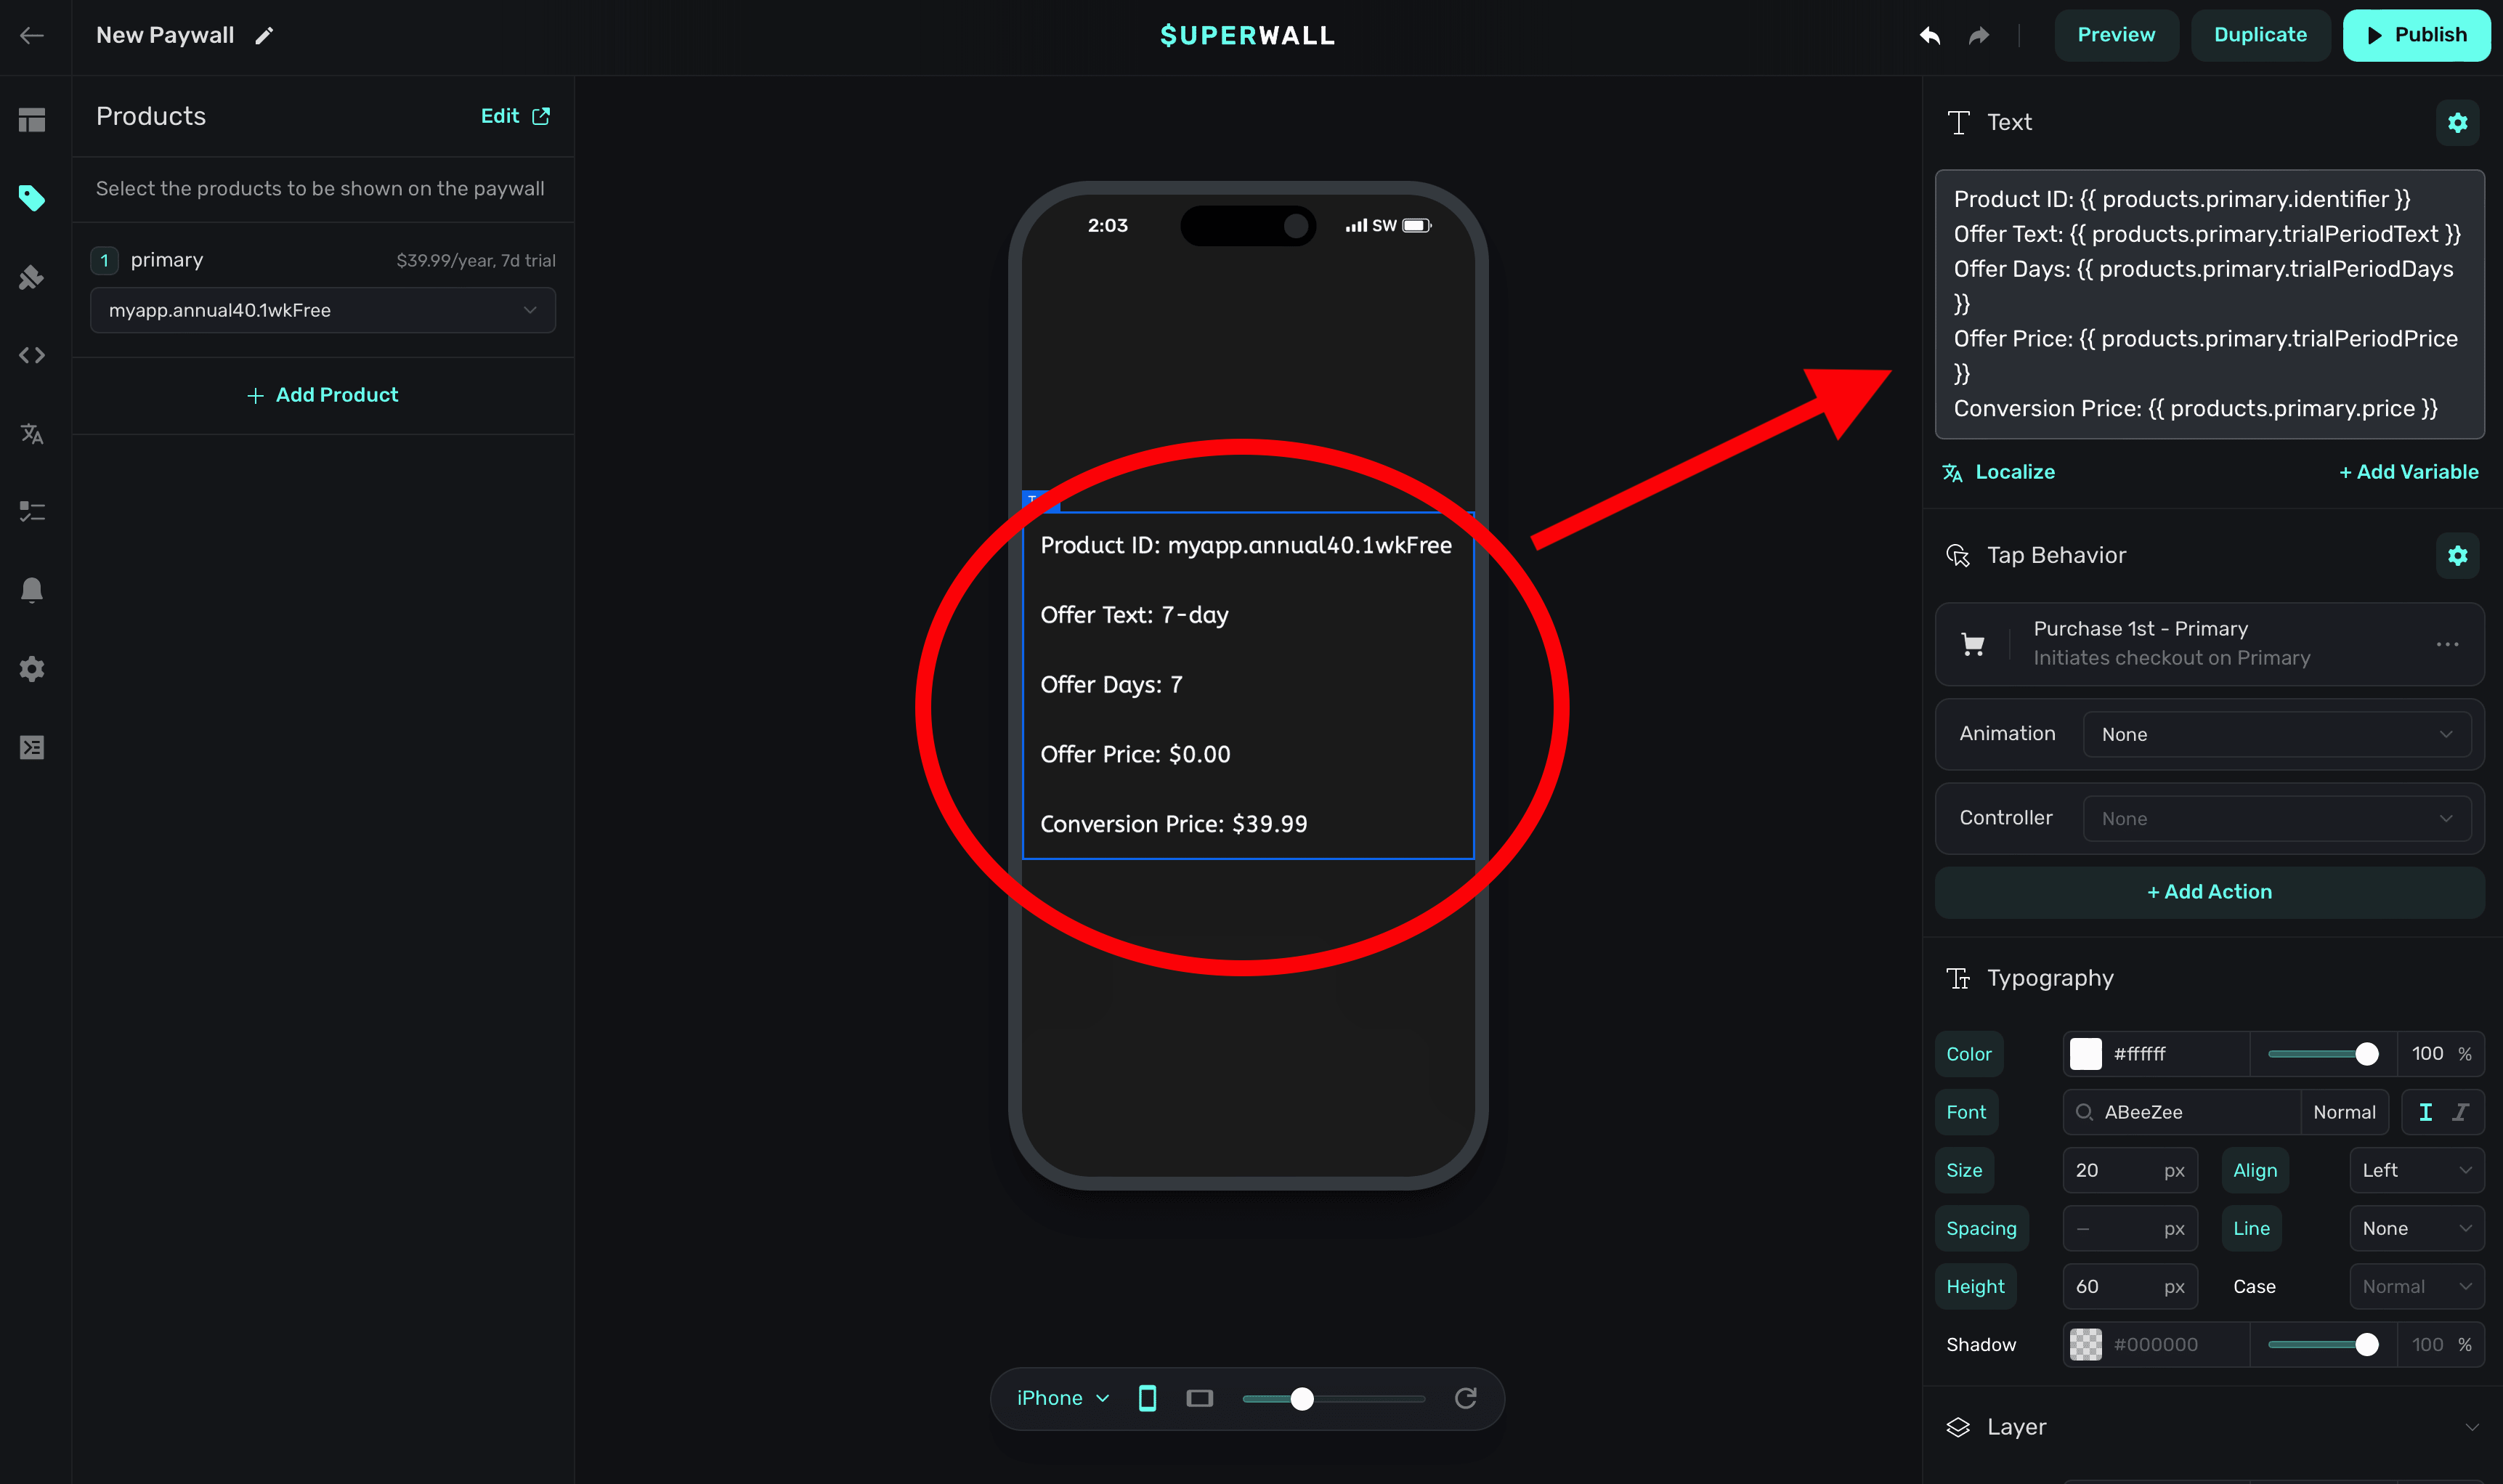
# Publishing
Source: https://superwall.com/docs/paywall-editor-publishing
To set your paywall live, click the **Publish** button in the top-right side of the editor:
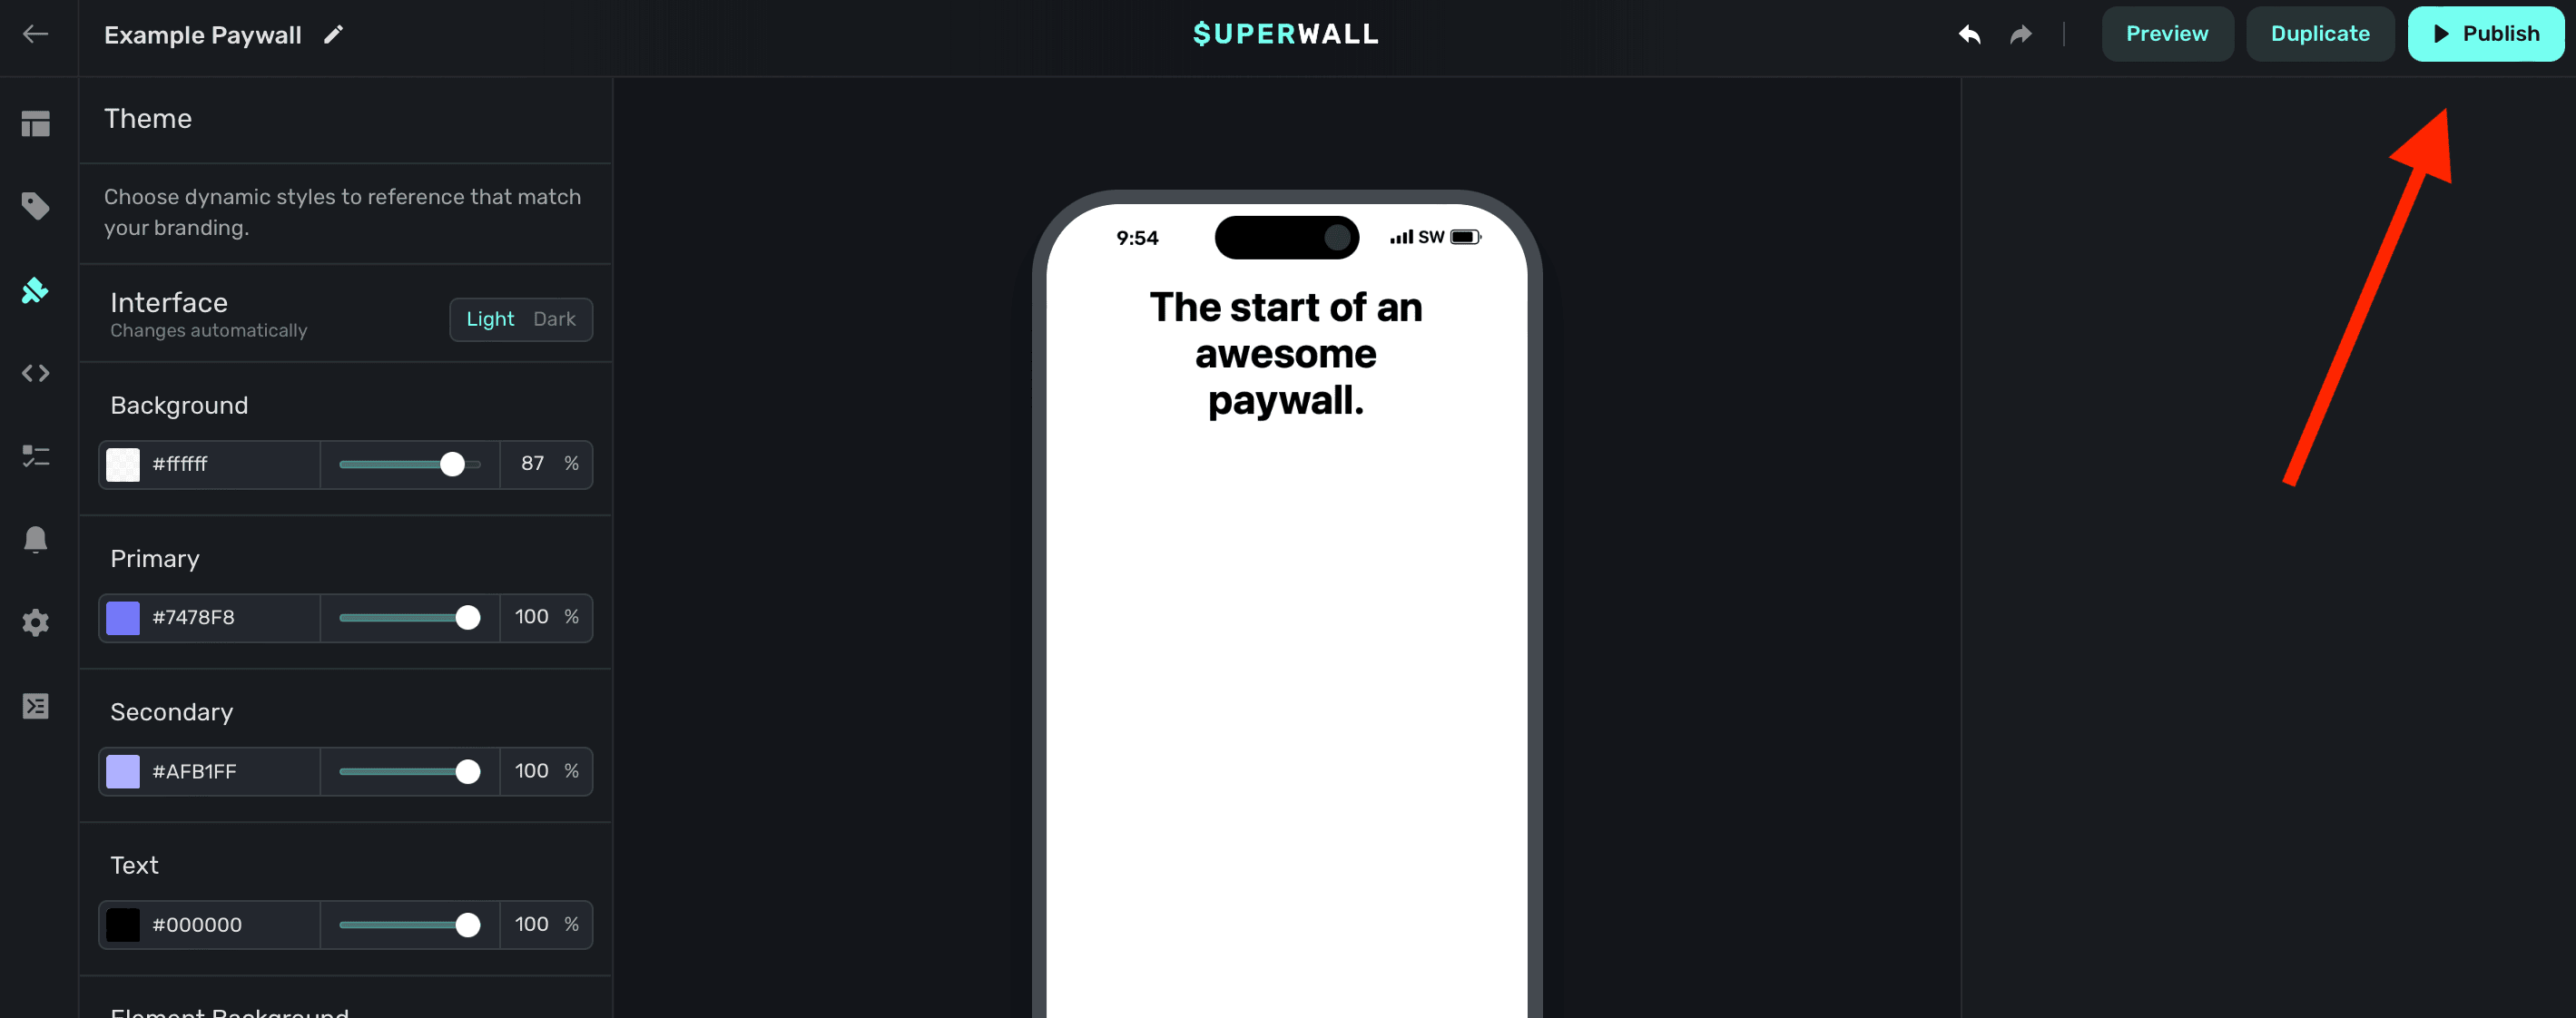
Setting your paywall live doesn't necessarily mean that users will see it. You'll first need to associate a paywall with a [campaign](/campaign). From there, either a user is matched to an audience filter or a [placement](/feature-gating) is evaluated which results in a paywall being presented.
Changes you make are saved locally, even if you haven't published the paywall. Refreshing won't
erase progress if you close the tab and come back later, unless you sign out.
# Renaming Paywalls
Source: https://superwall.com/docs/paywall-editor-renaming-paywalls
To rename a paywall, click the **Pencil Icon** button in the top-left side of the editor:
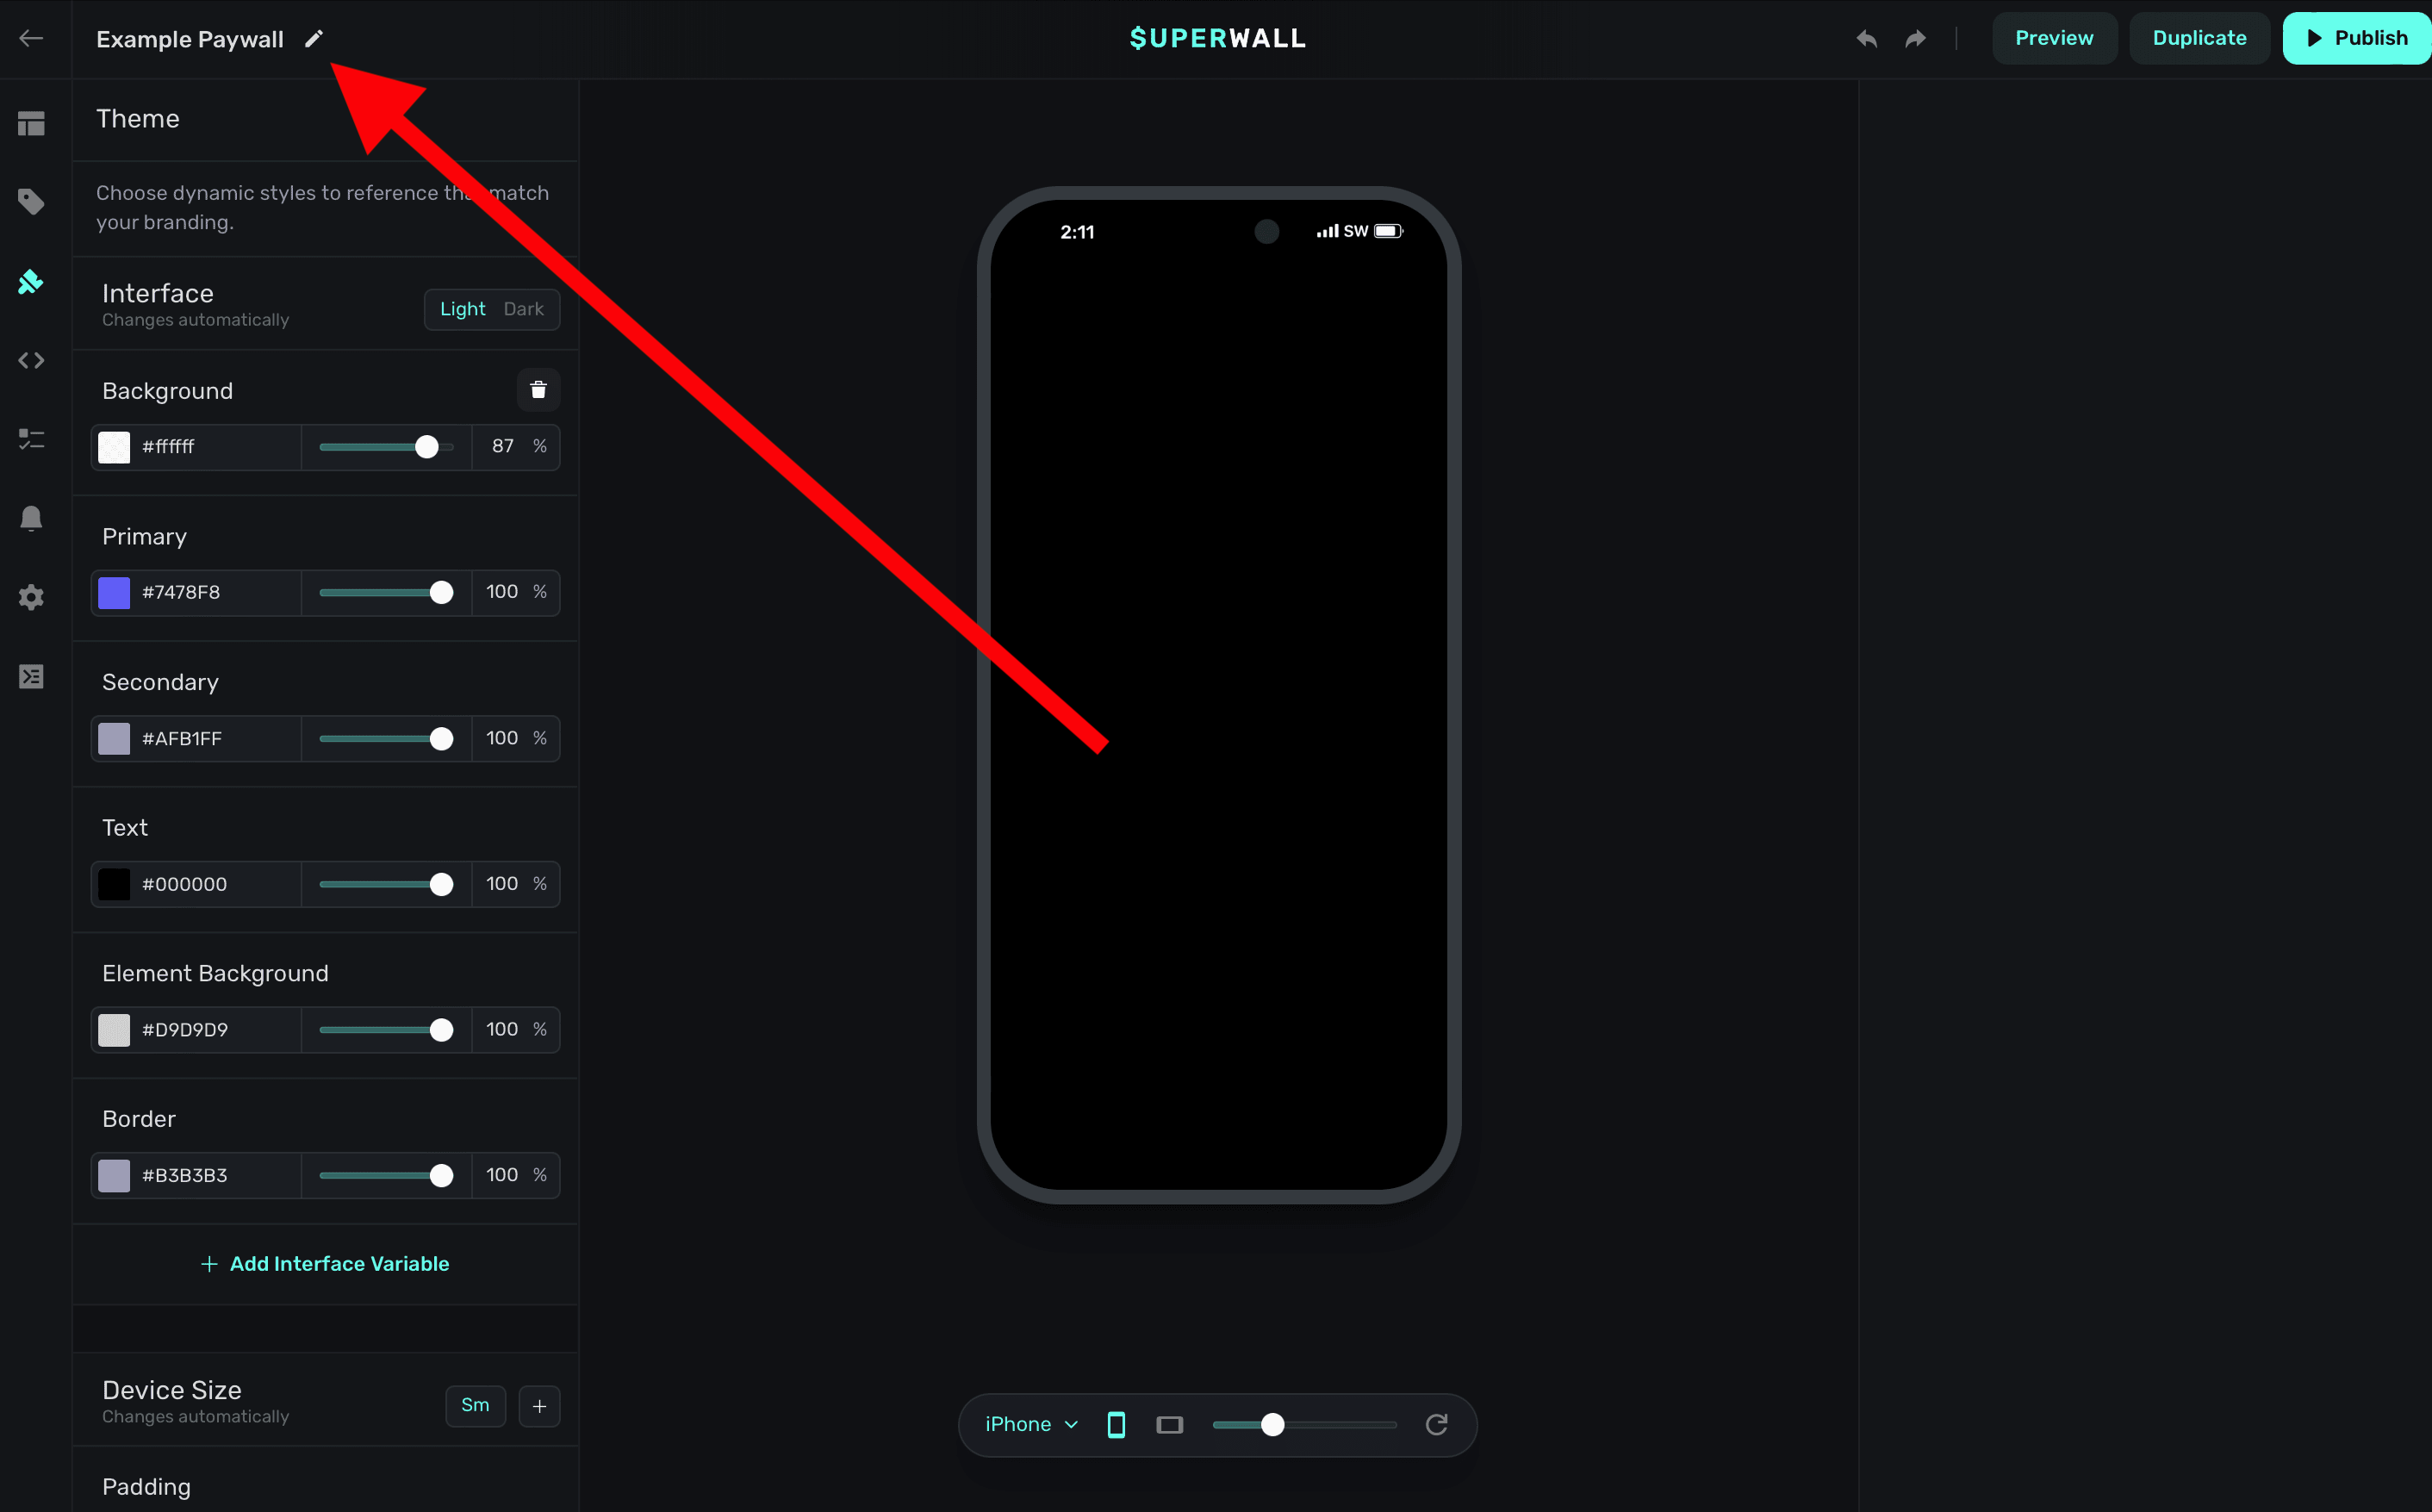
Type in a name, and click **Save**:

# Settings
Source: https://superwall.com/docs/paywall-editor-settings
To configure settings for your paywall, click the **Settings** button from the **sidebar**:
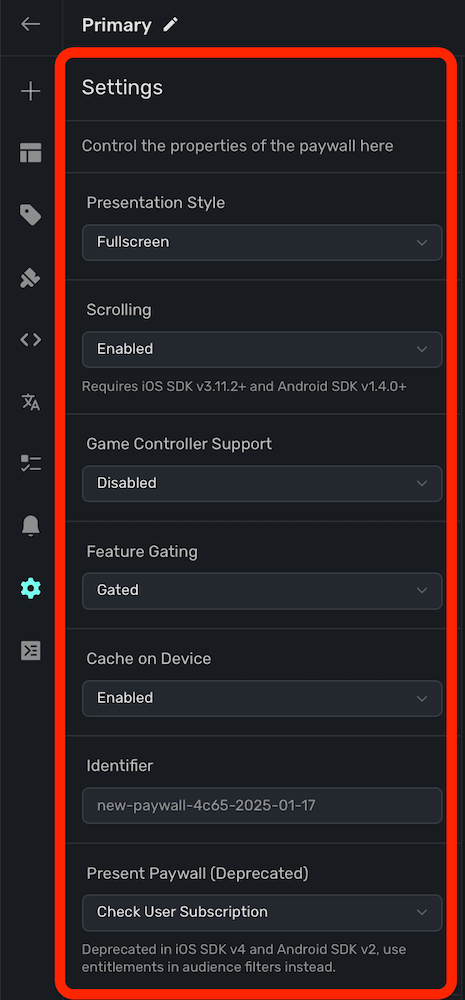
You have four primary properties of your paywall to configure here, all are set with default values.
### Presentation Style
Toggle the presentation style of your paywall. Available options are:
1. **Fullscreen:** The paywall will cover the entire device screen.
2. **Push:** The paywall will push onto a hierarchy, such as a `UINavigationController` on iOS.
3. **Modal:** The paywall presents with the platform's default modal API.
4. **No Animation:** The paywall presents modally, but without any animation.
5. **Drawer:** The paywall presents from a bottom drawer.
### Scrolling
Toggle the scrolling behavior of your paywall. Available options are:
1. **Enabled (Default):** The paywall can scroll its contents when presented on a device.
2. **Disabled:** Disables all scrolling behavior on the paywall.
Requires iOS SDK v3.11.2+ and Android SDK v1.4.0+
### Game Controller Support
Toggle game controller support for paywalls — obviously, ideal for paywalls shown in games where controllers may be in use. Available options are:
1. **Enabled:** The paywall can scroll its contents when presented on a device.
2. **Disabled (Default):** Disables all scrolling behavior on the paywall.
Learn more about game controller support [here](/game-controller-support#game-controller-support).
### Feature Gating
Feature gating allows you to control whether or not [placements](/campaigns-placements) should restrict access to features. Using either method, the paywall will still be presented if a user isn't subscribed:
1. **Non Gated:** Placements *will always* fire your feature block. Specifically, once the paywall is dismissed.
2. **Gated:** Placements *will only* fire your feature block if the user is subscribed. Note that if they are subscribed, the paywall will *not* be presented.
For example:
```swift
// With non gated - `logCaffeine()` is still invoked
Superwall.shared.register(placement: "caffeineLogged") {
logCaffeine()
}
// With gated - `logCaffeine()` is invoked only if the user is subscribed
Superwall.shared.register(placement: "caffeineLogged") {
logCaffeine()
}
```
This is useful to dynamically change what is paywalled in production without an app update. For example, in a caffeine tracking app — perhaps you might run a weekend campaign where logging caffeine is free. You'd simply change the paywall to be **Non Gated**. Then, the paywall would still be presented, but users would be able to continue and log caffeine.
For information on how this behaves when offline, view this [section](/feature-gating#handling-network-issues).
Feature gating does not apply if you are manually presenting a paywall via `getPaywall`.
### Cache on Device
If enabled, Superwall's SDK will cache the paywall on device. This can be useful if you have a paywall that could take a few seconds to fetch and present (i.e. if there is a video as part of your design). On-device caching can lead to quicker presentation.
Device caching is currently only available on iOS.
### Identifier
The identifier for the paywall. Non-editable.
### Present Paywall
This is now deprecated in iOS SDK version 4 and above, and version 2 and above for all other SDKs. Instead, use the [entitlements](/campaigns-audience#matching-to-entitlements) feature when creating campaign filters.
You can have a paywall present under two different conditions when a [placement](/campaigns-placements) is matched:
1. **Check User Subscription:** Present the paywall only if the user's subscription is not active.
2. **Always:** Present the paywall regardless of the user's subscription status.
# Slides
Source: https://superwall.com/docs/paywall-editor-slides-component
Use Superwall's slides component to create a horizontal or vertical slide UX driven by a user's gesture.
### Adding a slides component
The slide component was built to make interactive slide designs easy. It's similar to a [carousel](/paywall-editor-carousel-component), except its meant to be driven by user gestures instead of automatically progressing through its contents. To use the slides component:
1. In the left sidebar, click **+** to add a new element.
2. Choose **Slides** under the "Layout" header.
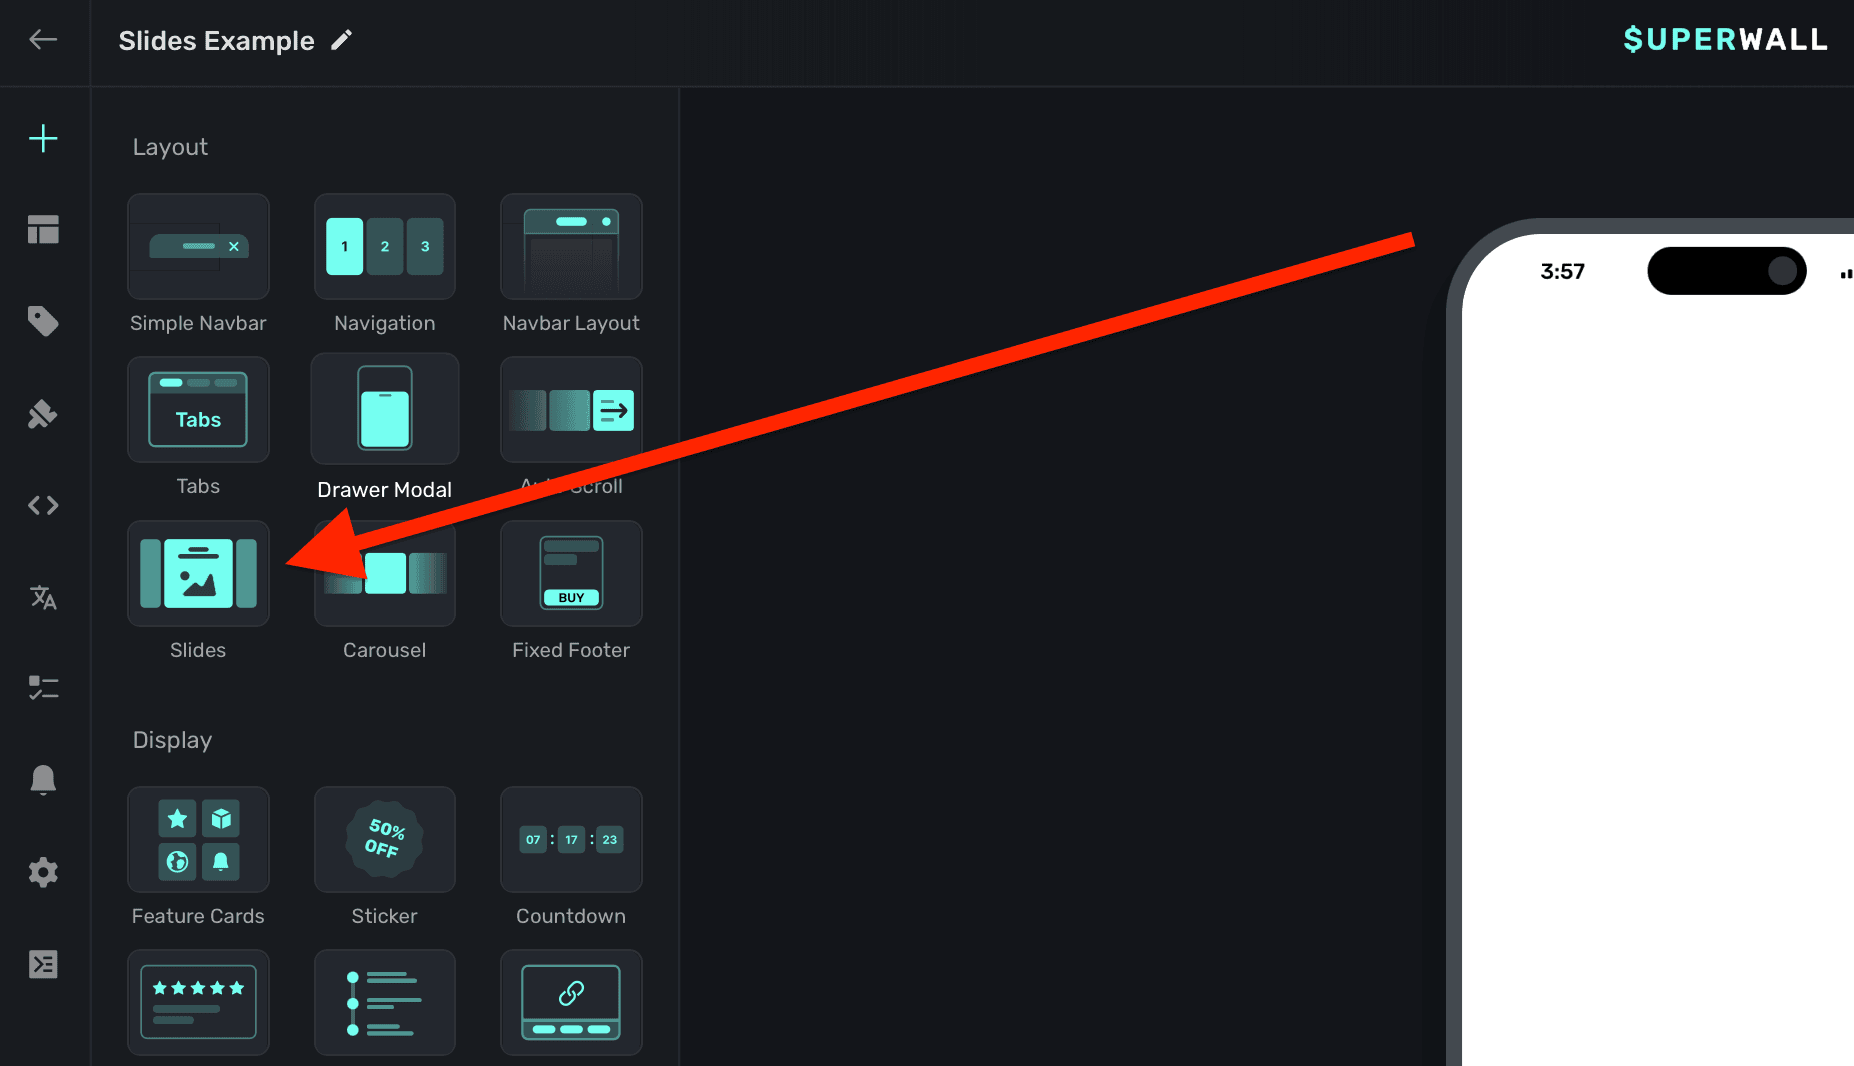
The slides component requires an explicit `width` set. Generally, setting this to 100% of the viewport's width works well. This is also the default size set:
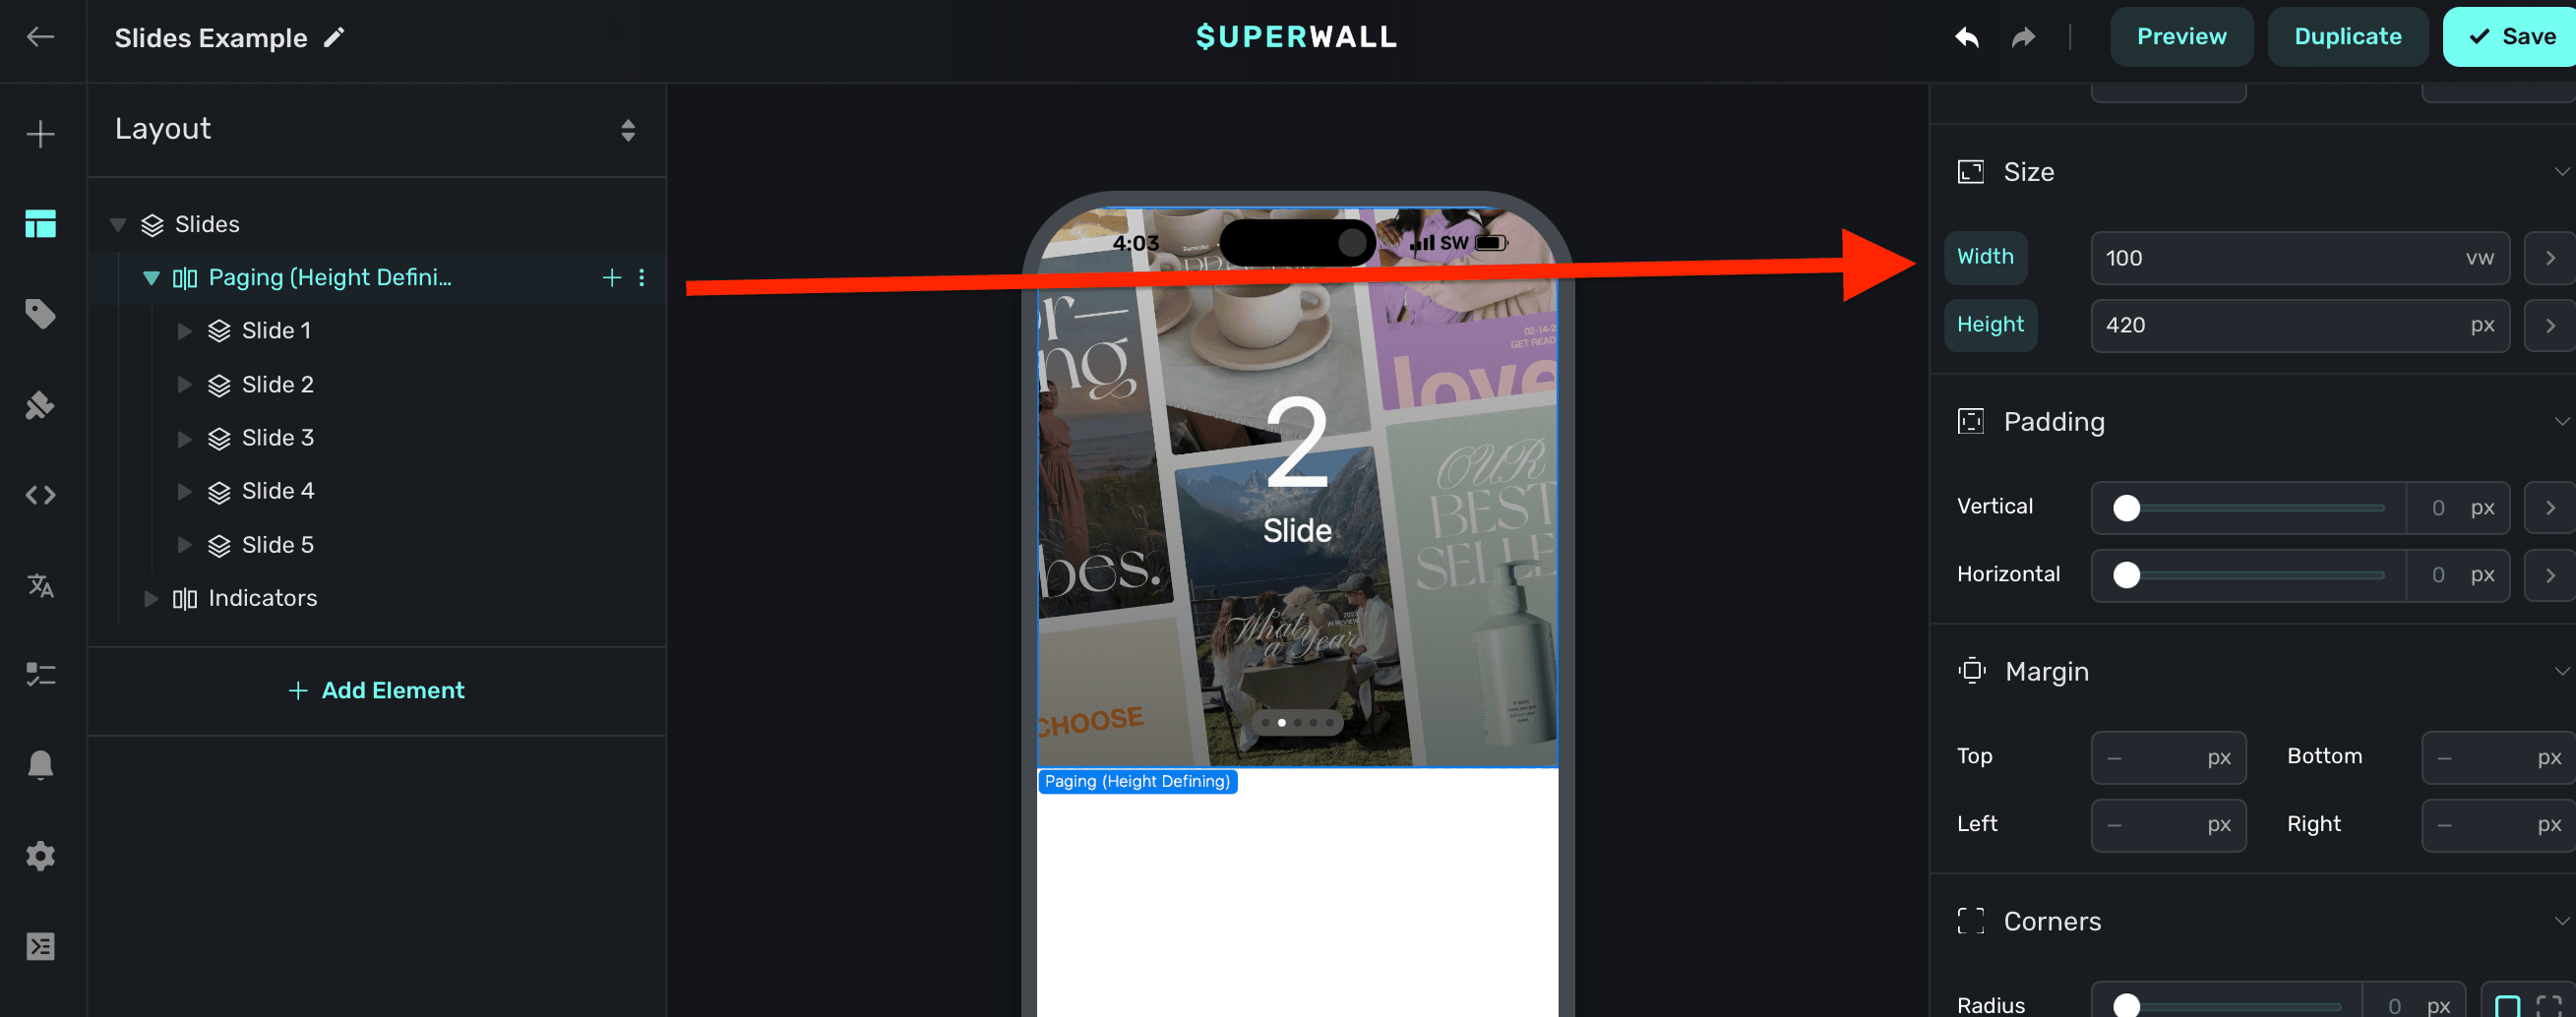
By default:
* The slides component is set to `Horizontal` scrolling.
* Scrolling indicators are created for you. Read below to see how you can customize these.
* A default height is assigned.
* The slides respond to gestures.
### Adding contents to slides
The slides component has a few demonstration items added to it by default. You can remove these and add your own content:
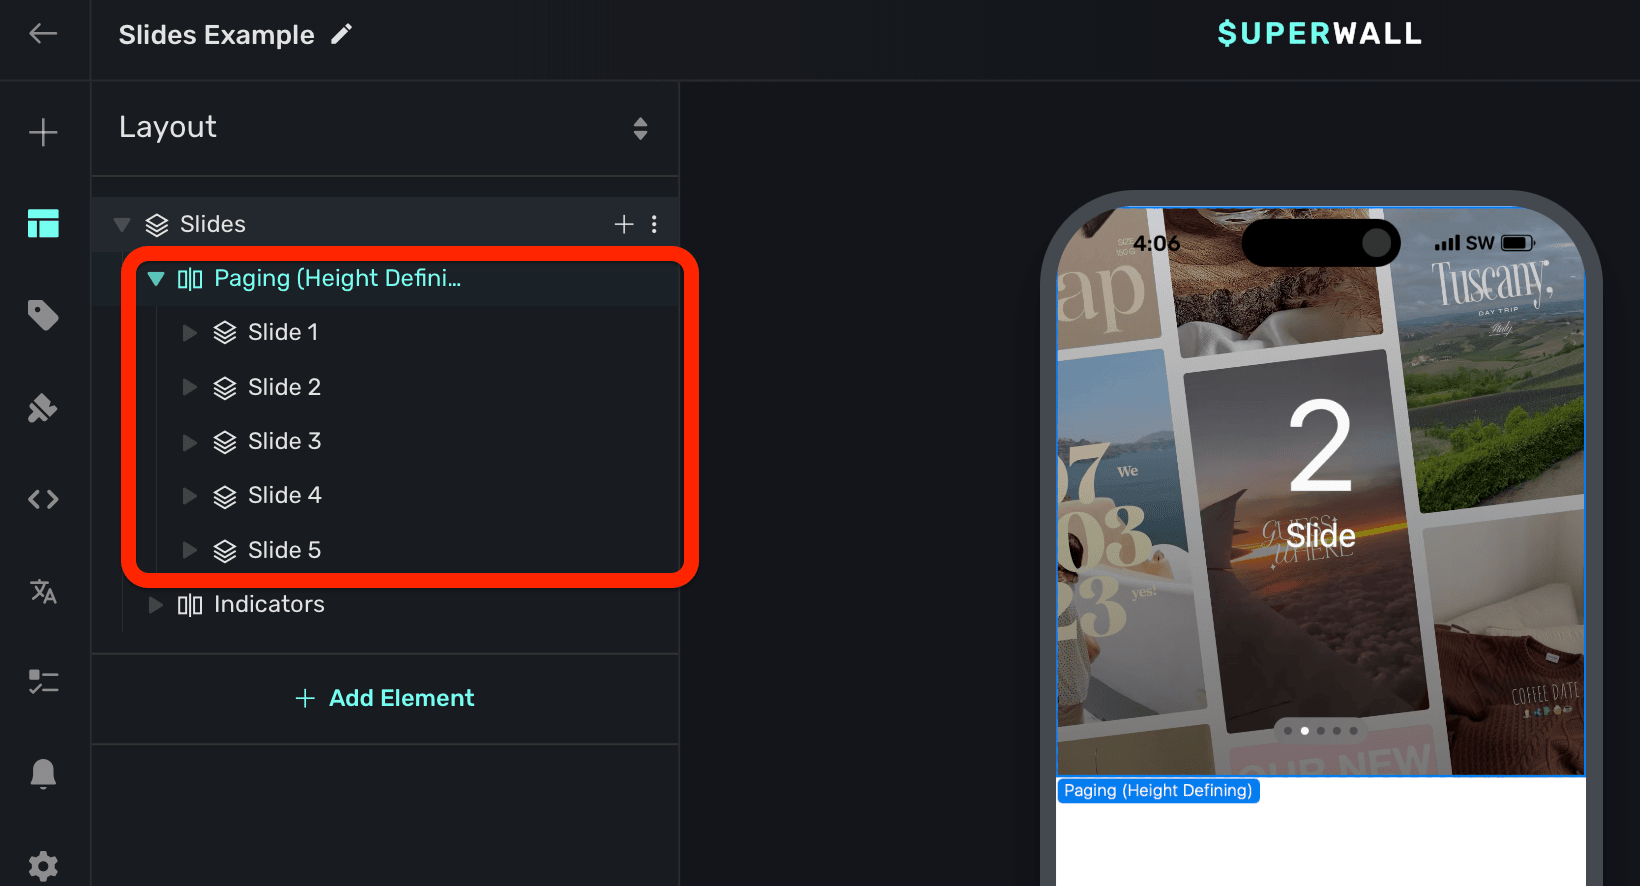
Here, the container stack determines the height. You can customize this as needed.
### Tracking or updating the displayed element in slides
When a slides element is added, Superwall automatically creates an element variable for it (accessed through the **[Variables](/paywall-editor-variables)** tab in the left sidebar, or the variables button in the **[floating toolbar](/paywall-editor-floating-toolbar)**). Its name will match whatever is in the element hierarchy in the left sidebar:
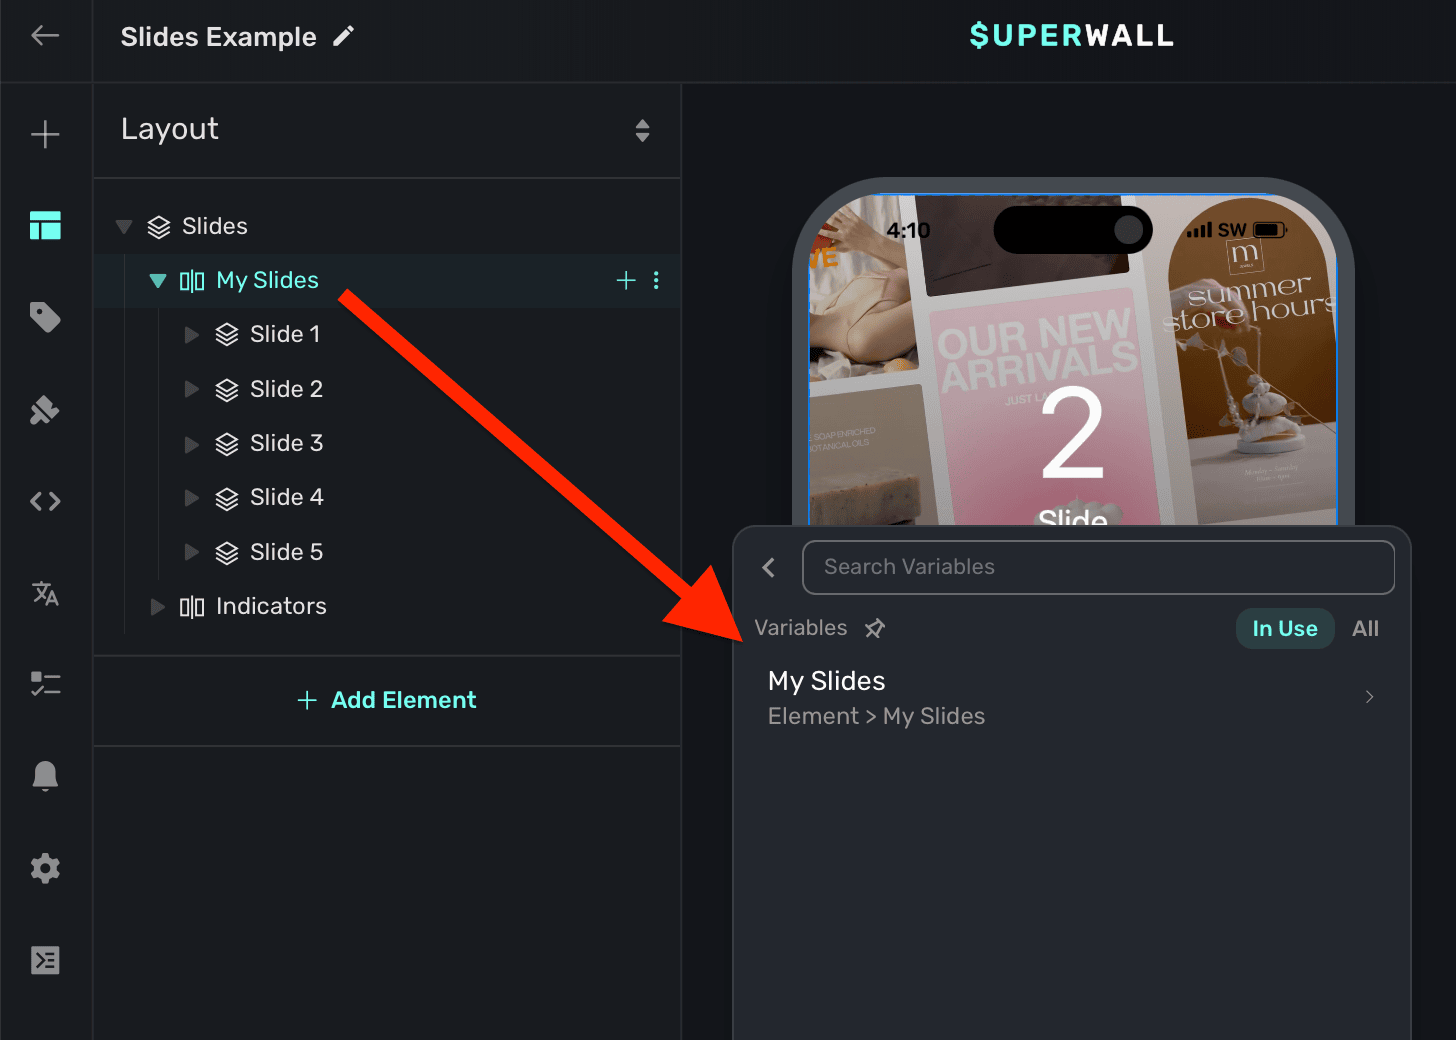
You can use its `Child Page Index` variable to change which slide is showing. You can use this to manually set which slide is showing. Here, the button progresses to the next slide by incrementing the slides `Child Page Index` variable:

The variable's name is derived by the node's unique identifier. You don't need to set or generally be aware of this value.
You can also reference this variable when using a [dynamic value](/paywall-editor-dynamic-values) to do things such as:
* Select a product based off of the index of the slide.
* Show custom paging indicators.
* Change text using [dynamic values](/paywall-editor-dynamic-values) based on the index.
* etc.
# Stacks
Source: https://superwall.com/docs/paywall-editor-stacks
From a component standpoint, stacks are the foundation of every layout. Most components and snippets will start with a stack. Under the hood, they mimic a flexbox layout.
If you are new to CSS Flexbox, try out this interactive [tool](https://flexbox.help). Or, simply change the properties in the editor to see realtime changes.
### Stack Specific Properties
Stacks have unique properties:
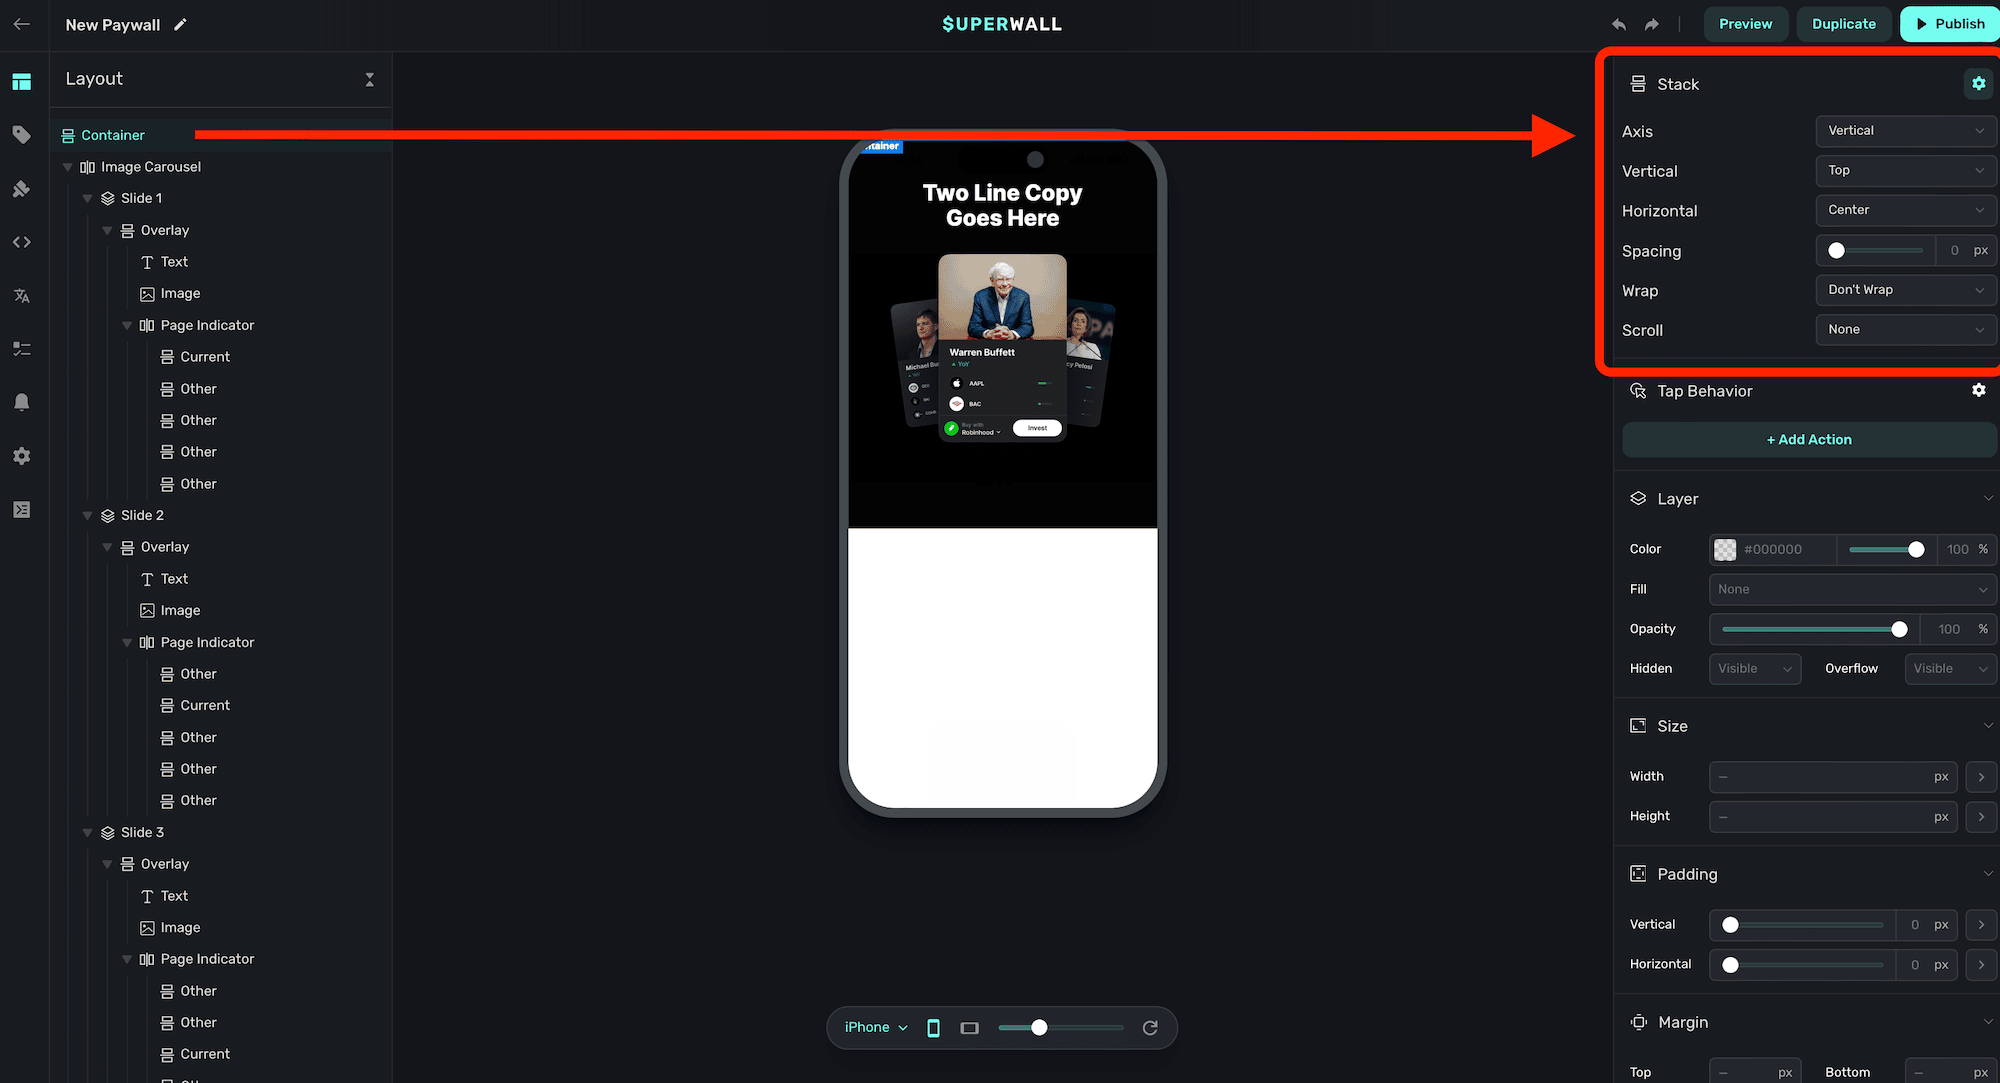
* **Axis**: Determines the arrangement of items within the stack.
1. `Horizontal`: Items are arranged left to right.
2. `Vertical`: Items are arranged top to bottom.
3. `Layered`: Items are stacked on top of each other.
* **Vertical**: Controls the vertical alignment of the items within the stack.
1. `Top`: Aligns items to the top of the container.
2. `Center`: Aligns items vertically in the center of the container.
3. `Bottom`: Aligns items to the bottom of the container.
4. `Stretch`: Stretches items to fill the vertical space of the container.
5. `Baseline`: Aligns items according to their baseline.
* **Horizontal**: Controls the horizontal alignment of the items within the stack.
1. `Left`: Aligns items to the left of the container.
2. `Center`: Aligns items horizontally in the center of the container.
3. `Right`: Aligns items to the right of the container.
4. `Fill Equally`: Distributes items evenly across the container, filling the space equally.
5. `Space Evenly`: Distributes items with equal space around them.
6. `Space Around`: Distributes items with space around them, with half-size space on the edges.
7. `Space Between`: Distributes items with space only between them, with no space at the edges.
* **Spacing**: Defines the amount of space between items within the stack, measured in pixels by default.
* **Wrap**: Specifies how items within the stack should behave when they exceed the container's width.
1. `Don't Wrap`: Items remain in a single line and do not wrap onto a new line.
2. `Wrap`: Items wrap onto the next line when they exceed the container's width.
3. `Wrap Reverse`: Items wrap onto the previous line in reverse order.
* **Scroll**: Determines the scrolling behavior of the stack.
1. `None`: Disables scrolling within the stack.
2. `Normal`: Enables standard scrolling behavior.
3. `Paging`: Enables paginated scrolling, allowing users to swipe through pages of items. See "Creating Carousels" below.
4. `Infinite`: Endless scrolling, items clone and repeat themselves once they reach the end.
* **Snap Position**: Defines the position at which items snap into place during paging. Only relevant if `Scroll` is set to `Paging`.
1. `Start`: Items snap to the start of the container.
2. `Center`: Items snap to the center of the container.
3. `End`: Items snap to the end of the container.
* **Auto Paging**: Controls whether a carousel's contents should automatically page between items. Only relevant if `Scroll` is set to `Paging`.
1. `Disabled`: Auto paging is turned off, and items page via user interaction.
2. `Enabled`: Auto paging is turned on and items will automatically page according to the paging delay.
* **Paging Delay**: The duration to automatically advance the slides. Only relevant if `Scroll` is set to `Paging` and `Auto Paging` is set to `Enabled`.
* **Infinite Scroll Speed**: The amount of pixels per frame that the carousel should advance. Only relevant if `Scroll` is set to `Infinite`.
To see how to use stacks for common designs, check out these pages:
* [Carousel](/paywall-editor-carousel-component)
* [Autoscrolling](/paywall-editor-autoscroll-component)
* [Slides](/paywall-editor-slides-component)
* [Navigation](/paywall-editor-navigation-component)
# Styling Elements
Source: https://superwall.com/docs/paywall-editor-styling-elements
Anytime you click on a component in the **Layout** tab, its editable properties will open on the right side of the editor window in the **component editor**. Here, you can see that clicking on the component in the layout tab opened its relevant properties in the component editor:
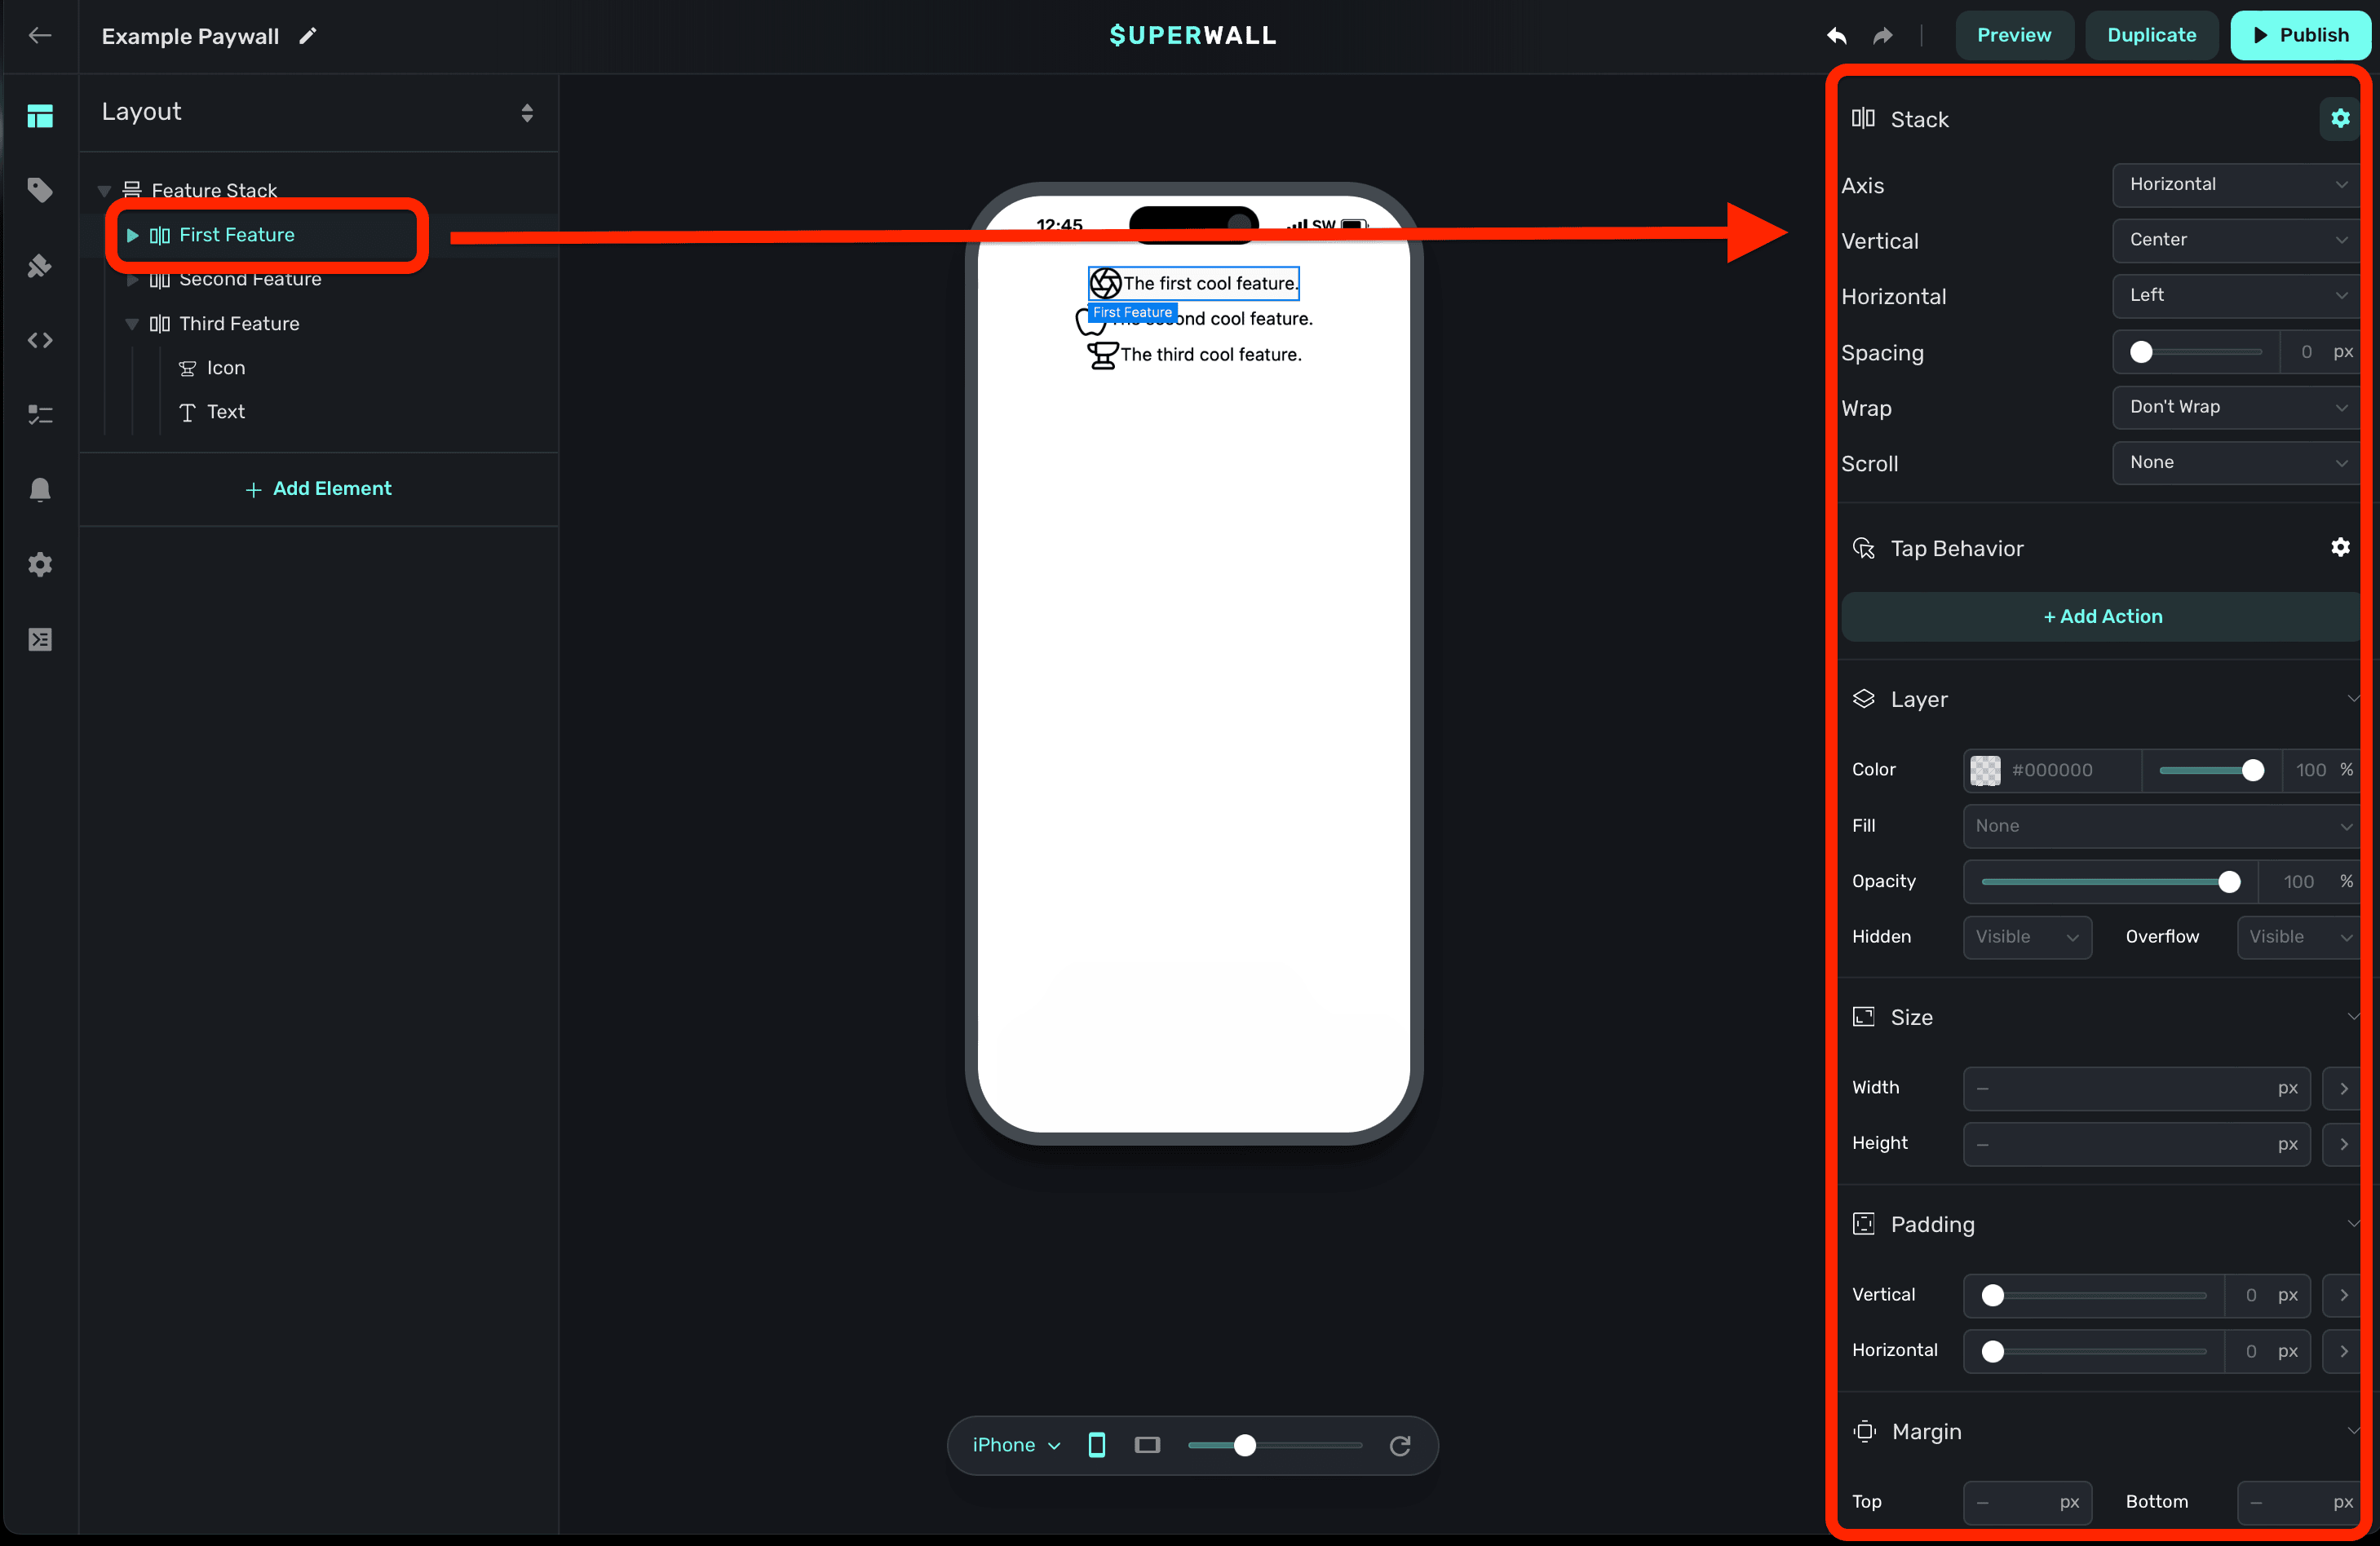
### Component Specific Properties
By default, when you select a component you'll see properties that are specific to it at the top of the component editor. For example, when you select a stack, you'll see stack-specific options. The same is true of text and any other component. Notice how the options change at the top-right here when a stack versus a text component are selected:
### Image generation
You can use A.I. to generate images. By selecting any image component, you can **click** on the **AI Tools** button to create an image based on the text and style you provide:
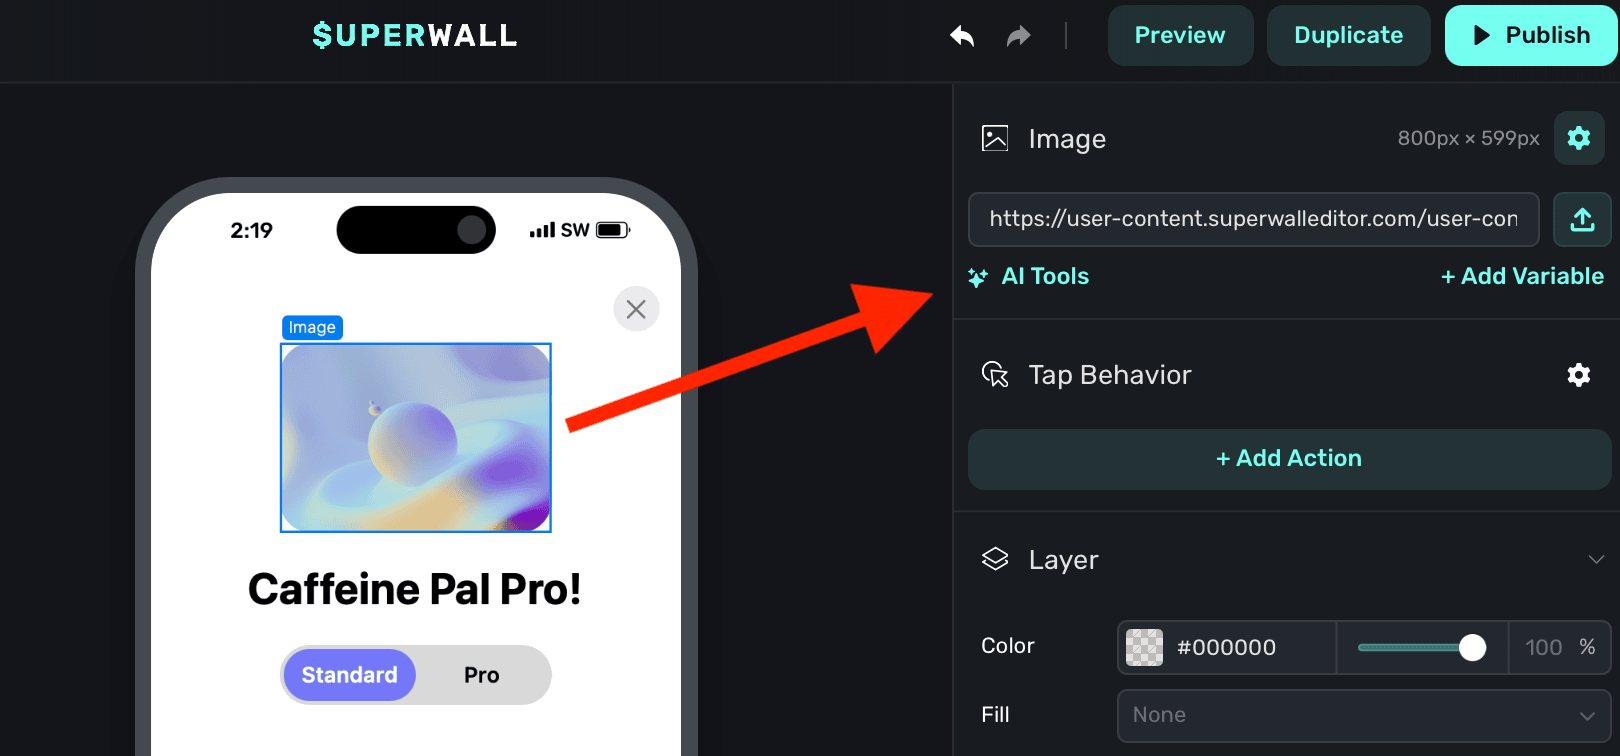
You are presented with two options:
1. **Generate Image:** Use this to create a brand new image, or regenerate an existing one.
2. **Remove Background:** This attempts to remove the background of the existing image element.
**Generating images:**
When the image generation editor modal is open, you can provide:
* **Image description:** A description of the image you'd like to generate. Generally speaking, the more detail you provide, the better the result will be. Instead of saying "Coffee up close", you might say "A close-up of a steaming cup of coffee with a heart-shaped foam design.""
* **Style:** The primary style of the image you're generating. Each one has several sub styles associated with it.
* **Sub-style:** A more specific style within the primary style you've chosen. For example, if you've chosen "Realistic Image", you might choose "Black and White" as a sub-style.
* **Remove background automatically:** Select this to have the image generator attempt to remove the background from the resulting image.
Here's an example prompt:
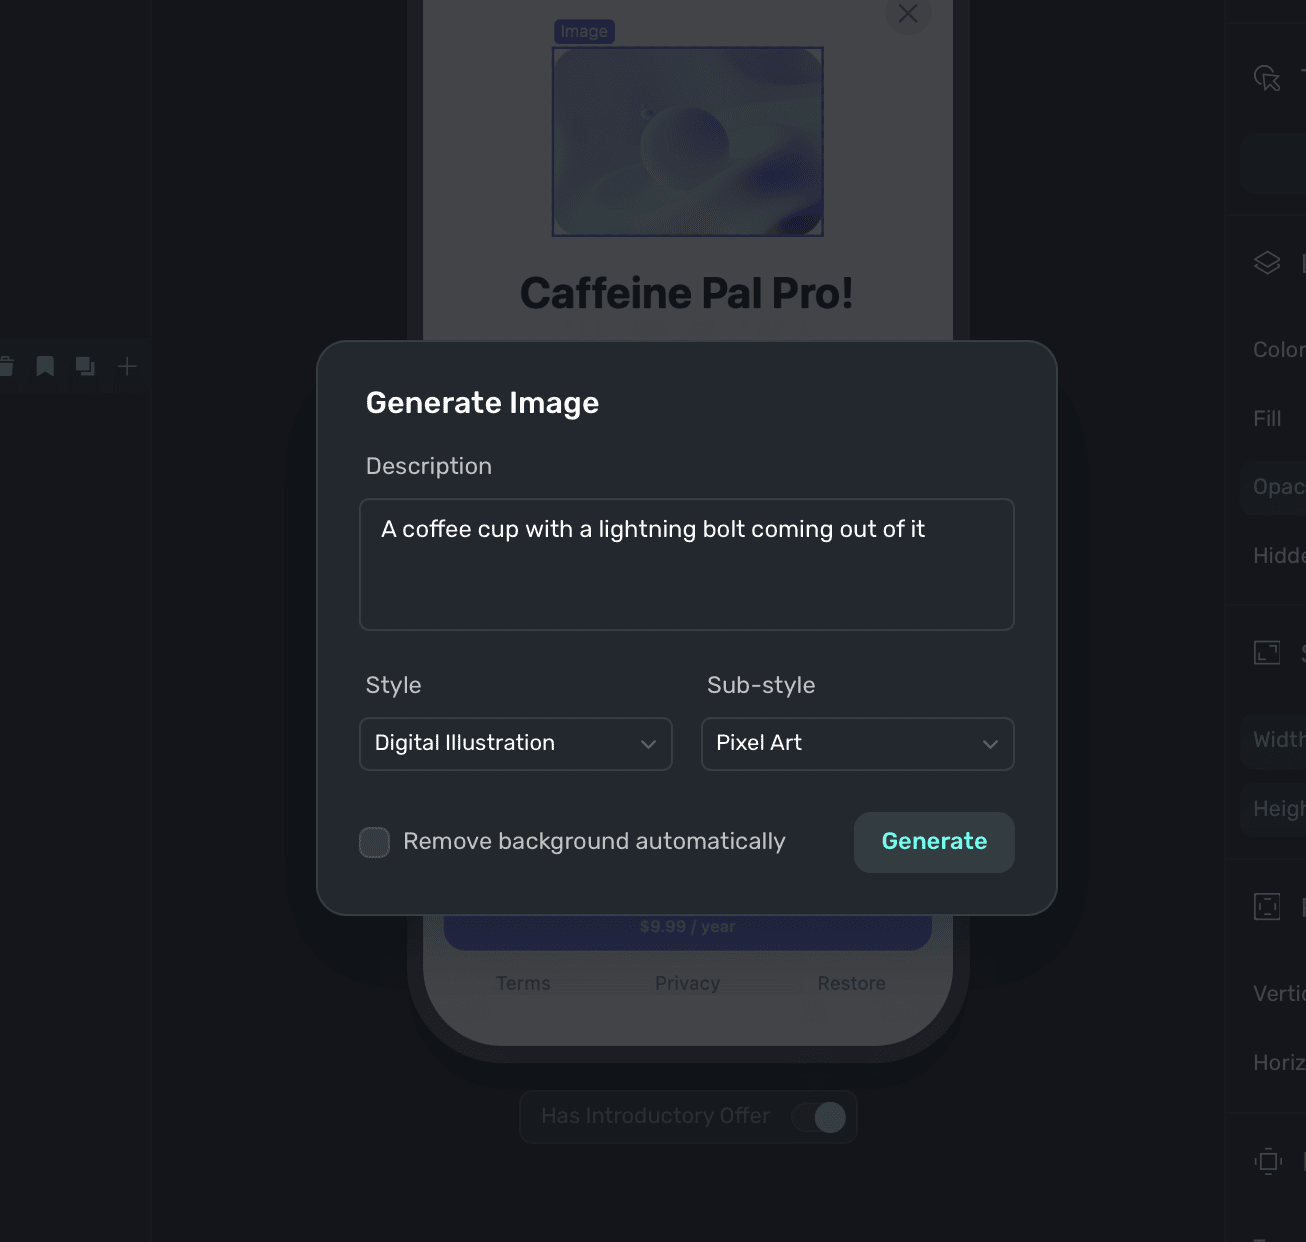
And, its result:
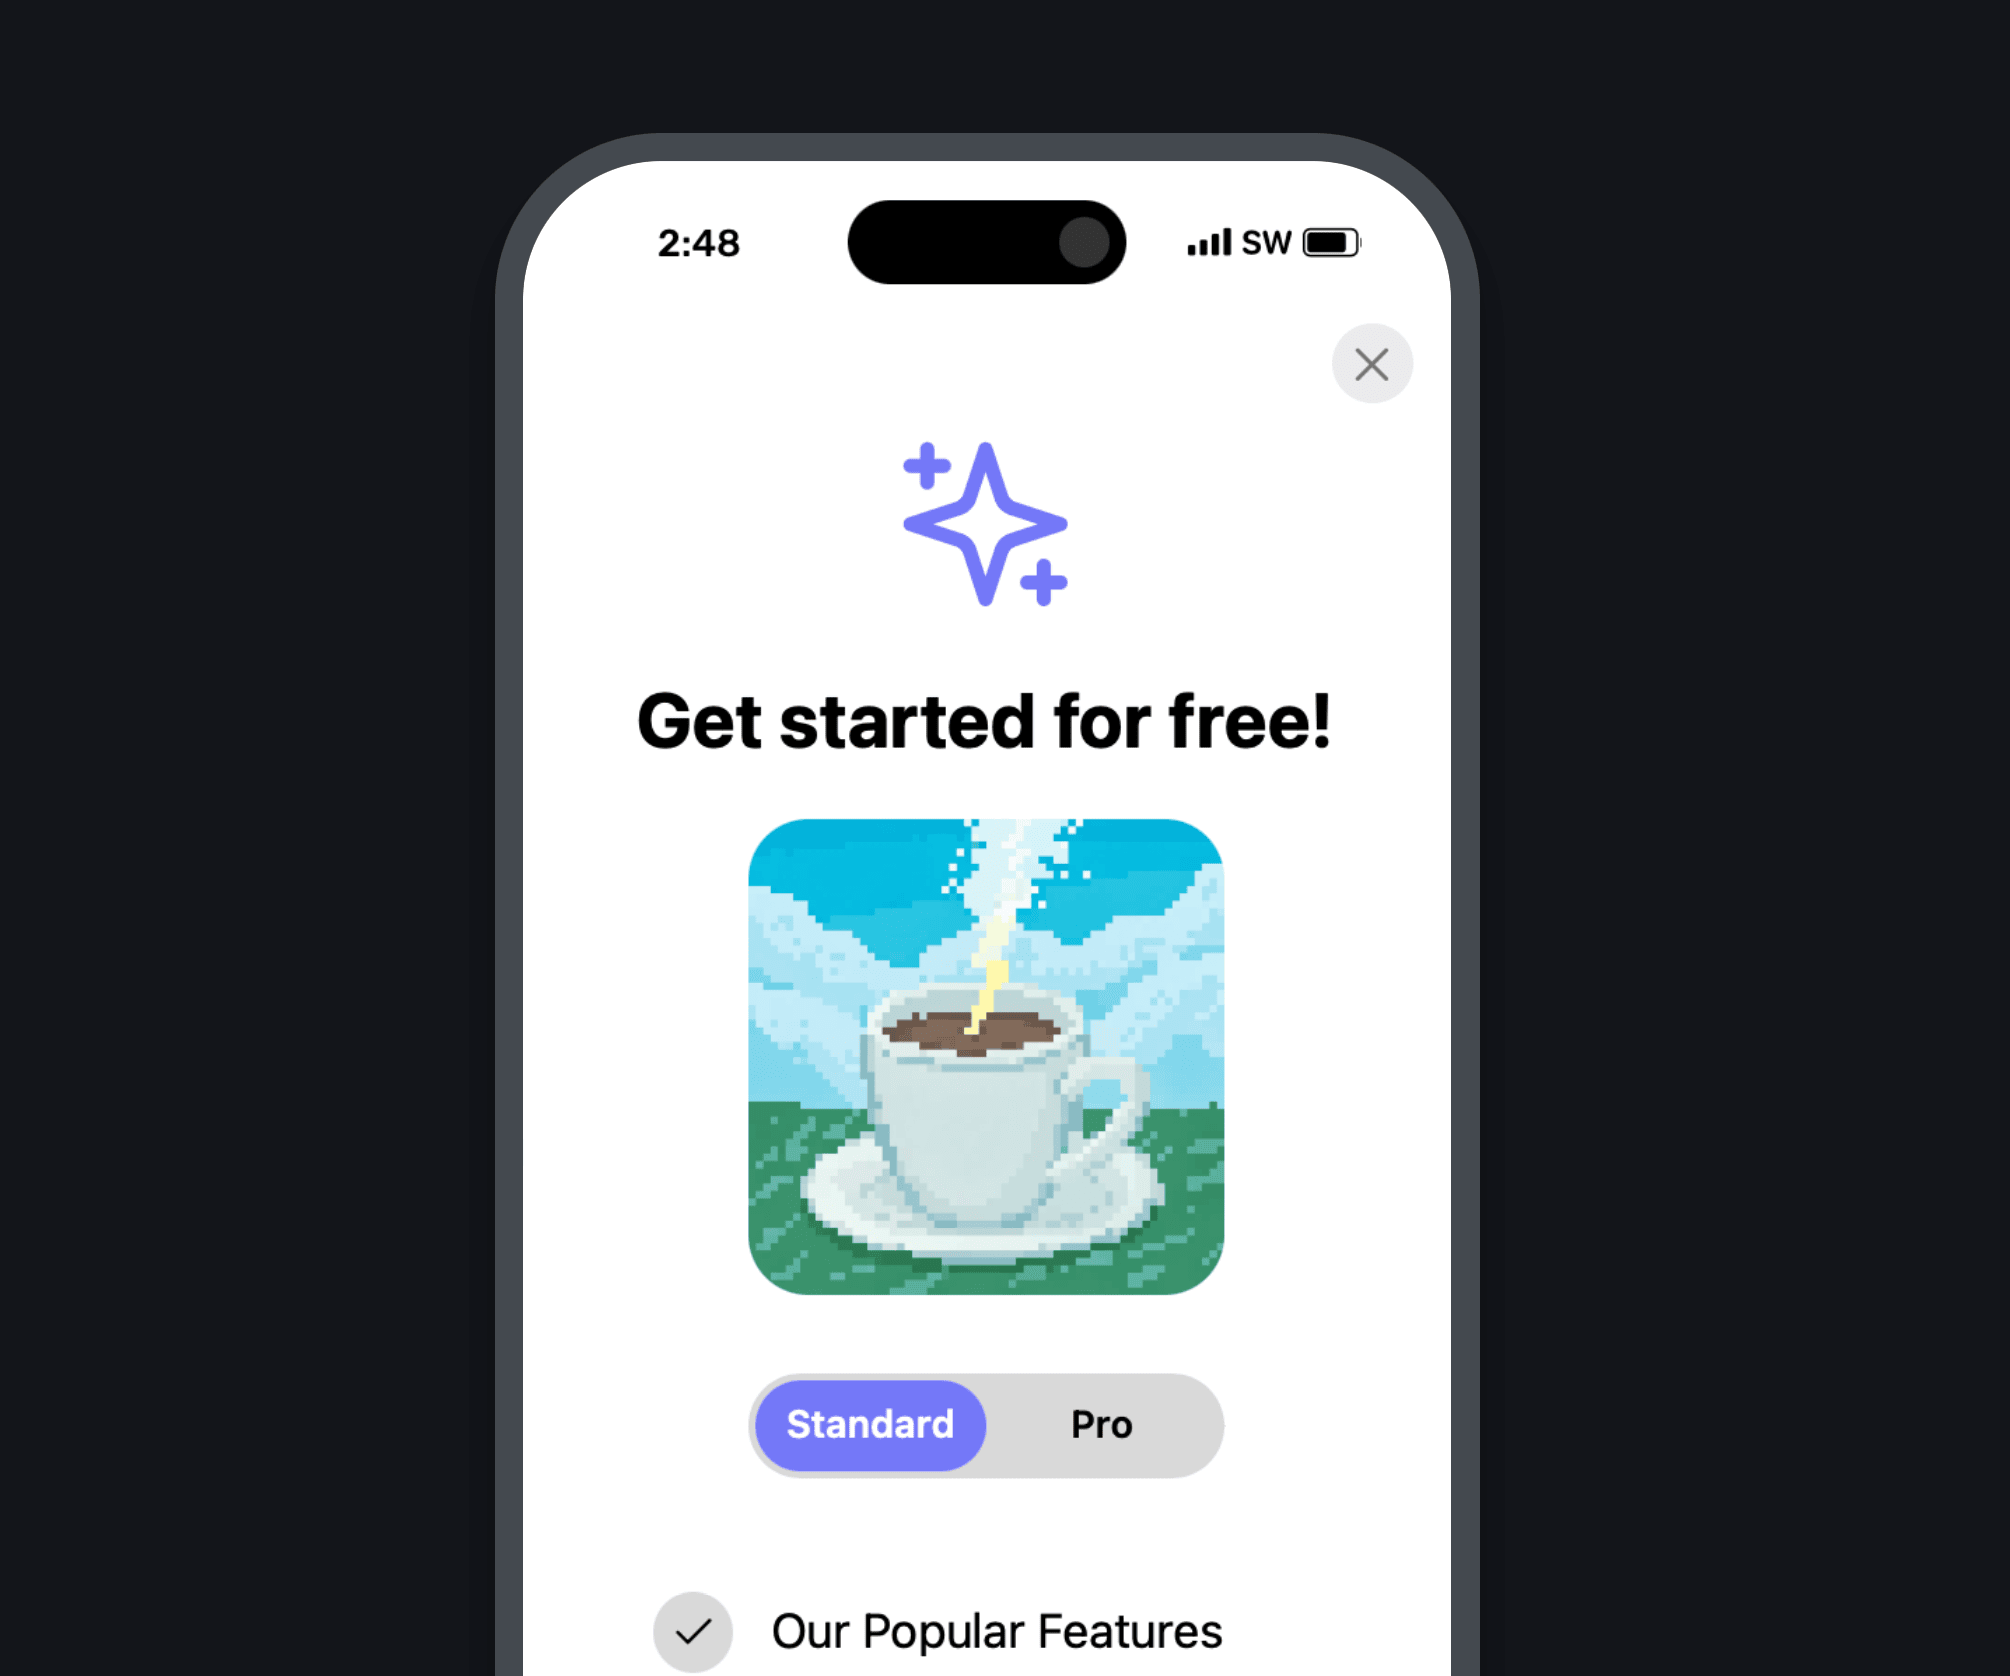
### Common component properties
Most components share similar properties related to things such as sizing, padding and more. Those are covered in more detail below.
Note that for any property that deals with editing a particular size, you can click on the disclosure arrow to choose a specific unit (such as `rems`):
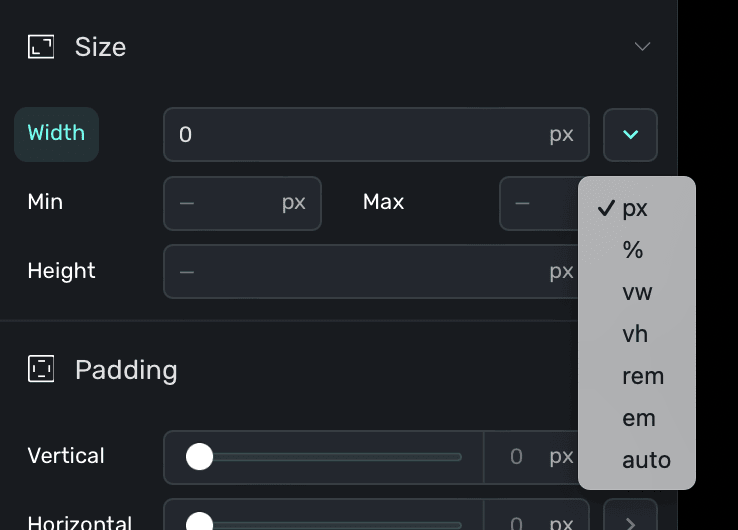
Further, most values accept either an input amount or you can use a slider to set one. Some elements support hovering over them to reveal a slider, as well:
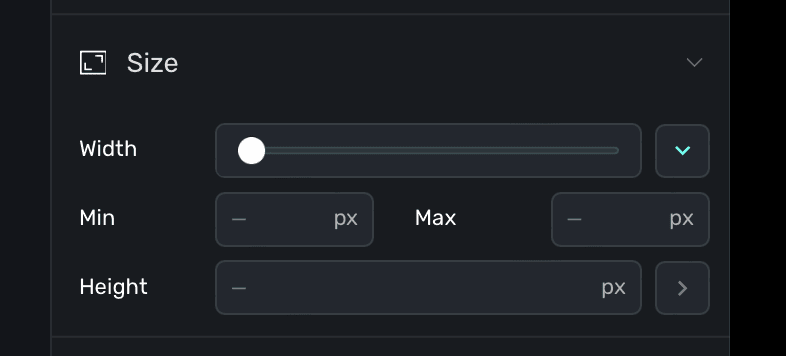
### Tap Behaviors
You can have a component trigger a specific action when it's tapped or clicked by adding a **tap behavior**. To add a tap behavior, **click** a component from either the Layout tab or the preview canvas, and in the **component editor** under under **Tap Behavior** click **+ Add Action**:
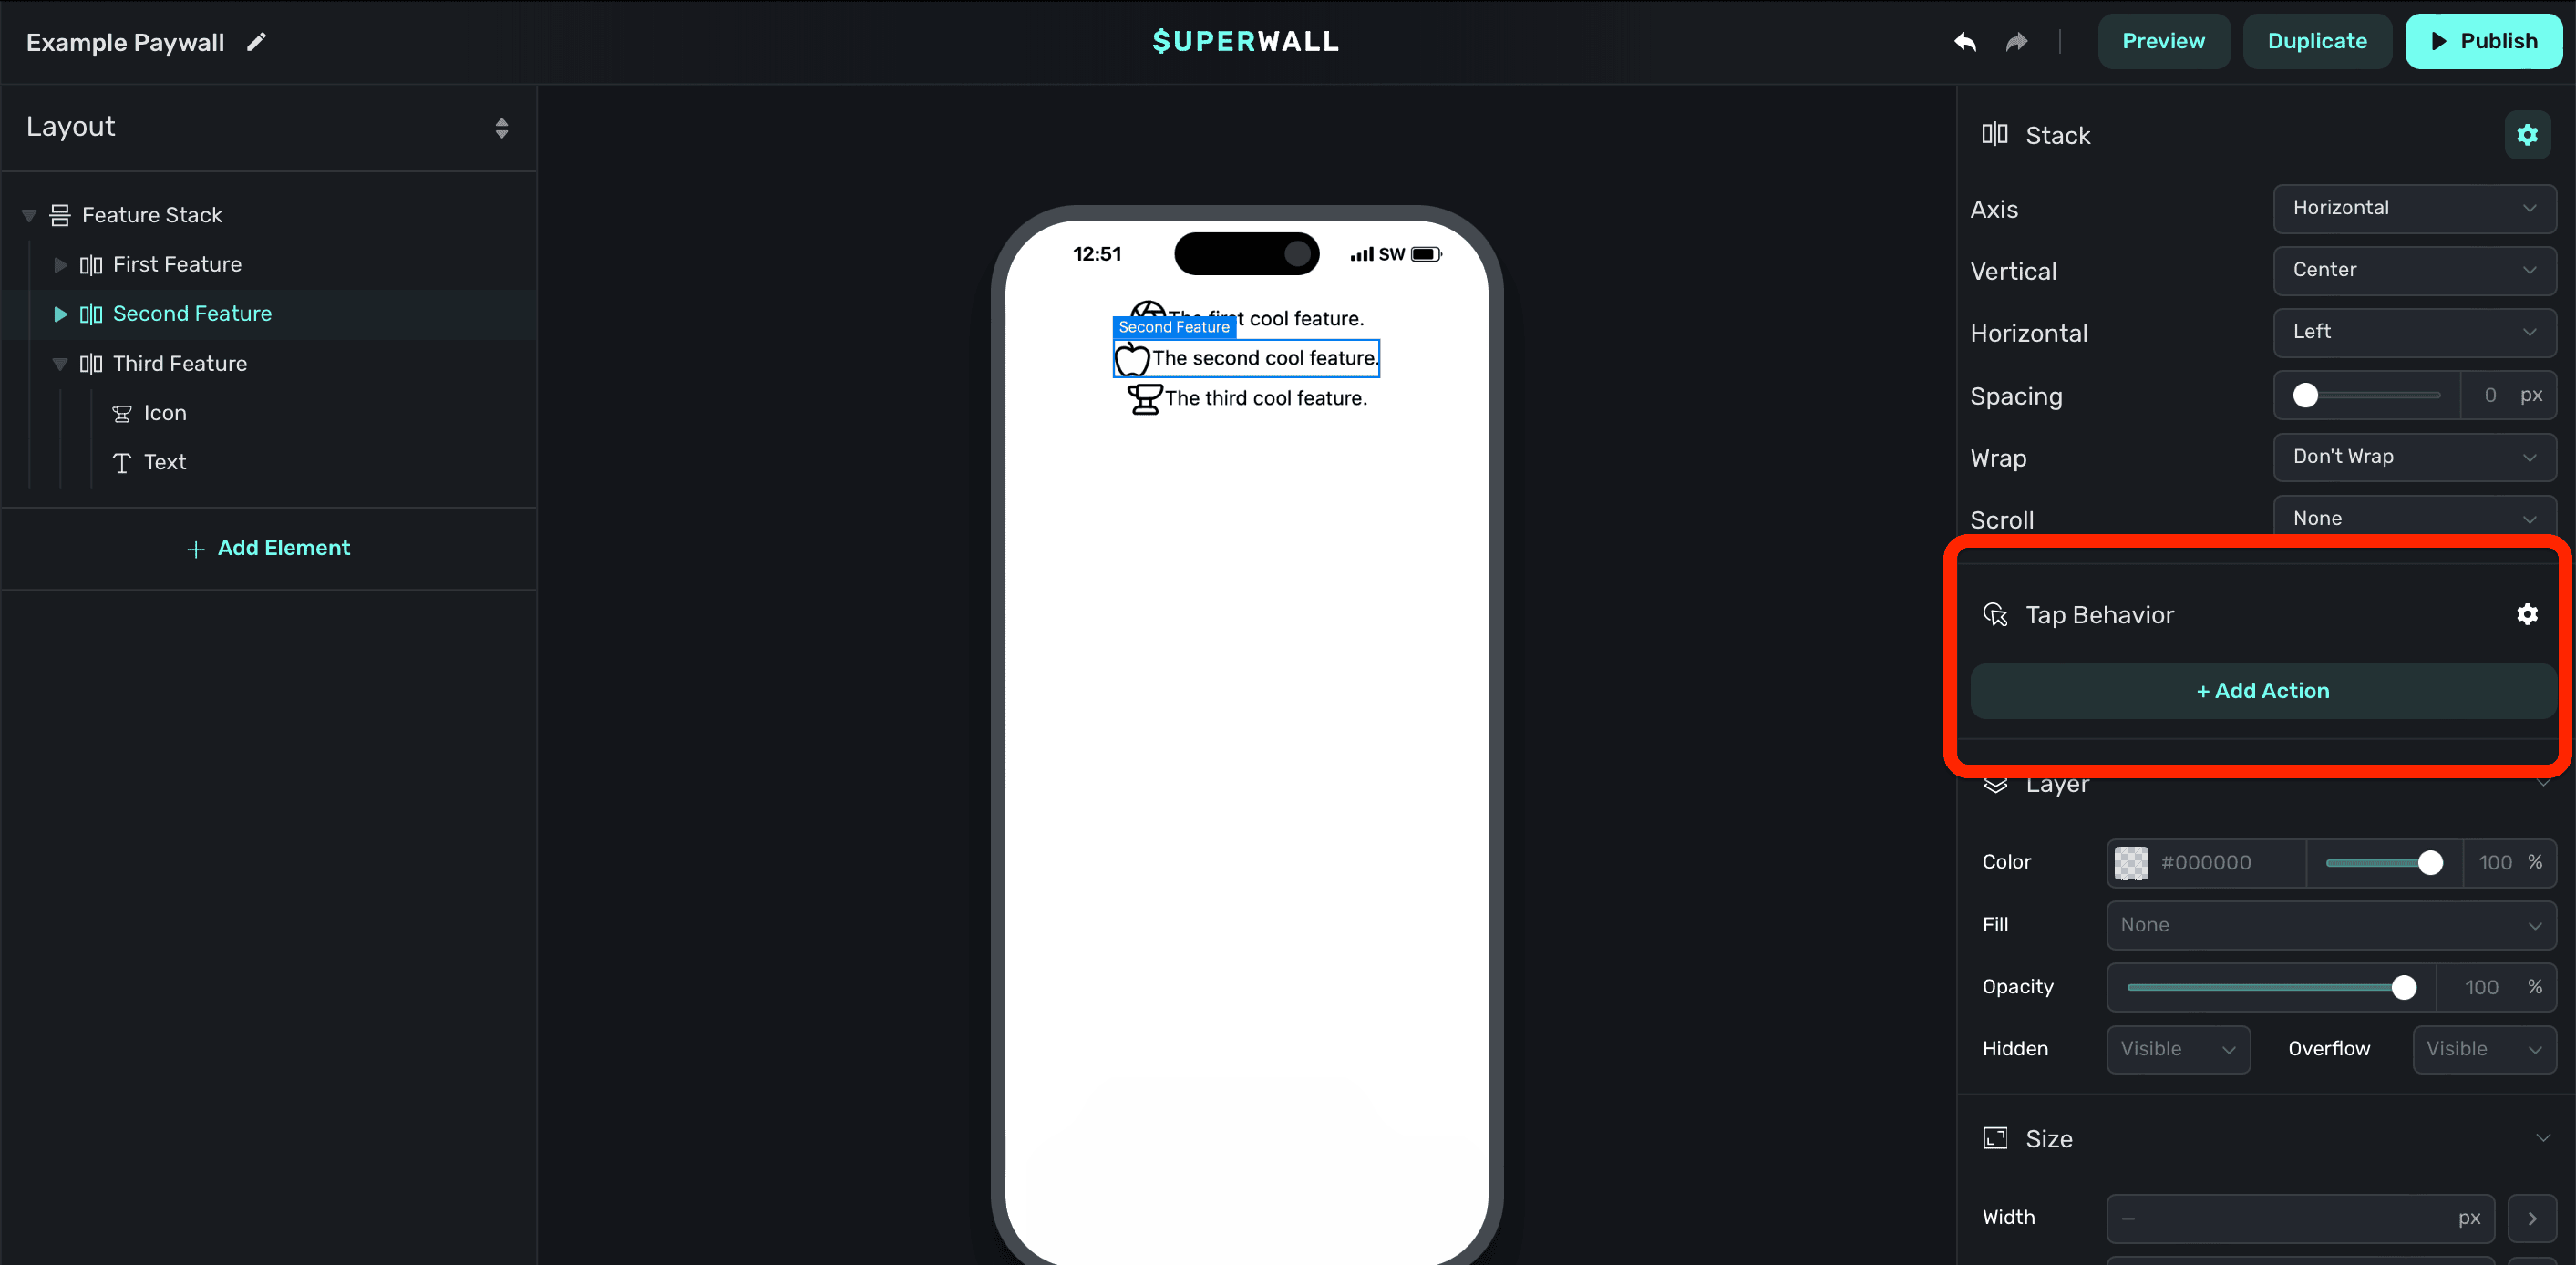
Available tap actions are:
* **Purchase:** Begin a purchasing flow of the selected product.
* **Set/Update Variable:** Sets or updates an existing variable's value. Options specific to the variable type will also be displayed. For example, a **Number** variable will have an option to choose an **Operation** such as Set, Increment or Decrement. Or, a **Boolean** variable's **Operation** will offer to either **Set** or **Toggle** the boolean value.
* **Select Product:** Puts the chosen product in a selected state. Useful for scenarios such as focusing a product in a paywall drawer, for example, when something is tapped or clicked.
* **Close:** Closes the paywall.
* **Restore:** Begins a purchase restore operation. Useful for restoring purchases someone may have made prior.
* **Open Url:** Opens the given URL via one of three different ways:
1. **In-app browser:** Attempts to open the link *inside* of the app using the platform's web browser control. For example, on iOS, this opens an instance of [`SFSafariViewController`](https://developer.apple.com/documentation/safariservices/sfsafariviewcontroller).
2. **External:** Attempts to open the link *outside* of the app using the platform's web browser app. For example, on iOS, this opens Safari. Please note that the paywall stays presented when the link is opened.
3. **Deep Link:** Similar to the **external** option, but it'll *close* the paywall before opening the URL. This is useful for internal navigation or when you are attempting to link to something in a web page and you'd like the paywall to close when doing so.
* **Custom Action:** Performs a custom action that you specify. Using custom actions, you can tie application logic to anything tapped or clicked on your paywall. Check out the docs [here](/custom-paywall-events).
* **Custom Placement:** Registers the placement you specify in the **Name** field. One common use-case is presenting another paywall from a currently opened one. Check out the example [here](/presenting-paywalls-from-one-another).
If a component has a tap action associated to it, you'll also see a **triangle** icon next to it within the sidebar:
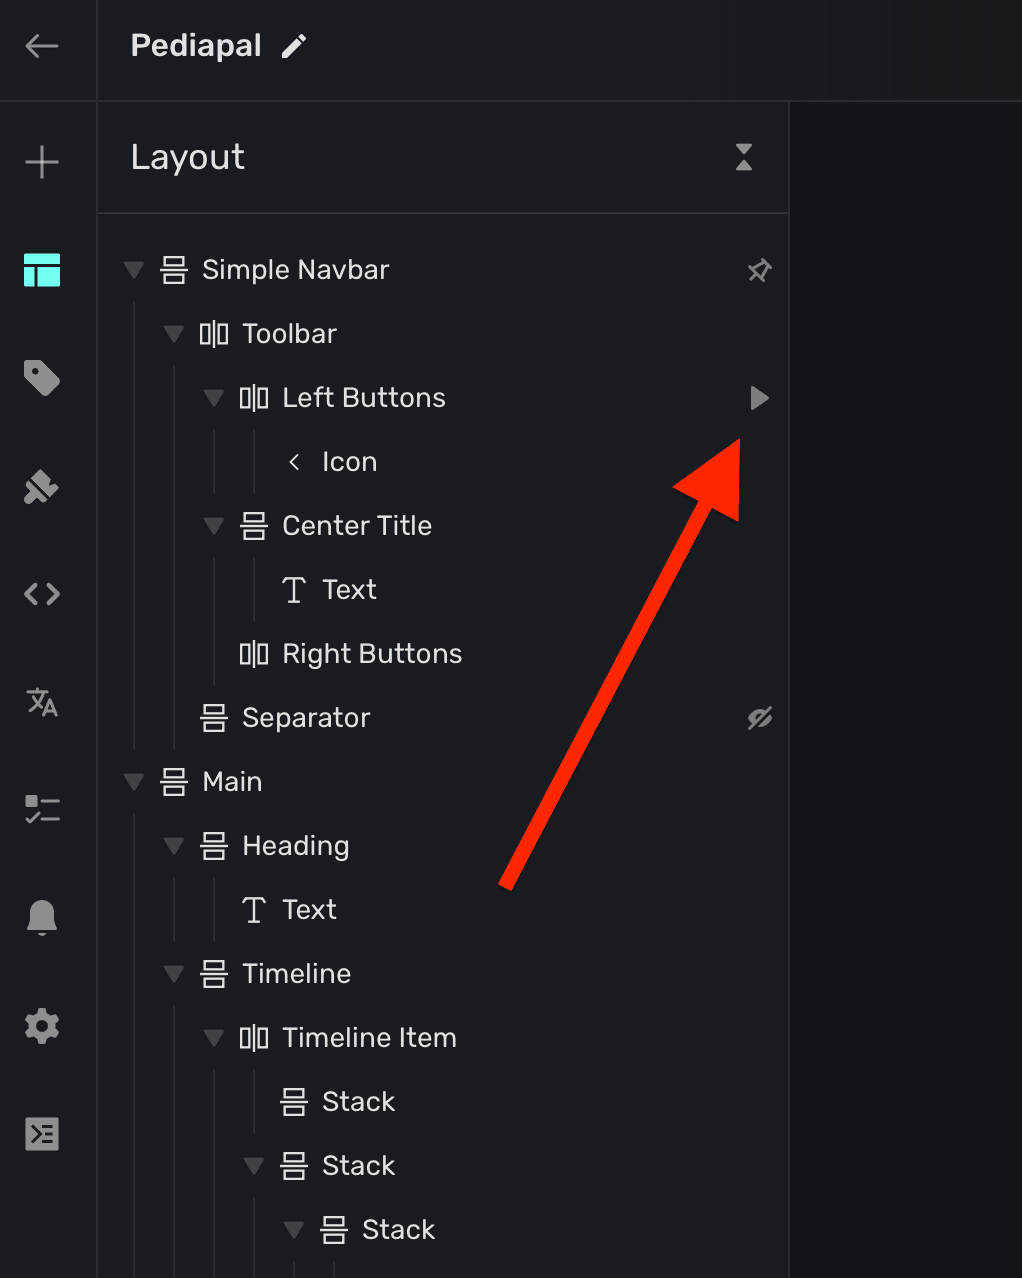
### Component styling properties
The properties below are editable regardless of which kind of component you are editing. The most important thing to keep in mind is that all of the properties below will work the same as they would on a web page. When you change these properties, behind the scenes — Superwall is applying the corresponding CSS code to the paywall.
### Typography
Edit the text, size, color and more of a component's text:
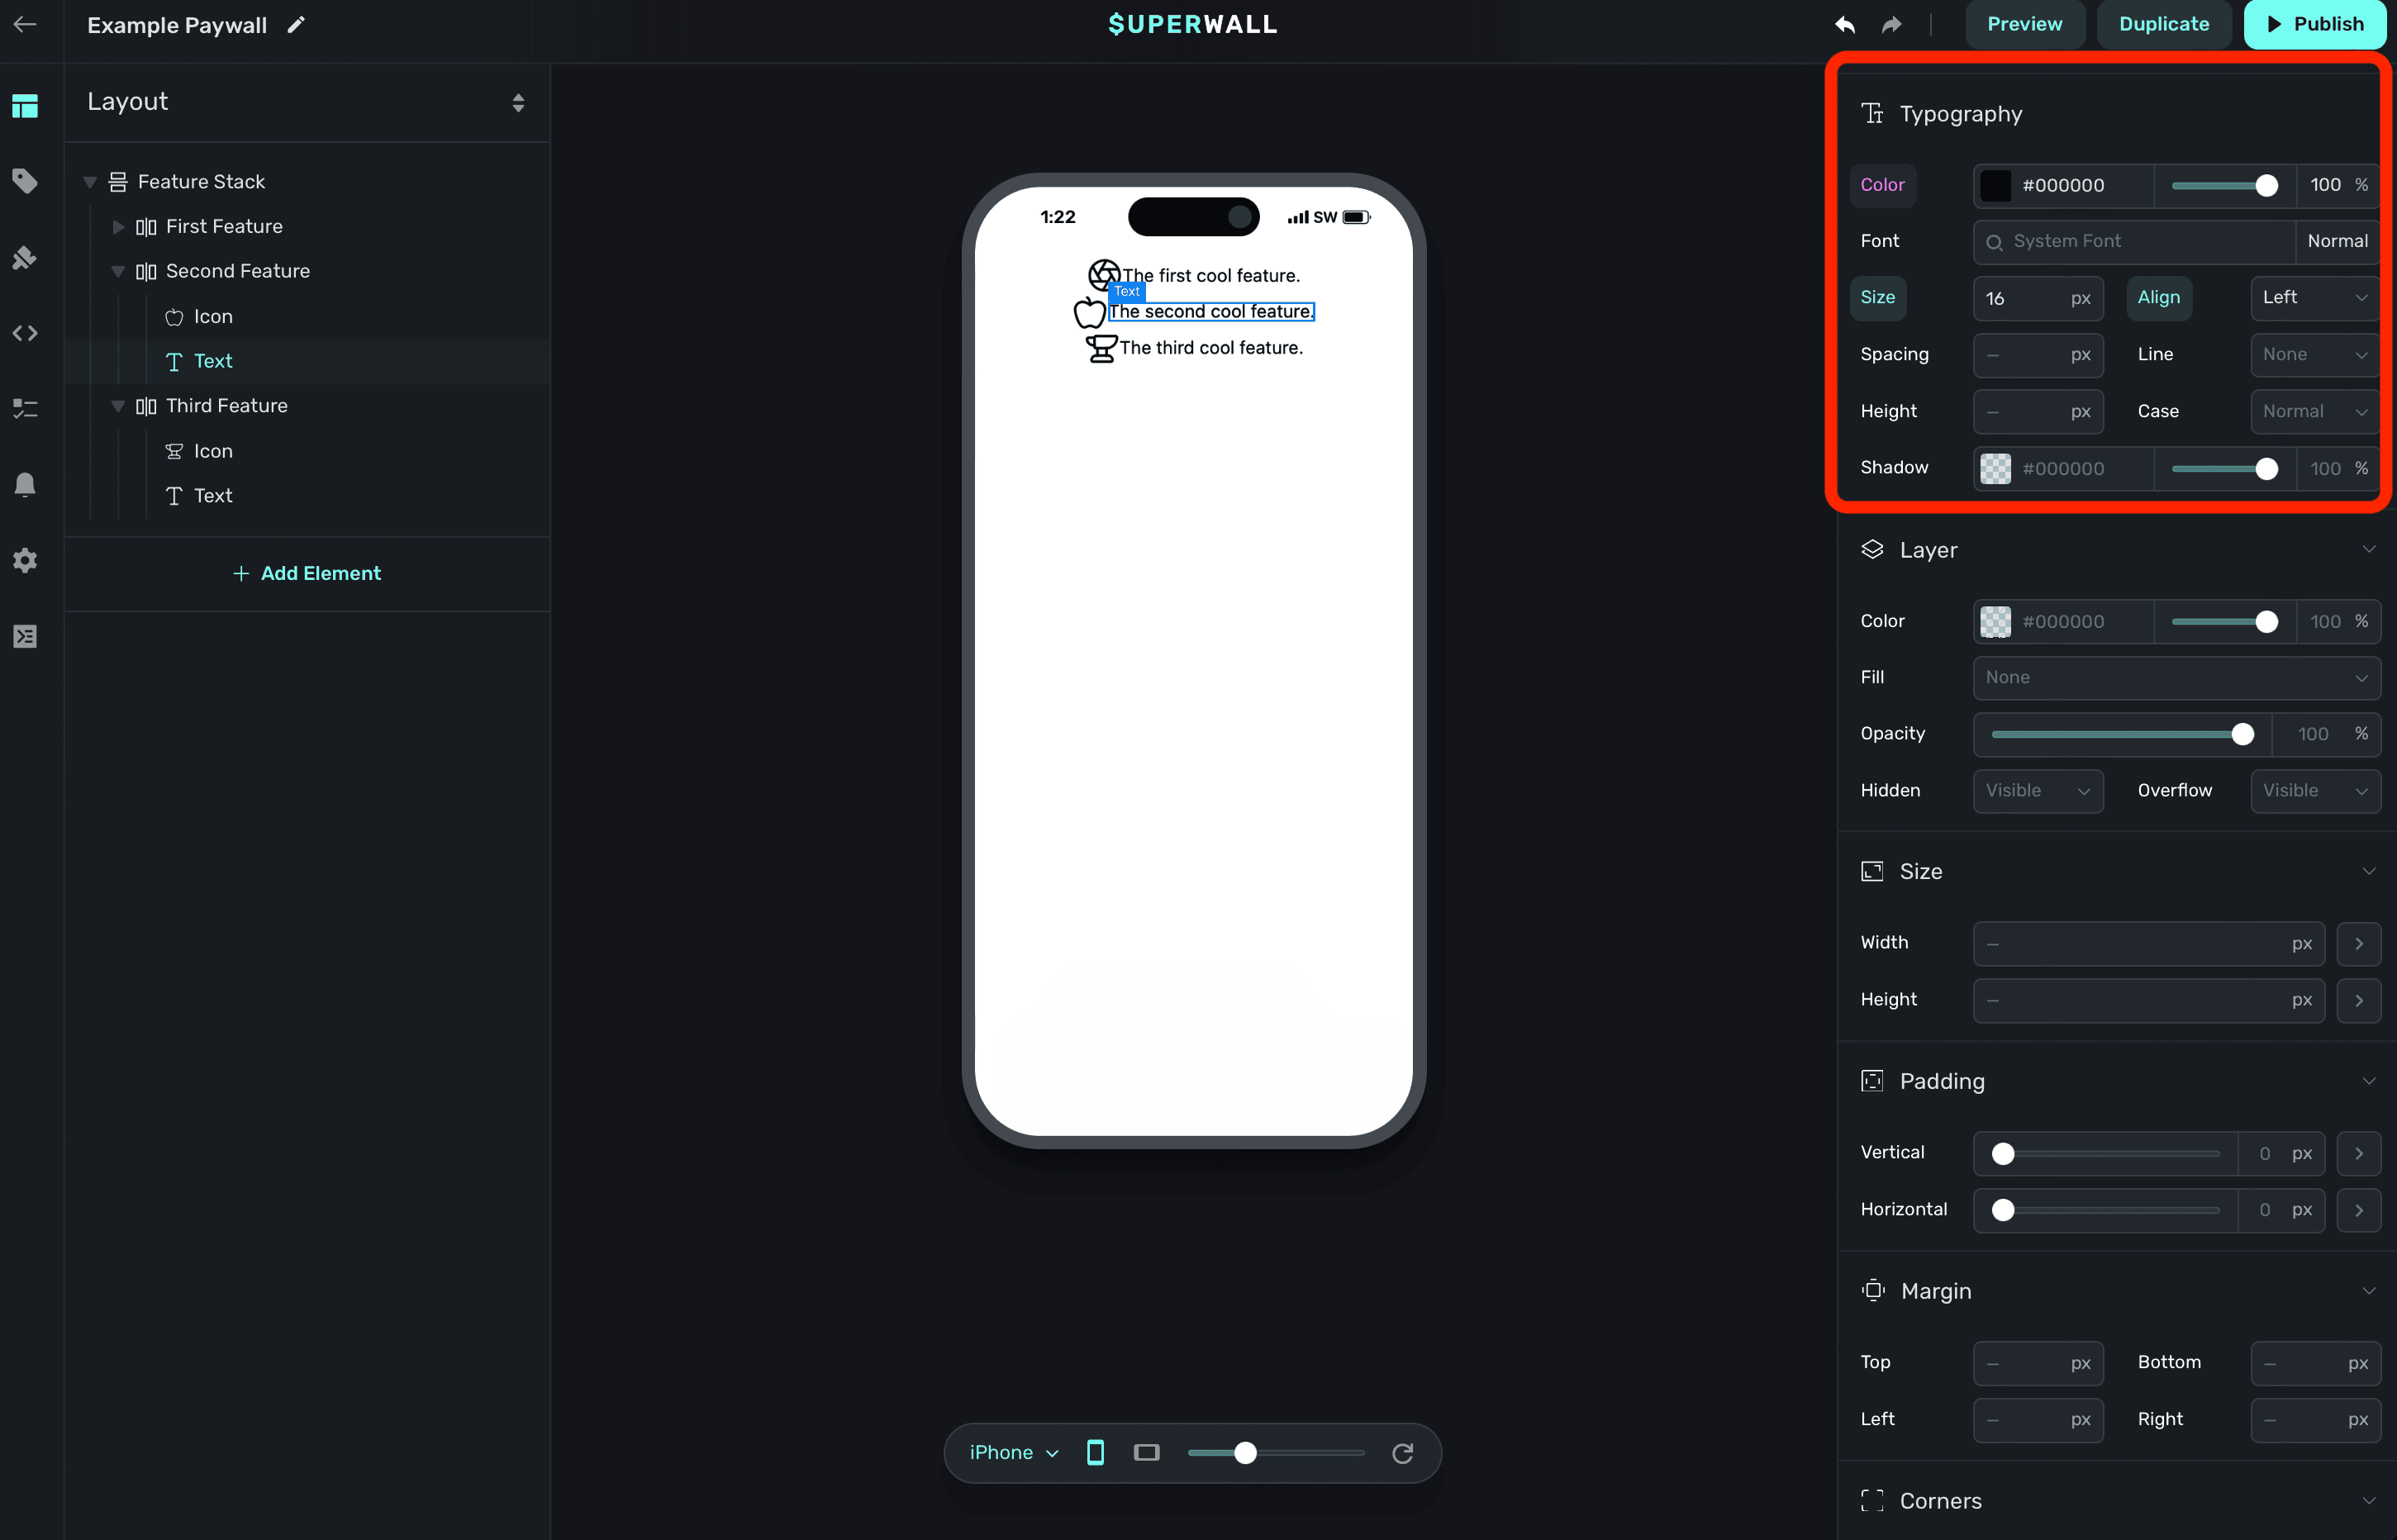
If you've added a [custom font](/paywall-editor-custom-fonts), you can also select it here.
### Layer
Properties here edit the underlying layer of the component:
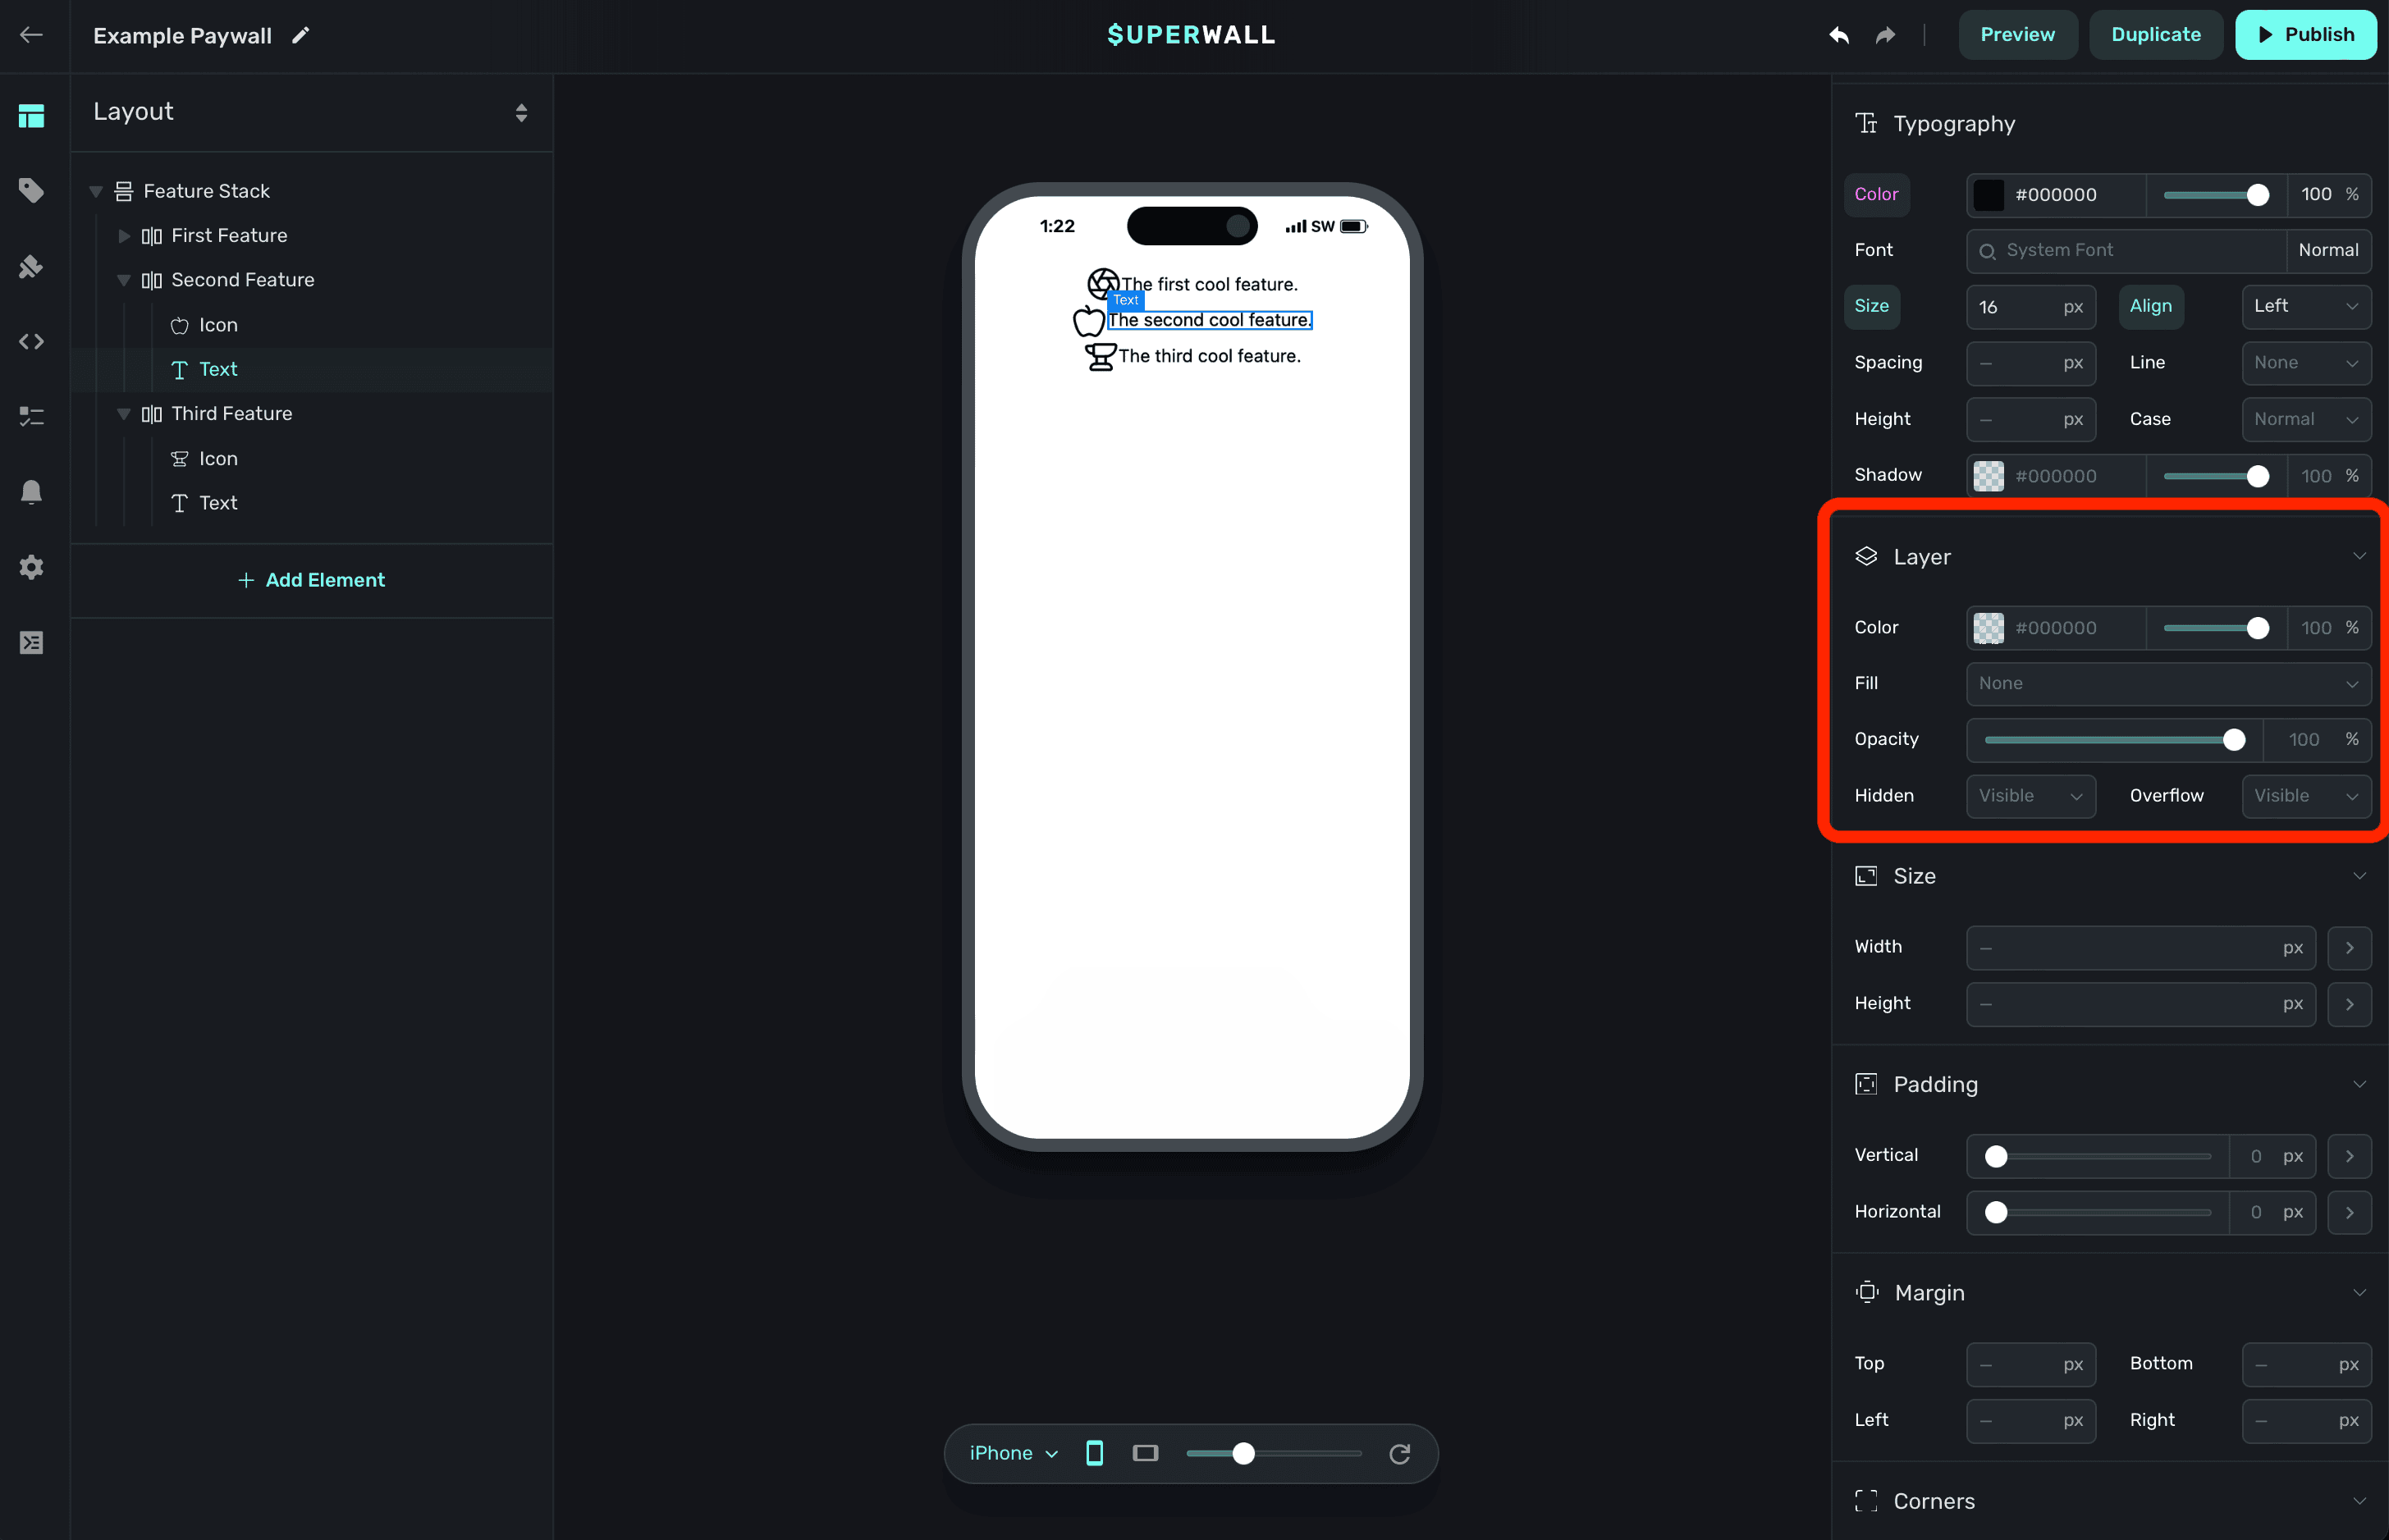
If you want a background fill, to toggle its overall opacity or other similar things — the layer is a great spot to do it.
### Size
Use size properties to set an explicitly width or height on the component:
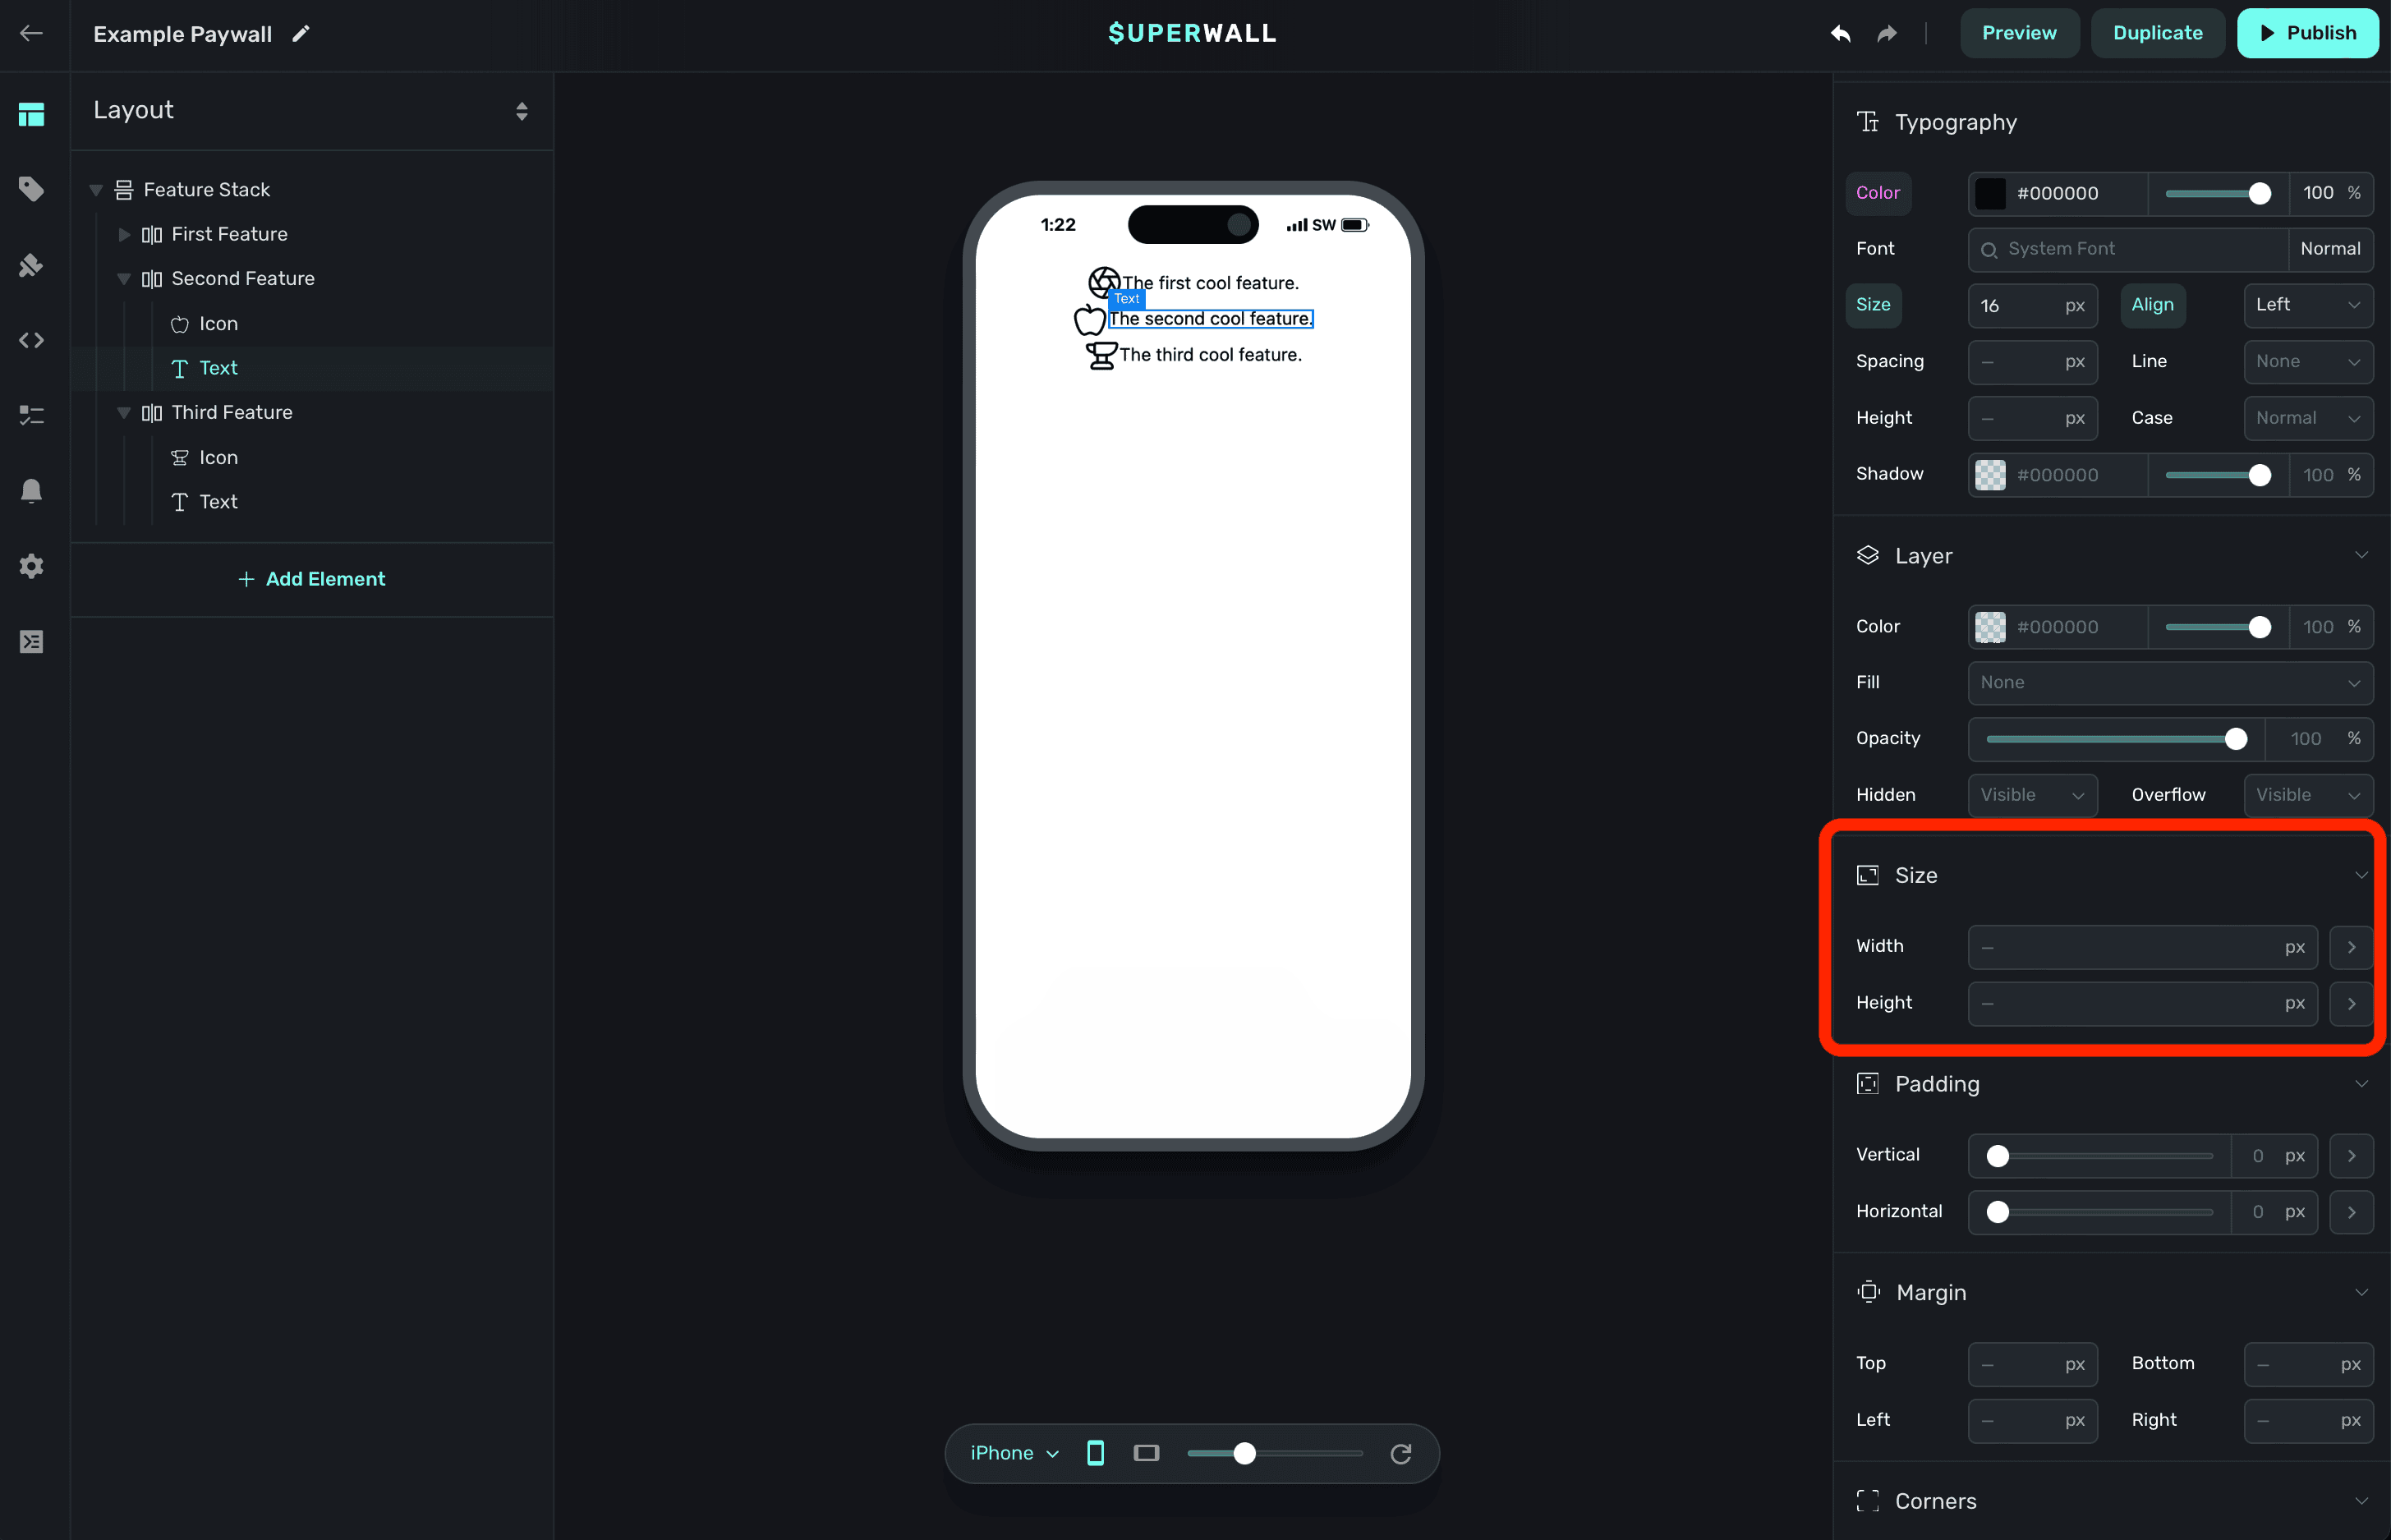
Using the dropdown arrow, you can set a range of minimum and maximum values:
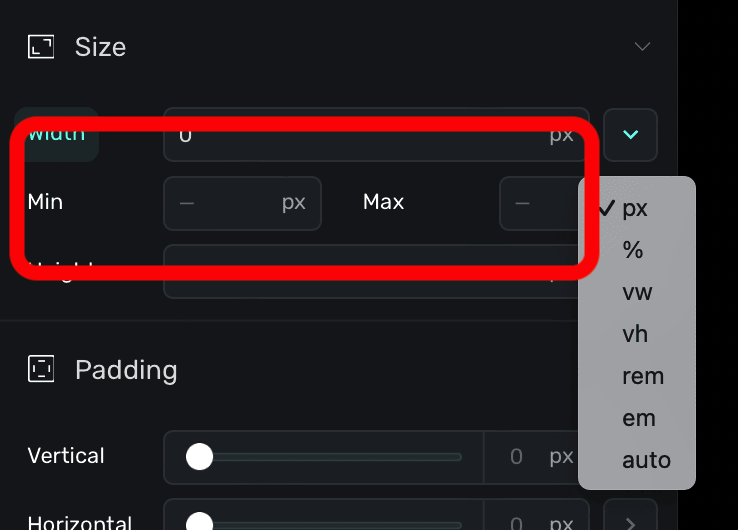
### Padding
Apply padding to the content within the component:
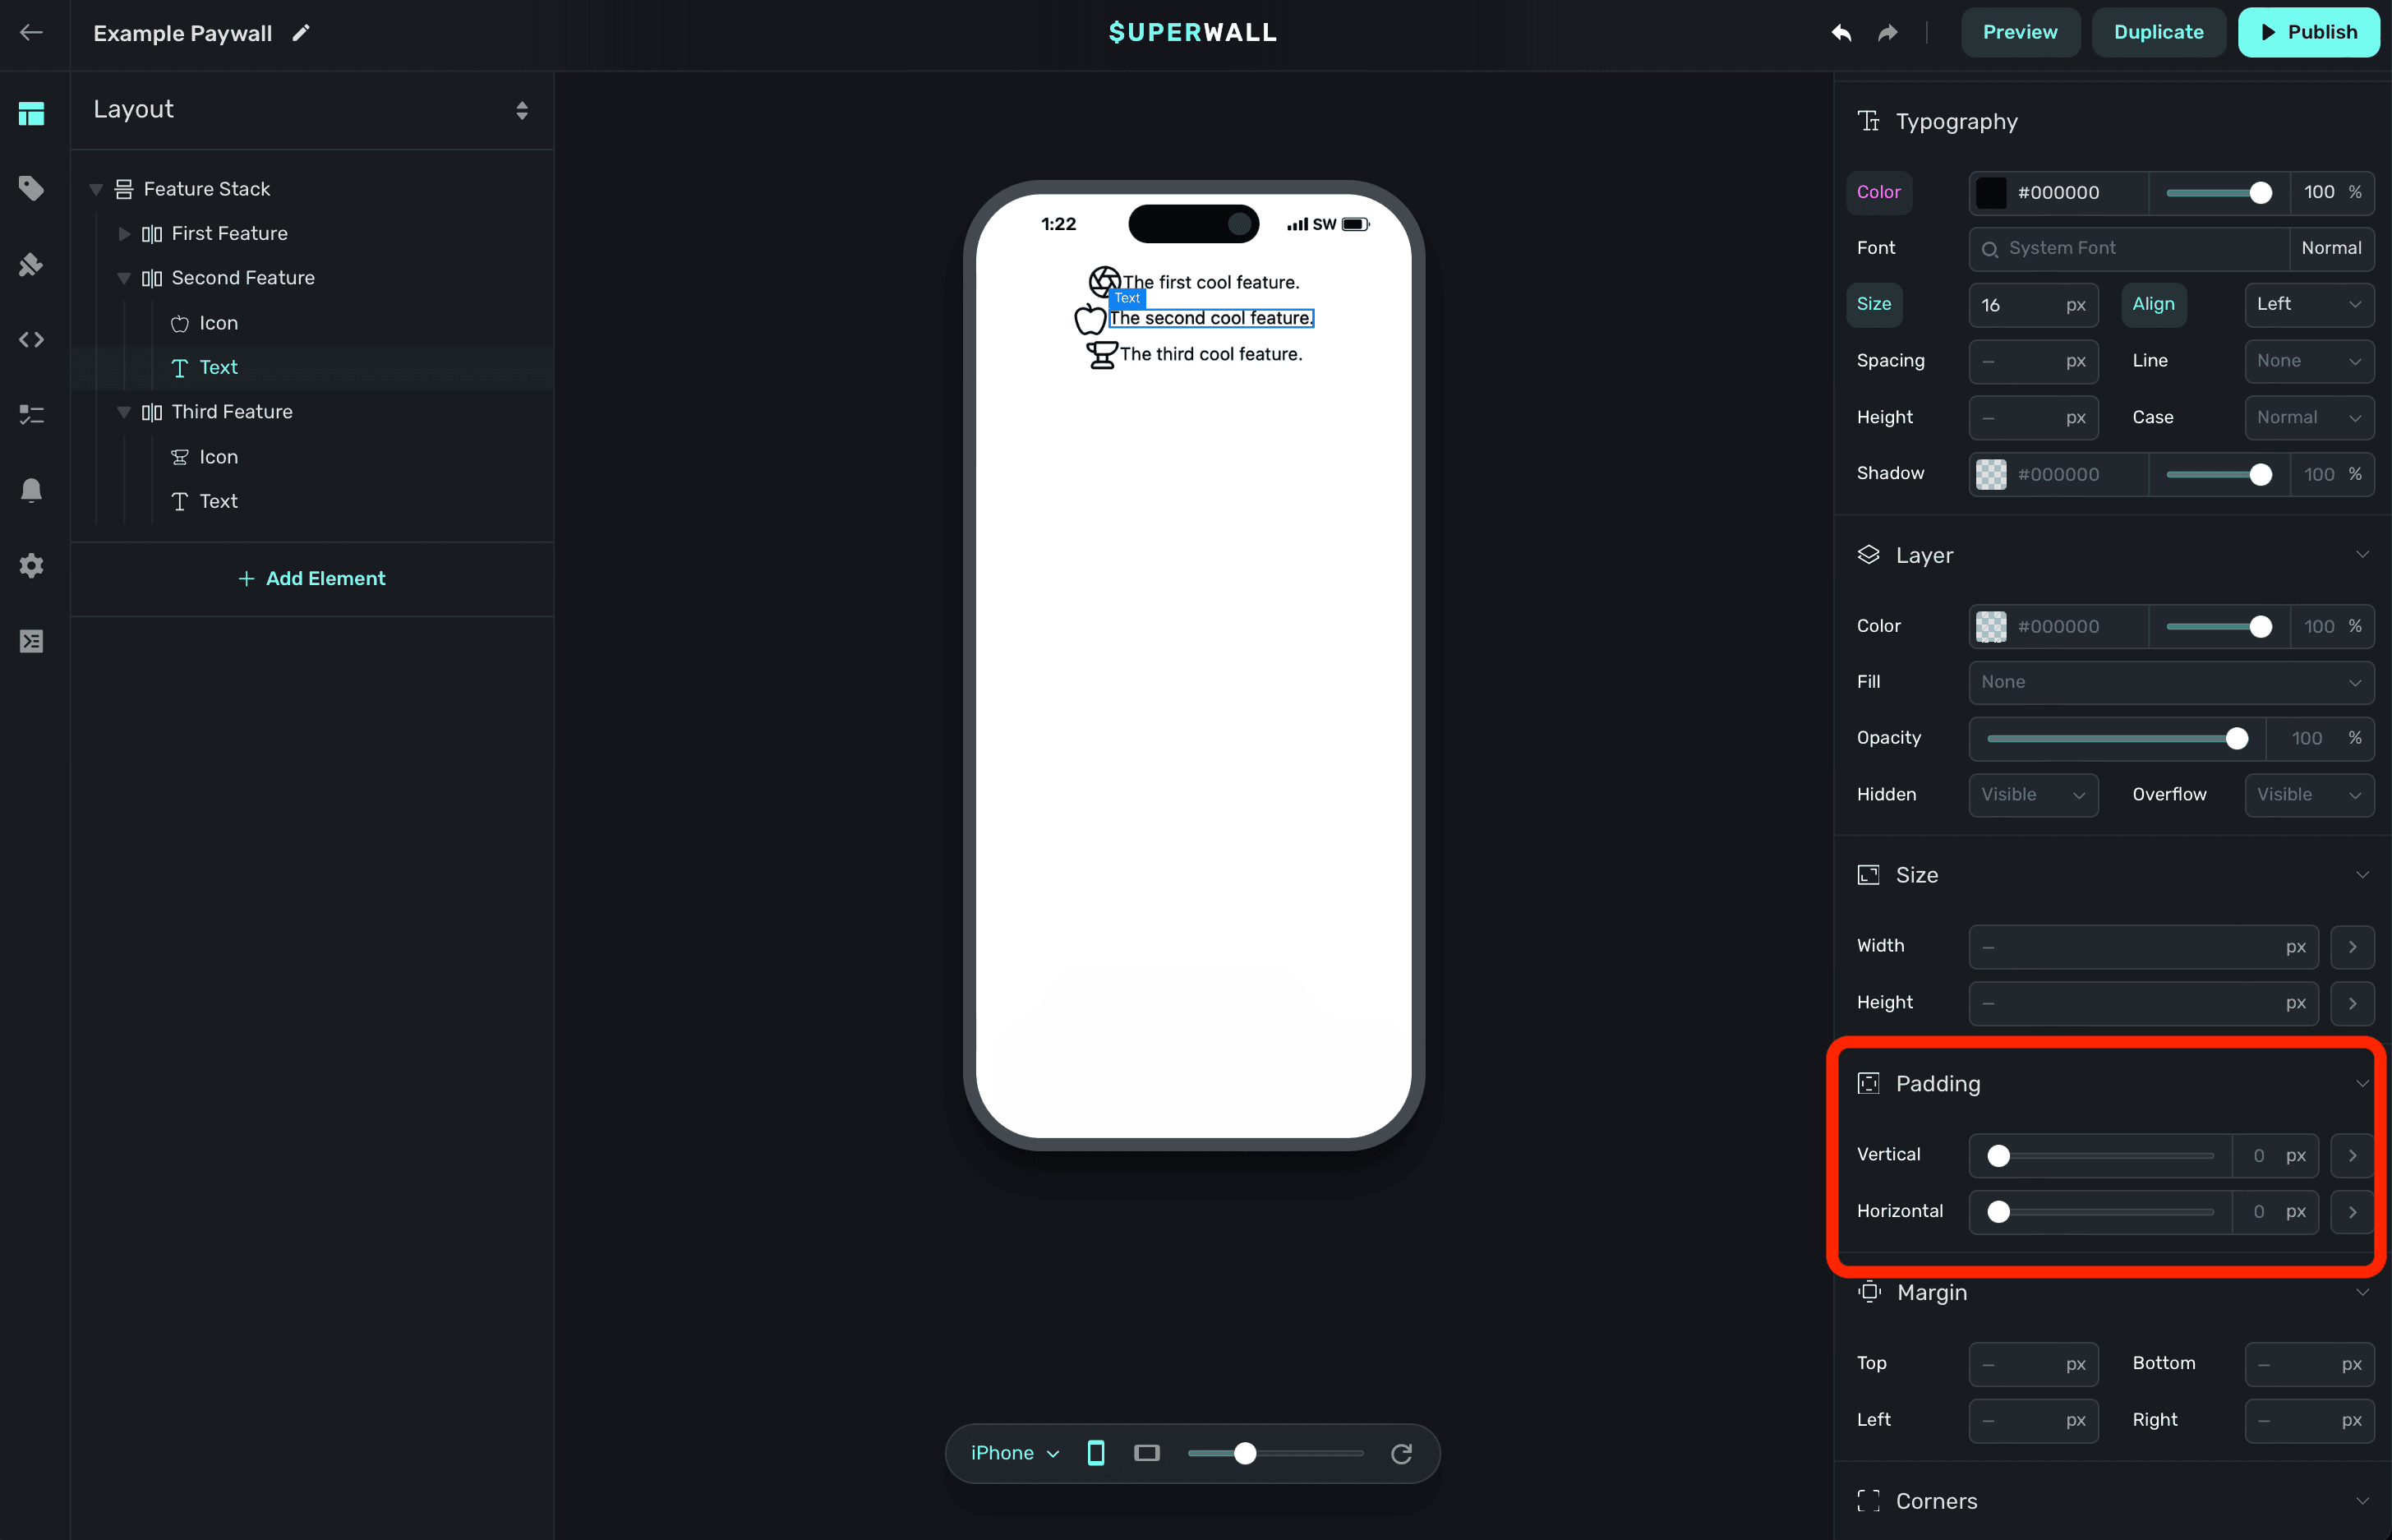
To have more granular control, expand each disclosure arrow to set only the top, bottom, left or right padding values:
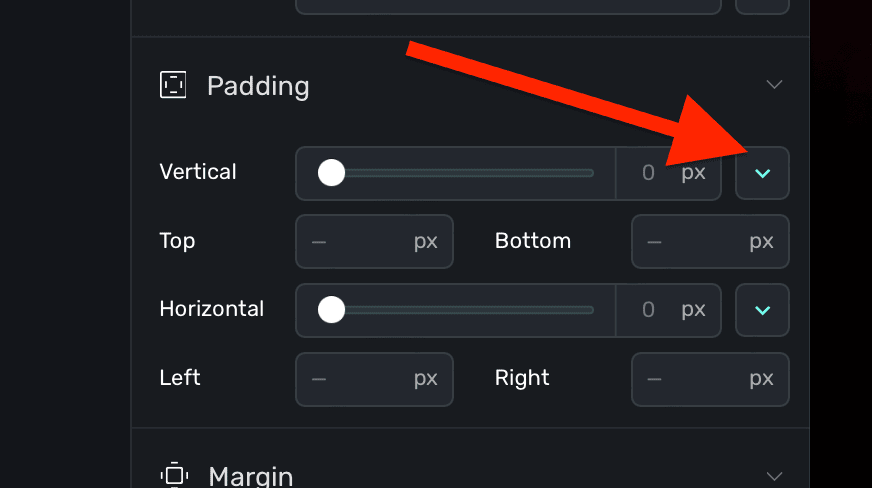
### Margin
Apply spacing to the content outside of the component, further separating it from adjacent components:
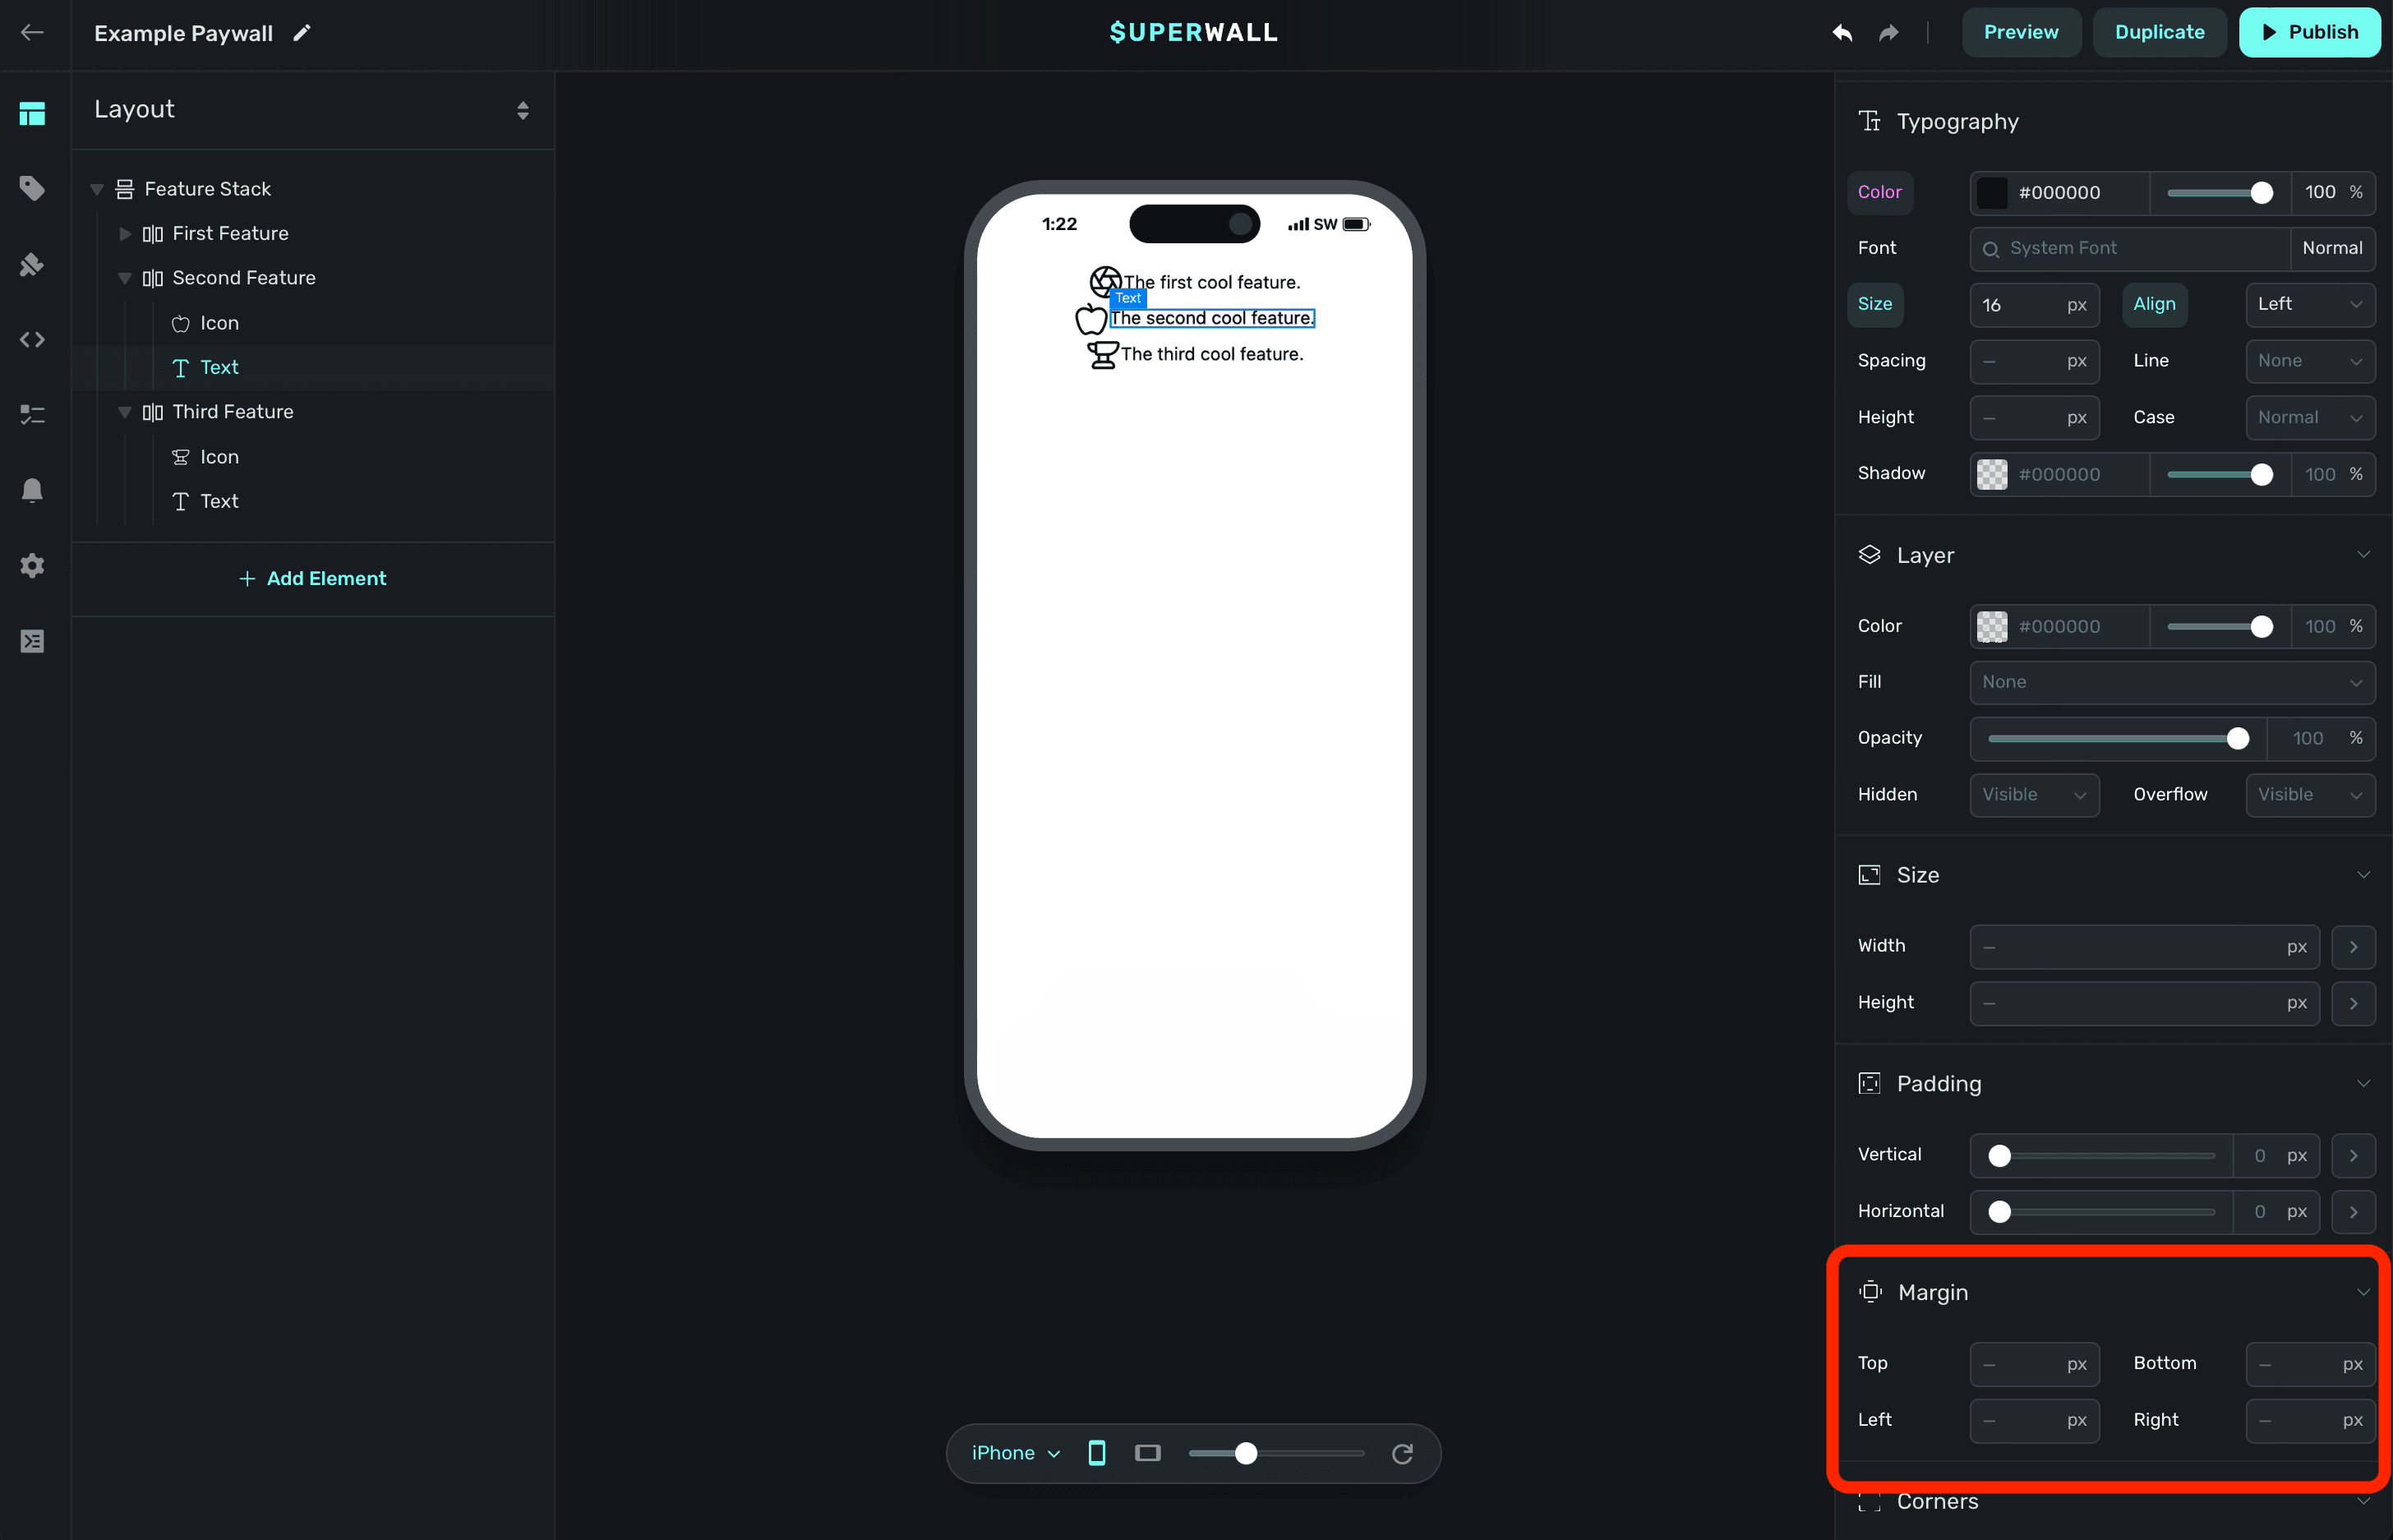
### Corners
Applies a corner radius to the component:
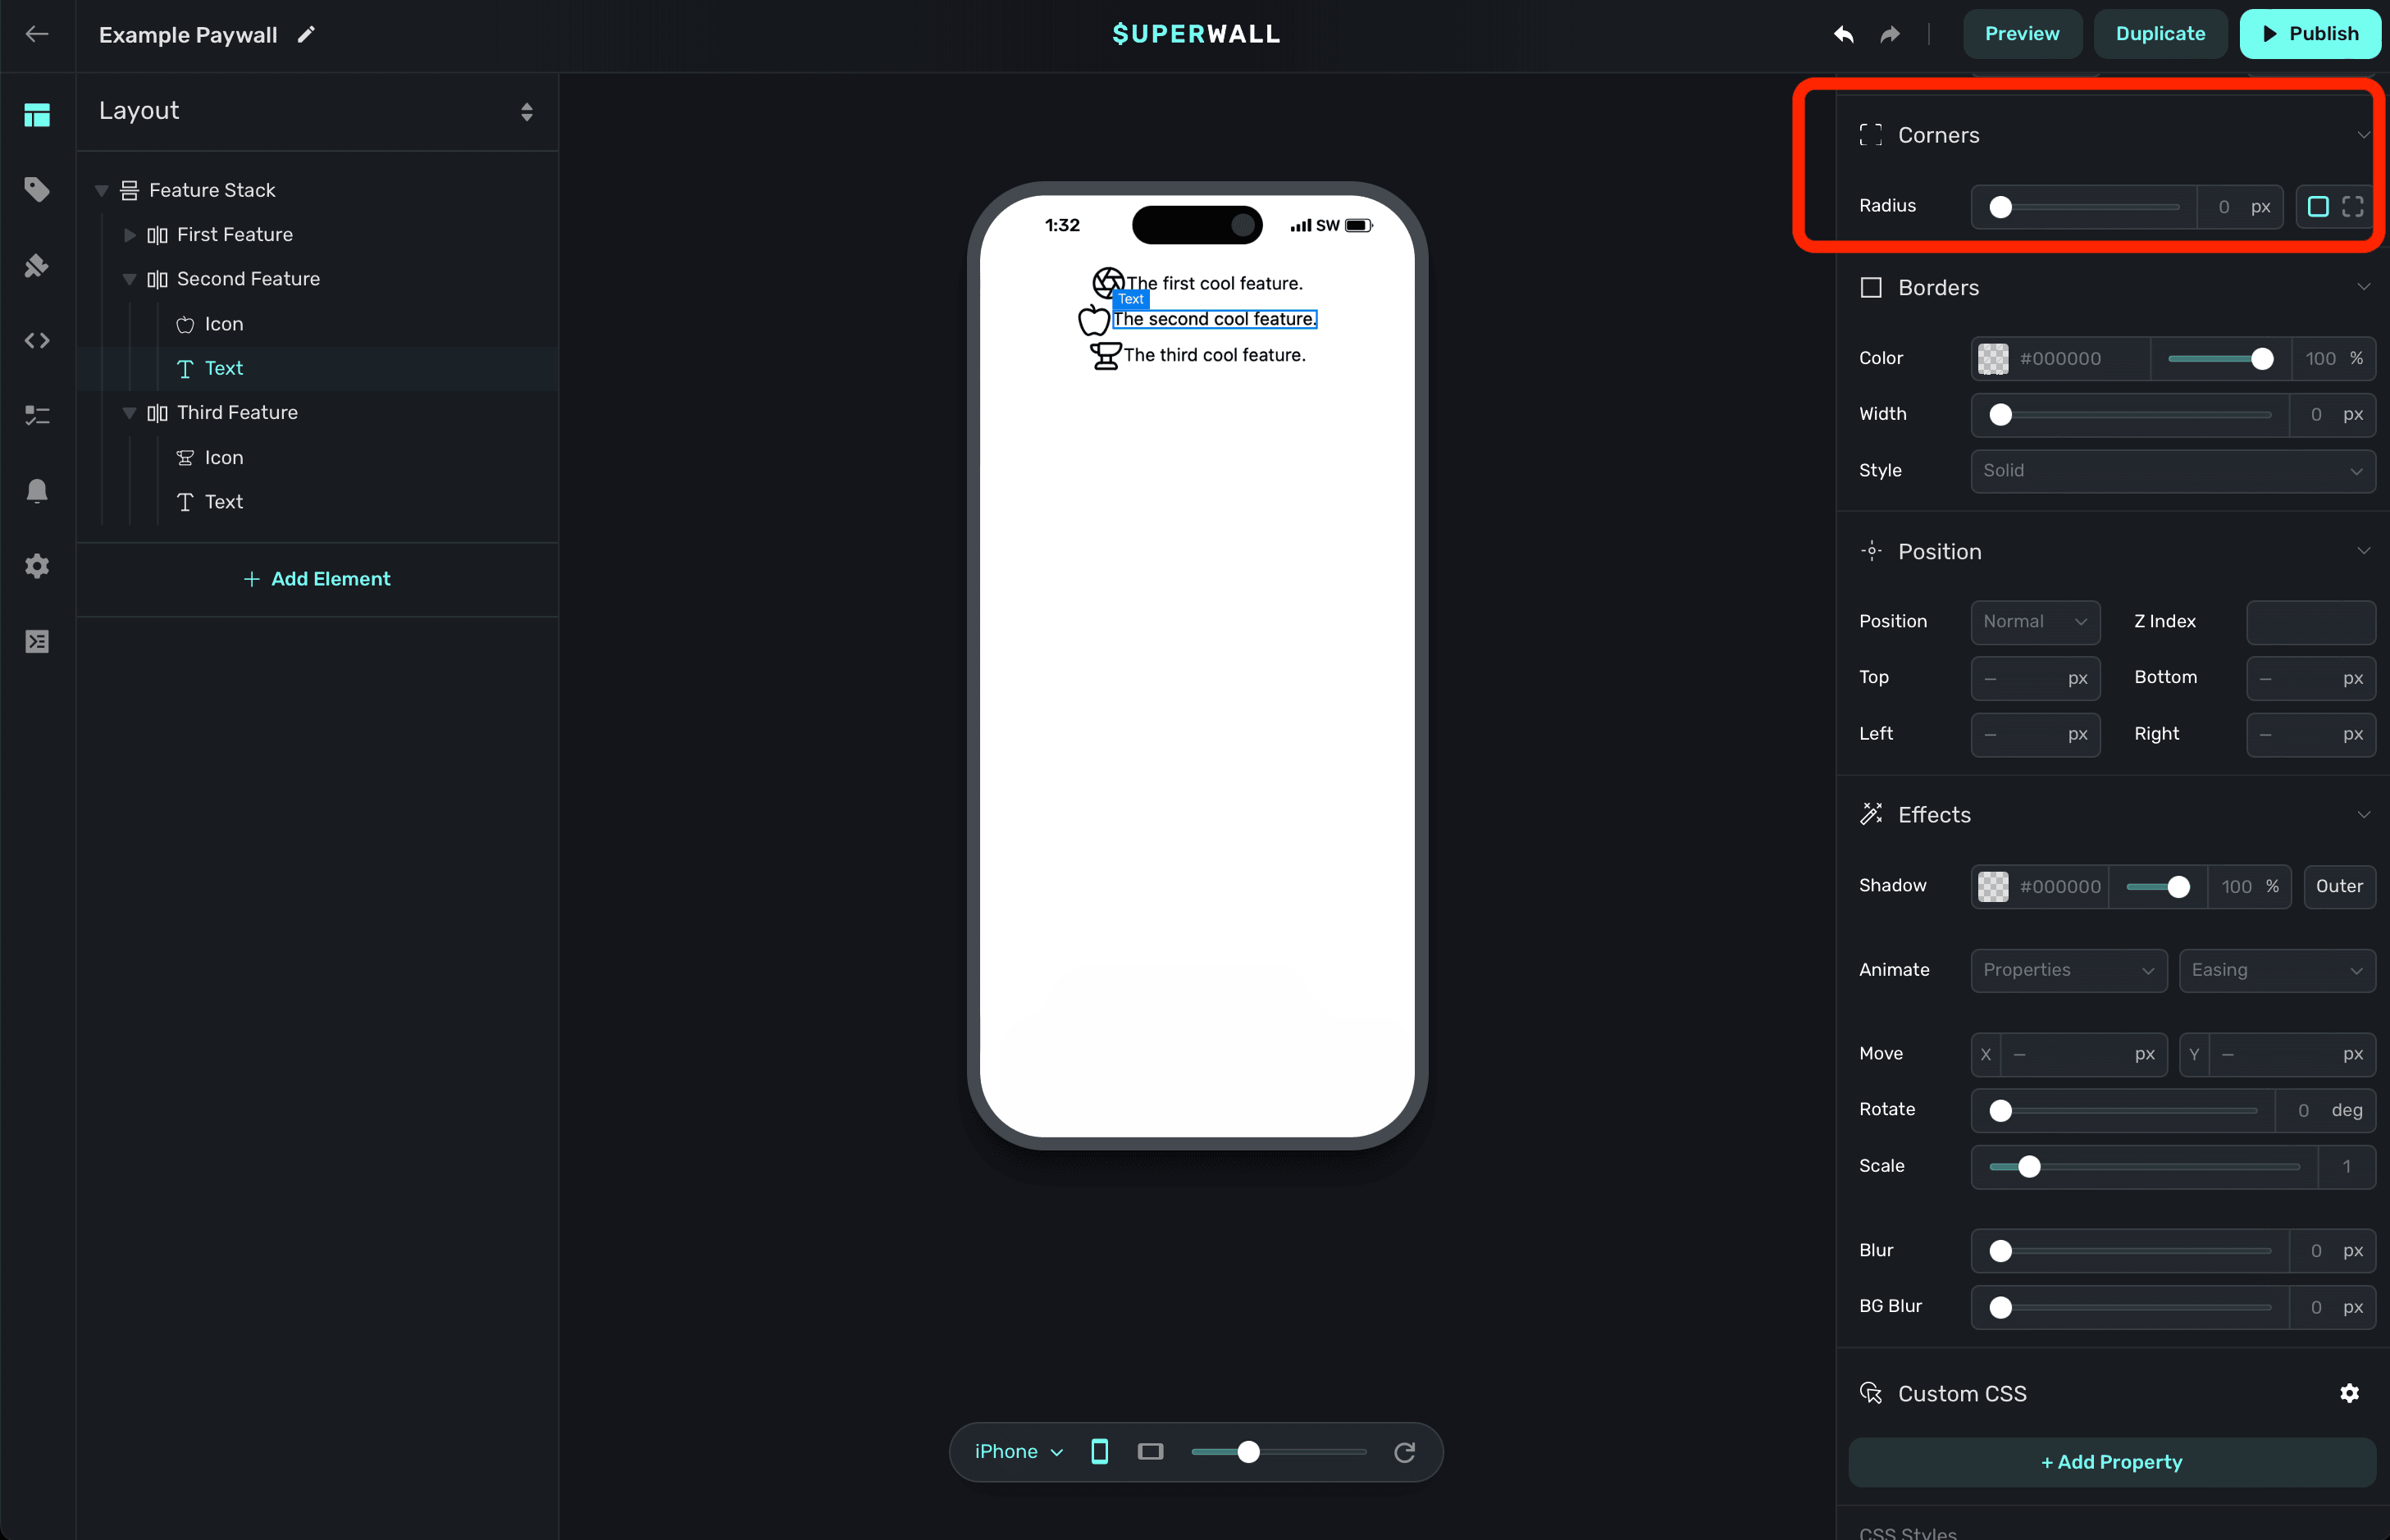
Note that you may not see any change unless the component has some sort of background or layer fill. Further, if you'd like to adjust just one or more corners, click the dashed square icon to individually enter values:
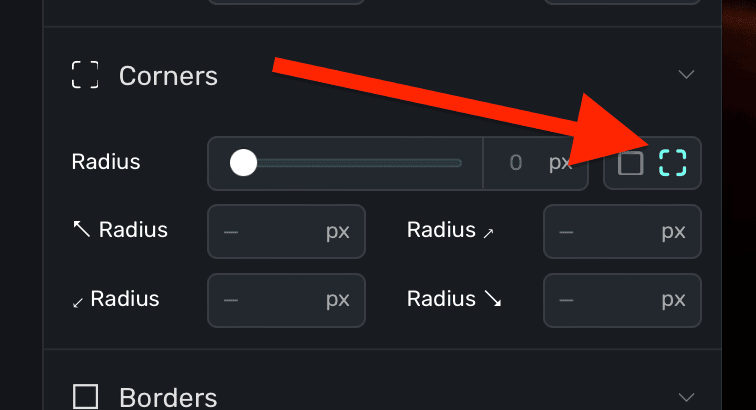
### Borders
Set a border around the the component:

You can set its width, style (i.e. dashed, solid, etc) and more.
### Position
Specifies the position strategy used to place the component:
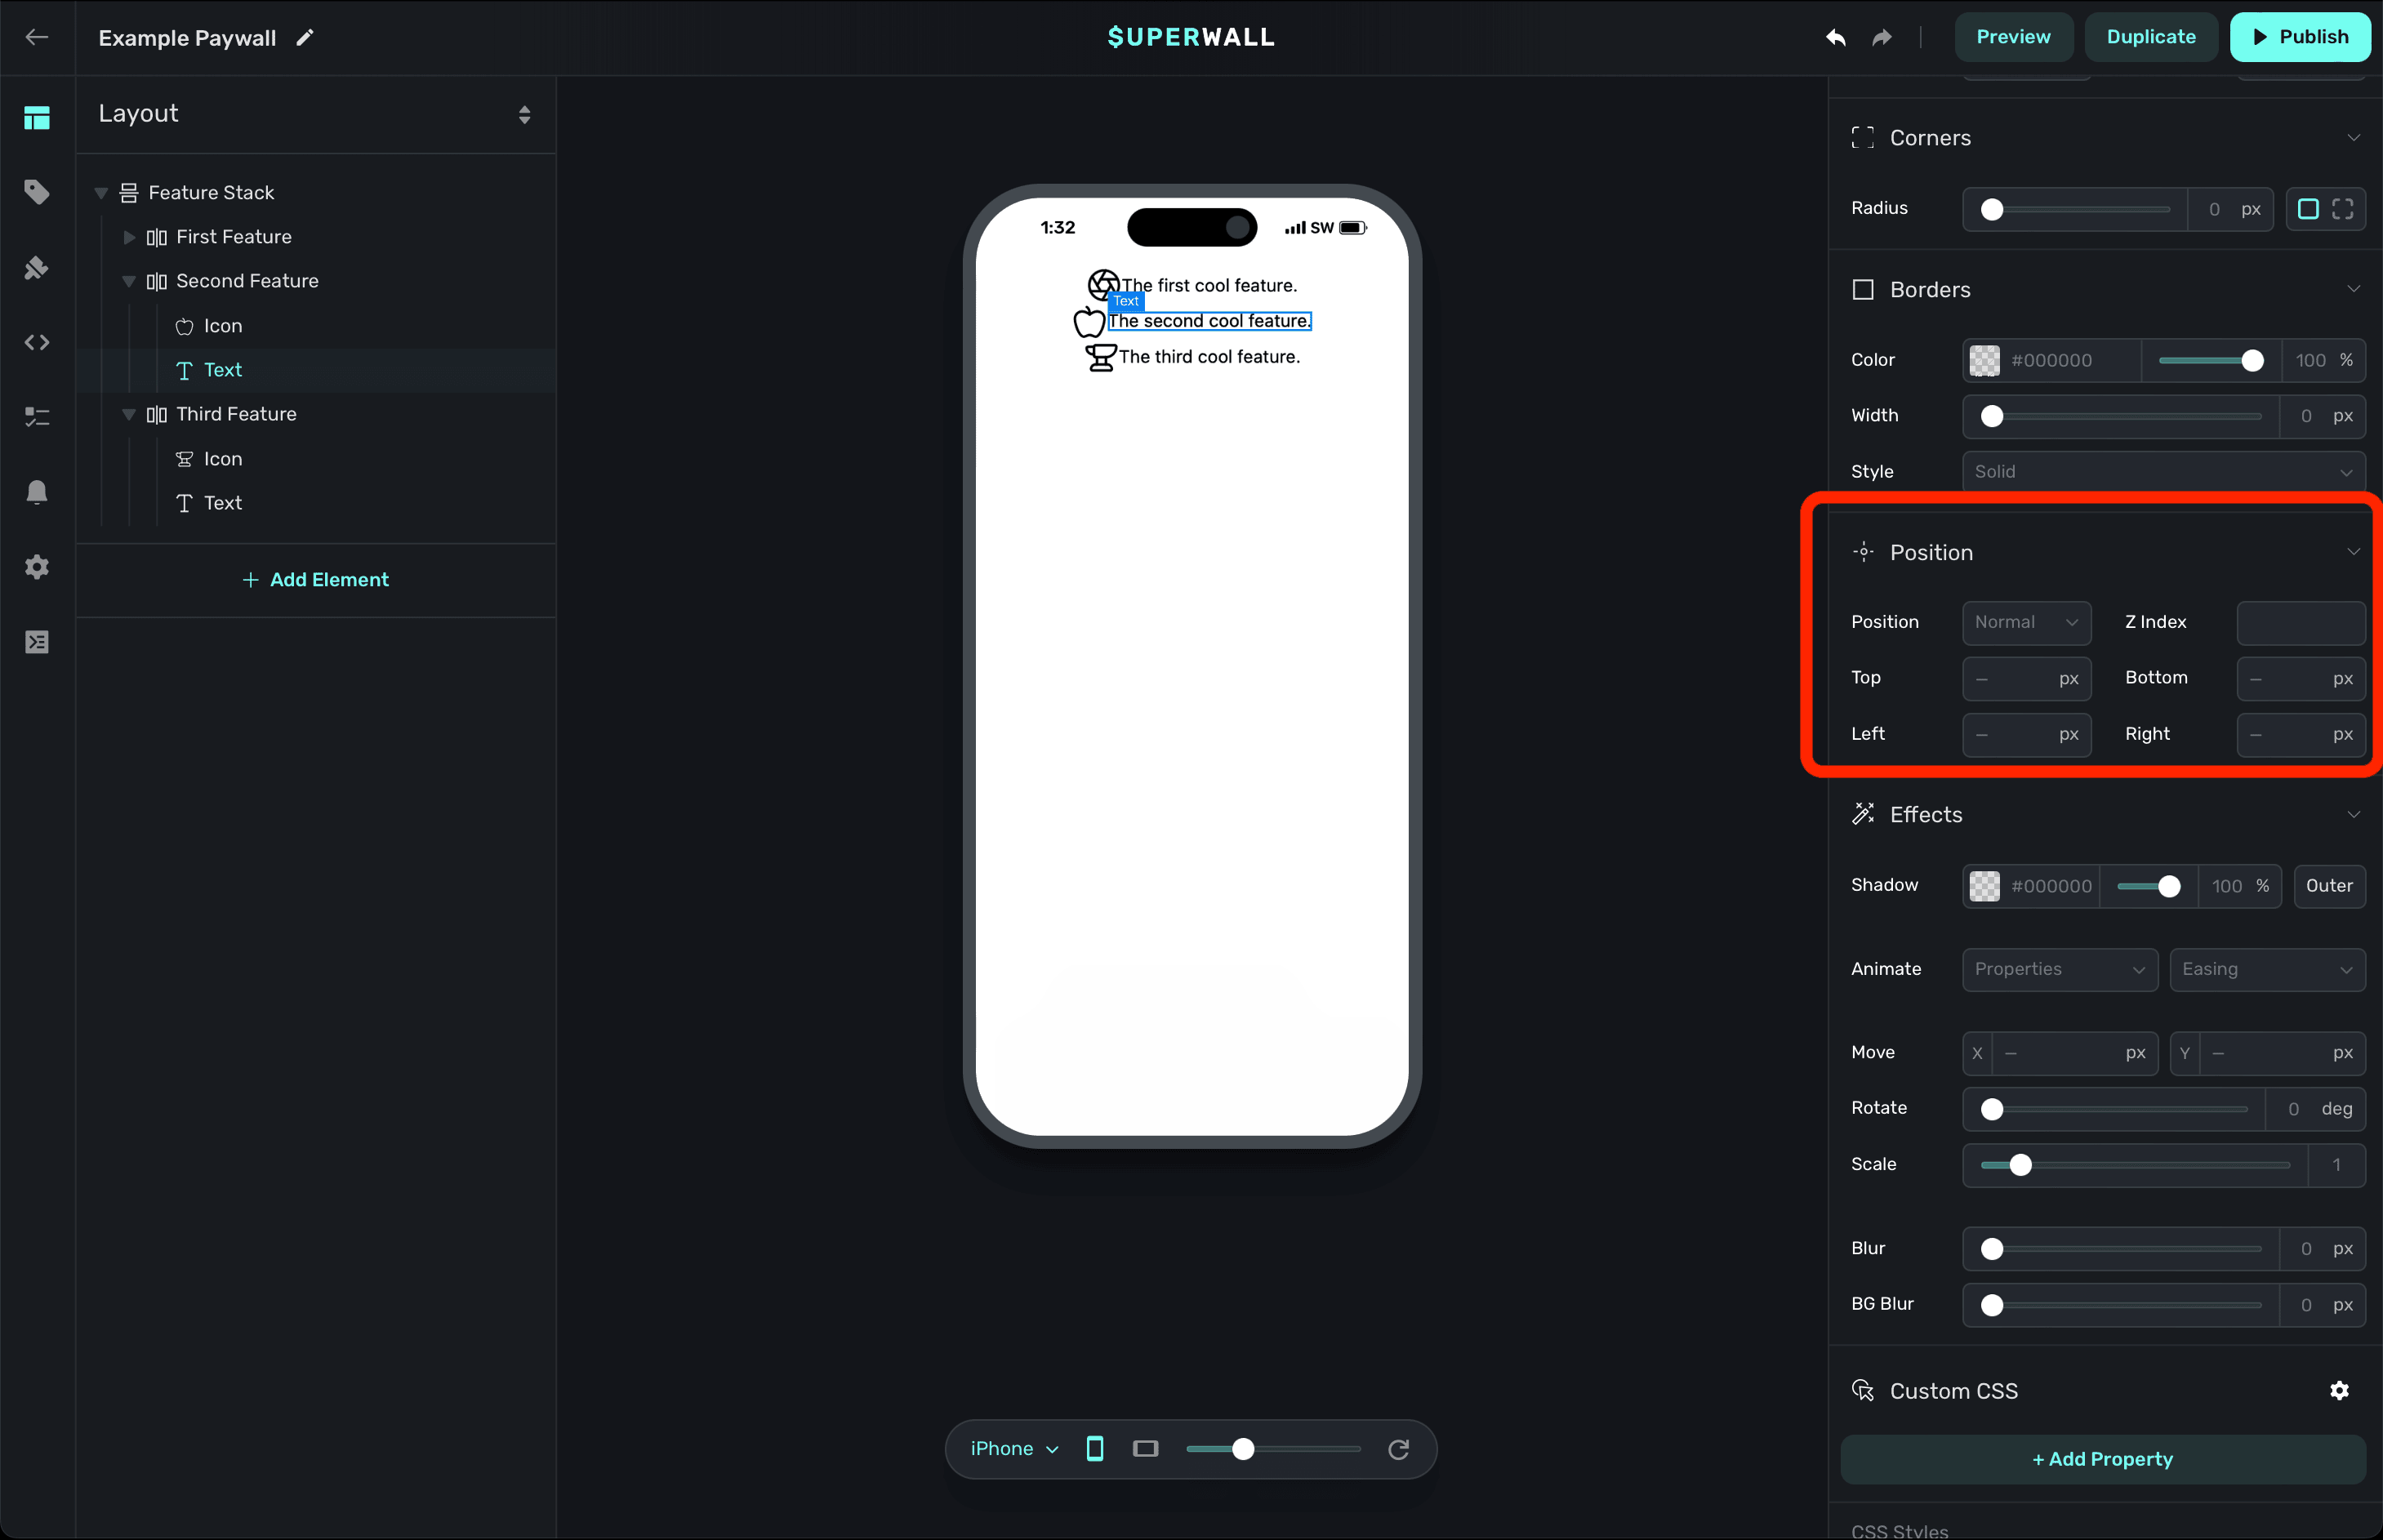
If you'd like to layer a component on top or below another component, the `Z Index` value is perfect here.
The most important value is what you use for `position`. Again, all of these options mirror their CSS counterpart. The available options are:
* **Normal:** The default option. The component will be positioned according to the normal flow of the paywall's hierarchy. This is analogous to `static` in CSS.
* **Relative:** Positions the component relative to its normal position, allowing you to move it with top, right, bottom, and left offsets *without* affecting the layout of surrounding components.
* **Absolute:** Removes the component from the normal paywall hierarchy flow and positions it relative to its nearest positioned component (which won't necessarily be a parent component).
* **Fixed:** Positions the component relative to the viewport, meaning it will stay in the same place even when the paywall is scrolled.
* **Sticky:** The component will behave as if it has a `normal` position *until* it teaches a certain point in the viewport. Then, it acts like it has a `fixed` position, sticking in place. This is great for sticky headers,footers or banners.
Mozilla has excellent developer docs over how the [position](https://developer.mozilla.org/en-US/docs/Web/CSS/position) CSS property works, along with interactive code samples. If you're having some issues getting things placed how you'd like, this is a great resource to check out.
### Effects
Applies CSS effects to the component:

If you're new to CSS transitions and animations, check out this interactive [reference](https://www.w3schools.com/css/css3_transitions.asp).
### Custom CSS
If you need to add some one-off custom CSS code, you can add them here. Just click **+ Add Property**:
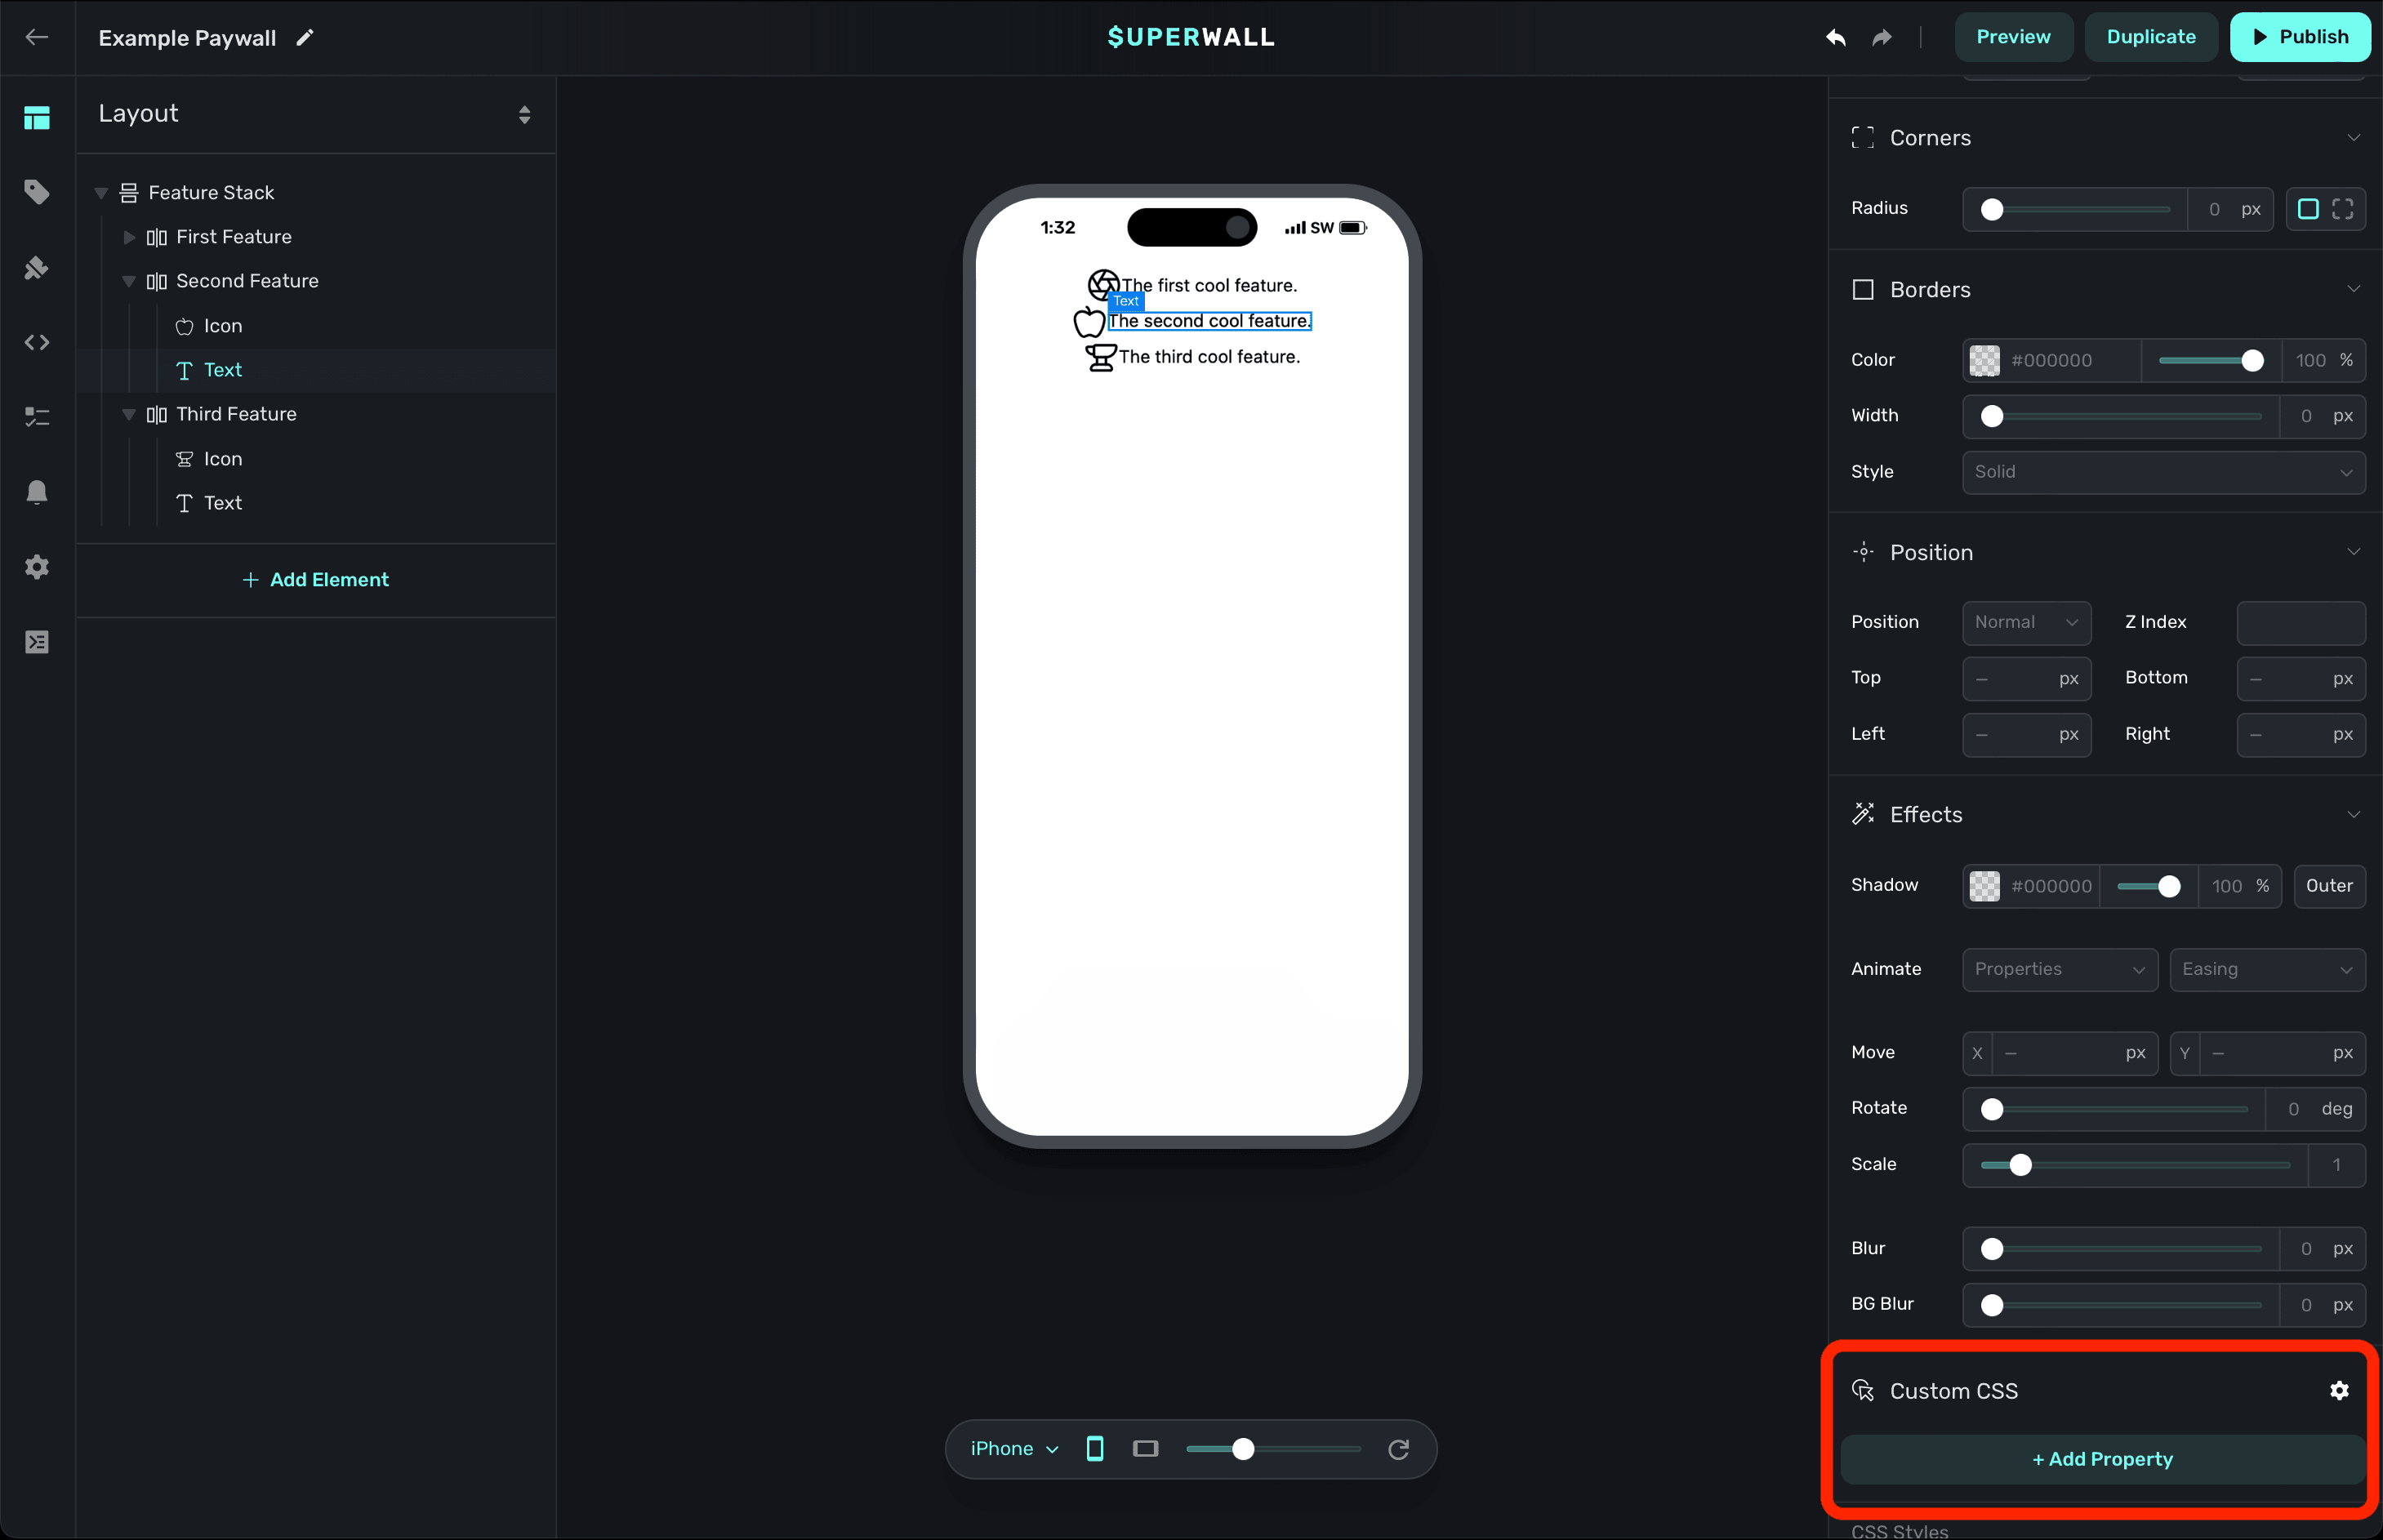
From there, type in the CSS property you need and select it from our dropdown menu:
Here, you can see a manually set background value for the selected component:
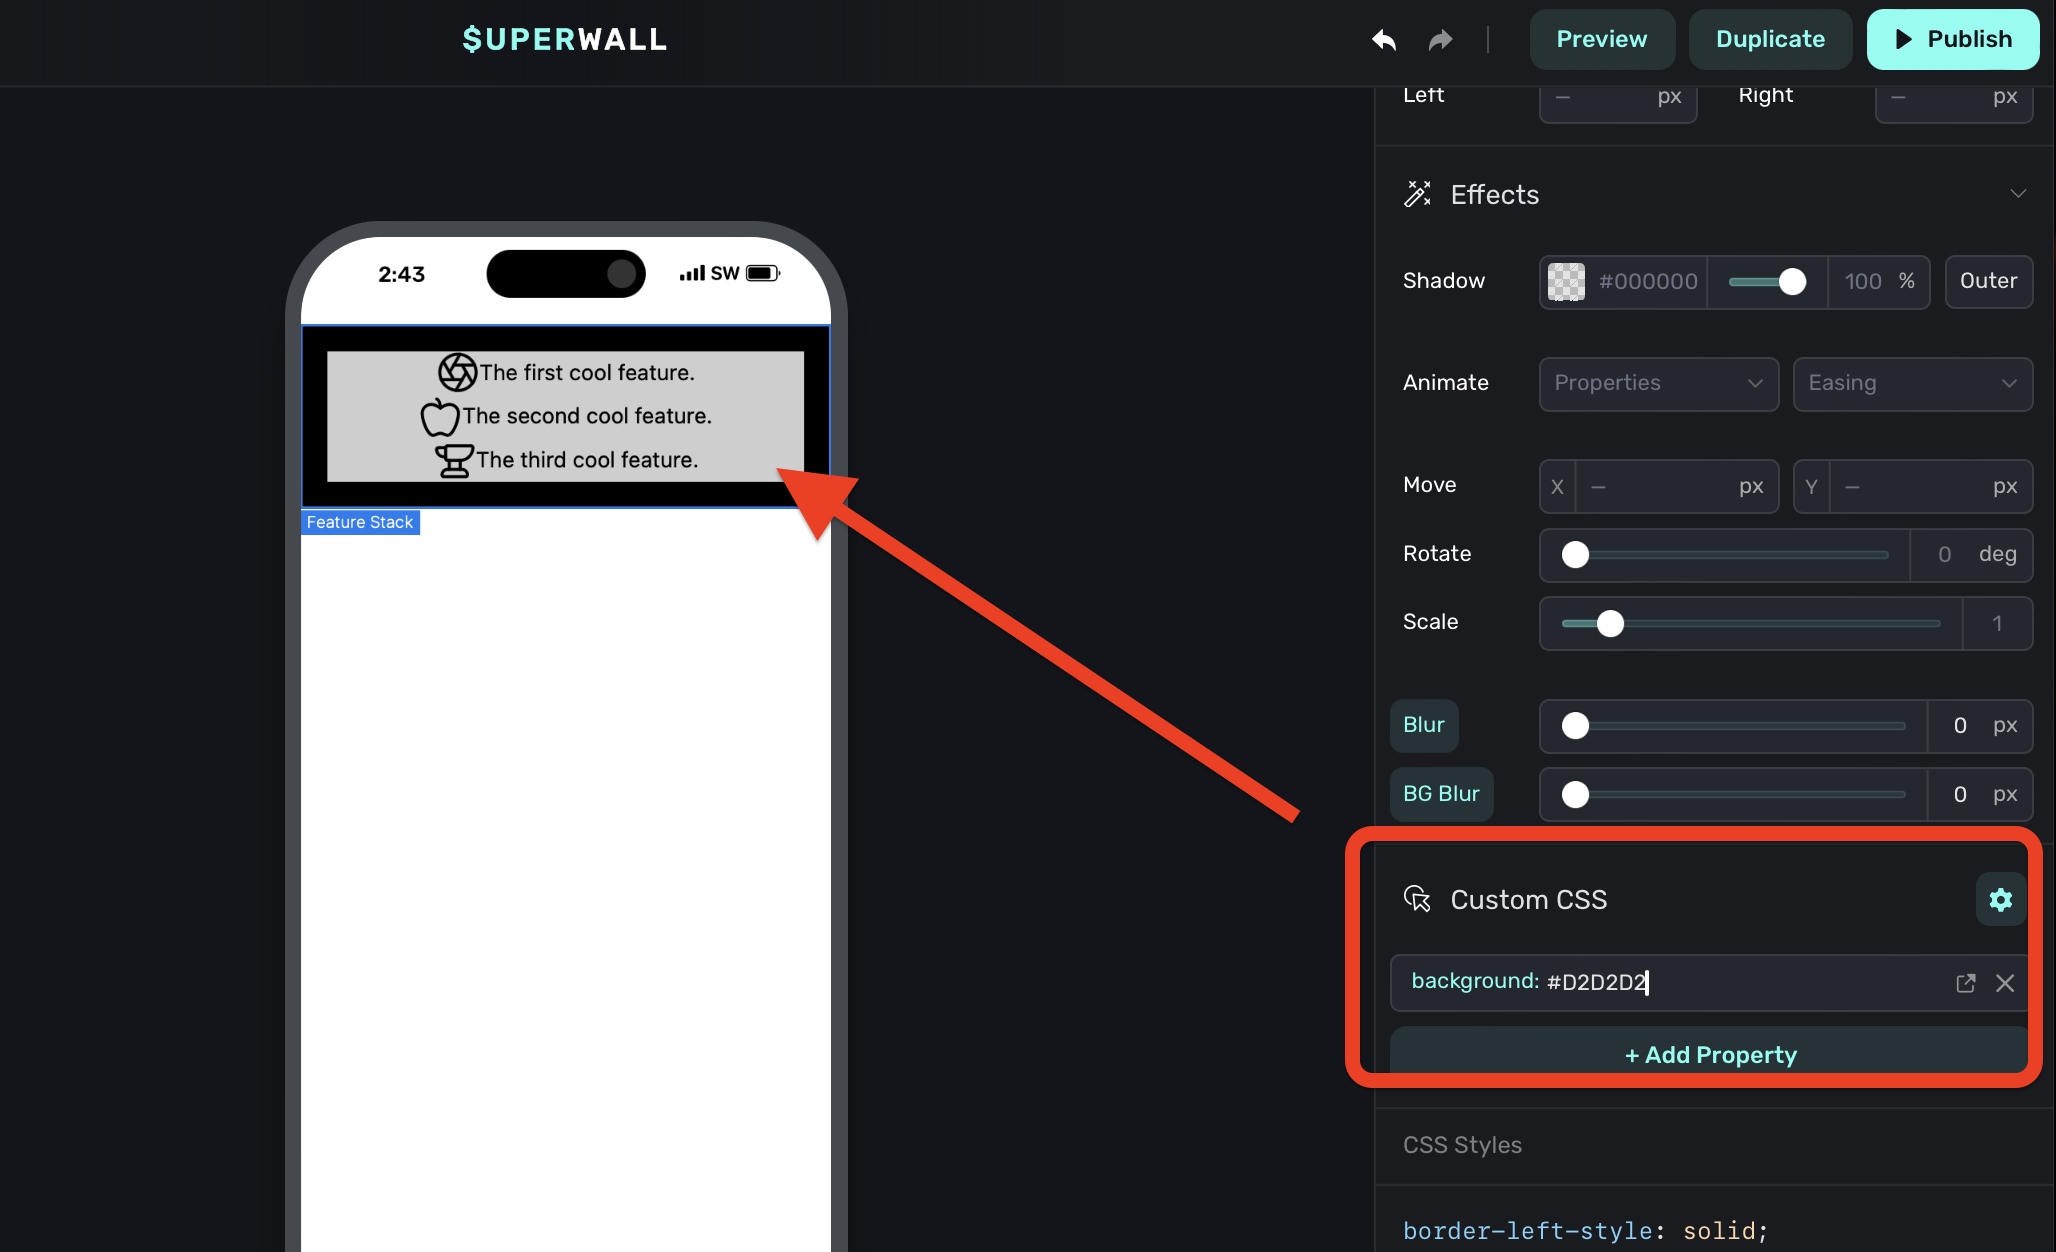
Using the Custom CSS section should be your last step, and only if you absolutely cannot achieve
the design you need. For example, here we should simply use the `layer` section to set a
background color.
### CSS Output
As you make any changes to these properties, you can see the actual CSS that Superwall is applying by scrolling down in the component editor to the **CSS Output** section:
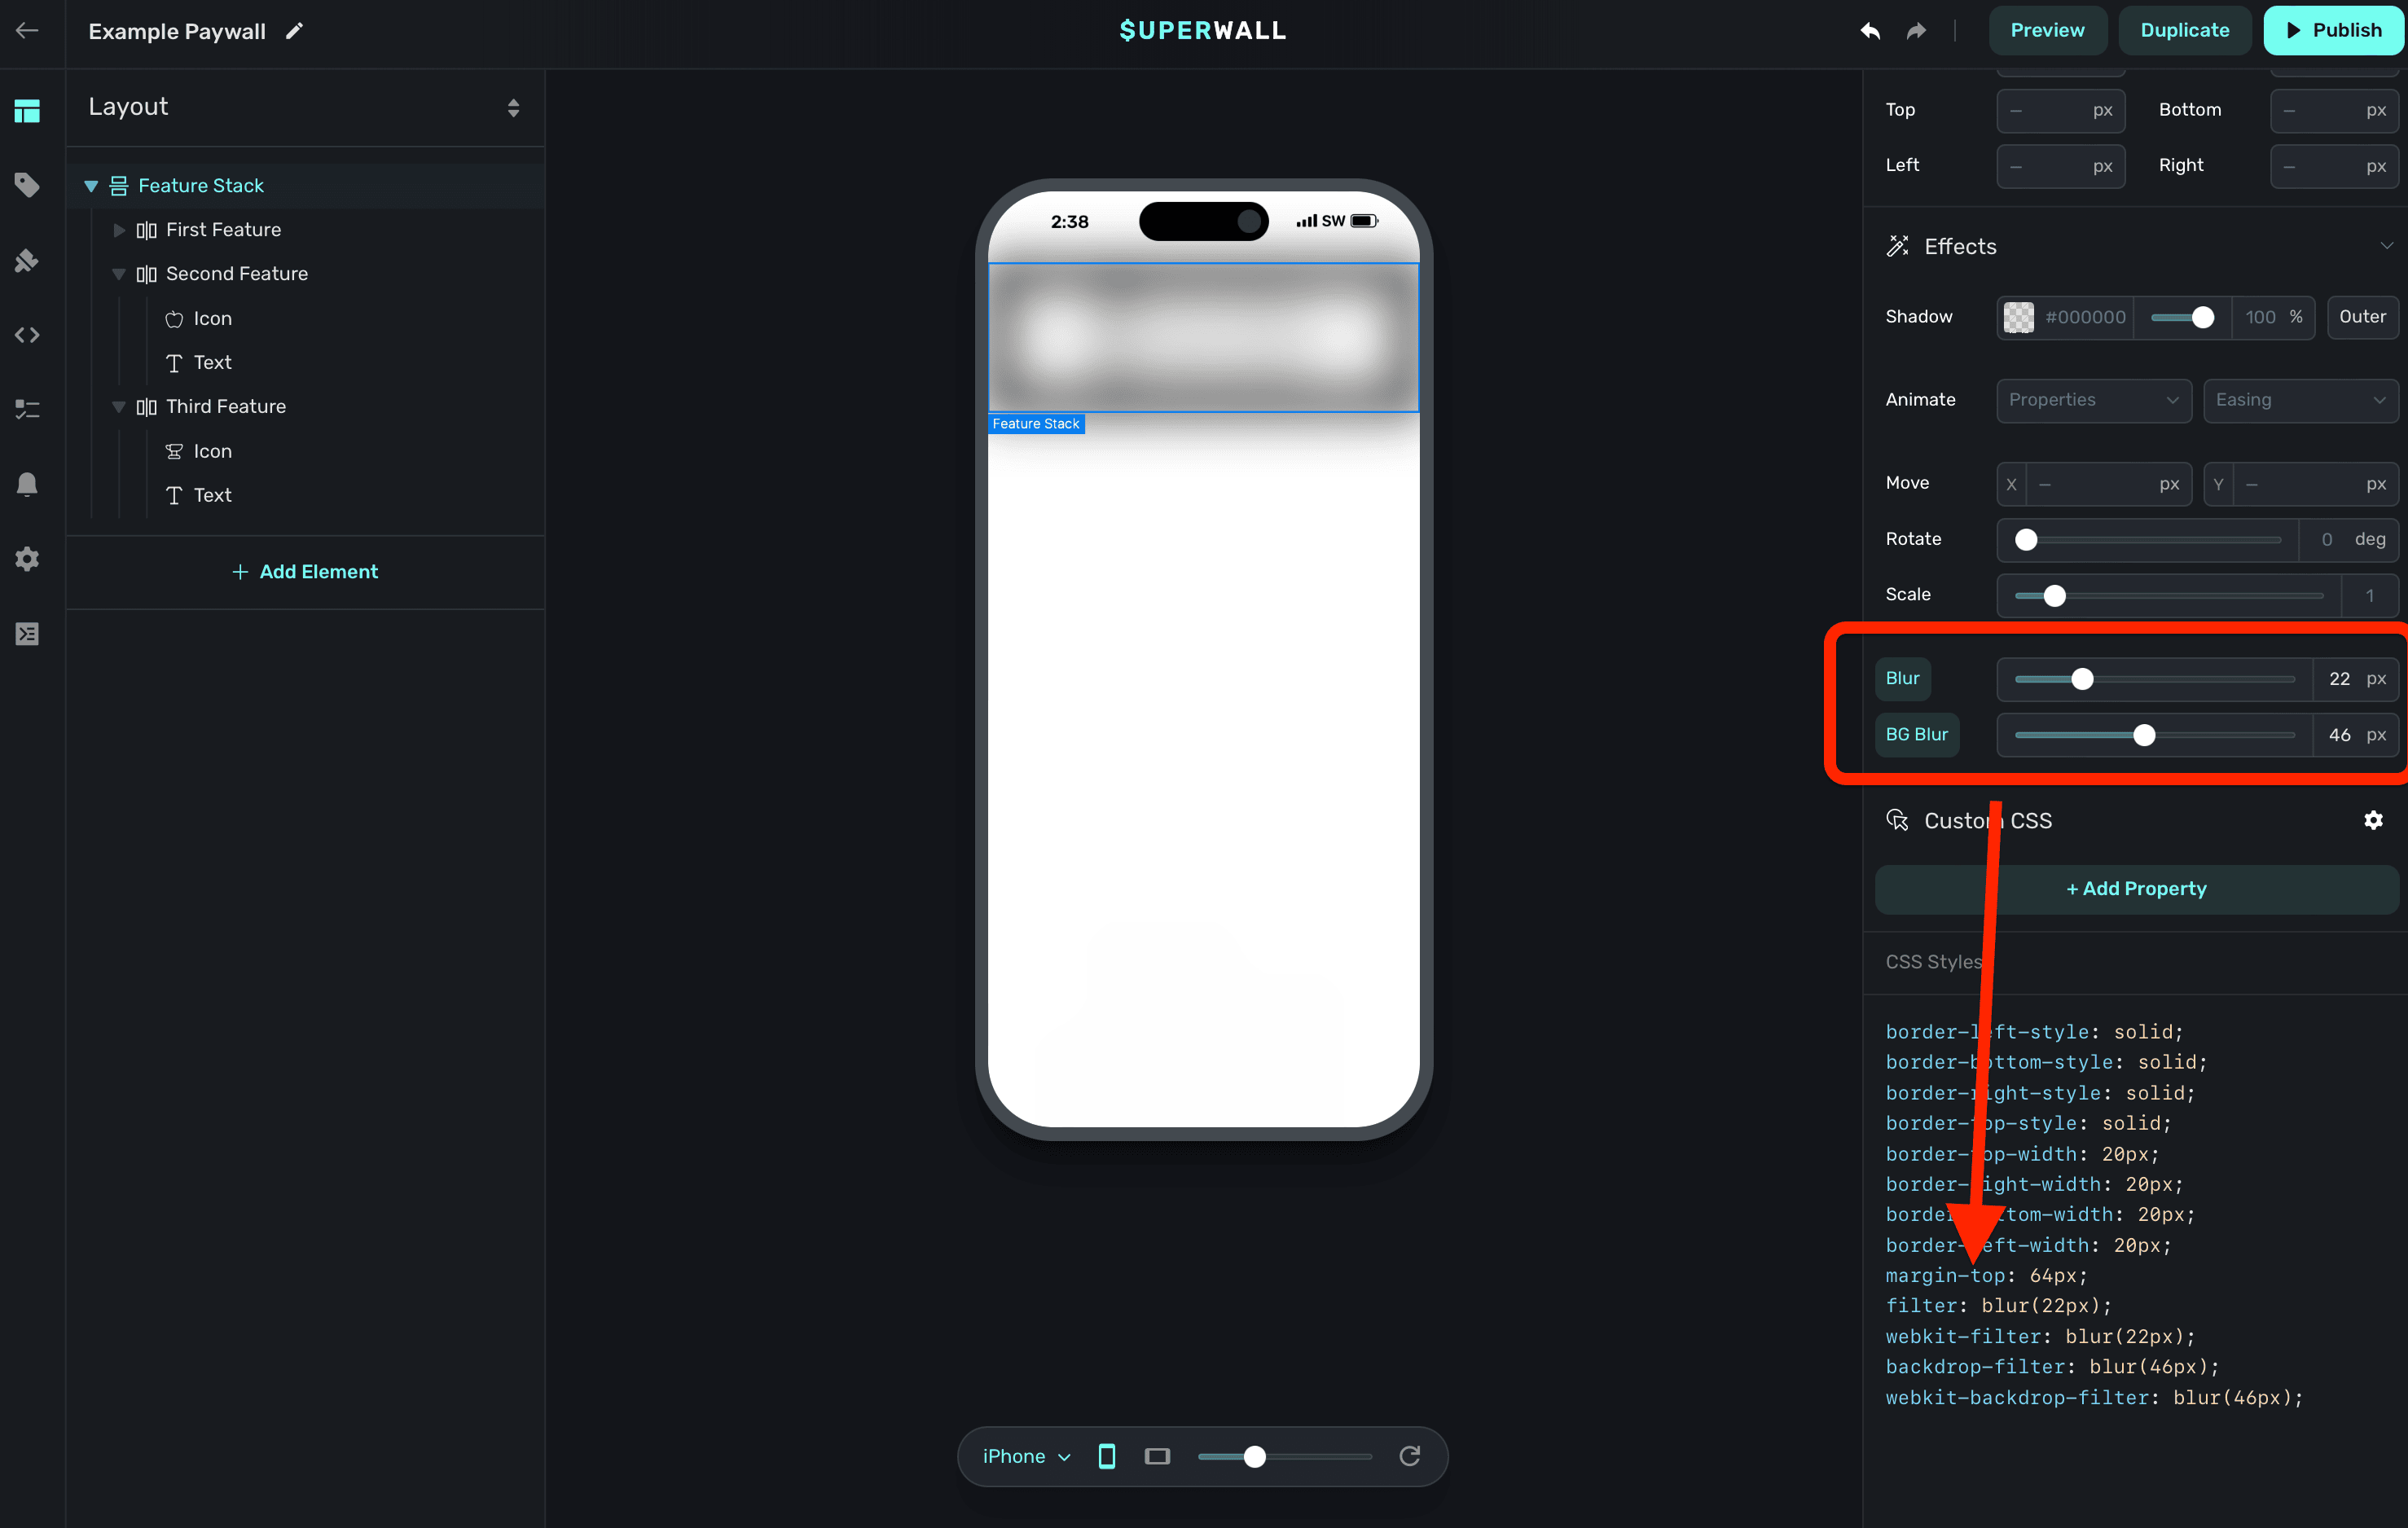
This can be useful for debugging or further refining your designs.
# Surveys
Source: https://superwall.com/docs/paywall-editor-surveys
To set up a survey to show users when they close a paywall or perform a purchase, click the **Surveys** button from the **sidebar**:
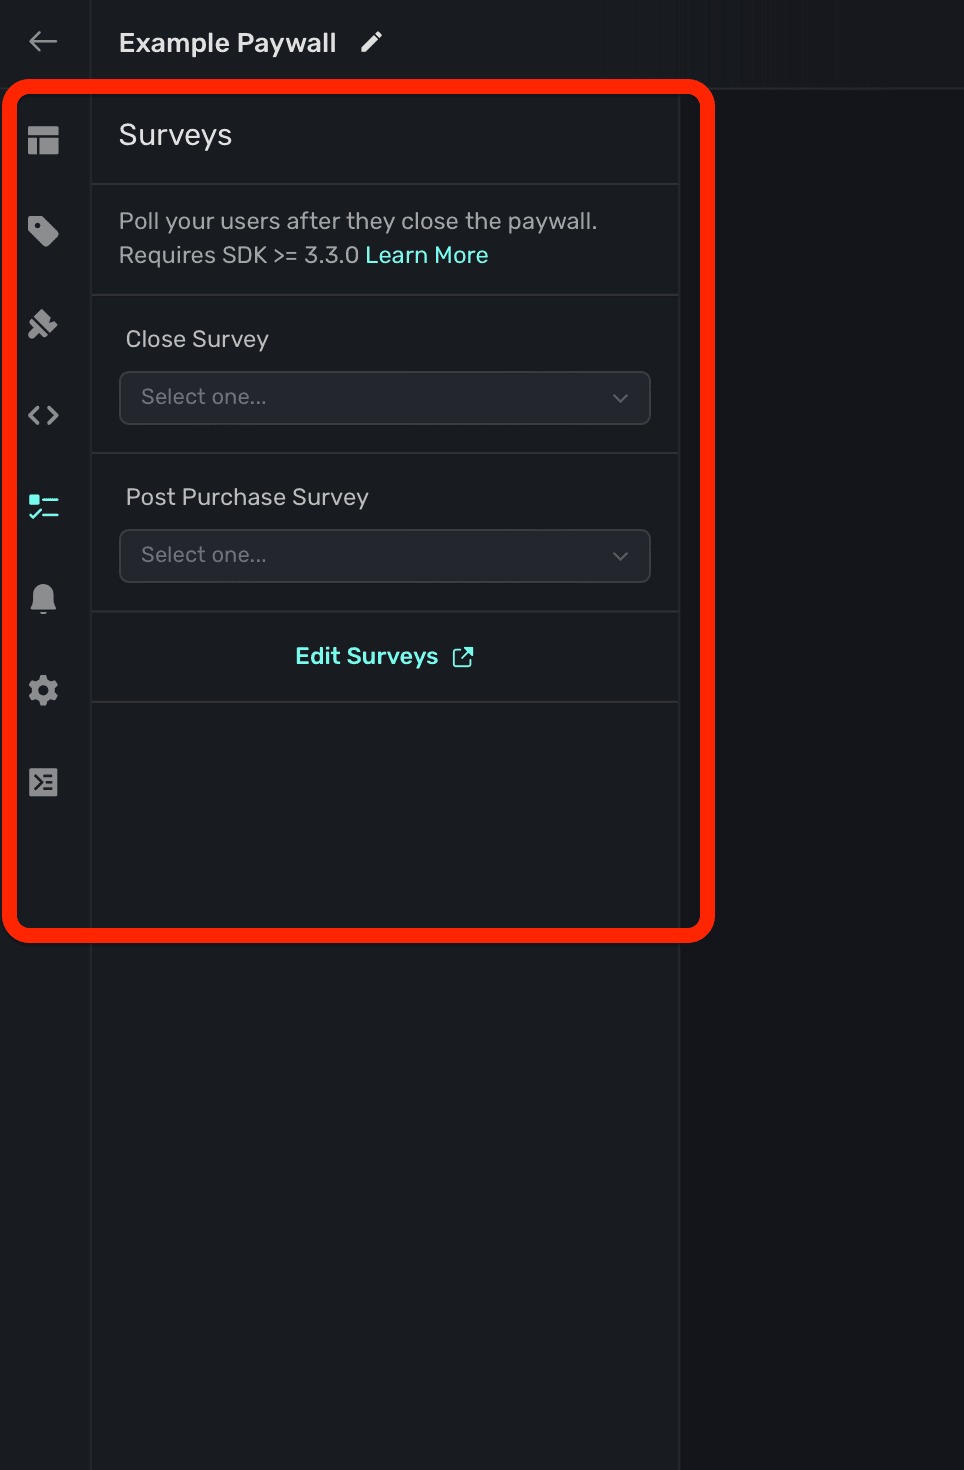
Every survey you've created for your app will be selectable in this section. Superwall's surveys display natively on the platform it's presented on. For example, on iOS, it will present as an action sheet.
### Close Survey
Select a **close survey** to present when a user closes a paywall and *does not* purchase a product or start a trial:
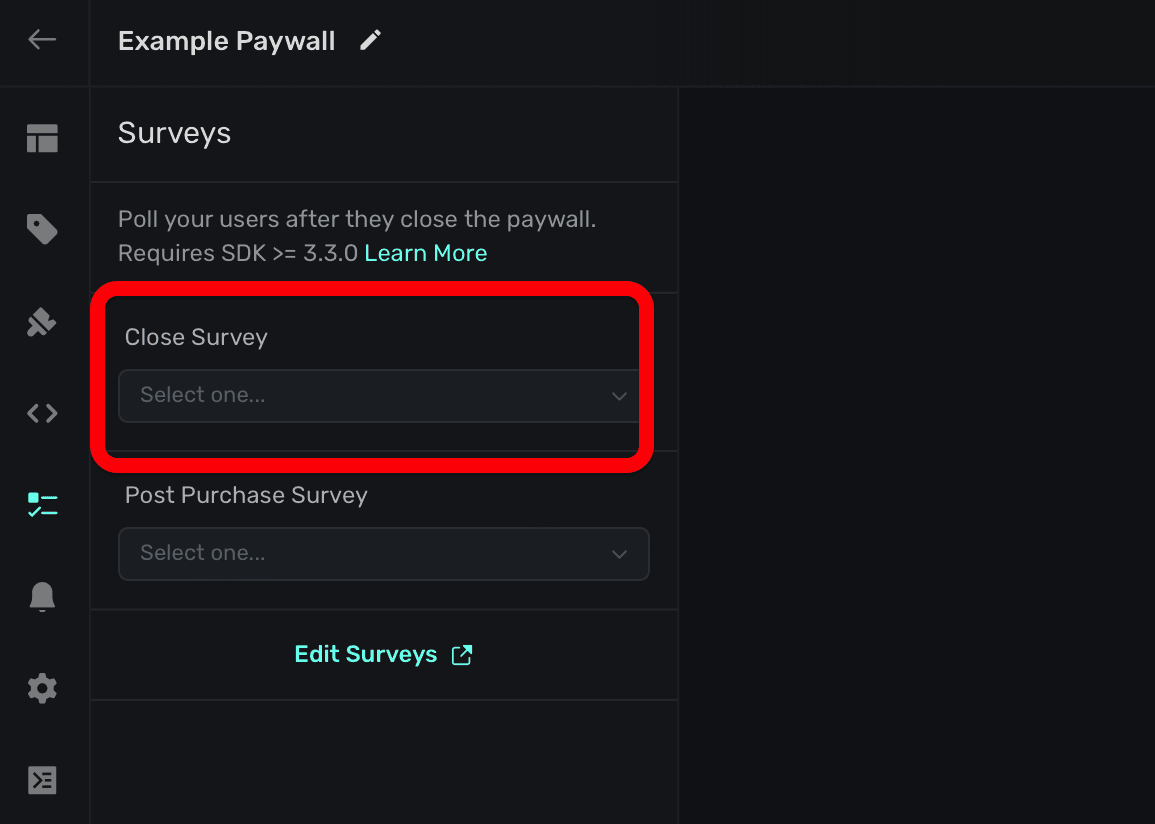
Ideally, you'd use these to discover why users aren't willing to pay or become a trialist. By default, Superwall's survey template is a good place to start.
### Post Purchase Survey
Select a **post purchase survey** to present after the user starts a trial or performs a purchase:
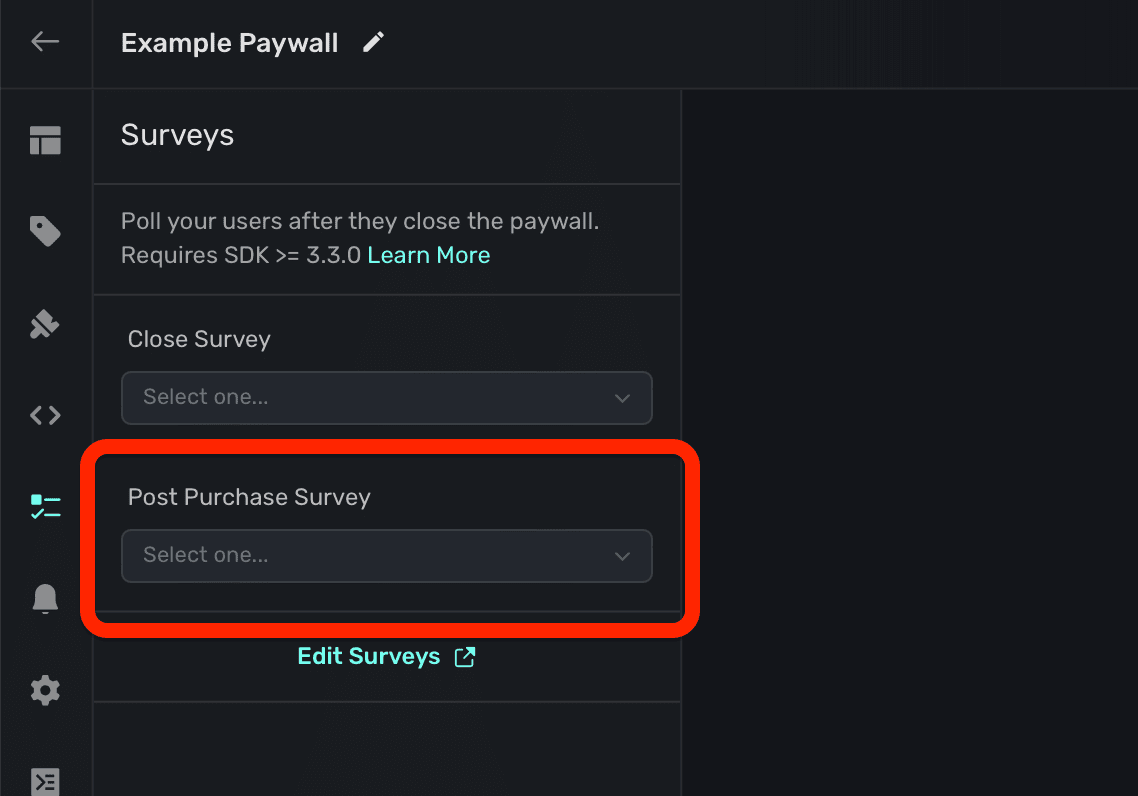
These are useful to hone in on what's working, or gain insights about the types of users who are paying.
### Creating or editing surveys
You can open the survey editor from the survey section by clicking **Editing Surveys**:
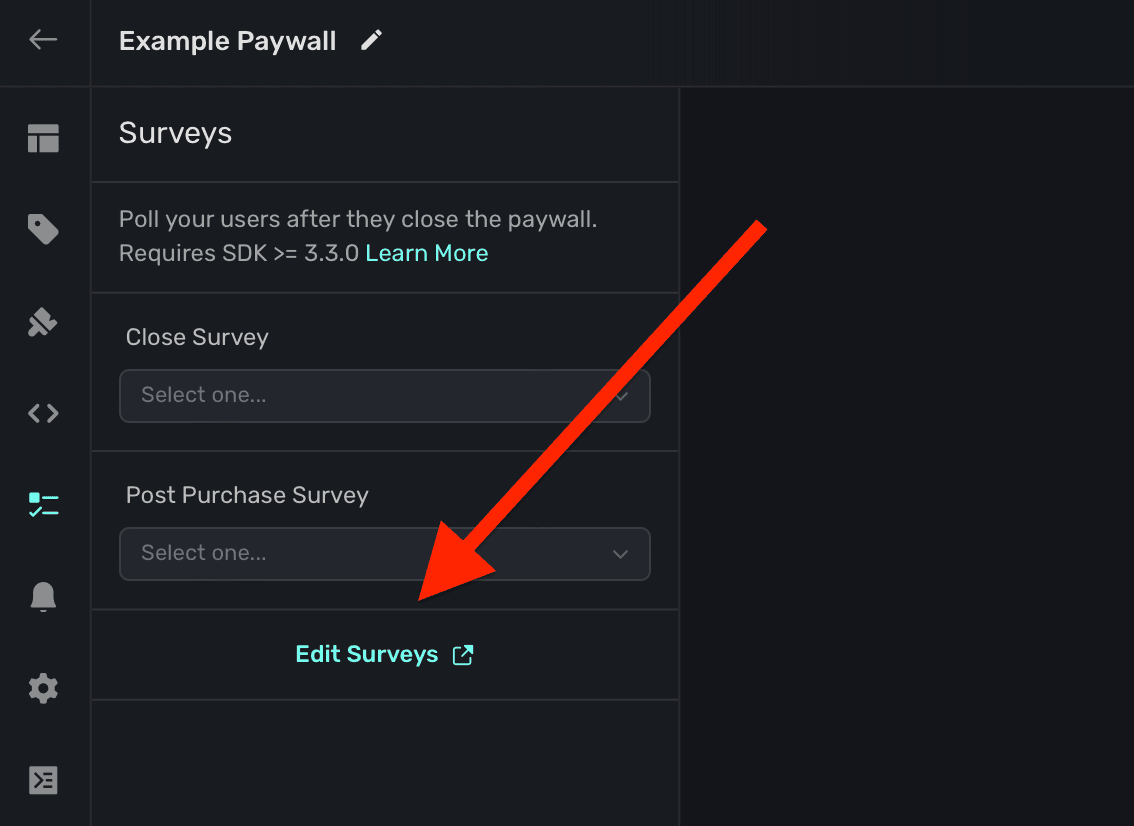
To learn more about creating a survey, view the [docs here](/surveys).
# Theme
Source: https://superwall.com/docs/paywall-editor-theme
To configure a paywall's theme, click the **Theme** button in the **sidebar**:
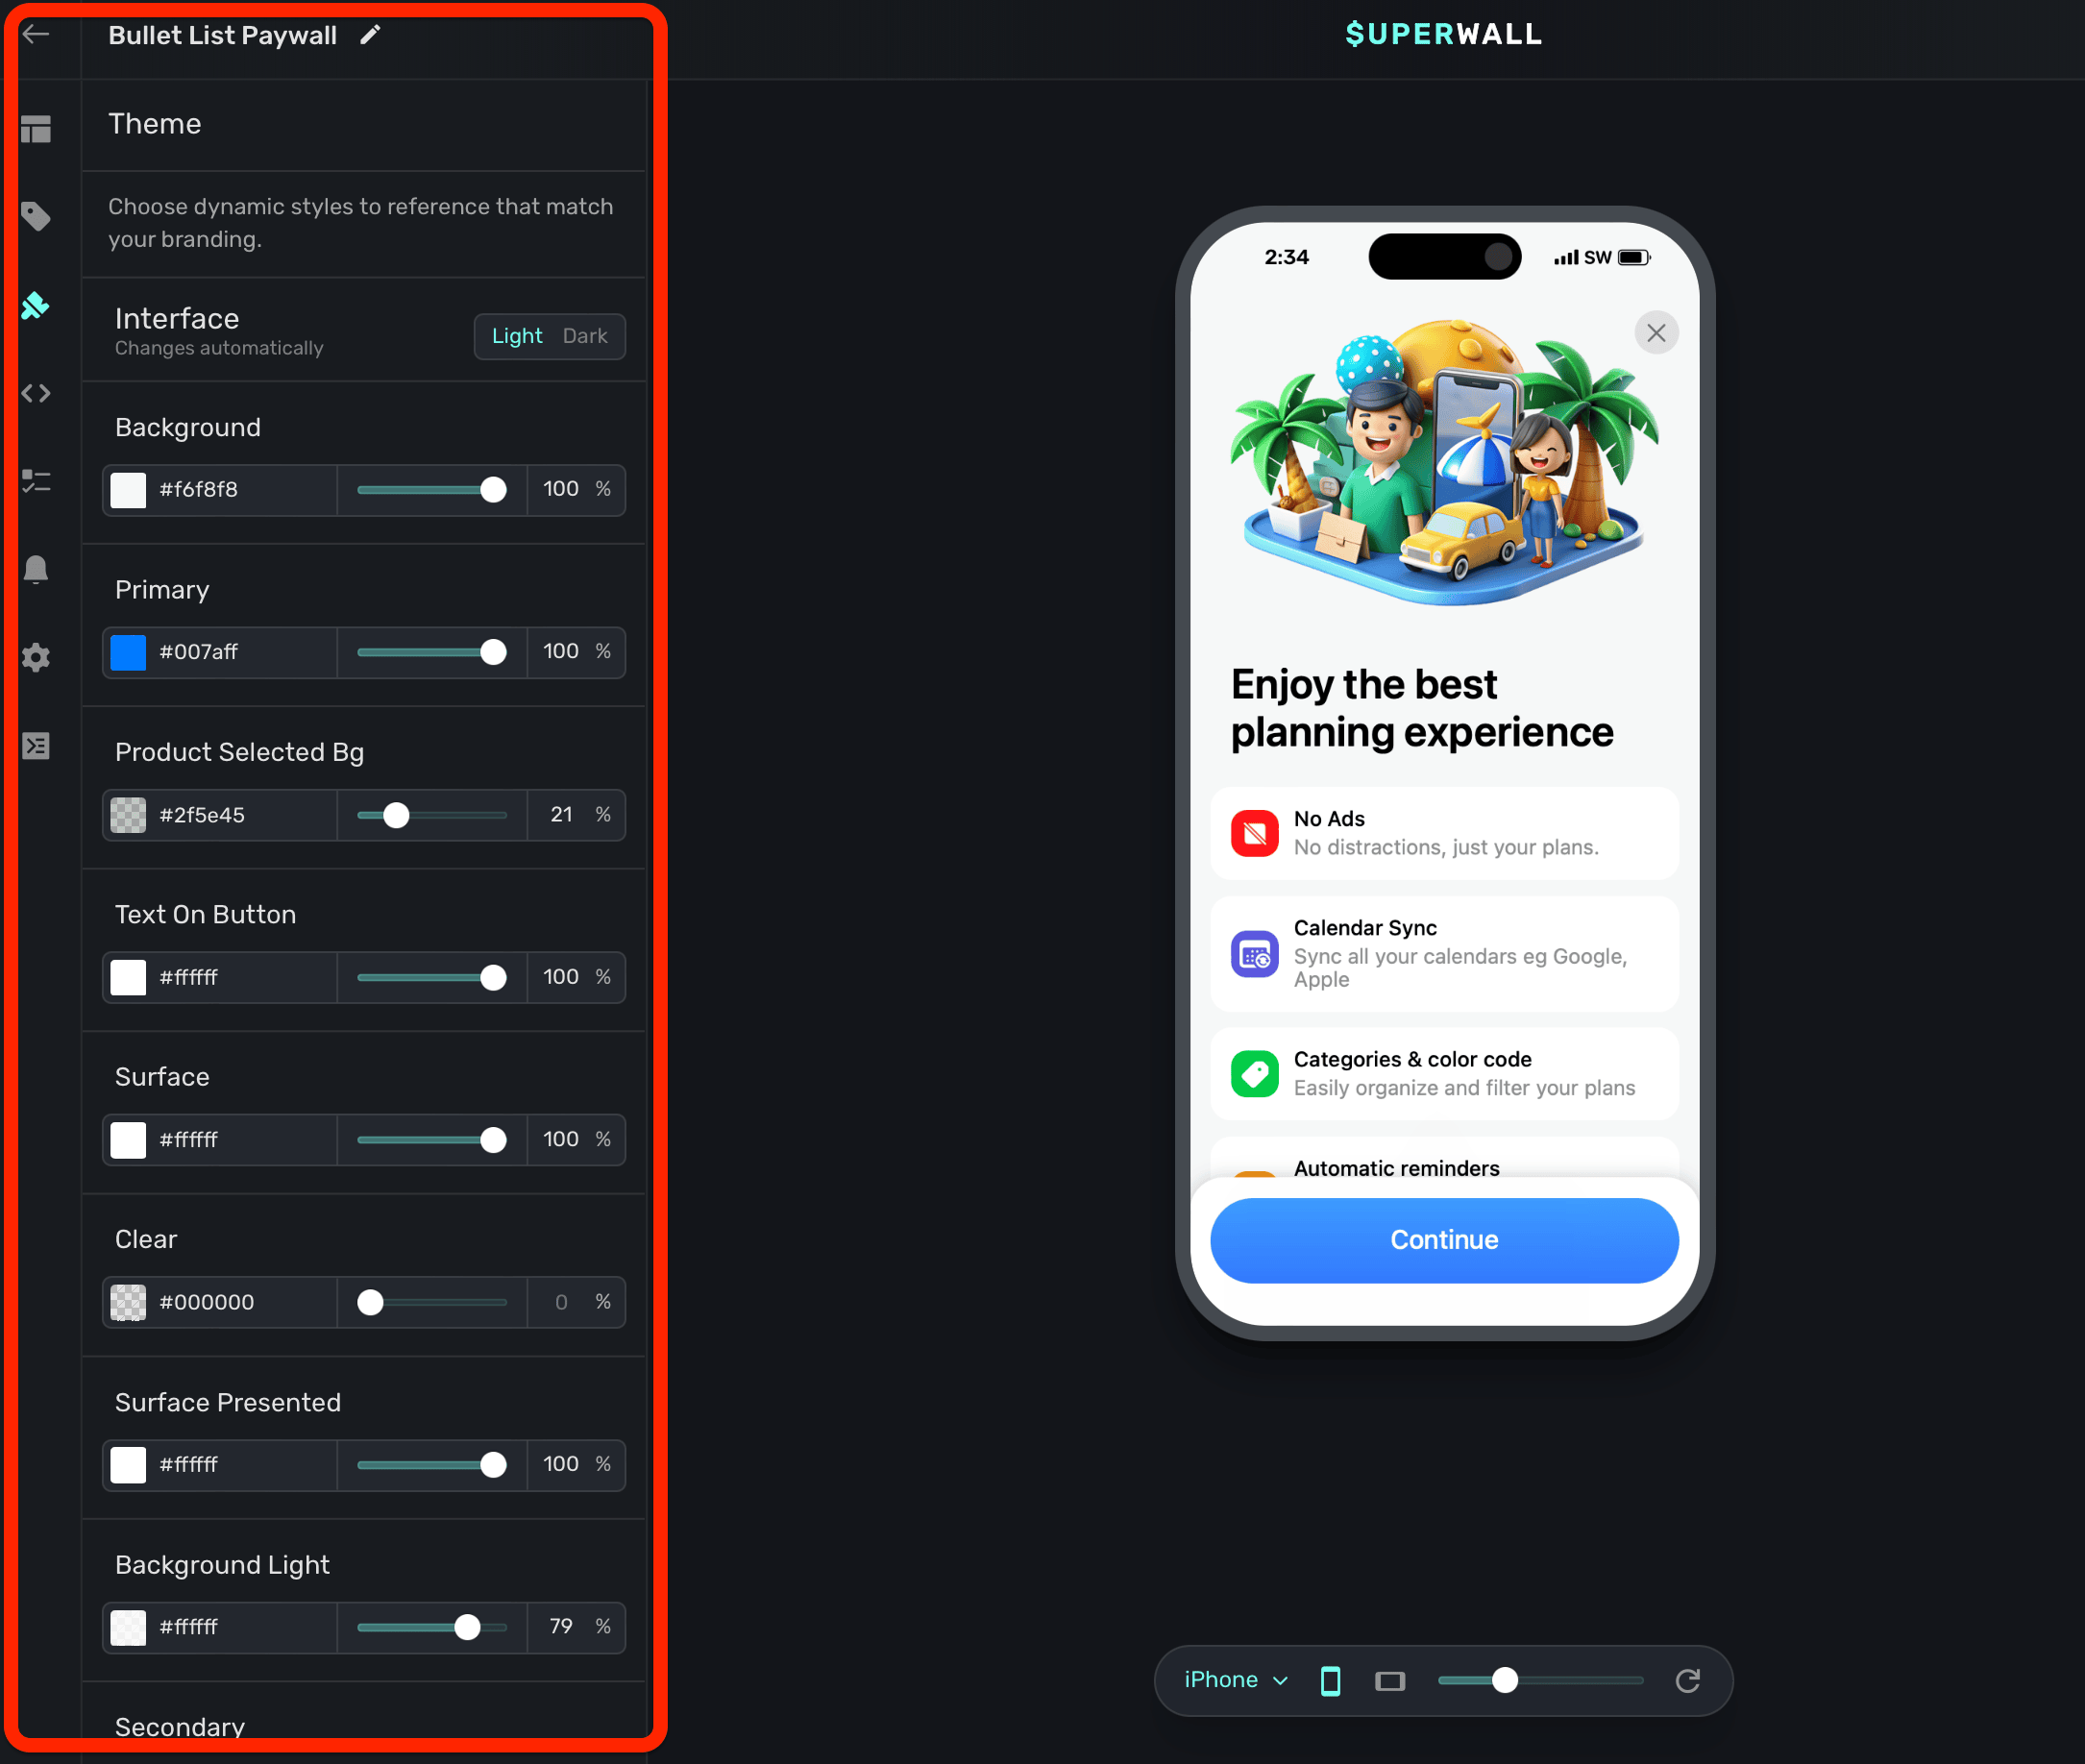
The theme options let you control the overall styling of your paywall. For example, you can change the background color, your primary color, and more. In addition, you can add your own variables to a theme to reference throughout your paywall's components.
A great place to start is to set the `primary` color to your brand's prominent color.
For example, notice how the entire background of the paywall changes when the `background` theme is changed from black to white:
Remember, these are *variables*, so while some of them like `background` immediately reflect their changes, most of them will be referenced by you within a component. For example, if you wanted to reference the default **padding** variable under the "Device size" section, you would:
1. Select a component.
2. Hover over the padding value you want to change (i.e. horizontal, vertical, individual values, etc.)
3. Hold the `option` or `alt` key and click **Edit**.
4. Select **padding** to apply it.
Here's what that example would look like:
Notice how the "padding" button now displays as purple, indicating it's referencing a variable.
There are three main theme groups for variables:
* **Interface:** These variables change automatically depending on the interface style of the device.
* **Device size:** These variables change automatically depending on the device size.
* **Theme:** Variables added here are static, and by default there is variable for a font choice.
### Interface
Use the **Interface** toggle to have your theme values be reflected in either light or dark mode. Any values you set will only apply when the device's interface theme matches the selected choice (i.e. light or dark).
**By default, Superwall has all of your theme apply to both light and dark mode.** But, if you click the **+** icon you can add dark mode specific values, too:
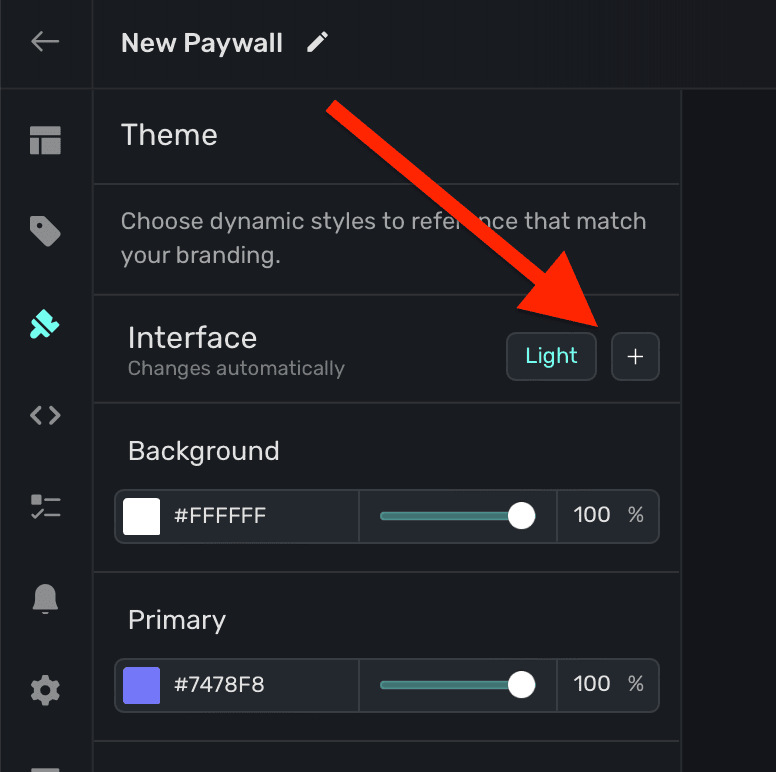
Superwall will copy all of your theme values over to the dark interface style, and from there you can customize them specifically for dark mode.
Superwall provides three interface theme variables out of the box:
* **Background:** The fill color of the paywall's background.
* **Primary:** The fill color of core component layers, like a button.
* **Text:** The text color.
However, you are free to add as many different theme variables as you need. Read below under "Creating theme variables" for more.
### Device Size
You can tailor variables to react to a device size. There are a total three different device sizes:
* **Small:** Typical iPhone device size in portrait.
* **Medium:** Typical iPhone device size in landscape, or a tablet in portrait or landscape.
* **Large:** Devices such as a desktop or laptop.
You can see the device preview change size as you toggle through the sizes:
By default, Superwall uses the **small** device size. Simply click the **+** button to add more. By default, Superwall provides a padding device size variable:
* **Padding:** A default padding of 16 pixels you can apply to components by referencing this variable.
### Theme static values
Variables you add here are static, meaning they don't react to device parameters and update their values. This is useful for thing you likely want to stay the same, regardless if light or dark mode is on, no matter the size of the device, etc.
Superwall provides a **font** static variable. Use it to set a default font to use for any text component.
### Custom fonts
Using the default **font** variable, you can also add a custom font. Click the **+** button in the font variable to add one:
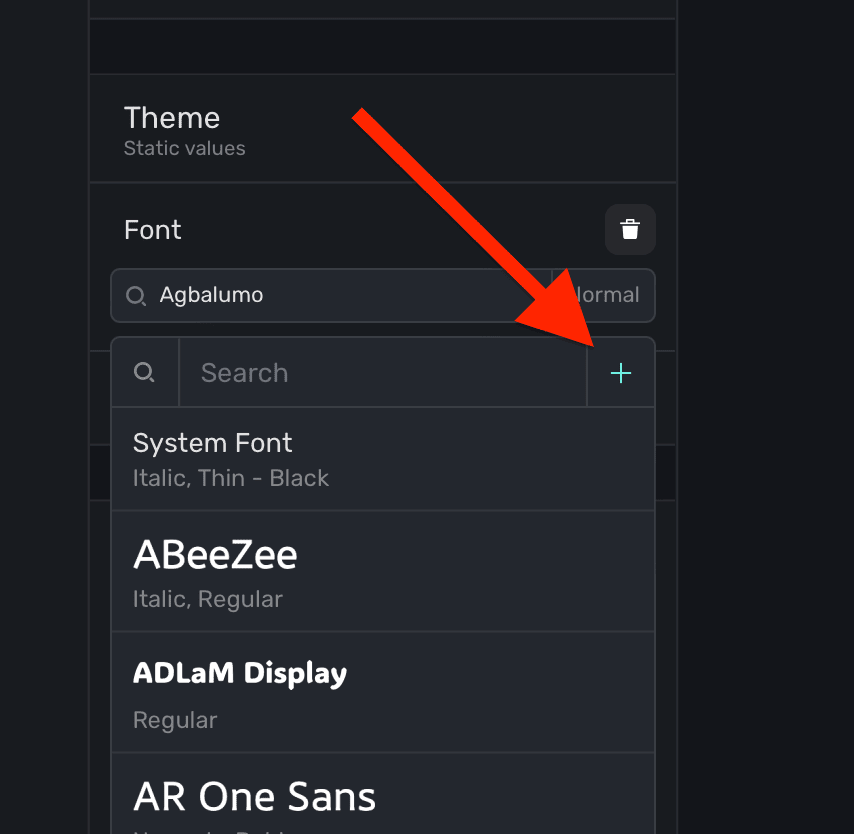
Additionally, you can add a custom font by **selecting** a text component, and under the **Typography** section in the component editor, click the **+** button:
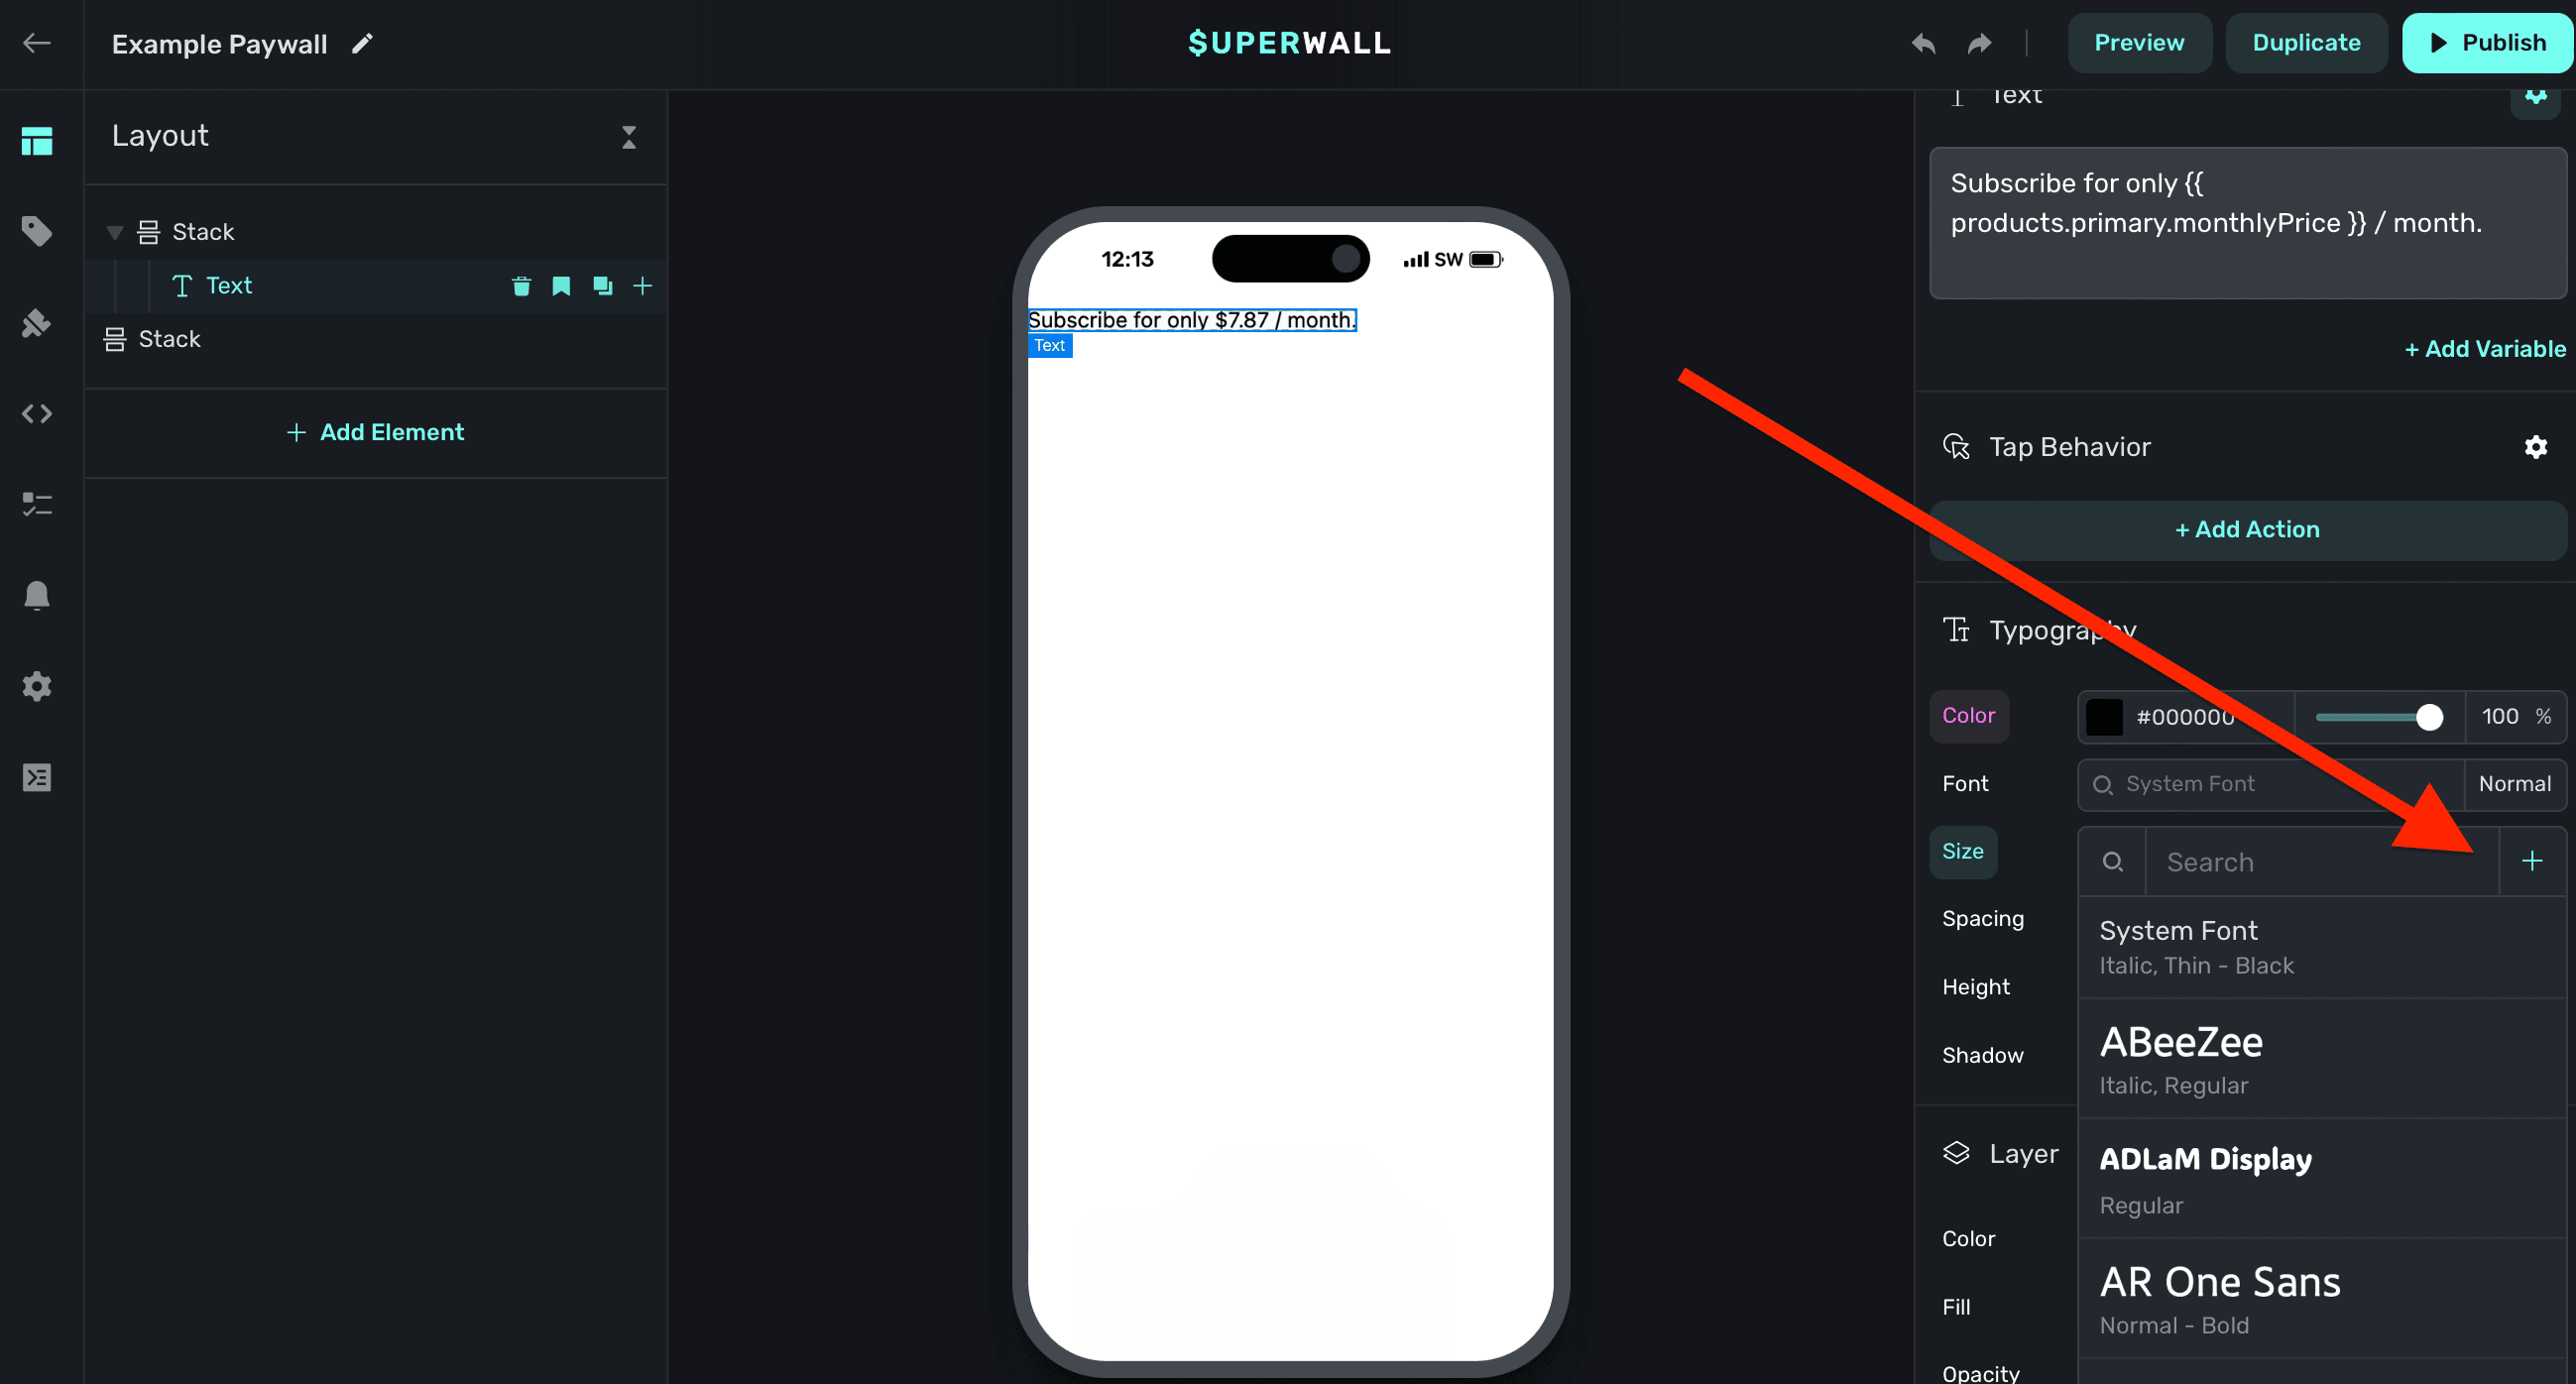
### Creating theme variables
To add your own theme variable, click **+ Add Theme Variable**:
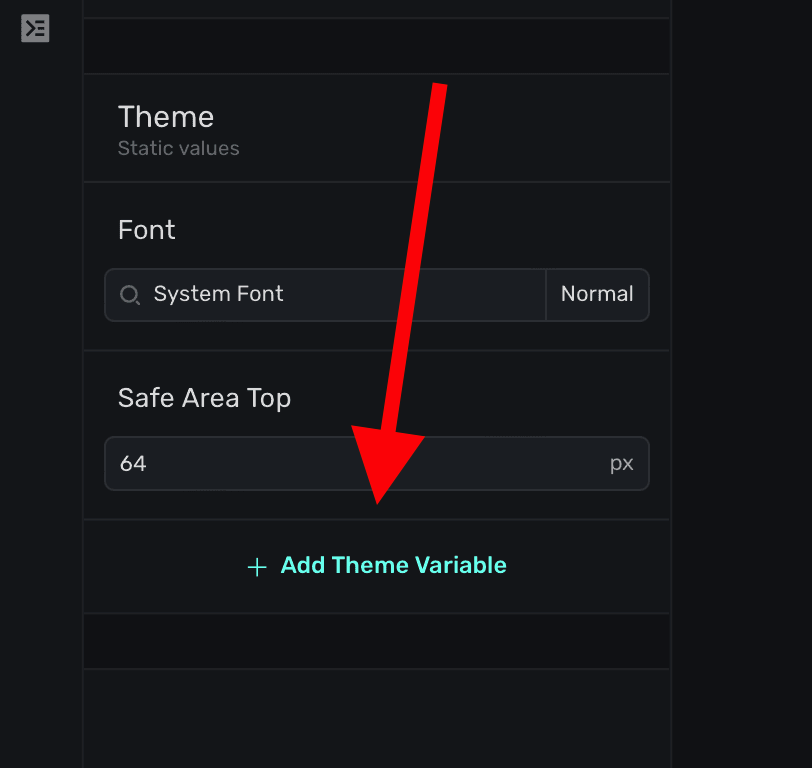
There are three different types you can add, all of which use CSS under the hood:
1. **Color:** Set up a color variable using a color picker.
2. **Length:** Set up a length variable using a value of either pixels, a percent, viewport values and more.
3. **Font:** Set up a font variable using the font picker.
Once you've given it a name, value type and initial value, click **Create** to begin using it:
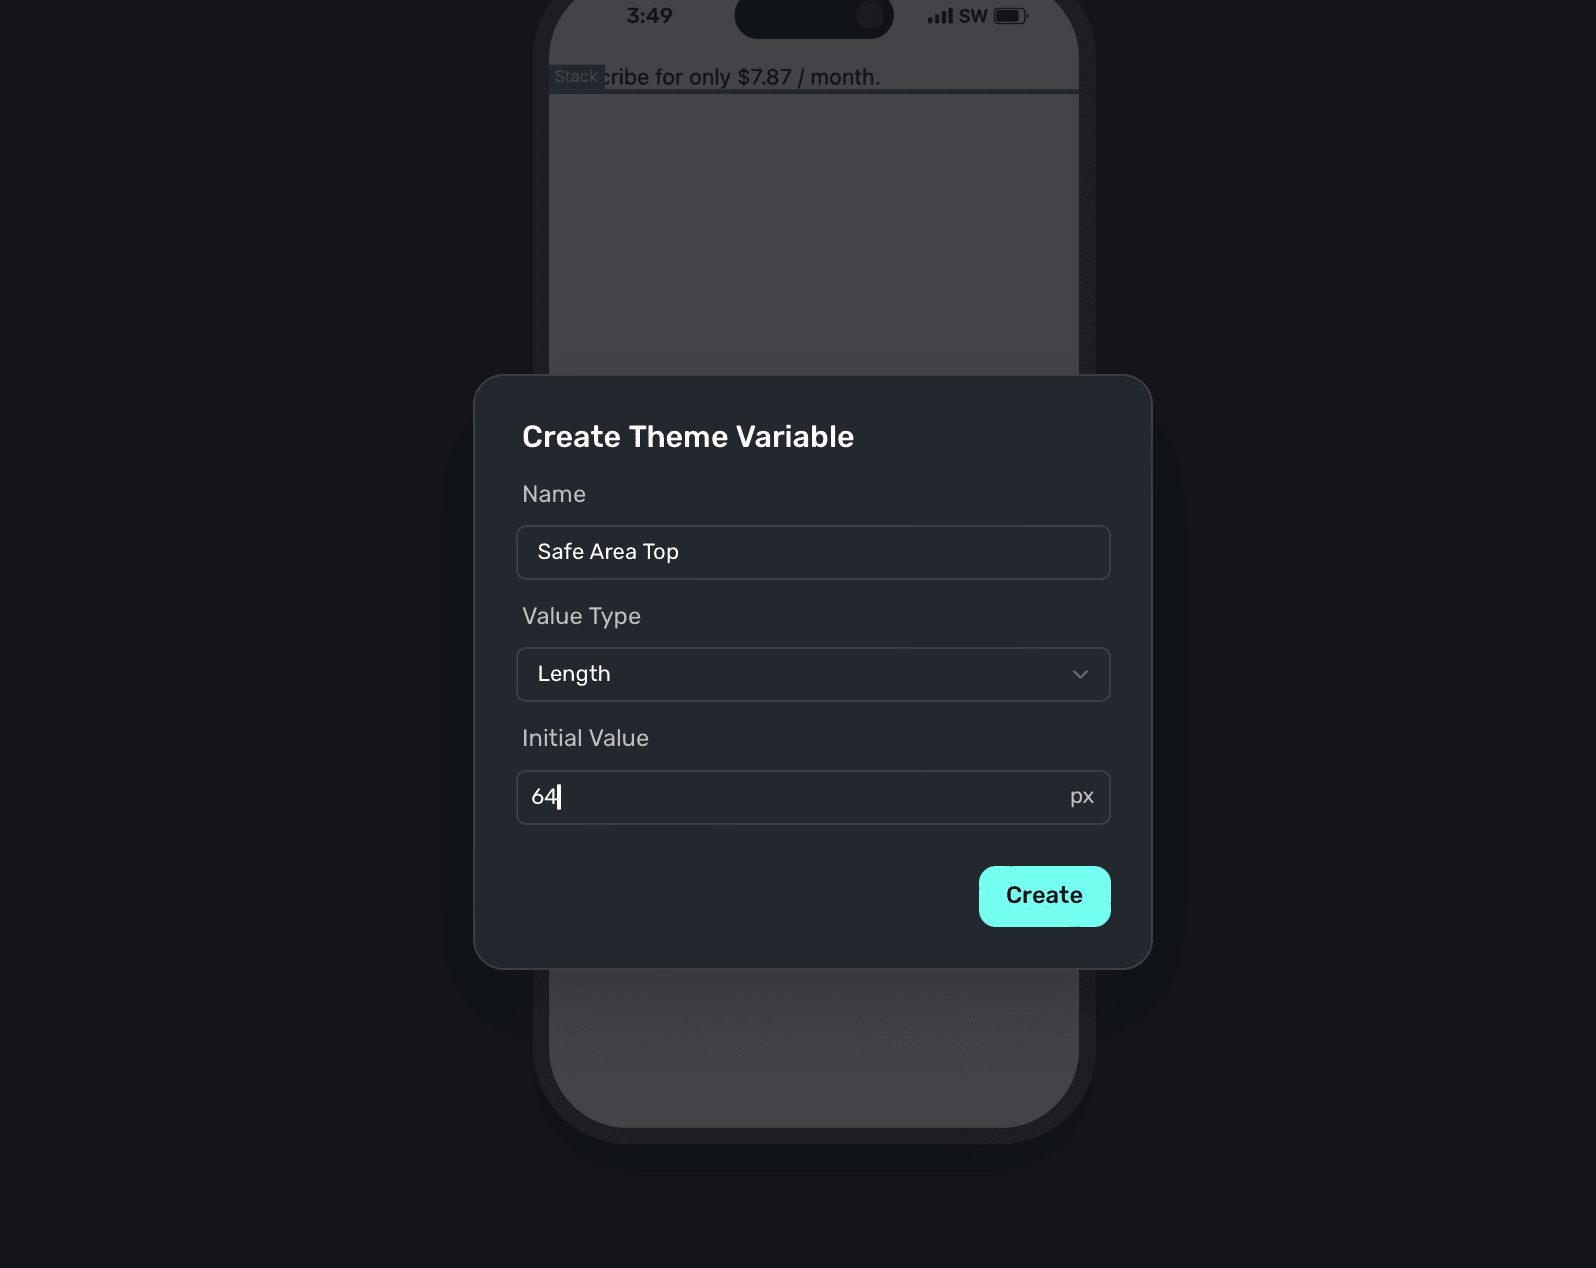
# Variables
Source: https://superwall.com/docs/paywall-editor-variables
To add or edit variables, click the **Variables** button from the **sidebar**:
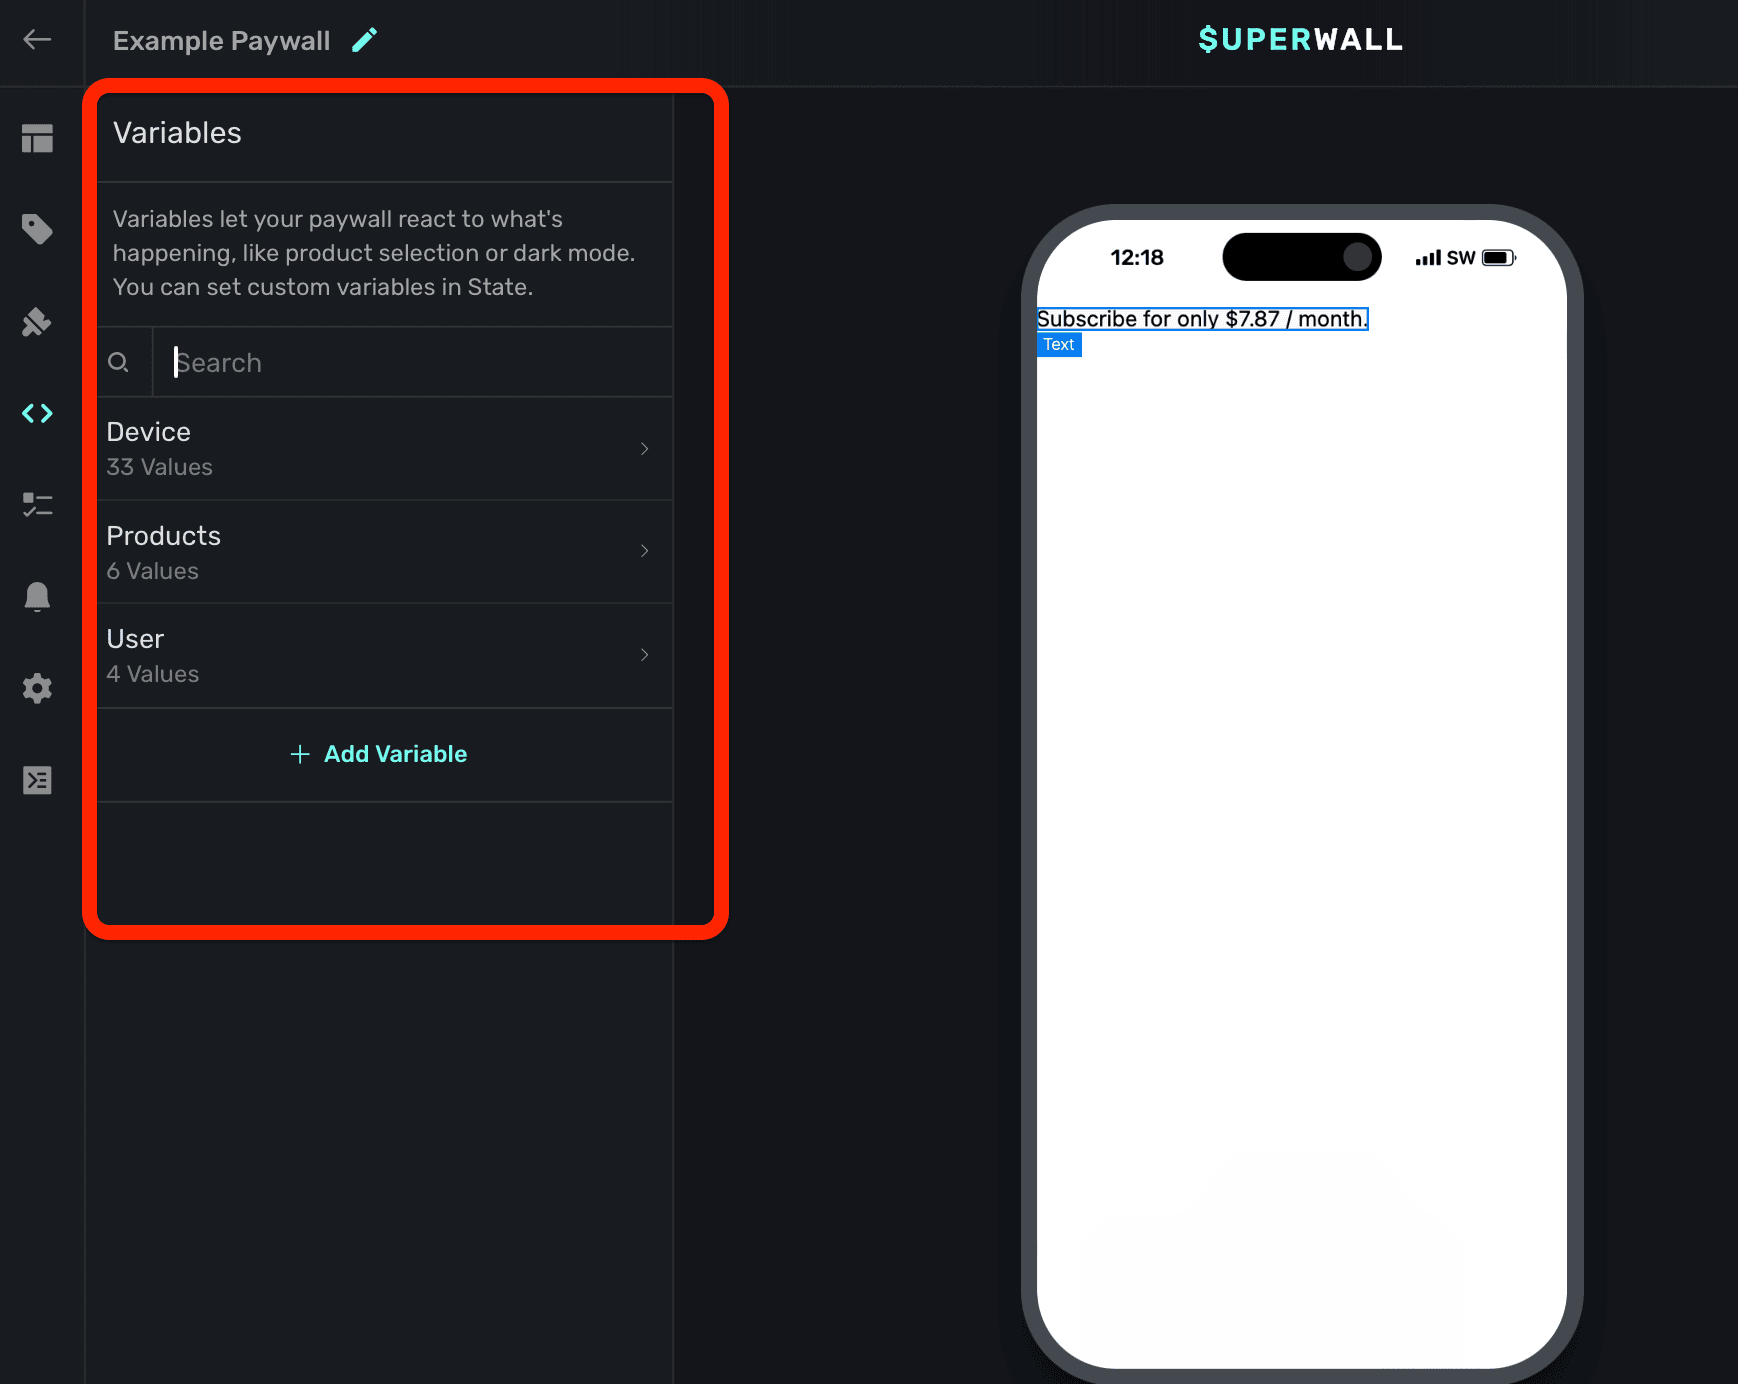
Variables allow you to reuse common values, adapt to the device's characteristics (such as size or color scheme), and do things like dynamically hide or how components. All of these scenarios can be achieved using variables in conjunction with our [dynamic values](/paywall-editor-dynamic-values) editor:
* Presenting or hiding a bottom sheet of products.
* Changing the padding of several elements based on the device's available width.
* Formatting the price of a product based on different parameters, such as trial availability.
By default, Superwall has three different type of variables for use:
* **Device:** Relates to the device, the app's install date, bundle ID and more.
* **Product:** Represents the products added to the paywall, and their properties. In addition, there are variables for the selected product in addition to the primary, secondary or tertiary product.
* **User:** User-specific values, such as their alias ID.
While those will allow you to cover several cases, you can also add your own custom variables too.
Variables dealing with any product period, such as `someProduct.period`, `someProduct.periodly`,
and other similar variables, do *not* localize automatically. This is because different languages
use varying orders and sentence structures for such terms. If you need them localized, add them as
you would any other term and enter localized values for each. Learn more about localization
[here](/paywall-editor-localization).
### Using Variables
You primarily use variables in the **component editor** and with [dynamic values](/paywall-editor-dynamic-values). When using a variable in text, follow the Liquid syntax to reference one: `{{ theVariable }}`. For example, to reference a variable in some text, you would:
1. Select the text component.
2. Under Text -> click "+ Add Variable".
3. Then, drill down or search for the variable or its corresponding property.
4. Click on it, and it'll be added to your text and correctly formatted.
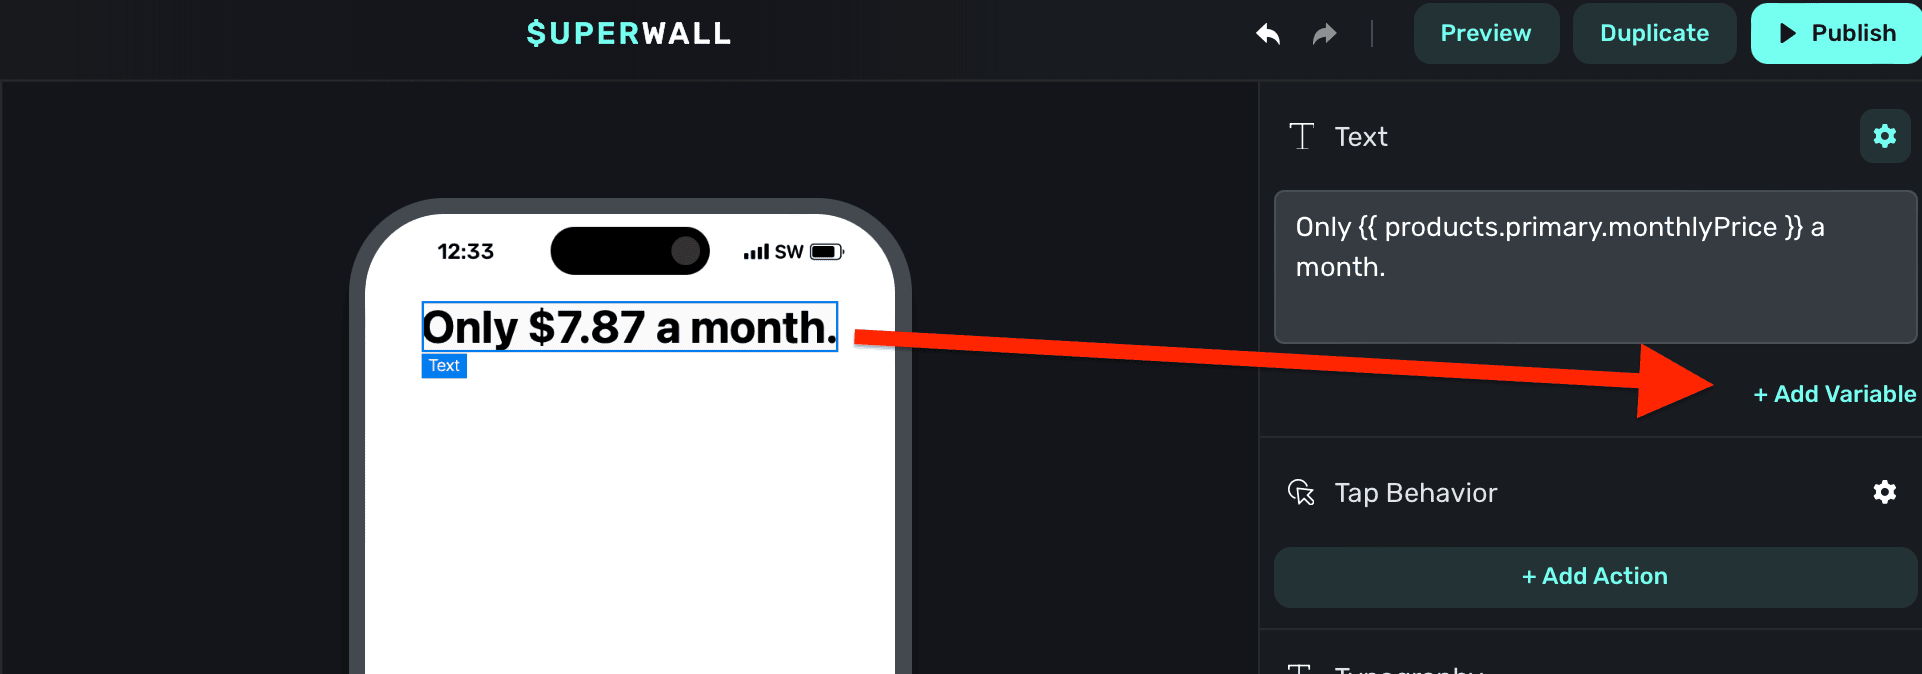
To use a variable with a component property, **click** on the property and choose **Dynamic**:
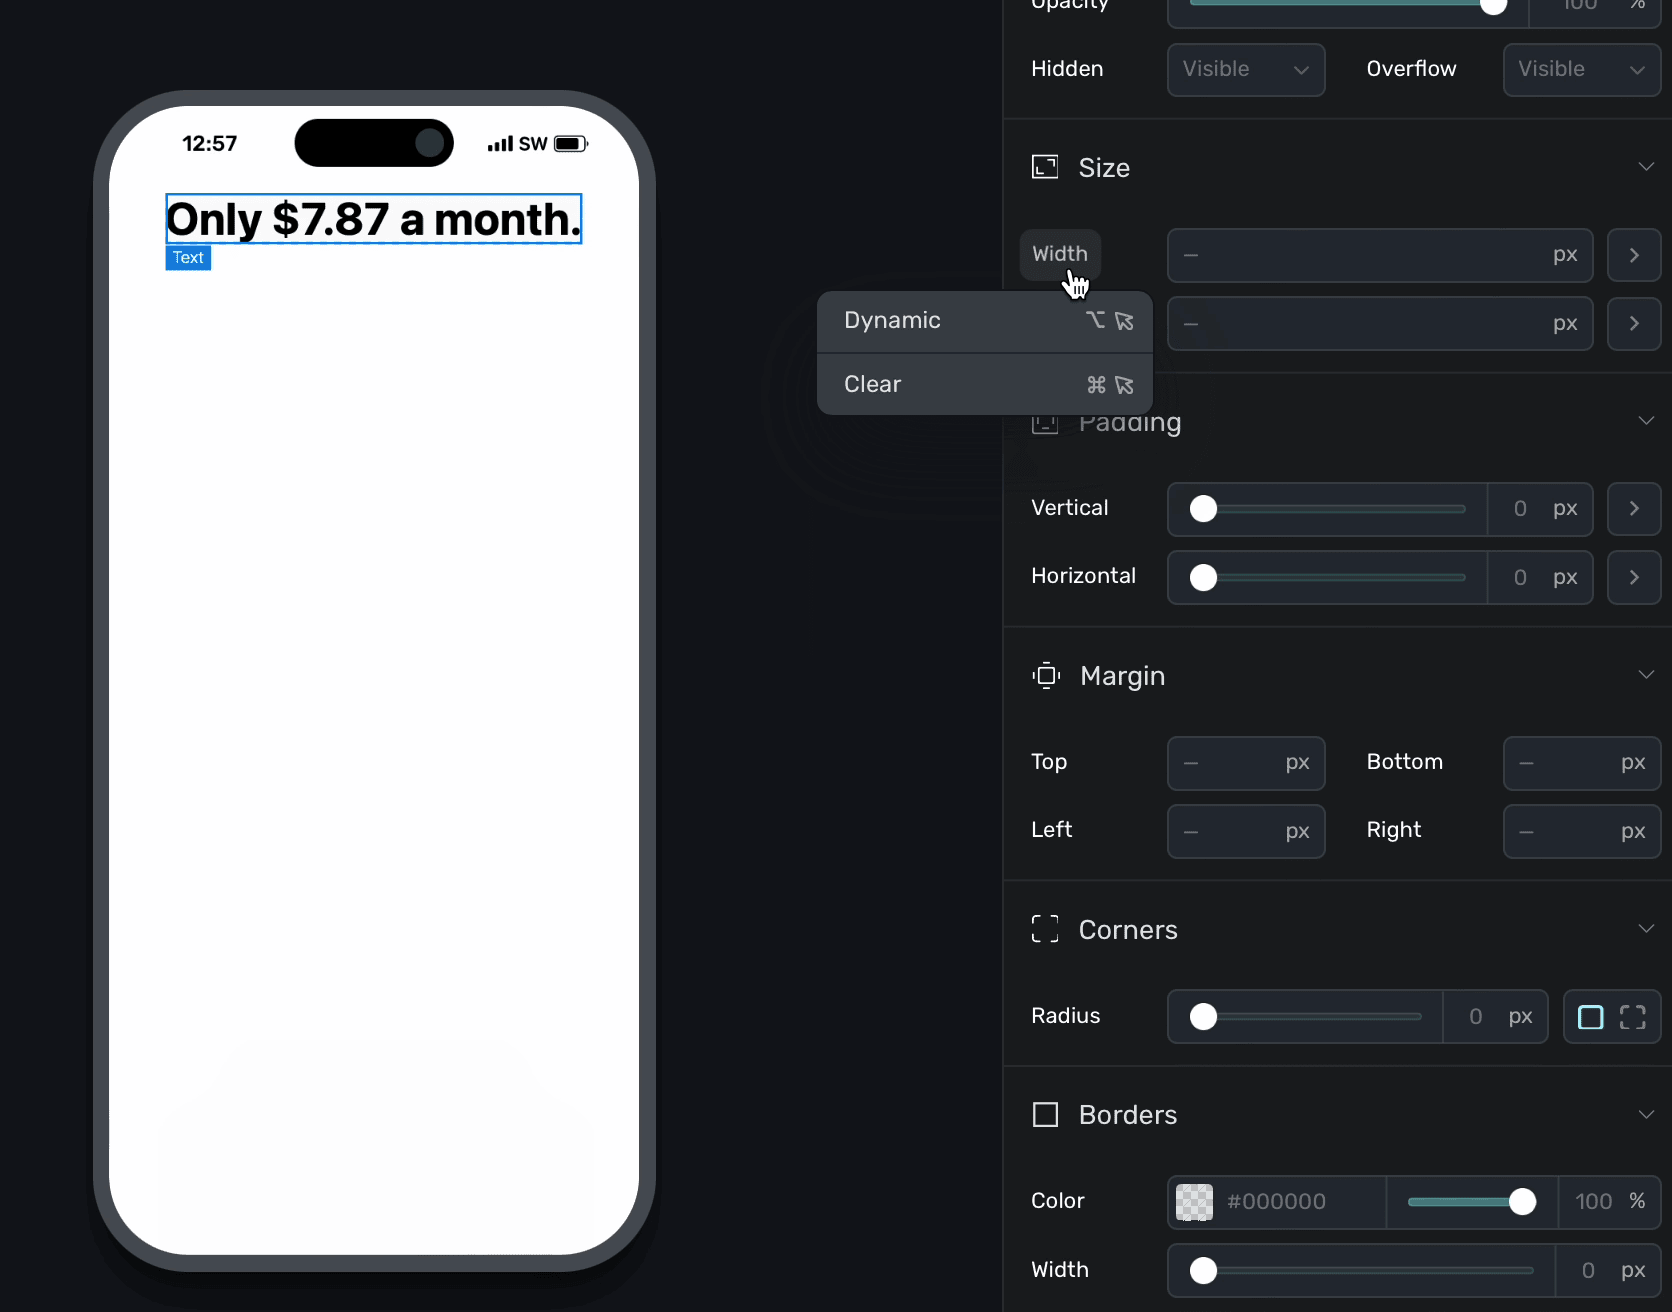
The [dynamic values](/paywall-editor-dynamic-values) editor will appear. Next to **then:**, choose your variable and click **Save**:
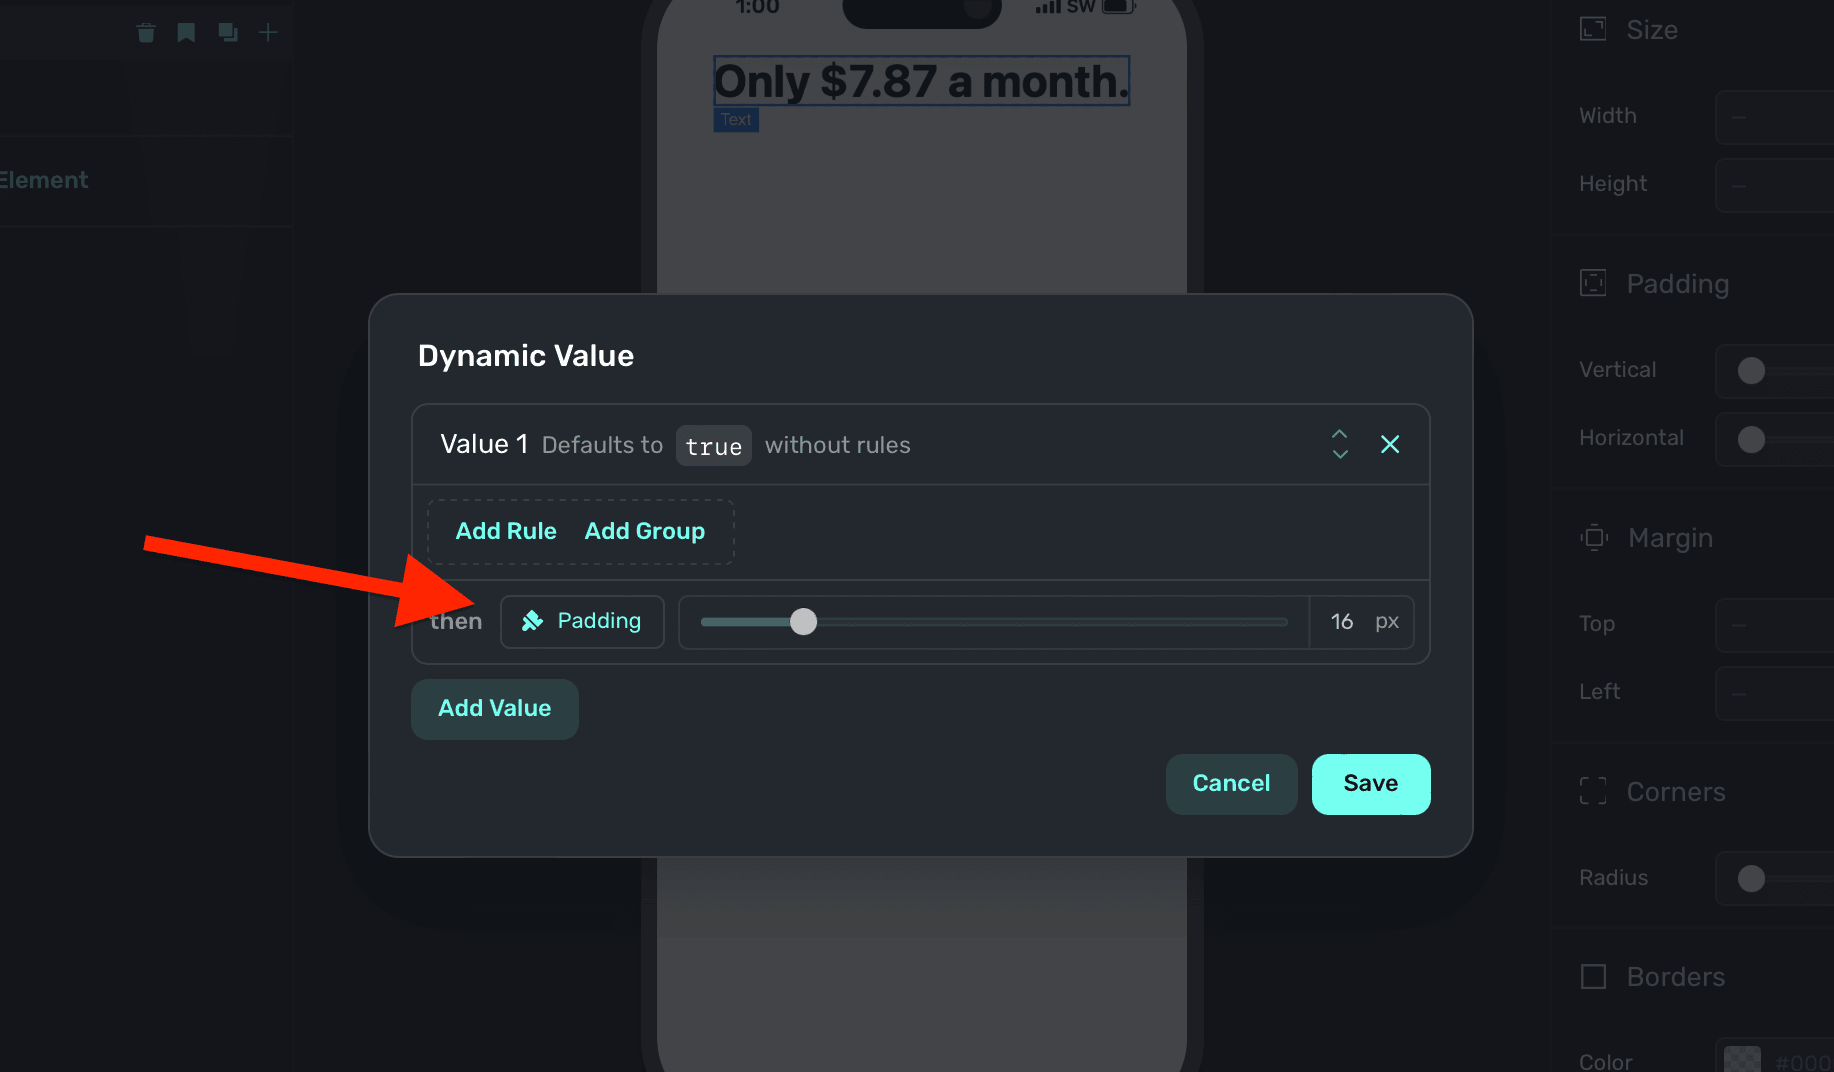
Above, the "padding" variable was used. You can ignore the if/then rules above if you simply want to apply a variable, but to dynamically enable or disable them — you can set conditions accordingly. Read the docs over [dynamic values](/paywall-editor-dynamic-values) to learn more.
You can also hover a property and hold down the **Option/Alt** key to bring up the dynamic values
editor.
### Clearing variables
To remove a variable that's in use, **click** the property or gear icon (which will be purple when a variable is being used) and selected **Clear**.
### Stock variable documentation
Below are all of the stock variables and their types. You don't have to memorize any of these — when the variable picker shows, each of the correct liquid
syntax appears above every variable, and it be will auto-inserted for you when selected.
| Property | Type | Example |
| ------------------------------- | ------ | ------------------------------------------------------------------------------- |
| App Install Date | Text | 2024-04-11 02:40:44.918000 |
| App User Id | Text | \$SuperwallAlias:2580915A-8A2A-40B6-A947-2BE75A42461E |
| App Version | Text | 1.0.2 |
| Bundle Id | Text | com.yourOrg.yourApp |
| Days Since Install | Number | 0 |
| Days Since Last Paywall View | Number | |
| Device Currency Code | Text | AED |
| Device Currency Symbol | Text | AED |
| Device Language Code | Text | en |
| Device Locale | Text | en\_AE |
| Device Model | Text | iPhone14 |
| Interface Style | Text | light |
| Interface Type | Text | iphone, ipad, mac. Returns "mac" for Mac Catalyst, "ipad" for iPad apps on mac. |
| Is Low Power Mode Enabled | Number | 0 |
| Is Mac | Number | 0 |
| Local Date | Text | 2024-05-02 |
| Local Date Time | Text | 2024-05-02T21:31:52 |
| Local Time | Text | 21:31:52 |
| Minutes Since Install | Number | 7 |
| Minutes Since Last Paywall View | Number | 1 |
| Orientation | String | "landscape" or "portrait" |
| Os Version | Text | 17.4.1 |
| Platform | Text | iOS |
| Public Api Key | Text | pk\_ccdfsriotuwiou23435 |
| Radio Type | Text | WiFi |
| Total Paywall Views | Number | 10 |
| Utc Date | Text | 2024-05-02 |
| Utc Date Time | Text | 2024-05-02T17:31:52 |
| Utc Time | Text | 17:31:52 |
| Vendor Id | Text | CC93GCD-ESB6-4DFF-A165-0963D0257221 |
| View Port Breakpoint | Text | X-Small/Small/Medium/Large/Extra Large/ Extra extra large |
| View Port Width | Number | 844 |
| View Port Height | Number | 390 |
Reference any of the variables above by using the `device` variable. For example, if you were creating a filter or dynamic value based off whether or not the device was a Mac, you'd write `{{ device.isMac }}`.
| Property | Type | Example |
| -------------------------- | ---- | -------------------- |
| Currency Code | Text | USD |
| Currency Symbol | Text | \$ |
| Daily Price | Text | \$0.26 |
| Identifier | Text | efc.1m799.3dt |
| Lanauge Code | Text | en |
| Locale | Text | en\_US\@currency=USD |
| Localized Period | Text | 1m |
| Monthly Price | Text | \$10.00 |
| Period | Text | month |
| Period Alt | Text | 1m |
| Period Days | Text | 30 |
| Period Months | Text | 1 |
| Period Weeks | Text | 4 |
| Period Years | Text | 0 |
| Periodly | Text | monthly |
| Price | Text | \$7.99 |
| Raw Price | Text | 7.99 |
| Raw Trial Period Price | Text | 0 |
| Trial Period Daily Price | Text | \$0.00 |
| Trial Period Days | Text | 0 |
| Trial Period End Date | Text | May 2, 2024 |
| Trial Period Monthly Price | Text | \$0.00 |
| Trial Period Months | Text | 0 |
| Trial Period Price | Text | \$0.00 |
| Trial Period Text | Text | 7-days |
| Trial Period Weekly Price | Text | \$1.00 |
| Trial Period Weeks | Text | 1 |
| Trial Period Yearly Price | Text | \$0.00 |
| Trial Period Years | Text | 0 |
| Weekly Price | Text | \$1.83 |
| Yearly Price | Text | \$100.00 |
The values above apply to any referenced product. There is the notion of a **primary**, **secondary**, **tertiary** and **selected** product. Whichever you use, you can use any of the above variables with it.
For example, to reference the price of the selected product (i.e. one the user has clicked or tapped on within the paywall) — you could write `The selected product cost {{ products.selected.price }}`.
There are also two more stock variables which deal with products, but aren't a part of a single product variable itself. They are referenced via the `products` variable:
| Property | Type | Example |
| ---------------------- | ------ | ---------- |
| Has Introductory Offer | Bool | True/False |
| Selected Index | Number | 0 |
Use `products.hasIntroductoryOffer` to detect whether or not a user has a trial available. Further, `products.selectedIndex` represents the index of a selected products (i.e. primary would equal 0).
| Property | Type | Example |
| --------------------------- | ------ | ----------------------------------------------------- |
| Alias Id | Text | \$SuperwallAlias:606Z8824-434B-2270-BBD9-F1DF3E994087 |
| Application Installed At Id | Text | 2024-04-15T04:59:31.163Z |
| Event Name | Text | custom\_value |
| Seed | Number | 0 |
Use any variable above by referencing the `user` variable first: `{{ user.seed }}`.
### Custom Variables
To create your own variable, click **+ Add Variable** in the **sidebar** under the **Variables** section:
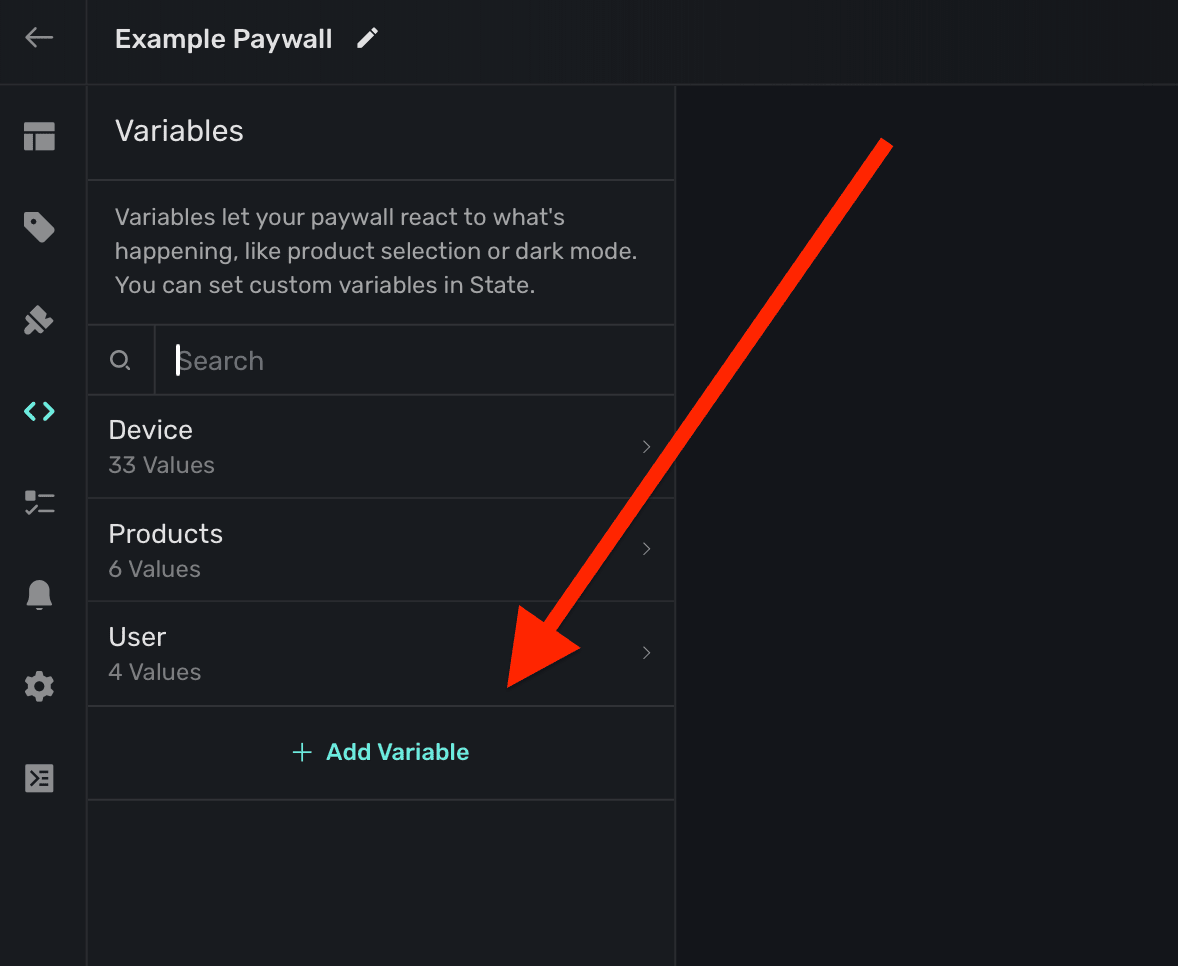
The variable editor will be presented:
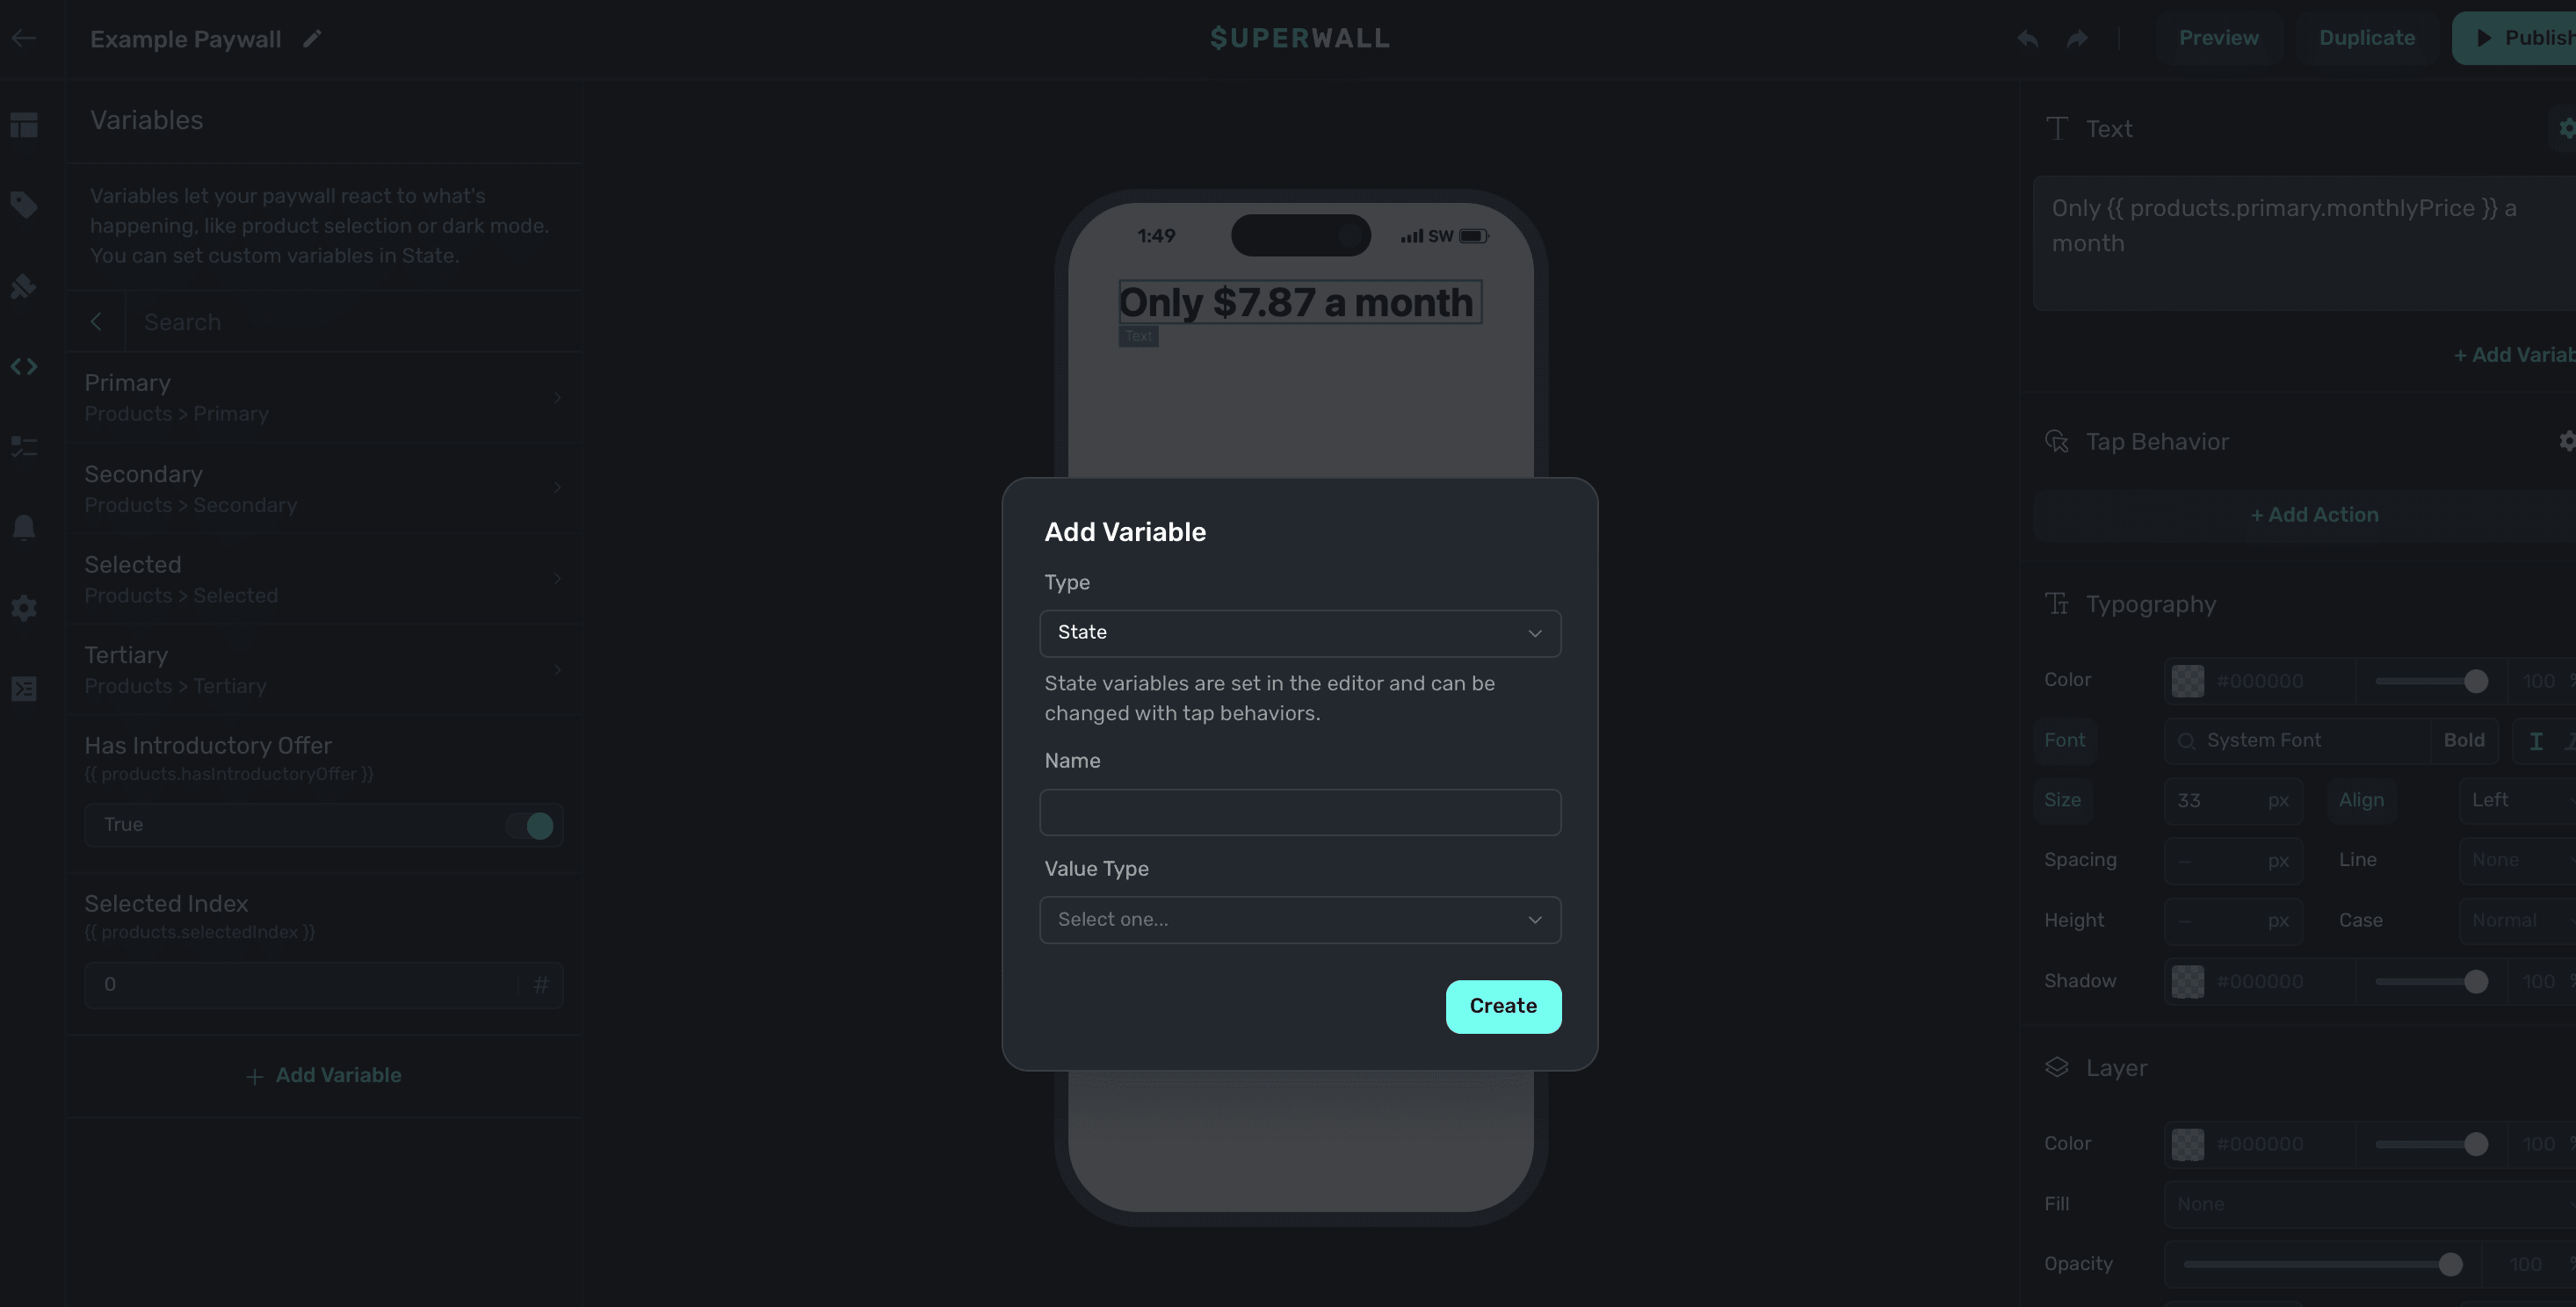
You'll be presented with four fields to fill out:
1. **Type:** The type of variable to create. Choose **State** if you'd like the variable to be mutated by [tap behaviors](/paywall-editor-styling-elements#tap-behaviors). **Parameter** variables are similar, but initial values can be passed in [from your app](/feature-gating#register-everything).
2. **Name:** How you will reference the variable. Any name will autocorrect to camel case, i.e. "Cool Variable" will be `coolVariable`.
3. **Value Type:** The variable type. Choose from `text`, `number`, or `boolean`.
4. **Initial Value:** The initial value of the variable. This only displays once a variable type has been chosen.
Once you have everything entered, click **Save**. Your variable will show up in a section in the **sidebar** under **Variables** called **Params**:
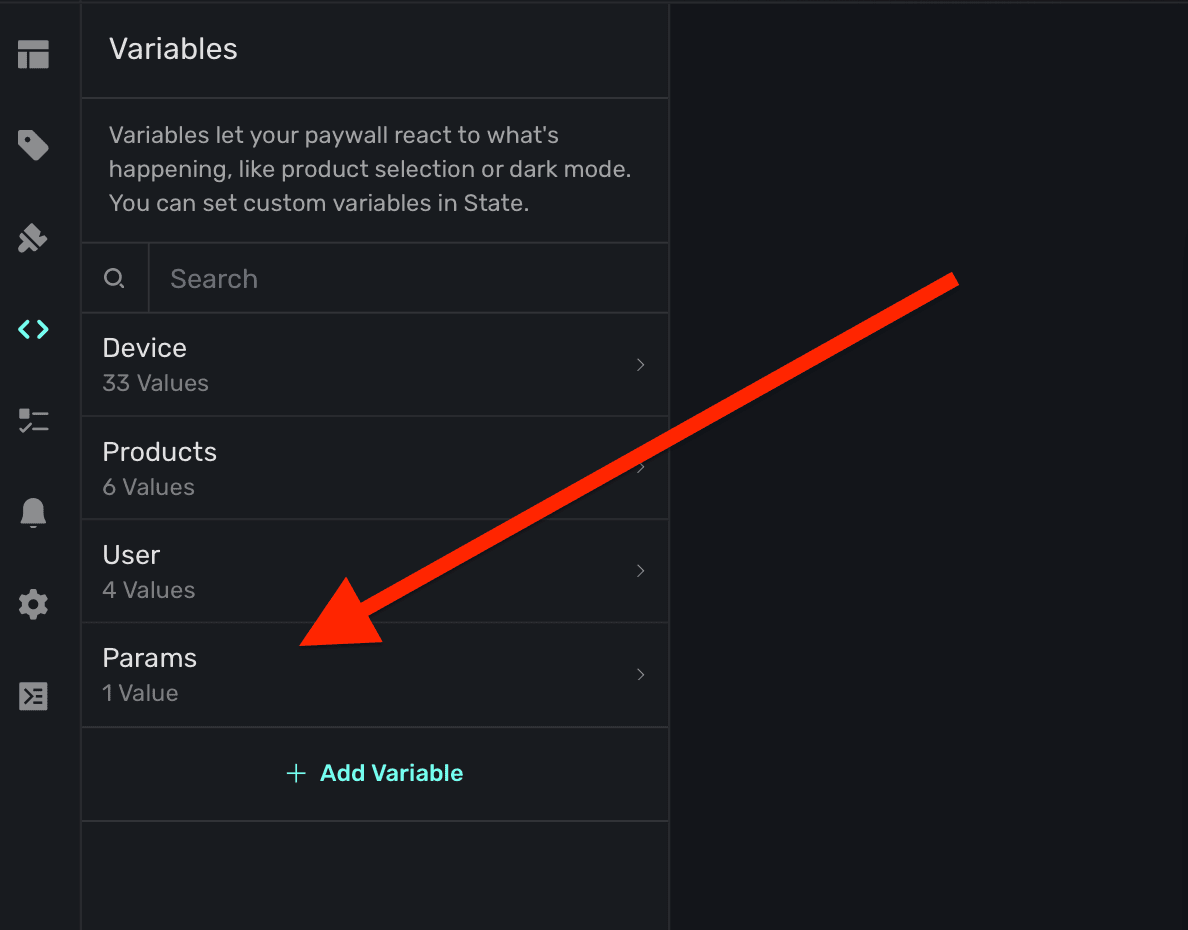
From there, they are able to be referenced the same way as any other variable:

### Liquid syntax formatting
In text, you can use [Liquid filters](https://shopify.github.io/liquid/filters/abs/) to modify output. To use filters, add a pipe after the variable. Then, add in one or more filters:
```
// Results in 17, the absolute value of -17
{{ -17 | abs }}
```
For example, to capitalize a text variable, you would write:
```
// If the name was "jordan", this results in "JORDAN"
{{ user.name | upcase }}
```
### Custom Liquid filters
To make it easier to express dates & countdowns we've added several non-standard filters to our Liquid engine.
#### `date_add_*` and `date_subtract_*`
These filters add or subtract a specified amount of time to/from a date.
| Filter | Description |
| ----------------------- | ----------------------------------------------------- |
| `date_add_seconds` | Adds the specified number of seconds to a date |
| `date_add_minutes` | Adds the specified number of minutes to a date |
| `date_add_hours` | Adds the specified number of hours to a date |
| `date_add_days` | Adds the specified number of days to a date |
| `date_add_weeks` | Adds the specified number of weeks to a date |
| `date_add_months` | Adds the specified number of months to a date |
| `date_add_years` | Adds the specified number of years to a date |
| `date_subtract_seconds` | Subtracts the specified number of seconds from a date |
| `date_subtract_minutes` | Subtracts the specified number of minutes from a date |
| `date_subtract_hours` | Subtracts the specified number of hours from a date |
| `date_subtract_days` | Subtracts the specified number of days from a date |
| `date_subtract_weeks` | Subtracts the specified number of weeks from a date |
| `date_subtract_months` | Subtracts the specified number of months from a date |
| `date_subtract_years` | Subtracts the specified number of years from a date |
**Example Usage**:
```liquid
{{ "2024-08-06T07:16:26.802Z" | date_add_minutes: 30 | date: "%s" }}
```
Output: `1722929186`
#### `countdown_*_partial`
These filters calculate the partial difference between two dates in various units. This is usefull for
formatting a countdown timer by exach segment.
| Filter | Description |
| --------------------------- | ----------------------------------------------------------------------------- |
| `countdown_minutes_partial` | Returns the remaining minutes in the current hour |
| `countdown_hours_partial` | Returns the remaining hours in the current day |
| `countdown_days_partial` | Returns the remaining days in the current week |
| `countdown_weeks_partial` | Returns the remaining weeks in the current month (assuming 4 weeks per month) |
| `countdown_months_partial` | Returns the remaining months in the current year |
| `countdown_years` | Returns the full number of years between the two dates |
**Example Usage**:
```liquid
{{ "2024-08-06T07:16:26.802Z" | countdown_hours_partial: "2024-08-06T15:30:00.000Z" }}:{{ "2024-08-06T07:16:26.802Z" | countdown_minutes_partial: "2024-08-06T15:30:00.000Z" }}
```
Output: `8:33`
#### `countdown_*_total`
These filters calculate the total difference between two dates in various units.
| Filter | Description |
| ------------------------- | ----------------------------------------------------- |
| `countdown_minutes_total` | Returns the total number of minutes between two dates |
| `countdown_hours_total` | Returns the total number of hours between two dates |
| `countdown_days_total` | Returns the total number of days between two dates |
| `countdown_weeks_total` | Returns the total number of weeks between two dates |
| `countdown_months_total` | Returns the total number of months between two dates |
| `countdown_years_total` | Returns the total number of years between two dates |
**Example Usage**:
```liquid
{{ "2024-08-06T07:16:26.802Z" | countdown_days_total: "2024-08-16T07:16:26.802Z" }}
```
Output: `10`
All these filters expect date strings as arguments. Anything that Javascript's default date
utility can parse will work. For countdown filters, the first argument is the starting date, and
the second argument (where applicable) is the end date.
The `countdown_*_total` filters calculate the total difference, while the `countdown_*_partial`
filters calculate the remainder after dividing by the next larger unit (except for years).
For `countdown_months_total` and `countdown_years_total`, the calculations account for varying
month lengths and leap years.
All countdown filters assume that the end date is later than the start date. If this isn't always
the case in your application, you may need to handle this scenario separately.
### Snippets with variables
If you create a group of components built off of variables and conditions, save it as a [snippet](/paywall-editor-layout#snippets) to reuse. There are several stock snippets built this way. For example the **Product Selector** snippet:
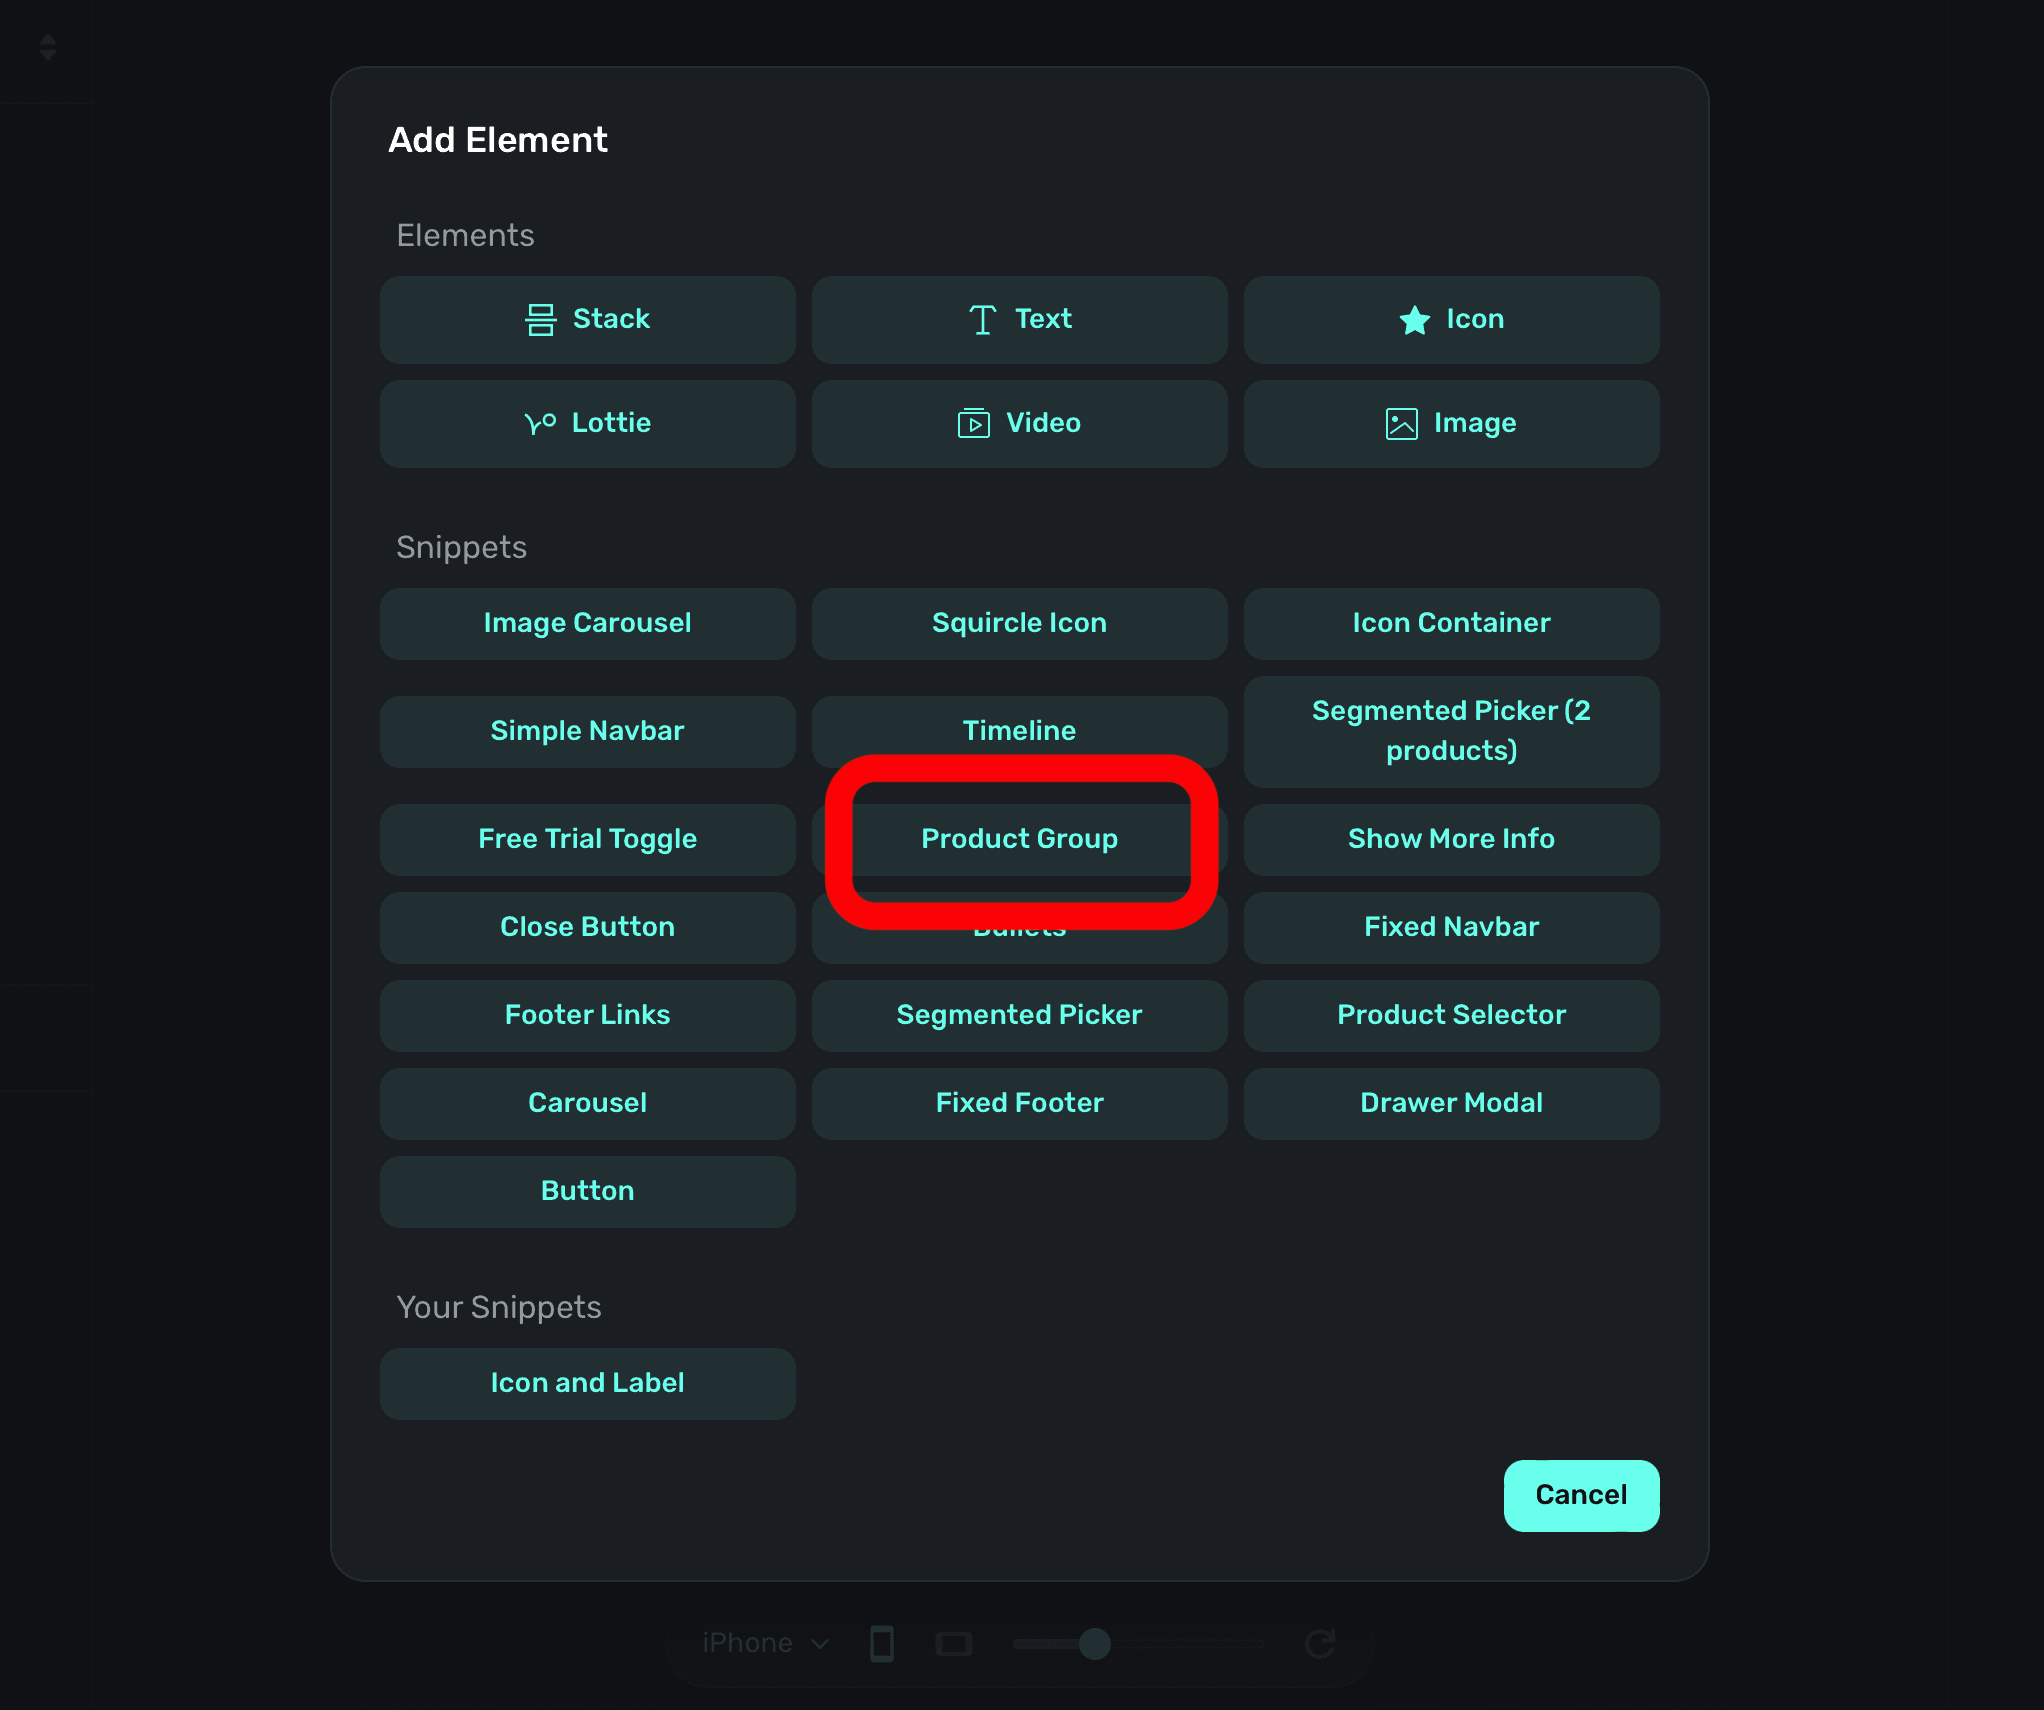
Adding this snippet shows your products in a vertical stack:
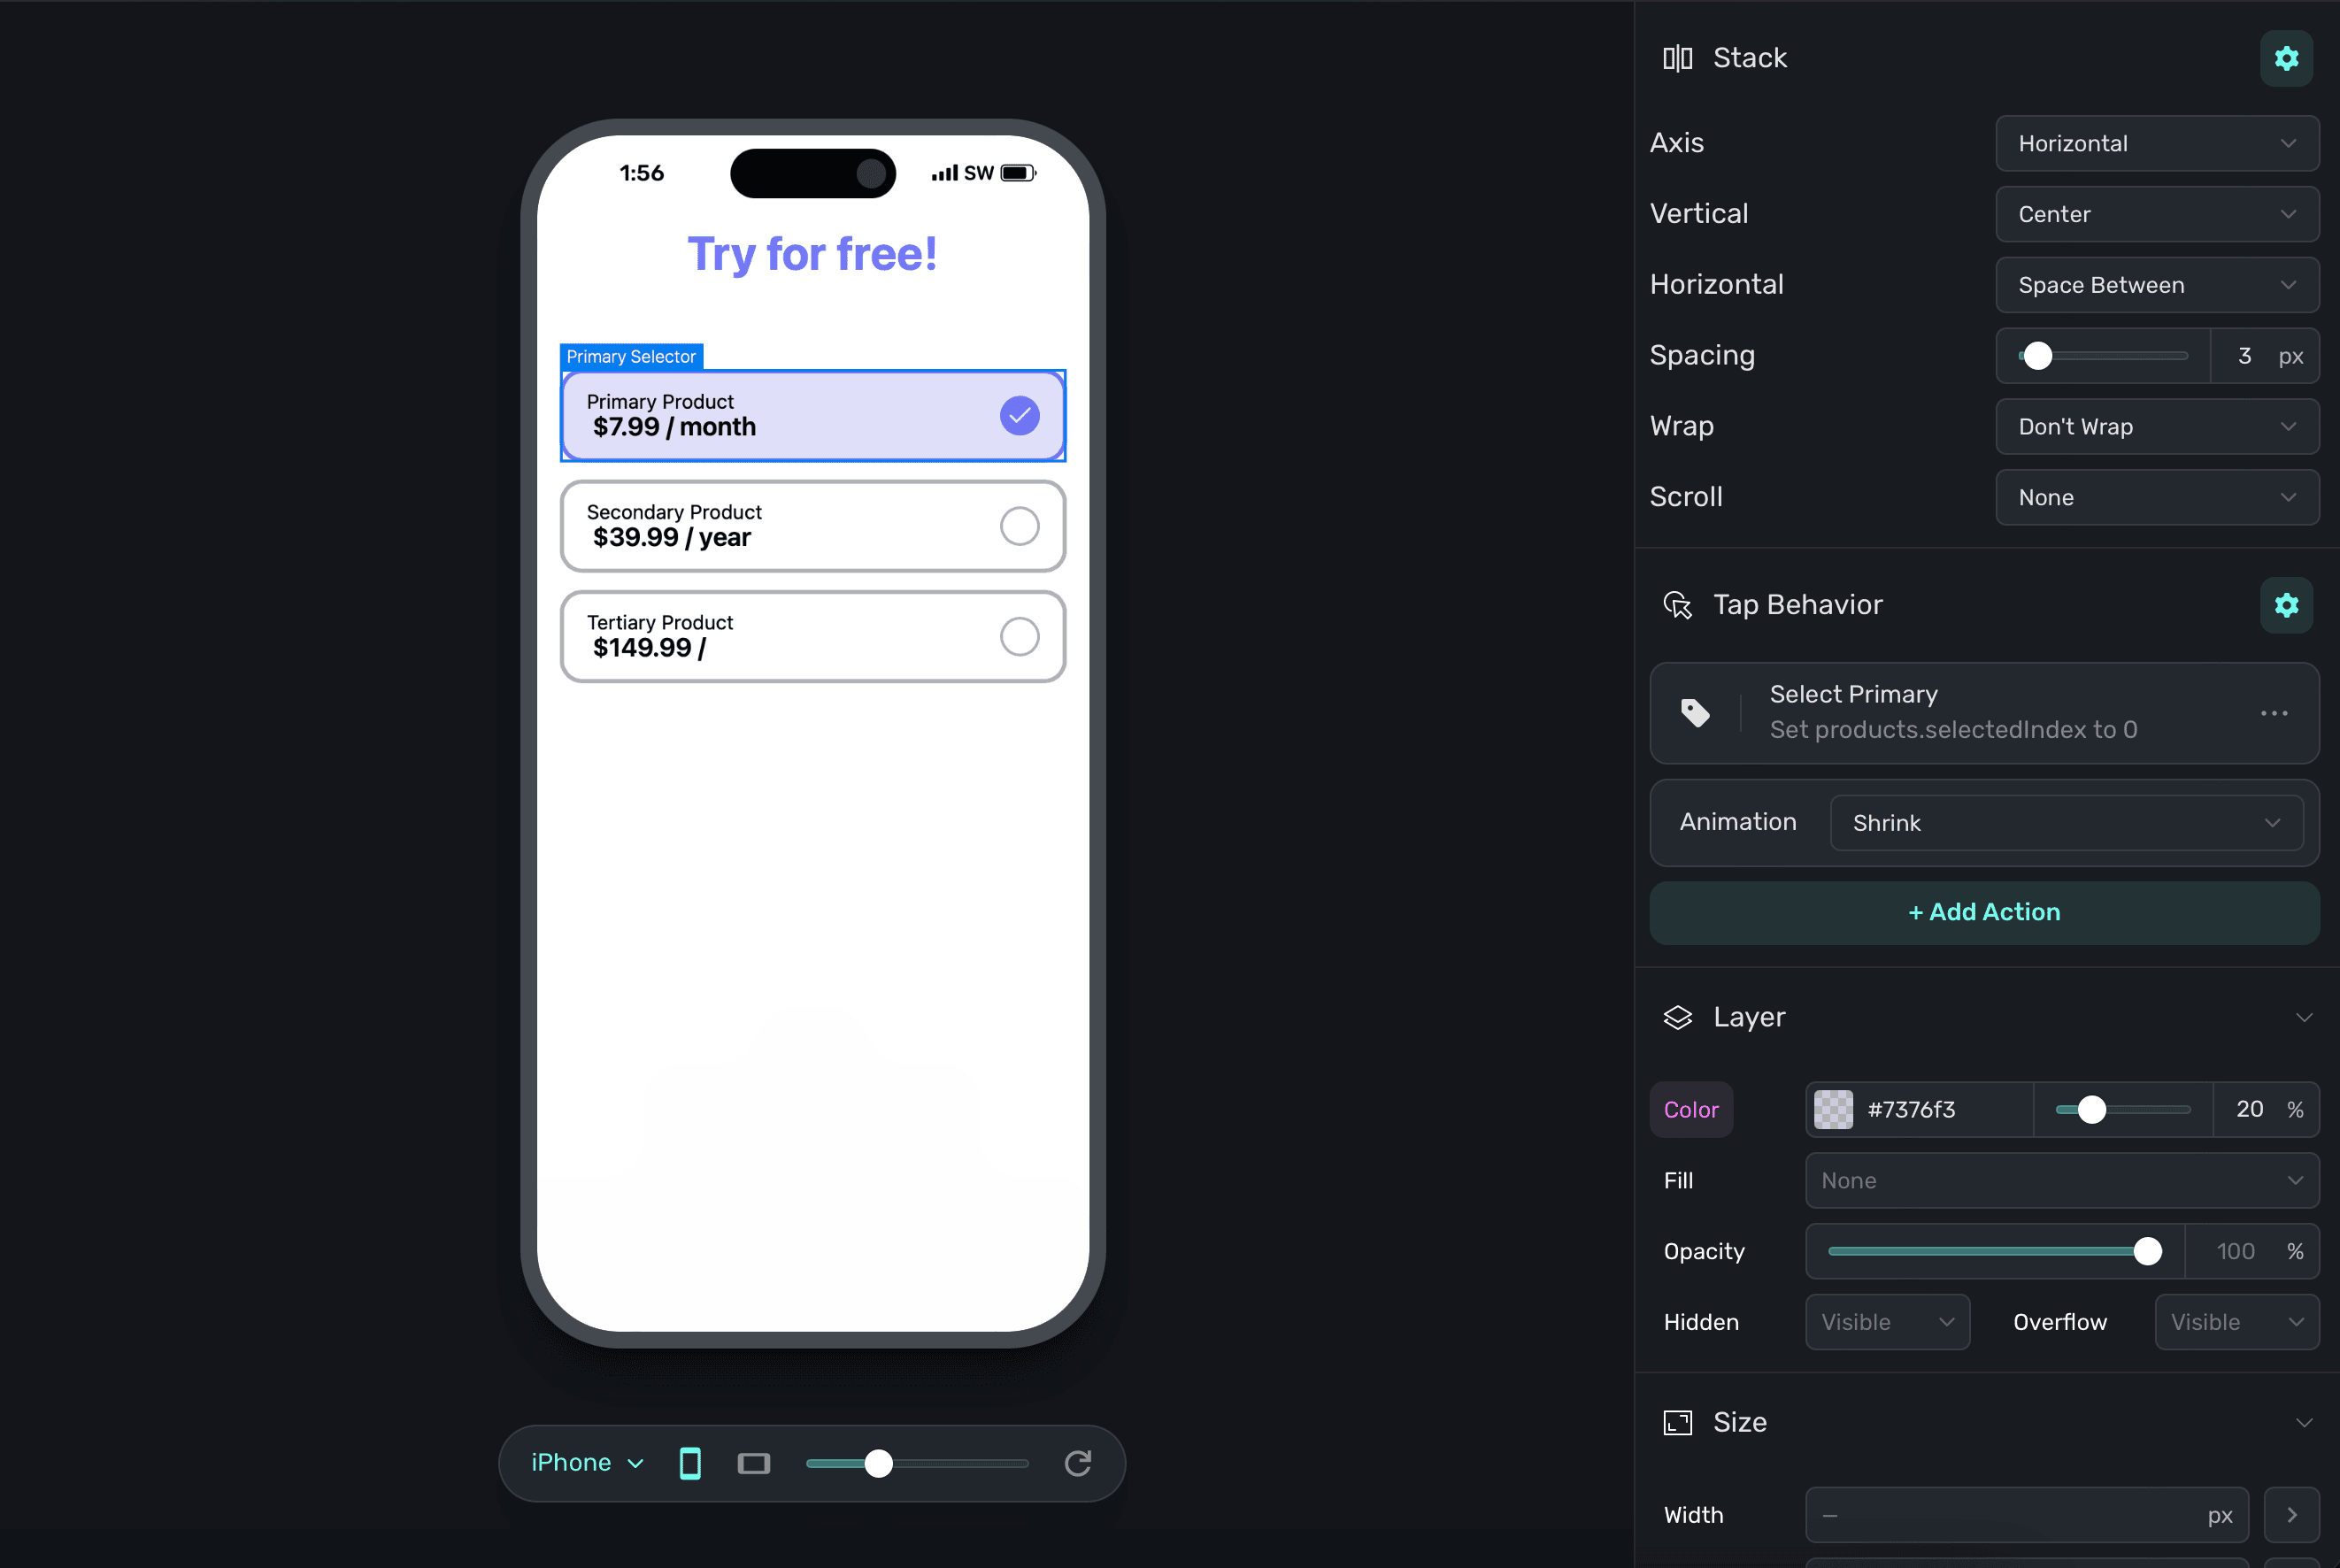
When one is selected, the checkmark next to it is filled in. This is achieved with stock variables (i.e. the selected product) and then changing layer opacity based on if the checkmark's corresponding product is selected or not:
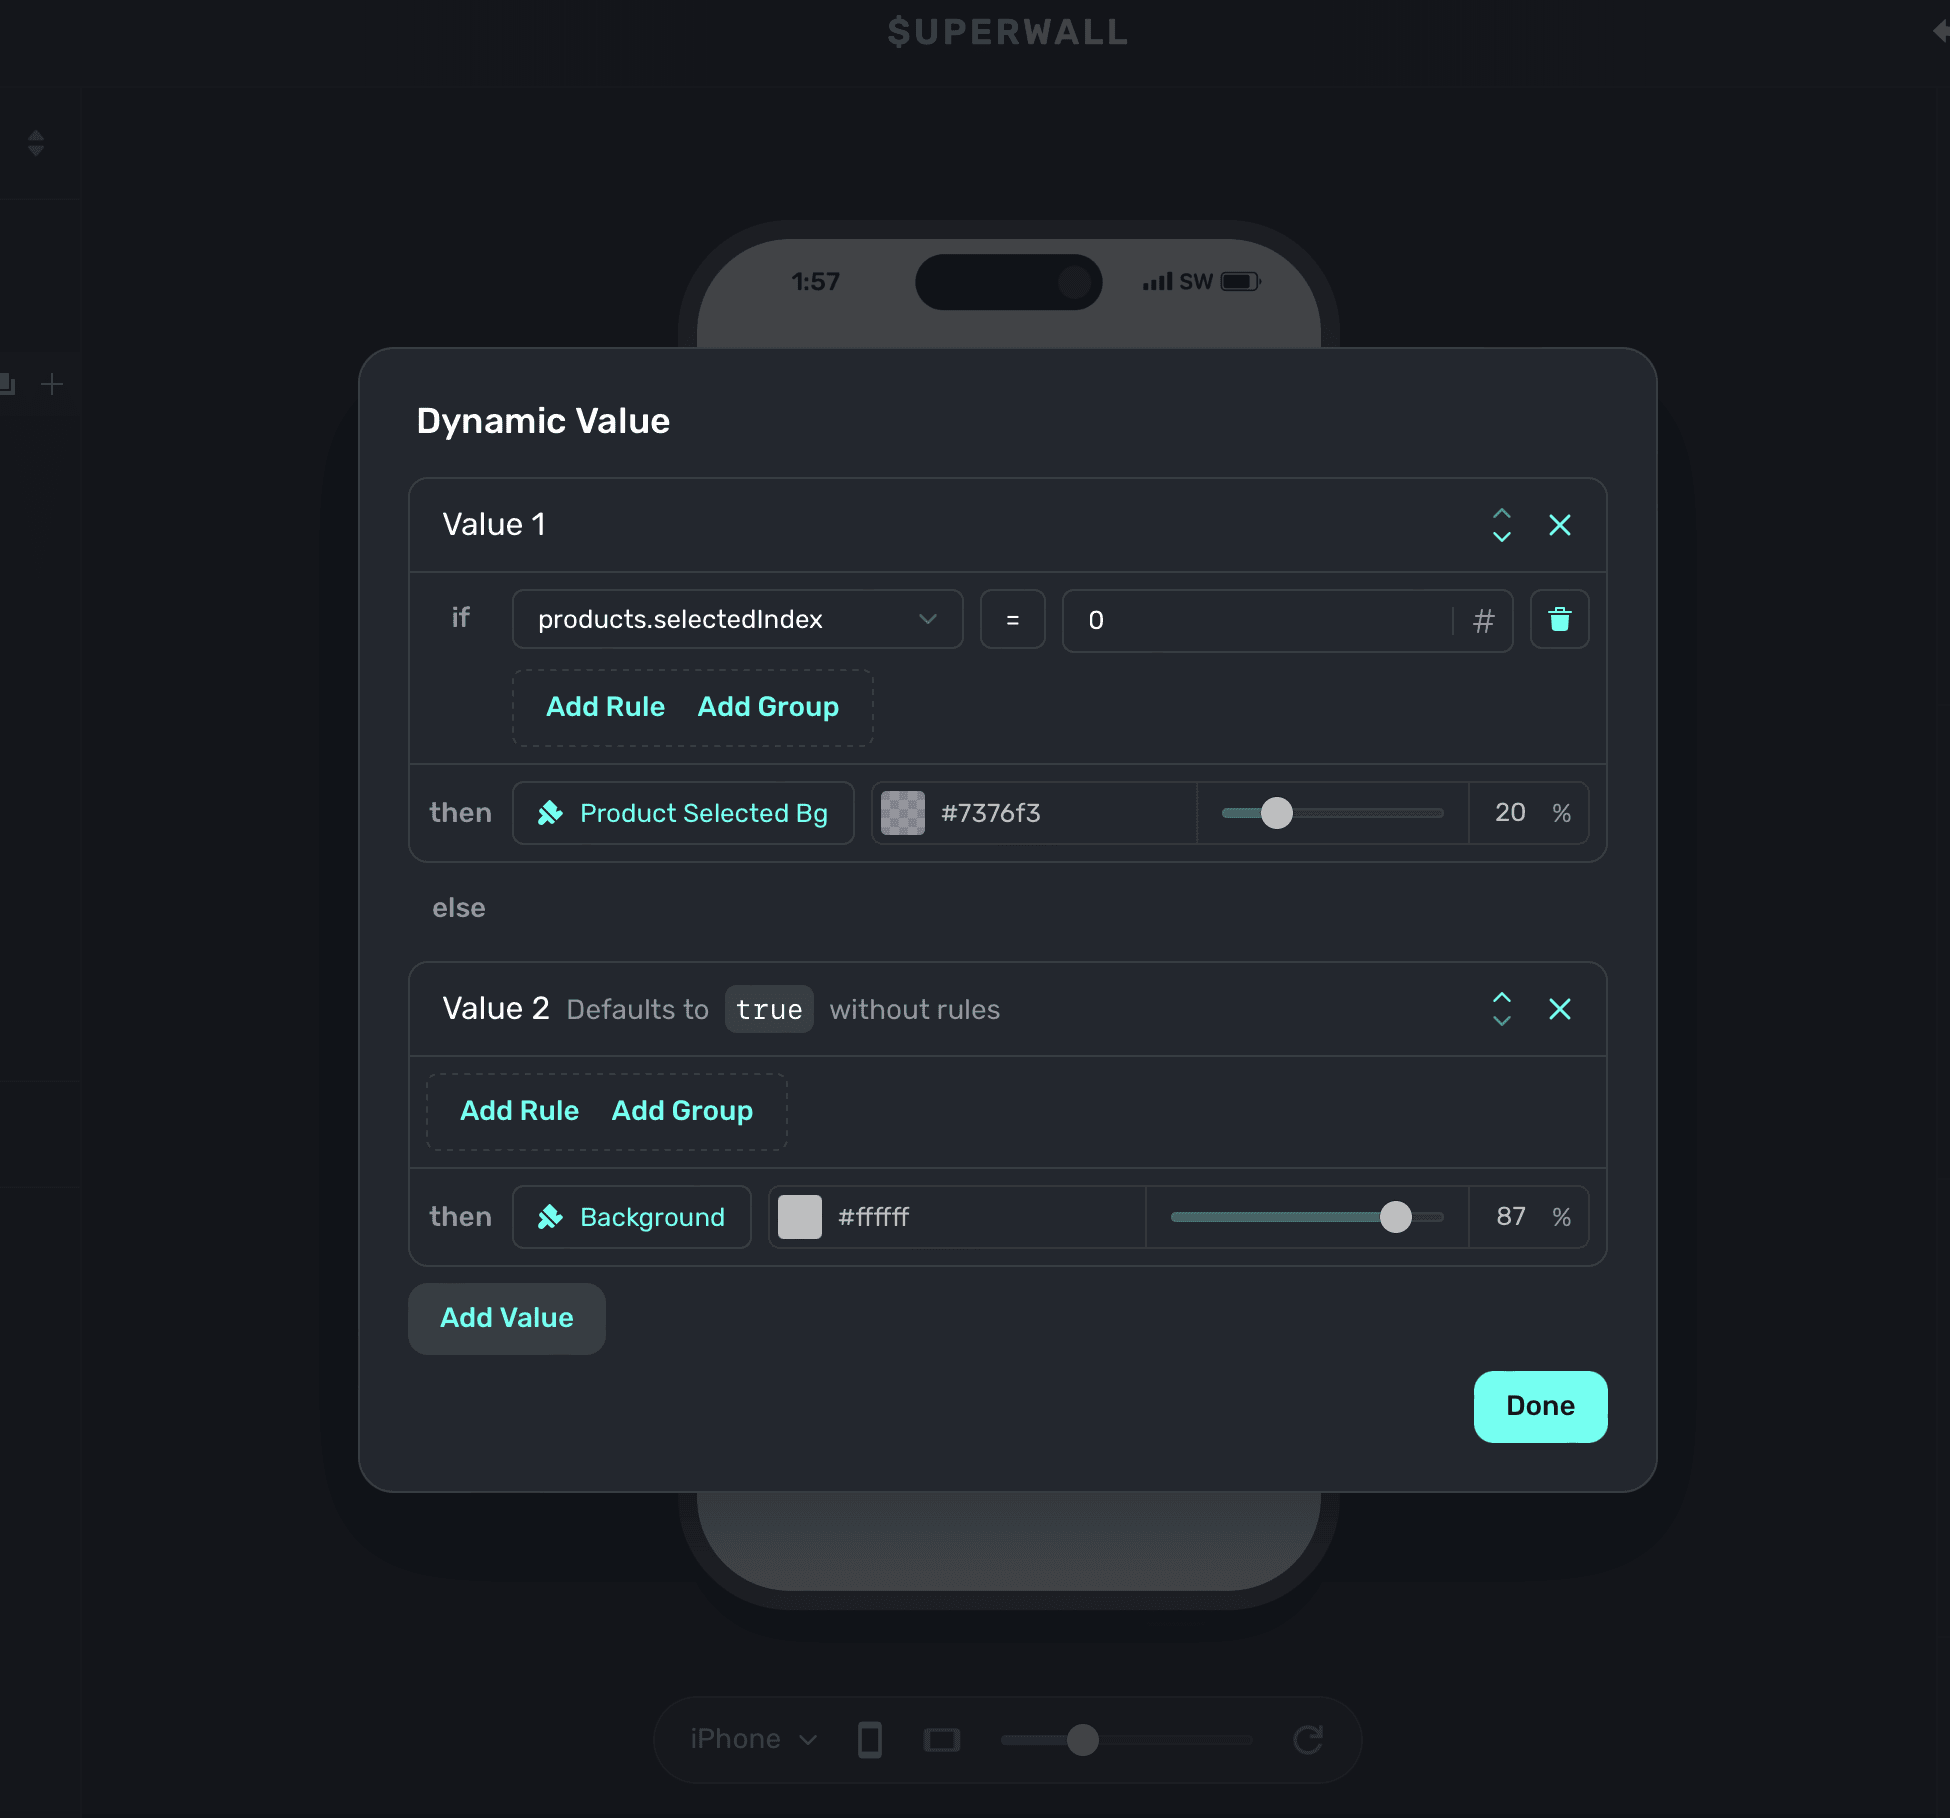
### Testing and handling different states
Often times, you'll want to test things like introductory or trial offers, a certain page within a paging design, or keep a modal drawer open to tweak its contents or look. To do that, simply change the variable's value in the editor. On the left sidebar, click **Variables** and then search for the one you're after and set its value.
Here are some common examples:
1. **Testing introductory offers:** To test trial or introductory offer states, change the `products.hasIntroductoryOffer` to `true` or `false`. In the example below, the text on the paywall changes based on whether or not a trial is available. To easily test it, you can toggle `products.hasIntroductoryOffer`:
2. **Testing a particular page in a paging paywall:** In this design, there are three distinct pages:
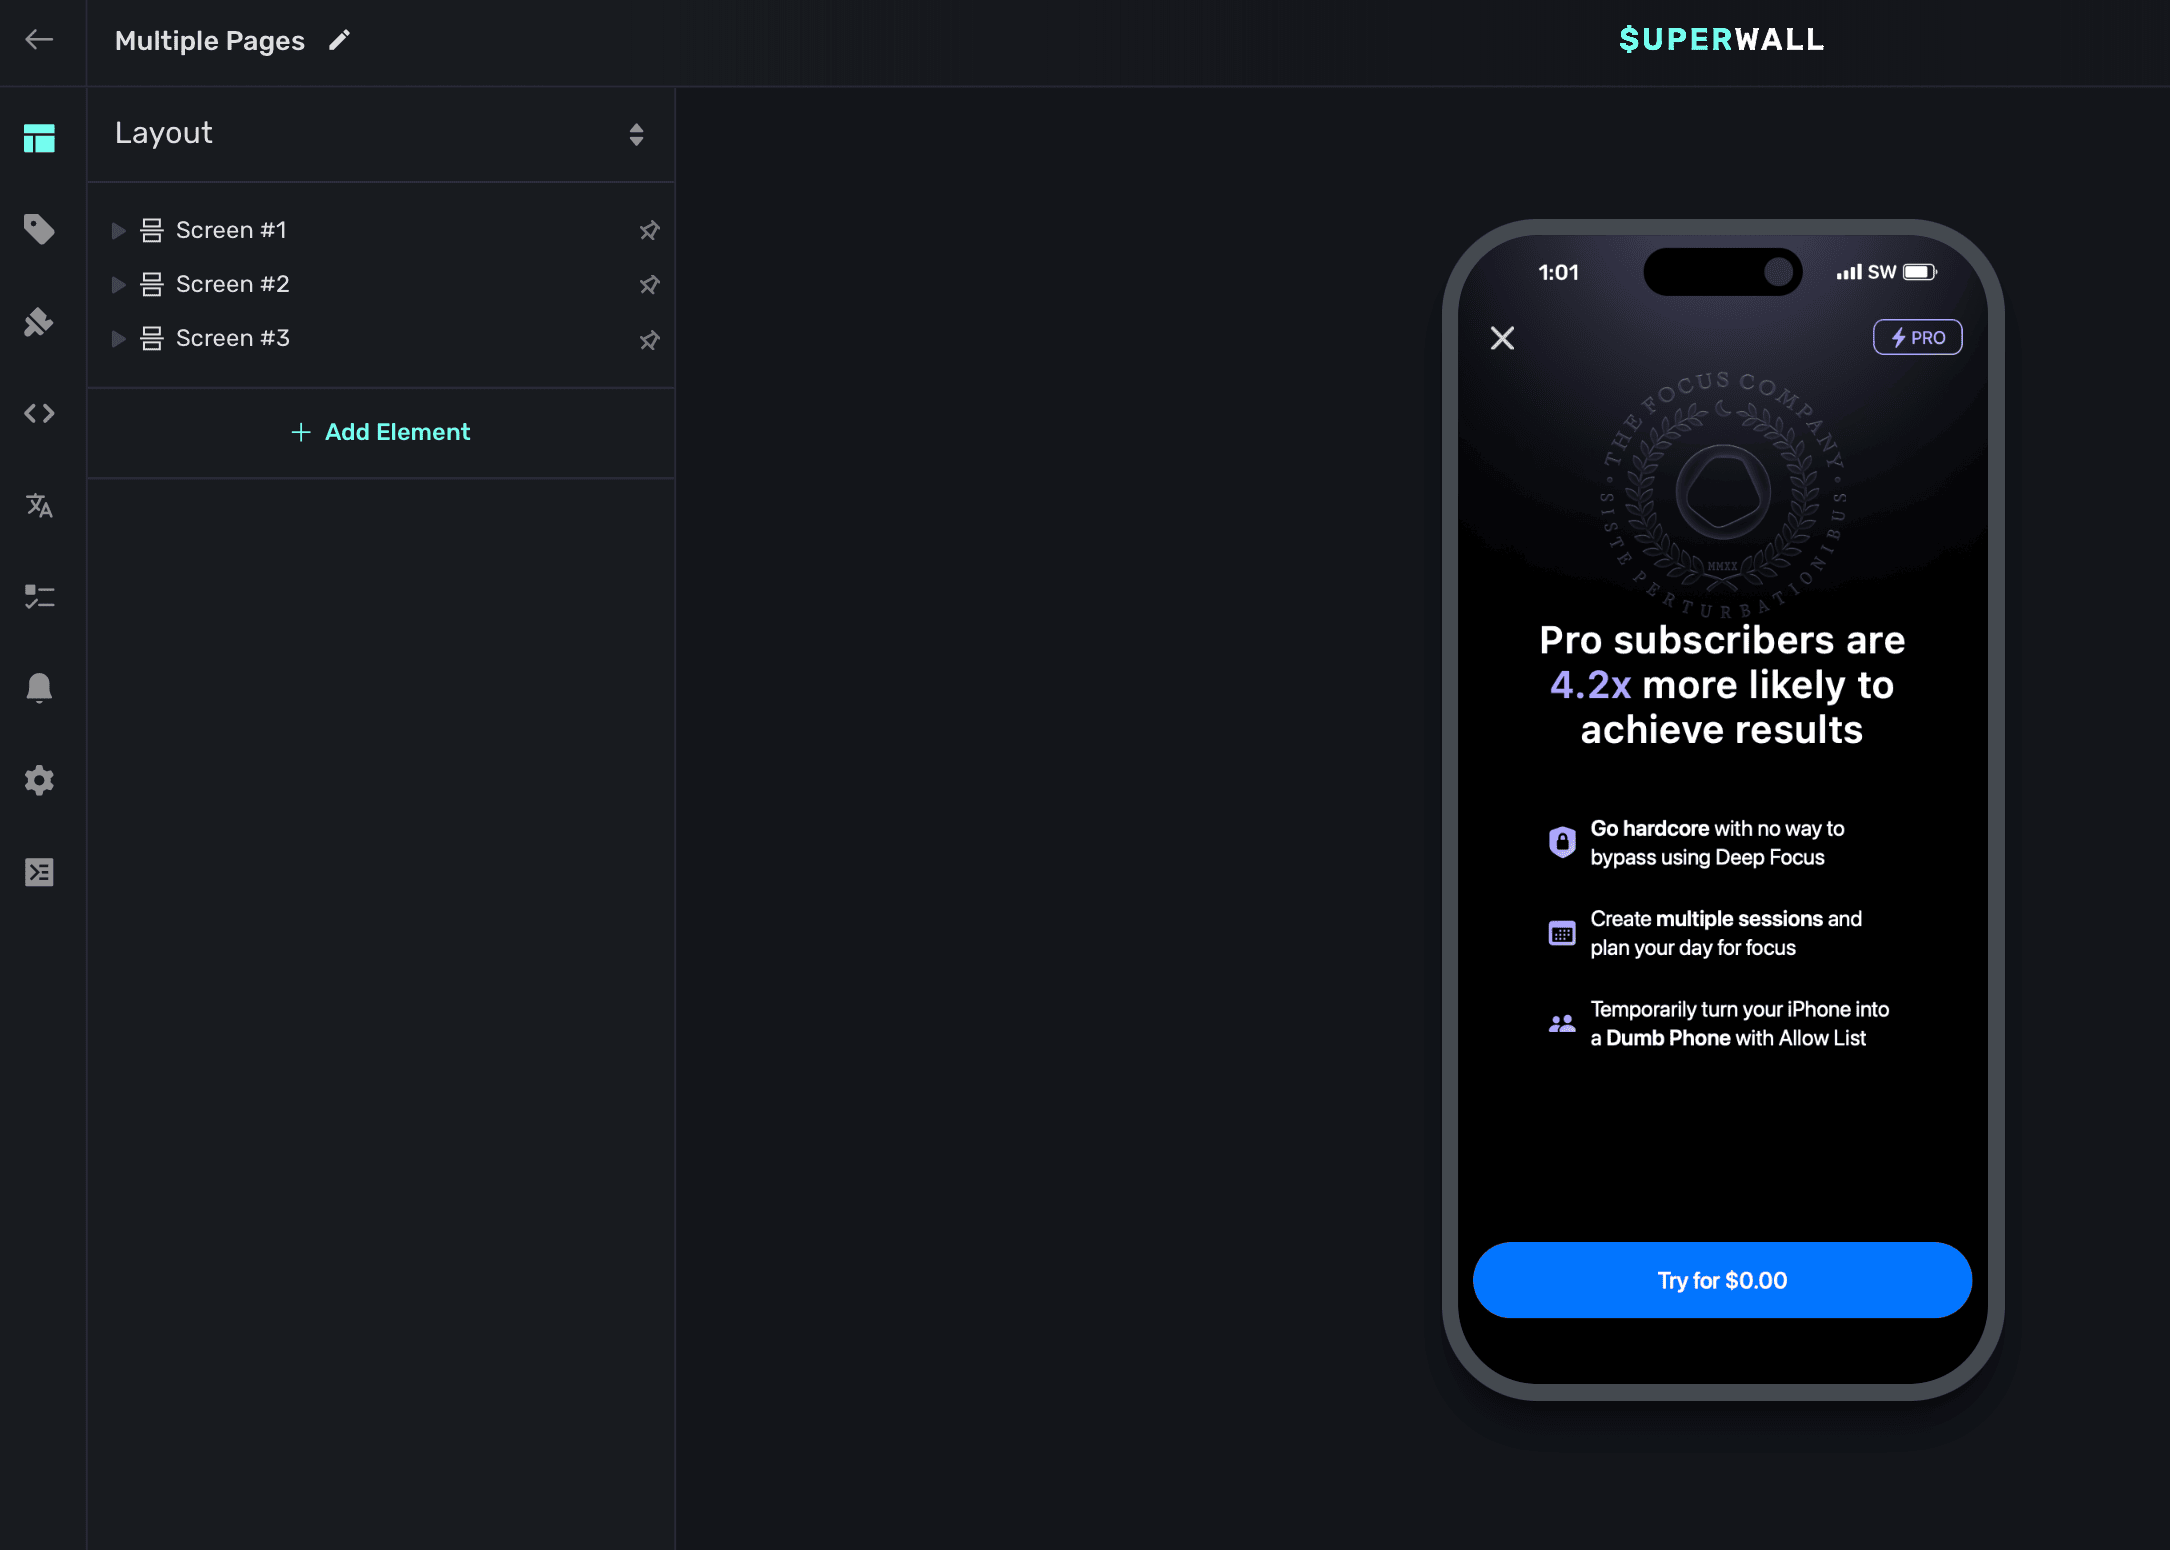
By default, the first one is showing. Though, if you needed to easily edit the second or third page, start by finding the variable that is controlling which page is shown. Typically, it'll be a state variable. Here, it's `changeScreen`:
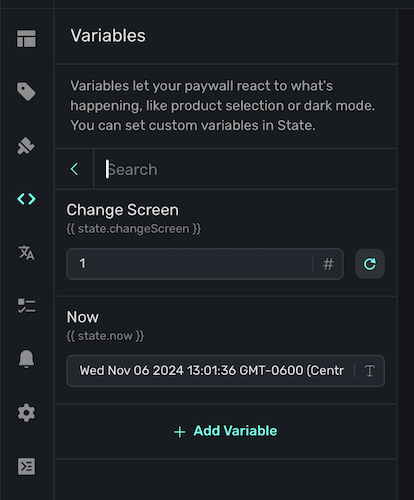
By changing it, you can easily pull up each individual page and edit it as needed:
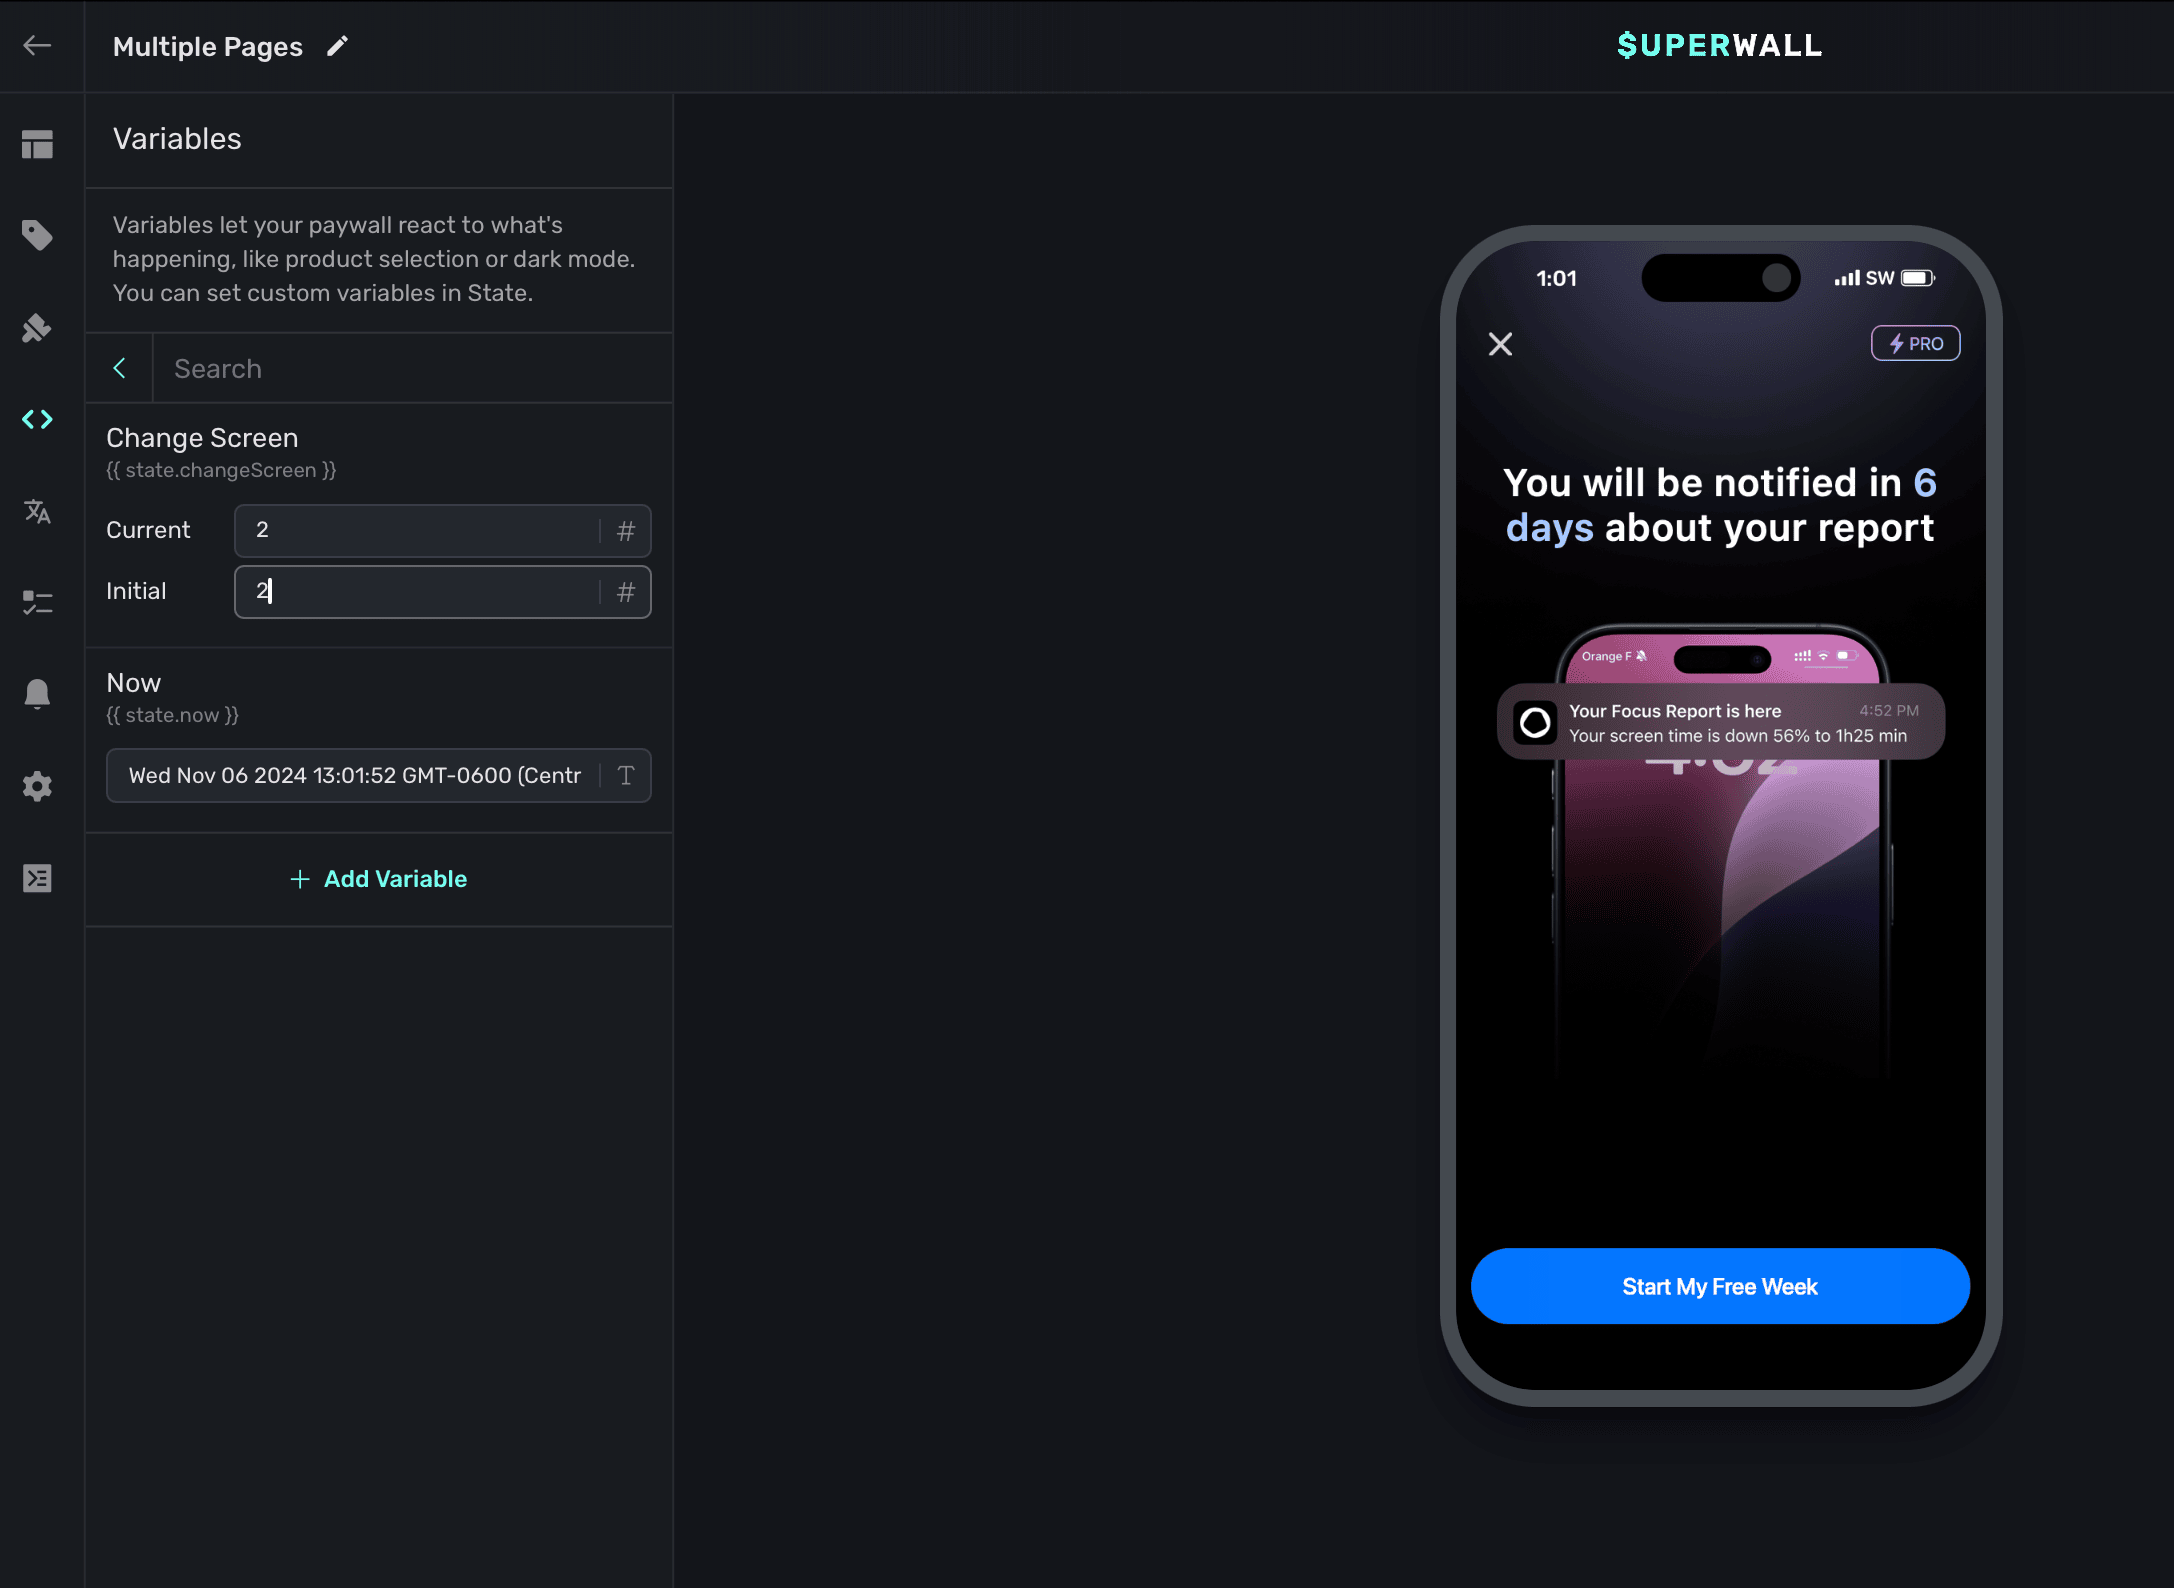
# Paywalls
Source: https://superwall.com/docs/paywalls
Create or edit paywalls across all of your campaigns in one place.
View the **Paywalls** section from the **sidebar** to view all of the paywalls you've created for the selected app, along with critical metrics:
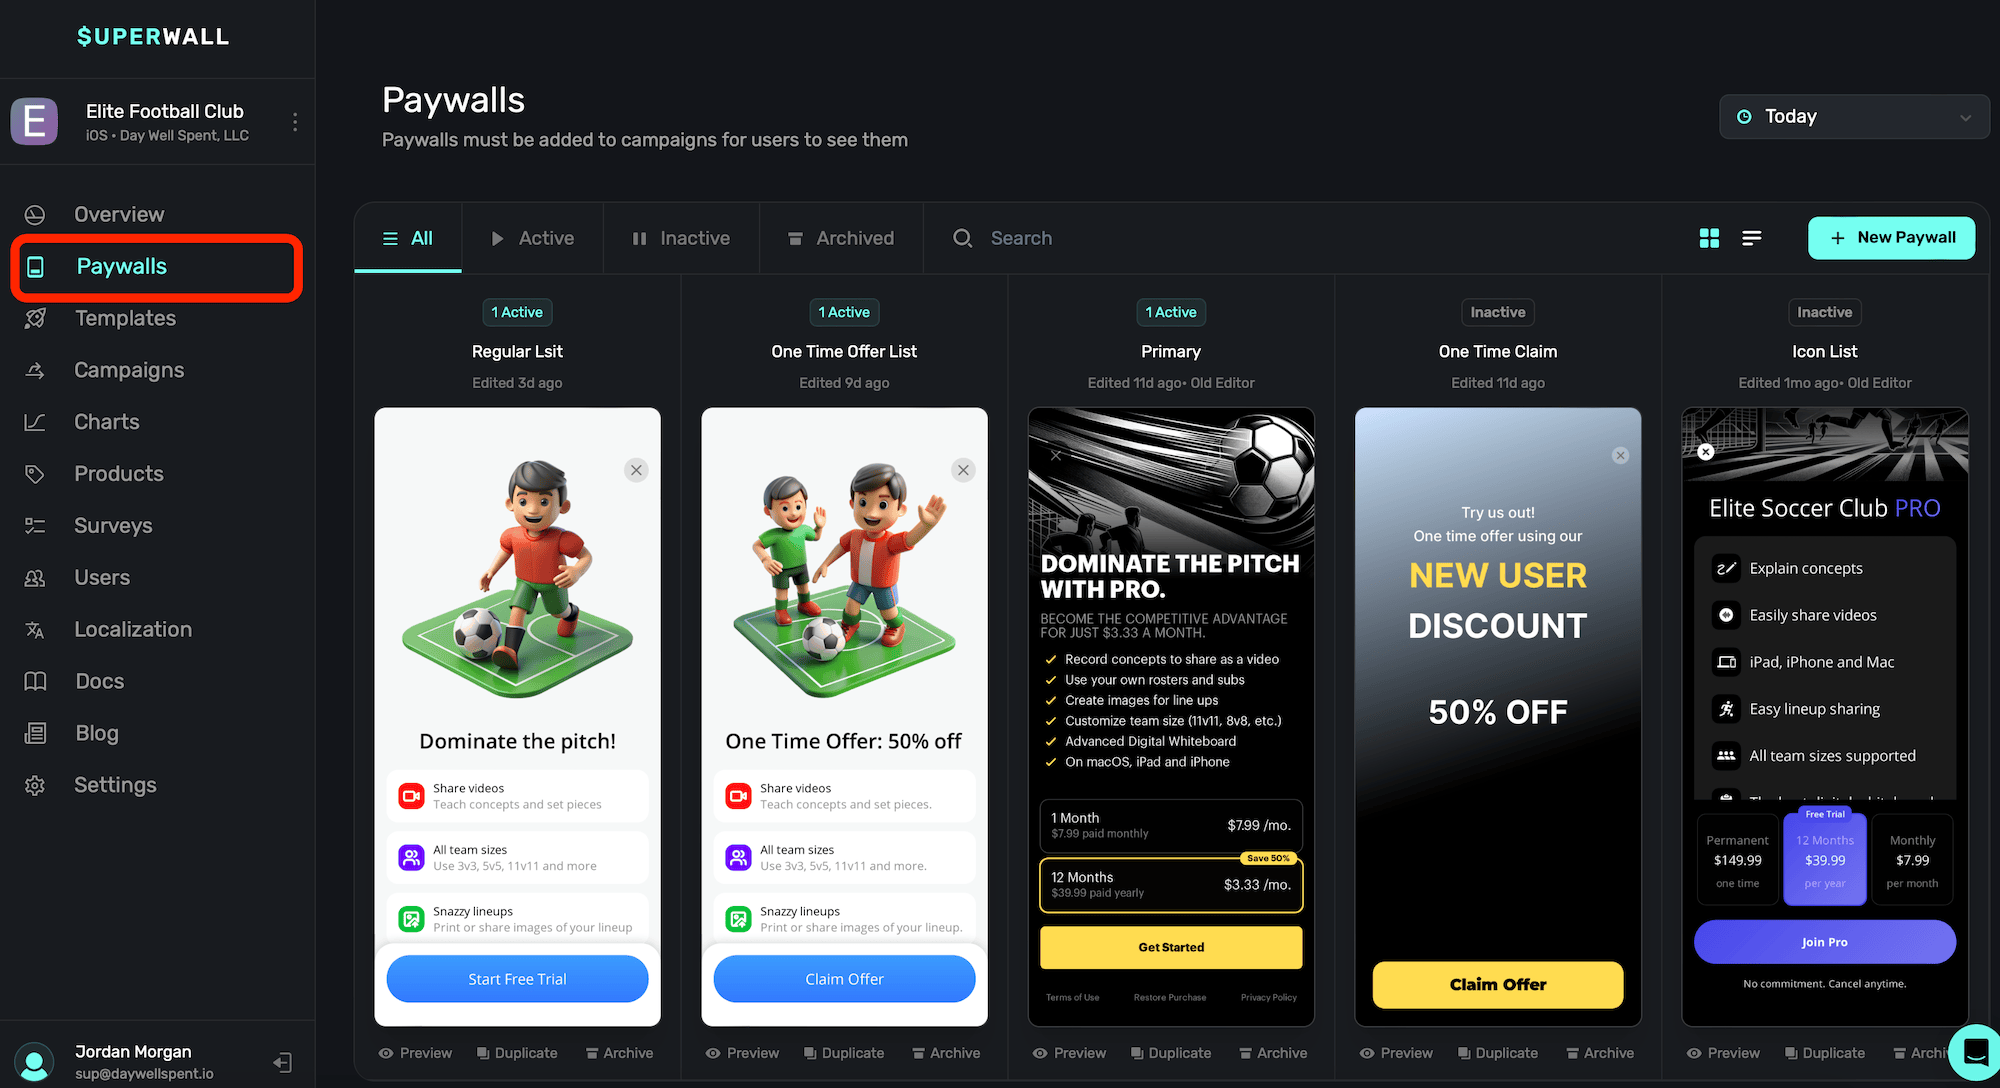
Below each paywall, you can also **Preview**, **Duplicate** or **Archive** it.
Archived paywalls can be restored at any point.
Looking for a beginner walkthrough of the paywall editor? Check out this video:
### Viewing paywalls by date
You can toggle which paywalls are showing by using the **date toggle**, located above your paywalls towards the top-right:
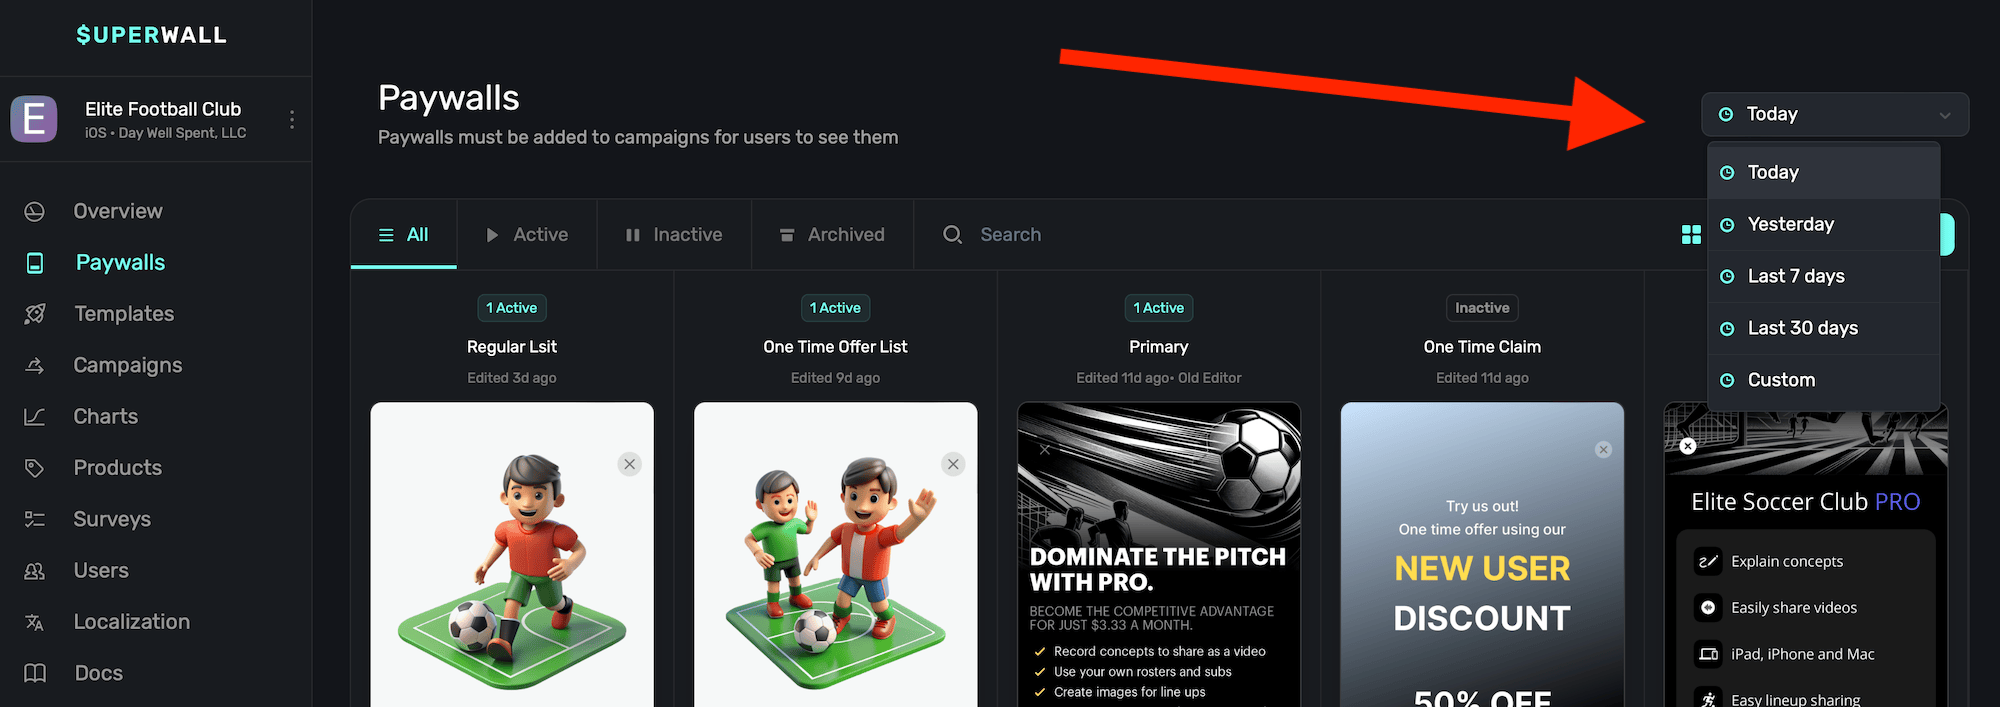
Choose **Custom** to select any arbitrary date range to filter by.
The date toggle works when you are viewing your paywalls as a
[**list**](#viewing-paywall-metrics).
### Viewing paywalls by status
To view a paywall by its status, click any of the options above the paywalls:
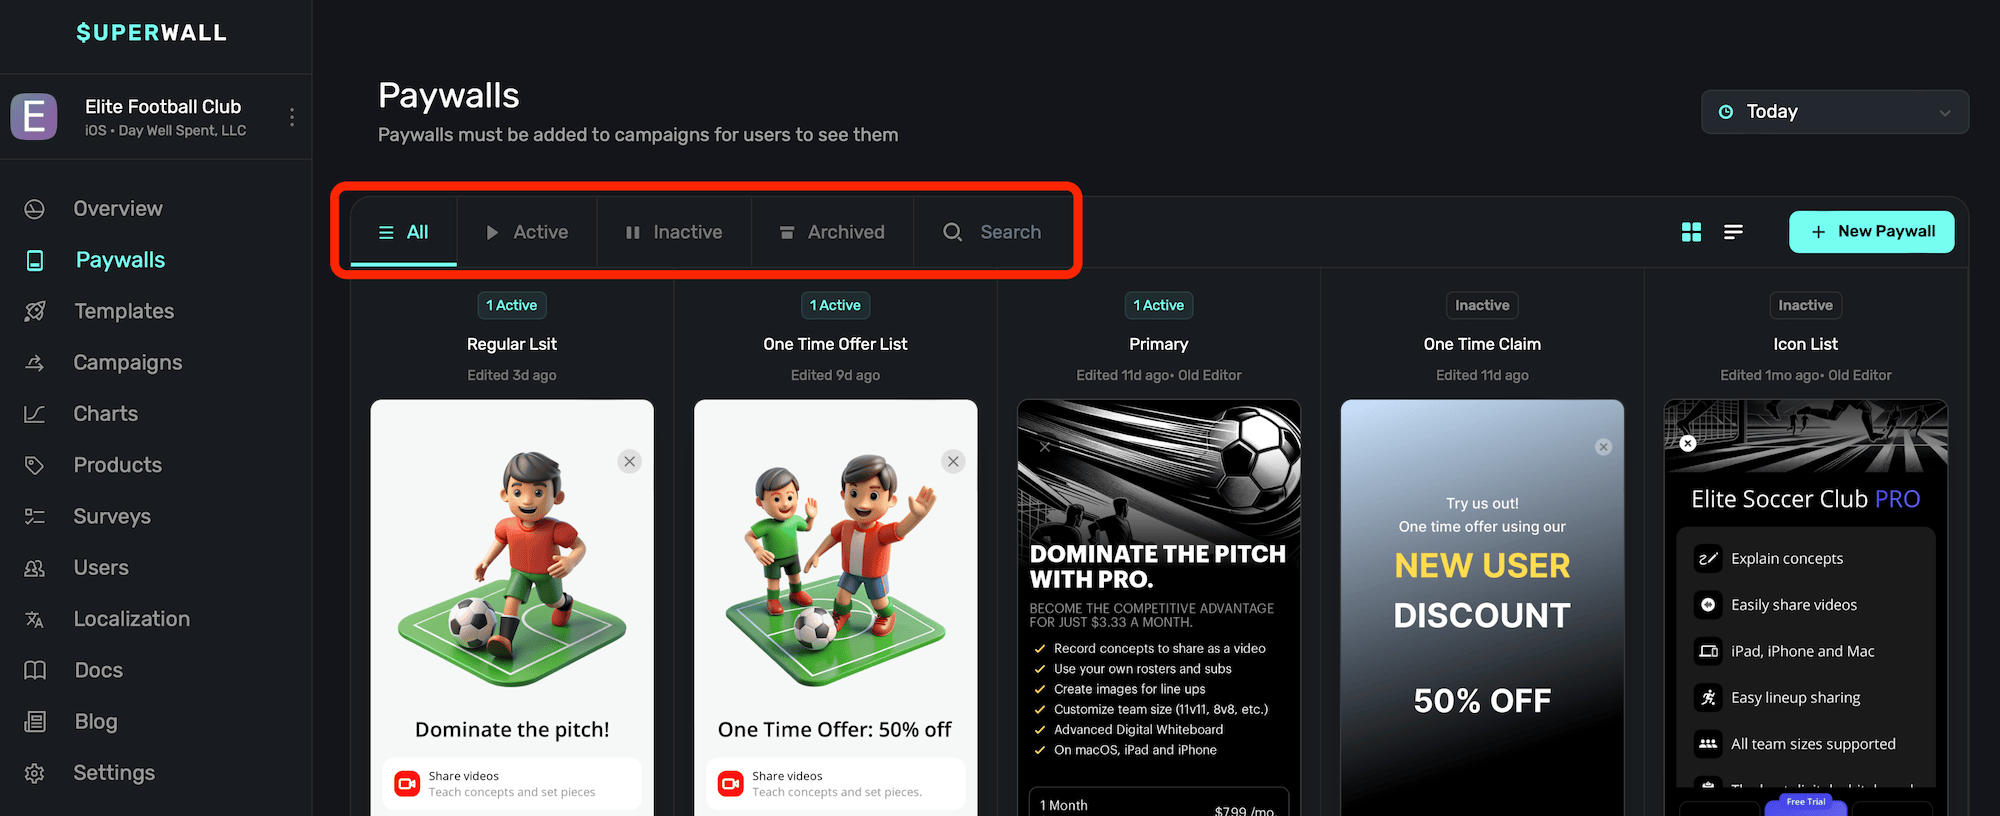
Here's what each status means:
Each paywall displayed corresponds to the currently selected app, located at the top-left of the
page.
| Property | Description |
| -------- | --------------------------------------------------------------------------------------------------------------------------- |
| All | Displays every paywall created, regardless of its status. |
| Active | Paywalls that are currently being displayed and are live. |
| Inactive | Paywalls which are not being displayed. They are not associated with any active campaign, or their rollout percentage is 0. |
| Archived | Paywalls that have been archived. These can be restored if needed. |
| Search | Perform a search across all of the app's paywalls, regardless of its status. |
### Viewing paywalls as a table or list
To toggle between viewing your paywalls by either a table or list, click the toggle buttons at the top:
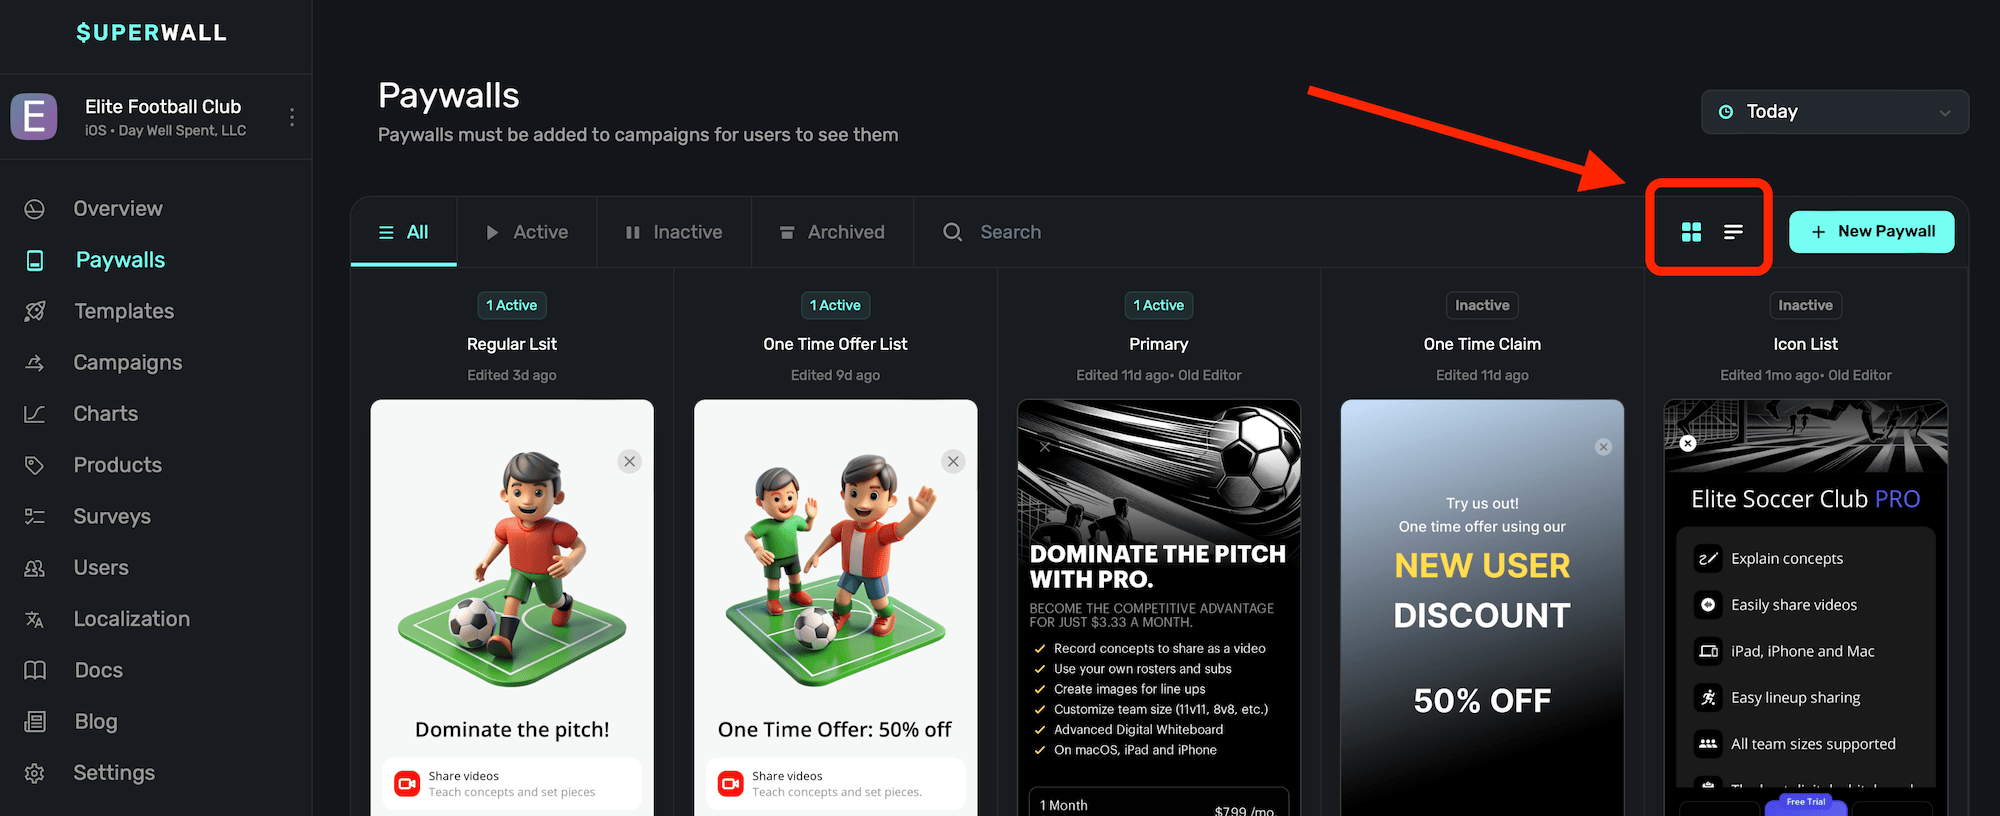
When viewing them as a **list**, Superwall also displays additional metrics.
### Viewing paywall metrics
Choose the **list** view to see high-level metrics about each paywall:
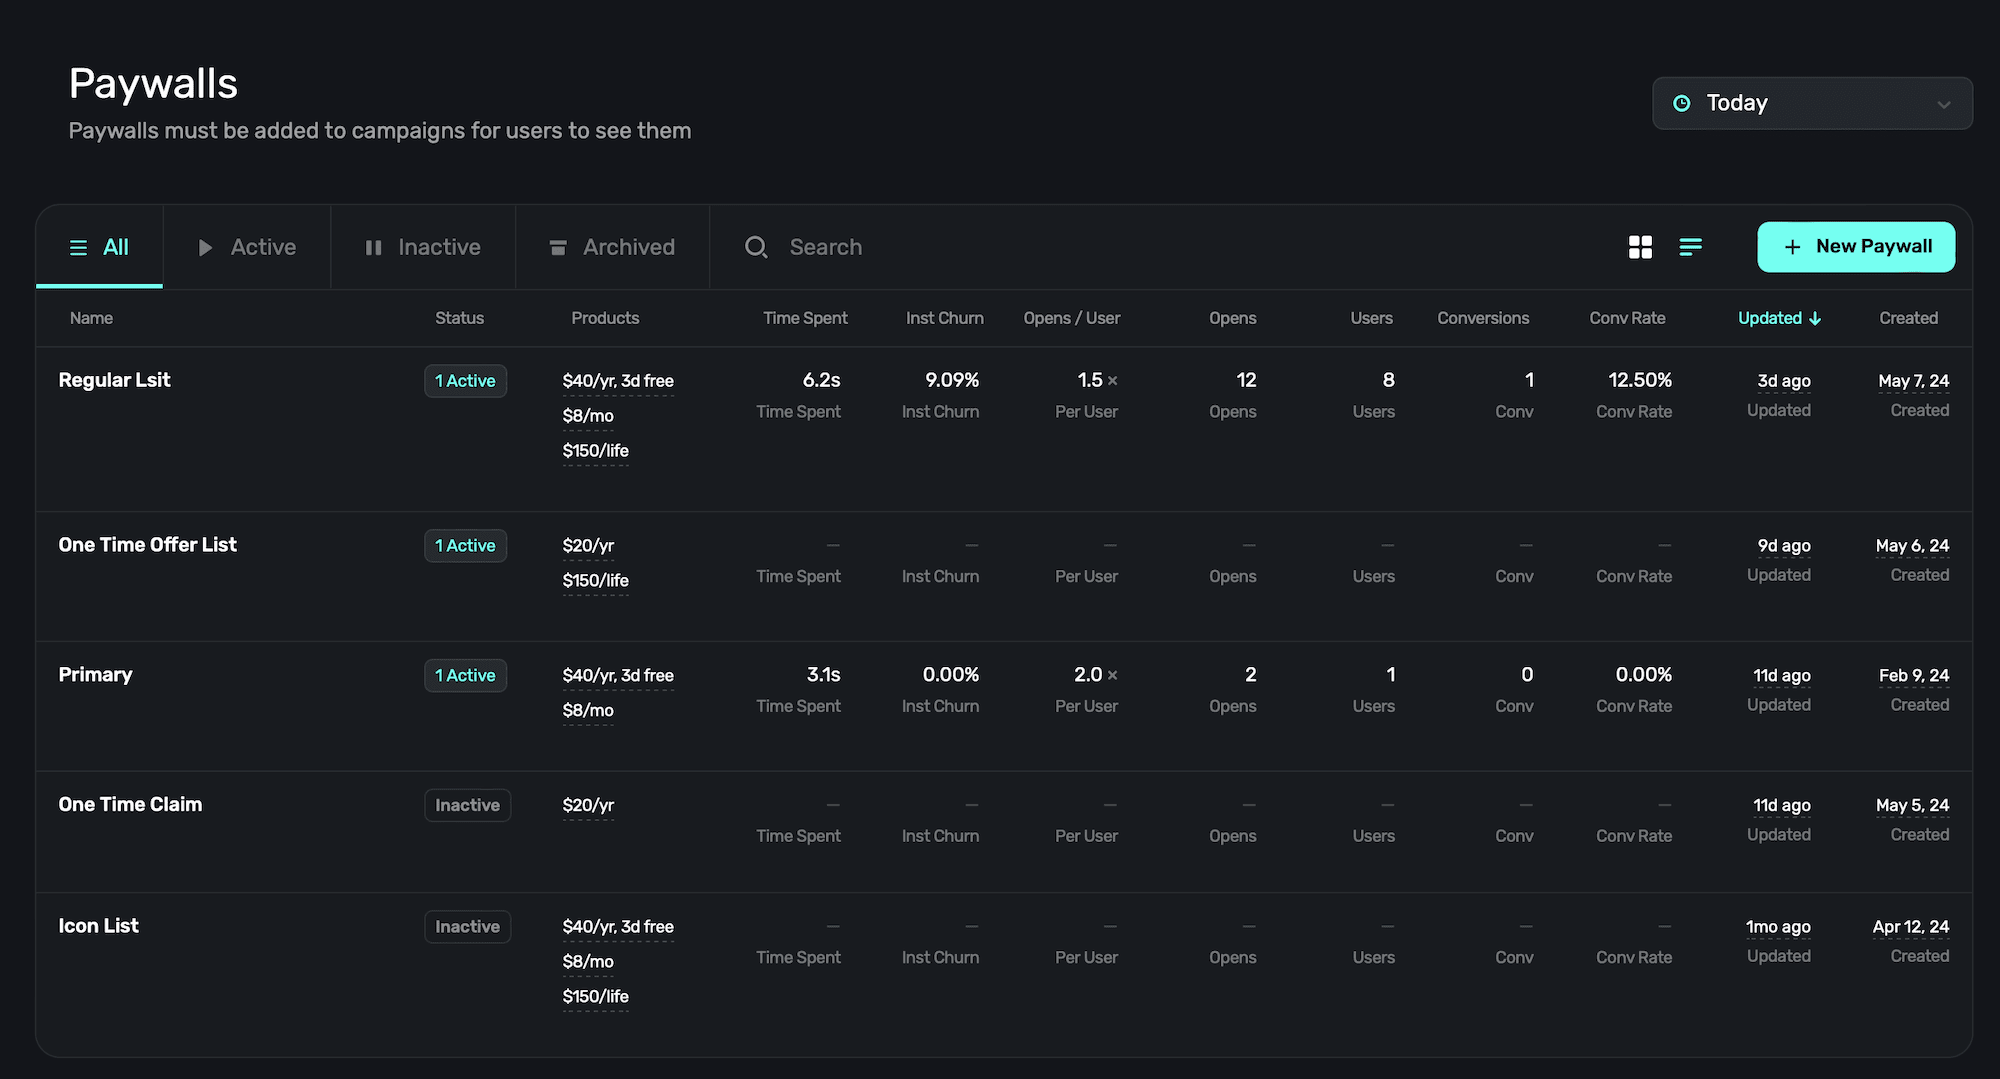
Each metric displays the data in the time frame that's selected from the date toggle. Here's what each metric represents:
| Property | Description |
| ----------- | ----------------------------------------------------------------------------------------------------------------------------------- |
| Status | The current status of the paywall (i.e. active, archived, etc). |
| Products | All of the products in use on the paywall. |
| Time Spent | How much time the paywall has spent being presented. |
| Inst Churn | Represents the percentage of users who closed the app while a paywall was presented, and the paywall was not manually closed prior. |
| Opens/User | The percentage per user of how many times the paywall was presented. |
| Opens | The total number of paywall opens. |
| Users | The total number of users who've interacted with the paywall. |
| Conversions | The total number of conversions for the paywall. |
| Conv Rate | The conversion rate of the paywall. |
| Updated | The date when the paywall was last updated. |
| Created | The date when the paywall was initially created or copied. |
Click on any of these values at the top of the list to order the data by that metric, either
ascending or descending.
### Creating a new paywall
To create a new paywall, click **+ New Paywall** at the top-right. For more on creating paywalls, check out this [doc](/paywall-editor-overview#using-the-editor).
# Pre-Launch Checklist
Source: https://superwall.com/docs/pre-launch-checklist
Ready to ship your app with Superwall? Here is a last minute checklist to give you confidence that you're ready to ship without issue.
In your Superwall account, make sure you've got a card on file to avoid any service disruptions.
Go to `Settings->Billing` in your Superwall account to add one if you haven't yet.
Set up your products in their respective storefront first, whether that's App Store Connect or
Google Play. Once you've done that, add them into Superwall. All of their respective identifiers
should match what they are in each storefront. For more details, refer to this
[page](/products).
Each paywall should display one or more of those previously added products. You can associate
them easily on the left hand side of the paywall editor.

Be sure your paywall presents and our SDK is configured in your app. If you need to double check
things, check out the [docs for the relevant platform](/configuring-the-sdk).
Next, after your paywall shows in Testflight and beta builds, make sure you can successfully
purchase a product, start a trial or kick off a subscription. If you run into an issue, try
these steps in our [troubleshooting guide](/troubleshooting). They solve a majority of the
common problems.
Finally, make sure that your subscriptions have been approved in each storefront. On App Store
Connect, for example, you'll have to send off each one individually for review. If this is your
initial launch, you can have them approved alongside the first build of your app.
If everything looks good here, you should be ready to launch with Superwall.
### Bonus Steps
These aren't essential, but they are good to think about to make sure you're leveraging all Superwall has to offer.
No matter how much you optimize flows, designs or copy — the truth is that, statistically speaking, the majority of users will not convert. Finding out why is key, and you can do that with our surveys that you can attach to any paywall.
Once a user closes a paywall, we'll present the survey attached to it. See how to set them up [here](/surveys).

If you're new to Superwall, it might be tempting to use one, do-it-all placement — like `showPaywall` or something similar. We don't recommend this, please use an individual placement for each action or scenario that could possibly trigger a paywall. The more placements you have, the more flexible you can be. It opens up things like:
1. Showing a particular paywall based on a placement. For example, in a caffeine tracking app, two of them might be `caffeineLogged` and `viewedCharts`. Later, you could tailor the paywall based on which placement was fired.
2. You can dynamically make some placements "Pro" or temporarily free to test feature gating without submitting app updates.
3. In your campaign view, you can see which placements resulted in conversions. This helps you see what particular features users might value the most.
The easy advice is to simply create a placement for each action that might be paywalled. For a quick video on how to use placements, check out this [YouTube Short](https://youtube.com/shorts/lZx8fAL8Nvw?feature=shared).
Audiences are how Superwall can segment users by filtering by several different values such as the time of day, app version and more. This lets you target different paywalls to certain audiences. To see an example of how you might set up an advanced example, see this video:
# Retrieving and Presenting a Paywall Yourself
Source: https://superwall.com/docs/presenting
Use this technique to get an instance of a paywall manually, using either UIKit, SwiftUI, or Jetpack Compose.
If you want complete control over the paywall presentation process, you can use `getPaywall(forPlacement:params:paywallOverrides:delegate:)`. This returns the `UIViewController` subclass `PaywallViewController`, which you can then present however you like. Or, you can use a SwiftUI `View` via `PaywallView`. The following is code is how you'd mimic [register](/docs/feature-gating):
```swift Swift
final class MyViewController: UIViewController {
private func presentPaywall() async {
do {
// 1
let paywallVc = try await Superwall.shared.getPaywall(
forPlacement: "campaign_trigger",
delegate: self
)
self.present(paywallVc, animated: true)
} catch let skippedReason as PaywallSkippedReason {
// 2
switch skippedReason {
case .holdout,
.noAudienceMatch,
.placementNotFound:
break
}
} catch {
// 3
print(error)
}
}
private func launchFeature() {
// Insert code to launch a feature that's behind your paywall.
}
}
// 4
extension MyViewController: PaywallViewControllerDelegate {
func paywall(
_ paywall: PaywallViewController,
didFinishWith result: PaywallResult,
shouldDismiss: Bool
) {
if shouldDismiss {
paywall.dismiss(animated: true)
}
switch result {
case .purchased,
.restored:
launchFeature()
case .declined:
let closeReason = paywall.info.closeReason
let featureGating = paywall.info.featureGatingBehavior
if closeReason != .forNextPaywall && featureGating == .nonGated {
launchFeature()
}
}
}
}
```
```swift Objective-C
@interface MyViewController : UIViewController
- (void)presentPaywall;
@end
@interface MyViewController ()
@end
@implementation MyViewController
- (void)presentPaywall {
// 1
[[Superwall sharedInstance] getPaywallForEvent:@"campaign_trigger" params:nil paywallOverrides:nil delegate:self completion:^(SWKGetPaywallResult * _Nonnull result) {
if (result.paywall != nil) {
[self presentViewController:result.paywall animated:YES completion:nil];
} else if (result.skippedReason != SWKPaywallSkippedReasonNone) {
switch (result.skippedReason) {
// 2
case SWKPaywallSkippedReasonHoldout:
case SWKPaywallSkippedReasonUserIsSubscribed:
case SWKPaywallSkippedReasonEventNotFound:
case SWKPaywallSkippedReasonNoRuleMatch:
case SWKPaywallSkippedReasonNone:
break;
};
} else if (result.error) {
// 3
NSLog(@"%@", result.error);
}
}];
}
-(void)launchFeature {
// Insert code to launch a feature that's behind your paywall.
}
// 4
- (void)paywall:(SWKPaywallViewController *)paywall didFinishWithResult:(enum SWKPaywallResult)result shouldDismiss:(BOOL)shouldDismiss {
if (shouldDismiss) {
[paywall dismissViewControllerAnimated:true completion:nil];
}
SWKPaywallCloseReason closeReason;
SWKFeatureGatingBehavior featureGating;
switch (result) {
case SWKPaywallResultPurchased:
case SWKPaywallResultRestored:
[self launchFeature];
break;
case SWKPaywallResultDeclined:
closeReason = paywall.info.closeReason;
featureGating = paywall.info.featureGatingBehavior;
if (closeReason != SWKPaywallCloseReasonForNextPaywall && featureGating == SWKFeatureGatingBehaviorNonGated) {
[self launchFeature];
}
break;
}
}
@end
```
```swift SwiftUI
import SuperwallKit
struct MyAwesomeApp: App {
@State var store: AppStore = .init()
init() {
Superwall.configure(apiKey: "MyAPIKey")
}
var body: some Scene {
WindowGroup {
ContentView()
.fullScreenCover(isPresented: $store.showPaywall) {
// You can just use 'placement' at a minimum. The 'feature'
// Closure fires if they convert
PaywallView(placement: "a_placement", onSkippedView: { skip in
switch skip {
case .userIsSubscribed,
.holdout(_),
.noRuleMatch,
.eventNotFound:
MySkipView()
}
}, onErrorView: { error in
MyErrorView()
}, feature: {
// User is subscribed as a result of the paywall purchase
// Or they already were (which would happen in `onSkippedView`)
})
}
}
}
}
```
```kotlin Kotlin
// This is an example of how to use `getPaywall` to use a composable`
import androidx.compose.foundation.layout.Arrangement
import androidx.compose.foundation.layout.Box
import androidx.compose.foundation.layout.Column
import androidx.compose.foundation.layout.fillMaxSize
import androidx.compose.material3.CircularProgressIndicator
import androidx.compose.material3.Text
import androidx.compose.runtime.Composable
import androidx.compose.runtime.LaunchedEffect
import androidx.compose.runtime.mutableStateOf
import androidx.compose.runtime.remember
import androidx.compose.ui.Alignment
import androidx.compose.ui.Modifier
import androidx.compose.ui.viewinterop.AndroidView
import com.superwall.sdk.Superwall
import com.superwall.sdk.paywall.presentation.get_paywall.getPaywall
import com.superwall.sdk.paywall.presentation.internal.request.PaywallOverrides
import com.superwall.sdk.paywall.vc.PaywallView
import com.superwall.sdk.paywall.vc.delegate.PaywallViewCallback
@Composable
fun PaywallComposable(
event: String,
params: Map? = null,
paywallOverrides: PaywallOverrides? = null,
callback: PaywallViewCallback,
errorComposable: @Composable ((Throwable) -> Unit) = { error: Throwable ->
// Default error composable
Text(text = "No paywall to display")
},
loadingComposable: @Composable (() -> Unit) = {
// Default loading composable
Box(modifier = Modifier.fillMaxSize()) {
Column(
modifier = Modifier.align(Alignment.Center),
verticalArrangement = Arrangement.Center,
horizontalAlignment = Alignment.CenterHorizontally
) {
CircularProgressIndicator()
}
}
}
) {
val viewState = remember { mutableStateOf(null) }
val errorState = remember { mutableStateOf(null) }
val context = LocalContext.current
LaunchedEffect(Unit) {
PaywallBuilder(event)
.params(params)
.overrides(paywallOverrides)
.delegate(delegate)
.activity(context as Activity)
.build()
.fold(onSuccess = {
viewState.value = it
}, onFailure = {
errorState.value = it
})
}
when {
viewState.value != null -> {
viewState.value?.let { viewToRender ->
DisposableEffect(viewToRender) {
viewToRender.onViewCreated()
onDispose {
viewToRender.beforeOnDestroy()
viewToRender.encapsulatingActivity = null
CoroutineScope(Dispatchers.Main).launch {
viewToRender.destroyed()
}
}
}
AndroidView(
factory = { context ->
viewToRender
}
)
}
}
errorState.value != null -> {
errorComposable(errorState.value!!)
}
else -> {
loadingComposable()
}
}
}
```
This does the following:
1. Gets the paywall view controller.
2. Handles the cases where the paywall was skipped.
3. Catches any presentation errors.
4. Implements the delegate. This is called when the user is finished with the paywall. First, it checks `shouldDismiss`. If this is true then is dismissed the paywall from view before launching any features. This may depend on the `result` depending on how you first presented your view. Then, it switches over the `result`. If the result is `purchased` or `restored` the feature can be launched. However, if the result is `declined`, it checks that the the `featureGating` property of `paywall.info` is `nonGated` and that the `closeReason` isn't `.forNextPaywall`.
### Best practices
1. **Make sure to prevent a paywall from being accessed after a purchase has occurred**.
If a user purchases from a paywall, it is your responsibility to make sure that the user can't access that paywall again. For example, if after successful purchase you decide to push a new view on to the navigation stack, you should make sure that the user can't go back to access the paywall.
2. **Make sure the paywall view controller deallocates before presenting it elsewhere**.
If you have a paywall view controller presented somewhere and you try to present
the same view controller elsewhere, you will get a crash. For example, you may
have a paywall in a tab bar controller, and then you also try to present it
modally. We plan on improving this, but currently it's your responsibility to
ensure this doesn't happen.
3. **Listening for Loading State Changes**.
If you have logic that depends on the progress of the paywall's loading state, you can use the delegate function `paywall(_:loadingStateDidChange:)`. Or, if you have an instance of a `PaywallViewController`, you can use the published property on iOS:
```swift
let stateSub = paywall.$loadingState.sink { state in
print(state)
}
```
# Presenting Paywalls from One Another
Source: https://superwall.com/docs/presenting-paywalls-from-one-another
Learn how to present a different paywall from one that's already presented.
It's possible to present another paywall from one already showing. This can be useful if you want to highlight a special discount, offer, or emphasize another feature more effectively using a different paywall. Check out the example here:
* A [placement](/campaigns-placements) is evaluated when the button is tapped. Superwall sees that the user isn't subscribed, so a paywall is shown.
* Next, the user taps the "Custom Icons Too 👀" button.
* The current paywall dismisses, and then presents the icons-centric paywall.

You can extend this technique to be used with several other interesting standard placements. For
example, presenting a paywall when the user abandons a transaction, responds to a survey and more.
Check out the examples [here](/campaigns-standard-placements#standard-placements).
There are two different ways you can do this, with [custom placements](/paywall-editor-styling-elements#tap-behaviors) or by using [deep links](/in-app-paywall-previews). We recommend using custom placements, as the setup is a little easier.
Custom placements minimum SDK requirements are 3.7.3 for iOS, 1.2.4 for Android, 1.2.2 for
flutter, and 1.2.6 for React Native.
They both have the same idea, though. You create a new campaign specifically for this purpose, attach a paywall and either add a filter (for deep linking) or a new placement (for custom placements) to match users to it.
While it's not *required* to make a new campaign, it is best practice. Then, if you later have
other paywalls you wish to open in the same manner, you can simply add a new
[audience](/campaigns-audience) for them in the campaign you make from the steps below.
### Use Custom Placements
Select a component on your paywall and add a **Custom Placement** Tap Behavior, and name it whatever you wish (i.e. showIconPaywall).

Finally, be sure to click **Publish** at the top of the editor to push your changes live
Create a new [campaign](/campaigns) specifically for this purpose, here — it's called "Custom Placement Example":

In your new campaign, [add a new placement](/campaigns-placements#adding-a-placement) that matches the name of your custom action you added in step one. For us, that's `showIconPaywall`:

Finally, choose a paywall that should present by **clicking** on the **Paywalls** button at the top:

### Use Deep Links
You'll need [deep links](/in-app-paywall-previews) set up for your app. This is how Superwall
will query parameters and later launch your desired paywall.
Choose the paywall you want to open another paywall from. Then, click the element (a button, text, etc.) that should open the new paywall:
1. In its component properties on the right-hand side, add a **Tap Behavior**.
2. Set its **Action** to **Open Url**.
3. For the URL, use your deep link scheme from step one, and then append a parameter which will represent which other paywall to present. This is specific to your app, but here — `offer` is the key and `icons` is the value. Your resulting URL should be constructed like this: `deepLinkScheme://?someKey=someValue`.
4. Set its **Type** to **Deep Link**.
5. Click **Done**.
Here's what it should look like (again, with your own values here):

Finally, be sure to click **Publish** at the top of the editor to push your changes live.
Create a new [campaign](/campaigns) specifically for this purpose, here — it's called "Deeplink Example":

In your new campaign, [add a placement](/campaigns-placements#adding-a-placement) for the `deepLink_open` standard placement:

Edit the default audience's filter to match `params.[whatever-you-named-the-parameter]`. Recall that in our example, the parameter was `offer` and the value was `icons`. So here, we'd type `params.offer` and **click** the **+** button:

Superwall will ask what type of new parameter this is — choose **Placement** and enter the parameter name once more (i.e. "offer"). Click **Save**:

Finally, choose the **is** operator and type in the value of your parameter (in our case, "icons"). Then, **click** the **+ Add Filter** button. Here's what it should look like:

Finally, choose a paywall that should present by **clicking** on the **Paywalls** button at the top:

### Test Opens
After following the steps above for either method, be sure to test out your presentation. Open the relevant paywall on a device and tap on whichever button should trigger the logic. The currently presented paywall should dismiss, and then immediately after — the other paywall will show.
# Adding Products
Source: https://superwall.com/docs/products
Add your existing products from their respective storefront, such as the App Store or the Google Play Store, to an app so they can be used in one or more paywalls. For adding Stripe products, please view [this doc](/web-checkout-adding-a-stripe-product).
Before you attempt to test a paywall on iOS via TestFlight, make sure they are in the "Ready to Submit" phase if it's their initial launch. For local testing, you can use a [StoreKit configuration file](/testing-purchases) at any point.
Right now, Superwall for iOS does not support [Promotional
Offers](https://developer.apple.com/documentation/storekit/in-app_purchase/original_api_for_in-app_purchase/subscriptions_and_offers/setting_up_promotional_offers),
only [Introductory
Offers](https://developer.apple.com/documentation/storekit/in-app_purchase/original_api_for_in-app_purchase/subscriptions_and_offers/implementing_introductory_offers_in_your_app).
Superwall for Android only supports 1 billing phase per offer.
To get started, select an app. Then **click** the **Products** button from the sidebar. Choose **+ Add Product**:
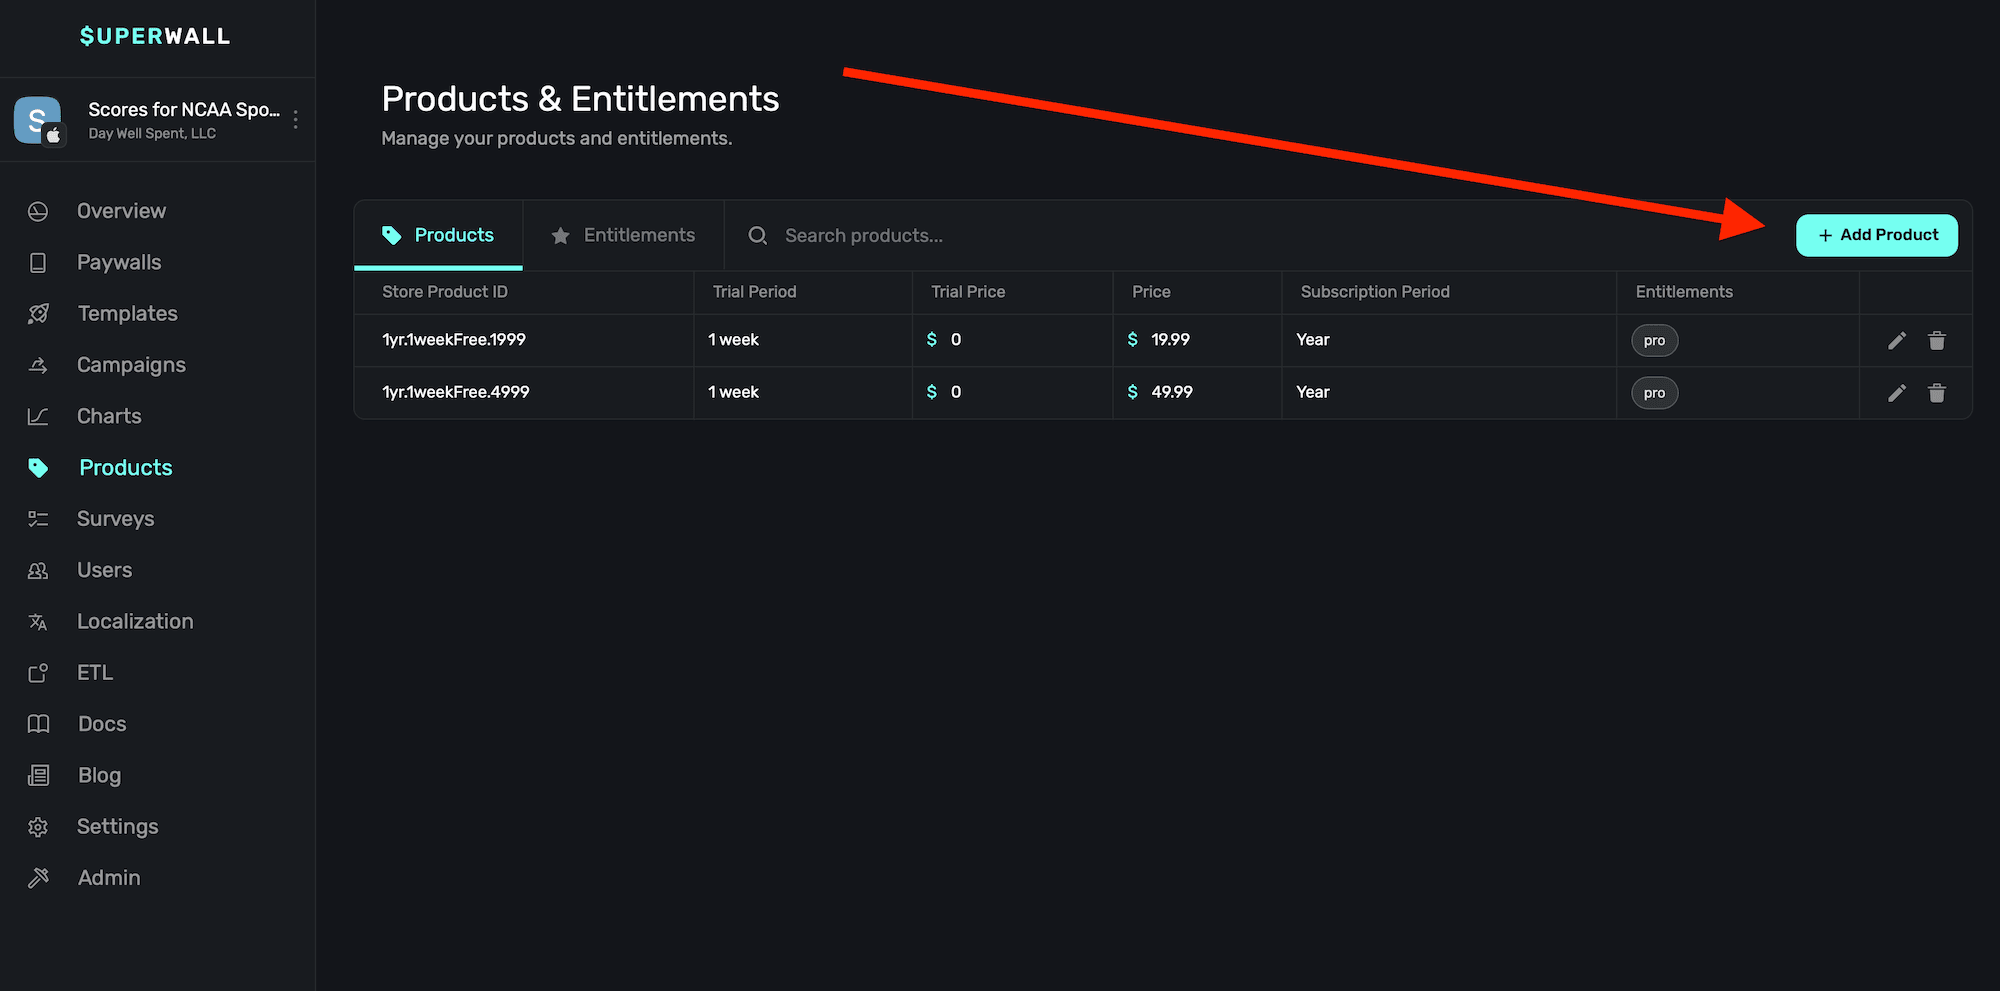
From there, you have five fields to fill out:
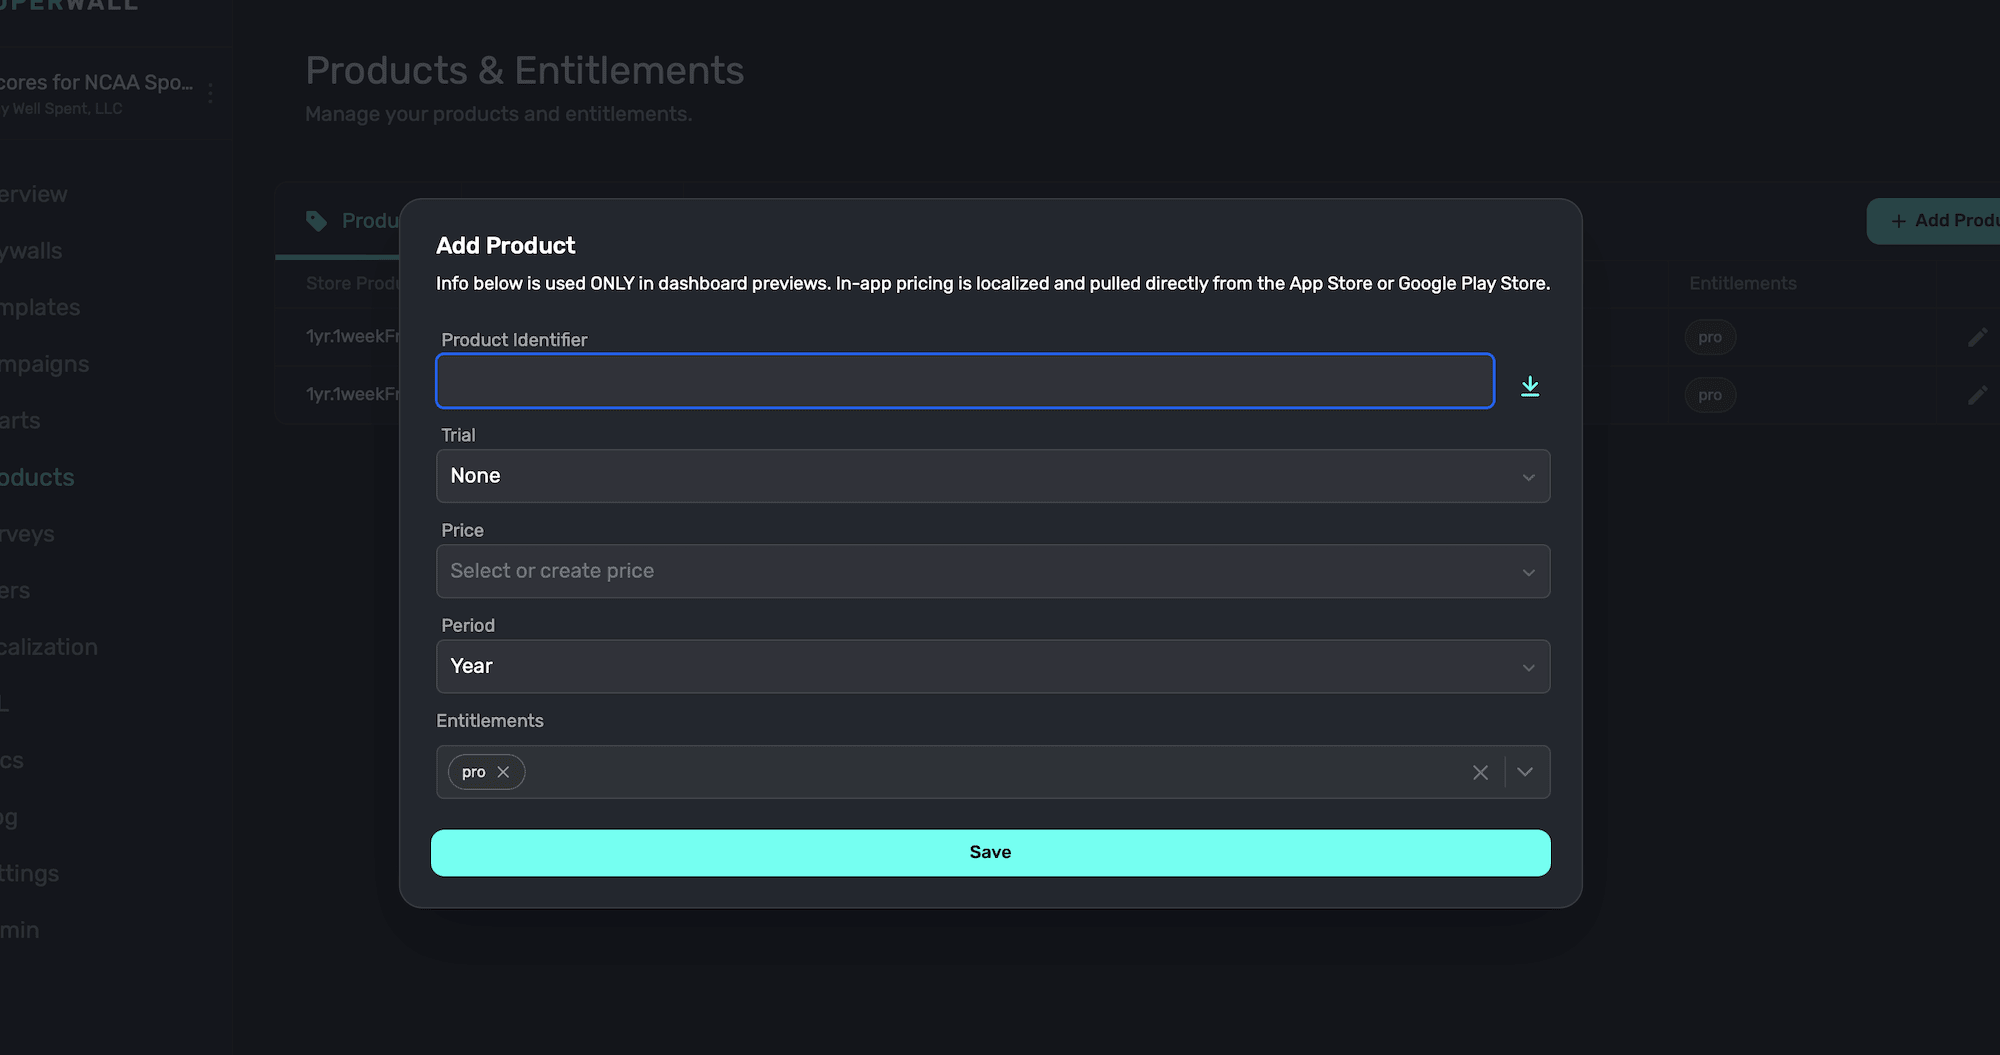
| Field | Description |
| ------------ | ---------------------------------------------------------------------------------------------------------- |
| Identifier | The StoreKit or Google Play product identifier for your product. |
| Trial | The trial duration attached to the product, if any. |
| Price | The price attached to the product. Either type one in, or just the dropdown to select common price points. |
| Period | The length of the subscription. |
| Entitlements | The entitlements this product belongs to. |
When your done, click **Save**.
Note that the pricing information you enter here is **only** used in the Paywall Editor. On
device, that information is pulled directly from the App Store or Google Play Store and will be
localized.
Take care to make sure your product identifier is correct and matches its storefront. This is the
most common cause for products not working correctly when testing.
### Entitlements
Entitlements represent the amount of access or features users are entitled to. They can be used to offer different tiers of service, or just represent a single "active" subscription if your app only has one level of service (i.e. "Pro" unlocks everything). All products are granted a default entitlement.
**If you don't have multiple tiers of service, then you don't need to make any additional entitlements.**
To add an entitlement, **click** on the **Entitlements** tab within the products page. Then click **Add Entitlement**:
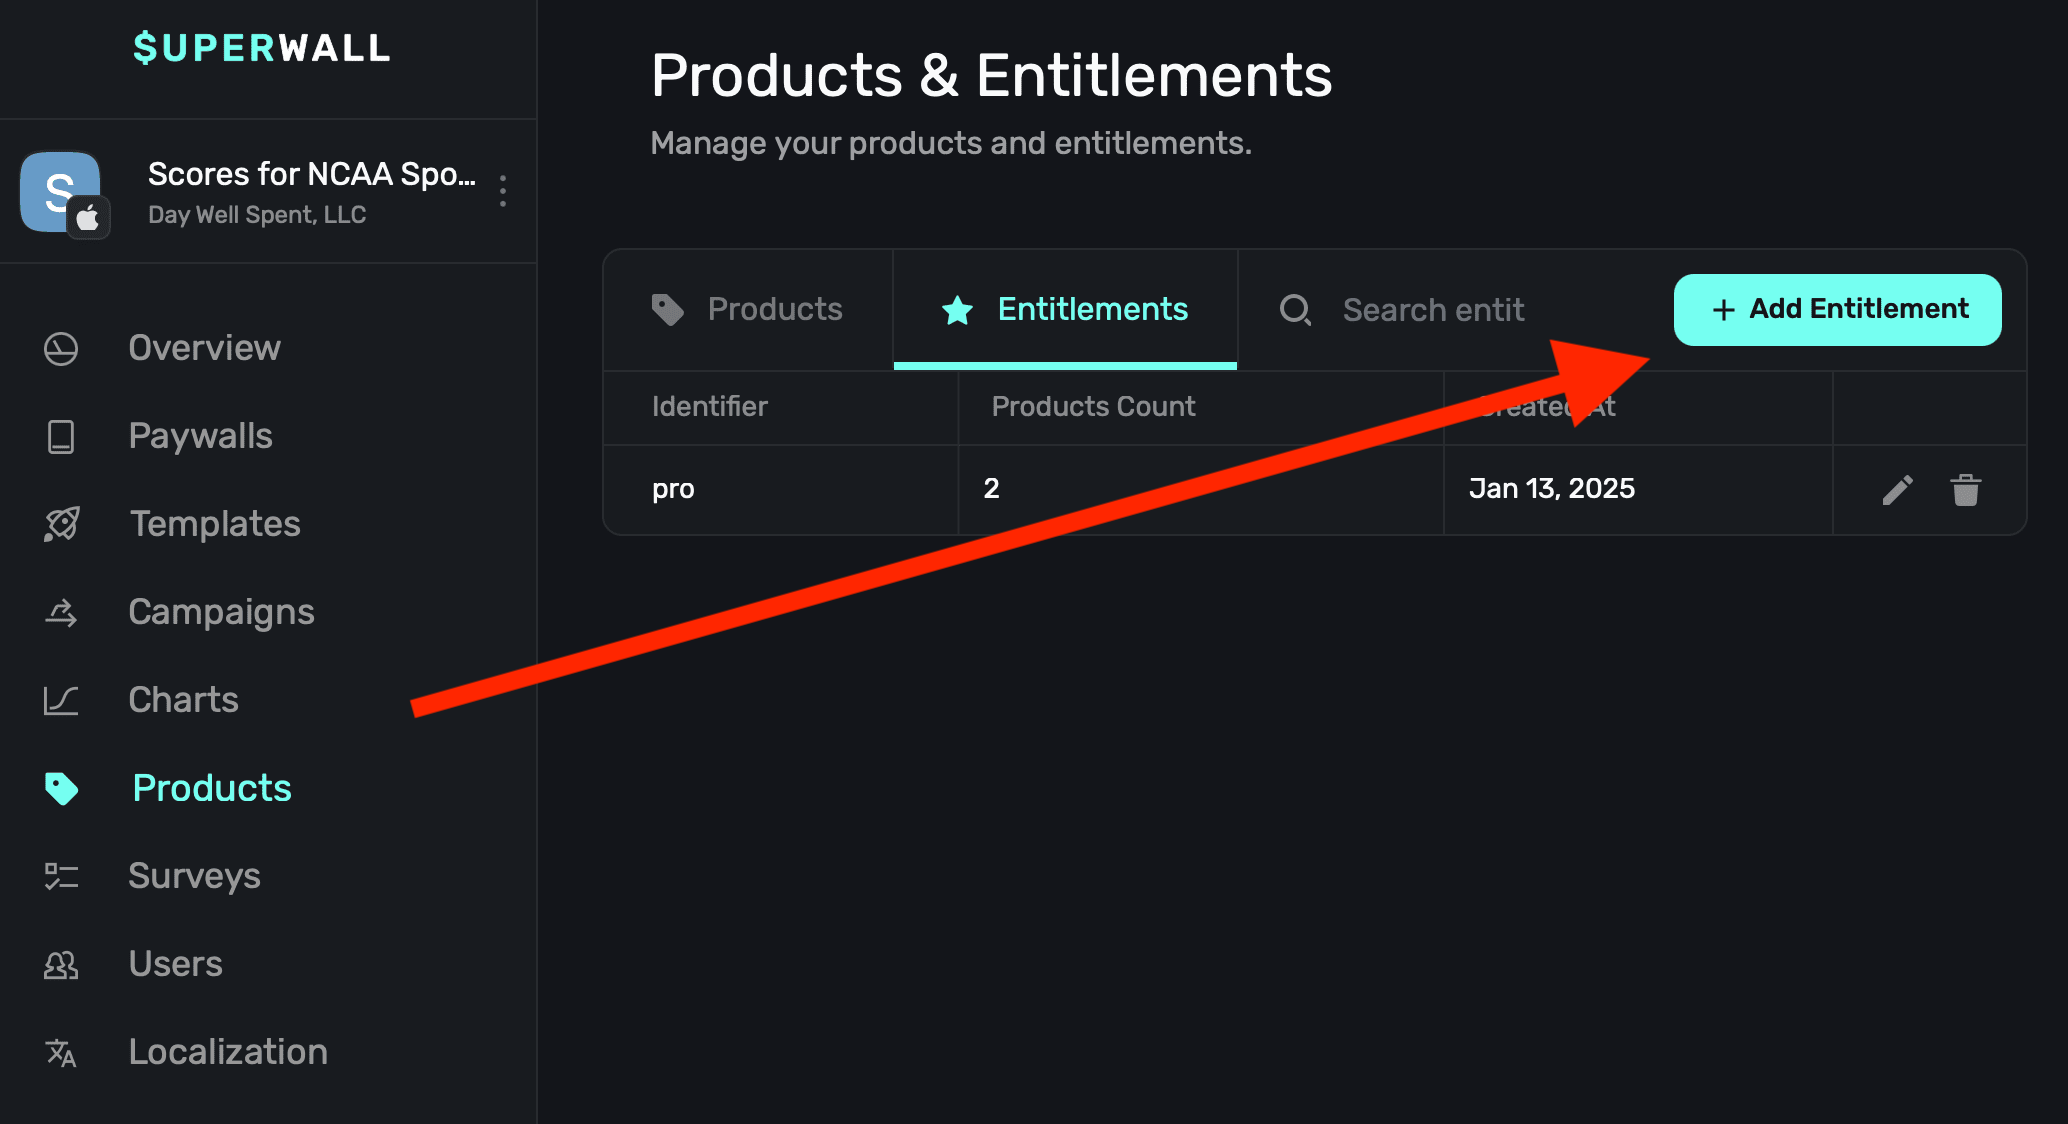
From there, give it a name, and click **Create**:
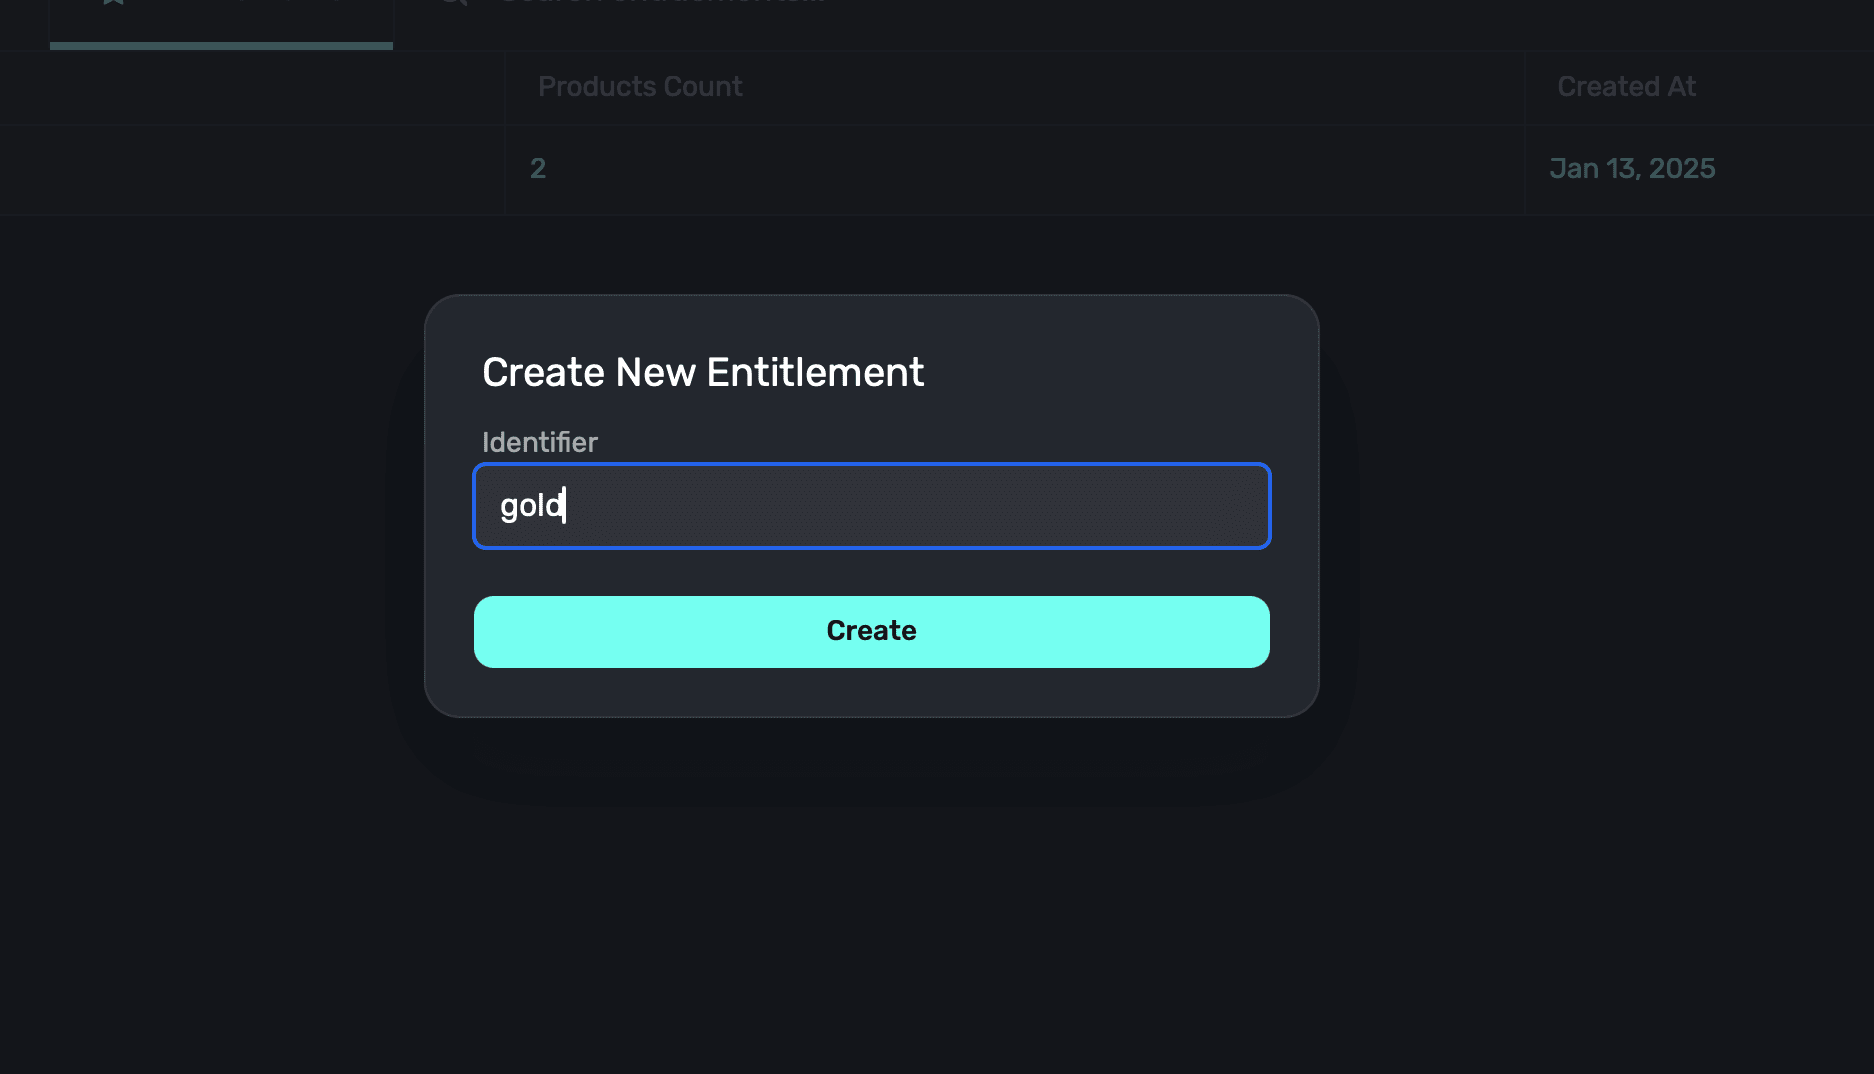
At this point, you can go back to your products and attach one or more entitlements to each one.
#### Editing entitlements
To edit or delete and entitlement, click on the trailing pencil icon or the trash can icon to remove one. Note that if your entitlement is associated with any product, you'll need to remove it first before you can delete it.
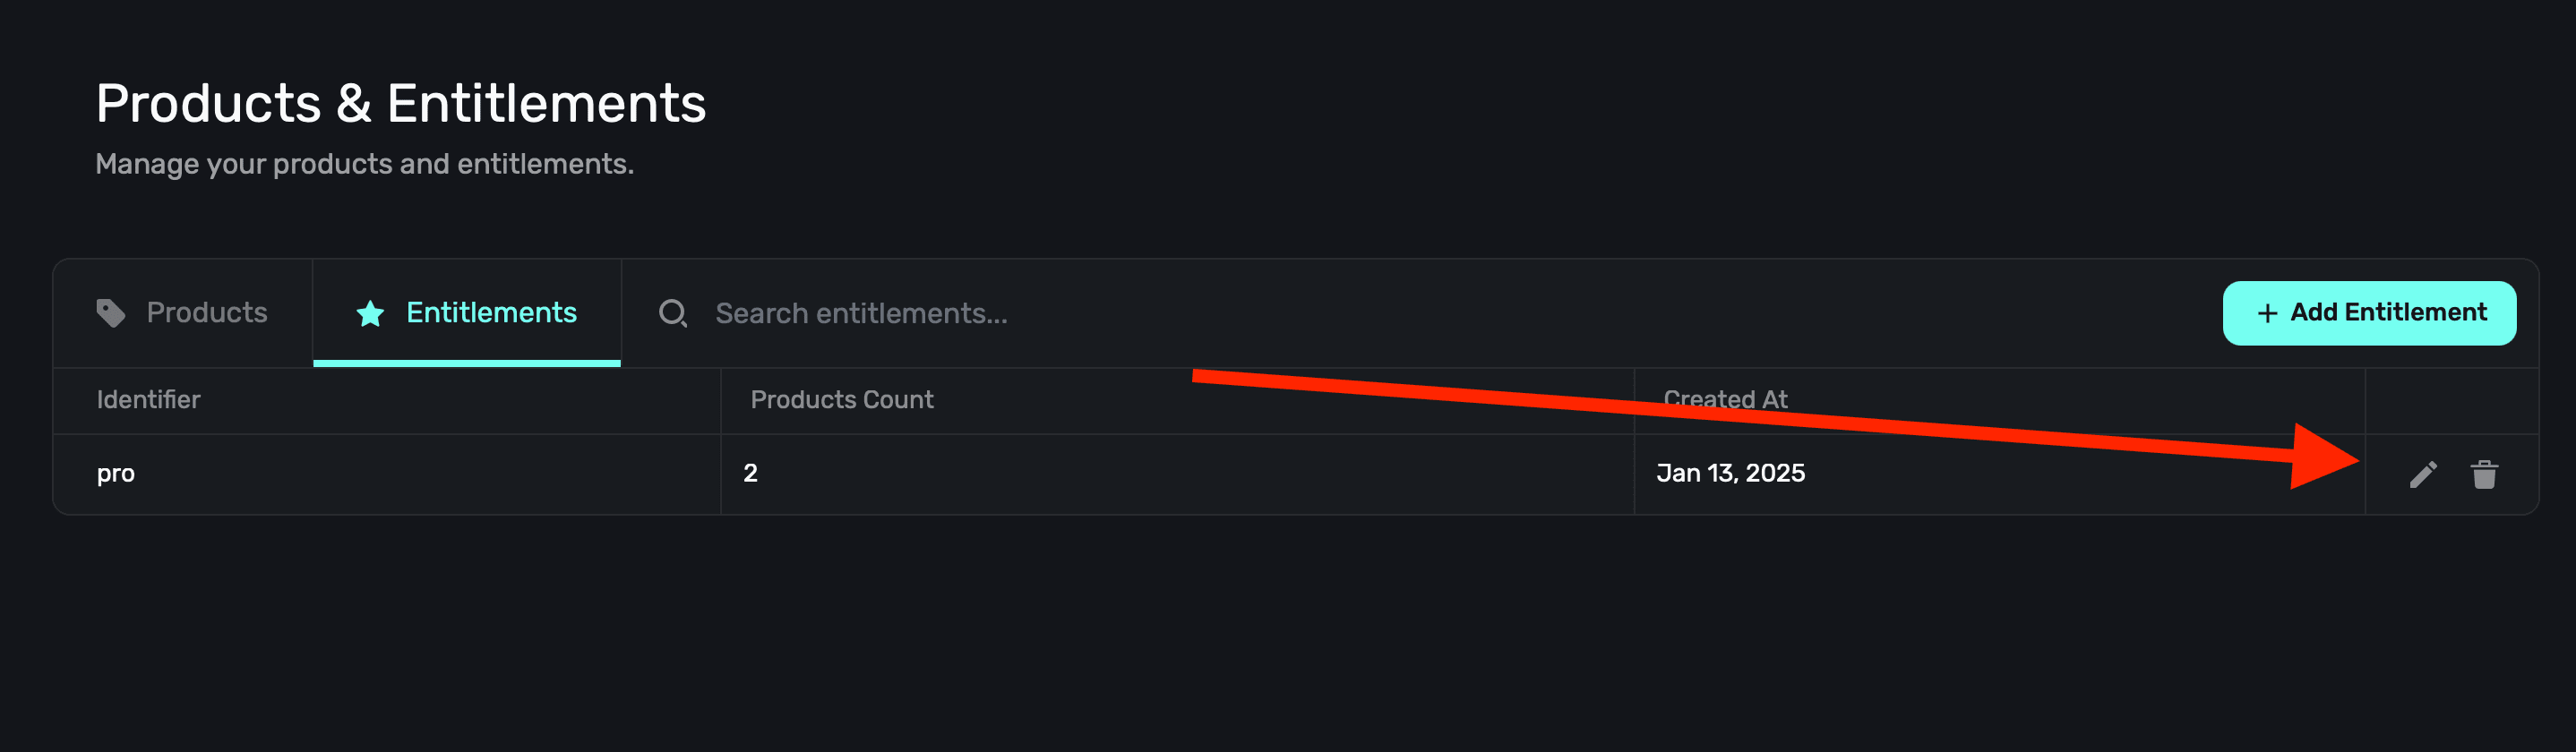
### Getting product identifiers
*If you use RevenueCat to handle in-app subscriptions, skip to [Using RevenueCat](/products#using-revenuecat)*
#### Using App Store Connect
On **App Store Connect**, head over to **Your App ▸ App Store ▸ Subscriptions ▸ *Your Subscription Group***:

Then, copy your **Product ID**:

### Using Google Play Console
To add subscription products, on **Google Play Console**, head over to **Your App ▸ Monetize ▸ Products ▸
Subscriptions**:
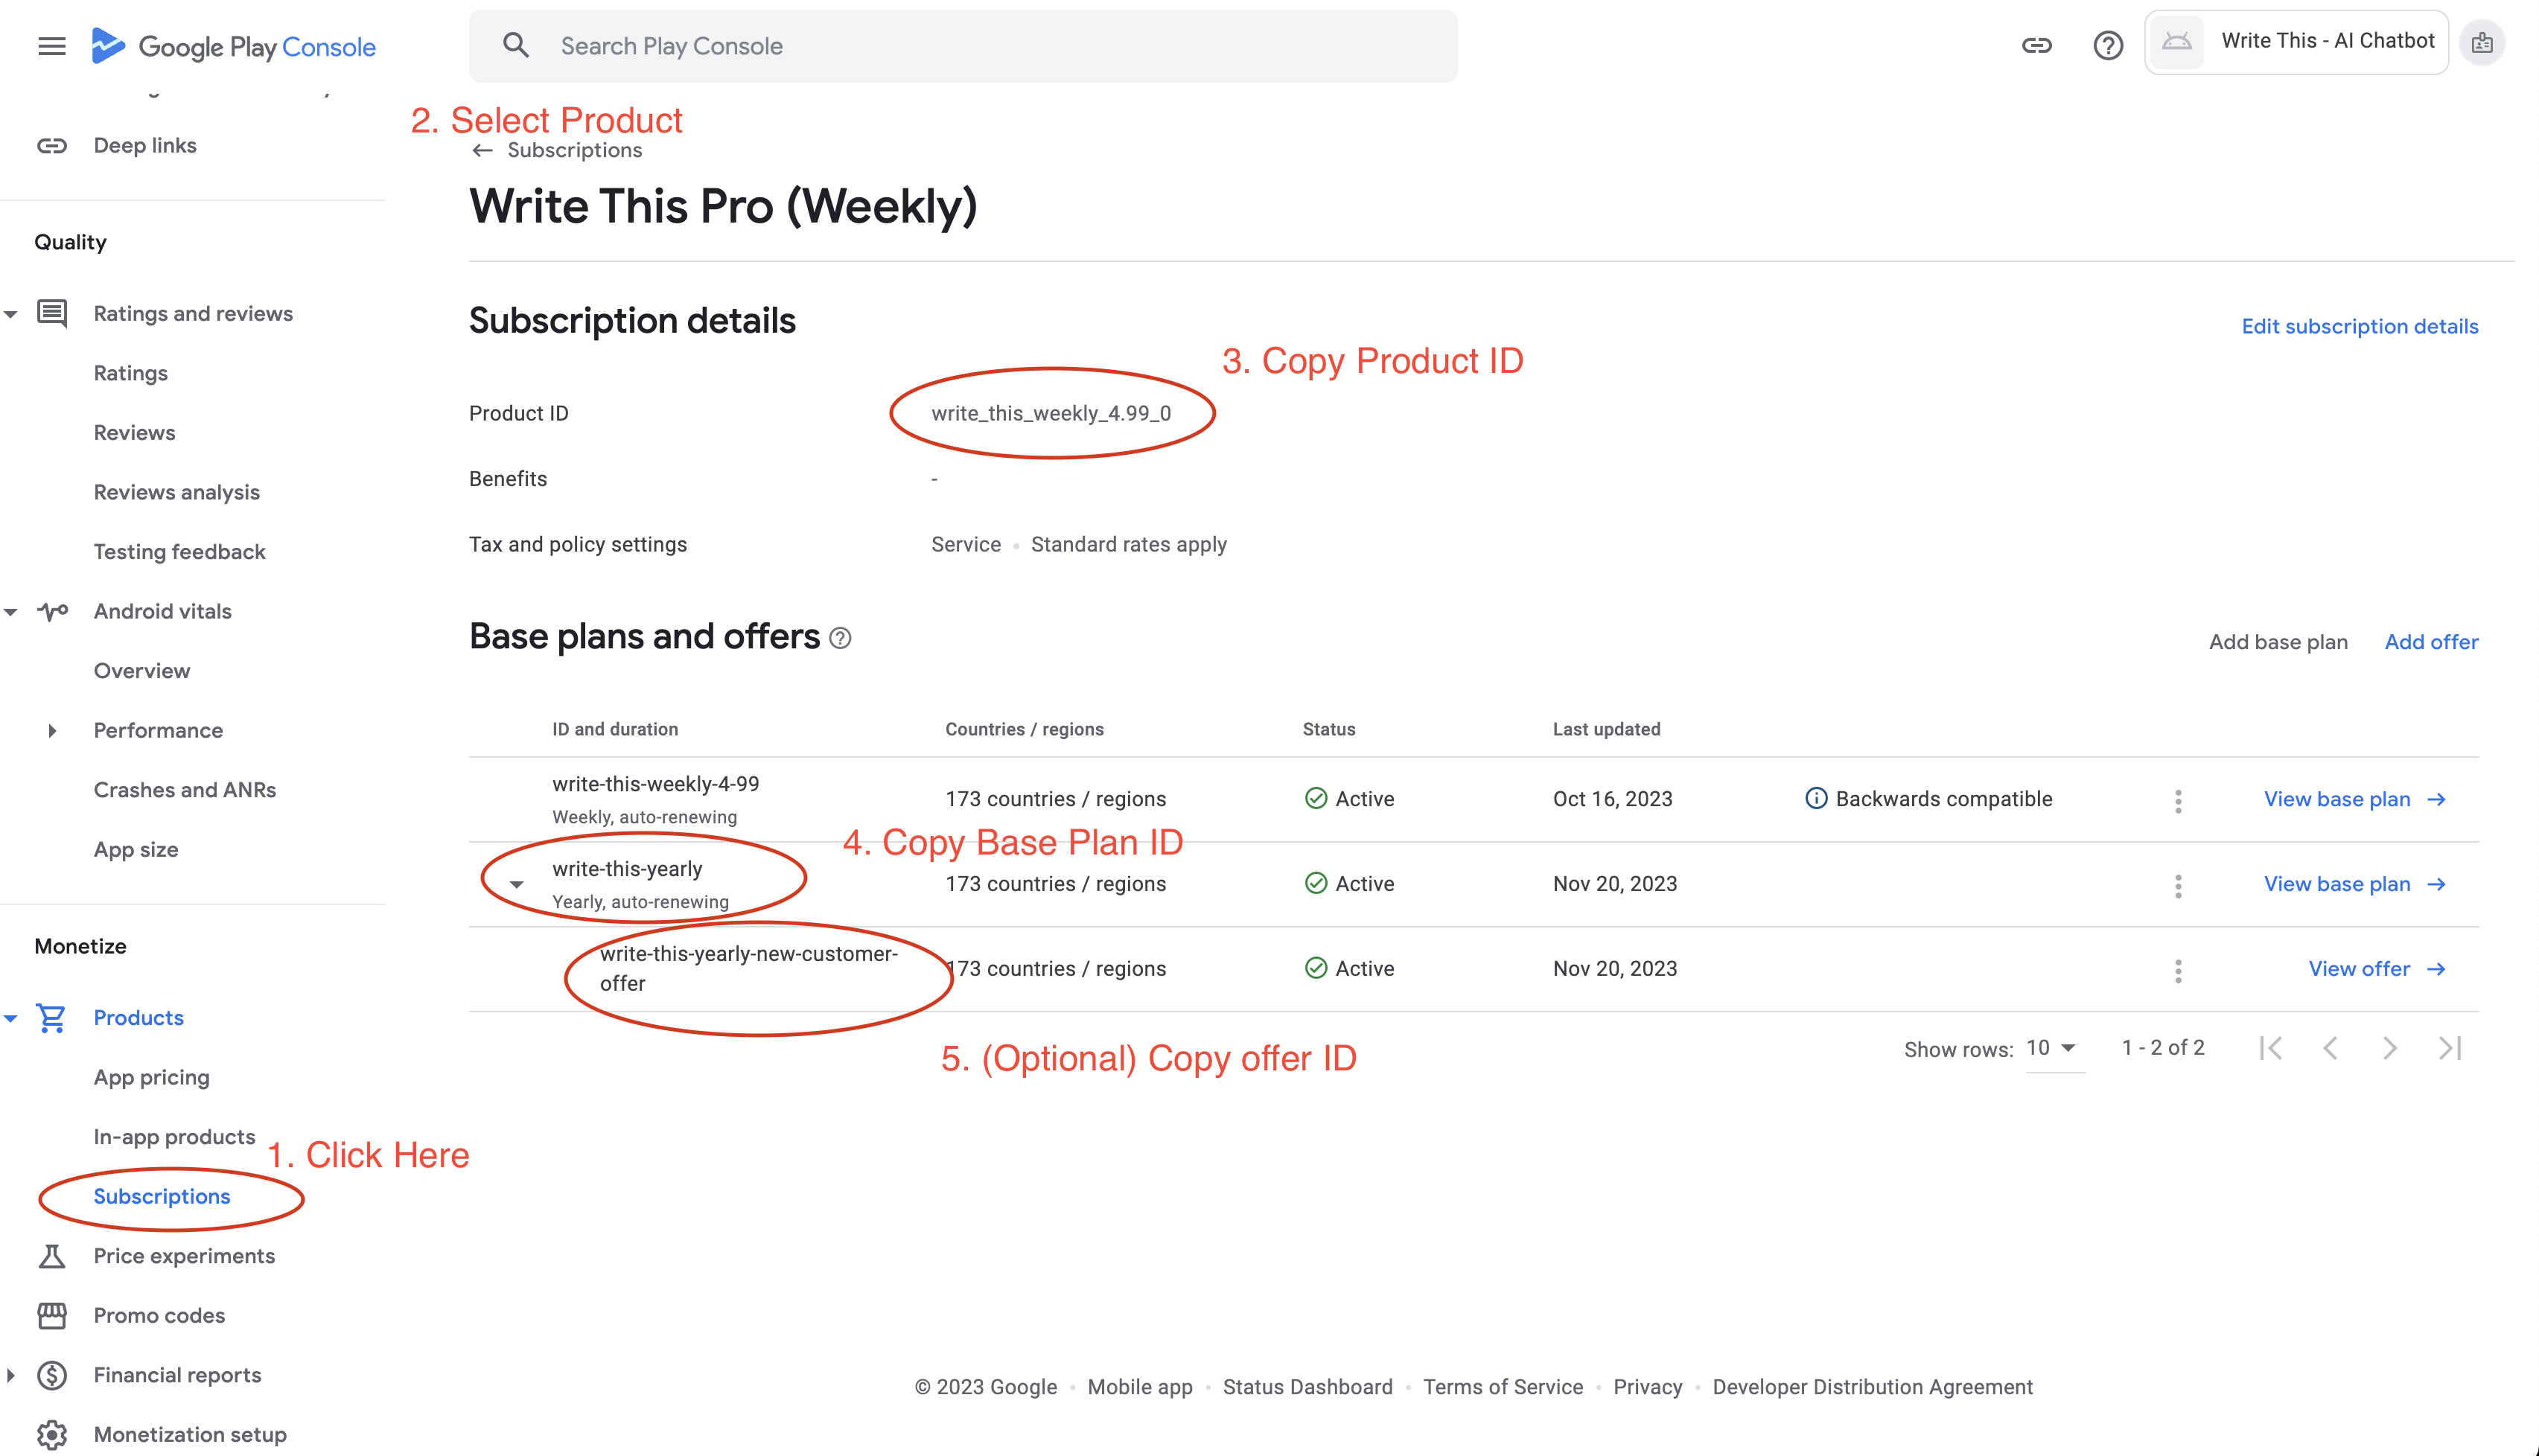
You can also grab your **base plan id** and any offer ids if you're going to use
them.
To add in-app products, no base plan id is required. For **period**, select **None(Lifetime/Consumable)**:
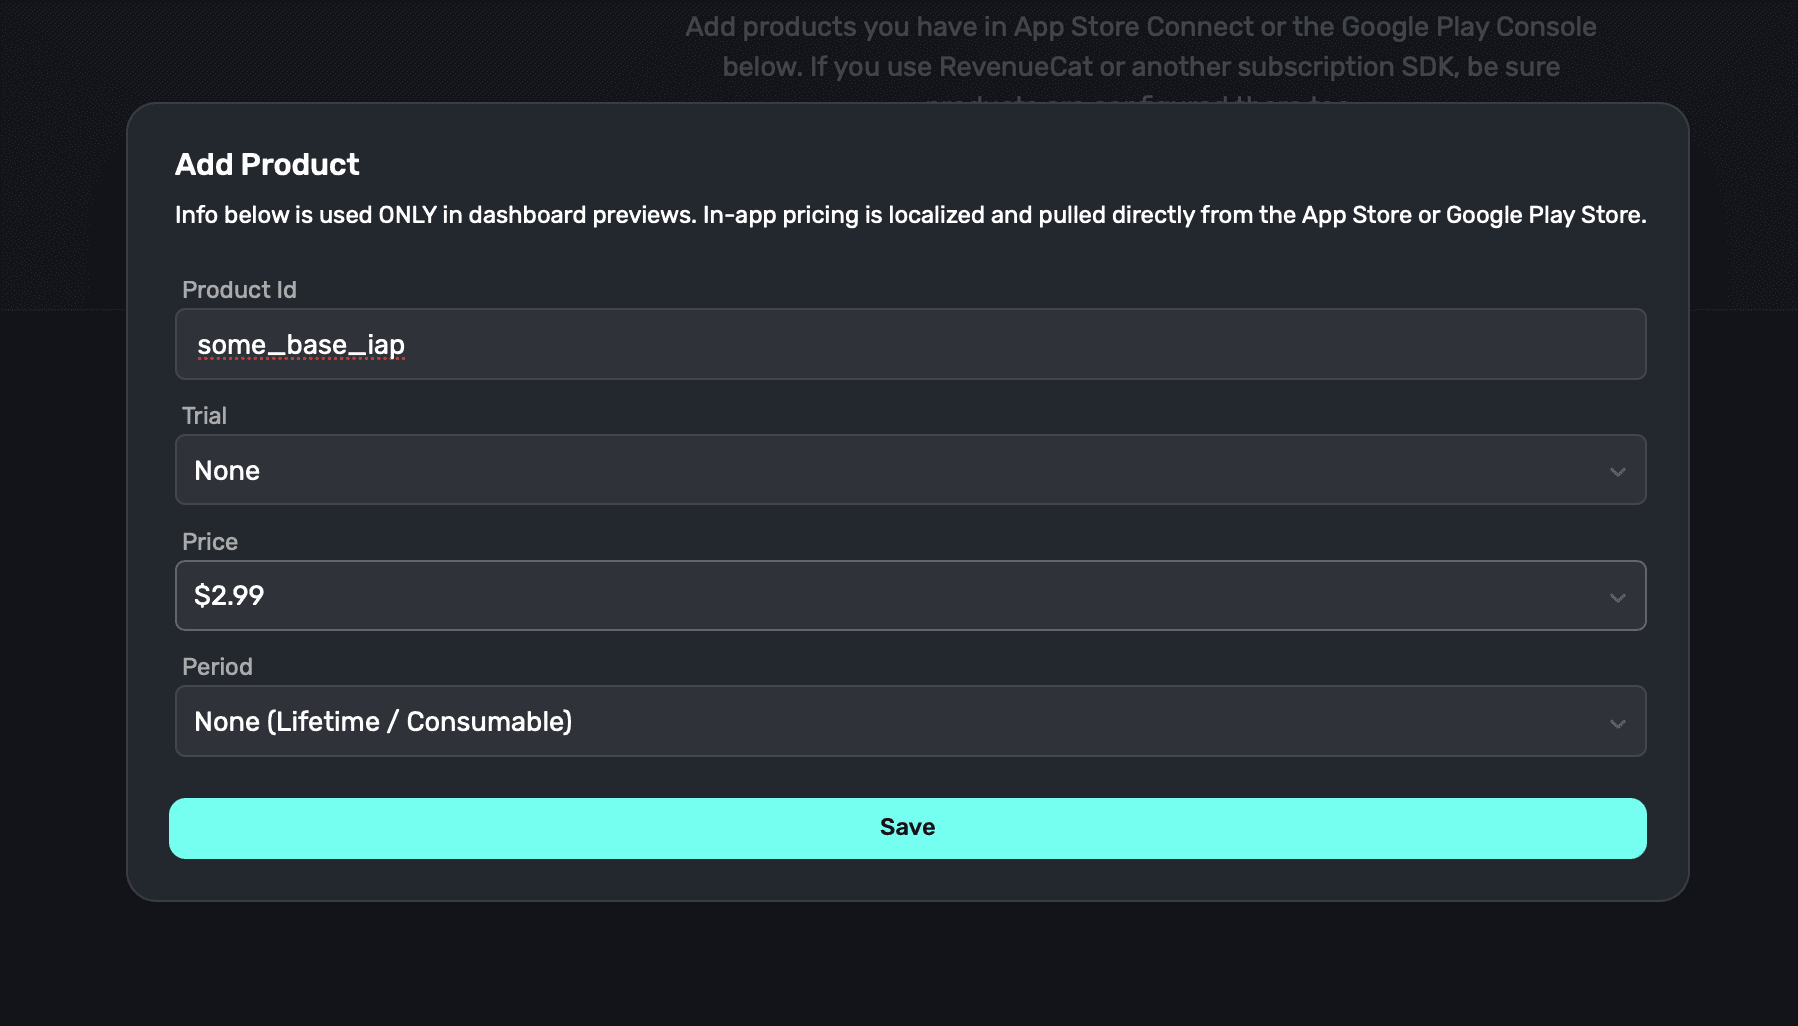
**Google Play Offers**
Google play allows you to create multiple base plans and multiple offers for
each base plan. When using Superwall, you can either specify a specific offer
or let Superwall choose the best offer for the user.
**Automatically Choosing Offers**
Once Google has returned offers that are applicable for that user, Superwall
will use the following logic to choose the best offer for the user:
* Find the longest free trial the customer is eligible for
* If there is no free trial, find the cheapest introductory period the customer is eligible for
* If there is none, fall back to the base plan
* If you have an offer on one of your products that you never want to automatically be selected by this logic (for example, because it is a discount only used for a specific customer group), you can add the tag sw-ignore-offer to that offer.
That means that if your eligiblitiy criteria is set so that someone can use an
offer only once, we'll respect that and choose from the best remaining offers.
**Specifying Offers**
Let's say you have a base plan with two or more offers which differ in trial
duration. You may want to A/B test these offers to see which one performs best.
To achieve this, you can specify the offer id in the Superwall dashboard.
When we specify an offer id, we'll ignore the logic above and always use the
offer **if the user is eligible**. If the user is not eligible for the offer,
we'll fall back to the base plan. The [eligiblity criteria](https://support.google.com/googleplay/android-developer/answer/12154973?hl=en#:~:text=or%20inactive%20states.-,Offer%20eligibility%C2%A0,-You%20can%20provide) is set in the Google
Play Console, and is based on the user's purchase history.
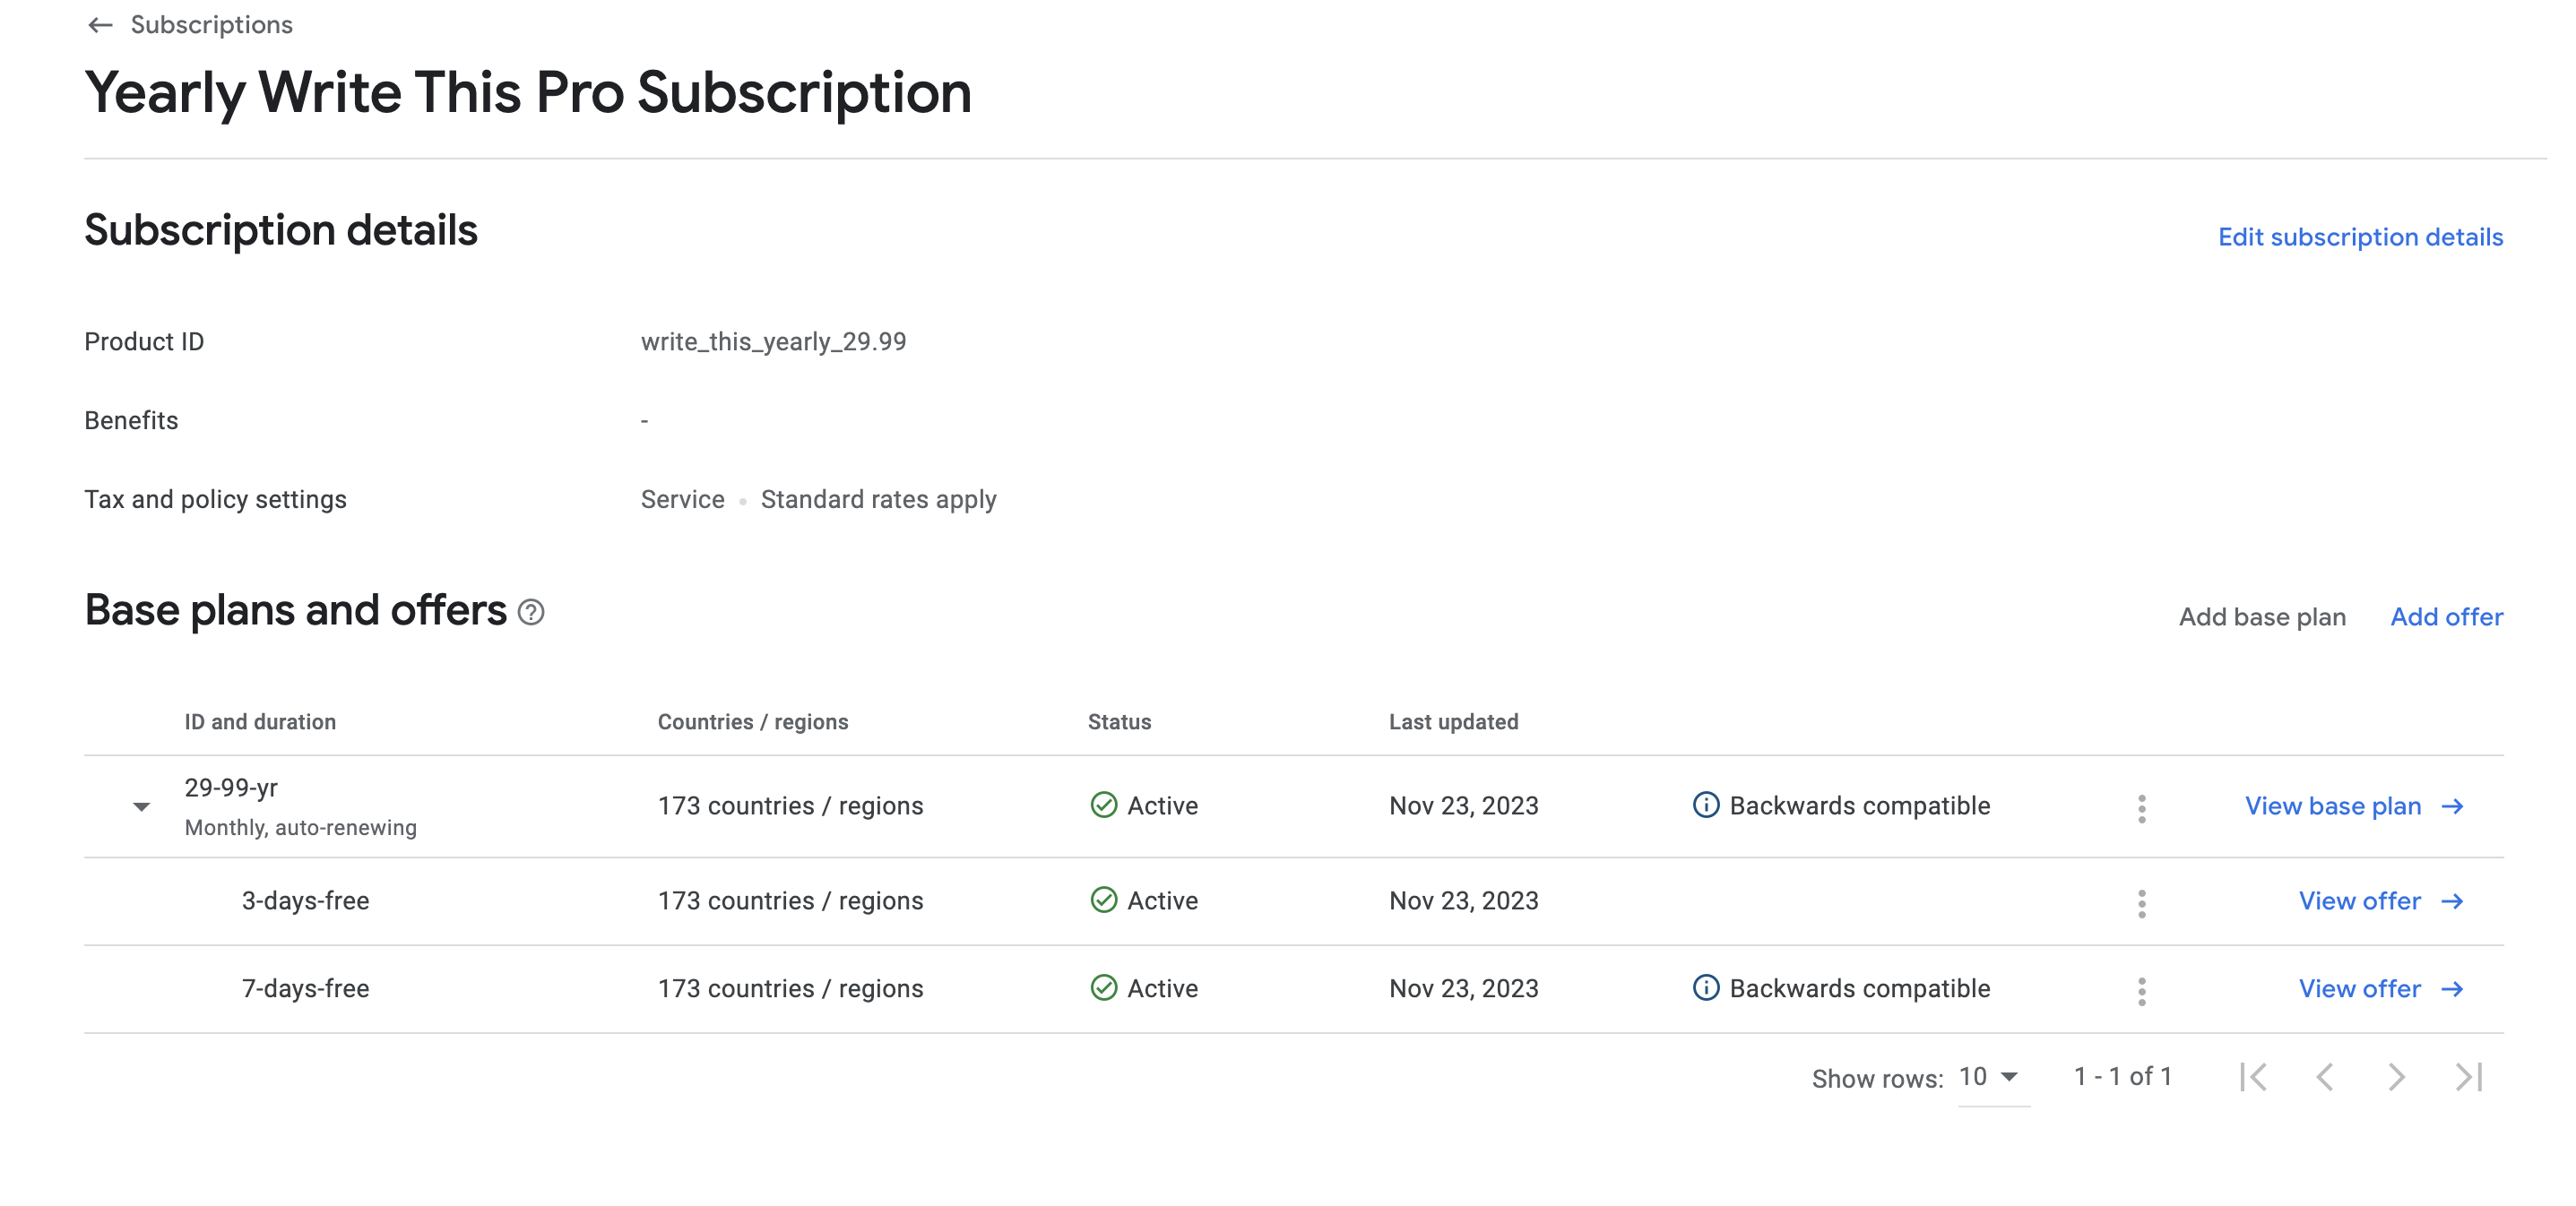
#### Using RevenueCat
For those who use RevenueCat, Superwall can automatically pre-populate your product identifiers to choose from when adding a product. In the **Add Product** modal, Superwall will display **any product attached to an offering** by following the steps below.
On RevenueCat, make sure your products are associated with an offering (it doesn't need to be the current offering):

Then, add your [RevenueCat Public API Key](https://docs.revenuecat.com/docs/authentication) inside of settings by clicking the **cog wheel icon** in the navigation bar from any page and selecting **Settings**. Paste your API key then click **Update Application**:

### Using products in paywalls
After you've added products to an app, you're ready to start using them in paywalls. Check out our [docs](/paywall-editor-products) for a step-by-step guide on how to do that.
### Understanding how consumable and non-consumable products work
Superwall uses entitlements to determine access to features instead of treating purchases as a simple “subscribed/unsubscribed” status. To that end, here is how to work with consumable and non-consumable products:
* **Consumable products** (e.g., credits, tokens, energy boosts) generally *aren't* associated with an entitlement.
* **Non-consumable products** (e.g., a lifetime unlock) *should* be linked to an entitlement in Superwall. This ensures users who purchase them receive the appropriate access to features.
Note that on iOS, if you're using consumables you need to include `SKIncludeConsumableInAppPurchaseHistory` (Apple's docs [here](https://developer.apple.com/documentation/bundleresources/information-property-list/skincludeconsumableinapppurchasehistory)) in your `info.plist` file. Ensure its type is set to `Boolean` and its value is `YES`. Note that on pre-iOS 18 devices, StoreKit 1 will be used when this key is present.
### Understanding paid offer types
Any **paid up front** or **pay as you go** product offer types will also be referenced using the `trial` variables. In Superwall, these are represented as "paid trials". For example, to reference the product's trial price of \$3.99 in the image below, you'd use `products.selected.trialPeriodPrice`:
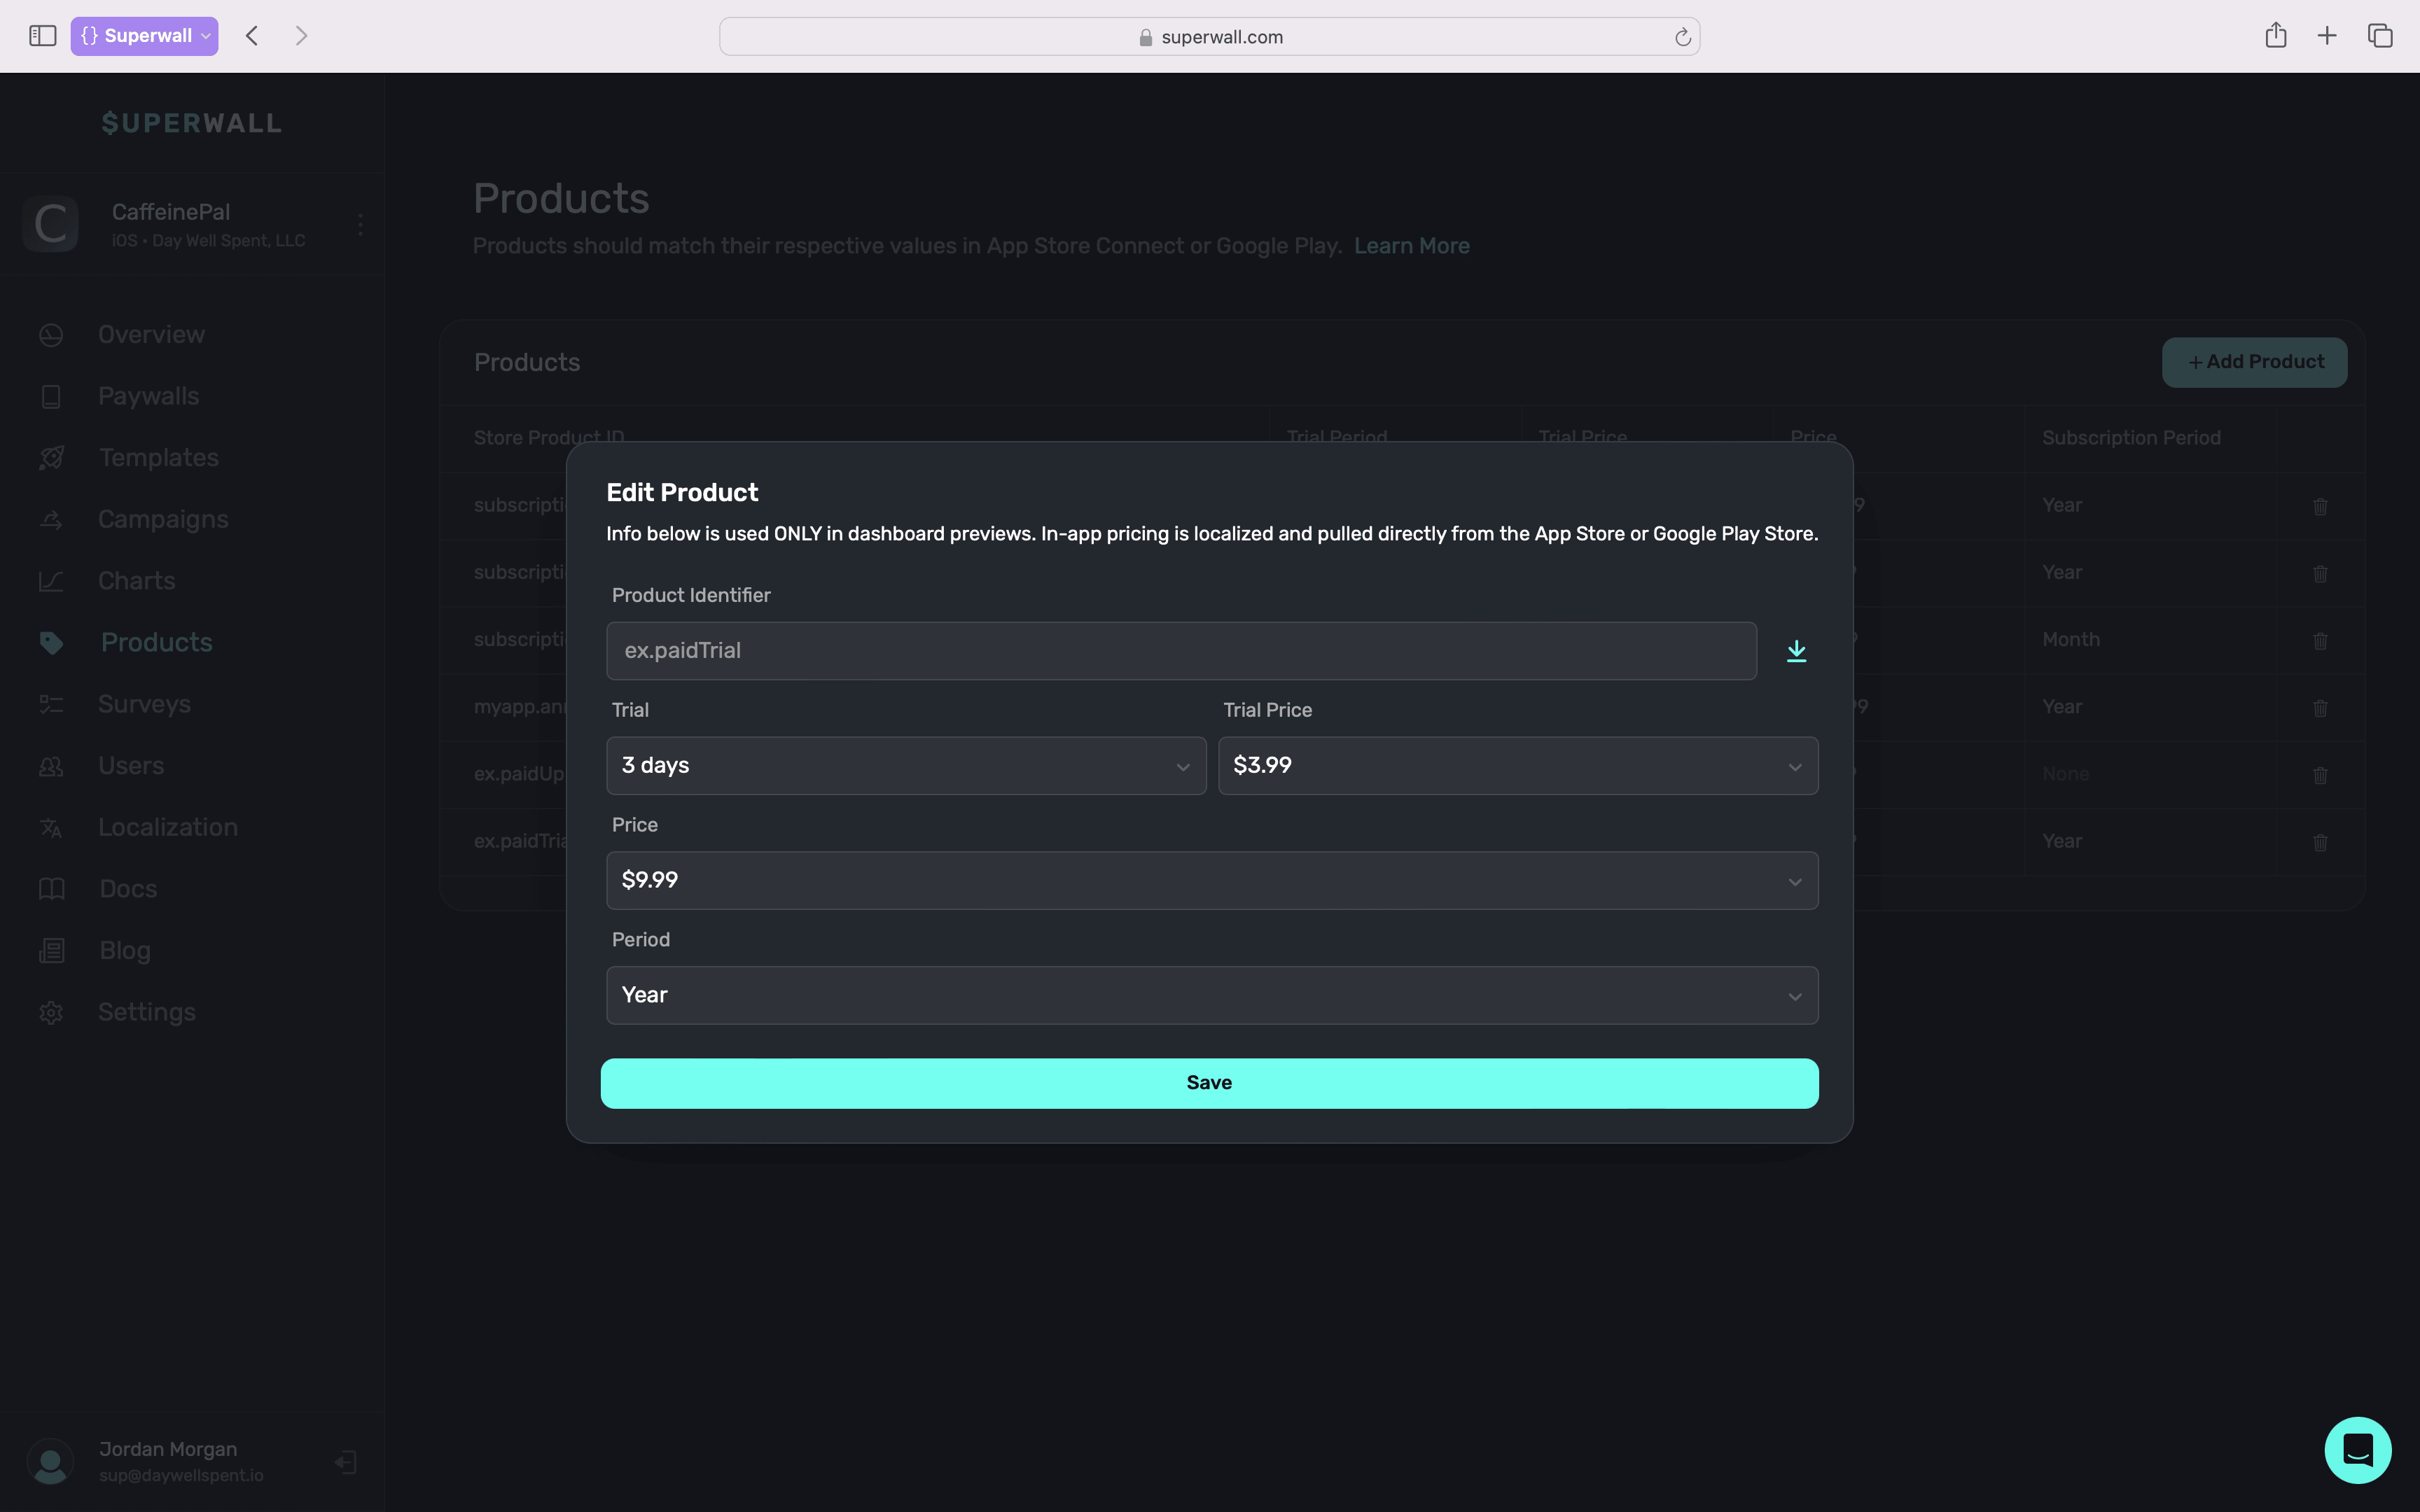
For more on setting customized text using Liquid Templating, visit this [doc](/paywall-editor-liquid).
### A note on StoreKit configuration files
If you're using a StoreKit Configuration file, pricing information will come from there during local testing. Therefore, it's important to keep your StoreKit Configuration file, Superwall, and the App Store products all in sync. Follow our [Setting up StoreKit testing](/testing-purchases) guide for more information.
Having an issue on device with products not appearing? Run through [this
checklist](/docs/troubleshooting#my-products-arent-loading) to make sure everything is configured
correctly.
# React Native
Source: https://superwall.com/docs/react-native
The long-awaited Superwall for React Native is now available! Here's how to get started!
### Quickstart
Under the hood, Superwall needs an app for each platform you're launched on, one for iOS and one for Android. Creating a new React Native app in Superwall automatically creates both of them for you. If you have one but not the other, follow [this guide](/creating-applications) to create one on the missing platform.
Follow the [installation guide](/installation-via-package) to install the SDK.
Follow the [configuration guide](/configuring-the-sdk) to configure the SDK
You're all set! 🎉 Reach out to us on Intercom or by [email](mailto:team@superwall.com)
For any feedback, email [team@superwall.com](mailto:team@superwall.com)
# Setting User Attributes
Source: https://superwall.com/docs/setting-user-properties
By setting user attributes, you can display information about the user on the paywall. You can also define [audiences](/campaigns-audience) in a campaign to determine which paywall to show to a user, based on their user attributes.
You do this by passing a `[String: Any?]` dictionary of attributes to `Superwall.shared.setUserAttributes(_:)`:
```swift Swift
let attributes: [String: Any] = [
"name": user.name,
"apnsToken": user.apnsTokenString,
"email": user.email,
"username": user.username,
"profilePic": user.profilePicUrl
]
Superwall.shared.setUserAttributes(attributes) // (merges existing attributes)
```
```swift Objective-C
NSDictionary *attributes = @{
@"name": user.name,
@"apnsToken": user.apnsTokenString,
@"email": user.email,
@"username": user.username,
@"profilePic": user.profilePicUrl
};
[[Superwall sharedInstance] setUserAttributes:attributes]; // (merges existing attributes)
```
```kotlin Kotlin
val attributes = mapOf(
"name" to user.name,
"apnsToken" to user.apnsTokenString,
"email" to user.email,
"username" to user.username,
"profilePic" to user.profilePicUrl
)
Superwall.instance.setUserAttributes(attributes) // (merges existing attributes)
```
```dart Flutter
Map attributes = {
"name": user.name,
"apnsToken": user.apnsTokenString,
"email": user.email,
"username": user.username,
"profilePic": user.profilePicUrl
};
Superwall.shared.setUserAttributes(attributes); // (merges existing attributes)
```
```typescript React Native
const attributes = {
name: user.name,
apnsToken: user.apnsTokenString,
email: user.email,
username: user.username,
profilePic: user.profilePicUrl,
};
Superwall.shared.setUserAttributes(attributes);
```
This is a merge operation, such that if the existing user attributes dictionary
already has a value for a given property, the old value is overwritten. Other
existing properties will not be affected. To unset/delete a value, you can pass `nil`
for the value.
You can reference user attributes in [campaign filters](/campaigns-audience) to help decide when to display your paywall. When you configure your paywall, you can also reference the user attributes in its text variables. For more information on how to that, see [Configuring a Paywall](/paywall-editor-overview).
In the future, you'll be able to use user attributes to email/notify users about
discounts.
Begin showing paywalls!
# Surveys
Source: https://superwall.com/docs/surveys
Adding a paywall exit or post-purchase survey is a great way to boost conversion and get feedback on why users declined or purchased from your paywall. Once you've configured a survey, it can be attached to multiple paywalls. A user will only ever see a specific survey once unless you reset its responses.
To attach a survey to a paywall, edit one or manage existing surveys, **click** the **Survey** button found on the sidebar:
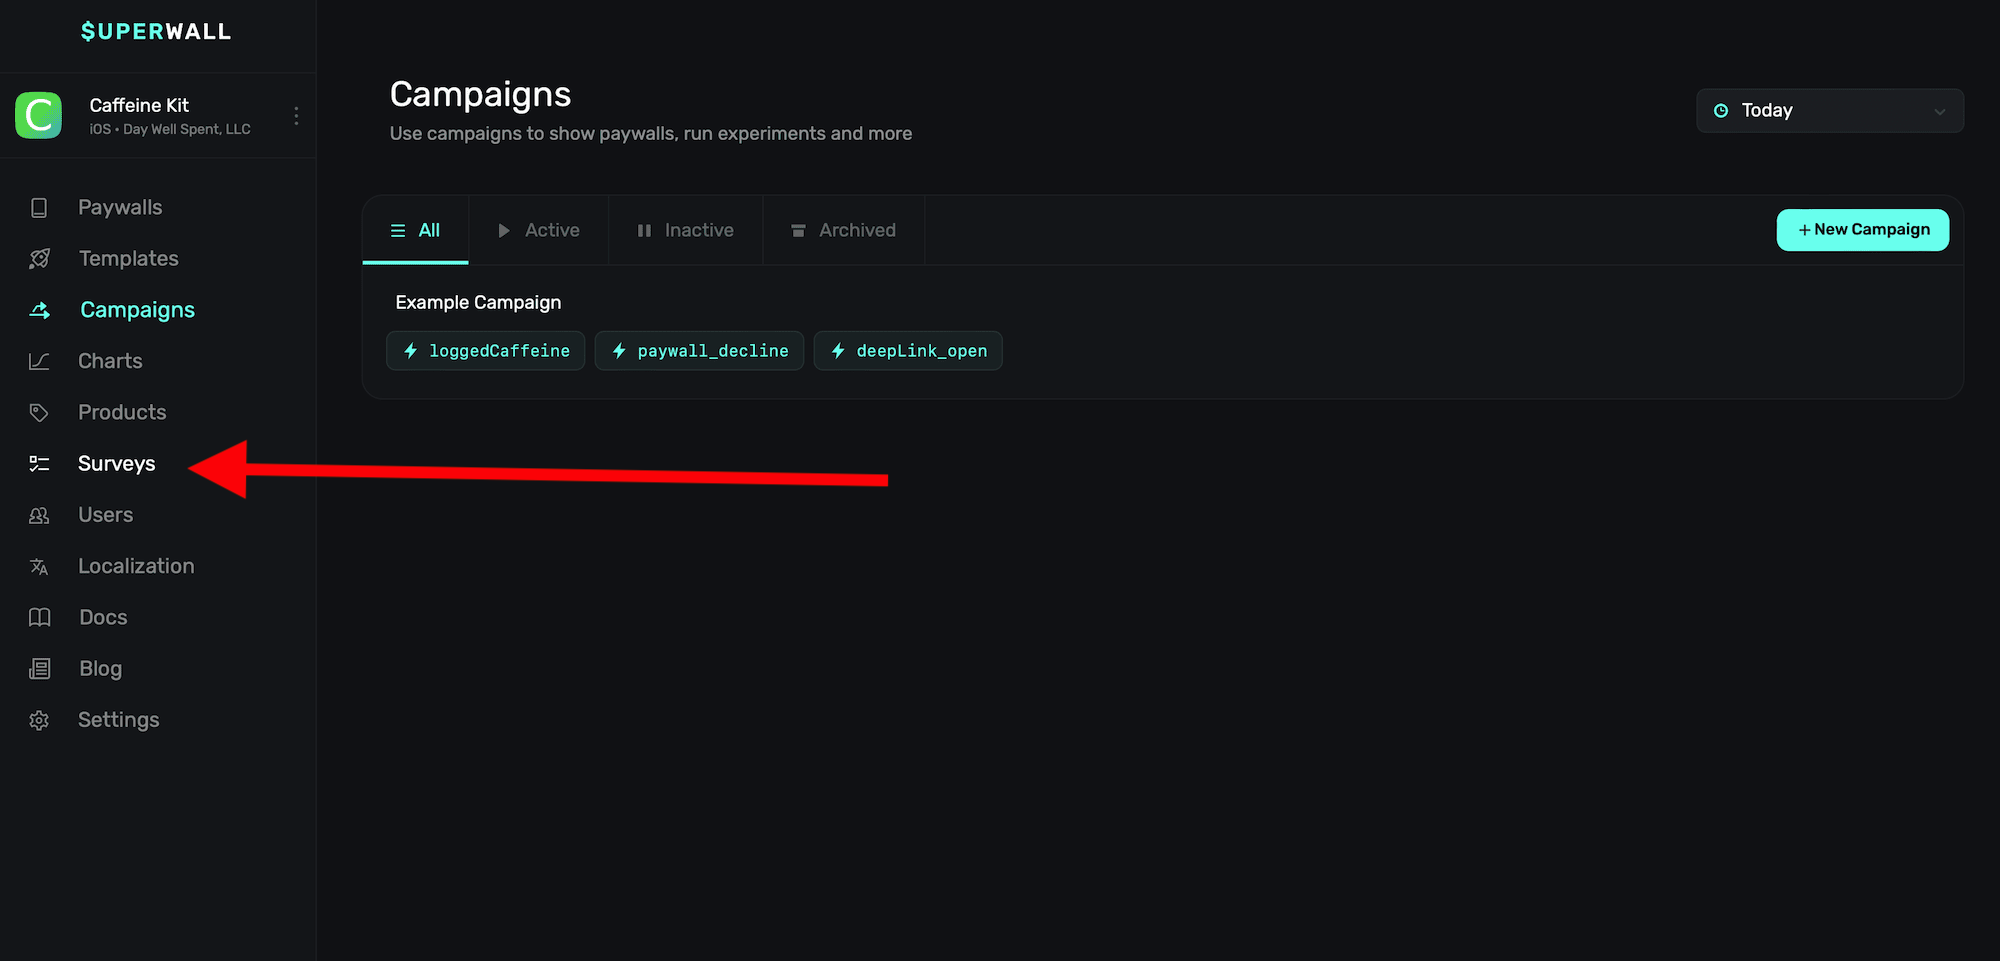
Once selected, you'll see an overview of all of the surveys you've created:
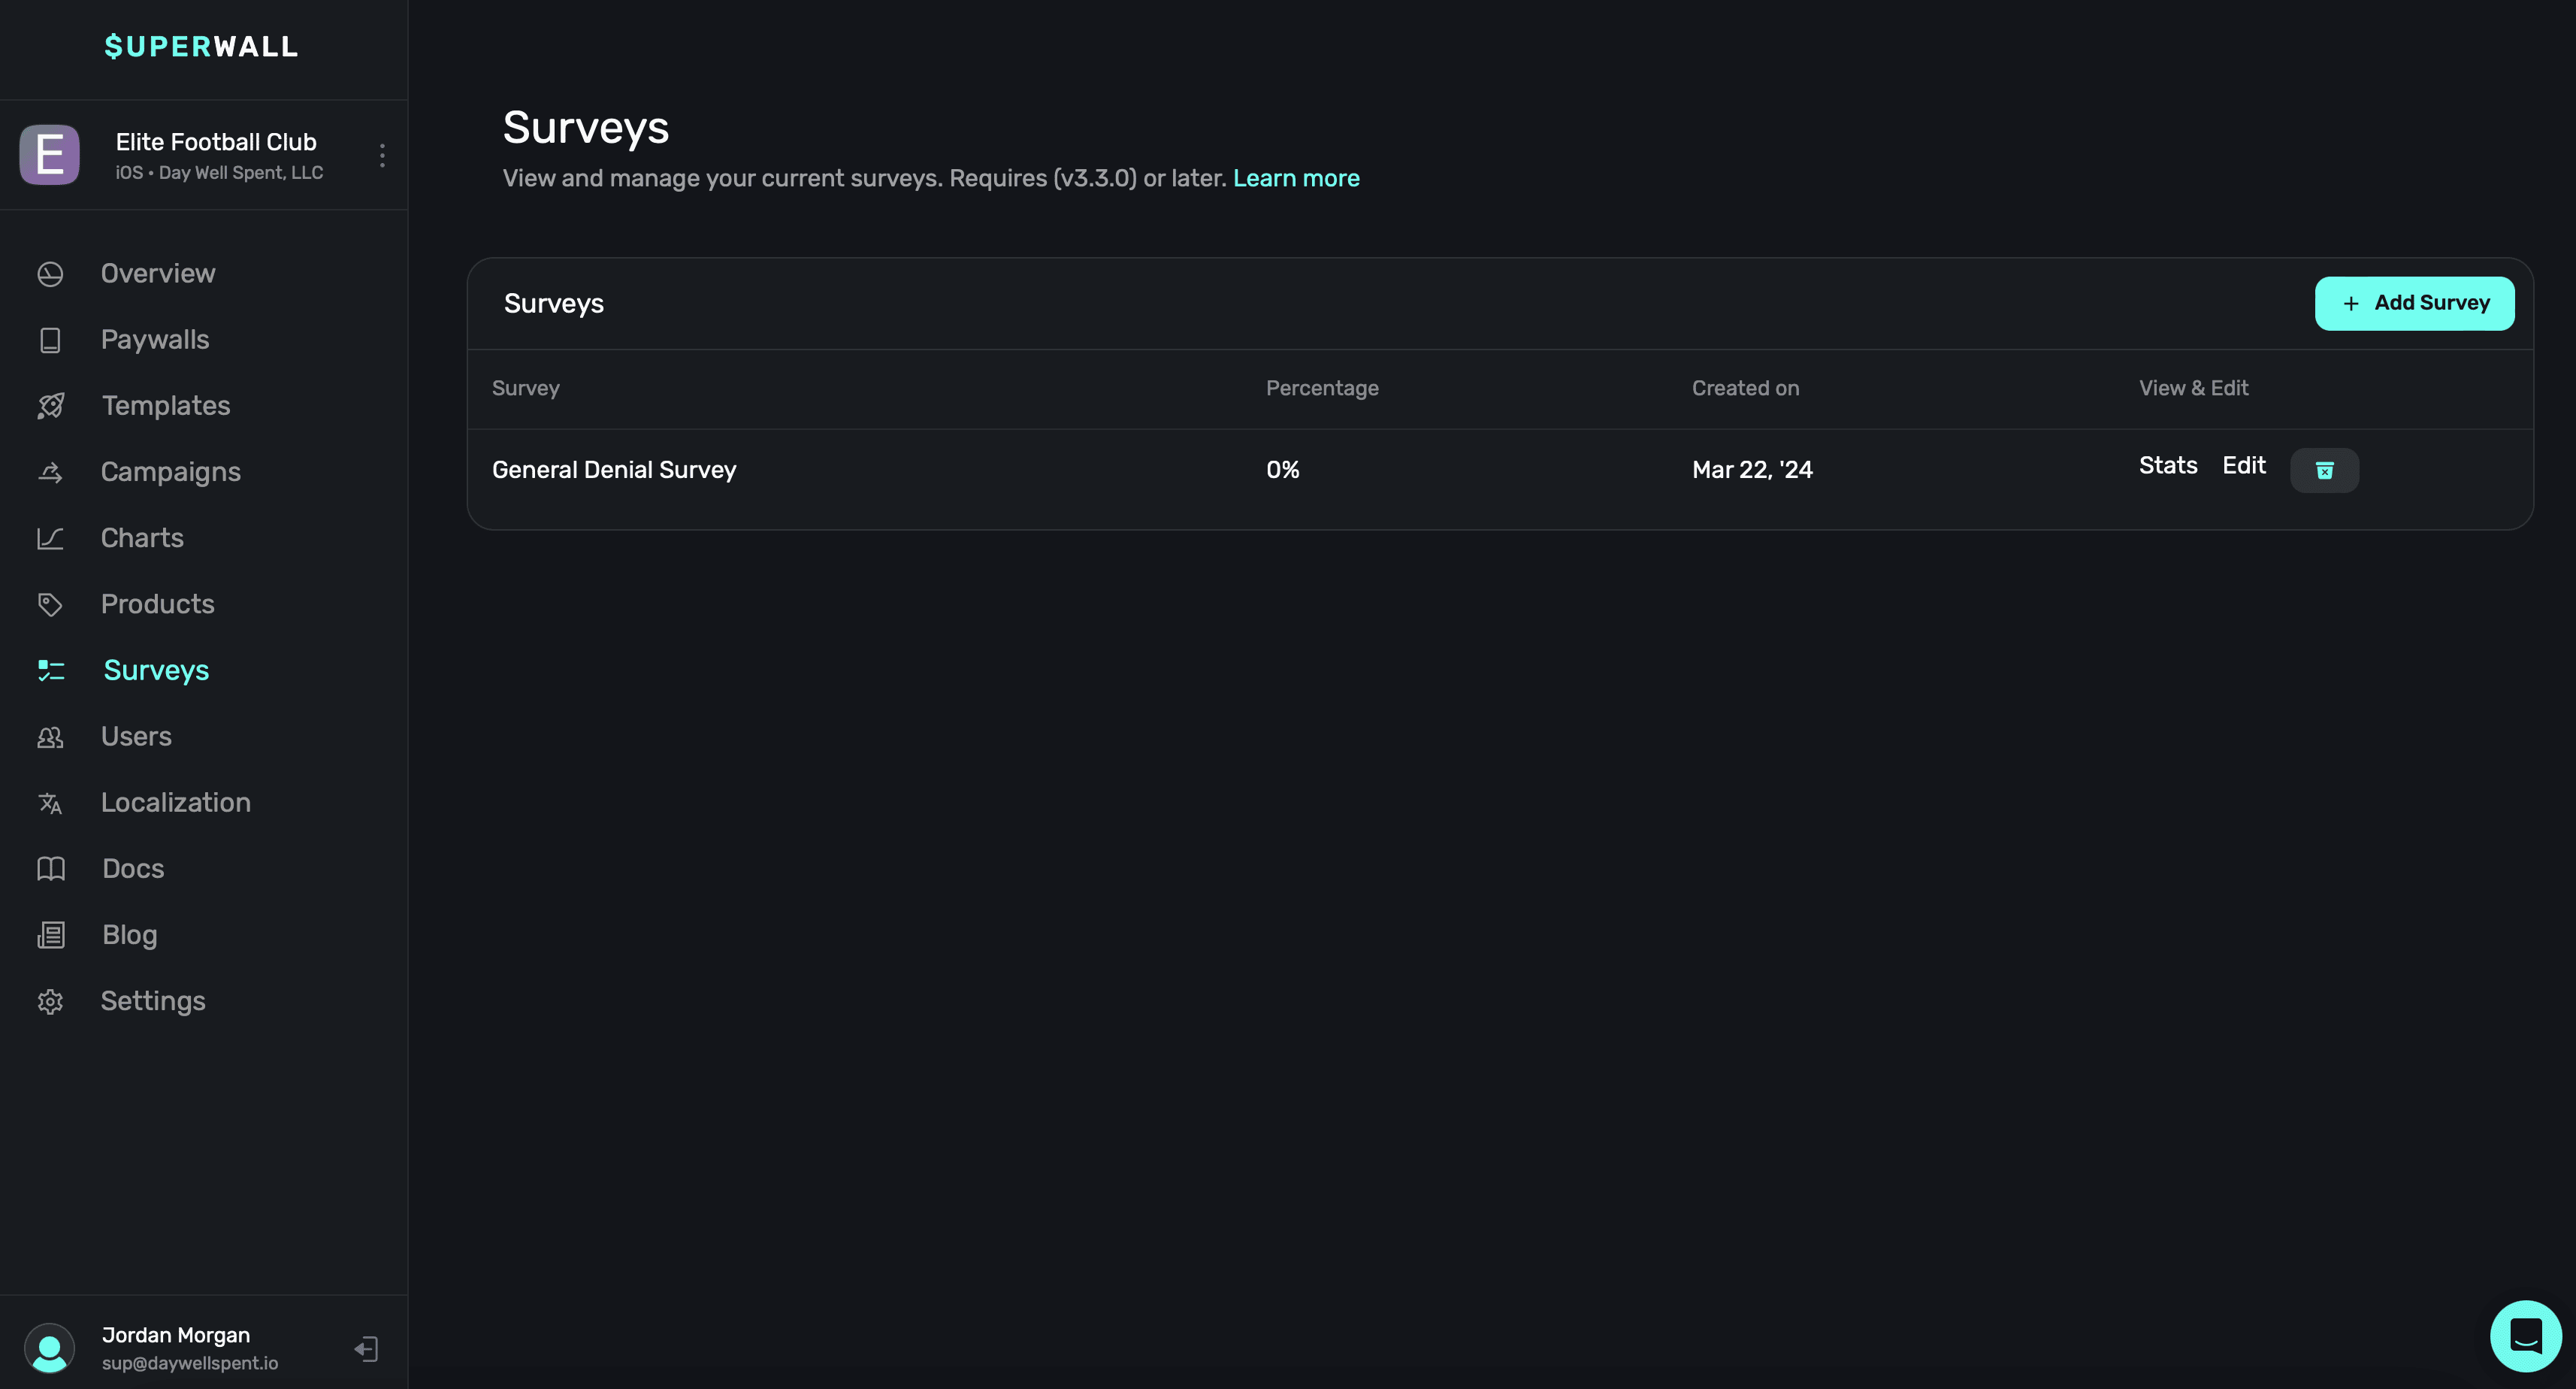
There are two types of surveys you can present:
* **Close Survey:** When a user declines to transact with a paywall or closes it.
* **Post-Purchase Survey:** When a user successfully transacts with a paywall.
No matter the type, each one is bound to present within the presentation percentages you set for it (more on that below).
Our surveys present using the native controls for the given platform (i.e. on iOS, a
`UIActionSheet`).
### Creating a new survey or editing existing ones
To create a new survey, click the **+ New Survey** button:
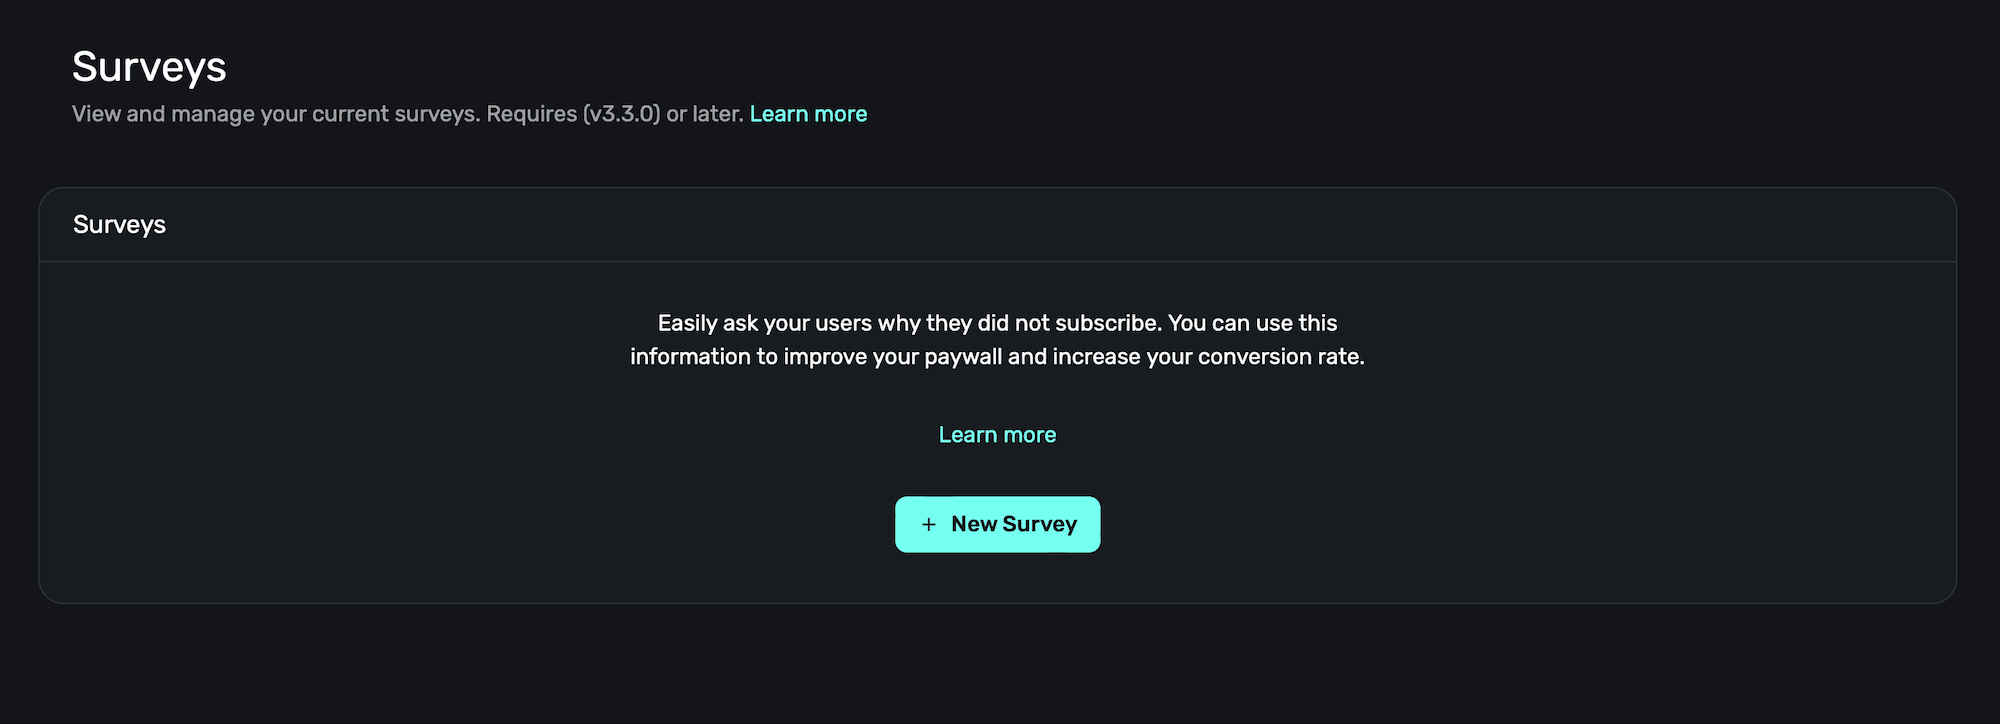
If you already have existing surveys, **click** the **+ Add Survey** button located at the top-right to make another one.
The survey editor will appear, and here you can edit all of the data for existing ones, or change the default options for a new one:
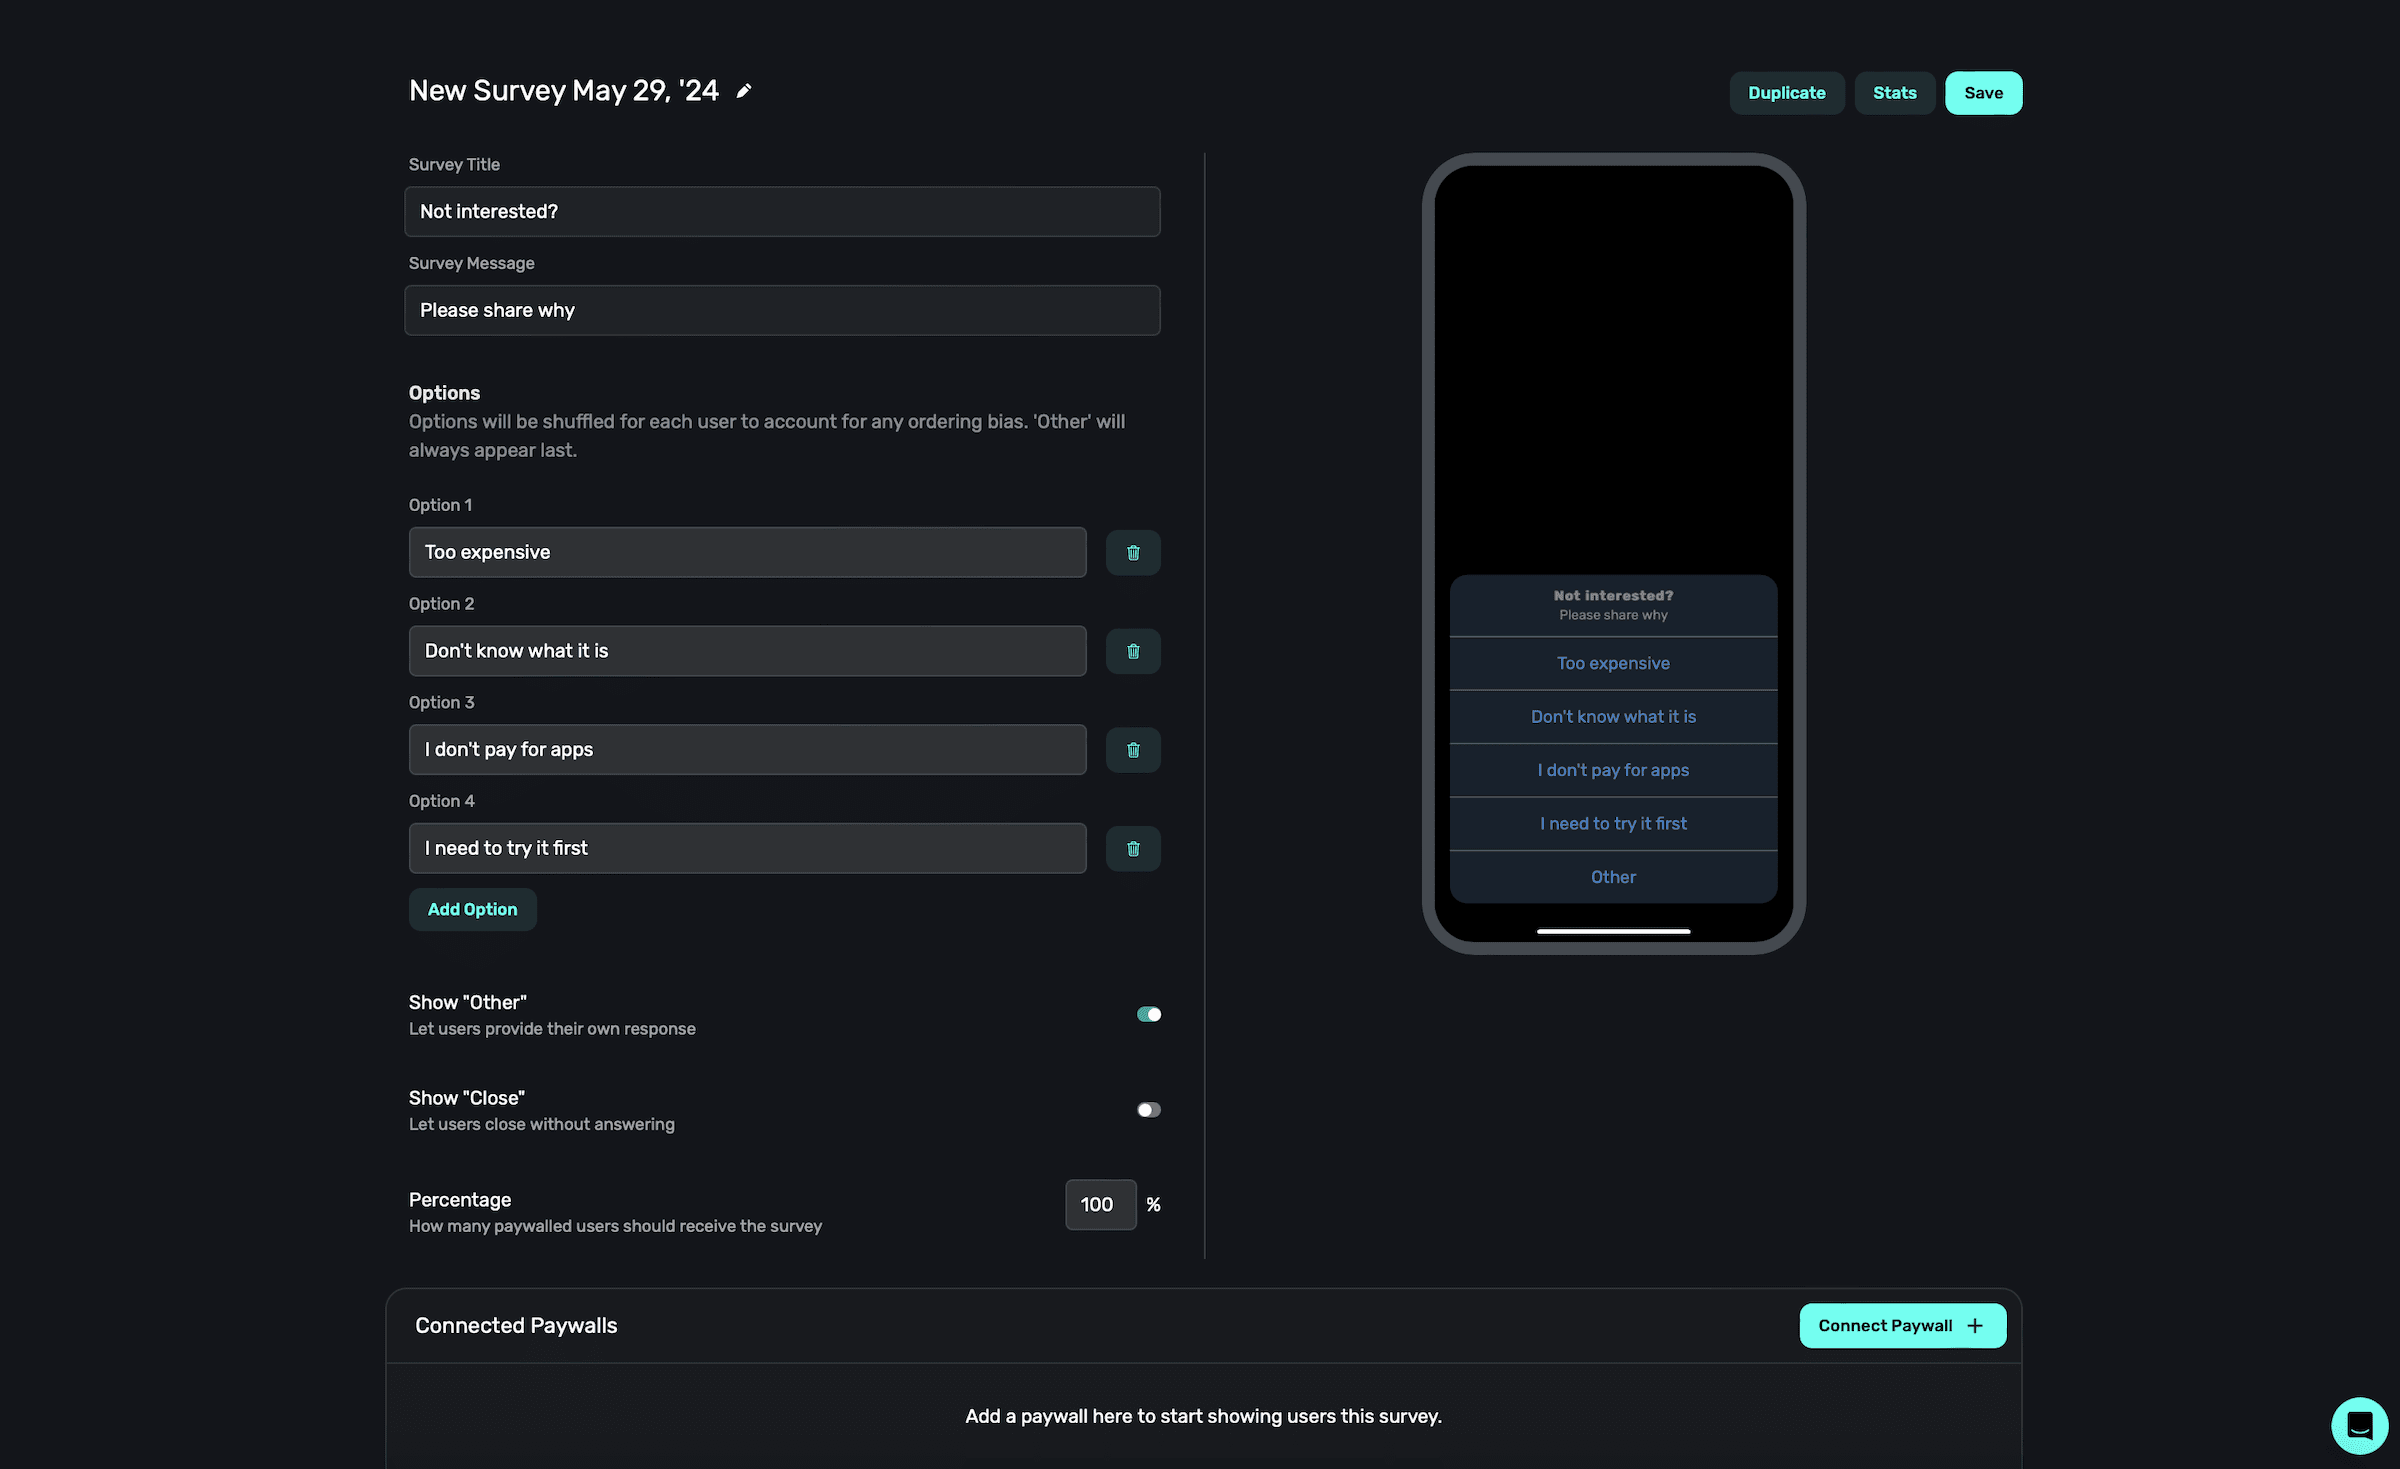
Superwall will provide sensible defaults for a new survey. If you're not quite sure what kind of
questions to ask, the default options are a great place to start and will yield insightful data.
All of the edits you make will be reflected in the preview on the right-hand side.
**Title**
The title of the survey, which will appear at the top.
**Message**
The message displays below the title, and you can use it to provide more context about the survey.
**Response options**
Each option you add here will be a response the user can choose. You'll see data about which one was selected once the survey is live. You can remove an option by using the trash icon on the right side of the text field. To add another option, **click** the **Add Option** button at the bottom of the existing options.
All survey options are shuffled for each user. This helps combat any ordering bias. However, the
"Other" button will always appear last.
**Using the "Other" button**
The "Other" button lets users type in a free text field. This is useful if users are willing to provide more context about why they declined (or purchased from) the paywall. If this is used, it will always display as the *last* option in the survey.
**Using the "Close" button**
You can also provide a "Close" button. Here, the user can exit the survey without providing a response. If you omit it, the user can only dismiss the survey by choosing a response.
**Toggling presentation percentages**
Use the percentage field to control how many users should receive the survey, from 0%-100%.
When you're done editing your survey, **click** the **Save** button at the top-right:
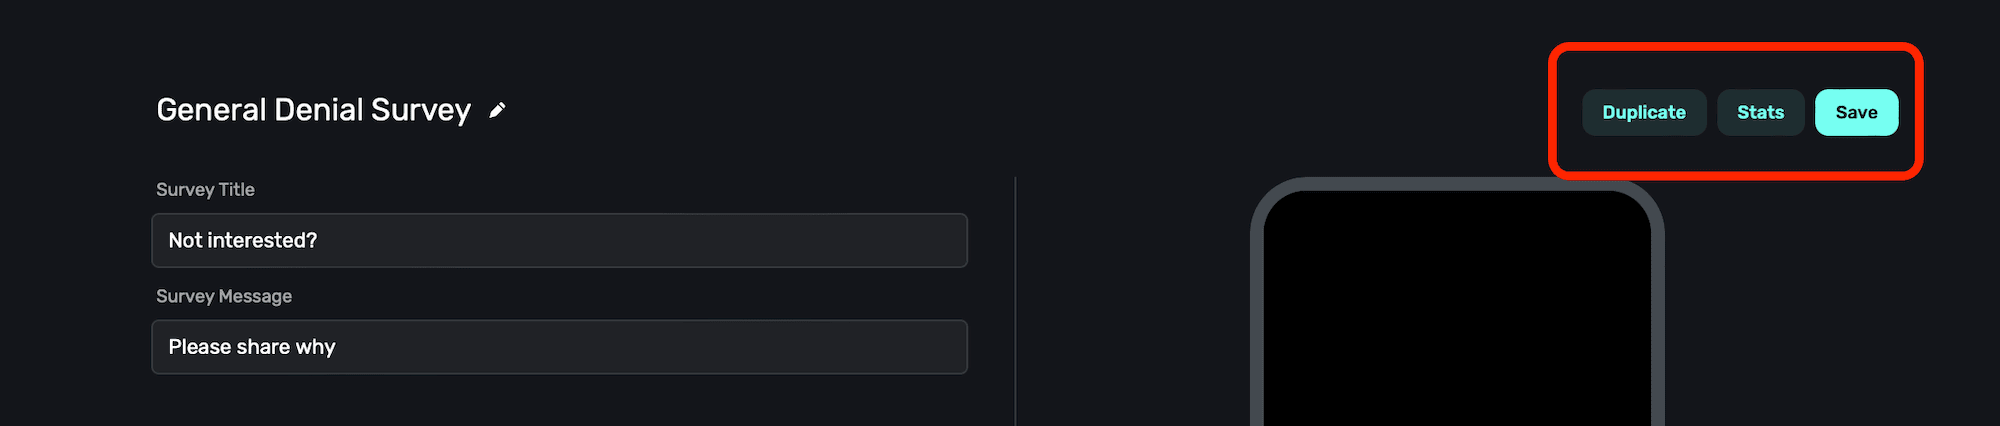
### Attach a survey to a paywall
Creating a survey *does not* mean it will start appearing. Instead, you choose which paywalls should present the survey. To attach a survey to a paywall, **click** the **Connect Paywall +** button in the bottom right of the survey editor:

Then, in the modal that's presented, select the paywall you wish to attach it to:
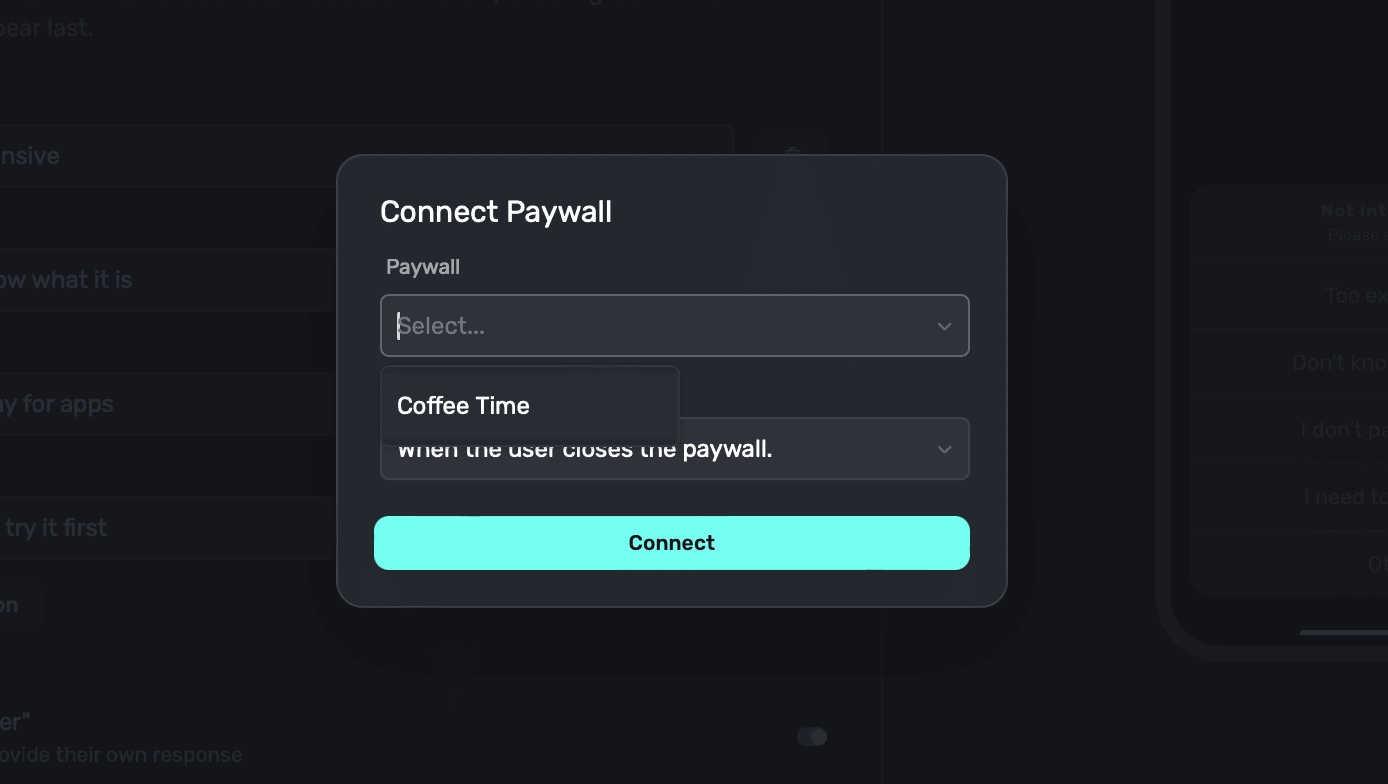
After you've selected a paywall, **click** the **Connect** button and you're all set. From there, each user will only see the survey **once** per paywall.
You can also attach surveys from the paywall editor itself. This is also where you specify whether
you want a close or post-purchase survey. Read how in this [doc](/paywall-editor-surveys).
### Managing surveys
**Deleting surveys**
To delete a survey, **click** the **Survey** button on the sidebar. Then, for the survey you wish to delete, click the **trashcan** icon:
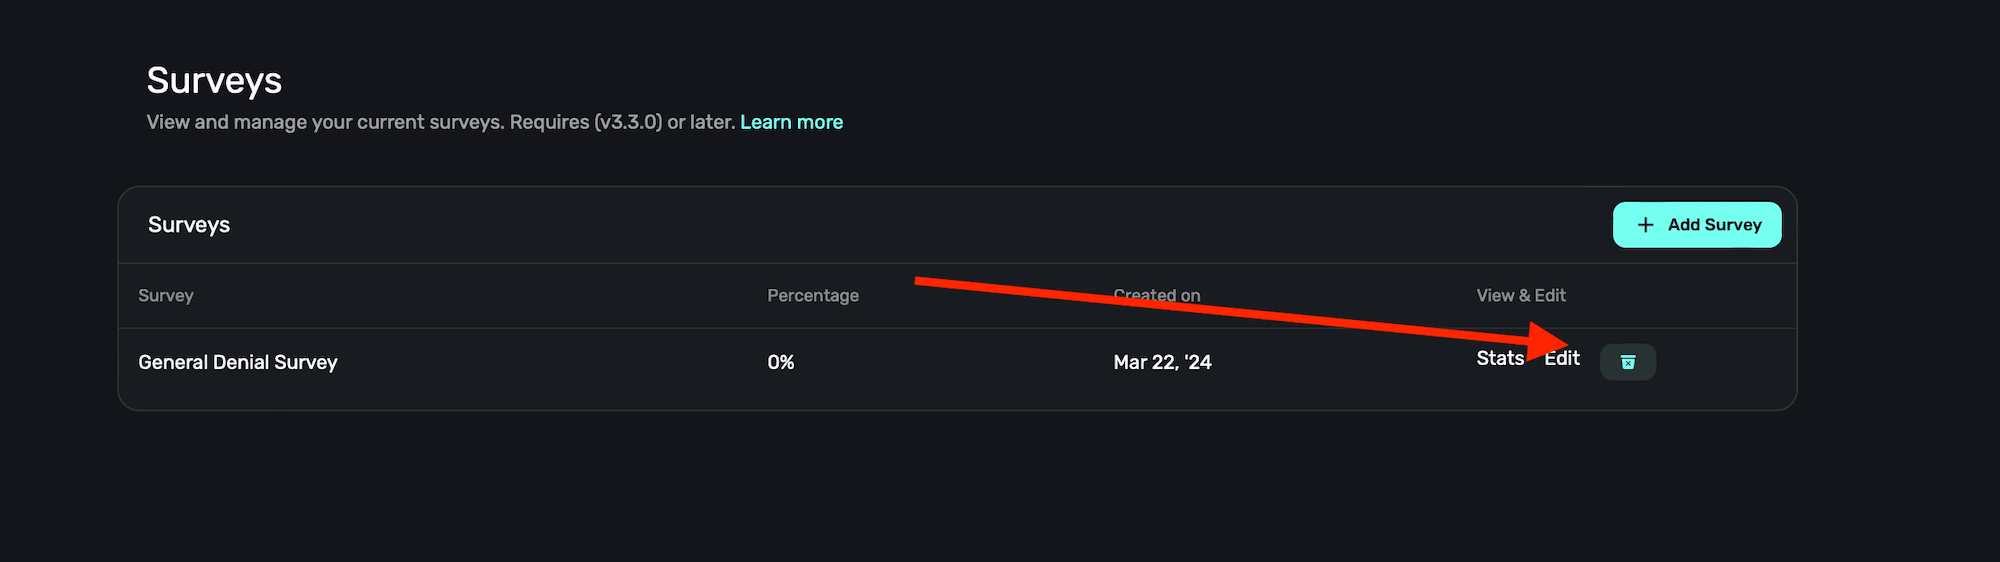
**Duplicating surveys**
To duplicate a survey, **click** the **Duplicate** button at the top-right when inside the survey editor:

### Viewing survey stats and results
To see the results for any survey, click on one and then **click**
the **Stats** button at the top-right:

From there, you'll see the survey responses:

**Viewing "Other" responses**
If you've included the "Other" button in your survey, you can view the responses from users by **clicking** the **"View "Other" Responses"** button:
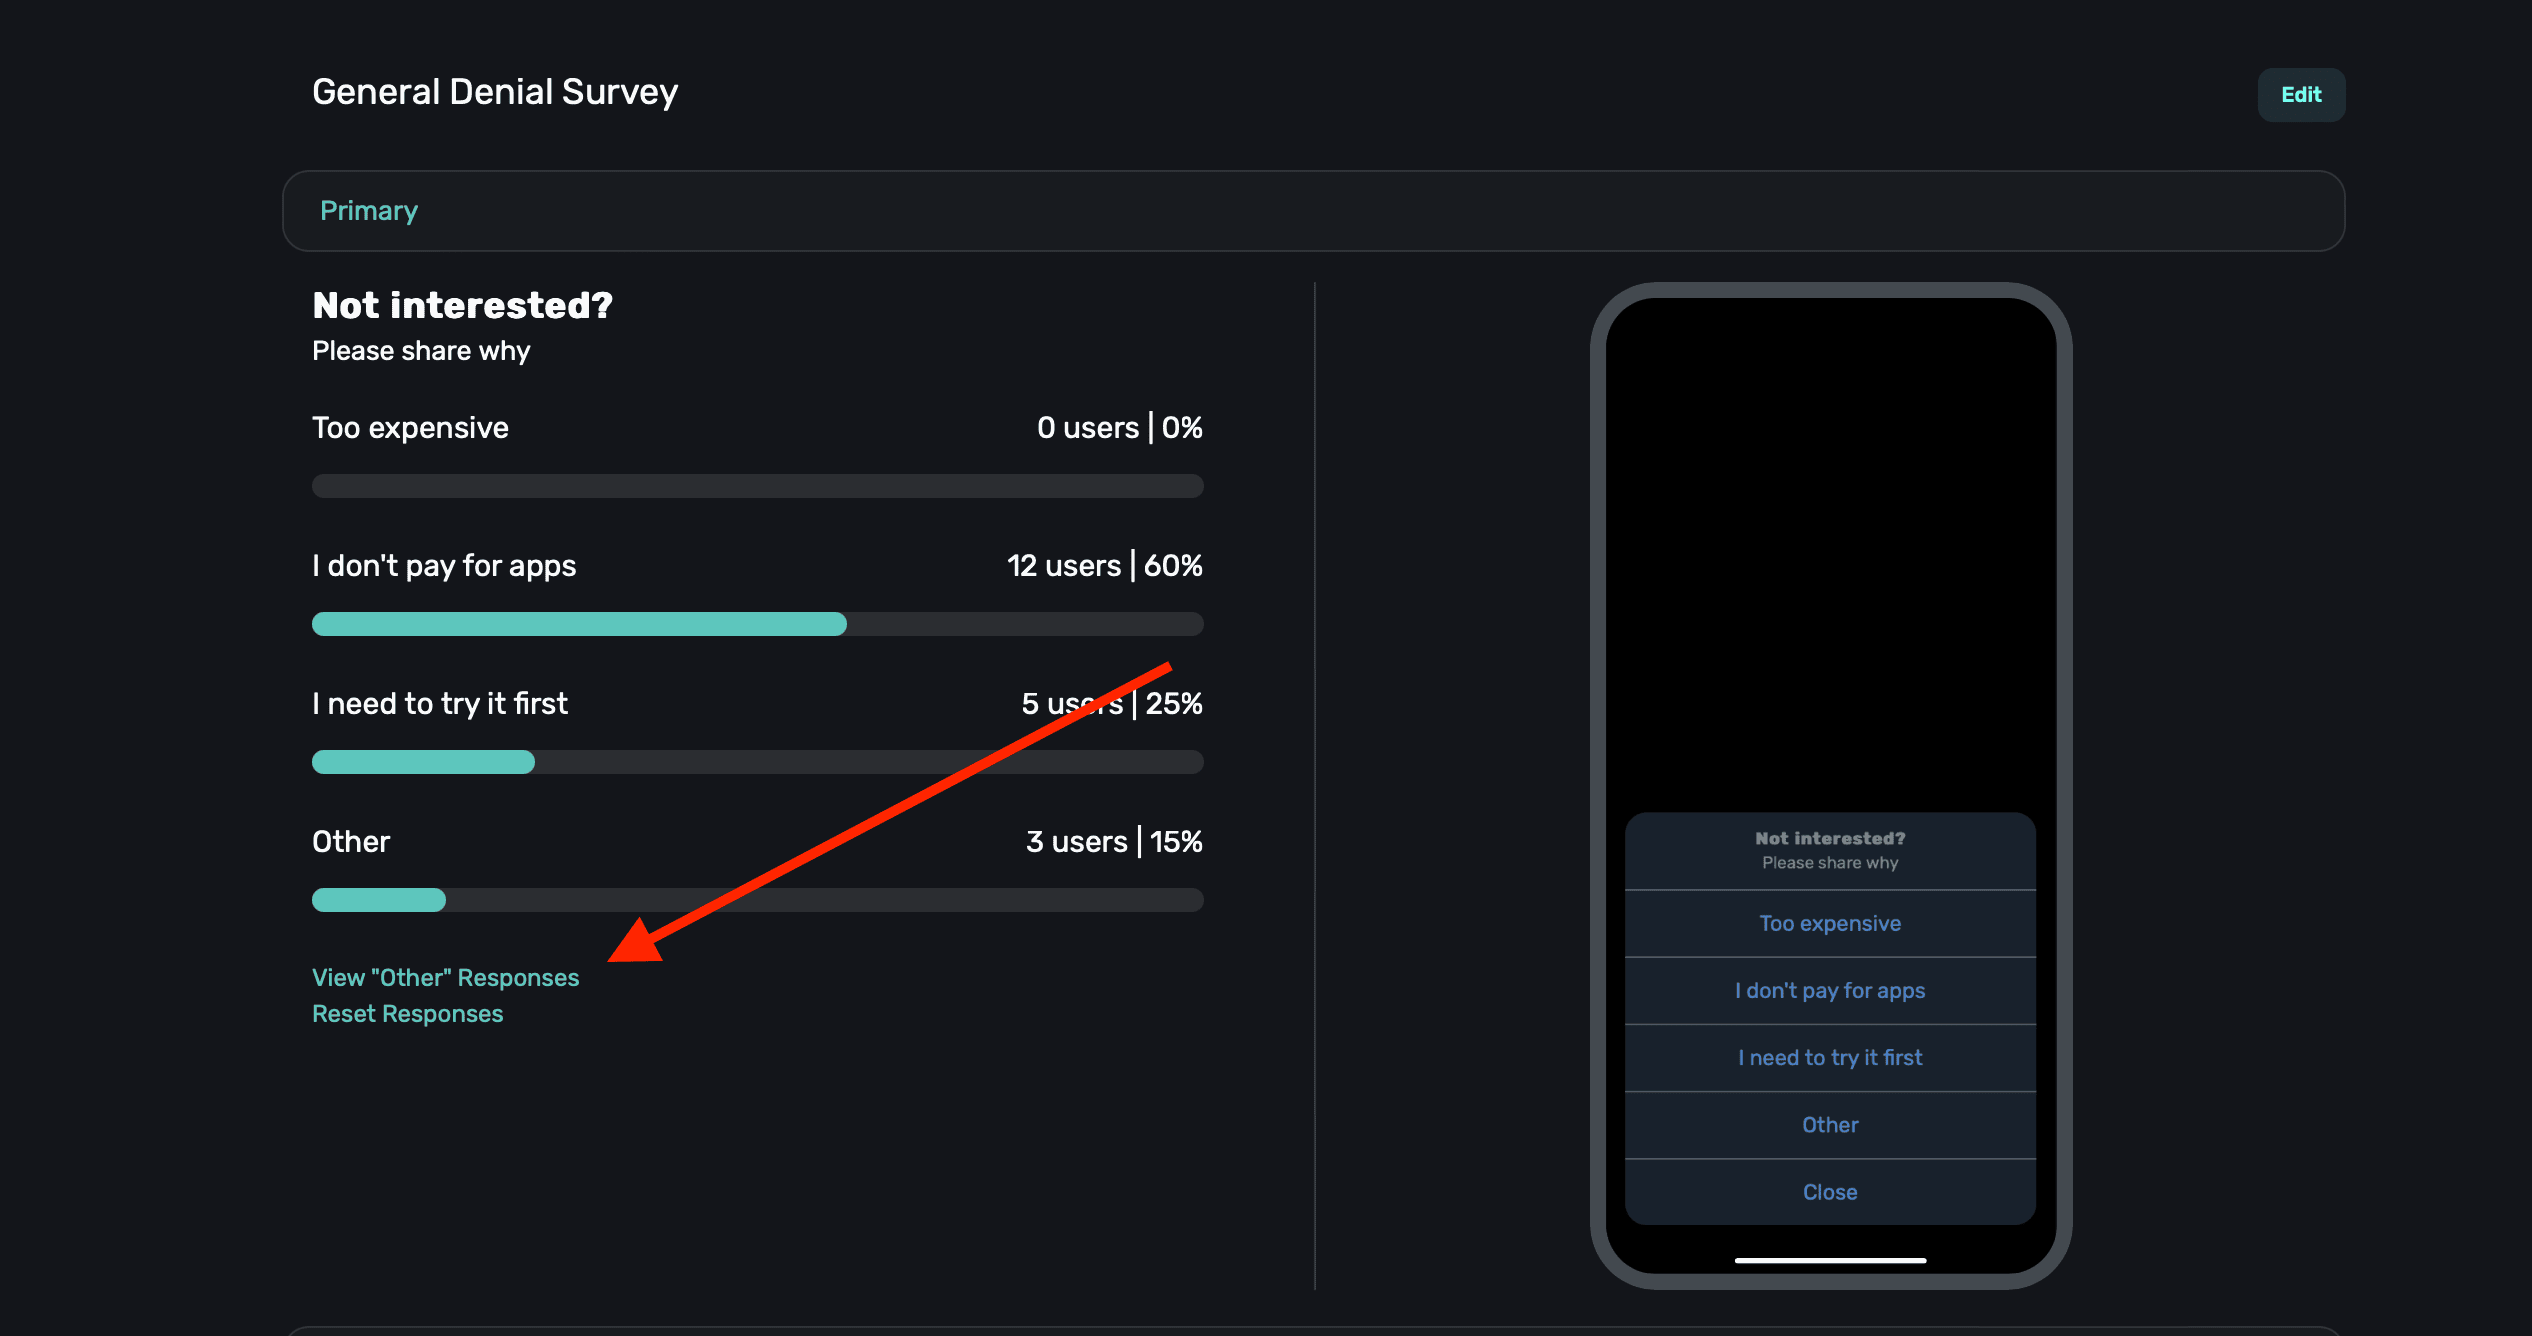
**Resetting survey stats**
Finally, if you wish to reset the survey results, **click** the **Reset Responses** button underneath the results:

Keep in mind that when you reset survey data, it also means that it will present to everyone once
again (within your presentation percentages).
### Tip: showing a paywall based off of a survey response
One particularly useful technique to use with surveys is to show a paywall with a discounted price if the user indicated the pricing was too expensive in their response. You can easily do this using a [standard placement](/campaigns-standard-placements) — and we have a step-by-step guide on how to do exactly this right [here](/campaigns-standard-placements#using-the-survey-response-event).
# Templates
Source: https://superwall.com/docs/templates
Use our template library to jump-start your paywall design process. Either plug in your products, switch them up to fit your needs, or remix them altogether.
Click **Templates** from the **sidebar** to start your paywall design process with one of our templates:
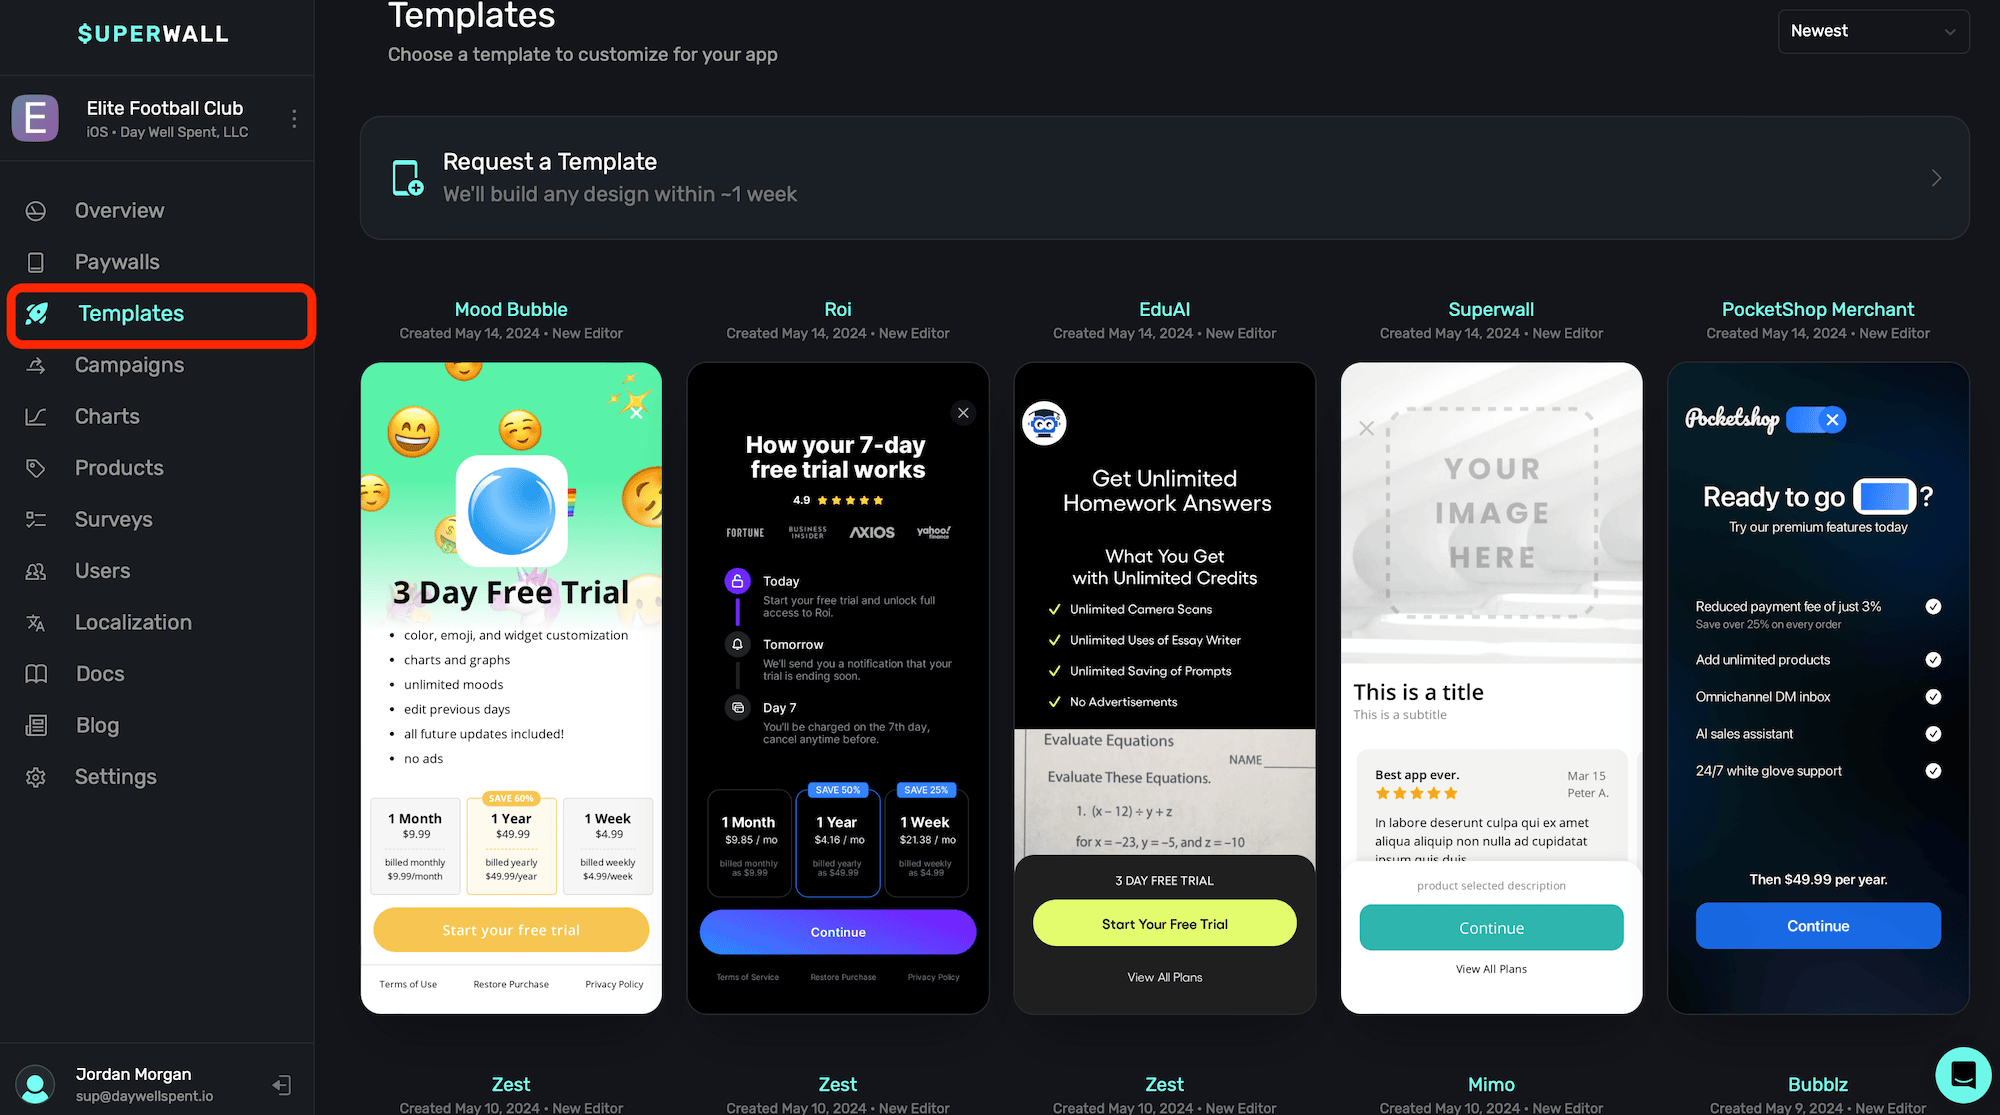
We hand-select the paywalls these templates are based on, and each one is from a high-performing segment on the App Store or Google Play Store. We recommend picking one that matches your design goals the best, and then tweaking them to fit your branding and needs from there.
Each template can be easily changed to support as many products as you need.
### Requesting a template
Superwall offers a complimentary white glove paywall design service for all users. Supply Superwall with either an existing paywall in production, a Figma link, Sketch file or anything else for Superwall's designers to use as a reference.
To get started, simply click **Request a Template** at the top, and fill out the form:
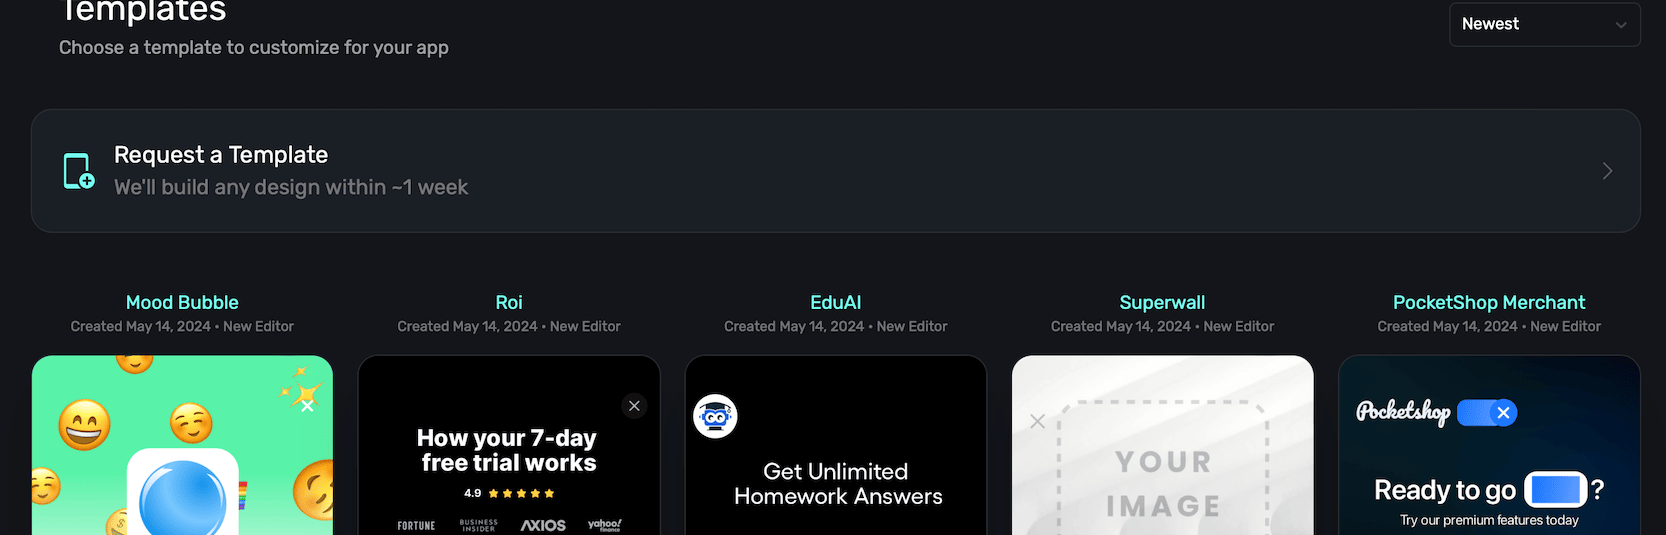
Turnaround is typically about 3-4 business days, but can also be up to a week depending on demand. Rest assured that Superwall's designers take the time to get these done right.
### Sorting paywall templates
To sort available templates by date (either newest to oldest, or vice-versa) or by recently updated — **click** the toggle in the top right and make a selection:
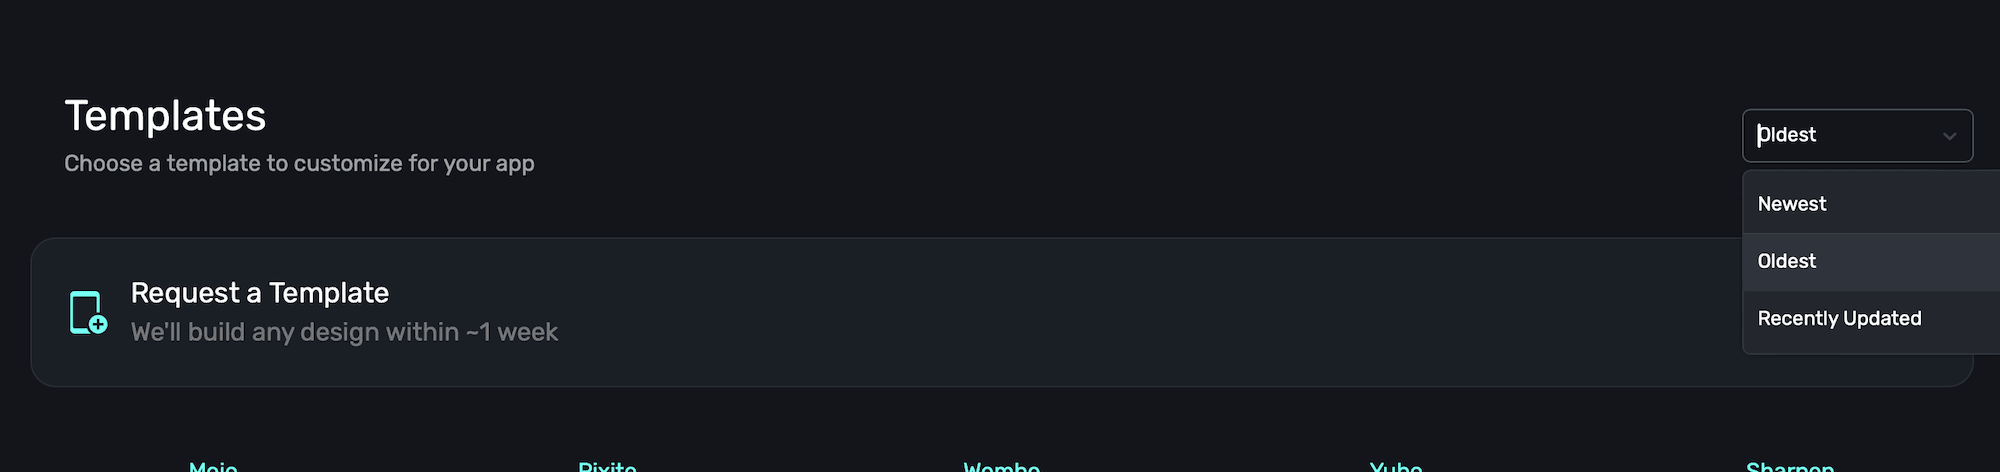
Superwall frequently updates existing templates, as well as adding new ones. Check back often!
# Setting up StoreKit testing
Source: https://superwall.com/docs/testing-purchases
(iOS only) StoreKit testing in Xcode is a local test environment for testing in-app purchases without requiring a connection to App Store servers. Set up in-app purchases in a local StoreKit configuration file in your Xcode project, or create a synced StoreKit configuration file in Xcode from your in-app purchase settings in App Store Connect. After you enable the configuration file, the test environment uses this local data on your paywalls when your app calls StoreKit APIs.
### Add a StoreKit Configuration File
Go to **File ▸ New ▸ File...** in the menu bar , select **StoreKit Configuration File** and hit **Next**:
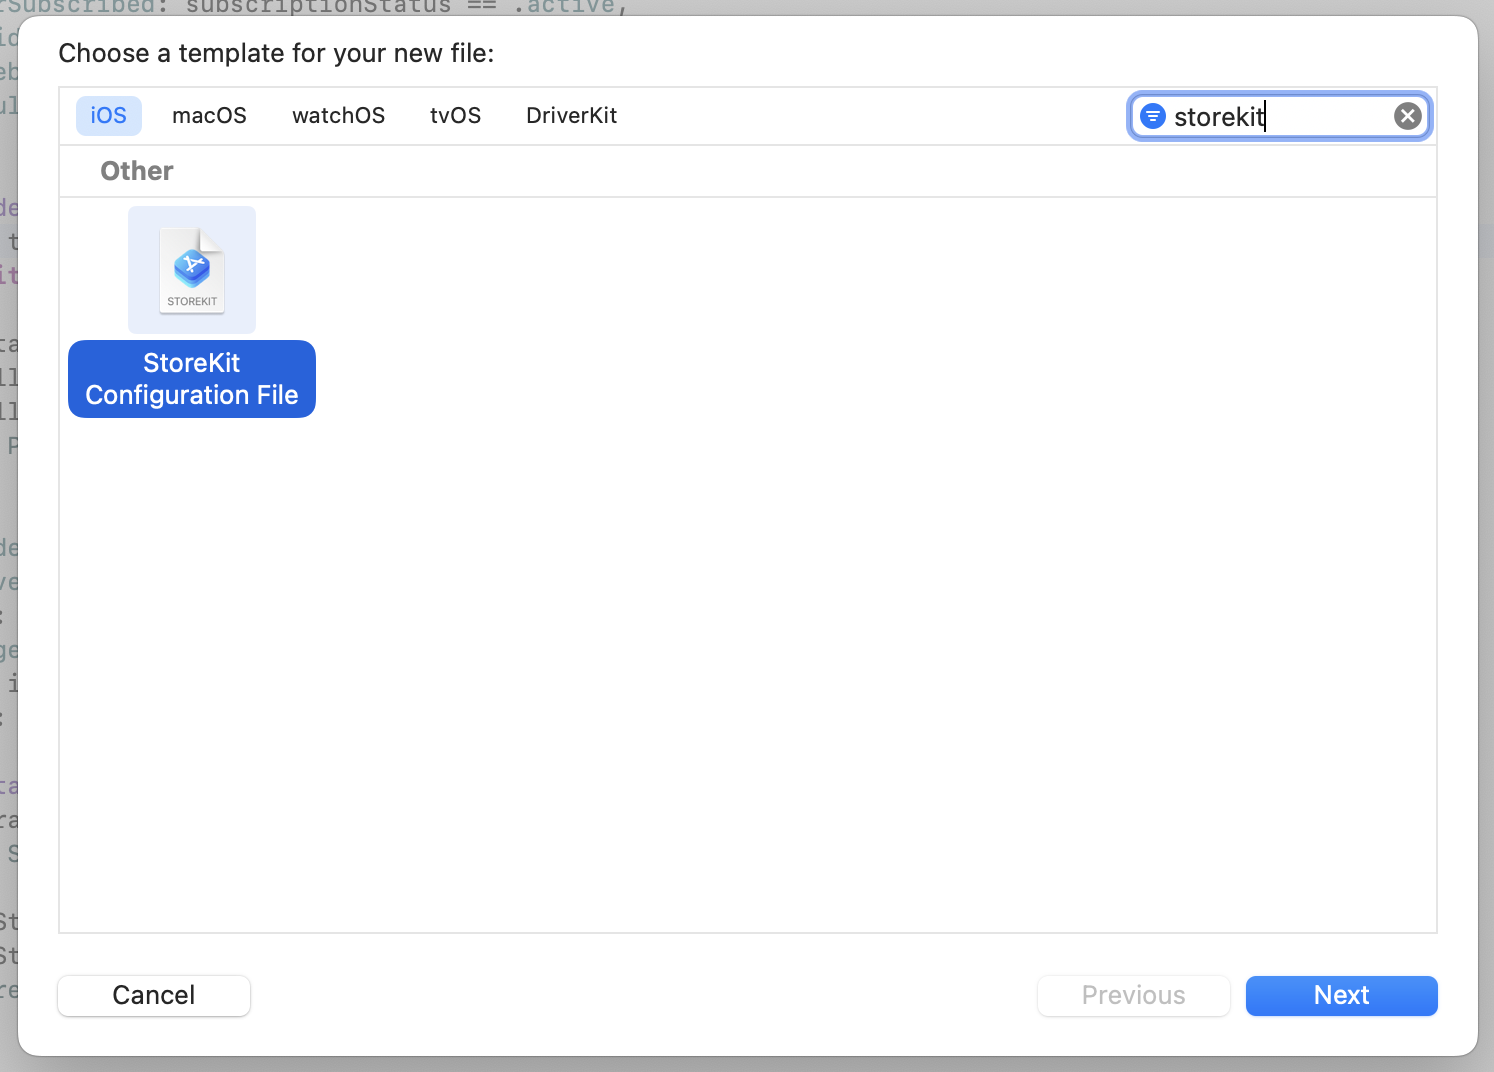
Give it the name **Products**. For a configuration file synced with an app on App Store Connect, select the checkbox, specify your team and app in the drop-down menus that appear, then click **Next**. For a local configuration, leave the checkbox unselected, then click **Next**. Save the file in the top-level folder of your project. You don't need to add it to your target.
### Create a New Scheme for StoreKit Testing
It's best practice to create a new scheme in Xcode to be used for StoreKit testing. This allows you to separate out staging and production environments.
Click the scheme in the scheme menu and click **Manage Schemes...**:

If you haven't already got a Staging scheme, select your current scheme and click **Duplicate**:
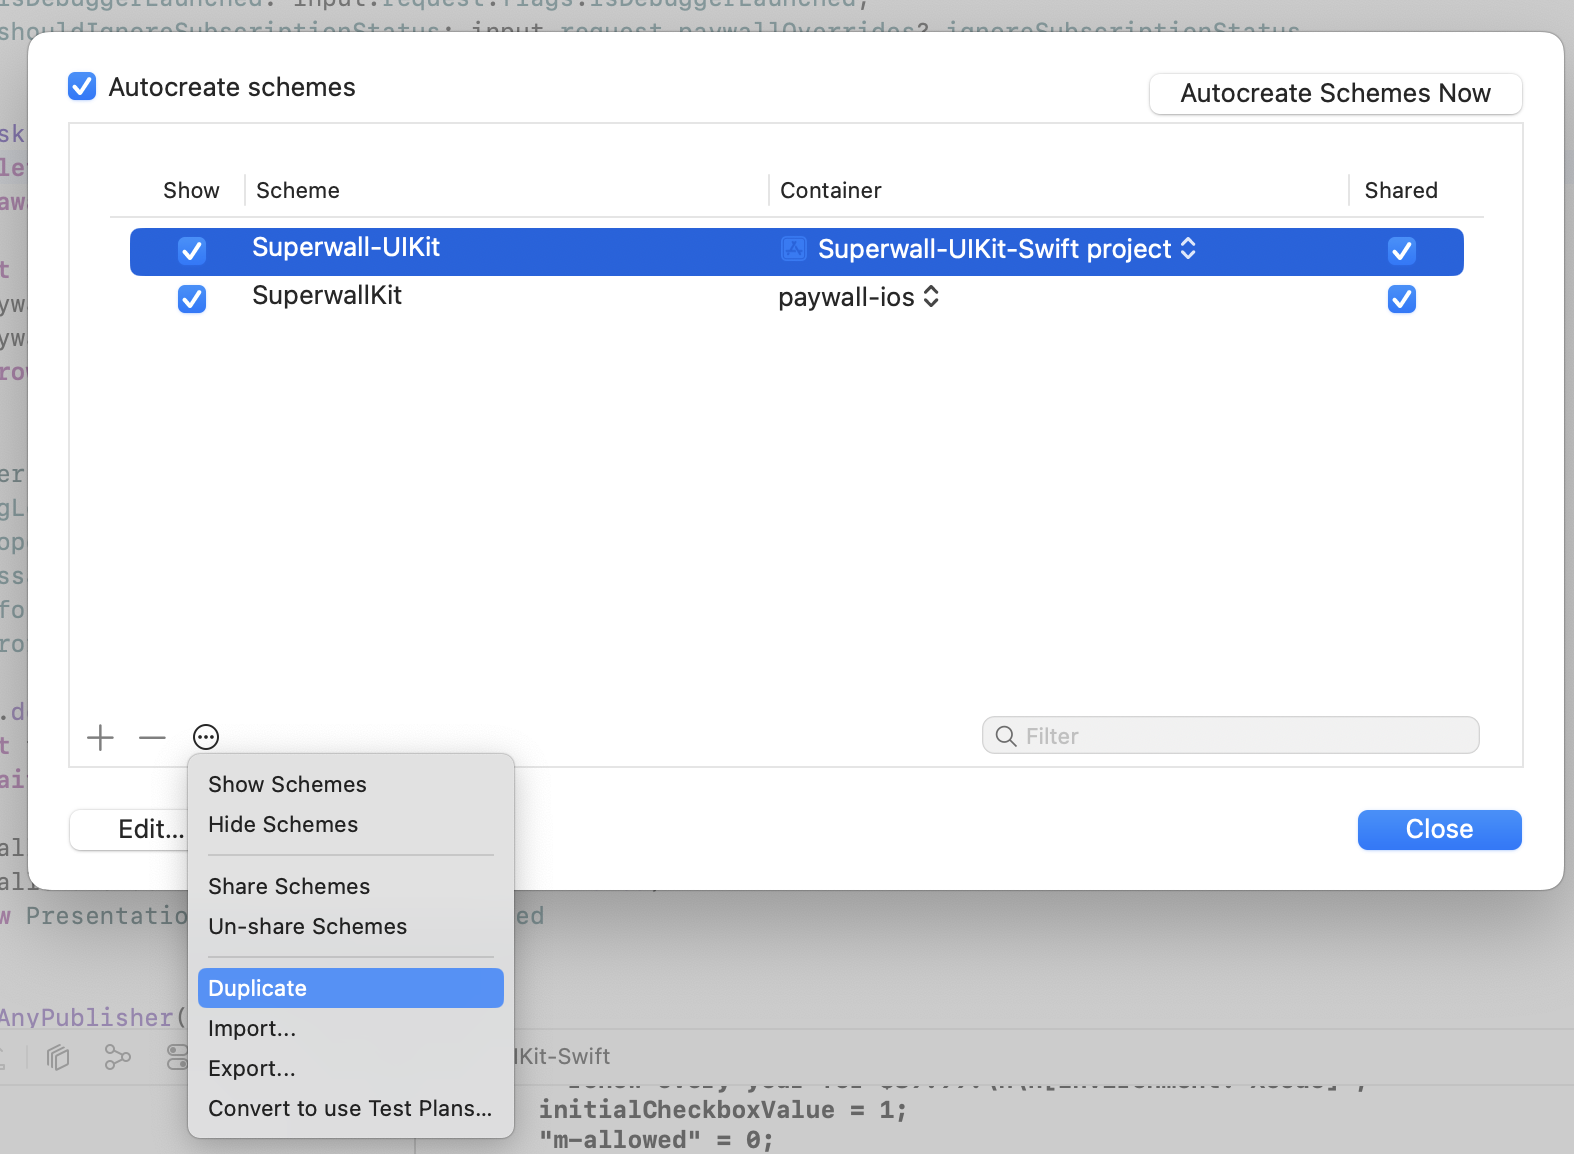
In the scheme editor, add the StoreKit Configuration file to your scheme by clicking on **Run** in the side bar, selecting the **Options** tab and choosing your configuration file in **StoreKit Configuration**. Then, click **Close**:
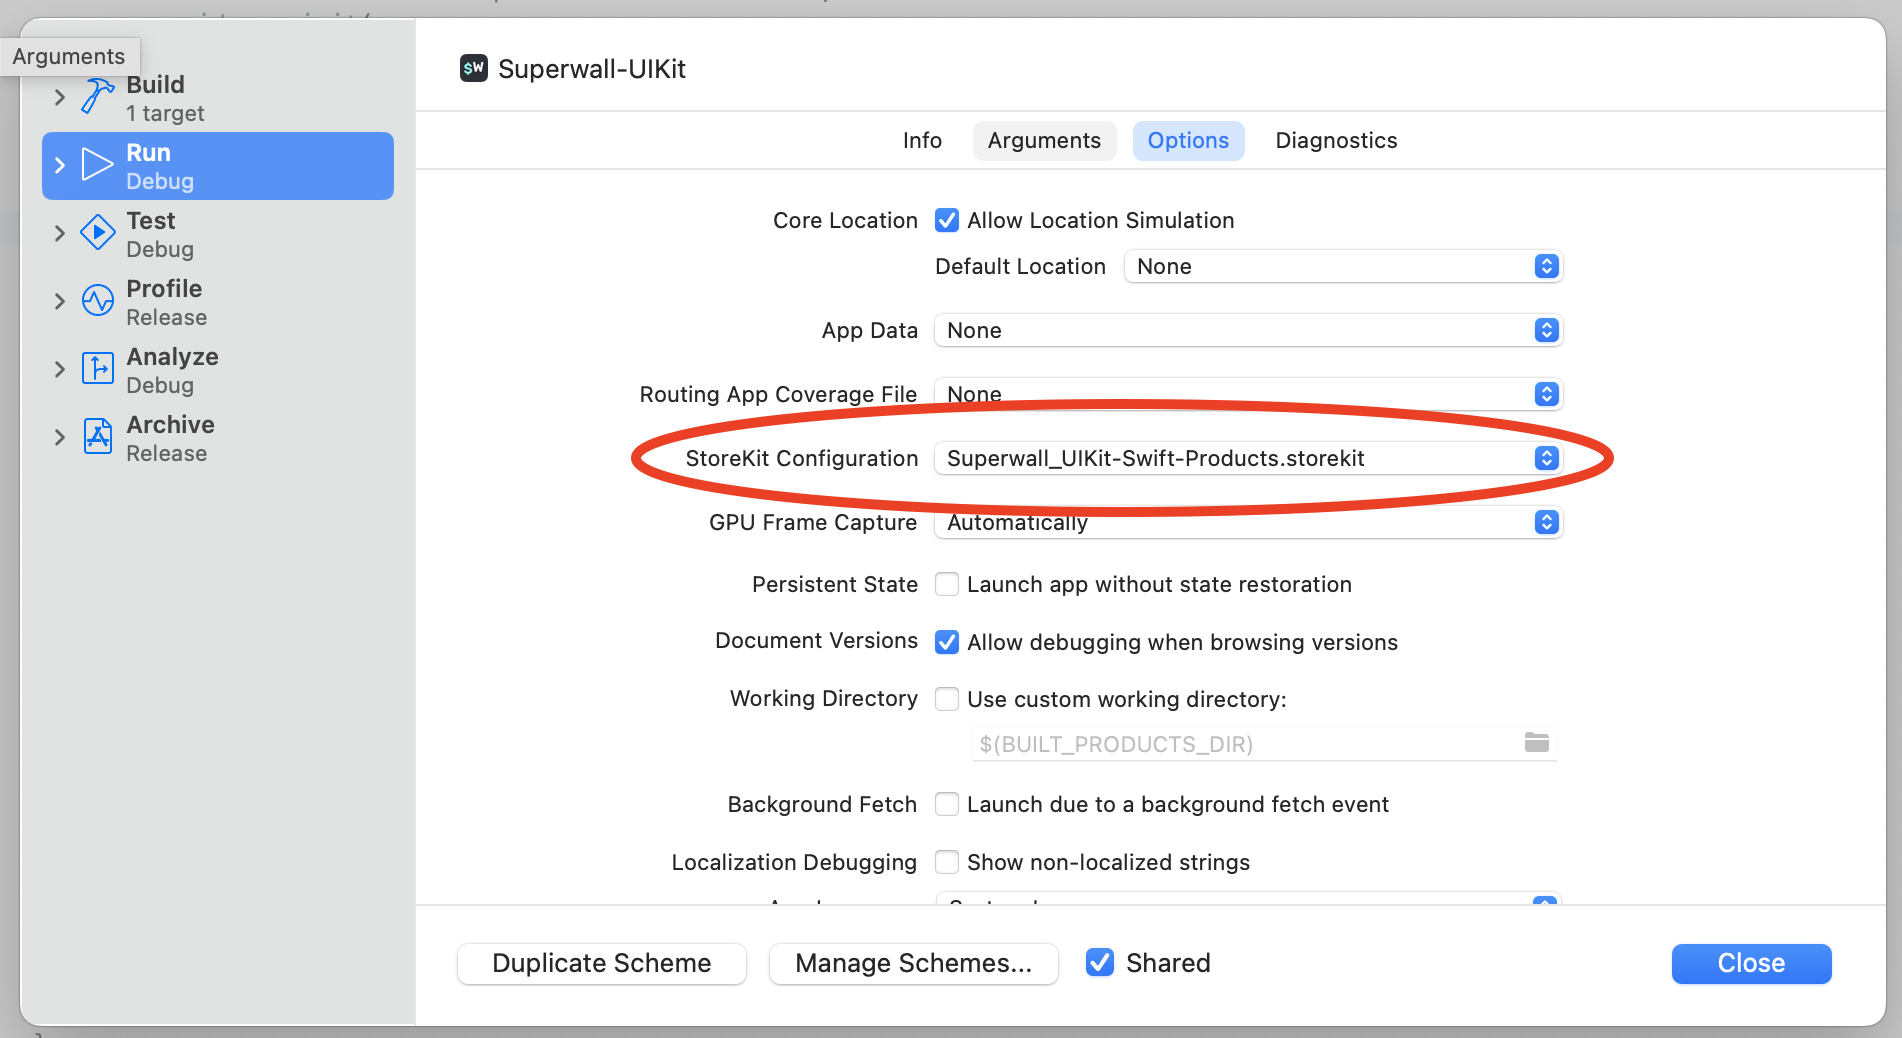
You can rename your scheme to **MyAppName (Staging)**.
### Setting up the StoreKit Configuration File
If you've chosen to sync your configuration file with the App Store, your apps will automatically be loaded into your StoreKit Configuration file. When you add new products, just sync again.
If you're using a local configuration, open **Products.storekit**, click the **+** button at the bottom and create a new product. In this tutorial, we'll create an auto-renewable subscription:
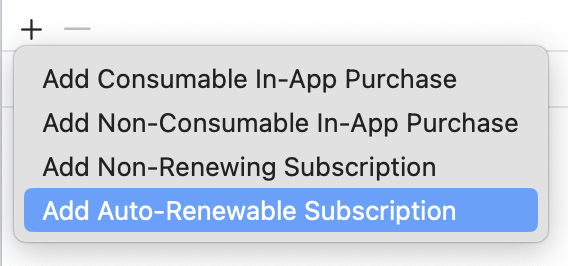
Enter a name for a new subscription group and click **Done**. The subscription group name should match one that is set up for your app in App Store Connect, but it's not a requirement. That means you can test your subscription groups and products in the simulator and then create the products in App Store Connect later:
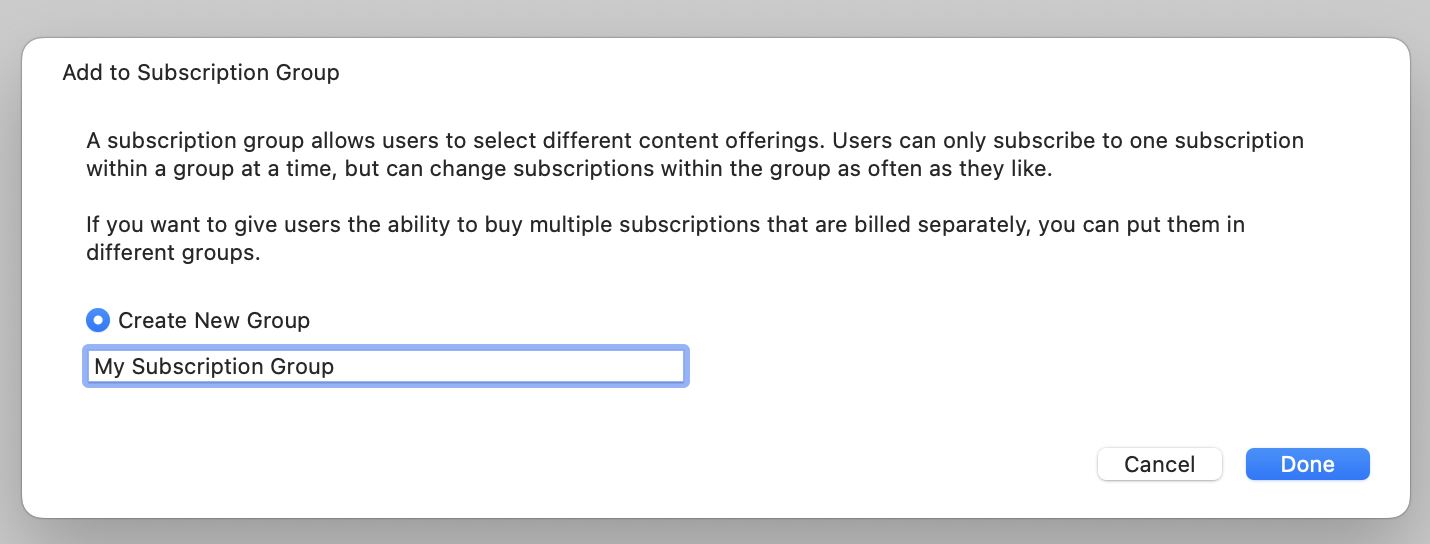
Configure the subscription as needed by filling in the **Reference Name**, **Product ID**, **Price**, **Subscription Duration**, and optionally an **Introductory Offer**. Again, this product doesn't have to exist in App Store Connect for you to test purchasing in the simulator. Here is a sample configuration:
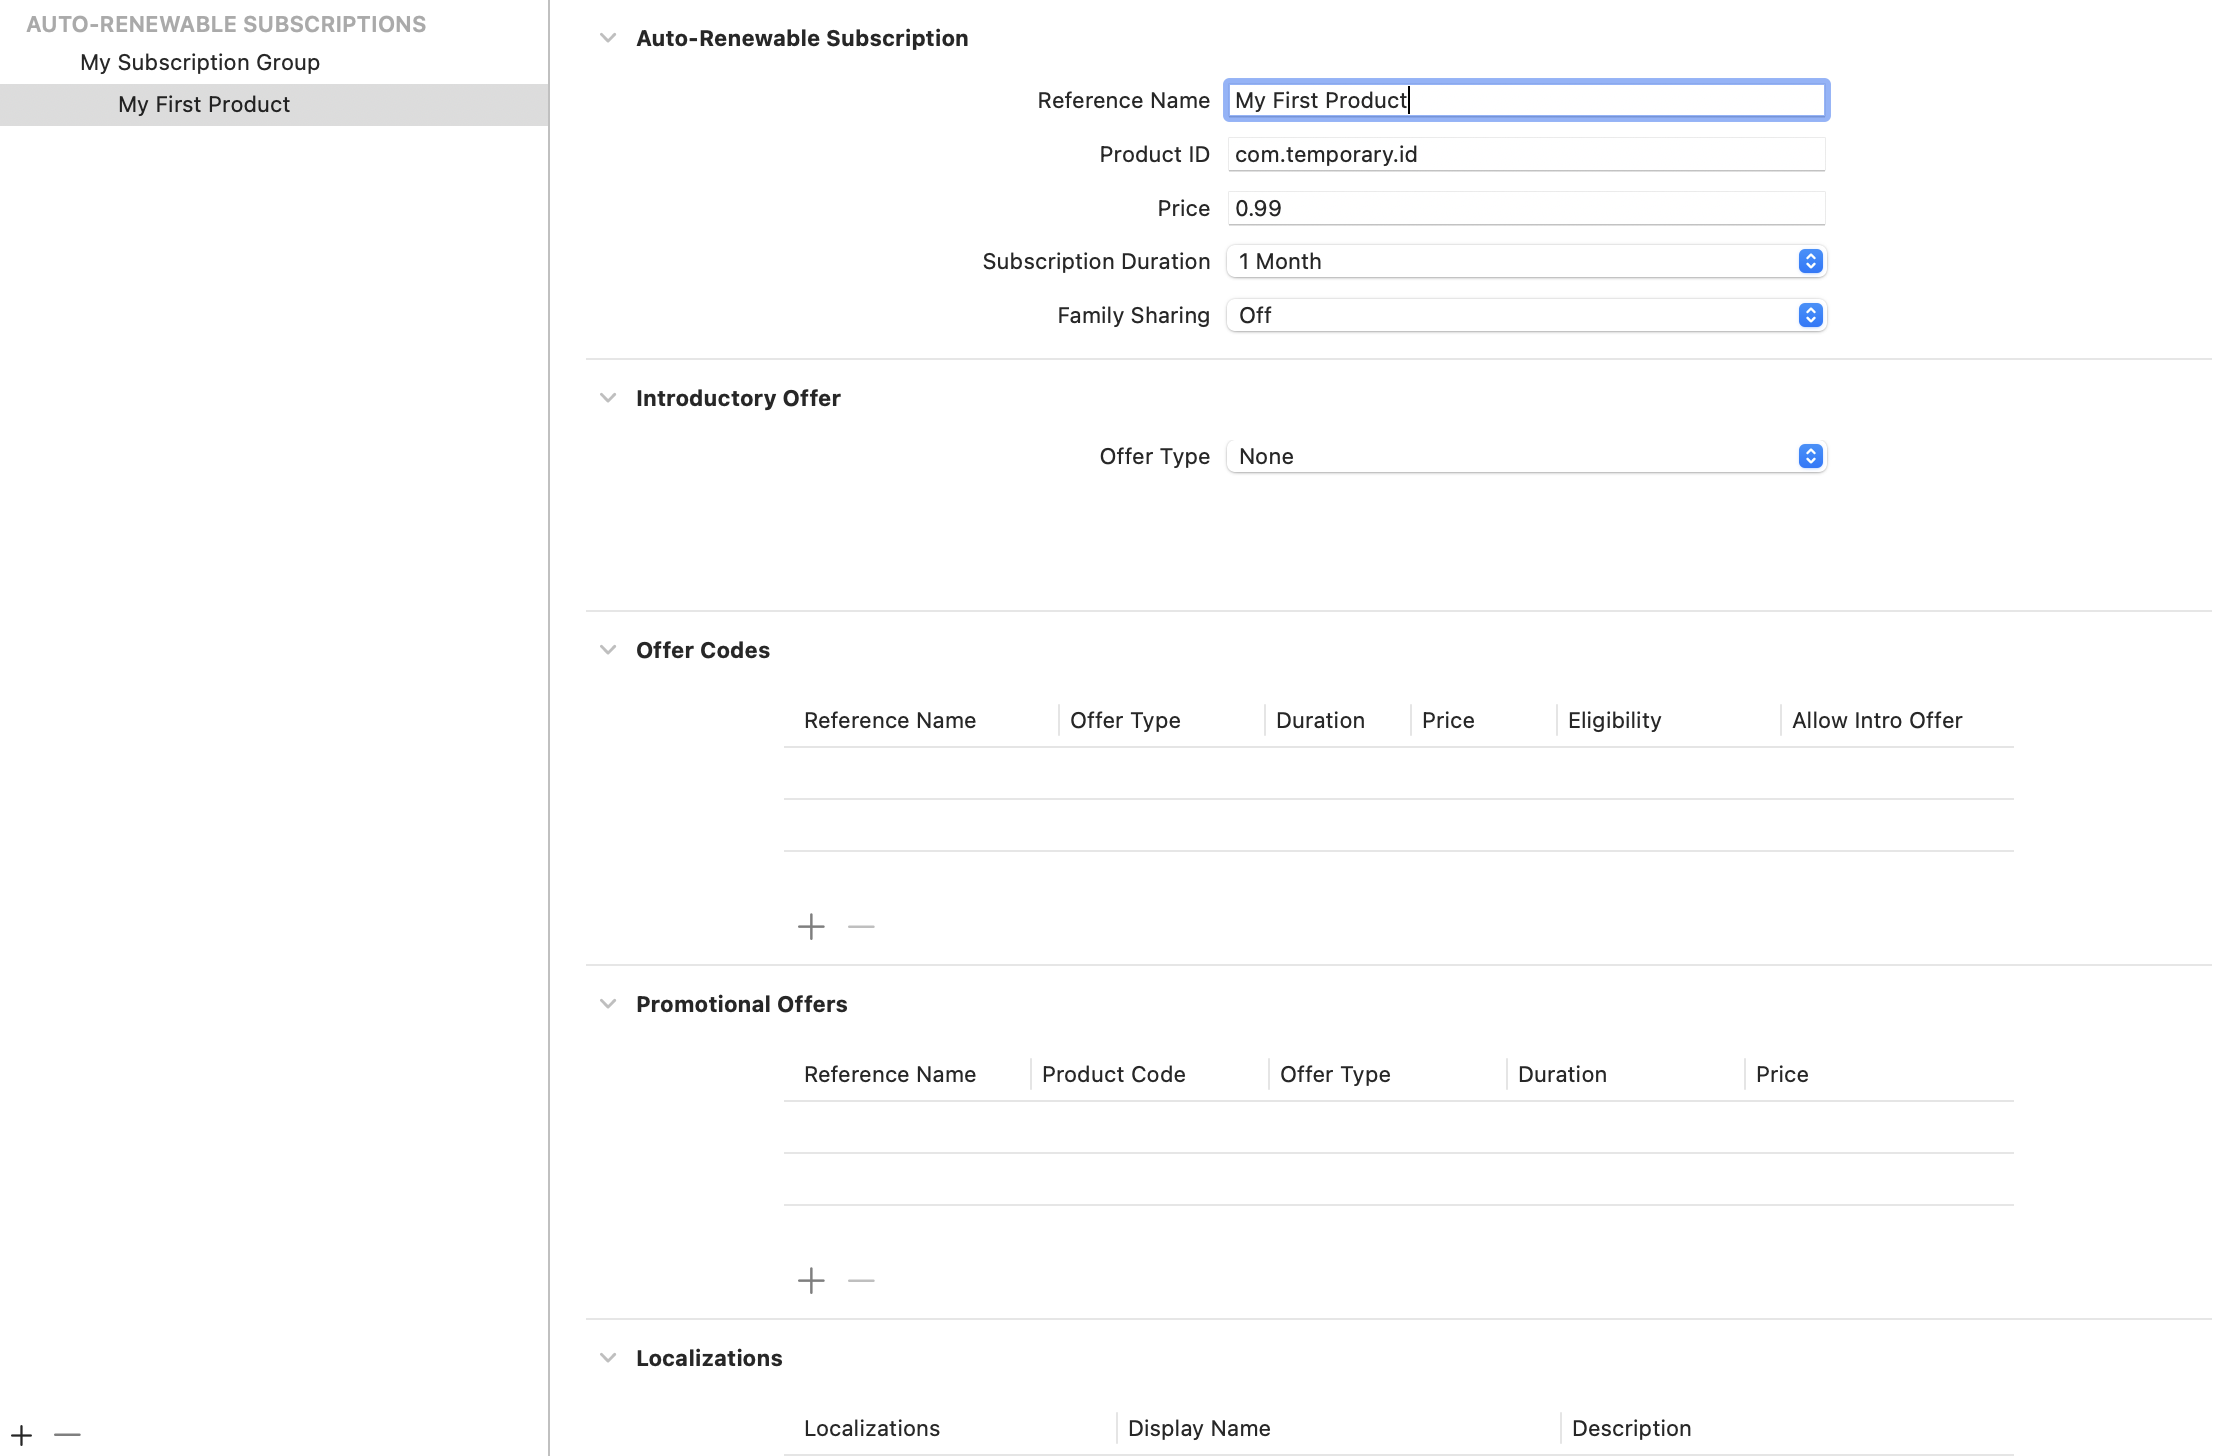
Repeat this for all of your products. When configuring a paywall, the product ID you enter here must match the product ID on the paywall.
You're now all set!
## Testing purchases with Transaction Manager
Once you've set up your StoreKit configuration file, you can leverage Xcode's Transaction Manager. Find it under **Debug -> StoreKit -> Manage Transactions...**:
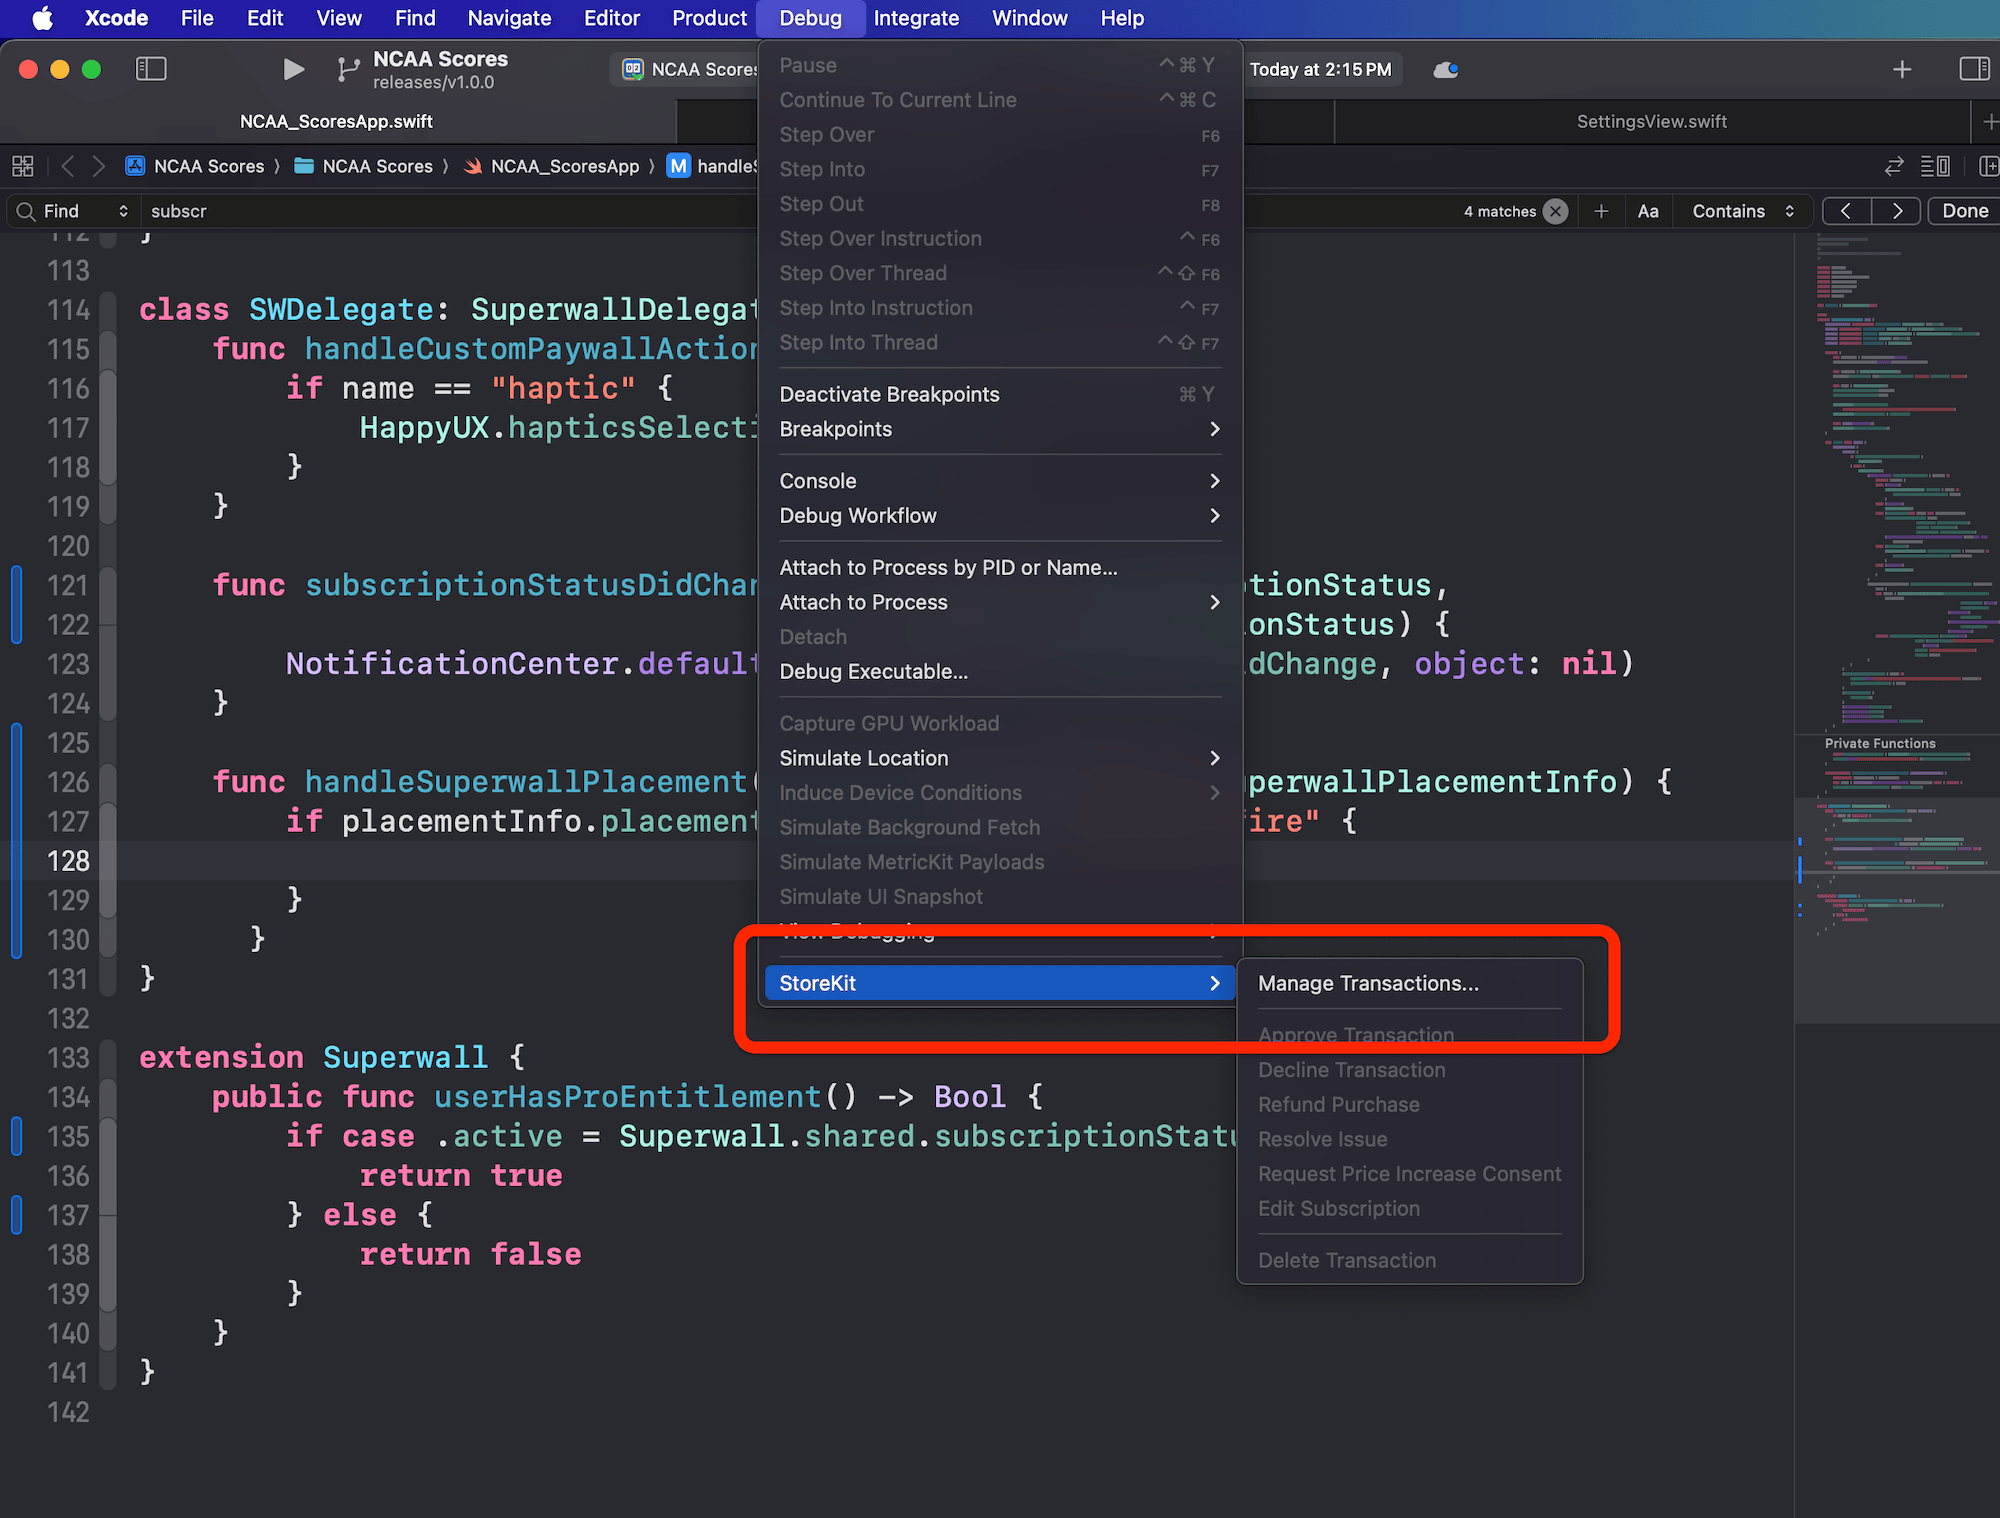
Use this to quickly test purchasing your products. Once you make a purchase, you can open Transaction Manager to delete it, refund it, request parental approval and much more. Most commonly, you'll probably delete the transaction to reset your subscription state:
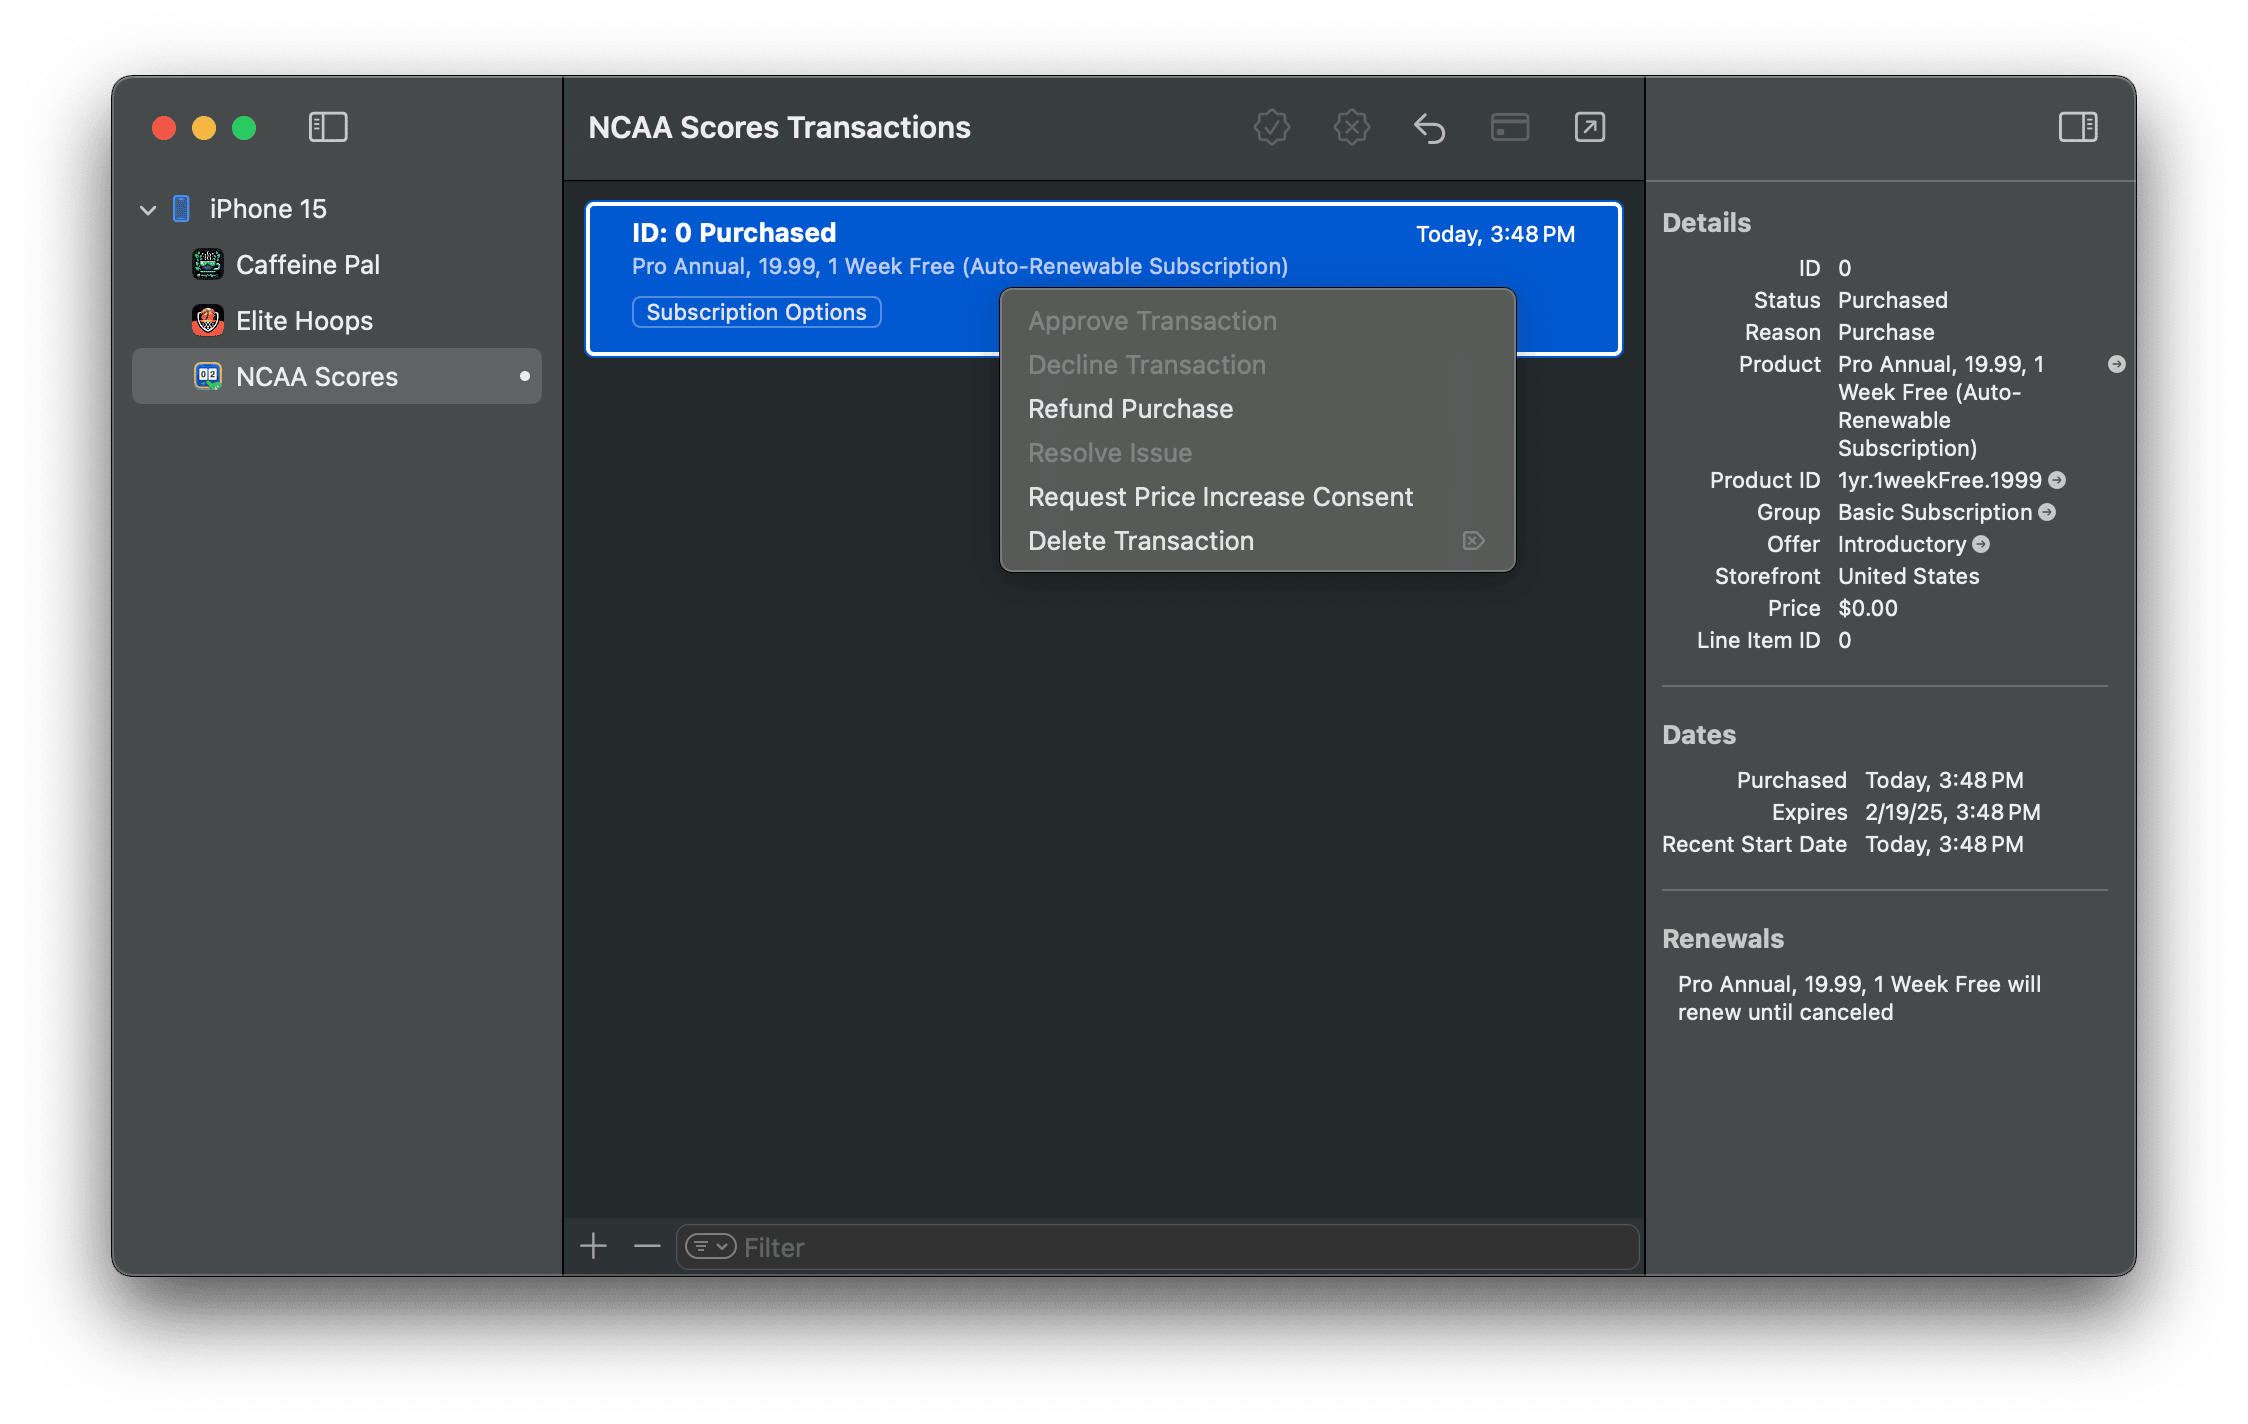
This makes everything a little faster, saving you the trouble of having to delete and reinstall your app to test these states. If you'd like to see a video over how to use it, check this one out:
# Abandoned Transaction Paywalls
Source: https://superwall.com/docs/tips-abandoned-transaction-paywall
Learn how to present a a paywall when a user starts to convert, but then cancels the transaction.
### What
Transaction abandon discounts can boost revenue by offering discounts to users who start, but don't complete, in-app purchases. We've seen 25-40% of revenue come from this method in a few of our own apps, and it can be implemented in Superwall without an app update.
### Why
Somewhere around only 50% of users complete in-app purchases once they start. Offering discounts to those who showed interest, but hesitated, can convert them into paying customers.
### How
# First Touch Paywalls
Source: https://superwall.com/docs/tips-first-touch-paywall
Learn how to present a paywall the moment users interact with your app.
### What
App installs to paywall views is one of the most critical metrics you can track. Using the first touch event to present a paywall is a great way to boost it.
### Why
Showing a paywall from the user's first touch can be an effective alternative to showing one simply after the app launches. This way, it feels less "in the way" and much less like a popup a user had no control over — while still ensuring users view your products.
### How
# Showing Unique Paywalls
Source: https://superwall.com/docs/tips-paywalls-based-on-placement
Learn how to present a unique paywall based on the audience that was matched within a campaign.
### What
Using [audiences](campaigns-audience) within a campaign, you can:
1. Show unique paywalls for each one.
2. And, within an audience, you can show multiple paywalls based on a [percentage](/campaigns-audience#paywalls).
### Why
Our data clearly demonstrates that showing the right paywall, to the right user, and at the right time dramatically affects revenue. There is rarely a one-size-fits all paywall, so you should be testing different variations of them often.
### How
# Feature Gating
Source: https://superwall.com/docs/tips-paywalls-feature-gating
Learn how to toggle feature gating in a paywall.
### What
Toggle [feature gating](/paywall-editor-settings#feature-gating) on a paywall to change whether or not a placement restricts access to features.
### Why
When you use "non-gated", it means users will still see a paywall *but* will have access to whatever feature is behind that paywall. This can be useful to allow access to pro features for a limited time — which hopefully will lead to more conversions later on down the road.
### How
# Custom Actions
Source: https://superwall.com/docs/tips-using-custom-actions
Learn how to use custom actions.
### What
Use [custom actions](/custom-paywall-events#custom-paywall-actions) to trigger application-specific functionality or logic from within your app.
### Why
Custom actions allow you to fire any arbitrary logic inside your app, allowing you to navigate to certain places or trigger platform-specific APIs (such as playing haptic feedback when tapping on a button on iOS).
### How
# Superwall Events
Source: https://superwall.com/docs/tracking-analytics
The SDK automatically tracks some events, which power the charts in the dashboard.
We encourage you to track them in your own analytics as described in [3rd Party Analytics](/3rd-party-analytics).
The following Superwall events can be used as placements to present paywalls:
* `app_install`
* `app_launch`
* `deepLink_open`
* `session_start`
* `paywall_decline`
* `transaction_fail`
* `transaction_abandon`
* `survey_response`
For more info about how to use these, check out [how to add them using a Placement](/campaigns-placements#adding-a-placement).
The full list of events is as follows:
| **Event Name** | **Action** | **Parameters** |
| ----------------------------------------------------------------------------------- | --------------------------------------------------------------------------------------------- | ------------------------------------------------------------------------------------------------------------------------------------------------------------------------------------------------------------------------------------------------------------------------------------------------------------------------------------------------------------------------------------------------------------------------------------------------------------------------------------------------------------------------------------------------------------------------------------------------------------------------------------------------------------------------------------------------------------------------------------------------------------------------------------------------------------------------------------------------------------------------------------------------------------------------------------------------------------------------------------------------------------------------------------------------------------------------------------------------------------------------------------------------------------------------------------------------------------------------------------------------------------------------------------------------------------------------------------------------------------------------------------------------------------------------------------------------------------------------------------------------------------------------------------------------------------------------------------------------------------------------------------------------------------------------------------------------------------------------------------------------------------------------------------------------------------------------------------------------------------------------------------------------------------------------------------------------------------------------------------------------------------------------------------------------------------------------------------------------------------------------------------------------------------------------------------------------------------------------------------------------------------------------------------------------------------------------------------------------------------------------------------------------ |
| `adServicesTokenRequestComplete` | When the AdServices token request finishes. | `["token": String]` |
| `adServicesTokenRequestFail` | When the AdServices token request fails. | `["error": Error]` |
| `adServicesTokenRequestStart` | When the AdServices token request starts. | None |
| `app_close` | Anytime the app leaves the foreground. | Same as `app_install` |
| `app_install` | When the SDK is configured for the first time. | `["is_superwall": true, "app_session_id": String, "using_purchase_controller": Bool]` |
| `app_launch` | When the app is launched from a cold start. | Same as `app_install` |
| `app_open` | Anytime the app enters the foreground. | Same as `app_install` |
| `configAttributes` | When the attributes affecting Superwall's configuration are set or changed. | None |
| `configFail` | When the Superwall configuration fails to be retrieved. | None |
| `configRefresh` | When the Superwall configuration is refreshed. | None |
| `confirmAllAssignments` | When all experiment assignments are confirmed. | None |
| `customPlacement` | When the user taps on an element in the paywall that has a `custom_placement` action. | `["name": String, "params": [String: Any], "paywallInfo": PaywallInfo]` |
| [`deepLink_open`](/campaigns-standard-placements#using-the-deeplink-open-event) | When a user opens the app via a deep link. | `["url": String, "path": String", "pathExtension": String, "lastPathComponent": String, "host": String, "query": String, "fragment": String]` + any query parameters in the deep link URL |
| `device_attributes` | When device attributes are sent to the backend every session. | Includes `app_session_id`, `app_version`, `os_version`, `device_model`, `device_locale`, and various hardware/software details. |
| `first_seen` | When the user is first seen in the app, regardless of login status. | Same as `app_install` |
| `freeTrial_start` | When a user completes a transaction for a subscription product with an introductory offer. | Same as `subscription_start` |
| `identityAlias` | When the user's identity aliases after calling `identify`. | None |
| `nonRecurringProduct_purchase` | When the user purchases a non-recurring product. | Same as `subscription_start` |
| `paywall_close` | When a paywall is closed (either manually or after a transaction succeeds). | \[“paywall\_webview\_load\_complete\_time”: String?, “paywall\_url”: String, “paywall\_response\_load\_start\_time”: String?, “paywall\_products\_load\_fail\_time”: String?, “secondary\_product\_id”: String, “feature\_gating”: Int, “paywall\_response\_load\_complete\_time”: String?, “is\_free\_trial\_available”: Bool, “is\_superwall”: true, “presented\_by”: String, “paywall\_name”: String, “paywall\_response\_load\_duration”: String?, “paywall\_identifier”: String, “paywall\_webview\_load\_start\_time”: String?, “paywall\_products\_load\_complete\_time”: String?, “paywall\_product\_ids”: String, “tertiary\_product\_id”: String, “paywall\_id”: String, “app\_session\_id”: String, “paywall\_products\_load\_start\_time”: String?, “primary\_product\_id”: String, “survey\_attached”: Bool, “survey\_presentation”: String?] |
| [`paywall_decline`](/campaigns-standard-placements#using-the-paywall-decline-event) | When a user manually dismisses a paywall. | Same as `paywall_close` |
| `paywall_open` | When a paywall is opened. | Same as `paywall_close` |
| `paywallPresentationRequest` | When something happened during the paywall presentation, whether a success or failure. | `[“source_event_name”: String, “status”: String, “is_superwall”: true, “app_session_id”: String, “pipeline_type”: String, “status_reason”: String]` |
| `paywallProductsLoad_complete` | When the request to load a paywall's products completes. | Same as `paywallResponseLoad_start` |
| `paywallProductsLoad_fail` | When the request to load a paywall's products fails. | Same as `paywallResponseLoad_start` |
| `paywallProductsLoad_retry` | When the request to load a paywall's products fails and is being retried. | `["triggeredPlacementName": String?, "paywallInfo": PaywallInfo, "attempt": Int]` |
| `paywallProductsLoad_start` | When the request to load a paywall's products starts. | Same as `paywallResponseLoad_start` |
| `paywallResponseLoad_complete` | When a paywall request to Superwall's servers completes. | Same as `paywallResponseLoad_start` |
| `paywallResponseLoad_fail` | When a paywall request to Superwall's servers fails. | Same as `paywallResponseLoad_start` |
| `paywallResponseLoad_notFound` | When a paywall request returns a 404 error. | Same as `paywallResponseLoad_start` |
| `paywallResponseLoad_start` | When a paywall request to Superwall's servers has started. | Same as `app_install` + `["is_triggered_from_event": Bool]` |
| `paywallWebviewLoad_complete` | When a paywall's webpage completes loading. | Same as `paywall_close` |
| `paywallWebviewLoad_fail` | When a paywall's webpage fails to load. | Same as `paywall_close` |
| `paywallWebviewLoad_fallback` | When a paywall's webpage fails and loads a fallback version. | Same as `paywall_close` |
| `paywallWebviewLoad_start` | When a paywall's webpage begins to load. | Same as `paywall_close` |
| `paywallWebviewLoad_timeout` | When the loading of a paywall's webpage times out. | Same as `paywall_close` |
| `reset` | When `Superwall.reset()` is called. | None |
| `restoreComplete` | When a restore completes successfully. | None |
| `restoreFail` | When a restore fails. | `["message": String]` |
| `restoreStart` | When a restore is initiated. | None |
| `session_start` | When the app is opened after at least 60 minutes since last `app_close`. | Same as `app_install` |
| `shimmerViewComplete` | When the shimmer view stops showing. | None |
| `shimmerViewStart` | When the shimmer view starts showing. | None |
| `subscription_start` | When a user completes a transaction for a subscription product without an introductory offer. | \[“product\_period\_days”: String, “product\_price”: String, “presentation\_source\_type”: String?, “paywall\_response\_load\_complete\_time”: String?, “product\_language\_code”: String, “product\_trial\_period\_monthly\_price”: String, “paywall\_products\_load\_duration”: String?, “product\_currency\_symbol”: String, “is\_superwall”: true, “app\_session\_id”: String, “product\_period\_months”: String, “presented\_by\_event\_id”: String?, “product\_id”: String, “trigger\_session\_id”: String, “paywall\_webview\_load\_complete\_time”: String?, “paywall\_response\_load\_start\_time”: String?, “product\_raw\_trial\_period\_price”: String, “feature\_gating”: Int, “paywall\_id”: String, “product\_trial\_period\_daily\_price”: String, “product\_period\_years”: String, “presented\_by”: String, “product\_period”: String, “paywall\_url”: String, “paywall\_name”: String, “paywall\_identifier”: String, “paywall\_products\_load\_start\_time”: String?, “product\_trial\_period\_months”: String, “product\_currency\_code”: String, “product\_period\_weeks”: String, “product\_periodly”: String, “product\_trial\_period\_text”: String, “paywall\_webview\_load\_start\_time”: String?, “paywall\_products\_load\_complete\_time”: String?, “primary\_product\_id”: String, “product\_trial\_period\_yearly\_price”: String, “paywalljs\_version”: String?, “product\_trial\_period\_years”: String, “tertiary\_product\_id”: String, “paywall\_products\_load\_fail\_time”: String?, “product\_trial\_period\_end\_date”: String, “product\_weekly\_price”: String, “variant\_id”: String, “presented\_by\_event\_timestamp”: String?, “paywall\_response\_load\_duration”: String?, “secondary\_product\_id”: String, “product\_trial\_period\_days”: String, “product\_monthly\_price”: String, “paywall\_product\_ids”: String, “product\_locale”: String, “product\_daily\_price”: String, “product\_raw\_price”: String, “product\_yearly\_price”: String, “product\_trial\_period\_price”: String, “product\_localized\_period”: String, “product\_identifier”: String, “experiment\_id”: String, “is\_free\_trial\_available”: Bool, “product\_trial\_period\_weeks”: String, “paywall\_webview\_load\_duration”: String?, “product\_period\_alt”: String, “product\_trial\_period\_weekly\_price”: String, “presented\_by\_event\_name”: String?] |
| `subscriptionStatus_didChange` | When a user's subscription status changes. | `["is_superwall": true, "app_session_id": String, "subscription_status": String]` |
| `surveyClose` | When the user chooses to close a survey instead of responding. | None |
| [`survey_response`](/campaigns-standard-placements#using-the-survey-response-event) | When a user responds to a paywall survey. | `["survey_selected_option_title": String, "survey_custom_response": String, "survey_id": String, "survey_assignment_key": String, "survey_selected_option_id": String]` |
| `touches_began` | When the user touches the app's UIWindow for the first time (if tracked by a campaign). | Same as `app_install` |
| `transaction_abandon` | When the user cancels a transaction. | Same as `subscription_start` |
| `transaction_complete` | When the user completes checkout and any product is purchased. | Same as subscription\_start + \[“web\_order\_line\_item\_id”: String, “app\_bundle\_id”: String, “config\_request\_id”: String, “state”: String, “subscription\_group\_id”: String, “is\_upgraded”: String, “expiration\_date”: String, “trigger\_session\_id”: String, “original\_transaction\_identifier”: String, “id”: String, “transaction\_date”: String, “is\_superwall”: true, “store\_transaction\_id”: String, “original\_transaction\_date”: String, “app\_session\_id”: String] |
| `transaction_fail` | When the payment sheet fails to complete a transaction (ignores user cancellation). | Same as `subscription_start` + `["message": String]` |
| `transaction_restore` | When the user successfully restores their purchases. | Same as `subscription_start` |
| `transaction_start` | When the payment sheet is displayed to the user. | Same as `subscription_start` |
| `transaction_timeout` | When the transaction takes longer than 5 seconds to display the payment sheet. | `["paywallInfo": PaywallInfo]` |
| `trigger_fire` | When a registered placement triggers a paywall. | `[“trigger_name”: String, “trigger_session_id”: String, “variant_id”: String?, “experiment_id”: String?, “paywall_identifier”: String?, “result”: String, “unmatched_rule_”: “”]. unmatched_rule_ indicates why a rule (with a specfiic experiment id) didn’t match. It will only exist if the result is no_rule_match. Its outcome will either be OCCURRENCE, referring to the limit applied to a rule, or EXPRESSION.` |
| `user_attributes` | When the user attributes are set. | `[“aliasId”: String, “seed”: Int, “app_session_id”: String, “applicationInstalledAt”: String, “is_superwall”: true, “application_installed_at”: String] + provided attributes` |
# Tracking Subscription State
Source: https://superwall.com/docs/tracking-subscription-state
Here's how to view whether or not a user is on a paid plan or not.
In your app's models, you might wish to set a flag representing whether or not a user is on a paid subscription:
```swift
@Observable
class UserData {
var isPaidUser: Bool = false
}
```
### Using subscription status
You can do this by observing the `subscriptionStatus` property on `Superwall.shared`. This property is an enum that represents the user's subscription status:
```swift
switch Superwall.shared.subscriptionStatus {
case .active(let entitlements):
logger.info("User has active entitlements: \(entitlements)")
userData.isPaidUser = true
case .inactive:
logger.info("User is free plan.")
userData.isPaidUser = false
case .unknown:
logger.info("User is inactive.")
userData.isPaidUser = false
}
```
One natural way to tie the logic of your model together with Superwall's subscription status is by having your own model conform to the [Superwall Delegate](/using-superwall-delegate):
```swift
@Observable
class UserData {
var isPaidUser: Bool = false
}
extension UserData: SuperwallDelegate {
// MARK: Superwall Delegate
func subscriptionStatusDidChange(from oldValue: SubscriptionStatus, to newValue: SubscriptionStatus) {
switch Superwall.shared.subscriptionStatus {
case .active(_):
// If you're using more than one entitlement, you can check which one is active here.
// This example just assumes one is being used.
logger.info("User is pro plan.")
self.isPaidUser = true
case .inactive:
logger.info("User is free plan.")
self.isPaidUser = false
case .unknown:
logger.info("User is free plan.")
self.isPaidUser = false
}
}
}
```
Another shorthand way to check? The `isActive` flag, which returns true if any entitlement is active:
```swift
if Superwall.shared.subscriptionStatus.isActive {
userData.isPaidUser = true
}
```
### Listening for entitlement changes in SwiftUI
For Swift based apps, you can also create a flexible custom modifier which would fire if any changes to a subscription state occur. Here's how:
```swift
import Foundation
import SuperwallKit
import SwiftUI
// MARK: - Notification Handling
extension NSNotification.Name {
static let entitlementDidChange = NSNotification.Name("entitlementDidChange")
}
extension NotificationCenter {
func entitlementChangedPublisher() -> NotificationCenter.Publisher {
return self.publisher(for: .entitlementDidChange)
}
}
// MARK: View Modifier
private struct EntitlementChangedModifier: ViewModifier {
// Or, change the `Bool` to `Set` if you want to know which entitlements are active.
// This example assumes you're only using one.
let handler: (Bool) -> ()
func body(content: Content) -> some View {
content
.onReceive(NotificationCenter.default.entitlementChangedPublisher(),
perform: { _ in
switch Superwall.shared.subscriptionStatus {
case .active(_):
handler(true)
case .inactive:
handler(false)
case .unknown:
handler(false)
}
})
}
}
// MARK: View Extensions
extension View {
func onEntitlementChanged(_ handler: @escaping (Bool) -> ()) -> some View {
self.modifier(EntitlementChangedModifier(handler: handler))
}
}
// Then, in any view, this modifier will fire when the subscription status changes
struct SomeView: View {
@State private var isPro: Bool = false
var body: some View {
VStack {
Text("User is pro: \(isPro ? "Yes" : "No")")
}
.onEntitlementChanged { isPro in
self.isPro = isPro
}
}
}
```
### Superwall checks subscription status for you
Remember that the Superwall SDK uses its [audience filters](/campaigns-audience#matching-to-entitlements) for a similar purpose. You generally don't need to wrap your calls registering placements around `if` statements checking if a user is on a paid plan, like this:
```swift
// Unnecessary
if !Superwall.shared.subscriptionStatus.isActive {
Superwall.shared.register(placement: "campaign_trigger")
}
```
In your audience filters, you can specify whether or not the subscription state should be considered...

...which eliminates the needs for code like the above. This keeps you code base cleaner, and the responsibility of "Should this paywall show" within the Superwall campaign platform as it was designed.
# How to Debug Paywall Issues in Production
Source: https://superwall.com/docs/troubleshooting-debug-paywalls-production
Learn how to use the dashboard’s event logs to debug paywall behavior for real users.
If you're seeing unexpected behavior in production and know the `userId`, here's how to debug:
1. **Search for the user in the dashboard.**
Go to the Users tab and enter their `userId`. Click the result to see their event log.
2. **Check the `paywallPresentationRequest` event.**
Look for this event in the log. It includes a `status` and `status_reason` that explains why a paywall did or didn’t show.
3. **Common error: `subscription_status_timeout`**
This means it took longer than 5 seconds to retrieve the subscription status. Check if `Superwall.shared.subscriptionStatus` is being set correctly or if there's an internet issue.
4. **Tip:** Use the same `userId` across analytics and Superwall via `identify(userId:)`.
# Paywall Memory Usage on iOS
Source: https://superwall.com/docs/troubleshooting-paywall-memory-usage-on-iOS
Investigate why your paywall might look like it's using more memory than you expect in Instruments.
When inspecting memory usage in Instruments, you might notice your paywall appears to be using over, or around, 512MB of memory. That can seem concerning, but in almost all cases, it's nothing to worry about.
Whenever a `WKWebView` is created, WebKit reserves a chunk of memory (typically 512MB) for virtual machine allocation. That memory is reserved by iOS, and most apps using WebKit on iOS will see similar readings during profiling within Instruments. In short, this is just how `WKWebView` is designed to work under the hood.
## Can I reduce this memory usage?
If your app creates a lot of paywalls or manages many `WKWebView` instances, you can reduce memory usage by turning off paywall preloading:
```swift
let options = SuperwallOptions()
options.paywalls.shouldPreload = false
Superwall.configure(apiKey: "MY_API_KEY", options: options)
```
This prevents Superwall from creating webviews ahead of time, which reduces memory pressure. However, the tradeoff is that the paywall will take slightly longer to show and users will briefly see the loading view as the paywall is initialized on demand.
We recommend leaving preloading on unless you're noticing real performance issues or memory warnings.
# Products Not Loading
Source: https://superwall.com/docs/troubleshooting-products-not-loading
The full checklist for iOS, Android, and RevenueCat when your products won’t show.
### iOS Checklist
* **On the Superwall dashboard:**
* Ensure all paywalls include at least one product with a valid identifier.
* **In Xcode:**
* Add products to your StoreKit file.
* Match your app's bundle ID to App Store Connect.
* Add In-App Purchase capability in the project.
* **In App Store Connect:**
* Agreements are active.
* Tax and banking info complete.
* Products marked "Ready to Submit".
* No products are in **"Missing Metadata"** status.
* Product IDs match your paywall.
* Wait at least 15 minutes after product creation.
* **In Production:**
* Wait up to 72 hours after app release for products to appear.
### Android Checklist
* Users in Russia and Belarus don’t have access to Google Billing. In this instance, products won't load and paywalls won't show. The `onError` `PaywallPresentationHandler` handler will get called.
* Ensure the device/emulator has the Play Store and is signed in.
* Check that your `applicationId` matches what’s in the Play Store.
### RevenueCat Checklist
* Product IDs added and linked to an entitlement.
* If using offerings, the product is part of one.
# Sandbox Free Trial Isn’t Appearing
Source: https://superwall.com/docs/troubleshooting-sandbox-free-trial-not-showing
Why free trials sometimes don’t show up in sandbox testing and what to do about it.
This can happen when you've previously purchased a subscription and then reinstall the app during sandbox testing. The issue:
* The on-device receipt is used to determine trial availability.
* In sandbox, this receipt isn’t retrieved until after a purchase or restore.
* So the SDK can’t determine if a free trial is available at app start.
**Fix:**
Restore purchases first, then try again. This won’t happen in production.
# StoreKit Transactions Not Clearing in Xcode
Source: https://superwall.com/docs/troubleshooting-storekit-transaction-stuck
Fix for when a test transaction seems stuck or active when it shouldn’t be.
Sometimes StoreKit test transactions appear active when they’re not. This is often due to a target membership issue or StoreKit config issue. To fix:
1. Open Xcode → **Debug → StoreKit → Manage Transactions**.
2. Delete all existing transactions.
3. If it still fails, remove the StoreKit config file from the project.
4. Build and run the project again.
5. Re-add the StoreKit config file.
# Fixing Unexpected Paywall Behavior
Source: https://superwall.com/docs/troubleshooting-unexpected-paywall-behavior
Step-by-step checklist when a paywall shows up when it shouldn’t—or doesn’t when it should.
If you're seeing a paywall when you think you shouldn't—or not seeing one when you should—run through this checklist:
1. **Check your subscription status logic.**
If you're [implementing subscription-related logic yourself](/advanced-configuration), make sure `Superwall.shared.subscriptionStatus` is kept in sync with the actual subscription status. If it's `.unknown` or `.active(_)`, the paywall won’t show unless explicitly overridden.
2. **Test device considerations.**
If you’ve previously purchased a subscription, the paywall won’t show again. On iOS, if you’re using a local StoreKit config file, delete and reinstall the app to reset the device’s subscription state.
3. **Review your campaign configuration.**
Confirm your placement name is spelled correctly and that all necessary properties are passed to match the audience filter. Also check for any holdout groups that might block the paywall.
4. **Verify product configuration.**
If your paywall references unavailable or invalid product identifiers, you’ll see a console error. When using a StoreKit file, be sure to add your products before testing paywall presentation.
# Using Placement Parameters
Source: https://superwall.com/docs/using-placement-parameters
Placement parameters allow you to send additional data to the Superwall platform when registering placements.
You can send parameters along with any placement you create. For example, if you had a caffeine logging app — perhaps you'd have a placement for logging caffeine:
```swift
// In iOS...
Superwall.shared.register(placement: "caffeineLogged") {
store.log(amountToLog)
}
```
Now, imagine you could log caffeine from several different touch points in your app. You may wish to know *where* the user tried to log caffeine from, and you could tie a parameter to the `caffeineLogged` placement to do this:
```swift iOS
Superwall.shared.register(placement: "caffeineLogged", params: ["via":"logging_page"]) {
store.log(amountToLog)
}
```
```kotlin Android
val params: Map = mapOf(
"via" to "logging_page"
)
Superwall.instance.register("caffeineLogged", params = params) {
store.log(amountToLog)
}
```
```dart Flutter
final params = {"via": "logging_page"};
Superwall.shared.registerPlacement(
"placement",
params: params,
feature: () {
logToStore(100);
}
);
```
```typescript React Native
Superwall.shared.register({
placement: 'caffeineLogged',
params: new Map([["via", "logging_page"]]),
feature: ()=>{
console.log("show coffee")
}
});
```
The `via` parameter could now be used all throughout Superwall. You could create a new [audience](/campaigns-audience) which has filters for each place users logged caffeine from, and unique paywalls for each of them.
Parameter placements can be used in four primary ways:
1. **Audience Filtering:** As mentioned above, you can filter against parameters when creating audiences. Following our example, you'd create a **placement parameter** named **via** and then choose how to filter off of the parameter's value:

2. **Templating in Text:** Parameters are available in our [paywall editor](/paywall-editor-overview), so you can easily use them in text components too:
```
Hey {{user.firstName}}! FitnessAI offers tons of {{user.fitnessGoal}} workouts to help you reach your goals :)
```
3. **Interfacing with Analytics:** Another common scenario is cohorting with your own analytics. See this [doc](/cohorting-in-3rd-party-tools) for more.
4. **Reference them on Paywalls:** Display dynamic images by constructing URLs based on placement parameters, change copy on a paywall to emphasize a feature, and more. For more, check out the docs over [creating custom variables](/paywall-editor-variables#custom-variables).
To see an example of using placement parameters in a paywall, see this video:
# Using Referral or Promo Codes with Superwall
Source: https://superwall.com/docs/using-referral-or-promo-codes-with-superwall
Learn how to use referral or promo codes with Superwall.
There are two primary ways to use referral codes or promo codes with Superwall:
1. **Using Superwall's Mobile SDKs**: By using [custom actions](/custom-paywall-events) along with a [campaign](/campaigns) for referrals, you can create a flow to handle referral codes and see their resulting conversions and other data. You create the products that each referral should unlock within the respective app storefront.
2. **Web Checkout**: Here, you can use Superwall's [web checkout](/web-checkout-overview) feature to easily offer referrals. With this approach, you could create a [checkout link](/web-checkout-creating-campaigns-to-show-paywalls) for each referral you need. Unlike the previous option, you create the [products in Stripe](/web-checkout-adding-a-stripe-product).
### Understanding Superwall's role
Before you continue, it's critical to understand Superwall's role in this process. Most referral flows usually call for two things:
1. A way to enter in a referral code and validate it.
2. And, a resulting discounted offer that the user can redeem.
**Your app must provide the referral code entry and validation.** In addition, you'll want to create discounted products in either App Store Connect, Google Play Console, or Stripe. Superwall offers products from these sources on paywalls. Remember, Superwall does *not* create or manage the products — it shows the ones you've imported from one of those places.
### Referral flows
Given that information, here is how most referral flows can work:
```mermaid
flowchart TD
A([Paywall is shown]) --> B[Referral Code claim button is tapped]
B --> C[Custom Action is fired from button tap]
C --> D[Responding in your Superwall Delegate, you present your own referral UI over the existing paywall]
D --> E{Code is valid?}
E -- NO --> F[Dismiss referral UI, existing paywall is still presented]
E -- YES --> G[Dismiss referral UI, dismiss existing paywall. Register placement for the referral code.]
G --> H[Present new paywall with discounted product. In Superwall, you can use campaign data to attribute conversions, trials, etc.]
```
Now, let's go through each step in detail. We'll assume that you're triggering this flow from a paywall that's already presented, but if that's not the case — just skip to the step where you present your referral entry UI (step four):
Create a campaign for your referrals. Here, you'd add the discounted product(s) you've made to a paywall. You can add in as many placements as you need. Maybe there's one for each influencer, or seasonal discount offer, etc. You'll register one of these placements later on if the referral code entry was successful.
A paywall is shown. On it, this button that reads "Referral Code" has a custom tap action called "showPromoRedeem" which gets tapped:
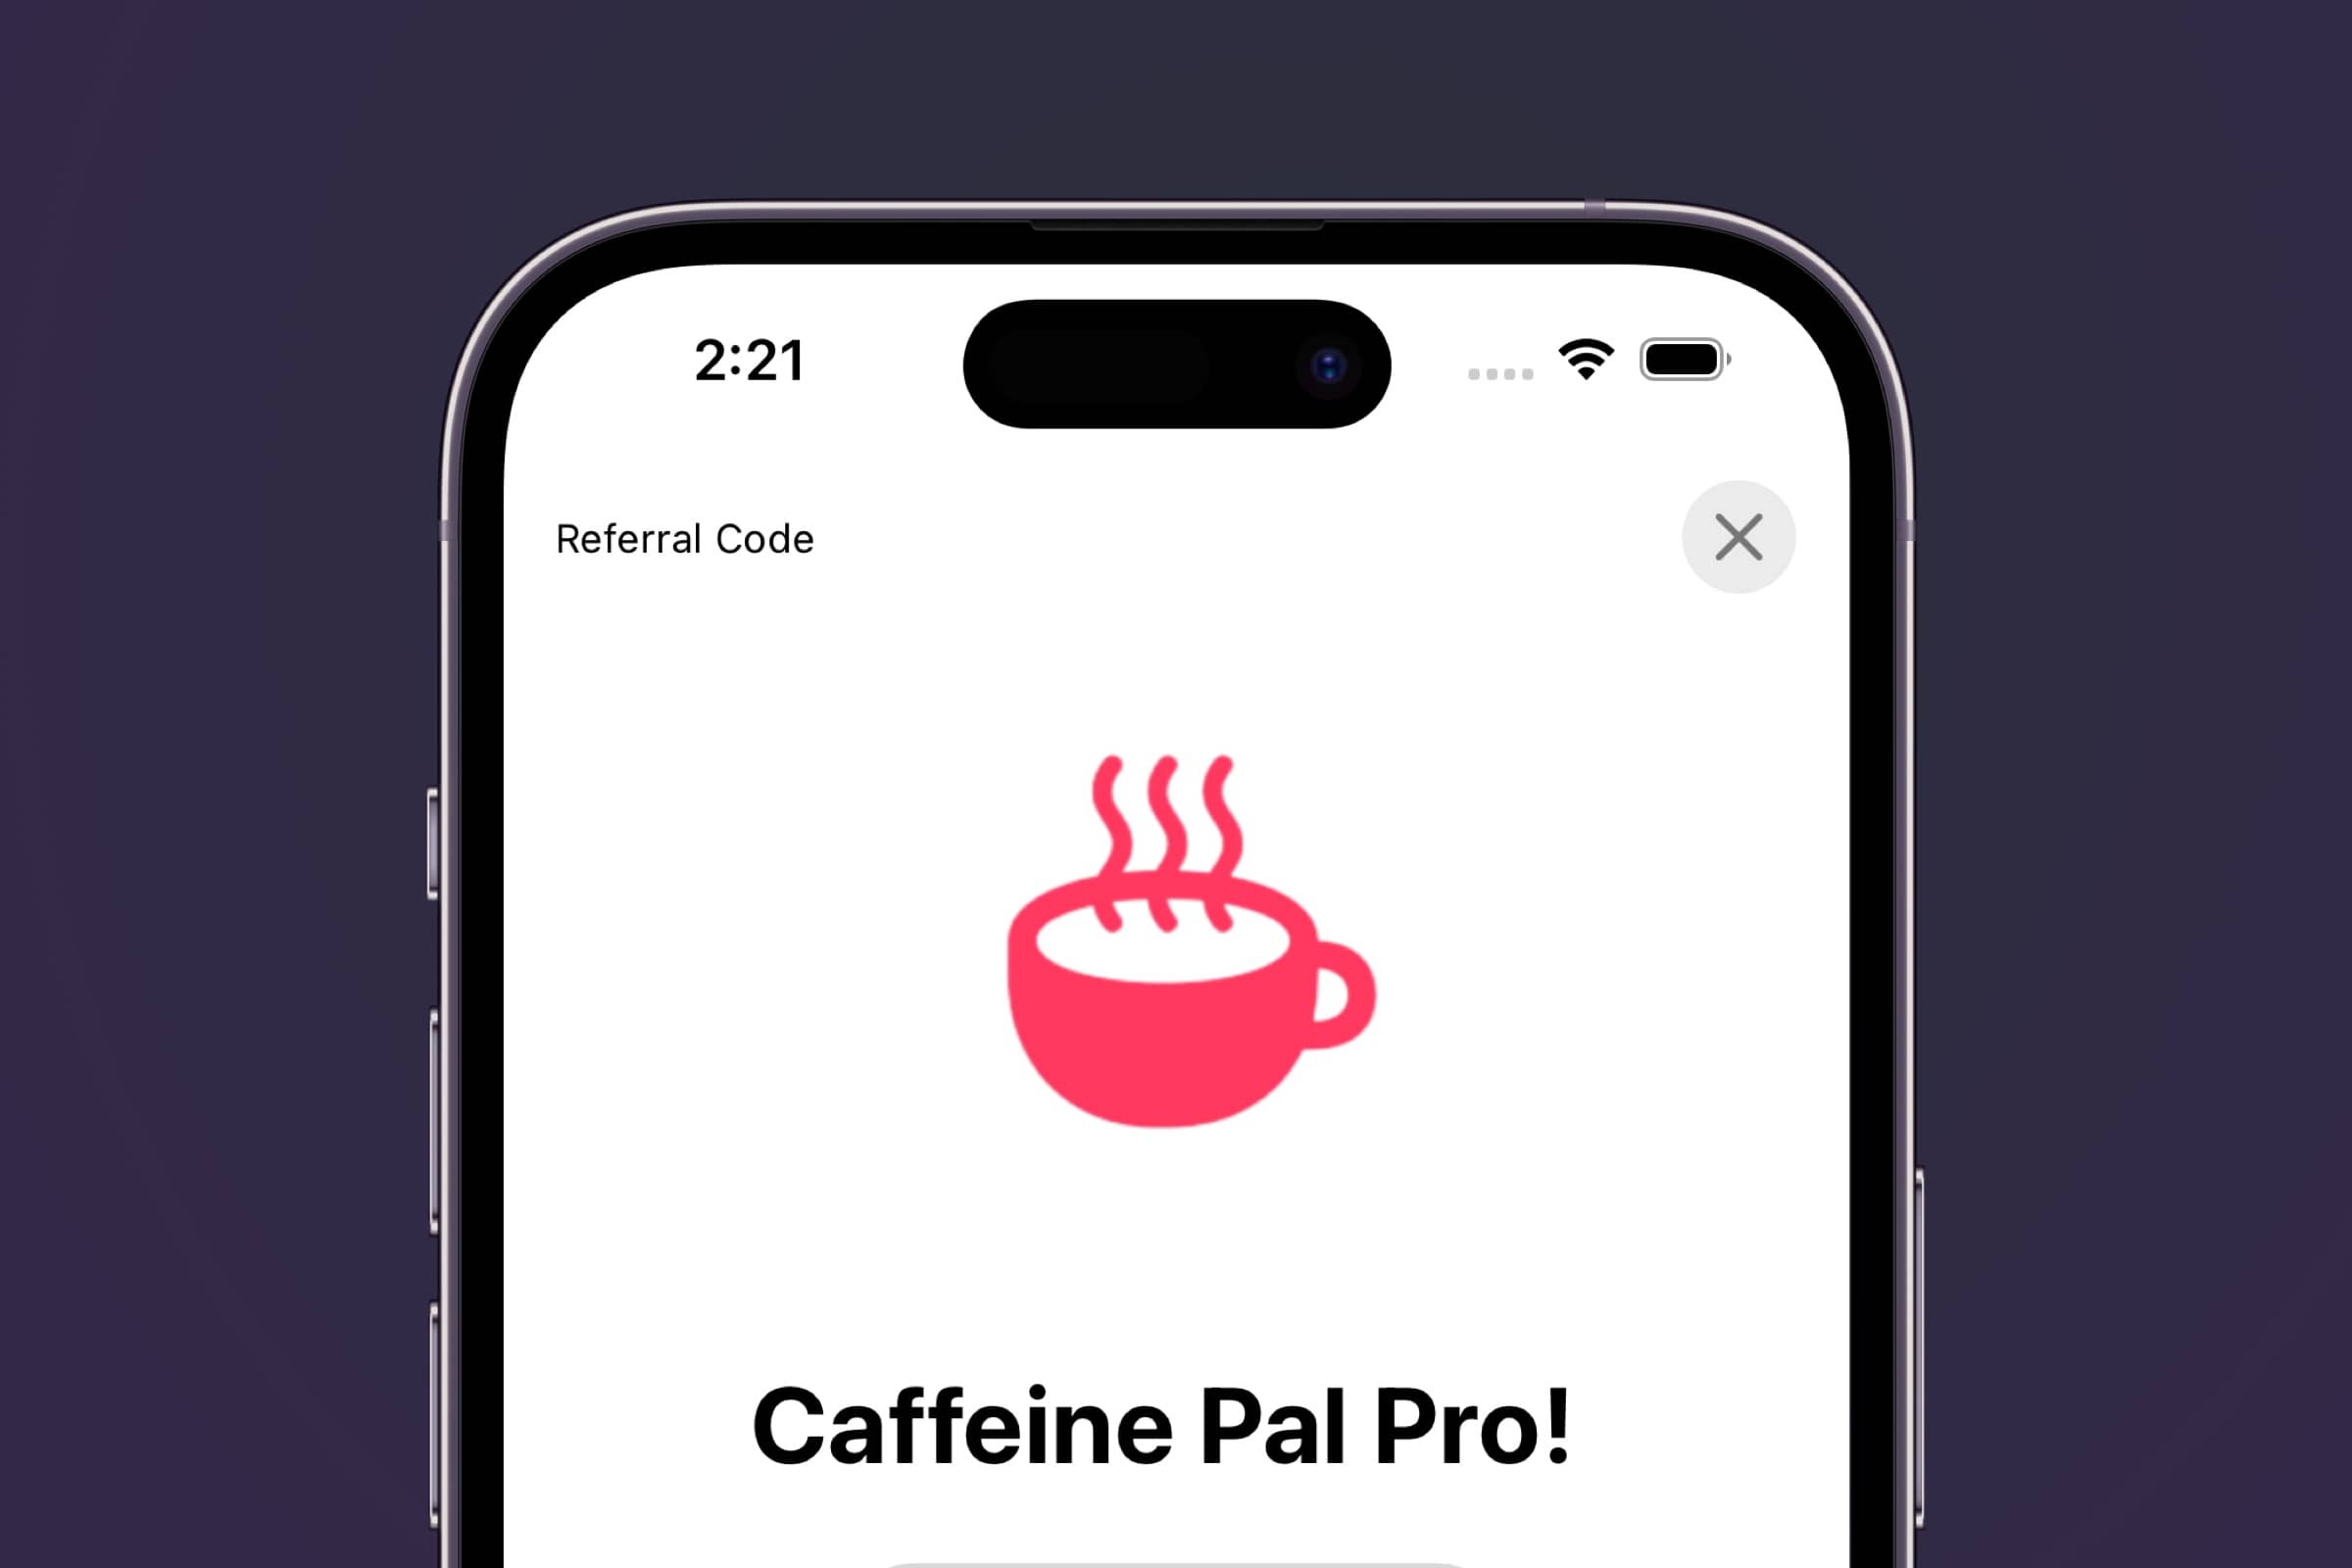
This app has a [`SuperwallDelegate`](/using-superwall-delegate):
```swift
@main
struct Caffeine_PalApp: App {
@State private var delegate: SWDelegate = .init()
init() {
Superwall.configure(apiKey: "api_key")
// Delegate configured here
Superwall.shared.delegate = delegate
}
var body: some Scene {
WindowGroup {
ContentView()
}
}
}
```
Using the [`SuperwallDelegate`](/using-superwall-delegate), the app responds to the custom action. It presents a customized referral redemption interface *on top* of the existing paywall. This is optional, but presenting over the paywall means that the user will be taken back to it if the redemption code entry fails:
```swift
@Observable
class SWDelegate: SuperwallDelegate {
enum CustomActions: String, Identifiable {
case showPromoRedeem
var id: Self { self }
}
func handleCustomPaywallAction(withName name: String) {
guard let action: CustomActions = .init(rawValue: name) else {
print("Unexpected custom action: \(name)")
return
}
switch action {
case .showPromoRedeem:
let referralUI = UIHostingController(rootView: ReferralRedeemView(callback: {
// TODO: Implement placement on success
}))
if let paywallVC = Superwall.shared.presentedViewController {
paywallVC.present(referralUI, animated: true)
} else {
// Present either using SwiftUI .sheet or other means
}
}
}
}
```
Now that your referral interface is showing, you'd validate the code on your server or by some other means.
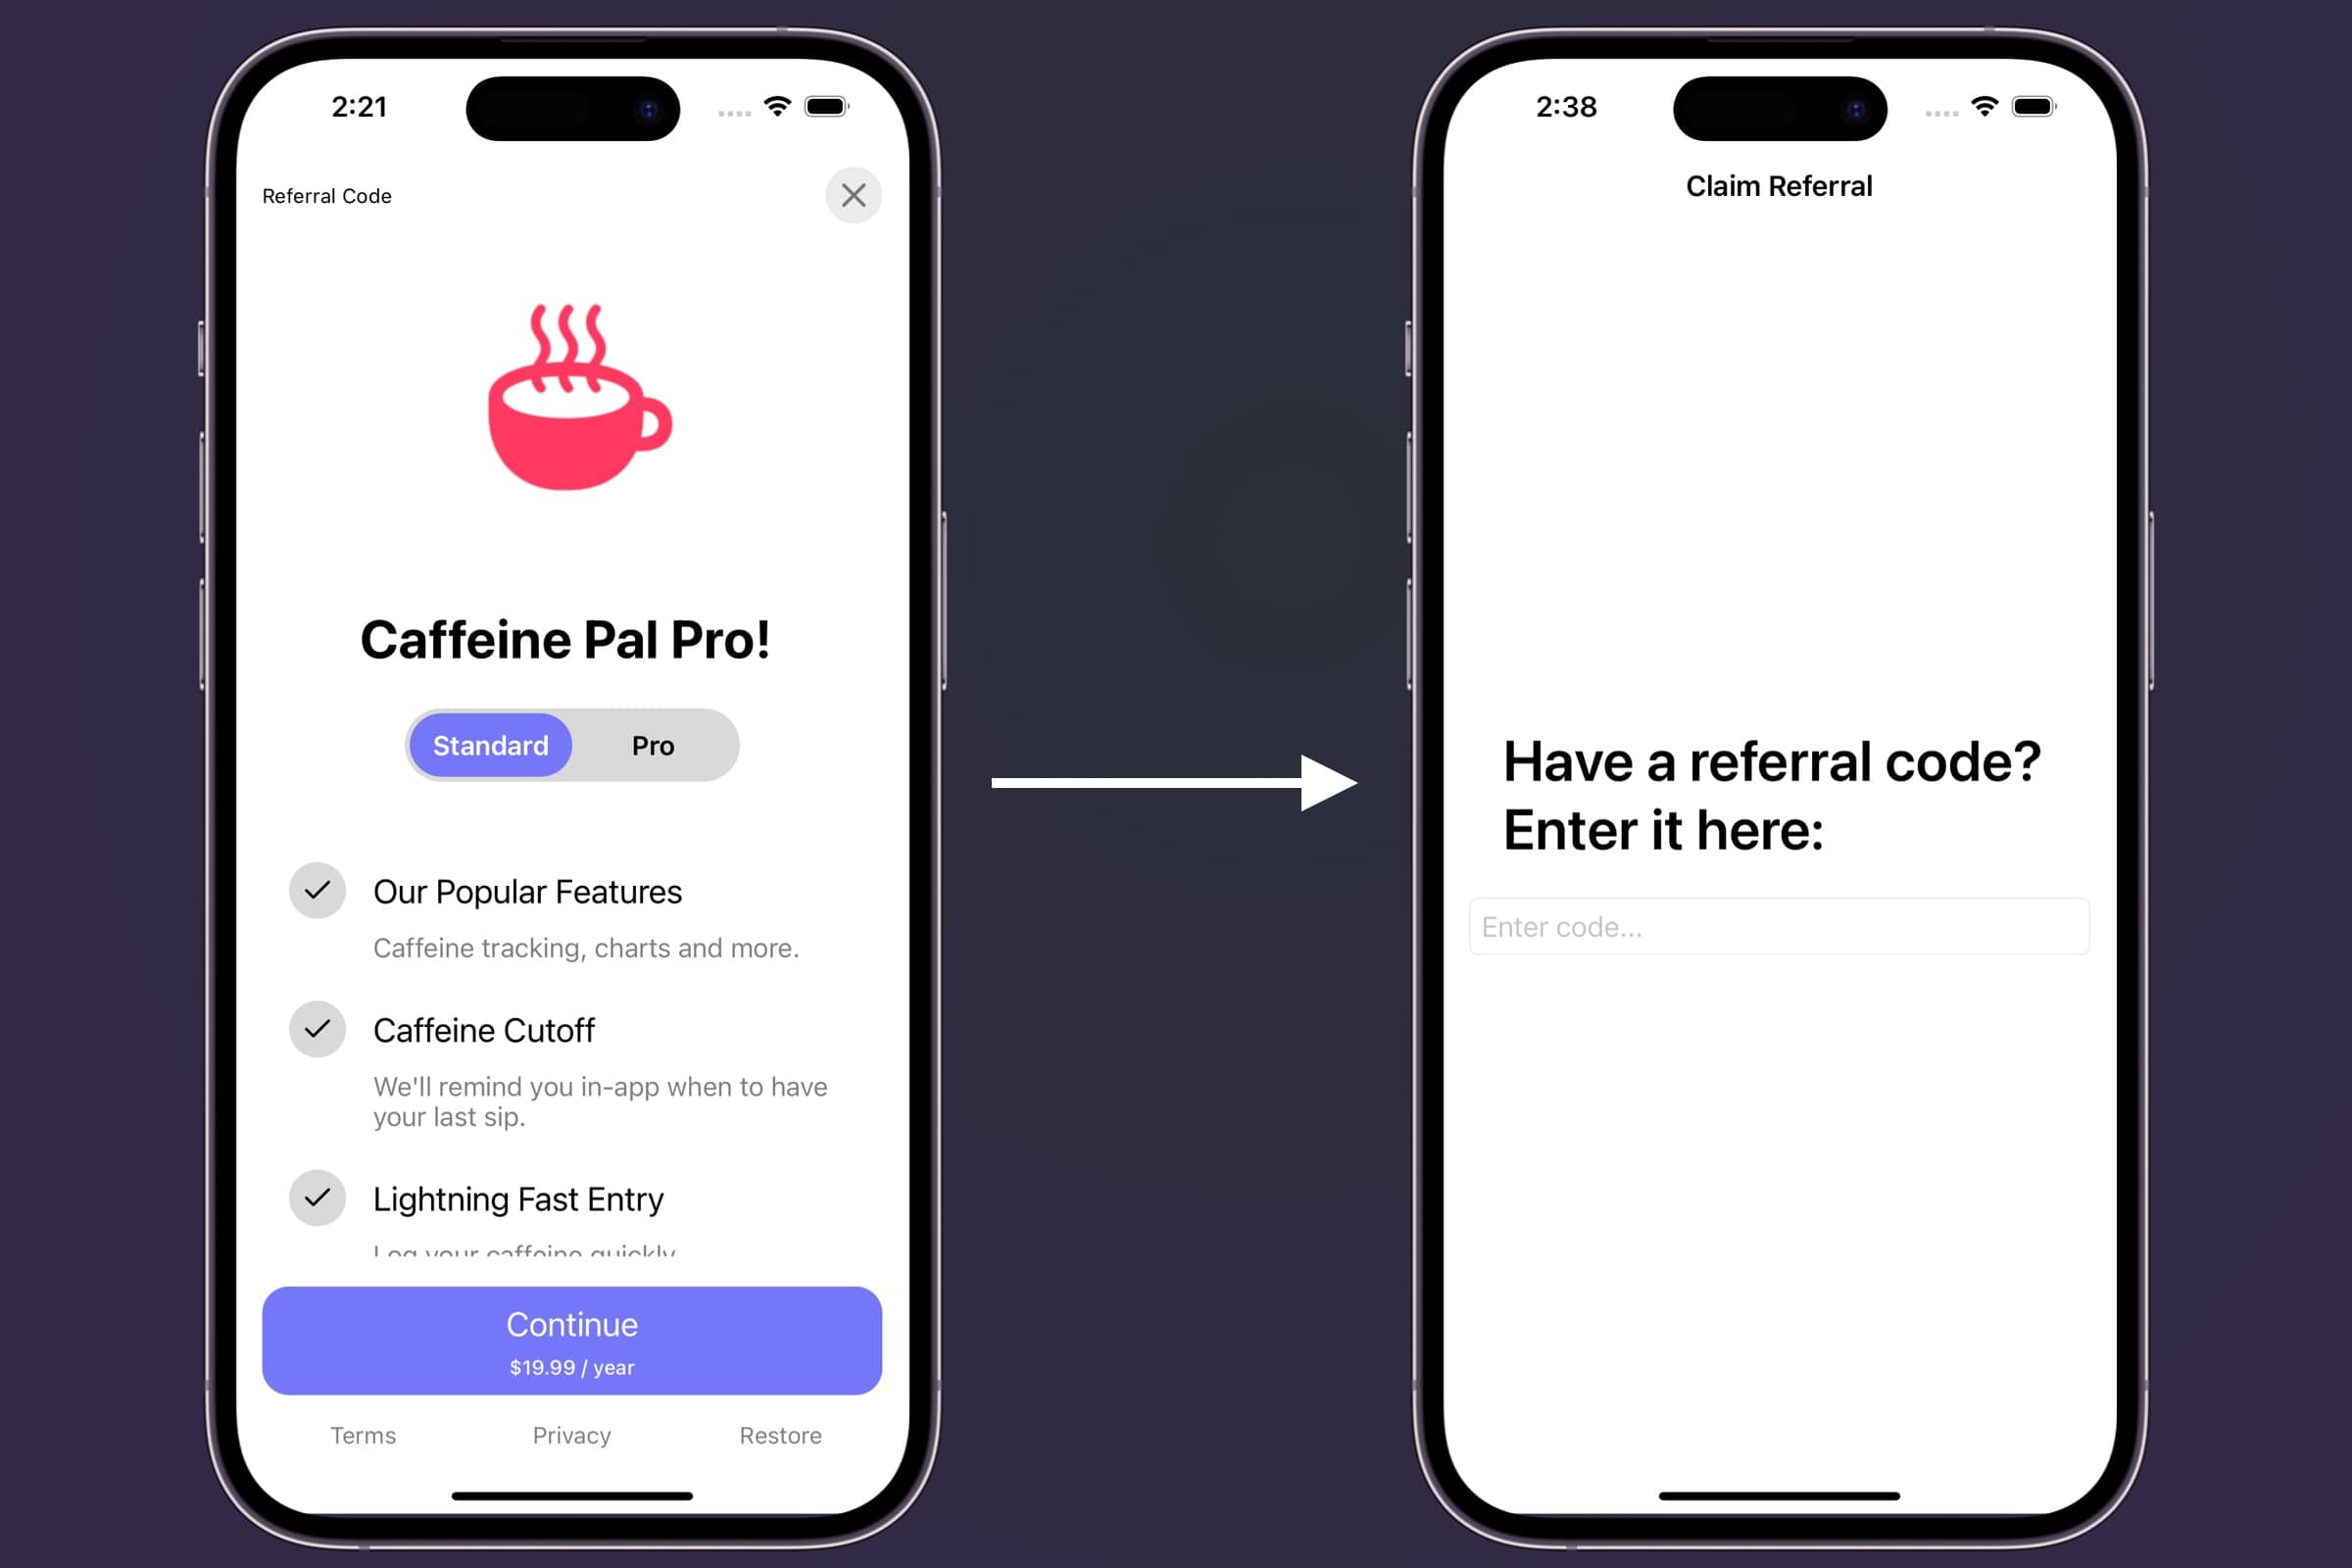
Now, if the code succeeds, you'd dismiss the referral UI and the existing paywall. In our callback, we...
1. Dismiss the existing views.
2. And, we register a placement that corresponds to a campaign you've setup for referral codes:
```swift
// This...
let referralUI = UIHostingController(rootView: ReferralRedeemView(callback: {
// TODO: Implement placement on success
}))
// Might look similar to this...
let referralUI = UIHostingController(rootView: ReferralRedeemView(callback: {
// Dismiss the referral UI
referralUI.dismiss(animated: true)
// Dismiss the existing paywall
Superwall.shared.presentedViewController?.dismiss(animated: true)
// This shows the paywall with the discounted product.
// It should be gated, which means the closure only fires if they convert.
Superwall.shared.register(placement: "referral",
params: ["influencer":"Jordan"]) {
MyAnalyticsService.shared.log("referral_code_redeemed",
properties: ["referral_code": "Jordan", "result": "trial_started"])
}
}))
```
Finally, your paywall and discounted product that you setup in step #1 is shown. If they convert, you'll see all of the details in your campaign that you built for referrals, just like you would any other campaign. You can also forward events to your third party analytics service as well, as shown in the previous step.
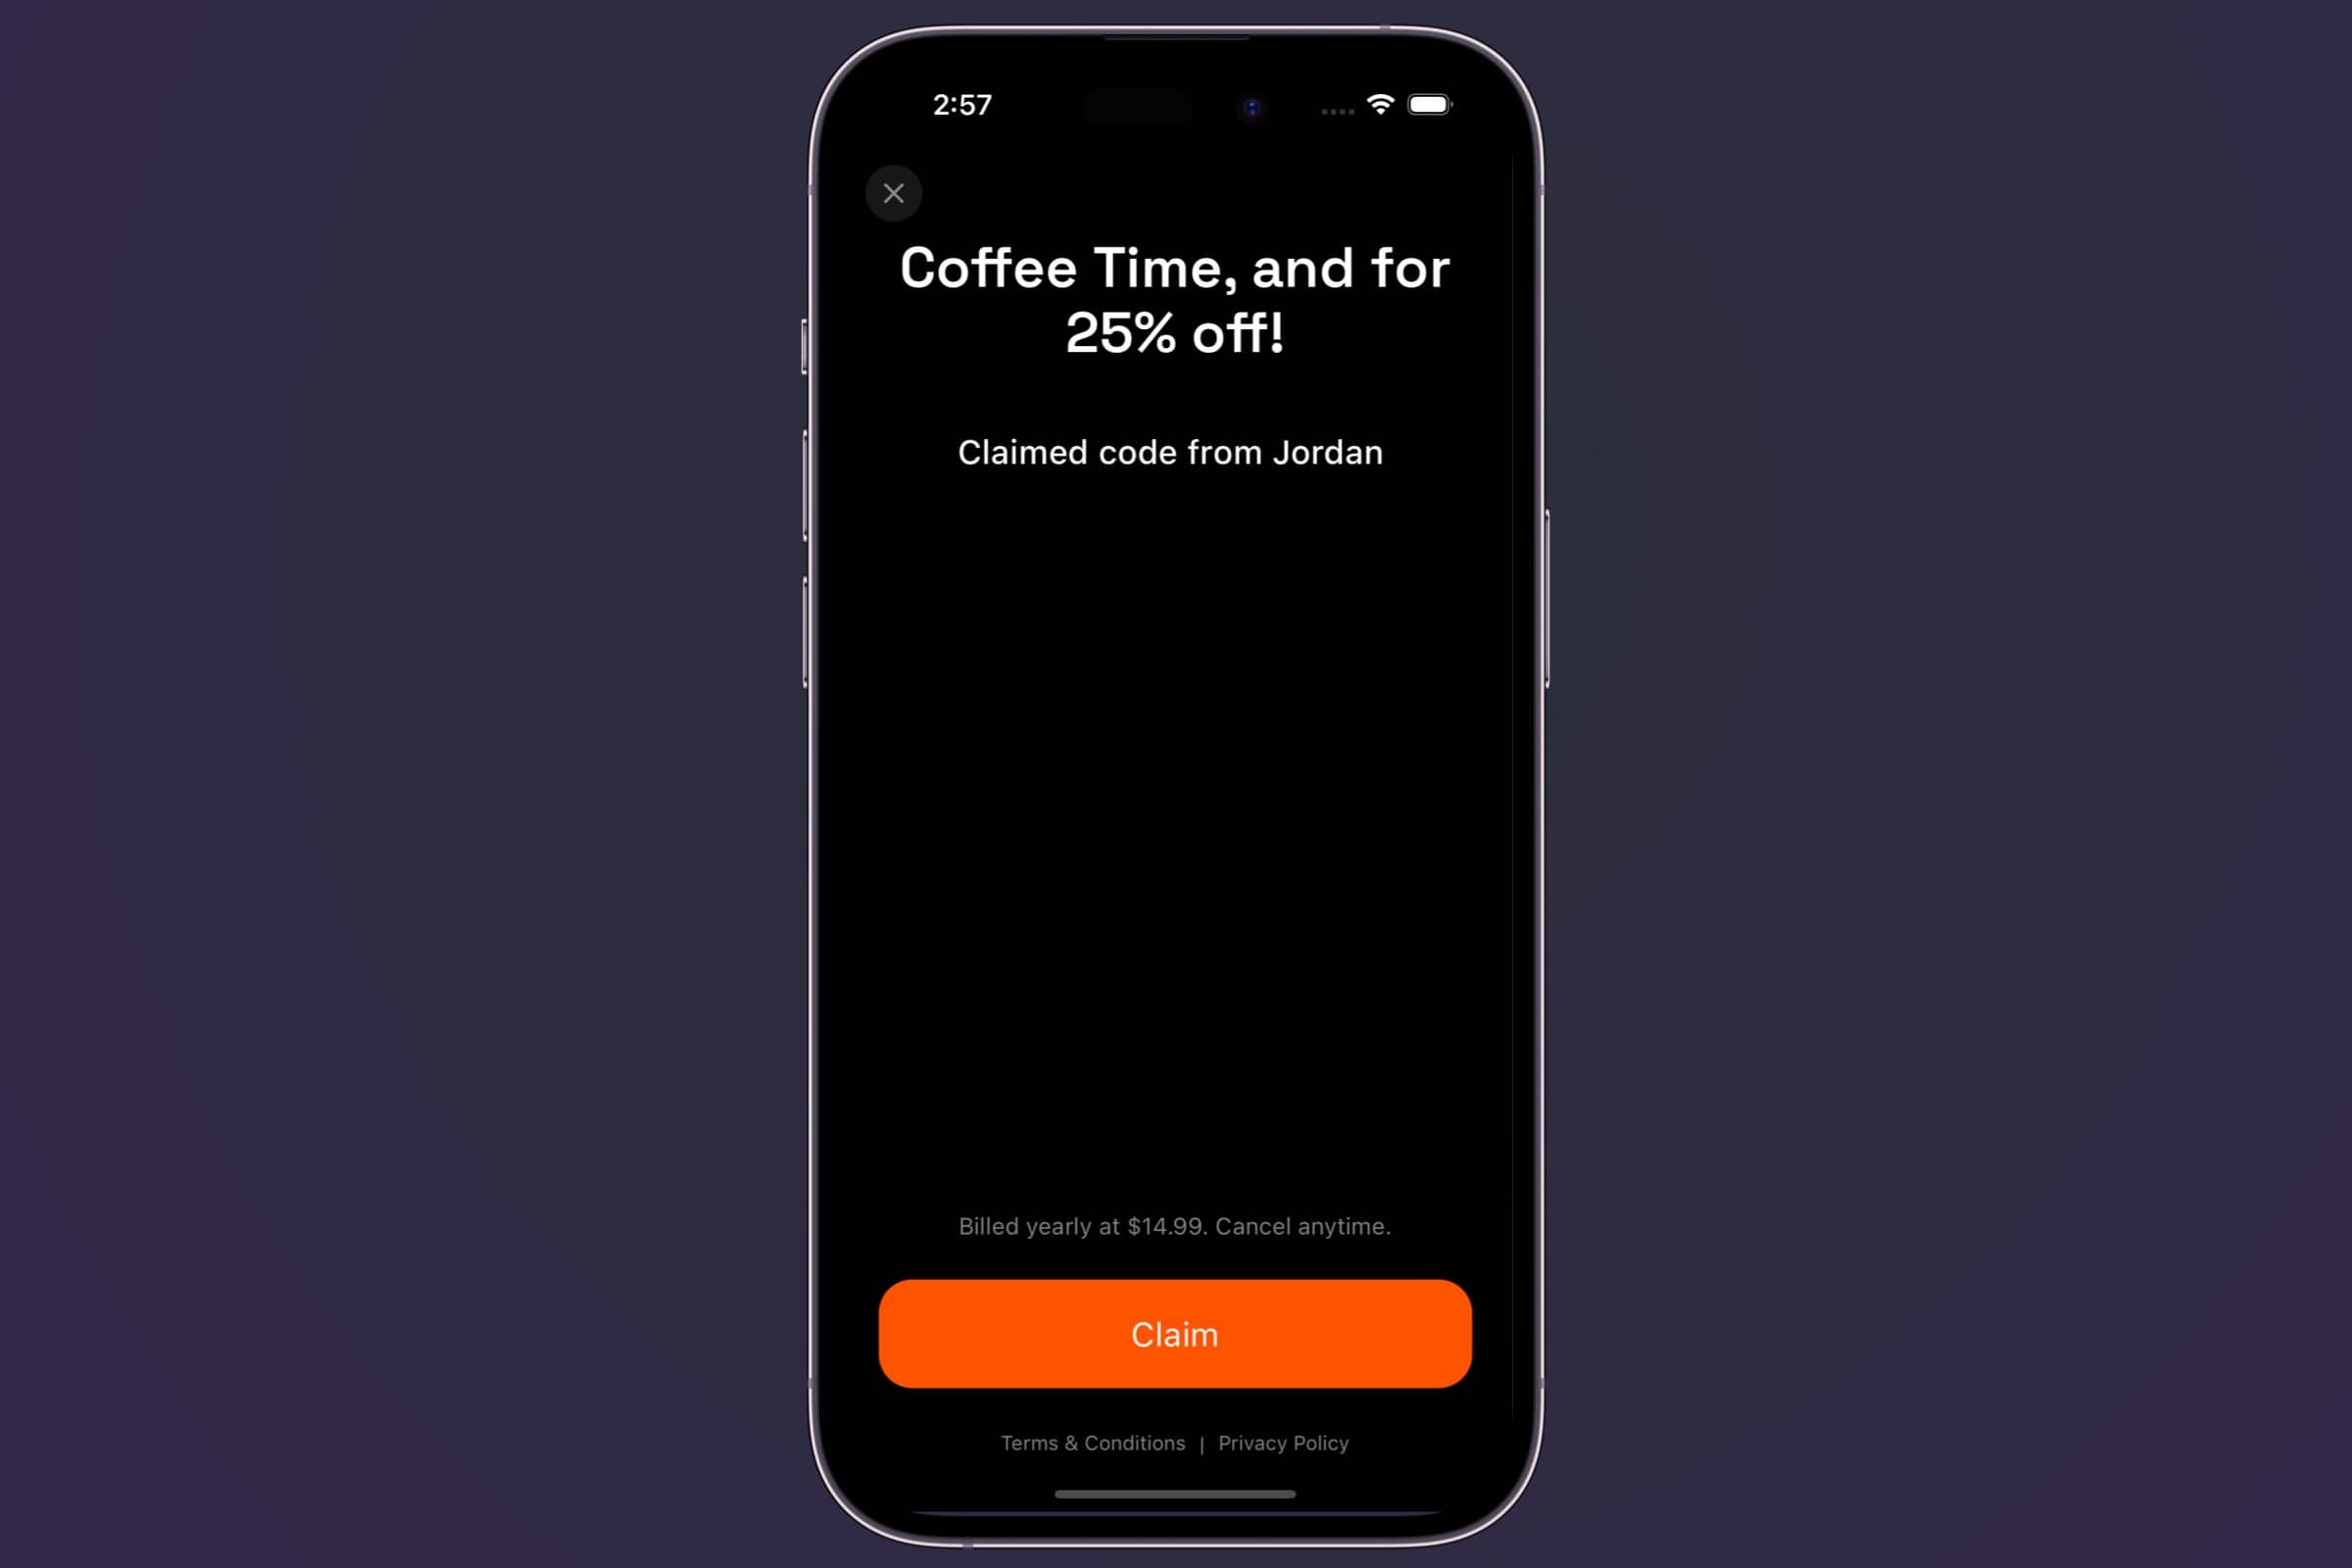
And that's it! It's a matter of creating discounted products, using them in a campaign, showing a referral UI and validating it, and then registering a placement to show those paywalls within a campaign.
The flow on web checkout is considerably easier, and that's primarily because you aren't navigating app storefronts for products and have a direct link to payments. And, just like with mobile, you can use your own referral entry system if you've got one to reveal web checkout links and their paywalls. Here's how it works:
Create a campaign for your referrals. Here, you'd add the discounted product(s) you've made to a paywall that were created in Stripe. You can add in as many placements as you need. Maybe there's one for each influencer, or seasonal discount offer, etc.
Next, simply send out the [web checkout](/web-checkout-creating-campaigns-to-show-paywalls) links to your users. You can create a link for each referral code, or you can use the same link for all of them.
Remember that with Superwall's web checkout feature, each placement you add becomes its own web checkout link.
When the user clicks the link, they are taken to a web checkout page that has the discounted product you created in Stripe. They can enter their payment information and complete the purchase.
And that's it! It's a matter of creating discounted products in Stripe, using them in a campaign, and then sending out the web checkout links to your users. You'll see all of the details in your campaign that you built for referrals, just like you would any other campaign, so you can track conversions, trial starts, and more.
# Using RevenueCat
Source: https://superwall.com/docs/using-revenuecat
If you want to use RevenueCat to handle your subscription-related logic with Superwall, follow this guide.
Not using RevenueCat? No problem! Superwall works out of the box without any additional SDKs.
Integrate RevenueCat with Superwall in one of two ways:
1. **Using a purchase controller:** Use this route if you want to maintain control over purchasing logic and code.
2. **Using PurchasesAreCompletedBy:** Here, you don't use a purchase controller and you tell RevenueCat that purchases are completed by your app using StoreKit. In this mode, RevenueCat will observe the purchases that the Superwall SDK makes. For more info [see here](https://www.revenuecat.com/docs/migrating-to-revenuecat/sdk-or-not/finishing-transactions).
#### 1. Create a PurchaseController
Create a new file called `RCPurchaseController.swift` or `RCPurchaseController.kt`, then copy and paste the following:
```swift Swift
import SuperwallKit
import RevenueCat
import StoreKit
enum PurchasingError: LocalizedError {
case sk2ProductNotFound
var errorDescription: String? {
switch self {
case .sk2ProductNotFound:
return "Superwall didn't pass a StoreKit 2 product to purchase. Are you sure you're not "
+ "configuring Superwall with a SuperwallOption to use StoreKit 1?"
}
}
}
final class RCPurchaseController: PurchaseController {
// MARK: Sync Subscription Status
/// Makes sure that Superwall knows the customer's entitlements by
/// changing `Superwall.shared.entitlements`
func syncSubscriptionStatus() {
assert(Purchases.isConfigured, "You must configure RevenueCat before calling this method.")
Task {
for await customerInfo in Purchases.shared.customerInfoStream {
// Gets called whenever new CustomerInfo is available
let superwallEntitlements = customerInfo.entitlements.activeInCurrentEnvironment.keys.map {
Entitlement(id: $0)
}
await MainActor.run { [superwallEntitlements] in
Superwall.shared.subscriptionStatus = .active(Set(superwallEntitlements))
}
}
}
}
// MARK: Handle Purchases
/// Makes a purchase with RevenueCat and returns its result. This gets called when
/// someone tries to purchase a product on one of your paywalls.
func purchase(product: SuperwallKit.StoreProduct) async -> PurchaseResult {
do {
guard let sk2Product = product.sk2Product else {
throw PurchasingError.sk2ProductNotFound
}
let storeProduct = RevenueCat.StoreProduct(sk2Product: sk2Product)
let revenueCatResult = try await Purchases.shared.purchase(product: storeProduct)
if revenueCatResult.userCancelled {
return .cancelled
} else {
return .purchased
}
} catch let error as ErrorCode {
if error == .paymentPendingError {
return .pending
} else {
return .failed(error)
}
} catch {
return .failed(error)
}
}
// MARK: Handle Restores
/// Makes a restore with RevenueCat and returns `.restored`, unless an error is thrown.
/// This gets called when someone tries to restore purchases on one of your paywalls.
func restorePurchases() async -> RestorationResult {
do {
_ = try await Purchases.shared.restorePurchases()
return .restored
} catch let error {
return .failed(error)
}
}
}
```
```kotlin Kotlin
package com.superwall.superapp
import android.app.Activity
import android.content.Context
import com.android.billingclient.api.ProductDetails
import com.revenuecat.purchases.CustomerInfo
import com.revenuecat.purchases.LogLevel
import com.revenuecat.purchases.ProductType
import com.revenuecat.purchases.PurchaseParams
import com.revenuecat.purchases.Purchases
import com.revenuecat.purchases.PurchasesConfiguration
import com.revenuecat.purchases.PurchasesError
import com.revenuecat.purchases.PurchasesErrorCode
import com.revenuecat.purchases.getCustomerInfoWith
import com.revenuecat.purchases.interfaces.GetStoreProductsCallback
import com.revenuecat.purchases.interfaces.PurchaseCallback
import com.revenuecat.purchases.interfaces.ReceiveCustomerInfoCallback
import com.revenuecat.purchases.interfaces.UpdatedCustomerInfoListener
import com.revenuecat.purchases.models.StoreProduct
import com.revenuecat.purchases.models.StoreTransaction
import com.revenuecat.purchases.models.SubscriptionOption
import com.revenuecat.purchases.models.googleProduct
import com.revenuecat.purchases.purchaseWith
import com.superwall.sdk.Superwall
import com.superwall.sdk.delegate.PurchaseResult
import com.superwall.sdk.delegate.RestorationResult
import com.superwall.sdk.delegate.subscription_controller.PurchaseController
import com.superwall.sdk.models.entitlements.Entitlement
import com.superwall.sdk.models.entitlements.SubscriptionStatus
import kotlinx.coroutines.CompletableDeferred
suspend fun Purchases.awaitProducts(productIds: List): List {
val deferred = CompletableDeferred>()
getProducts(
productIds,
object : GetStoreProductsCallback {
override fun onReceived(storeProducts: List) {
deferred.complete(storeProducts)
}
override fun onError(error: PurchasesError) {
deferred.completeExceptionally(Exception(error.message))
}
},
)
return deferred.await()
}
interface PurchaseCompletion {
var storeTransaction: StoreTransaction
var customerInfo: CustomerInfo
}
// Create a custom exception class that wraps PurchasesError
private class PurchasesException(
val purchasesError: PurchasesError,
) : Exception(purchasesError.toString())
suspend fun Purchases.awaitPurchase(
activity: Activity,
storeProduct: StoreProduct,
): PurchaseCompletion {
val deferred = CompletableDeferred()
purchase(
PurchaseParams.Builder(activity, storeProduct).build(),
object : PurchaseCallback {
override fun onCompleted(
storeTransaction: StoreTransaction,
customerInfo: CustomerInfo,
) {
deferred.complete(
object : PurchaseCompletion {
override var storeTransaction: StoreTransaction = storeTransaction
override var customerInfo: CustomerInfo = customerInfo
},
)
}
override fun onError(
error: PurchasesError,
p1: Boolean,
) {
deferred.completeExceptionally(PurchasesException(error))
}
},
)
return deferred.await()
}
suspend fun Purchases.awaitRestoration(): CustomerInfo {
val deferred = CompletableDeferred()
restorePurchases(
object : ReceiveCustomerInfoCallback {
override fun onReceived(purchaserInfo: CustomerInfo) {
deferred.complete(purchaserInfo)
}
override fun onError(error: PurchasesError) {
deferred.completeExceptionally(error as Throwable)
}
},
)
return deferred.await()
}
class RevenueCatPurchaseController(
val context: Context,
) : PurchaseController,
UpdatedCustomerInfoListener {
init {
Purchases.logLevel = LogLevel.DEBUG
Purchases.configure(
PurchasesConfiguration
.Builder(
context,
"android_rc_key",
).build(),
)
// Make sure we get the updates
Purchases.sharedInstance.updatedCustomerInfoListener = this
}
fun syncSubscriptionStatus() {
// Refetch the customer info on load
Purchases.sharedInstance.getCustomerInfoWith {
if (hasAnyActiveEntitlements(it)) {
setSubscriptionStatus(
SubscriptionStatus.Active(
it.entitlements.active
.map {
Entitlement(it.key, Entitlement.Type.SERVICE_LEVEL)
}.toSet(),
),
)
} else {
setSubscriptionStatus(SubscriptionStatus.Inactive)
}
}
}
/**
* Callback for rc customer updated info
*/
override fun onReceived(customerInfo: CustomerInfo) {
if (hasAnyActiveEntitlements(customerInfo)) {
setSubscriptionStatus(
SubscriptionStatus.Active(
customerInfo.entitlements.active
.map {
Entitlement(it.key, Entitlement.Type.SERVICE_LEVEL)
}.toSet(),
),
)
} else {
setSubscriptionStatus(SubscriptionStatus.Inactive)
}
}
/**
* Initiate a purchase
*/
override suspend fun purchase(
activity: Activity,
productDetails: ProductDetails,
basePlanId: String?,
offerId: String?,
): PurchaseResult {
// Find products matching productId from RevenueCat
val products = Purchases.sharedInstance.awaitProducts(listOf(productDetails.productId))
// Choose the product which matches the given base plan.
// If no base plan set, select first product or fail.
val product =
products.firstOrNull { it.googleProduct?.basePlanId == basePlanId }
?: products.firstOrNull()
?: return PurchaseResult.Failed("Product not found")
return when (product.type) {
ProductType.SUBS, ProductType.UNKNOWN ->
handleSubscription(
activity,
product,
basePlanId,
offerId,
)
ProductType.INAPP -> handleInAppPurchase(activity, product)
}
}
private fun buildSubscriptionOptionId(
basePlanId: String?,
offerId: String?,
): String =
buildString {
basePlanId?.let { append("$it") }
offerId?.let { append(":$it") }
}
private suspend fun handleSubscription(
activity: Activity,
storeProduct: StoreProduct,
basePlanId: String?,
offerId: String?,
): PurchaseResult {
storeProduct.subscriptionOptions?.let { subscriptionOptions ->
// If subscription option exists, concatenate base + offer ID.
val subscriptionOptionId = buildSubscriptionOptionId(basePlanId, offerId)
// Find first subscription option that matches the subscription option ID or default
// to letting revenuecat choose.
val subscriptionOption =
subscriptionOptions.firstOrNull { it.id == subscriptionOptionId }
?: subscriptionOptions.defaultOffer
// Purchase subscription option, otherwise fail.
if (subscriptionOption != null) {
return purchaseSubscription(activity, subscriptionOption)
}
}
return PurchaseResult.Failed("Valid subscription option not found for product.")
}
private suspend fun purchaseSubscription(
activity: Activity,
subscriptionOption: SubscriptionOption,
): PurchaseResult {
val deferred = CompletableDeferred()
Purchases.sharedInstance.purchaseWith(
PurchaseParams.Builder(activity, subscriptionOption).build(),
onError = { error, userCancelled ->
deferred.complete(
if (userCancelled) {
PurchaseResult.Cancelled()
} else {
PurchaseResult.Failed(
error.message,
)
},
)
},
onSuccess = { _, _ ->
deferred.complete(PurchaseResult.Purchased())
},
)
return deferred.await()
}
private suspend fun handleInAppPurchase(
activity: Activity,
storeProduct: StoreProduct,
): PurchaseResult =
try {
Purchases.sharedInstance.awaitPurchase(activity, storeProduct)
PurchaseResult.Purchased()
} catch (e: PurchasesException) {
when (e.purchasesError.code) {
PurchasesErrorCode.PurchaseCancelledError -> PurchaseResult.Cancelled()
else ->
PurchaseResult.Failed(
e.message ?: "Purchase failed due to an unknown error",
)
}
}
/**
* Restore purchases
*/
override suspend fun restorePurchases(): RestorationResult {
try {
if (hasAnyActiveEntitlements(Purchases.sharedInstance.awaitRestoration())) {
return RestorationResult.Restored()
} else {
return RestorationResult.Failed(Exception("No active entitlements"))
}
} catch (e: Throwable) {
return RestorationResult.Failed(e)
}
}
/**
* Check if the customer has any active entitlements
*/
private fun hasAnyActiveEntitlements(customerInfo: CustomerInfo): Boolean {
val entitlements =
customerInfo.entitlements.active.values
.map { it.identifier }
return entitlements.isNotEmpty()
}
private fun setSubscriptionStatus(subscriptionStatus: SubscriptionStatus) {
if (Superwall.initialized) {
Superwall.instance.setSubscriptionStatus(subscriptionStatus)
}
}
}
```
```dart Flutter
import 'dart:io';
import 'package:flutter/services.dart';
import 'package:purchases_flutter/purchases_flutter.dart';
import 'package:superwallkit_flutter/superwallkit_flutter.dart' hide LogLevel;
class RCPurchaseController extends PurchaseController {
// MARK: Configure and sync subscription Status
/// Makes sure that Superwall knows the customers subscription status by
/// changing `Superwall.shared.subscriptionStatus`
Future configureAndSyncSubscriptionStatus() async {
// Configure RevenueCat
await Purchases.setLogLevel(LogLevel.debug);
final configuration = Platform.isIOS
? PurchasesConfiguration('ios_rc_key')
: PurchasesConfiguration('android_rc_key');
await Purchases.configure(configuration);
// Listen for changes
Purchases.addCustomerInfoUpdateListener((customerInfo) async {
// Gets called whenever new CustomerInfo is available
final entitlements = customerInfo.entitlements.active.keys
.map((id) => Entitlement(id: id))
.toSet();
final hasActiveEntitlementOrSubscription = customerInfo
.hasActiveEntitlementOrSubscription(); // Why? -> https://www.revenuecat.com/docs/entitlements#entitlements
if (hasActiveEntitlementOrSubscription) {
await Superwall.shared.setSubscriptionStatus(
SubscriptionStatusActive(entitlements: entitlements));
} else {
await Superwall.shared
.setSubscriptionStatus(SubscriptionStatusInactive());
}
});
}
// MARK: Handle Purchases
/// Makes a purchase from App Store with RevenueCat and returns its
/// result. This gets called when someone tries to purchase a product on
/// one of your paywalls from iOS.
@override
Future purchaseFromAppStore(String productId) async {
// Find products matching productId from RevenueCat
final products = await PurchasesAdditions.getAllProducts([productId]);
// Get first product for product ID (this will properly throw if empty)
final storeProduct = products.firstOrNull;
if (storeProduct == null) {
return PurchaseResult.failed(
'Failed to find store product for $productId');
}
final purchaseResult = await _purchaseStoreProduct(storeProduct);
return purchaseResult;
}
/// Makes a purchase from Google Play with RevenueCat and returns its
/// result. This gets called when someone tries to purchase a product on
/// one of your paywalls from Android.
@override
Future purchaseFromGooglePlay(
String productId, String? basePlanId, String? offerId) async {
// Find products matching productId from RevenueCat
List products =
await PurchasesAdditions.getAllProducts([productId]);
// Choose the product which matches the given base plan.
// If no base plan set, select first product or fail.
String storeProductId = "$productId:$basePlanId";
// Try to find the first product where the googleProduct's basePlanId matches the given basePlanId.
StoreProduct? matchingProduct;
// Loop through each product in the products list.
for (final product in products) {
// Check if the current product's basePlanId matches the given basePlanId.
if (product.identifier == storeProductId) {
// If a match is found, assign this product to matchingProduct.
matchingProduct = product;
// Break the loop as we found our matching product.
break;
}
}
// If a matching product is not found, then try to get the first product from the list.
StoreProduct? storeProduct =
matchingProduct ?? (products.isNotEmpty ? products.first : null);
// If no product is found (either matching or the first one), return a failed purchase result.
if (storeProduct == null) {
return PurchaseResult.failed("Product not found");
}
switch (storeProduct.productCategory) {
case ProductCategory.subscription:
SubscriptionOption? subscriptionOption =
await _fetchGooglePlaySubscriptionOption(
storeProduct, basePlanId, offerId);
if (subscriptionOption == null) {
return PurchaseResult.failed(
"Valid subscription option not found for product.");
}
return await _purchaseSubscriptionOption(subscriptionOption);
case ProductCategory.nonSubscription:
return await _purchaseStoreProduct(storeProduct);
case null:
return PurchaseResult.failed("Unable to determine product category");
}
}
Future _fetchGooglePlaySubscriptionOption(
StoreProduct storeProduct,
String? basePlanId,
String? offerId,
) async {
final subscriptionOptions = storeProduct.subscriptionOptions;
if (subscriptionOptions != null && subscriptionOptions.isNotEmpty) {
// Concatenate base + offer ID
final subscriptionOptionId =
_buildSubscriptionOptionId(basePlanId, offerId);
// Find first subscription option that matches the subscription option ID or use the default offer
SubscriptionOption? subscriptionOption;
// Search for the subscription option with the matching ID
for (final option in subscriptionOptions) {
if (option.id == subscriptionOptionId) {
subscriptionOption = option;
break;
}
}
// If no matching subscription option is found, use the default option
subscriptionOption ??= storeProduct.defaultOption;
// Return the subscription option
return subscriptionOption;
}
return null;
}
Future _purchaseSubscriptionOption(
SubscriptionOption subscriptionOption) async {
// Define the async perform purchase function
Future performPurchase() async {
// Attempt to purchase product
CustomerInfo customerInfo =
await Purchases.purchaseSubscriptionOption(subscriptionOption);
return customerInfo;
}
PurchaseResult purchaseResult =
await _handleSharedPurchase(performPurchase);
return purchaseResult;
}
Future _purchaseStoreProduct(
StoreProduct storeProduct) async {
// Define the async perform purchase function
Future performPurchase() async {
// Attempt to purchase product
CustomerInfo customerInfo =
await Purchases.purchaseStoreProduct(storeProduct);
return customerInfo;
}
PurchaseResult purchaseResult =
await _handleSharedPurchase(performPurchase);
return purchaseResult;
}
// MARK: Shared purchase
Future _handleSharedPurchase(
Future Function() performPurchase) async {
try {
// Perform the purchase using the function provided
CustomerInfo customerInfo = await performPurchase();
// Handle the results
if (customerInfo.hasActiveEntitlementOrSubscription()) {
return PurchaseResult.purchased;
} else {
return PurchaseResult.failed("No active subscriptions found.");
}
} on PlatformException catch (e) {
var errorCode = PurchasesErrorHelper.getErrorCode(e);
if (errorCode == PurchasesErrorCode.paymentPendingError) {
return PurchaseResult.pending;
} else if (errorCode == PurchasesErrorCode.purchaseCancelledError) {
return PurchaseResult.cancelled;
} else {
return PurchaseResult.failed(
e.message ?? "Purchase failed in RCPurchaseController");
}
}
}
// MARK: Handle Restores
/// Makes a restore with RevenueCat and returns `.restored`, unless an error is thrown.
/// This gets called when someone tries to restore purchases on one of your paywalls.
@override
Future restorePurchases() async {
try {
await Purchases.restorePurchases();
return RestorationResult.restored;
} on PlatformException catch (e) {
// Error restoring purchases
return RestorationResult.failed(
e.message ?? "Restore failed in RCPurchaseController");
}
}
}
// MARK: Helpers
String _buildSubscriptionOptionId(String? basePlanId, String? offerId) {
String result = '';
if (basePlanId != null) {
result += basePlanId;
}
if (offerId != null) {
if (basePlanId != null) {
result += ':';
}
result += offerId;
}
return result;
}
extension CustomerInfoAdditions on CustomerInfo {
bool hasActiveEntitlementOrSubscription() {
return (activeSubscriptions.isNotEmpty || entitlements.active.isNotEmpty);
}
}
extension PurchasesAdditions on Purchases {
static Future> getAllProducts(
List productIdentifiers) async {
final subscriptionProducts = await Purchases.getProducts(productIdentifiers,
productCategory: ProductCategory.subscription);
final nonSubscriptionProducts = await Purchases.getProducts(
productIdentifiers,
productCategory: ProductCategory.nonSubscription);
final combinedProducts = [
...subscriptionProducts,
...nonSubscriptionProducts
];
return combinedProducts;
}
}
```
```typescript React Native
import { Platform } from "react-native"
import Superwall, {
PurchaseController,
PurchaseResult,
RestorationResult,
SubscriptionStatus,
PurchaseResultCancelled,
PurchaseResultFailed,
PurchaseResultPending,
PurchaseResultPurchased,
} from '@superwall/react-native-superwall';
import Purchases, {
type CustomerInfo,
PRODUCT_CATEGORY,
type PurchasesStoreProduct,
type SubscriptionOption,
PURCHASES_ERROR_CODE,
type MakePurchaseResult,
} from "react-native-purchases"
export class RCPurchaseController extends PurchaseController {
constructor() {
super()
Purchases.setLogLevel(Purchases.LOG_LEVEL.DEBUG);
const apiKey = Platform.OS === 'ios' ? 'ios_rc_key' : 'android_rc_key';
Purchases.configure({ apiKey });
}
syncSubscriptionStatus() {
// Listen for changes
Purchases.addCustomerInfoUpdateListener((customerInfo) => {
const entitlementIds = Object.keys(customerInfo.entitlements.active)
Superwall.shared.setSubscriptionStatus(
entitlementIds.length === 0
? SubscriptionStatus.Inactive()
: SubscriptionStatus.Active(entitlementIds)
)
})
}
async purchaseFromAppStore(productId: string): Promise {
const products = await Promise.all([
Purchases.getProducts([productId], PRODUCT_CATEGORY.SUBSCRIPTION),
Purchases.getProducts([productId], PRODUCT_CATEGORY.NON_SUBSCRIPTION),
]).then((results) => results.flat())
// Assuming an equivalent for Dart's firstOrNull is not directly available in TypeScript,
// so using a simple conditional check
const storeProduct = products.length > 0 ? products[0] : null
if (!storeProduct) {
return new PurchaseResultFailed("Failed to find store product for $productId")
}
return await this._purchaseStoreProduct(storeProduct)
}
async purchaseFromGooglePlay(
productId: string,
basePlanId?: string,
offerId?: string
): Promise {
// Find products matching productId from RevenueCat
const products = await Promise.all([
Purchases.getProducts([productId], PRODUCT_CATEGORY.SUBSCRIPTION),
Purchases.getProducts([productId], PRODUCT_CATEGORY.NON_SUBSCRIPTION),
]).then((results) => results.flat())
// Choose the product which matches the given base plan.
// If no base plan set, select first product or fail.
const storeProductId = `${productId}:${basePlanId}`
// Initialize matchingProduct as null explicitly
let matchingProduct: PurchasesStoreProduct | null = null
// Loop through each product in the products array
for (const product of products) {
// Check if the current product's identifier matches the given storeProductId
if (product.identifier === storeProductId) {
// If a match is found, assign this product to matchingProduct
matchingProduct = product
// Break the loop as we found our matching product
break
}
}
let storeProduct: PurchasesStoreProduct | null =
matchingProduct ??
(products.length > 0 && typeof products[0] !== "undefined" ? products[0] : null)
// If no product is found (either matching or the first one), return a failed purchase result.
if (storeProduct === null) {
return new PurchaseResultFailed("Product not found")
}
switch (storeProduct.productCategory) {
case PRODUCT_CATEGORY.SUBSCRIPTION:
const subscriptionOption = await this._fetchGooglePlaySubscriptionOption(
storeProduct,
basePlanId,
offerId
)
if (subscriptionOption === null) {
return new PurchaseResultFailed("Valid subscription option not found for product.")
}
return await this._purchaseSubscriptionOption(subscriptionOption)
case PRODUCT_CATEGORY.NON_SUBSCRIPTION:
return await this._purchaseStoreProduct(storeProduct)
default:
return new PurchaseResultFailed("Unable to determine product category")
}
}
private async _purchaseStoreProduct(
storeProduct: PurchasesStoreProduct
): Promise {
const performPurchase = async (): Promise => {
// Attempt to purchase product
const makePurchaseResult = await Purchases.purchaseStoreProduct(storeProduct)
return makePurchaseResult
}
return await this.handleSharedPurchase(performPurchase)
}
private async _fetchGooglePlaySubscriptionOption(
storeProduct: PurchasesStoreProduct,
basePlanId?: string,
offerId?: string
): Promise {
const subscriptionOptions = storeProduct.subscriptionOptions
if (subscriptionOptions && subscriptionOptions.length > 0) {
// Concatenate base + offer ID
const subscriptionOptionId = this.buildSubscriptionOptionId(basePlanId, offerId)
// Find first subscription option that matches the subscription option ID or use the default offer
let subscriptionOption: SubscriptionOption | null = null
// Search for the subscription option with the matching ID
for (const option of subscriptionOptions) {
if (option.id === subscriptionOptionId) {
subscriptionOption = option
break
}
}
// If no matching subscription option is found, use the default option
subscriptionOption = subscriptionOption ?? storeProduct.defaultOption
// Return the subscription option
return subscriptionOption
}
return null
}
private buildSubscriptionOptionId(basePlanId?: string, offerId?: string): string {
let result = ""
if (basePlanId !== null) {
result += basePlanId
}
if (offerId !== null) {
if (basePlanId !== null) {
result += ":"
}
result += offerId
}
return result
}
private async _purchaseSubscriptionOption(
subscriptionOption: SubscriptionOption
): Promise {
// Define the async perform purchase function
const performPurchase = async (): Promise => {
// Attempt to purchase product
const purchaseResult = await Purchases.purchaseSubscriptionOption(subscriptionOption)
return purchaseResult
}
const purchaseResult: PurchaseResult = await this.handleSharedPurchase(performPurchase)
return purchaseResult
}
private async handleSharedPurchase(
performPurchase: () => Promise
): Promise {
try {
// Perform the purchase using the function provided
const makePurchaseResult = await performPurchase()
// Handle the results
if (this.hasActiveEntitlementOrSubscription(makePurchaseResult.customerInfo)) {
return new PurchaseResultPurchased()
} else {
return new PurchaseResultFailed("No active subscriptions found.")
}
} catch (e: any) {
// Catch block to handle exceptions, adjusted for TypeScript
if (e.userCancelled) {
return new PurchaseResultCancelled()
}
if (e.code === PURCHASES_ERROR_CODE.PAYMENT_PENDING_ERROR) {
return new PurchaseResultPending()
} else {
return new PurchaseResultFailed(e.message)
}
}
}
async restorePurchases(): Promise {
try {
await Purchases.restorePurchases()
return RestorationResult.restored()
} catch (e: any) {
return RestorationResult.failed(e.message)
}
}
private hasActiveEntitlementOrSubscription(customerInfo: CustomerInfo): Boolean {
return (
customerInfo.activeSubscriptions.length > 0 &&
Object.keys(customerInfo.entitlements.active).length > 0
)
}
}
```
As discussed in [Purchases and Subscription Status](/docs/advanced-configuration), this `PurchaseController` is responsible for handling the subscription-related logic. Take a few moments to look through the code to understand how it does this.
#### 2. Configure Superwall
Initialize an instance of `RCPurchaseController` and pass it in to `Superwall.configure(apiKey:purchaseController)`:
```swift Swift
let purchaseController = RCPurchaseController()
Superwall.configure(
apiKey: "MY_API_KEY",
purchaseController: purchaseController
)
```
```swift Objective-C
RCPurchaseController *purchaseController = [RCPurchaseController alloc] init];
[Superwall
configureWithApiKey:@"MY_API_KEY"
purchaseController:purchaseController
options:options
completion:nil
];
```
```kotlin Kotlin
val purchaseController = RCPurchaseController(this)
Superwall.configure(
this,
"MY_API_KEY",
purchaseController
)
// Make sure we sync the subscription status
// on first load and whenever it changes
purchaseController.syncSubscriptionStatus()
```
```dart Flutter
RCPurchaseController purchaseController = RCPurchaseController();
Superwall.configure(
apiKey,
purchaseController: purchaseController
);
await purchaseController.configureAndSyncSubscriptionStatus();
```
```typescript React Native
React.useEffect(() => {
const apiKey = Platform.OS === "ios" ? "MY_SUPERWALL_IOS_API_KEY" : "MY_SUPERWALL_ANDROID_API_KEY"
const purchaseController = new RCPurchaseController()
Superwall.configure(apiKey, null, purchaseController)
purchaseController.syncSubscriptionStatus()
}, [])
```
#### 3. Sync the subscription status
Then, call `purchaseController.syncSubscriptionStatus()` to keep Superwall's subscription status up to date with RevenueCat.
That's it! Check out our sample apps for working examples:
* [iOS](https://github.com/superwall/Superwall-iOS/tree/master/Examples/Advanced)
* [React Native](https://github.com/superwall/react-native-superwall/blob/main/example/src/RCPurchaseController.tsx)
* [Android](https://github.com/superwall/Superwall-Android/tree/develop/example/app/src/revenuecat)
* [Flutter](https://github.com/superwall/Superwall-Flutter/blob/main/example/lib/RCPurchaseController.dart)
### Using PurchasesAreCompletedBy
If you're using RevenueCat's [PurchasesAreCompletedBy](https://www.revenuecat.com/docs/migrating-to-revenuecat/sdk-or-not/finishing-transactions), you don't need to create a purchase controller. Register your placements, present a paywall — and Superwall will take care of completing any purchase the user starts. However, there are a few things to note if you use this setup:
1. Here, you aren't using RevenueCat's [entitlements](https://www.revenuecat.com/docs/getting-started/entitlements#entitlements) as a source of truth. If your app is multiplatform, you'll need to consider how to link up pro features or purchased products for users.
2. If you require custom logic when purchases occur, then you'll want to add a purchase controller. In that case, Superwall handles purchasing flows and RevenueCat will still observe transactions to power their analytics and charts.
3. Be sure that user identifiers are set the same way across Superwall and RevenueCat.
Example:
```swift
Superwall.configure(apiKey: "superwall_public_key")
Superwall.shared.identify(userId: user.identifier)
Purchases.configure(with:
.builder(withAPIKey: "revcat_public_key")
.with(purchasesAreCompletedBy: .myApp, storeKitVersion: .storeKit1/.storeKit2)
.with(appUserID: user.identifier)
.build()
)
```
For more information on observer mode, visit [RevenueCat's docs](https://www.revenuecat.com/docs/migrating-to-revenuecat/sdk-or-not/finishing-transactions).
# Using the Superwall Delegate
Source: https://superwall.com/docs/using-superwall-delegate
Use a Superwall delegate to help interface with 3rd party analytics, see which product was purchased on a paywall, handle custom placements and more.
Use a Superwall's delegate to extend our SDK's functionality across several surface areas by assigning to the `delegate` property:
```swift Swift
class SWDelegate: SuperwallDelegate {
// Implement delegate methods here
}
// After configuring the SDK...
Superwall.shared.delegate = SWDelegate()
```
```swift Objective-C
// In its own file...
#import
@import SuperwallKit;
@interface SWDelegate : NSObject
@end
@implementation SWDelegate
// Implement delegate methods here
@end
// After configuring the SDK...
[[Superwall sharedInstance] setDelegate:[SWDelegate new]];
```
```kotlin Kotlin
class SWDelegate : SuperwallDelegate {
// Implement delegate methods here
}
// When configuring the SDK...
Superwall.instance.delegate = SWDelegate()
```
```dart Flutter
import 'package:superwall_flutter/superwall_flutter.dart';
class SWDelegate extends SuperwallDelegate {
// Implement delegate methods here
}
// When configuring the SDK...
void configureSDK() {
Superwall.shared.setDelegate(SWDelegate());
}
```
```typescript React Native
import {
PaywallInfo,
SubscriptionStatus,
SuperwallDelegate,
SuperwallPlacementInfo,
PlacementType,
} from "@superwall/react-native-superwall"
// Implement delegate methods
export class SWDelegate extends SuperwallDelegate {}
// In your app.tsx...
import { SWDelegate } from "./SWDelegate"
export default function App() {
const delegate = new SWDelegate()
React.useEffect(() => {
const setupSuperwall = async () => {
// After configuring the SDK...
Superwall.shared.setDelegate(delegate)
}
}, [])
}
```
Some common use cases for using the Superwall delegate include:
* **Custom actions:** [Respond to custom tap actions from a paywall.](/custom-paywall-events#custom-paywall-actions)
* **Respond to purchases:** [See which product was purchased from the presented paywall.](/viewing-purchased-products)
* **Analytics:** [Forward events from Superwall to your own analytics.](/3rd-party-analytics)
Below are some commonly used implementations when using the delegate.
### Superwall Events
Most of what occurs in Superwall can be viewed using the delegate method to respond to events:
```swift Swift
class SWDelegate: SuperwallDelegate {
func handleSuperwallEvent(withInfo eventInfo: SuperwallEventInfo) {
switch eventInfo.event {
case .transactionComplete(let transaction, let product, let paywallInfo):
print("Converted from paywall originalTransactionIdentifier: \(transaction?.originalTransactionIdentifier ?? "")")
print("Converted from paywall storeTransactionId: \(transaction?.storeTransactionId ?? "")")
print("Converted from paywall productIdentifier: \(product.productIdentifier)")
print("Converted from paywall paywallInfo: \(paywallInfo.identifier)")
case .transactionRestore(let restoreType, let paywallInfo):
print("transactionRestore restoreType \(restoreType)")
case let .customPlacement(name, params, paywallInfo):
// Forward Mixpanel/Ampltiude/etc
print("\(name) - \(params) - \(paywallInfo)")
default:
// And several more events to use...
print("Default event: \(eventInfo.event.description)")
}
}
}
```
```swift Objective-C
// SWDelegate.h...
#import
@import SuperwallKit;
NS_ASSUME_NONNULL_BEGIN
@interface SWDelegate : NSObject
@end
NS_ASSUME_NONNULL_END
// SWDelegate.m...
@implementation SWDelegate
- (void)handleSuperwallEventWithInfo:(SWKSuperwallEventInfo *)eventInfo {
switch(eventInfo.event) {
// Switch on any event type here...
case SWKSuperwallEventTransactionComplete:
NSLog(@"Transaction complete: %@", eventInfo.params[@"primary_product_id"]);
}
}
```
```kotlin Kotlin
class SWDelegate : SuperwallDelegate {
override fun handleSuperwallEvent(eventInfo: SuperwallEventInfo) {
// Handle any relevant events here...
when (eventInfo.event) {
is SuperwallPlacement.TransactionComplete -> {
val transaction = (eventInfo.event as SuperwallPlacement.TransactionComplete).transaction
val product = (eventInfo.event as SuperwallPlacement.TransactionComplete).product
val paywallInfo = (eventInfo.event as SuperwallPlacement.TransactionComplete).paywallInfo
println("Transaction Complete: $transaction, Product: $product, Paywall Info: $paywallInfo")
}
else -> {
// Handle other cases
}
}
}
}
```
```dart Flutter
class _MyAppState extends State implements SuperwallDelegate {
@override
Future handleSuperwallEvent(SuperwallEventInfo eventInfo) async {
switch (eventInfo.event.type) {
// Handle any other event types as needed
case PlacementType.transactionComplete:
final product = eventInfo.params?['product'];
logging.info('Transaction complete event received with product: $product');
break;
default:
logging.info('Unhandled event type: ${eventInfo.event.type}');
break;
}
}
}
```
```typescript React Native
export class MySuperwallDelegate extends SuperwallDelegate {
handleSuperwallPlacement(placementInfo: SuperwallPlacementInfo) {
console.log("Handling Superwall placement:", placementInfo)
switch (placementInfo.placement.type) {
case PlacementType.transactionComplete:
const product = placementInfo.params?.["product"]
if (product) {
console.log(`Product: ${product}`)
} else {
console.log("Product not found in params.")
}
break
default:
// Handle any other placement types as needed...
break
}
}
}
```
### Paywall Custom Actions
Using the [custom tap action](/custom-paywall-events), you can respond to any arbitrary event from a paywall:
```swift Swift
class SWDelegate: SuperwallDelegate {
func handleCustomPaywallAction(withName name: String) {
if name == "showHelpCenter" {
DispatchQueue.main.asyncAfter(deadline: .now() + 0.33) {
self.showHelpCenter.toggle()
}
}
}
}
```
```swift Objective-C
// SWDelegate.h...
#import
@import SuperwallKit;
NS_ASSUME_NONNULL_BEGIN
@interface SWDelegate : NSObject
@end
NS_ASSUME_NONNULL_END
// SWDelegate.m...
#import "SWDelegate.h"
@implementation SWDelegate
- (void)handleCustomPaywallActionWithName:(NSString *)name {
if ([name isEqualToString:@"showHelpCenter"]) {
[self showHelpCenter];
}
}
@end
```
```kotlin Kotlin
class SWDelegate : SuperwallDelegate {
override fun handleCustomPaywallAction(withName: String) {
if (withName == "caffeineLogged") {
println("Custom paywall action: $withName")
}
}
}
```
```dart Flutter
class _MyAppState extends State implements SuperwallDelegate {
final logging = Logging();
@override
void handleCustomPaywallAction(String name) {
logging.info('handleCustomPaywallAction: $name');
}
}
```
```typescript React Native
export class MySuperwallDelegate extends SuperwallDelegate {
handleCustomPaywallAction(name: string): void {
console.log("Handling custom paywall action:", name)
}
}
```
### Subscription status changes
You can be informed of subscription status changes using the delegate. If you need to set or handle the status on your own, use a [purchase controller](/advanced-configuration) — this function is only for informational, tracking or similar purposes:
```swift Swift
class SWDelegate: SuperwallDelegate {
func subscriptionStatusDidChange(from oldValue: SubscriptionStatus, to newValue: SubscriptionStatus) {
// Log or handle subscription change in your Ui
}
}
```
```swift Objective-C
// SWDelegate.h...
#import
@import SuperwallKit;
NS_ASSUME_NONNULL_BEGIN
@interface SWDelegate : NSObject
@end
NS_ASSUME_NONNULL_END
// SWDelegate.m...
@implementation SWDelegate
- (void)subscriptionStatusDidChangeFrom:(enum SWKSubscriptionStatus)oldValue
to:(enum SWKSubscriptionStatus)newValue {
NSLog(@"Changed from %lu to %lu", (unsigned long)oldValue, (unsigned long)newValue);
}
@end
```
```kotlin Kotlin
class SWDelegate : SuperwallDelegate {
override fun subscriptionStatusDidChange(from: SubscriptionStatus, to: SubscriptionStatus) {
println("Subscription status changed from $from to $to")
}
}
```
```dart Flutter
class _MyAppState extends State implements SuperwallDelegate {
final logging = Logging();
@override
void subscriptionStatusDidChange(SubscriptionStatus newValue) {
logging.info('subscriptionStatusDidChange: $newValue');
}
}
```
```typescript React Native
export class MySuperwallDelegate extends SuperwallDelegate {
subscriptionStatusDidChange(from: SubscriptionStatus, to: SubscriptionStatus): void {
console.log("Entitlement status changed from", from, "to", to)
}
}
```
### Paywall events
The delegate also has callbacks for several paywall events, such dismissing, presenting, and more. Here's an example:
```swift Swift
class SWDelegate: SuperwallDelegate {
func didPresentPaywall(withInfo paywallInfo: PaywallInfo) {
// paywallInfo will contain all of the presented paywall's info
}
}
```
```swift Objective-C
// SWDelegate.h...
#import
@import SuperwallKit;
NS_ASSUME_NONNULL_BEGIN
@interface SWDelegate : NSObject
@end
NS_ASSUME_NONNULL_END
// SWDelegate.m...
@implementation SWDelegate
- (void)didPresentPaywallWithInfo:(SWKPaywallInfo *)paywallInfo {
NSLog(@"Presented paywall with info: %@", paywallInfo);
}
@end
```
```kotlin Kotlin
class SWDelegate : SuperwallDelegate {
override fun didPresentPaywall(withInfo: PaywallInfo) {
println("Paywall presented: $withInfo")
}
}
```
```dart Flutter
class _MyAppState extends State implements SuperwallDelegate {
final logging = Logging();
@override
void didPresentPaywall(PaywallInfo paywallInfo) {
logging.info('didPresentPaywall: $paywallInfo');
}
}
```
```typescript React Native
export class MySuperwallDelegate extends SuperwallDelegate {
didPresentPaywall(paywallInfo: PaywallInfo): void {
console.log("Paywall did present:", paywallInfo)
}
}
```
# Using Superwall with Cursor
Source: https://superwall.com/docs/using-superwall-with-cursor
Use our SDK footprint file, along with a custom Cursor User Rule, to use Superwall with AI.
If you're developing an app using [Cursor](https://www.cursor.com/en), you can use our custom [Cursor User Rule](https://docs.cursor.com/context/rules-for-ai) to speed up your development. You can also prepend some of the examples found on [cursorrules.io](https://cursorrules.io), or use your current rule, in addition by adding in our following Superwall User Rule after it.
Right now, this is available for iOS and Swift with more SDKs and languages to come.
### Cursor user rules setup
To get started:
1. Download the User Rule file for iOS [here](https://github.com/superwall/cursor-rules/blob/main/ios-swiftui-cursor-rules-superwall-sdk.md).
2. In Cursor, go to **Cursor -> Settings... -> Cursor Settings**.
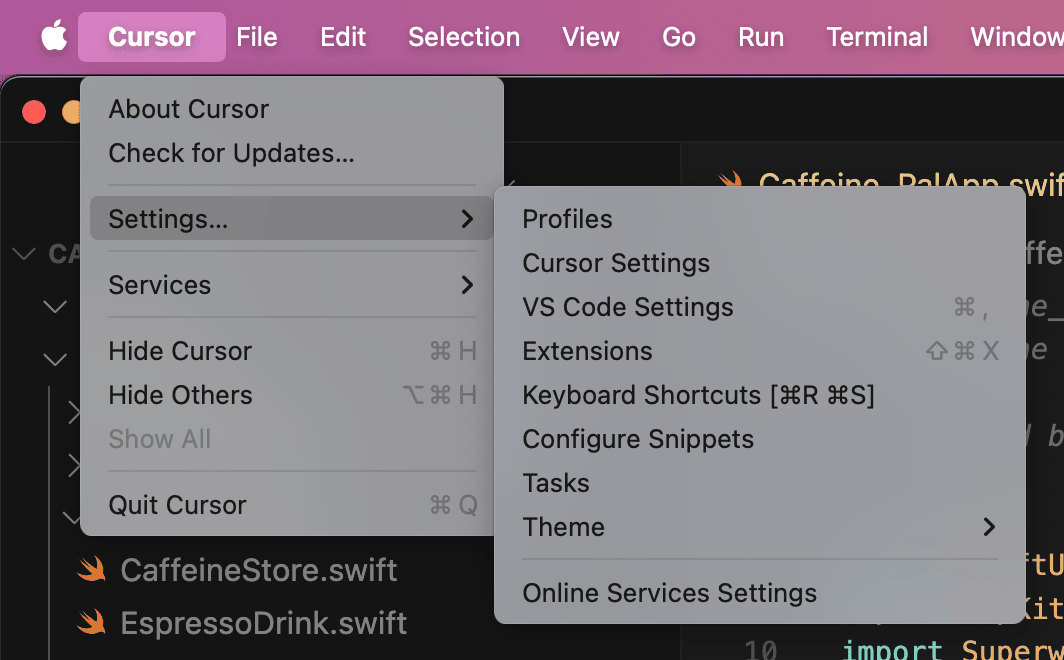
3. Under **User Rules**, paste in the text from the User Rule file.
This feature works much better if you remind Cursor that a code sample is related to Superwall. For example:
```md
// ✅ Try to do it this way!
Using the Superwall SDK, register a placement called "drinkCoffee" and include a print statement saying `Coffee time` in the block.
// ❌ Try not do it this way!
Register a placement called "drinkCoffee" and include a print statement saying `Coffee time` in the block.
```
Remember to check for updates to the User Cursor Rule, as we will edit it when our SDKs change.
Remember, LLMs can be hit or miss with advice — always review the code it suggests! Despite tuning the rules and prompts as best as we can, sometimes you may get inaccurate results.
# Passing in options
Source: https://superwall.com/docs/using-superwalloptions
When configuring the SDK you can pass in options that configure Superwall, the paywall presentation, and its appearance.
### Logging
Logging is enabled by default in the SDK and is controlled by two properties: `level` and `scopes`.
`level` determines the minimum log level to print to the console. There are five types of log level:
1. **debug**: Prints all logs from the SDK to the console. Useful for debugging your app if something isn't working as expected.
2. **info**: Prints errors, warnings, and useful information from the SDK to the console.
3. **warn**: Prints errors and warnings from the SDK to the console.
4. **error**: Only prints errors from the SDK to the console.
5. **none**: Turns off all logs.
The SDK defaults to `info`.
`scopes` defines the scope of logs to print to the console. For example, you might only care about logs relating to `paywallPresentation` and `paywallTransactions`. This defaults to `.all`. Check out [LogScope](https://sdk.superwall.me/documentation/superwallkit/logscope) for all possible cases.
You set these properties like this:
```swift Swift
let options = SuperwallOptions()
options.logging.level = .warn
options.logging.scopes = [.paywallPresentation, .paywallTransactions]
Superwall.configure(apiKey:"MY_API_KEY", options: options);
// Or you can set:
Superwall.shared.logLevel = .warn
```
```swift Objective-C
SWKSuperwallOptions *options = [[SWKSuperwallOptions alloc] init];
options.logging.level = SWKLogLevelWarn;
[Superwall
configureWithApiKey:@"pk_e6bd9bd73182afb33e95ffdf997b9df74a45e1b5b46ed9c9"
purchaseController:nil
options:options
completion:nil
];
[Superwall sharedInstance].logLevel = SWKLogLevelWarn;
```
```kotlin Kotlin
val options = SuperwallOptions()
options.logging.level = LogLevel.warn
options.logging.scopes = EnumSet.of(LogScope.paywallPresentation, LogScope.paywallTransactions)
Superwall.configure(
this,
apiKey = "MY_API_KEY",
options = options
)
// Or you can set:
Superwall.instance.logLevel = LogLevel.warn
// Or use the configuration DSL
configureSuperwall("MY_API_KEY") {
options {
logging {
level = LogLevel.warn
scopes = EnumSet.of(LogScope.paywallPresentation, LogScope.paywallTransactions)
}
}
}
```
```dart Flutter
SuperwallOptions options = SuperwallOptions();
options.logging.level = LogLevel.warn;
options.logging.scopes = { LogScope.paywallPresentation, LogScope.paywallEvents };
Superwall.configure(
"MY_API_KEY",
options: options
);
// Or you can set:
Superwall.logging.logLevel = LogLevel.warn;
```
```typescript React Native
const options = new SuperwallOptions()
options.logging.level = LogLevel.Warn
options.logging.scopes = [LogScope.PaywallPresentation, LogScope.PaywallTransactions]
Superwall.configure(
"MY_API_KEY",
null,
options: options
);
// Or you can set:
await Superwall.shared.setLogLevel(LogLevel.Warn)
```
### Preloading Paywalls
Paywalls are preloaded by default when the app is launched from a cold start. The paywalls that are preloaded are determined by the list of placements that result in a paywall for the user when [registered](/docs/feature-gating). Preloading is smart, only preloading paywalls that belong to audiences that could be matched.
Paywalls are cached by default, which means after they load once, they don't need to be reloaded from the network unless you make a change to them on the dashboard. However, if you have a lot of paywalls, preloading may increase network usage of your app on first load of the paywalls and result in slower loading times overall.
You can turn off preloading by setting `shouldPreload` to `false`:
```swift Swift
let options = SuperwallOptions()
options.paywalls.shouldPreload = false
Superwall.configure(apiKey: "MY_API_KEY", options: options)
```
```swift Objective-C
SWKSuperwallOptions *options = [[SWKSuperwallOptions alloc] init];
options.paywalls.shouldPreload = false;
[Superwall
configureWithApiKey:@"MY_API_KEY"
purchaseController:nil
options:options
completion:nil
];
```
```kotlin Kotlin
val options = SuperwallOptions()
options.paywalls.shouldPreload = false
Superwall.configure(
this,
apiKey = "MY_API_KEY",
options = options
)
// Or using the configuration DSL
configureSuperwall("MY_API_KEY") {
options {
paywalls {
shouldPreload = false
}
}
}
```
```dart Flutter
SuperwallOptions options = SuperwallOptions();
options.paywalls.shouldPreload = false;
Superwall.configure(
"MY_API_KEY",
options: options
);
```
```typescript React Native
const options = new SuperwallOptions()
options.paywalls.shouldPreload = false
Superwall.configure(
"MY_API_KEY",
null,
options: options
);
// Or you can set:
Superwall.instance.logLevel = LogLevel.Warn
```
Then, if you'd like to preload paywalls for specific placements you can use `preloadPaywalls(forPlacements:)`:
```swift Swift
Superwall.shared.preloadPaywalls(forPlacements: ["campaign_trigger"]);
```
```swift Objective-C
NSMutableSet *eventNames = [NSMutableSet set];
[eventNames addObject:@"campaign_trigger"];
[[Superwall sharedInstance] preloadPaywallsForPlacements:placementNames];
```
```kotlin Kotlin
val eventNames = setOf("campaign_trigger")
Superwall.instance.preloadPaywalls(eventNames)
```
```dart Flutter
var placements = {"campaign_trigger"};
Superwall.shared.preloadPaywallsForPlacements(placements);
```
```typescript React Native
var placements = {"campaign_trigger"};
Superwall.shared.preloadPaywalls(placements);
```
If you'd like to preload all paywalls you can use `preloadAllPaywalls()`:
```swift Swift
Superwall.shared.preloadAllPaywalls()
```
```swift Objective-C
[[Superwall sharedInstance] preloadAllPaywalls];
```
```kotlin Kotlin
Superwall.instance.preloadAllPaywalls()
```
```dart Flutter
Superwall.shared.preloadAllPaywalls();
```
```typescript React Native
// Coming soon
```
Note: These methods will not reload any paywalls that have already been preloaded.
### External Data Collection
By default, Superwall sends all registered events and properties back to the Superwall servers. However, if you have privacy concerns, you can stop this by setting `isExternalDataCollectionEnabled` to `false`:
```swift Swift
let options = SuperwallOptions()
options.isExternalDataCollectionEnabled = false
Superwall.configure(apiKey: "MY_API_KEY", options: options)
```
```swift Objective-C
SWKSuperwallOptions *options = [[SWKSuperwallOptions alloc] init];
options.isExternalDataCollectionEnabled = false;
[Superwall configureWithApiKey:@"MY_API_KEY" purchaseController:nil options:options completion:nil];
```
```kotlin Kotlin
val options = SuperwallOptions()
options.isExternalDataCollectionEnabled = false
Superwall.configure(
this,
apiKey = "MY_API_KEY",
options = options
)
// Or using the configuration DSL
configureSuperwall("MY_API_KEY") {
options {
isExternalDataCollectionEnabled = false
}
}
```
```dart Flutter
SuperwallOptions options = SuperwallOptions();
options.isExternalDataCollectionEnabled = false;
Superwall.configure(
"MY_API_KEY",
options: options
);
```
```typescript React Native
const options = SuperwallOptions()
options.isExternalDataCollectionEnabled = false
Superwall.configure(
"MY_API_KEY",
options: options
);
```
Disabling this will not affect your ability to create triggers based on properties.
### Automatically Dismissing the Paywall
By default, Superwall automatically dismisses the paywall when a product is purchased or restored. You can disable this by setting `automaticallyDismiss` to `false`:
```swift Swift
let options = SuperwallOptions()
options.paywalls.automaticallyDismiss = false
Superwall.configure(apiKey: "MY_API_KEY", options: options)
```
```swift Objective-C
SWKSuperwallOptions *options = [[SWKSuperwallOptions alloc] init];
options.automaticallyDismiss = false;
[Superwall configureWithApiKey:@"MY_API_KEY" purchaseController:nil options:options completion:^{}];
```
```kotlin Kotlin
val options = SuperwallOptions()
options.paywalls.automaticallyDismiss = false
Superwall.configure(
this,
apiKey = "MY_API_KEY",
options = options
)
// Or using the configuration DSL
configureSuperwall("MY_API_KEY") {
options {
paywalls {
automaticallyDismiss = false
}
}
}
```
```dart Flutter
SuperwallOptions options = SuperwallOptions();
options.paywalls.automaticallyDismiss = false;
Superwall.configure(
"MY_API_KEY",
options: options
);
```
```typescript React Native
const options = SuperwallOptions()
options.paywalls.automaticallyDismiss = false
Superwall.configure(
"MY_API_KEY",
null,
options: options
);
```
To manually dismiss the paywall , call `Superwall.shared.dismiss()`.
### Custom Restore Failure Message
You can set the title, message and close button title for the alert that appears after a restoration failure:
```swift Swift
let options = SuperwallOptions()
options.paywalls.restoreFailed.title = "My Title"
options.paywalls.restoreFailed.message = "My message"
options.paywalls.restoreFailed.closeButtonTitle = "Close"
Superwall.configure(apiKey: "MY_API_KEY", options: options)
```
```swift Objective-C
SWKSuperwallOptions *options = [[SWKSuperwallOptions alloc] init];
options.paywalls.restoreFailed.title = @"My Title";
options.paywalls.restoreFailed.message = @"My message";
options.paywalls.restoreFailed.closeButtonTitle = @"Close";
[Superwall configureWithApiKey:@"MY_API_KEY" purchaseController:nil options:options completion:nil];
```
```kotlin Kotlin
val options = SuperwallOptions()
options.paywalls.restoreFailed.title = "My Title"
options.paywalls.restoreFailed.message = "My message"
options.paywalls.restoreFailed.closeButtonTitle = "Close"
Superwall.configure(
this,
apiKey = "MY_API_KEY",
options = options
)
// Or using the configuration DSL
configureSuperwall("MY_API_KEY") {
options {
paywalls {
restoreFailed.title = "My Title"
restoreFailed.message = "My message"
restoreFailed.closeButtonTitle = "Close"
}
}
}
```
```dart Flutter
SuperwallOptions options = SuperwallOptions();
options.paywalls.restoreFailed.title = "My Title";
options.paywalls.restoreFailed.message = "My message";
options.paywalls.restoreFailed.closeButtonTitle = "Close";
Superwall.configure(
"MY_API_KEY",
options: options
);
```
```typescript React Native
const options = SuperwallOptions()
options.paywalls.restoreFailed.title = "My Title"
options.paywalls.restoreFailed.message = "My message";
options.paywalls.restoreFailed.closeButtonTitle = "Close";
Superwall.configure(
"MY_API_KEY",
null,
options: options
);
```
### Haptic Feedback
On iOS, the paywall uses haptic feedback by default after a user purchases or restores a product, opens a URL from the paywall, or closes the paywall. To disable this, set the `isHapticFeedbackEnabled` `PaywallOption` to false:
```swift Swift
let options = SuperwallOptions()
options.paywalls.isHapticFeedbackEnabled = false
Superwall.configure(apiKey: "MY_API_KEY", options: options)
```
```swift Objective-C
SWKSuperwallOptions *options = [[SWKSuperwallOptions alloc] init];
options.isHapticFeedbackEnabled = false;
[Superwall configureWithApiKey:@"MY_API_KEY" purchaseController:nil options:options completion:^{}];
```
```dart Flutter
SuperwallOptions options = SuperwallOptions();
options.paywalls.isHapticFeedbackEnabled = false;
Superwall.configure(
"MY_API_KEY",
options: options
);
```
```typescript React Native
const options = SuperwallOptions()
options.paywalls.isHapticFeedbackEnabled = false;
Superwall.configure(
"MY_API_KEY",
null,
options: options
);
```
Note: Android does not use haptic feedback.
### Transaction Background View
During a transaction, we add a `UIActivityIndicator` behind the view to indicate a loading status. However, you can remove this by setting the `transactionBackgroundView` to `nil`:
```swift Swift
let options = SuperwallOptions()
options.paywalls.transactionBackgroundView = nil
Superwall.configure(apiKey: "MY_API_KEY", options: options)
```
```swift Objective-C
SWKSuperwallOptions *options = [[SWKSuperwallOptions alloc] init];
options.paywalls.transactionBackgroundView = SWKTransactionBackgroundViewNone;
[Superwall
configureWithApiKey:@"MY_API_KEY"
purchaseController:nil
options:options
completion:nil
];
```
```kotlin Kotlin
val options = SuperwallOptions()
options.paywalls.transactionBackgroundView = null
Superwall.configure(
this,
apiKey = "MY_API_KEY",
options = options
)
// Or using the configuration DSL
configureSuperwall("MY_API_KEY") {
options {
paywalls {
transactionBackgroundView = null
}
}
}
```
```dart Flutter
SuperwallOptions options = SuperwallOptions();
options.paywalls.transactionBackgroundView = TransactionBackgroundView.none;
Superwall.configure(
"MY_API_KEY",
options: options
);
```
```typescript React Native
const options = SuperwallOptions()
options.paywalls.transactionBackgroundView = TransactionBackgroundView.none
Superwall.configure(
"MY_API_KEY",
null,
options: options
);
```
### Purchase Failure Alert
When a purchase fails, we automatically present an alert with the error message. If you'd like to show your own alert after failure, set the `shouldShowPurchaseFailureAlert` `PaywallOption` to `false`:
```swift Swift
let options = SuperwallOptions()
options.paywalls.shouldShowPurchaseFailureAlert = false
Superwall.configure(apiKey: "MY_API_KEY", options: options)
```
```swift Objective-C
SWKSuperwallOptions *options = [[SWKSuperwallOptions alloc] init];
options.paywalls.shouldShowPurchaseFailureAlert = false;
[Superwall
configureWithApiKey:@"MY_API_KEY"
purchaseController:nil
options:options
completion:nil
];
```
```kotlin Kotlin
val options = SuperwallOptions()
options.paywalls.shouldShowPurchaseFailureAlert = false
Superwall.configure(
this,
apiKey = "MY_API_KEY",
options = options
)
// Or using the configuration DSL
configureSuperwall("MY_API_KEY") {
options {
paywalls {
shouldShowPurchaseFailureAlert = false
}
}
}
```
```dart Flutter
SuperwallOptions options = SuperwallOptions();
options.paywalls.shouldShowPurchaseFailureAlert = false;
Superwall.configure(
"MY_API_KEY",
options: options
);
```
```typescript React Native
const options = SuperwallOptions()
options.paywalls.shouldShowPurchaseFailureAlert = false;
Superwall.configure(
"MY_API_KEY",
null,
options: options
);
```
### Locale Identifier
When evaluating rules, the device locale identifier is set to `autoupdatingCurrent`. However, you can override this if you want to test a specific locale:
```swift Swift
let options = SuperwallOptions()
options.localeIdentifier = "en_GB"
Superwall.configure(apiKey: "MY_API_KEY", options: options)
// Or you can set:
Superwall.shared.localeIdentifier = "en_GB"
// To revert to default:
Superwall.shared.localeIdentifier = nil
```
```swift Objective-C
SWKSuperwallOptions *options = [[SWKSuperwallOptions alloc] init];
options.localeIdentifier = @"en_GB";
[Superwall configureWithApiKey:@"MY_API_KEY" purchaseController:nil options:options completion:^{}];
// Or you can set:
[Superwall sharedInstance].localeIdentifier = "en_GB"
// To revert to default:
[Superwall sharedInstance].localeIdentifier = nil
```
```kotlin Kotlin
val options = SuperwallOptions()
options.localeIdentifier = "en_GB"
Superwall.configure(
this,
apiKey = "MY_API_KEY",
options = options
)
// Or using the configuration DSL
configureSuperwall("MY_API_KEY") {
options {
localeIdentifier = "en_GB"
}
}
```
```dart Flutter
SuperwallOptions options = SuperwallOptions();
options.localeIdentifier = "en_GB";
Superwall.configure(
"MY_API_KEY",
options: options
);
// Or you can set:
Superwall.shared.setLocaleIdentifier("en_GB");
// To revert to default:
Superwall.shared.setLocaleIdentifier(null);
```
```typescript React Native
const options = SuperwallOptions()
options.localeIdentifier = "en_GB";
Superwall.configure(
"MY_API_KEY",
null,
options: options
);
```
For a list of locales that are available on iOS, take a look at [this list](https://gist.github.com/jacobbubu/1836273). You can also preview your paywall in different locales using [In-App Previews](/docs/in-app-paywall-previews).
### Game Controller
If you're using a game controller, you can enable this in `SuperwallOptions` too. Check out our [Game Controller Support](/docs/game-controller-support) article.
Take a look at [SuperwallOptions](https://sdk.superwall.me/documentation/superwallkit/superwalloptions) in our SDK reference for more info.
# Using the Presentation Handler When Presenting Paywalls
Source: https://superwall.com/docs/using-the-presentation-handler
The `PaywallPresentationHandler` enables you to monitor and respond to key events during paywall presentation, such as when a paywall is displayed, dismissed, encounters an error, or is skipped.
You can provide a `PaywallPresentationHandler` to `register`, whose functions provide status updates for a paywall:
* `onDismiss`: Called when the paywall is dismissed. Accepts a `PaywallInfo` object containing info about the dismissed paywall, and there is a `PaywallResult` informing you of any transaction.
* `onPresent`: Called when the paywall did present. Accepts a `PaywallInfo` object containing info about the presented paywall.
* `onError`: Called when an error occurred when trying to present a paywall. Accepts an `Error` indicating why the paywall could not present.
* `onSkip`: Called when a paywall is skipped. Accepts a `PaywallSkippedReason` enum indicating why the paywall was skipped.
```swift Swift
let handler = PaywallPresentationHandler()
handler.onDismiss { paywallInfo, result in
print("The paywall dismissed. PaywallInfo: \(paywallInfo). Result: \(result)")
}
handler.onPresent { paywallInfo in
print("The paywall presented. PaywallInfo:", paywallInfo)
}
handler.onError { error in
print("The paywall presentation failed with error \(error)")
}
handler.onSkip { reason in
switch reason {
case .holdout(let experiment):
print("Paywall not shown because user is in a holdout group in Experiment: \(experiment.id)")
case .noAudienceMatch:
print("Paywall not shown because user doesn't match any audiences.")
case .placementNotFound:
print("Paywall not shown because this placement isn't part of a campaign.")
}
}
Superwall.shared.register(placement: "campaign_trigger", handler: handler) {
// Feature launched
}
```
```swift Objective-C
SWKPaywallPresentationHandler *handler = [[SWKPaywallPresentationHandler alloc] init];
[handler onDismiss:^(SWKPaywallInfo * _Nonnull paywallInfo,
enum SWKPaywallResult result,
SWKStoreProduct * _Nullable product) {
NSLog(@"The paywall presented. PaywallInfo: %@ - result: %ld", paywallInfo, (long)result);
}];
[handler onPresent:^(SWKPaywallInfo * _Nonnull paywallInfo) {
NSLog(@"The paywall presented. PaywallInfo: %@", paywallInfo);
}];
[handler onError:^(NSError * _Nonnull error) {
NSLog(@"The paywall presentation failed with error %@", error);
}];
[handler onSkip:^(enum SWKPaywallSkippedReason reason) {
switch (reason) {
case SWKPaywallSkippedReasonUserIsSubscribed:
NSLog(@"Paywall not shown because user is subscribed.");
break;
case SWKPaywallSkippedReasonHoldout:
NSLog(@"Paywall not shown because user is in a holdout group.");
break;
case SWKPaywallSkippedReasonNoAudienceMatch:
NSLog(@"Paywall not shown because user doesn't match any audiences.");
break;
case SWKPaywallSkippedReasonPlacementNotFound:
NSLog(@"Paywall not shown because this placement isn't part of a campaign.");
break;
case SWKPaywallSkippedReasonNone:
// The paywall wasn't skipped.
break;
}
}];
[[Superwall sharedInstance] registerWithPlacement:@"campaign_trigger" params:nil handler:handler feature:^{
// Feature launched.
}];
```
```kotlin Kotlin
val handler = PaywallPresentationHandler()
handler.onDismiss { paywallInfo, result ->
println("The paywall dismissed. PaywallInfo: ${it}")
}
handler.onPresent {
println("The paywall presented. PaywallInfo: ${it}")
}
handler.onError {
println("The paywall errored. Error: ${it}")
}
handler.onSkip {
when (it) {
is PaywallSkippedReason.PlacementNotFound -> {
println("The paywall was skipped because the placement was not found.")
}
is PaywallSkippedReason.Holdout -> {
println("The paywall was skipped because the user is in a holdout group.")
}
is PaywallSkippedReason.NoAudienceMatch -> {
println("The paywall was skipped because no audience matched.")
}
}
}
Superwall.instance.register(placement = "campaign_trigger", handler = handler) {
// Feature launched
}
```
```dart Flutter
PaywallPresentationHandler handler = PaywallPresentationHandler();
handler.onPresent((paywallInfo) async {
String name = await paywallInfo.name;
print("Handler (onPresent): $name");
});
handler.onDismiss((paywallInfo, paywallResult) async {
String name = await paywallInfo.name;
print("Handler (onDismiss): $name");
});
handler.onError((error) {
print("Handler (onError): ${error}");
});
handler.onSkip((skipReason) async {
String description = await skipReason.description;
if (skipReason is PaywallSkippedReasonHoldout) {
print("Handler (onSkip): $description");
final experiment = await skipReason.experiment;
final experimentId = await experiment.id;
print("Holdout with experiment: ${experimentId}");
} else if (skipReason is PaywallSkippedReasonNoAudienceMatch) {
print("Handler (onSkip): $description");
} else if (skipReason is PaywallSkippedReasonPlacementNotFound) {
print("Handler (onSkip): $description");
} else {
print("Handler (onSkip): Unknown skip reason");
}
});
Superwall.shared.registerPlacement("campaign_trigger", handler: handler, feature: () {
// Feature launched
});
```
```typescript React Native
const handler = new PaywallPresentationHandler()
handler.onPresent((paywallInfo) => {
const name = paywallInfo.name
console.log(`Handler (onPresent): ${name}`)
})
handler.onDismiss((paywallInfo, paywallResult) => {
const name = paywallInfo.name
console.log(`Handler (onDismiss): ${name}`)
})
handler.onError((error) => {
console.log(`Handler (onError): ${error}`)
})
handler.onSkip((skipReason) => {
const description = skipReason.description
if (skipReason instanceof PaywallSkippedReasonHoldout) {
console.log(`Handler (onSkip): ${description}`)
const experiment = skipReason.experiment
const experimentId = experiment.id
console.log(`Holdout with experiment: ${experimentId}`)
} else if (skipReason instanceof PaywallSkippedReasonNoAudienceMatch) {
console.log(`Handler (onSkip): ${description}`)
} else if (skipReason instanceof PaywallSkippedReasonPlacementNotFound) {
console.log(`Handler (onSkip): ${description}`)
} else {
console.log(`Handler (onSkip): Unknown skip reason`)
}
})
Superwall.shared.register({
placement: 'campaign_trigger',
handler: handler,
feature: () => {
// Feature launched
}
});
```
Wanting to see which product was just purchased from a paywall? Use `onDismiss` and the `result`
parameter. Or, you can use the
[SuperwallDelegate](/3rd-party-analytics#using-events-to-see-purchased-products).
# Viewing Purchased Products
Source: https://superwall.com/docs/viewing-purchased-products
There are several ways to view which product was purchased as a result of a paywall presentation.
When a paywall is presenting and a user converts, you can view the purchased products in several different ways.
### Use the `PaywallPresentationHandler`
Arguably the easiest of the options — simply pass in a presentation handler and check out the product within the `onDismiss` block.
```swift Swift
let handler = PaywallPresentationHandler()
handler.onDismiss { _, result in
switch result {
case .declined:
print("No purchased occurred.")
case .purchased(let product):
print("Purchased \(product.productIdentifier)")
case .restored:
print("Restored purchases.")
}
}
Superwall.shared.register(placement: "caffeineLogged", handler: handler) {
logCaffeine()
}
```
```swift Objective-C
SWKPaywallPresentationHandler *handler = [SWKPaywallPresentationHandler new];
[handler onDismiss:^(SWKPaywallInfo * _Nonnull info,
enum SWKPaywallResult result,
SWKStoreProduct * _Nullable product) {
switch (result) {
case SWKPaywallResultPurchased:
NSLog(@"Purchased %@", product.productIdentifier);
default:
NSLog(@"Unhandled event.");
}
}];
[[Superwall sharedInstance] registerWithPlacement:@"caffeineLogged"
params:@{}
handler:handler
feature:^{
[self logCaffeine];
}];
```
```kotlin Android
val handler = PaywallPresentationHandler()
handler.onDismiss { _, paywallResult ->
when (paywallResult) {
is PaywallResult.Purchased -> {
// The user made a purchase!
val purchasedProductId = paywallResult.productId
println("User purchased product: $purchasedProductId")
// ... do something with the purchased product ID ...
}
is PaywallResult.Declined -> {
// The user declined to make a purchase.
println("User declined to make a purchase.")
// ... handle the declined case ...
}
is PaywallResult.Restored -> {
// The user restored a purchase.
println("User restored a purchase.")
// ... handle the restored case ...
}
}
}
Superwall.instance.register(placement = "caffeineLogged", handler = handler) {
logCaffeine()
}
```
```dart Flutter
PaywallPresentationHandler handler = PaywallPresentationHandler();
handler.onDismiss((paywallInfo, paywallResult) async {
String name = await paywallInfo.name;
print("Handler (onDismiss): $name");
switch (paywallResult) {
case PurchasedPaywallResult(productId: var id):
// The user made a purchase!
print('User purchased product: $id');
// ... do something with the purchased product ID ...
break;
case DeclinedPaywallResult():
// The user declined to make a purchase.
print('User declined the paywall.');
// ... handle the declined case ...
break;
case RestoredPaywallResult():
// The user restored a purchase.
print('User restored a previous purchase.');
// ... handle the restored case ...
break;
}
});
Superwall.shared.registerPlacement(
"caffeineLogged", handler: handler, feature: () {
logCaffeine();
});
```
```typescript React Native
import * as React from "react"
import Superwall from "../../src"
import { PaywallPresentationHandler, PaywallInfo } from "../../src"
import type { PaywallResult } from "../../src/public/PaywallResult"
const Home = () => {
const navigation = useNavigation()
const presentationHandler: PaywallPresentationHandler = {
onDismiss: (handler: (info: PaywallInfo, result: PaywallResult) => void) => {
handler = (info, result) => {
console.log("Paywall dismissed with info:", info, "and result:", result)
if (result.type === "purchased") {
console.log("Product purchased with ID:", result.productId)
}
}
},
onPresent: (handler: (info: PaywallInfo) => void) => {
handler = (info) => {
console.log("Paywall presented with info:", info)
// Add logic for when the paywall is presented
}
},
onError: (handler: (error: string) => void) => {
handler = (error) => {
console.error("Error presenting paywall:", error)
// Handle any errors that occur during presentation
}
},
onSkip: () => {
console.log("Paywall presentation skipped")
// Handle the case where the paywall presentation is skipped
},
}
const nonGated = () => {
Superwall.shared.register({ placement: "non_gated", handler: presentationHandler, feature: () => {
navigation.navigate("caffeineLogged", {
value: "Go for caffeine logging",
})
});
}
return // Your view code here
}
```
### Use `SuperwallDelegate`
Next, the [SuperwallDelegate](/using-superwall-delegate) offers up much more information, and can inform you of virtually any Superwall event that occurred:
```swift Swift
class SWDelegate: SuperwallDelegate {
func handleSuperwallEvent(withInfo eventInfo: SuperwallEventInfo) {
switch eventInfo.event {
case .transactionComplete(_, let product, _, _):
print("Transaction complete: product: \(product.productIdentifier)")
case .subscriptionStart(let product, _):
print("Subscription start: product: \(product.productIdentifier)")
case .freeTrialStart(let product, _):
print("Free trial start: product: \(product.productIdentifier)")
case .transactionRestore(_, _):
print("Transaction restored")
case .nonRecurringProductPurchase(let product, _):
print("Consumable product purchased: \(product.id)")
default:
print("Unhandled event.")
}
}
}
@main
struct Caffeine_PalApp: App {
@State private var swDelegate: SWDelegate = .init()
init() {
Superwall.configure(apiKey: "my_api_key")
Superwall.shared.delegate = swDelegate
}
var body: some Scene {
WindowGroup {
ContentView()
}
}
}
```
```swift Objective-C
// SWDelegate.h...
#import
@import SuperwallKit;
NS_ASSUME_NONNULL_BEGIN
@interface SWDelegate : NSObject
@end
NS_ASSUME_NONNULL_END
// SWDelegate.m...
@implementation SWDelegate
- (void)handleSuperwallEventWithInfo:(SWKSuperwallEventInfo *)eventInfo {
switch(eventInfo.event) {
case SWKSuperwallEventTransactionComplete:
NSLog(@"Transaction complete: %@", eventInfo.params[@"primary_product_id"]);
}
}
// In AppDelegate.m...
#import "AppDelegate.h"
#import "SWDelegate.h"
@import SuperwallKit;
@interface AppDelegate ()
@property (strong, nonatomic) SWDelegate *delegate;
@end
@implementation AppDelegate
- (BOOL)application:(UIApplication *)application didFinishLaunchingWithOptions:(NSDictionary *)launchOptions {
// Override point for customization after application launch.
self.delegate = [SWDelegate new];
[Superwall configureWithApiKey:@"my_api_key"];
[Superwall sharedInstance].delegate = self.delegate;
return YES;
}
```
```kotlin Android
class SWDelegate : SuperwallDelegate {
override fun handleSuperwallEvent(eventInfo: SuperwallEventInfo) {
when (eventInfo.event) {
is SuperwallPlacement.TransactionComplete -> {
val transaction = (eventInfo.event as SuperwallPlacement.TransactionComplete).transaction
val product = (eventInfo.event as SuperwallPlacement.TransactionComplete).product
val paywallInfo = (eventInfo.event as SuperwallPlacement.TransactionComplete).paywallInfo
println("Transaction Complete: $transaction, Product: $product, Paywall Info: $paywallInfo")
}
else -> {
// Handle other cases
}
}
}
}
class MyApplication : Application() {
override fun onCreate() {
super.onCreate()
Superwall.configure(this, "my_api_key")
Superwall.instance.delegate = SWDelegate()
}
}
```
```dart Flutter
import 'dart:io';
import 'package:flutter/material.dart';
import 'package:superwallkit_flutter/superwallkit_flutter.dart';
class _MyAppState extends State implements SuperwallDelegate {
final logging = Logging();
@override
void initState() {
super.initState();
configureSuperwall(useRevenueCat);
}
Future configureSuperwall(bool useRevenueCat) async {
try {
final apiKey = Platform.isIOS
? 'ios_api_project_key'
: 'android_api_project_key';
final logging = Logging();
logging.level = LogLevel.warn;
logging.scopes = {LogScope.all};
final options = SuperwallOptions();
options.paywalls.shouldPreload = false;
options.logging = logging;
Superwall.configure(apiKey,
purchaseController: null,
options: options, completion: () {
logging.info('Executing Superwall configure completion block');
});
Superwall.shared.setDelegate(this);
} catch (e) {
// Handle any errors that occur during configuration
logging.error('Failed to configure Superwall:', e);
}
}
@override
Future handleSuperwallEvent(SuperwallEventInfo eventInfo) async {
switch (eventInfo.event.type) {
case PlacementType.transactionComplete:
final product = eventInfo.params?['product'];
logging.info('Transaction complete event received with product: $product');
// Add any additional logic you need to handle the transaction complete event
break;
// Handle other events if necessary
default:
logging.info('Unhandled event type: ${eventInfo.event.type}');
break;
}
}
}
```
```typescript React Native
import {
PaywallInfo,
SubscriptionStatus,
SuperwallDelegate,
SuperwallPlacementInfo,
PlacementType,
} from '../../src';
export class MySuperwallDelegate extends SuperwallDelegate {
handleSuperwallPlacement(placementInfo: SuperwallPlacementInfo) {
console.log('Handling Superwall placement:', placementInfo);
switch (placementInfo.placement.type) {
case PlacementType.transactionComplete:
const product = placementInfo.params?.["product"];
if (product) {
console.log(`Product: ${product}`);
} else {
console.log("Product not found in params.");
}
break;
default:
break;
}
}
}
export default function App() {
const delegate = new MySuperwallDelegate();
React.useEffect(() => {
const setupSuperwall = async () => {
const apiKey =
Platform.OS === 'ios'
? 'ios_api_project_key'
: 'android_api_project_key';
Superwall.configure({
apiKey: apiKey,
});
Superwall.shared.setDelegate(delegate);
};
}
}
```
### Use a purchase controller
If you are controlling the purchasing pipeline yourself via a [purchase controller](/advanced-configuration), then naturally the purchased product is available:
```swift Swift
final class MyPurchaseController: PurchaseController {
func purchase(product: StoreProduct) async -> PurchaseResult {
print("Kicking off purchase of \(product.productIdentifier)")
do {
let result = try await MyPurchaseLogic.purchase(product: product)
return .purchased // .cancelled, .pending, .failed(Error)
} catch {
return .failed(error)
}
}
// 2
func restorePurchases() async -> RestorationResult {
print("Restoring purchases")
return .restored // false
}
}
@main
struct Caffeine_PalApp: App {
private let pc: MyPurchaseController = .init()
init() {
Superwall.configure(apiKey: "my_api_key", purchaseController: pc)
}
var body: some Scene {
WindowGroup {
ContentView()
}
}
}
```
```swift Objective-C
// In MyPurchaseController.h...
#import
@import SuperwallKit;
@import StoreKit;
NS_ASSUME_NONNULL_BEGIN
@interface MyPurchaseController : NSObject
+ (instancetype)sharedInstance;
@end
NS_ASSUME_NONNULL_END
// In MyPurchaseController.m...
#import "MyPurchaseController.h"
@implementation MyPurchaseController
+ (instancetype)sharedInstance
{
static MyPurchaseController *sharedInstance = nil;
static dispatch_once_t onceToken;
dispatch_once(&onceToken, ^{
sharedInstance = [MyPurchaseController new];
});
return sharedInstance;
}
- (void)purchaseWithProduct:(SWKStoreProduct * _Nonnull)product
completion:(void (^ _Nonnull)(enum SWKPurchaseResult, NSError * _Nullable))completion {
NSLog(@"Kicking off purchase of %@", product.productIdentifier);
// Do purchase logic here
completion(SWKPurchaseResultPurchased, nil);
}
- (void)restorePurchasesWithCompletion:(void (^ _Nonnull)(enum SWKRestorationResult, NSError * _Nullable))completion {
// Do restore logic here
completion(SWKRestorationResultRestored, nil);
}
@end
// In AppDelegate.m...
#import "AppDelegate.h"
#import "MyPurchaseController.h"
@import SuperwallKit;
@interface AppDelegate ()
@end
@implementation AppDelegate
- (BOOL)application:(UIApplication *)application didFinishLaunchingWithOptions:(NSDictionary *)launchOptions {
// Override point for customization after application launch.
[Superwall configureWithApiKey:@"my_api_key"
purchaseController:[MyPurchaseController sharedInstance]
options:nil
completion:^{
}];
return YES;
}
```
```kotlin Android
class MyPurchaseController(val context: Context): PurchaseController {
override suspend fun purchase(
activity: Activity,
productDetails: ProductDetails,
basePlanId: String?,
offerId: String?
): PurchaseResult {
println("Kicking off purchase of $basePlanId")
return PurchaseResult.Purchased()
}
override suspend fun restorePurchases(): RestorationResult {
TODO("Not yet implemented")
}
}
class MyApplication : Application() {
override fun onCreate() {
super.onCreate()
Superwall.configure(this, "my_api_key", purchaseController = MyPurchaseController(this))
}
}
```
```dart Flutter
class MyPurchaseController extends PurchaseController {
// 1
@override
Future purchaseFromAppStore(String productId) async {
print('Attempting to purchase product with ID: $productId');
// Do purchase logic
return PurchaseResult.purchased;
}
@override
Future purchaseFromGooglePlay(
String productId,
String? basePlanId,
String? offerId
) async {
print('Attempting to purchase product with ID: $productId and basePlanId: $basePlanId');
// Do purchase logic
return PurchaseResult.purchased;
}
@override
Future restorePurchases() async {
// Do resture logic
}
}
```
```typescript React Native
export class MyPurchaseController extends PurchaseController {
// 1
async purchaseFromAppStore(productId: string): Promise {
console.log("Kicking off purchase of ", productId)
// Purchase logic
return await this._purchaseStoreProduct(storeProduct)
}
async purchaseFromGooglePlay(
productId: string,
basePlanId?: string,
offerId?: string
): Promise {
console.log("Kicking off purchase of ", productId, " base plan ID", basePlanId)
// Purchase logic
return await this._purchaseStoreProduct(storeProduct)
}
// 2
async restorePurchases(): Promise {
// TODO
// ----
// Restore purchases and return true if successful.
}
}
```
### SwiftUI - Use `PaywallView`
The `PaywallView` allows you to show a paywall by sending it a placement. It also has a dismiss handler where the purchased product will be vended:
```swift
@main
struct Caffeine_PalApp: App {
@State private var presentPaywall: Bool = false
init() {
Superwall.configure(apiKey: "my_api_key")
}
var body: some Scene {
WindowGroup {
Button("Log") {
presentPaywall.toggle()
}
.sheet(isPresented: $presentPaywall) {
PaywallView(placement: "caffeineLogged", params: nil, paywallOverrides: nil) { info, result in
switch result {
case .declined:
print("No purchased occurred.")
case .purchased(let product):
print("Purchased \(product.productIdentifier)")
case .restored:
print("Restored purchases.")
}
} feature: {
print("Converted")
presentPaywall.toggle()
}
}
}
}
}
```
# Creating Stripe Products
Source: https://superwall.com/docs/web-checkout-adding-a-stripe-product
Create products in Stripe to show on your web paywalls.
### Adding products
Once your app is configured with Stripe, you can create products in Stripe to show on your web paywalls. To get started, **click** on **Products** from the overview page:

You will need to complete Stripe configuration first. If you're seeing a message to finish this
step, follow the steps outlined [here](/web-checkout-configuring-stripe-keys-and-settings).
Next, **click** on the **+ Import Products** button in the top right corner:
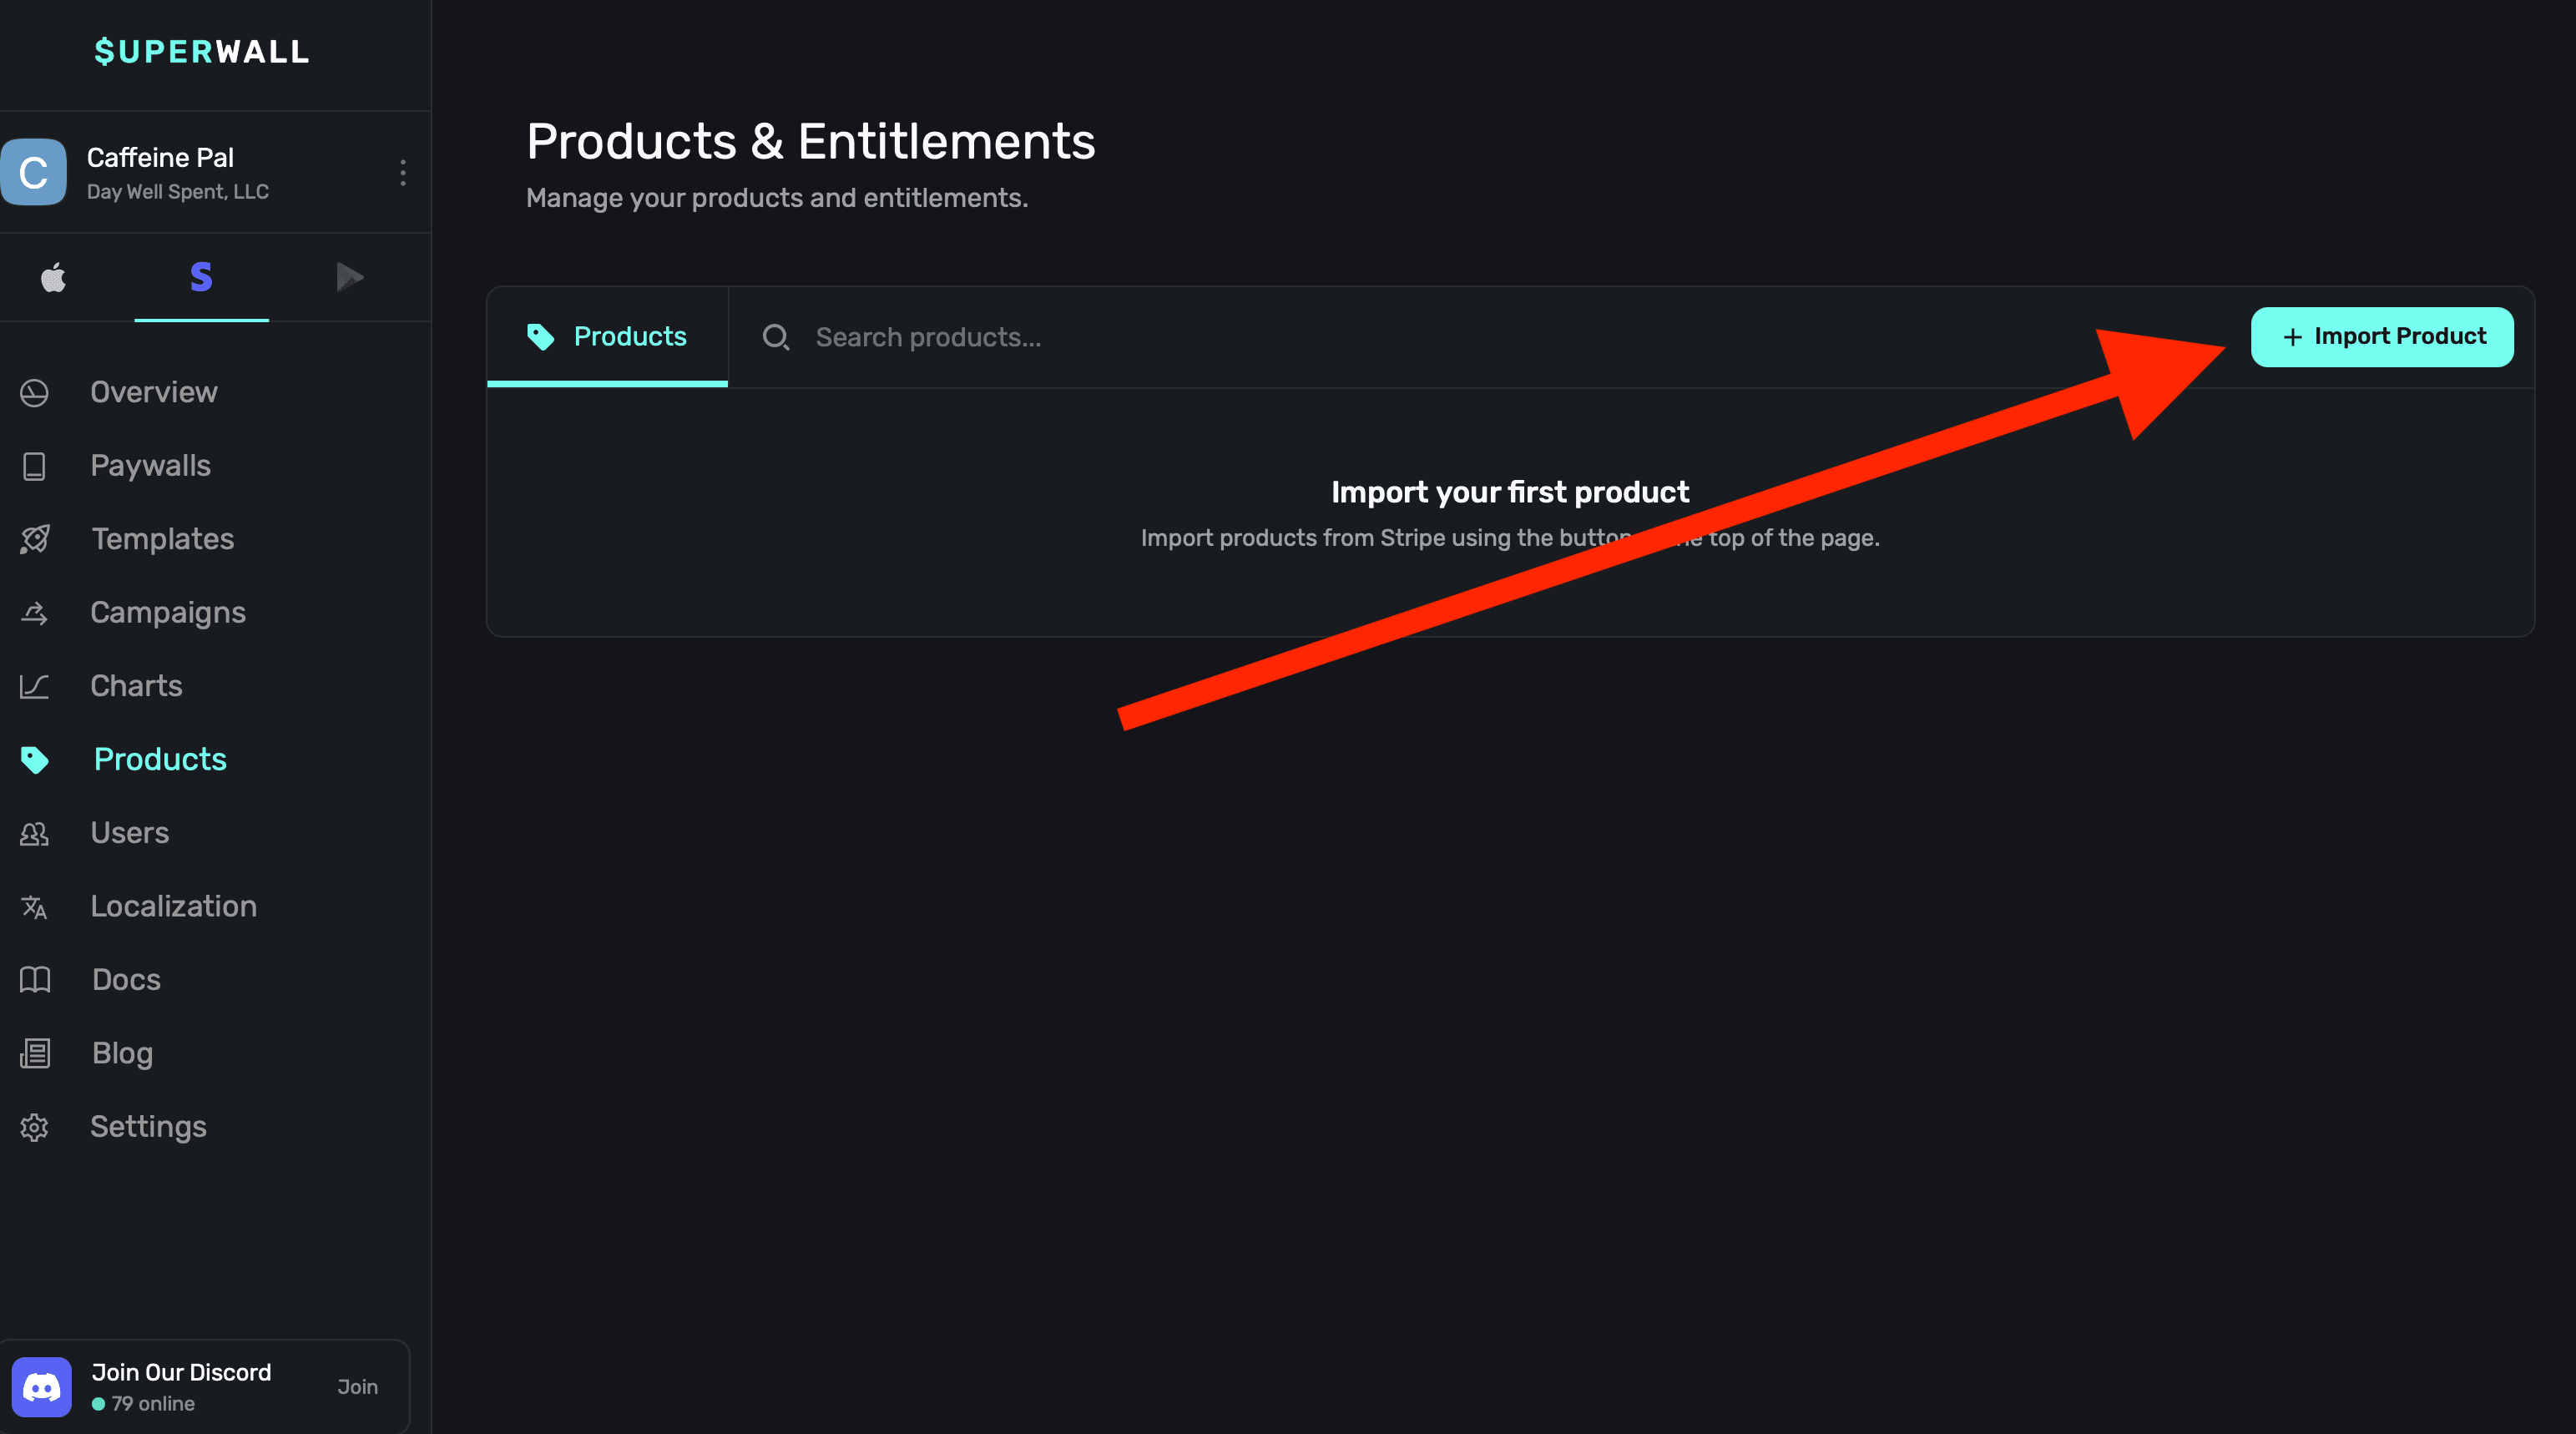
You'll be given a choice to add either a:
1. **Live Product:** These are for production purchases and flows.
2. **Sandbox Product:** These are for testing purchases and flows.
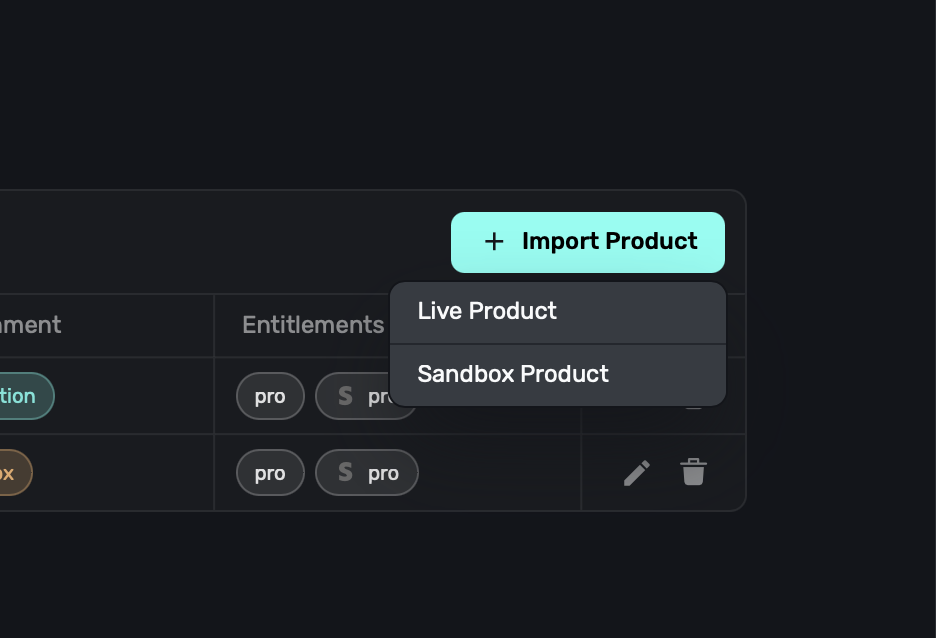
Superwall supports both sandbox and live products. To learn more about their differences, here's a
good overview from [Stripe's documentation](https://docs.stripe.com/test-mode).
**Using products already created in Stripe**
If you've already created products in Stripe, you can import them into Superwall now. All you need to do is select the "Product" and the rest of the fields should automatically populate with its data when you select them. You will need to choose which entitlement or entitlements a product should grant a use access to:
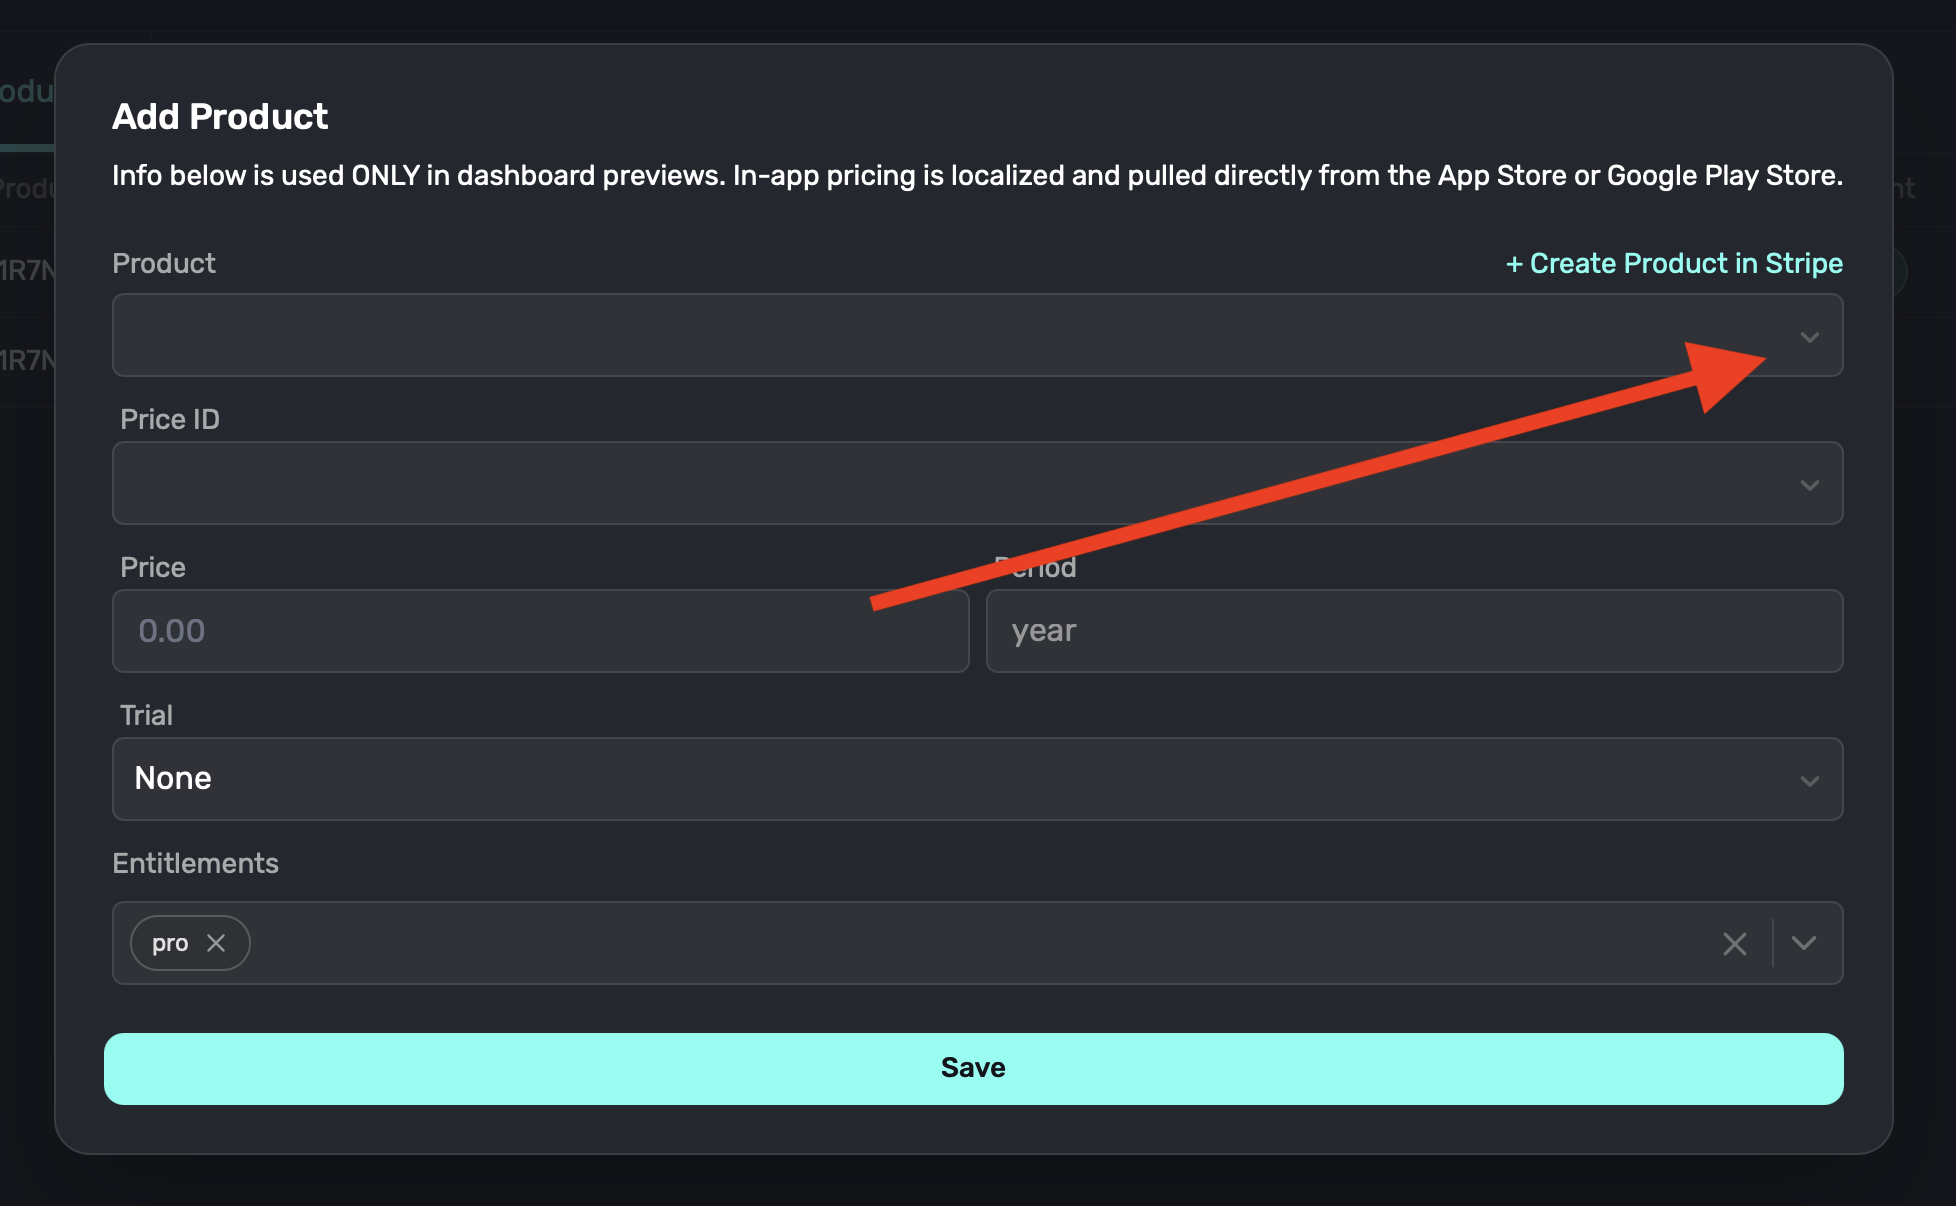
Once you're done **click** on the **Save** button and your product is ready to be used in a paywall.
**Creating new products in Stripe**
To create new products, **click** on the **Create Product in Stripe** link:
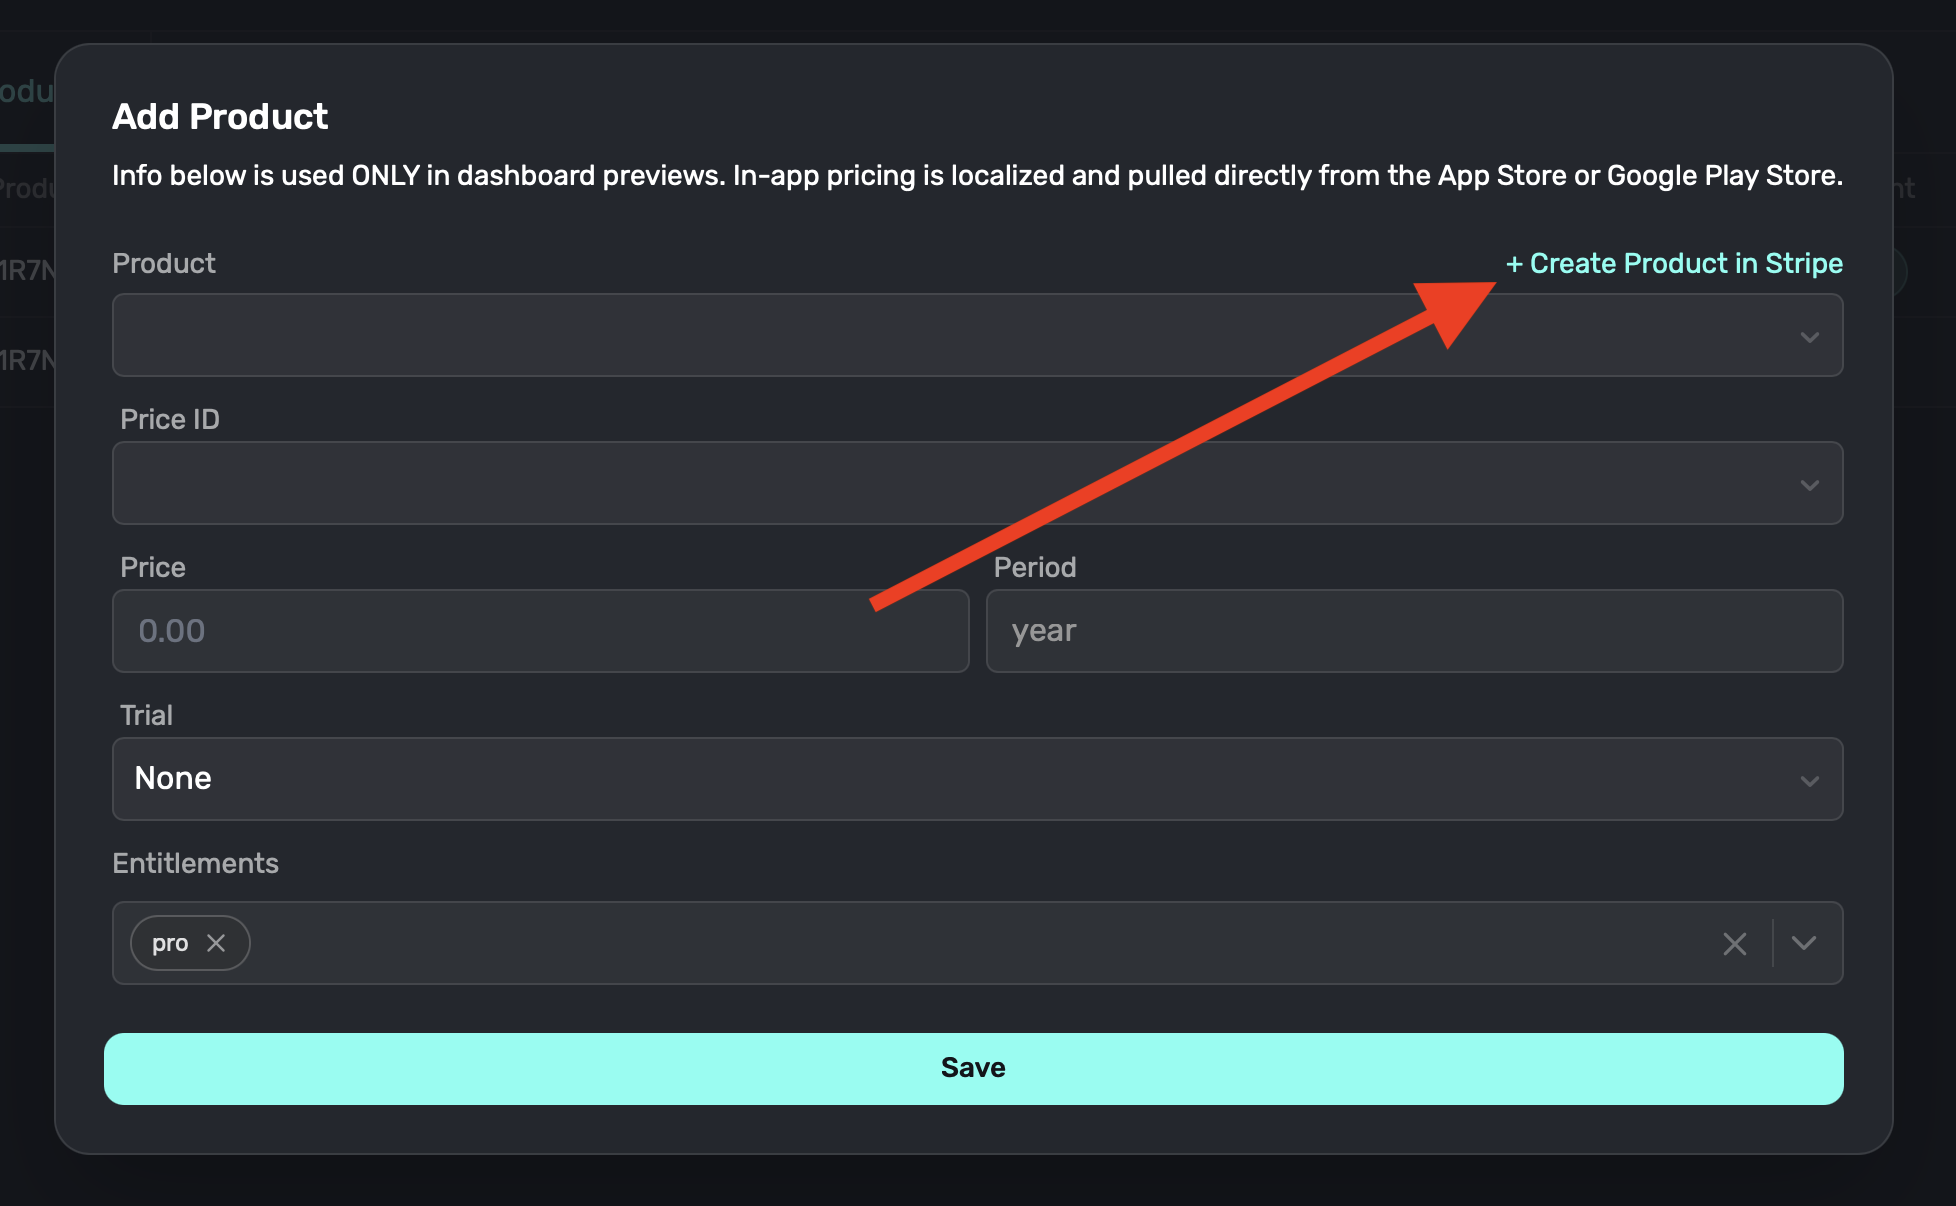{" "}
From there, fill in all of the fields presented to you in Stripe:
1. **Name:** The product name, i.e. "Pro", "Premium", etc.
2. **Description:** A description of the product, this will show up in checkout.
3. **Image:** An image representing the product, this will show up in checkout. Optional.
4. **Product tax code:** The tax code classification for the product. Refer to your territories tax codes for more information.
5. **Recurring vs One-off:** For subscriptions, choose "Recurring", whereas one time purchases or consumables should be "one-off" products.
6. **Amount:** The price of your product, and what it will renew at if it's recurring.
7. **Billing period:** The billing period for the product, i.e. "Monthly", "Yearly", etc.
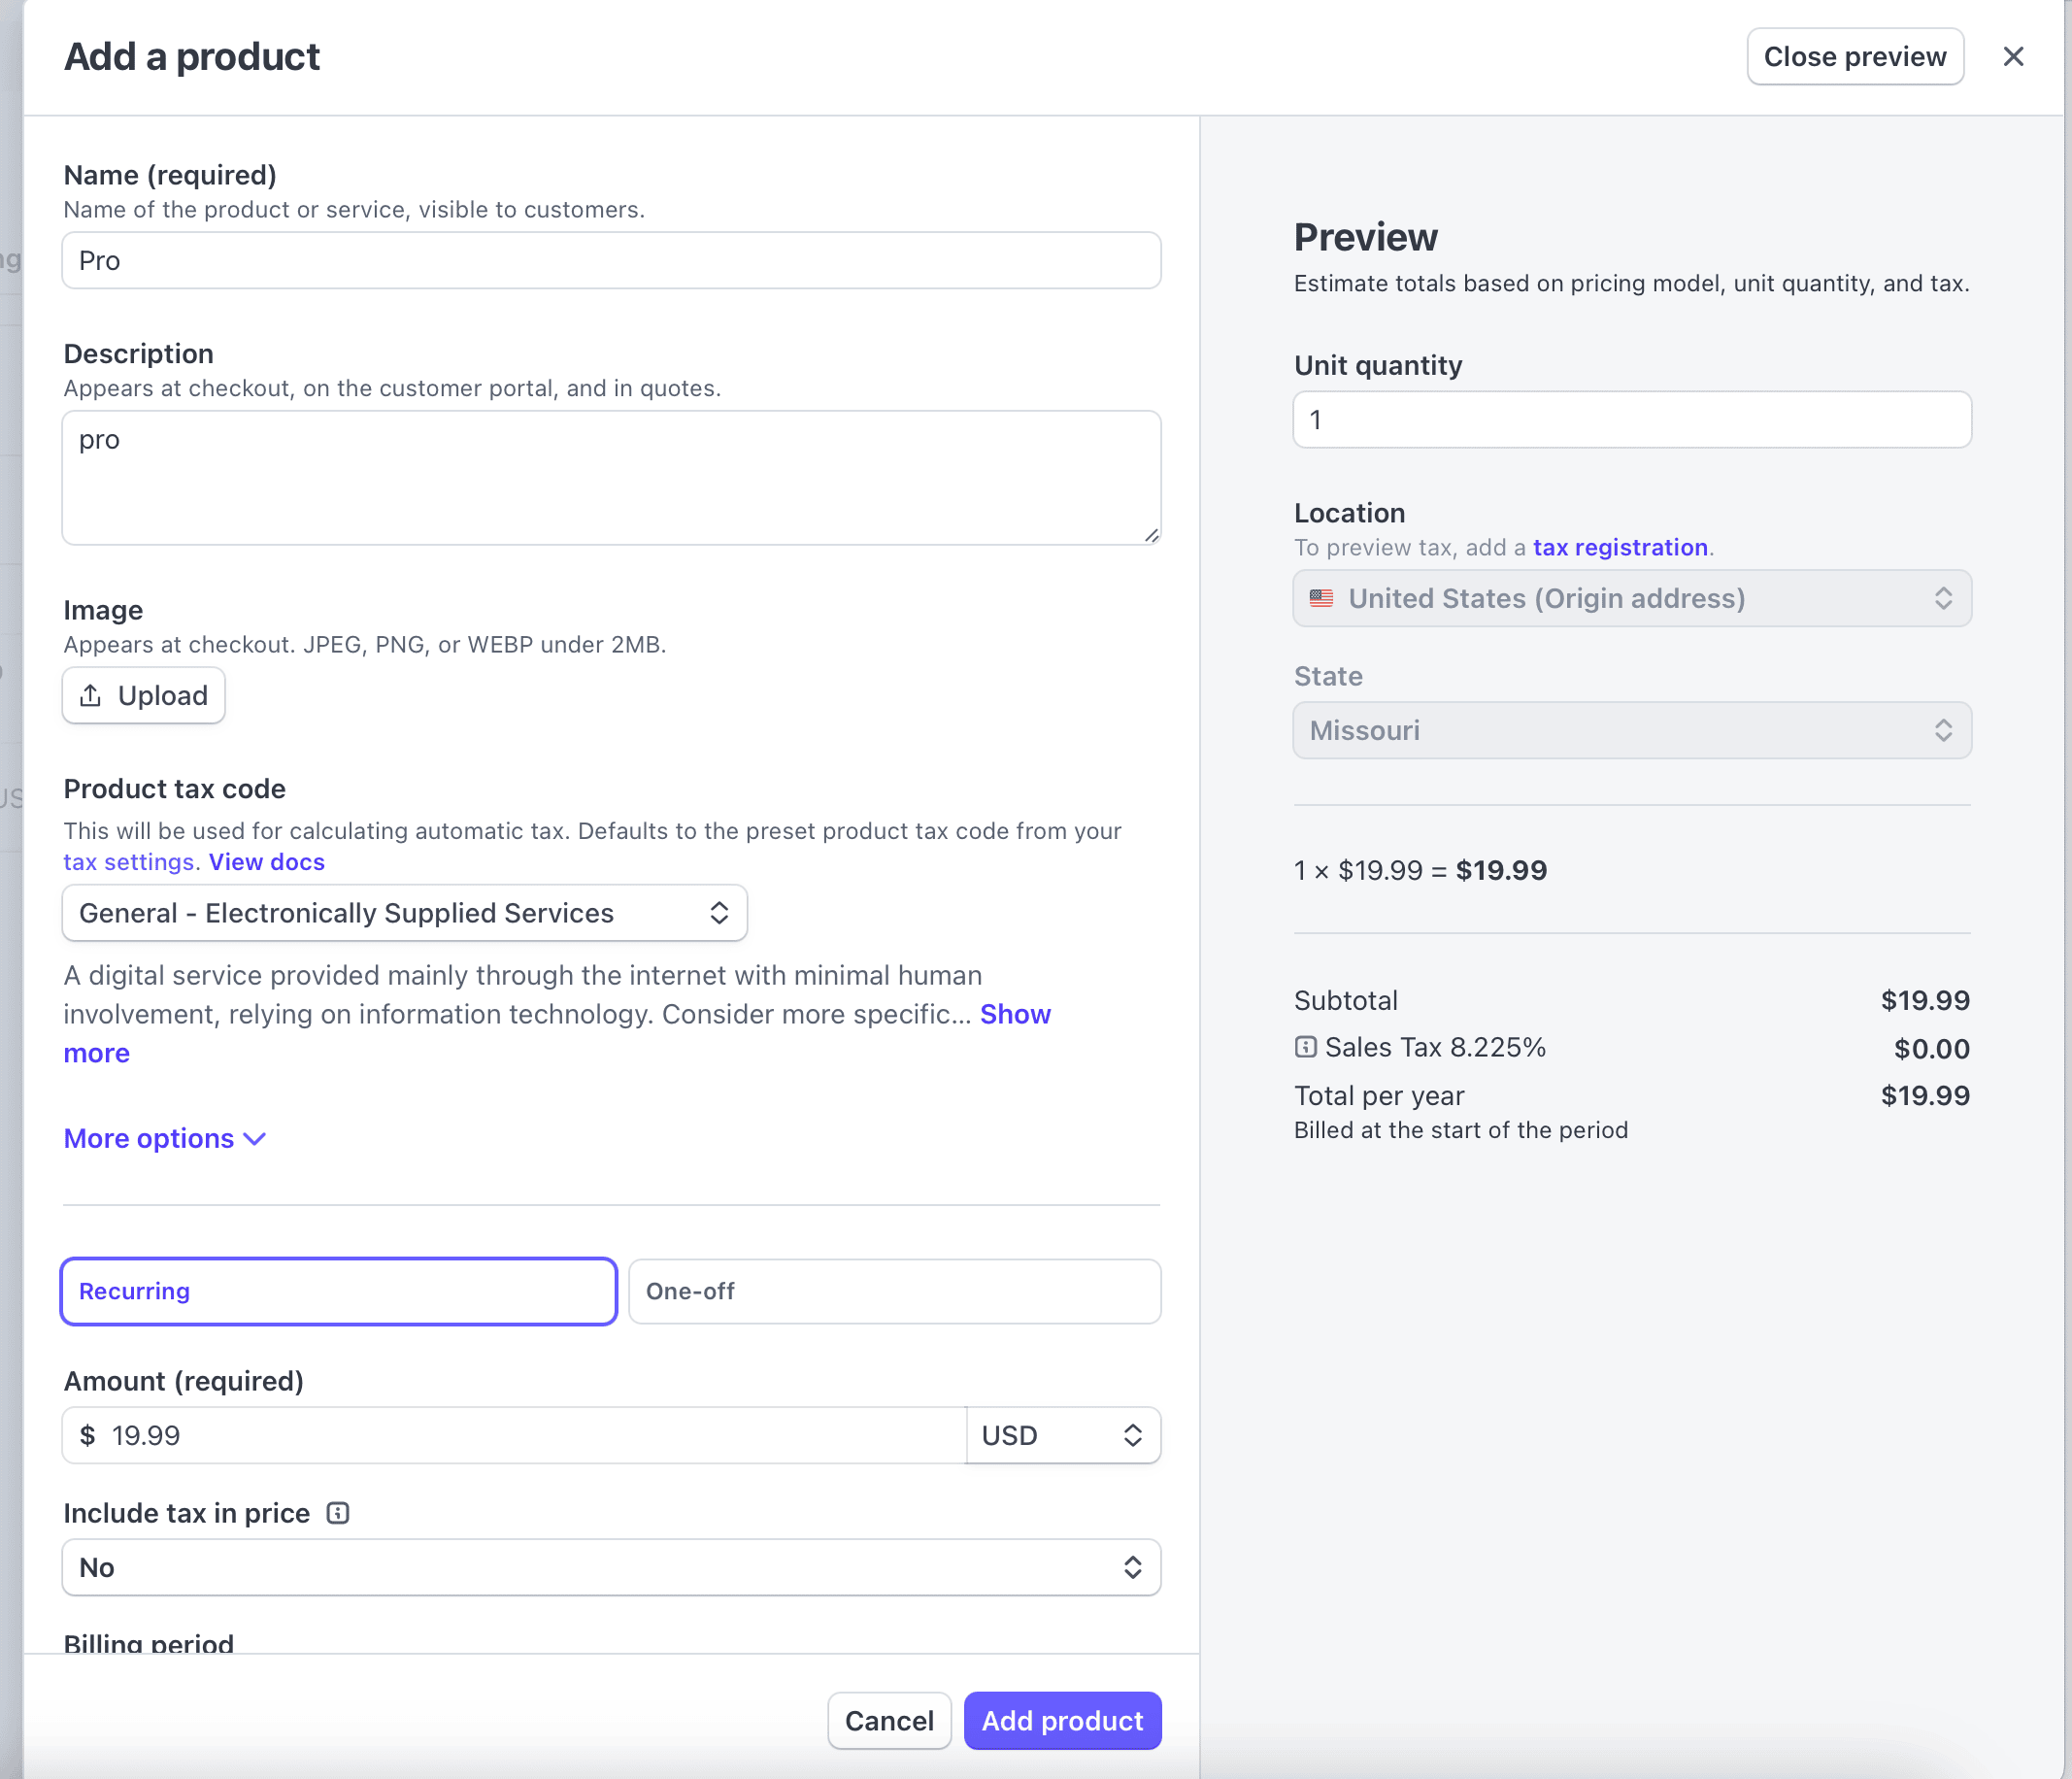
Once you've finished filling out pricing details, product name and all other metadata, **click** on the **Add product** button at the bottom right of the form. You should be redirected to your Stripe products page:
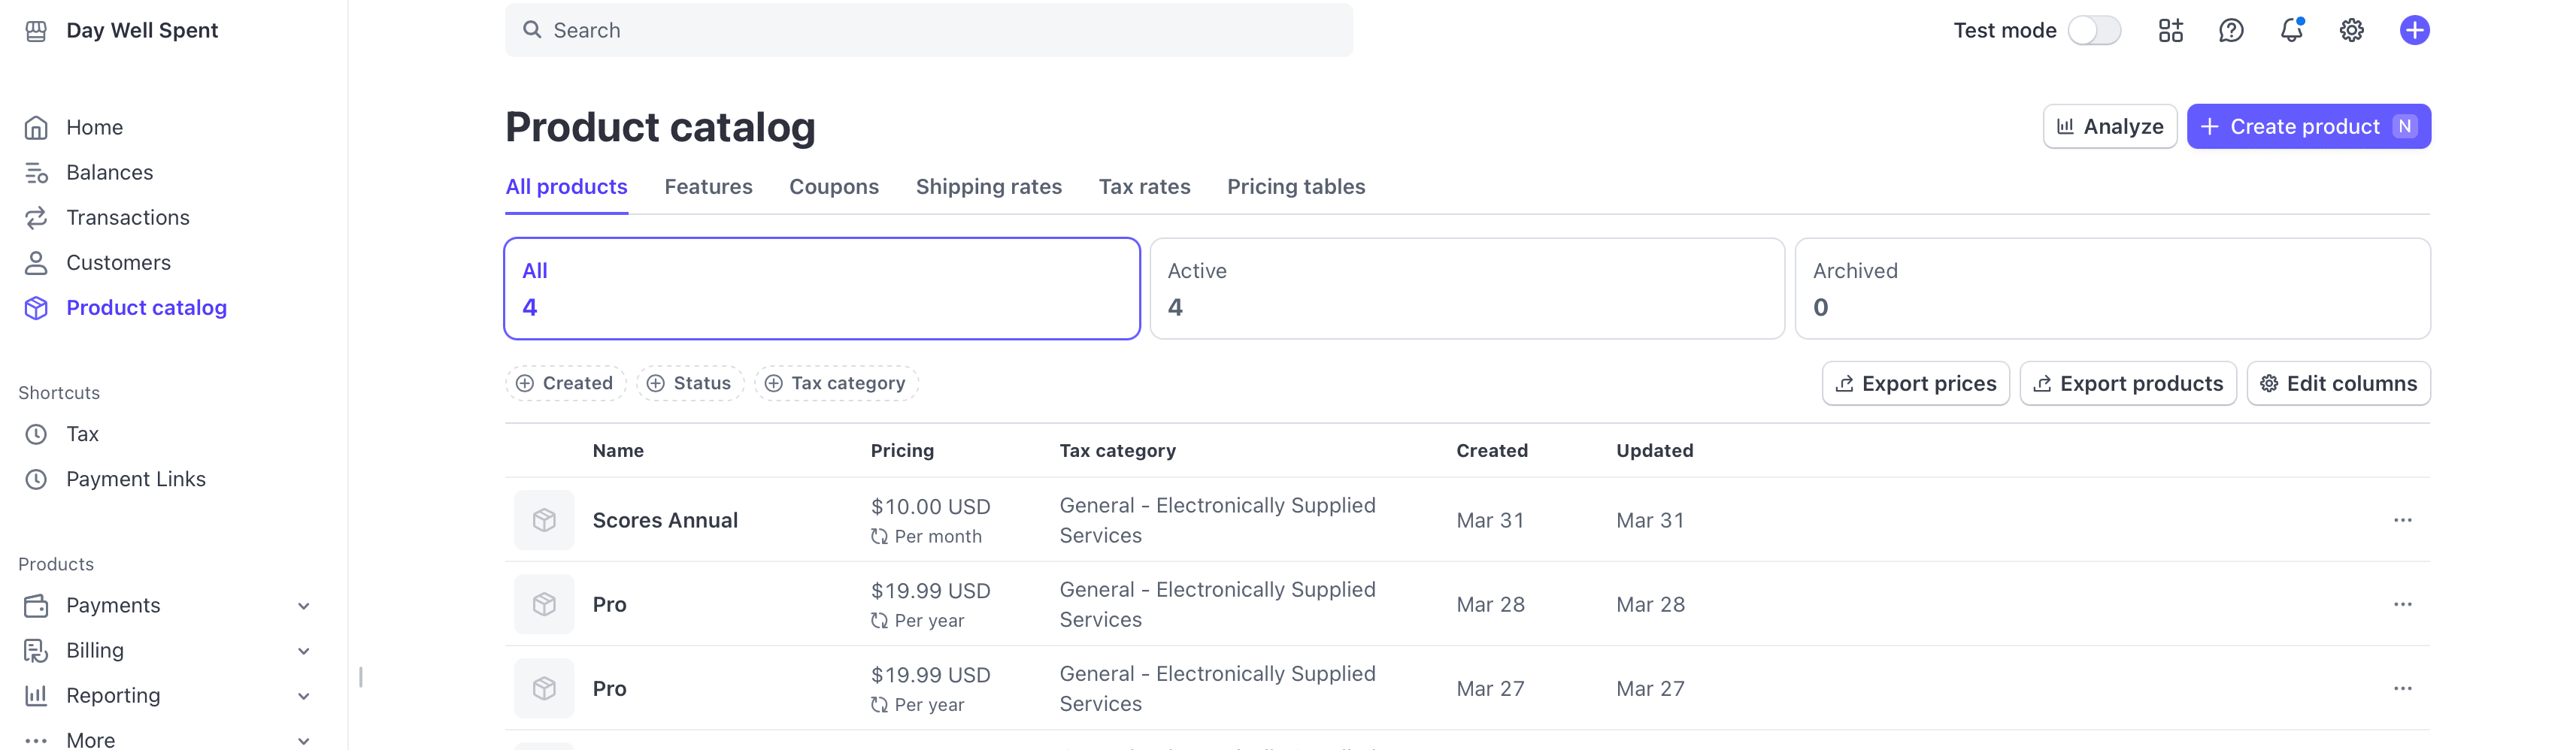
Now, when you return to Superwall, select your product from the **Products** drop down, and when you select the other fields, Superwall will pull in the data for you (aside from trials, which you choose when adding a Stripe product). Here, the new "Scores Annual" product created in Stripe shows up in the products menu now:
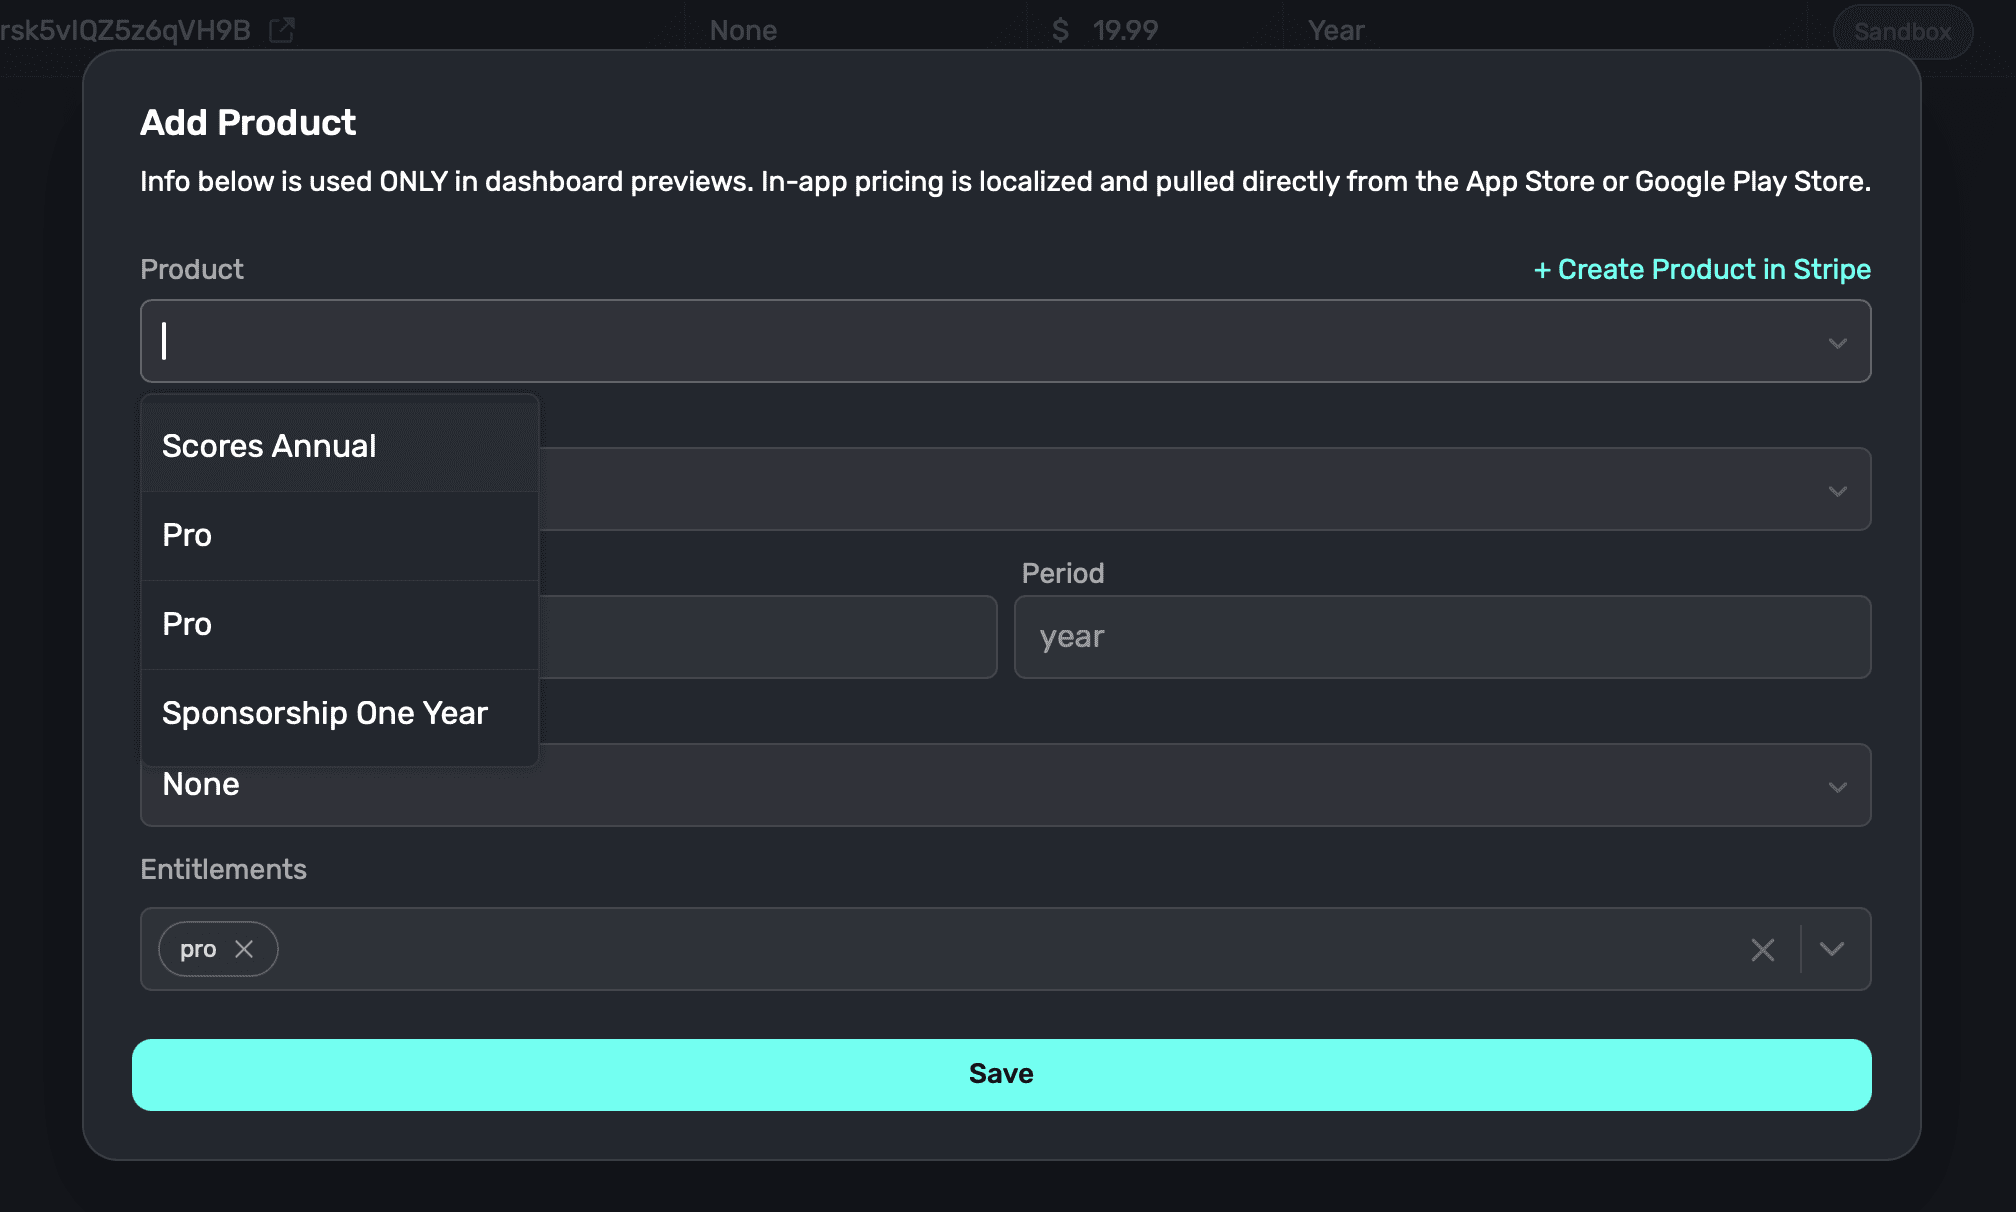
Be sure to associate the correct entitlement to the product as well.
**Adding products to paywalls**
Adding Stripe products to web paywalls works the exact same way as it does for mobile paywalls. Check out the docs [here](/paywall-editor-products). For a quick overview:
1. Open the paywall editor.
2. On the left sidebar click on **Products**.
3. Choose the products to add, as in the image below:

Keep in mind that to test products, it's as simple as adding a test product to a paywall and performing the checkout flow. For more information, please refer to [this doc](/web-checkout-testing-products).
### Sandbox products
Sandbox products are used to test purchases. When you create one, you can add it to any web paywall to test check out flows. You create sandbox products the same you create other products, just choose "Sandbox Product" when creating a product. You'll see a sandbox banner at the top of Stripe when you create these types of products:
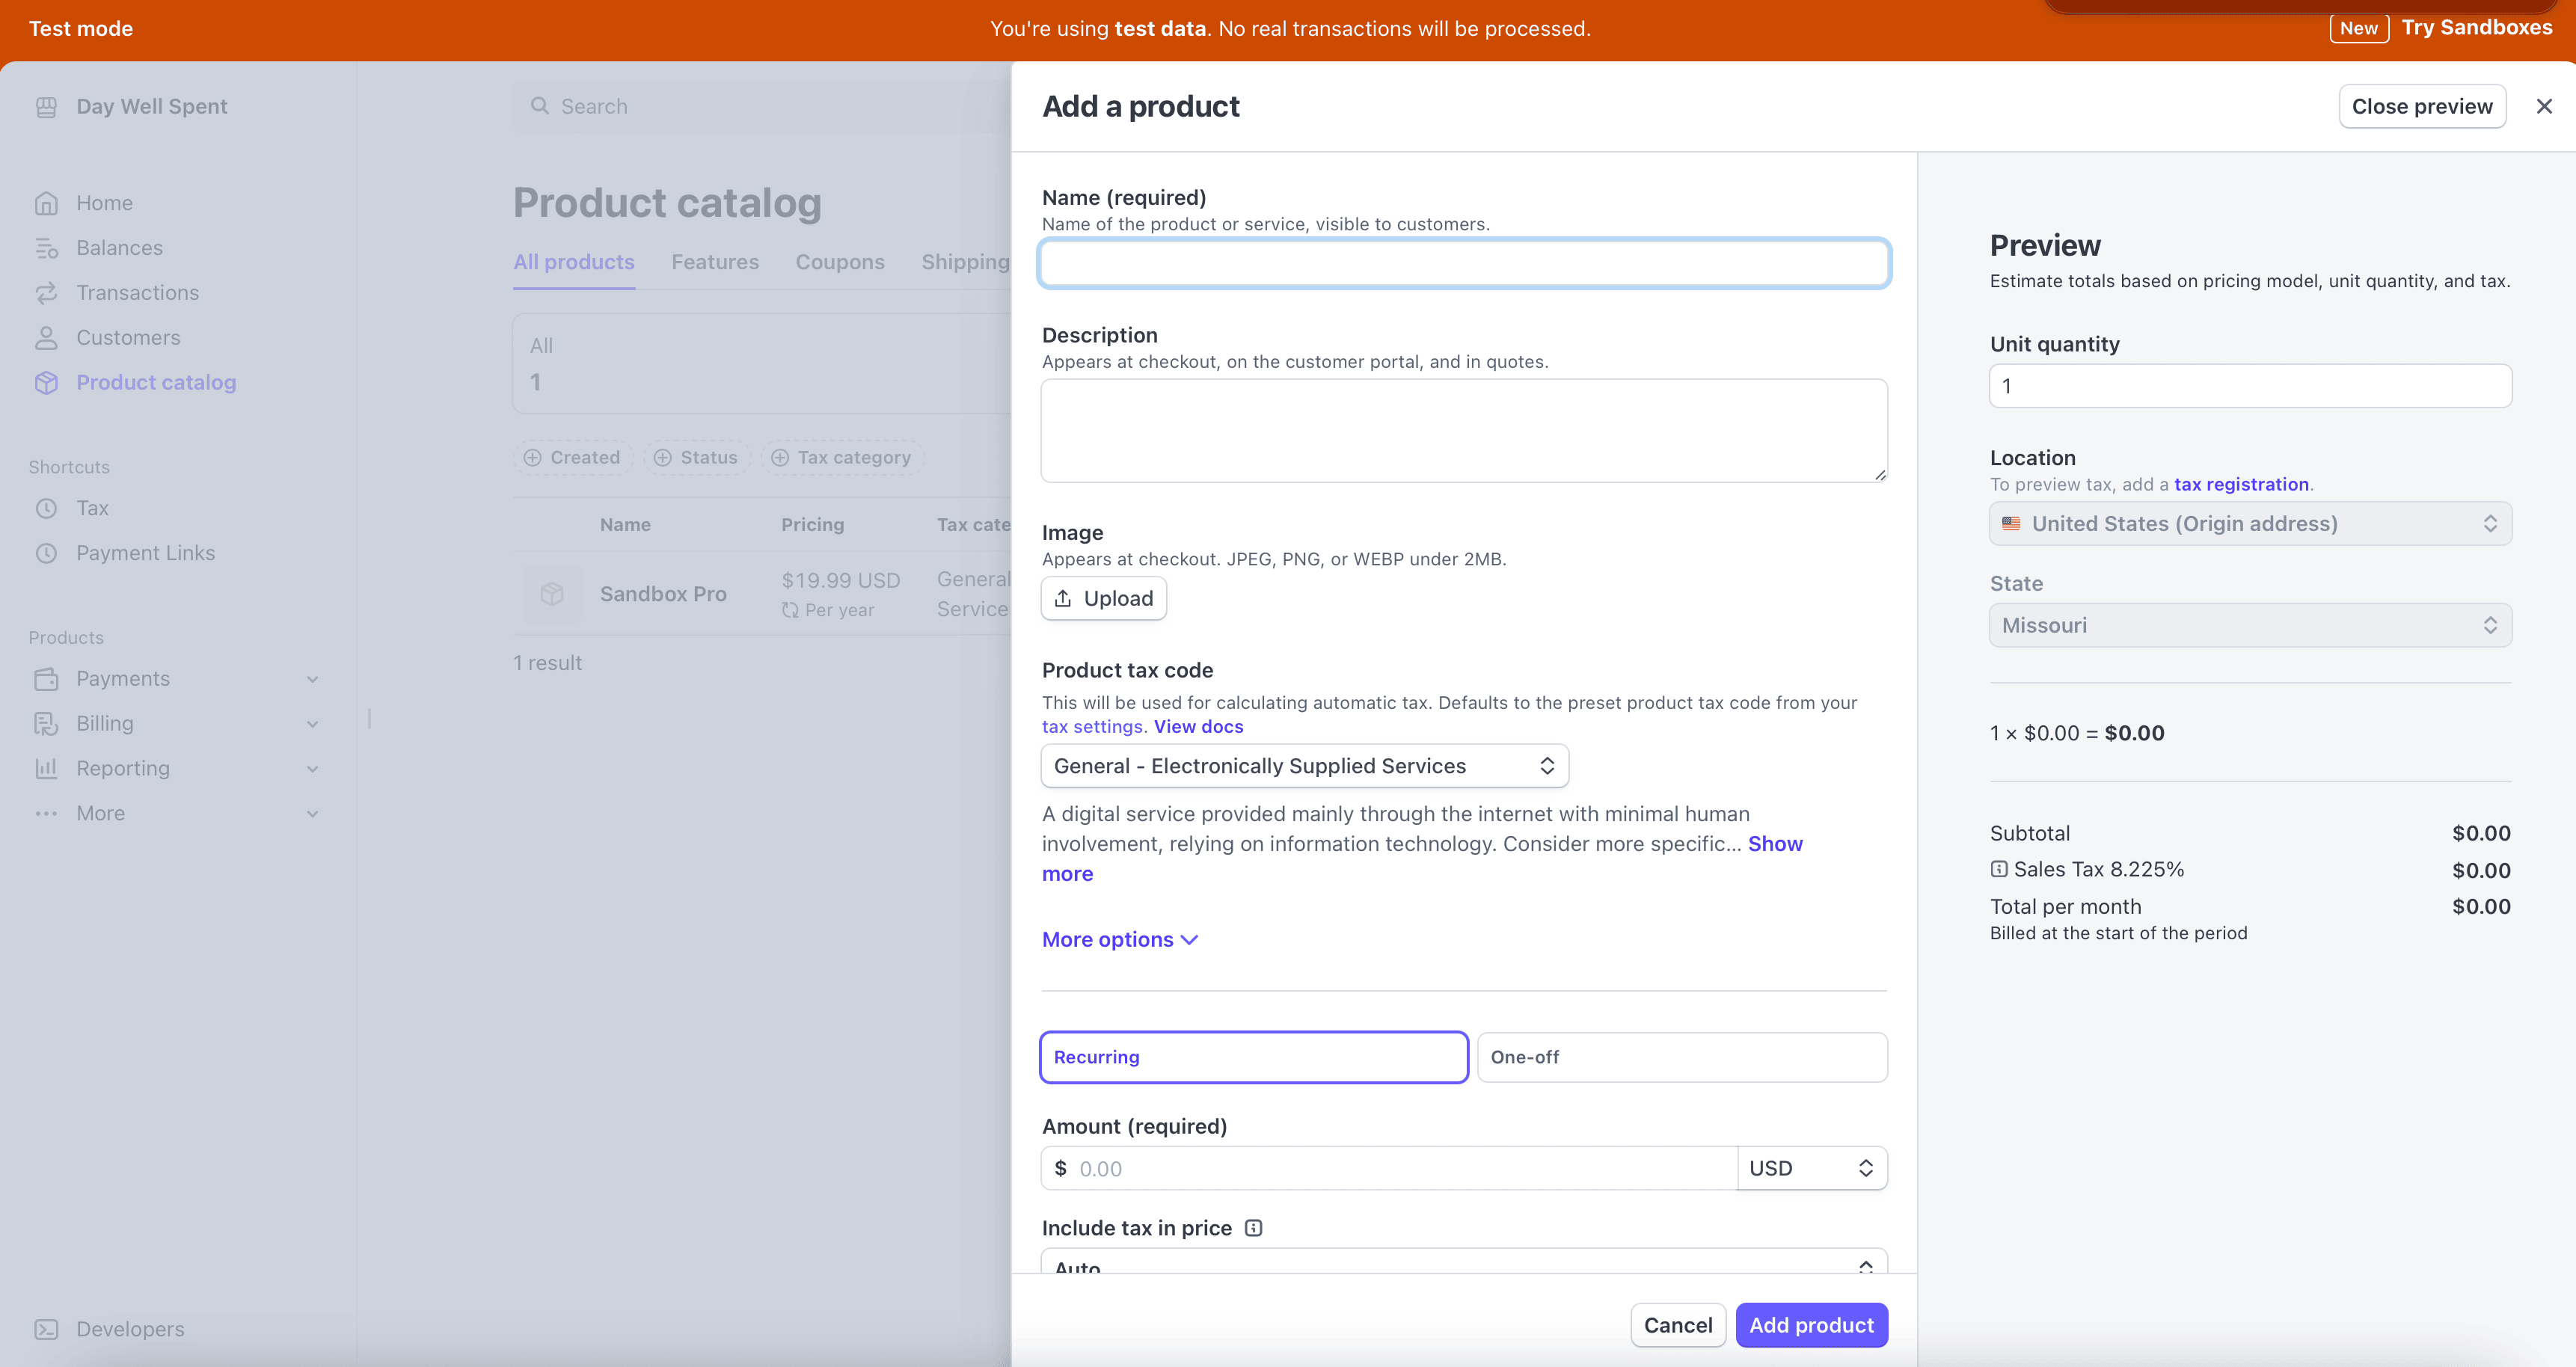
Once you've created a sandbox product in Stripe, import them to Superwall the same way as you would a normal product, and then they are ready for use in a paywall. Within the products page, Superwall will show which environment each product belongs to:
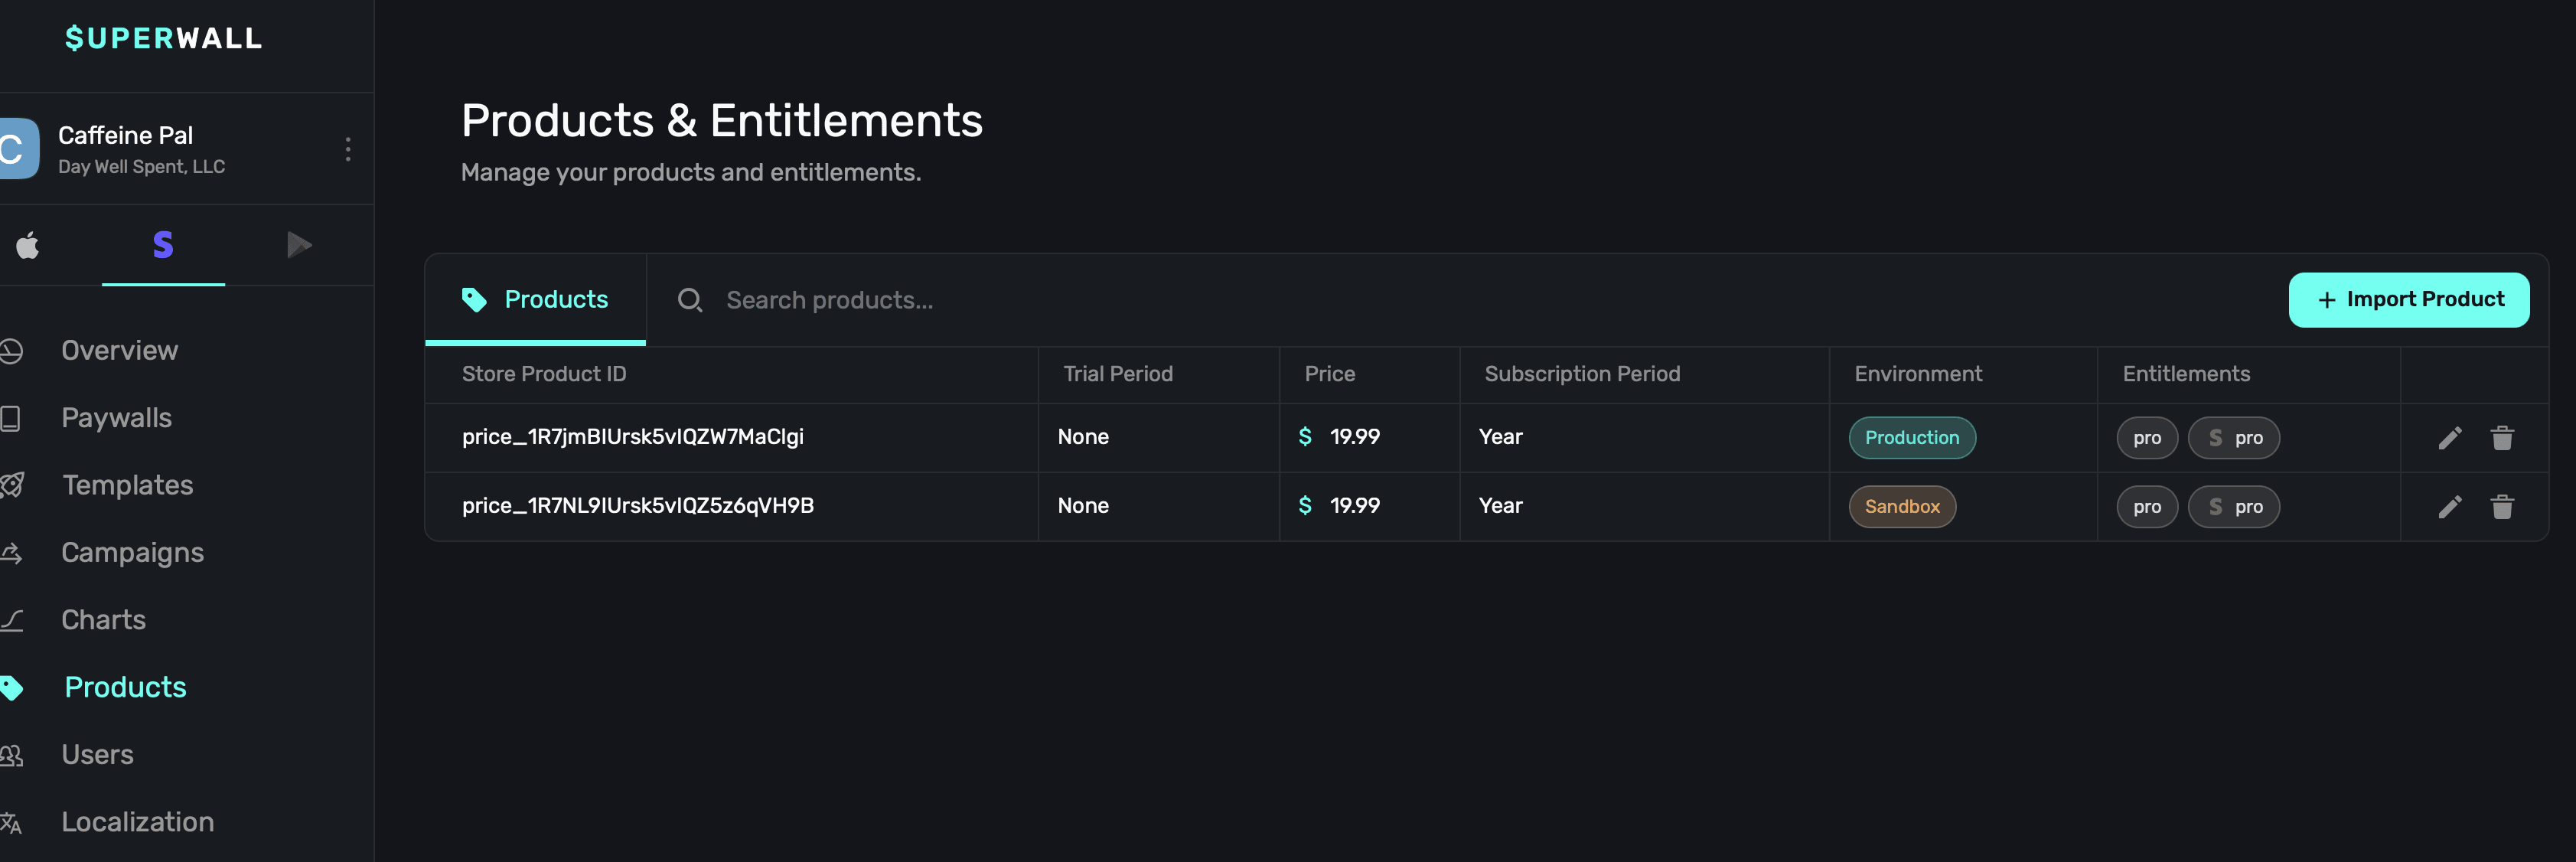
When testing with sandbox products, you can see their details in the Overview page. **For this to work, all products on a paywall must be test products.** Put differently, the sandbox metrics won't show here if you mixed and matched live and sandbox products on the same paywall when testing:
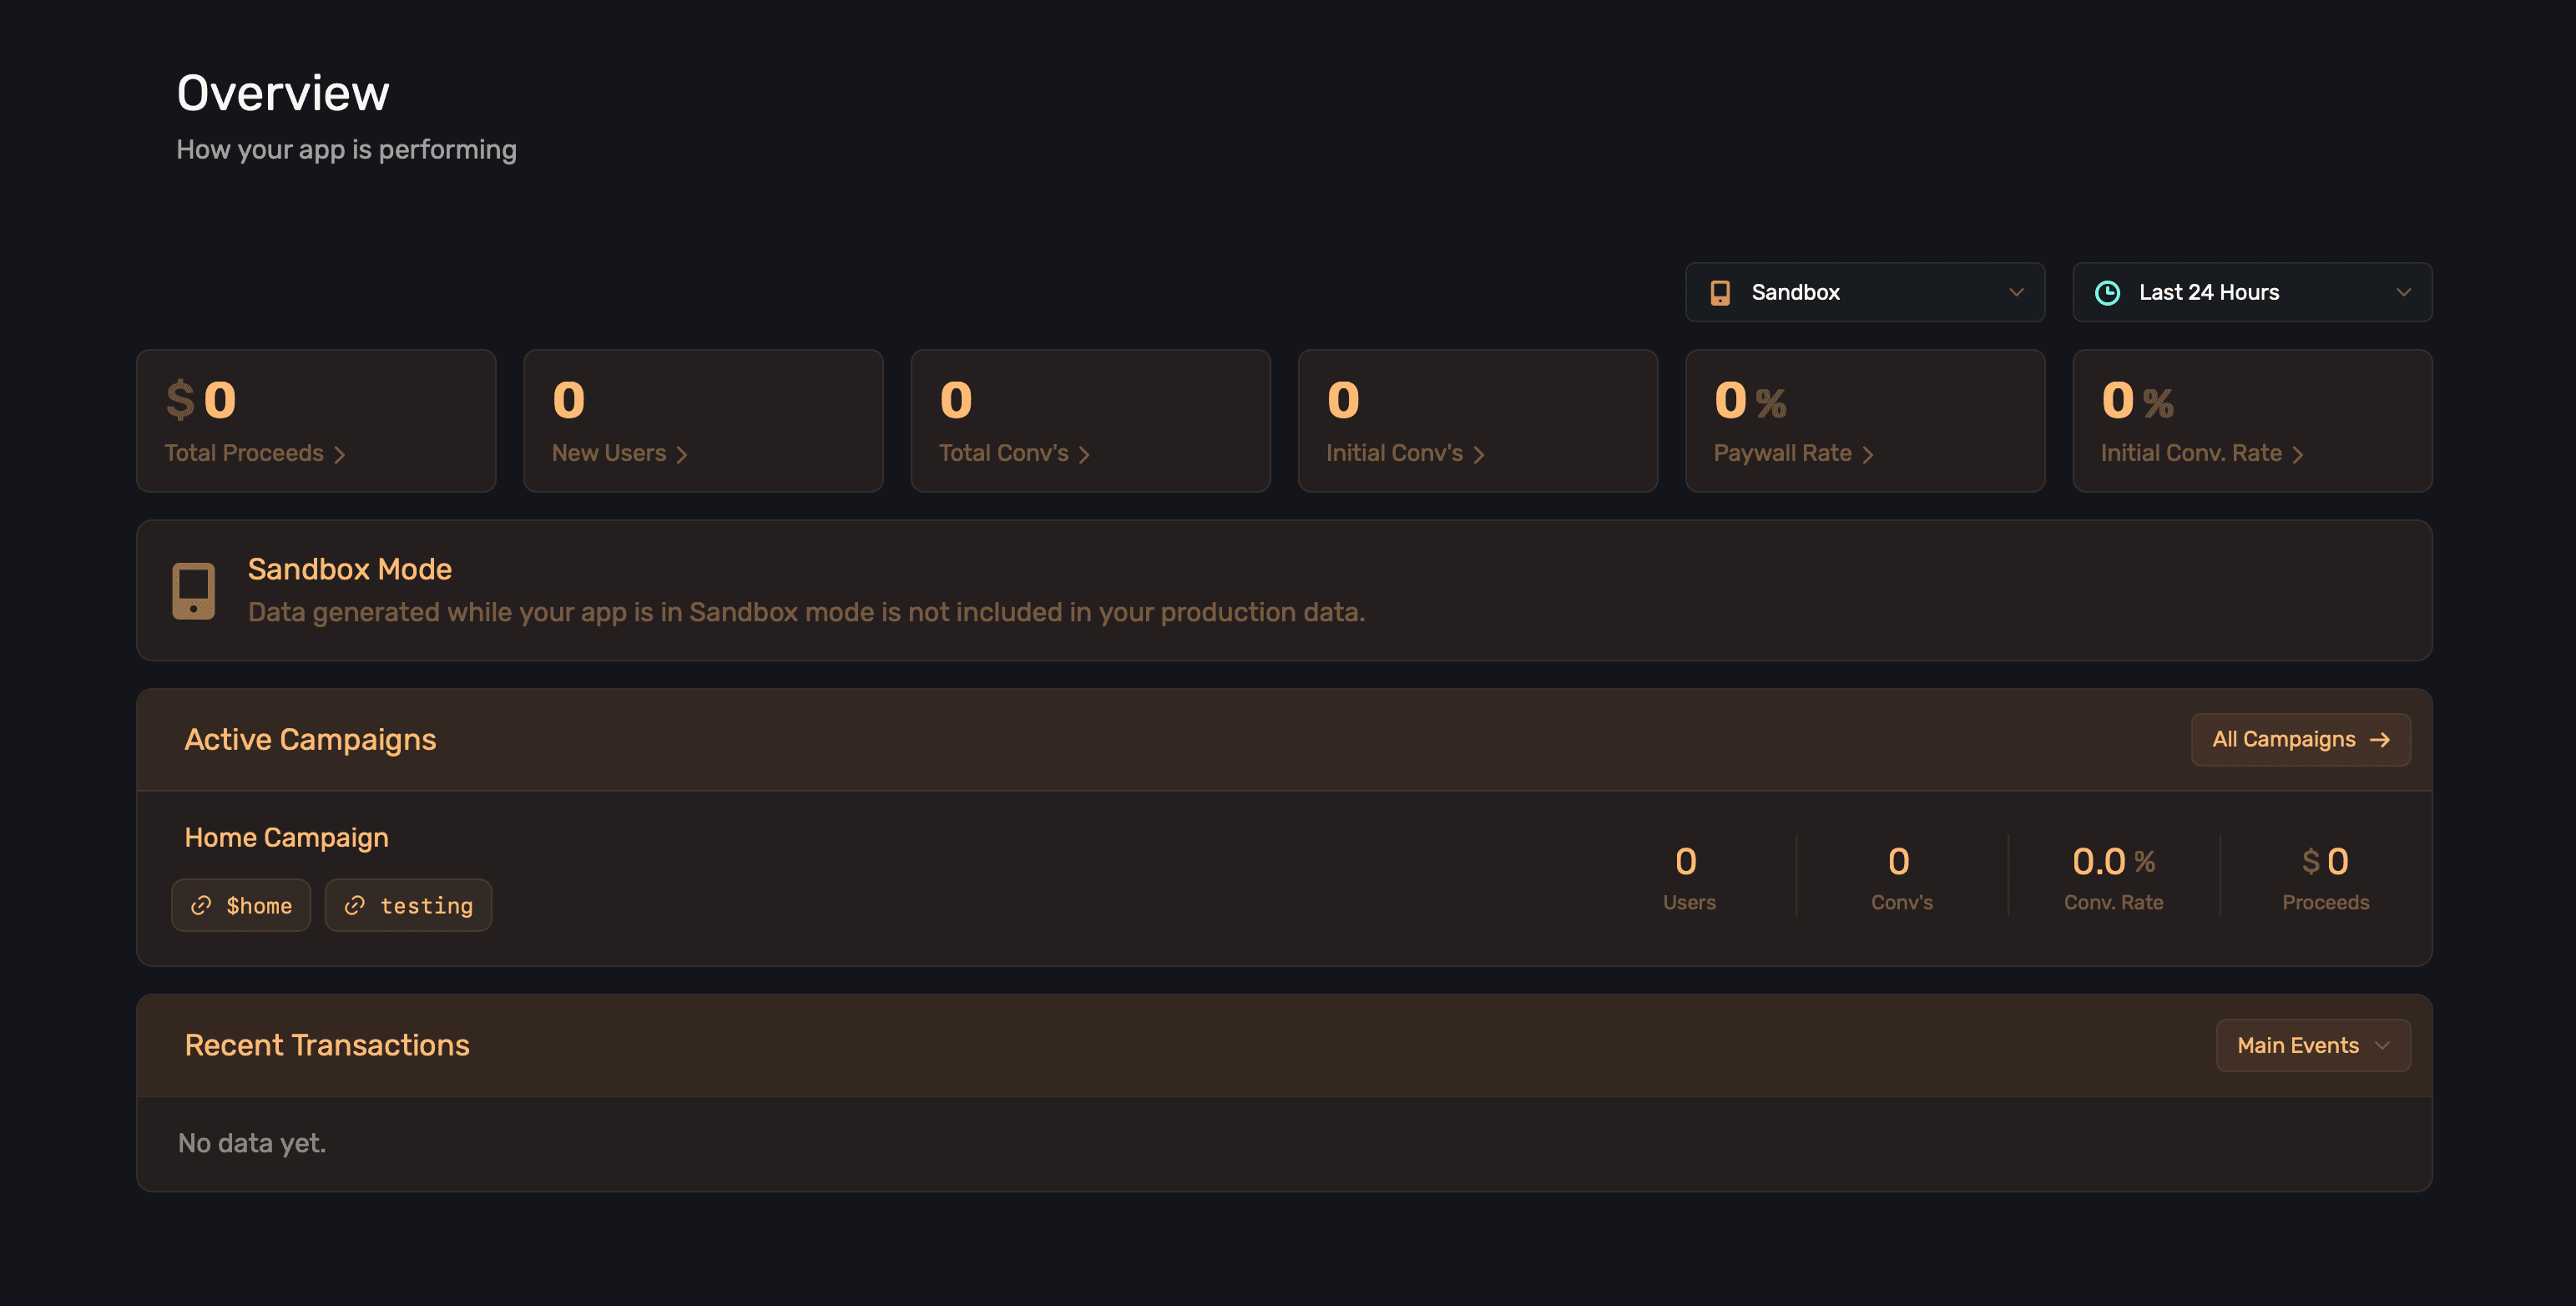
### Free trials
Trials are controlled by Superwall, they are not set up in Stripe. When you go to add a product, you choose the terms. You can also reuse the same product ID multiple times to create different trial lengths. This is a powerful capability, as it avoids the need to create a similar product over and over just to offer different trial terms. For example, you can use the same product ID with a one week trial, no trial, 3 day trial, and any other terms you need — these will all be represented as individual products you can add to paywalls.
# Configuring Stripe Keys and Settings
Source: https://superwall.com/docs/web-checkout-configuring-stripe-keys-and-settings
Create your Stripe keys to connect Superwall to Stripe. Fill out some settings to configure your app.
Once you've created a [Stripe app](/web-checkout-creating-an-app), you'll need to configure it with your Stripe keys and fill in a few settings. This is a one-time setup that connects Superwall to Stripe. The easiest way to get started is to click on the link in your overview page, which will take you to your app's [Settings](/overview-settings) page:
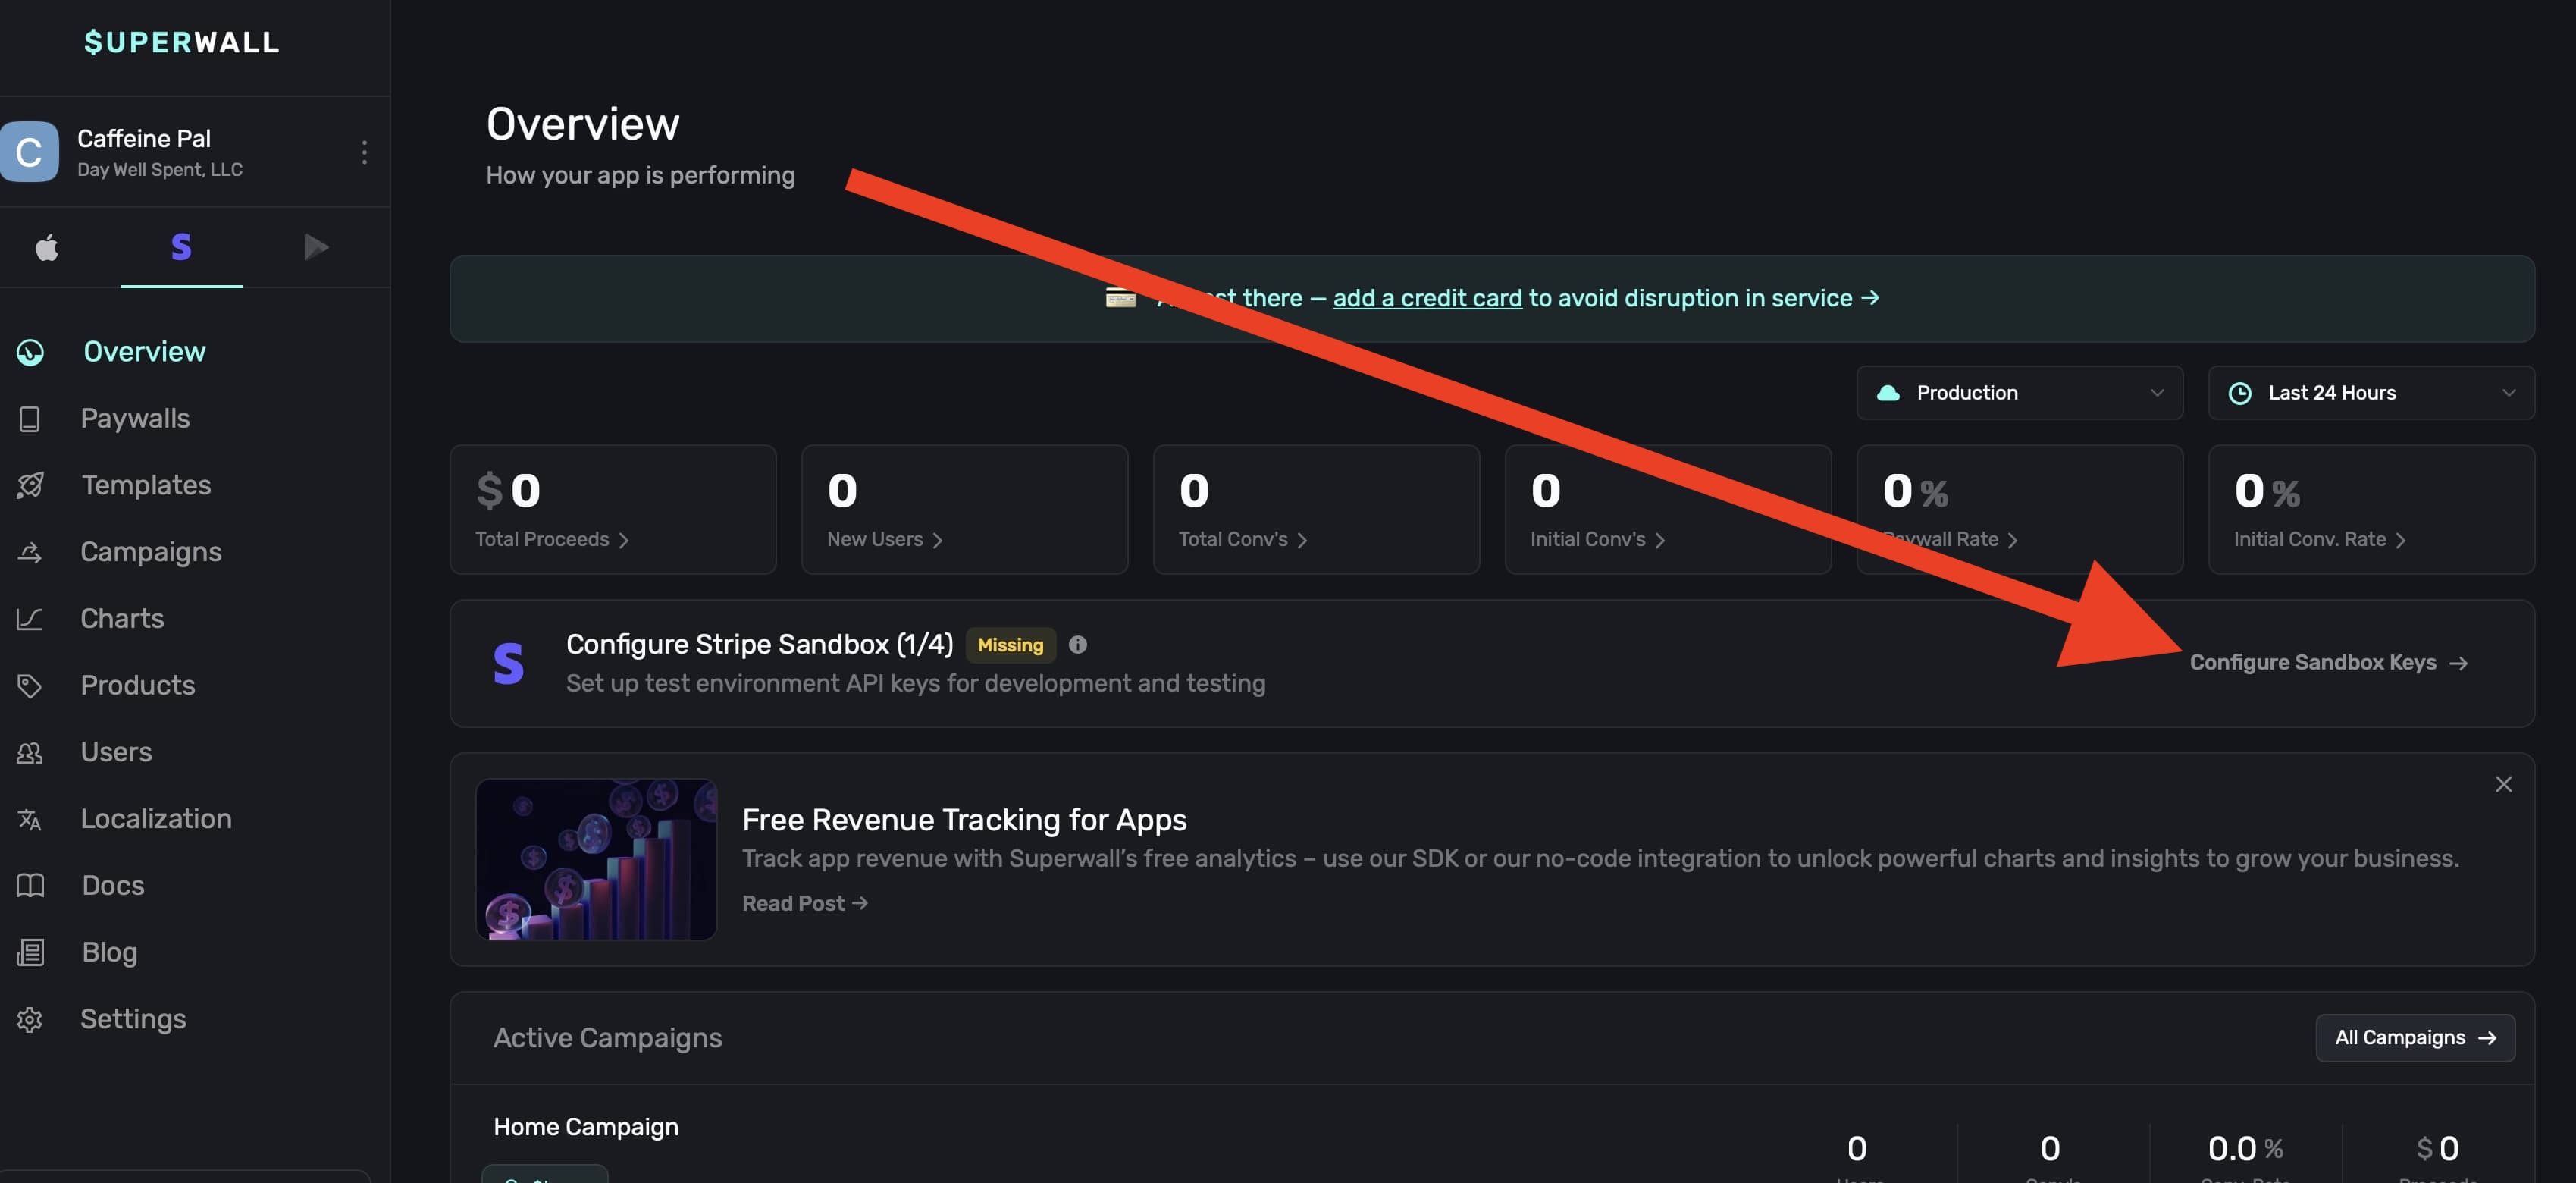
### Application settings
Fill out metadata about your iOS app in this section.

1. **Icon:** An icon to represent your app, we recommend using the same one that your iOS app does. This will appear on the checkout and subscription management pages.
2. **Web Paywall Domain:** The domain your paywalls will be shown from. This was set when the Stripe app was created, and cannot be changed.
3. **Application Name:** The name of your app, we recommend using the same name as your iOS app.
4. **Support URL:** A URL to your support page. This will be shown on the checkout and subscription management pages.
5. **Support Email:** An email you provide customers for support questions and general reach out
6. **Redeemable on Desktop:** If your app is an iPad app on Mac, enable this option so that users can redeem products on their Mac. If you aren't using iPads Apps on the Mac, you can disable this. If this is disabled, Superwall enforces redemption on an iOS device.
Once you've filled out this information, **click** on the **Update Application** button.
### Stripe Live Configuration
This section allows you to connect Stripe keys with Superwall. You will need:
1. **Publishable Key:** A Stripe publishable key. Stripe creates this key for you, you don't need to generate it yourself.
2. **Secret Key:** A Stripe secret key that you create. Once you've made one, paste it here.
To access these, click on the **[API Keys](https://dashboard.stripe.com/apikeys)** link:

Under **Restricted Keys**, click on **+ Create restricted key**:
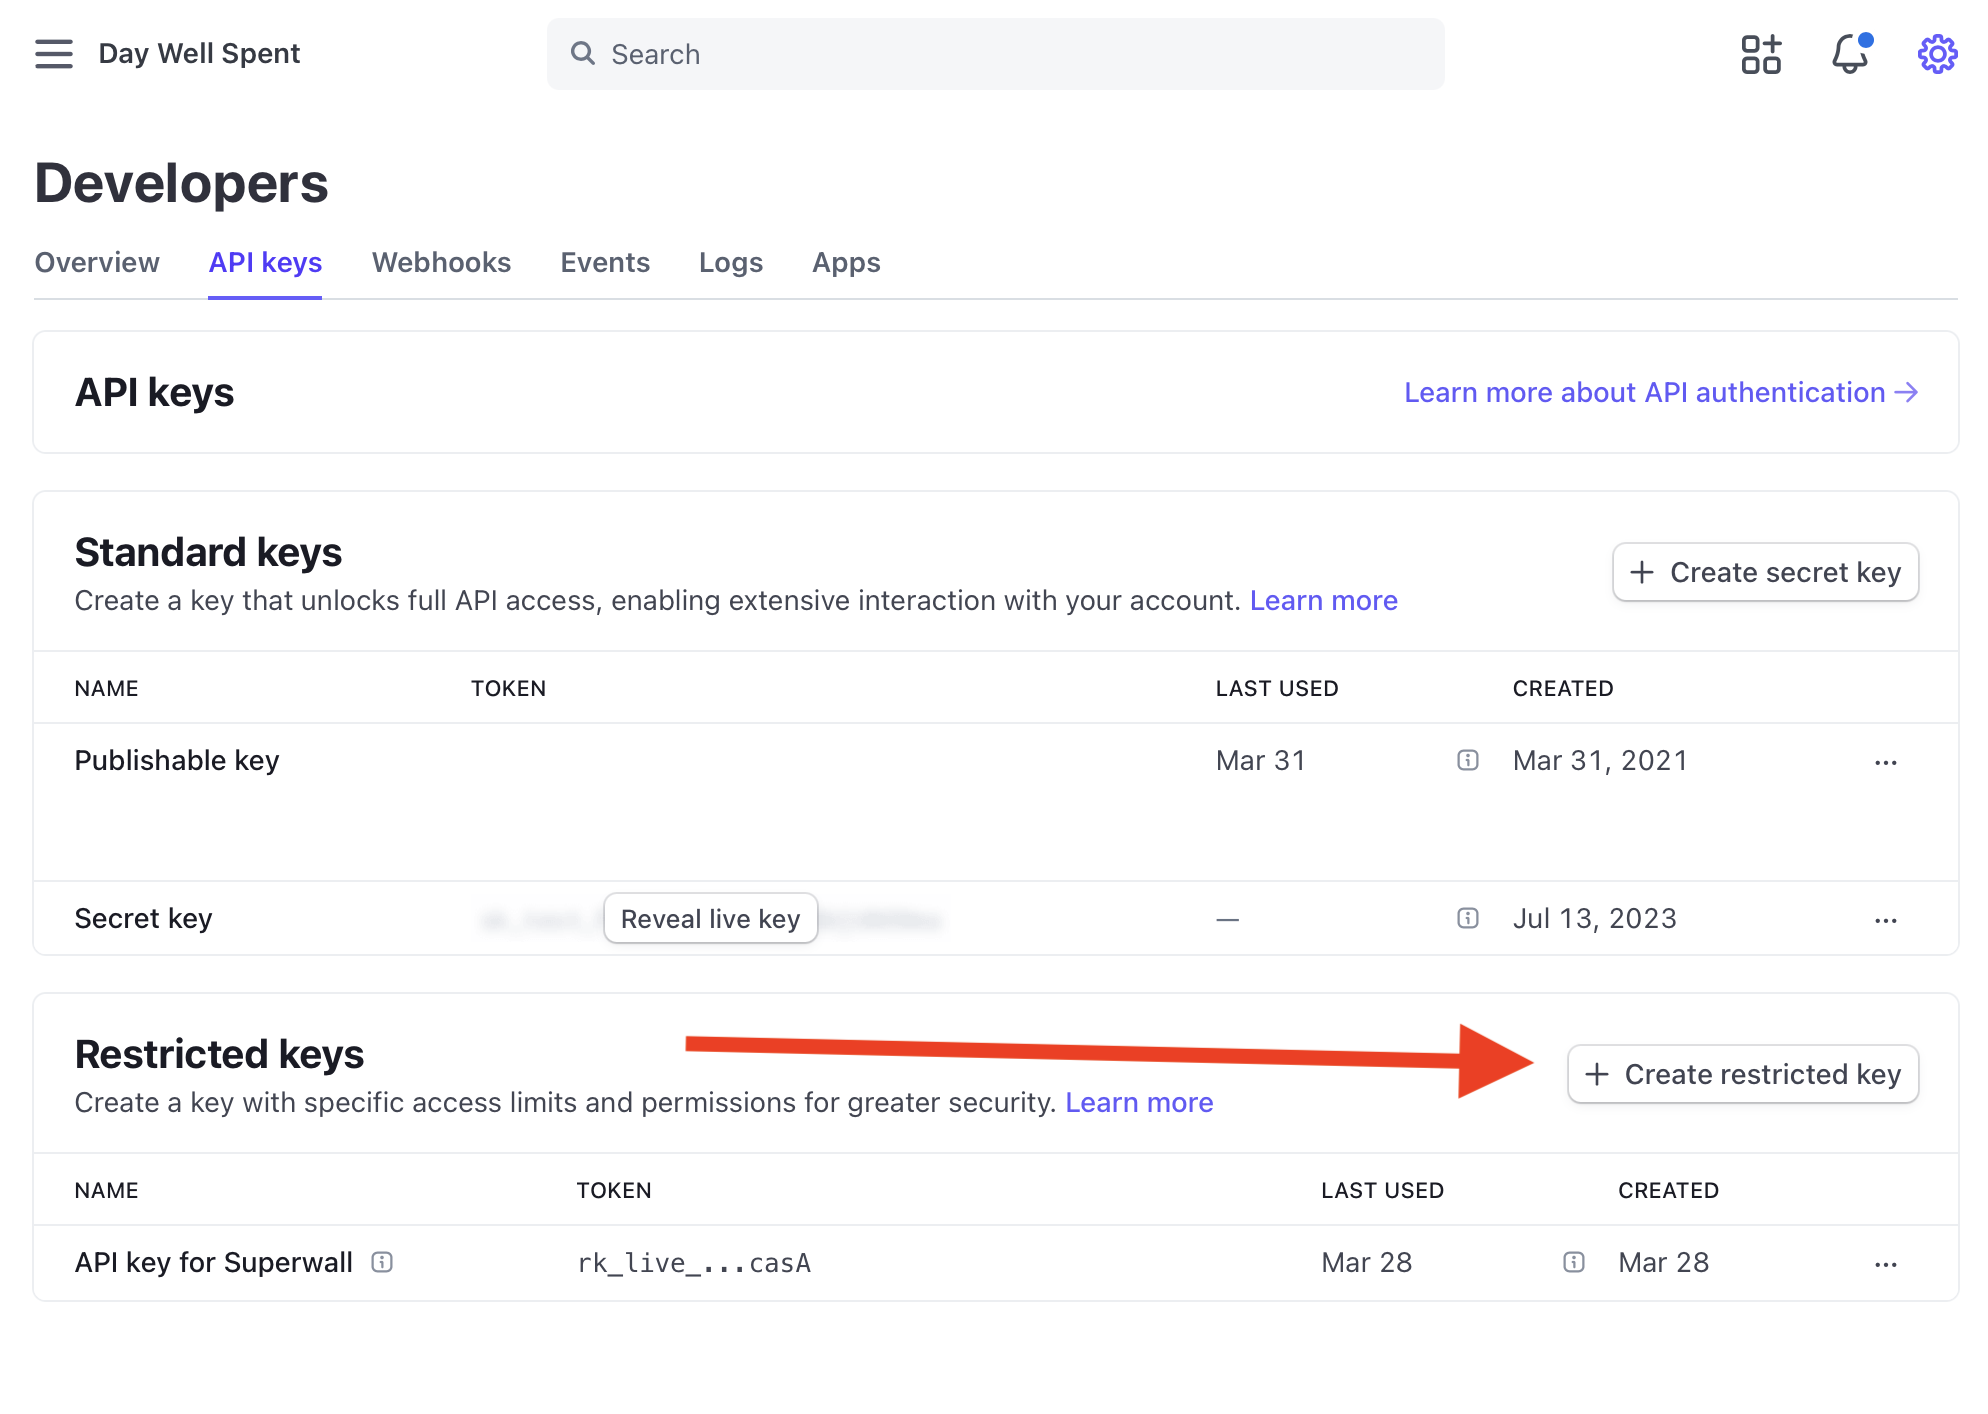
Choose "Providing this key to another website" and click **Continue ->**:

Use "Superwall" as the name and "superwall.com" as the URL, then click **Create restricted key**:
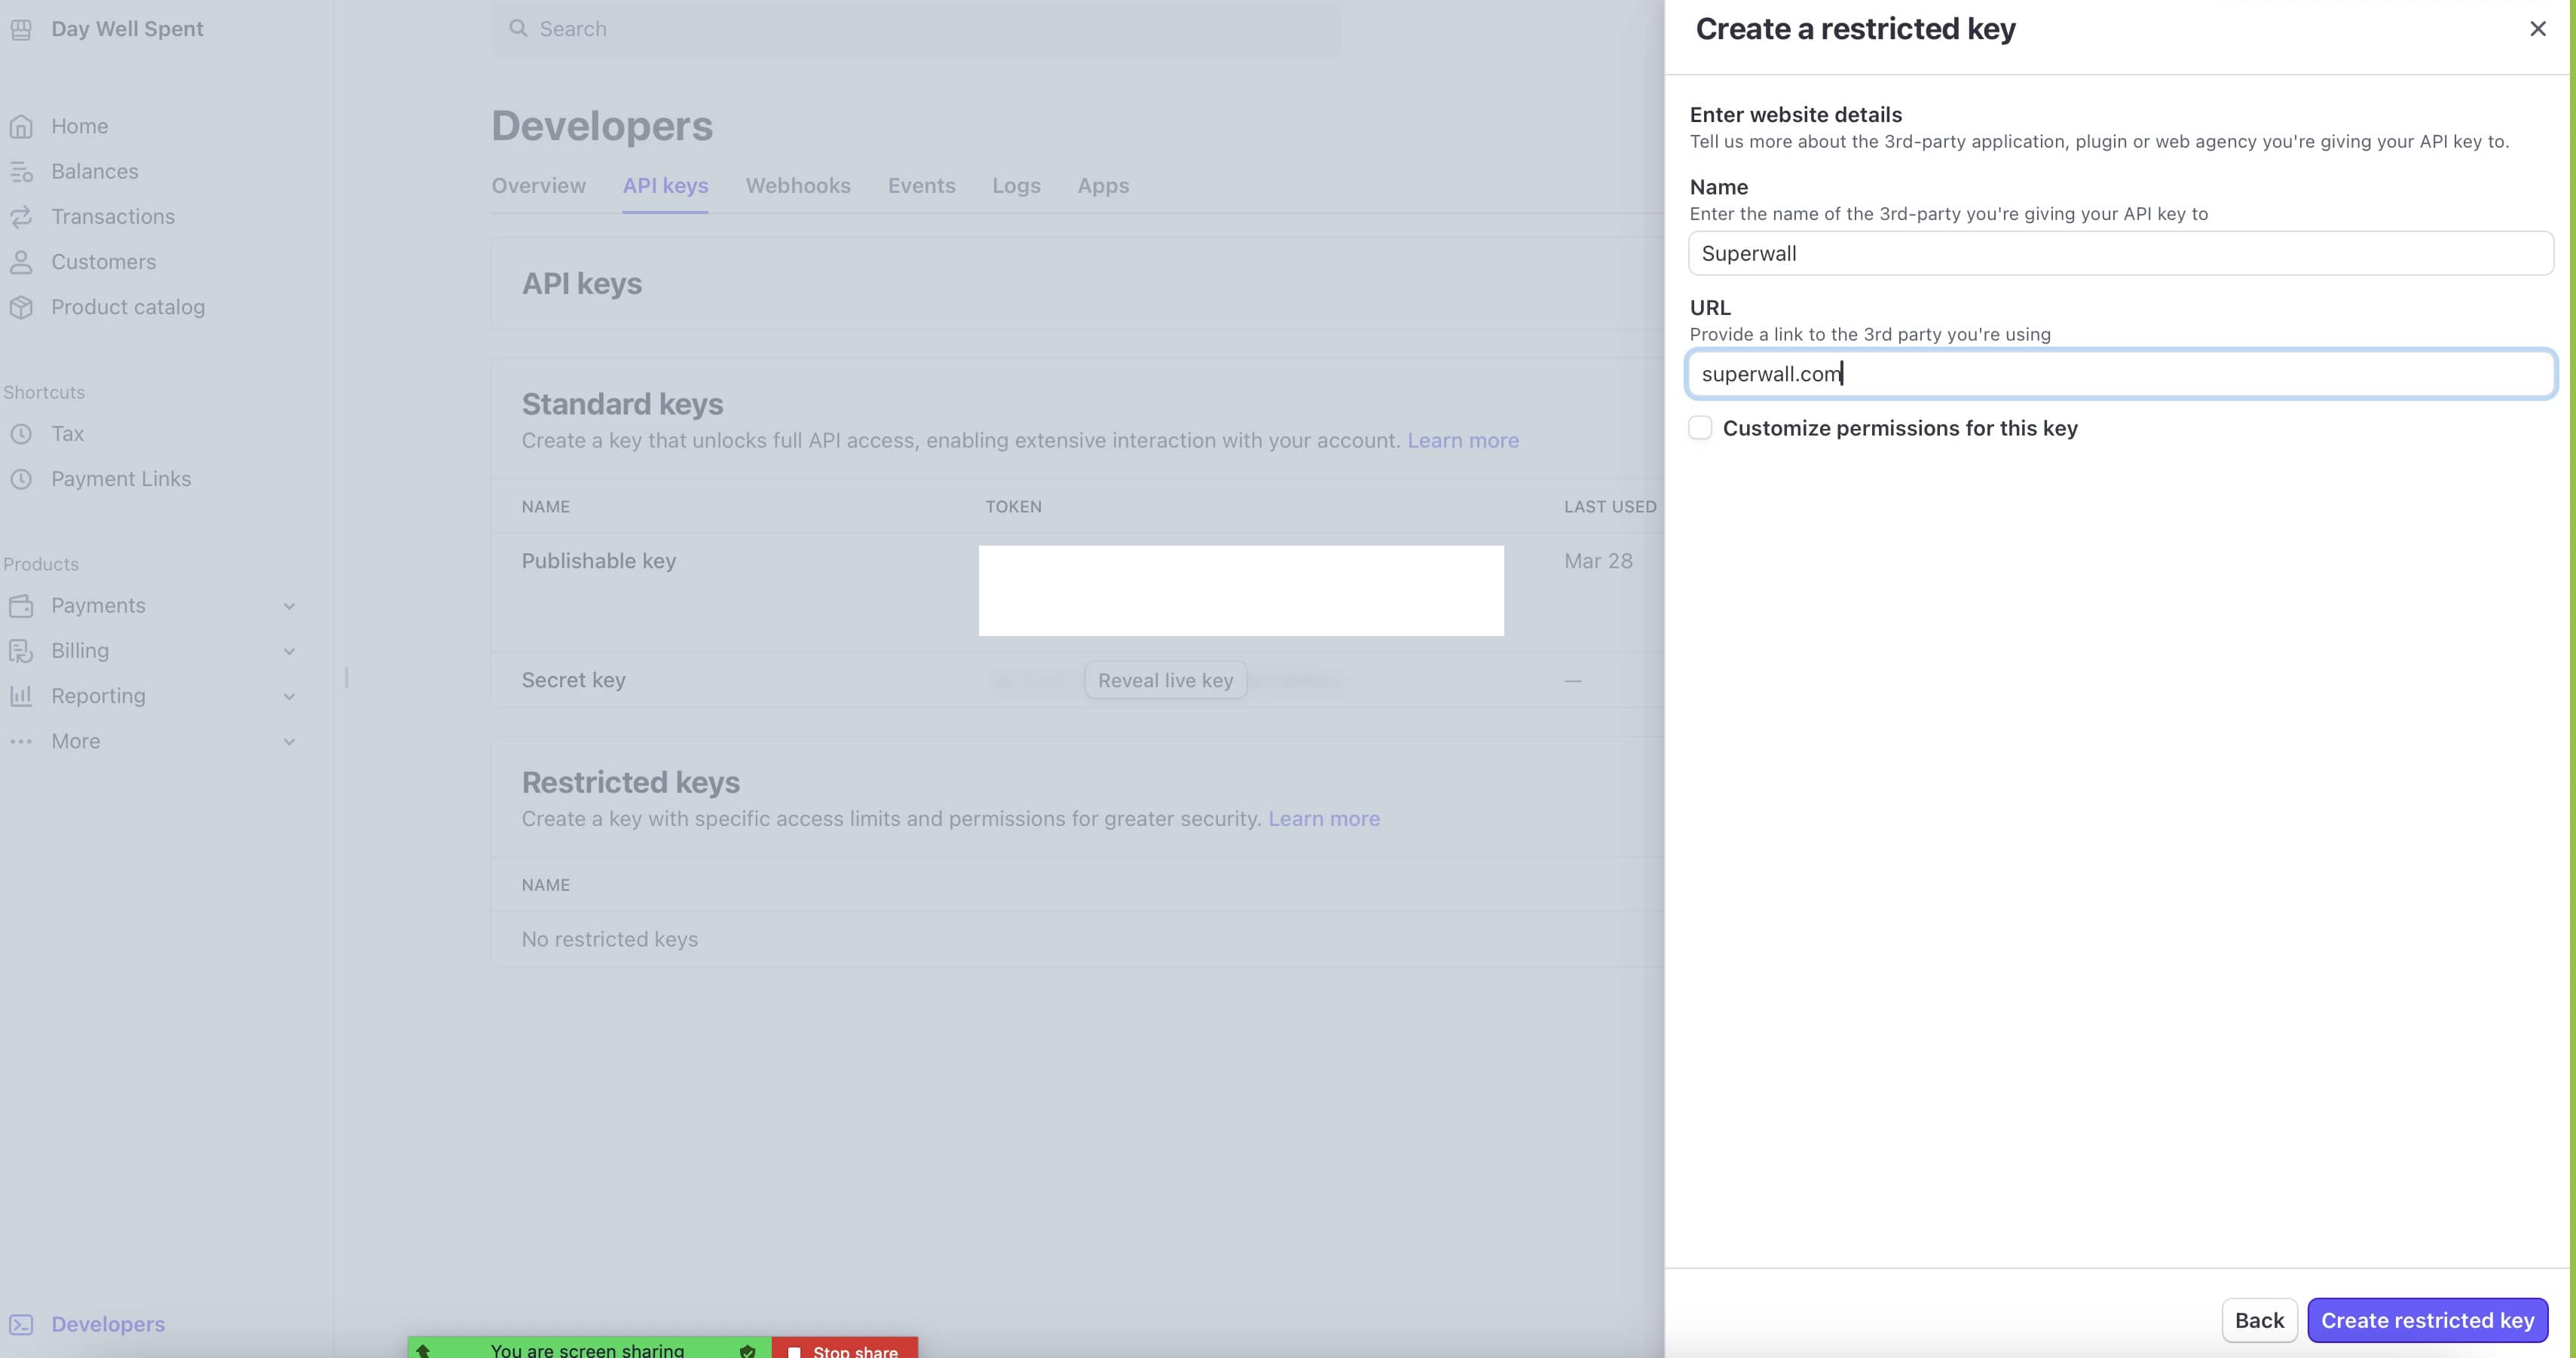
You'll get a modal of your restricted key, **copy this to your clipboard**, you won't be able to view it again:
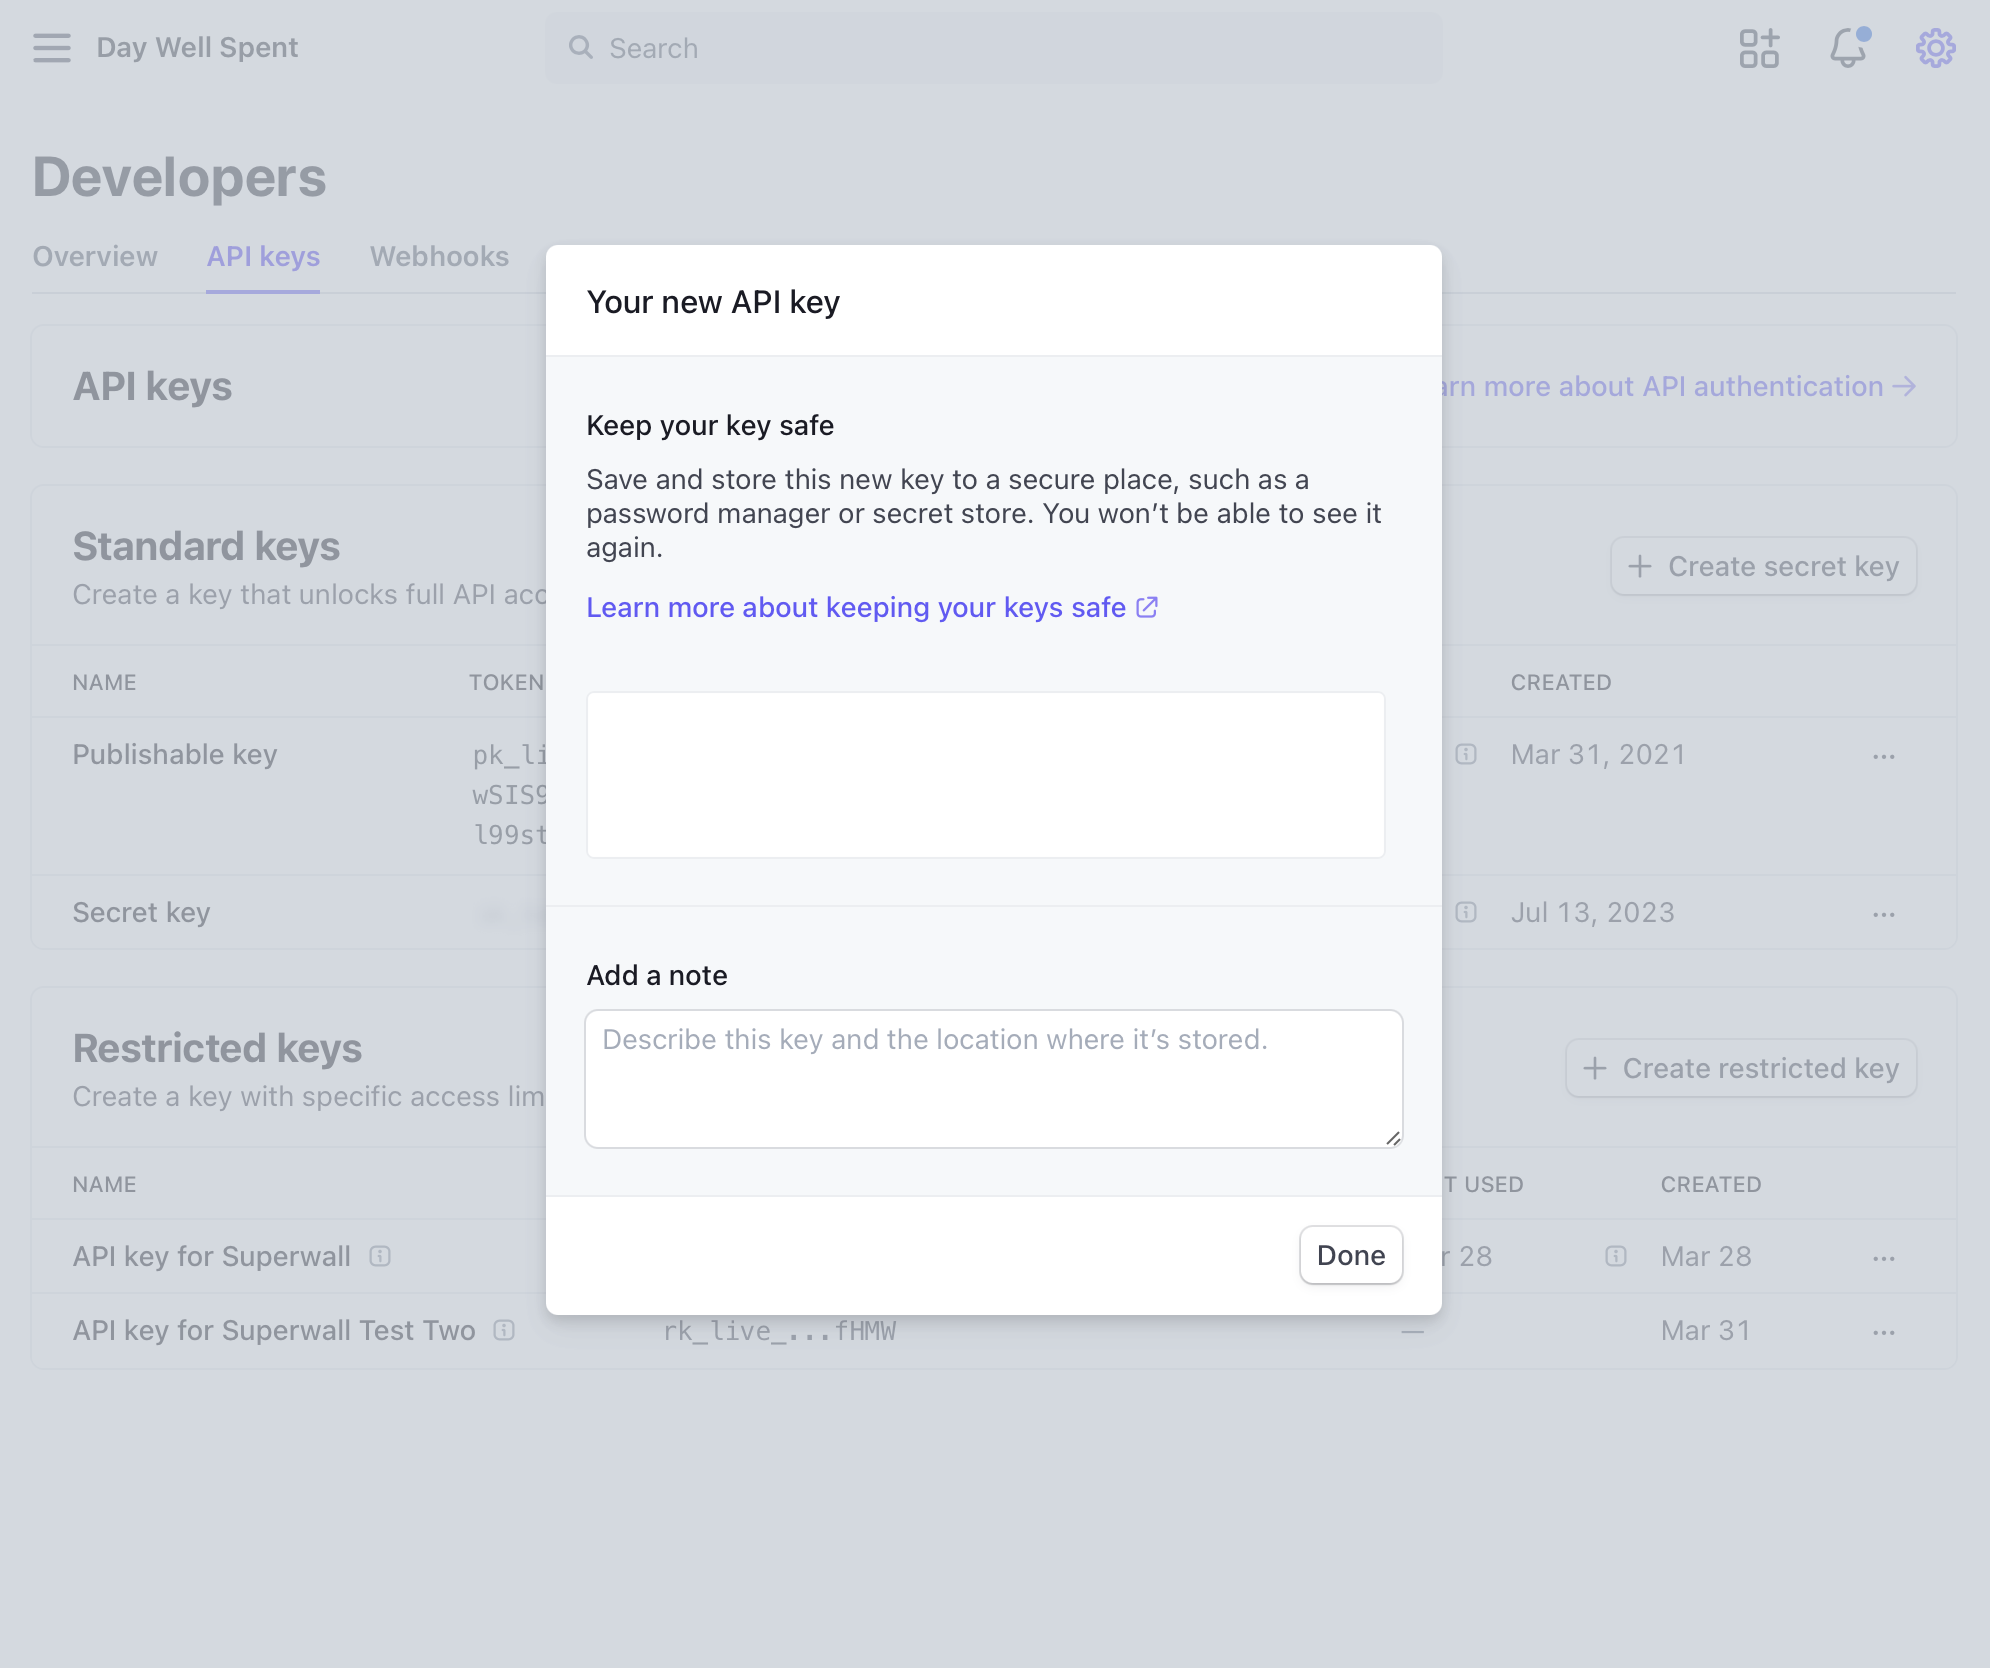
From there, copy your **Publishable Key** and **copied key** from the Stripe dashboard to Superwall:
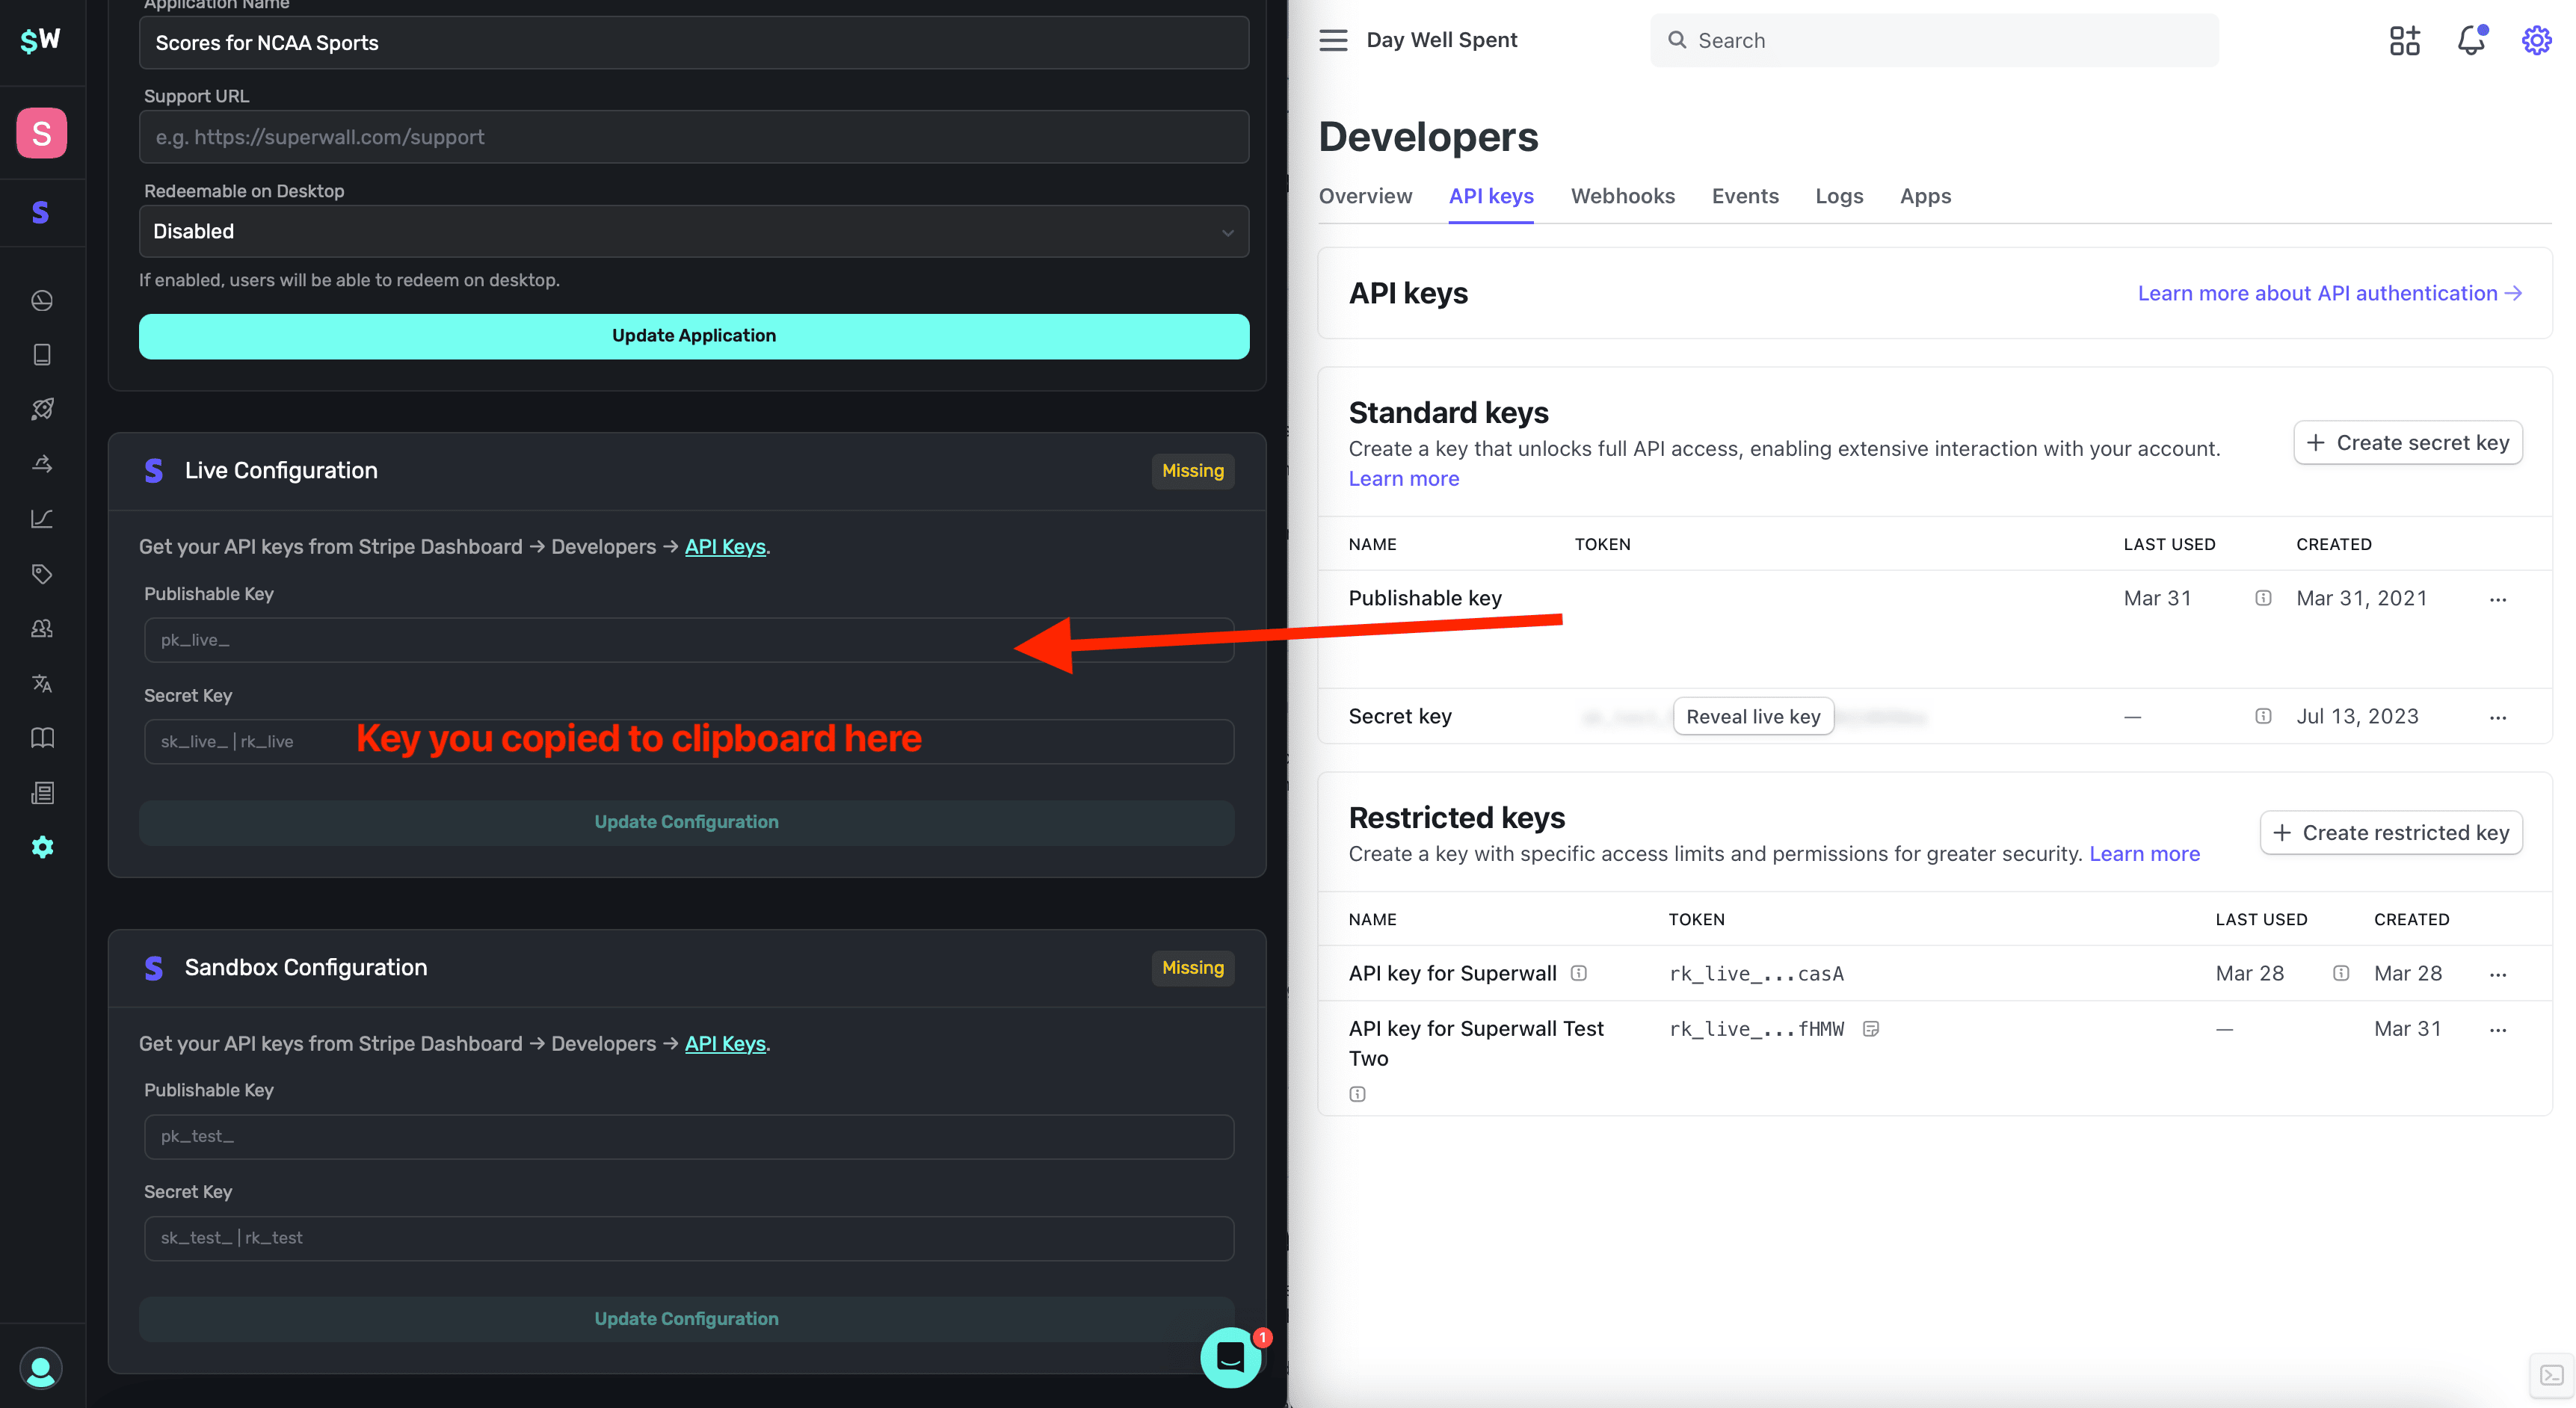
Once you've provided those two keys, **click** on **Update Configuration** to save your changes. This section should say "Configured" at the top right if setup was successful:
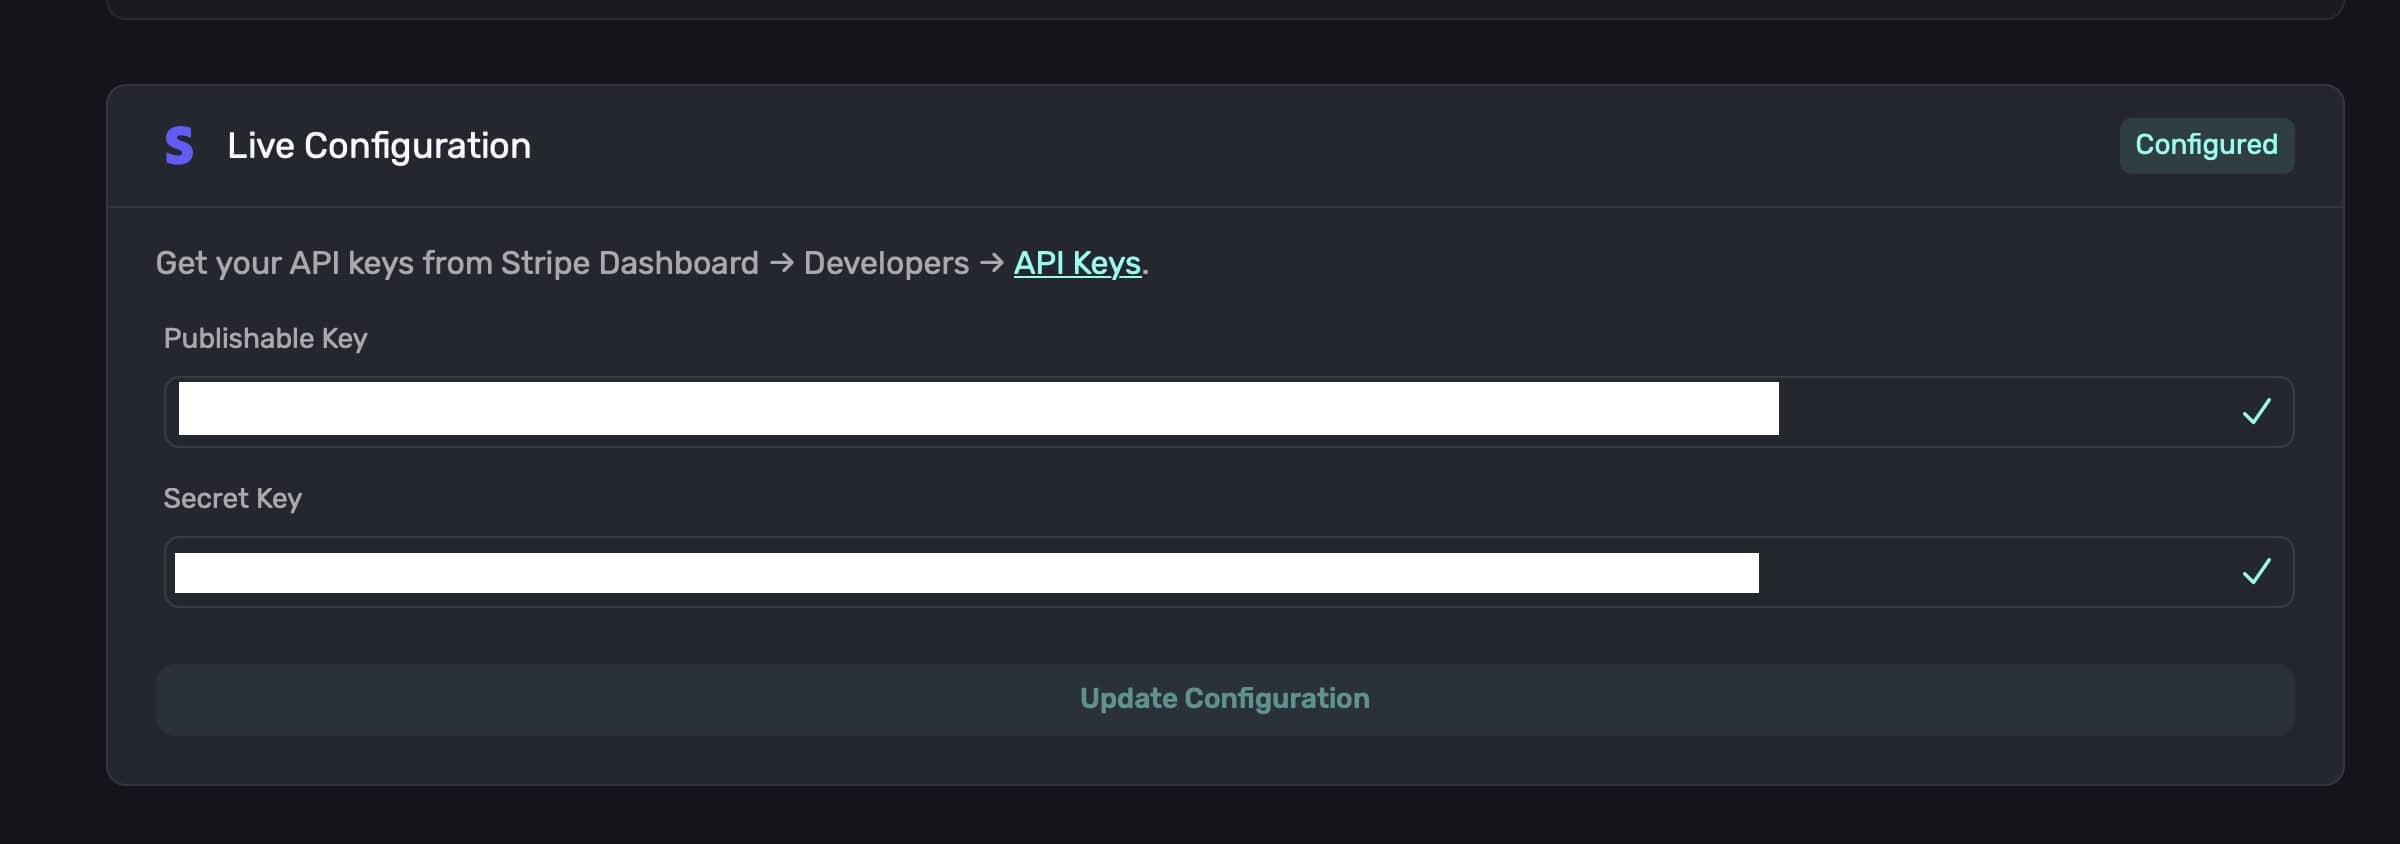
### Stripe Sandbox Configuration
For the sandbox configuration, you'll follow the same previous steps, **except you retrieve the keys from this link**: [Stripe Sandbox API Keys](https://dashboard.stripe.com/test/apikeys).
You should see something similar to this:
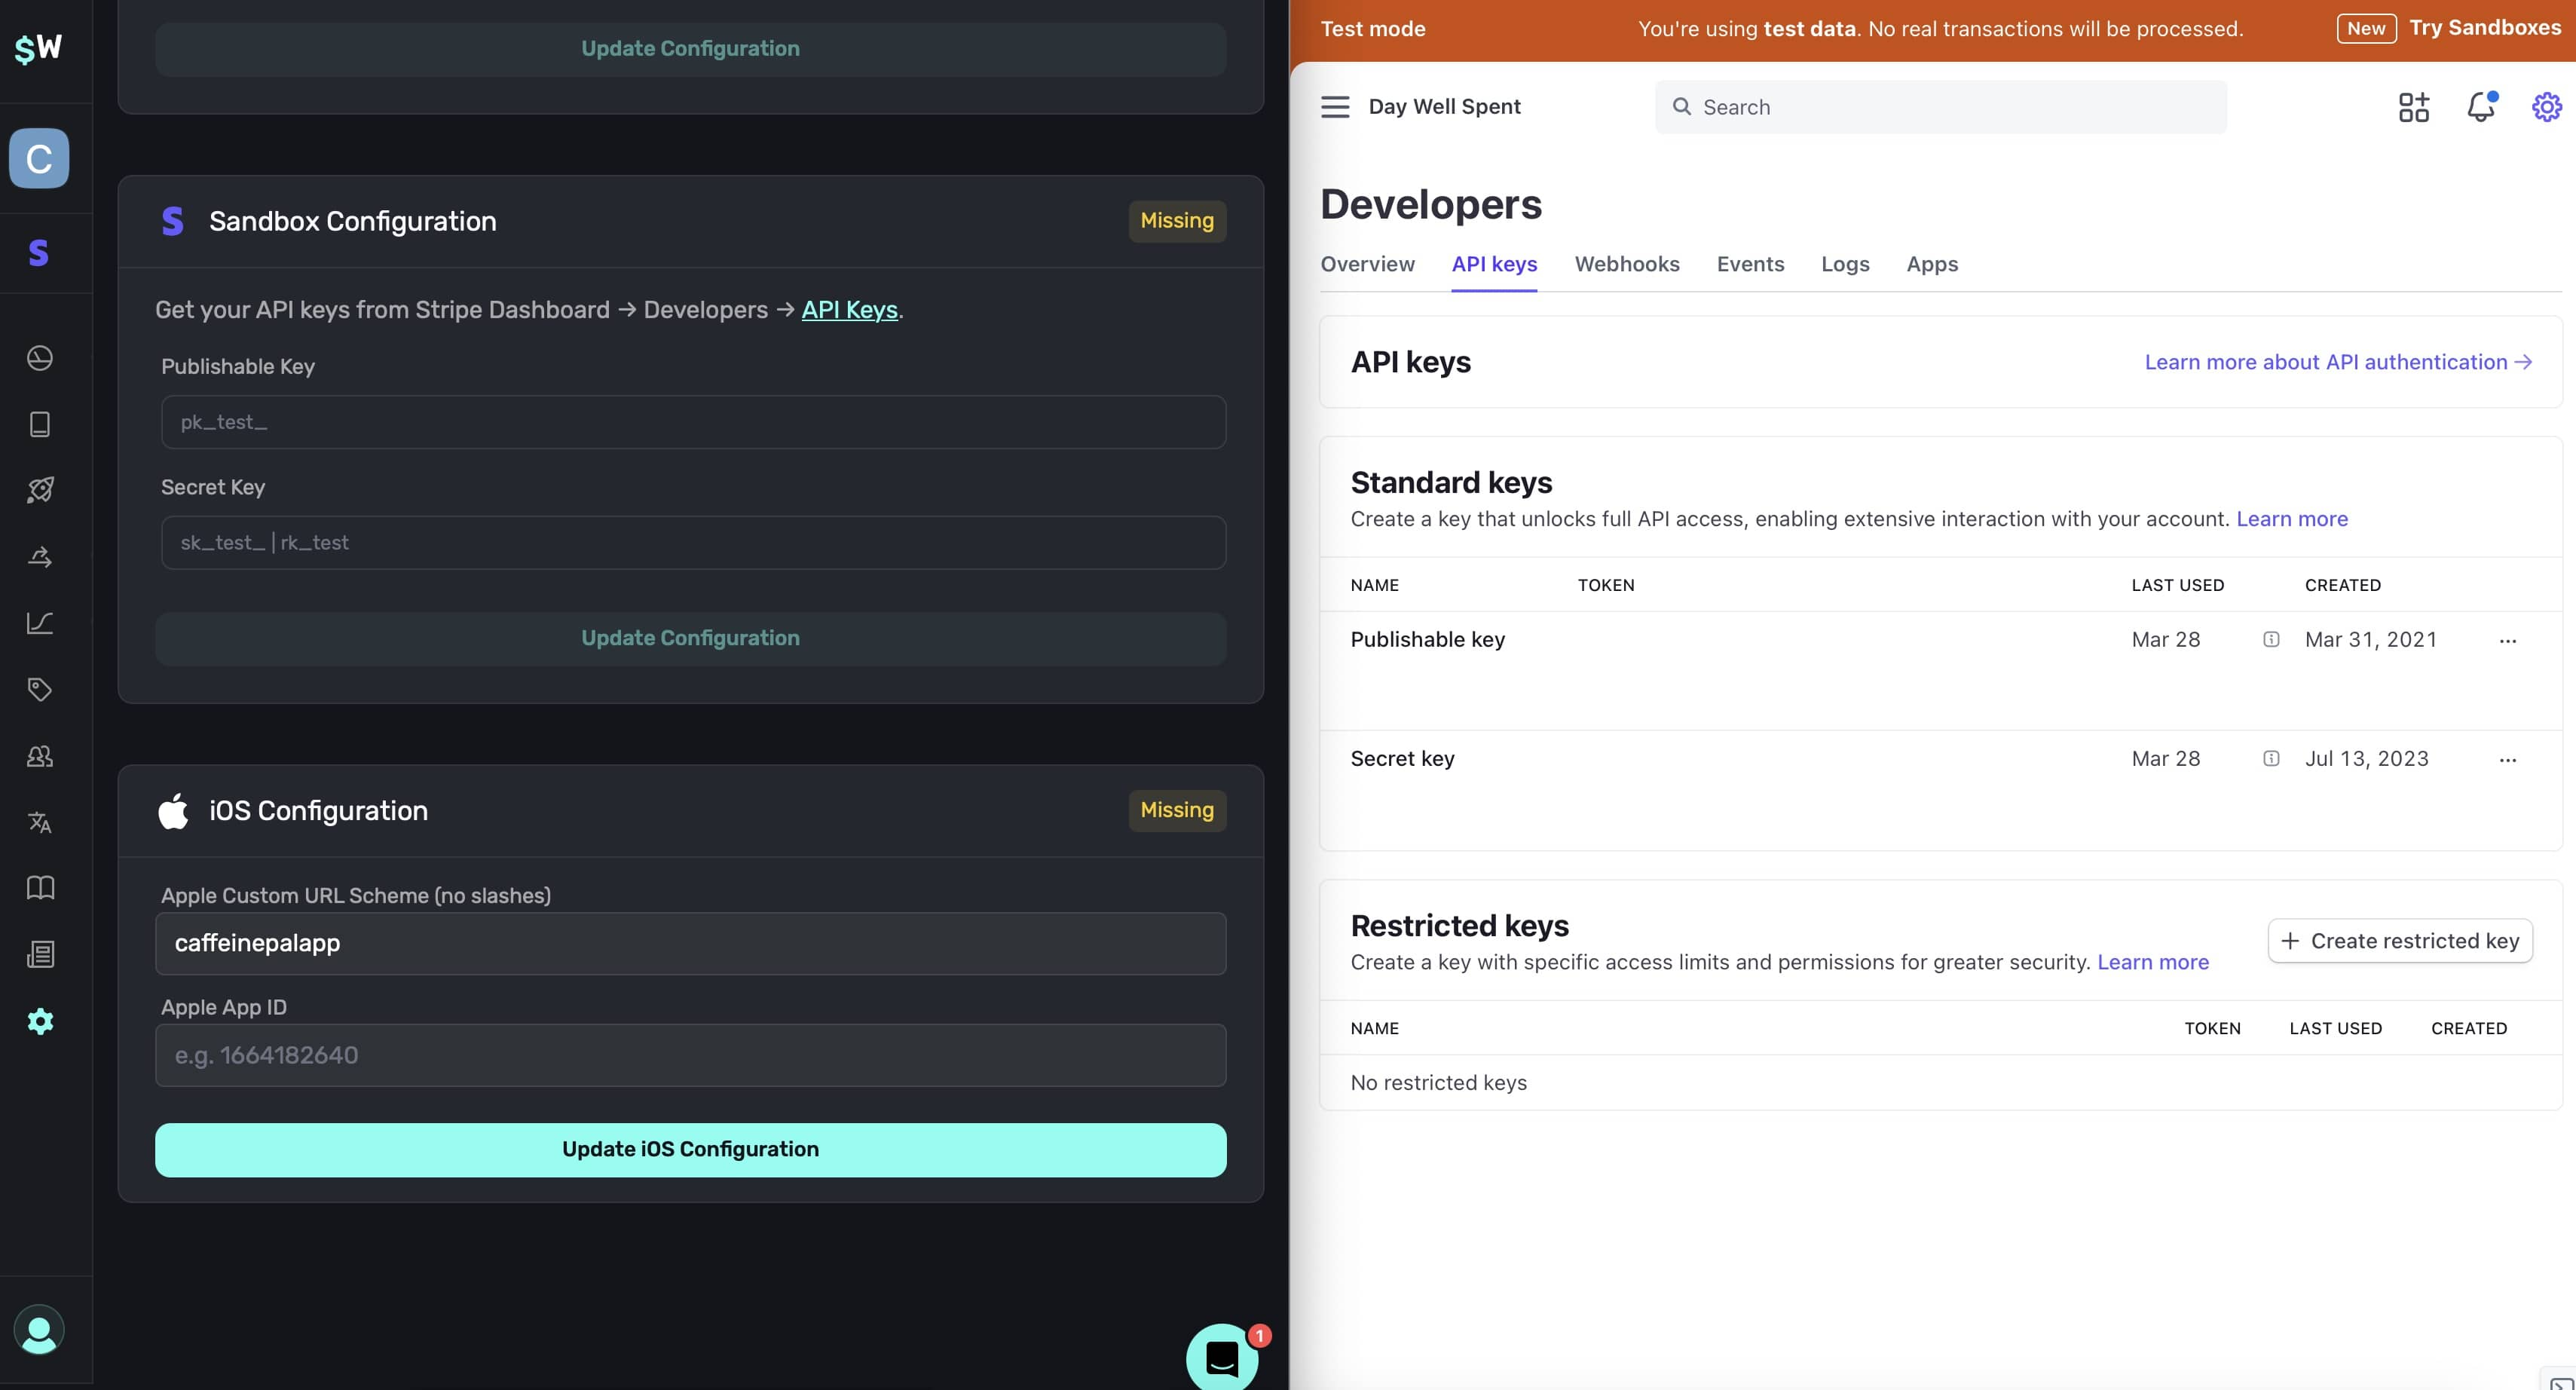
Paste the both the **Publishable Key** and **Secret Key** into Superwall for each respective field and **click** on the **Update Configuration** button. As before, this section should say "Configured" at the top right if setup was successful.
### iOS configuration
Next, fill in your [custom URL scheme](/in-app-paywall-previews) and iOS app ID. **This information is required.** If you're unsure of your app's ID, you find it in **[App Store Connect](https://appstoreconnect.apple.com) -> Select your App -> General -> App Information -> Apple ID**:

### Confirm setup
Once you've filled out all of these fields, you should see **Configured** for each section:
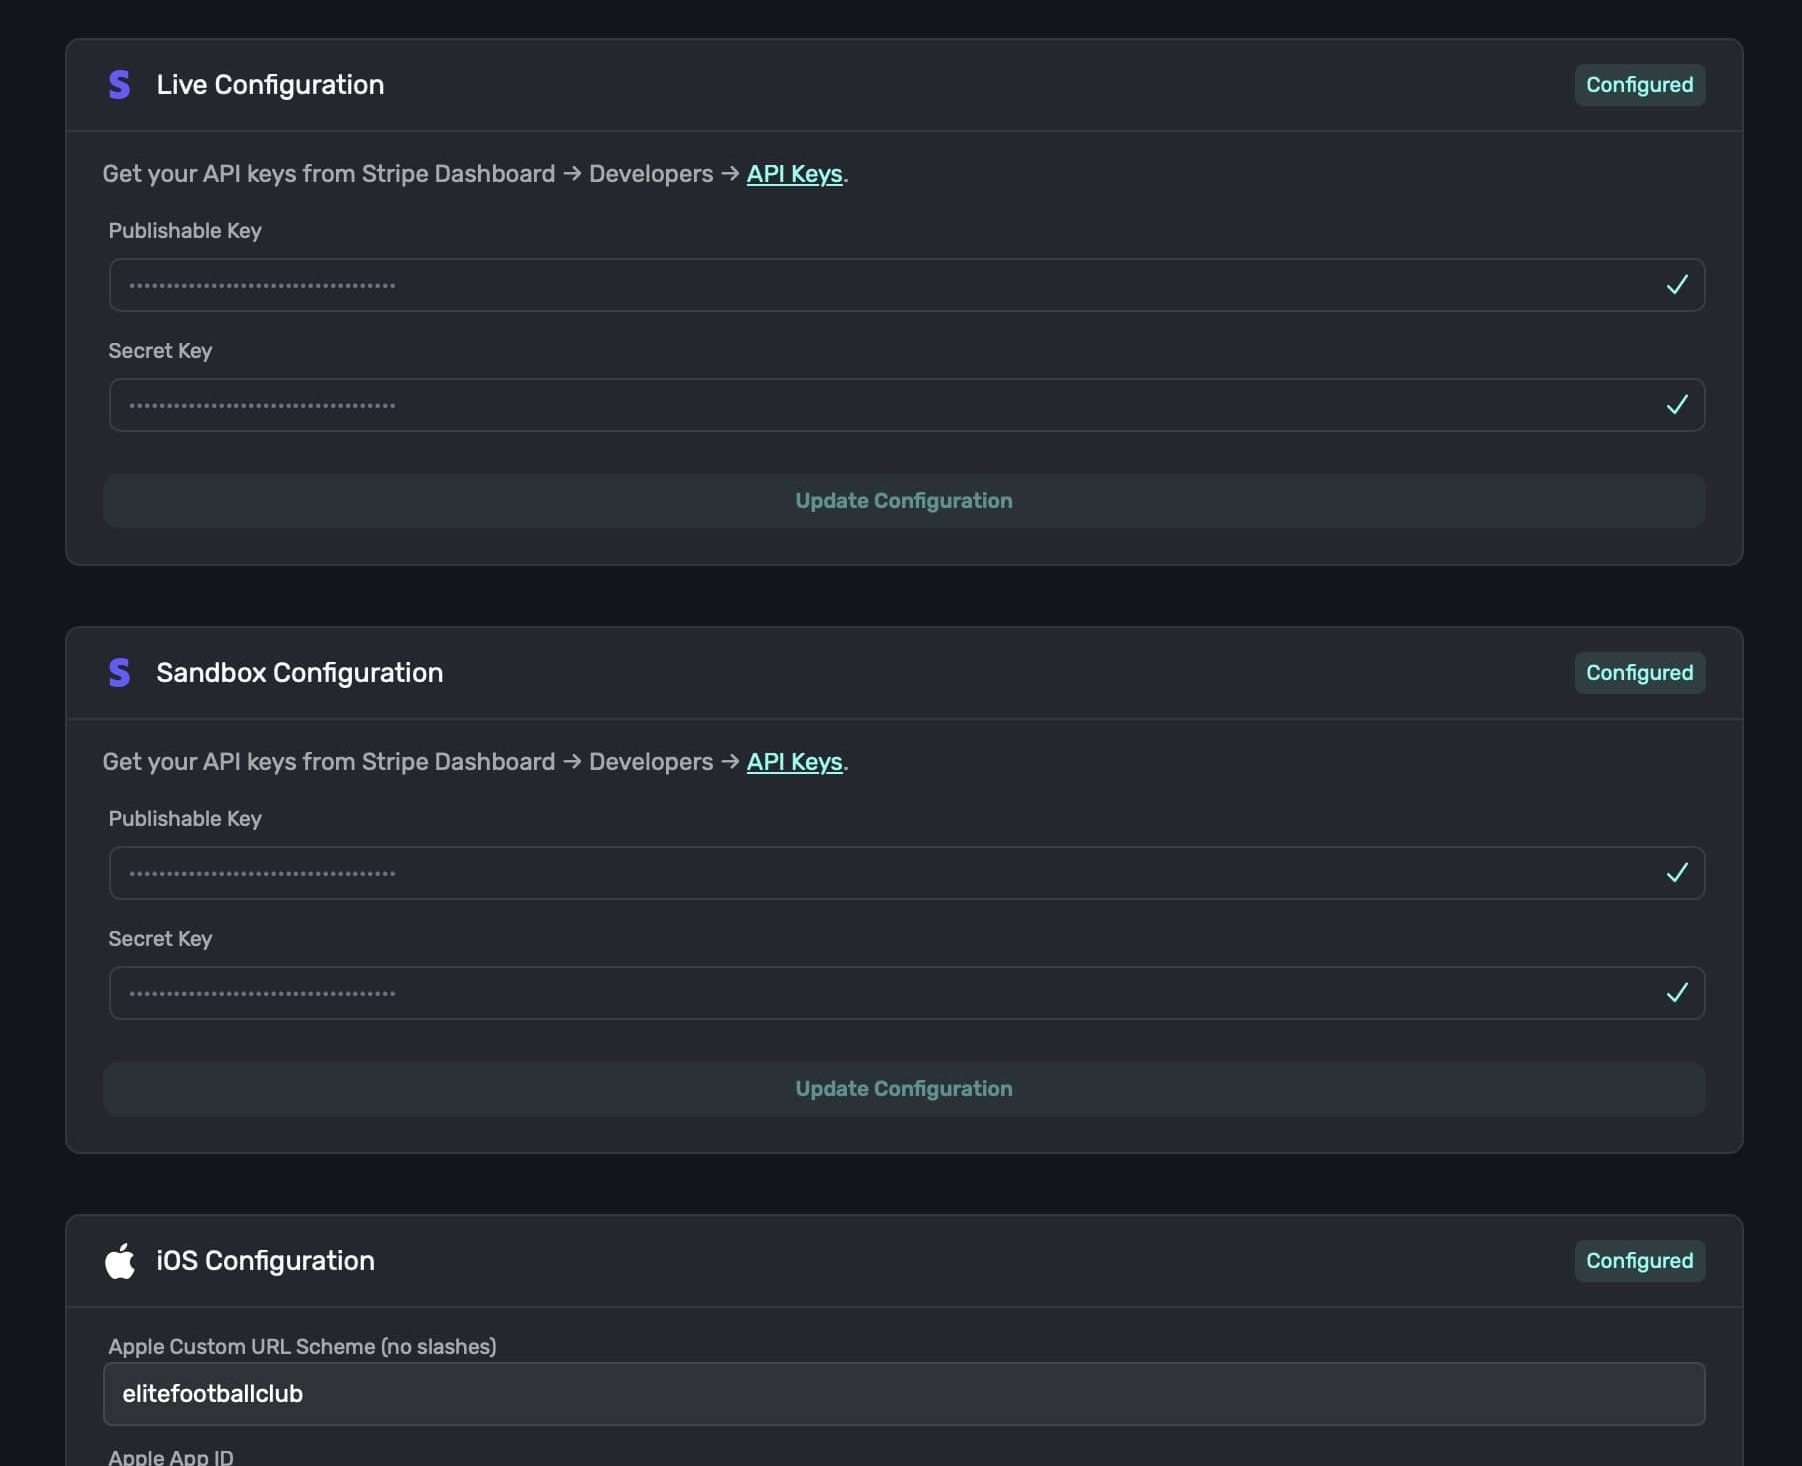
Next, you'll need to create some products in Stripe.
# Creating an App
Source: https://superwall.com/docs/web-checkout-creating-an-app
Add a Stripe app to an existing project within Superwall.
### Adding a Stripe app to Superwall
Web checkout is represented in Superwall as a Stripe app. To create one, open any existing project and click on the Stripe logo at the top left:
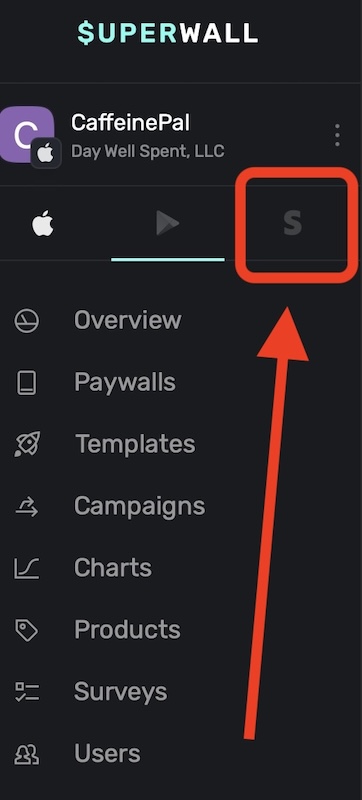
Right now, web checkout is only available for iOS apps. Android support is coming soon.
You'll be presented with three fields to fill out:
1. **Platform:** This will default to Stripe — leave this unchanged.
2. **App Name:** Shown at checkout, we recommend using the same name as your app.
3. **Domain:** The URL your paywall will be shown from, and `superwall.app` will be appended to it. You cannot edit this once your app is created.
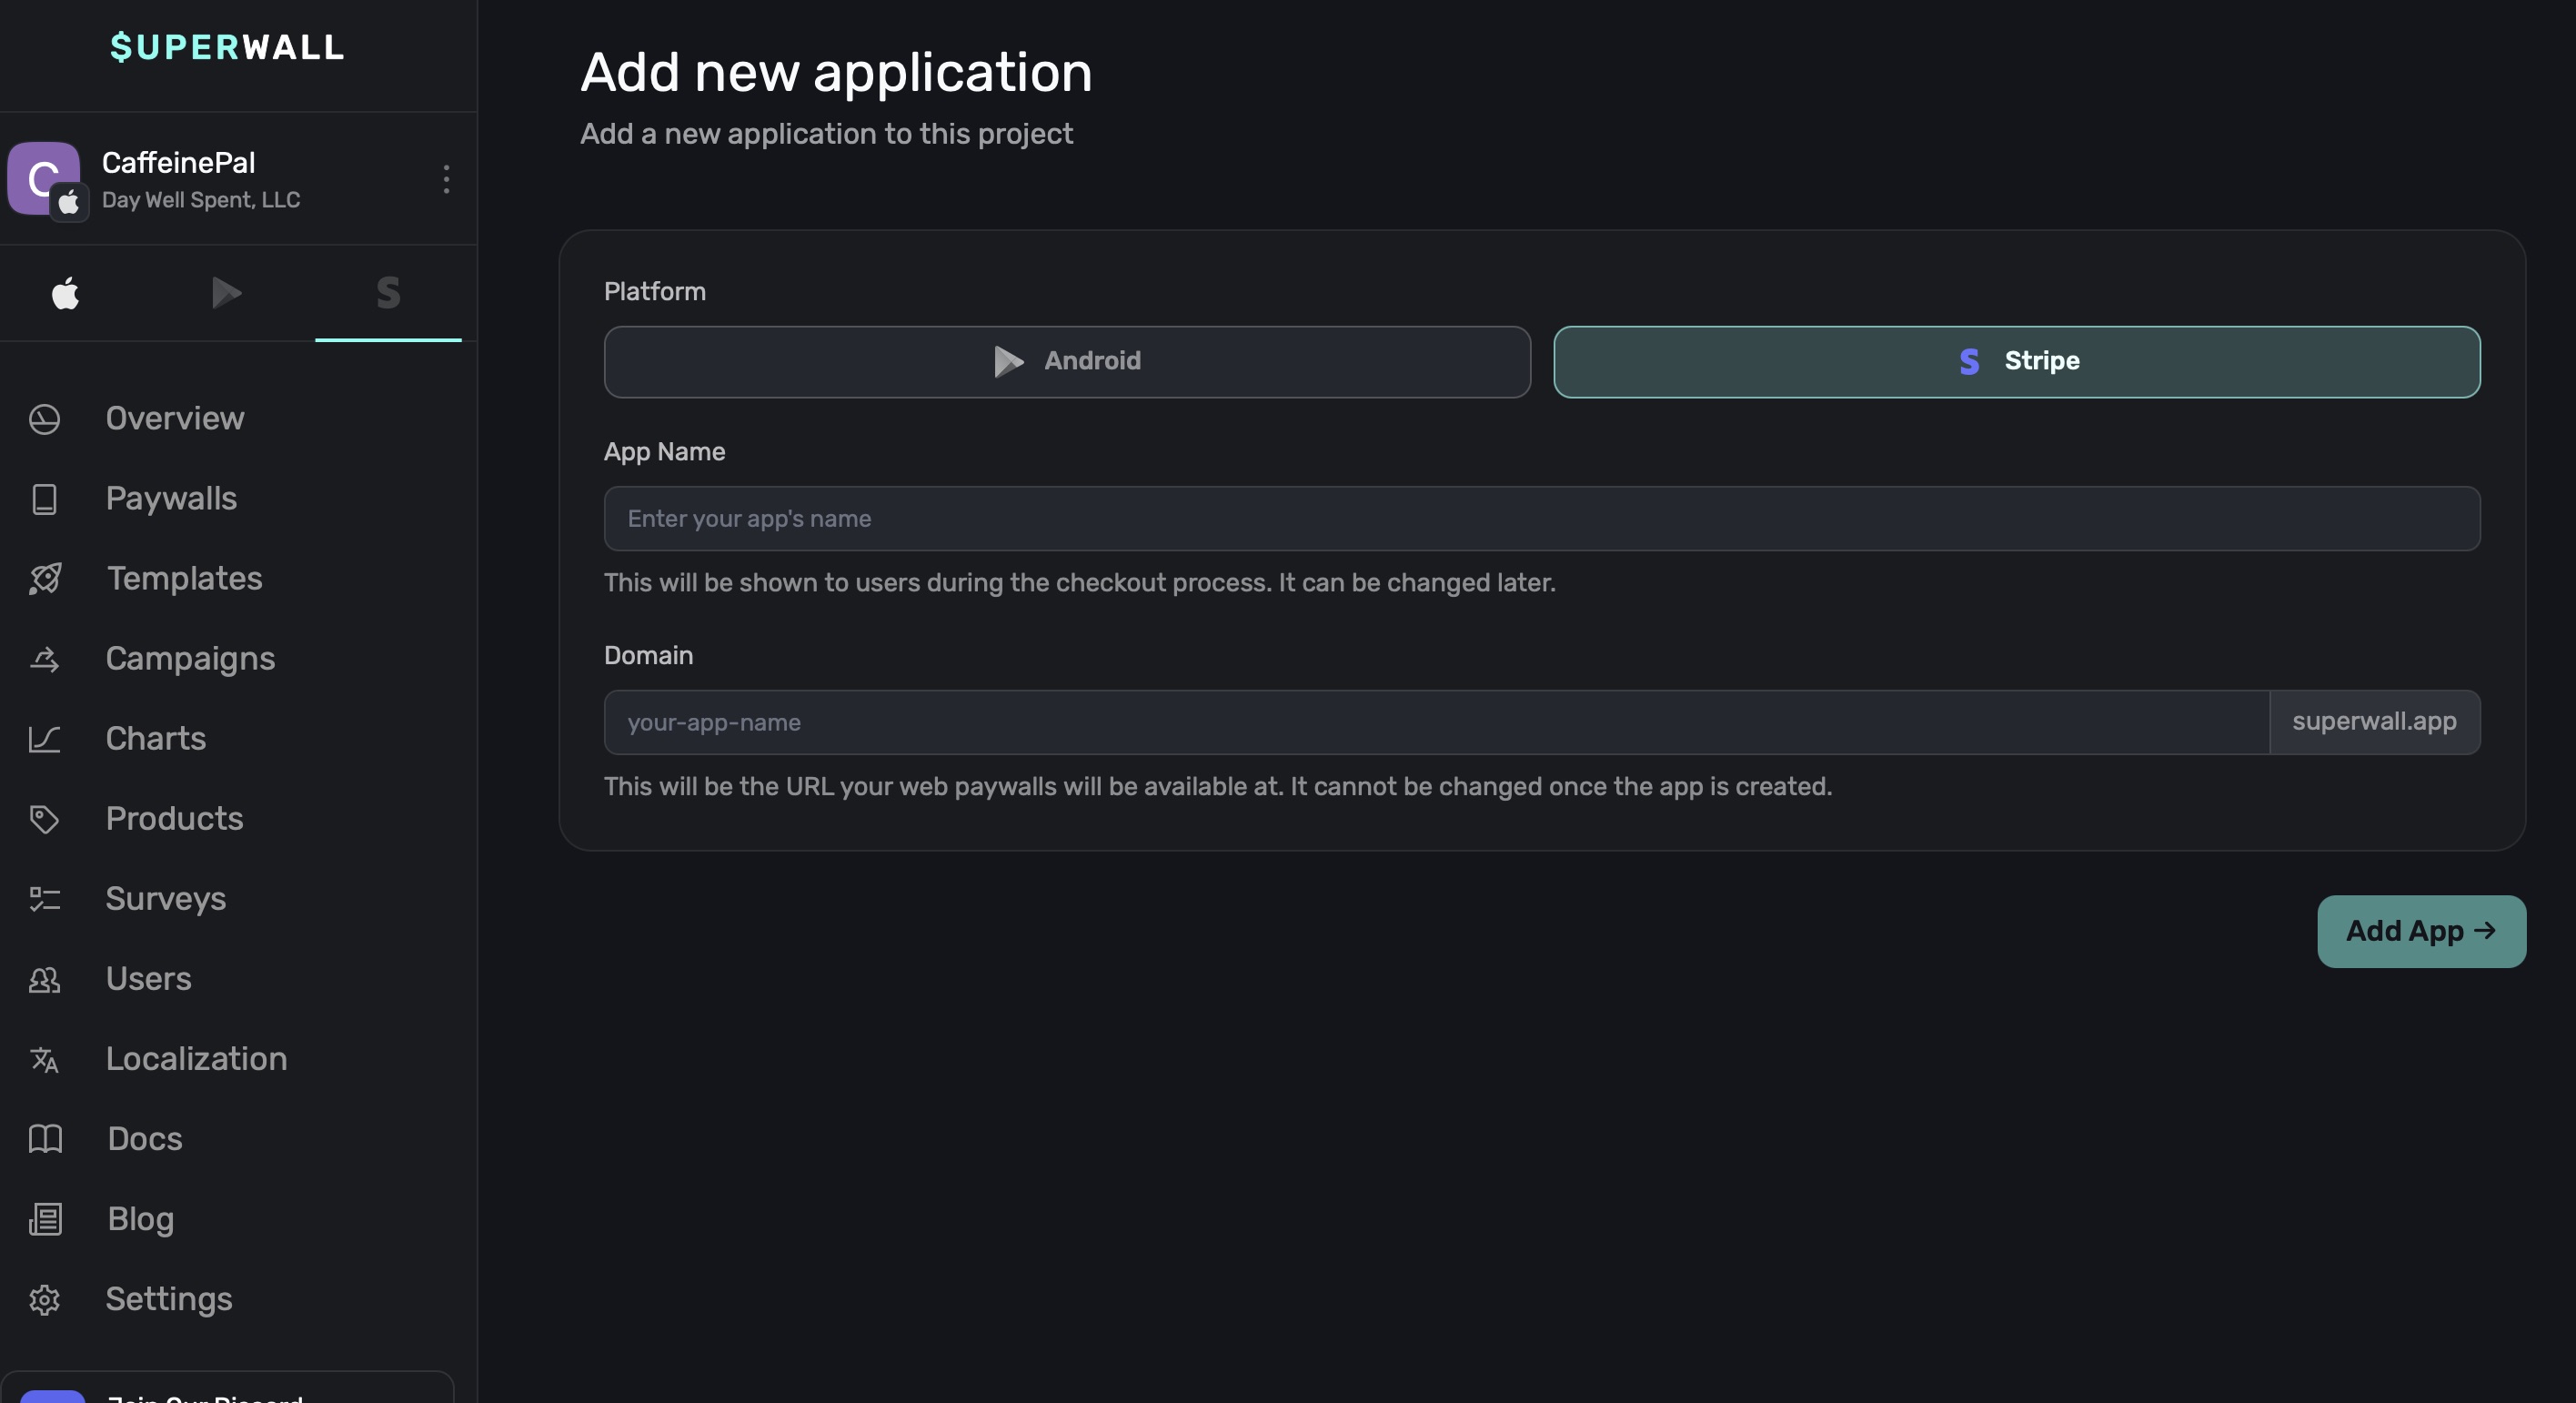
Once you've filled these out, **click** on **Add App ->**. You'll automatically be taken to your app's [overview](/overview-metrics) page. Next, it's time to [configure your app with Stripe](/web-checkout-configuring-stripe-keys-and-settings).
# Web Checkout Links
Source: https://superwall.com/docs/web-checkout-creating-campaigns-to-show-paywalls
Learn how to use campaigns and placements to present web paywalls using Superwall's web checkout links.
Once you've [created a Stripe app](/web-checkout-creating-an-app), [configured Stripe with Superwall](web-checkout-configuring-stripe-keys-and-settings) and have [created Stripe products](web-checkout-adding-a-stripe-product) — you're ready to configure a campaign to show a web paywall.
Before you proceed, recall that web checkout has all of the advantages of the Superwall platform. If you are unfamiliar with how to create campaigns or what a placement is — we recommend you read through the [introduction](/home) documentation and [campaigns doc](/campaigns) first.
### Understanding placements in web checkout
There are two primary differences between web checkout and the typical Superwall campaign flow:
1. **Placements become unique URLs** which, in turn, show your paywall. These are called *web checkout links*.
2. **User variables** are not available in audience filtering.
Other than that, everything operates as a normal Superwall campaign would. For example:
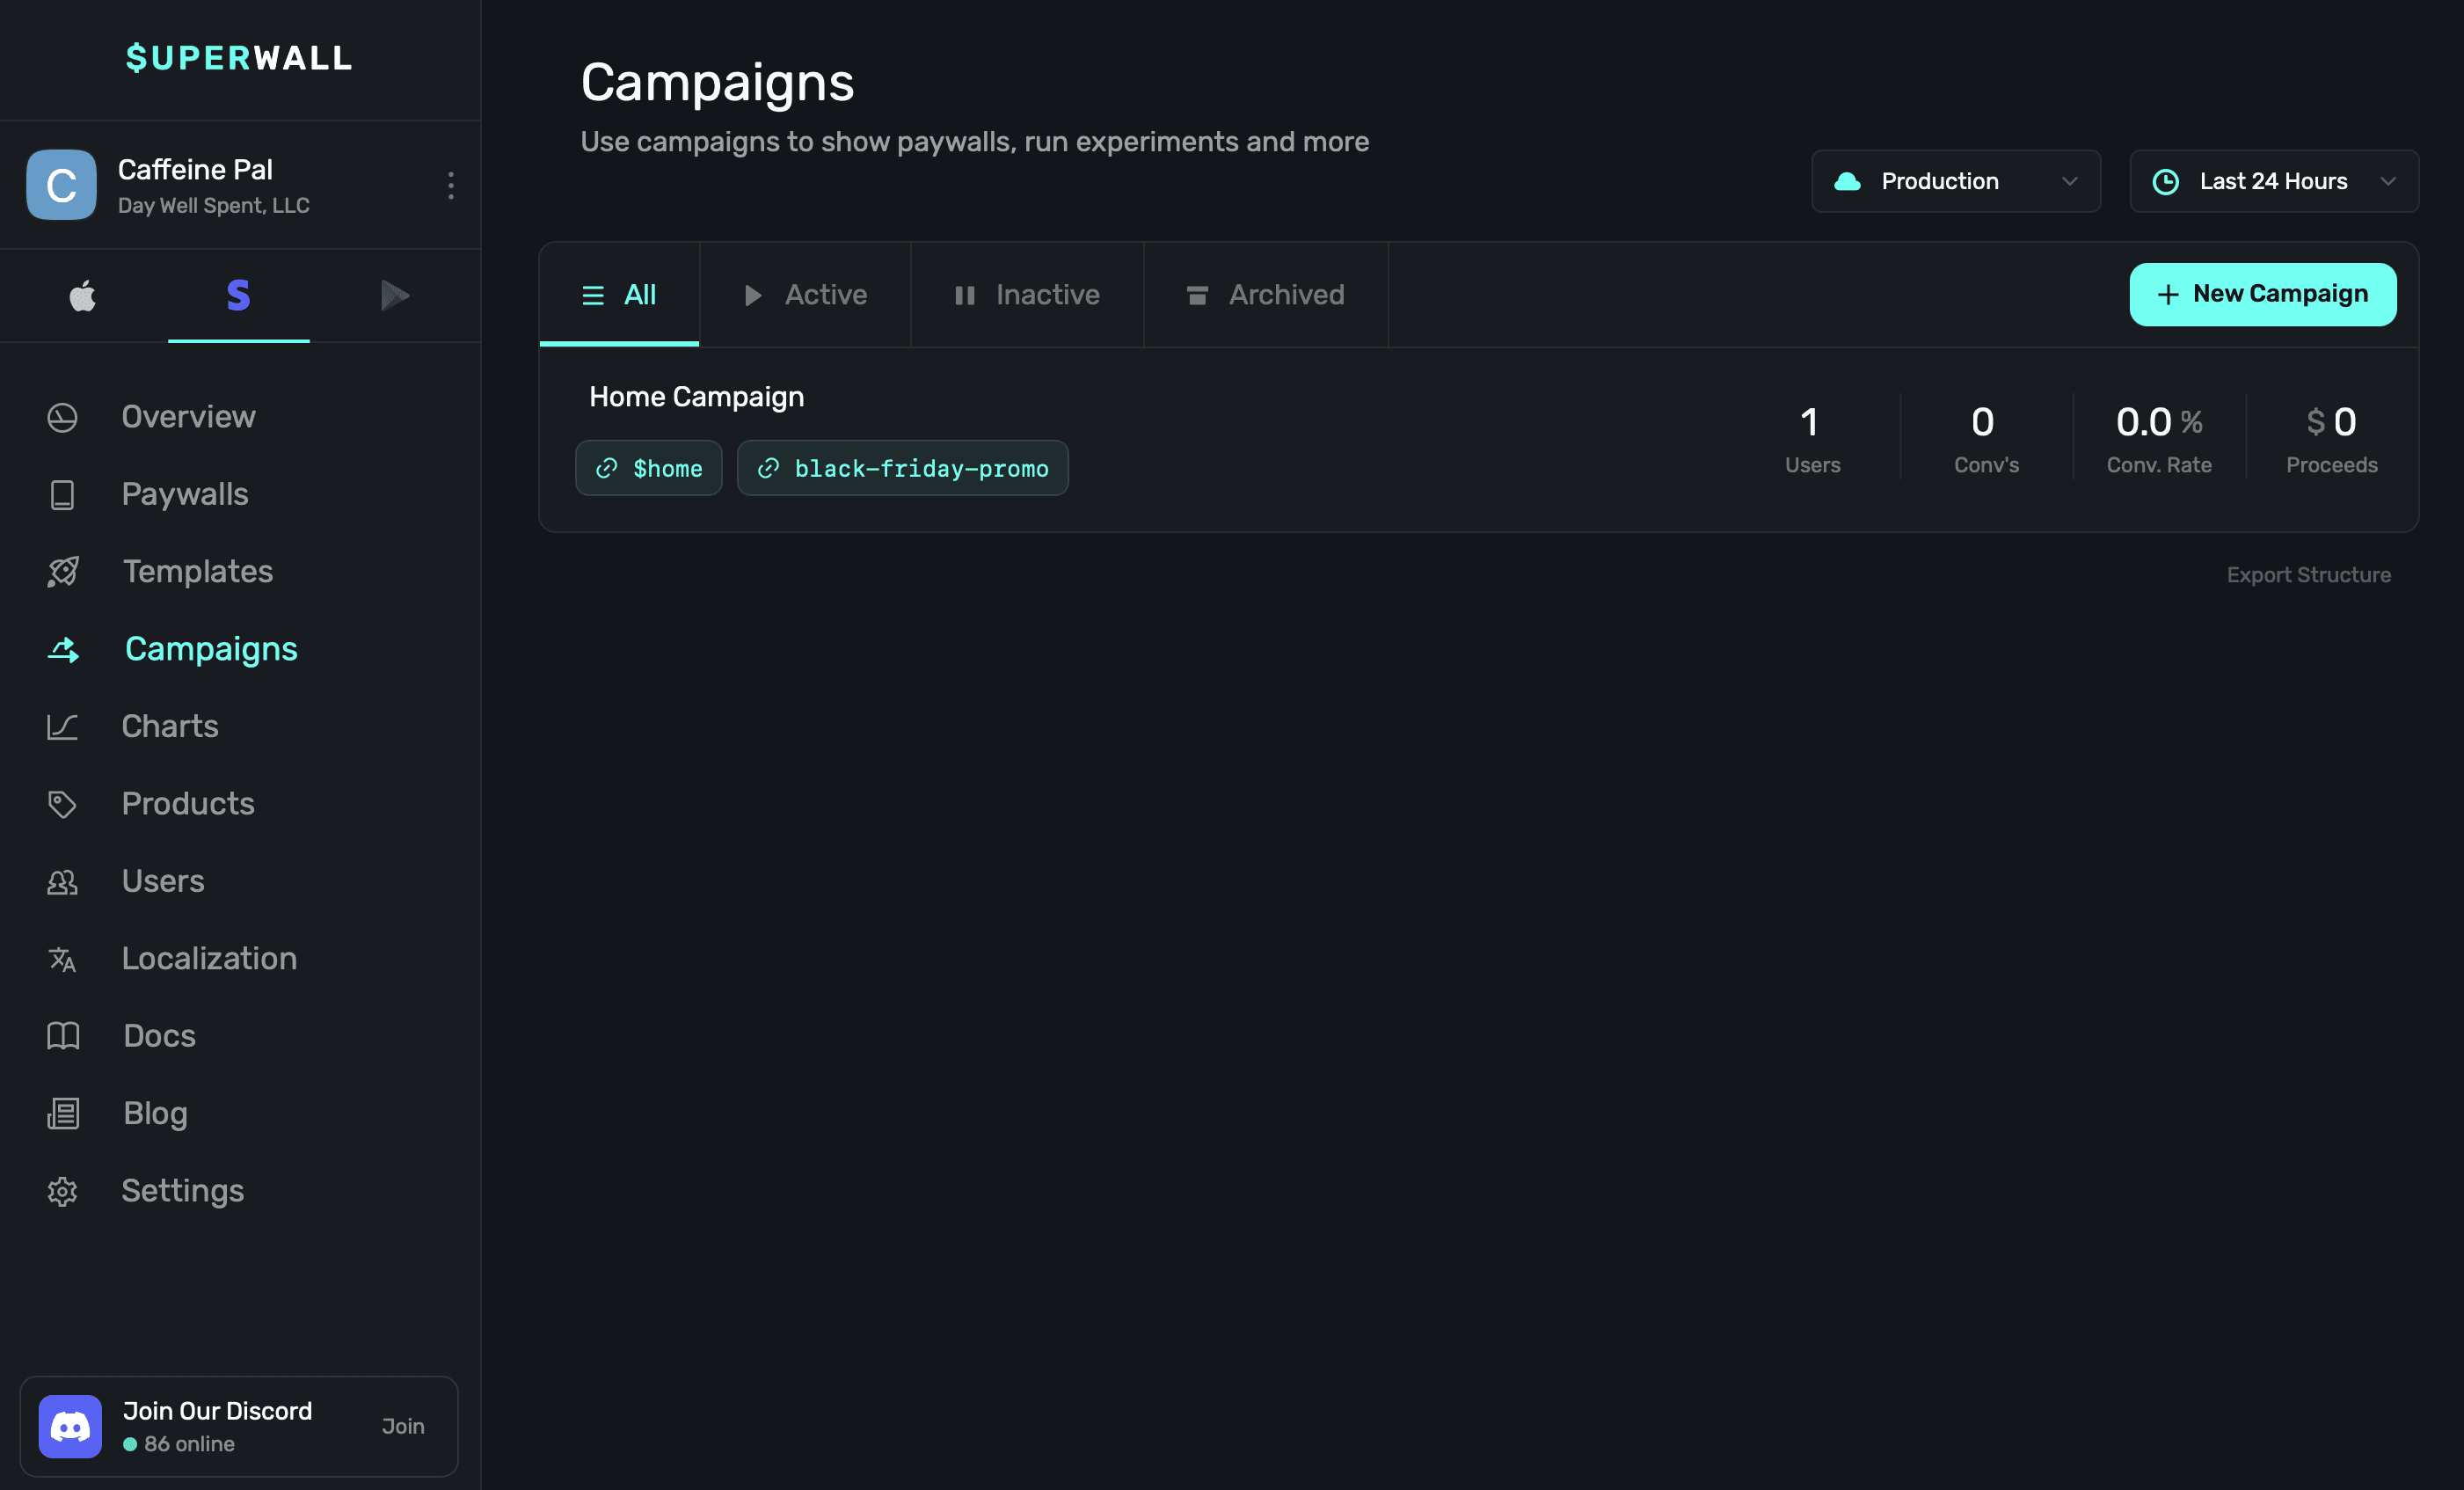
Here, the placement `black-friday-promo` presents a paywall. If the app's URL in [settings](/web-checkout-configuring-stripe-keys-and-settings) is `caffeinepal`, then the URL for this placement would be `https://caffeinepal.superwall.app/black-friday-promo`. Visiting that web checkout link presents a paywall:
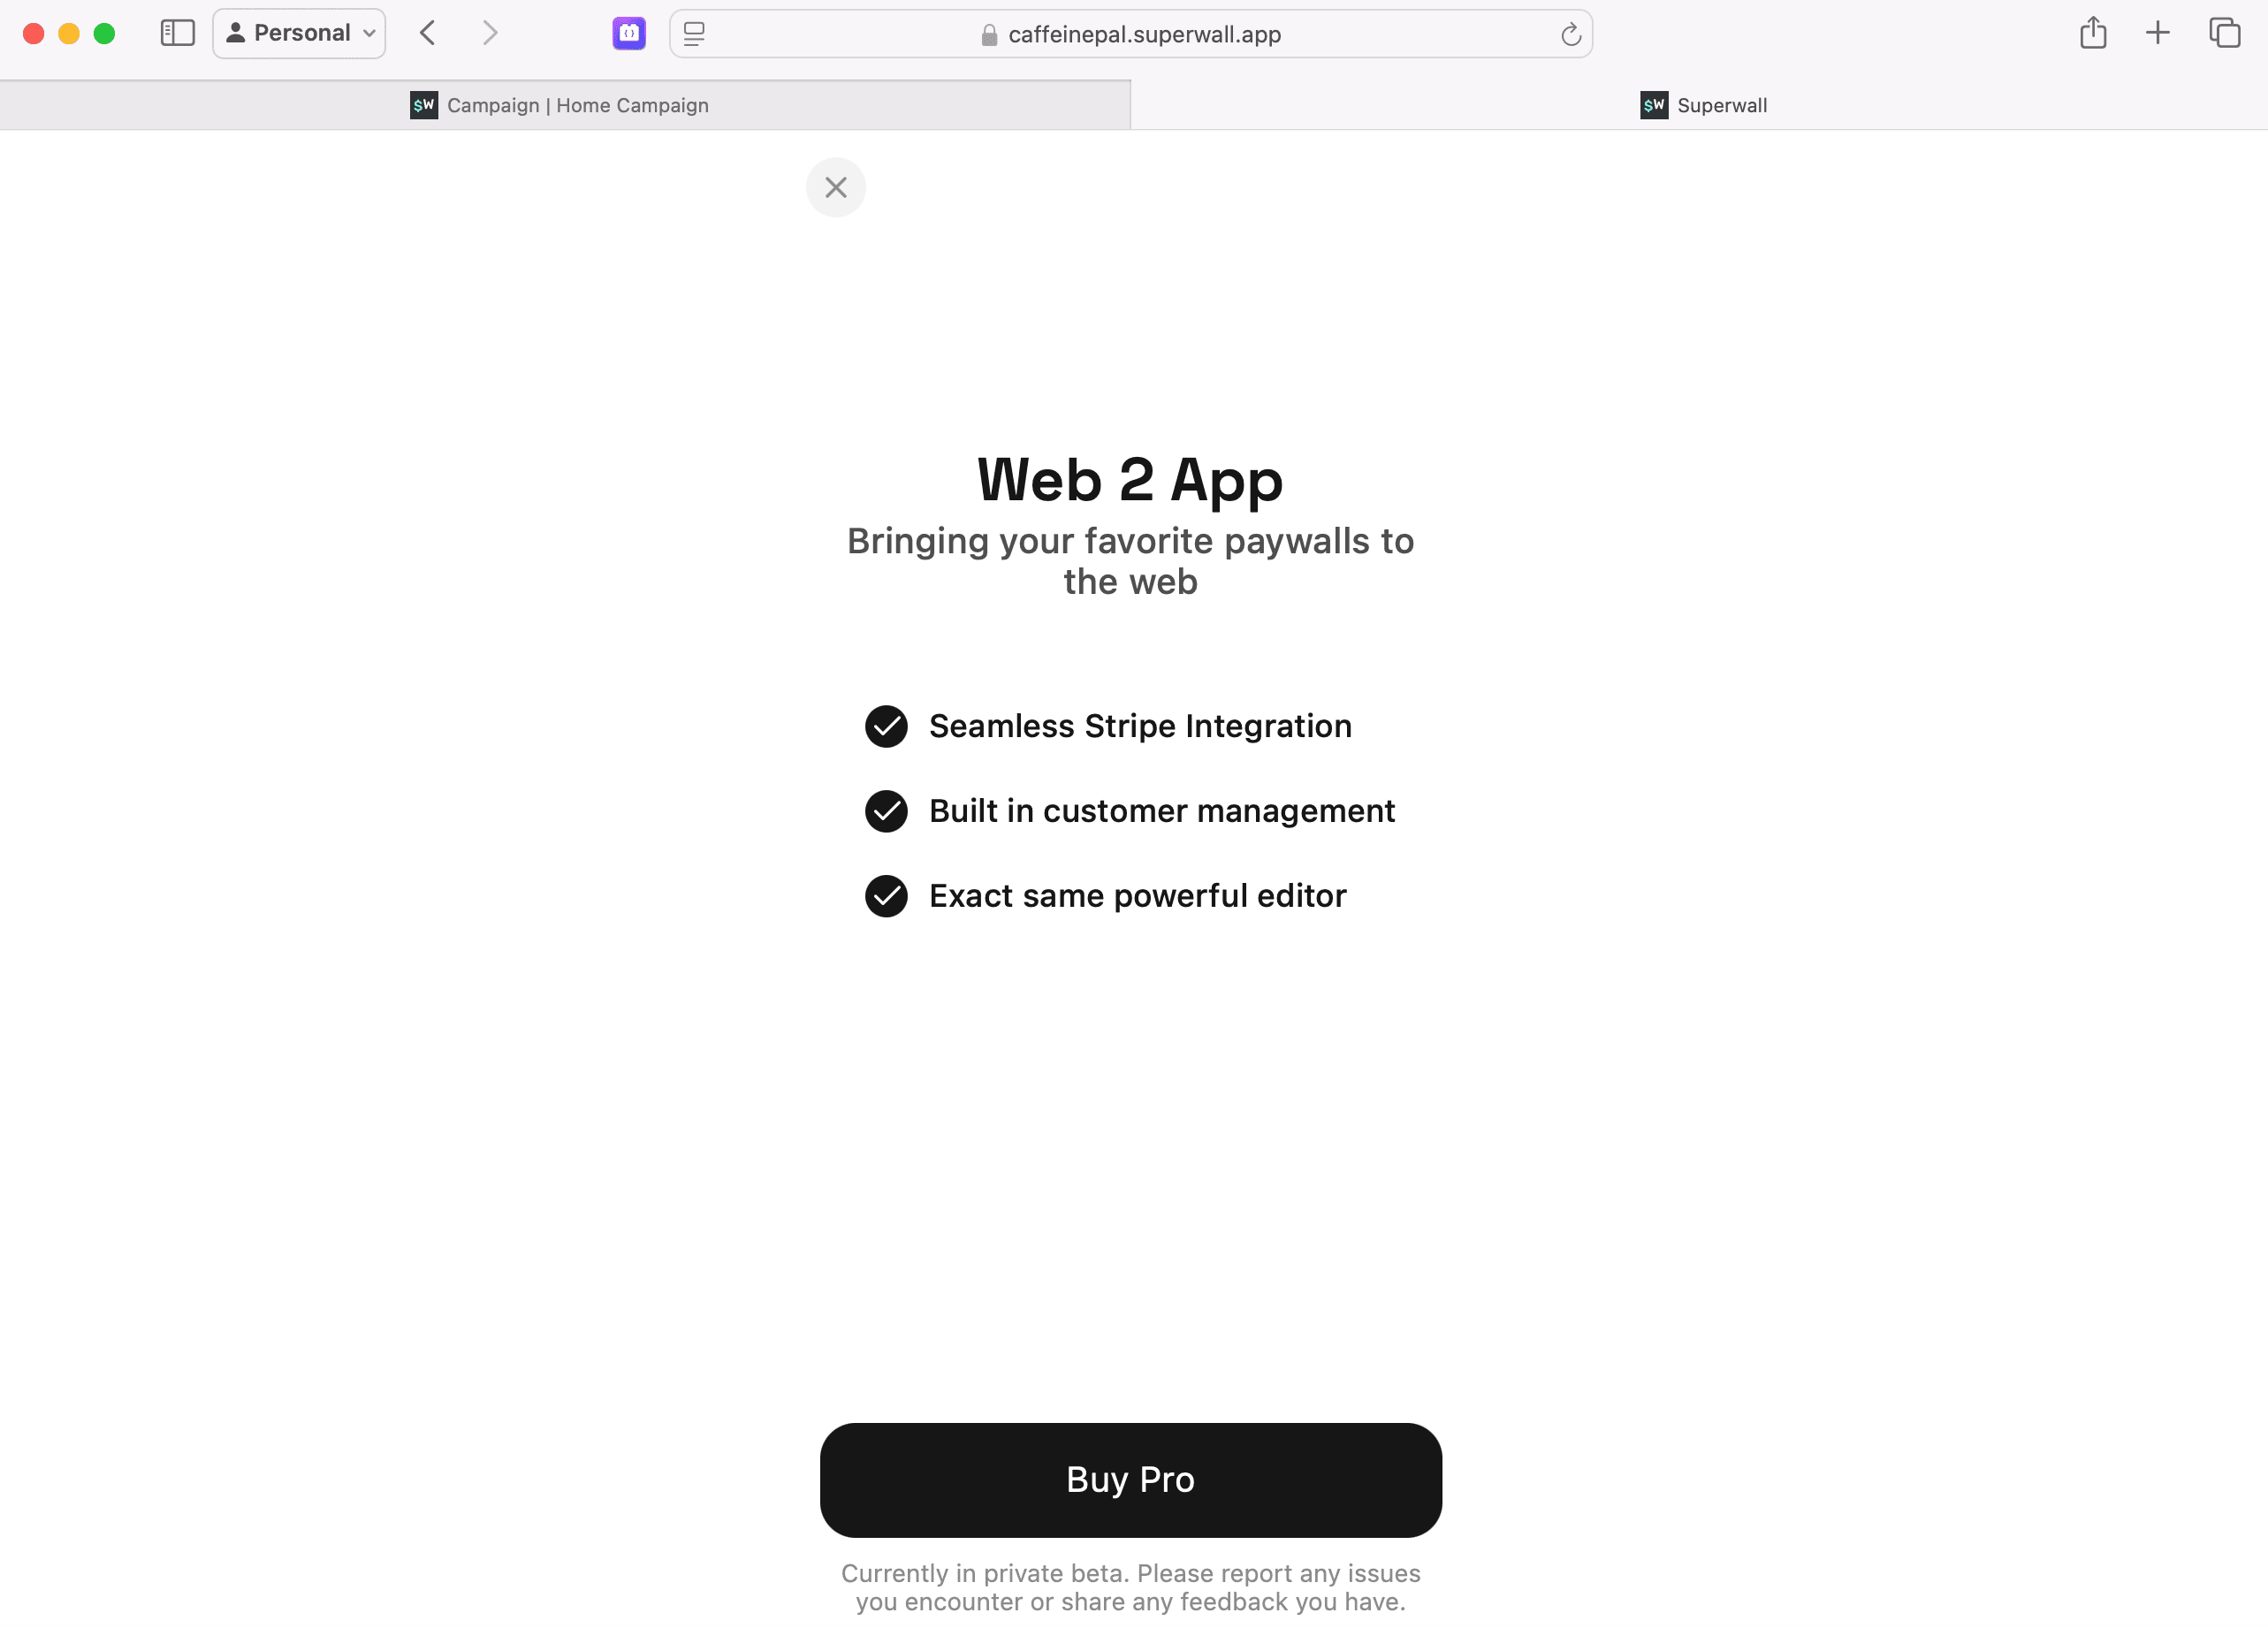
Conceptually, you can think of these web checkout links performing a similar function as registering a placement does in our mobile SDK:
```swift
Superwall.shared.register(placement:"black-friday-promo") { _ in }
```
This means that you now can use web checkout with all of the same powerful features that Superwall offers, such as A/B testing, paywall targeting and more. Again, these work just like any other campaign would in Superwall. The interface is the same, so now you create placements, start creating audience filters and more:

Also, remember to create responsive paywalls. Users can view your checkout page on a laptop, phone and other varying sized viewports. For some quick tips, check out this blog post over adapting paywalls to look great on [iPad](https://superwall.com/blog/how-to-create-adaptable-paywalls-for-iphone-and-ipad-using-superwall).
### A note on the `$home` placement
Every campaign has a `$home` placement out of the box. This placement acts a "default" link, and isn't required to be part of the URL as other placements are. For example:
```plaintext
// This works
https://caffeinepal.superwall.app/$home
// And this also works, even though `$home` isn't in the URL
https://caffeinepal.superwall.app/
```
This is useful so that even if a user visits your web checkout link, and there isn't a placement in the URL — they'll still see a paywall.
### How query string parameters work
You can attach query string parameters to any web checkout link by appending them to the URL:
```html
https://caffeinepal.superwall.app/black-friday-promo?name=jordan
```
This will pass the `name` parameter to the placement, and you can use it in your audience filters. For example, you could create a filter that only shows the paywall if the `name` parameter is equal to `jordan`:
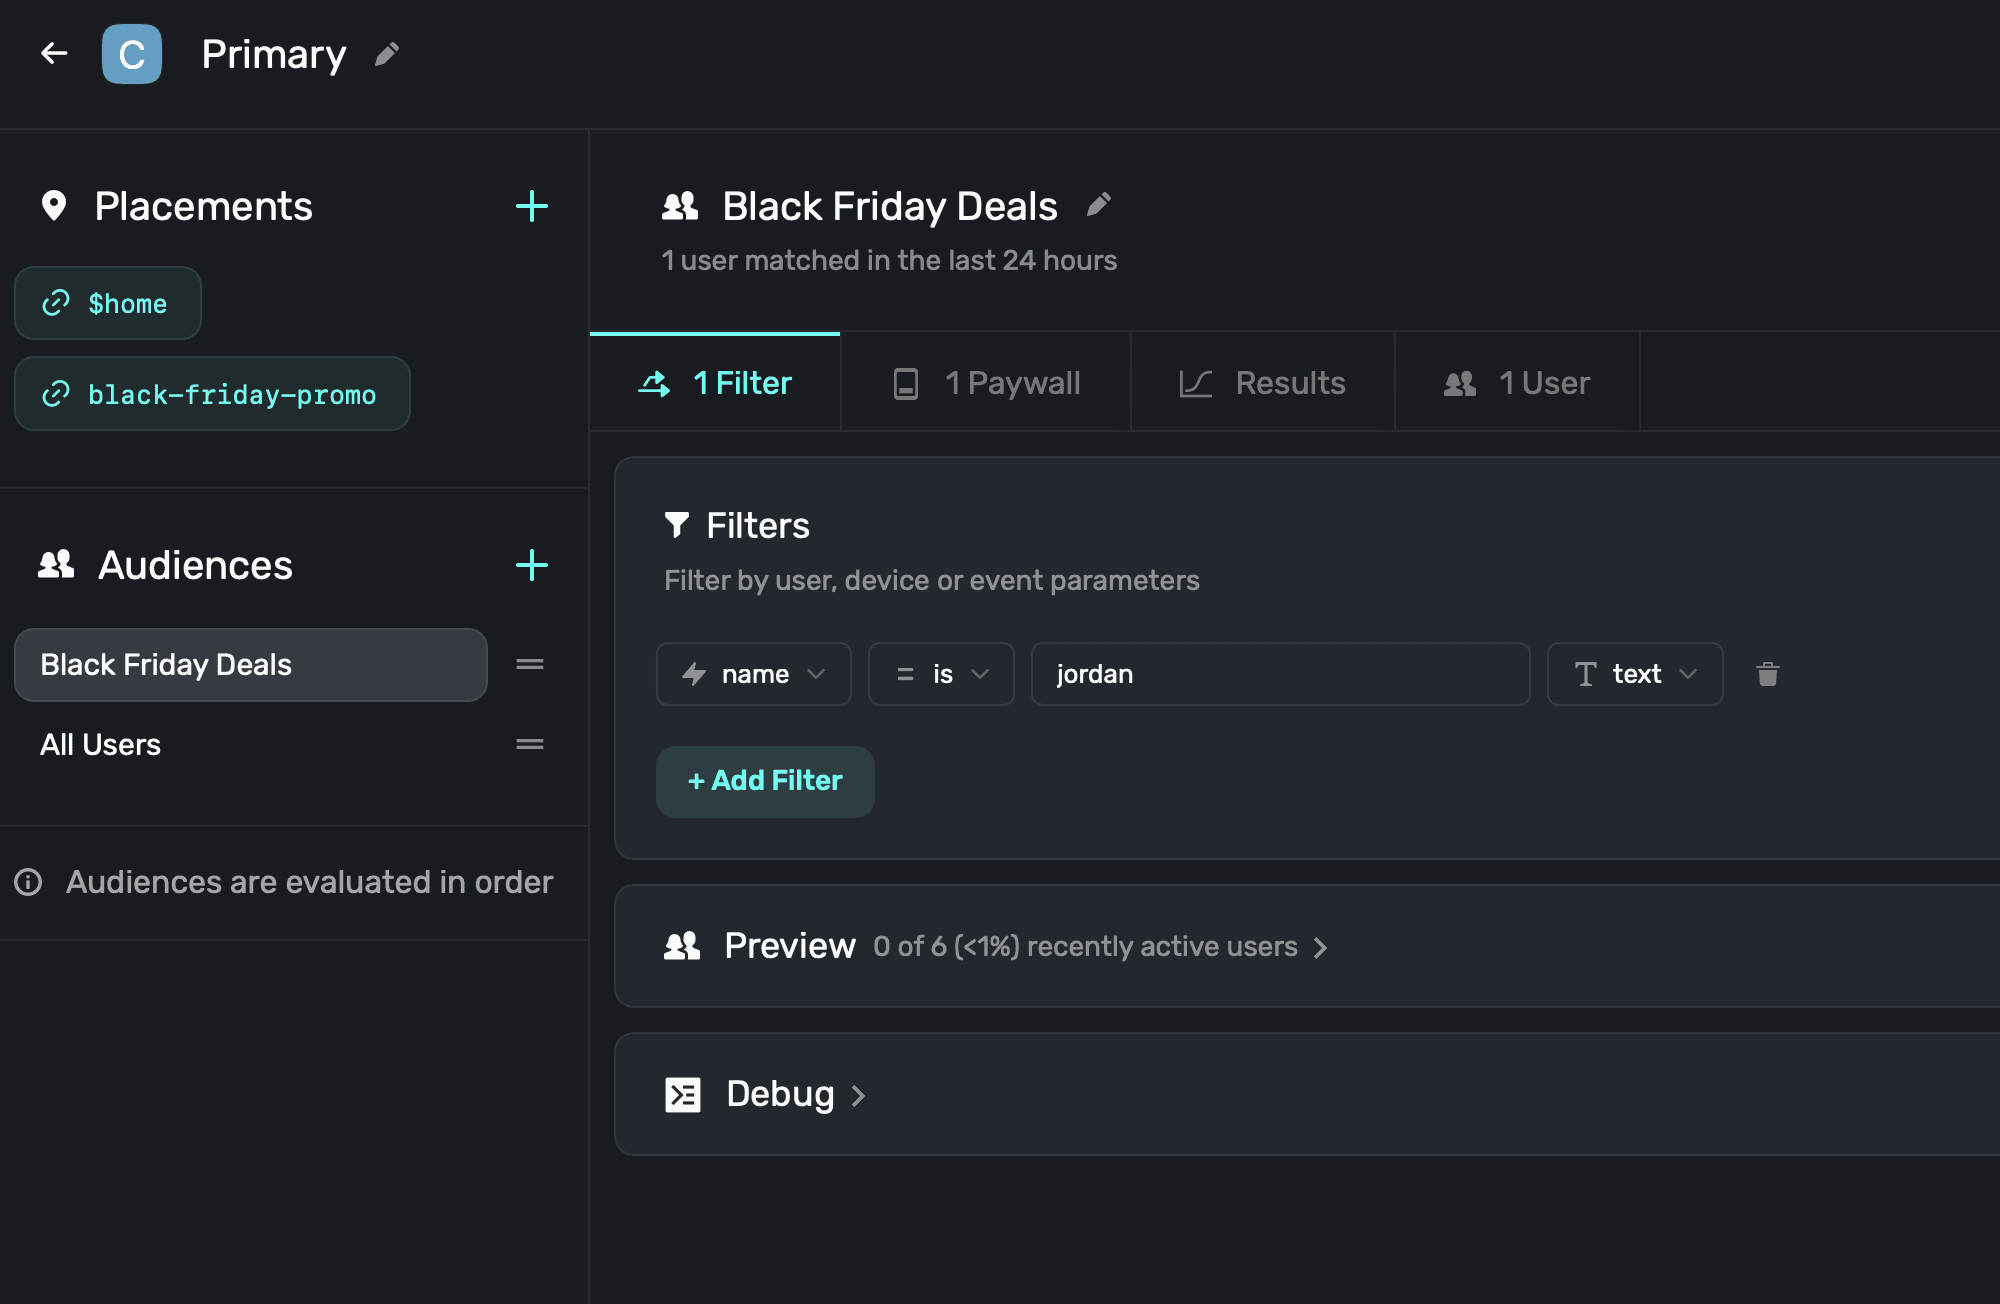
Or, you could access them in your paywall using the same flow as you would for [placement parameters](/using-placement-parameters):
1. In the paywall editor, add a variable.
2. Make it a `parameter` type. Match the `name` to the query string parameter key (here, that would be `name`).
3. Set the value type, then click **Create**.
4. Now, you can use that variable in your paywall:
This makes it easy to show in your paywall:

Then, if the URL is visited, the audience filter matches from above — and we can see the value on the paywall, too:
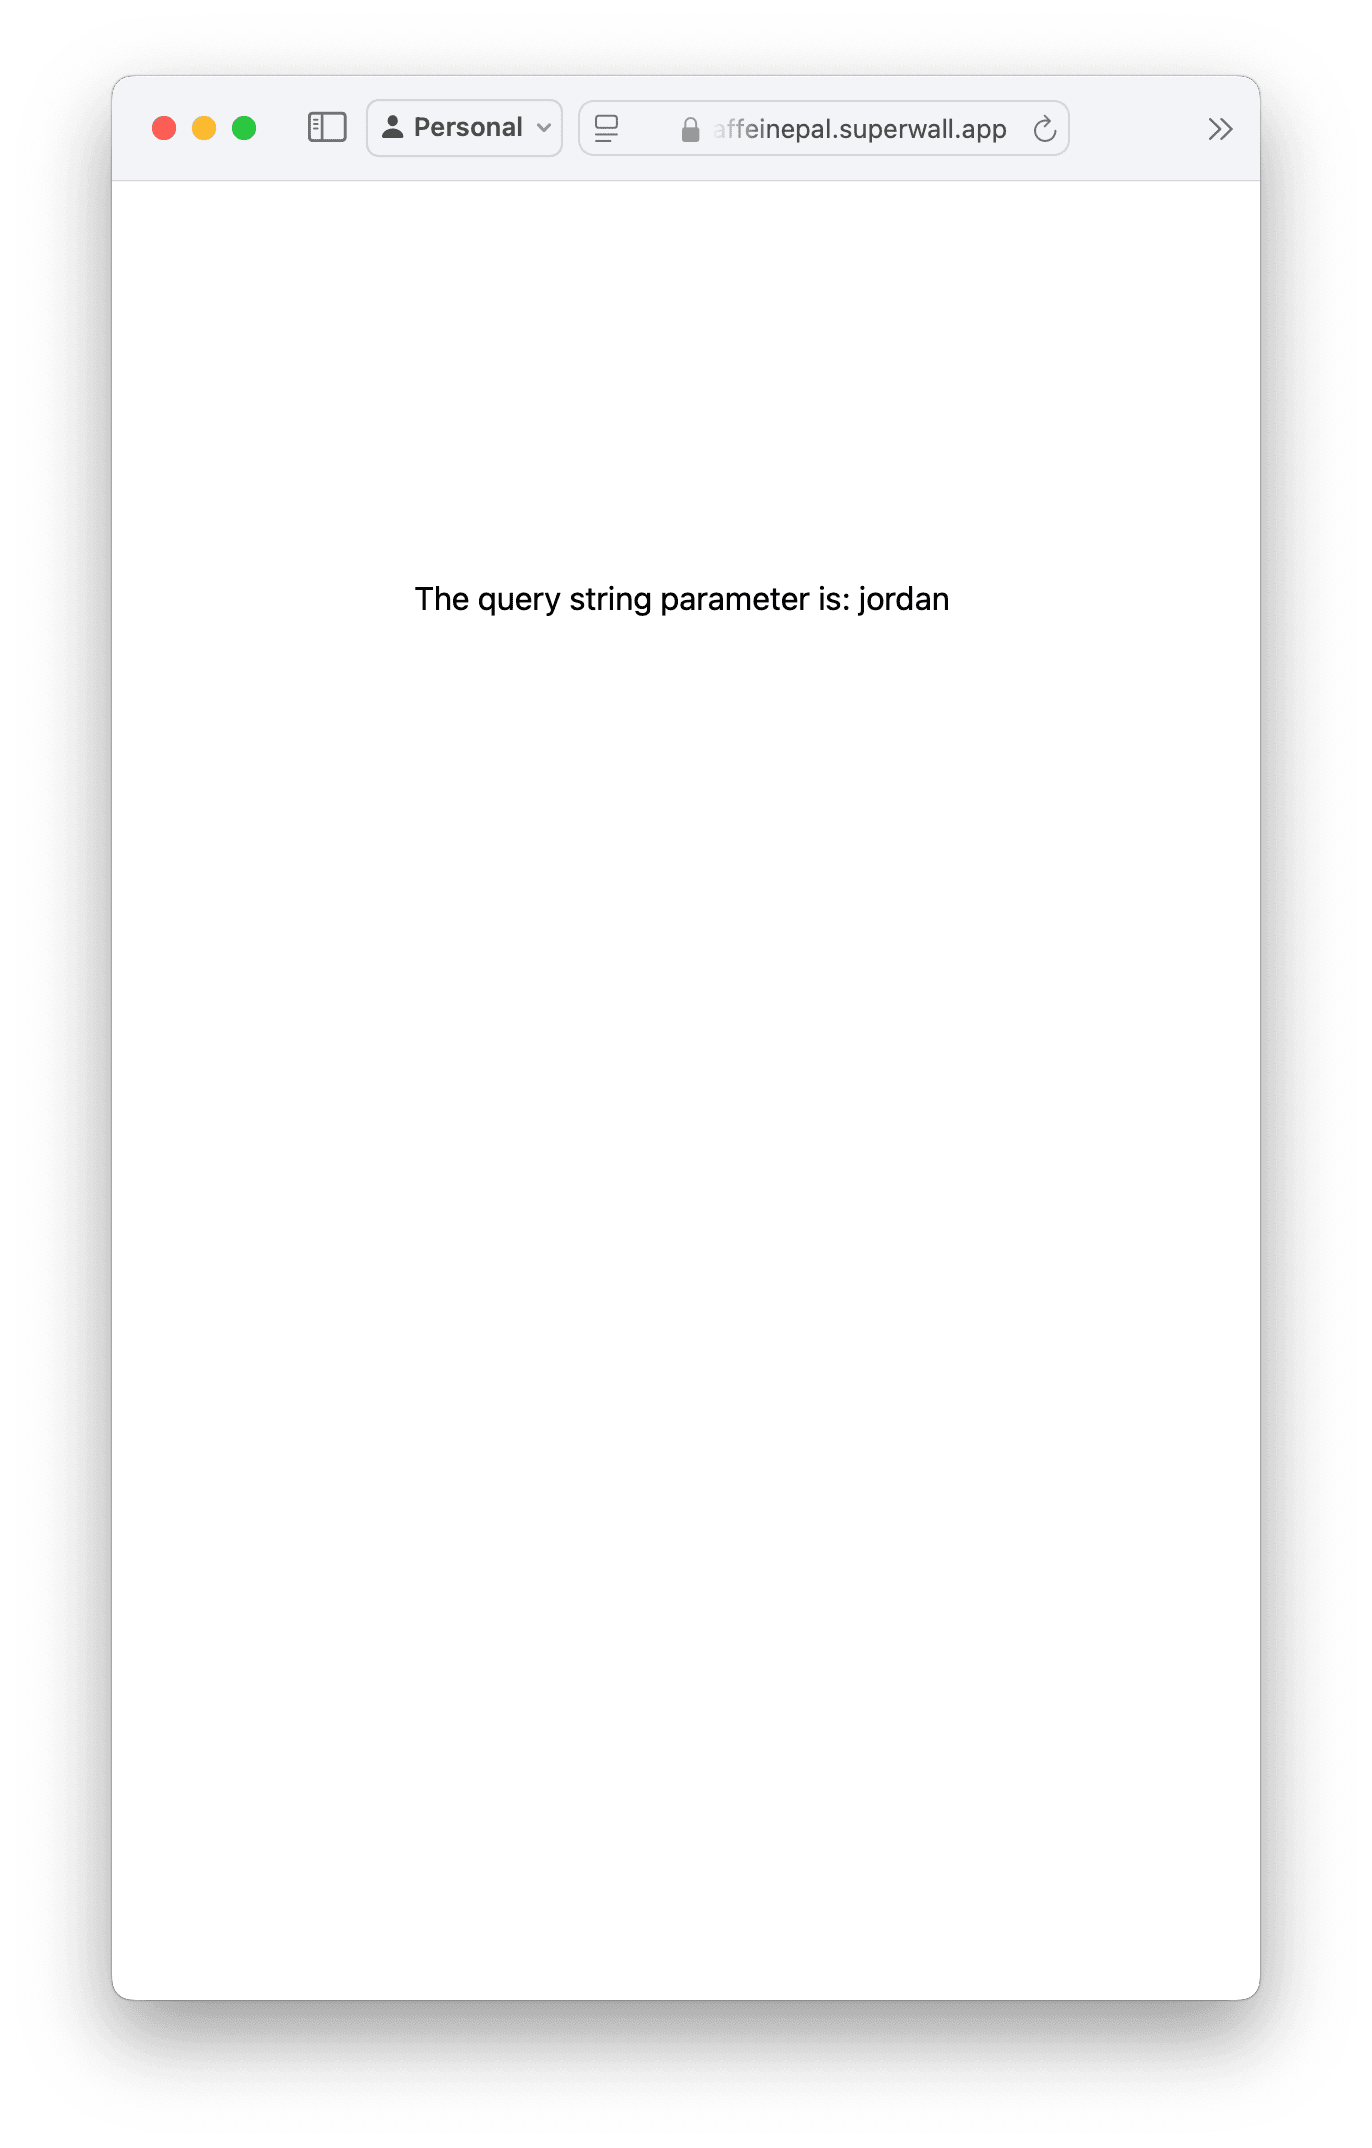
Of course, this is a simplistic example — but this is useful for personalization, seasonal events, influencer campaigns and more. Any query string parameter you pass can be used in the paywall, and in audience filters.
### Automatically populating user emails in checkout flows
There is a special query string parameter you can use to automatically populate the user's email in the checkout flow. This is useful for pre-filling the email field in the checkout form, so that users don't have to enter it manually. Simply add `email` and set the value to the user's email address:
```html
https://caffeinepal.superwall.app/black-friday-promo?email=myemail@yahoo.com
```
When the Stripe checkout flow launches, the email is now filled out automatically:
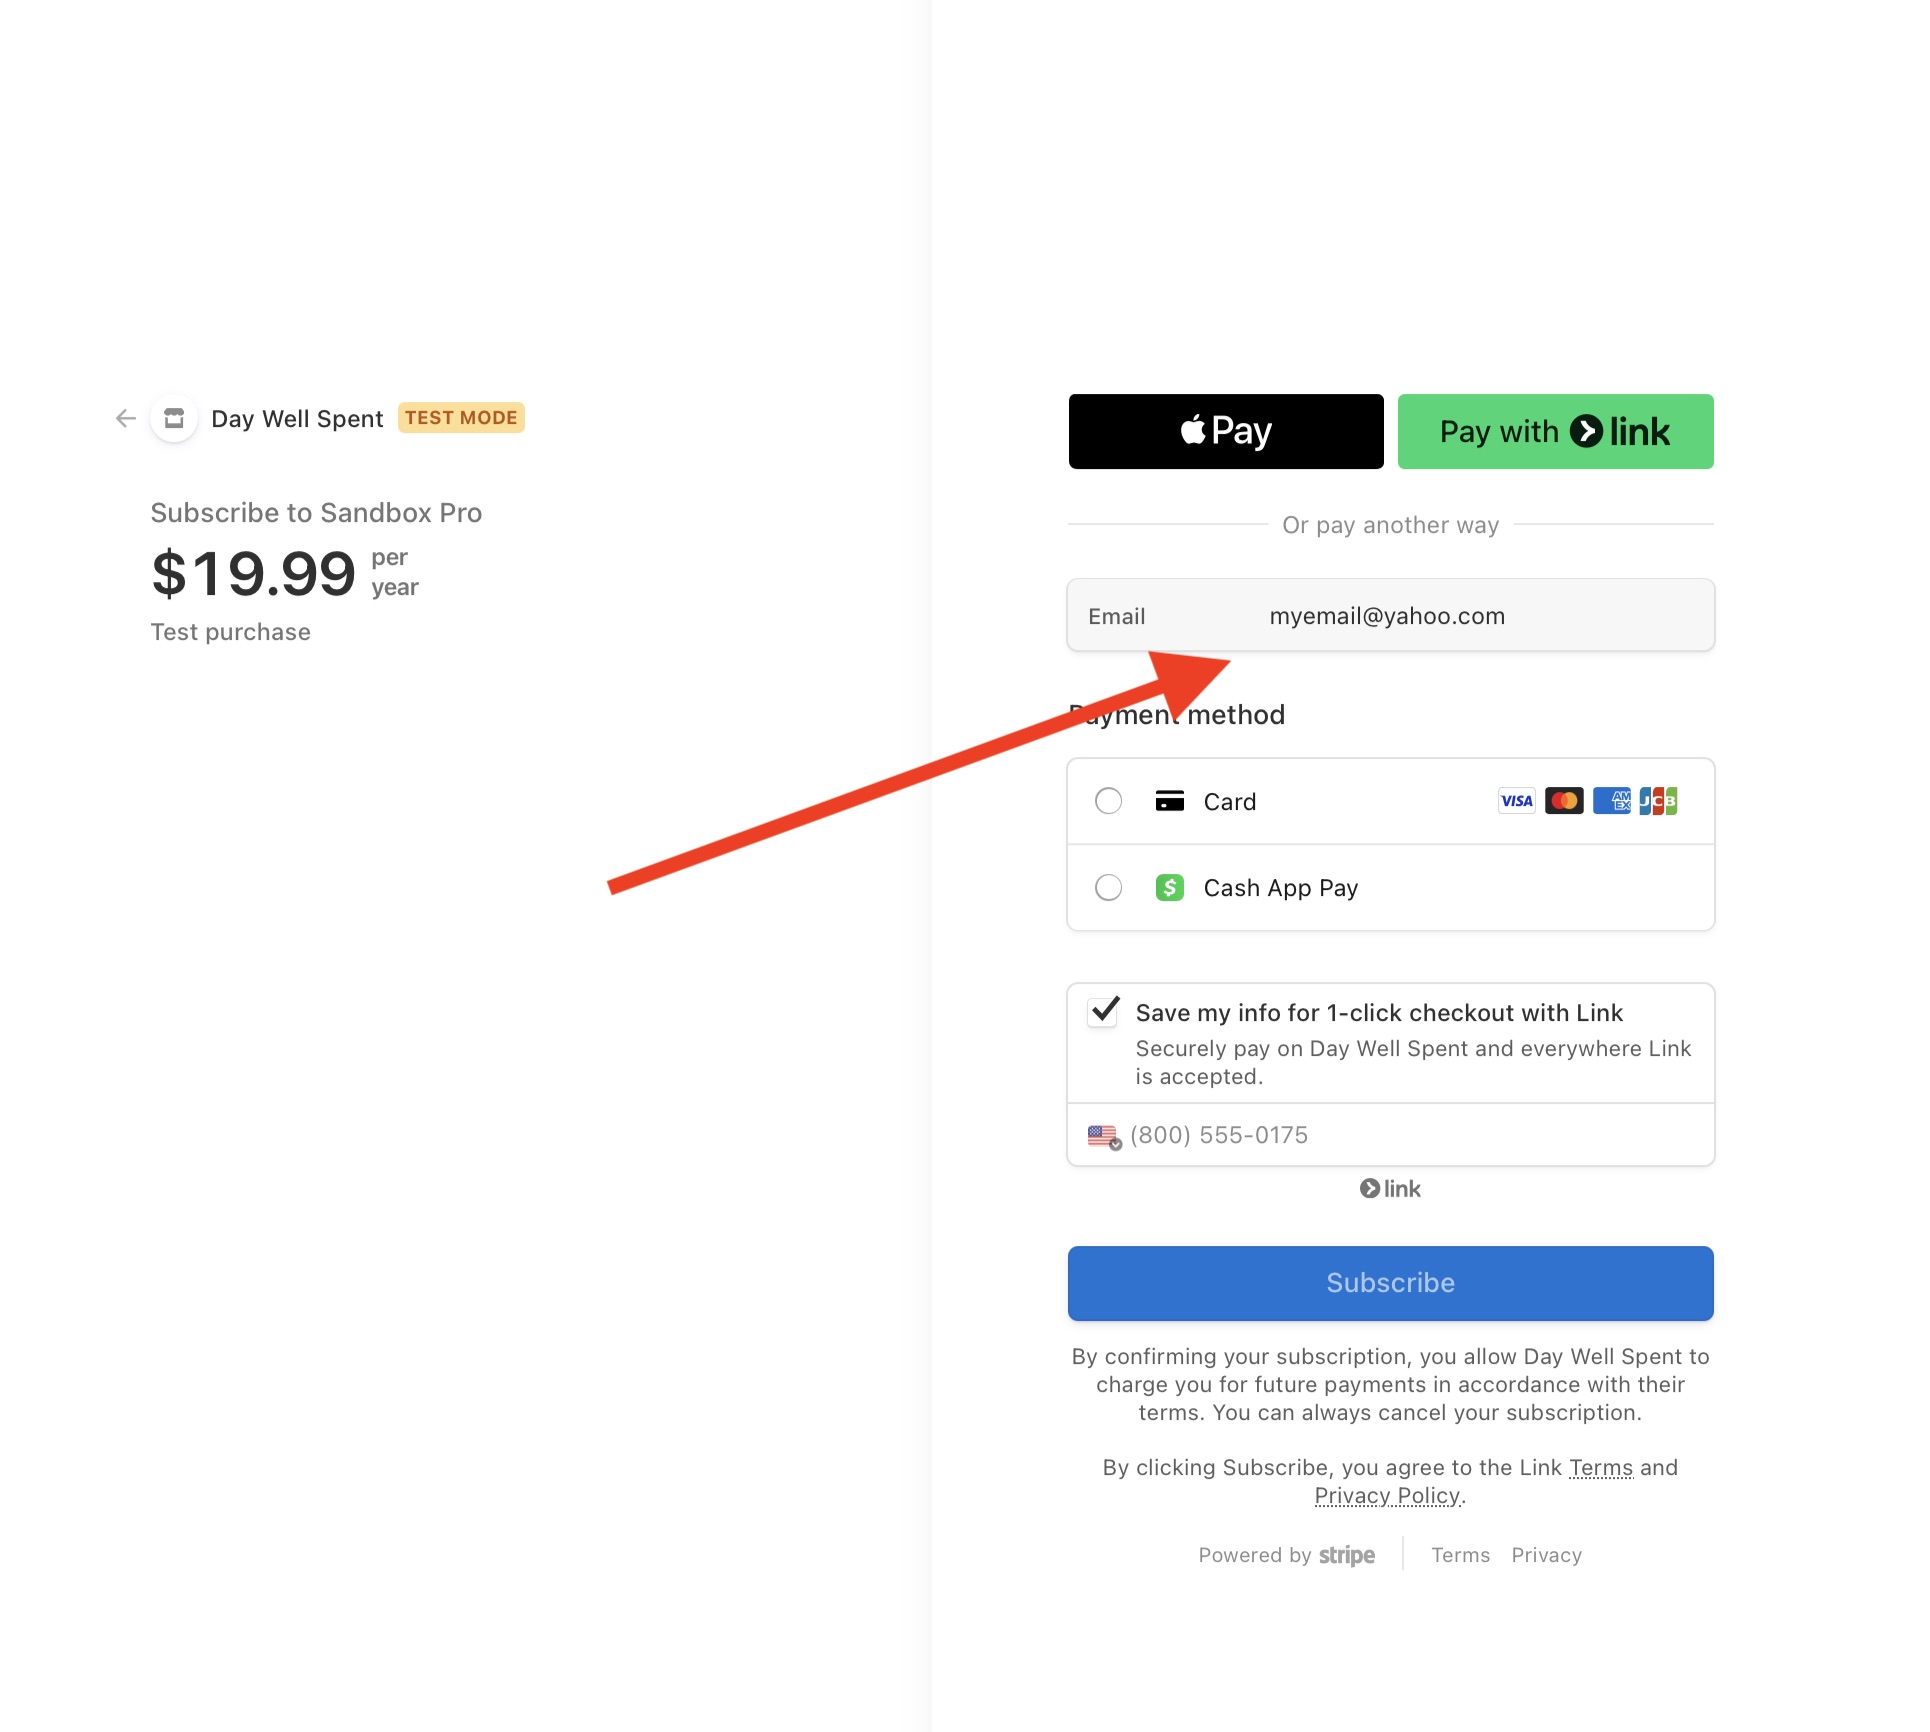
# Web Checkout FAQ
Source: https://superwall.com/docs/web-checkout-faq
Frequently asked questions about web checkout.
### How does restoring memberships work on iOS when you've purchased via web checkout?
When the user taps on the restore link in the paywall, we'll do the normal restore flow for on-device subscriptions. However, if you've enabled web checkout and the restored
entitlements don't match the entitlements belonging to the products on the paywall, we'll present an alert asking the user if they'd like to check for subscriptions on the web. This will
take them out of your app to the [plan management screen](/web-checkout-managing-memberships) where they can get a redemption link to restore their subscriptions.
### What happens if a user taps the redemption link multiple times or shares it?
Redemption codes are single-use and tied to a specific device. Once a code has been redeemed, it cannot be used again on a different device.
However, users can visit the manage page and request a new redemption link. This generates a new code that can be used to activate access on another device.
#### Without accounts (`identify` not called)
If you're not using accounts with Superwall (i.e. you never call `identify`), we allow up to **five active devices** per user. When a sixth device redeems a code, the **first device** to have redeemed a code will automatically lose access. This helps prevent abuse while still supporting reasonable multi-device usage.
#### With accounts (`identify` called)
If you are using accounts with Superwall (i.e. you call `identify` with an `appUserId` when someone logs in), then entitlements are tied to the user ID, not the individual device.
* If two different `appUserIds` redeem codes, **only the most recently identified user will retain access**.
* If the **same `appUserId` is used across multiple devices**, all those devices will **automatically share access** without needing to redeem again.
This system ensures flexibility while protecting against unauthorized sharing of redemption codes.
### How do I associate a web checkout purchase with a user in my app?
The short answer — use Superwall's [user identification APIs](/identity-management#identified-users). When you configure Superwall, or a user signs in or out, you can always associate their login status to Superwall's SDK:
```swift
Superwall.shared.identify(userId: user.id)
```
This will ensure that the user is associated with the web checkout purchase.
# Redeeming In-App
Source: https://superwall.com/docs/web-checkout-linking-membership-to-iOS-app
Handle a deep link in your app and use the delegate methods.
After purchasing from a web paywall, the user will be presented with a link to install your app and another to redeem their purchase on device.
This redeem link is a deep link that redirects to your app. Please follow our [deep link setup guide](/in-app-paywall-previews) to ensure everything is correctly configured.
Make sure you have configured the SDK inside `application(_
application:didFinishLaunchingWithOptions:)` before the deep link fires.
When your app opens via the deep link, we will call the delegate method `willRedeemLink()` before making a network call to redeem the code.
At this point, you might wish to display a loading indicator in your app in case of network issues. After receiving a response from the network, we will call `didRedeemLink(result:)` with the
result of redeeming the code. This is an enum that has the following cases:
* `success(code: String, redemptionInfo: RedemptionInfo)`: The redemption succeeded and `redemptionInfo` contains information about the redeemed code.
* `error(code: String, error: ErrorInfo)`: An error occurred while redeeming. You can check the error message via the `error` parameter.
* `expiredCode(code: String, expired: ExpiredCodeInfo)`: The code expired and `ExpiredCodeInfo` contains information about whether a redemption email has been resent and an optional obfuscated email address that the redemption email was sent to.
* `invalidCode(code: String)`: The code that was redeemed was invalid.
* `expiredSubscription(code: String, redemptionInfo: RedemptionInfo)`: The subscription that the code redeemed has expired.
On network failure, the SDK will retry up to 6 times before returning an `error` `RedemptionResult` in `didRedeemLink(result:)`.
Superwall will automatically update the subscription status with the redeemed web entitlements. However, if you're using a `PurchaseController`, you will need to handle this yourself.
### Using a PurchaseController
If you're using StoreKit in your PurchaseController, you'll need to merge the web entitlements with the device entitlements before setting the subscription status.
Here's an example of how you might do this:
```swift
func syncSubscriptionStatus() async {
var products: Set = []
// Get the device entitlements
for await verificationResult in Transaction.currentEntitlements {
switch verificationResult {
case .verified(let transaction):
products.insert(transaction.productID)
case .unverified:
break
}
}
let storeProducts = await Superwall.shared.products(for: products)
let deviceEntitlements = Set(storeProducts.flatMap { $0.entitlements })
// Get the web entitlements from Superwall
let webEntitlements = Superwall.shared.entitlements.web
// Merge the two sets of entitlements
let allEntitlements = deviceEntitlements.union(webEntitlements)
await MainActor.run {
Superwall.shared.subscriptionStatus = .active(allEntitlements)
}
}
```
In addition to syncing the subscription status when purchasing and restoring, you'll need to sync it whenever `didRedeemLink(result:)` is called:
```swift
final class Delegate: SuperwallDelegate {
func didRedeemLink(result: RedemptionResult) {
Task {
await syncSubscriptionStatus()
}
}
}
```
### Using a PurchaseController with RevenueCat
If you're using RevenueCat, you'll need to follow [steps 1 to 4 in their guide](https://www.revenuecat.com/docs/web/integrations/stripe) to set up Stripe with RevenueCat. Then, you'll need to
associate the RevenueCat customer with the Stripe subscription IDs returned from redeeming the code. You can do this by extracting the ids from the `RedemptionResult` and sending them to RevenueCat's API
by using the `didRedeemLink(result:)` delegate method:
```swift
import Foundation
import RevenueCat
final class Delegate: SuperwallDelegate {
// The user tapped on a deep link to redeem a code
func willRedeemLink() {
print("[!] willRedeemLink")
// Optionally show a loading indicator here
}
// Superwall received a redemption result and validated the purchase with Stripe.
func didRedeemLink(result: RedemptionResult) {
print("[!] didRedeemLink", result)
// Send Stripe IDs to RevenueCat to link purchases to the customer
// Get a list of subscription ids tied to the customer.
guard let stripeSubscriptionIds = result.stripeSubscriptionIds else { return }
guard let url = URL(string: "https://api.revenuecat.com/v1/receipts") else { return }
let revenueCatStripePublicAPIKey = "strp....." // replace with your RevenueCat Stripe Public API Key
let appUserId = Purchases.shared.appUserID
// In the background...
Task.detached {
await withTaskGroup(of: Void.self) { group in
// For each subscription id, link it to the user in RevenueCat
for stripeSubscriptionId in stripeSubscriptionIds {
group.addTask {
var request = URLRequest(url: url)
request.httpMethod = "POST"
request.setValue("application/json", forHTTPHeaderField: "Content-Type")
request.setValue("application/json", forHTTPHeaderField: "Accept")
request.setValue("stripe", forHTTPHeaderField: "X-Platform")
request.setValue("Bearer \(revenueCatStripePublicAPIKey)", forHTTPHeaderField: "Authorization")
do {
request.httpBody = try JSONEncoder().encode([
"app_user_id": appUserId,
"fetch_token": stripeSubscriptionId
])
let (data, _) = try await URLSession.shared.data(for: request)
let json = try JSONSerialization.jsonObject(with: data, options: [])
print("[!] Success: linked \(stripeSubscriptionId) to user \(appUserId)", json)
} catch {
print("[!] Error: unable to link \(stripeSubscriptionId) to user \(appUserId)", error)
}
}
}
}
/// After all network calls complete, invalidate the cache without switching to the main thread.
Purchases.shared.getCustomerInfo(fetchPolicy: .fetchCurrent) { customerInfo, error in
/// If you're using `Purchases.shared.customerInfoStream`, or keeping Superwall Entitlements in sync
/// via RevenueCat's `PurchasesDelegate` methods, you don't need to do anything here. Those methods will be
/// called automatically when this call fetches the most up to customer info, ignoring any local caches.
/// Otherwise, if you're manually calling `Purchases.shared.getCustomerInfo` to keep Superwall's entitlements
/// in sync, you should use the newly updated customer info here to do so.
}
/// You could always access web entitlements here as well
/// `let webEntitlements = Superwall.shared.entitlements.web`
// After all network calls complete...
await MainActor.run {
// Perform UI updates on the main thread, like letting the user know their subscription was redeemed
}
}
}
}
```
If you call `logIn` from RevenueCat's SDK, then you need to call the logic you've implemented
inside `didRedeemLink(result:)` again. For example, that means if `logIn` was invoked from
RevenueCat, you'd either abstract out this logic above into a function to call again, or simply
call this function directly.
The web entitlements will be returned along with other existing entitlements in the `CustomerInfo` object accessible via RevenueCat's SDK.
If you’re logging in and out of RevenueCat, make sure to resend the Stripe subscription IDs to RevenueCat’s endpoint after logging in.
### Refreshing of web entitlements
If you aren't using a Purchase Controller, the SDK will refresh the web entitlements every 24 hours.
### Redeeming while a paywall is open
If a redeem event occurs when a paywall is open, the SDK will track that as a restore event and the paywall will close.
# Restoring & Managing Purchases
Source: https://superwall.com/docs/web-checkout-managing-memberships
Learn how users can manage their subscriptions from purchases made via the web.
When users purchase a subscription via the web, they can can access their account details via a plan management page. This url is included in their receipt which is sent to their email upon a successful purchase. To retrieve the link, users must enter in their email that was used during checkout. Otherwise, to offer this link manually you can use the following URL format:
```plaintext
https://{your URL in settings}.superwall.app/manage
```
When this page is visited, users enter in their email that used during checkout to receive a link to manage their subscription:
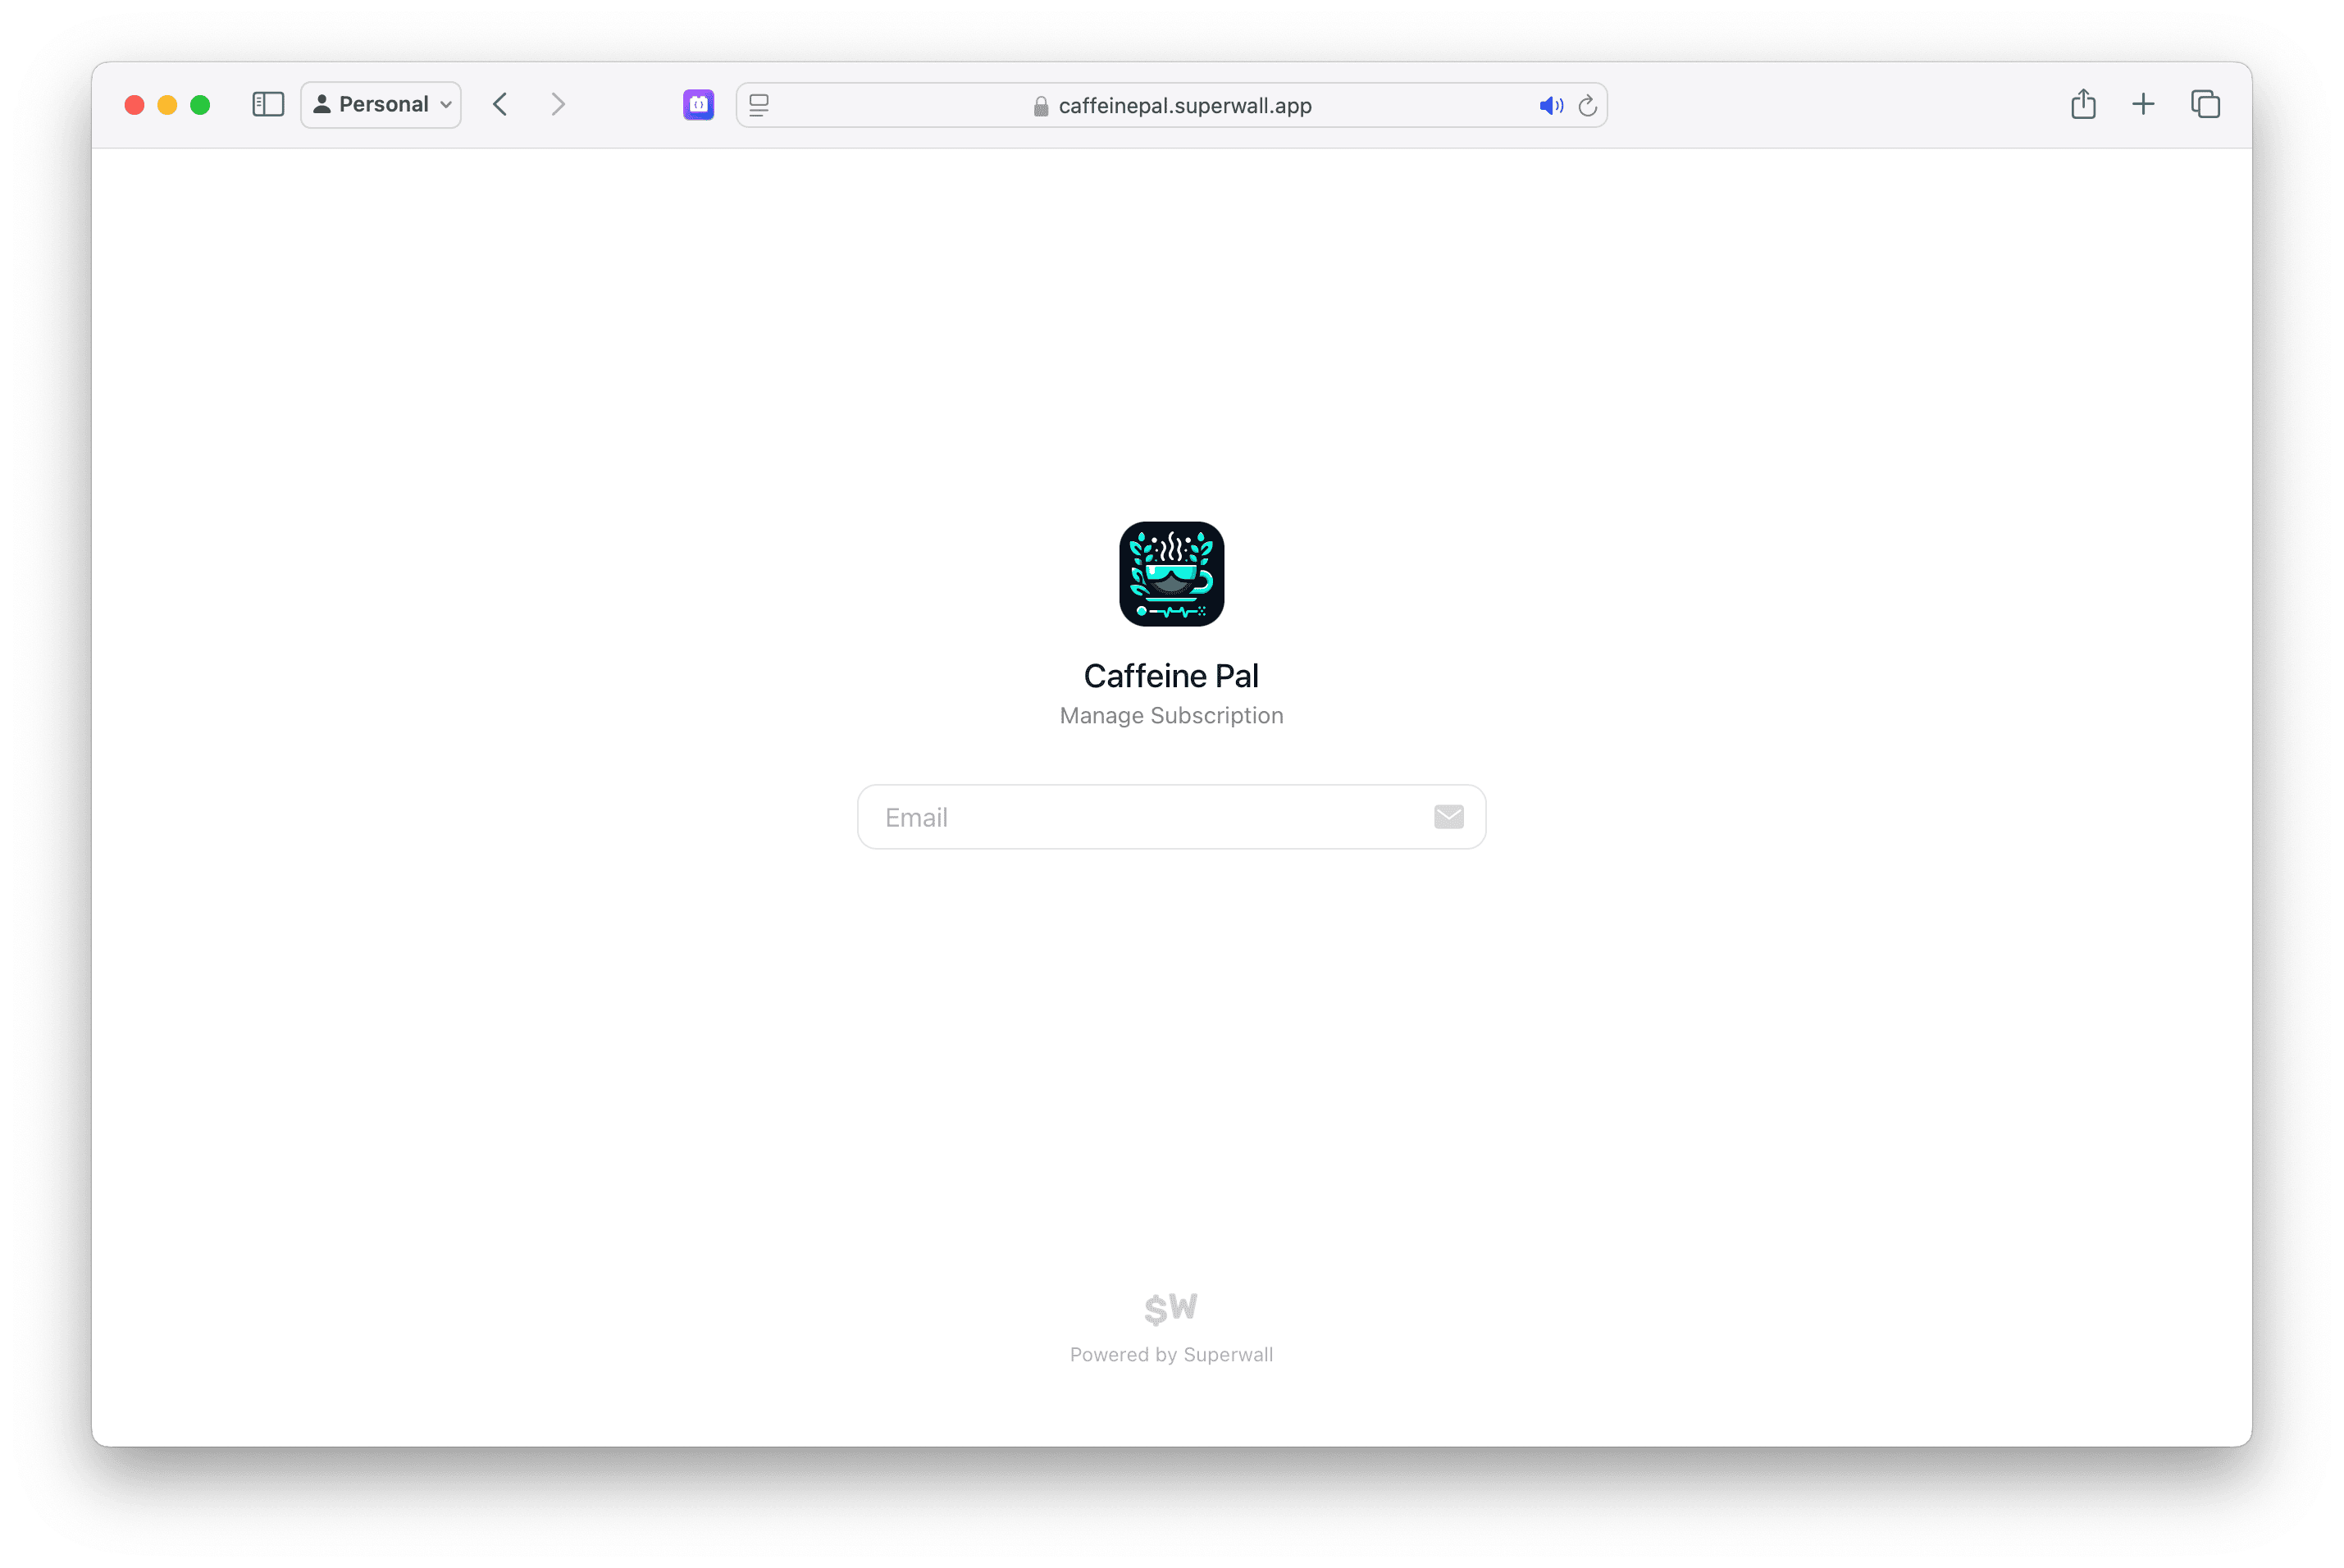
For the above example, the URL would be `https://caffeinepal.superwall.app/manage`. After entering their email, they will receive a link to manage their subscription, update payment methods, view their billing history, and more:
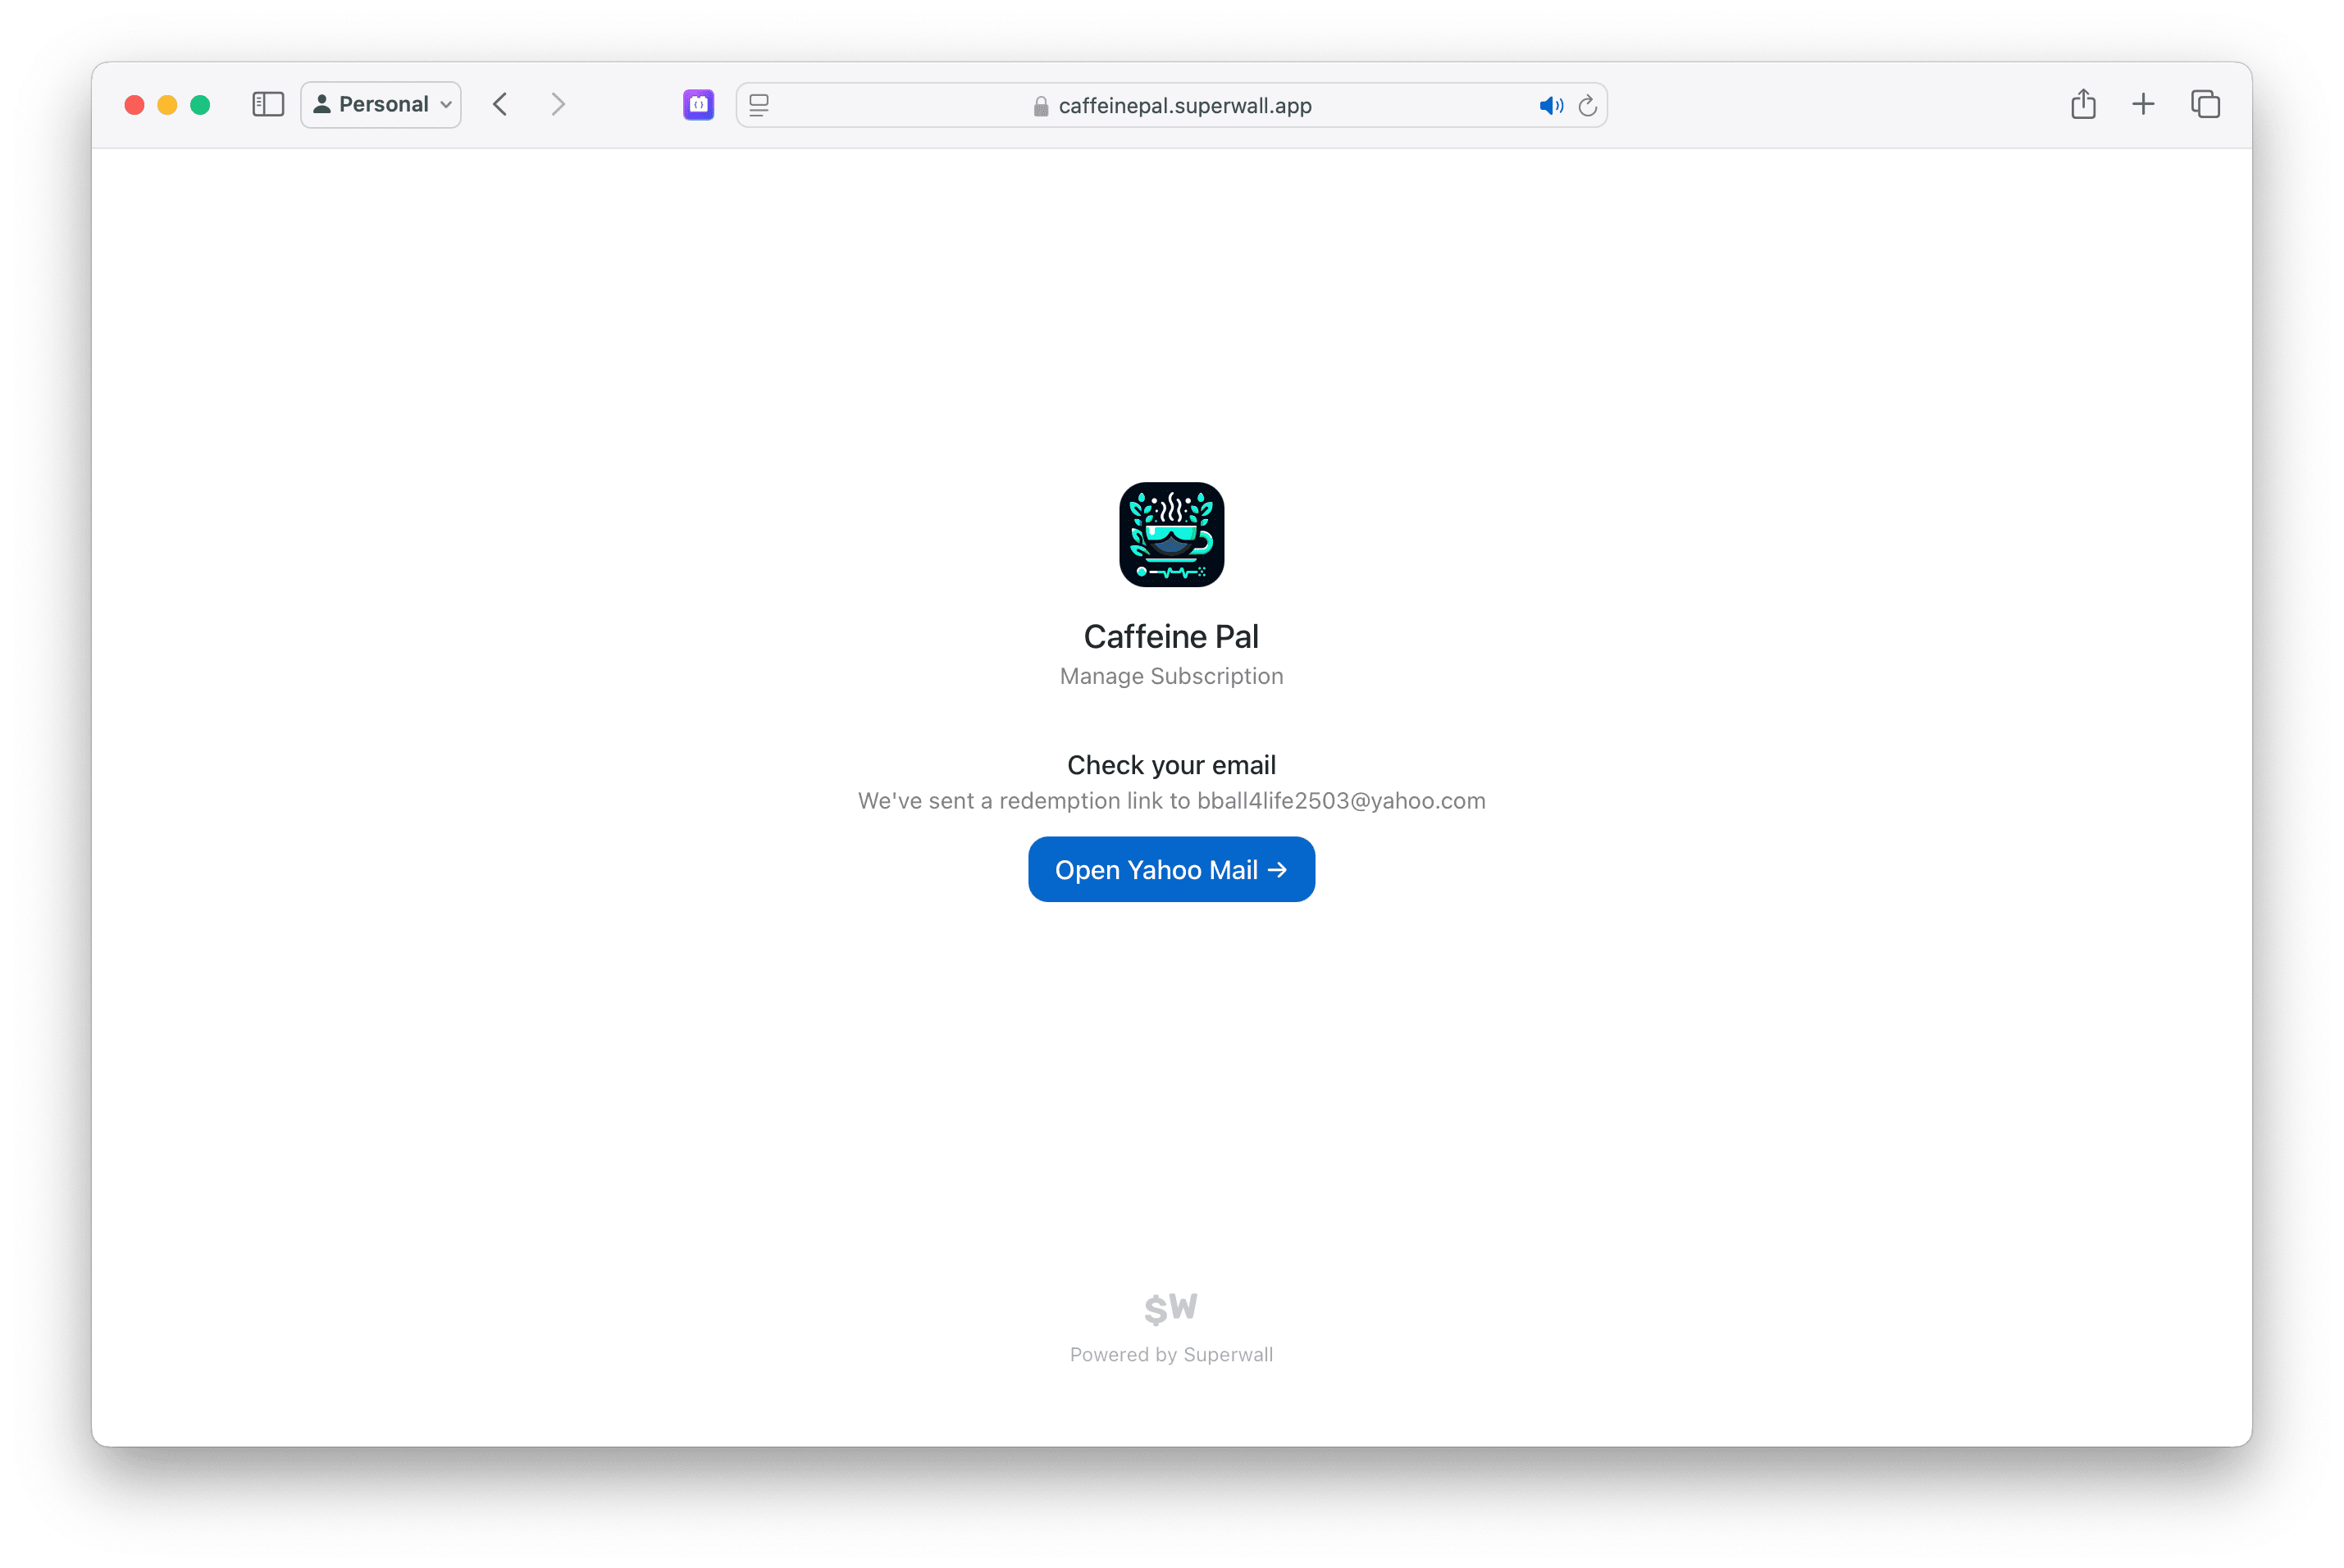
For situations where a user needs to restore their purchases, check out the answer in this [F.A.Q](/web-checkout-faq).
# Overview
Source: https://superwall.com/docs/web-checkout-overview
Let customers purchase products online via Stripe, and them link them to your iOS app with one seamless flow. No authentication required.
Superwall's web checkout integration makes it easy to set up purchasing funnels for your app via the web. Web checkout is powered by Stripe and Stripe products. Once an online purchase is complete, the customer will be redirected back to your app with a deep link that can be used to unlock content or features in your app via any associated [entitlement](/products#entitlements).
Web checkout requires the Superwall iOS SDK 4.2.0 or later.
Visual learner? Go watch our web checkout tour over on YouTube
[here](https://youtu.be/eUSIySsN1ZU).
### How it works
Superwall presents paywalls via the concept of [campaigns](/campaigns), and each campaign has one or more [placements](/campaigns-placements). A paywall is shown in a campaign when a placement is triggered after your [audience filters](/campaigns-audience) are evaluated. This setup is Superwall's foundation, and the web checkout flow works the exact same way.
The core difference? Each placement becomes a unique URL that you can share, send or email to present a user with a paywall that leads to a Stripe checkout flow. And just like with Superwall on apps, you can create experiments, try out different paywalls, run price tests and more.
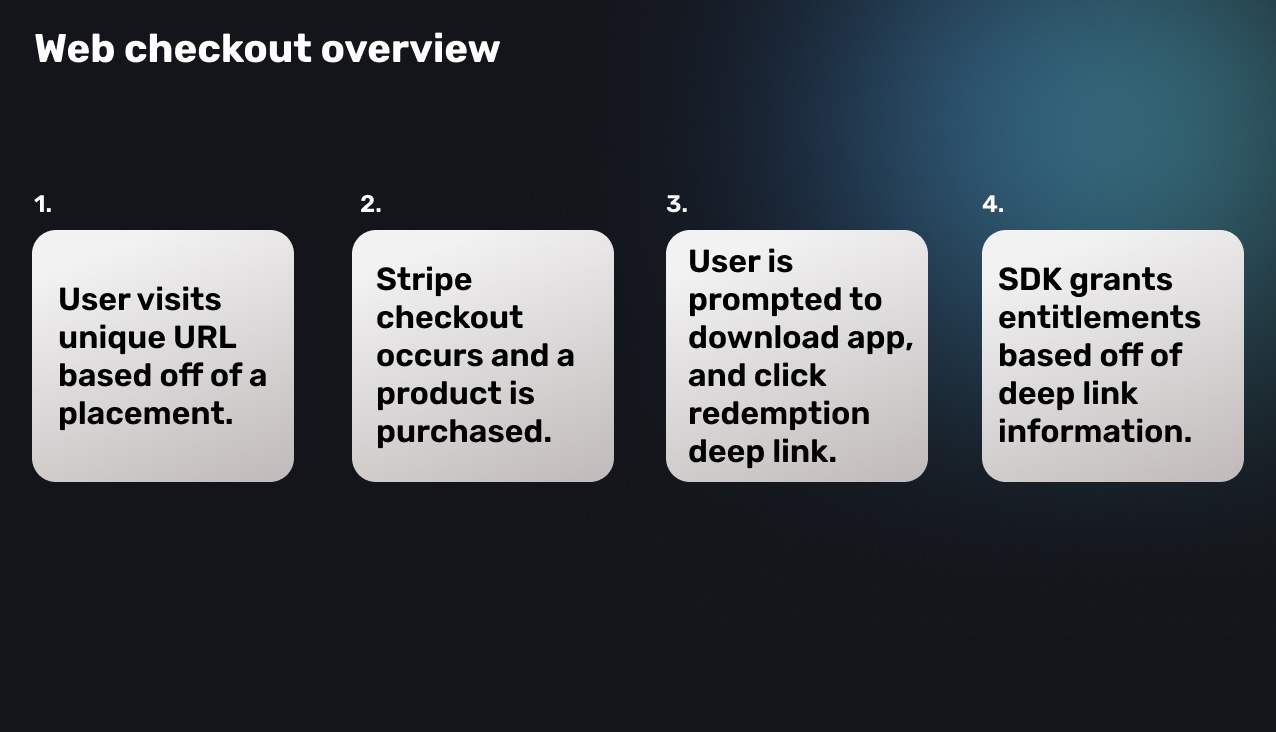
### Overall flow
Refer to the individual pages below to get started, but for a quick, high-level overview — here's how web checkout works from beginning to end:
1. A Stripe app is added to an existing iOS project in Superwall.
2. Stripe is configured with Superwall.
3. iOS app details are configured in the Stripe app's settings page (within Superwall).
4. Products are created *in* Stripe, and imported into Superwall.
5. Within a campaign (a default one is provided), you attach those products to a paywall.
6. A user visits a placement URL, and performs the checkout flow.
7. After a successful purchase, the user is redirected to download the app.
8. *On the device that they downloaded the app*, they click the redemption link.
9. Your iOS app is opened via a deep link (which means it must be set up with Superwall deep links, [docs here](/in-app-paywall-previews)).
10. In the `SuperwallDelegate`, `willRedeemLink()` is called, and then once it's fetched — `didRedeemLink(result:)` is called with the result of the redemption.
11. Finally, this user's account and details are managed via a link they find in their [email receipt or by visiting a URL manually](/web-checkout-managing-memberships).
### Getting setup
Before you start, you'll need to have a Stripe account and a Superwall account. If you don't have a Stripe account, you can sign up for one [here](https://dashboard.stripe.com/register).
To opt yourself into the beta, please visit ["Public Beta
Settings"](https://superwall.com/applications/:app/settings/experiments).
1. **[Creating a Stripe App](/web-checkout-creating-an-app):** First, you'll add a Stripe app to an existing project within Superwall.
2. **[Configuration](/web-checkout-configuring-stripe-keys-and-settings):** Next, you'll need to perform a one-time setup to connect Stripe with Superwall.
3. **[Creating Stripe products](/web-checkout-configuring-stripe-keys-and-settings):** Create your products in Stripe to add to your web paywalls.
### Creating paywalls and campaigns
4. **[Presenting paywalls](/web-checkout-creating-campaigns-to-show-paywalls):** Set up a campaign, create some placements and add paywalls to begin showing them to customers.
### Associating entitlements to your iOS apps
5. **[Linking purchases to your iOS app](/web-checkout-linking-membership-to-iOS-app):** Once a purchase occurs, the user will be prompted to download your app and click on a redemption link.
6. **[Managing memberships](/web-checkout-managing-memberships):** Users can cancel, update or manage their memberships via Stripe.
### Testing purchases
7. **[Testing purchases](/web-checkout-testing-purchases):** Test your web checkout flow with test purchases.
# Sandbox Purchases
Source: https://superwall.com/docs/web-checkout-testing-purchases
Test with your web paywalls by using sandbox products.
### Purchase flow overview
When a user clicks on a button to purchase a product, the process will switch over to Stripe's checkout flow:
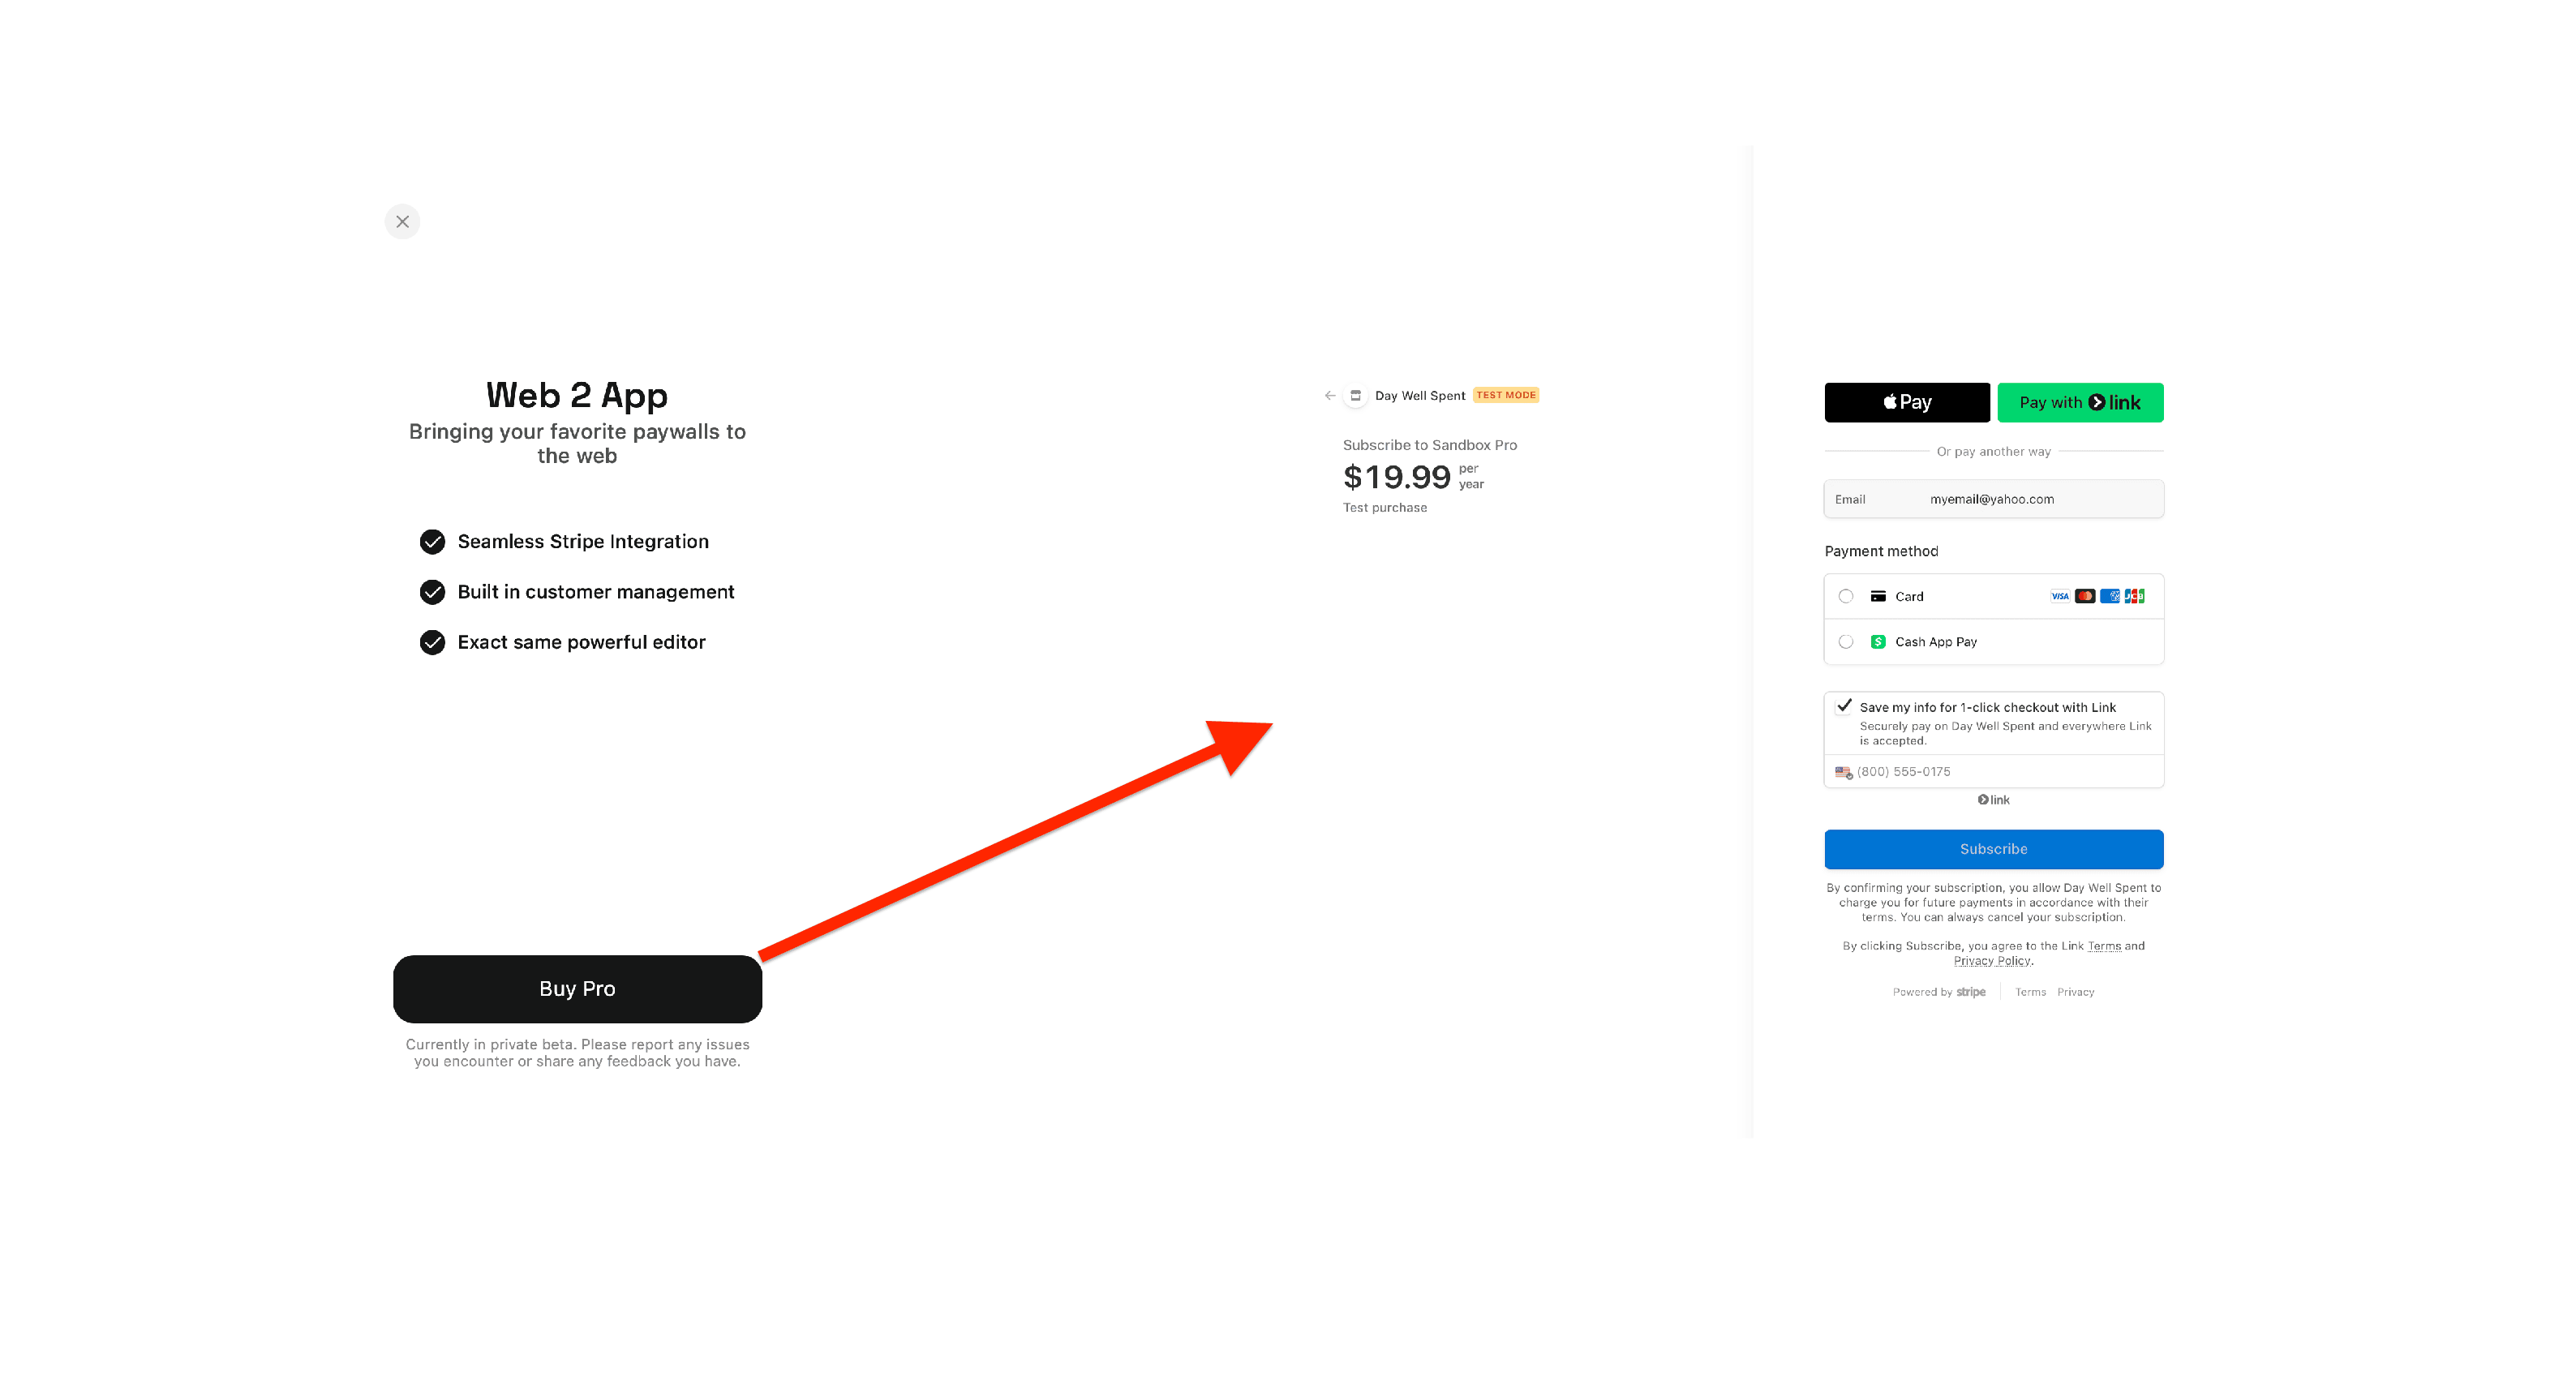
Once the purchase goes through successfully, they'll be taken to a page where Superwall prompts them to:
1. Download the app.
2. Click the redemption link.
Users should click the redemption link *on the device where the app is installed*. If the setting for "Redeemable on Desktop" is diabled, they'll be prompted to continue on an iOS device.
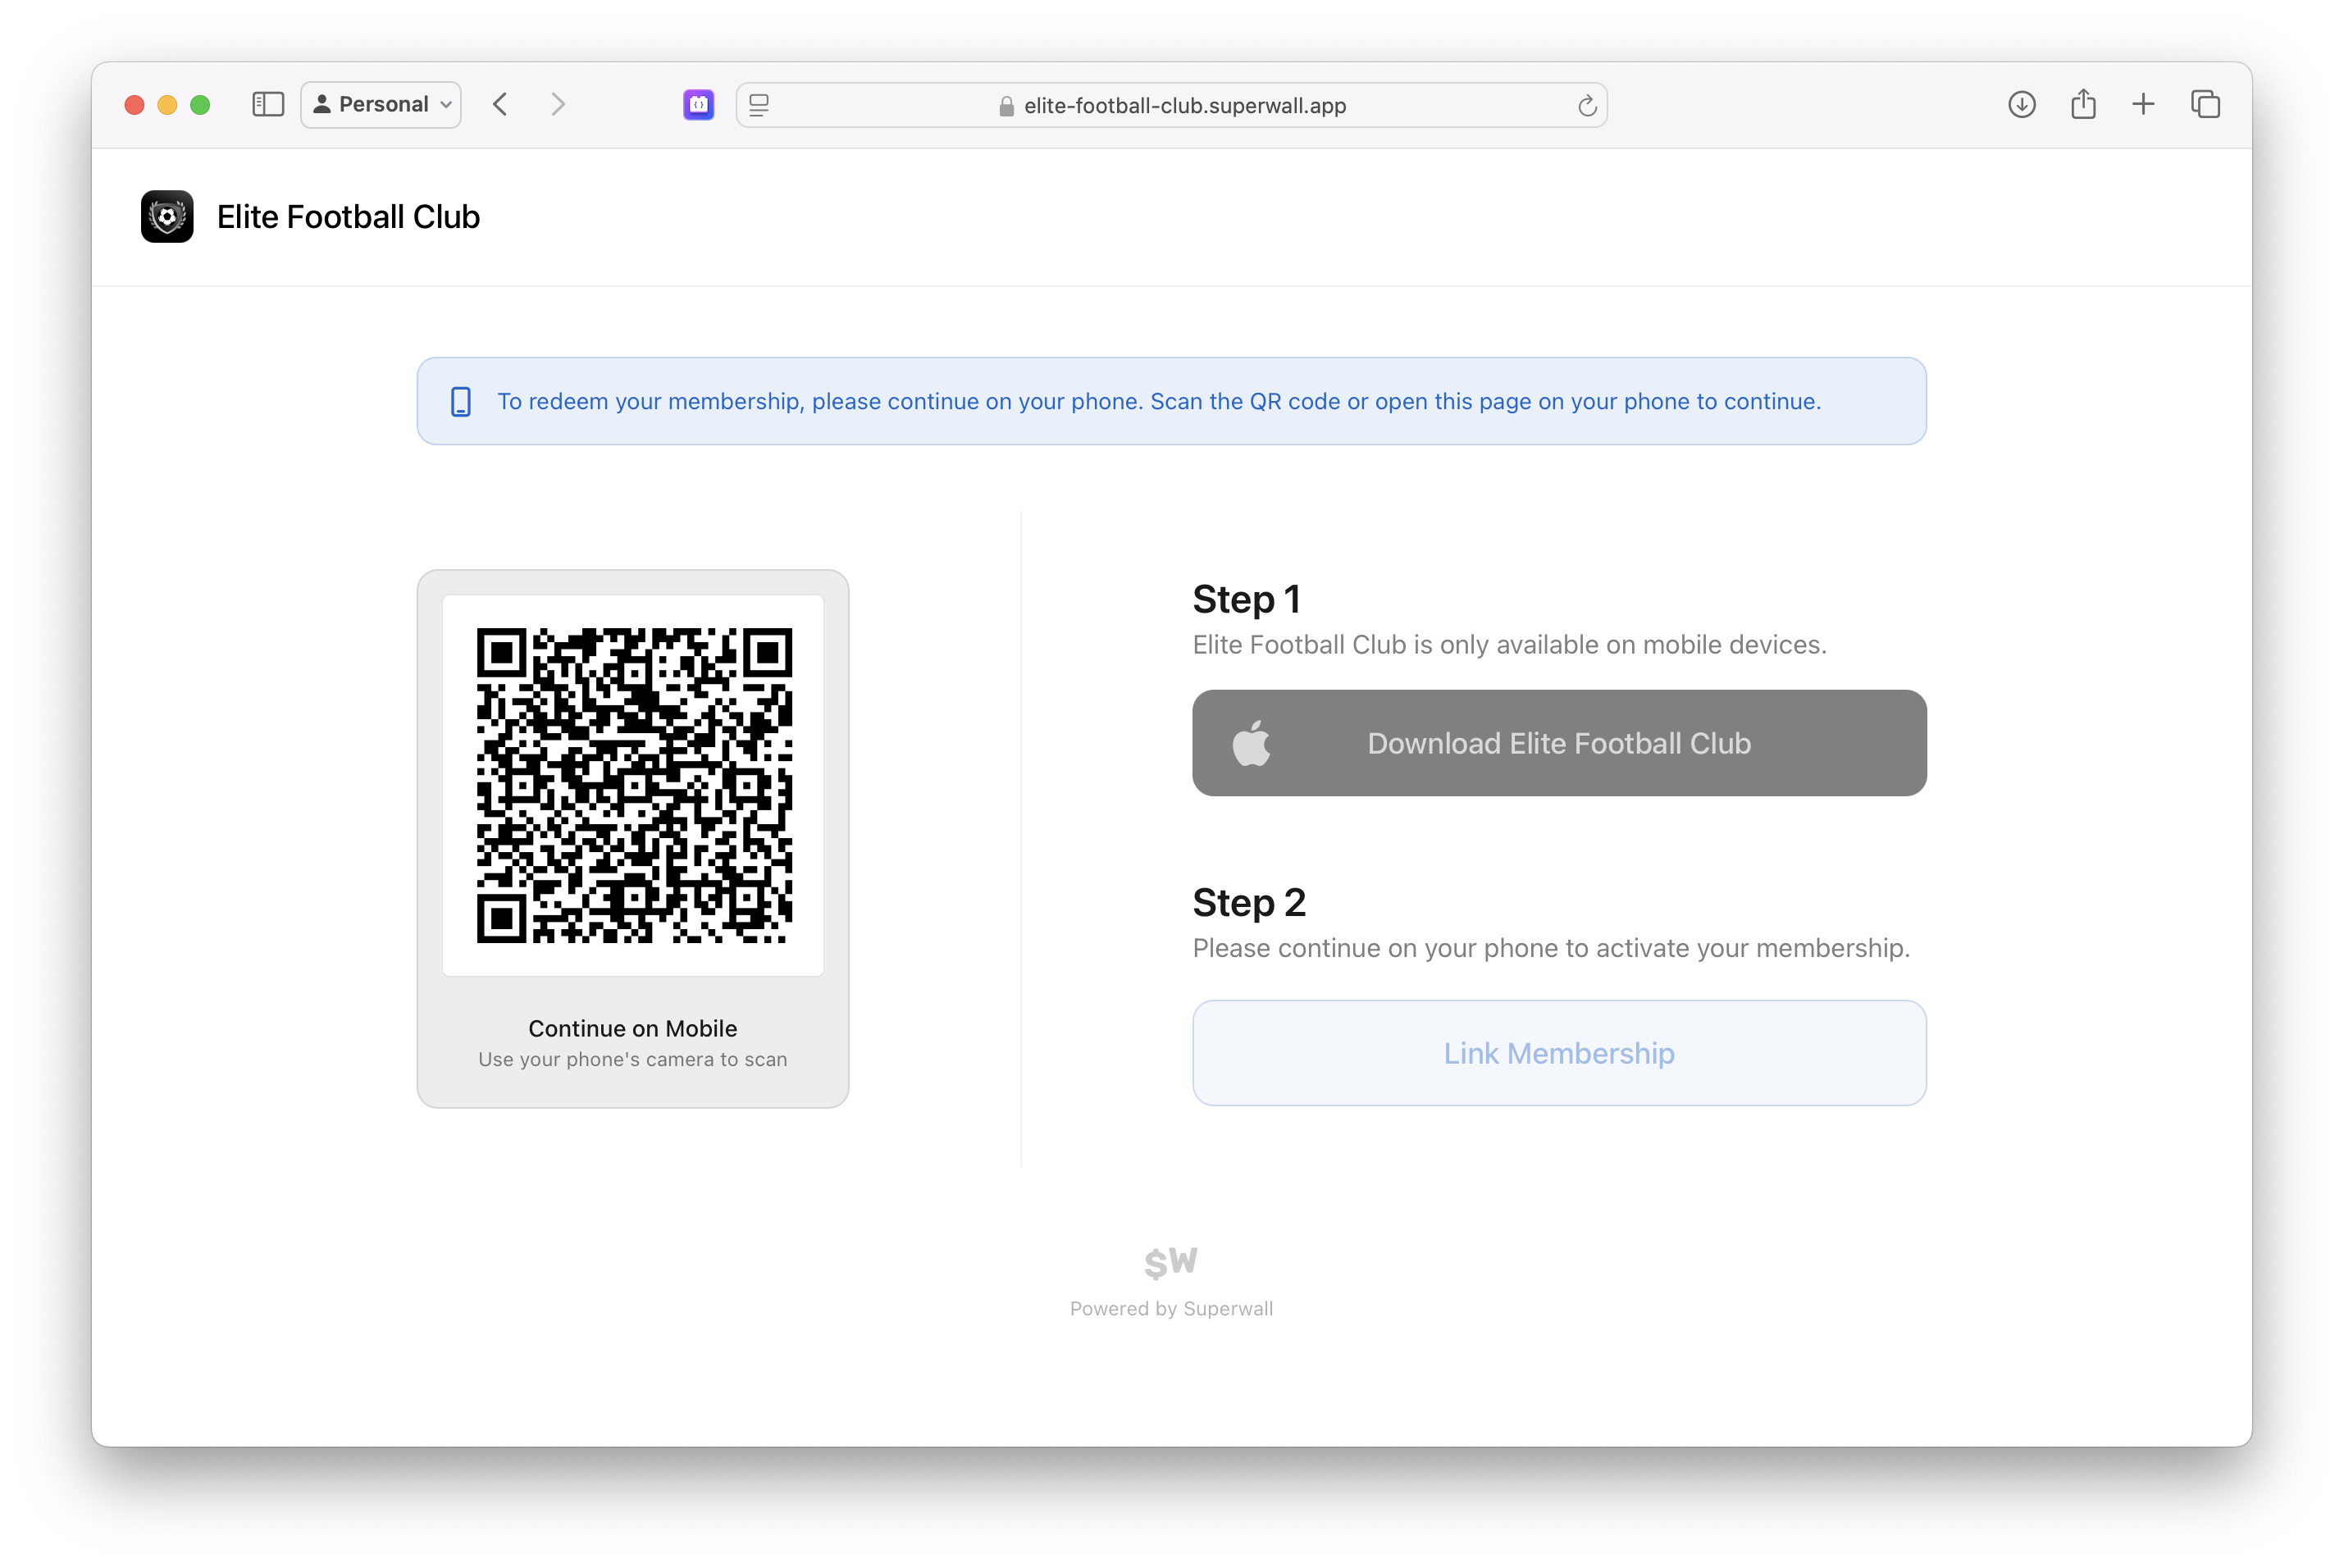
From there, the [redemption flow](/web-checkout-linking-membership-to-iOS-app) occurs.
### Testing a purchase
To test a purchase:
1. Add a [sandbox product](/web-checkout-adding-a-stripe-product#creating-sandbox-products-to-test-with) to a paywall.
2. Visit the paywall URL and checkout.
3. Choose "Card" for the payment method.
4. For the card number, use `4242 4242 4242 4242` with any expiration date later than today, any CVC and fill out the name and zip code.
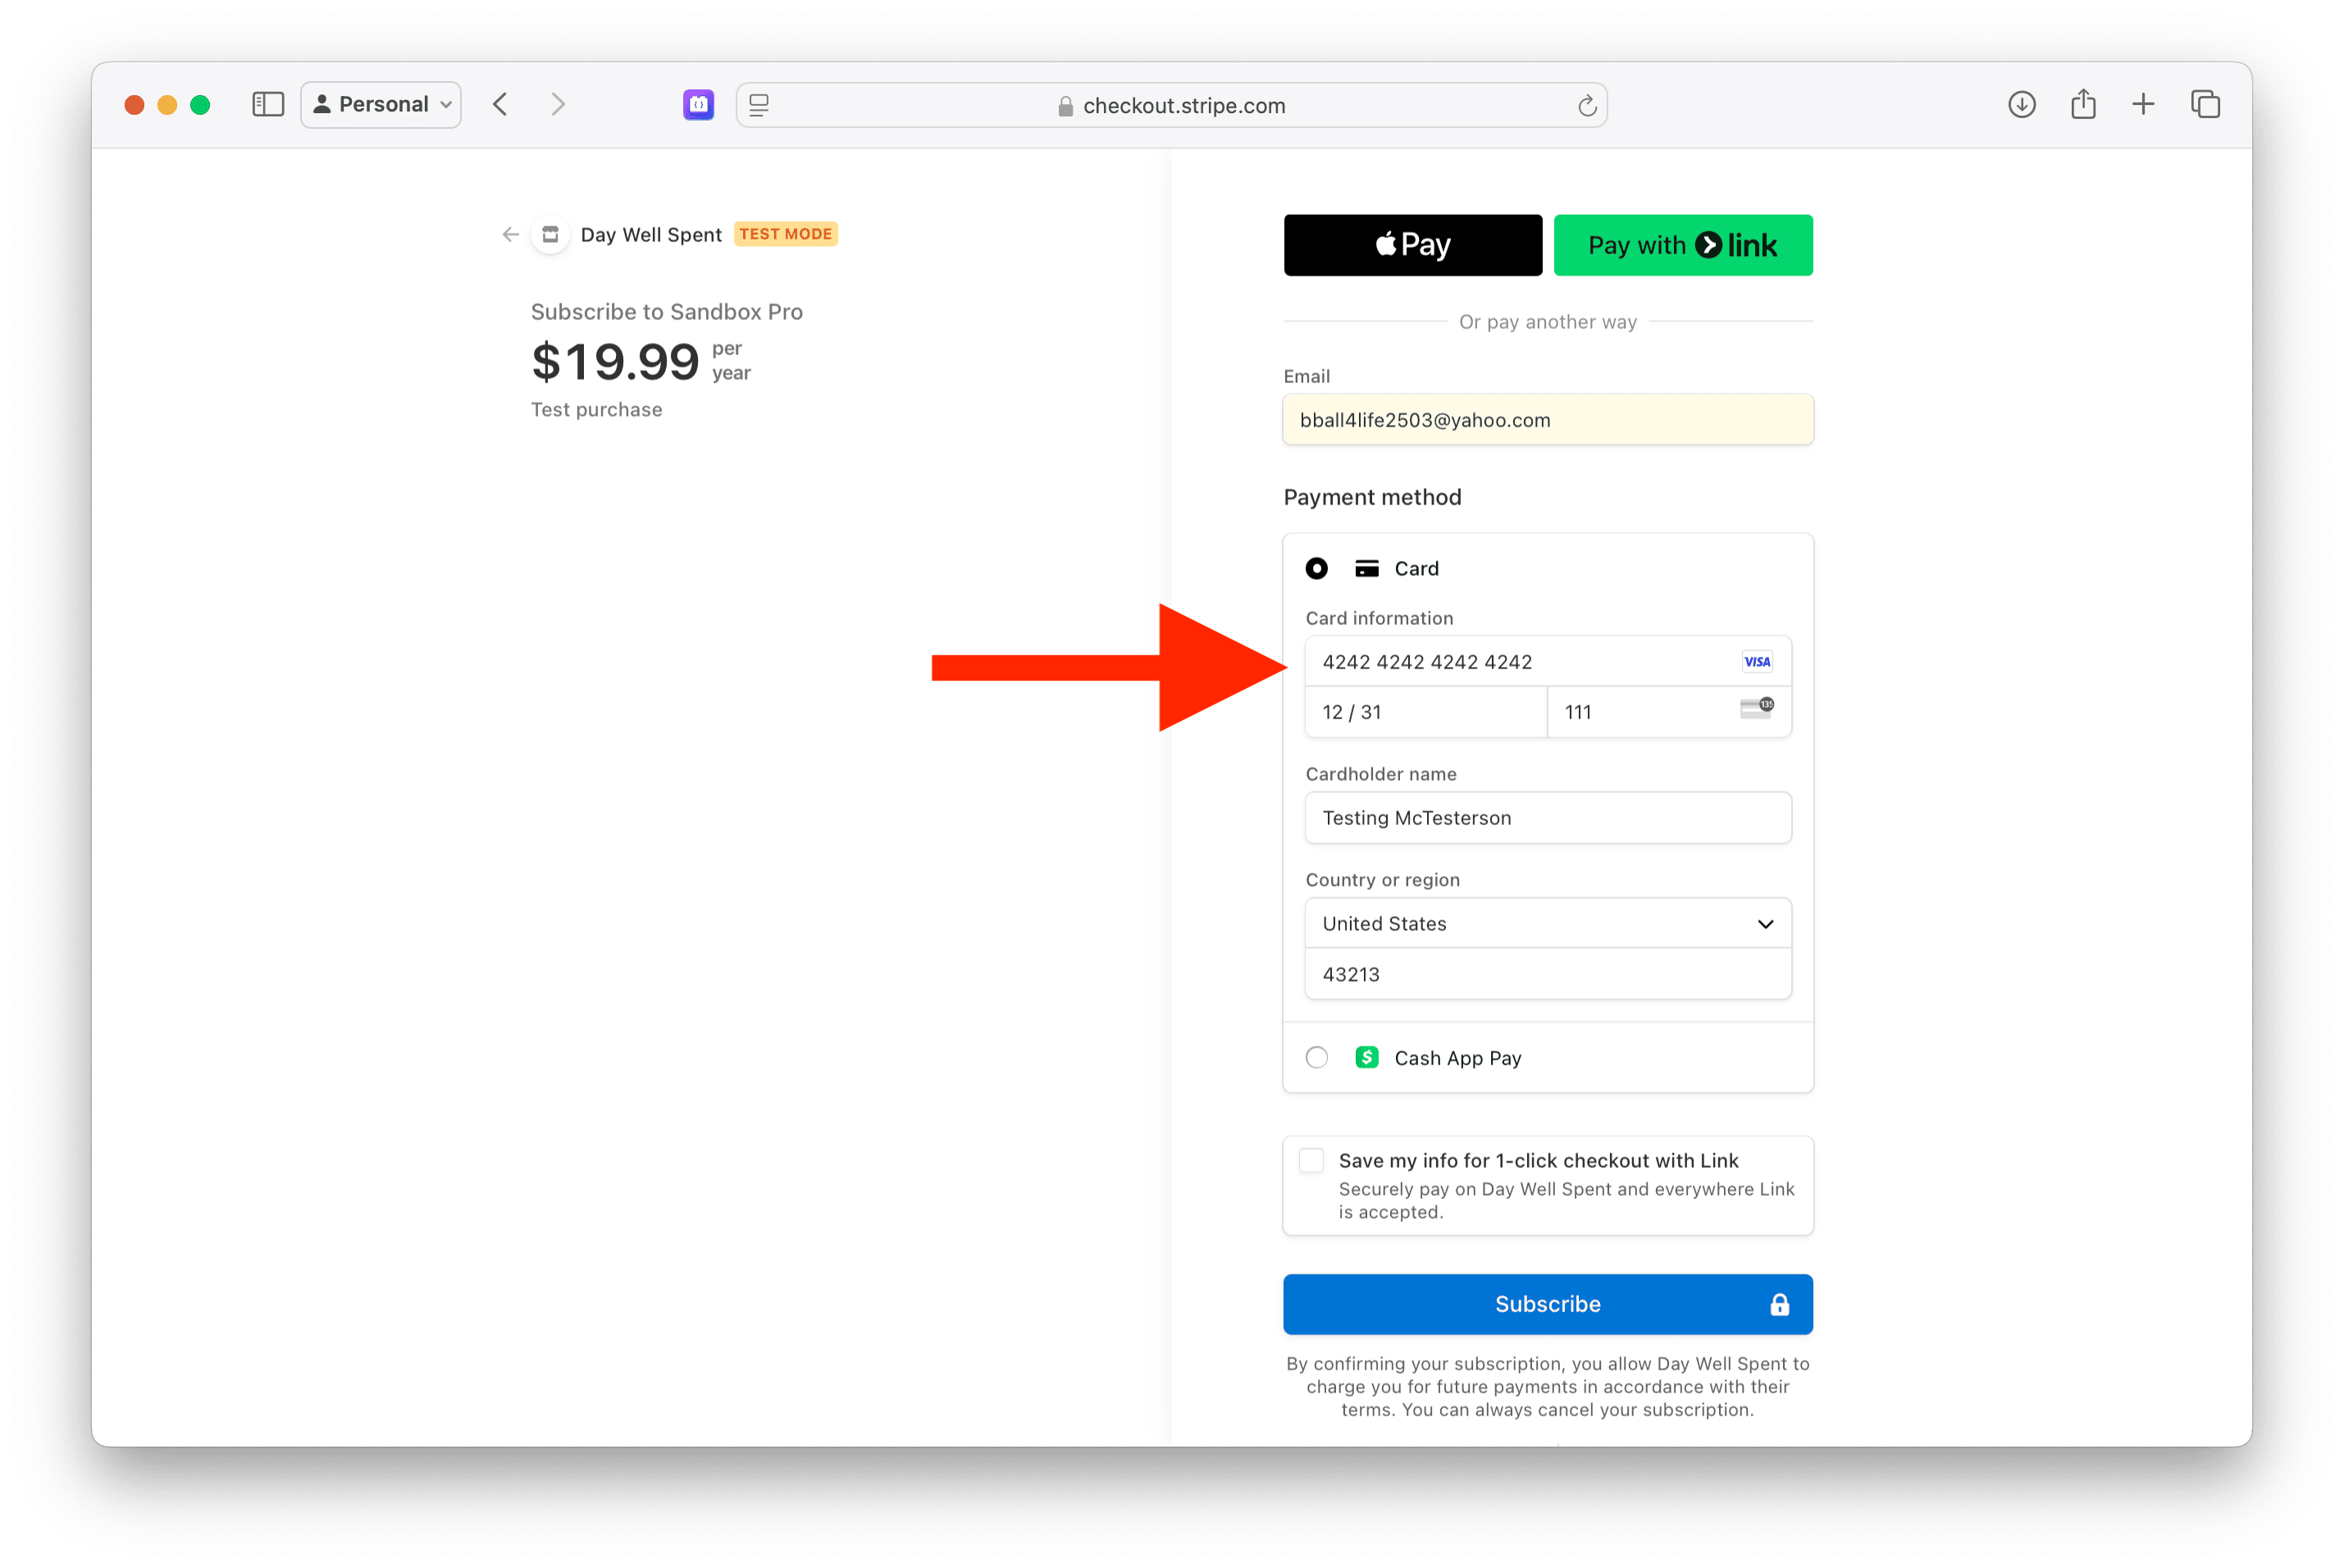
This will allow you to checkout and go through the entire flow to debug issues, test it out on a device and more.