Configure the SDK
As soon as your app launches, you need to configure the SDK with your Public API Key. You'll retrieve this from the Superwall settings page.
Sign Up & Grab Keys
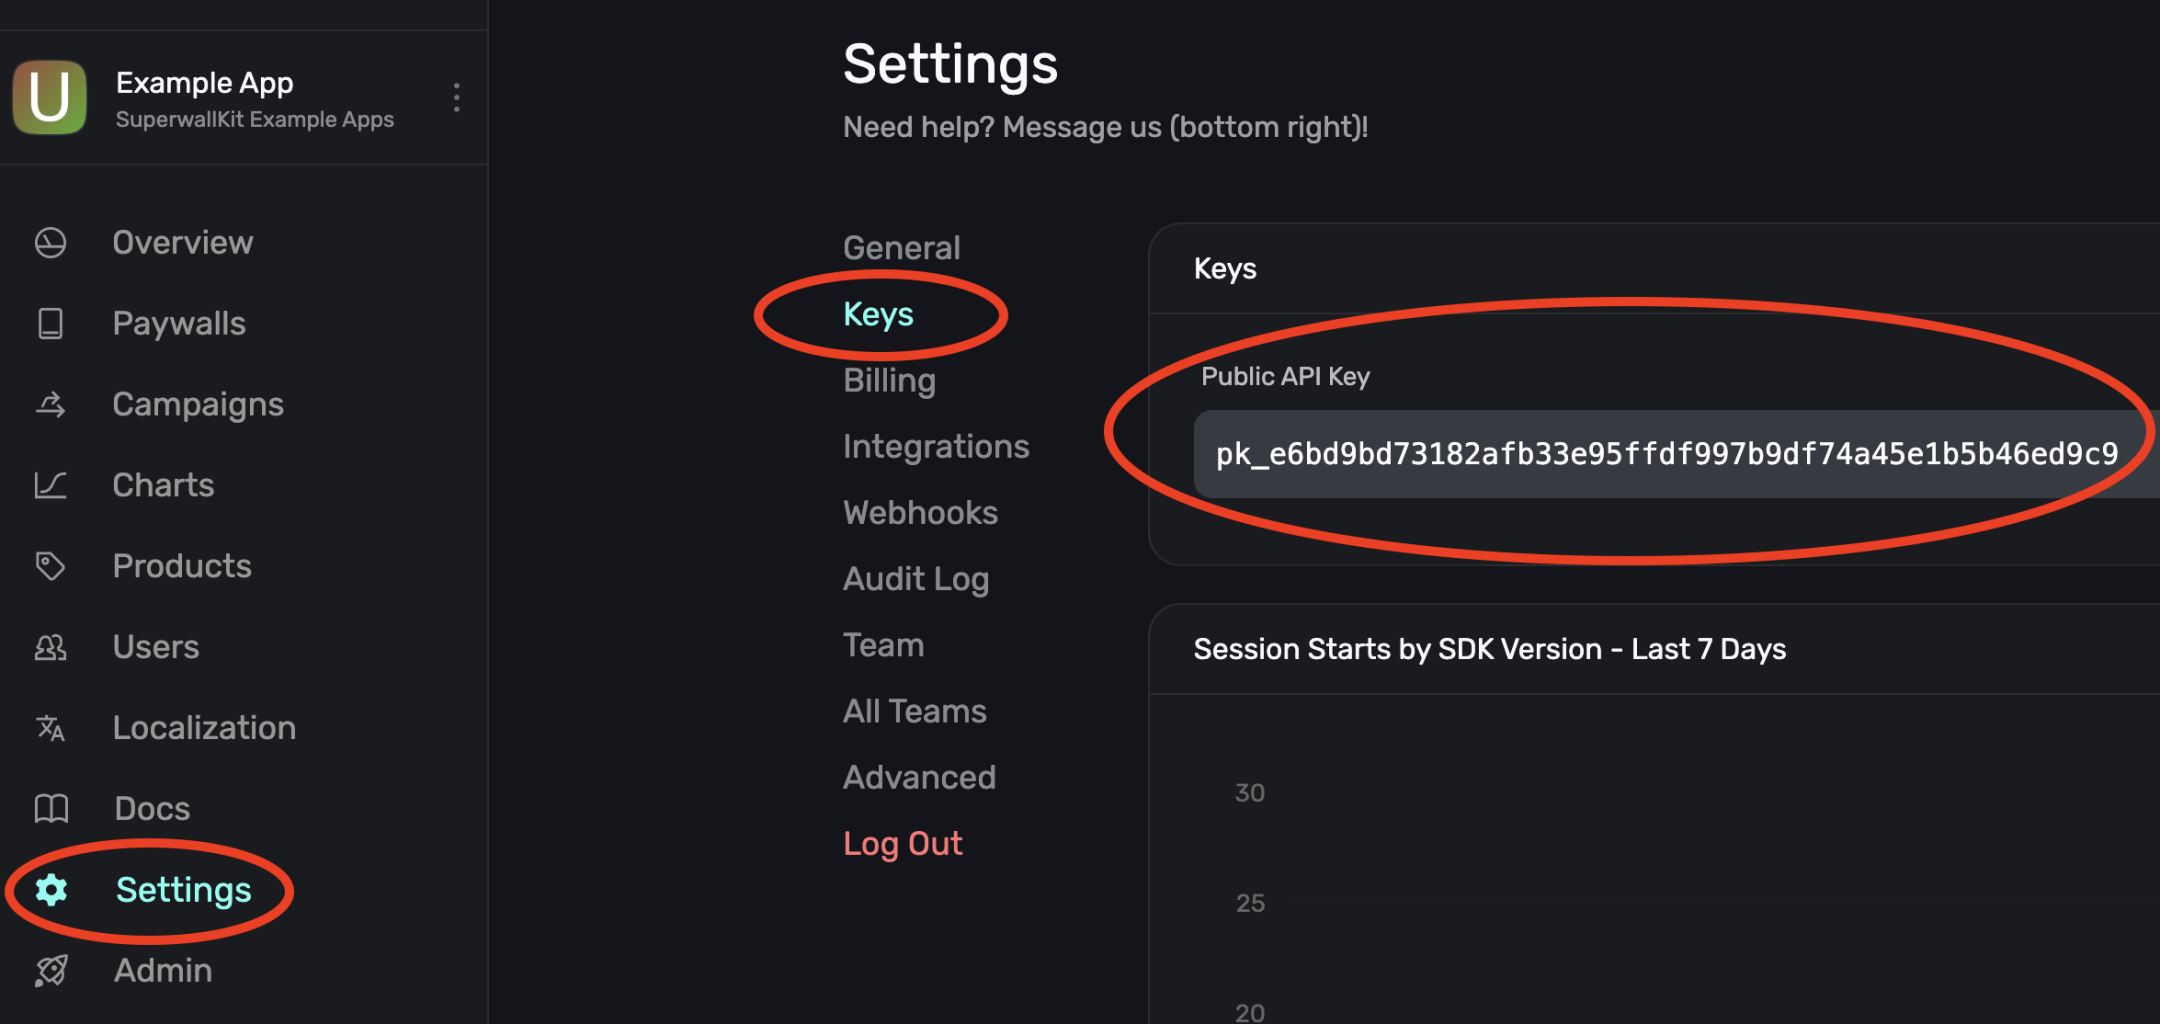
If you haven't already, sign up for a free account on Superwall. Then, when you're through to the Dashboard, click Settings from the panel on the left, click Keys and copy your Public API Key:
Initialize Superwall in your app
Begin by editing your main Application entrypoint. Depending on the
platform this could be AppDelegate.swift or SceneDelegate.swift for iOS,
MainApplication.kt for Android, main.dart in Flutter, or App.tsx for React Native:
// MainApplication.kt

class MainApplication : android.app.Application(), SuperwallDelegate {
    override fun onCreate() {
        super.onCreate()

        // Setup
        Superwall.configure(this, "MY_API_KEY")

        // OR using the DSL
        configureSuperwall("MY_API_KEY") {
            purchaseController = MyPurchaseController(this@MainApplication)
        }
    }
}
This configures a shared instance of Superwall, the primary class for interacting with the SDK's API. Make sure to replace MY_API_KEY with your public API key that you just retrieved.
By default, Superwall handles basic subscription-related logic for you. However, if you’d like
greater control over this process (e.g. if you’re using RevenueCat), you’ll want to pass in a
PurchaseController to your configuration call and manually set the subscriptionStatus. You can
also pass in SuperwallOptions to customize the appearance and behavior of the SDK. See
Purchases and Subscription Status for more.
You've now configured Superwall!
For further help, check out our Android example apps for working examples of implementing the Superwall SDK.
How is this guide?