Superwall Android Vibe Coding Guide
This is an all-in-one prompt to get the Superwall SDK set up in your app.
Prerequisites
We recommend setting up the Superwall Docs MCP for any further setup/questions, but it is not required. If you want it, ask me to add it and refer me to the docs.
Integration Steps
- Install the Superwall SDK
- Configure it with my API key:
{{ PUBLIC_API_KEY }} - Present a paywall
- Set up deep link handling
- Ask me about how I want to handle these two items:
- Identifying the user
- Setting user attributes
How to Implement a Step
Implement each step one at a time. For each step, do the following:
- If the Superwall Docs MCP is available, get context using it before starting. Use it as the primary source of truth for Superwall knowledge.
- If the MCP is not available, use the SDK quickstart reference below as the source of truth.
- Then, help implement the step as described in the docs.
- If needed, ask for project-specific clarification.
- Finally, test the step or instruct on how to test it.
- Explain what you did, what step is complete, and what step is next.
Install the SDK
Overview
To see the latest release, check out the repository
Install via Gradle
Gradle is the preferred way to install Superwall for Android.
In your build.gradle or build.gradle.kts add the latest Superwall SDK. You
can find the latest release here.

implementation "com.superwall.sdk:superwall-android:2.7.8"implementation("com.superwall.sdk:superwall-android:2.7.8")[libraries]
superwall-android = { group = "com.superwall.sdk", name = "superwall-android", version = "2.7.8" }
// And in your build.gradle.kts
dependencies {
implementation(libs.superwall.android)
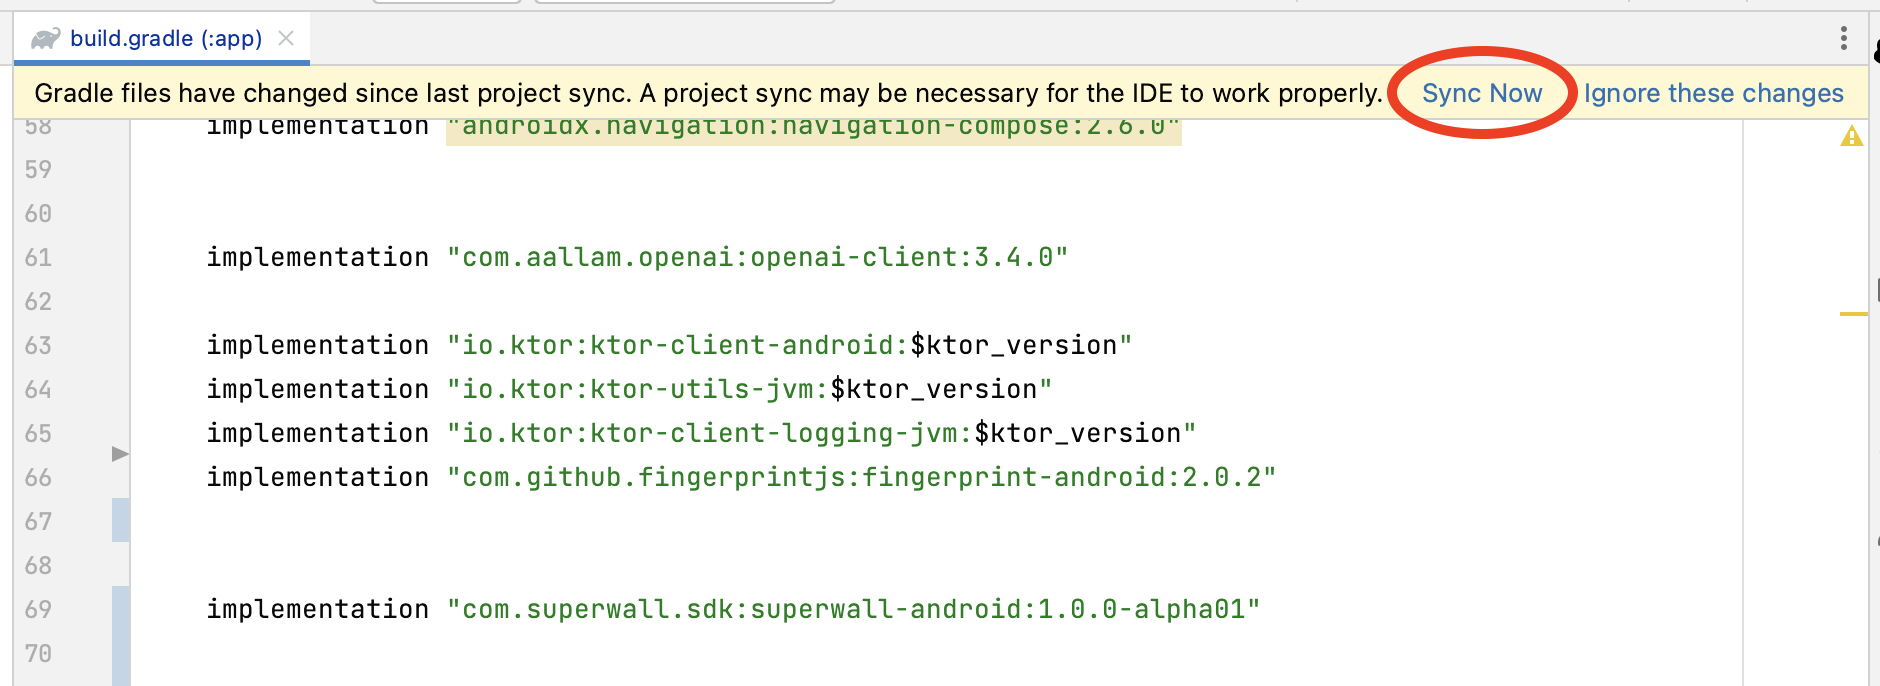
}Make sure to run Sync Now to force Android Studio to update.
Go to your AndroidManifest.xml and add the following permissions:

<uses-permission android:name="android.permission.INTERNET" />
<uses-permission android:name="com.android.vending.BILLING" />
Then add our Activity to your AndroidManifest.xml:

<activity
  android:name="com.superwall.sdk.paywall.view.SuperwallPaywallActivity"
  android:theme="@style/Theme.MaterialComponents.DayNight.NoActionBar"
  android:configChanges="orientation|screenSize|keyboardHidden">
</activity>
<activity android:name="com.superwall.sdk.debug.DebugViewActivity" />
<activity android:name="com.superwall.sdk.debug.localizations.SWLocalizationActivity" />
<activity android:name="com.superwall.sdk.debug.SWConsoleActivity" />
Set your app's theme in the android:theme section.
When choosing a device or emulator to run on make sure that it has the Play Store app and that you are signed in to your Google account on the Play Store.
Configure the SDK
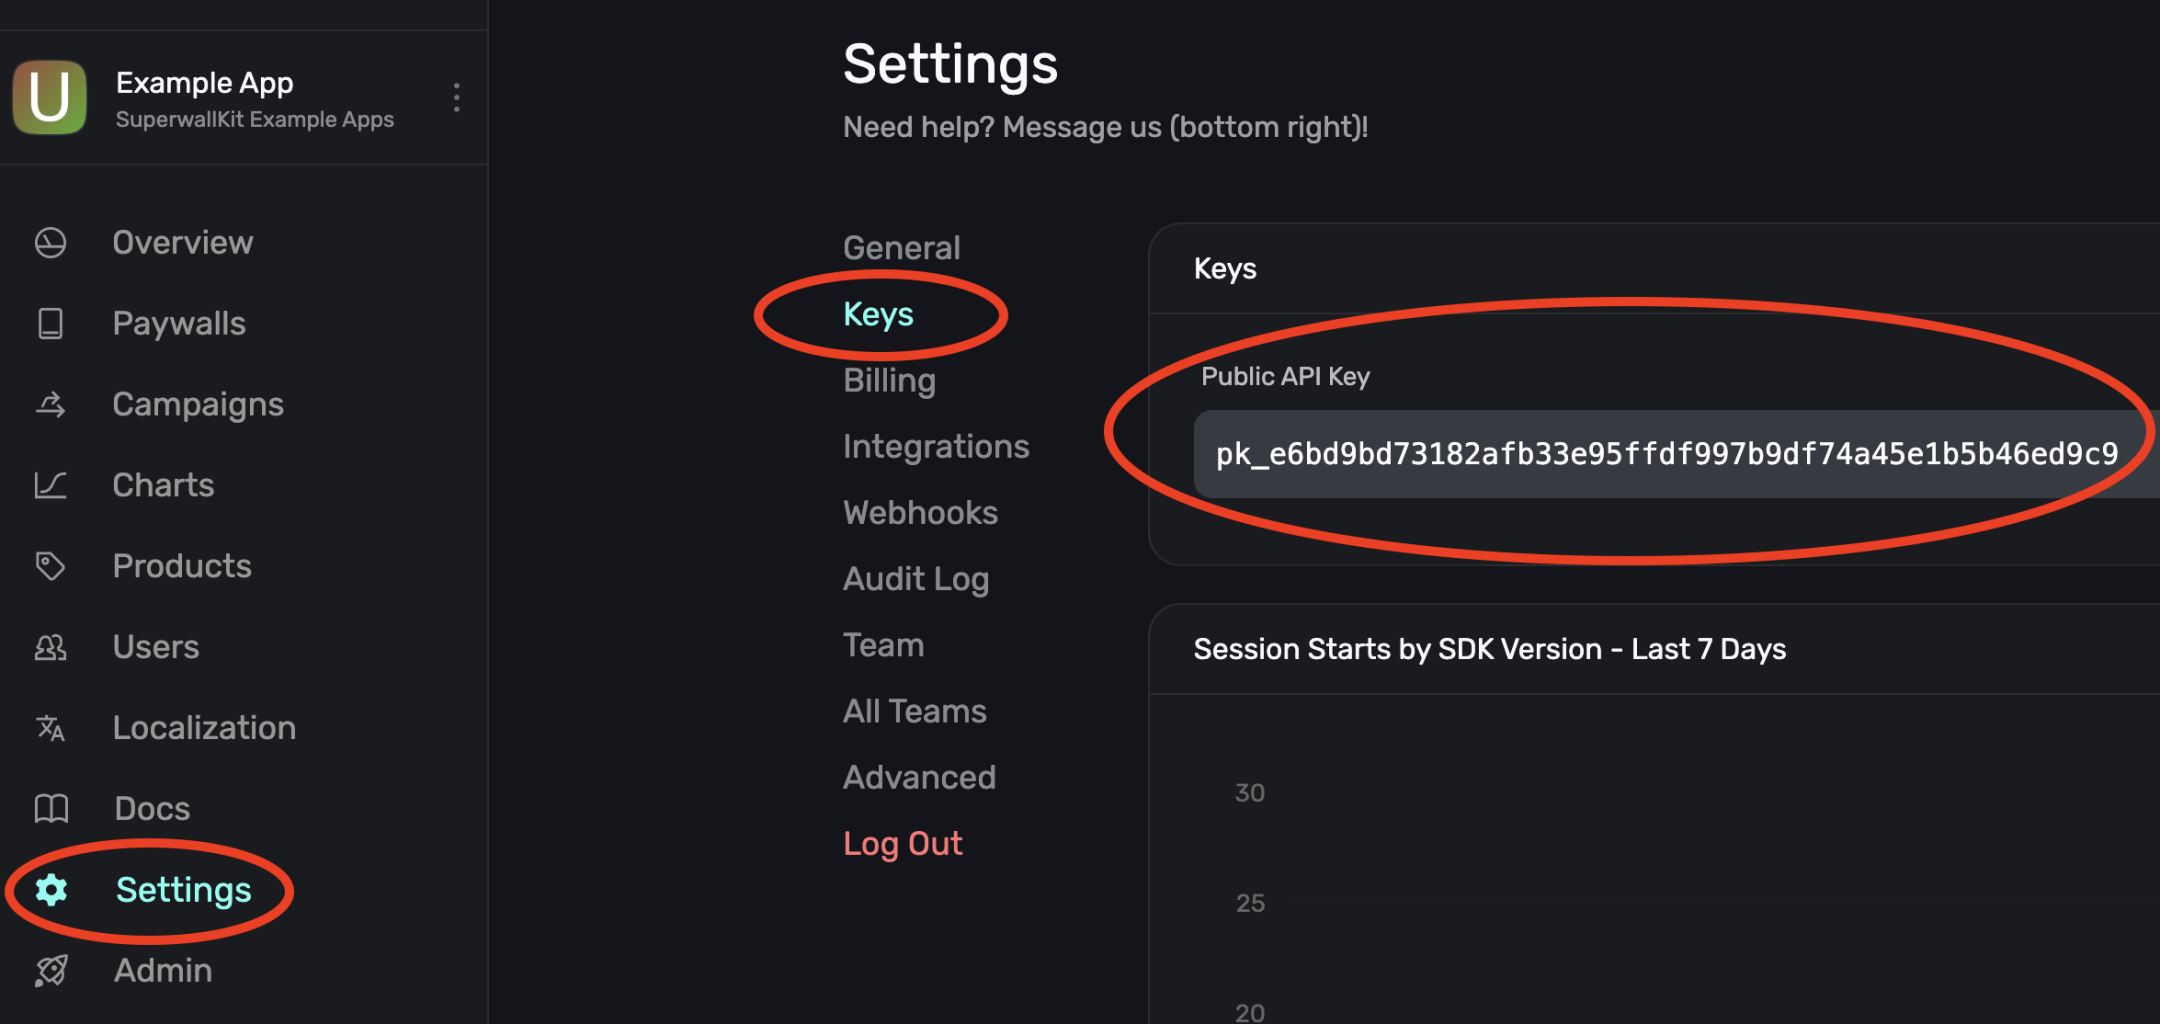
As soon as your app launches, you need to configure the SDK with your Public API Key. You'll retrieve this from the Superwall settings page.
Sign Up & Grab Keys
If you haven't already, sign up for a free account on Superwall. Then, when you're through to the Dashboard, click Settings from the panel on the left, click Keys and copy your Public API Key:
Initialize Superwall in your app
Begin by editing your main Application entrypoint. Depending on the
platform this could be AppDelegate.swift or SceneDelegate.swift for iOS,
MainApplication.kt for Android, main.dart in Flutter, or App.tsx for React Native:
// MainApplication.kt

class MainApplication : android.app.Application(), SuperwallDelegate {
    override fun onCreate() {
        super.onCreate()

        // Setup
        Superwall.configure(this, "MY_API_KEY")

        // OR using the DSL
        configureSuperwall("MY_API_KEY") {
            purchaseController = MyPurchaseController(this@MainApplication)
        }
    }
}
This configures a shared instance of Superwall, the primary class for interacting with the SDK's API. Make sure to replace MY_API_KEY with your public API key that you just retrieved.
By default, Superwall handles basic subscription-related logic for you. However, if you’d like
greater control over this process (e.g. if you’re using RevenueCat), you’ll want to pass in a
PurchaseController to your configuration call and manually set the subscriptionStatus. You can
also pass in SuperwallOptions to customize the appearance and behavior of the SDK. See
Purchases and Subscription Status for more.
You've now configured Superwall!
For further help, check out our Android example apps for working examples of implementing the Superwall SDK.
User Management
Anonymous Users
Superwall automatically generates a random user ID that persists internally until the user deletes/reinstalls your app.
You can call Superwall.shared.reset() to reset this ID and clear any paywall assignments.
Identified Users
If you use your own user management system, call identify(userId:options:) when you have a user's identity. This will alias your userId with the anonymous Superwall ID enabling us to load the user’s assigned paywalls.
Calling Superwall.shared.reset() will reset the on-device userId to a random ID and clear the paywall assignments.
Google Play receives the identifier you pass to BillingFlowParams.Builder.setObfuscatedAccountId as both the obfuscatedExternalAccountId and the externalAccountId we forward to your Superwall backend. By default we SHA-256 hash your userId before sending it. If you want the raw appUserId to appear in Play Console and downstream server events, set SuperwallOptions().passIdentifiersToPlayStore = true before configuring the SDK. Make sure the value complies with Google's policies—it must not contain personally identifiable information.
// After retrieving a user's ID, e.g. from logging in or creating an account
Superwall.instance.identify(user.id)

// When the user signs out
Superwall.instance.reset()
Advanced Use Case
You can supply an IdentityOptions object, whose property restorePaywallAssignments you can set to true. This tells the SDK to wait to restore paywall assignments from the server before presenting any paywalls. This should only be used in advanced use cases. If you expect users of your app to switch accounts or delete/reinstall a lot, you'd set this when users log in to an existing account.
Best Practices for a Unique User ID
- Do NOT make your User IDs guessable – they are public facing.
- Do NOT set emails as User IDs – this isn't GDPR compliant.
- Do NOT set IDFA or DeviceIds as User IDs – these are device specific / easily rotated by the operating system.
- Do NOT hardcode strings as User IDs – this will cause every user to be treated as the same user by Superwall.
Identifying users from App Store server events
On iOS, Superwall always supplies an appAccountToken with every StoreKit 2 transaction:
| Scenario | Value used for appAccountToken |
|---|---|
You’ve called Superwall.shared.identify(userId:) | The exact userId you passed |
You haven’t called identify yet | The UUID automatically generated for the anonymous user (the alias ID), without the $SuperwallAlias: prefix |
You passed a non‑UUID userId to identify | StoreKit rejects it; Superwall falls back to the alias UUID |
Because the SDK falls back to the alias UUID, purchase notifications sent to your server always include a stable, unique identifier—even before the user signs in.
// Generate and use a UUID user ID in Swift
let userId = UUID().uuidString
Superwall.shared.identify(userId: userId)
Presenting Paywalls
This allows you to register a placement to access a feature that may or may not be paywalled later in time. It also allows you to choose whether the user can access the feature even if they don't make a purchase.
Here's an example.
With Superwall
fun pressedWorkoutButton() {
  // remotely decide if a paywall is shown and if
  // navigation.startWorkout() is a paid-only feature
  Superwall.instance.register("StartWorkout") {
    navigation.startWorkout()
  }
}
Without Superwall
fun pressedWorkoutButton() {
  if (user.hasActiveSubscription) {
    navigation.startWorkout()
  } else {
    navigation.presentPaywall { result ->
      if (result) {
        navigation.startWorkout()
      } else {
        // user didn't pay, developer decides what to do
      }
    }
  }
}
How registering placements presents paywalls
You can configure "StartWorkout" to present a paywall by creating a campaign, adding the placement, and adding a paywall to an audience in the dashboard.
- The SDK retrieves your campaign settings from the dashboard on app launch.
- When a placement is called that belongs to a campaign, audiences are evaluated on device and the user enters an experiment — this means there's no delay between registering a placement and presenting a paywall.
- If it's the first time a user is entering an experiment, a paywall is decided for the user based on the percentages you set in the dashboard
- Once a user is assigned a paywall for an audience, they will continue to see that paywall until you remove the paywall from the audience or reset assignments to the paywall.
- After the paywall is closed, the Superwall SDK looks at the Feature Gating value associated with your paywall, configurable from the paywall editor under General > Feature Gating (more on this below)
- If the paywall is set to Non Gated, the
feature:closure onregister(placement: ...)gets called when the paywall is dismissed (whether they paid or not) - If the paywall is set to Gated, the
feature:closure onregister(placement: ...)gets called only if the user is already paying or if they begin paying.
- If the paywall is set to Non Gated, the
- If no paywall is configured, the feature gets executed immediately without any additional network calls.
Given the low cost nature of how register works, we strongly recommend registering all core functionality in order to remotely configure which features you want to gate – without an app update.
// on the welcome screen
fun pressedSignUp() {
  Superwall.instance.register("SignUp") {
    navigation.beginOnboarding()
  }
}

// in another view controller
fun pressedWorkoutButton() {
  Superwall.instance.register("StartWorkout") {
    navigation.startWorkout()
  }
}
Automatically Registered Placements
The SDK automatically registers some internal placements which can be used to present paywalls:
Register. Everything.
To provide your team with ultimate flexibility, we recommend registering all of your analytics events, even if you don't pass feature blocks through. This way you can retroactively add a paywall almost anywhere – without an app update!
If you're already set up with an analytics provider, you'll typically have an Analytics.swift singleton (or similar) to disperse all your events from. Here's how that file might look:
Getting a presentation result
Use getPresentationResult(forPlacement:params:) when you need to ask the SDK what would happen when registering a placement — without actually showing a paywall. Superwall evaluates the placement and its audience filters then returns a PresentationResult. You can use this to adapt your app's behavior based on the outcome (such as showing a lock icon next to a pro feature if they aren't subscribed).
In short, this lets you peek at the outcome first and decide how your app should respond:
Tracking Subscription State
Superwall tracks the subscription state of a user for you. However, there are times in your app where you need to know if a user is on a paid plan or not. For example, you might want to conditionally show certain UI elements or enable premium features based on their subscription status.
Using subscriptionStatus
The easiest way to track subscription status in Android is by accessing the subscriptionStatus StateFlow:
class MainActivity : AppCompatActivity() {
    override fun onCreate(savedInstanceState: Bundle?) {
        super.onCreate(savedInstanceState)

        // Get current status
        val status = Superwall.instance.subscriptionStatus.value
        when (status) {
            is SubscriptionStatus.Active -> {
                Log.d("Superwall", "User has active entitlements: ${status.entitlements}")
                showPremiumContent()
            }
            is SubscriptionStatus.Inactive -> {
                Log.d("Superwall", "User is on free plan")
                showFreeContent()
            }
            is SubscriptionStatus.Unknown -> {
                Log.d("Superwall", "Subscription status unknown")
                showLoadingState()
            }
        }
    }
}
The SubscriptionStatus sealed class has three possible states:
SubscriptionStatus.Unknown- Status is not yet determinedSubscriptionStatus.Active(Set<String>)- User has active entitlements (set of entitlement identifiers)SubscriptionStatus.Inactive- User has no active entitlements
Observing subscription status changes
You can observe real-time subscription status changes using Kotlin's StateFlow:
class MainActivity : AppCompatActivity() {
    override fun onCreate(savedInstanceState: Bundle?) {
        super.onCreate(savedInstanceState)

        lifecycleScope.launch {
            Superwall.instance.subscriptionStatus.collect { status ->
                when (status) {
                    is SubscriptionStatus.Active -> {
                        Log.d("Superwall", "User upgraded to pro!")
                        updateUiForPremiumUser()
                    }
                    is SubscriptionStatus.Inactive -> {
                        Log.d("Superwall", "User is on free plan")
                        updateUiForFreeUser()
                    }
                    is SubscriptionStatus.Unknown -> {
                        Log.d("Superwall", "Loading subscription status...")
                        showLoadingState()
                    }
                }
            }
        }
    }
}
Using with Jetpack Compose
If you're using Jetpack Compose, you can observe subscription status reactively:
@Composable
fun ContentScreen() {
    val subscriptionStatus by Superwall.instance.subscriptionStatus
        .collectAsState()

    Column {
        when (subscriptionStatus) {
            is SubscriptionStatus.Active -> {
                val entitlements = (subscriptionStatus as SubscriptionStatus.Active).entitlements
                Text("Premium user with: ${entitlements.joinToString()}")
                PremiumContent()
            }
            is SubscriptionStatus.Inactive -> {
                Text("Free user")
                FreeContent()
            }
            is SubscriptionStatus.Unknown -> {
                Text("Loading...")
                LoadingIndicator()
            }
        }
    }
}
Reading detailed purchase history (2.6.6+)
When you need more context than SubscriptionStatus provides (for example, to show the full transaction history or mix web redemptions with Google Play receipts), subscribe to Superwall.instance.customerInfo. The flow emits a CustomerInfo object that merges device, web, and external purchase controller data.
class BillingDashboardFragment : Fragment() {

  override fun onViewCreated(view: View, savedInstanceState: Bundle?) {
    viewLifecycleOwner.lifecycleScope.launch {
      Superwall.instance.customerInfo.collect { info ->
        val subscriptions = info.subscriptions.map { it.productId to it.expiresDate }
        val nonSubscriptions = info.nonSubscriptions.map { it.productId to it.purchaseDate }
        val entitlementIds = info.entitlements.filter { it.isActive }.map { it.id }

        renderCustomerInfo(
          activeProducts = info.activeSubscriptionProductIds,
          entitlements = entitlementIds,
          subscriptions = subscriptions,
          oneTimePurchases = nonSubscriptions
        )
      }
    }
  }
}
Need the latest value immediately (for example, during cold start)? Call Superwall.instance.getCustomerInfo() to synchronously read the most recent snapshot before collecting the flow:
val cached = Superwall.instance.getCustomerInfo()
renderCustomerInfo(
  activeProducts = cached.activeSubscriptionProductIds,
  entitlements = cached.entitlements.filter { it.isActive }.map { it.id },
  subscriptions = cached.subscriptions.map { it.productId to it.purchaseDate },
  oneTimePurchases = cached.nonSubscriptions.map { it.productId to it.purchaseDate }
)
After you start collecting, you can also watch for SuperwallDelegate.customerInfoDidChange(from:to:) to run analytics or sync other systems whenever purchases change.
Checking for specific entitlements
If your app has multiple subscription tiers (e.g., Bronze, Silver, Gold), you can check for specific entitlements:
val status = Superwall.instance.subscriptionStatus.value
when (status) {
    is SubscriptionStatus.Active -> {
        if (status.entitlements.contains("gold")) {
            // Show gold-tier features
            showGoldFeatures()
        } else if (status.entitlements.contains("silver")) {
            // Show silver-tier features
            showSilverFeatures()
        }
    }
    else -> showFreeFeatures()
}
Setting subscription status
When using Superwall with a custom purchase controller or third-party billing service, you need to manually update the subscription status. Here's how to sync with RevenueCat:
class RevenueCatPurchaseController : PurchaseController {

    override suspend fun purchase(
        activity: Activity,
        product: StoreProduct
    ): PurchaseResult {
        return try {
            val result = Purchases.sharedInstance.purchase(activity, product.sku)

            // Update Superwall subscription status based on RevenueCat result
            if (result.isSuccessful) {
                val entitlements = result.customerInfo.entitlements.active.keys
                Superwall.instance.setSubscriptionStatus(
                    SubscriptionStatus.Active(entitlements)
                )
                PurchaseResult.Purchased
            } else {
                PurchaseResult.Failed(Exception("Purchase failed"))
            }
        } catch (e: Exception) {
            PurchaseResult.Failed(e)
        }
    }

    override suspend fun restorePurchases(): RestorationResult {
        return try {
            val customerInfo = Purchases.sharedInstance.restorePurchases()
            val activeEntitlements = customerInfo.entitlements.active.keys

            if (activeEntitlements.isNotEmpty()) {
                Superwall.instance.setSubscriptionStatus(
                    SubscriptionStatus.Active(activeEntitlements)
                )
            } else {
                Superwall.instance.setSubscriptionStatus(SubscriptionStatus.Inactive)
            }

            RestorationResult.Restored
        } catch (e: Exception) {
            RestorationResult.Failed(e)
        }
    }
}
You can also listen for subscription changes from your billing service:
class SubscriptionManager {

    fun syncSubscriptionStatus() {
        Purchases.sharedInstance.getCustomerInfoWith { customerInfo ->
            val activeEntitlements = customerInfo.entitlements.active.keys

            if (activeEntitlements.isNotEmpty()) {
                Superwall.instance.setSubscriptionStatus(
                    SubscriptionStatus.Active(activeEntitlements)
                )
            } else {
                Superwall.instance.setSubscriptionStatus(SubscriptionStatus.Inactive)
            }
        }
    }
}
Using SuperwallDelegate
You can also listen for subscription status changes using the SuperwallDelegate:
class MyApplication : Application() {

    override fun onCreate() {
        super.onCreate()

        Superwall.configure(
            applicationContext = this,
            apiKey = "YOUR_API_KEY",
            options = SuperwallOptions().apply {
                delegate = object : SuperwallDelegate() {
                    override fun subscriptionStatusDidChange(
                        from: SubscriptionStatus,
                        to: SubscriptionStatus
                    ) {
                        when (to) {
                            is SubscriptionStatus.Active -> {
                                Log.d("Superwall", "User is now premium")
                            }
                            is SubscriptionStatus.Inactive -> {
                                Log.d("Superwall", "User is now free")
                            }
                            is SubscriptionStatus.Unknown -> {
                                Log.d("Superwall", "Status unknown")
                            }
                        }
                    }
                }
            }
        )
    }
}
Superwall checks subscription status for you
Remember that the Superwall SDK uses its audience filters for determining when to show paywalls. You generally don't need to wrap your calls to register placements with subscription status checks:
// ❌ Unnecessary
if (Superwall.instance.subscriptionStatus.value !is SubscriptionStatus.Active) {
    Superwall.instance.register("campaign_trigger")
}

// ✅ Just register the placement
Superwall.instance.register("campaign_trigger")
In your audience filters, you can specify whether the subscription state should be considered, which keeps your codebase cleaner and puts the "Should this paywall show?" logic where it belongs—in the Superwall dashboard.
Setting User Attributes
By setting user attributes, you can display information about the user on the paywall. You can also define audiences in a campaign to determine which paywall to show to a user, based on their user attributes.
If a paywall uses the Set user attributes action, the merged attributes are sent back to your app via SuperwallDelegate.userAttributesDidChange(newAttributes:).
You do this by passing a [String: Any?] dictionary of attributes to Superwall.shared.setUserAttributes(_:):
val attributes = mapOf(
    "name" to user.name,
    "apnsToken" to user.apnsTokenString,
    "email" to user.email,
    "username" to user.username,
    "profilePic" to user.profilePicUrl,
    "stripe_customer_id" to user.stripeCustomerId // Optional: For Stripe checkout prefilling
)

Superwall.instance.setUserAttributes(attributes) // (merges existing attributes)
Usage
This is a merge operation, such that if the existing user attributes dictionary
already has a value for a given property, the old value is overwritten. Other
existing properties will not be affected. To unset/delete a value, you can pass nil
for the value.
You can reference user attributes in audience filters to help decide when to display your paywall. When you configure your paywall, you can also reference the user attributes in its text variables. For more information on how to that, see Configuring a Paywall.
Handling Deep Links
- Previewing paywalls on your device before going live.
- Deep linking to specific campaigns.
- Web Checkout Post-Checkout Redirecting
Setup
The way to deep link into your app is URL Schemes.
Adding a Custom URL Scheme
Add the following to your AndroidManifest.xml file:
<activity android:name=".MainActivity">
    <intent-filter>
        <action android:name="android.intent.action.VIEW" />
        <category android:name="android.intent.category.DEFAULT" />
        <category android:name="android.intent.category.BROWSABLE" />
        <data android:scheme="exampleapp" />
    </intent-filter>
</activity>
This configuration allows your app to open in response to a deep link with the format exampleapp:// from your MainActivity class.
Handling Deep Links
In your MainActivity (or the activity specified in your intent-filter), add the following Kotlin code to handle deep links:
class MainActivity : AppCompatActivity() {
    override fun onCreate(savedInstanceState: Bundle?) {
        super.onCreate(savedInstanceState)

        // Respond to deep links
        respondToDeepLinks()
    }

    private fun respondToDeepLinks() {
        intent?.data?.let { uri ->
            Superwall.instance.handleDeepLink(uri)
        }
    }
}
Handling App Links
Adding app links
Android App links enable seamless integration between the Web checkout and your app, enabling users to redeem the purchase automatically.
To allow Android app links to open your app, you will need to follow these steps:
1. Add your app's fingerprint and schema to Stripe settings
To verify that the request to open the app is legitimate, Android requires your app's keystore SHA256 fingerprint, with at least one for your development keystore and one for your release keystore. You can obtain these fingerprints in the following way:
Development fingerprints
If you're using Android studio or have Android components installed, you can obtain your debug key by running the following command in your terminal:
keytool -list -v -keystore ~/.android/debug.keystore -alias androiddebugkey -storepass android -keypass android
And then copying the outputted SHA256 fingerprint.
Release fingerprints
To obtain the release fingerprints, you'll need your own keystore file (the one you use to sign the final application package before publishing).
You can do this by running the following command in your terminal:
keytool -list -v -keystore <PATH_TO_YOUR_KEYSTORE> -alias <YOUR_KEY_ALIAS>
And then copying the outputted SHA256 fingerprint.
Adding the fingerprints to the project
To add the fingerprints to Superwall, open the Settings tab of your Superwall Stripe application.
Under the Android Configuration title, you should see three fields:
- Package schema - this allows us to know which schema your app uses to open and parse deep links
- Package name - your app's package name, i.e.
com.mydomain.myapp - App fingerprints - One or more of your app's fingerprints, comma separated

Once added, click the Update Configuration button which will ensure the application asset links are properly generated for Google to verify.
2. Add the schema to your app's Android Manifest
For this, you'll need to copy the domain from your Superwall Stripe settings.
Then, open your AndroidManifest.xml and inside the <activity ...> tag declaring your deep link handling activity, add the following, replacing the domain with the one from the settings:
<intent-filter android:autoVerify="true">
    <action android:name="android.intent.action.VIEW" />

    <category android:name="android.intent.category.DEFAULT" />
    <category android:name="android.intent.category.BROWSABLE" />

    <data android:scheme="https" />
	<data android:host="yourappdomain.superwall.app"
		  android:pathPrefix="/redeem" />
</intent-filter>
3. Handle incoming deep links using Superwall SDK
In the same activity as in step #2, you'll need to pass deeplinks along to Superwall SDK.
You can do this by overriding your Activity's onCreate and onNewIntent methods and passing along the intent data to Superwall using Superwall.handleDeepLinks() method. The method returns a kotlin.Result indicating if the deep link will be handled by Superwall SDK.
override fun onCreate(savedInstanceState: Bundle?) {
    super.onCreate(savedInstanceState)
	// your onCreate code
	intent?.data?.let { uri ->
	    Superwall.handleDeepLink(uri)
	}
}

override fun onNewIntent(intent: Intent, caller: ComponentCaller) {
    super.onNewIntent(intent, caller)
    // ... Your onNewIntent code
    intent?.data?.let { uri ->
	    Superwall.handleDeepLink(uri)
	}
}
4. Handling links while testing
If you are running your app using Android Studio, you need to be aware that it won't automatically allow verified links to be opened using the app, but you will need to enable it in settings yourself. This is not the case when installing from Play Store, and all the links will be handled automatically.
To do that, once you install the app on your device, open:
Settings > Apps > Your Application Name > Open By Default
Under there, the Open supported links should be enabled.
Tap Add Links button and selected the available links.

Testing & more details
For details regarding testing and setup, you can refer to Android's guide for verifying app links. Note - Superwall generates the assetlinks.json for you. To check the file, you can use the subdomain from your Superwall stripe configuation:
https://my-app.superwall.app/.well-known/assetlinks.json
Previewing Paywalls
Next, build and run your app on your phone.
Then, head to the Superwall Dashboard. Click on Settings from the Dashboard panel on the left, then select General:

With the General tab selected, type your custom URL scheme, without slashes, into the Apple Custom URL Scheme field:

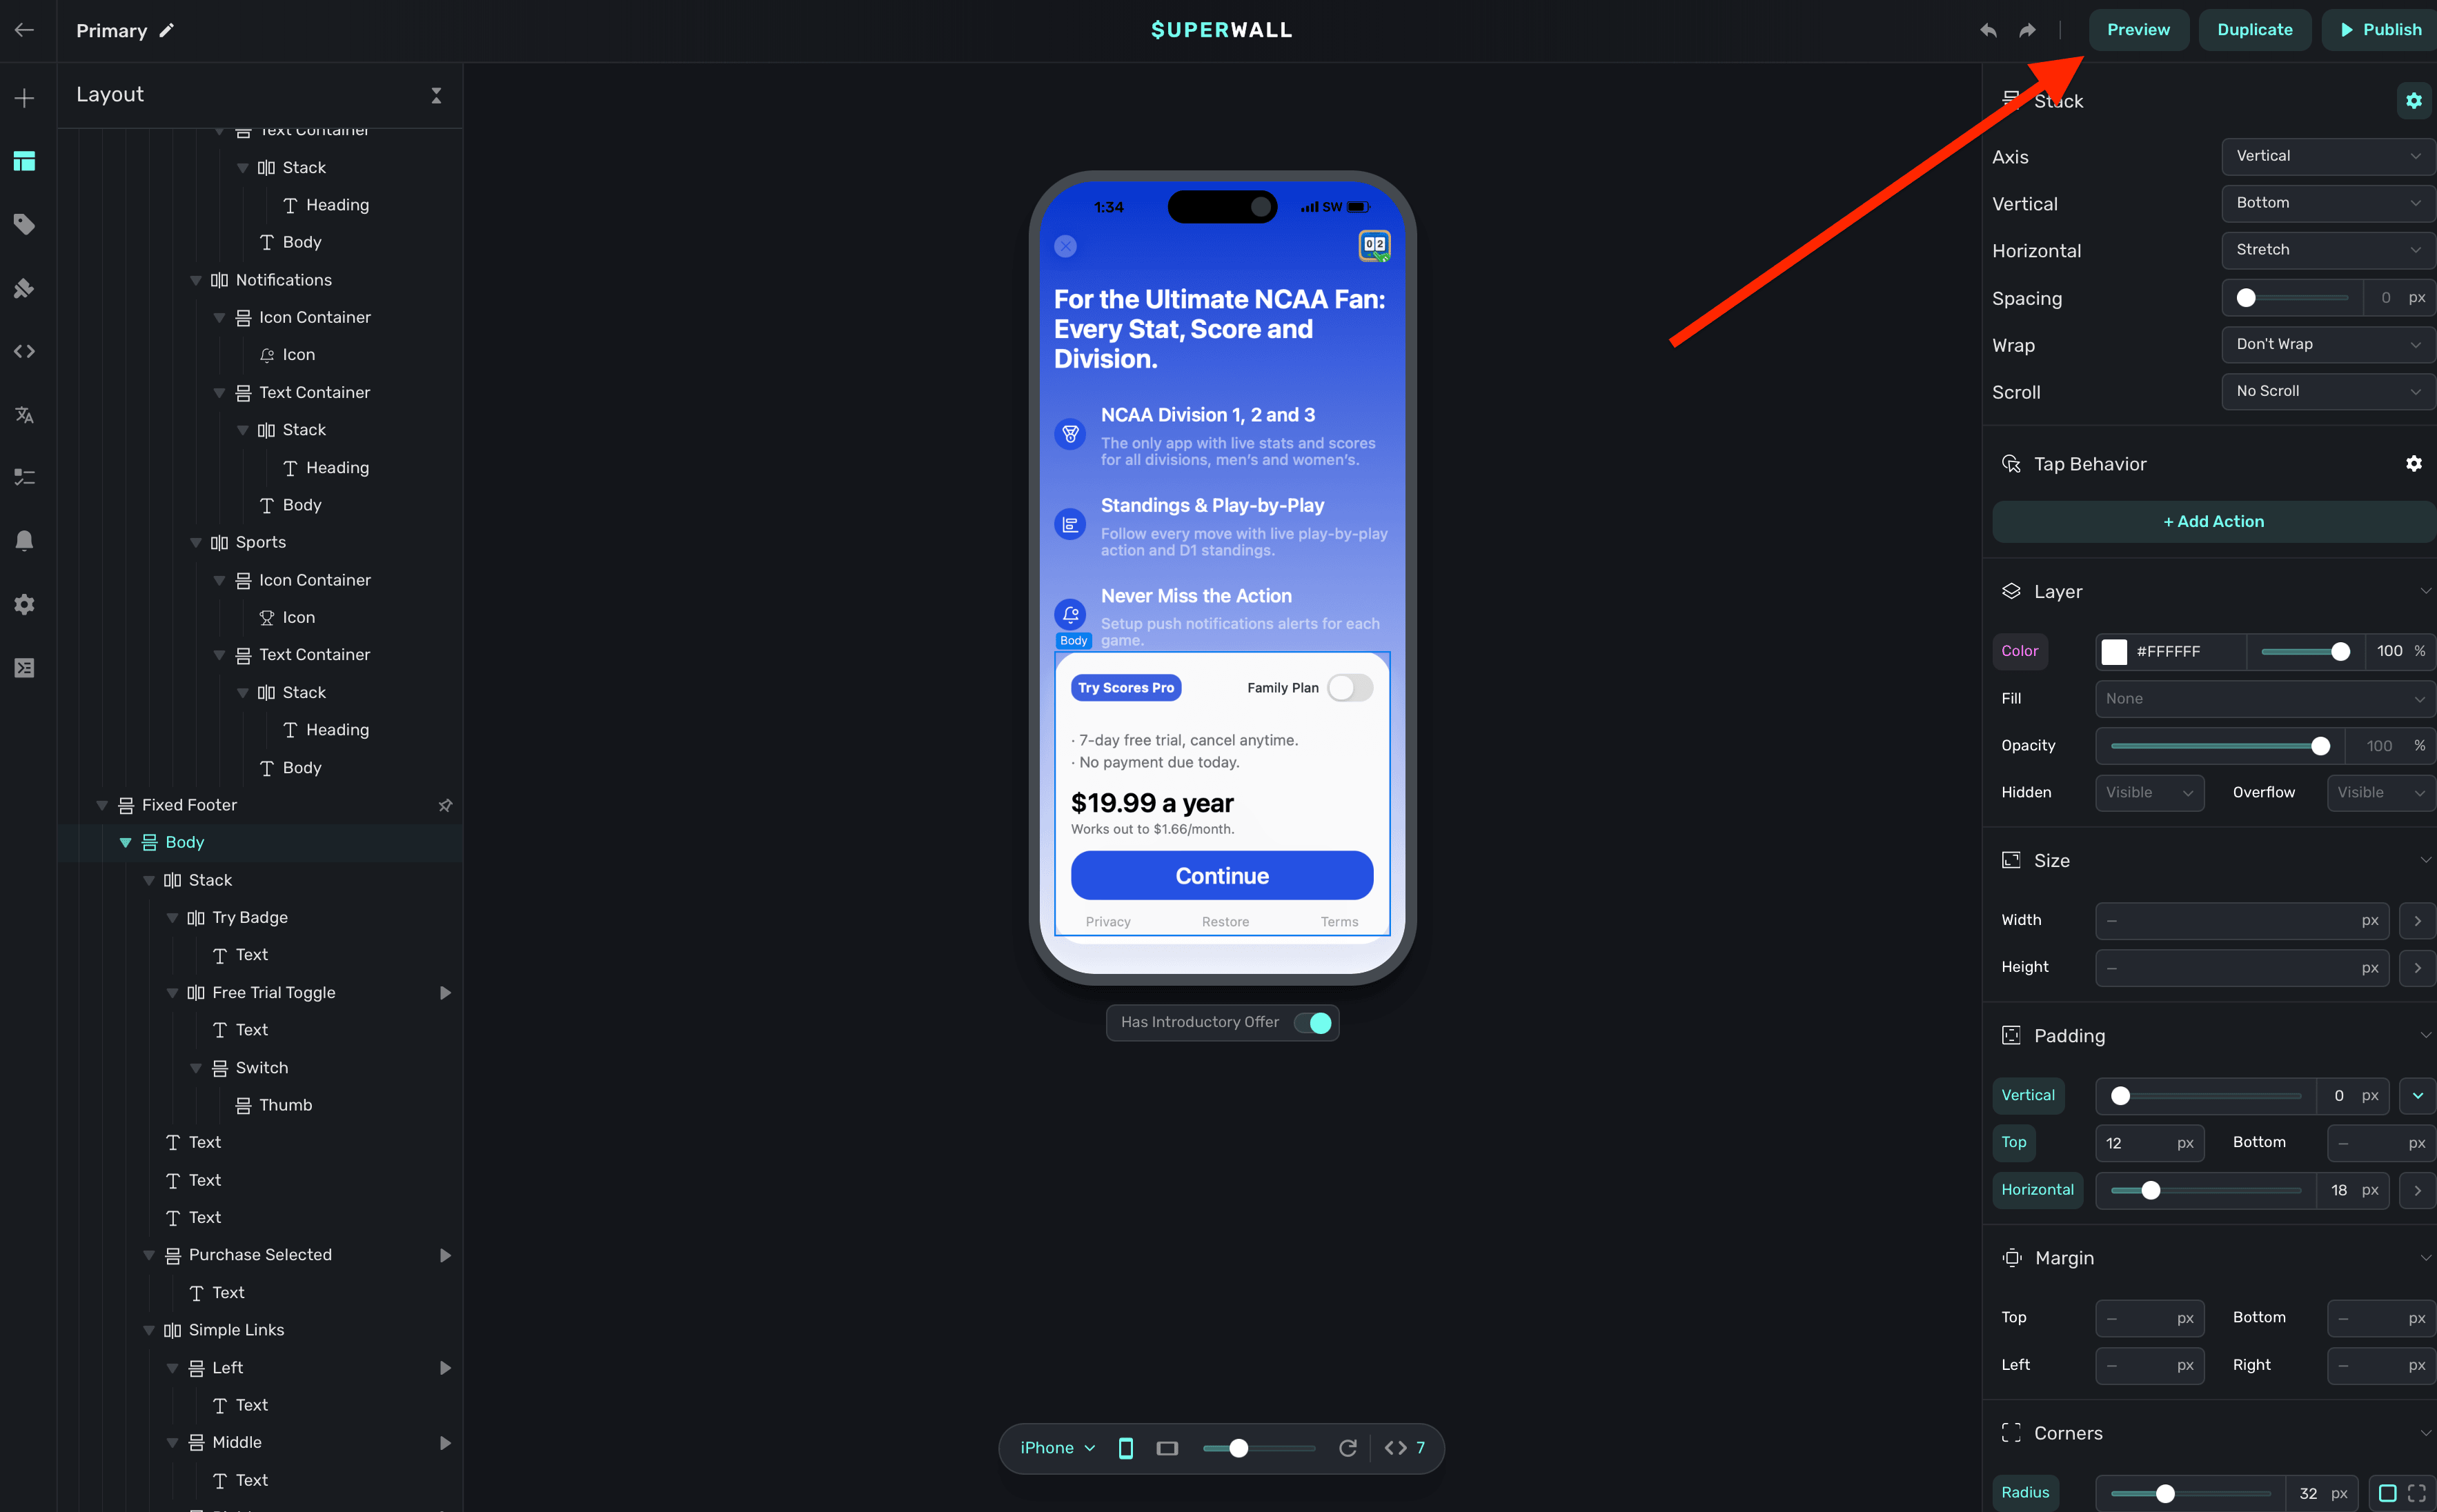
Next, open your paywall from the dashboard and click Preview. You'll see a QR code appear in a pop-up:
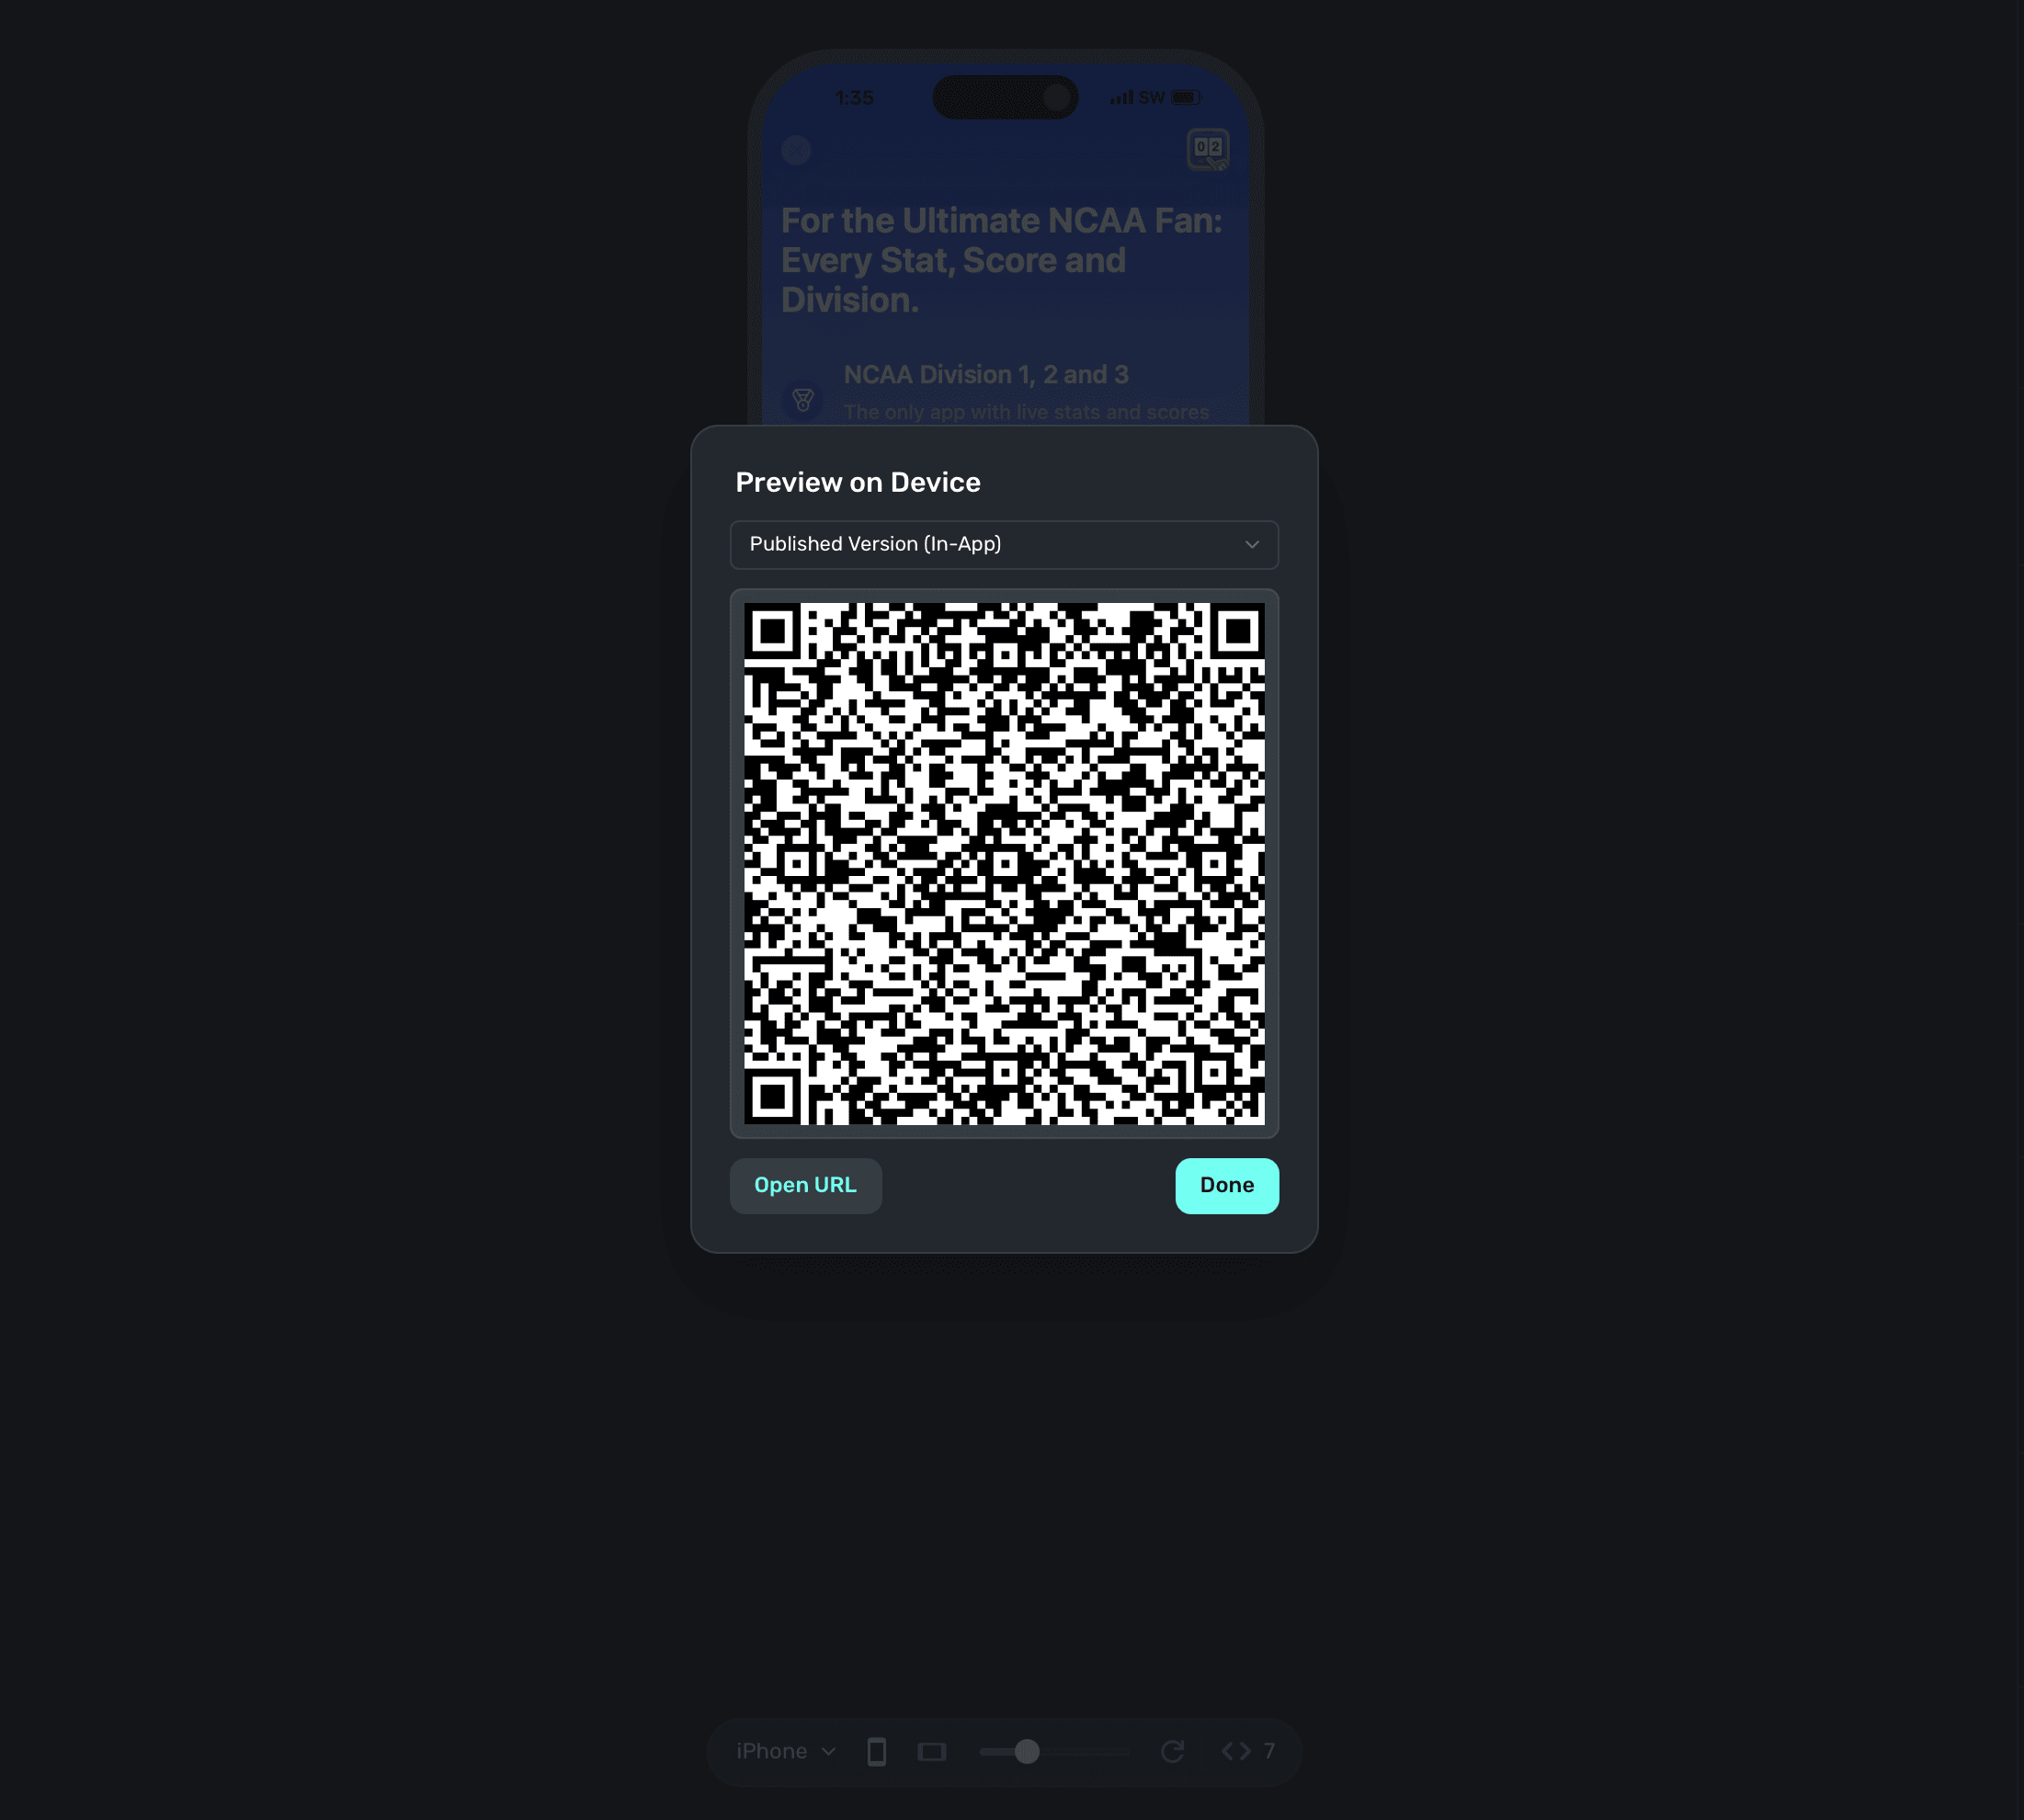
On your device, scan this QR code. You can do this via Apple's Camera app. This will take you to a paywall viewer within your app, where you can preview all your paywalls in different configurations.
Using Deep Links to Present Paywalls
Deep links can also be used as a placement in a campaign to present paywalls. Simply add deepLink_open as an placement, and the URL parameters of the deep link can be used as parameters! You can also use custom placements for this purpose. Read this doc for examples of both.
Related deep link guides
- Handling Deep Links — Use
handleDeepLinkwith thedeepLink_openstandard placement and dashboard campaign rules to present paywalls from deep links, without hardcoding routing logic in your app.
How is this guide?