Audiences
Audiences allow you to set up simple or complex filtering rules to match certain users and show a paywall to them. For a user to see a paywall, they must be matched to an audience. An audience can show one or more paywalls based on a percentage you set (i.e. show paywall A to 70% of users, and paywall B to 30%).
Another way to think of them is this: If you're wanting to create conditions, filters or certain rules or flows that must happen to show a paywall — then you create an audience for it.
If creating filters to show a paywall under certain conditions doesn't apply to you, then you can simply leave the default audience on — it'll match everyone who hits a placement.
In the audience view, you can set up filtering rules, check results of experiments and recent transactions resulting from them. All of your current audiences will show in the left-hand side of the campaign details screen:
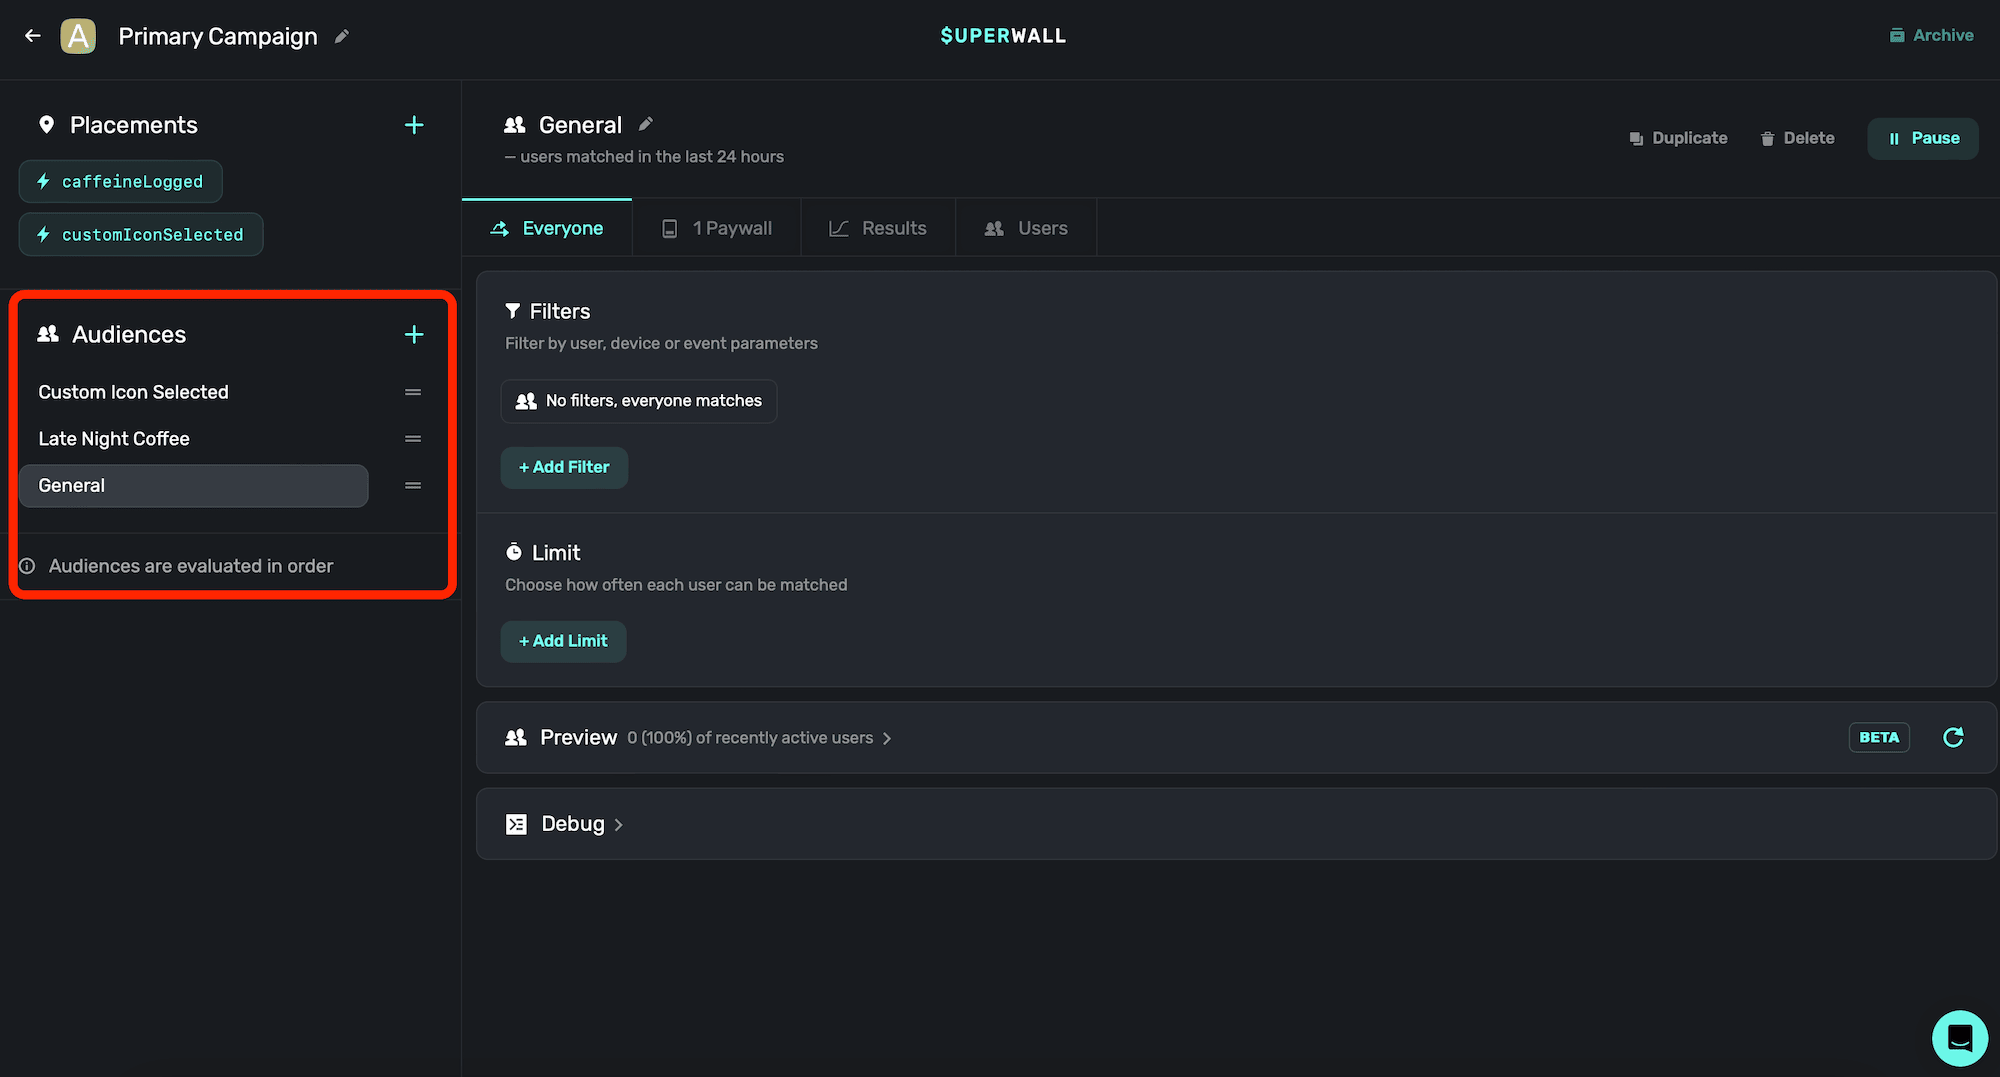
The audience section lets you edit the order in which audiences are evaluated. Superwall evaluates audiences top-to-bottom. For example, consider you had three audiences for a caffeine tracking app:
- An audience for users who tried to set a custom app icon.
- An audience for users who've logged caffeine late at night.
- And, everyone else.
If a user logged caffeine in the morning, Superwall would first check if they matched the custom app icon audience, and then the audience for logging caffeine late at night. Since neither of those match (since they are logging caffeine in the morning, and not setting a custom icon), they'd land in the "everyone else" audience bucket.
Adding a new audience
To create a new audience, click the + button in the audiences section, located at the left-hand side of the campaign details view:
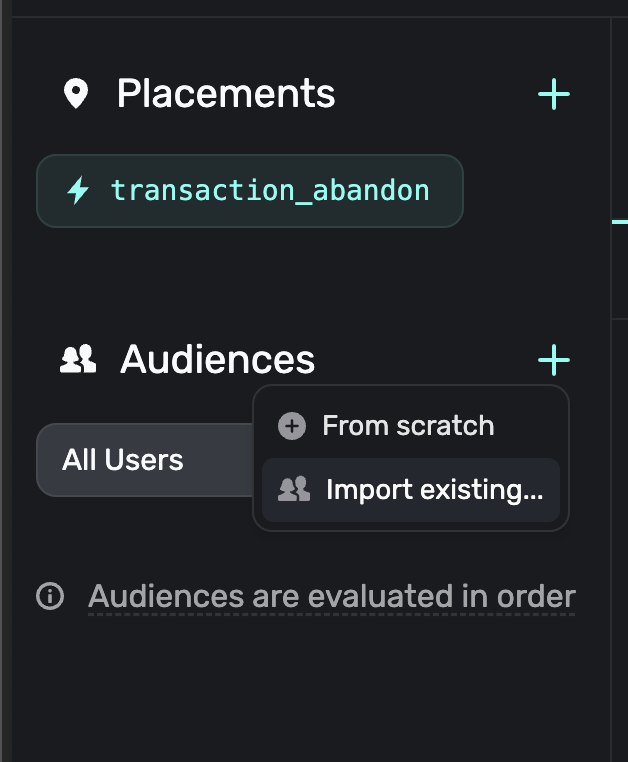
You have two options for creating a new audience:
- From scratch: This is the default option. It will create a new audience with no filters.
- Import existing...: Use this to copy an existing audience and use it as a template for a new one. See Duplicate an audience for more details.
Renaming Audiences
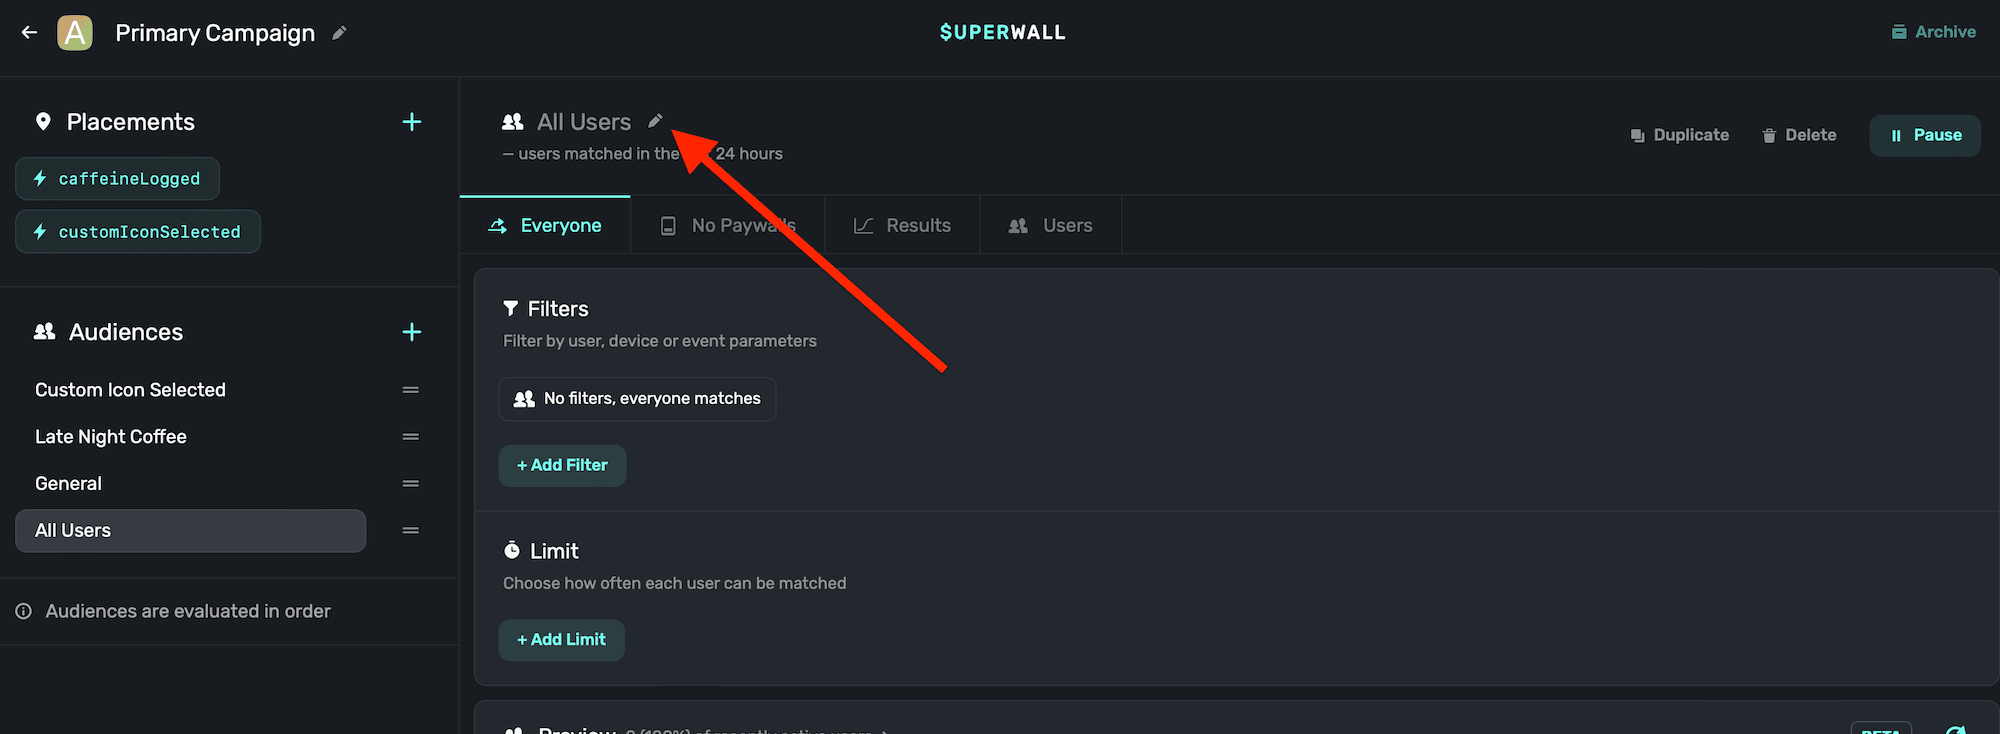
To rename an audience, click the pencil icon, located at the top of a selected audience:
Configuring an audience
To use an audience to filter for a particular set of events, rules or any other condition — you use filters, specify if an entitlement should be evaluated, along with an optional limit.
Creating filters
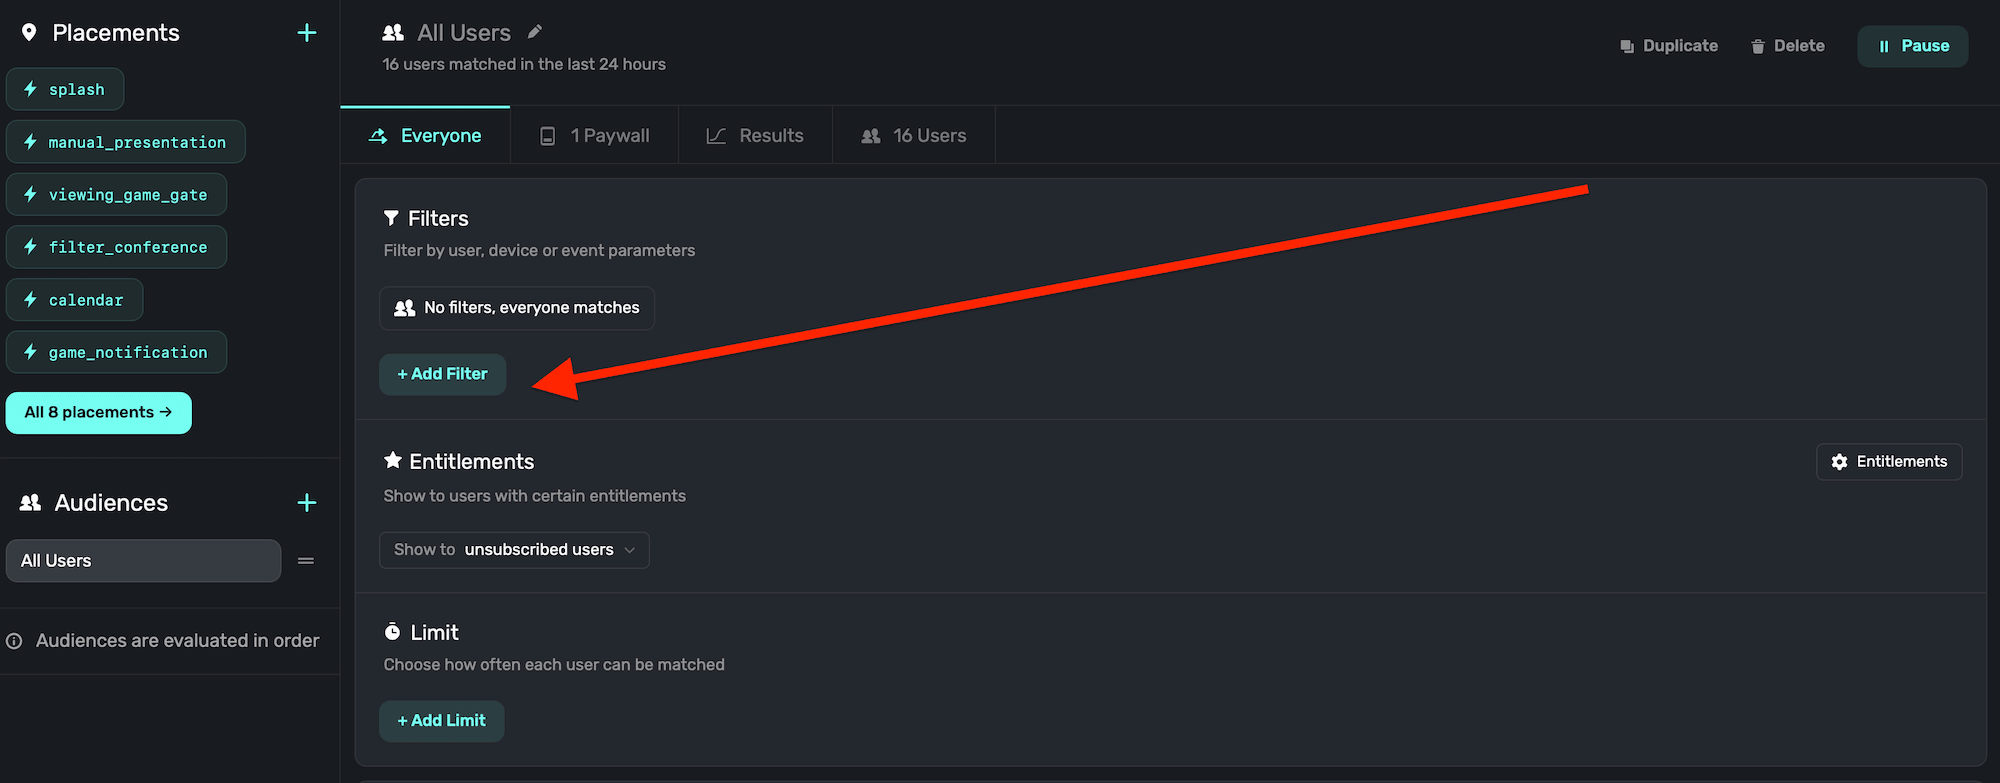
You can add filters (i.e. rules or conditions to match against) by clicking on an audience, and then clicking the + Add Filter button:
From there, select any of the events to create a filter with. For example, if you want to use a placement you've made to match against:
- Click "+ Add Filter".
- Type in "event_name".
- For the evaluation operator, choose "is".
- And then, type in the placement's name.
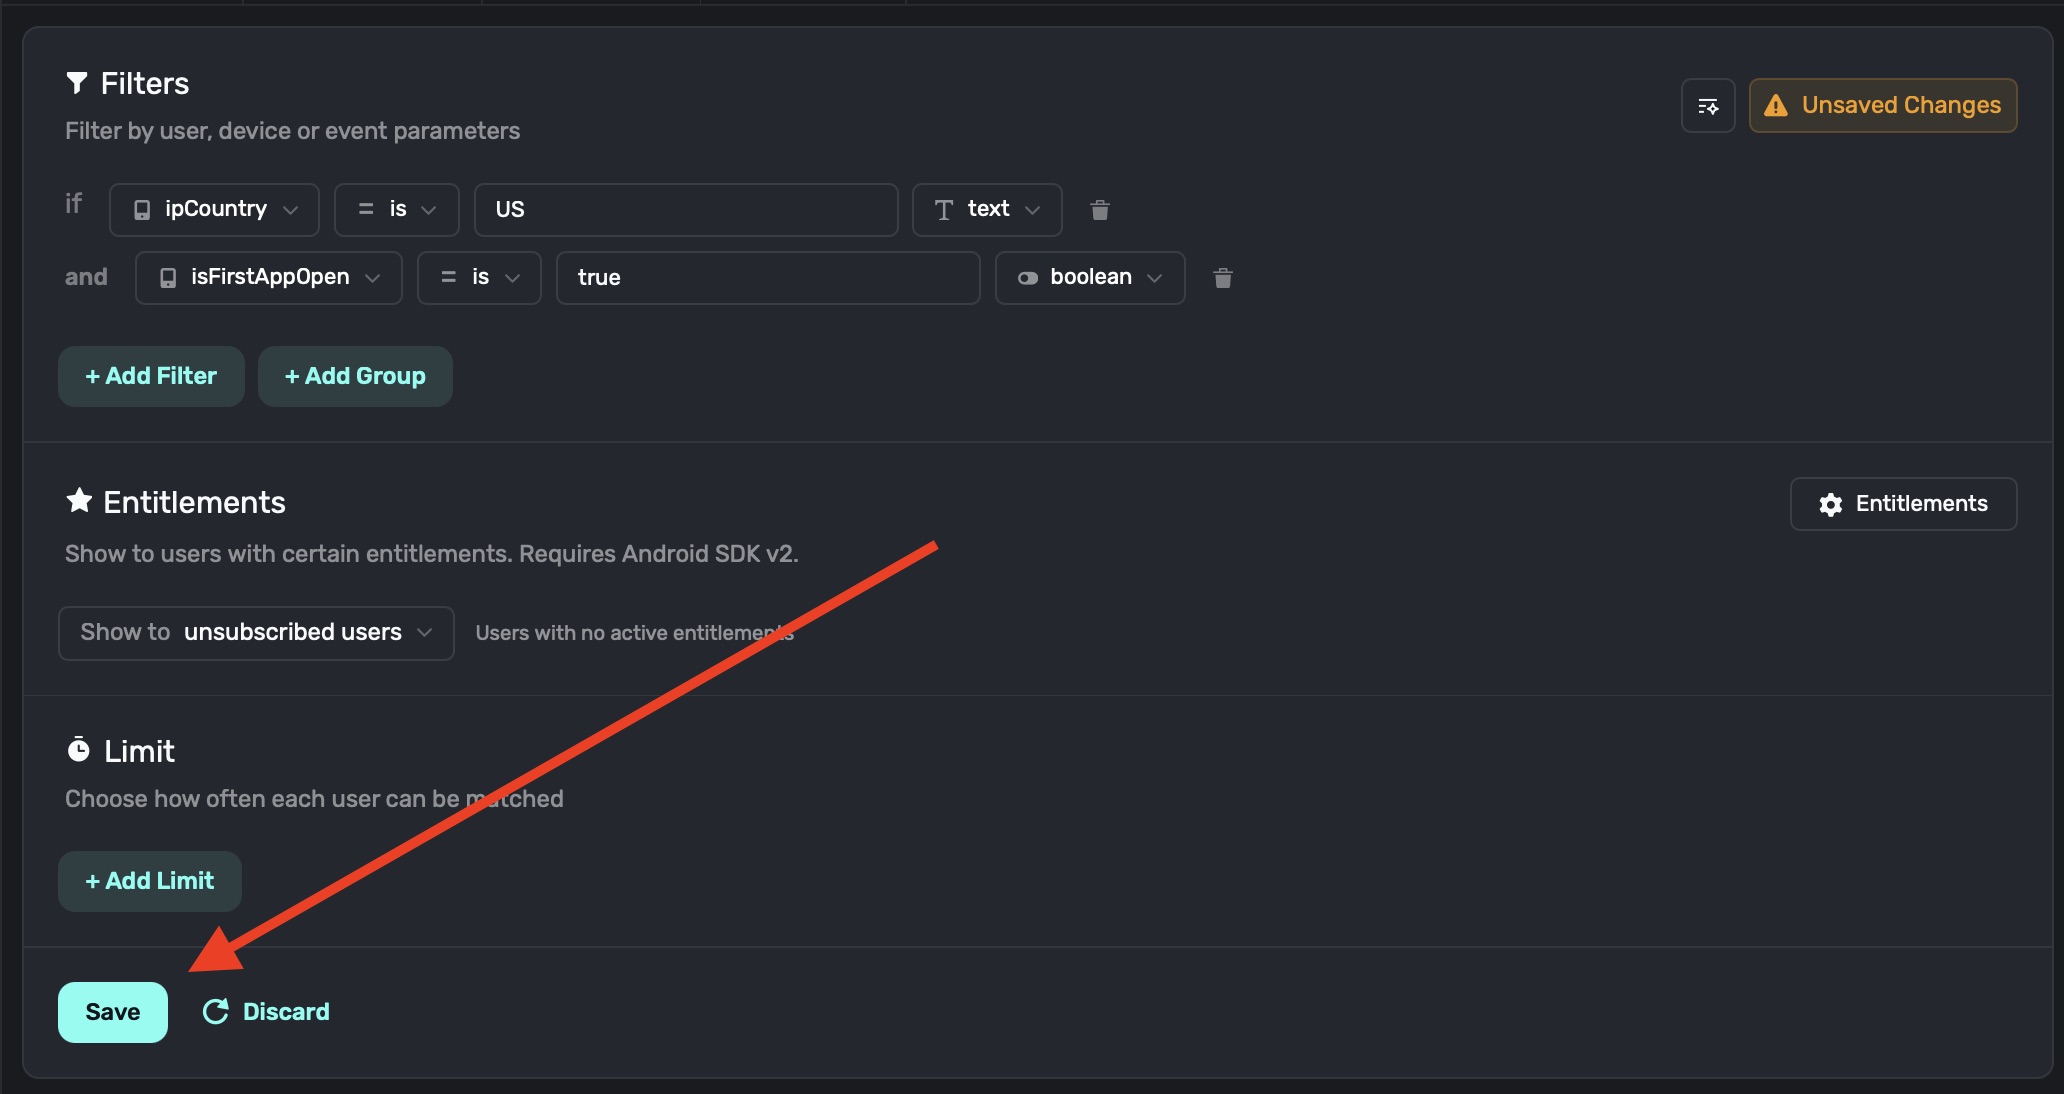
For example, if we wanted to show a certain paywall for users who tried to set a custom icon, it might look like this:
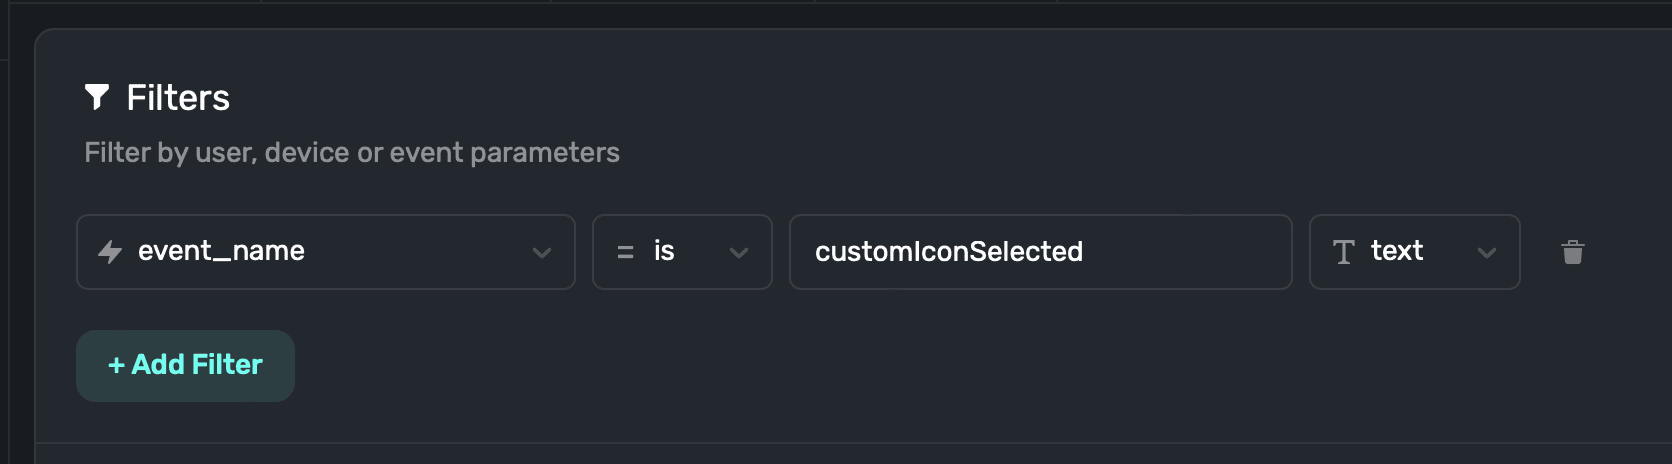
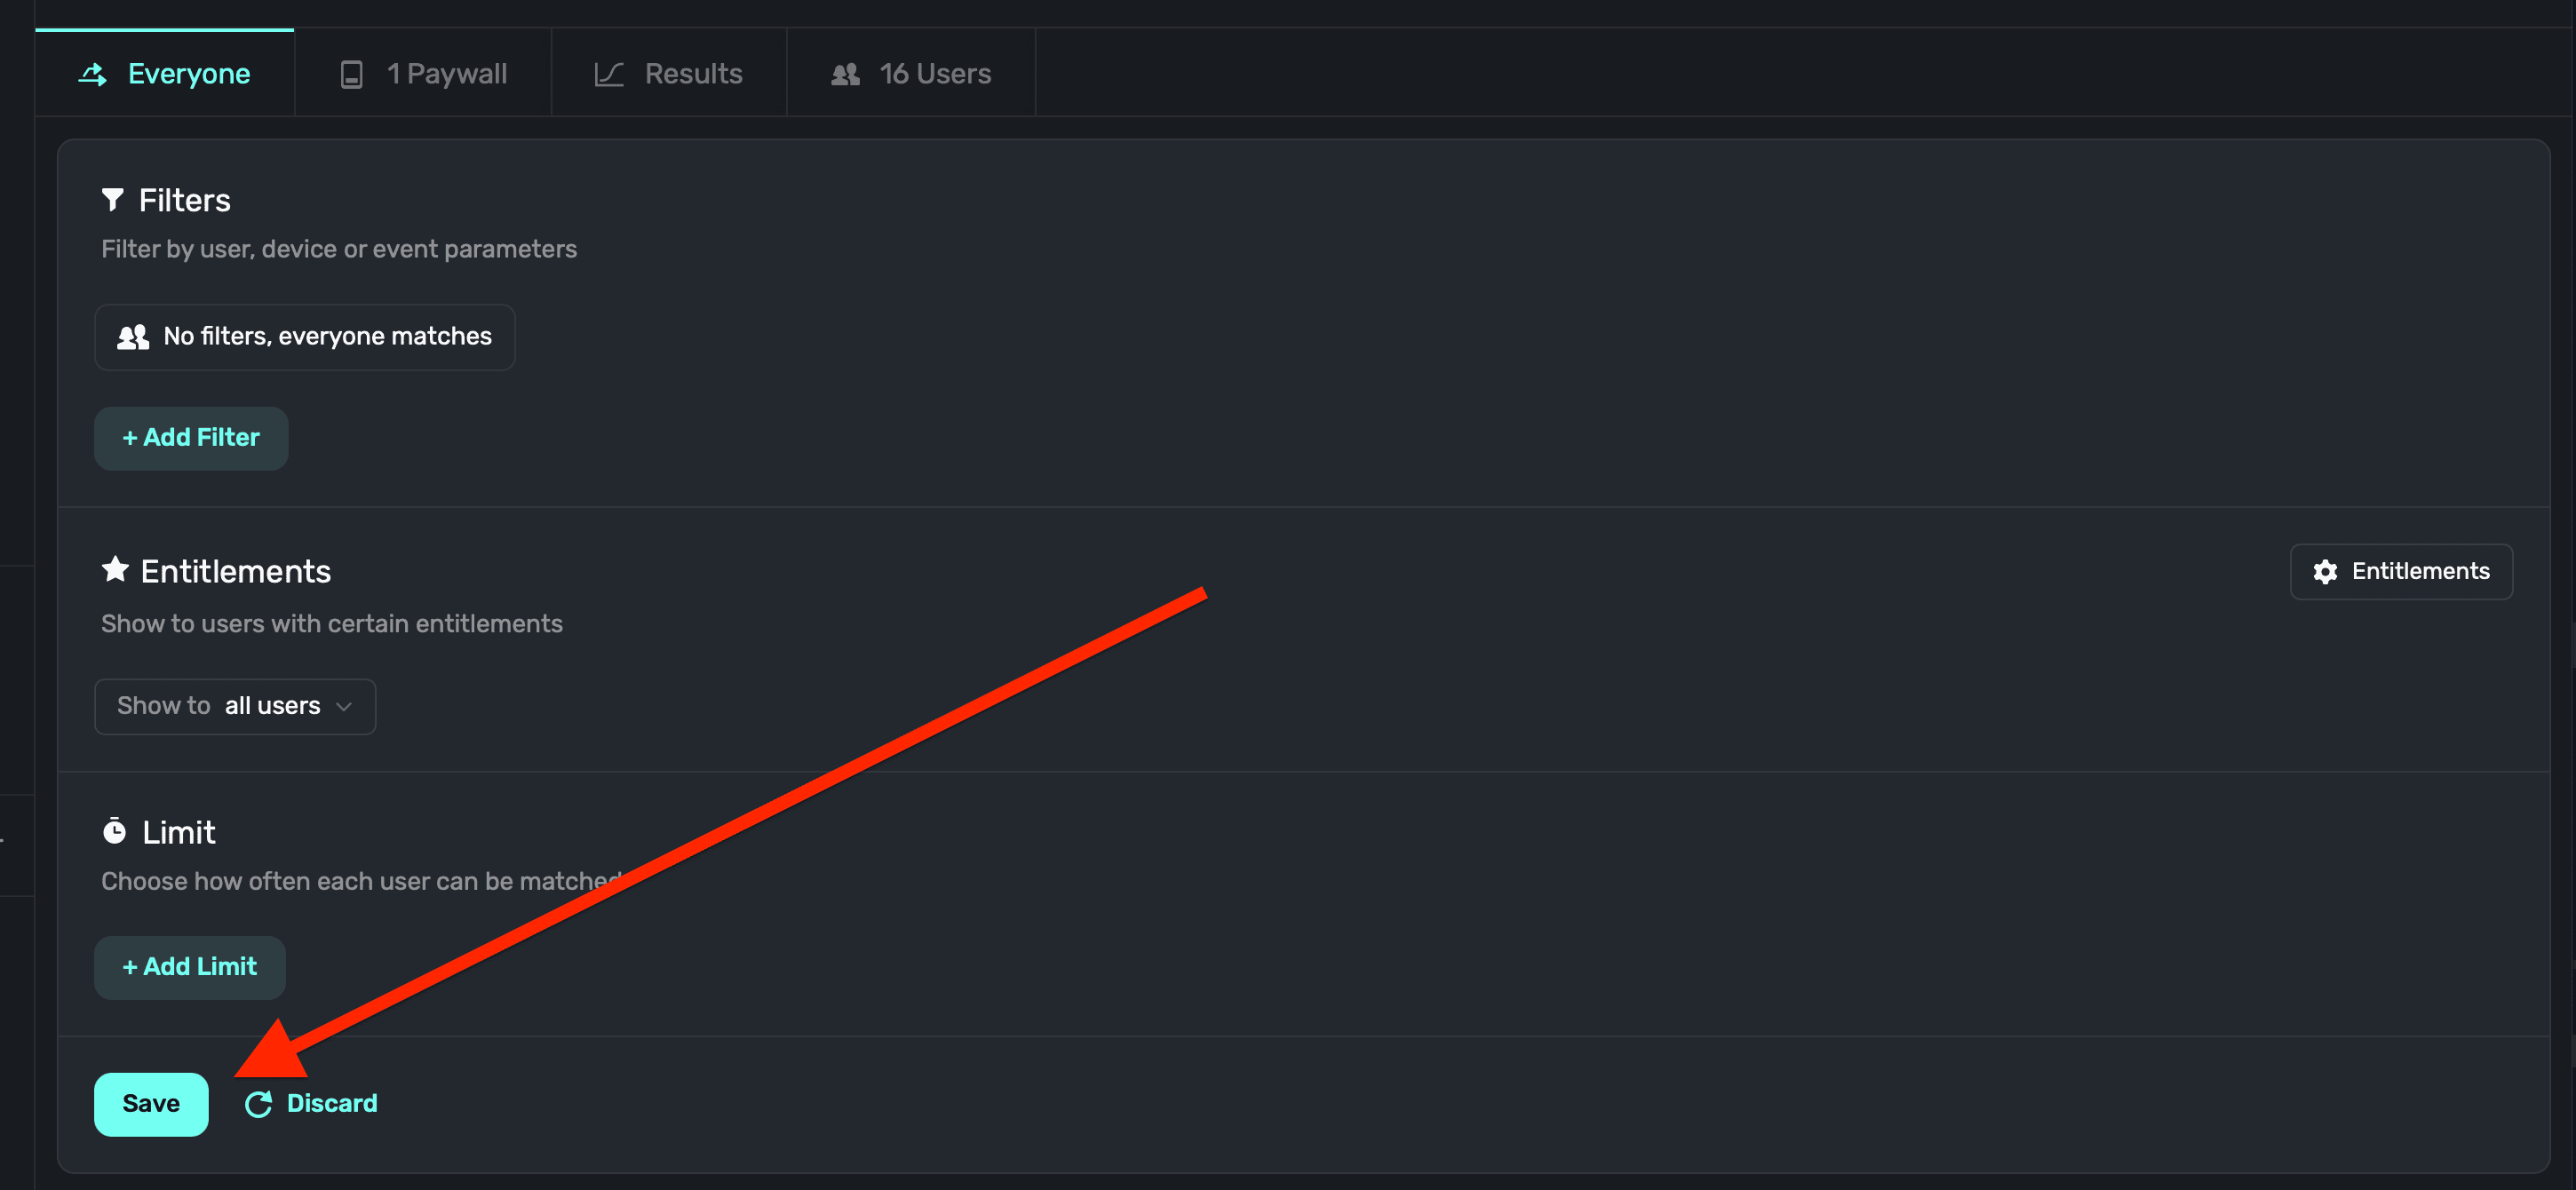
When you have a condition setup, click the Save button towards the bottom to apply it:
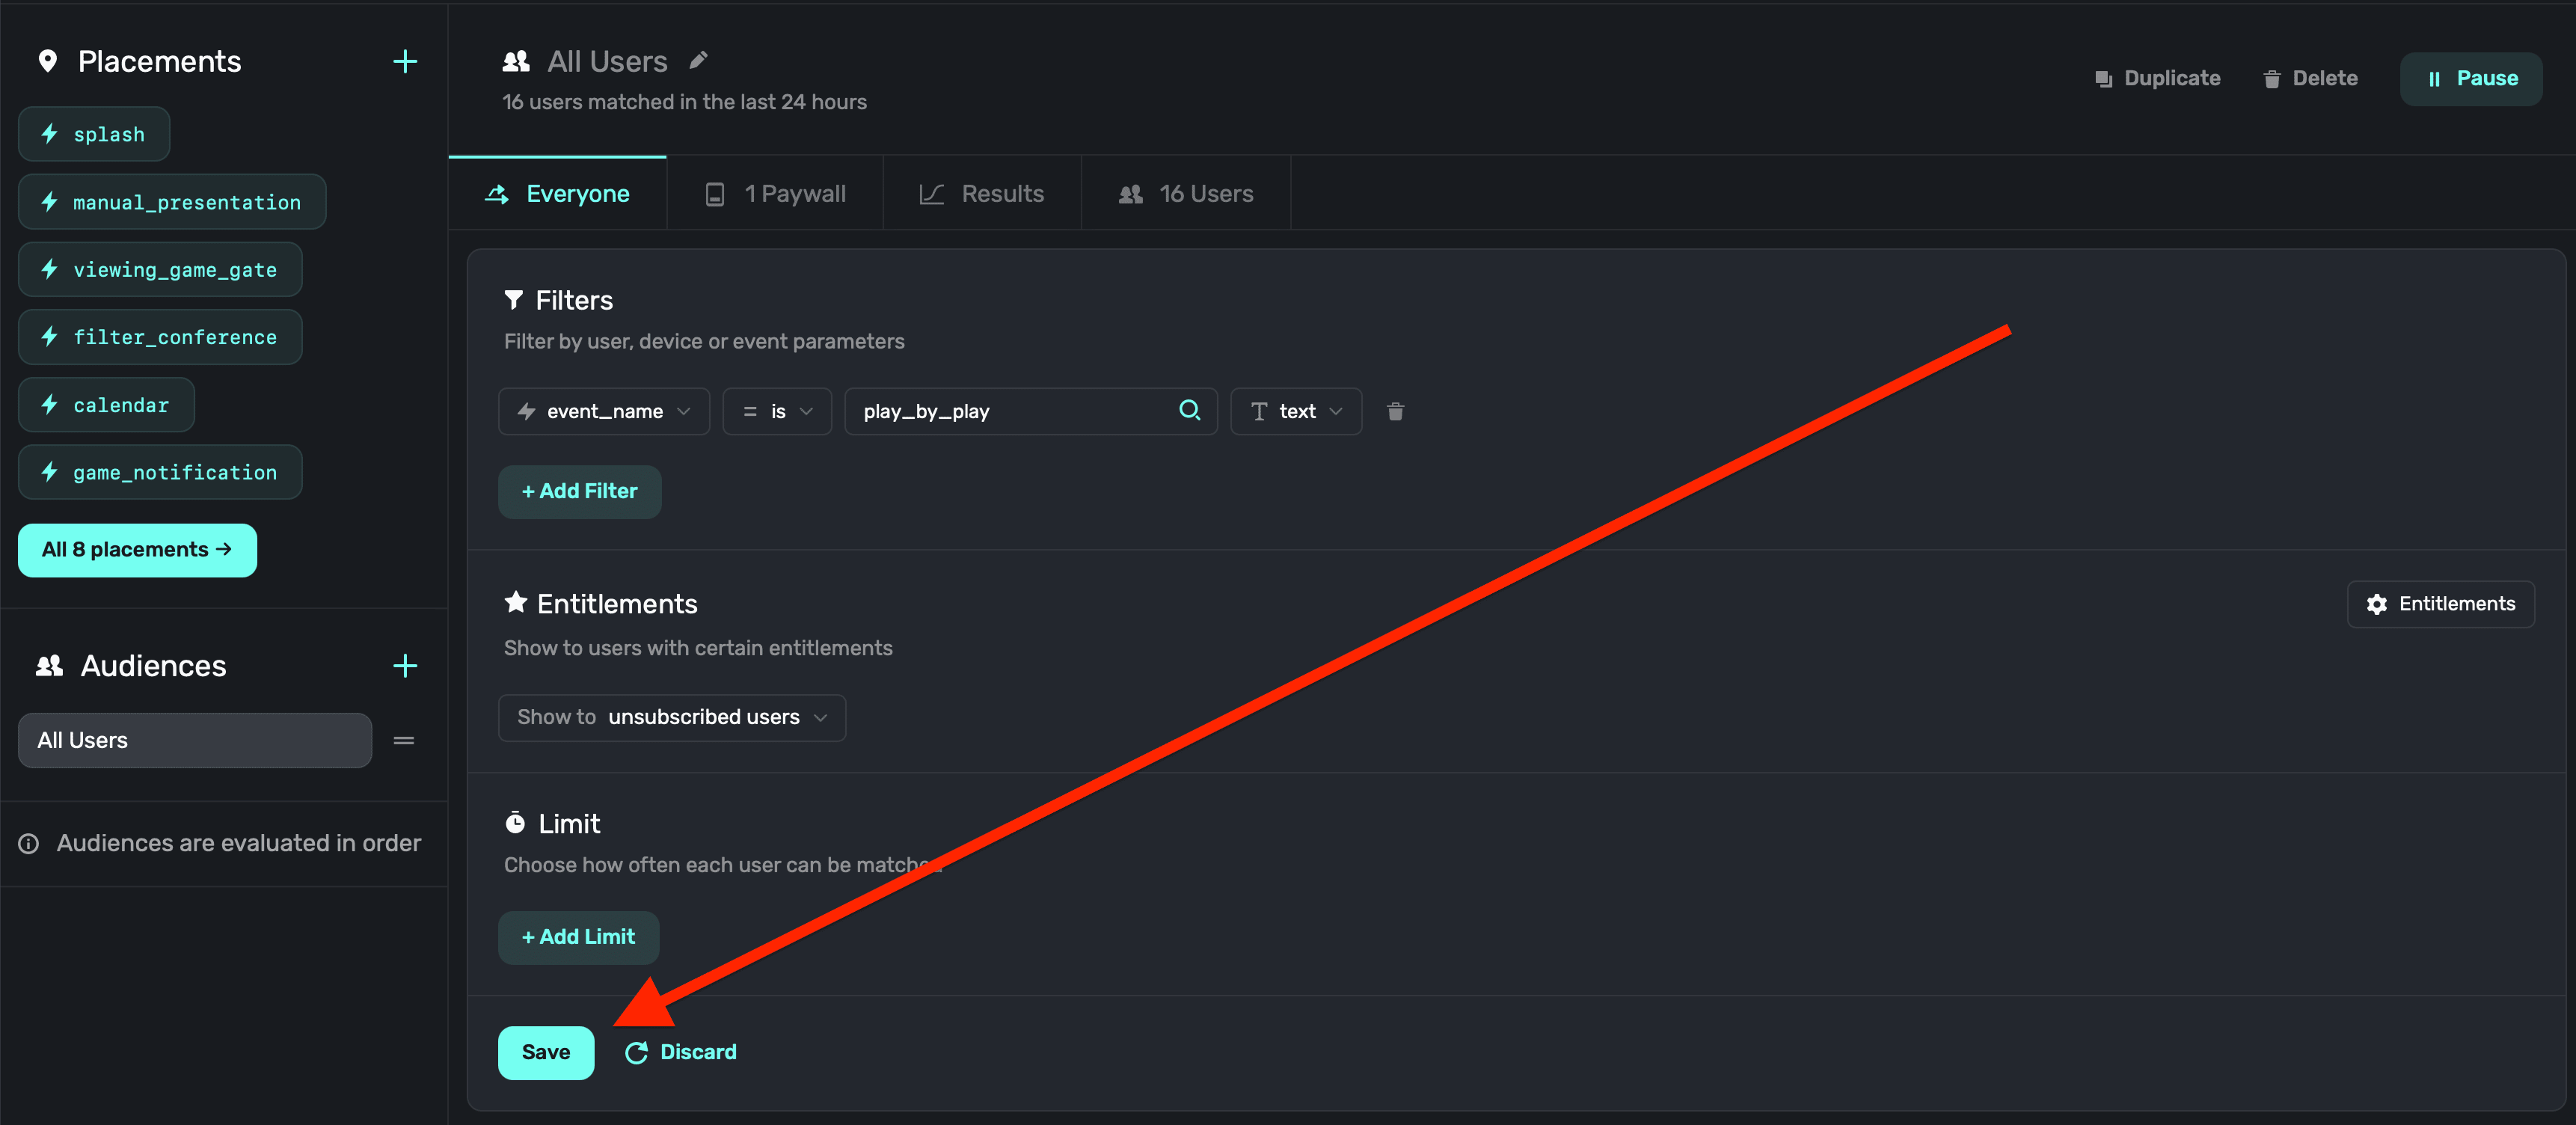
If you don't want to save any filter you're working on, click the Discard button by the save button.
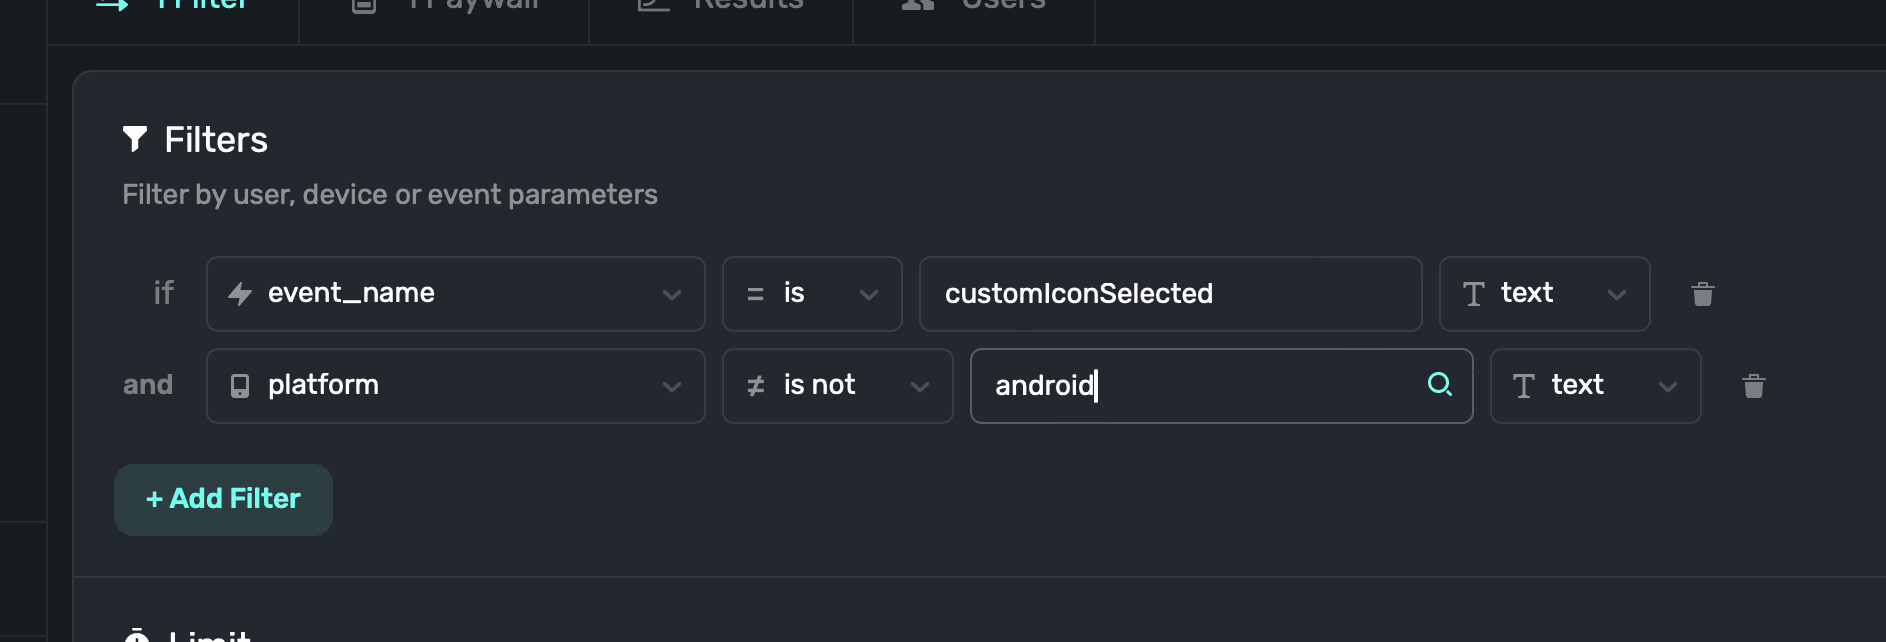
You can combine rules together, too. In the following example, if we only wanted the paywall to show on iOS, and not Android, you can simply click "+Add Filter" once more, and add the condition:
Using user properties or placement parameters
You can reference user attributes and placement parameters in campaign filters. For example, if you were to set hasLoggedCoffee on your user, you could use that in a filter.
Adding user properties
- Click on Add Filter, and then click the + icon:
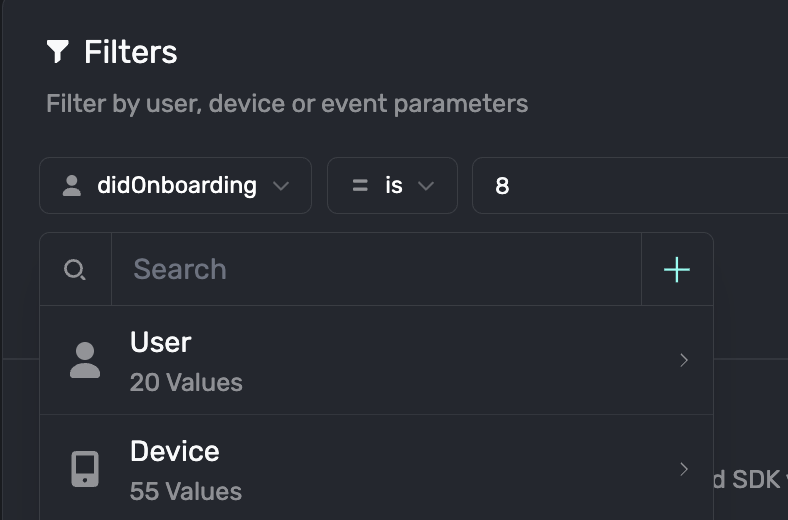
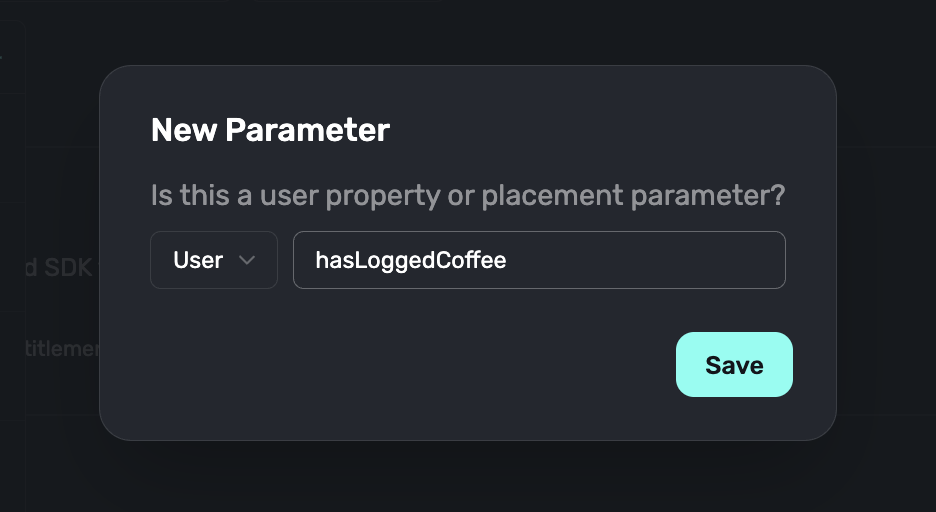
- Select User and name the property, then save it:
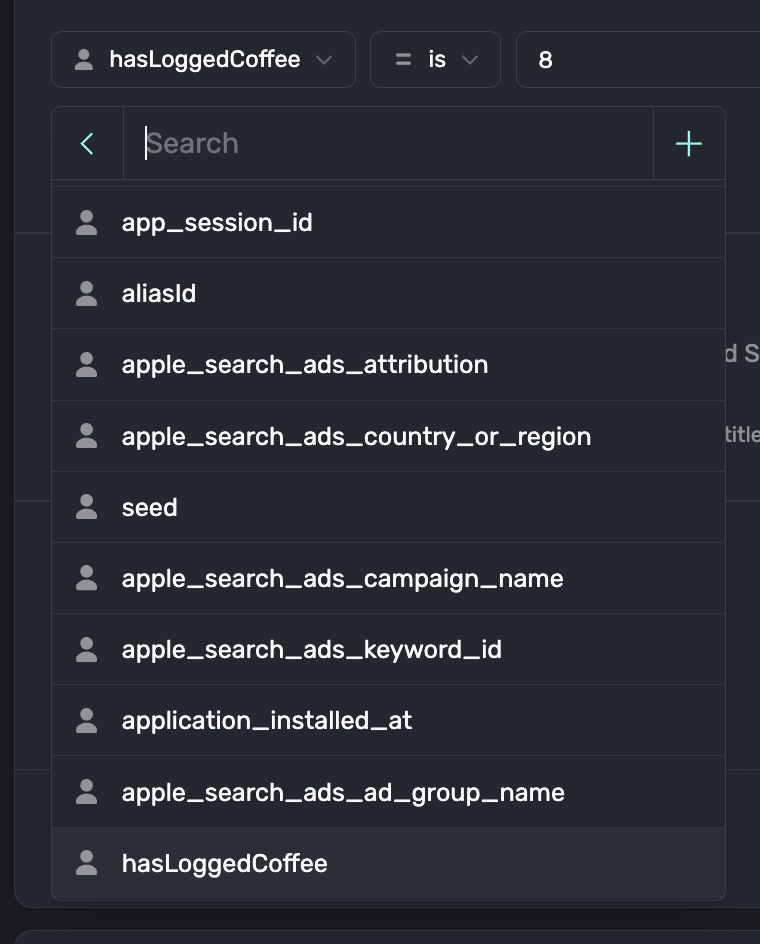
- Now you can select User (or type the property name) and the new property is available for user in your filter. Here, it's at the bottom:
Adding placement parameters
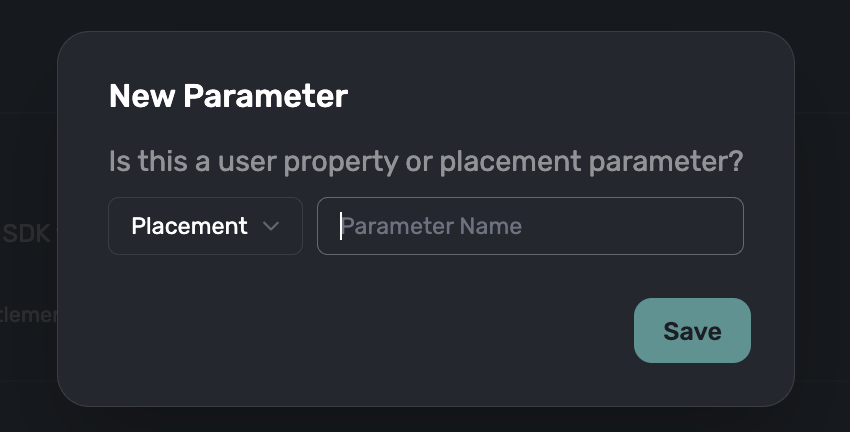
This works exactly the same as above, just choose "Placement" instead:
Using rule groups
You can combine rules together in groups. For example, you can mix AND and OR operators in the same group. To create a rule group, click on + Add Group in the filter editor.
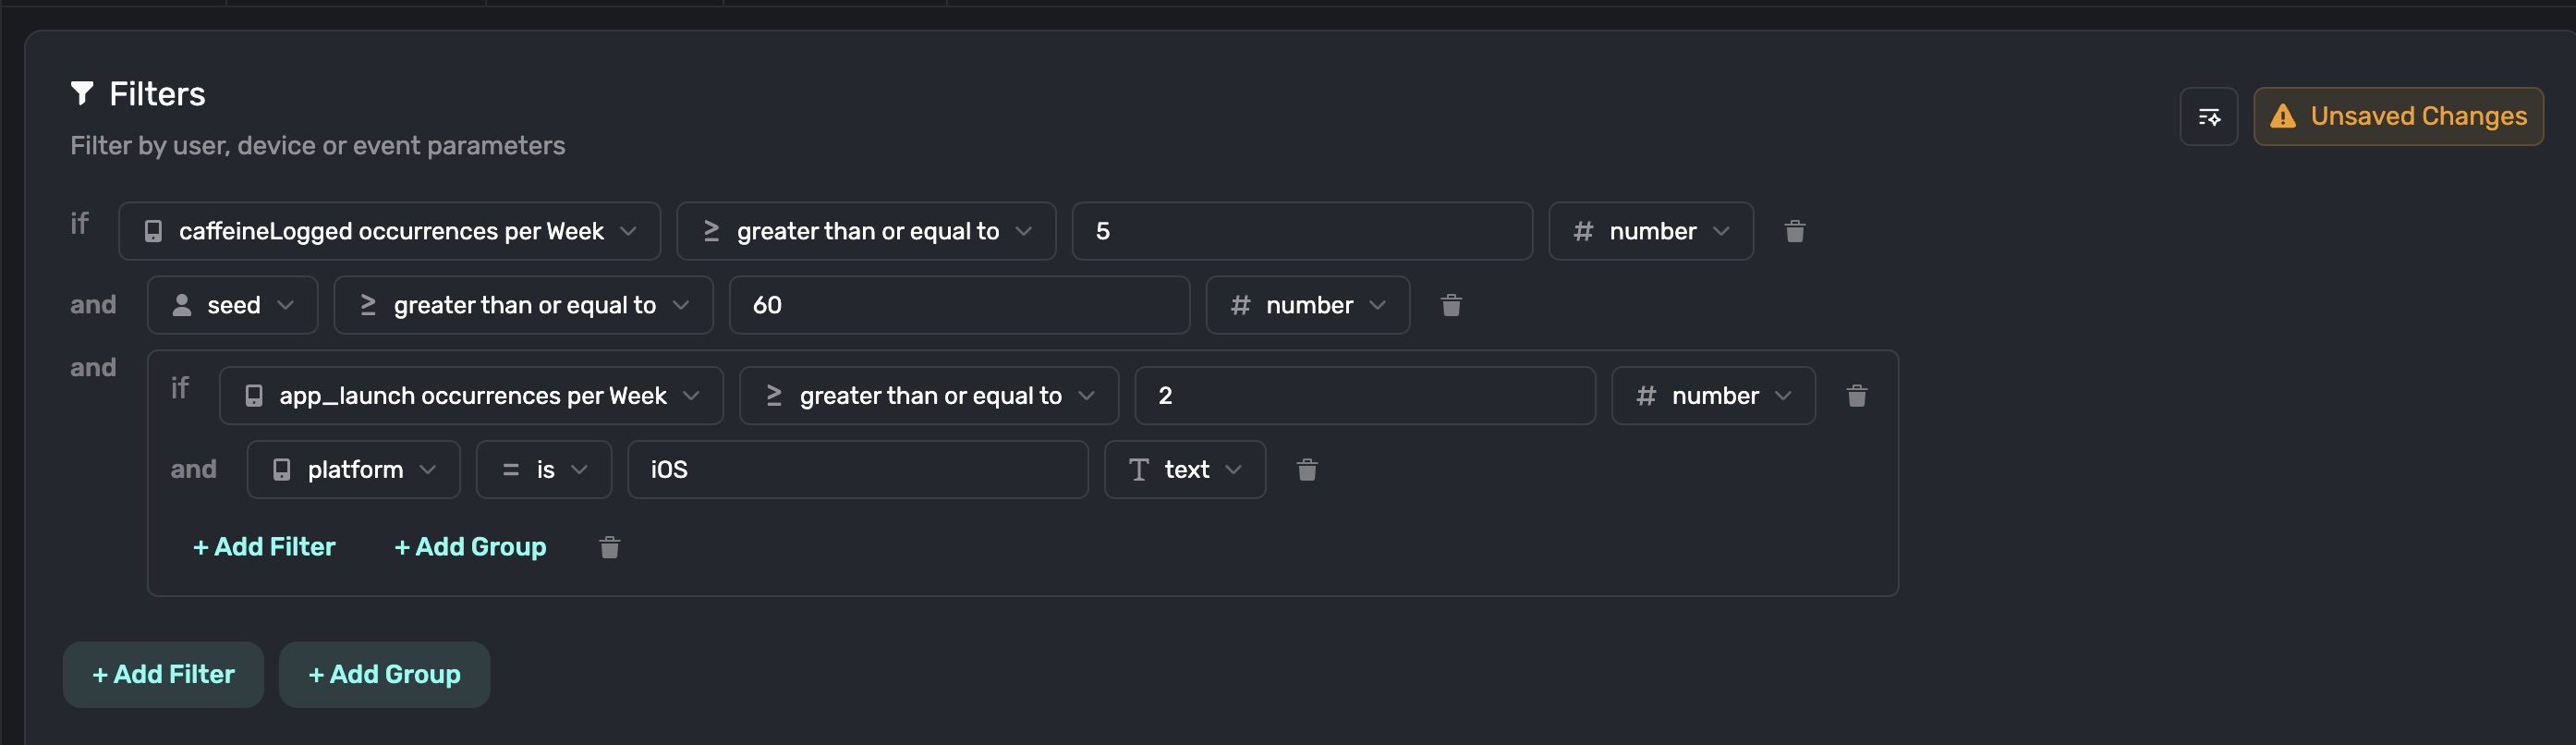
In the following example, we've created a filter that matches...
- Users who have logged caffeine at least 5 times in the last week.
- And their user seed greater than or equal to 60.
- And if the app has been launched at least twice this week and they are on iOS.
For a hands on tutorial of creating multiple filters to show different paywalls, check out this video:
Assignments Are "Sticky". Once a user is assigned a paywall or a holdout within an audience, they will continue to see that assignment unless you reset them (by clicking the reset icon next to Assigned) or remove the paywall from the rule via the X button. Remember: Changing a paywall's percentage only affects new users. It doesn't affect assignments for users who already saw that paywall.
Matching to entitlements or subscription status
To match your campaign to specific entitlement, or base it on the user's current subscription status, click the entitlements button and choose an option:

- Unsubscribed users (default): Users without an active entitlement match.
- All users: All users match.
- Auto-renew disabled: Users who have opted out of auto-renew.
- Active trials, auto-renew disabled: Users currently in an active trial, but they've already cancelled it before their trial period expired.
- Active subscriptions, auto-renew disabled: Users with an active subscription who have auto-renew turned off (i.e. these users will eventually churn).
- Expired entitlements: Users whose entitlements have expired.
- Specify entitlements...: Users with the specified entitlement(s) and state are matched. Here, you can combine multiple entitlement checks, too. For example, if
goldisactivebutplatinumisinactive:

Once you've set up entitlement checks for the campaign, click the Save button that appears at the bottom:
Setting a limit
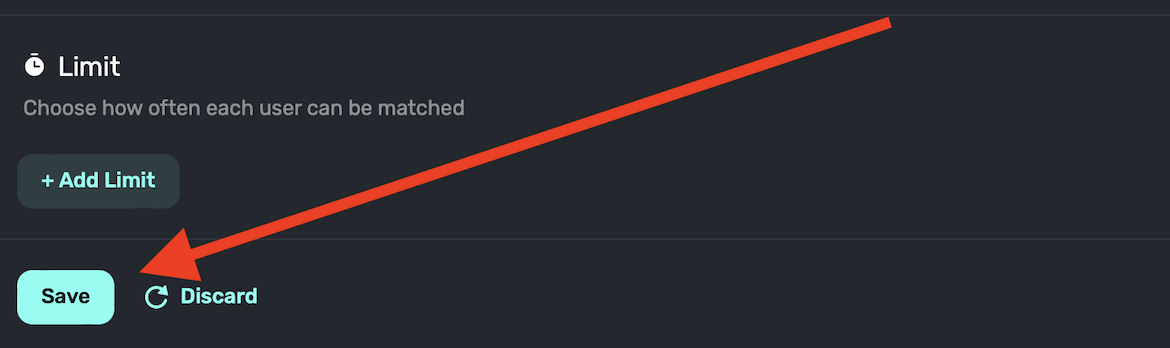
To set a limit for an audience, click the + Add Limit button — located below the entitlements section:

This is useful if you want to limit how many times a user can match with the audience. You can choose how many times the limit should be placed, along with a time duration and time span. For example: 1 (times) every 60 (time duration) minutes (time span):

Once you've set up a limit, click the Save button at the bottom:
Using AI audience generation
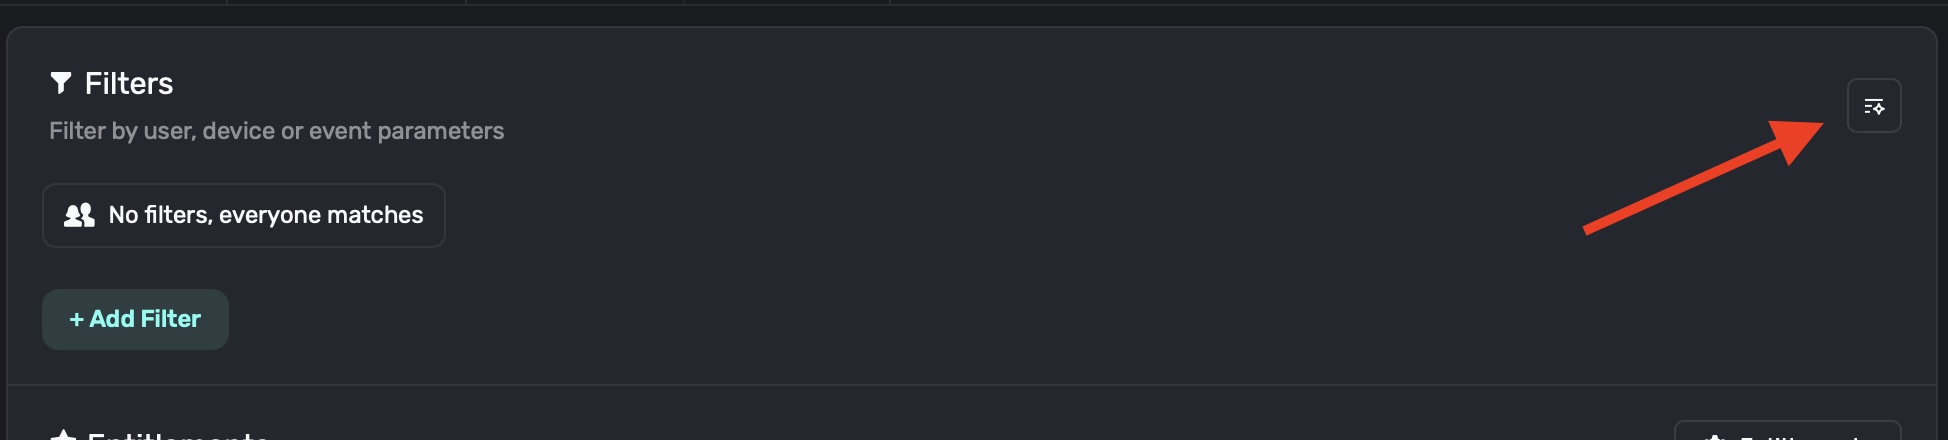
Superwall can generate an audience for you based on a description of the audience you want to target. To do this, click the AI Audience button — located here:
Then, simply describe the audience you want to target, and Superwall will generate a filter for you. Superwall can use your custom placements and user attributes to generate a filter for you. For example, you could type "Target all users in the United States who have opened at least once":
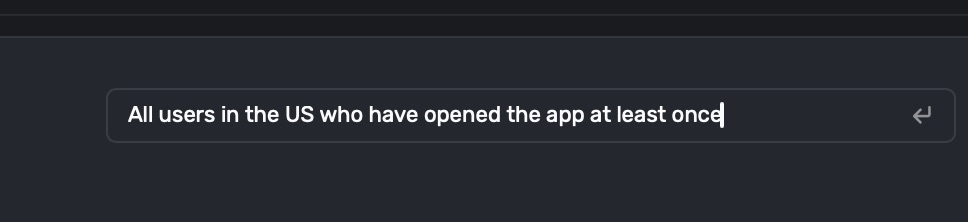
From there, Superwall will generate a filter for you. You can then click the Save button to apply it:
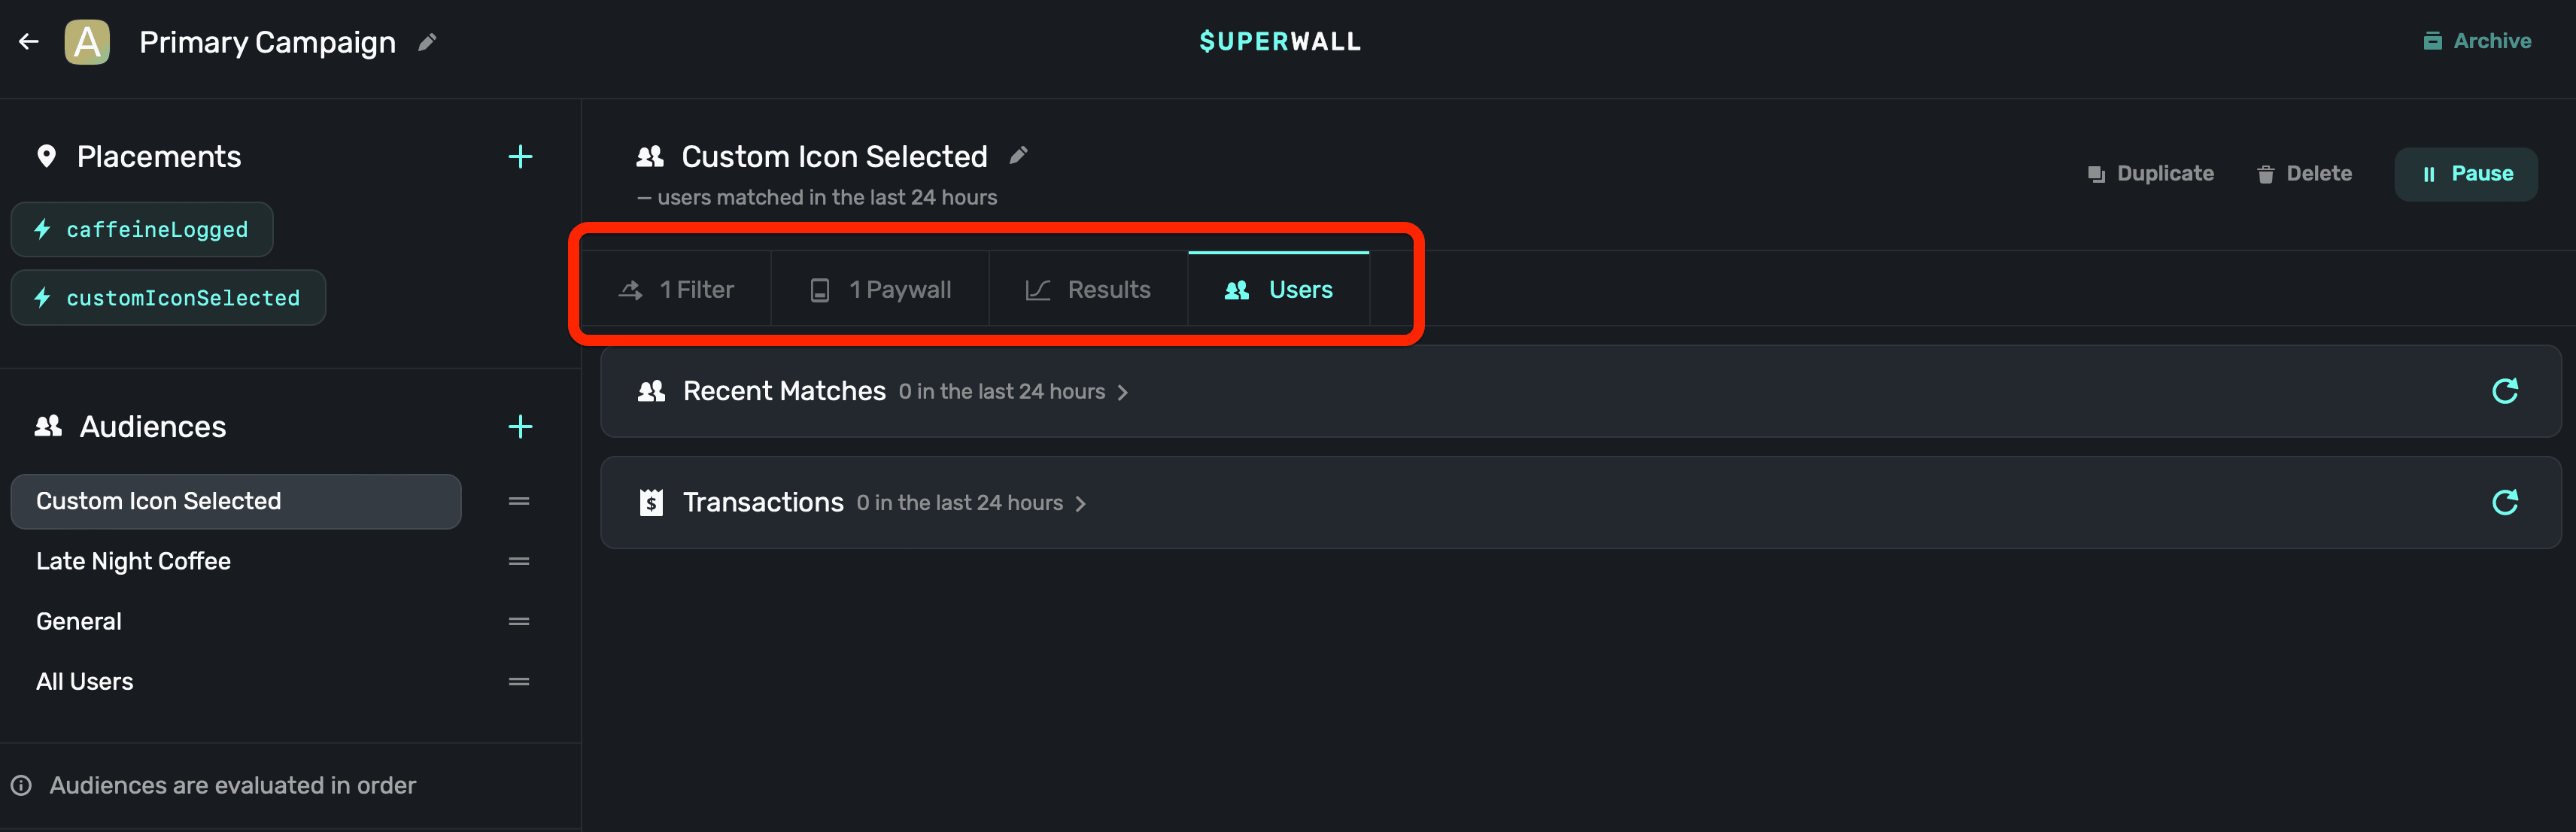
Audience details
When you select an audience, you can toggle between four main sections:
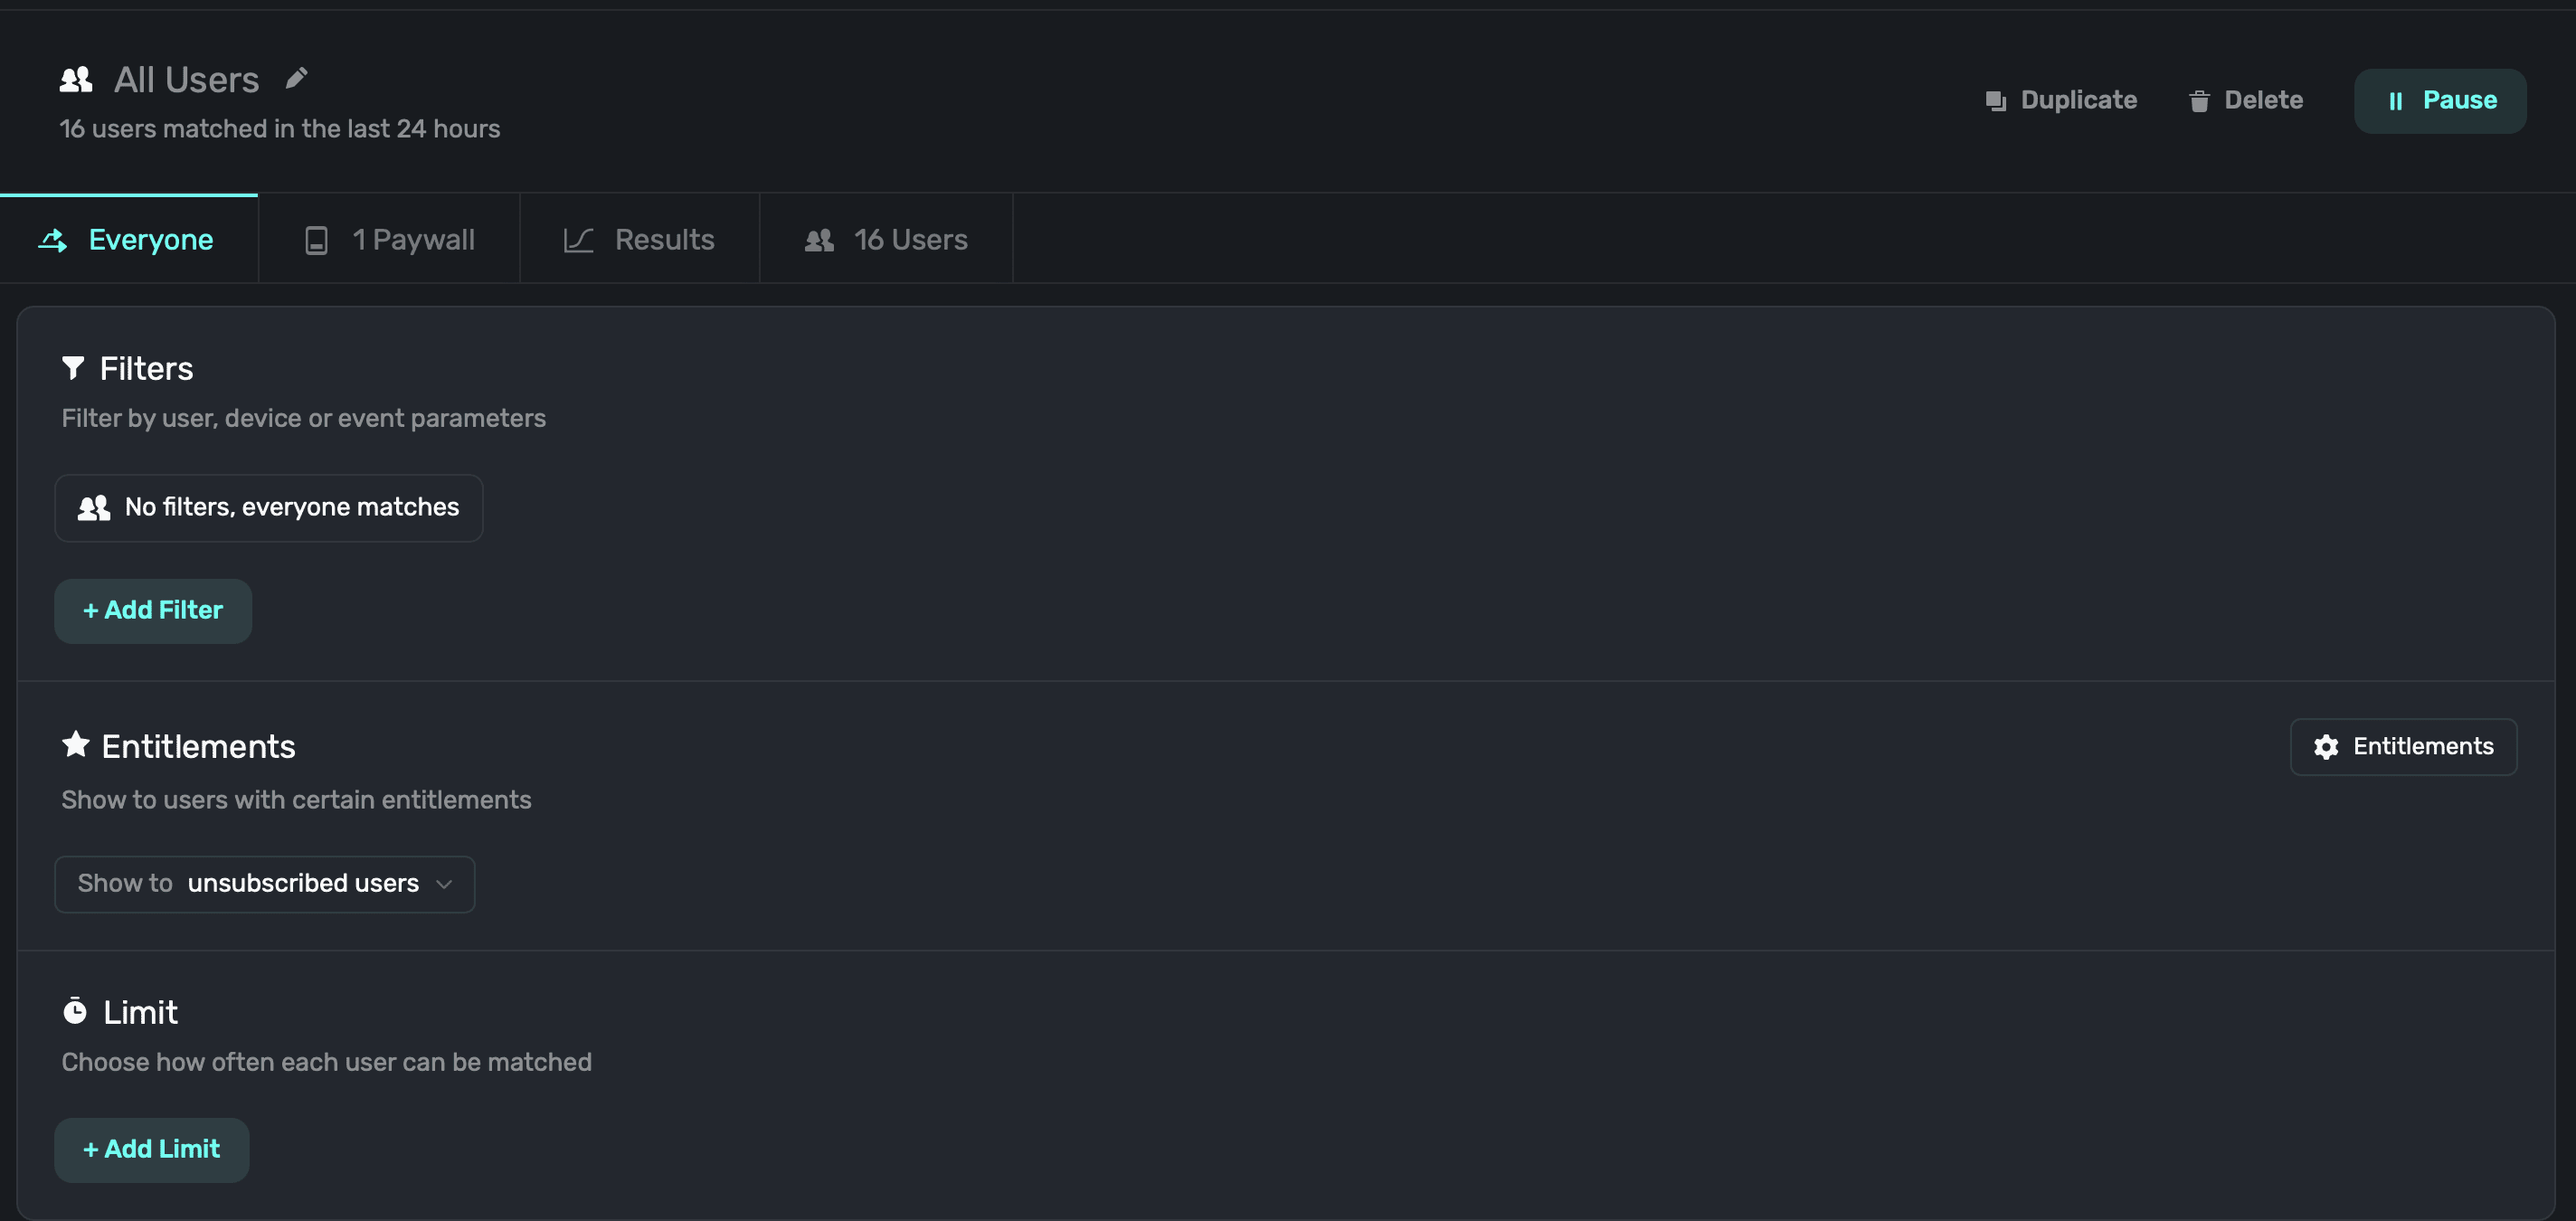
Filters
This is where you can configure filters and limits. If there isn't one set, this will say "Everyone", indicating the audience will match all users.
Paywalls
This section displays the paywalls which will present for the audience.
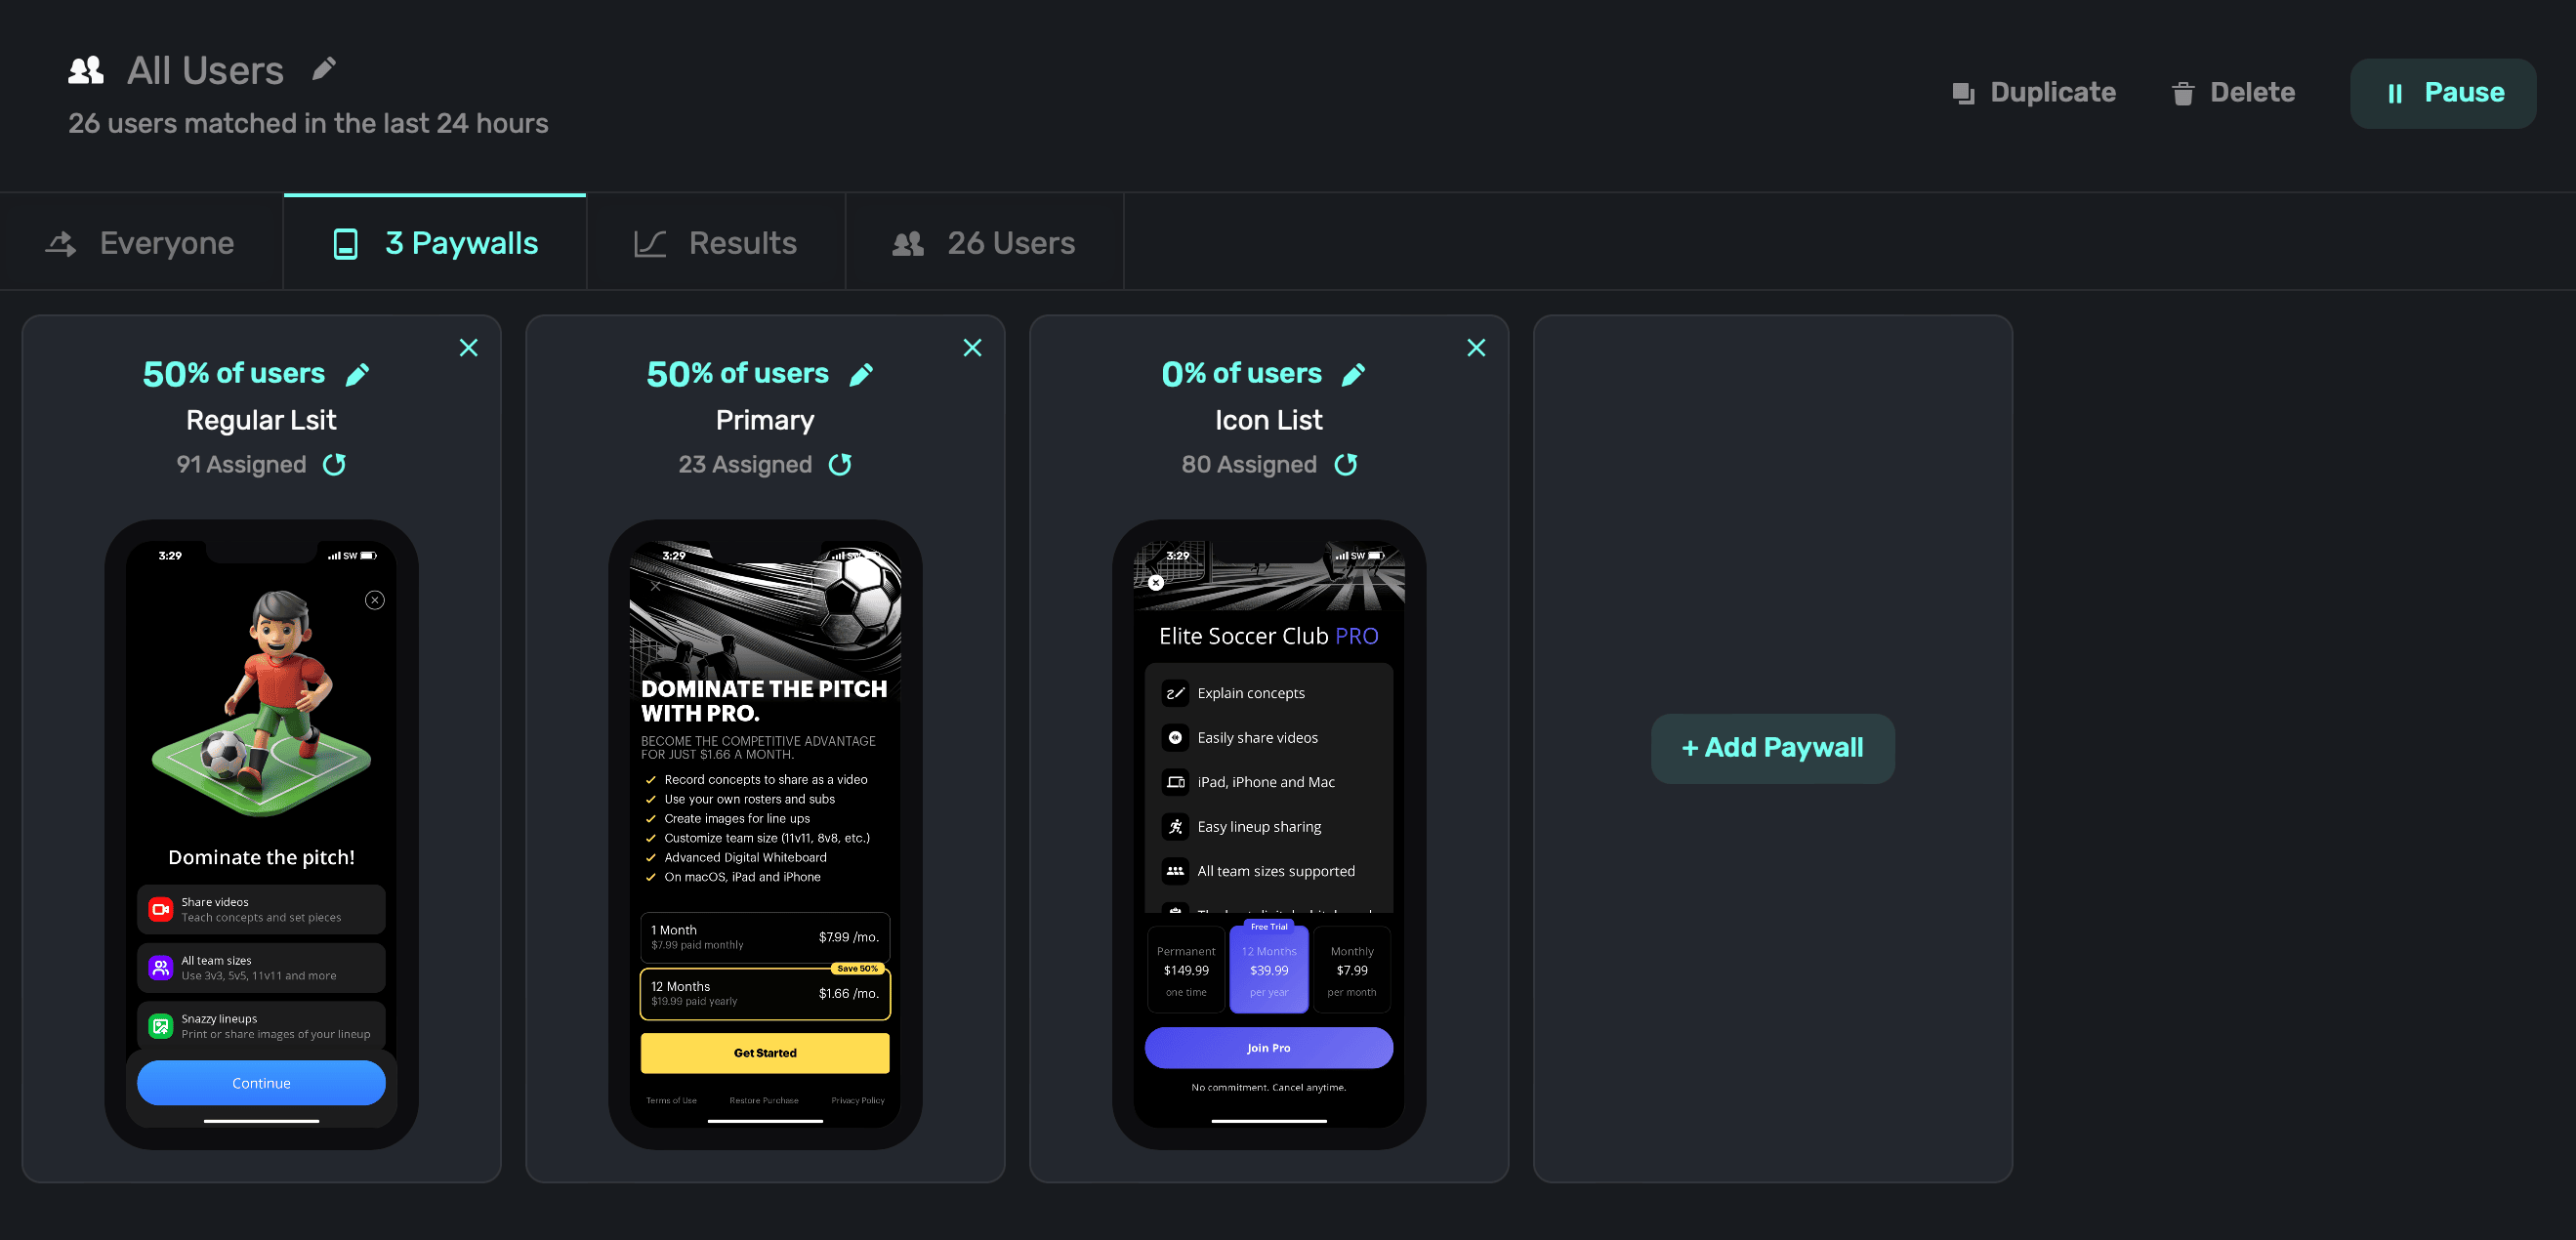
You can add new paywalls for the audience to use, or set a percentage to show across multiple paywalls when the audience is matched. To add a new paywall, click on + Add Paywall to associate one to the current campaign.
Results
Here, you can see how paywalls are performing for the given audience.
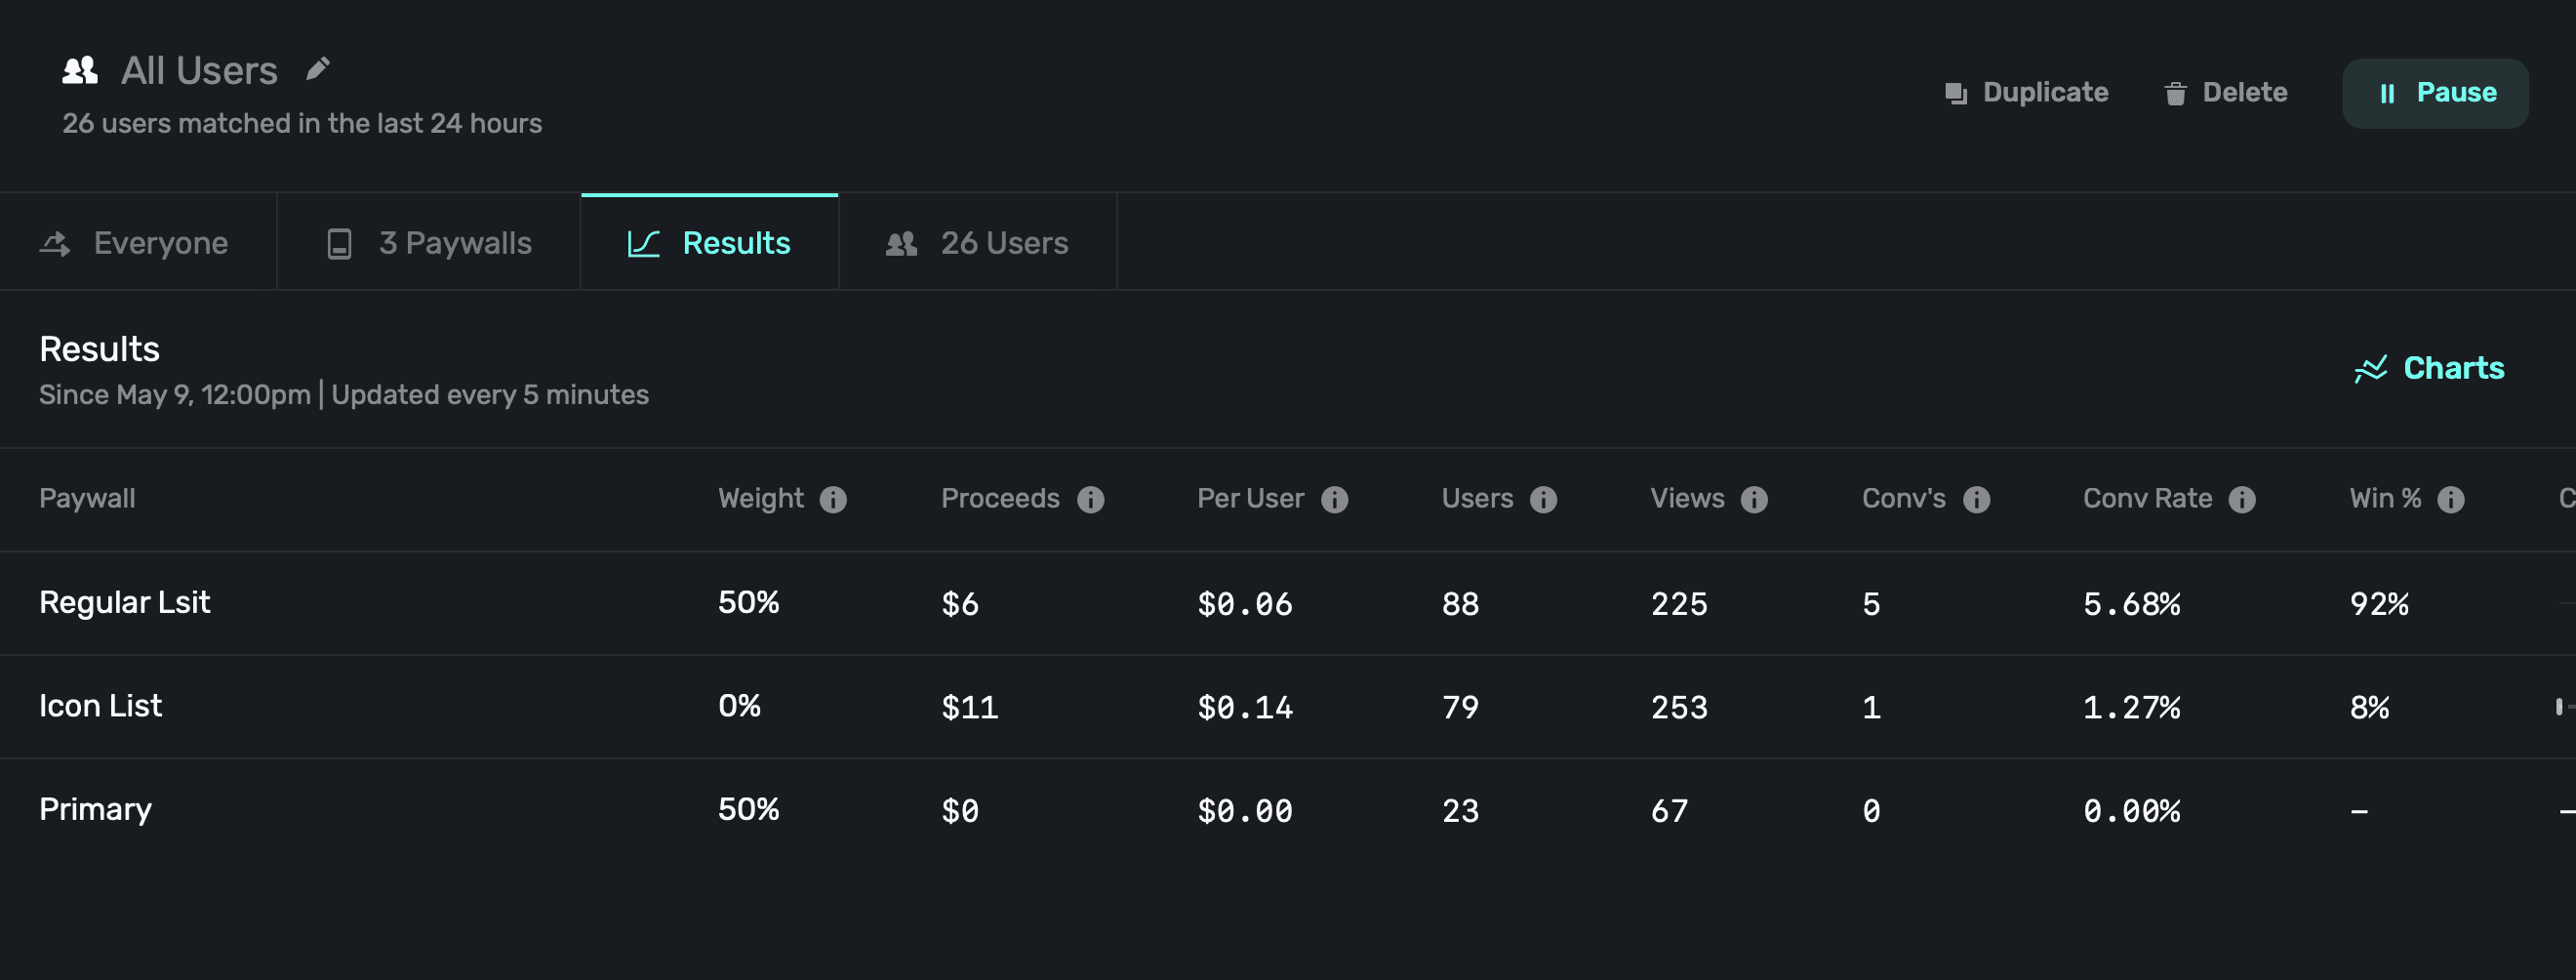
Superwall will show top-level metrics here, but if you want to see more details, click the Charts button at the top-right hand side of the metrics.
Users
Finally, the users section shows recent matches in the audience from filters set up for it, and transactions that have resulted from them.

When viewing either one, Superwall will show which placement resulted in the paywall being presented (recent matches), and which placement led to a conversion (transactions).
Reordering audiences
To change the order that Superwall evaluates audiences, simply drag and drop them in the left-hand sidebar of any opened campaign:
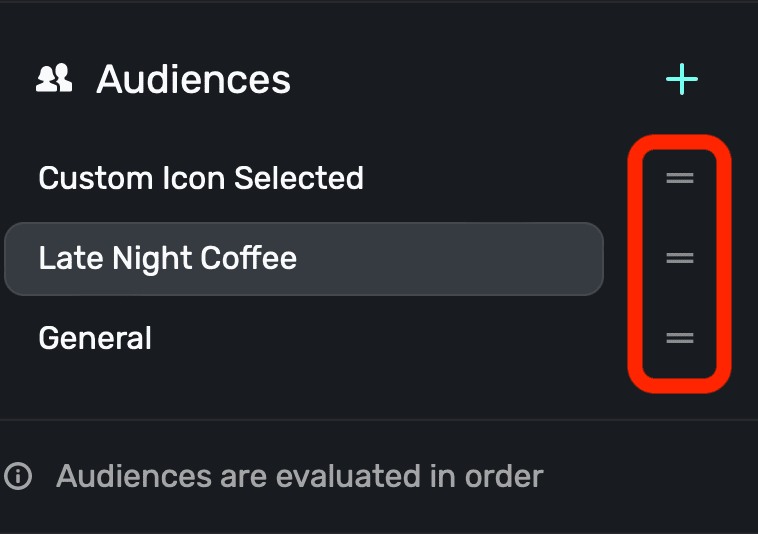
Remember, Superwall will check the audience at the top of the list here, and then go down one-by-one until it hits a match. These checks occur when a user hits a code path where you've registered a placement or if an automatically tracked placement is triggered (i.e. something like survey_response).
Changing audience status
You can duplicate, delete, pause or archive an audience using the buttons at the top of open audience:

Archived audiences can be restored at any point. Paused campaigns are not evaluated by Superwall.
Duplicate an audience
To duplicate or copy an existing audience, click the + button and choose "Import existing...". Then, you can select the audience you want to copy. Click it to use it as a template for a new audience:
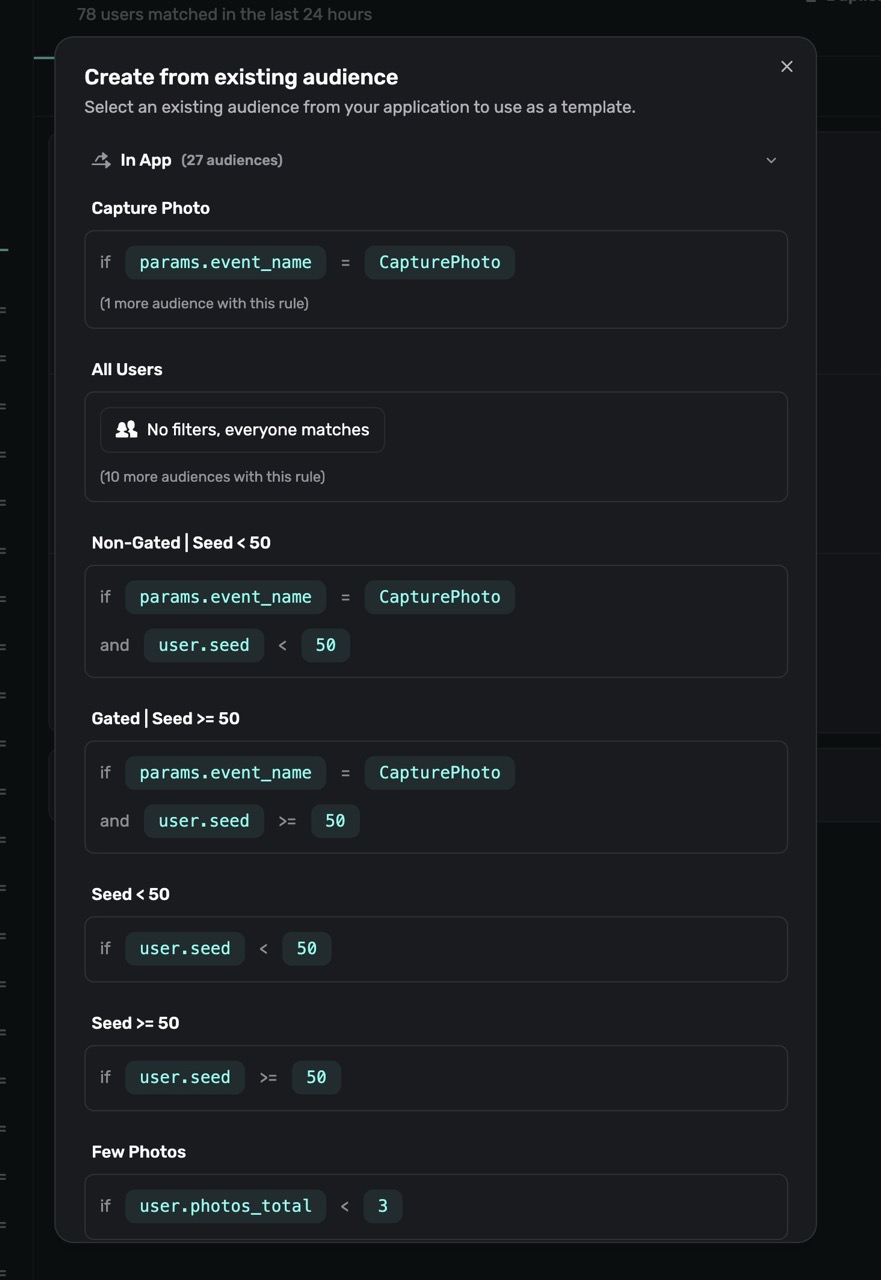
From there, you can edit its name, filters, paywalls, and more.
Common filters
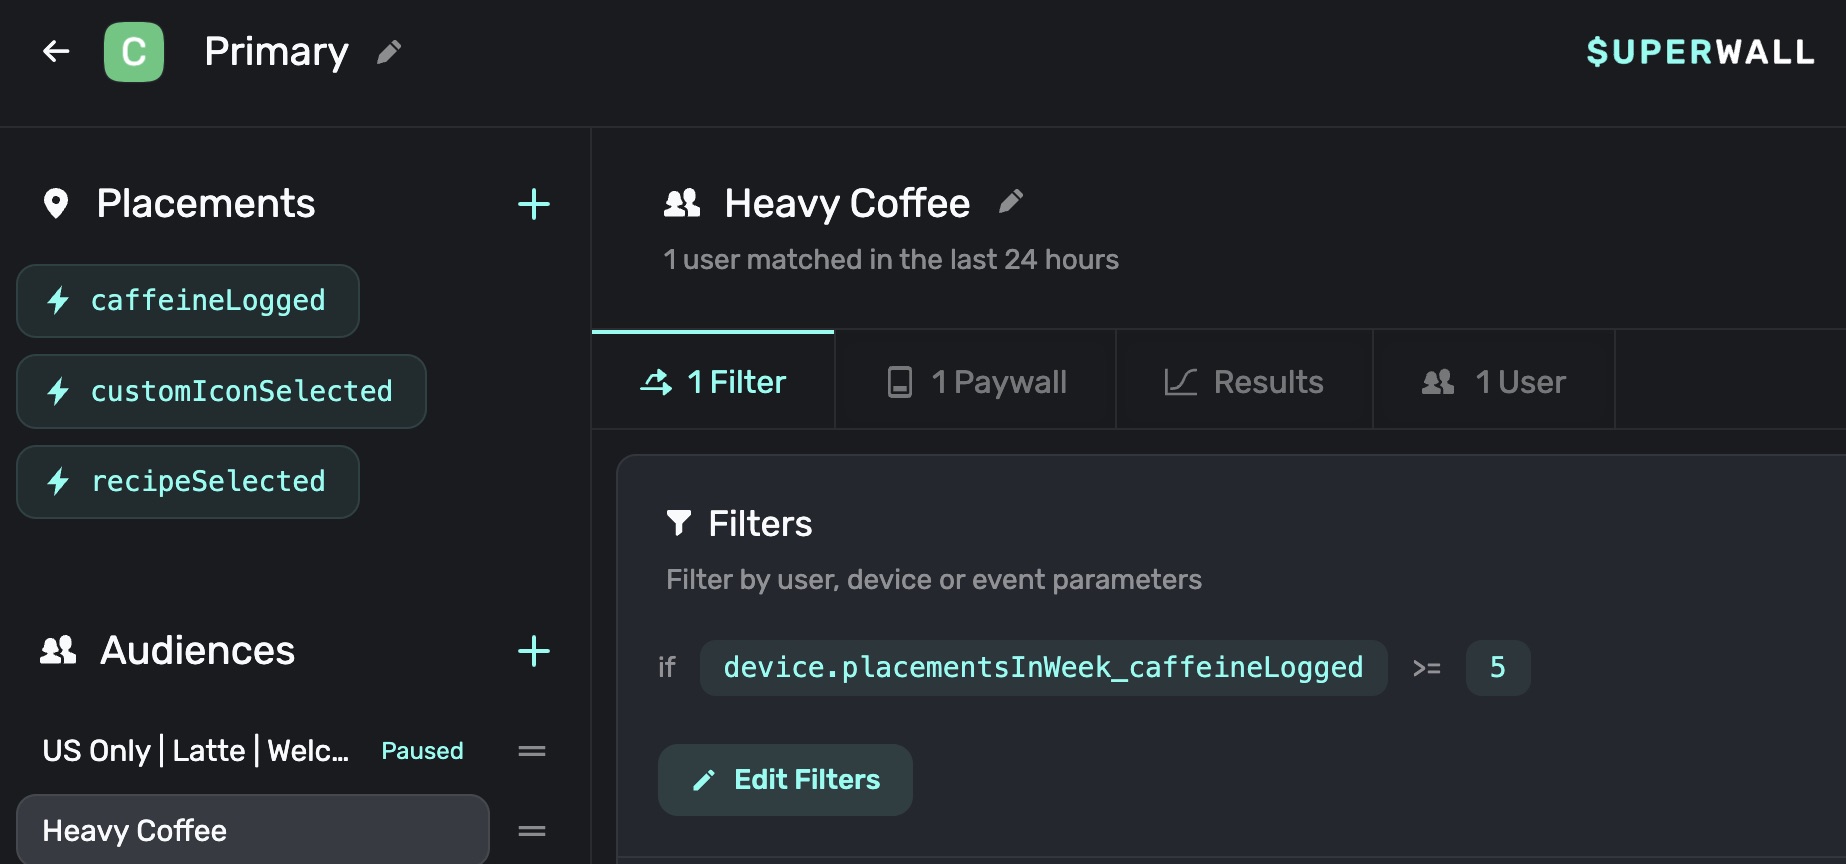
Event count filters
Event count filters are a powerful way to target users based on the number of times they've performed an action or fired a placement. In this example, we would target users who have triggered the caffeineLogged placement at least 3 times in the last week:
You can choose from the following time ranges:
- Hour
- Day
- Week
- Month
- Since install
To create an event count filter, click on the + Add Filter button, and then select one of the "Occurrences..." options:
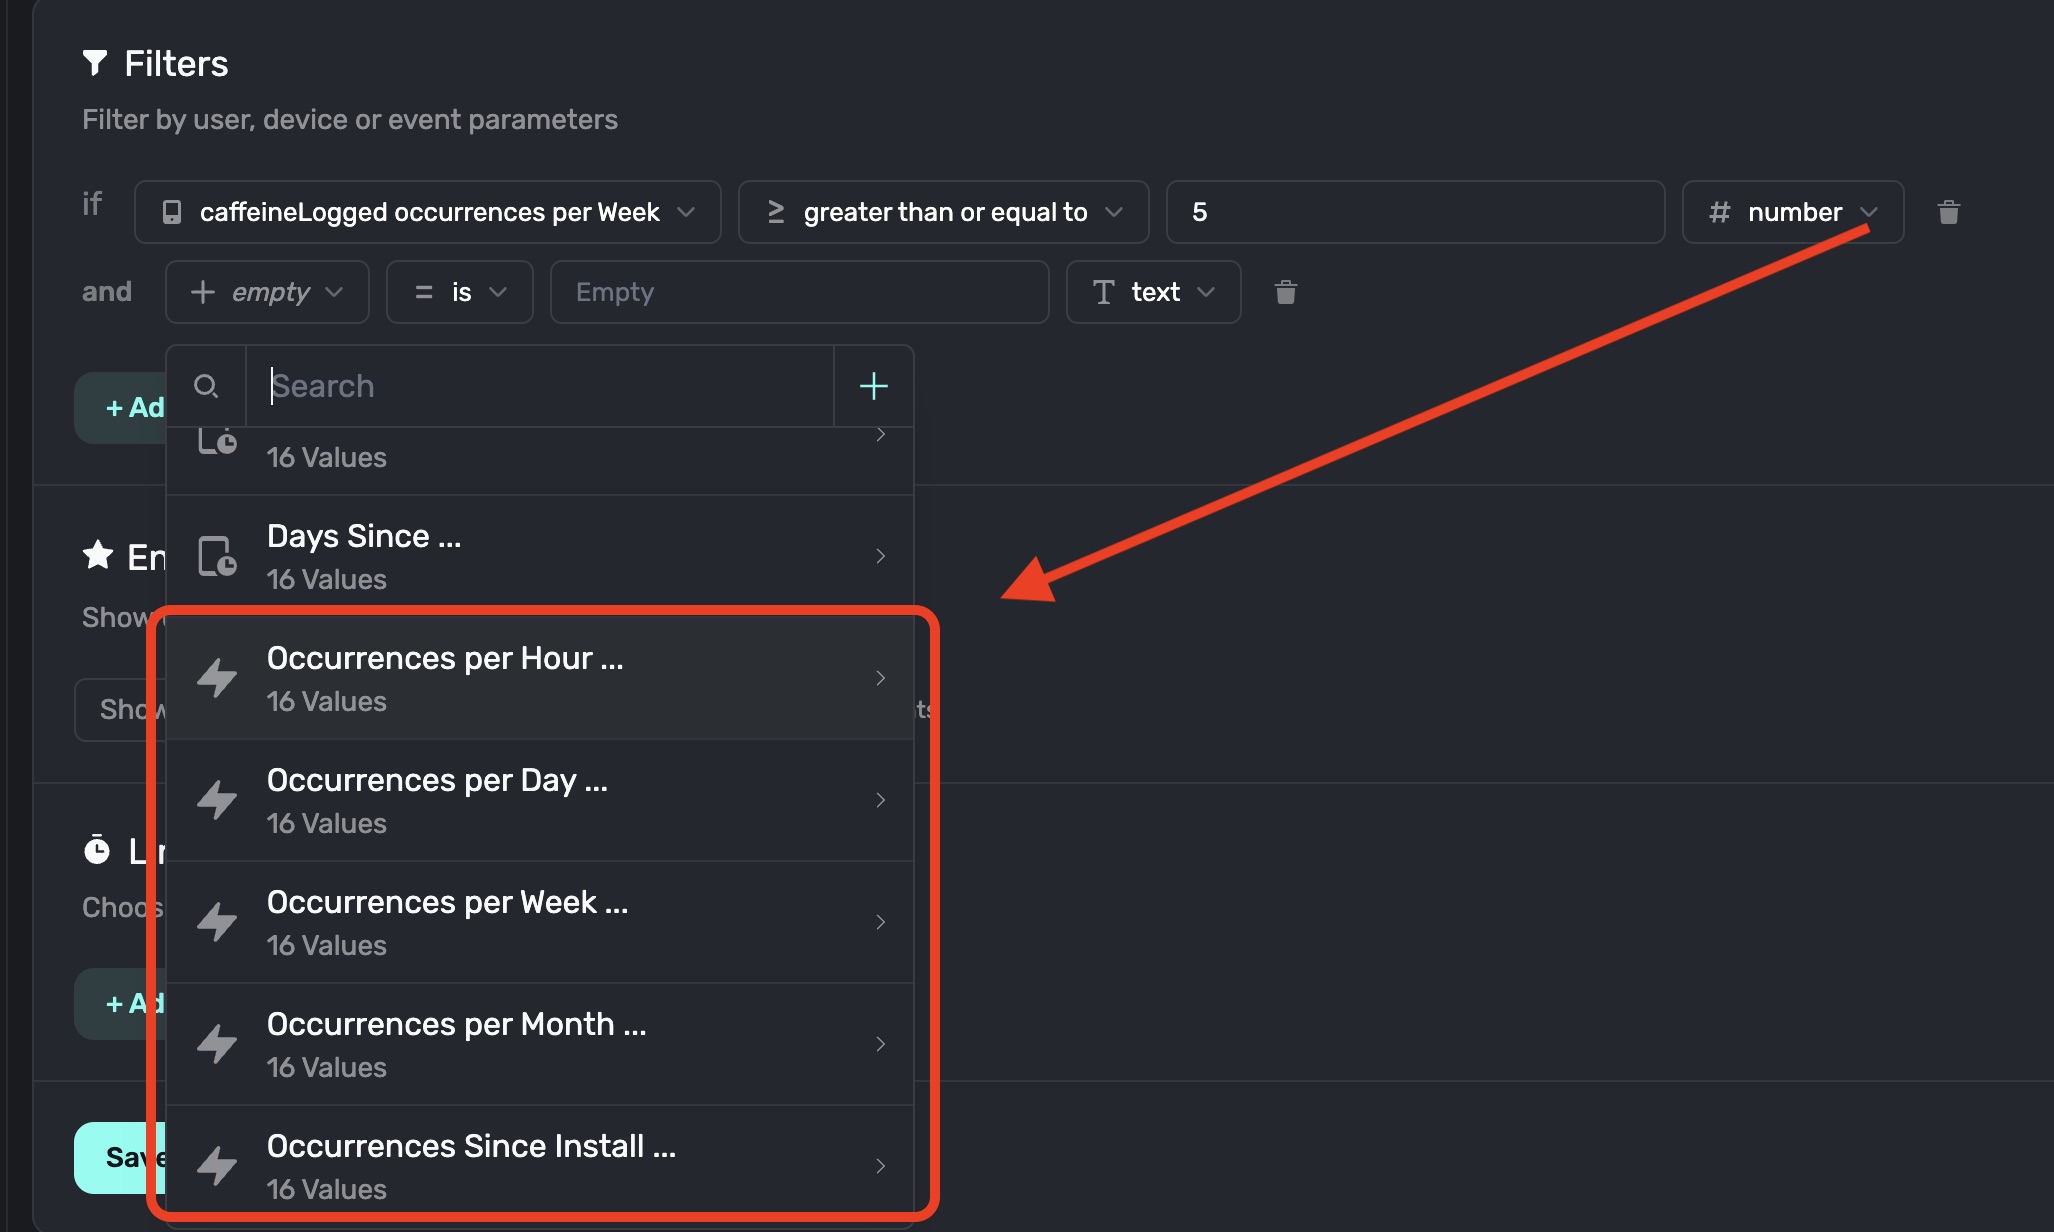
Then, filter for the event or placement you want to target. In our example, we're filtering for the caffeineLogged placement:

Then choose the operator you want to use and the number of times the event or placement must have occurred. In our example above, we're targeting users who have logged caffeine at least 5 times in the last week. Be sure to click the Save button to save it:
App versions
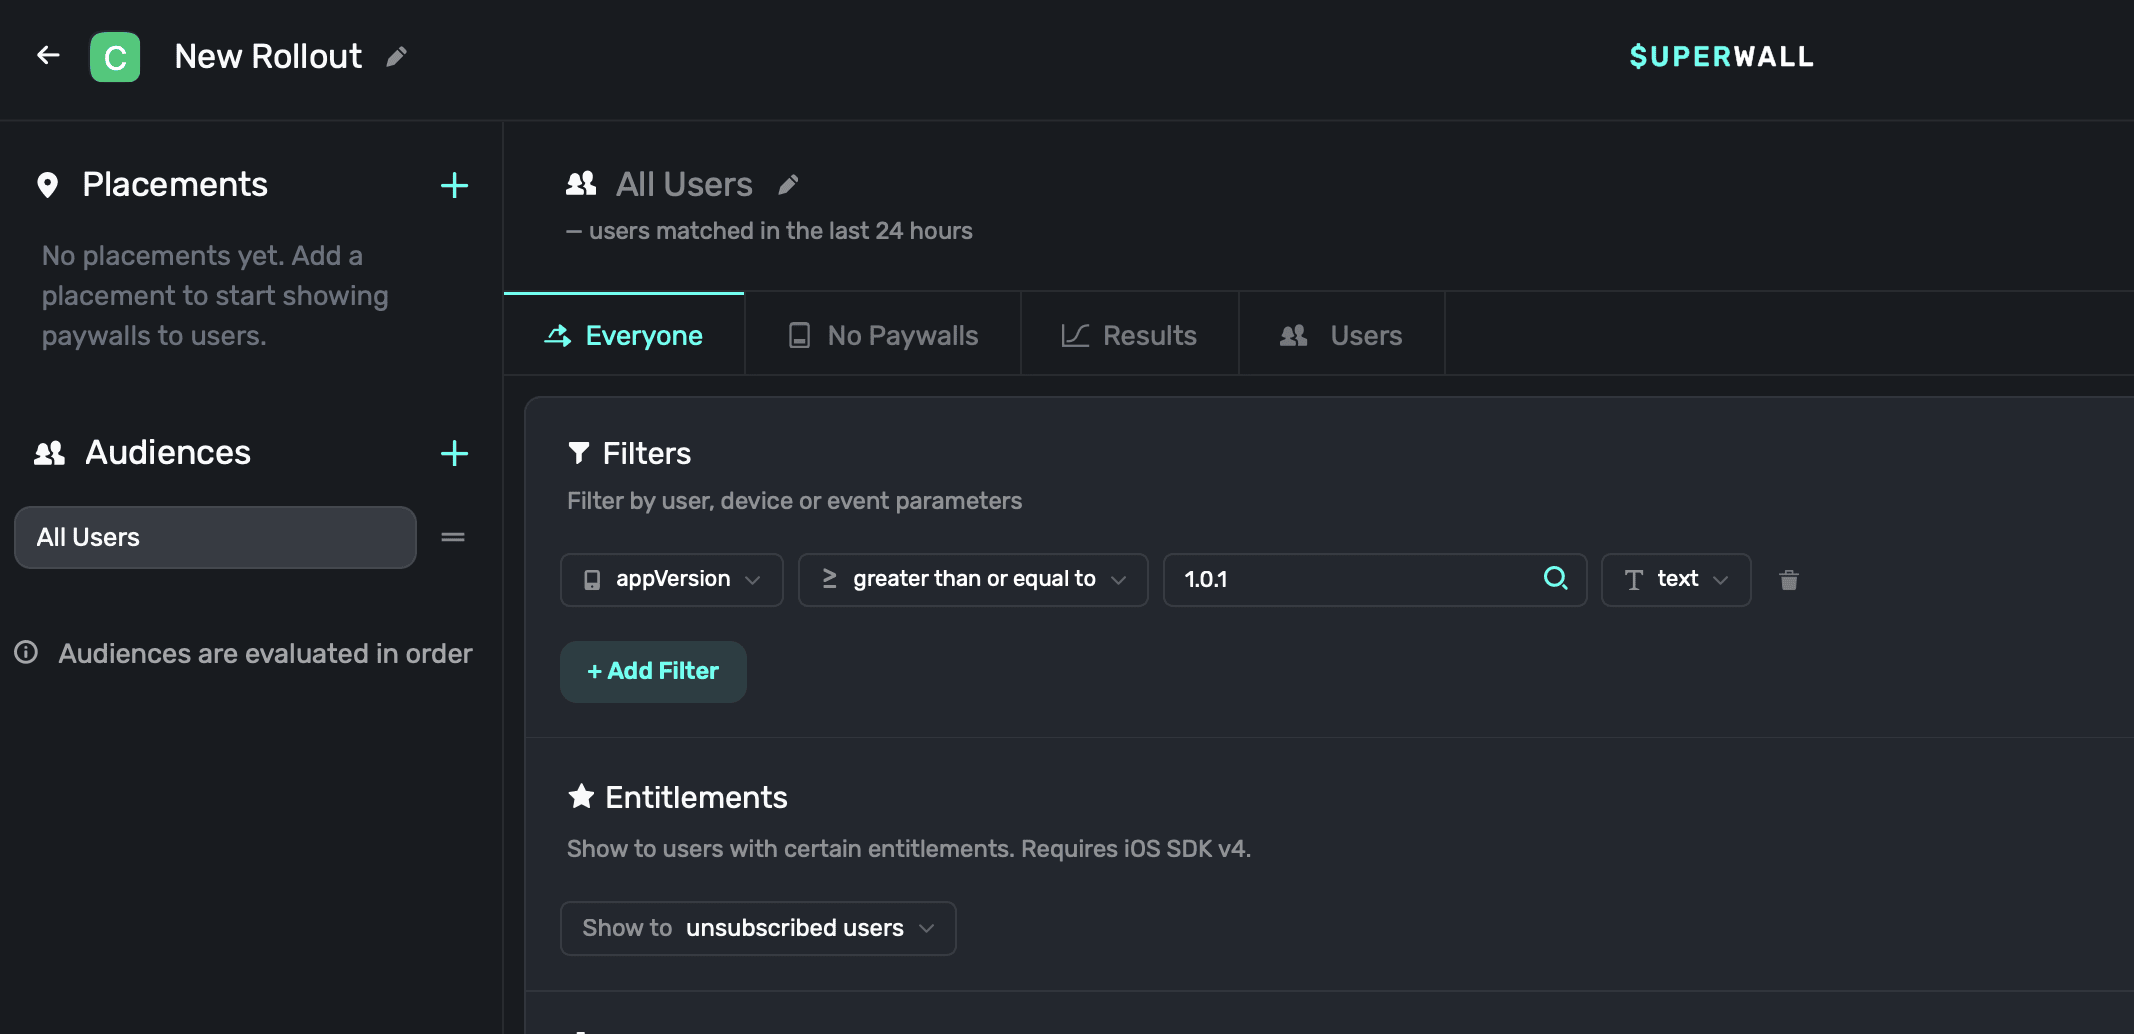
To filter by app version, add appVersion as a filter. This is helpful if you want to show a paywall to users on a specific version of your app. For example, to target users on version 1.0.1 or later, add a filter for appVersion, the operator to is greater than or equal to, and the value to 1.0.1:
Another useful app version filter is appVersionPadded. When filtering by app version, string comparisons can cause unexpected behavior for versions with triple digits. For example, 3.100.0 would incorrectly compare as less than 3.65.0 when using a standard appVersion filter.
To solve this, use the appVersionPadded in your filter. It automatically zero-pads each segment of the version (e.g., 3.65.0 becomes 003.065.000 and 3.100.0 becomes 003.100.000), allowing greater than and less than comparisons to work as expected.
Use appVersionPadded instead of appVersion whenever you're doing a greater than or less than comparison across major or minor version updates that could exceed two digits.
Here's an example:
| Version | appVersion Comparison to 3.65.0 | appVersionPadded Comparison to 003.065.000 |
|---|---|---|
| 3.64.0 | Less than | Less than |
| 3.65.0 | Equal | Equal |
| 3.66.0 | Greater than | Greater than |
| 3.100.0 | Less than ❌ | Greater than ✅ |
User seeds
One particularly useful property to filter by are user seeds, which are automatically assigned by Superwall to a user from 0-99. You can add them as a filter by entering user.seed. User seeds are primarily used to control entirely different user experiences across different campaigns.
For example, imagine testing whether showing a paywall early in onboarding or at the end of it works better for conversion:
Campaign A: Placement early in onboarding
For your audience filter, you could use user seeds 0-49.
Here's what that would look like when setting up the filter:
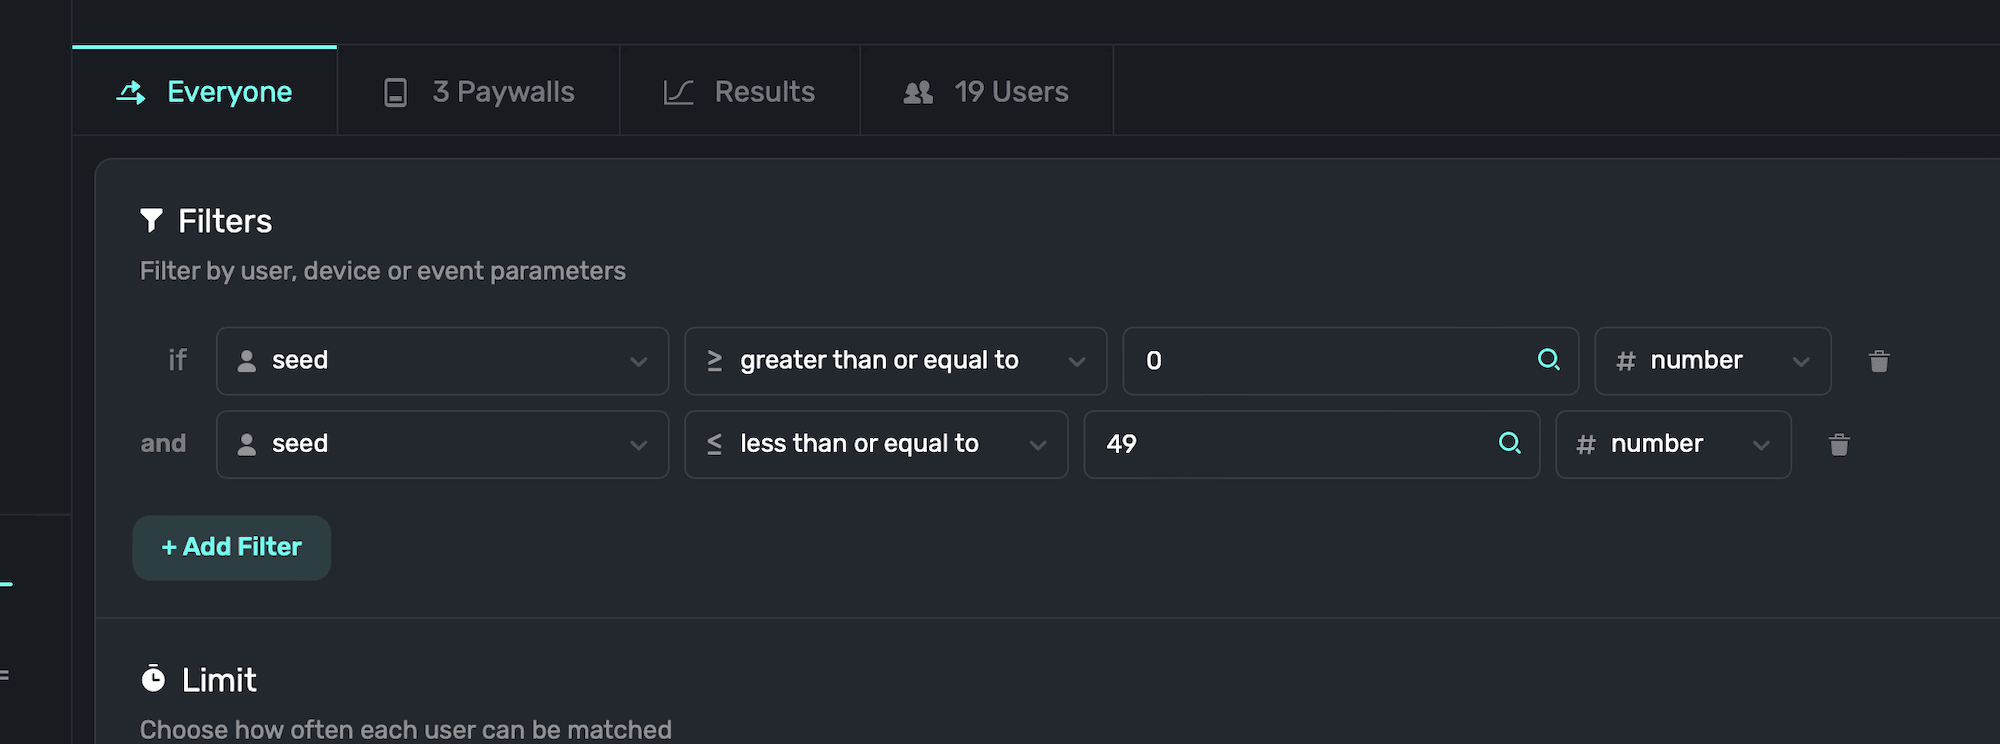
Campaign B: Placement late in onboarding
And here, you'd filter by user seeds 50-99.
Even though these are filters that were set up across two entirely different campaigns, you can still define certain user audiences without creating custom placements for each of them. Using user seeds, you can easily compare the campaign results, too.
How is this guide?