Stripe Setup
Connect Superwall to Stripe using the official Stripe app and configure your settings.
Once you've created a Stripe app, you'll need to connect it with Stripe and fill in a few settings. This is a one-time setup that connects Superwall to Stripe. The easiest way to get started is to click on the link in your overview page, which will take you to your app's Settings page:
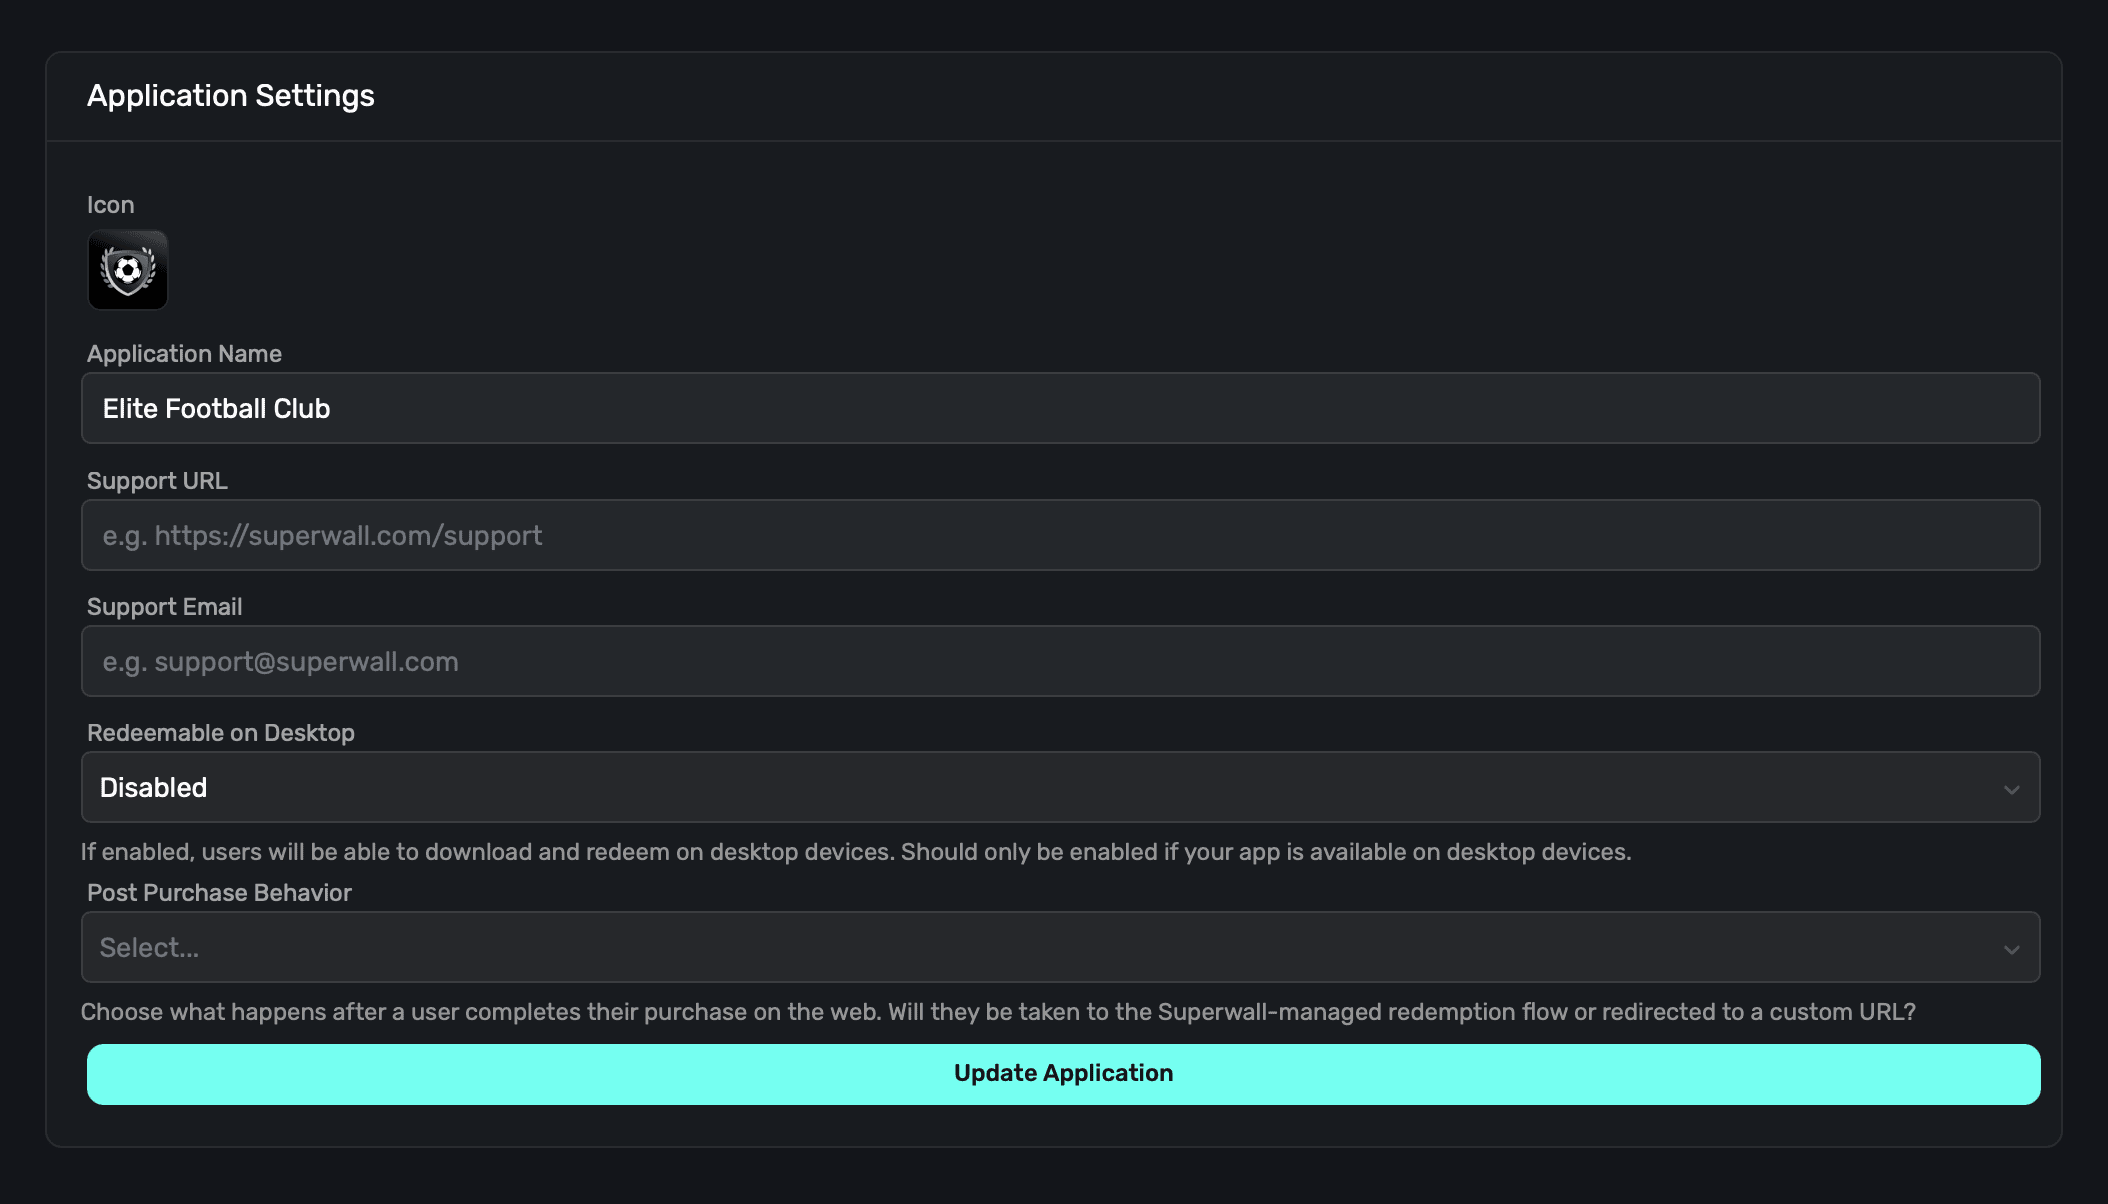
Application settings
Fill out metadata about your iOS app in this section.
-
Icon: An icon to represent your app, we recommend using the same one that your iOS app does. This will appear on the checkout and subscription management pages.
-
Application Name: The name of your app, we recommend using the same name as your iOS app.
-
Support URL: A URL to your support page. This will be shown on the checkout and subscription management pages.
-
Support Email: An email you provide customers for support questions and general reach out
-
Redeemable on Desktop: If your app is an iPad app on Mac, enable this option so that users can redeem products on their Mac. If you aren't using iPads Apps on the Mac, you can disable this. If this is disabled, Superwall enforces redemption on an iOS device.
Once you've filled out this information, click on the Update Application button.
Post-Purchase Behavior
Configure what happens after a user completes a purchase on the web:

Redeem (Default): Superwall manages the entire redemption flow. Users are automatically deep linked to your app with a redemption code, with fallback to the App Store/Play Store if the app isn't installed. This is recommended for most apps.
Redirect: Redirect users to your own custom URL with purchase information passed as query parameters. Use this when you need to:
- Show a custom success or onboarding page
- Perform additional verification or actions before redemption
- Integrate with your own deep linking infrastructure
When using Redirect mode, you'll need to provide a Redirect URL (must start with https://). Purchase data will be appended as query parameters:
app_user_id- User's app identifieremail- User's email addressstripe_subscription_id- Stripe subscription ID, or Stripe Checkout session ID for one-time purchases- Any custom placement parameters you've set
Learn more about post-checkout redirecting.
This application setting is the default for Web Checkout purchases. A web checkout paywall can override it for a specific purchase button with a Redeem Purchase after-purchase action. See Redeem Purchase for web checkout.
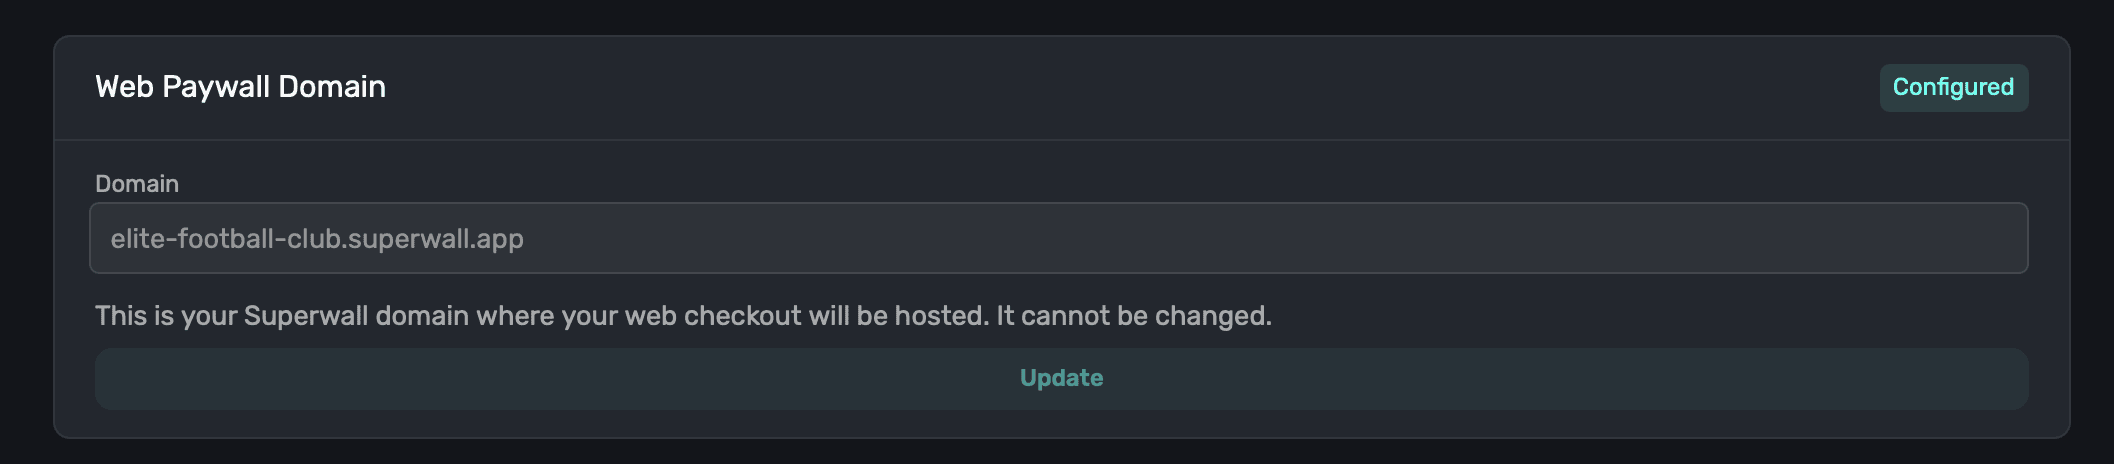
Web Paywall Domain
This is the domain your paywalls will be shown from. This was set when the Stripe app was created, and cannot be changed.
Apple Pay domain setup
If you want Apple Pay to appear in Stripe Checkout, add your Superwall web paywall domain as a Stripe payment method domain. Stripe requires the exact domain that hosts checkout to be registered before domain-based payment methods such as Apple Pay can appear.
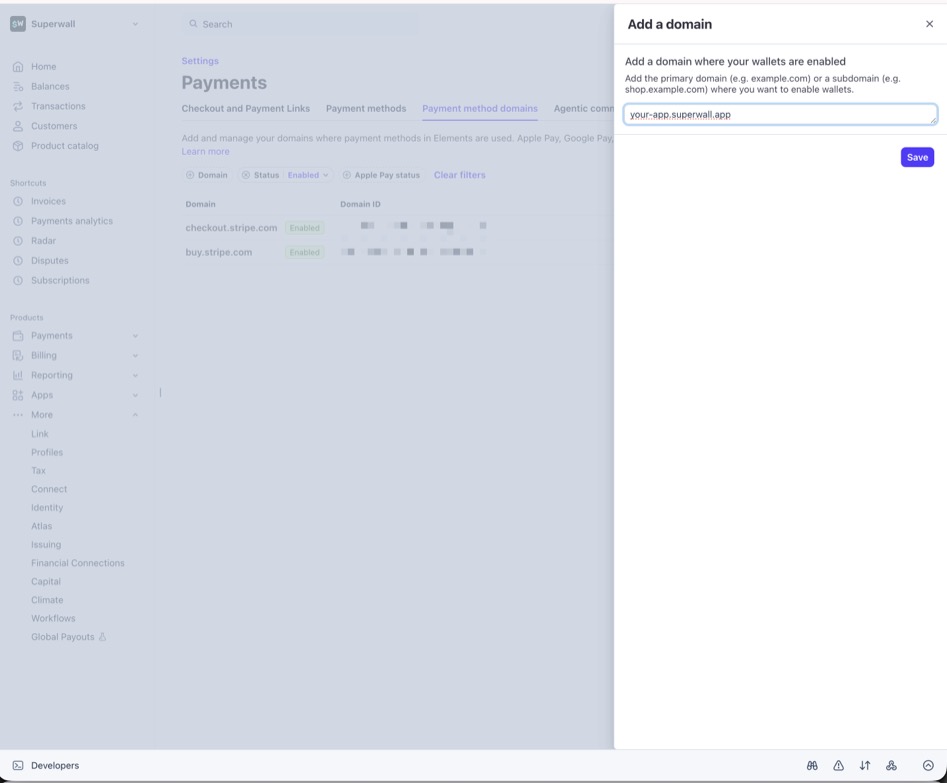
For a Superwall web checkout app, register the domain shown in Web Paywall Domain. For example, if your Superwall checkout links use https://caffeinepal.superwall.app, register caffeinepal.superwall.app in Stripe.
Register the Superwall subdomain only. Do not include https://, a path, or the root
superwall.app domain.
- 1
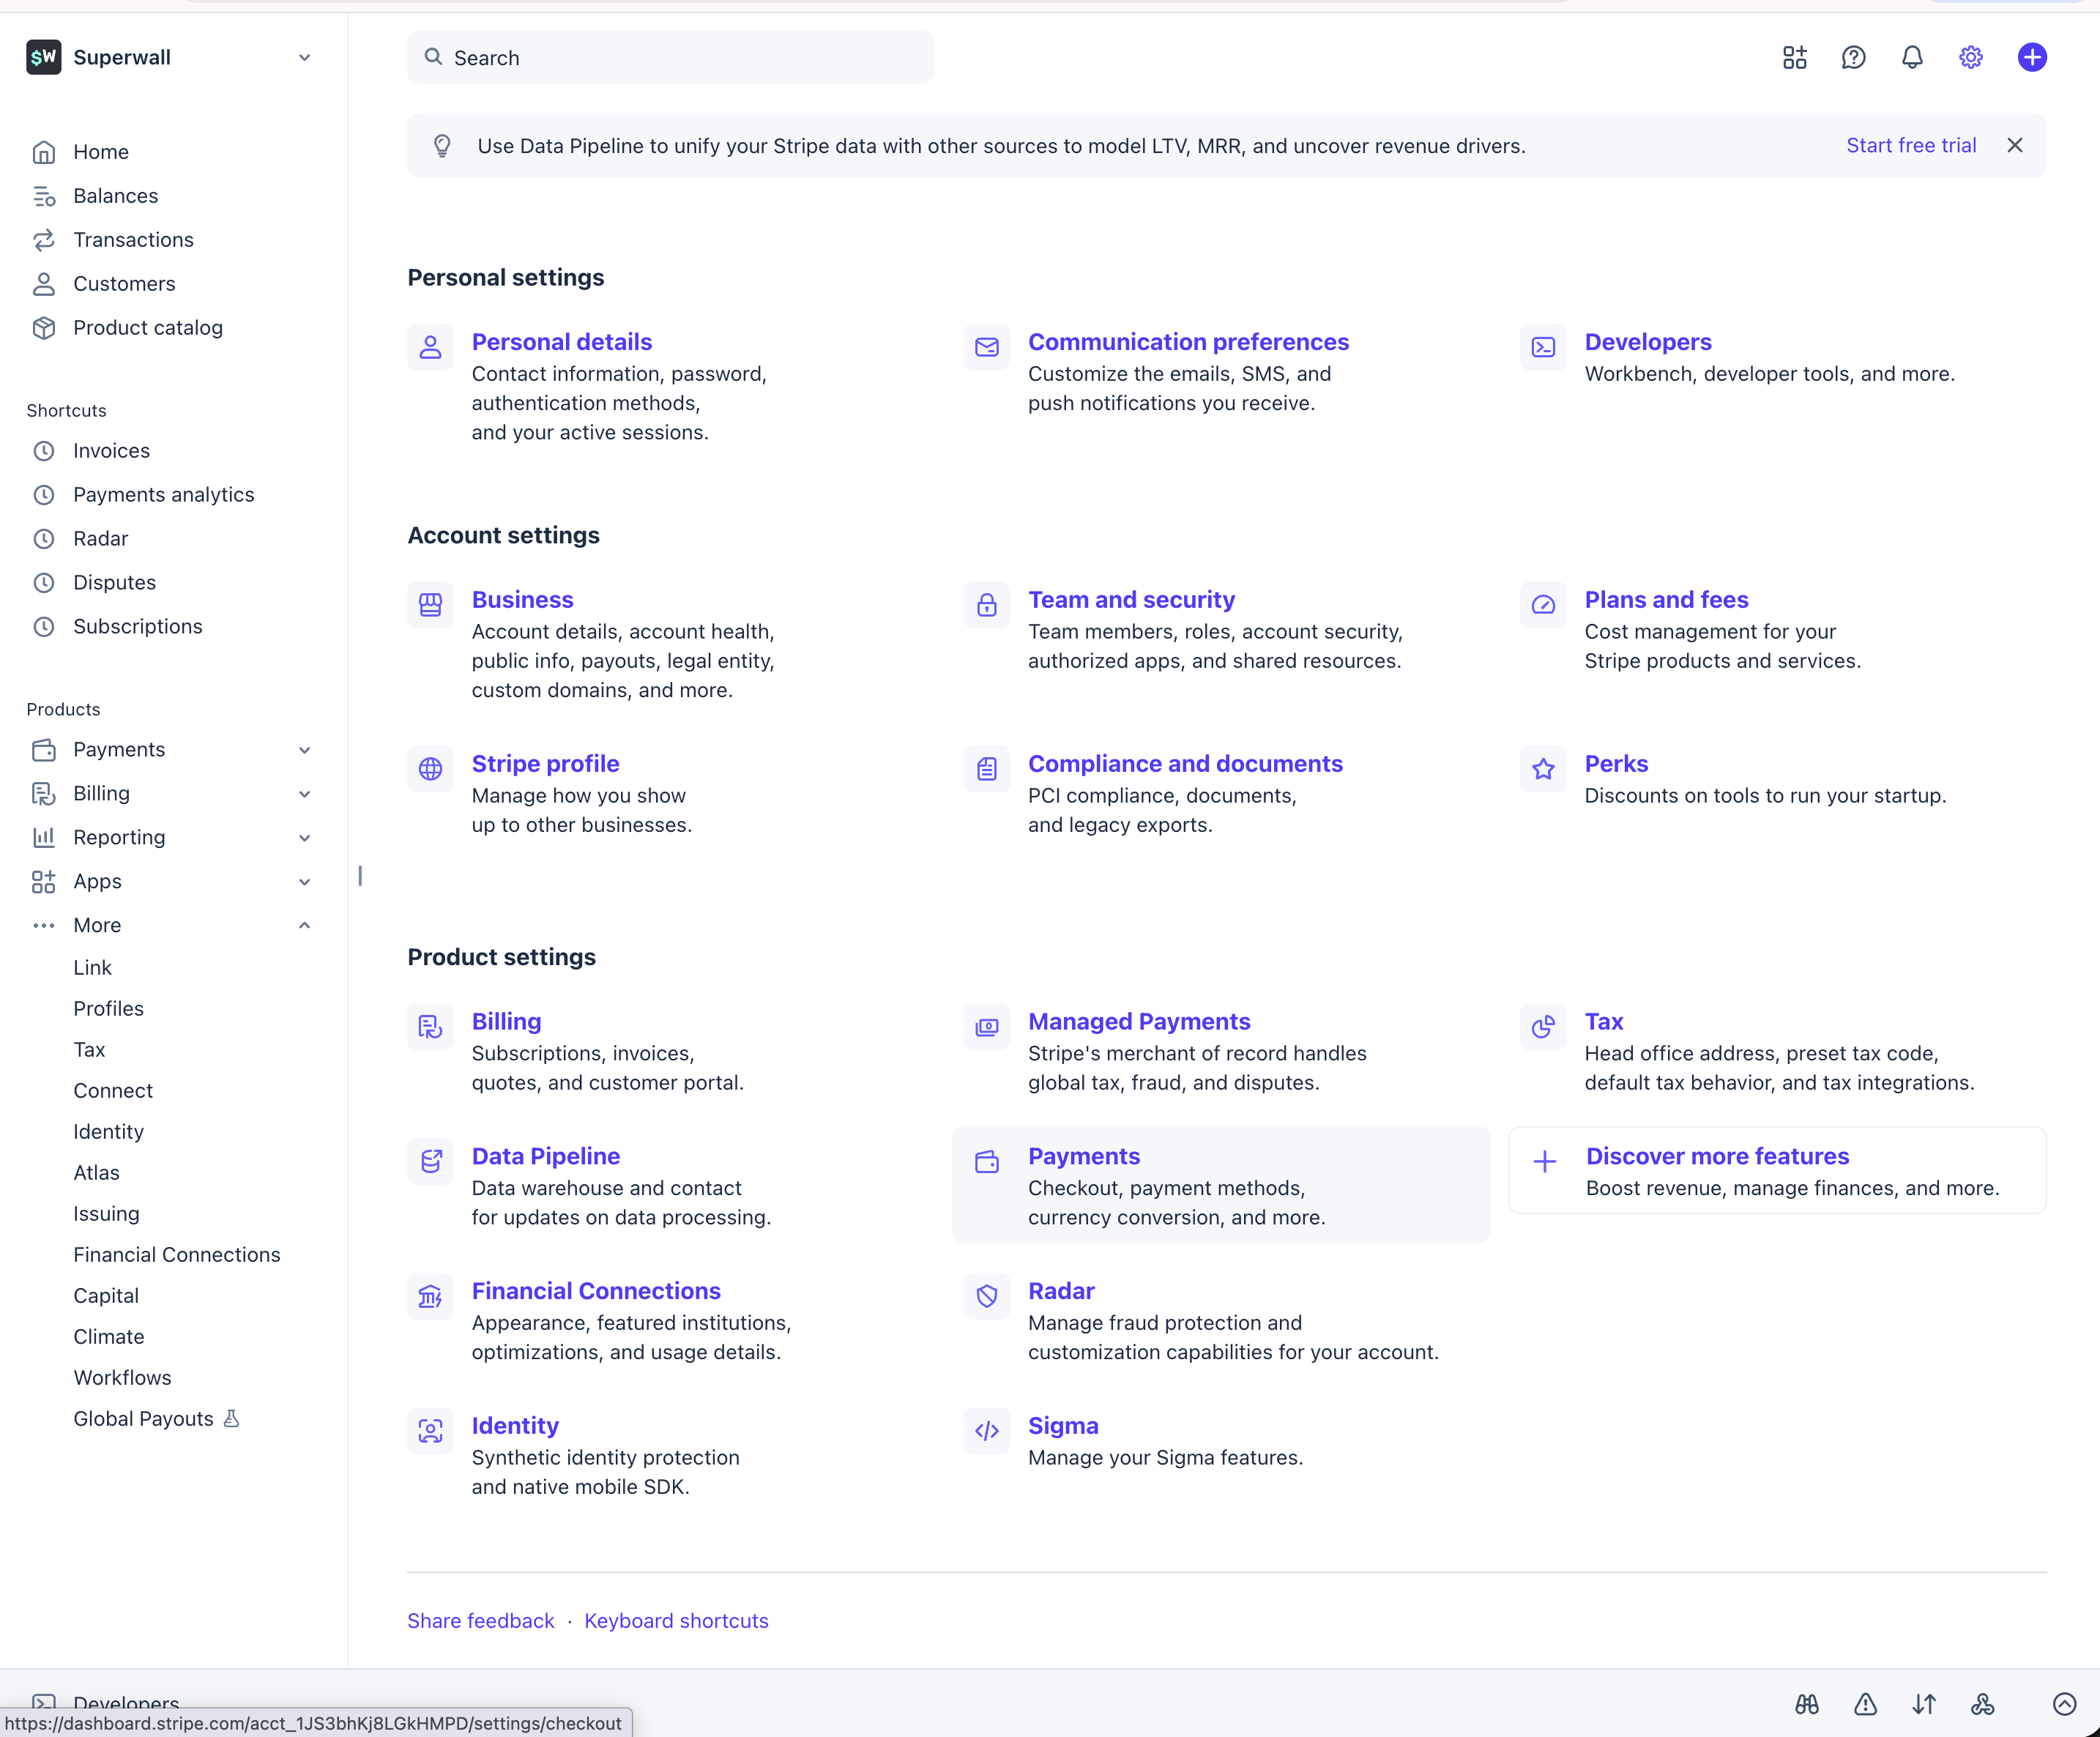
Open payment settings in Stripe
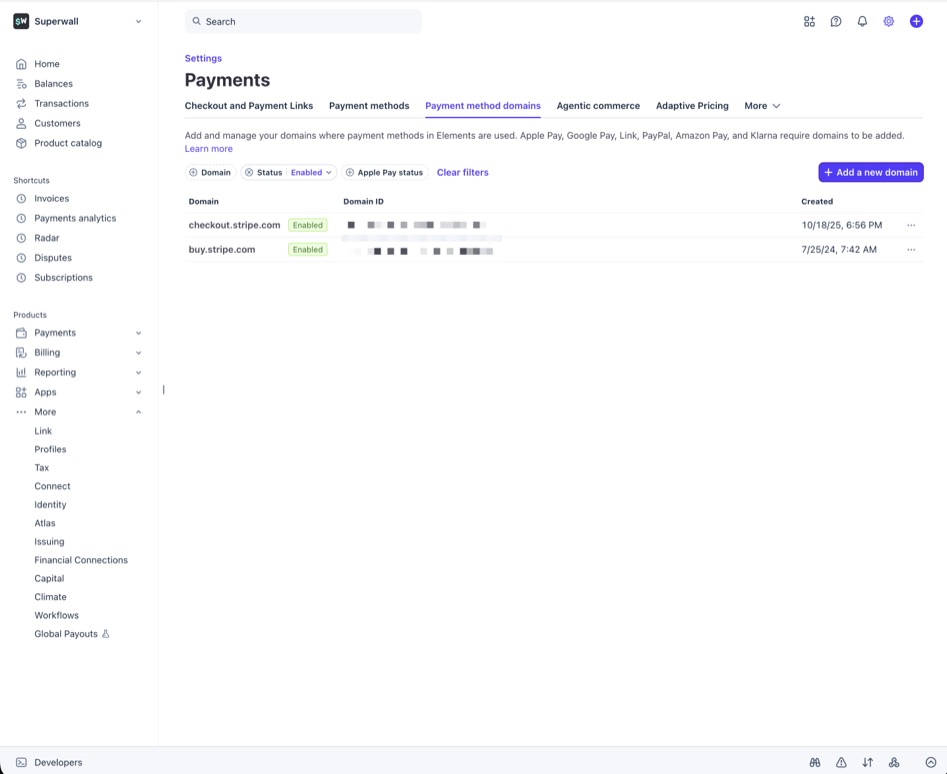
In Stripe, open Settings, then select Payments.
- 2
Open payment method domains
In the Payments settings, open Payment method domains.
- 3
Add your Superwall domain
Click Add a new domain, enter your Superwall web paywall domain, then save it.
After Stripe validates the domain, it should appear as enabled. Apple Pay may still be hidden if the customer is not using a supported device, browser, card, country, or currency.
Stripe settings are mode-specific. If you use sandbox checkout, repeat this setup with Test mode enabled in Stripe. Then repeat it again in live mode before launching.
For more details, see Stripe's payment method domain registration docs.
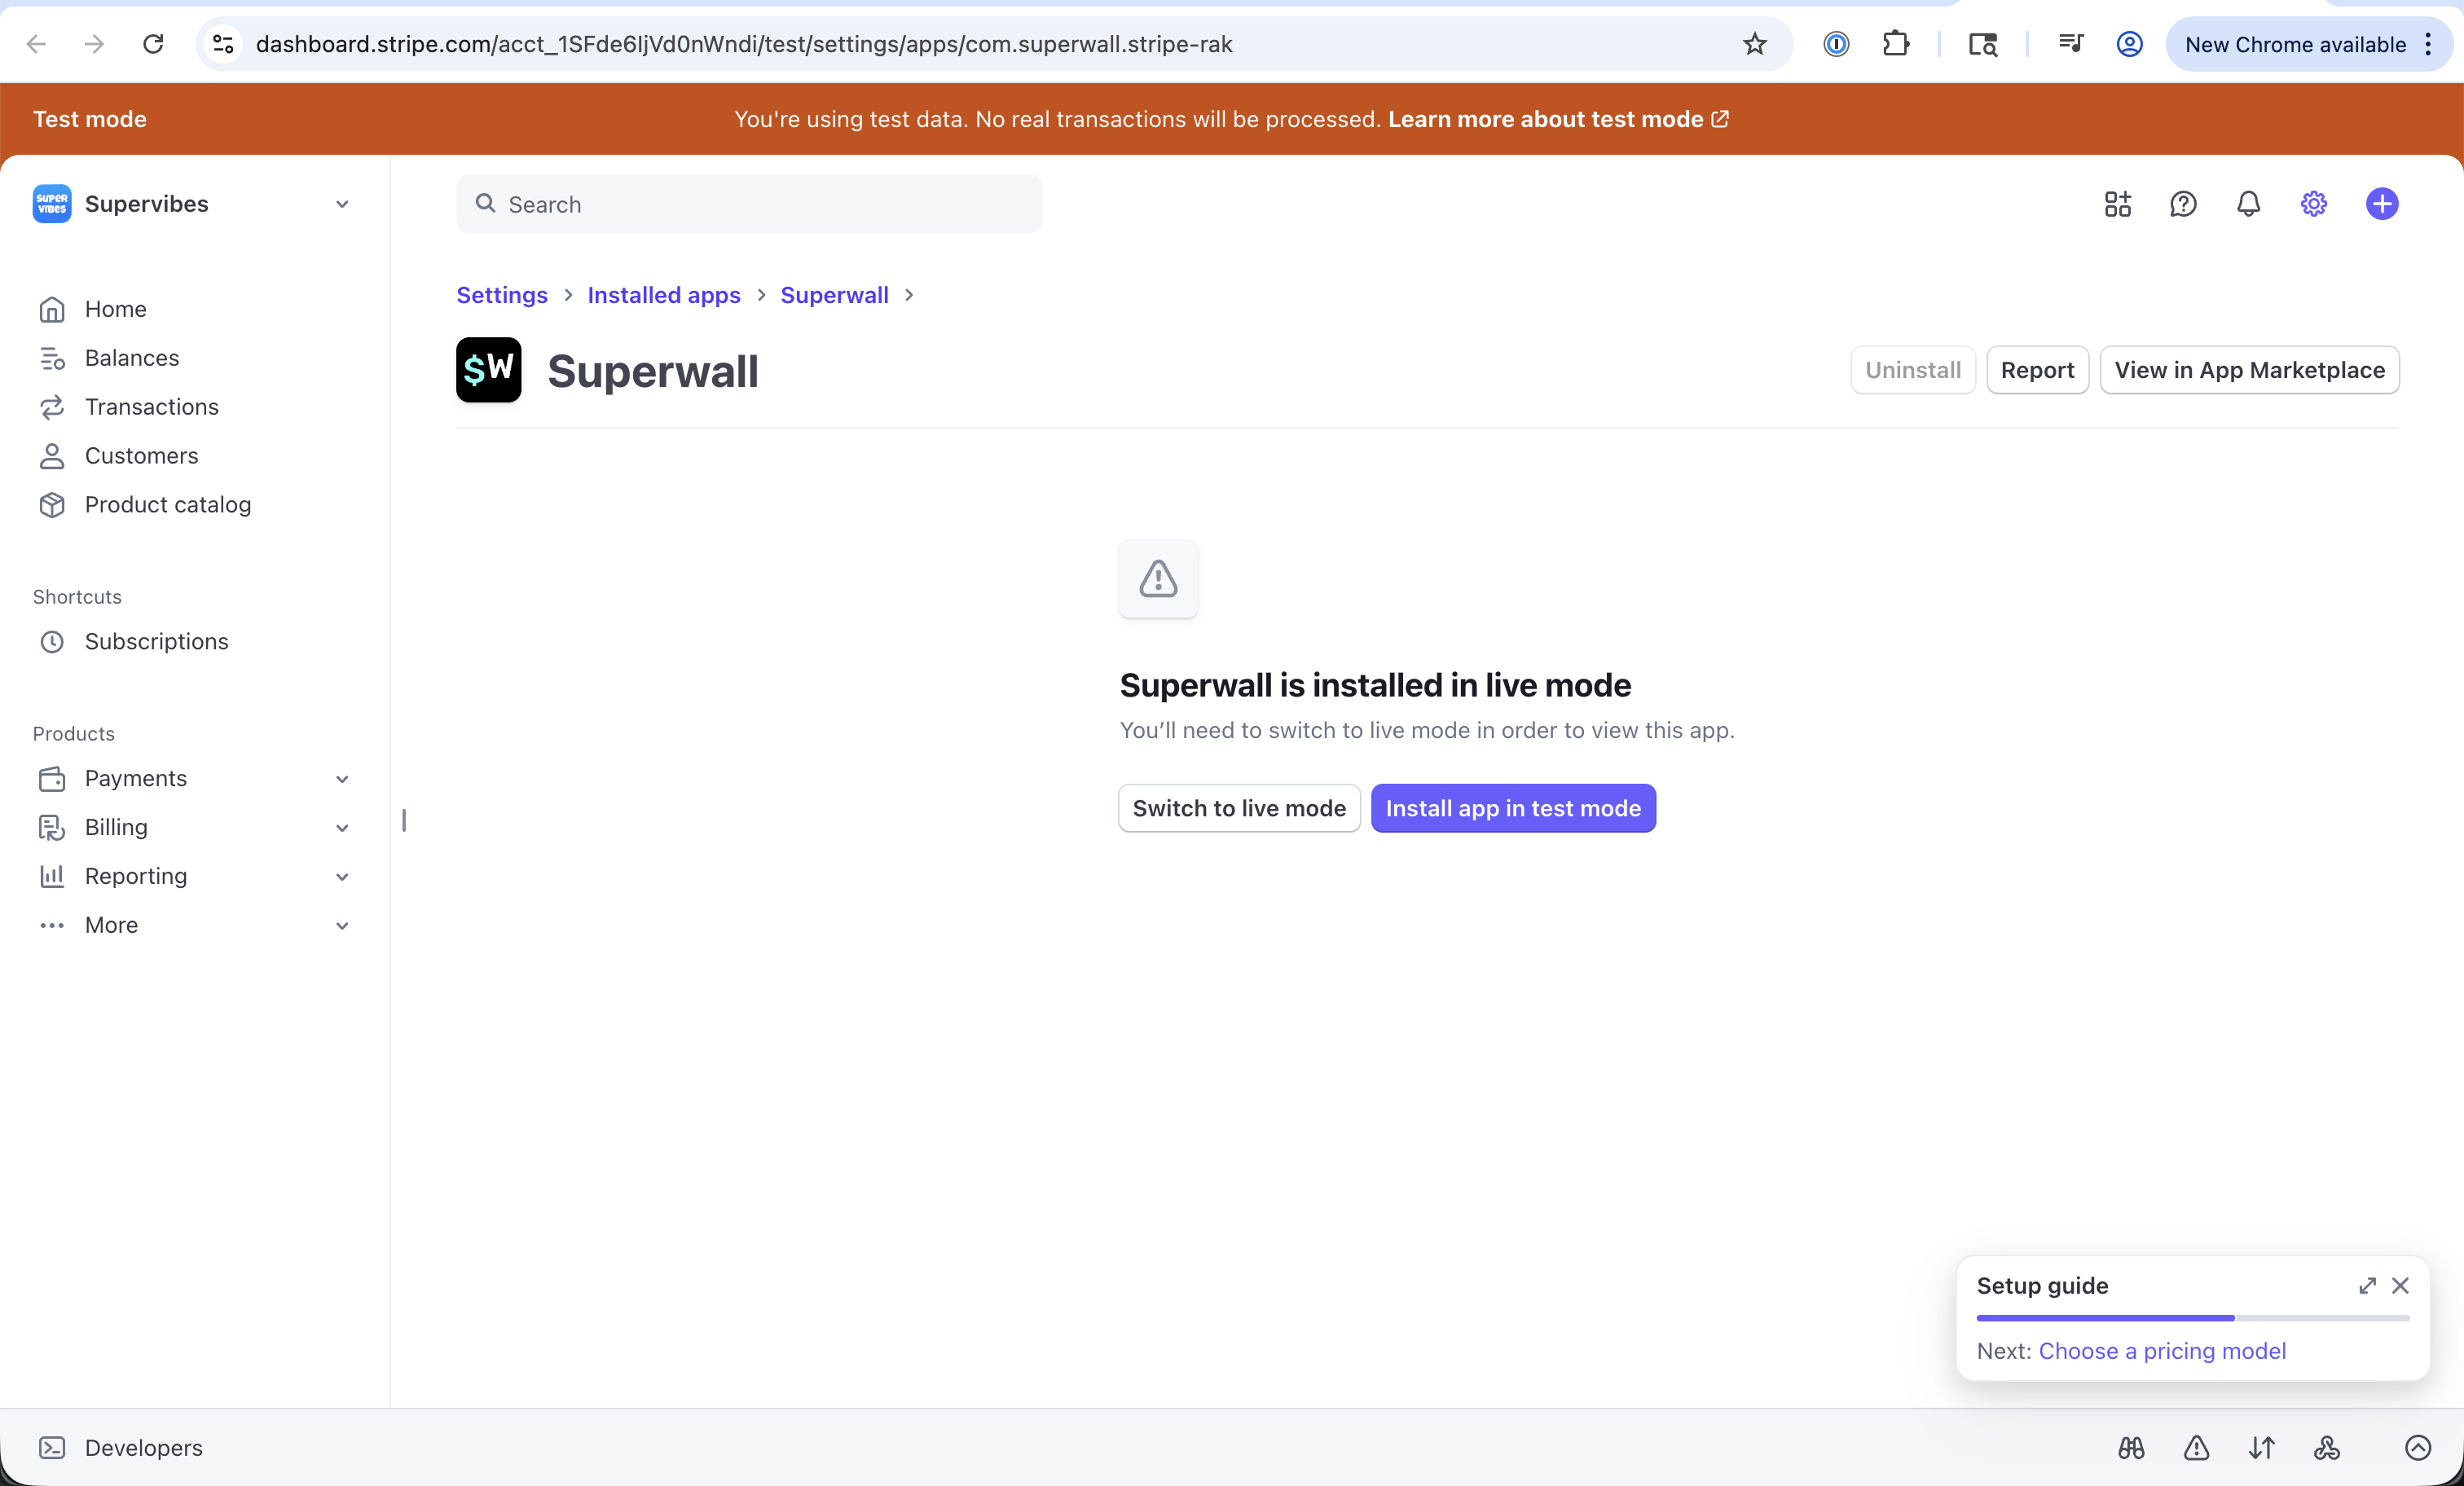
Stripe Live Configuration
To connect Stripe with Superwall, you'll use the official Superwall Stripe app:
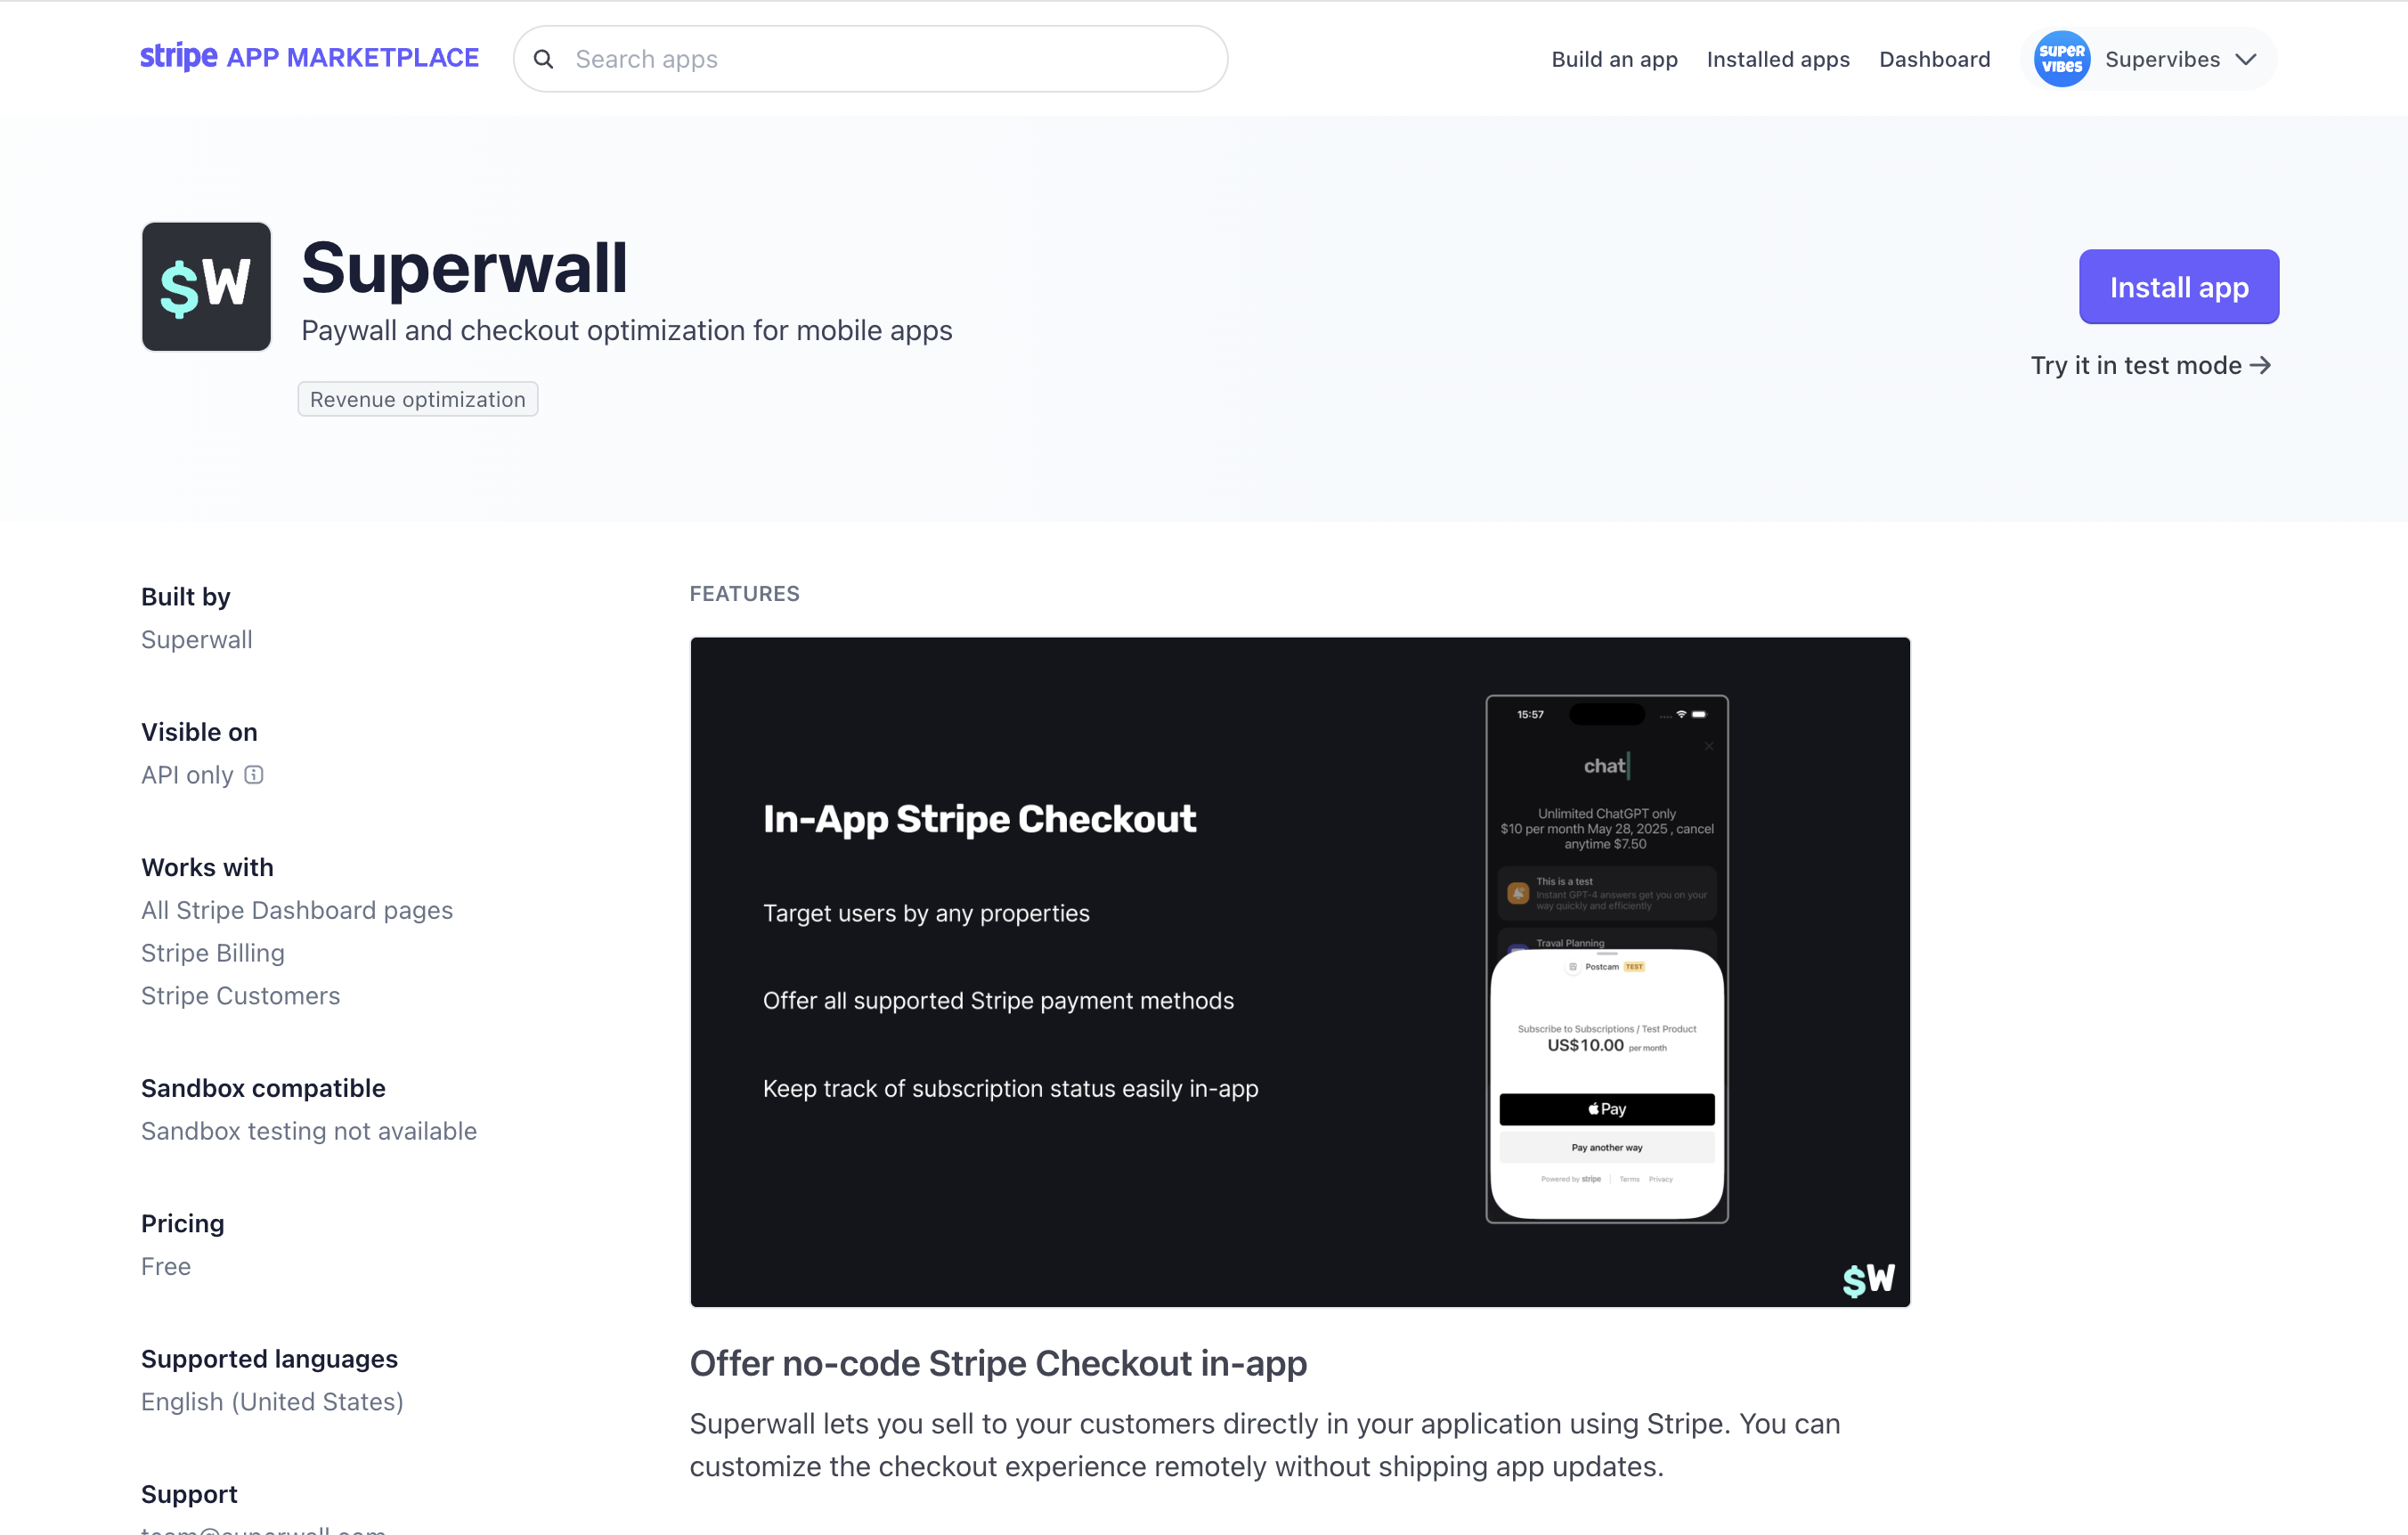
Step 1: Visit the Stripe Marketplace
Visit the Superwall app on Stripe Marketplace:
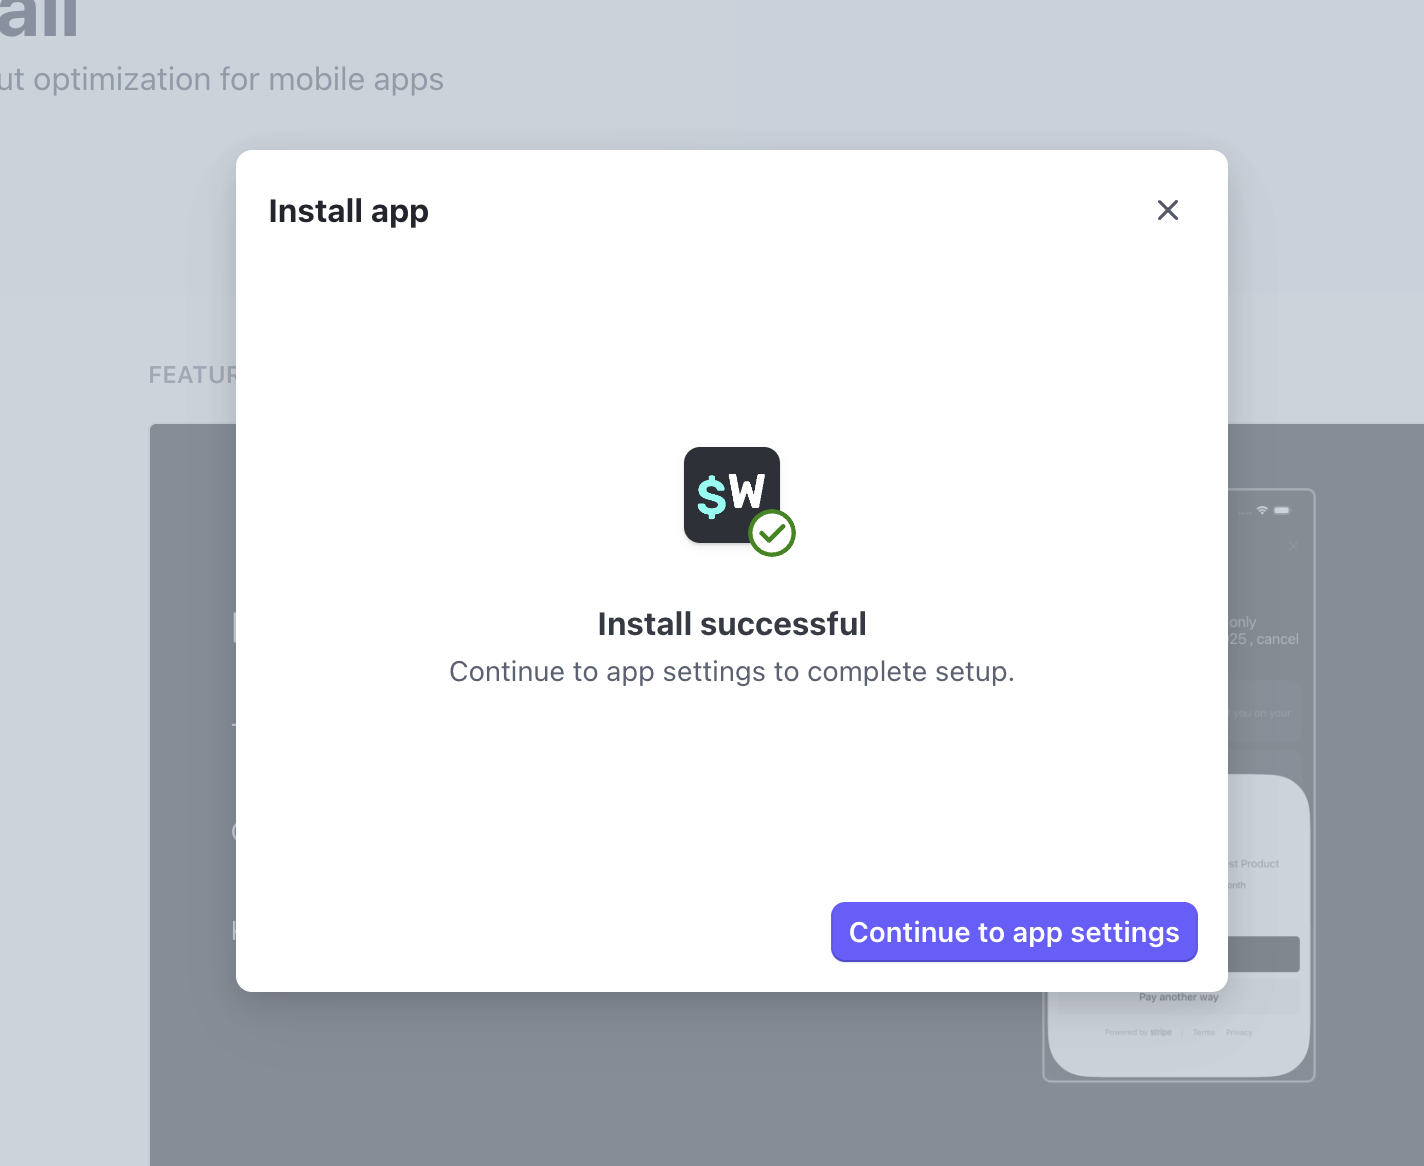
Step 2: Install the App
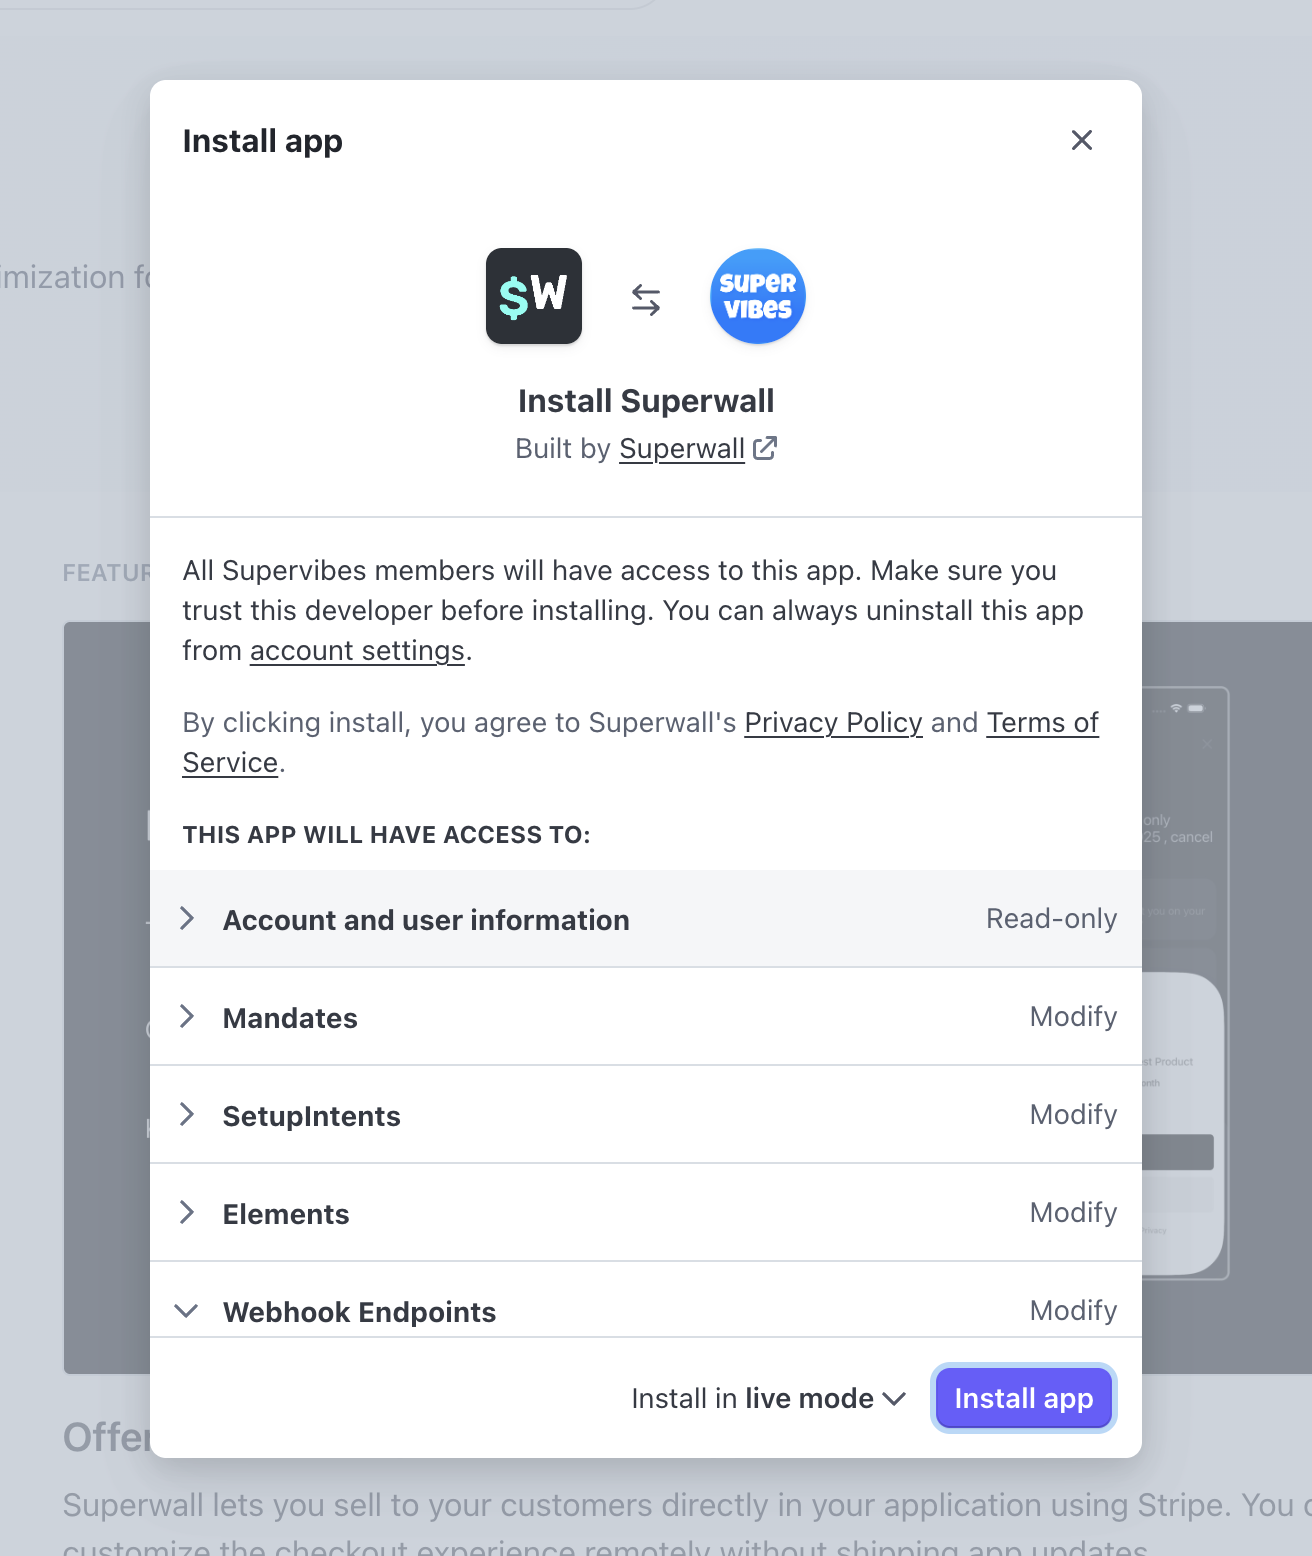
Click Install app to begin the authorization flow:
Step 3: Continue Installation
Click Continue to proceed with the installation:
Step 4: Generate API Keys
Click Generate keys to create your API keys:
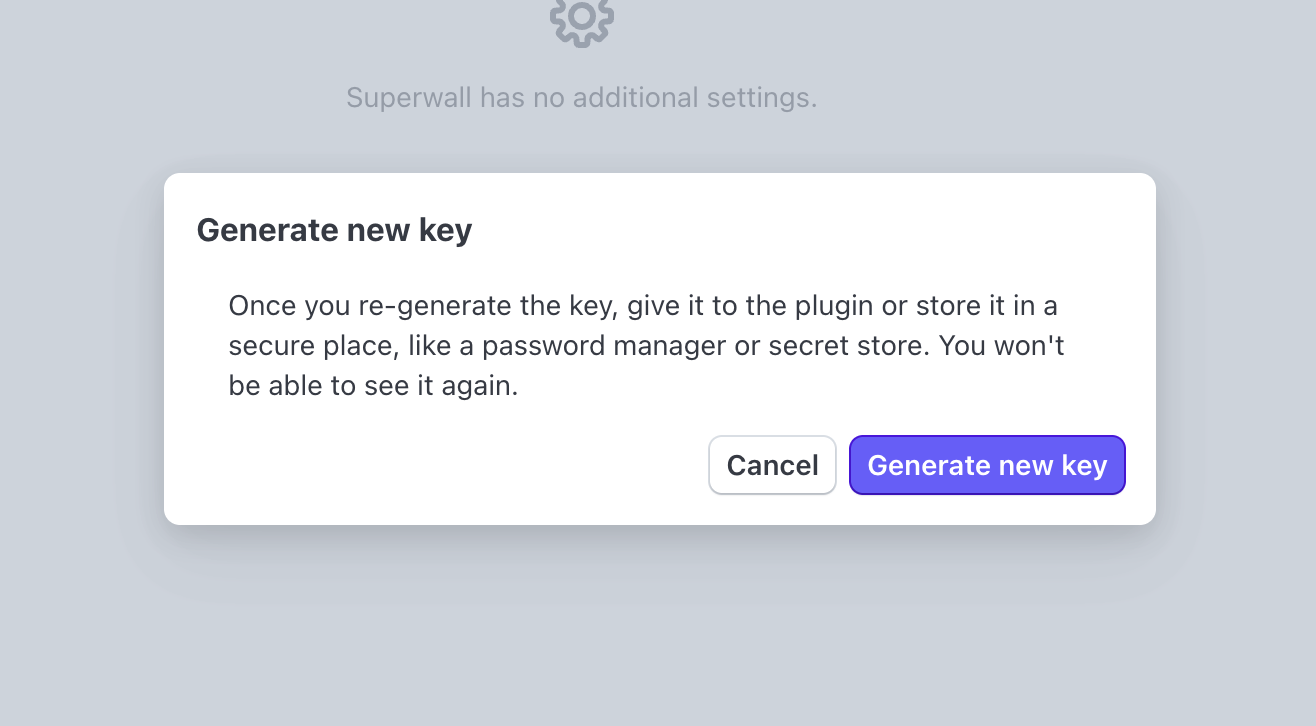
Step 5: Confirm Key Generation
Click Generate keys again to confirm:
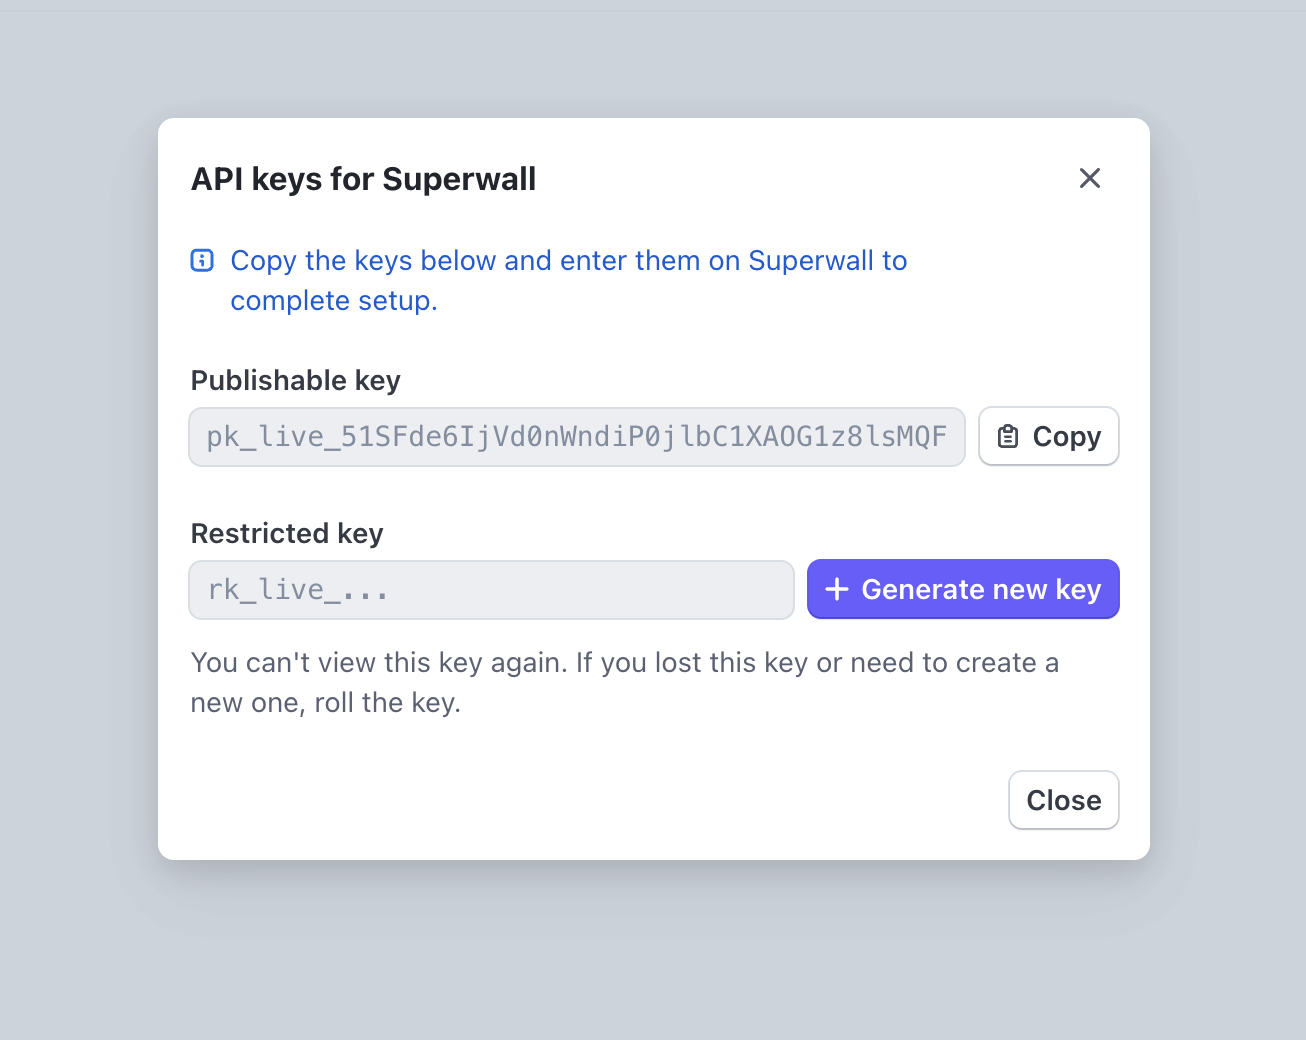
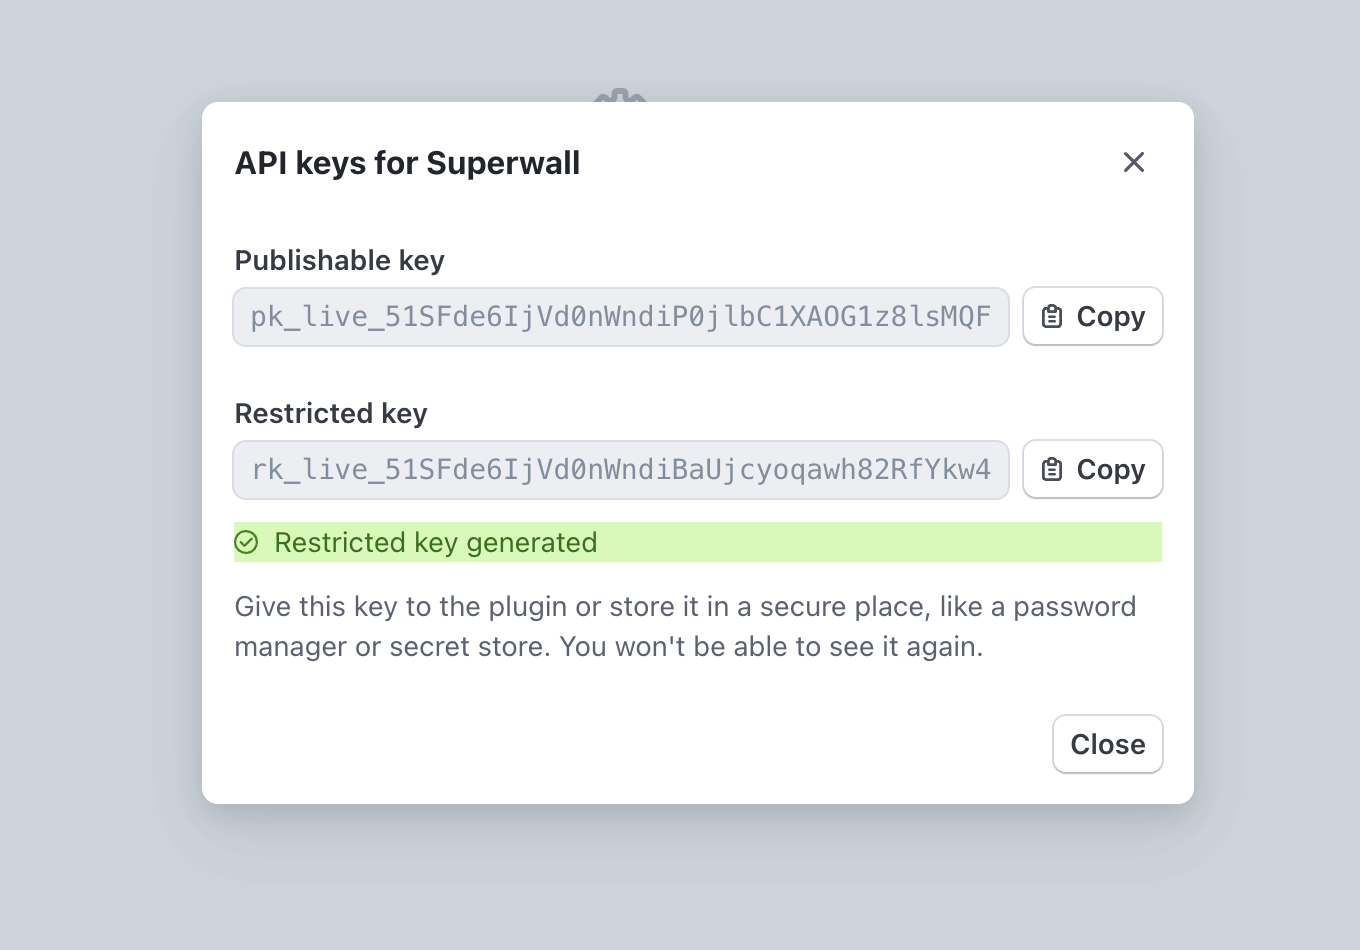
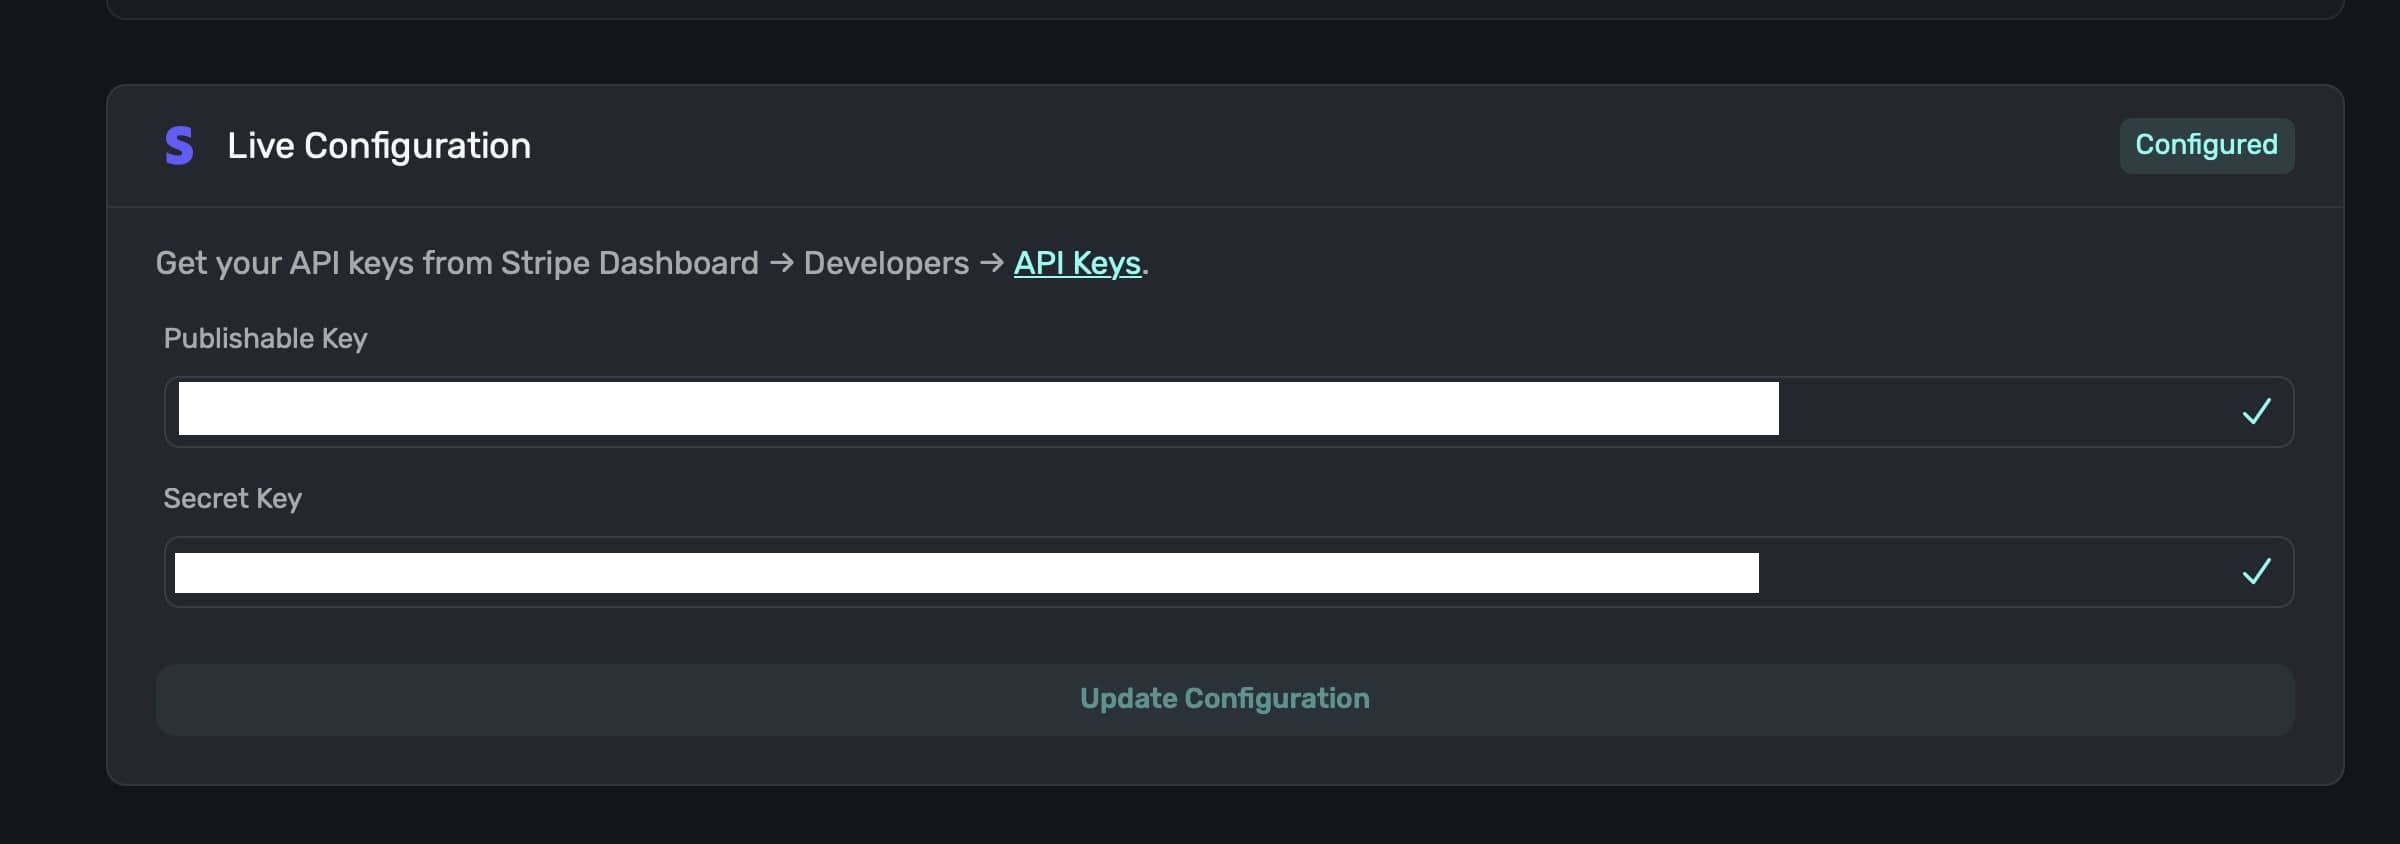
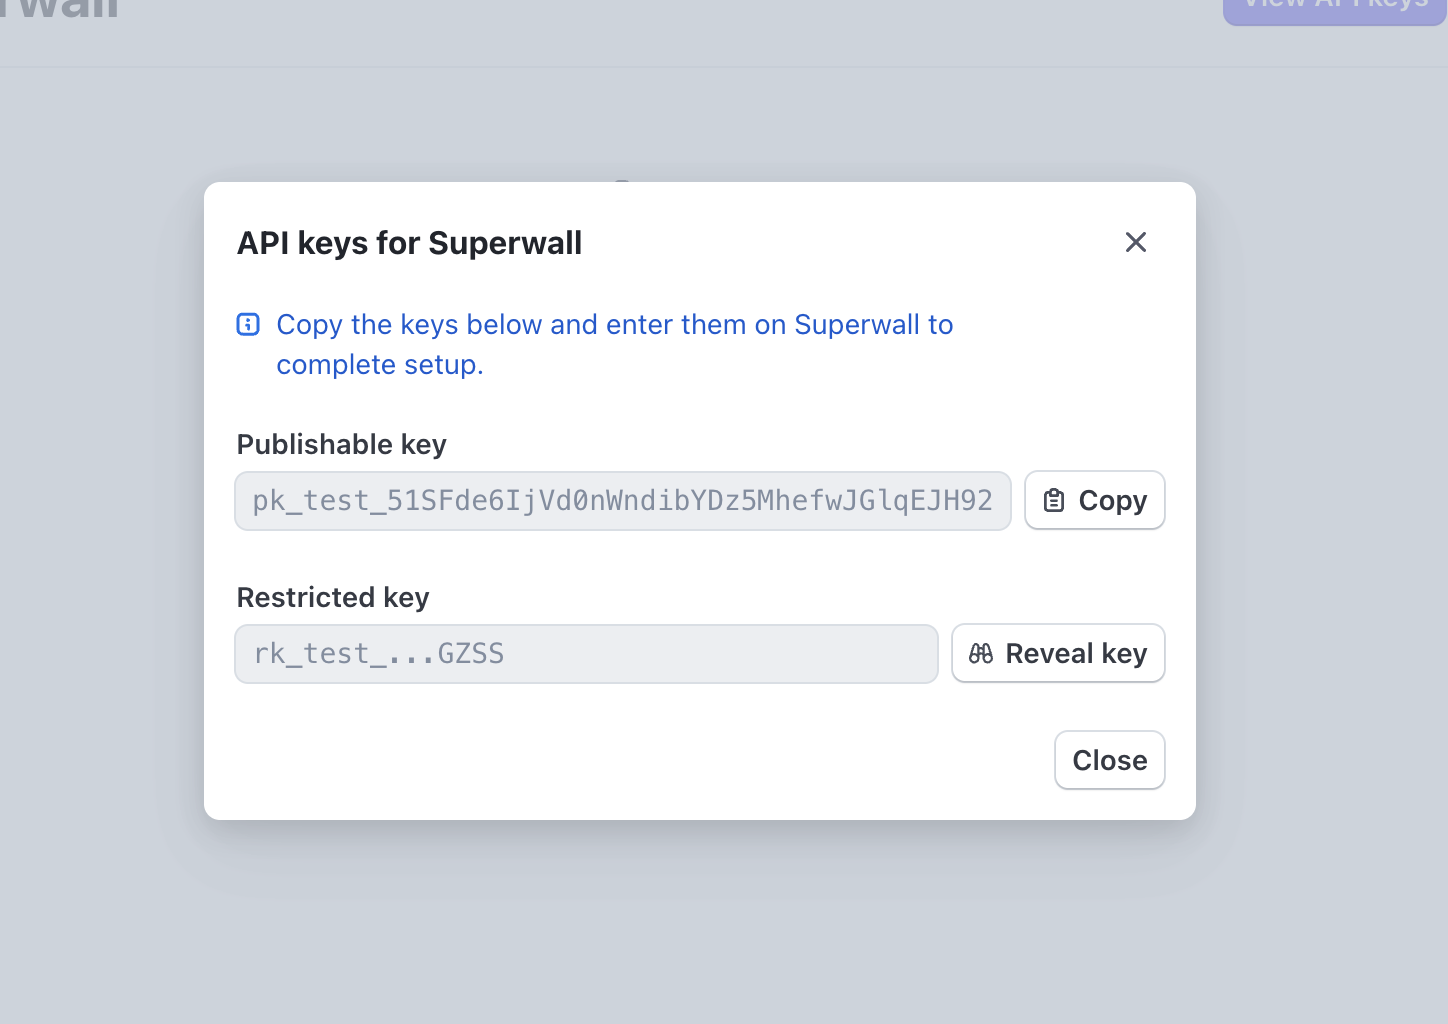
Step 6: Copy Your Keys
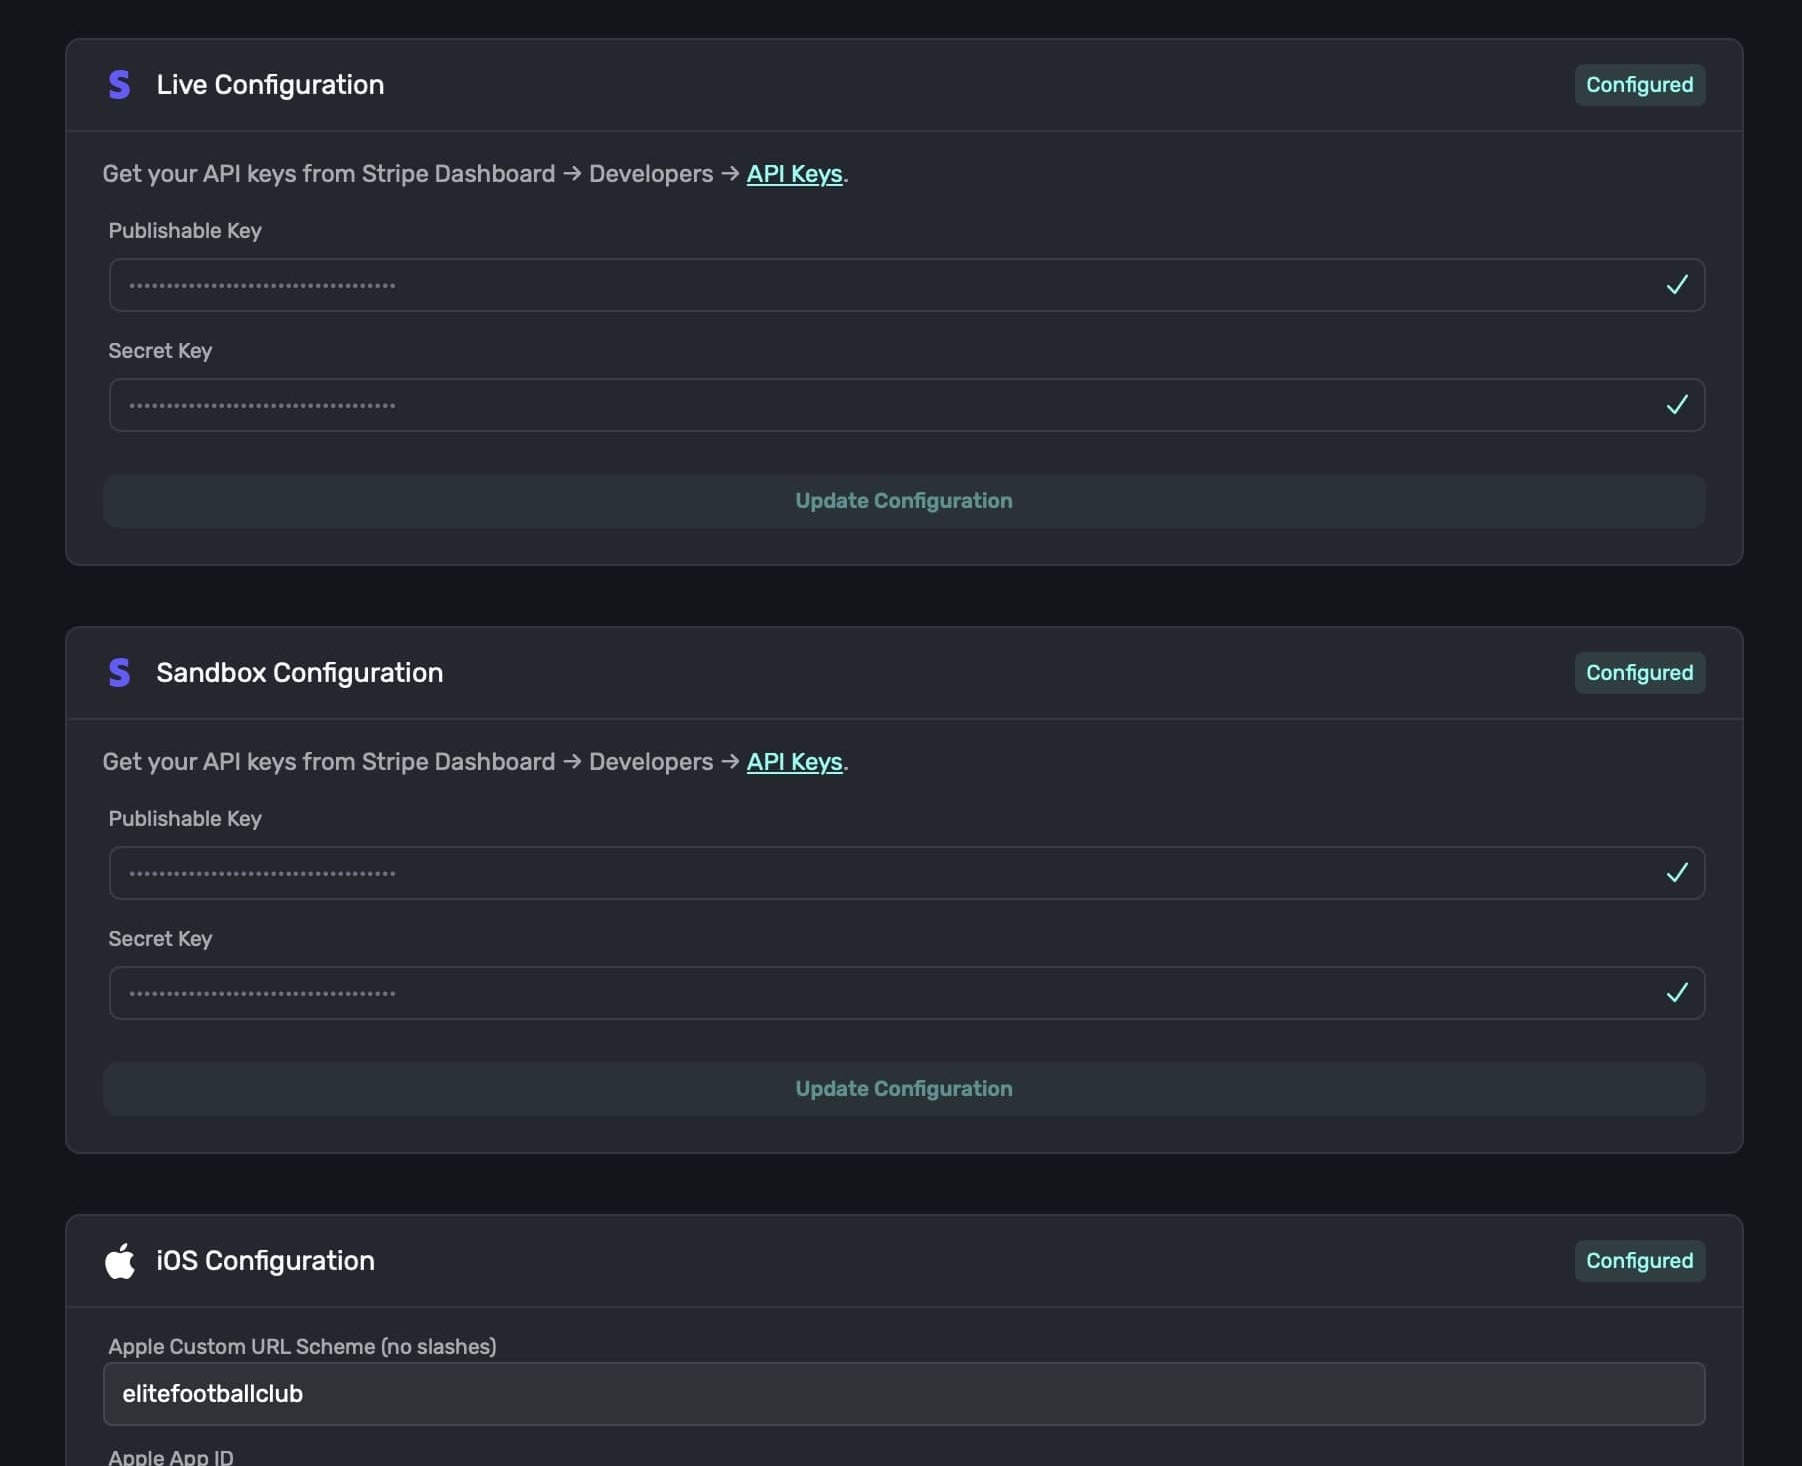
After installation, you'll receive a Publishable Key and a Restricted Secret Key with the proper permissions already configured. Copy both keys:
Step 7: Configure Superwall
Paste the keys into the corresponding fields in Superwall:
- Publishable Key: Your Stripe publishable key from the app
- Secret Key: The restricted secret key provided by the app
Then click on Update Configuration to save your changes.
This section should say "Configured" at the top right if setup was successful:
Adaptive Pricing
If you want web checkout customers to pay in their local currency, enable Stripe Adaptive Pricing in Stripe's payment settings after connecting your Stripe keys. Adaptive Pricing is configured in Stripe separately for live and sandbox mode.
Managed Payments
After your Stripe keys are configured, you can enable Managed Payments from Settings, then Stripe Configuration. Managed Payments uses Stripe as merchant of record for eligible Stripe web checkout payments through Stripe Connect, including tax calculation and compliance.
The Managed Payments switch is available only for eligible Superwall accounts and connected Stripe accounts. If the switch is not visible, or if Stripe asks you to accept Connect terms before enabling it, follow the Managed Payments guide before launching.
Stripe Sandbox Configuration
The Superwall Stripe app provides both live and test mode keys. Make sure you're in the correct mode in your Stripe dashboard when copying keys.
For sandbox/test mode, switch to Test mode in your Stripe dashboard (toggle in the top-right corner), then follow these steps:
Step 1: Access the Superwall App
Navigate to the Superwall app in your Stripe dashboard. If already installed, find it under Apps:
Step 2: Install in Test Mode
If you haven't installed the app in test mode yet, click Install app:
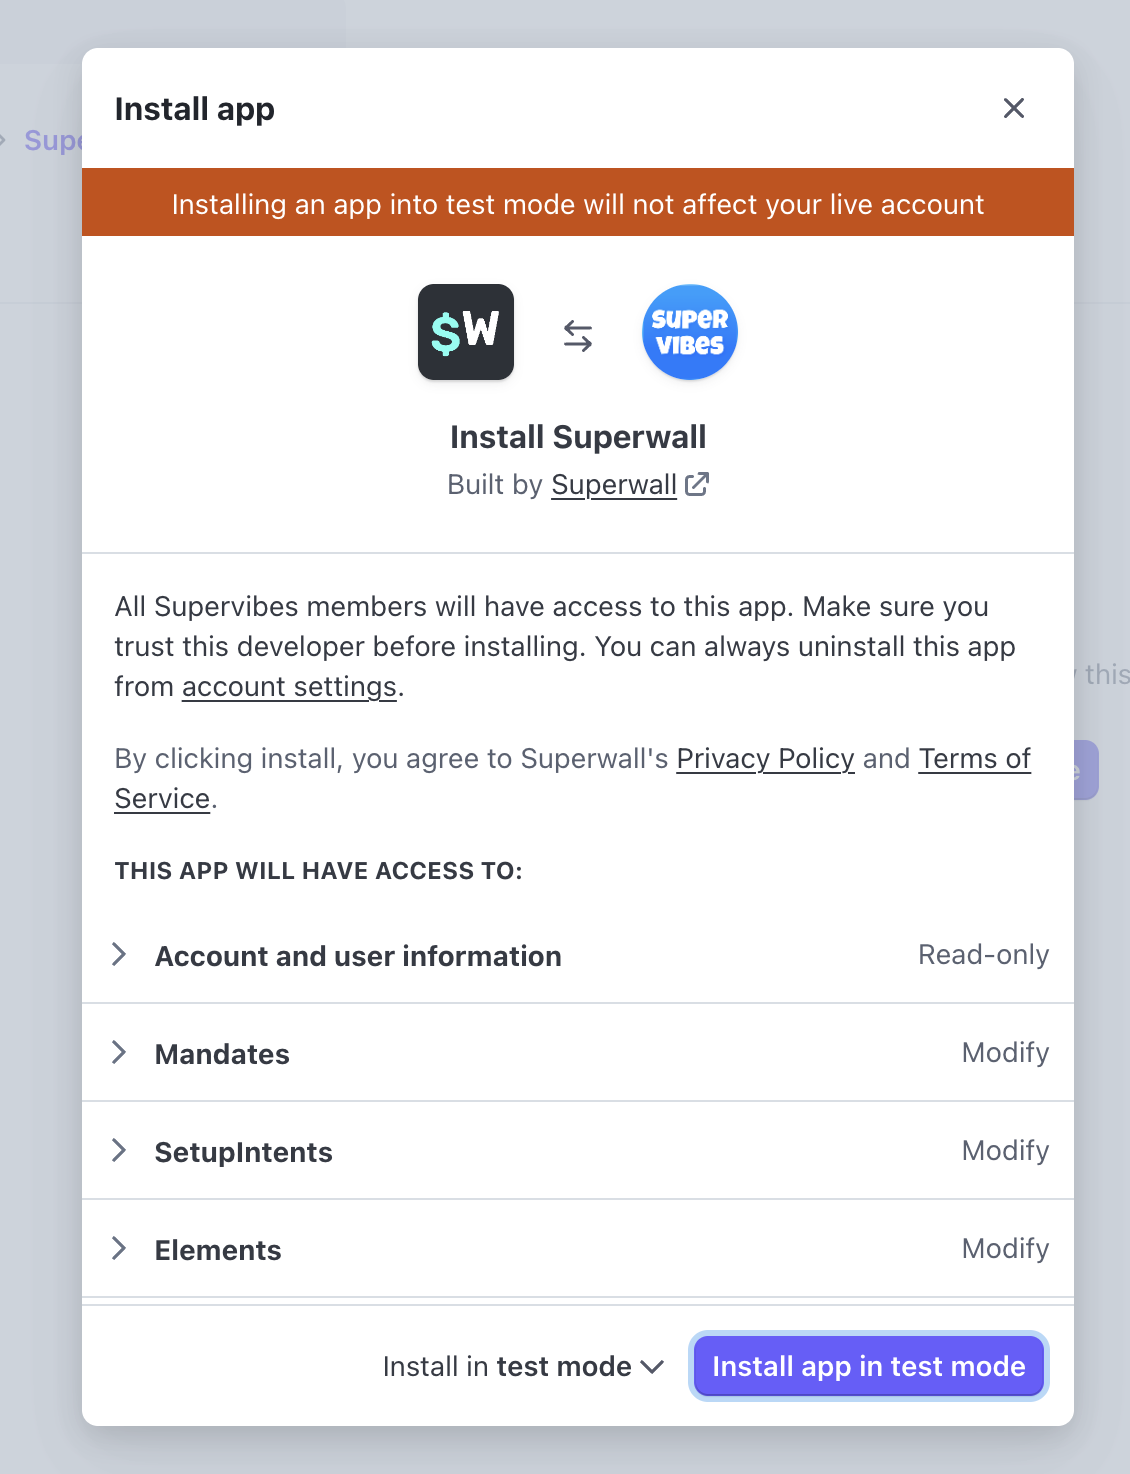
Step 3: Continue Installation
Click Continue to proceed:
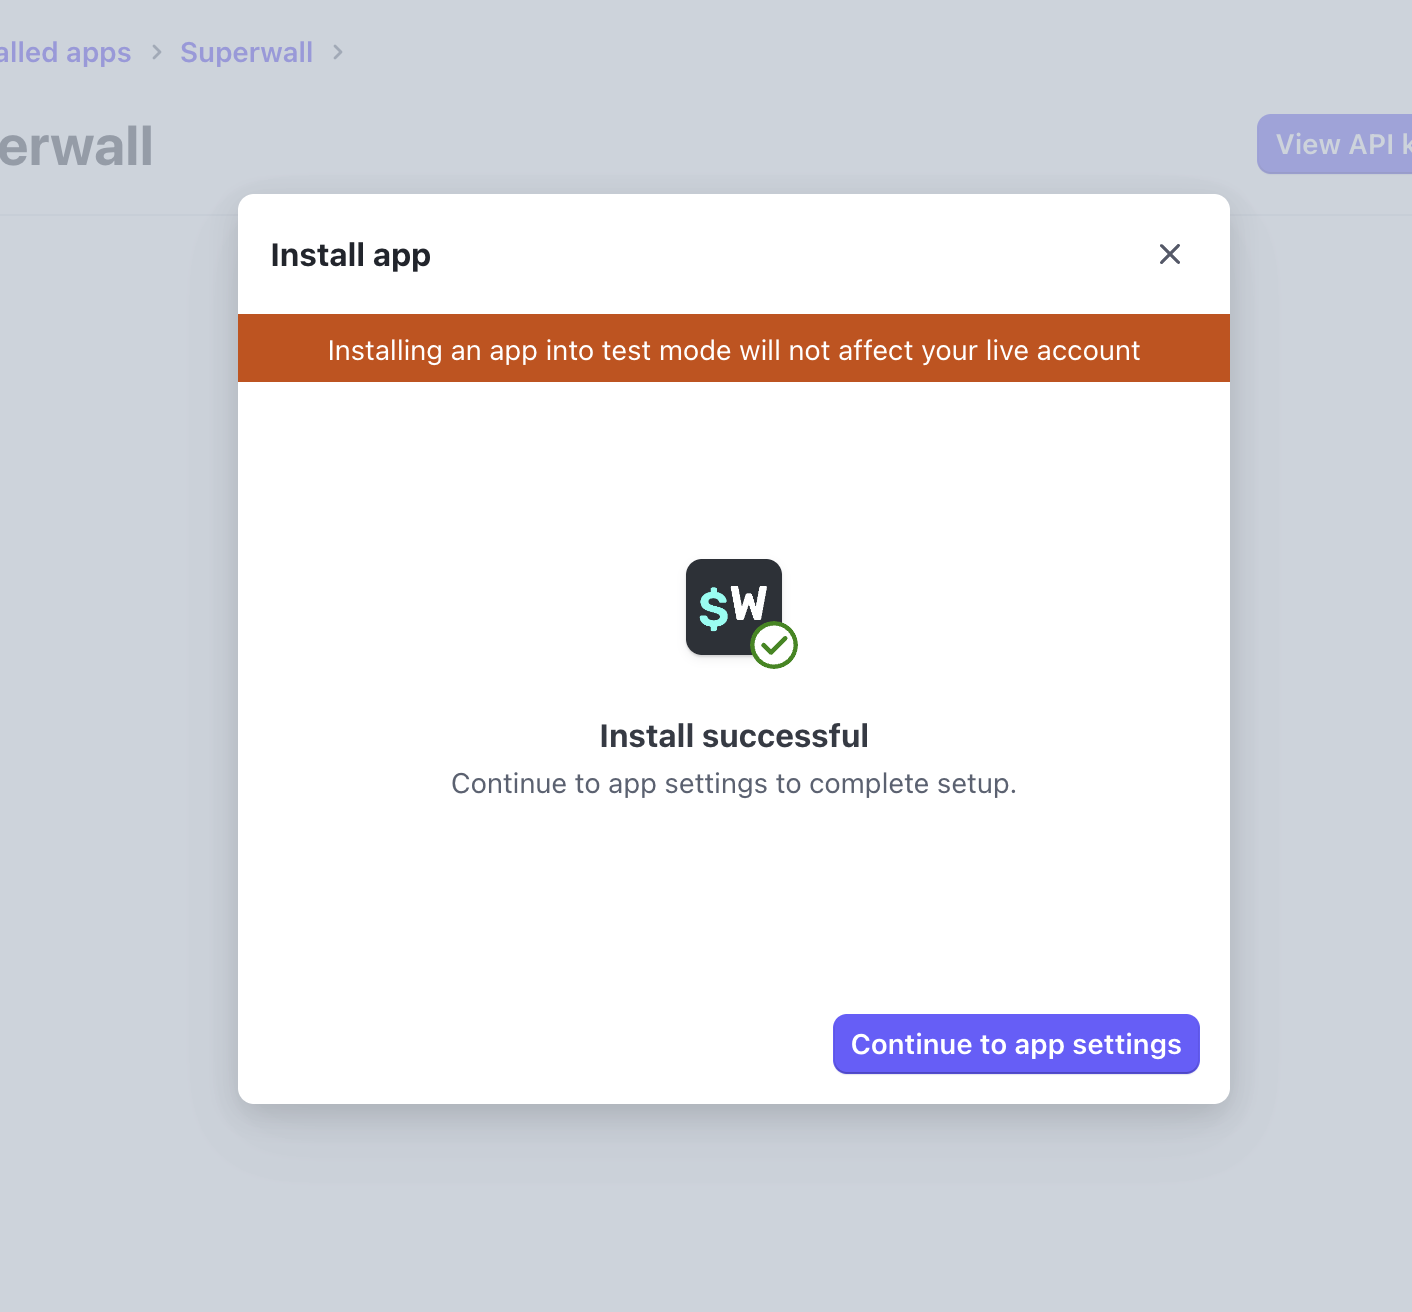
Step 4: Reveal Your API Keys
Click Reveal test key to view your test mode API keys:
Step 5: Copy Your Test Keys
Copy both the Publishable Key and Secret Key:
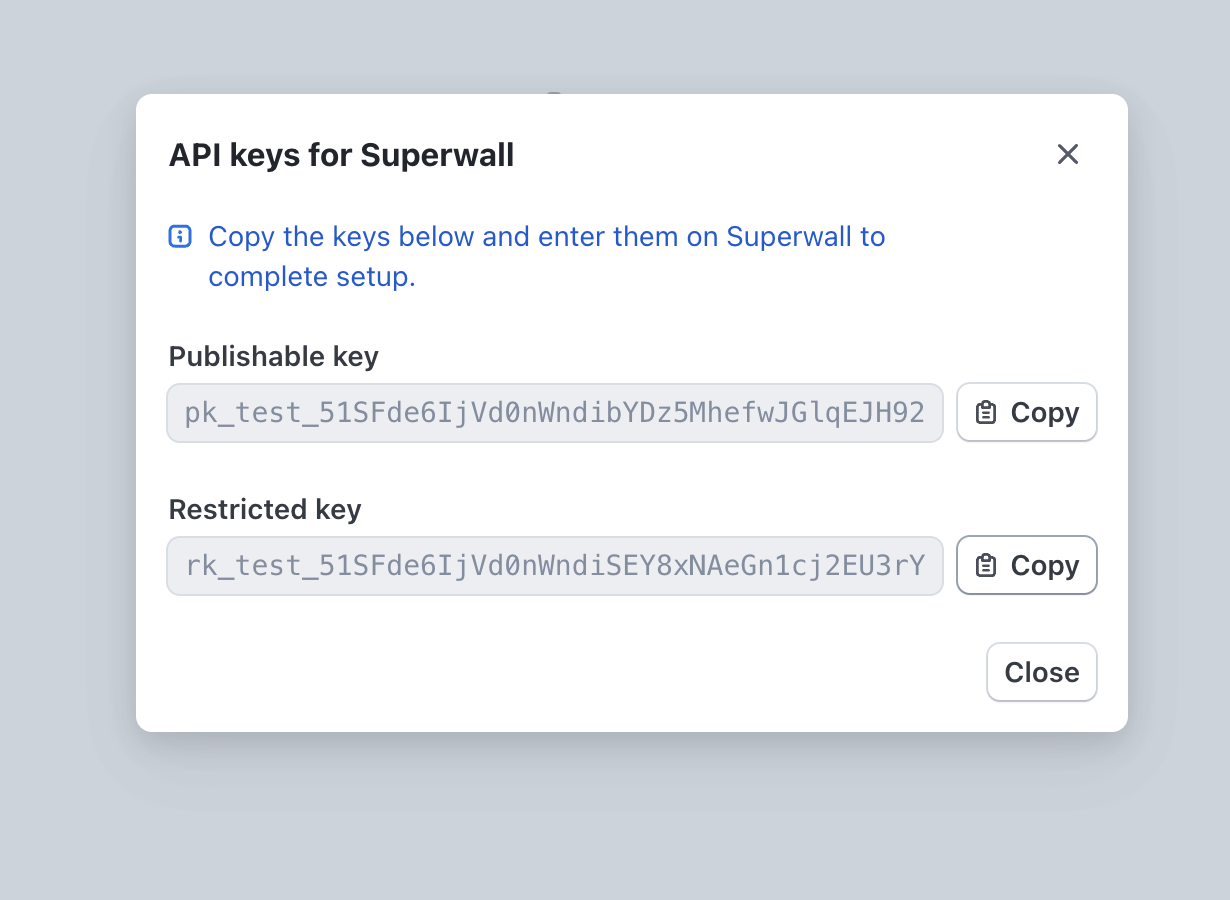
Step 6: Configure Superwall
Paste both keys into the Sandbox Configuration fields in Superwall, then click on the Update Configuration button.
This section should say "Configured" at the top right if setup was successful.
iOS configuration
Superwall uses the details here to handle deep links back to your app after a purchase occurs. All of this information is required.
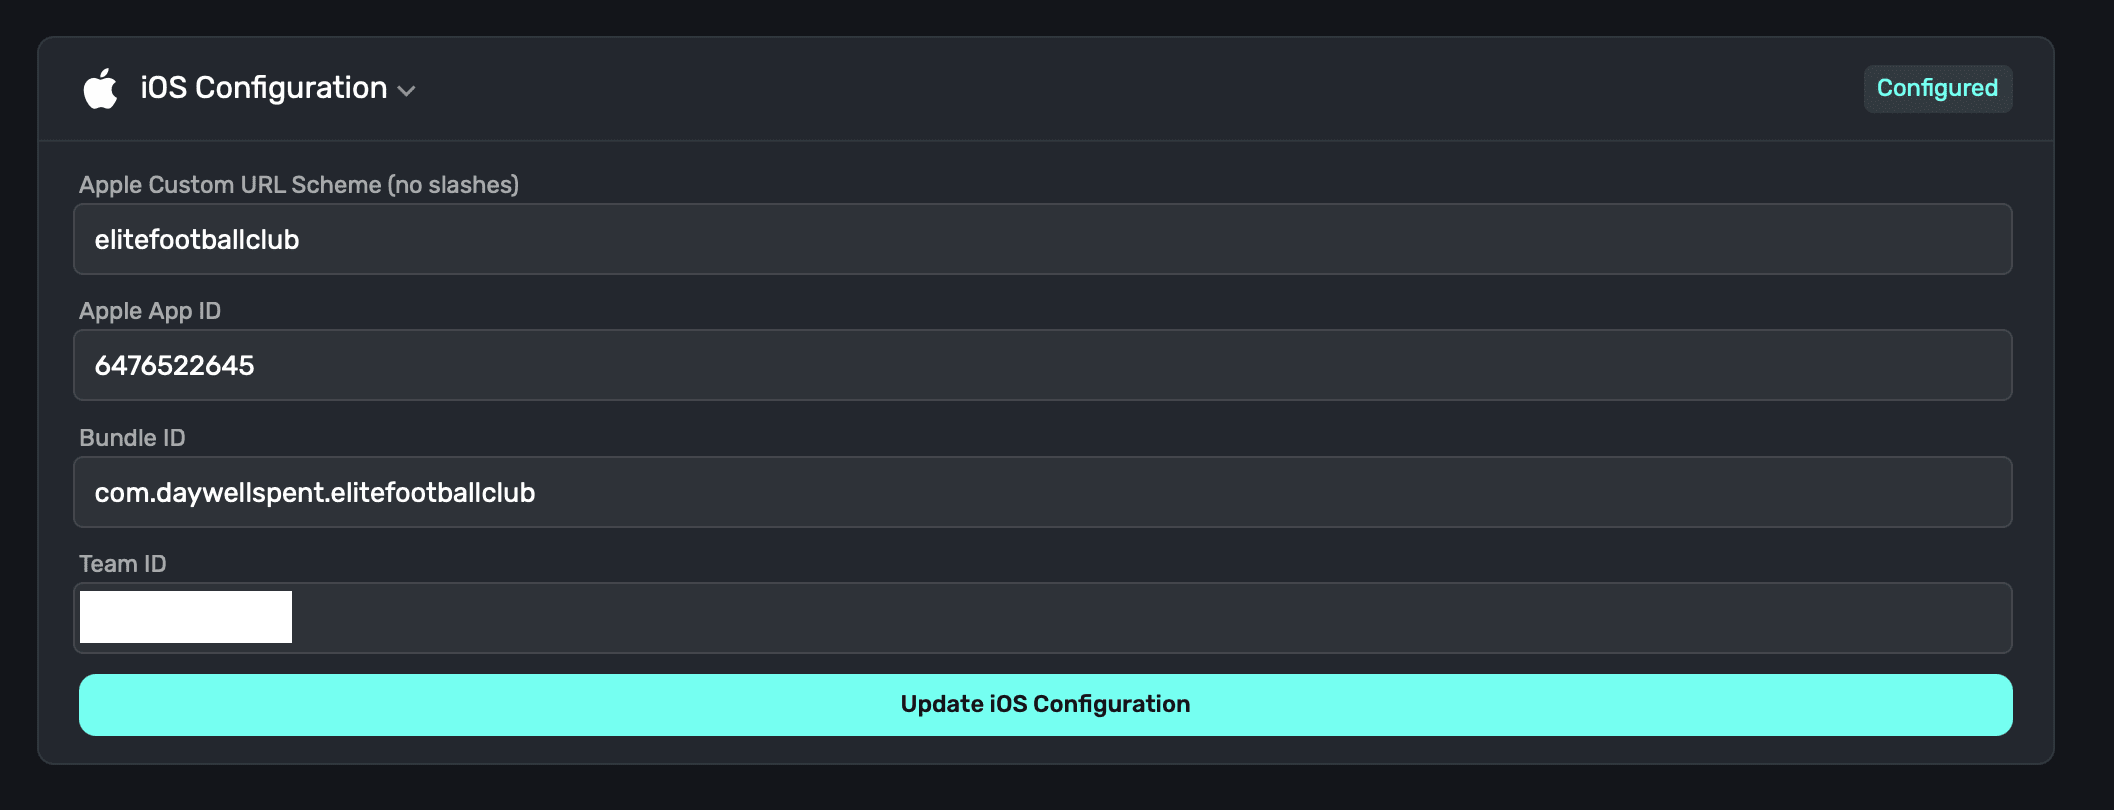
- Apple Custom URL Scheme: Add your app's custom URL scheme. If you haven't set on up, read here for instructions.
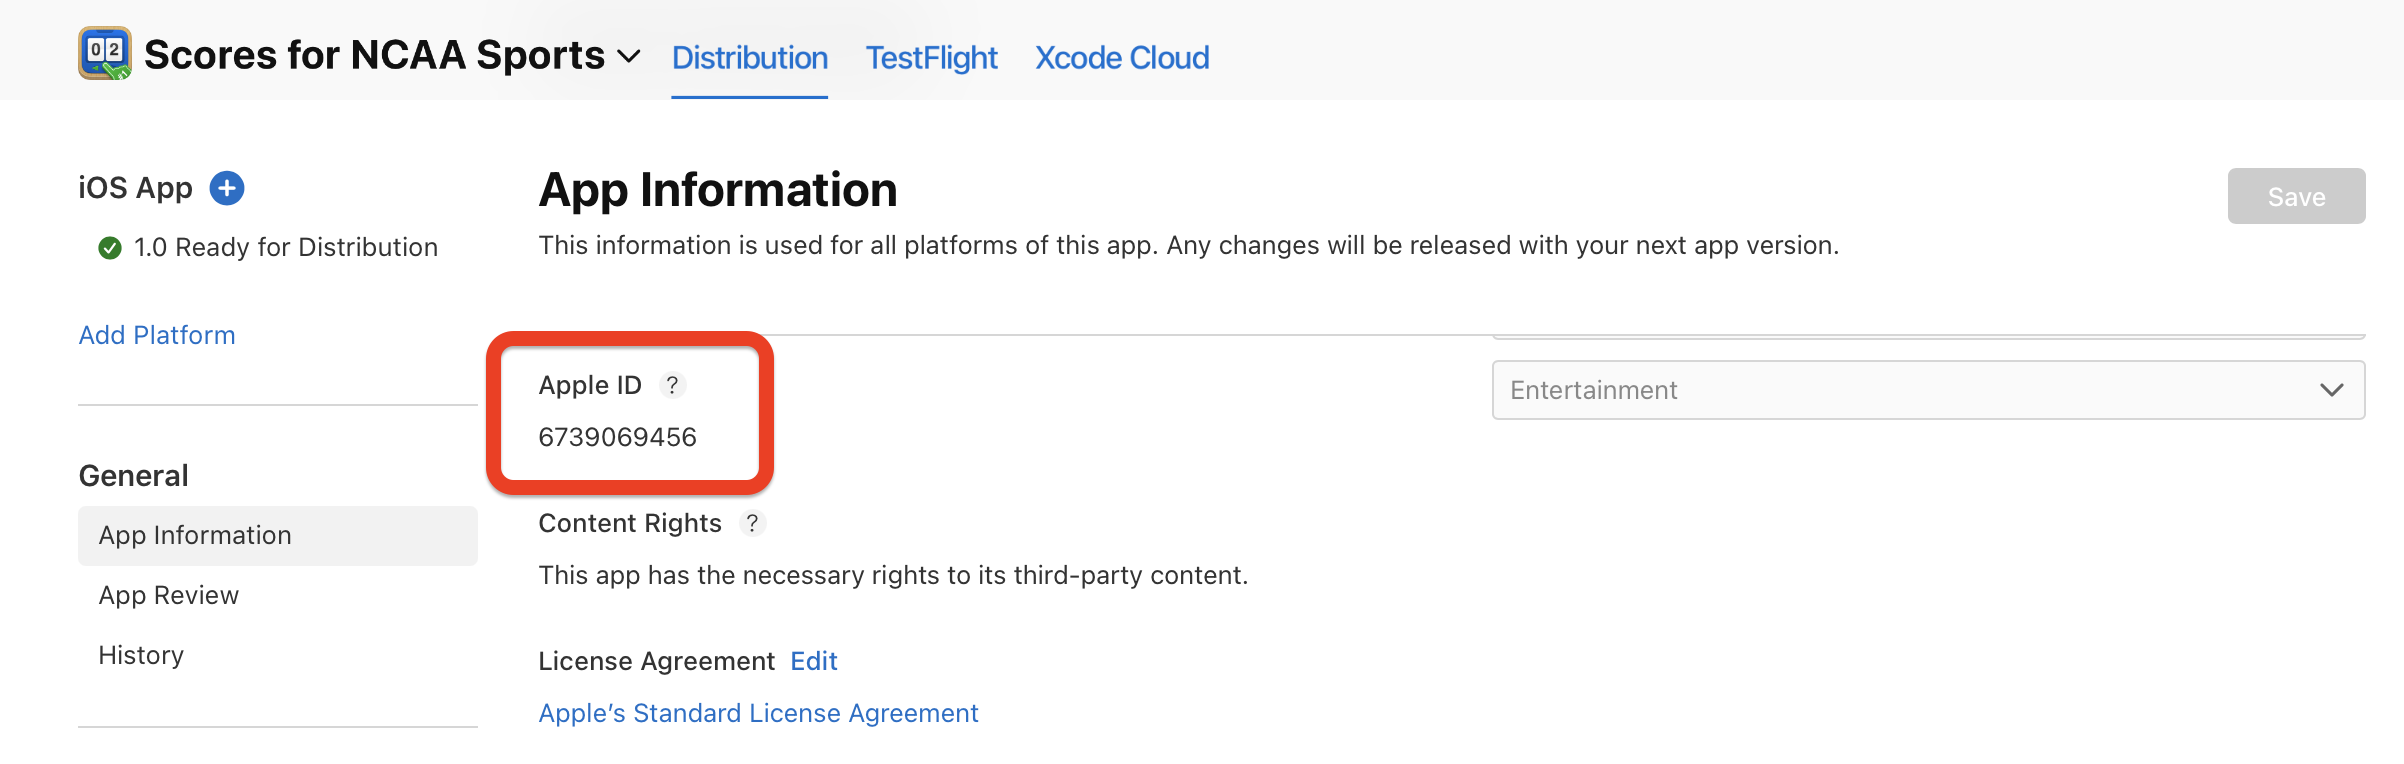
- Apple App ID: Your iOS app's ID. If you're unsure of your app's ID, you find it in App Store Connect -> Select your App -> General -> App Information -> Apple ID:
- Bundle ID: Your iOS app's bundle ID. You can find this in Xcode -> Targets -> General -> Identity -> Bundle Identifier.
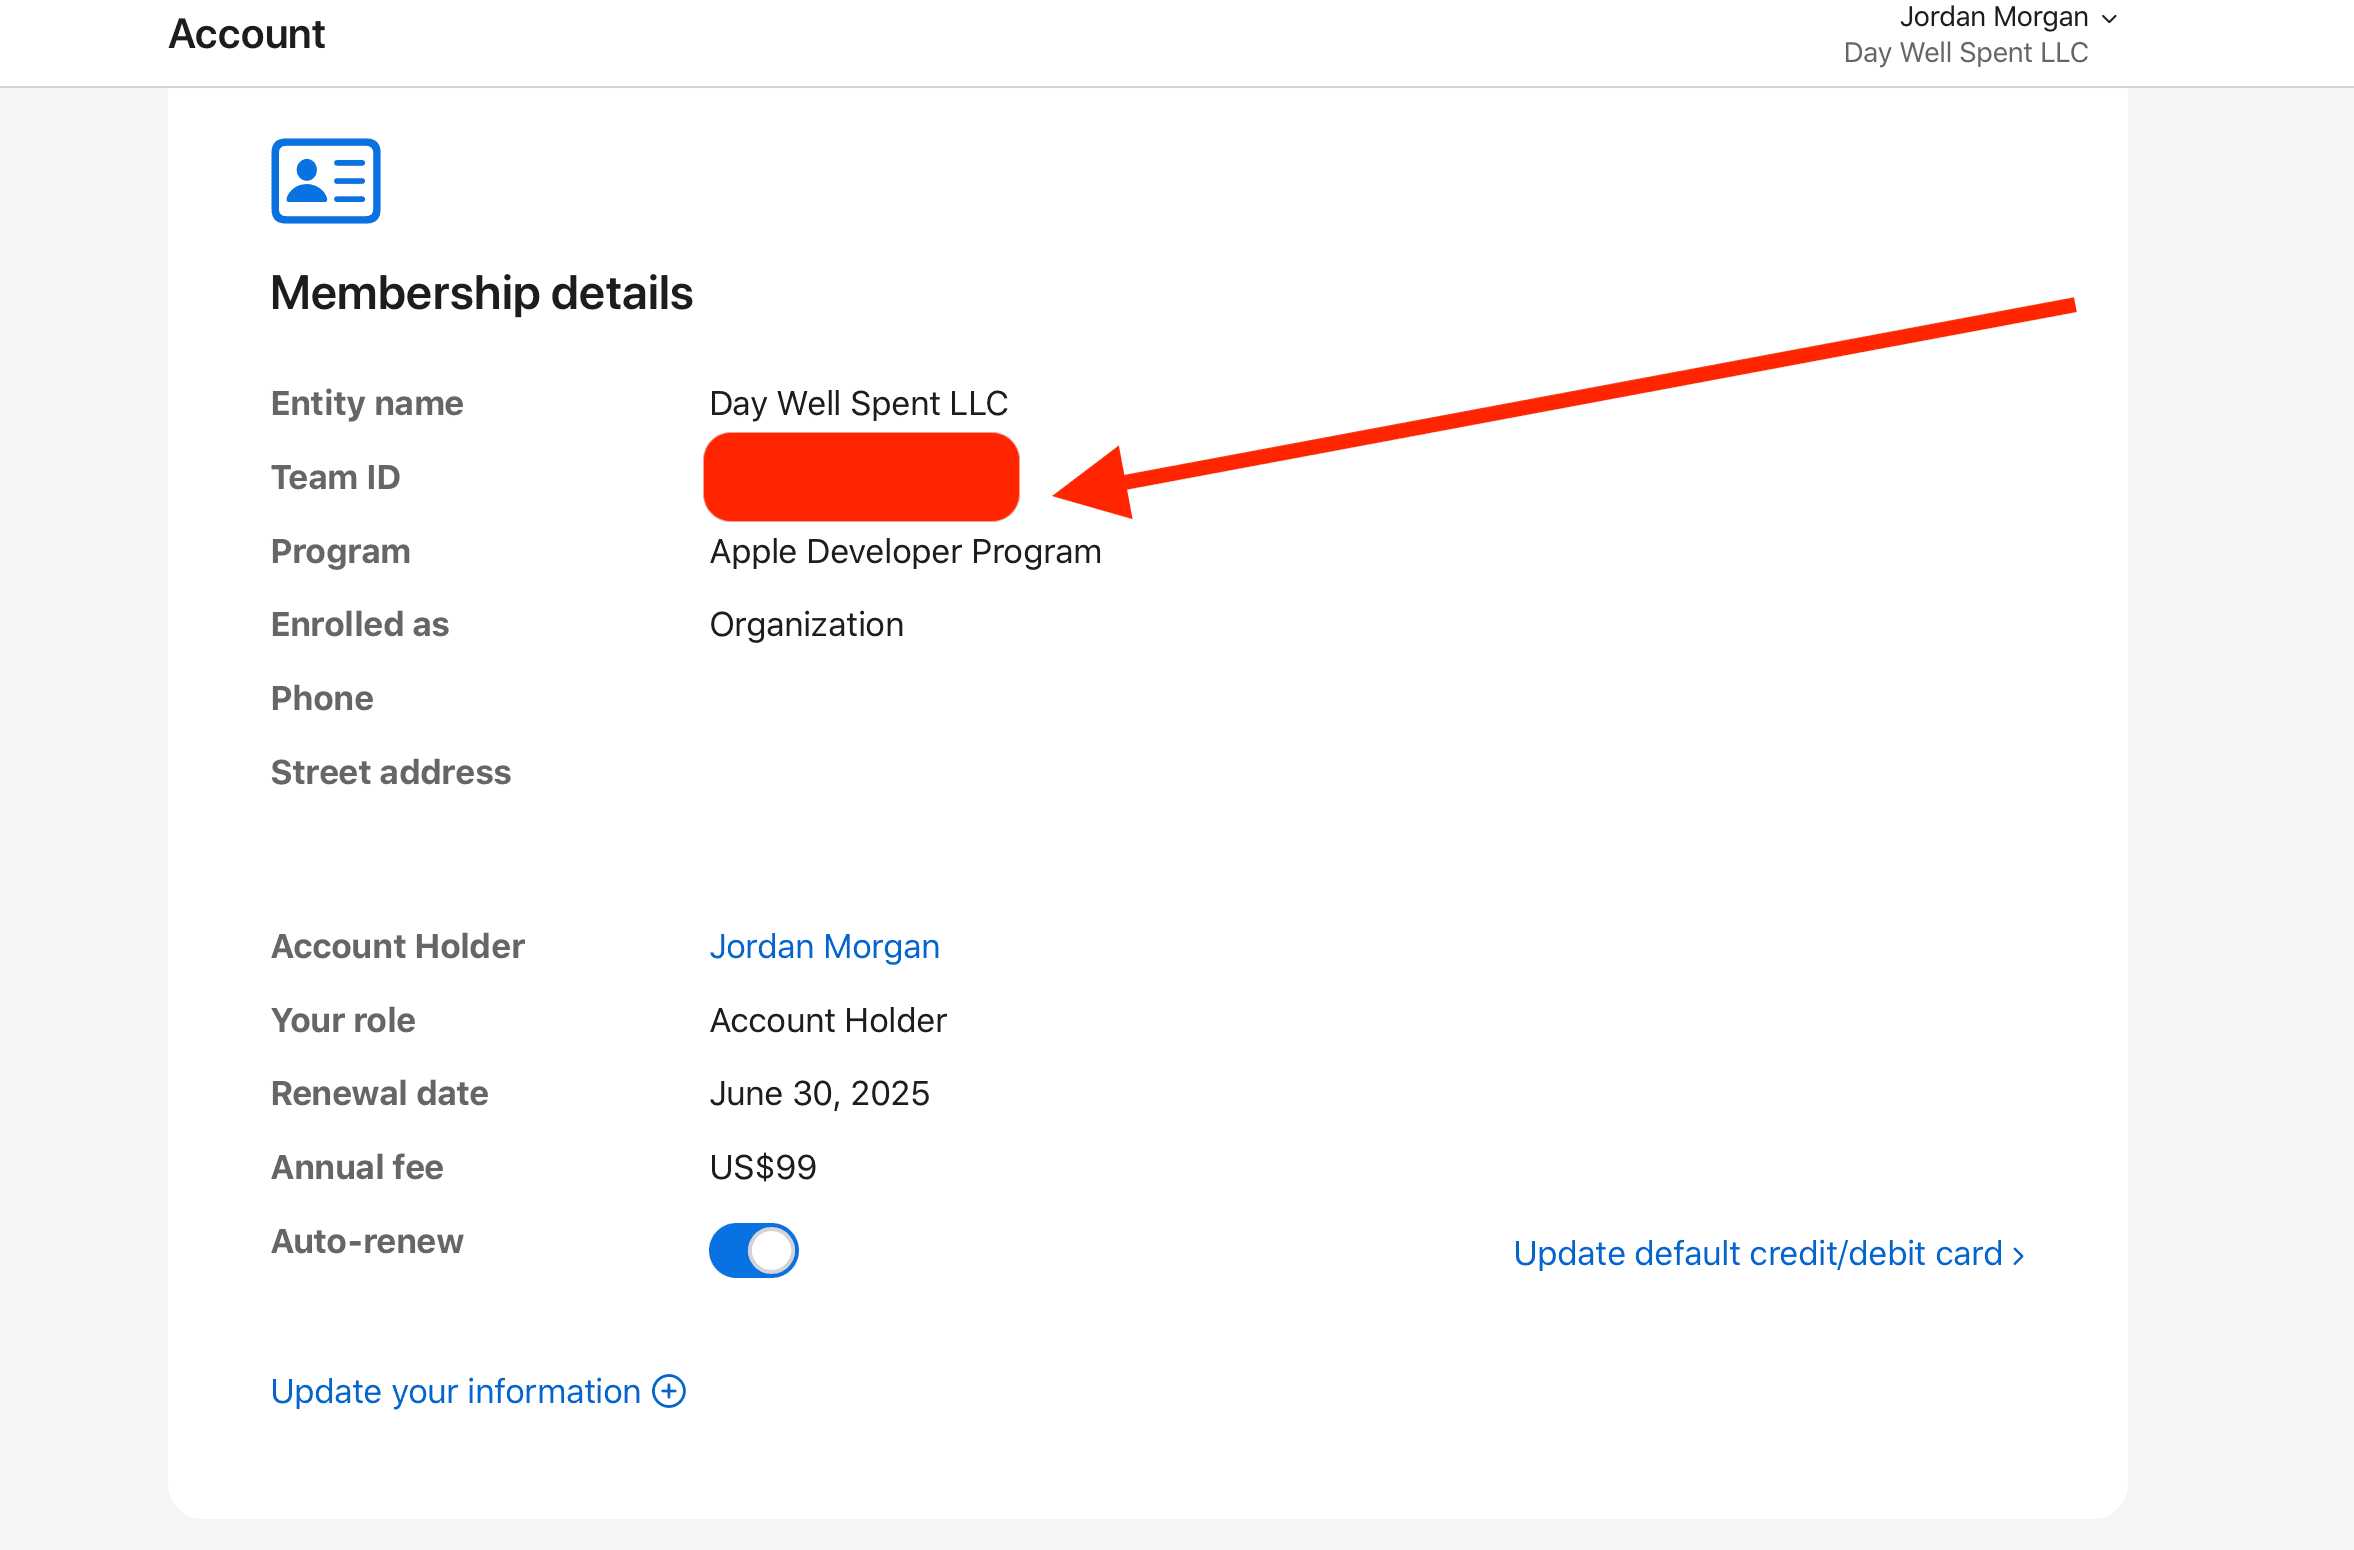
- Team ID: The team ID that your iOS app belongs to. To find this, visit Apple Developer -> Account -> Membership details -> Team ID. It's obscured here, but it'll be where the arrow points in the image below:
Confirm setup
Once you've filled out all of these fields, you should see Configured for each section:
Next, you'll need to create some products in Stripe.
How is this guide?