App2Web
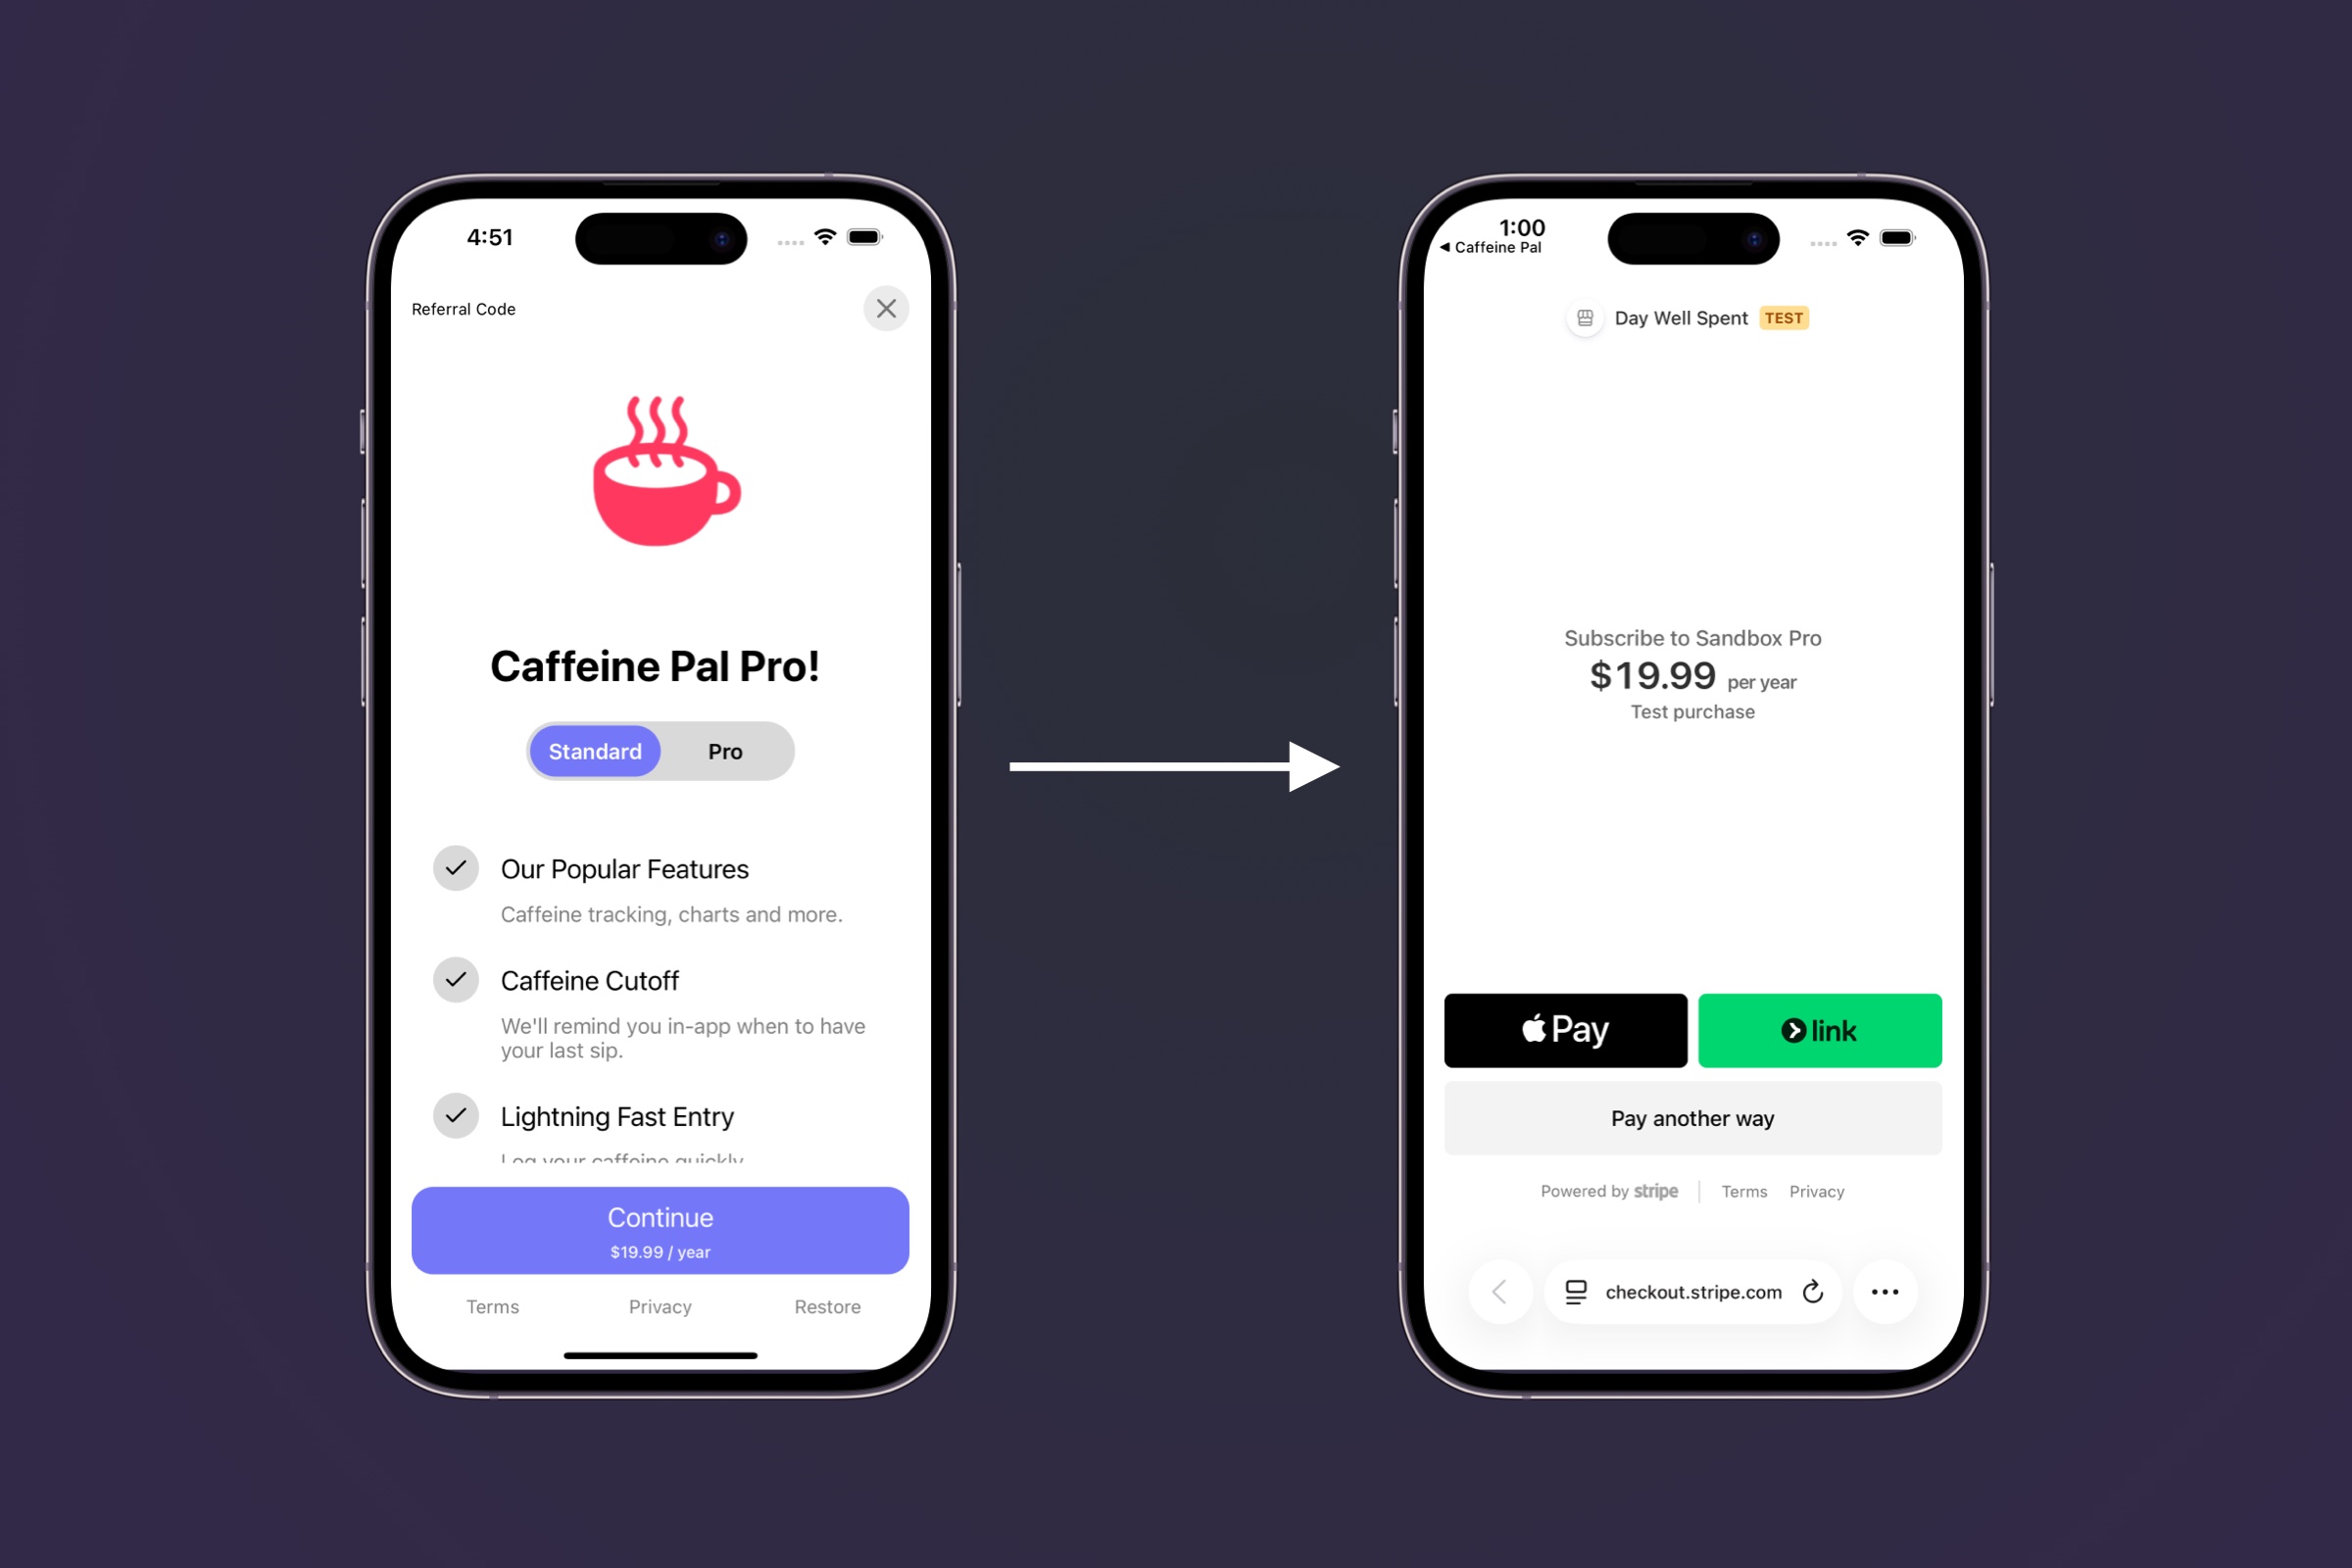
Offer Stripe products directly from your iOS paywalls and perform checkout flows.
For customers in the United States, you can offer Stripe products directly from your iOS paywalls. This is a great way to streamline the checkout process and make it easier for users to purchase your products.
- 1
Configure Web Checkout
First, follow the web checkout setup guide to create a Stripe app and configure your web checkout settings. Specifically, you'll need to complete the first three steps. This includes installing the Superwall Stripe app and setting up your app's settings.
- 2
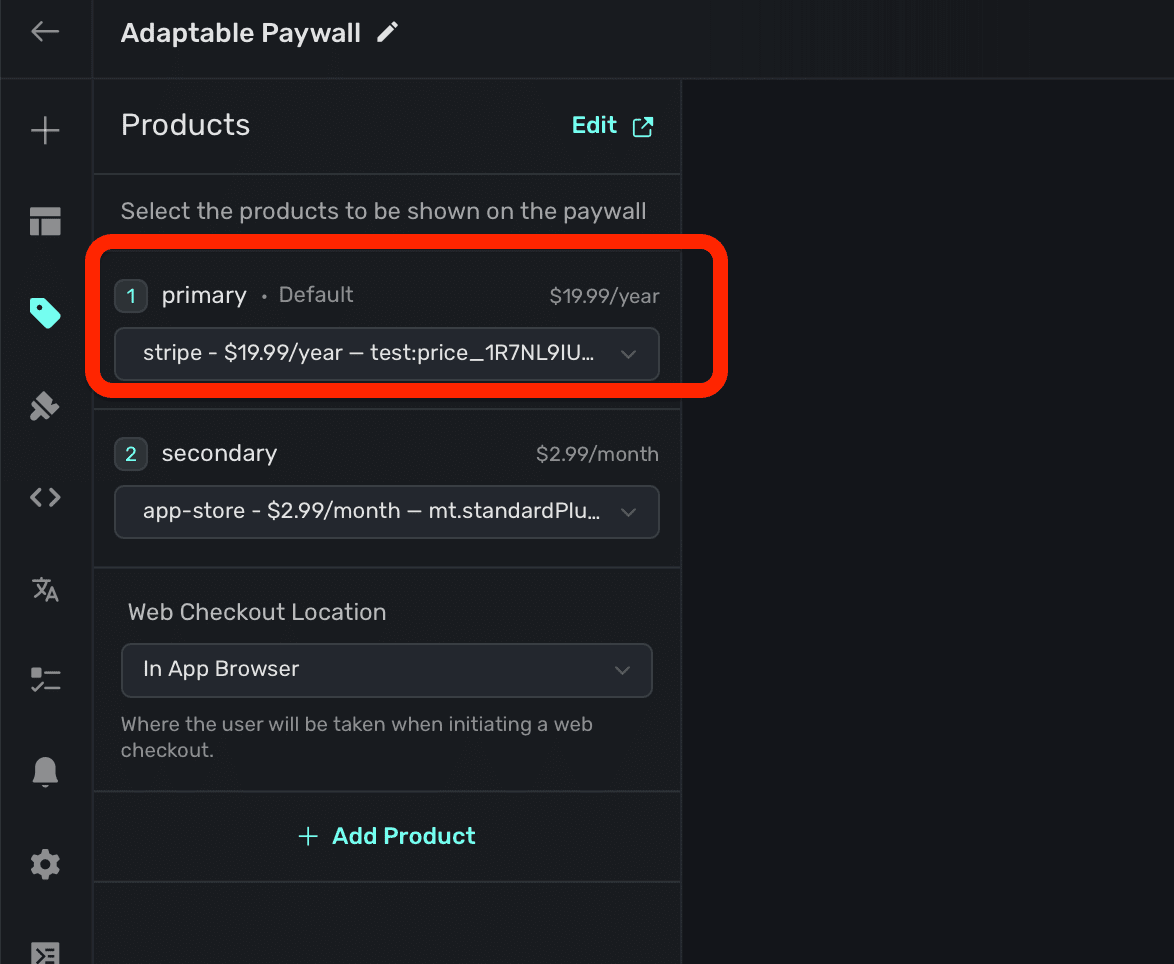
Add a Stripe product to an iOS paywall
Select a paywall and add a Stripe product to it. This will allow users to purchase the product directly from the paywall. Stripe products are prepended with "stripe" in the product selector:
- 3
Choose Web Checkout Location
You can control whether or not Stripe checkout opens in your app via Safari, or externally in the Safari app:

App Store Review Tip: If you choose the in-app sheet option, we strongly suggest showing your Stripe purchase experience to Apple during an App Review before testing with users. We recommend adding the following to your App Review notes:
US users will be able to purchase a subscription using Stripe. These users are filtered using their registered App Store country. All other countries will only be able to purchase a subscription using Apple IAPs. You can test this by switching your device's registered App Store country.
- 4
Create a campaign for U.S. customers
Since the ruling only applies to customers in the United States, you can easily create a campaign filter that will match to those customers. Just create a filter where
storeFrontCountryCodematchesUSA, like this: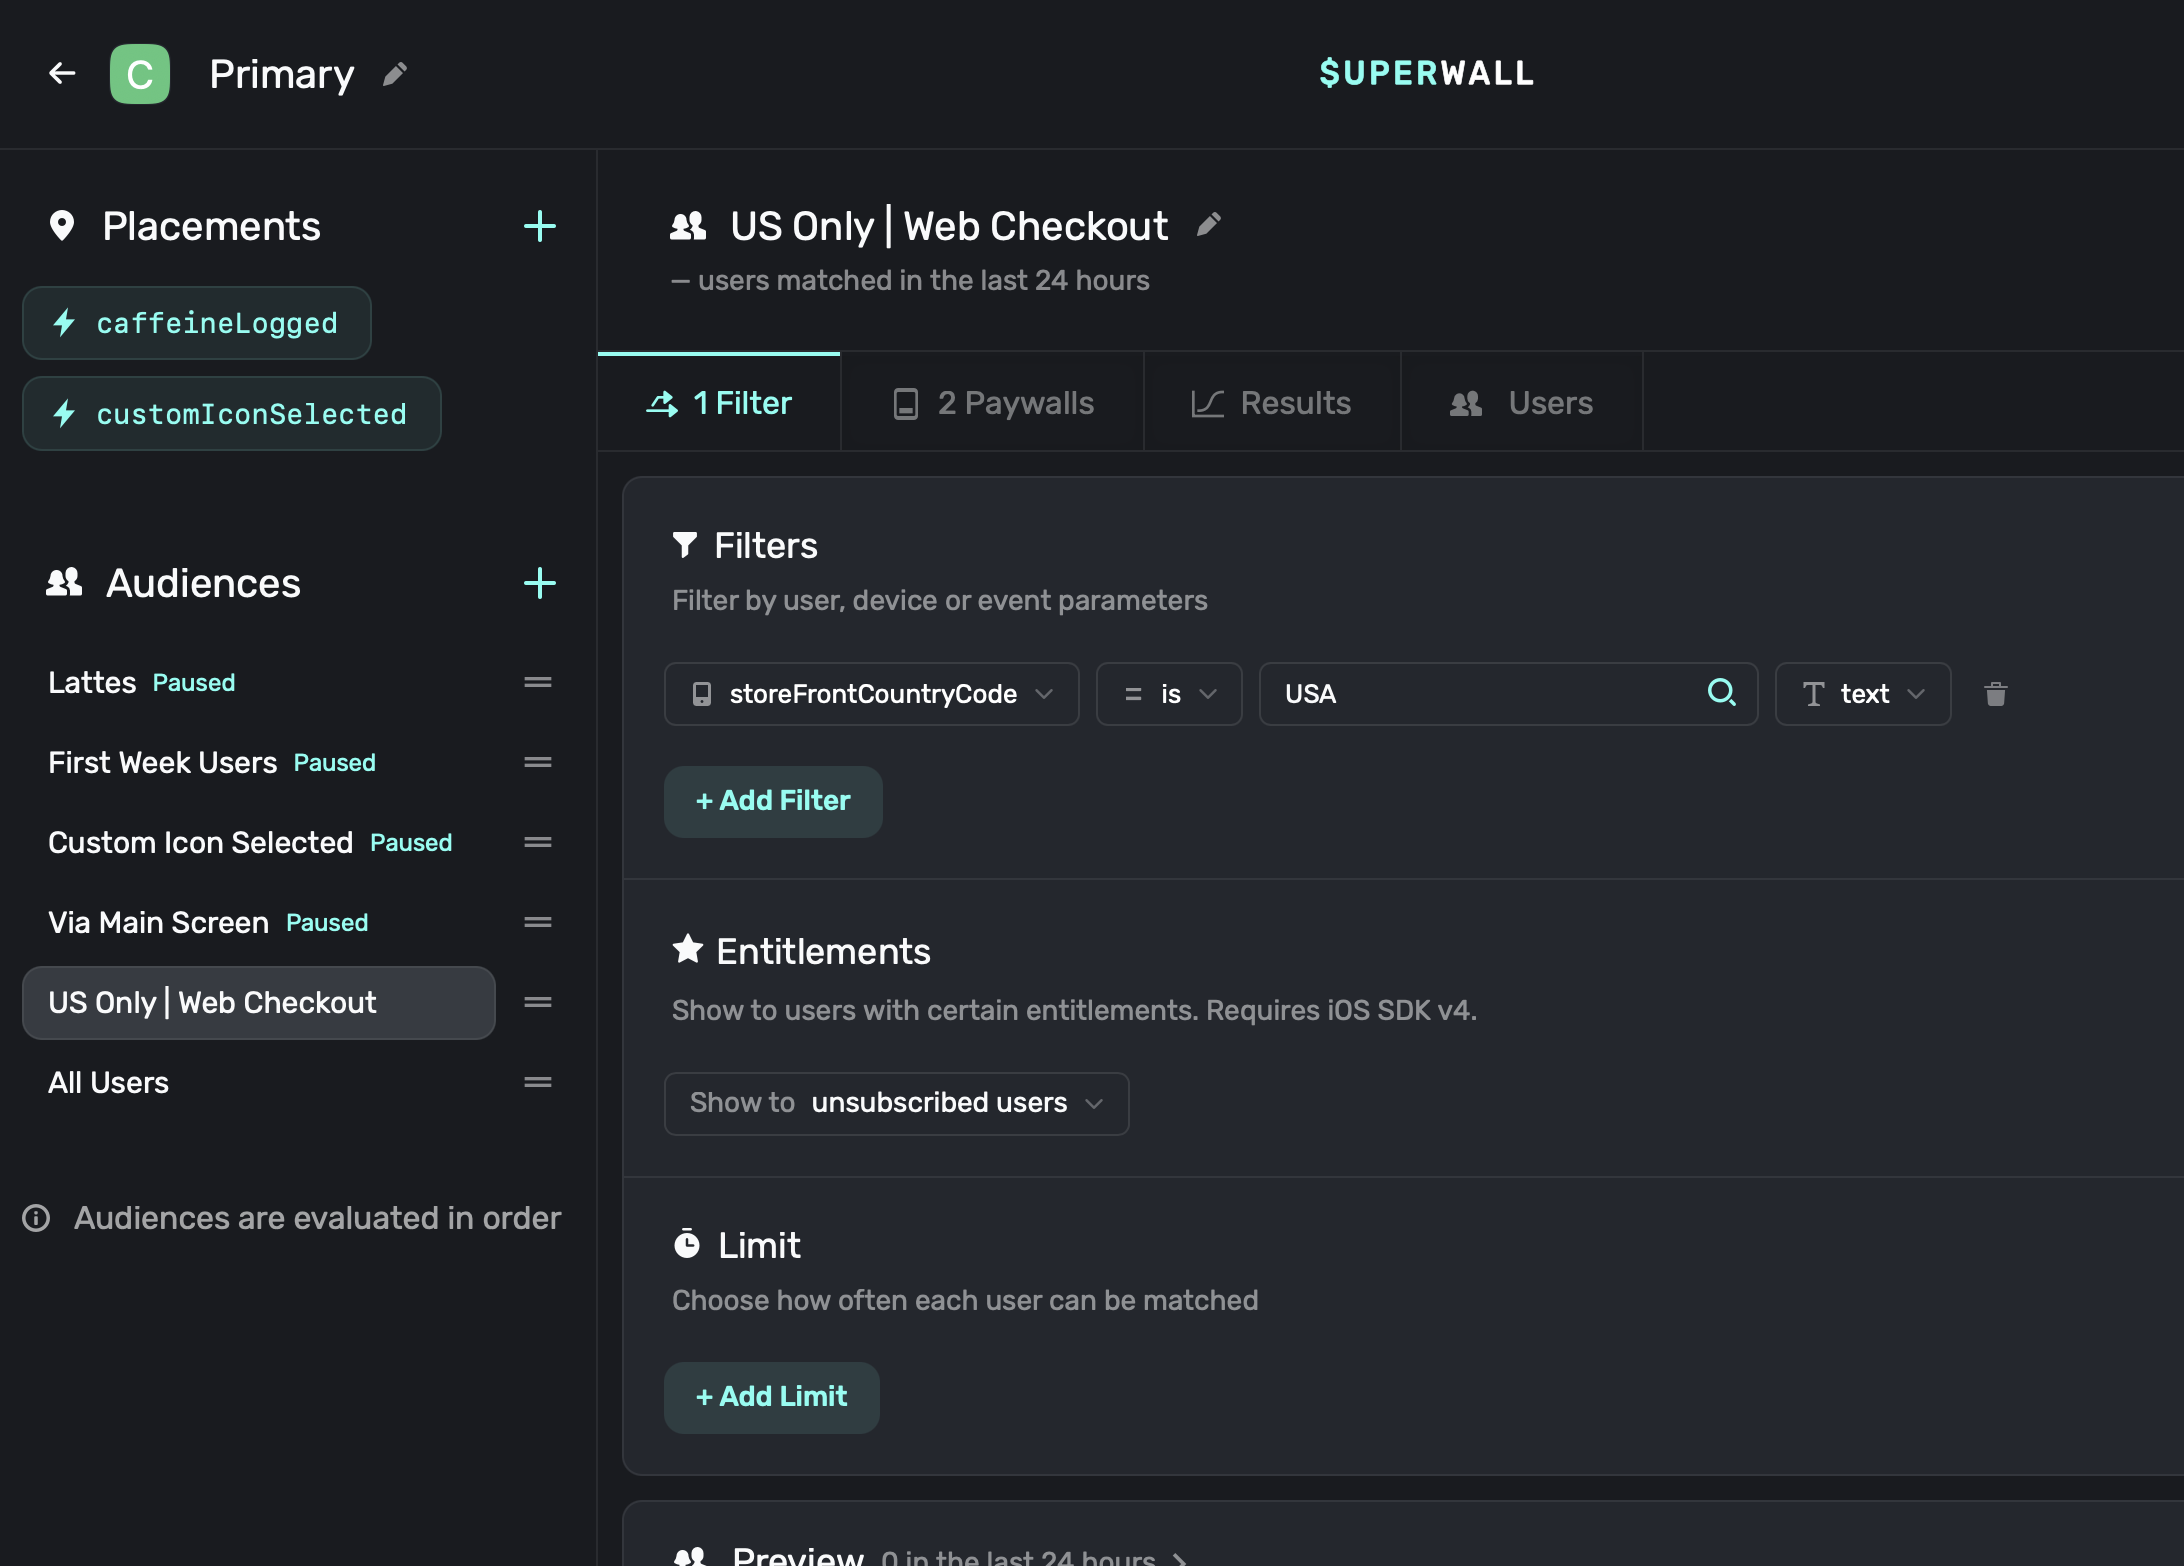
- 5
Respond to Checkout
From there, the flow works the same way as it would for web checkout. Once the payment succeeds, the Superwall delegate functions
willRedeemLink()anddidRedeemLink(result:)will be called. You can use these functions to handle the deep link in your app if you need to show any specific UI as described in our Post-Checkout Redirecting docs.Additionally, the subscription status will be updated automatically and the delegate callback
func subscriptionStatusDidChange(from oldValue: SubscriptionStatus, to newValue: SubscriptionStatus)will be called. If you're using aPurchaseController, refer to the docs here.
If you need to test checkout, learn how here.
Prefill customer information
When starting checkout from an iOS paywall (App2Web), you can prefill customer information in two ways:
Stripe will automatically prefill the email field if you set the user's email as a User Attribute in your app before initiating checkout.
Stripe Customer ID
If you already have a Stripe customer ID for your user, you can set it as the stripe_customer_id user attribute. This will associate the checkout session with the existing Stripe customer, automatically prefilling their saved information and payment methods:
Superwall.shared.setUserAttributes([
    "email": user.email,
    "stripe_customer_id": user.stripeCustomerId
])
When both stripe_customer_id and email are provided, the Stripe customer ID takes precedence. The checkout session will use the existing customer's information rather than creating a new customer.
How is this guide?