Overview
Let customers purchase products online via Stripe, then link them to your iOS app with one seamless flow. No authentication required.
Superwall's web checkout integration makes it easy to set up purchasing funnels for your app via the web. Web checkout is powered by Stripe. Once an online purchase is complete, the customer will be redirected back to your app with a deep link that can be used to unlock content or features in your app via any associated entitlement.
Web checkout requires the Superwall iOS SDK 4.2.0 or later.
Visual learner? Go watch our web checkout tour over on YouTube here.
How it works
Superwall presents paywalls via the concept of campaigns, and each campaign has one or more placements. A paywall is shown in a campaign when a placement is triggered after your audience filters are evaluated. This setup is Superwall's foundation, and the web checkout flow works the exact same way.
The core difference? Each placement becomes a unique URL that you can share, send or email to present a user with a paywall that leads to a Stripe checkout flow. And just like with Superwall on apps, you can create experiments, try out different paywalls, run price tests and more.

Overall flow
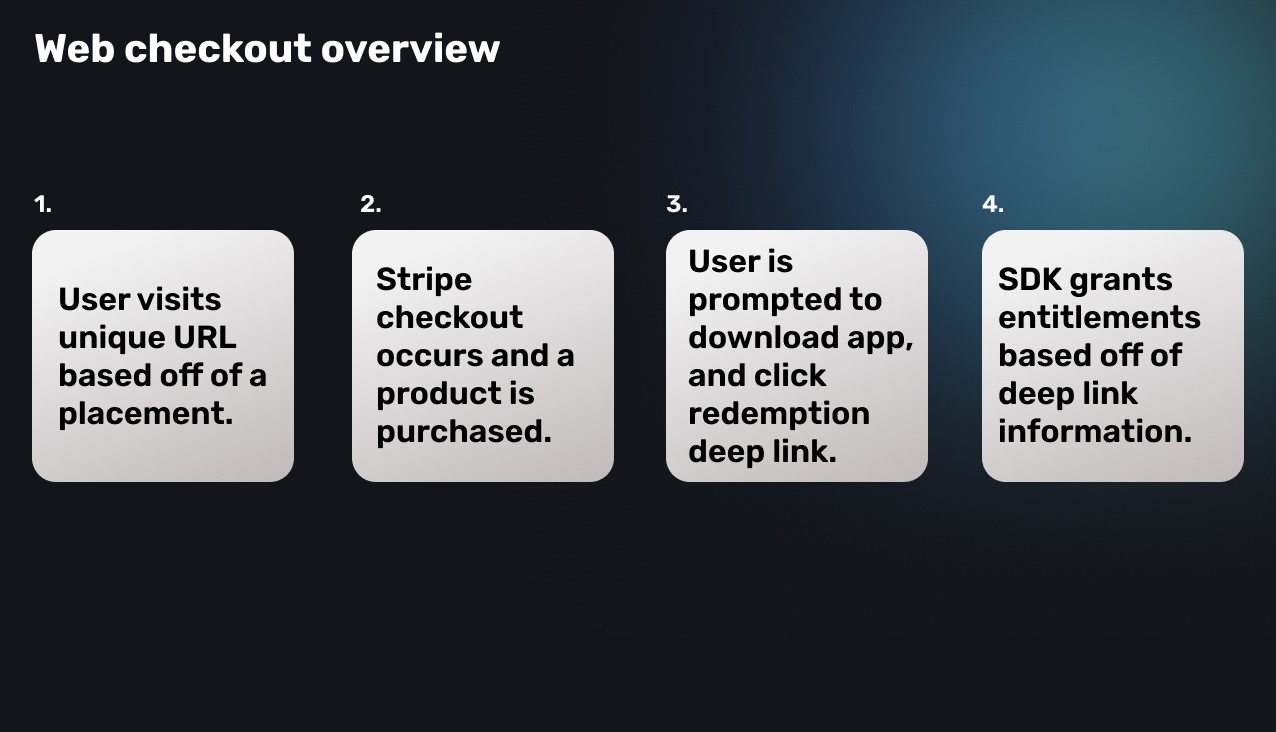
Refer to the individual pages below to get started, but for a quick, high-level overview — here's how web checkout works from beginning to end:
- A Web Checkout app is added to an existing iOS project in Superwall.
- Your checkout provider is configured with Superwall.
- iOS app details and post-purchase behavior are configured in the provider's settings page (within Superwall).
- Products are created in your payment provider, and imported into Superwall.
- Within a campaign (a default one is provided), you attach those products to a paywall.
- A user visits a placement URL, and performs the checkout flow.
- After a successful purchase, the user is redirected based on your post-purchase behavior setting:
- Redeem mode (default): User is directed to download the app and click the redemption link
- Redirect mode: User is redirected to your custom URL with purchase data
- For Redeem mode: On the device that they downloaded the app, they click the redemption link.
- Your iOS app is opened via a deep link (which means it must be set up with Superwall deep links, docs here).
- In the
SuperwallDelegate,willRedeemLink()is called, and then once it's fetched —didRedeemLink(result:)is called with the result of the redemption. - Finally, this user's account and details are managed via a link they find in their email receipt or by visiting a URL manually.
Getting setup
Before you start, you'll need to have a Superwall account and a Stripe account. You can create a Stripe account here.
- Creating an app: First, you'll add a Web Checkout app to an existing project within Superwall.
- Stripe setup: Install the Superwall Stripe app for automatic configuration.
- Managing products: Create or import products to add to your web paywalls.
Creating paywalls and campaigns
- Presenting paywalls: Set up a campaign, create some placements and add paywalls to begin showing them to customers.
Associating entitlements to your iOS apps
- Linking purchases to your iOS app: Once a purchase occurs, the user will be prompted to download your app and click on a redemption link.
- Managing memberships: Users can cancel, update or manage their memberships via Stripe.
Testing purchases
- Testing purchases: Test your web checkout flow with test purchases.
App to Web
- App to Web Checkout: For customers in the United States, you can offer Stripe products directly from your iOS paywalls.
Troubleshooting
If a user has issues accessing their subscription in your app after paying via web checkout, direct them to your plan management page to retrieve their subscription link or manage billing. For example: http://yourapp.superwall.app/manage
How is this guide?
Edit on GitHub