Google Play Revenue Tracking
Send Google Play purchase events to Superwall with a service account key and real-time developer notifications.
Google Play revenue tracking sends your Android app's purchase events to Superwall, including subscription renewals, one-time purchases, and refunds. Superwall reads purchase details through a service account in your Google Cloud project and receives events through Google Play's real-time developer notifications.
Google Play setup is in the new dashboard at app.superwall.com. In the legacy dashboard, choose Google Play under Settings > Revenue Tracking and click Set Up Google Play to open it.
Requirements
- An Android app in Superwall that belongs to a project. If the new dashboard says the app isn't in a project, open Integrations and click Convert to project, then click Convert to Project on the page that opens.
- An Owner, Admin, or User (Legacy) role in Superwall. Editors, Readers, and Analysts can't save the setup. If your project access is Restricted, you also need the Admin project role for the app's project. See Access Controls.
- A Google Cloud project where you can enable APIs and create service accounts.
- The account owner role or the Admin (all permissions) permission in Play Console, which you need to invite users.
Play Console sends an app's real-time developer notifications to one Pub/Sub topic. If you already send them to another service, create the service account in the Google Cloud project that holds that topic. Superwall adds its own subscription to the topic, and your existing subscriptions keep receiving notifications.
Step 1: Enable the Google Cloud APIs
Select the Google Cloud project you'll use to connect your Android app to Superwall. Then open each API's page and click Enable:
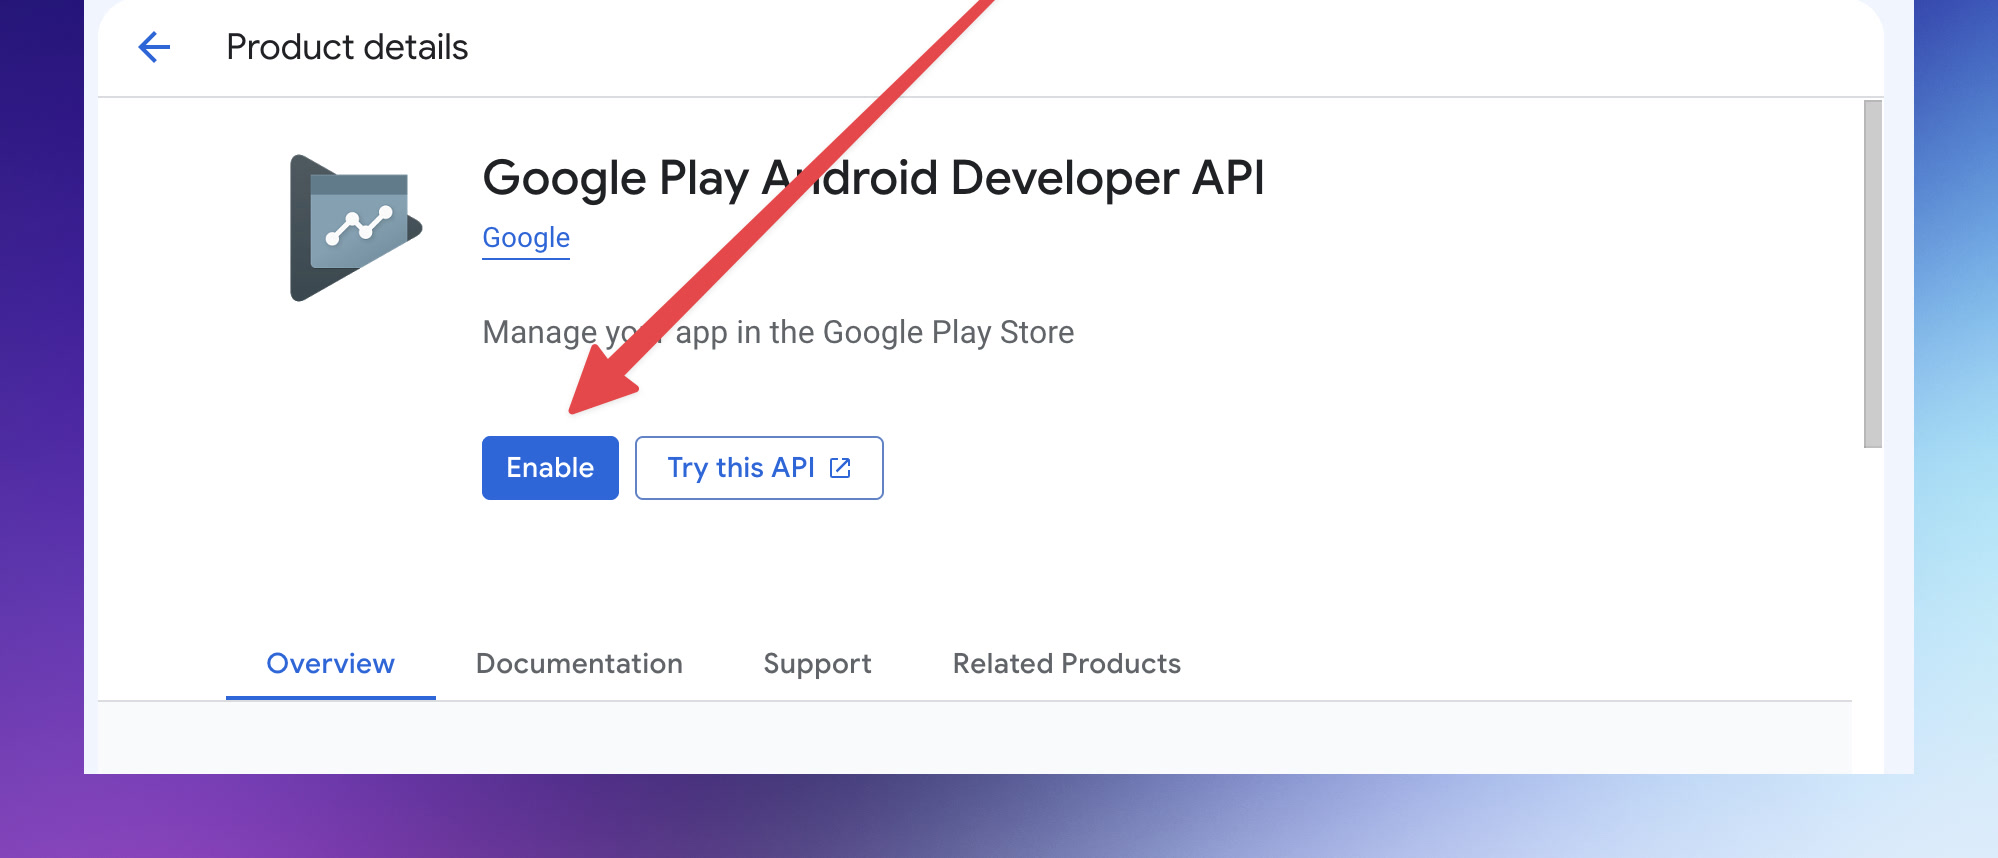
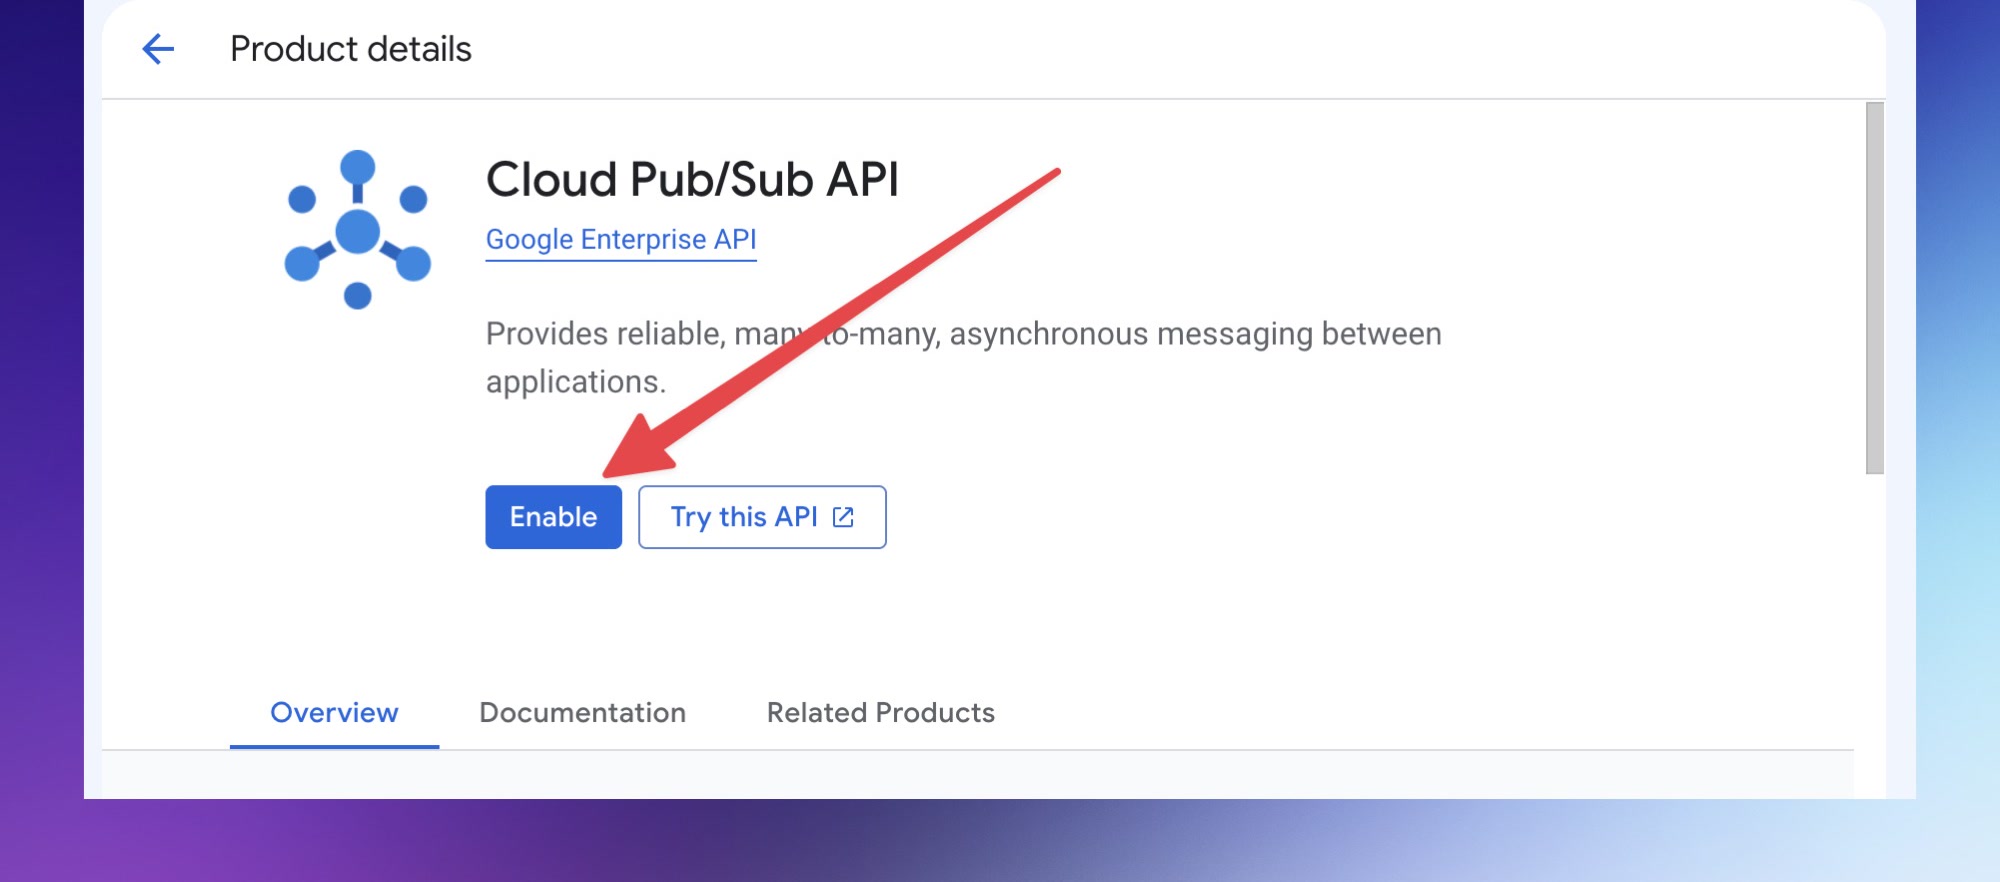
An enabled API shows API Enabled and a Manage button on its page.
Step 2: Create a service account and key
- 1
Create the service account
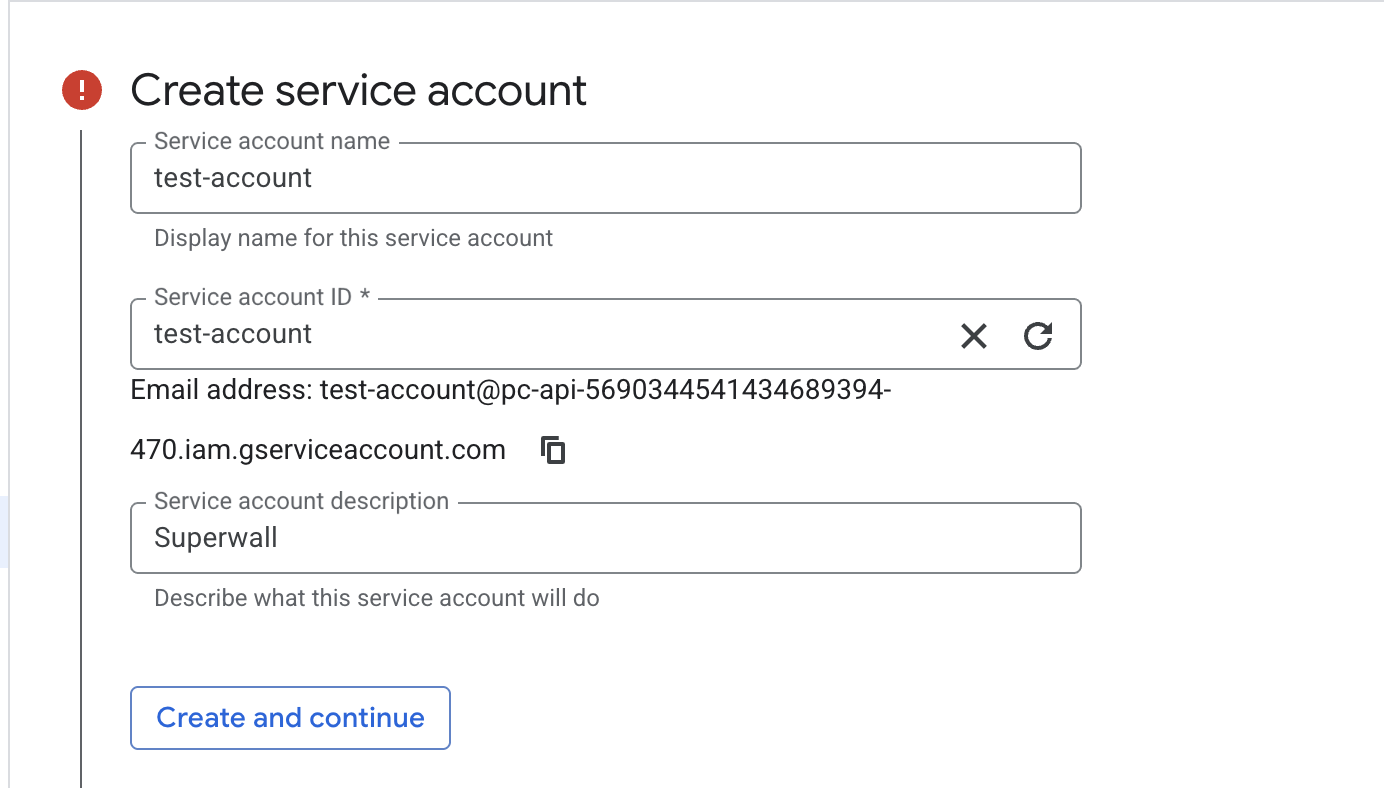
Open Service Accounts in Google Cloud, in the same project you used in step 1, and click Create service account. Enter any name and ID, then click Create and continue.
- 2
Grant the Pub/Sub Admin role
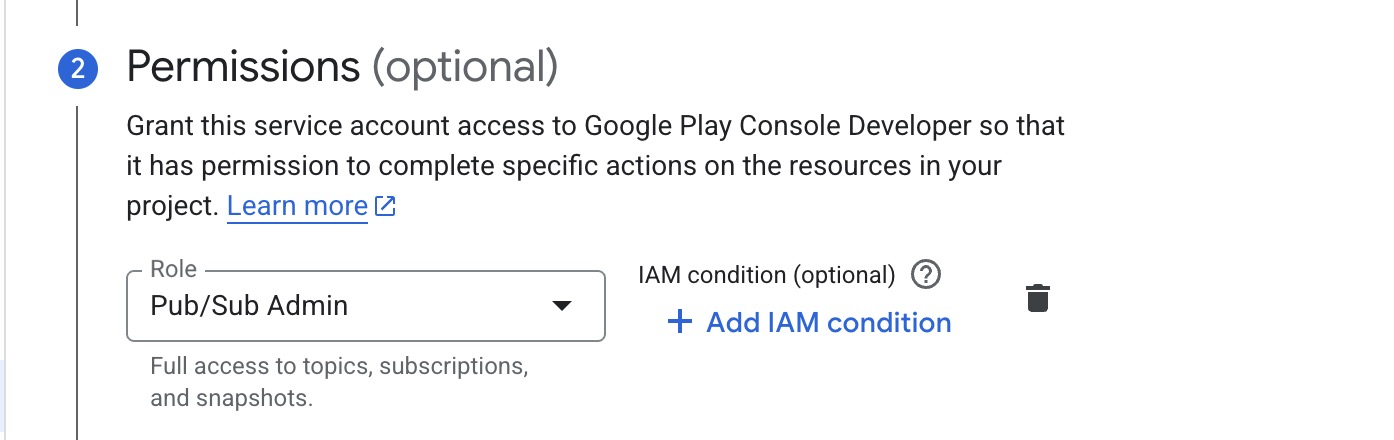
Under Permissions, add the Pub/Sub Admin role and click Continue. Skip Principals with access and click Done.
Superwall uses this role to create the notification topic, allow Google Play to publish to it, and add its own subscription to it.
- 3
Download a JSON key
Click the new service account and open its Keys tab.
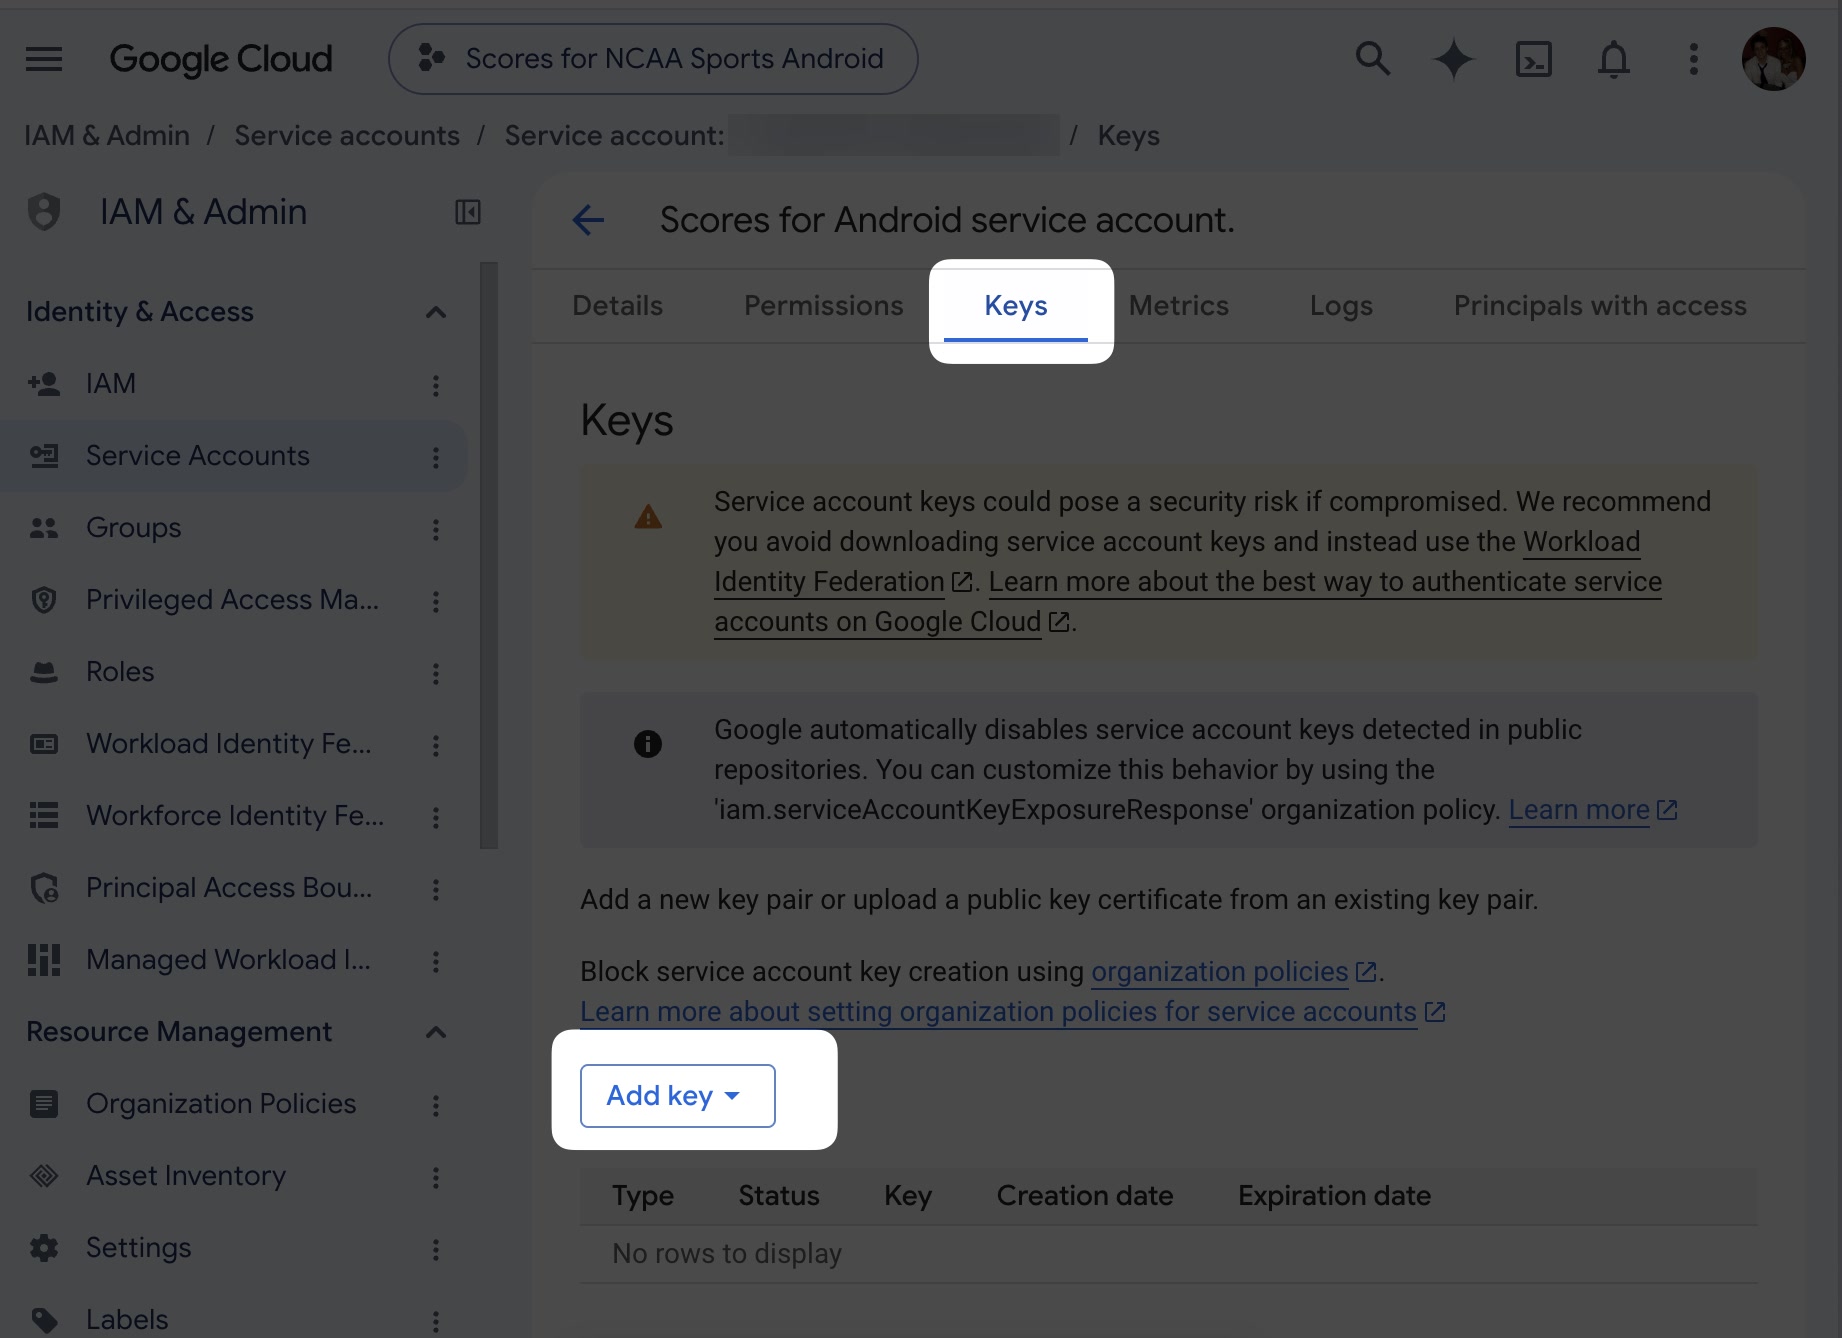
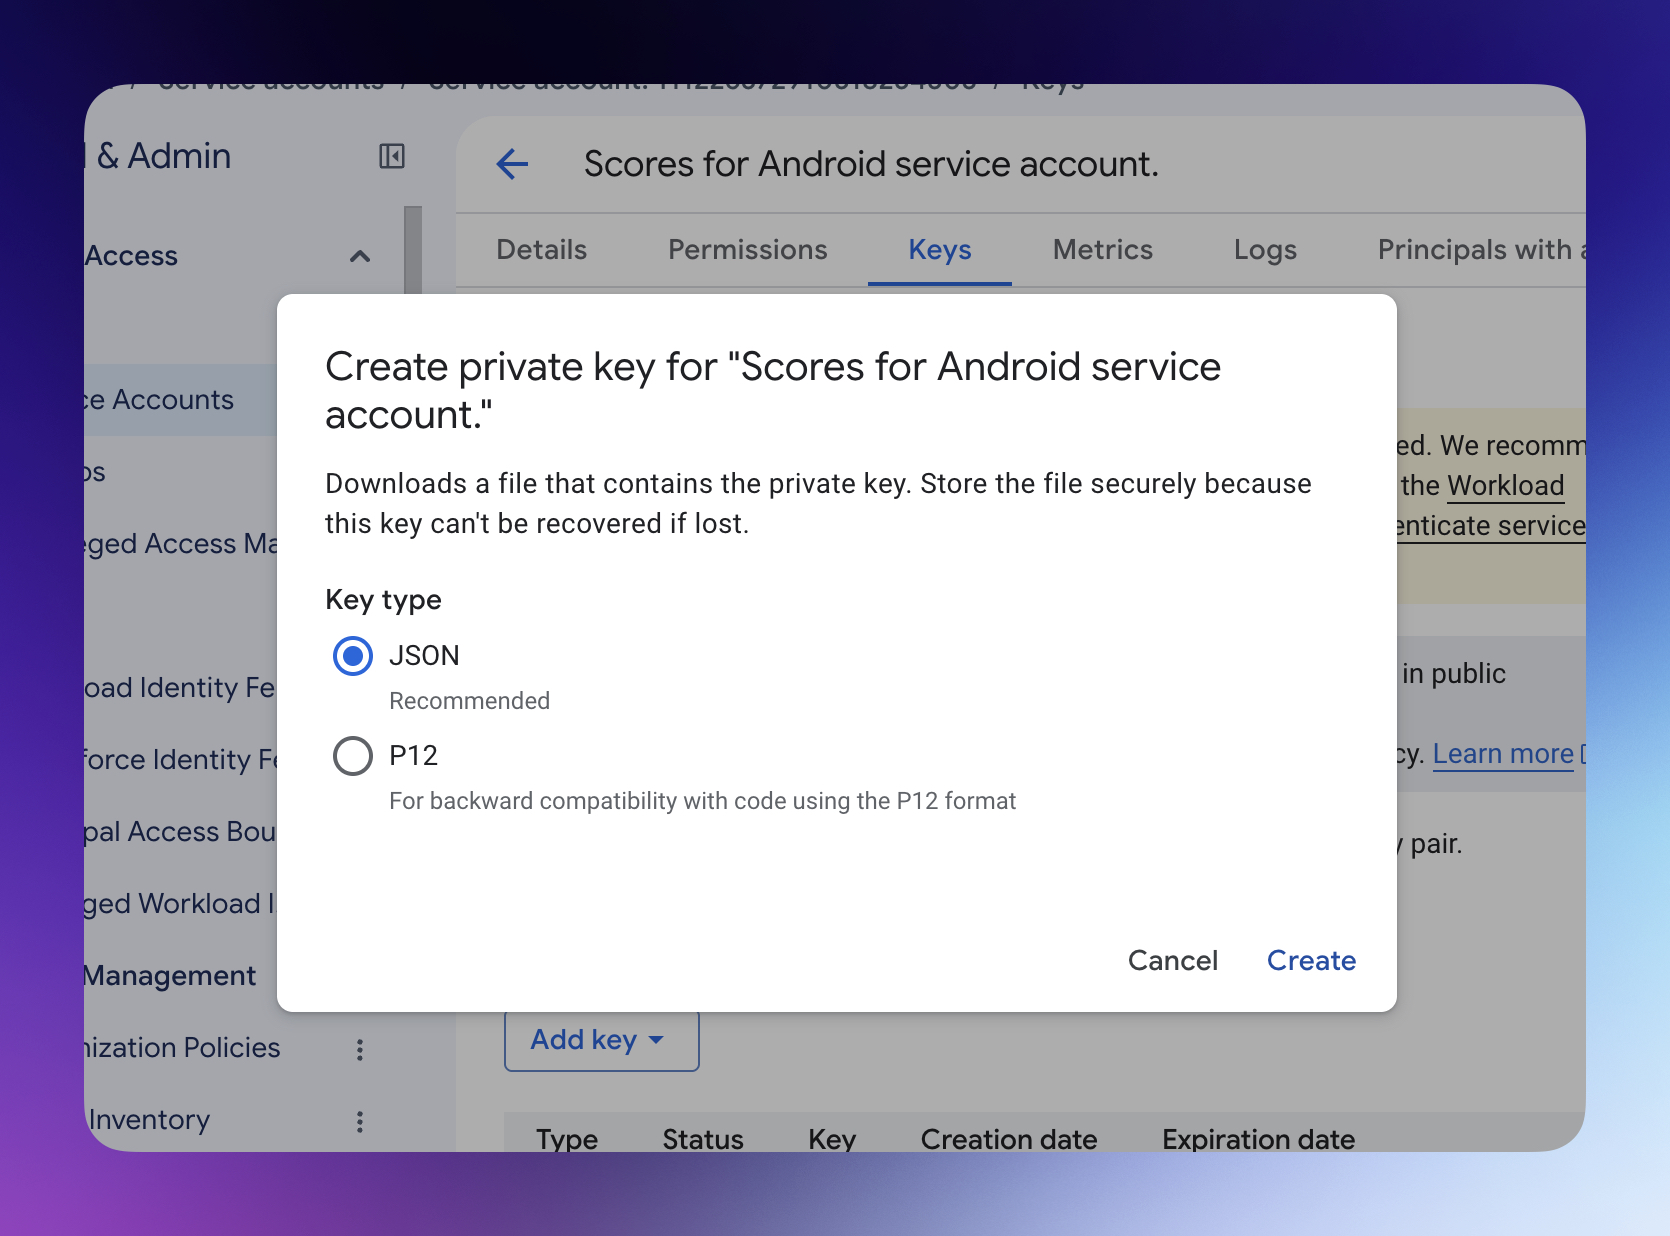
Click Add key > Create new key, select JSON, and click Create. Google Cloud downloads the key file. You upload it to Superwall in step 4.
If Google Cloud says an organization policy blocks key creation, ask an organization policy administrator to exempt the project. Organizations created on or after May 3, 2024 block key creation by default with the
iam.disableServiceAccountKeyCreationconstraint.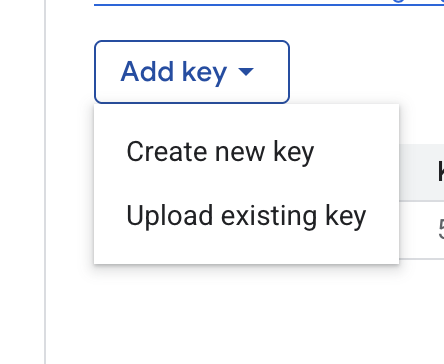
Step 3: Invite the service account in Play Console
- 1
Copy the service account email
In Google Cloud, copy the service account's email address from its Details tab. The key file also contains it as
client_email.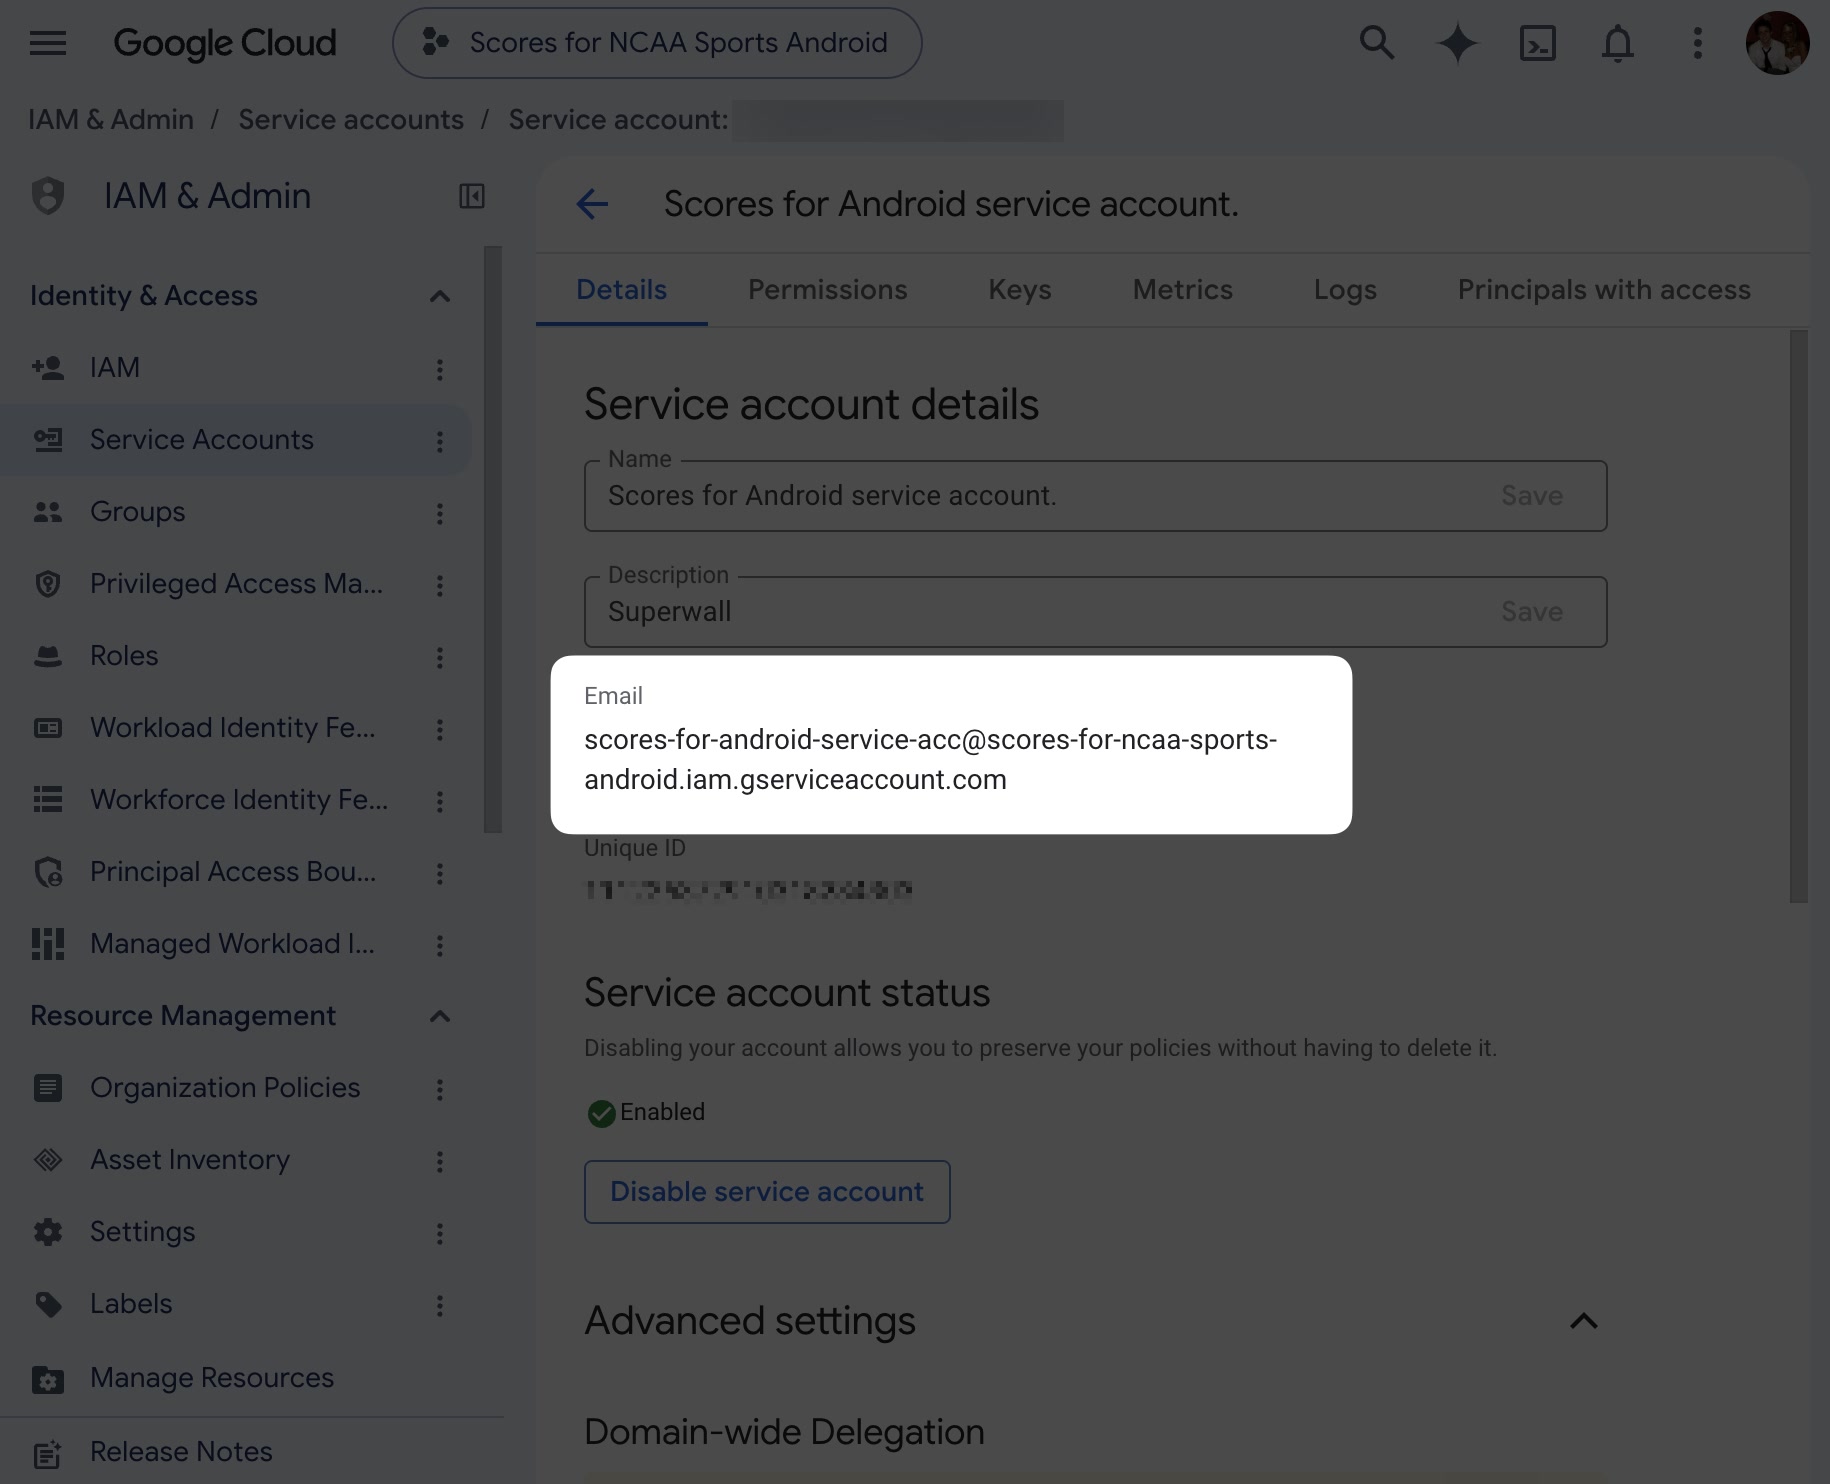
- 2
Invite the service account
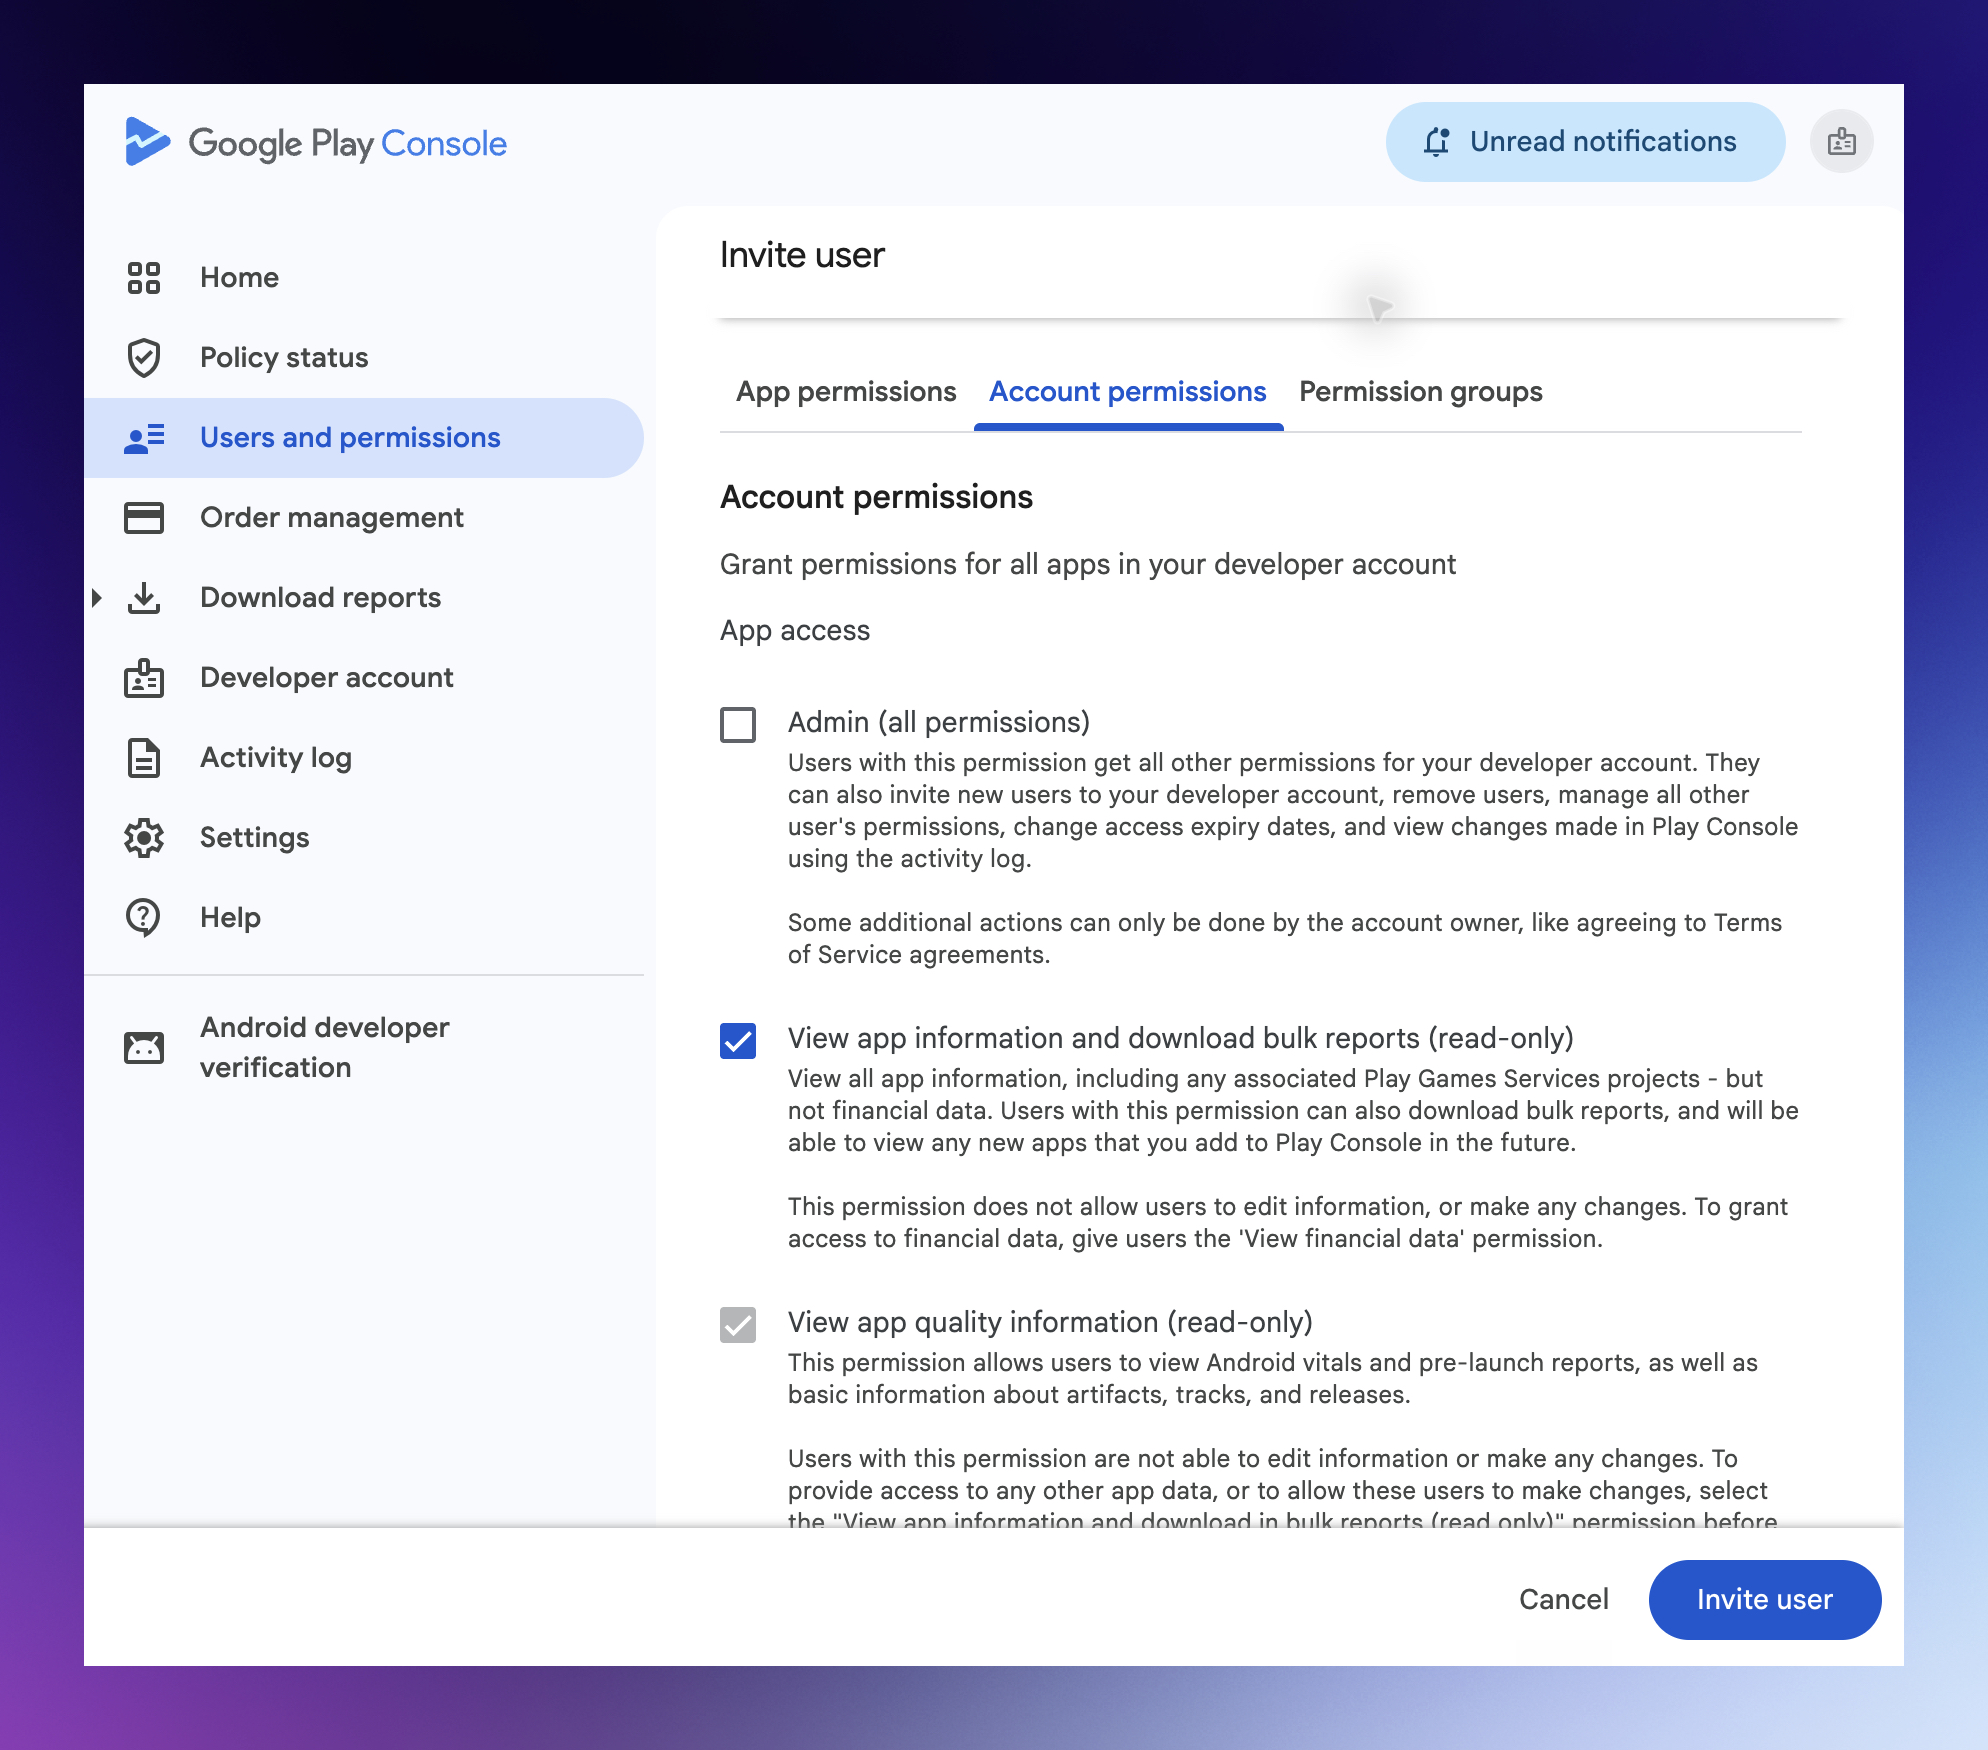
In Play Console, open Users and permissions and click Invite new users. Paste the email address.
- 3
Grant permissions
On the Account permissions tab, turn on:
- View app information and download bulk reports (read-only)
- View financial data, orders, and cancellation survey responses
- Manage orders and subscriptions
Click Invite user.
Google can take up to 48 hours to apply a newly invited service account's permissions. Until then, the Service account can access the app in Play Console check in step 4 fails.
Step 4: Connect Google Play in Superwall
- 1
Open Revenue tracking
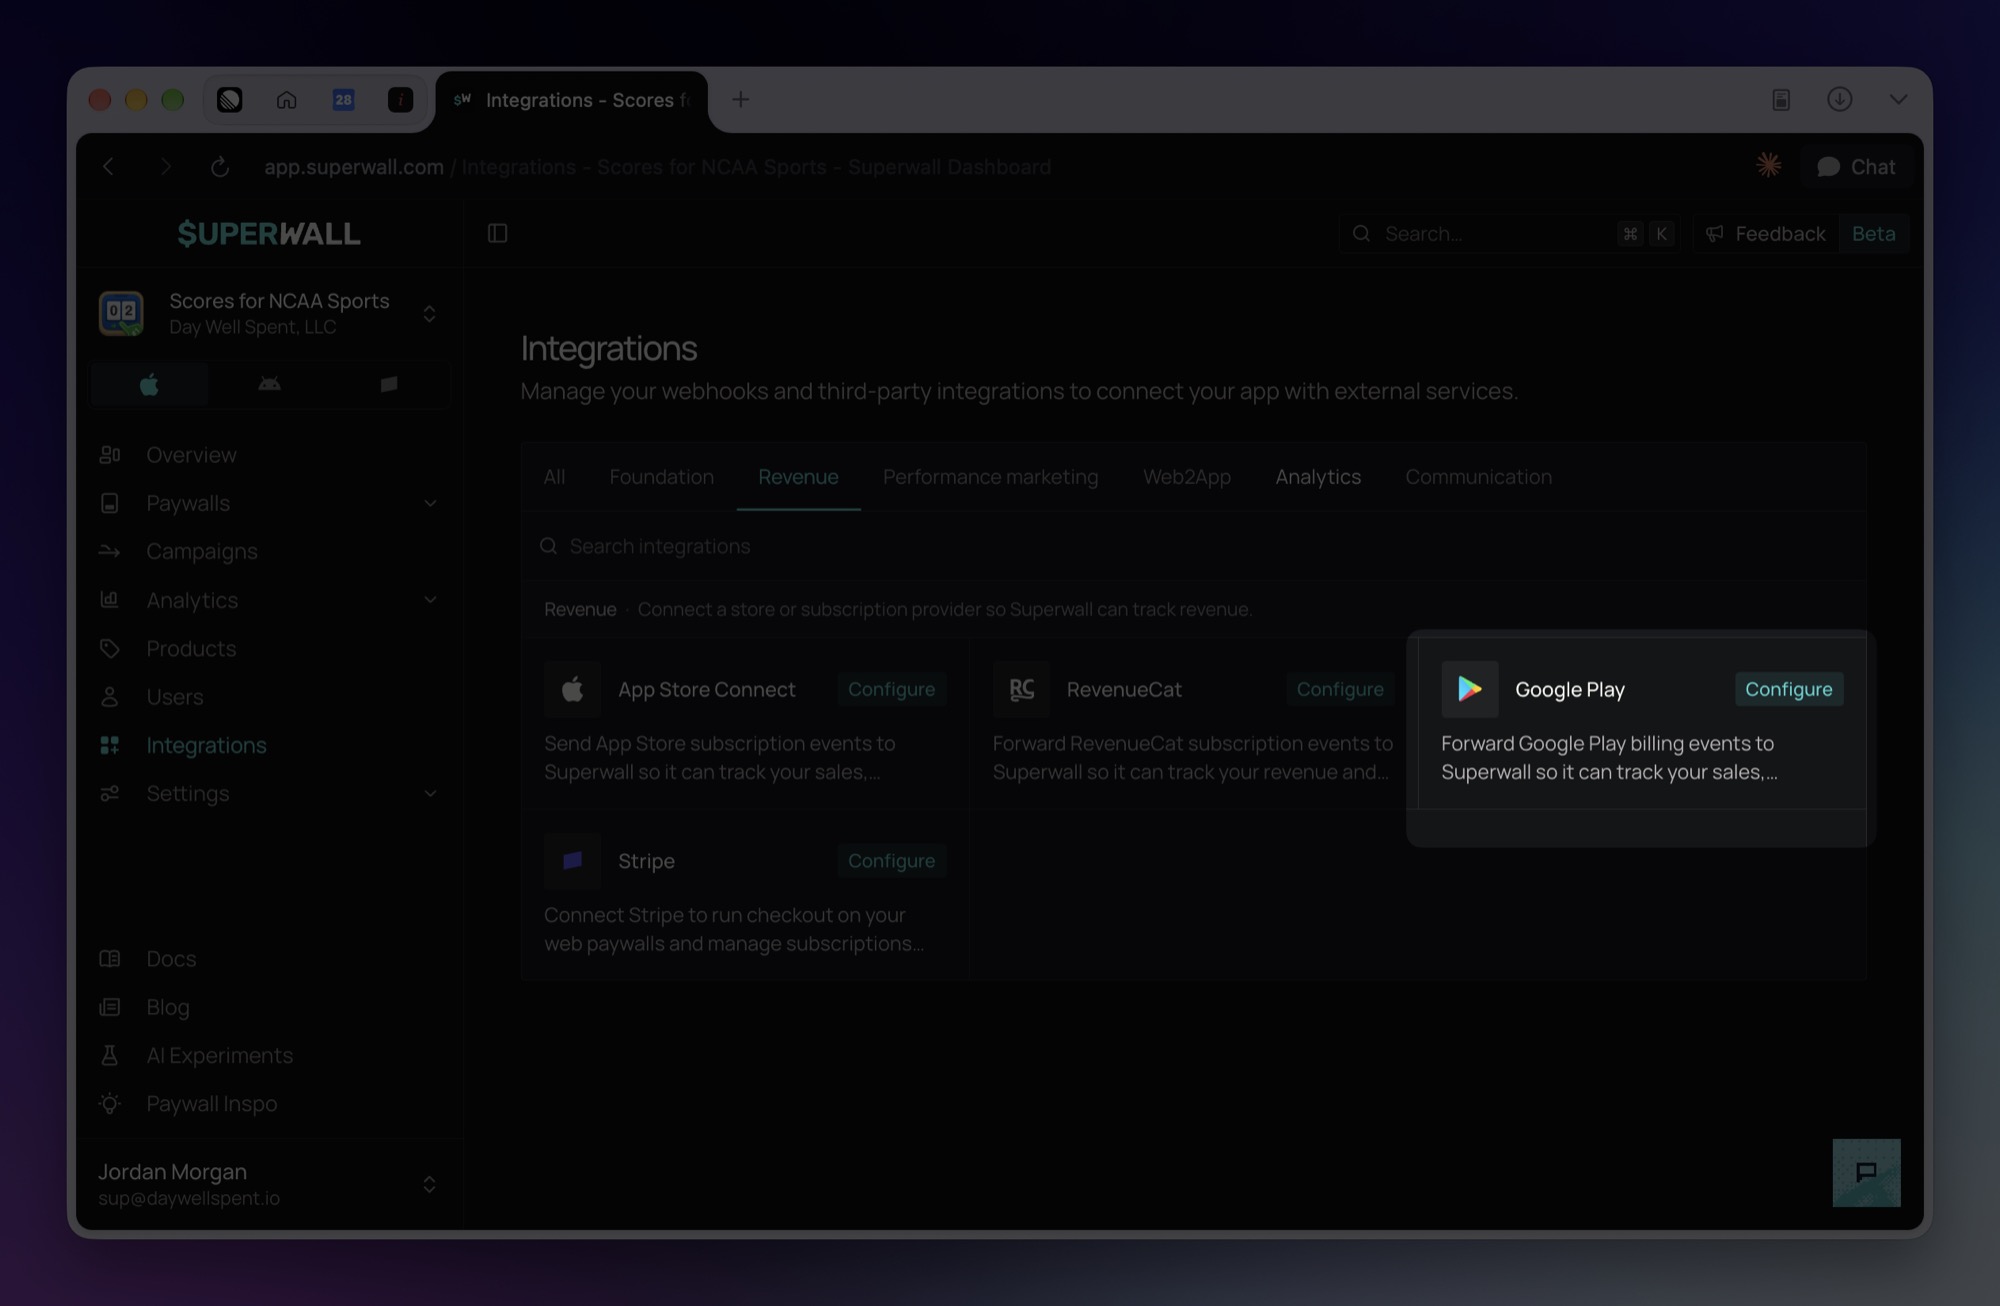
In the new dashboard, click Integrations in the sidebar. Under Revenue, click Google Play. This opens the Revenue tracking page.
- 2
Select Google Play
Click Google Play to make it your app's revenue provider. The Google Play setup card appears below.
The revenue provider sets which source Superwall's charts use for revenue. If you send revenue through RevenueCat, set up RevenueCat instead.
- 3
Add the package name and key
In Package name, enter your app's application ID from Play Console, such as
com.example.app. It's listed under your app's name in Play Console. Superwall fills this in when your app's settings already include it.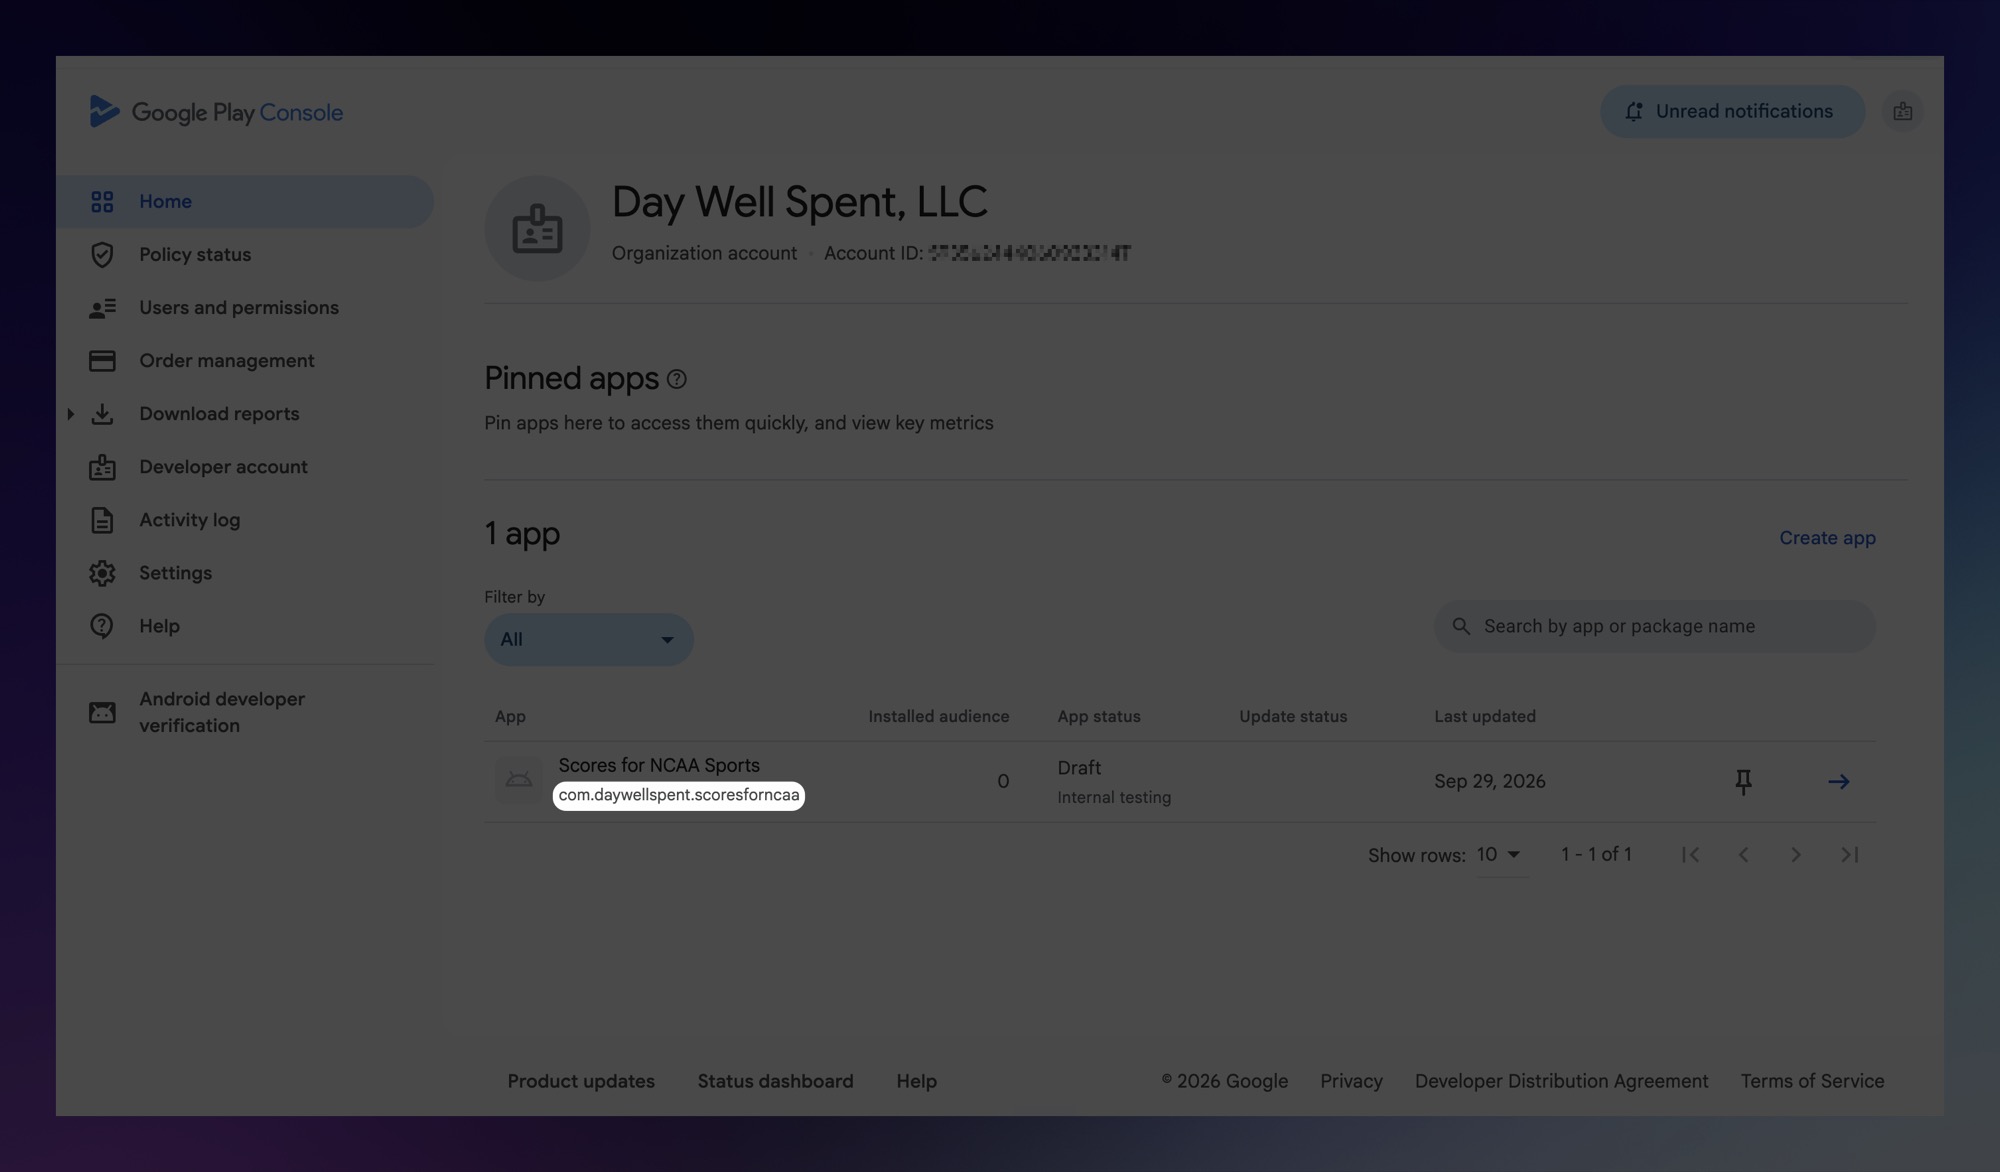
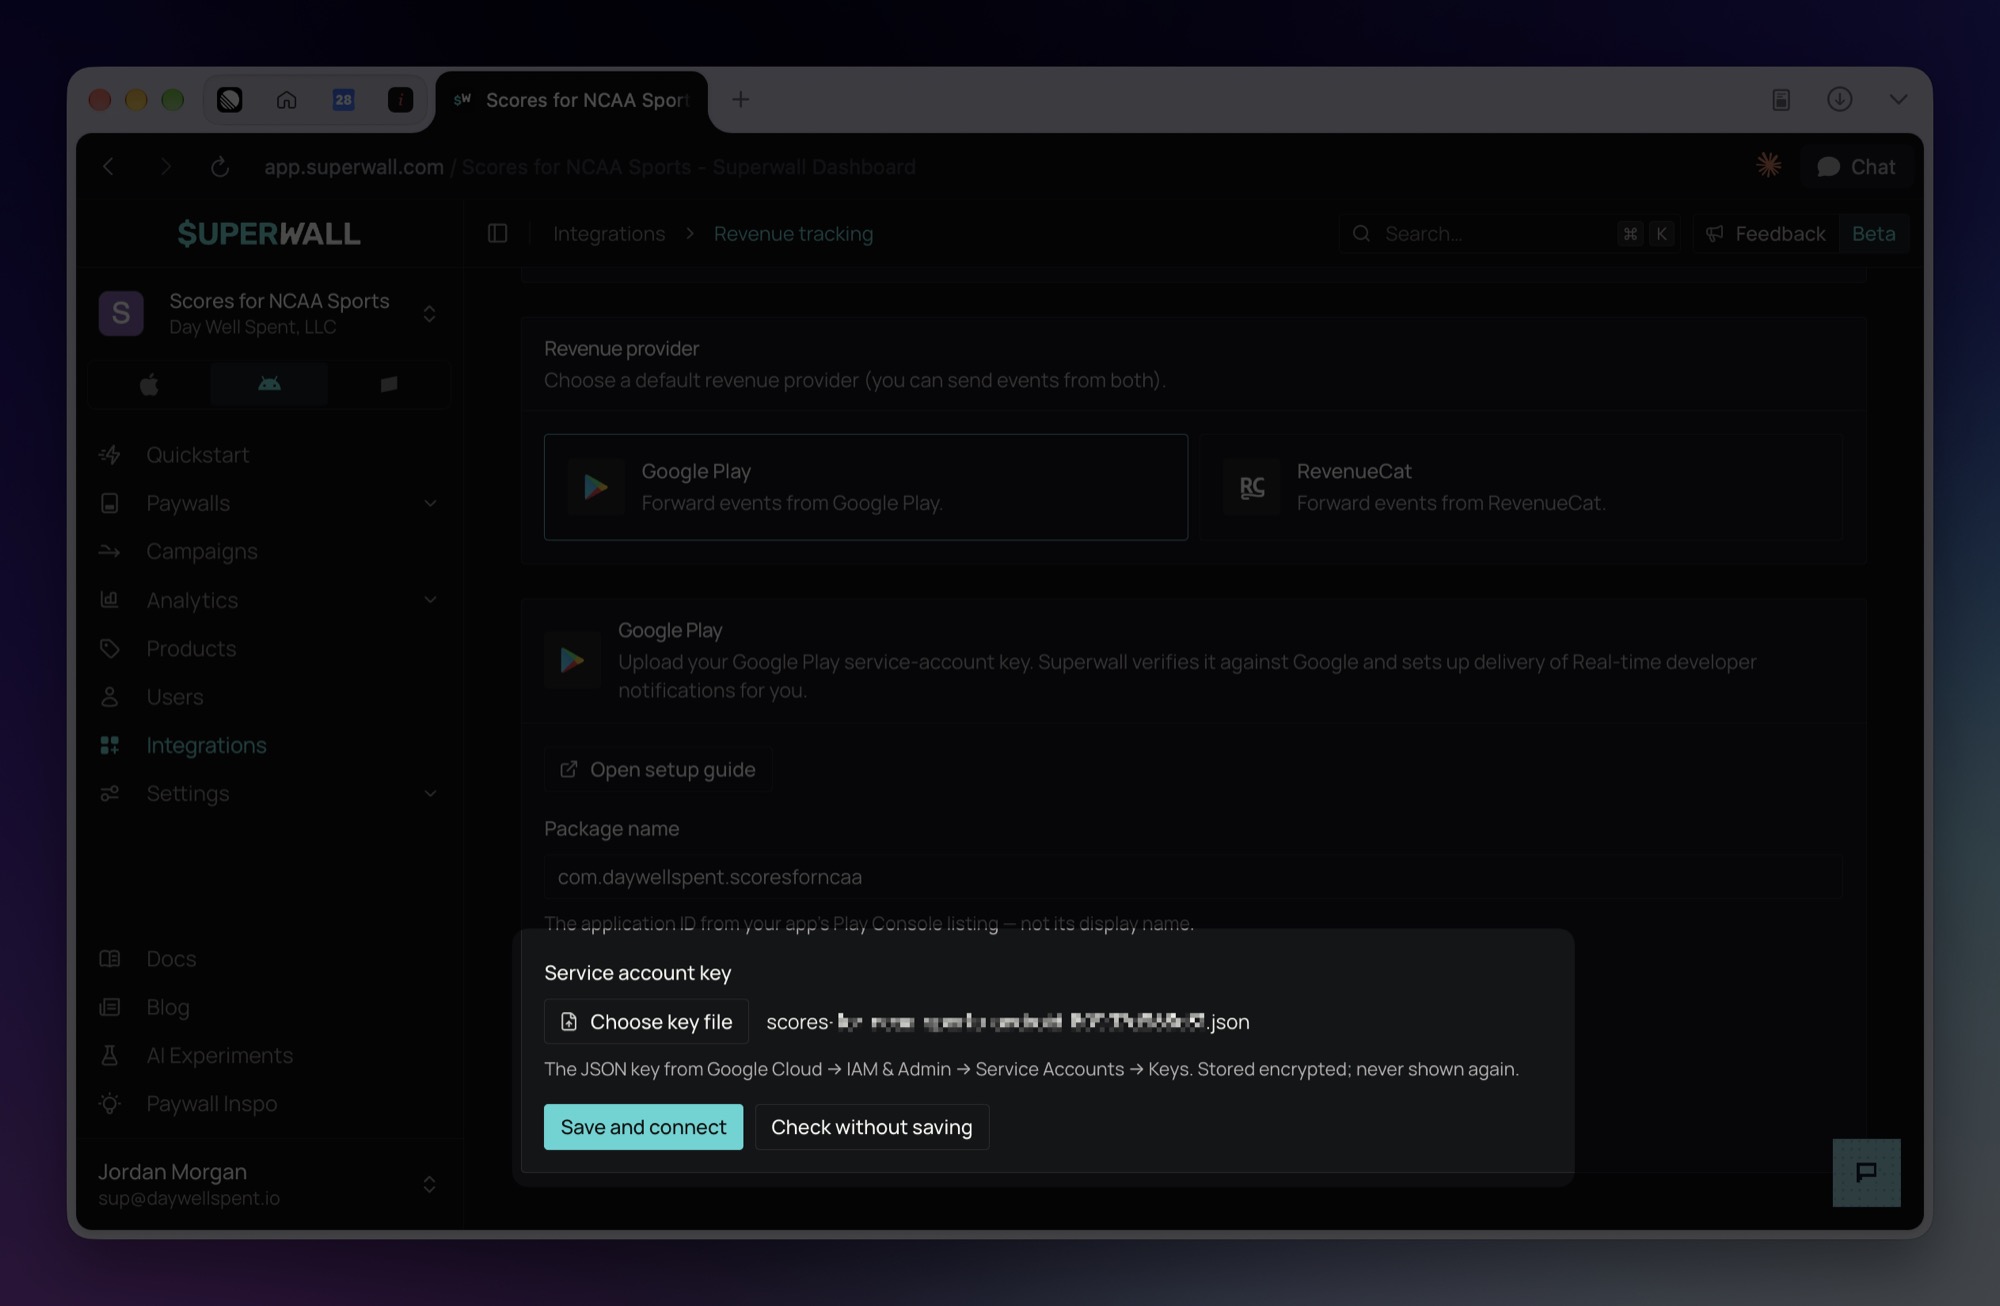
Click Choose key file and select the JSON key from step 2.
- 4
Save and connect
Click Save and connect. Superwall checks the key with Google before it stores anything. If a check fails, Superwall shows Nothing was saved with the reason, and nothing is stored. See Troubleshooting.
When the save succeeds, Superwall shows Google Play connected, and the key field reads Using the stored key for your service account's email.
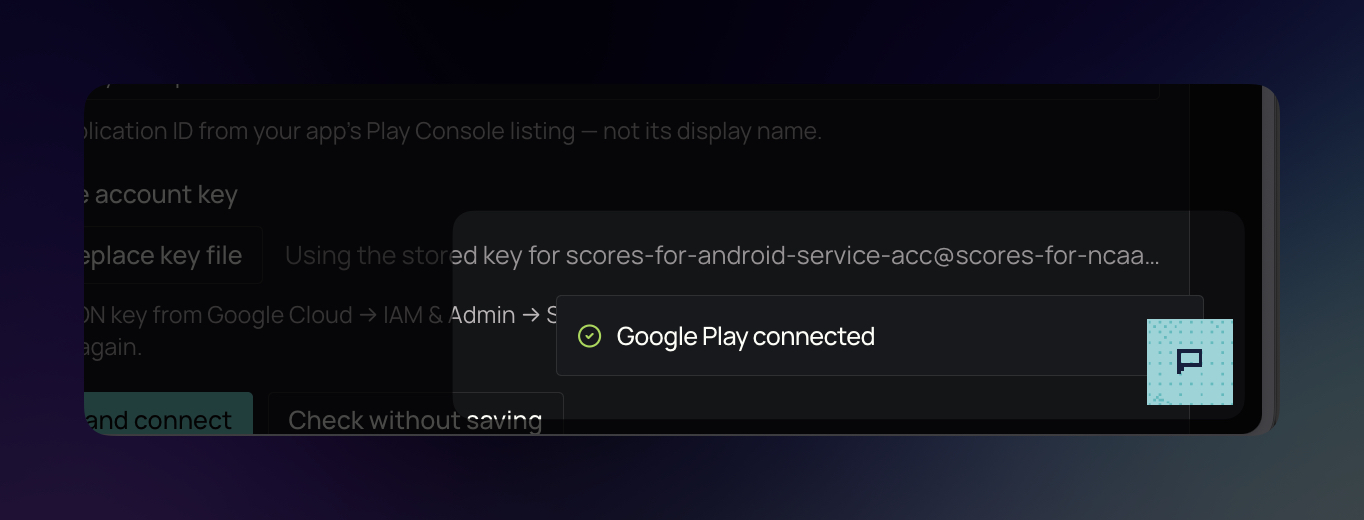
To run the checks without saving anything, click Check without saving.
When none of the checks fail, Superwall saves the key and sets up notification delivery in your Google Cloud project:
- If a topic in the project already lets Google Play publish to it, Superwall uses that topic. Otherwise, Superwall creates a topic named
Play-Store-Notificationsand grantsgoogle-play-developer-notifications@system.gserviceaccount.comthe Pub/Sub Publisher role on it. - Superwall adds a push subscription to the topic. Its name starts with
Superwall-, and it delivers each notification to Superwall.
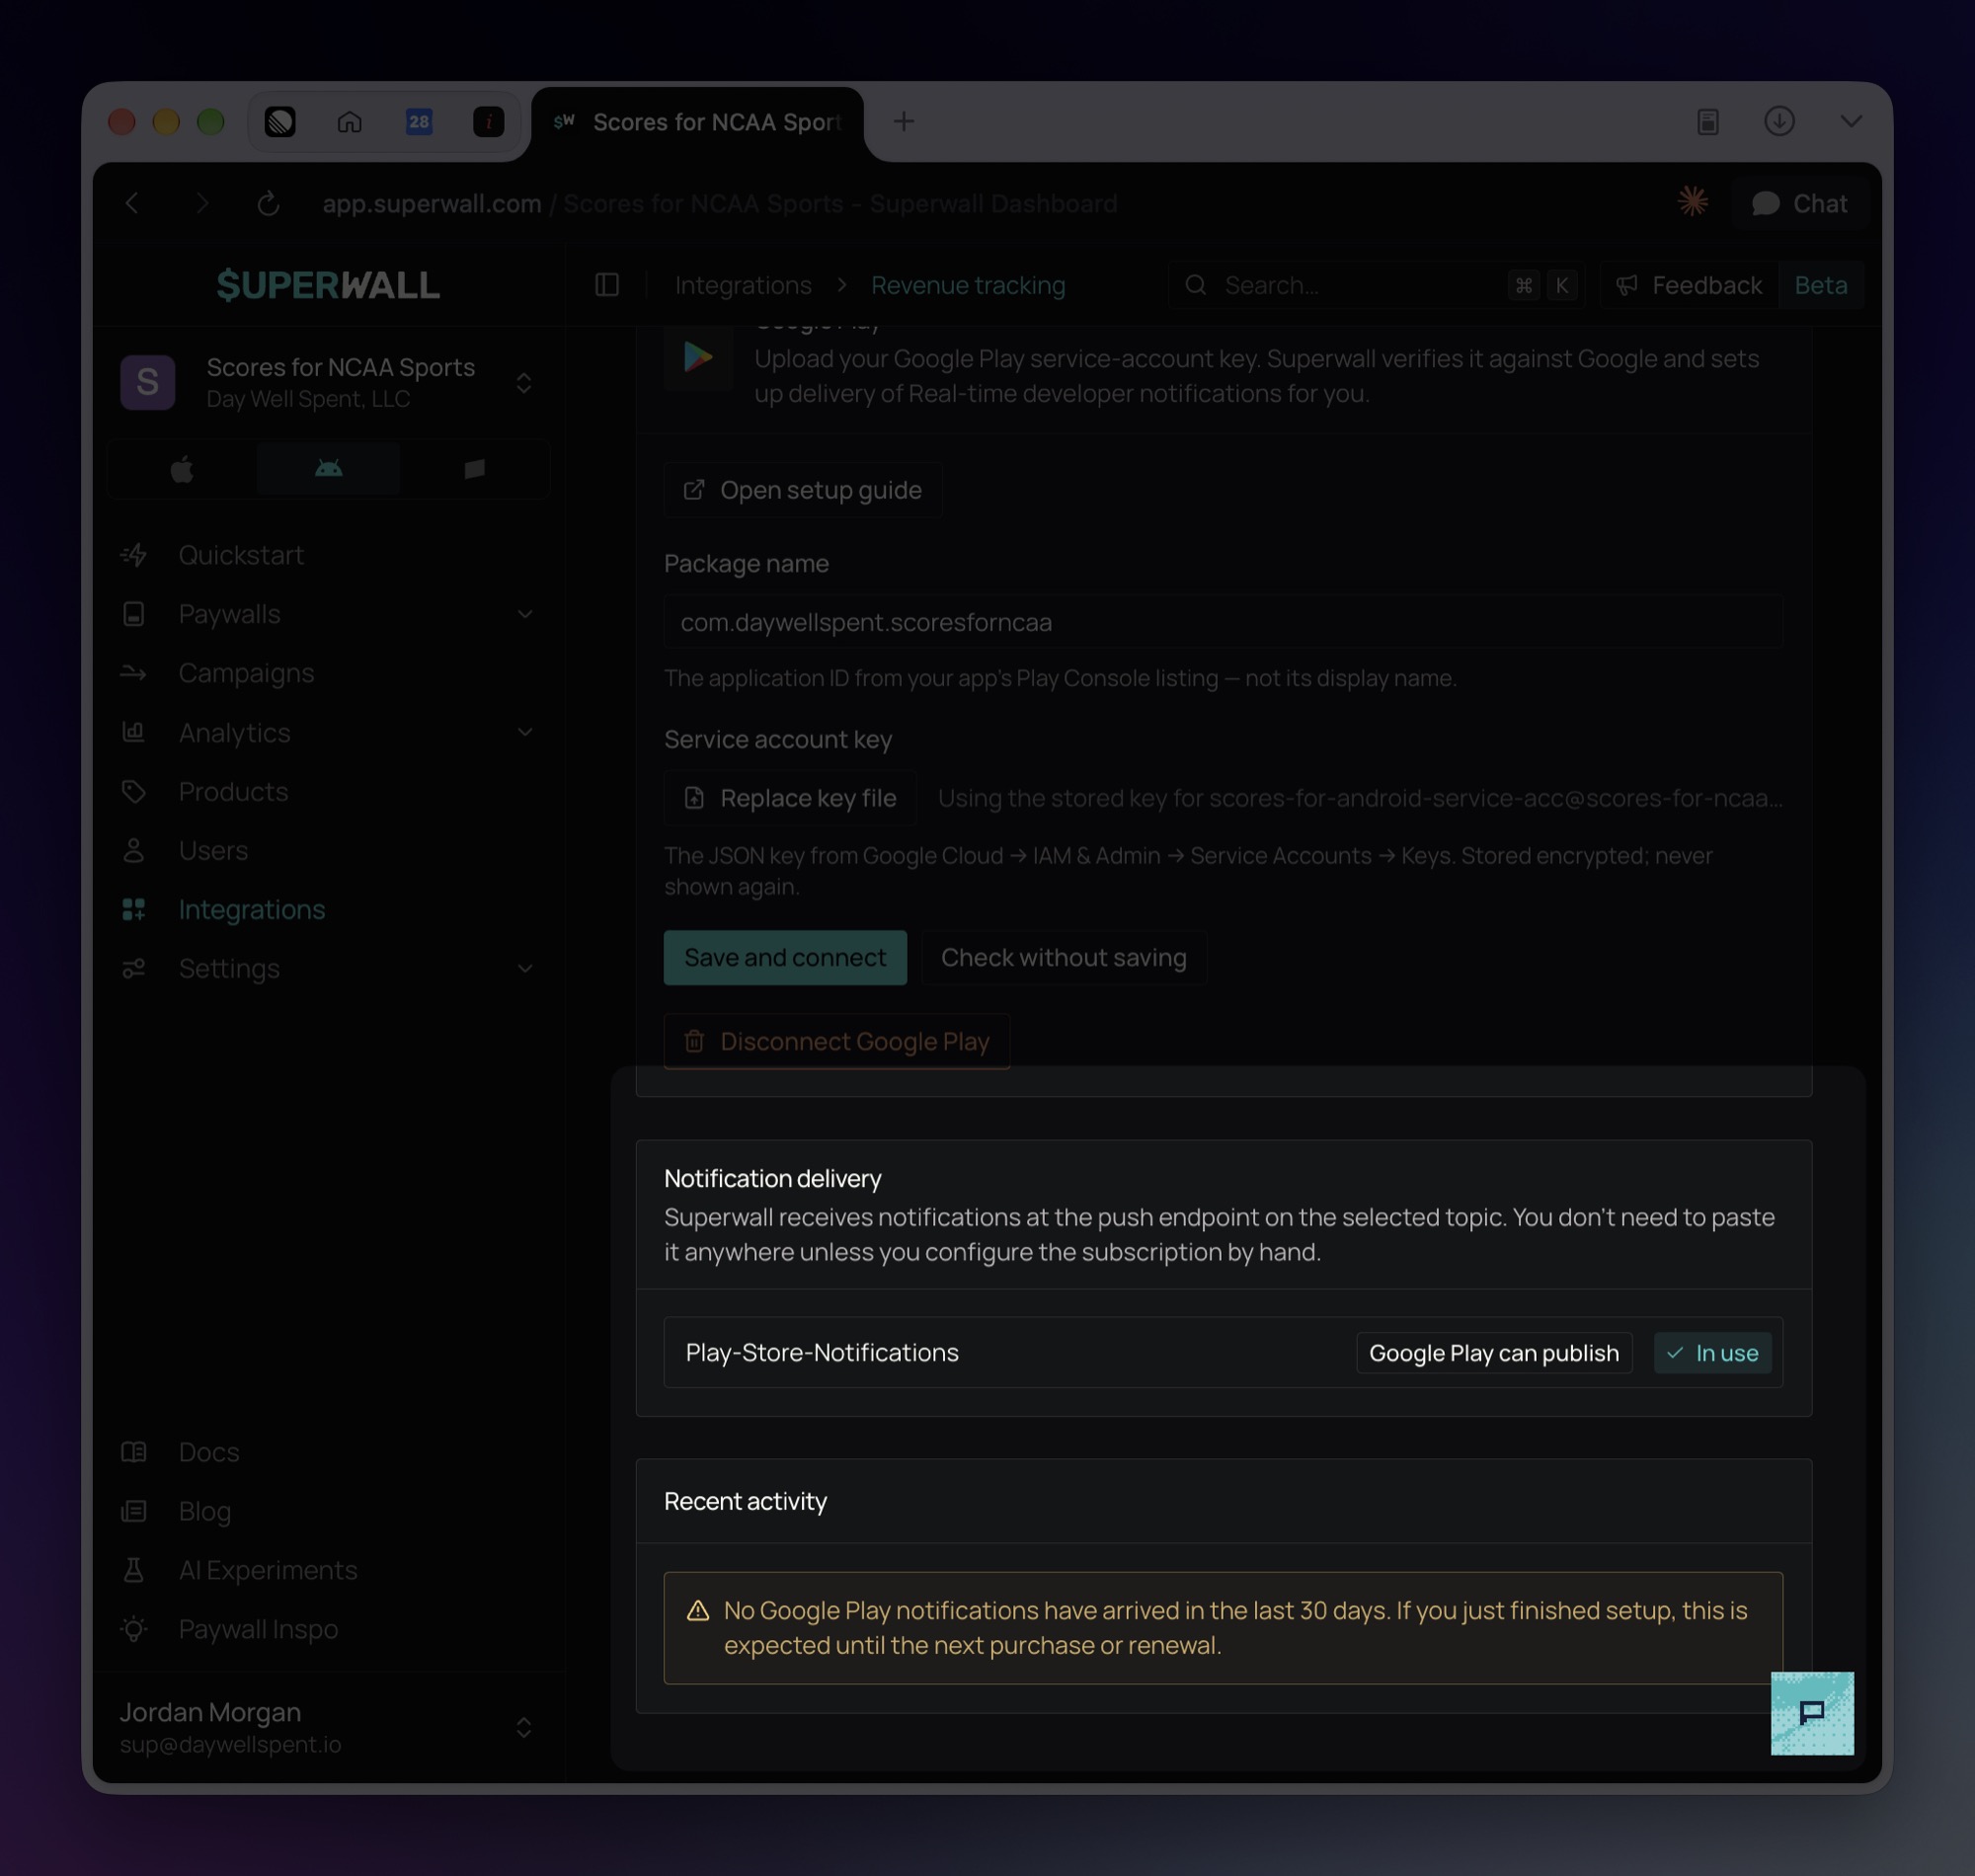
After you save, a Notification delivery card appears below the setup card. It lists the topics in your Google Cloud project by their short names, such as Play-Store-Notifications, with these labels:
| Label | Meaning |
|---|---|
| In use | Superwall's subscription is on this topic. |
| Google Play can publish | Google Play has the Pub/Sub Publisher role on this topic. |
| Missing publisher access | Google Play can't publish to this topic. |
| Permissions unknown | The service account can't read the topic's permissions. Grant it the Pub/Sub Admin role. |
If more than one topic is marked Google Play can publish, make sure the topic marked In use is the one you enter in Play Console. To switch, click Use this topic next to the right one. Save and connect picks the topic again each time you save, so check the topic marked In use after every save.
Step 5: Turn on real-time developer notifications
- 1
Open Monetization setup
In Play Console, select your app and go to Monetize with Play > Monetization setup.
- 2
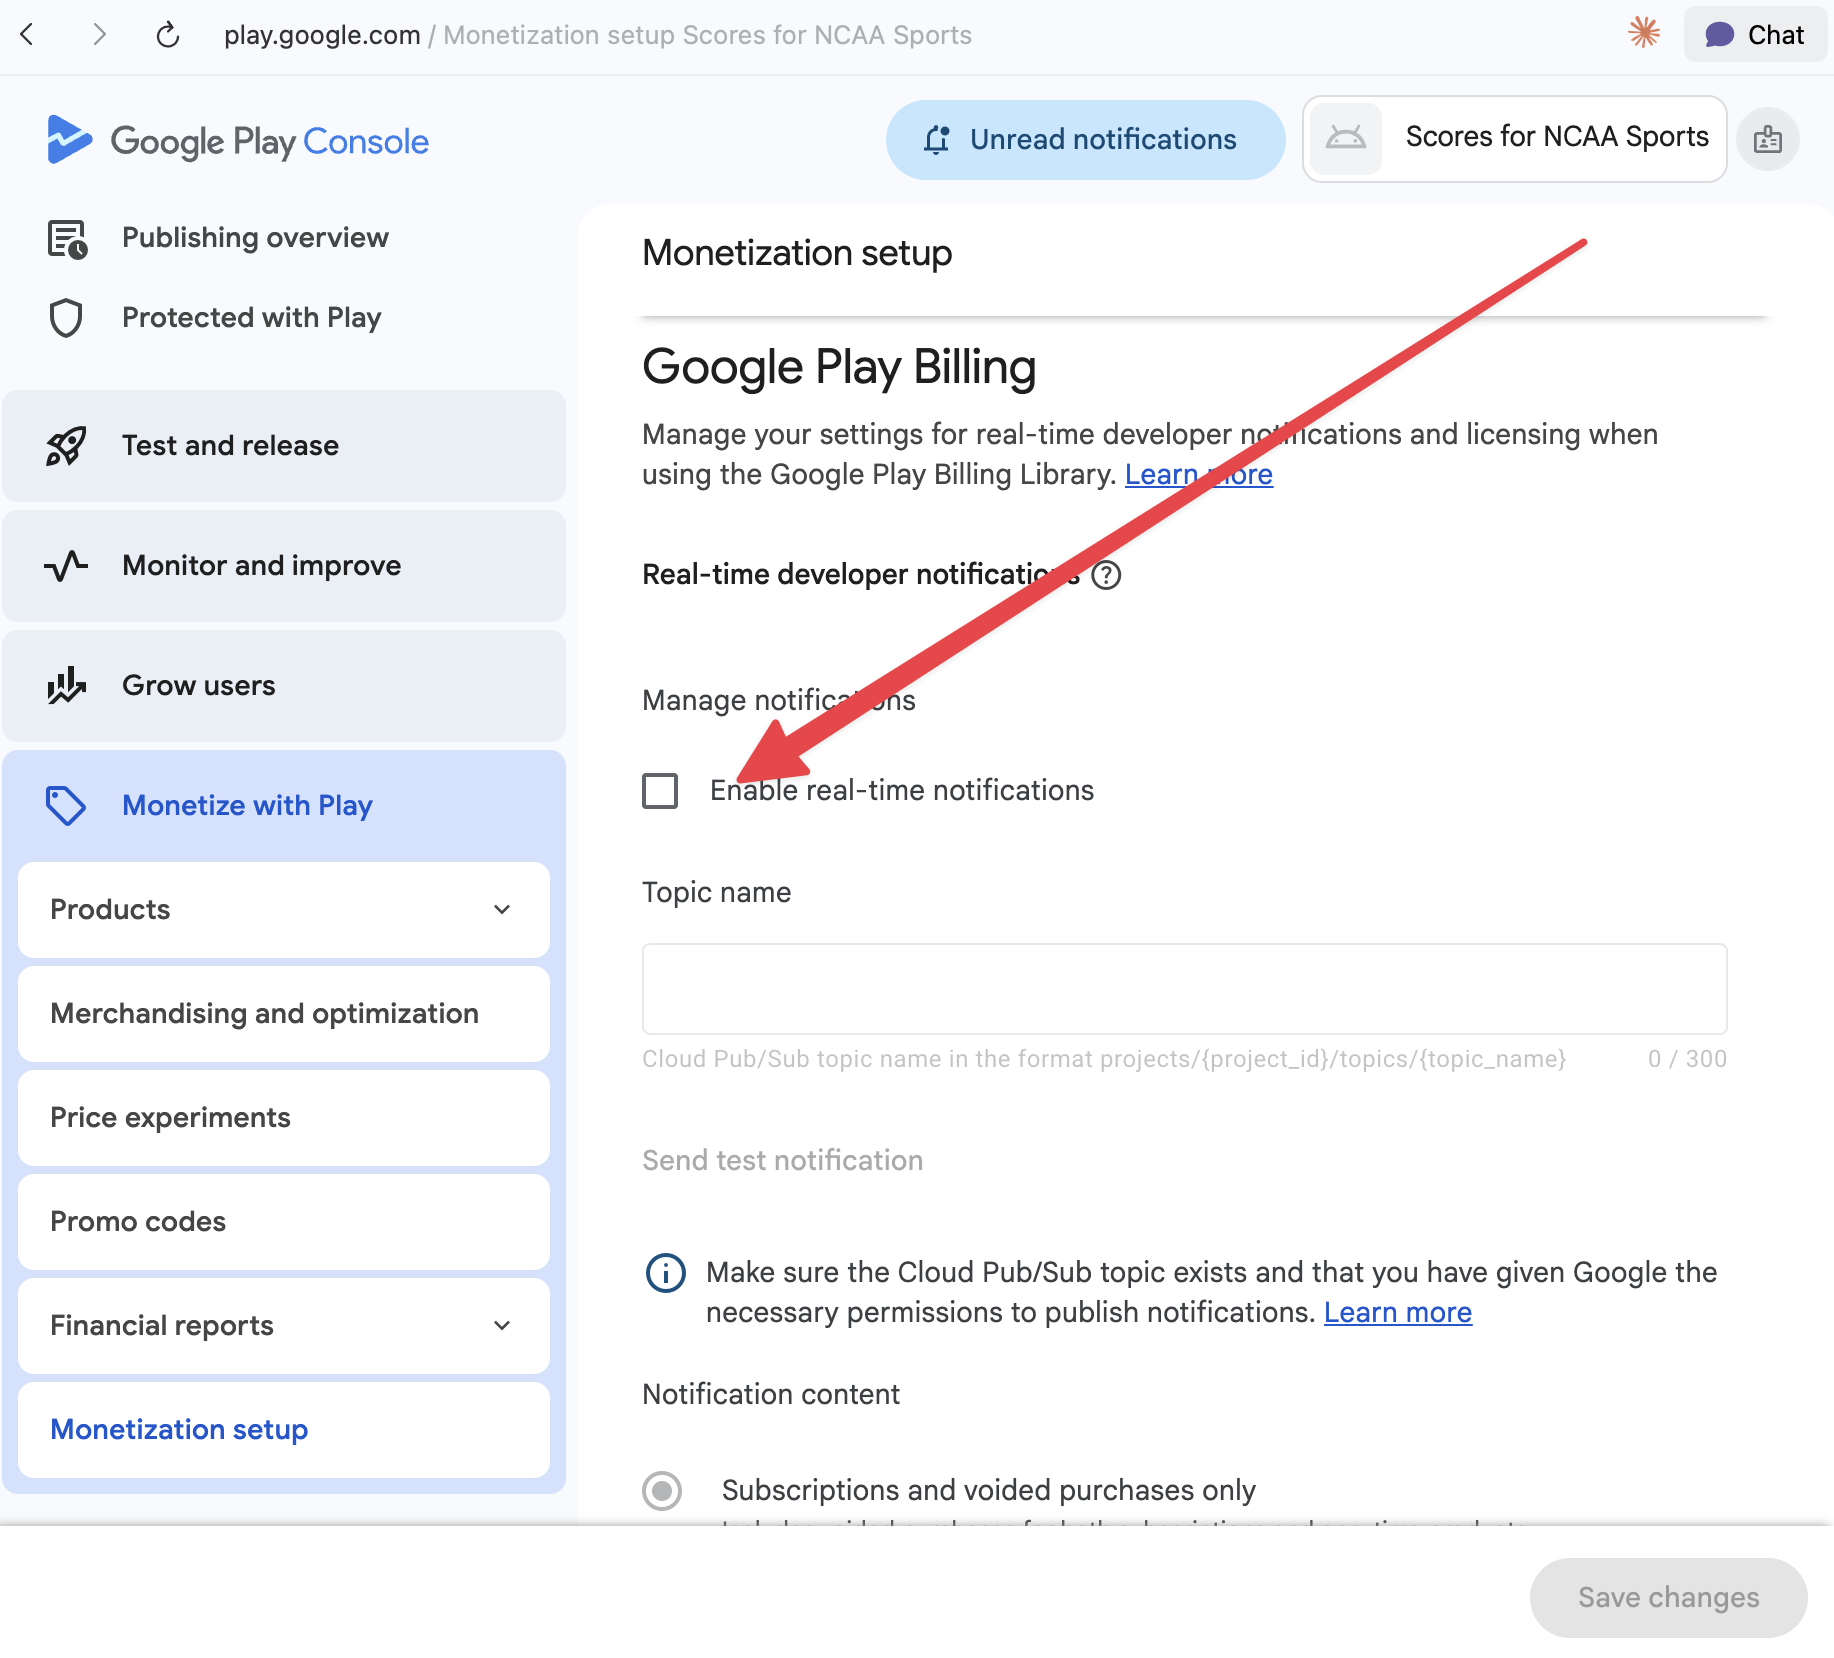
Enable real-time notifications
Check Enable real-time notifications.
- 3
Enter the full topic name
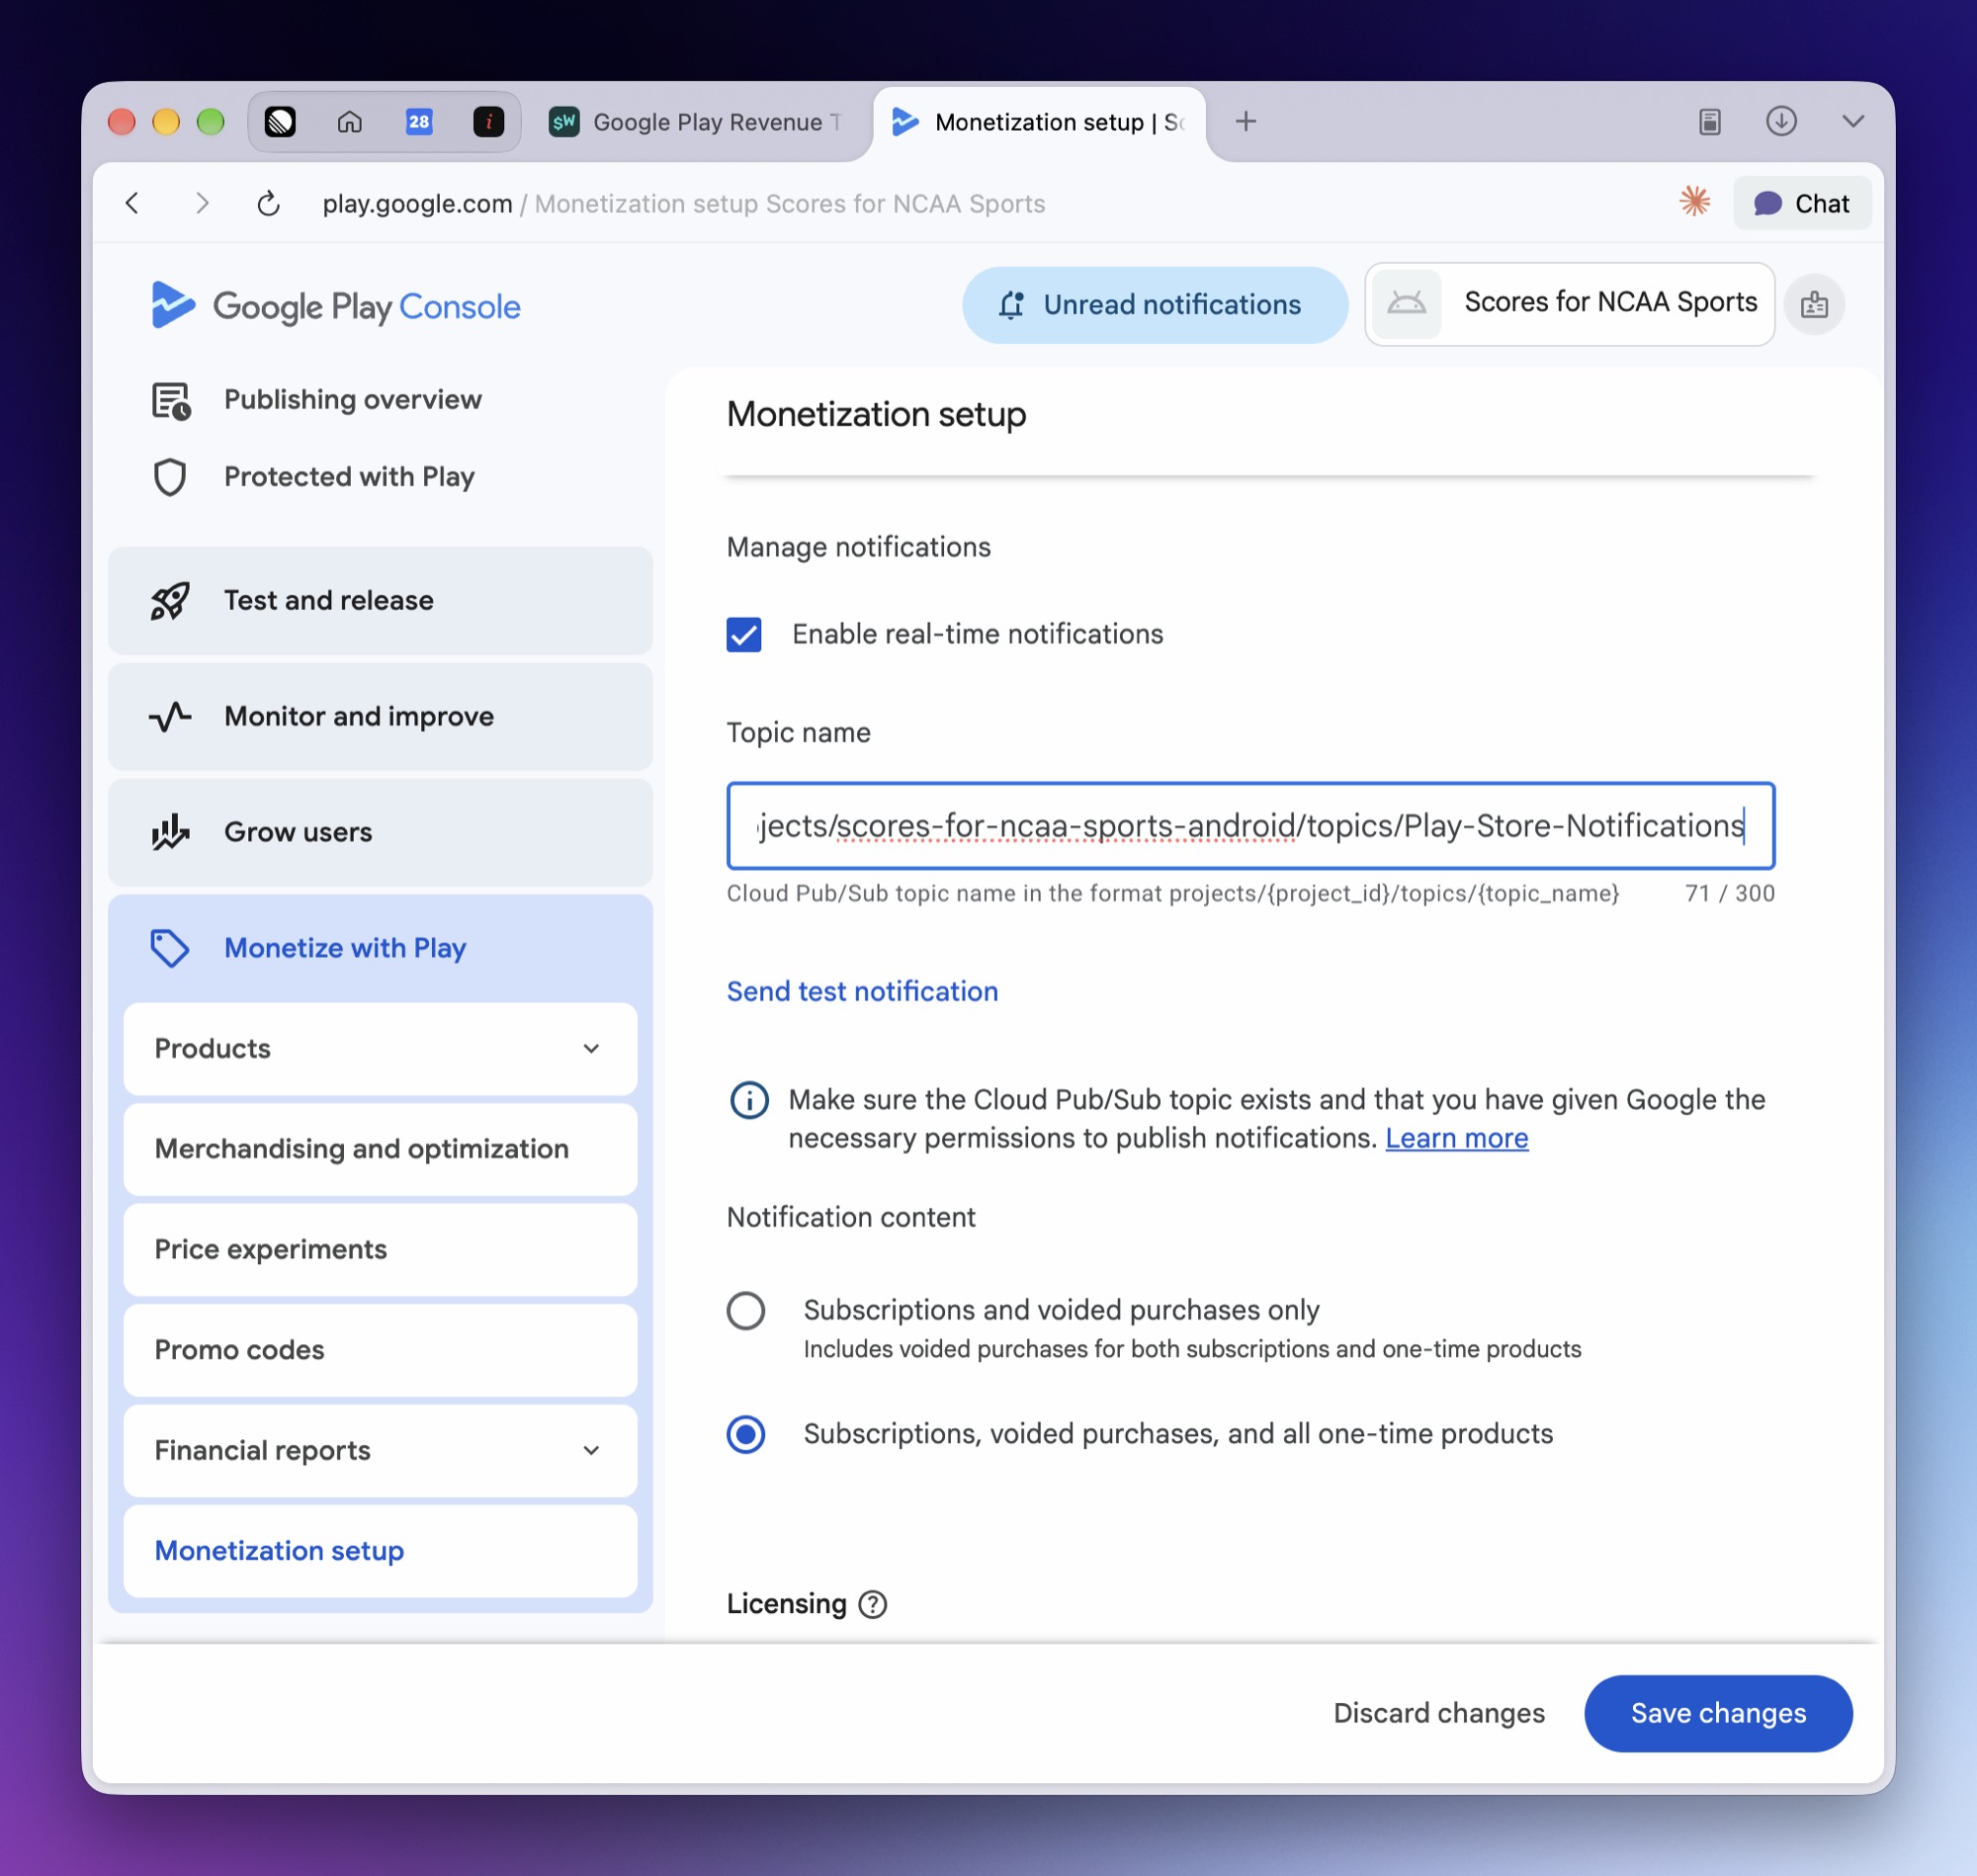
In Topic name, enter the full name of the topic marked In use in Superwall:
projects/<your-project-id>/topics/Play-Store-NotificationsReplace
<your-project-id>with your Google Cloud project ID. It's theproject_idvalue in your key file, and the part of your service account's email between@and.iam.gserviceaccount.com. If Superwall used an existing topic, replacePlay-Store-Notificationswith that topic's name. The short name on its own doesn't work. - 4
Choose notification content
Under Notification content, select Subscriptions, voided purchases, and all one-time products. Superwall processes all three. The default, Subscriptions and voided purchases only, leaves out one-time purchases.
- 5
Test and save
Click Send test notification, then click Save changes.
Verify it's working
Reload the Revenue tracking page in Superwall. Under Recent activity, Notifications received counts the notifications delivered to Superwall in the last 30 days, including test notifications from Play Console.
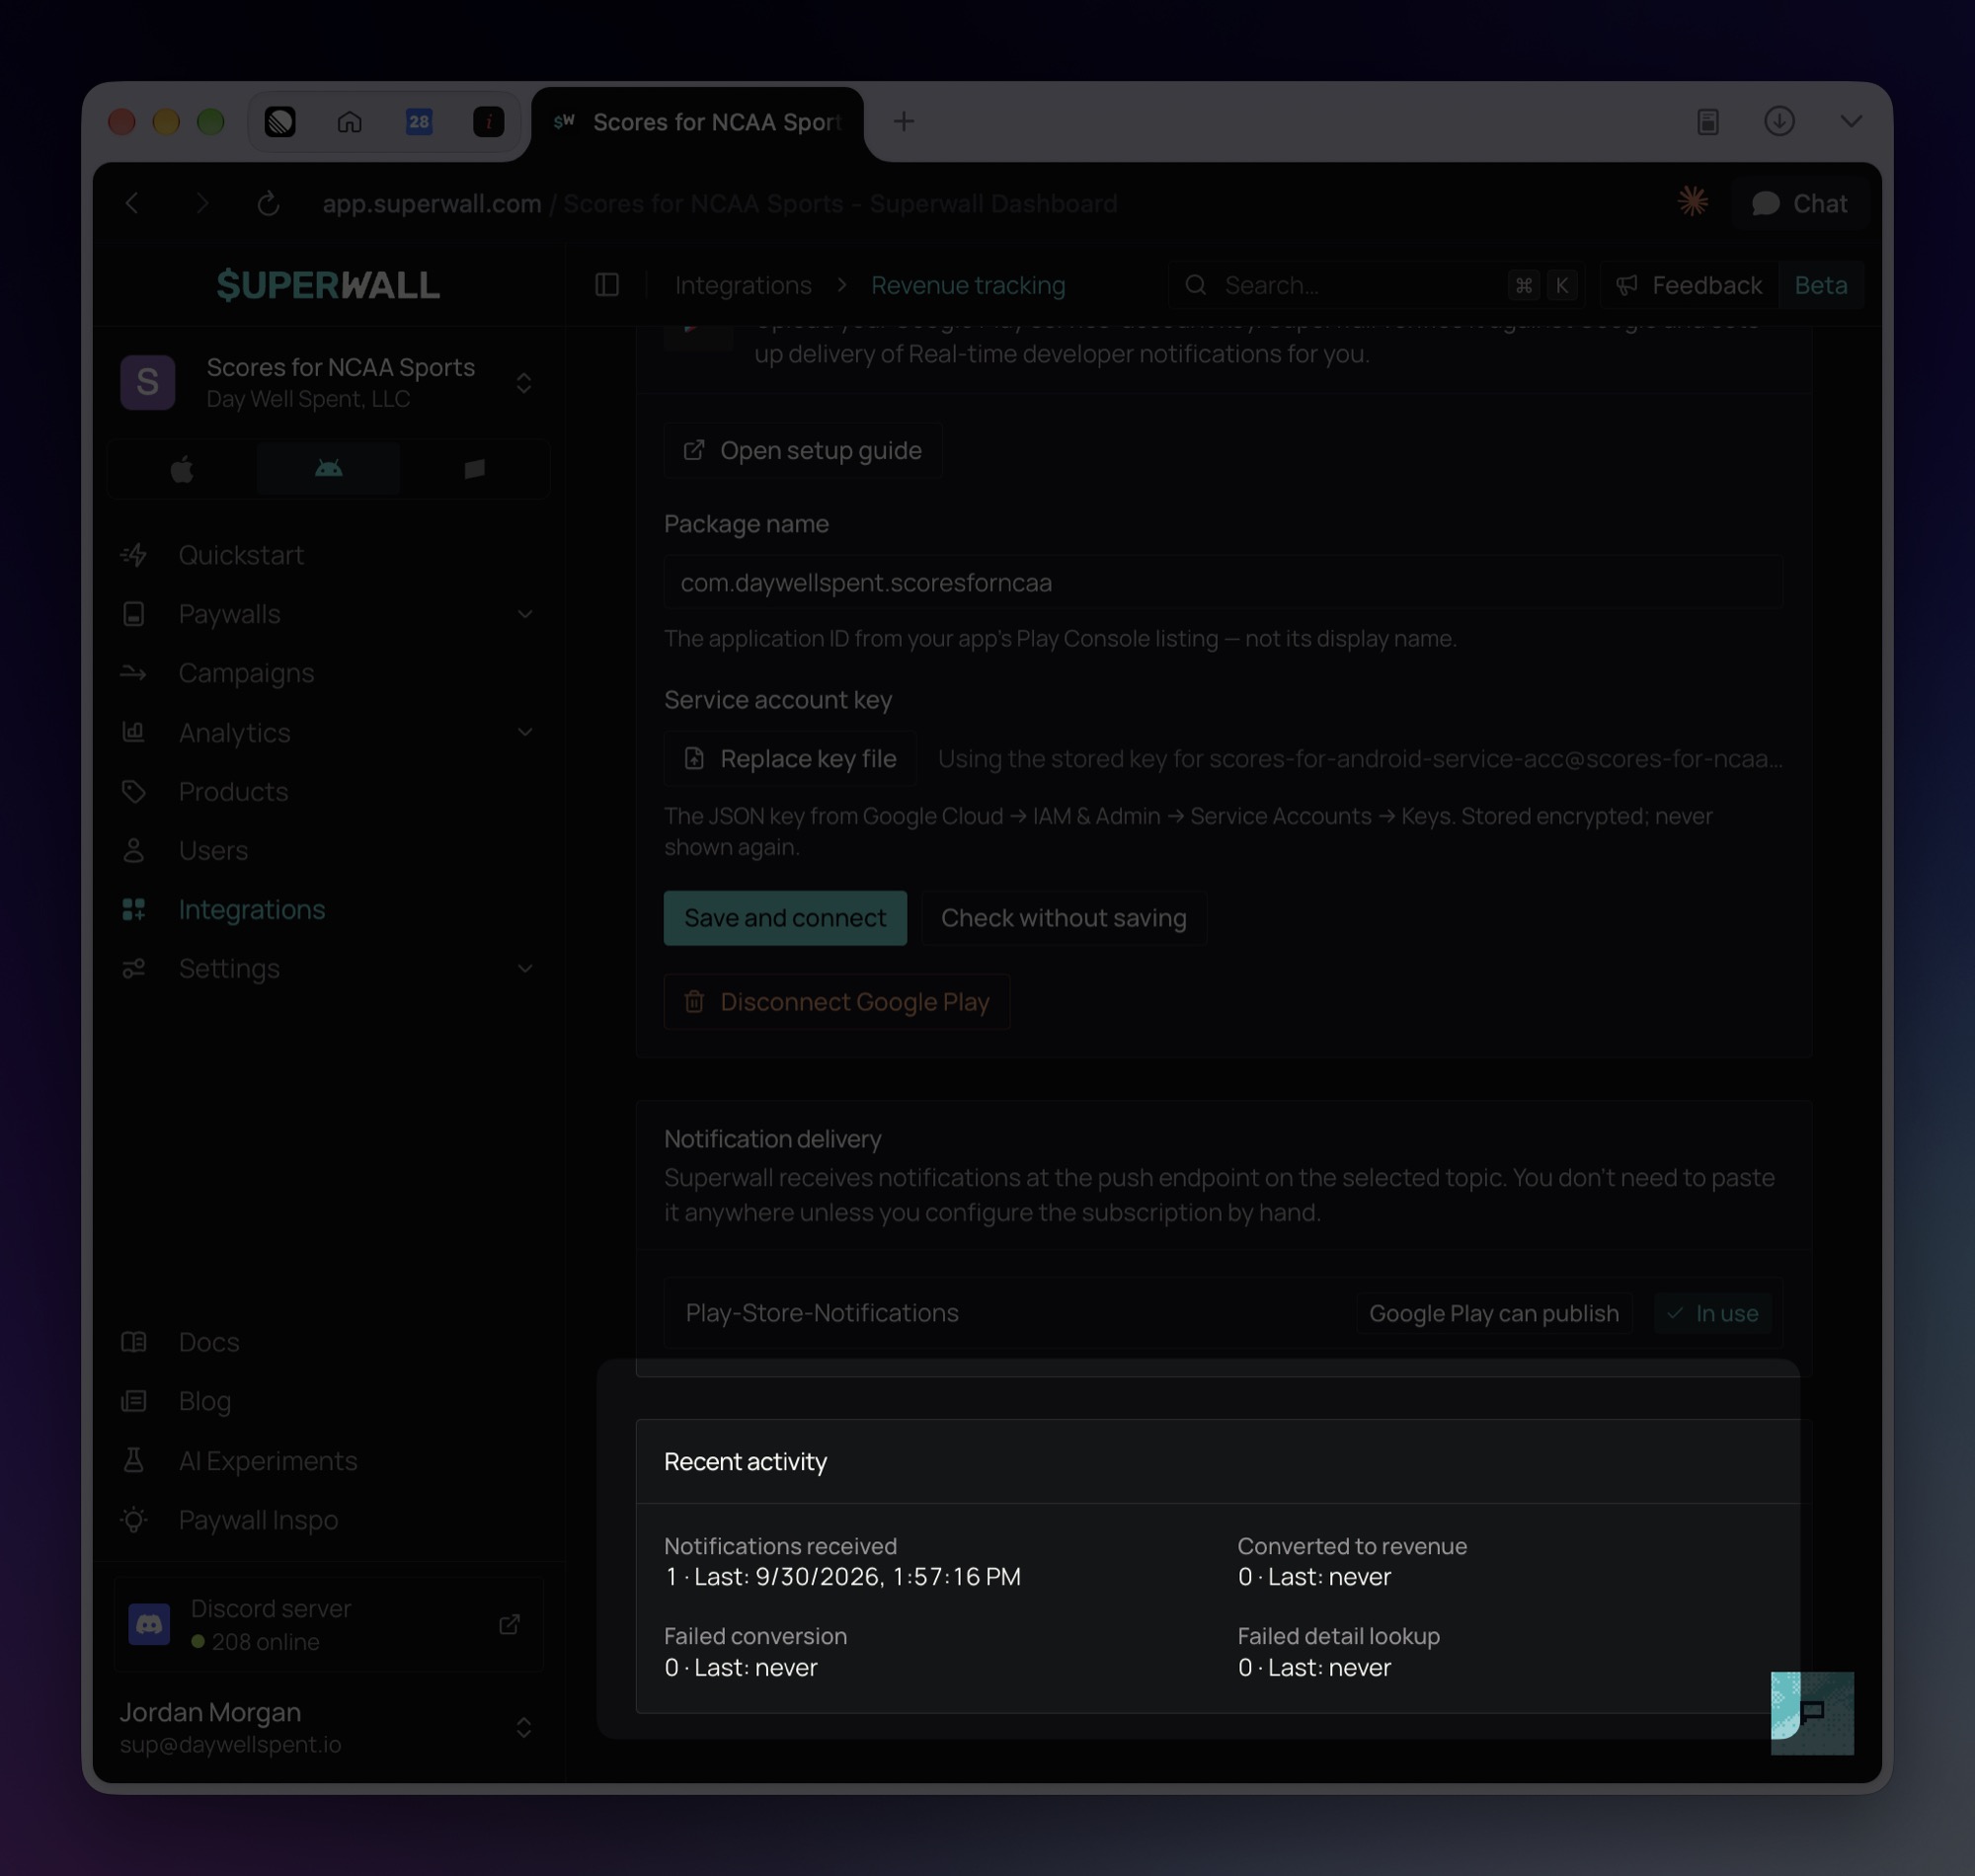
If Recent activity still says no Google Play notifications have arrived, check that Topic name in Play Console matches the topic marked In use.
Troubleshooting
To see which check fails, click Check without saving. It runs the checks in order and stops at the first one that fails, and the checks after it are grayed out. It doesn't save anything. Fix the failing check, then click Save and connect. After a failed save, choose your key file again and check Package name first.
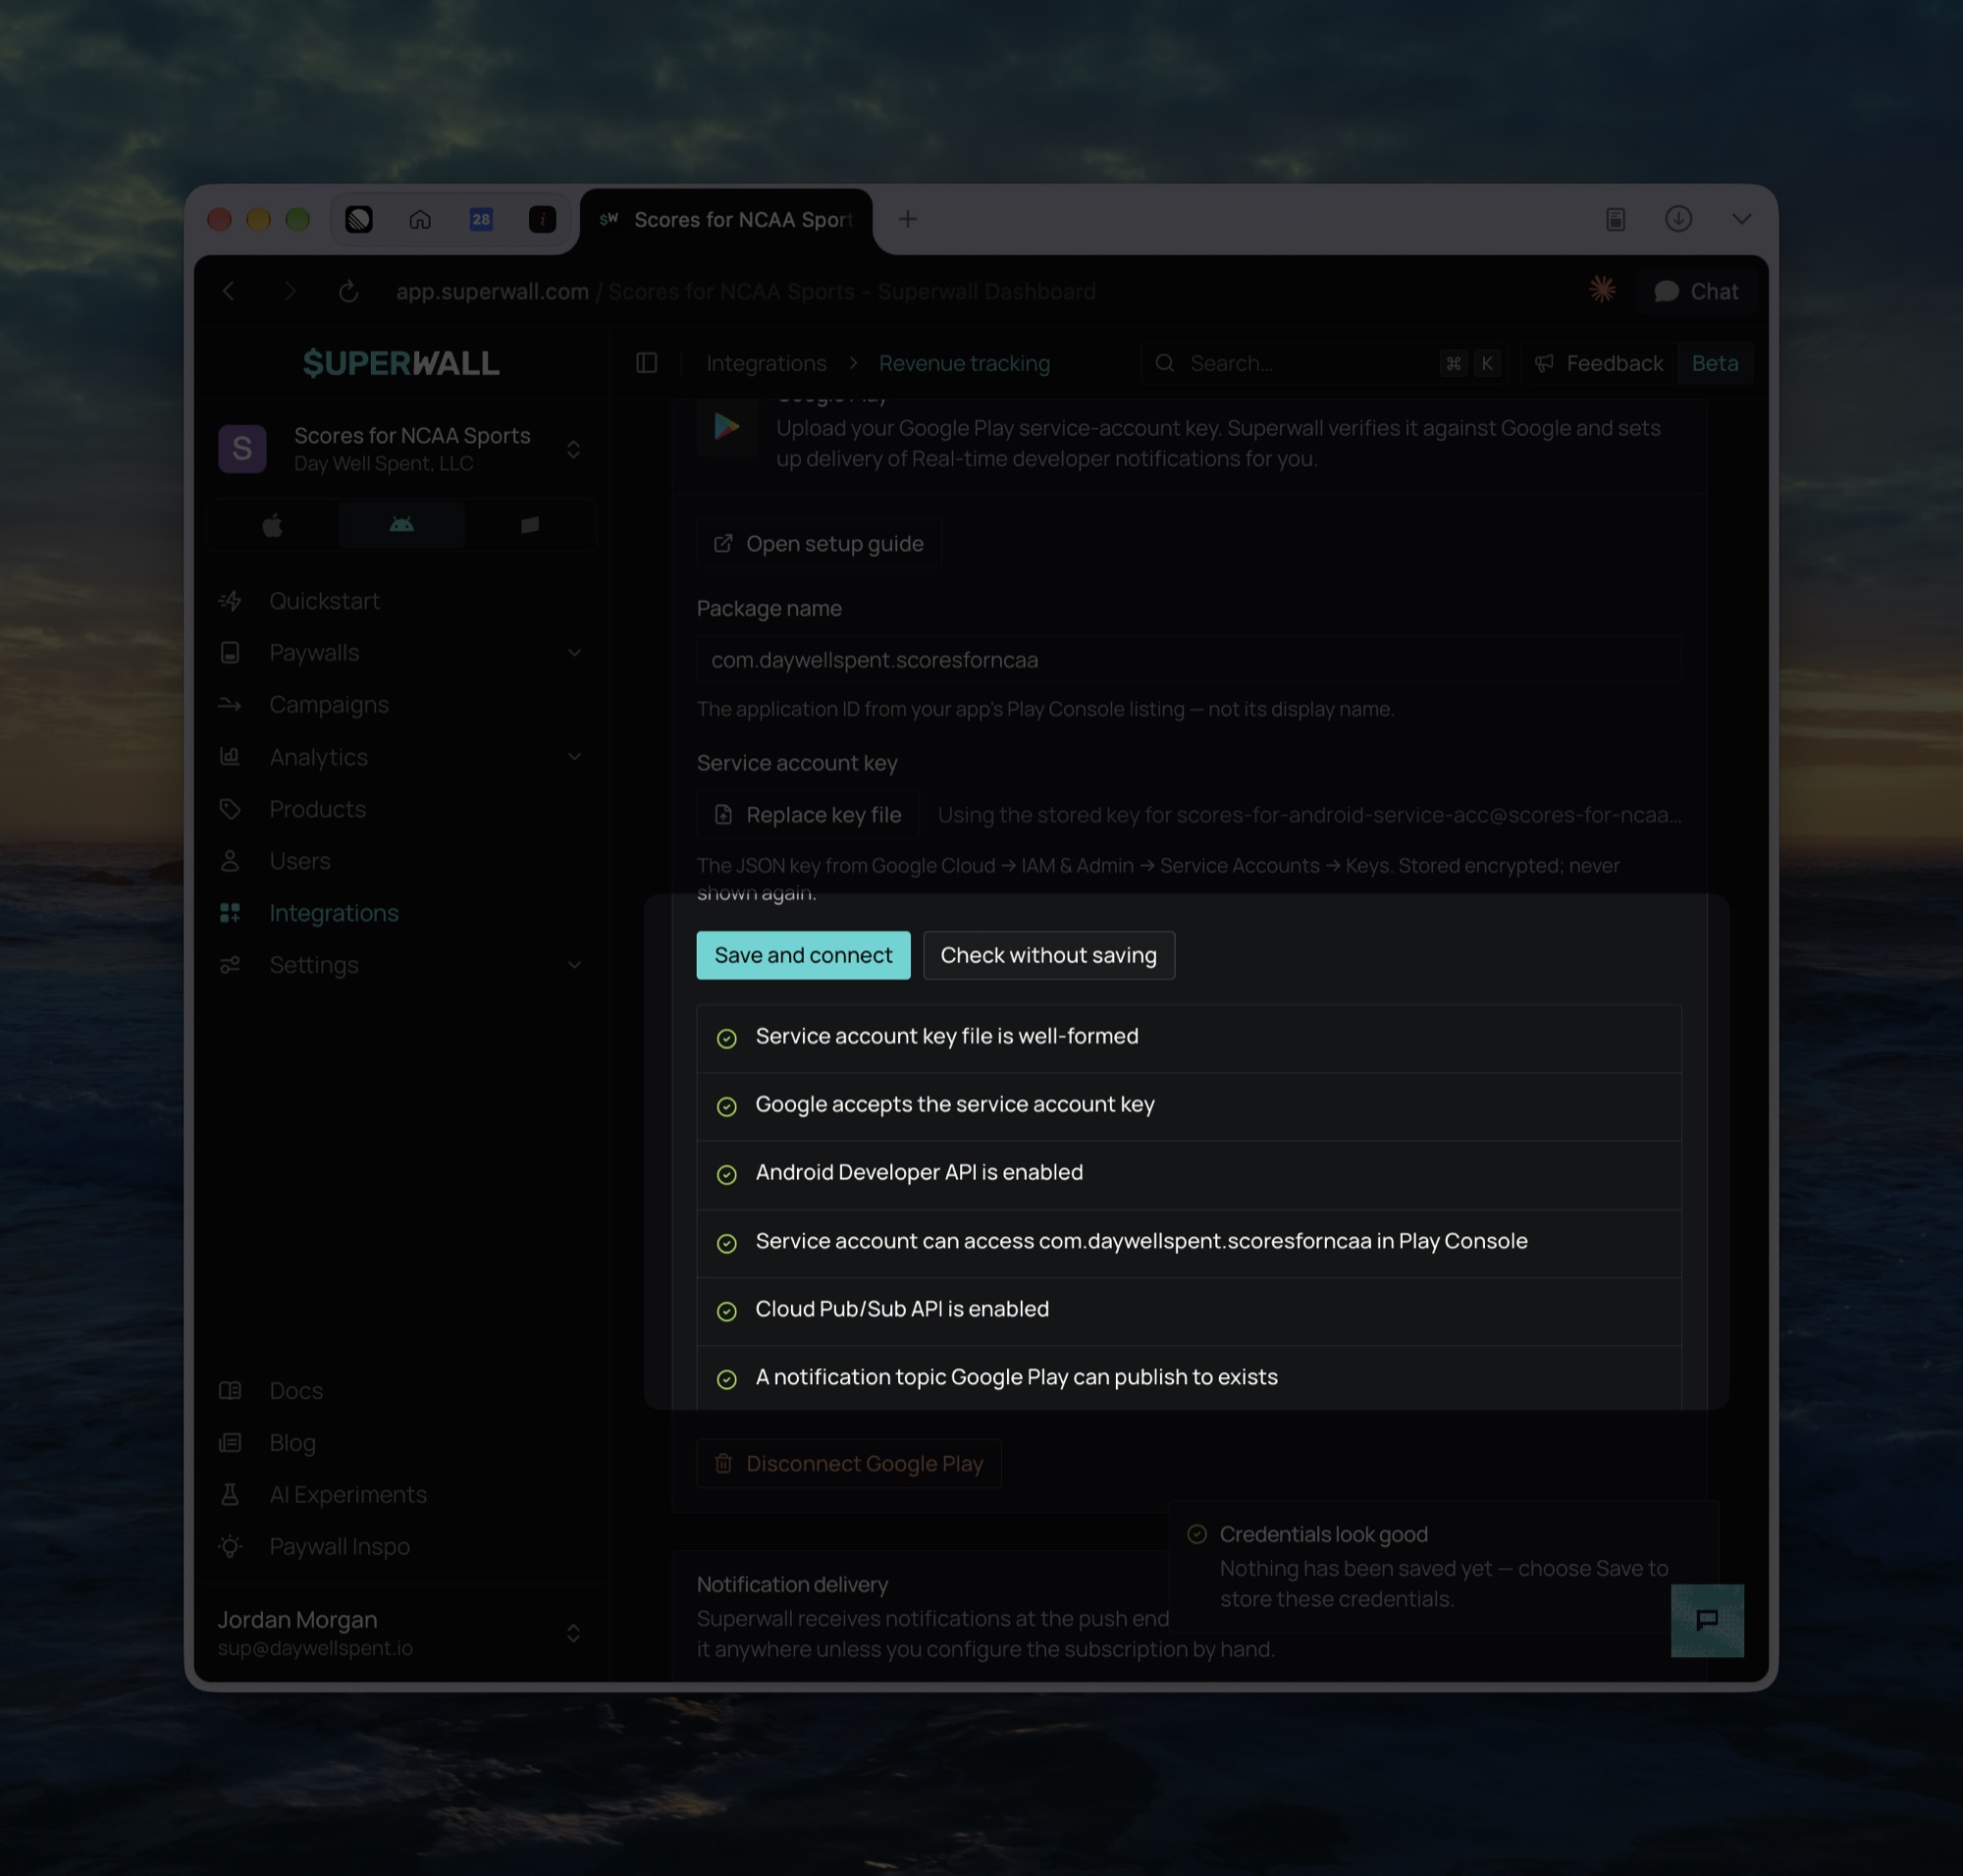
| Check | How to fix it |
|---|---|
| Service account key file is well-formed | Upload the JSON key file from step 2 without editing it. OAuth client files and P12 keys don't work. |
| Google accepts the service account key | If the key was disabled, enable it. If it was deleted, create a new JSON key. If the service account was disabled, enable it. If it was deleted, undelete it within 30 days and create a new JSON key, or create a new service account and repeat steps 2 and 3. |
| Android Developer API is enabled | Enable the Google Play Android Developer API, wait a few minutes, and try again. |
| Service account can access the app in Play Console | Check Package name against the application ID in Play Console. If it matches, invite the service account as described in step 3. New invitations can take up to 48 hours to apply. |
| Cloud Pub/Sub API is enabled | Enable the Cloud Pub/Sub API. If it's already enabled, grant the service account the Pub/Sub Admin role. |
| A notification topic Google Play can publish to exists | This check only warns and doesn't block saving. Superwall creates the Play-Store-Notifications topic when you save. If the warning says Superwall can't read topic permissions, grant the service account the Pub/Sub Admin role. |
If no topic is marked In use after you save, Superwall couldn't set up notification delivery. Grant the service account the Pub/Sub Admin role, then reload the Revenue tracking page. If a topic is marked Google Play can publish, click Use this topic next to it or click Save and connect again. Otherwise, click Create the topic for me under Notification delivery. If your organization restricts sharing by domain, add an exception for google-play-developer-notifications@system.gserviceaccount.com.
Update or disconnect
- To change the package name, edit Package name and click Save and connect. Superwall re-checks the stored key, so you don't need to upload it again.
- To replace the key, click Replace key file, choose the new file, and click Save and connect.
- To move notifications to another topic, click Use this topic next to it under Notification delivery, then update Topic name in Play Console to match. Pick a topic marked Google Play can publish. Saving the setup again can move the subscription back, so check In use after each save.
- Disconnect Google Play takes effect immediately, without a confirmation step. It removes the stored key and settings, and Superwall stops creating revenue events from the app's Google Play notifications. The topic and the
Superwall-subscription stay in your Google Cloud project, and the subscription keeps delivering notifications to Superwall until you delete it.
How Google Cloud, Play Console, and Superwall connect
Your Google Cloud project doesn't know about your app on its own. It holds the two APIs, the service account, and the Pub/Sub topic. Play Console connects them to your app in two places:
- Inviting the service account in step 3 gives it access to your apps in Play Console. Google checks that access each time Superwall looks up a purchase.
- Entering the topic name in step 5 tells Google Play where to send your app's notifications.
When someone makes a purchase in your app:
- Google Play publishes a notification to your topic.
- Pub/Sub forwards it to Superwall through the
Superwall-subscription. - Superwall uses your service account key to look up the purchase details from Google Play.
Superwall only creates revenue events from notifications for the package name you entered in step 4.
How is this guide?